In this post, I’m sharing how you can build a simple wardrobe cabinet for coat storage.
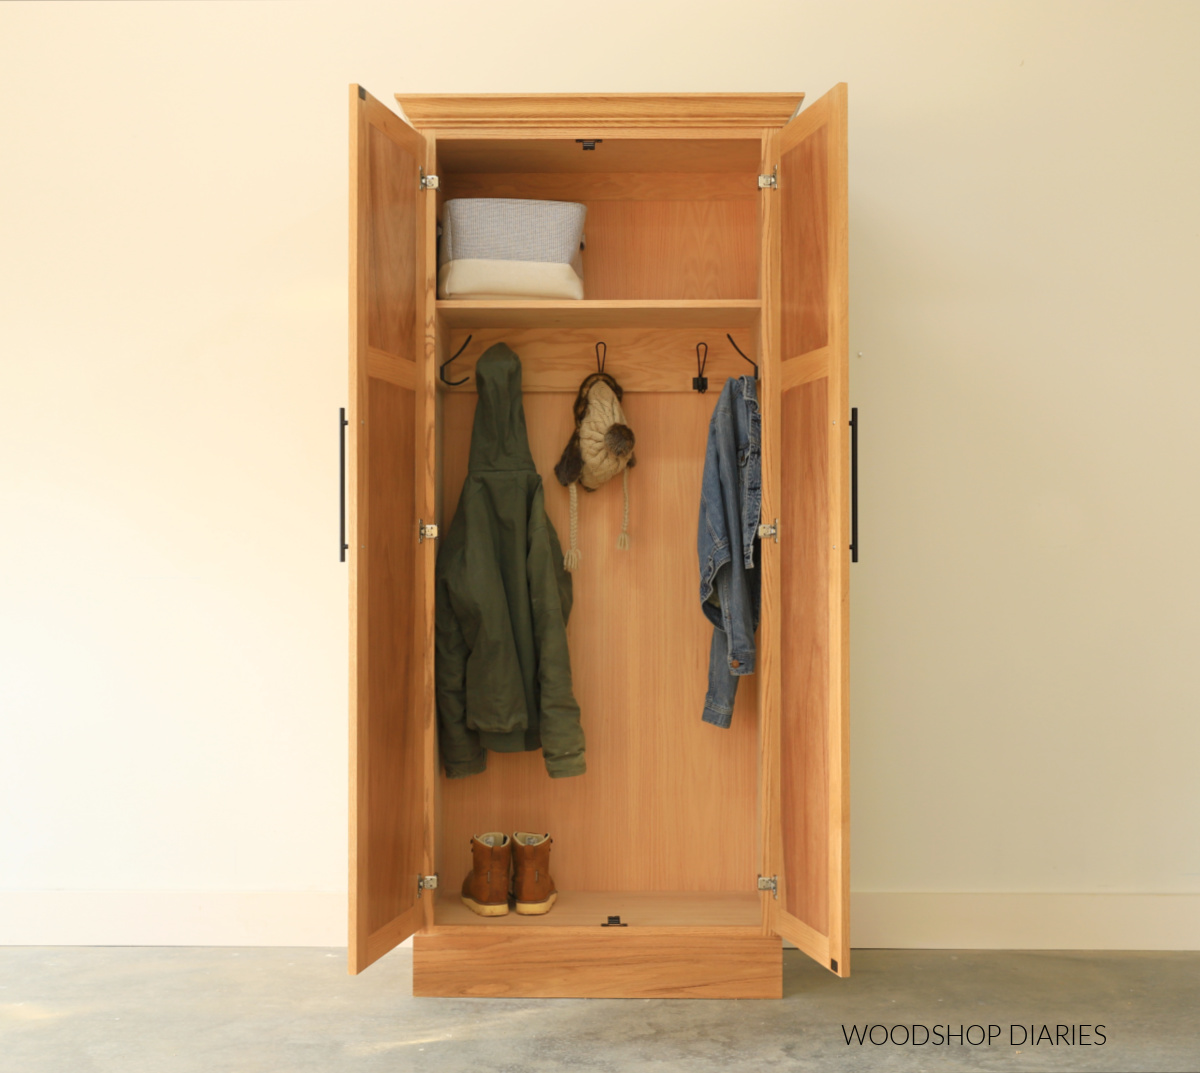
This double door storage cabinet is a great option to hide coats and jackets in an entryway, a walk in closet, or a bedroom.
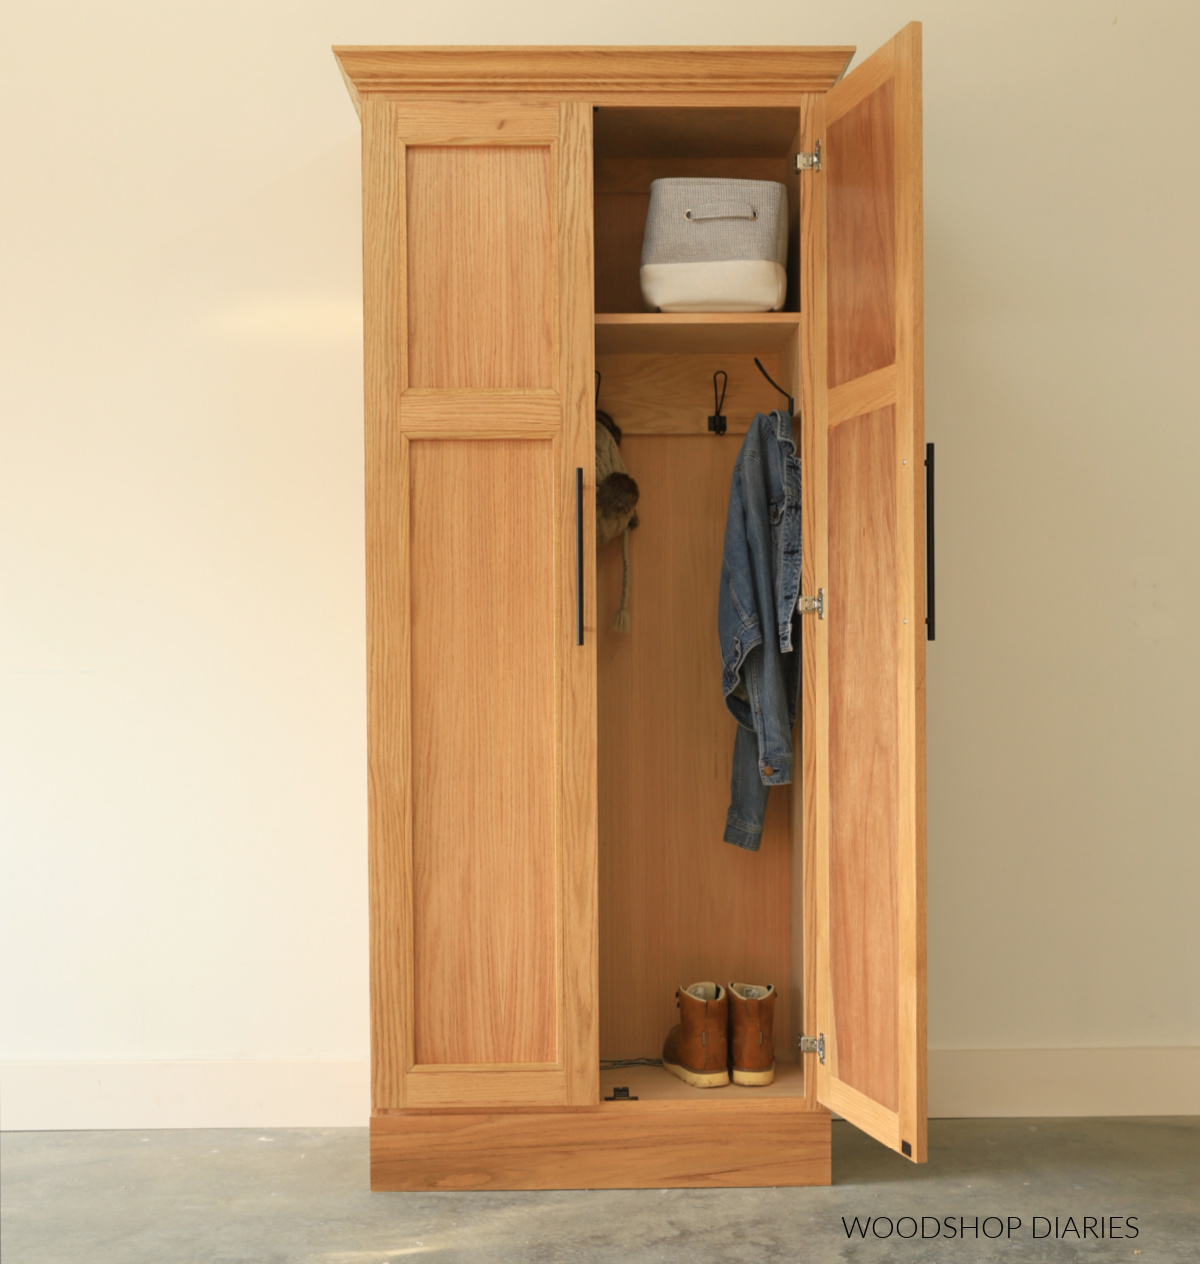
But it looks so nice, you could also modify it to add more shelves and use it for regular storage (not just for coats and jackets!) in an office or living room.
While somewhat large in size, it’s simple in style and assembly. So you can build it quickly with just a few basic tools.
If you’d like to build your own, I’m sharing the plans, video, and some helpful tips below, so let’s dive in and make some sawdust.
*This post contains affiliate links. See website policies.
What to consider before building
If you really simplify this project, it’s just a big box. So, it’s incredibly easy to customize in both size and design.
For example, if you leave the doors off and add more shelves, it makes a great bookshelf. Or, keep the doors on and add more shelves, and you’ve got a great little pantry.
Since this is just a box, the possibilities are practically endless so you may consider swapping the hooks for a hanging rod or the shelves for drawers.
How big should a coat cabinet be?
Armoires and wardrobe cabinets don’t have a standard specific size. Typical armoire cabinet widths range from 36-44″ wide and heights range from 72-78″ tall.
Depending on the storage inside, the depth can vary from 16″ to 24″. However, if you plan to use a hanging rod with clothes hangers (not hooks like shown here), the depth should be at least 20-24″ to accommodate standard sized clothing hangers.
These are COMMON sizes, but you may find some smaller or larger.
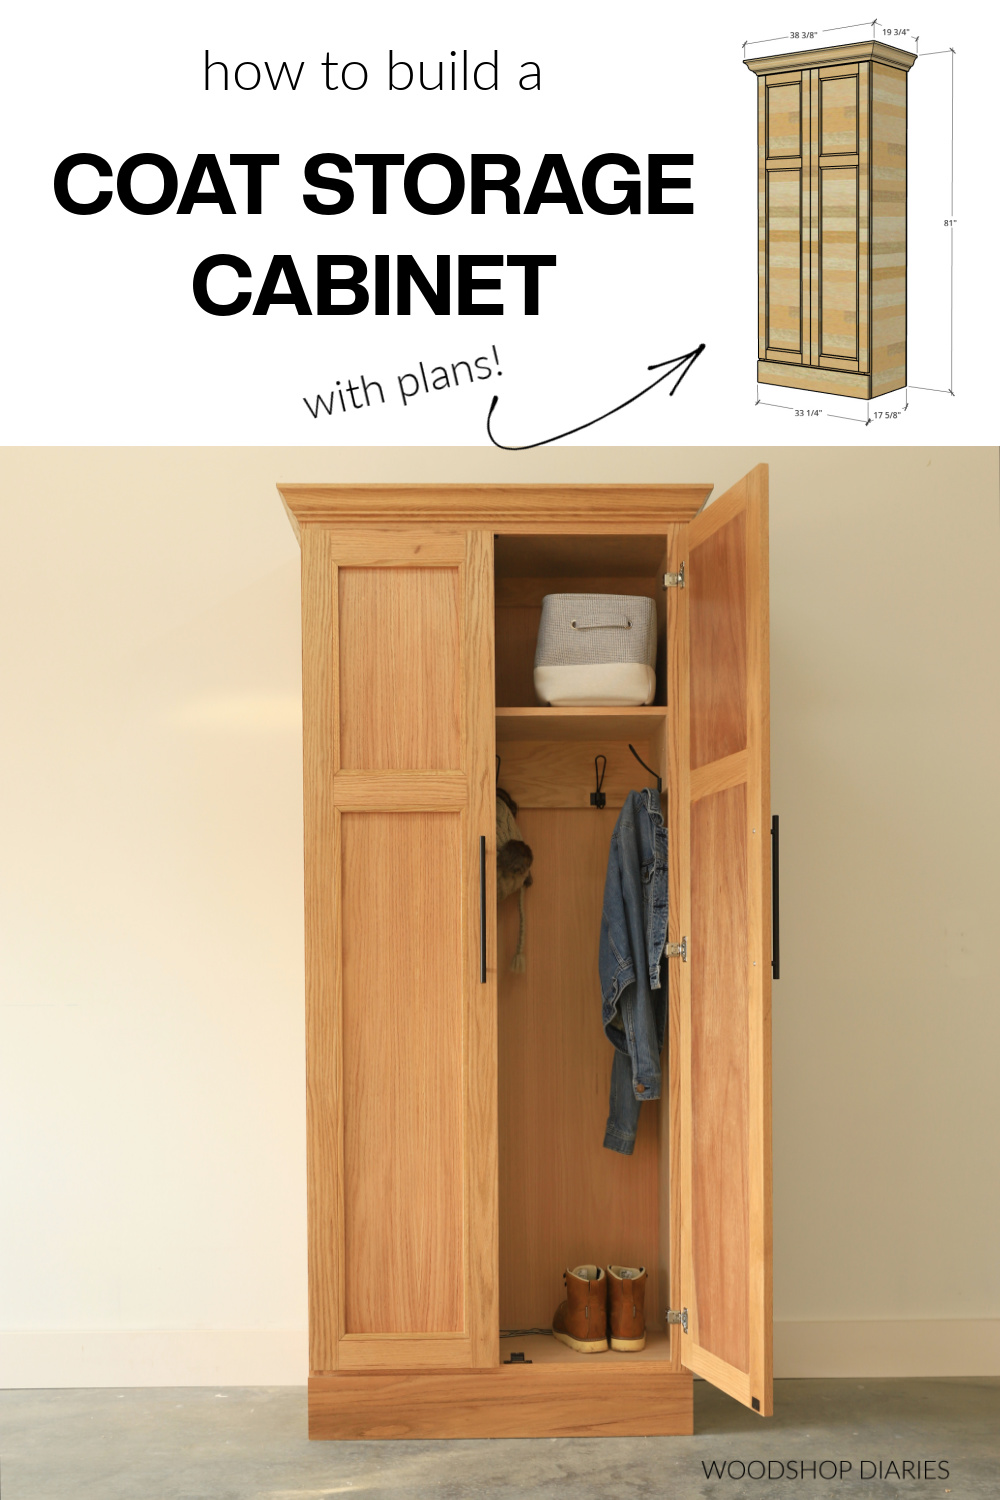
The overall dimensions for this project are 17 ⅝″ deep x 33 ¼″ wide x 78″ tall WITHOUT THE CROWN MOLDING.
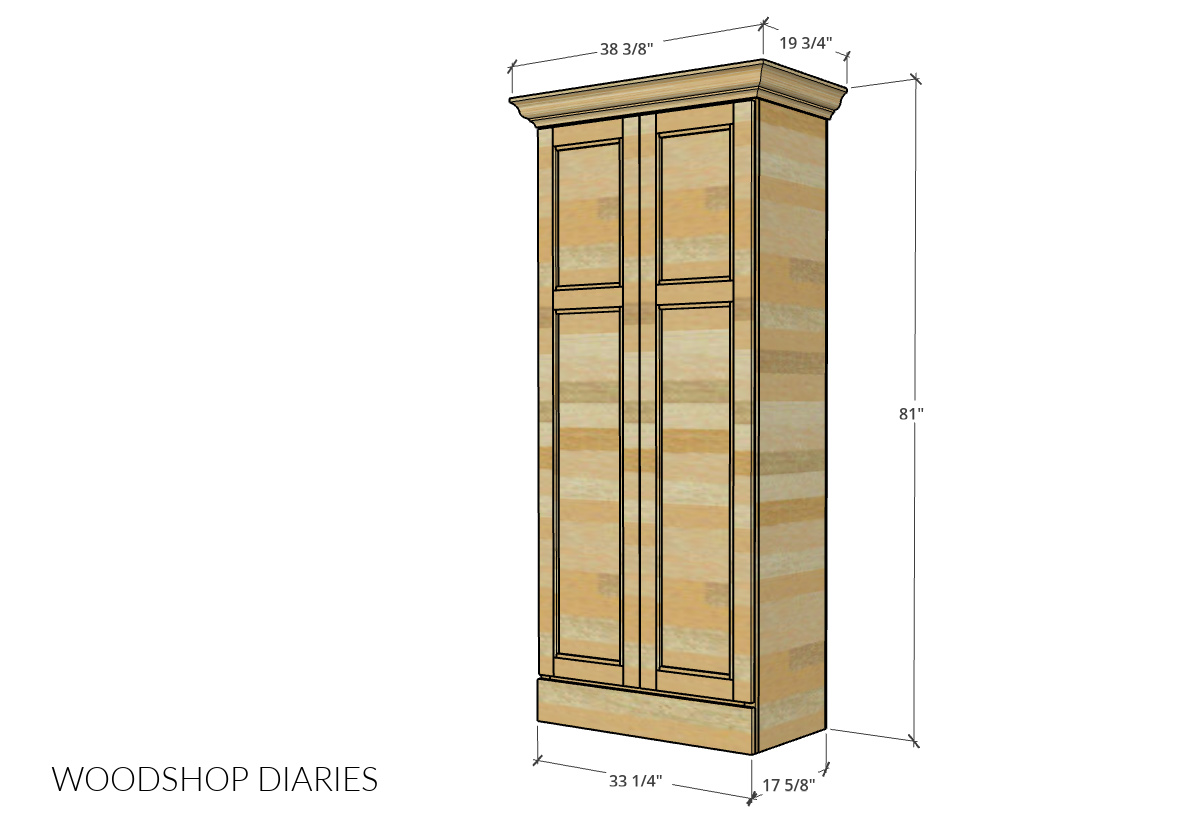
Including the molding, the cabinet measures roughly 19 ¾″ deep x 38 ⅜″ wide x 81″ tall. Exact dimensions will vary depending on the size crown molding used.
You may find these resources helpful throughout the build:
Want to be the first to know about new projects and plans? Subscribe to the newsletter for priority access!
How to build an Armoire Coat Cabinet
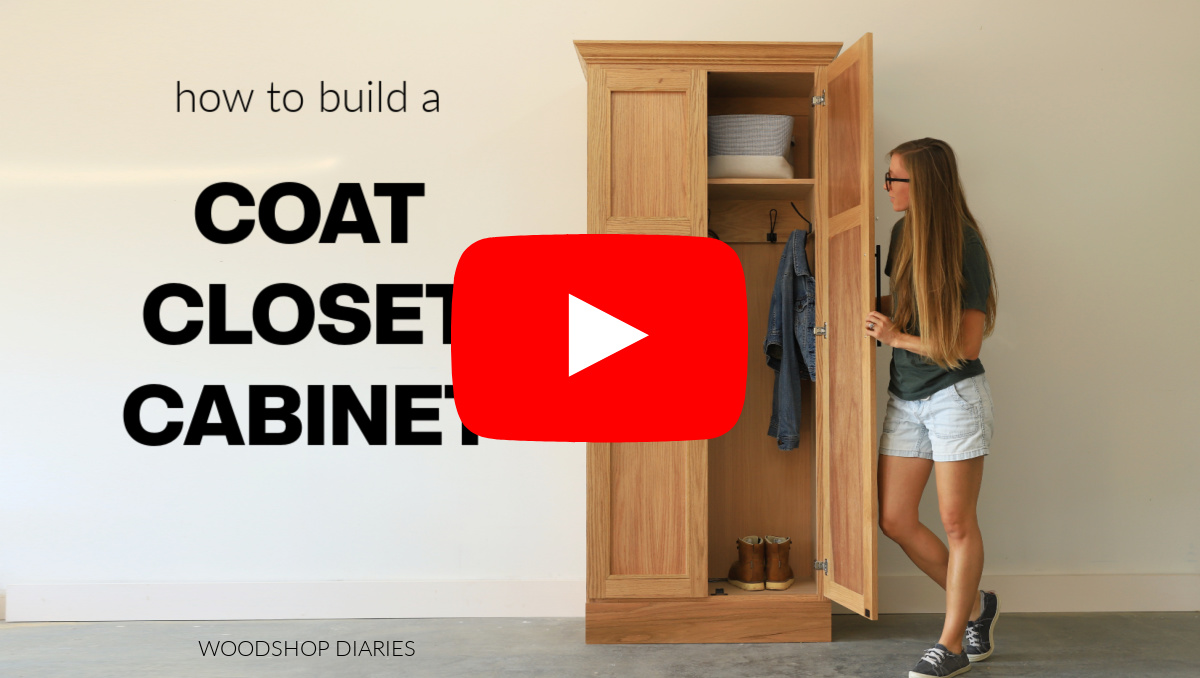
If you prefer to watch, I’ve shared the full build video with tons of tips, behind the scenes, and additional details on my YouTube Channel here.
Love watching how-to videos? Subscribe to my YouTube channel for plenty more where that came from!
Prefer to print? Grab the printable coat closet cabinet building plans here:
Tools & Materials
Tools:
- Circular Saw
- Cutting Guides (Kreg Rip Cut and AccuCut–optional)
- Miter Saw
- Drill/Driver
- Pocket Hole Jig
- Brad Nailer
- ⅜″ Dowel Jig
- Concealed Hinge Jig
Materials:
- (1) 4’x8′ sheet ¾” plywood
- (1) 4’x8′ sheets ¼” plywood
- (5) 1x3x8 boards
- (2) 1x2x8 boards
- (1) 1x6x4 board
- (4) 8 foot sticks ½″ square dowel or trim
- 8 foot piece crown molding
- (1) 100 count box 1 ¼” Pocket Hole Screws
- (1) 1 lb. box 1 ¼″ wood screws
- 1 ¼” Brad nails
- Wood Glue
- (6) pair 1 ¼″ overlay face frame concealed hinges
- (24) ⅜″ x 1 ½″ long dowel pins
- Edge banding (optional)
Not sure what type of lumber to use for this project?
1x LUMBER & TRIM: If painting, preprimed pine, spruce, or poplar are great budget friendly options. And if staining, usually, you want to use the same wood type as your plywood so that they match once stained. Check out this post to learn how to shop for and purchase lumber for your project.
PLYWOOD: I recommend using cabinet grade hardwood plywood (like birch, maple, oak, etc). Check out this post to learn how to choose the right plywood for your project.
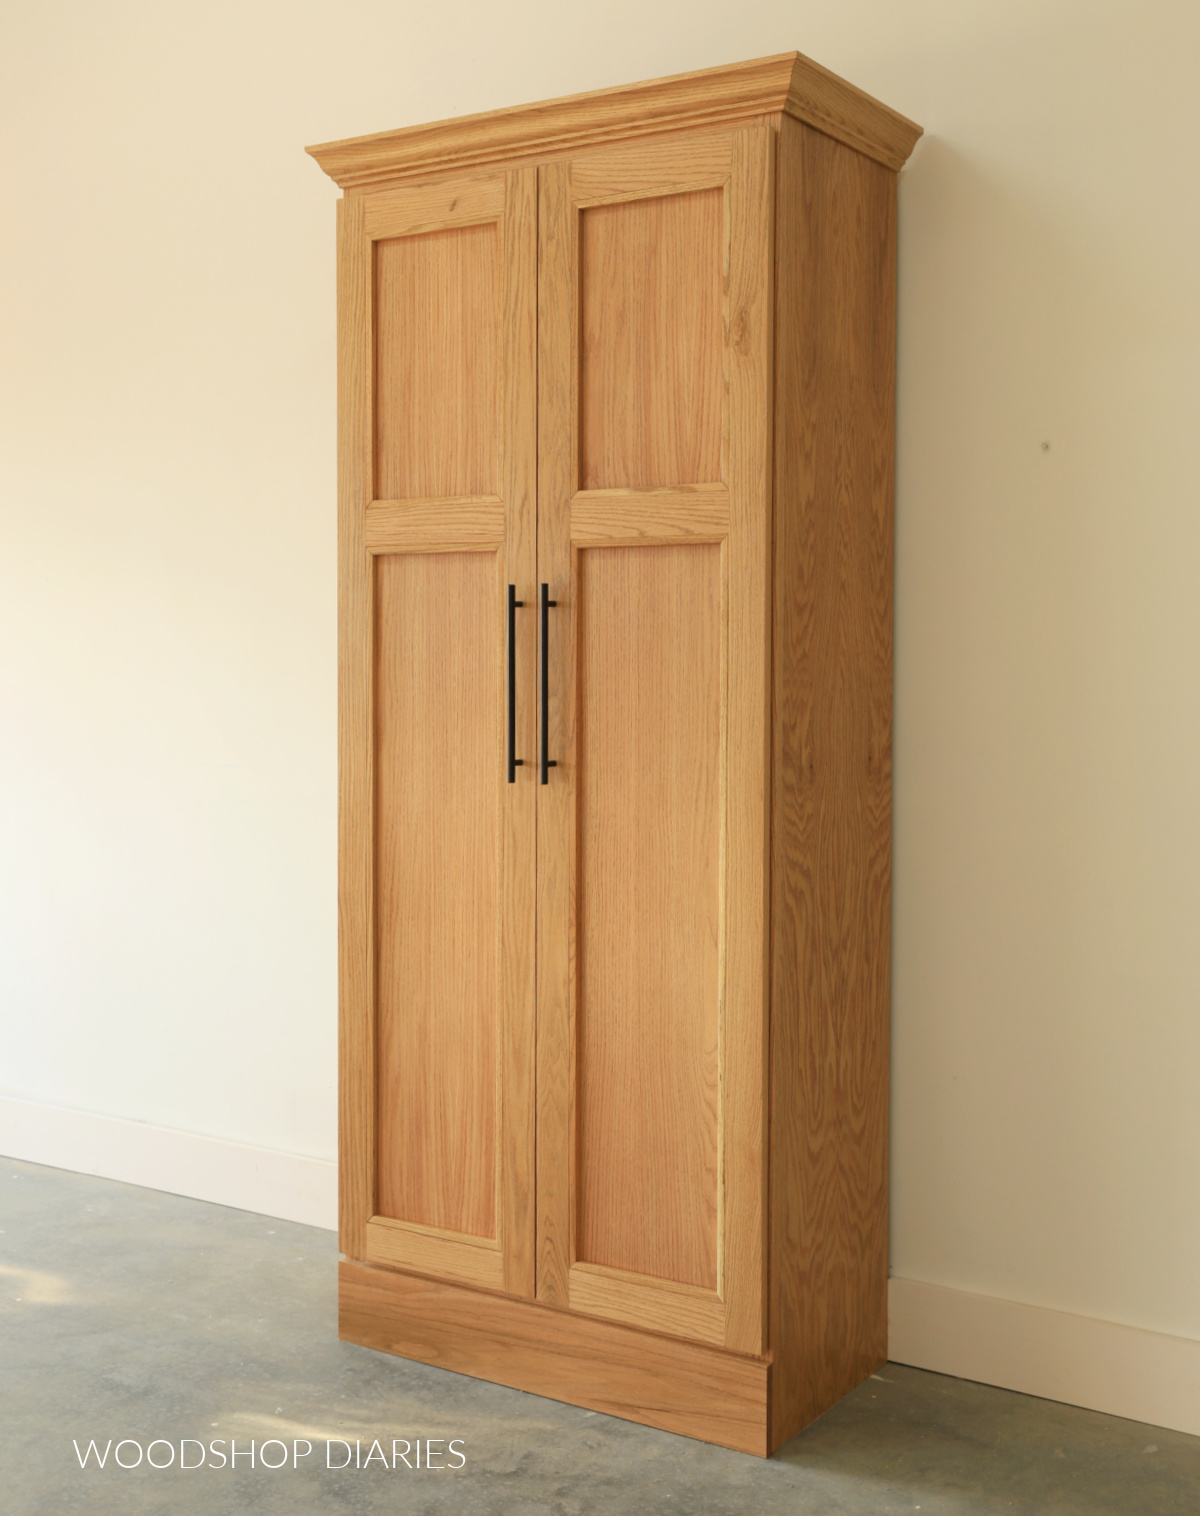
I used red oak lumber to build the cabinet shown.
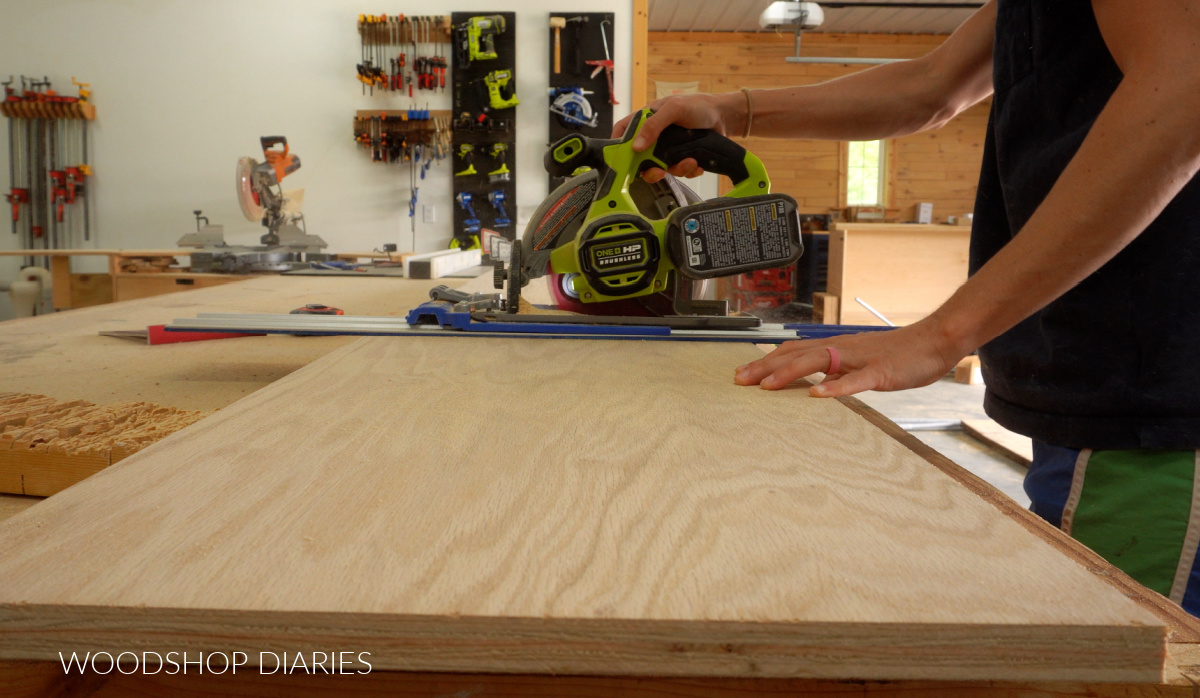
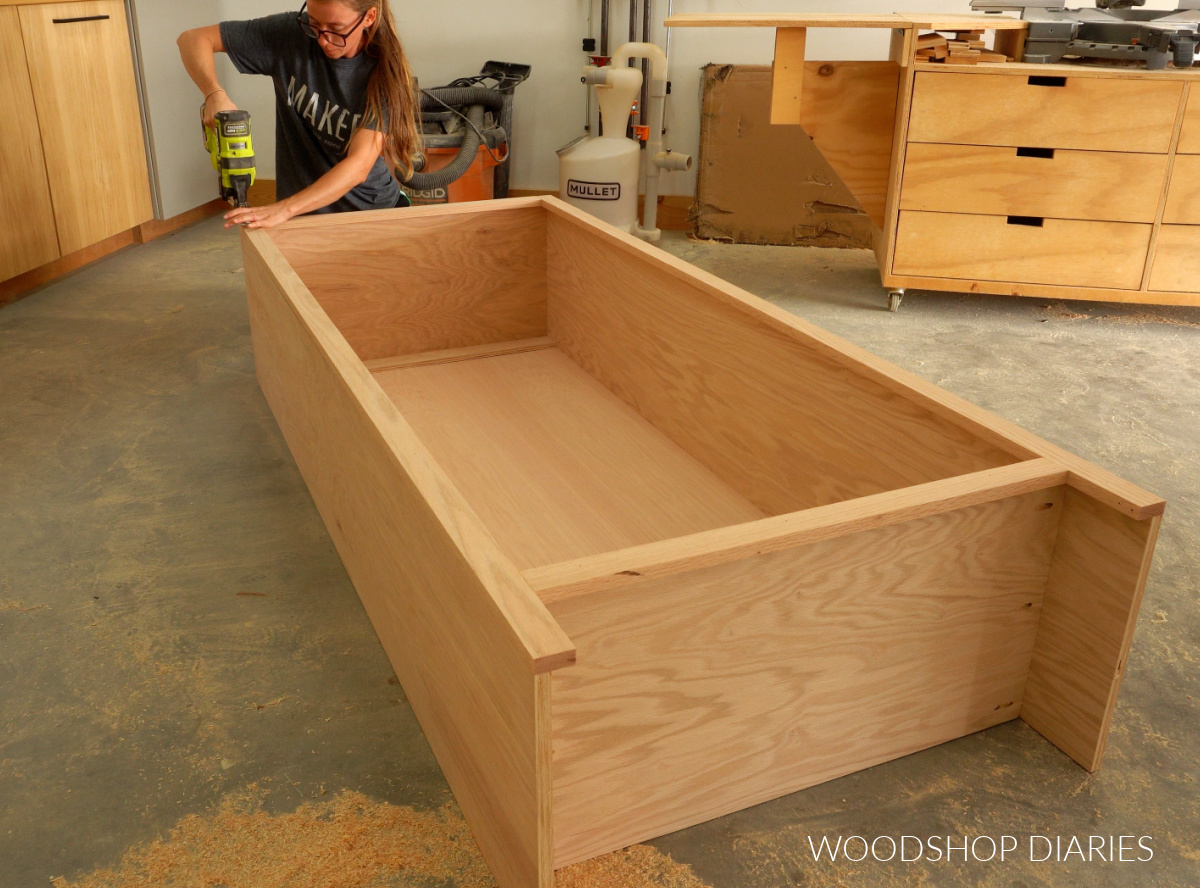
Step 1: Assemble Cabinet Box
To get started, I began cutting down my plywood sheet into two cabinet sides, a top and bottom panel, and a thin support strip to run along the back.
Learn how to cut plywood sheets without a table saw here.
You can find the full cut list and cut diagrams in the printable coat cabinet building plans here.
Once these pieces were cut, I drilled pocket holes into the top and bottom panels and into the top support strip to assemble.
RELATED: How to use pocket holes in woodworking
After sanding everything well, I assembled the coat cabinet box with pocket hole screws. As you see in the photo below, the top support strip is installed directly below the top support of the cabinet flush to the back.
The top support will be used to secure the cabinet to the wall once completed.
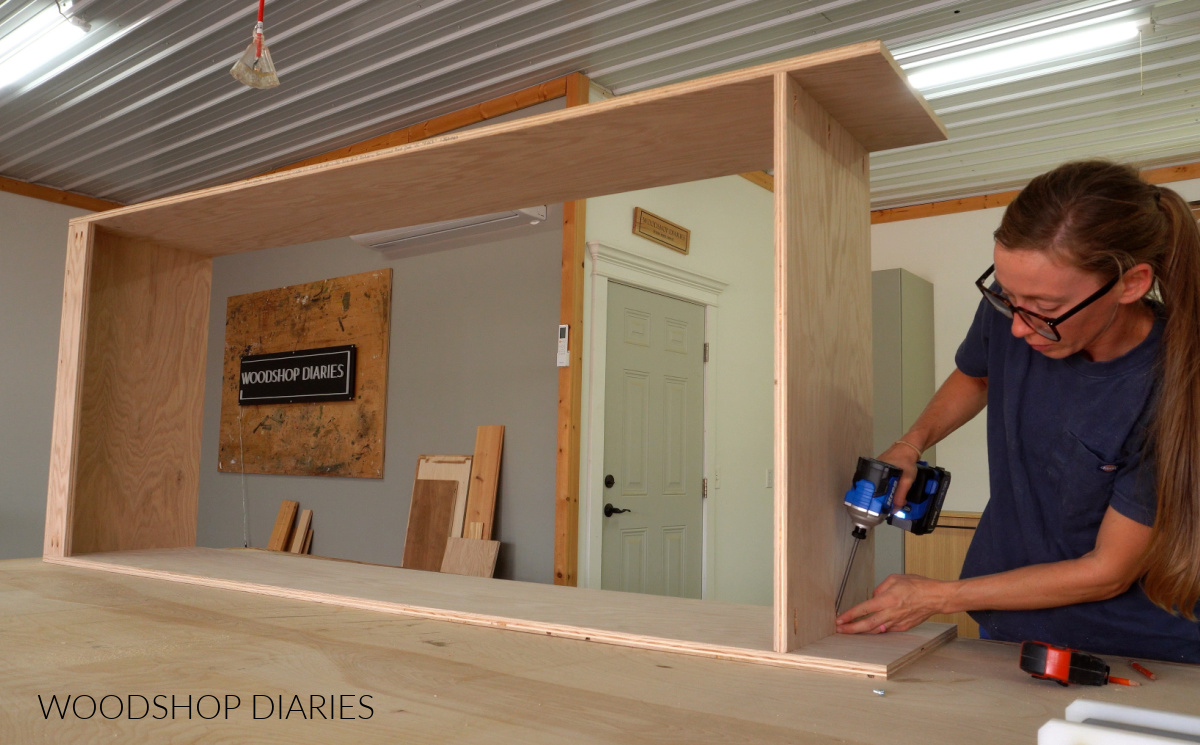
And the bottom support is installed about 6″ up from the bottom of the sides (this allows for adding a trim piece later).
Step 2: Install Back Panel
Once the cabinet box was assembled, I needed to add the back. Now, in the printable plans, I share two different ways to install the back panel. You can simply cut a ¼″ plywood piece to fit on the back and staple/nail/screw it on.
OR, you can use a router and a rabbeting bit to route along the back of the cabinet to inset the back panel into.
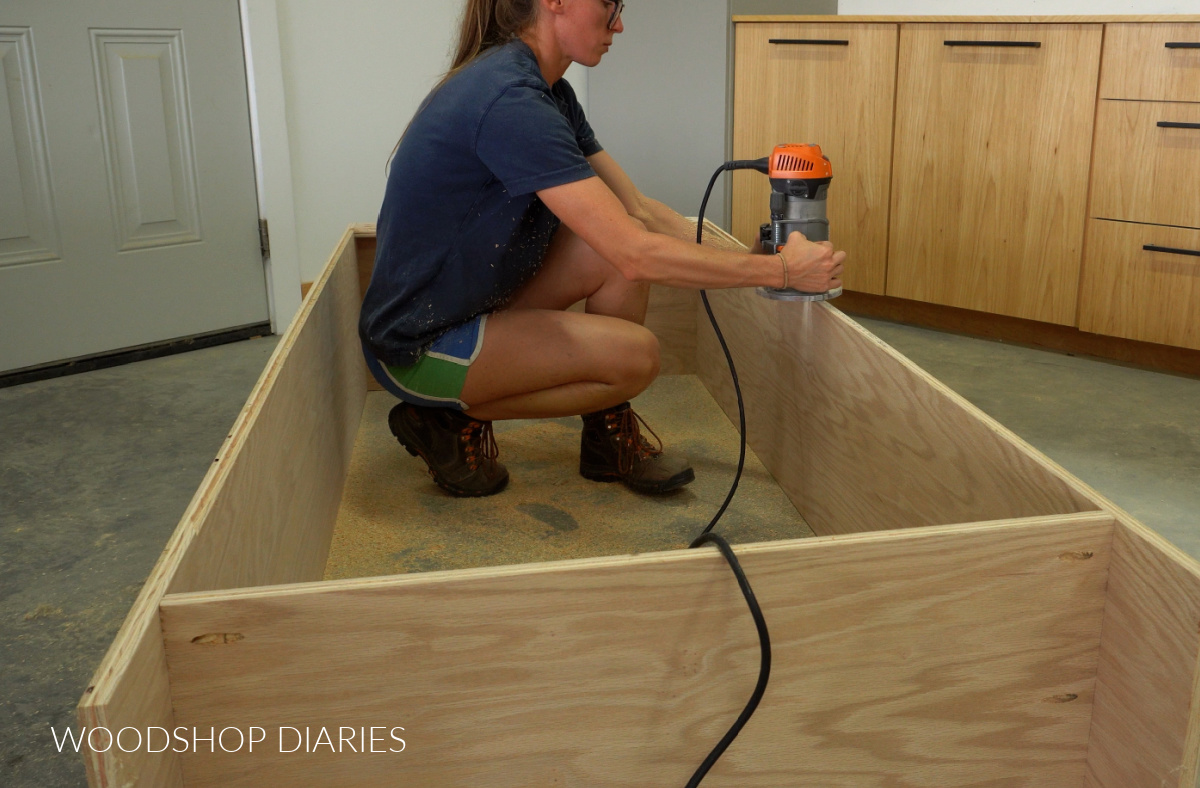
Because both sides of my cabinet will be exposed and I was planning to stain it, the exposed plywood edges of the back panel would be visible in the finished project.
That’s why I opted to route a rabbet: so my plywood panel would sit inset and hide the edges.
After routing, I cut a piece of ¼″ plywood to fit into my rabbet and stapled it along the back side.
Prefer to print? Grab the printable building plans to build this wardrobe cabinet here.
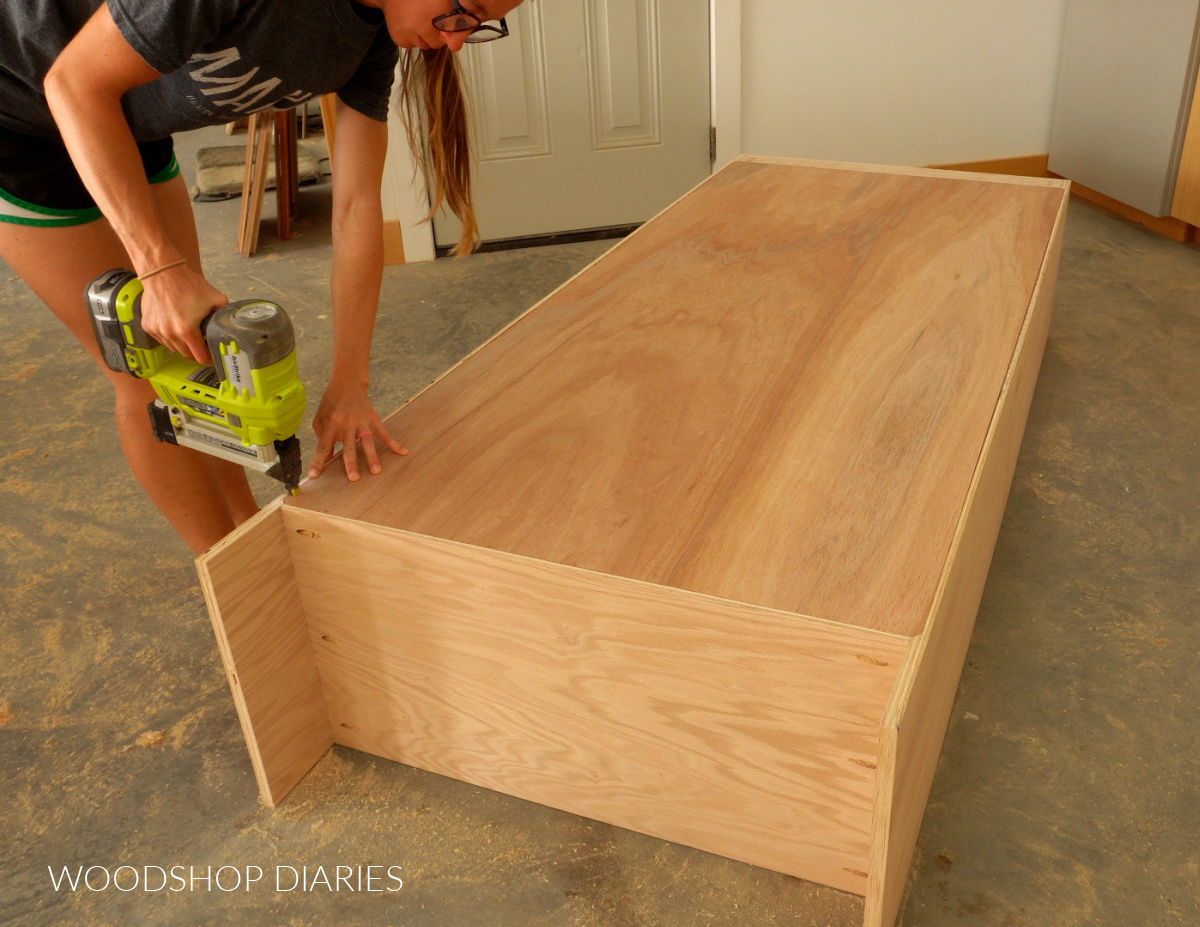
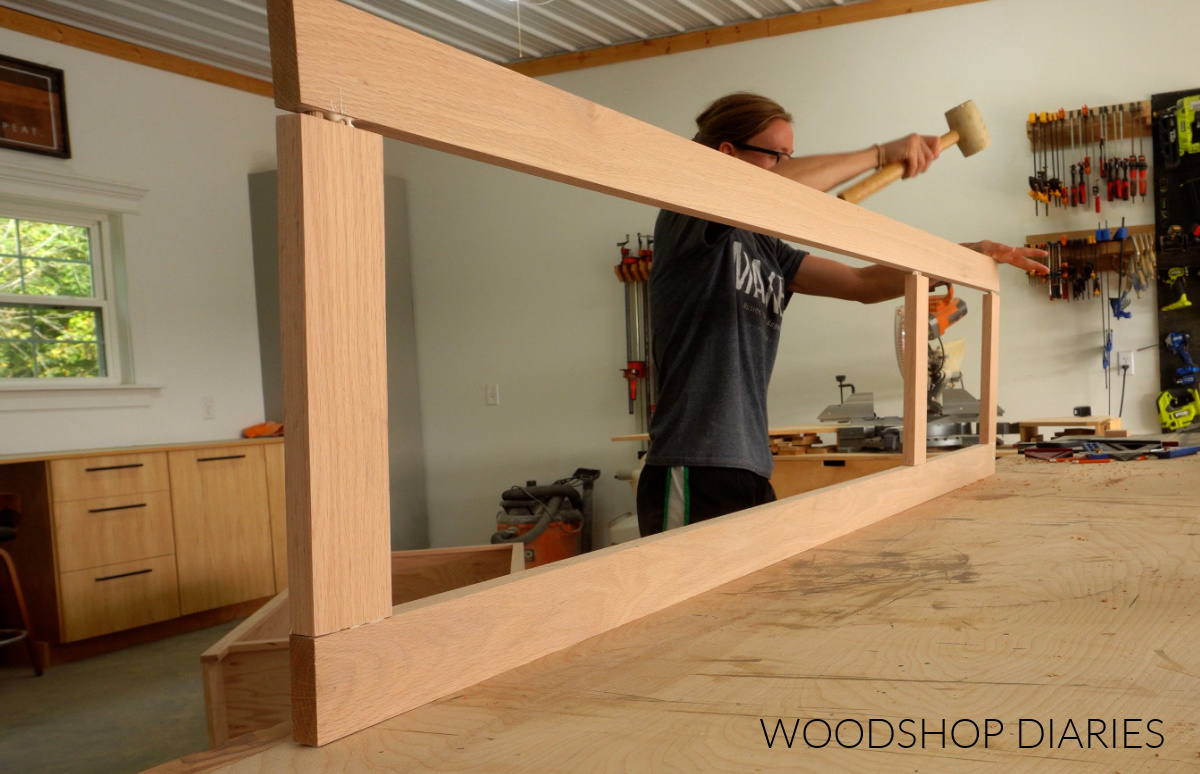
Step 3: Add Face Frame
Next, I assembled a face frame to fit onto the front of the cabinet. I built the face frame from solid wood 1x2s and 1x3s (1x2s on the sides and 1x3s on the top and bottom) and assembled using pocket holes and screws.
A standard size pocket hole jig can work fine, BUT, when building face frames, I recommend using a Kreg Micro Jig with pan head pocket hole screws. The smaller holes and screws are less likely to cause splits.
Learn more about how, when, and why to use the Kreg Micro Jig here.
After making sure the face frame did, in fact, fit the cabinet (always double check!), I applied a bead of wood glue along the front edge, placed the frame on top and brad nailed it in place.
Step 4: Install Shelf & Hook Supports
I cut a strip of ¾″ plywood to about 6″ wide and cut two short and one long support to kind of “line” the inside of the cabinet to support the shelf.
This part is a little backwards from what I share in the printable plans because when I built it, I wasn’t thinking about how to attach the back piece.
Ideally, after routing in step 2, I should have attached the back support between the cabinet sides before adding the back panel. But, I didn’t realize it until later.
So instead, I screwed the two short supports onto each side of the cabinet about ¾″ inset from the back edge. Then I could slide the back support in behind it like you see below.
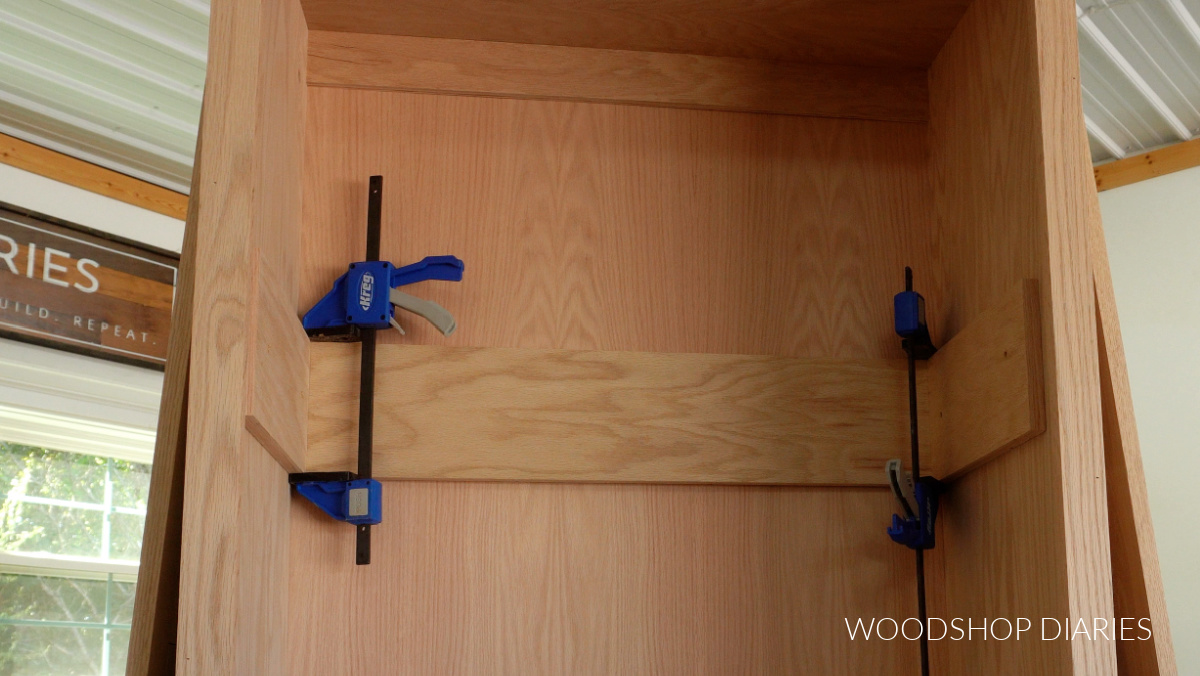
You can see this in more detail in the video, but from there, I drove screws from the back side of the cabinet to secure the back support.
Then, I cut a piece of ¾″ plywood to rest across these supports as a shelf. I brad nailed to secure it, but you could also use screws if you wanted.
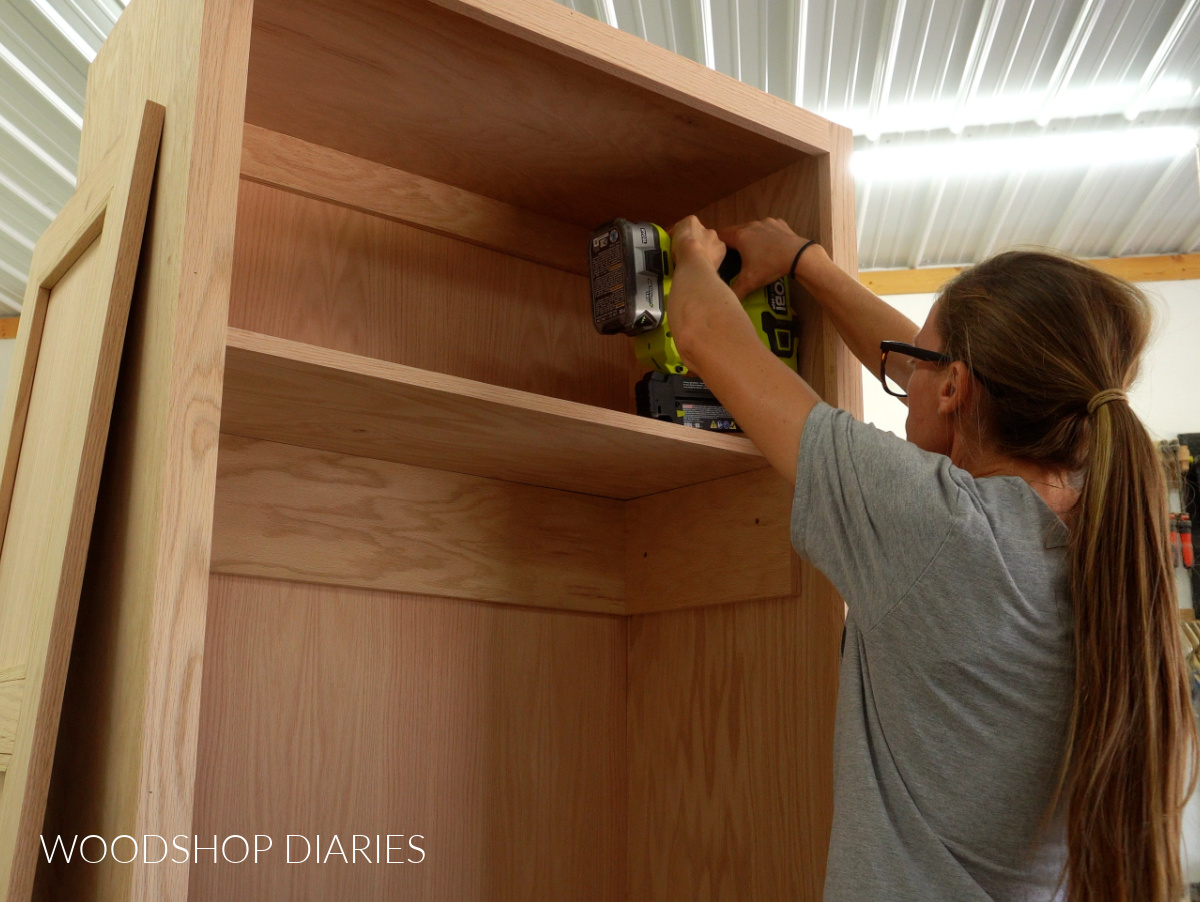
NOTE: Notice that the front edges of the supports and the shelf are edge banded so they look like solid wood vs plywood. This is optional, but it makes it look a bit more finished, so I recommend it. Learn how to apply edge banding here.
TIP: The shelf supports will also be where I install the hooks to hang coats on. If you don’t want hooks or you want to add more shelving into this cabinet, feel free to skip adding the shelf supports and simply drill shelf pin holes to add adjustable shelves.
Learn how to install adjustable shelves into any project here.
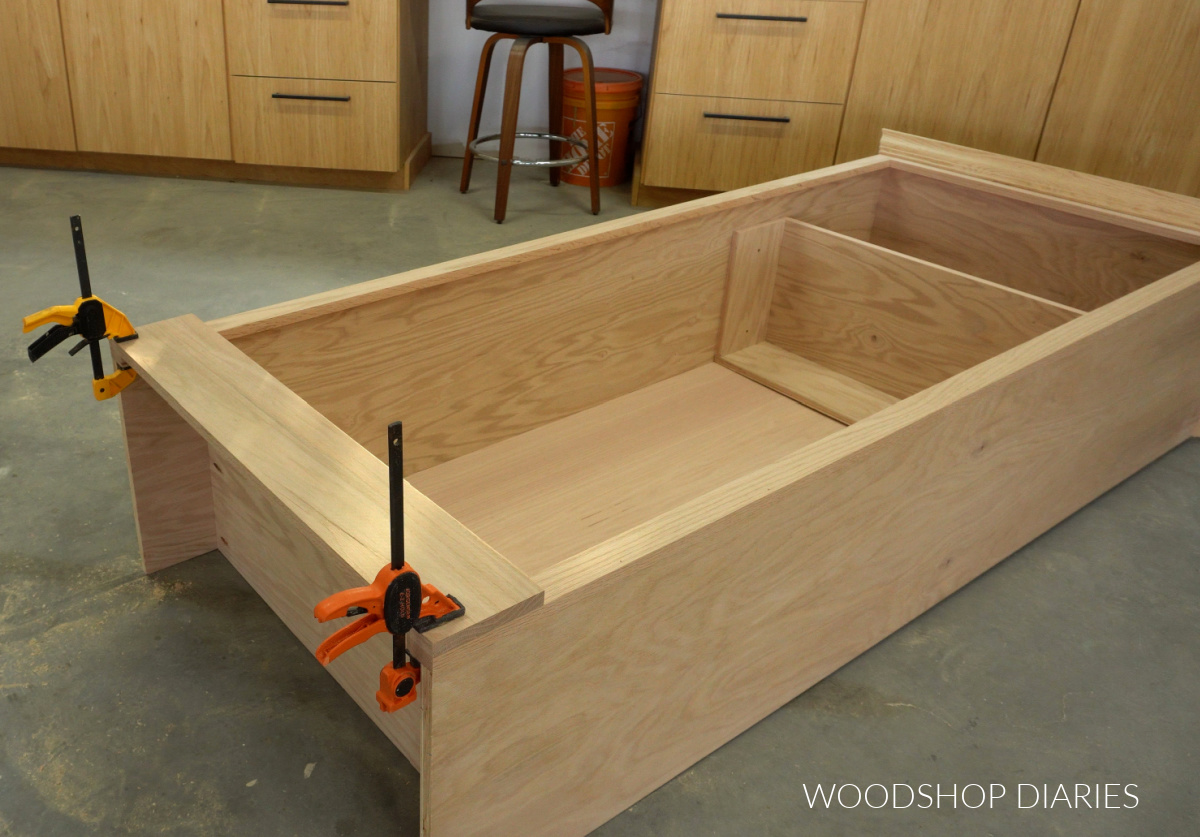
Step 5: Add Trim
The last part to finish up the cabinet is adding some trim along the top and bottom to give it some extra dimensions and dress it up a bit.
I cut to fit and installed some crown molding around the top, then cut to fit and glued a piece of 1×6 board along the bottom like you see below.
RELATED: How to cut crown molding
Prefer to print? Grab the printable building plans for this armoire storage cabinet here.
Step 6: Build & Install Doors
Now that the cabinet is complete, all that’s left is the doors. I cut 1×3 boards to build two identical door frames from and I assembled the frames using wood glue and dowels.
RELATED: How to use a dowel jig
There are a lot of ways to build a cabinet door, but I personally like to keep it as simple as possible. In this case, I had some scrap trim left over from several previous projects that was about ½″ square.
So I cut to fit these pieces to line the inside openings in my door frames. If I install these flush to the front edge of my frame (which is ¾″ thick), that leaves a ¼″ recess on the back to be able to add ¼″ plywood door panels.
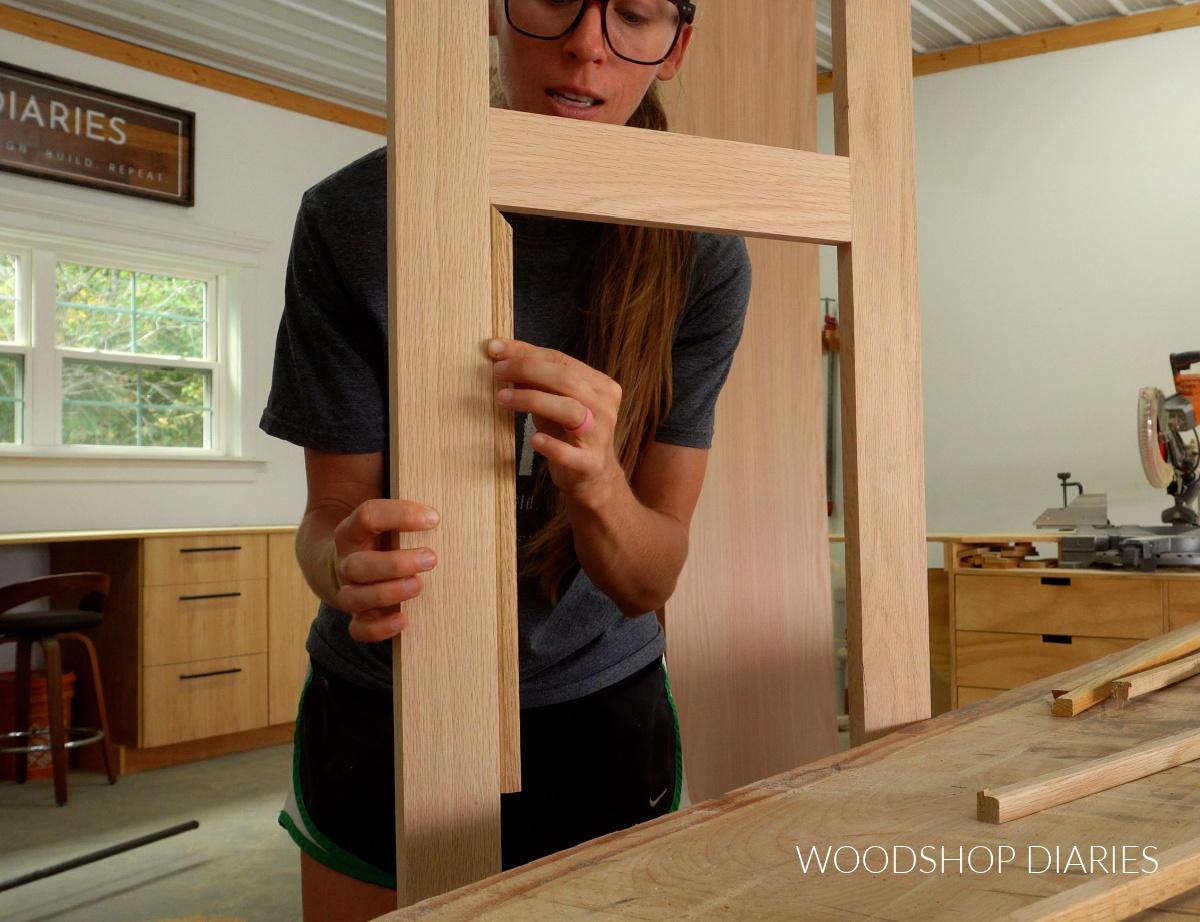
TIP: ½″ square dowels or any small decorative trim (½″ or smaller) can work here.
Once cut, I carefully glued these trim pieces into my door openings.
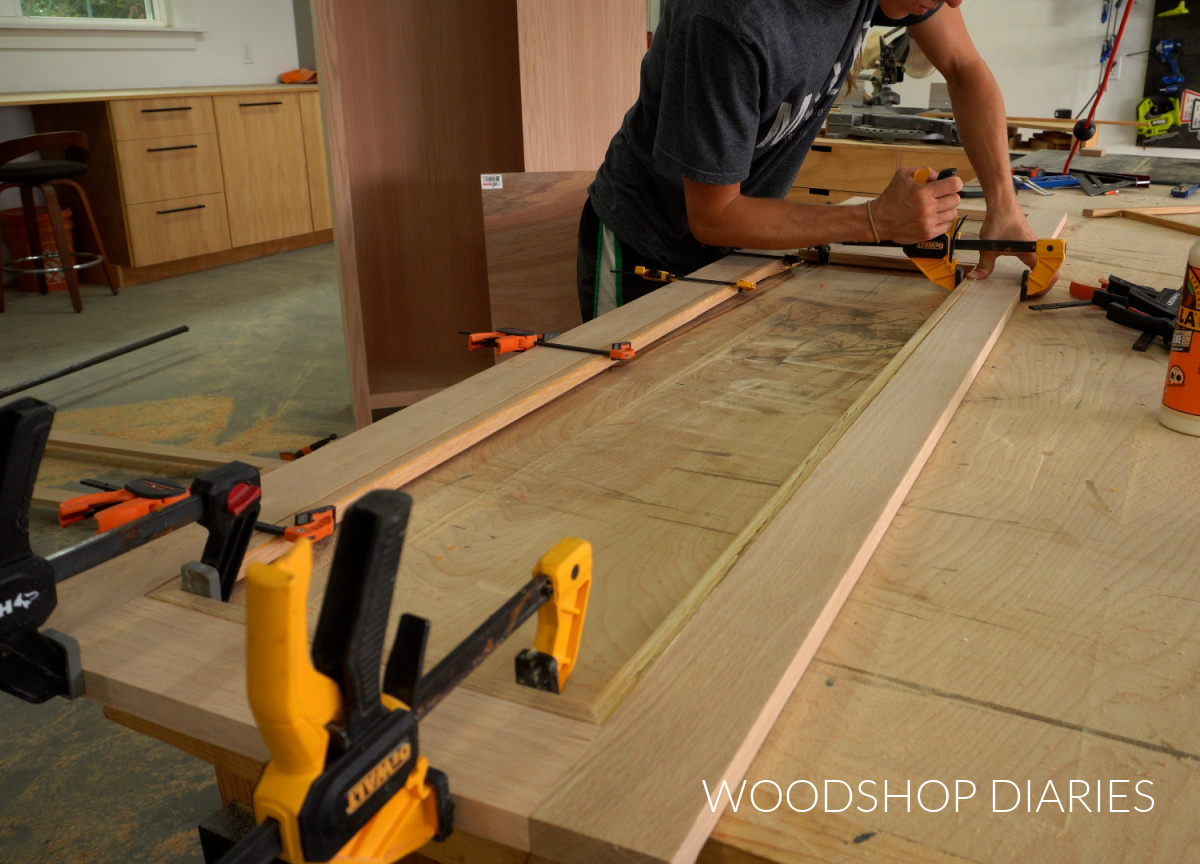
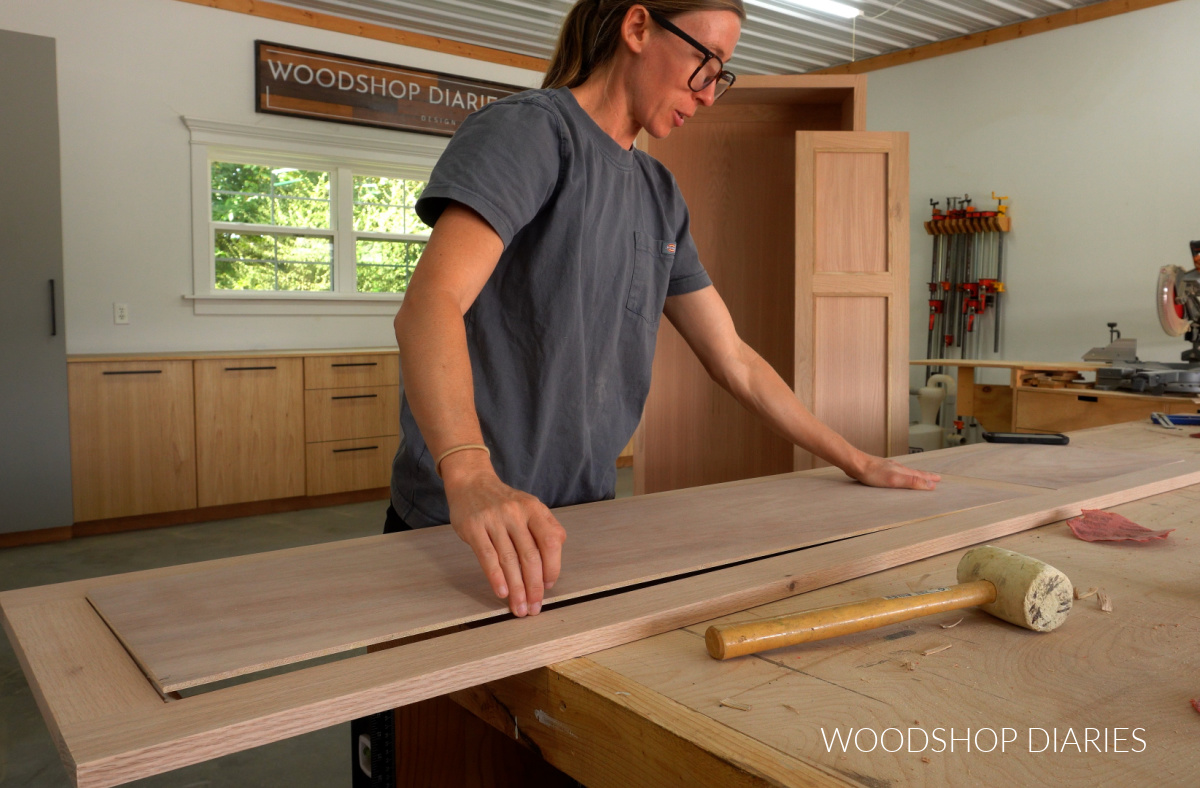
Then, I cut to fit ¼″ plywood panels to fit into the back side and glued these into each door frame.
Prefer to print? Grab the printable coat storage cabinet plans here.
After the glue was dry on the door panels, before installing them, I went ahead and stained the cabinet and the doors separately (I used Minwax Weathered Oak), then applied a few coats of Minwax Polycrylic to seal it.
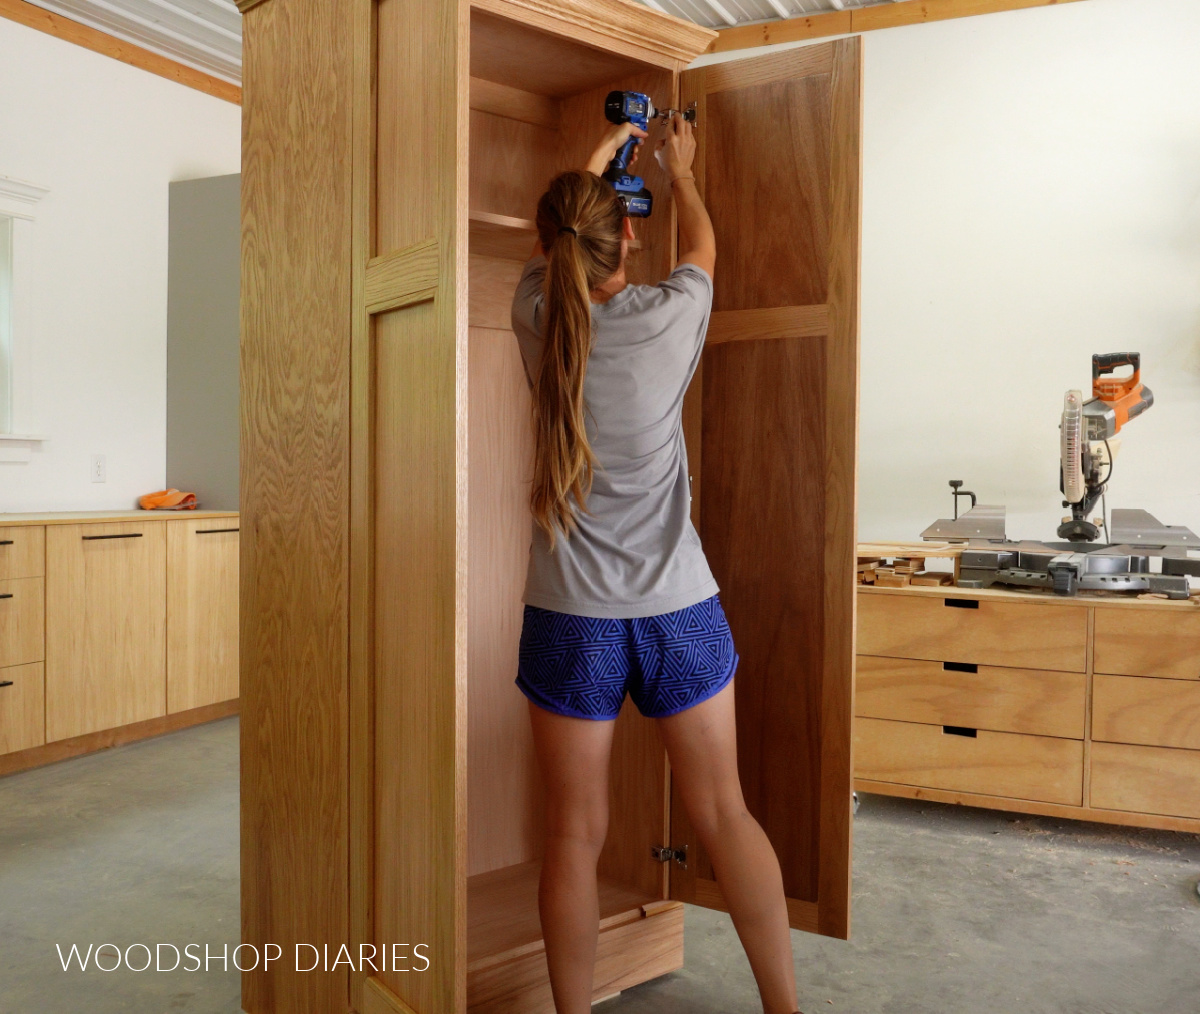
Once the finish was dry, I installed three concealed hinges (overlay face frame hinges) onto each door, then hung the doors onto the cabinet.
RELATED: How to choose the right hinges for your project
ALSO RELATED: How to install concealed hinges
Step 7: Finish & Install
To finish up, I installed some simple door pulls to each door and magnetic catches (optional) to help keep the doors closed tight. Then, I added some hooks to the shelf supports inside the cabinet to be able to hang hats, coats, bags, etc.
And now this coat storage cabinet is ready for my entryway!
I’ll be moving this into my mudroom very soon and when I do, I’ll secure it to the wall studs through the top support I mentioned in step 1.
I love that there’s a place for shoes below, a shelf for accessories at the top, and plenty of room for hanging coats and hats in the middle.
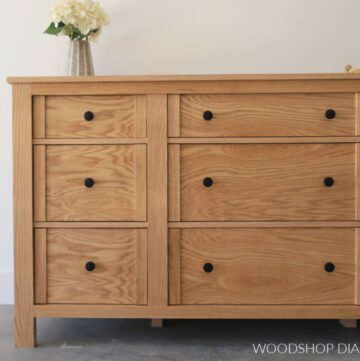
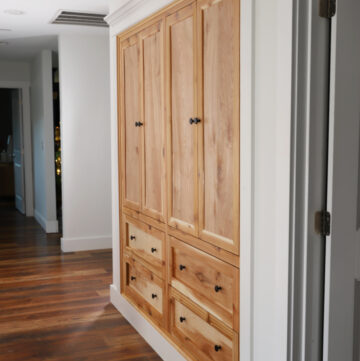
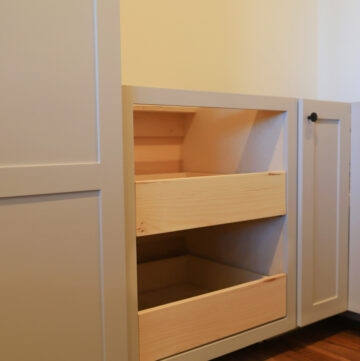
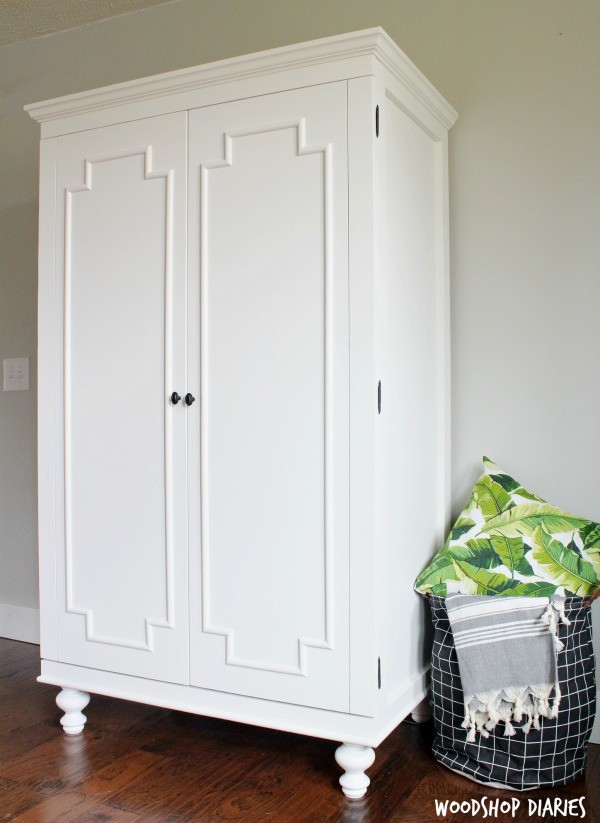
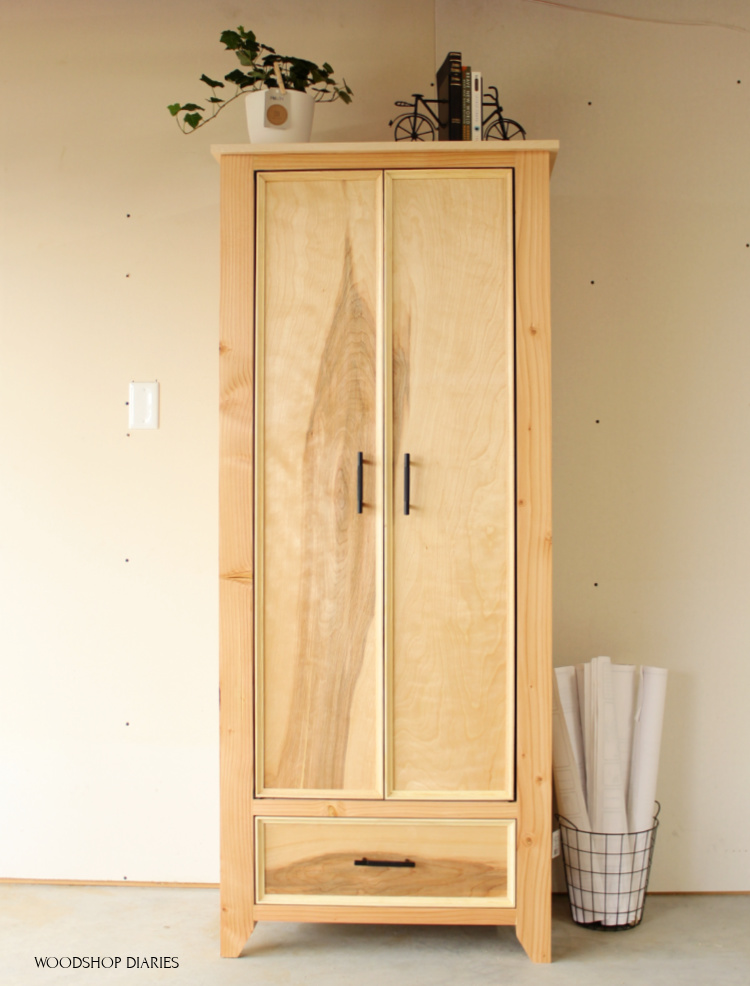
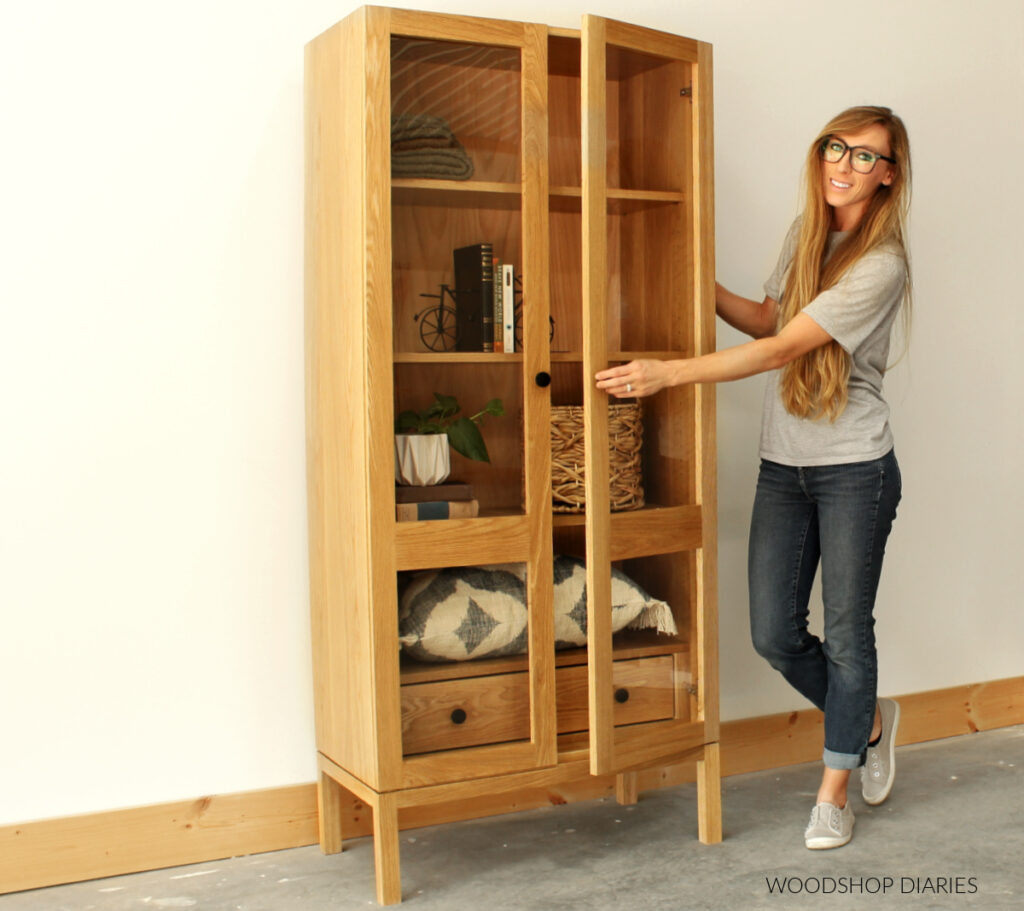
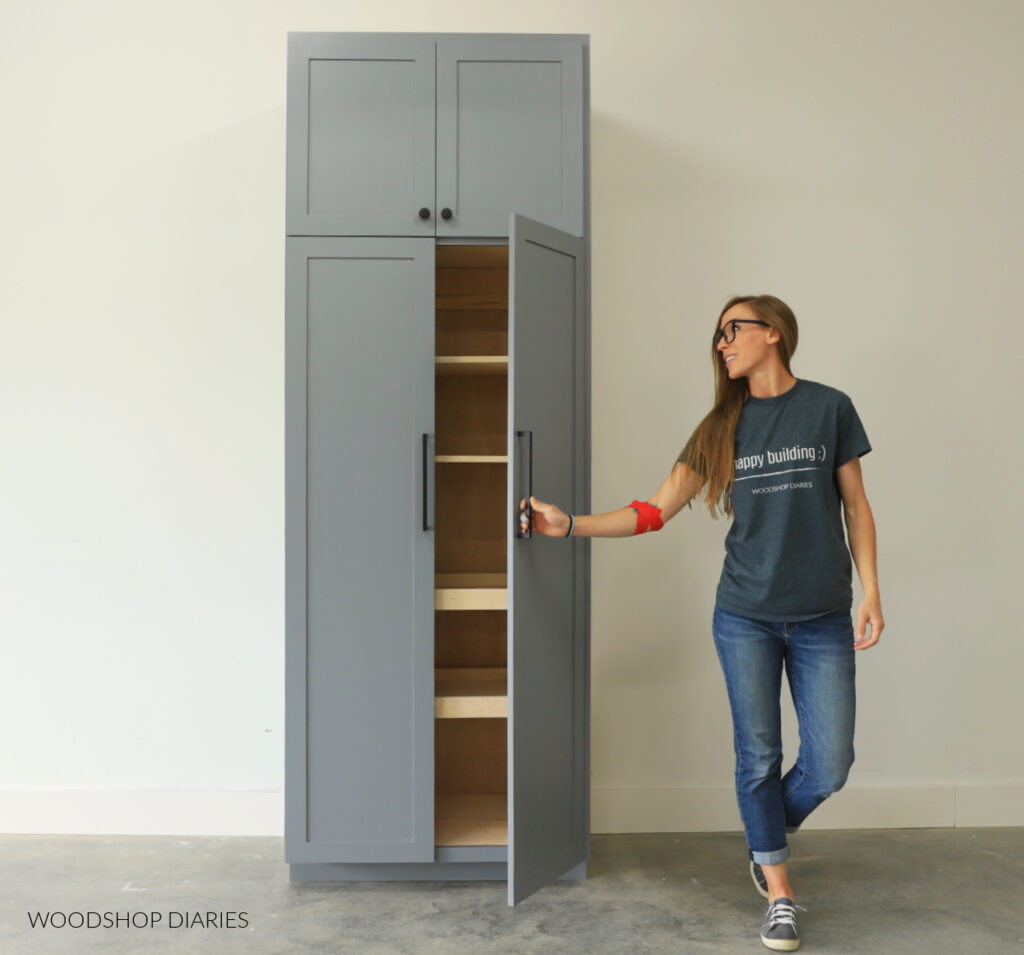
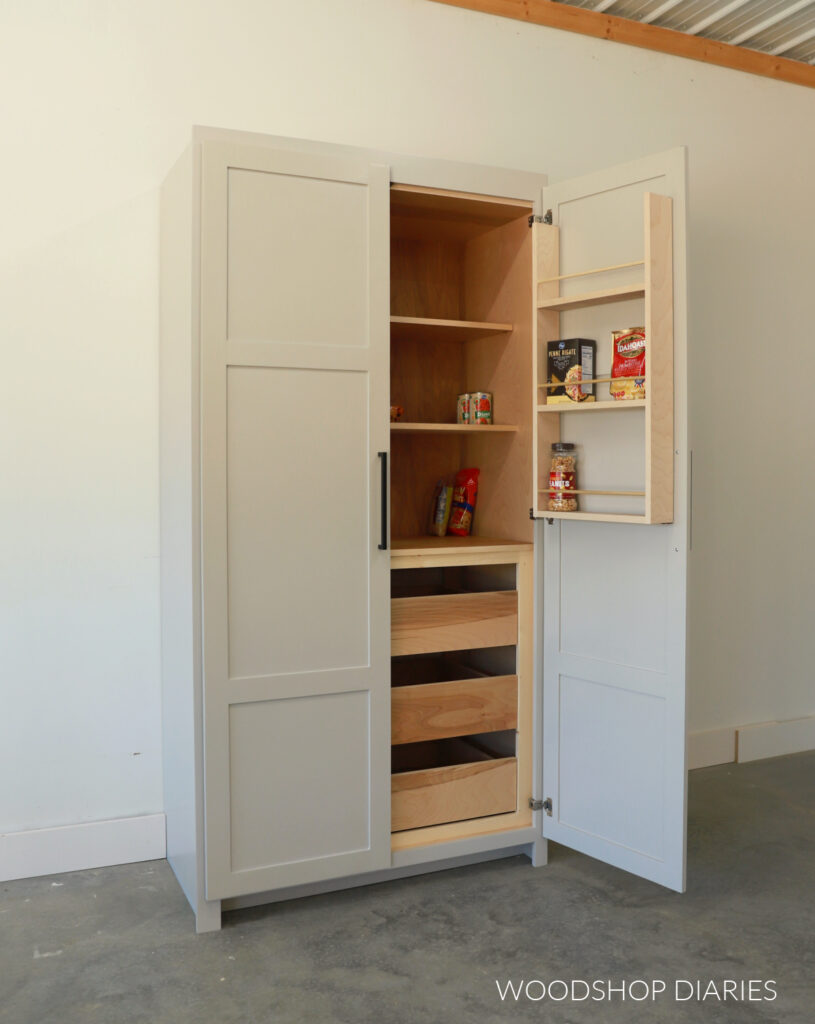
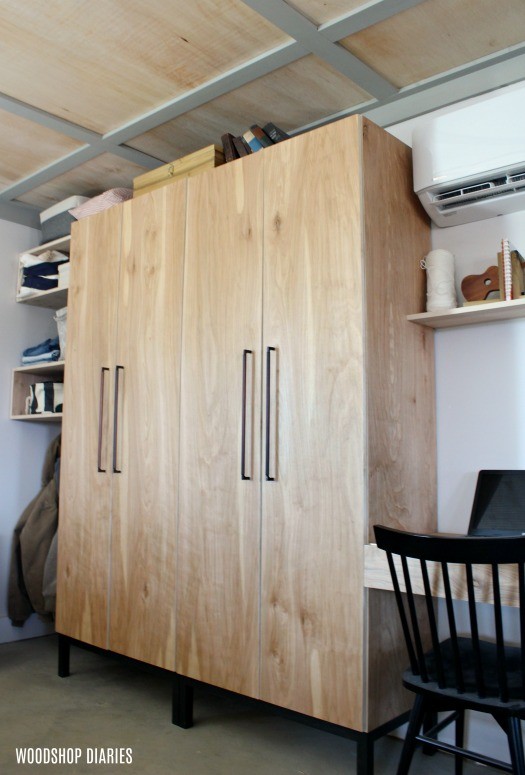
Looking for more DIY Armoire Cabinet Projects?
Enjoyed this project, but looking for more ideas? These types of tall storage cabinets are some of my favorites to build, so I’ve got plenty more you’ll enjoy browsing below.
Click the image(s) to see how to build each one:
If you enjoyed this project, don’t forget to pin this or share to your favorite social media channel to save it for later!
Until next time, friends, happy building!