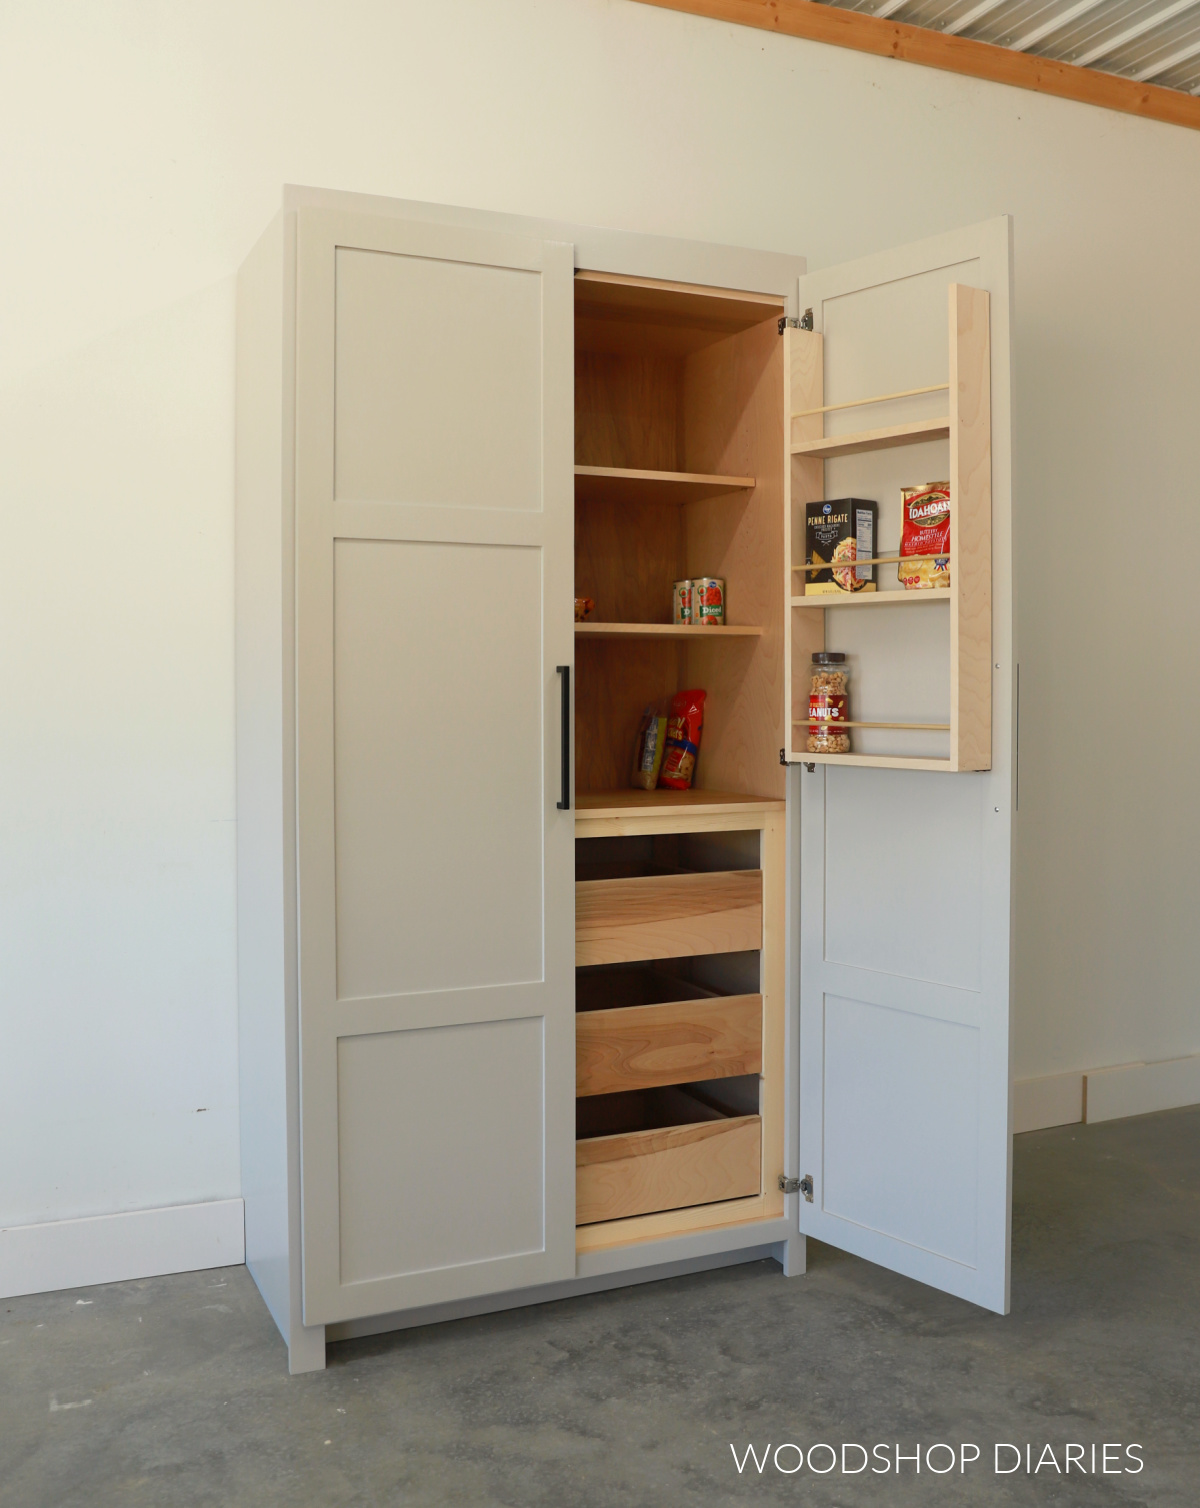
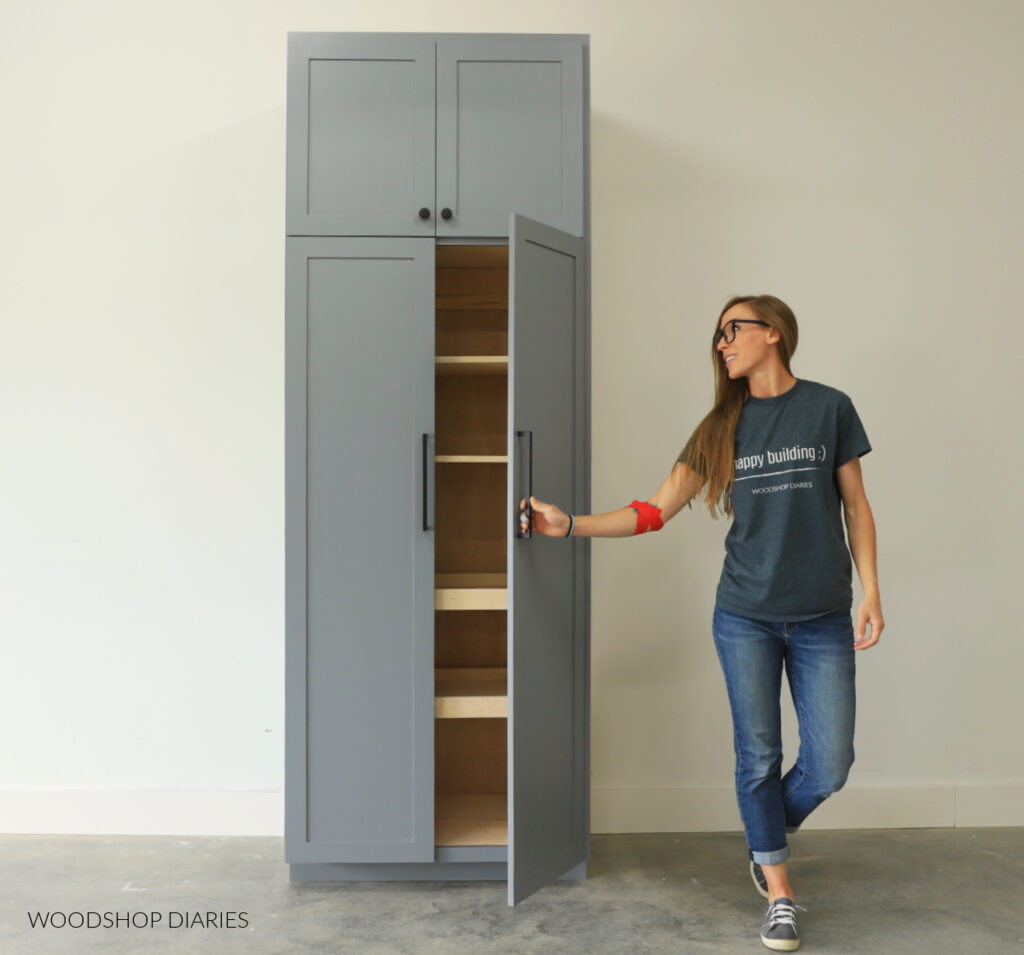
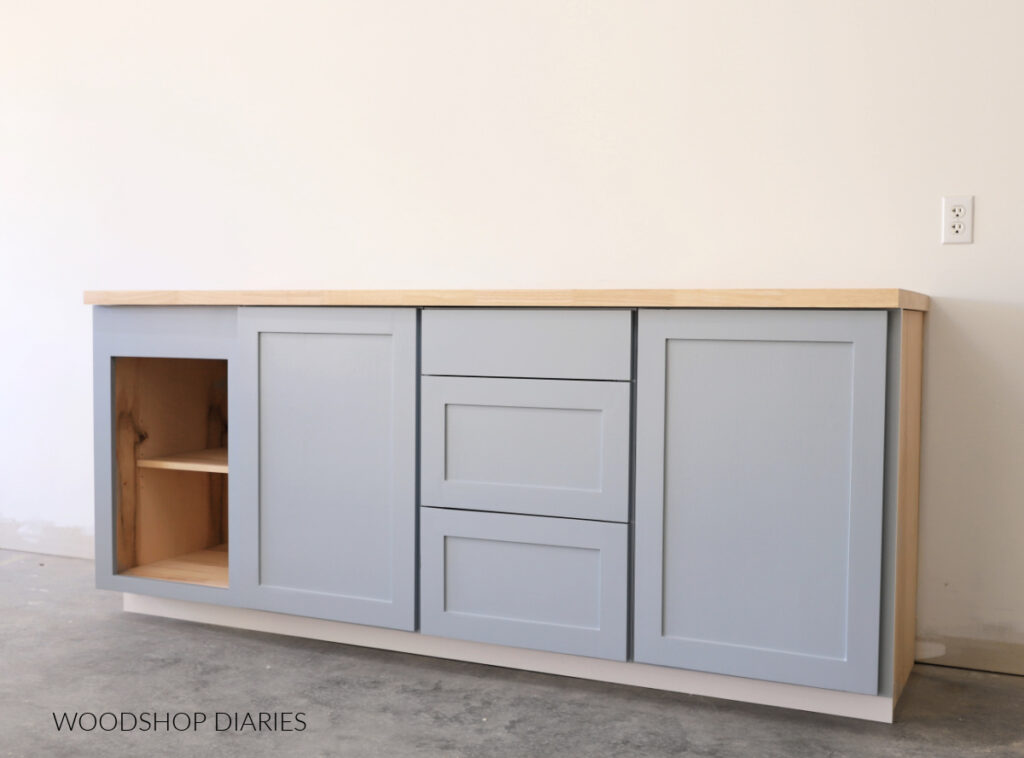
In this post, I’m sharing how to build a kitchen pantry cupboard–also sometimes called a larder cabinet.
This large pantry cabinet can stand alone in your kitchen to add extra storage for food and snacks. OR, it can be built in alongside other cabinets in a walk in pantry, or closet.
In my case, this cupboard will (eventually) be going into my walk in pantry as a built in.
But first, we’ve got to move a doorway and a light switch, then patch drywall and flooring. It’ll be a whole thing…
So for now, it’ll be a freestanding piece until we are ready to “build it into” the space.
If you could use some extra storage in your kitchen, I’ve got the plans and details to build your own below.
*This post contains affiliate links. See website policies.
What to know before building a larder cabinet
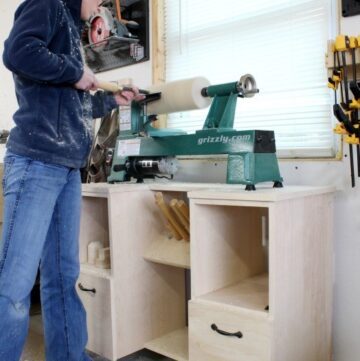
This project is a great one to practice all sorts of skills with. Since it involves building and installing both drawers, doors and shelves, it’s a bit complex, so I’d consider it an intermediate level build.
Cabinet Door Options
Personally, I do not enjoy building cabinet doors and these large, three panel doors proved quite the challenge since I opted to assemble them using a tongue and groove method. (Lots of precise cuts–was not very fun haha)
If I were to build this again, I’d probably choose a simpler way to make the doors. So if you watch the video and are overwhelmed with the door part, don’t panic! You can make them other ways.
I share 7 basic ways to make cabinet doors here so feel free to choose a method you feel comfortable with.
Door Weight Considerations
On the topic of doors, since these pantry doors are large, it’s important to consider the weight, especially when adding shelves to the back side.
As a general rule of thumb, standard concealed hinges are rated for about 10 lbs each (check the manufacturer’s specs on your specific hinges as this can vary). So two hinges on a door means the door can weigh ~20 lbs.
Three hinges would be ~30 lbs, four hinges would be ~40 lbs, etc. Keep in mind that heavier doors also put strain on other parts of the project, so number of hinges is just one consideration.
These doors should not be loaded down with heavy items. I used three hinges per door. If you wanted more weight capacity, consider adding four hinges or using heavy duty hinges.
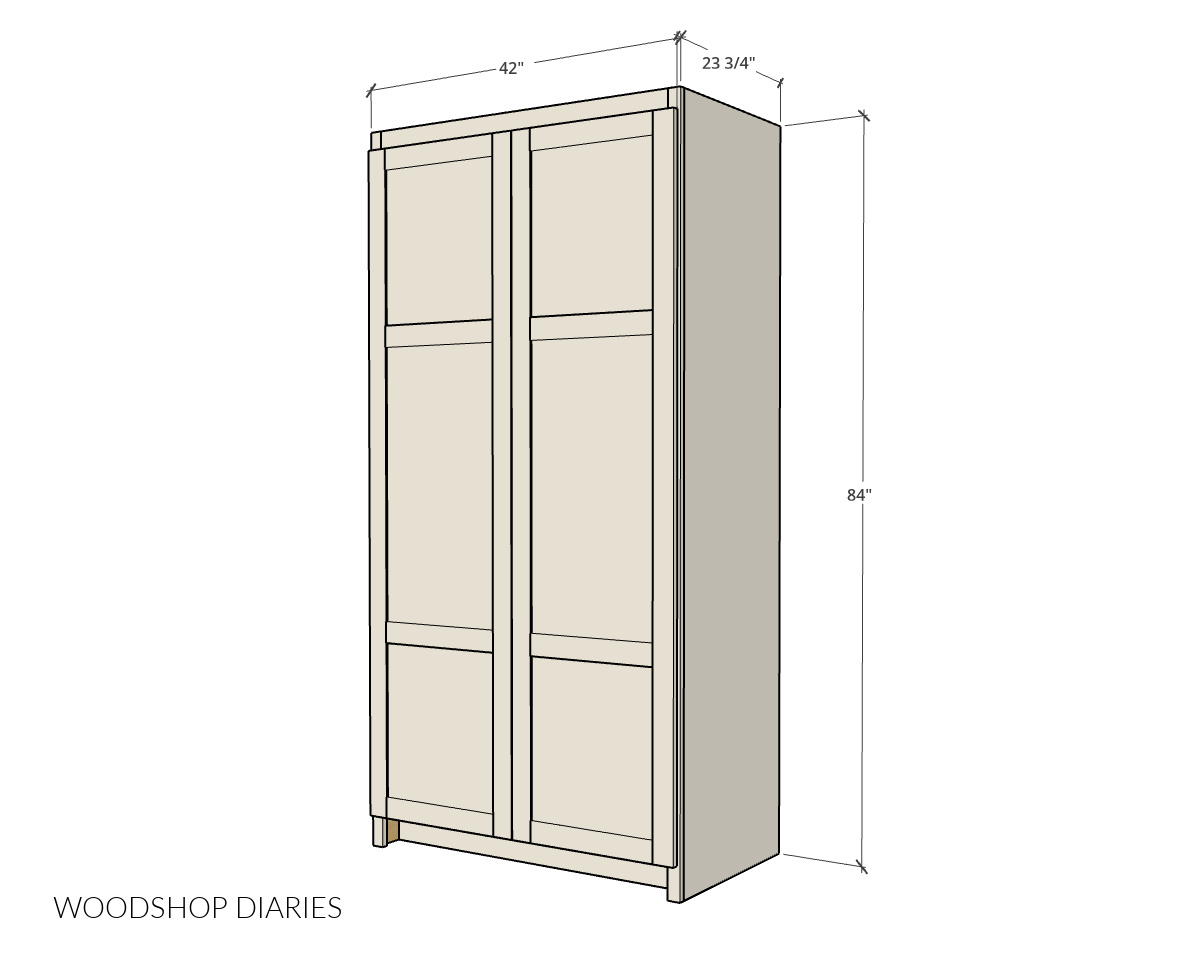
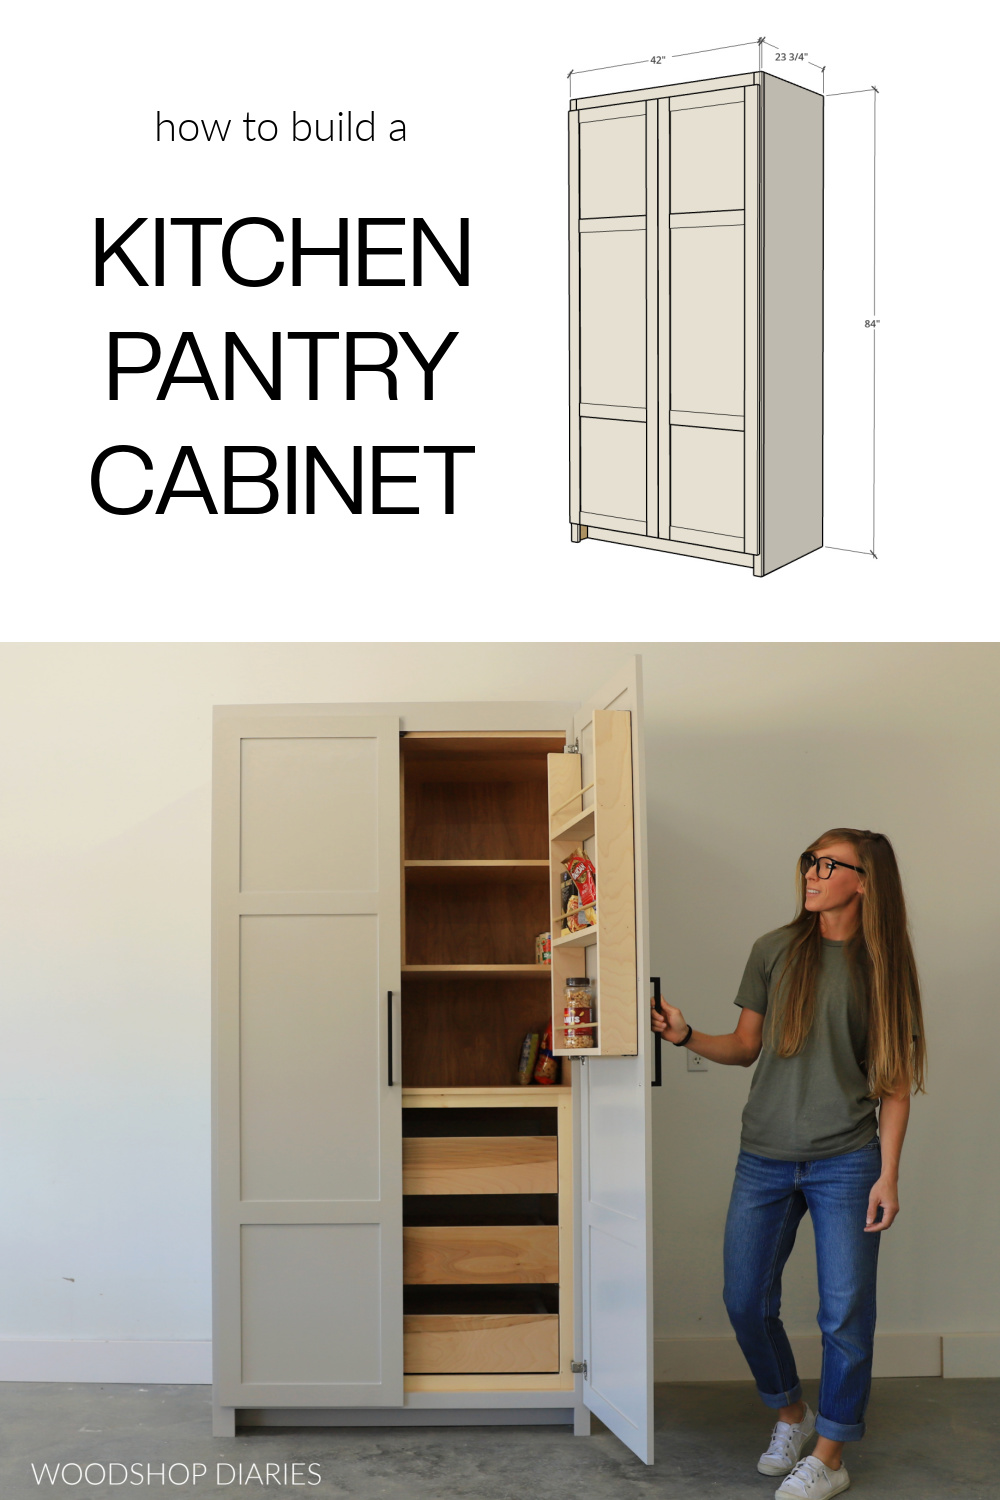
Overall Dimensions
The overall dimensions of this kitchen pantry cupboard are approximately 23 ¾″ deep (including the door) x 42″ wide x 84″ tall.
Helpful Resources for this Project
You might find these resources helpful throughout the build:
Enjoy DIY projects and woodworking plans? Sign up for priority access for the latest posts on Woodshop Diaries!
How to Build a Kitchen Pantry Cupboard
If you prefer to watch, check out the full build video on my YouTube channel packed full of behind the scenes footage, tips, and great visuals to help with the build:
Love watching how-to videos? Subscribe to my YouTube channel for plenty more where that came from!
Prefer to print? Grab the printable pantry cabinet building plans available here:
Tools & Materials
Tools:
- Drill/Driver
- Circular Saw and plywood cutting guides (Kreg Rip Cut & Kreg AccuCut)
- Miter Saw
- Pocket Hole Jig
- Table saw and/or router (optional*)
- Brad or Finish Nailer
- Concealed Hinge Jig
- Shelf Pin Jig
- Clamps (various sizes)
- ⅜″ diameter Forstener Bit
*Table saw and/or router are only needed for the door assembly using the tongue and groove method. If you choose to assemble your doors differently, these tools may not be needed.
Materials:
- (3) 4’x8′ sheets ¾″ plywood
- (1) 4’x8′ sheet ½″ plywood
- (1) 4’x8′ sheet ¼″ plywood
- (1) 1x4x4′ board
- (4) 1x2x8′ boards
- (6) 1x3x8′ boards
- (3) ⅜″ diameter x 36″ dowel rods
- (3) pair 20″ ball bearing drawer slides
- (3-4) pair 1 ¼″ overlay face frame concealed hinges
- 1″ pocket hole screws
- 1 ¼” pocket hole screws
- 1 ¼” , 2″ and 2 ½″ wood screws
- Edge banding (optional, but recommended)
- Shelf Pins
- Wood Glue
- (8) 1 ½″ corner brackets
I recommend using cabinet grade plywood for this project (birch, maple and oak are great options). Learn how to choose the right plywood for your project here.
For the 1x material, any wood type is fine. I used pre-primed pine for the parts I painted (the face frame and door) and spruce (whitewood) for the parts I wasn’t painting (the interior face frame).
Step 1: Assemble the Main Cabinet
To begin, I cut down my ¾″ plywood sheets to build the main body of the cabinet. You can find the full cut list and plywood cut diagrams in the printable plans.
RELATED: How to cut plywood sheets with a circular saw
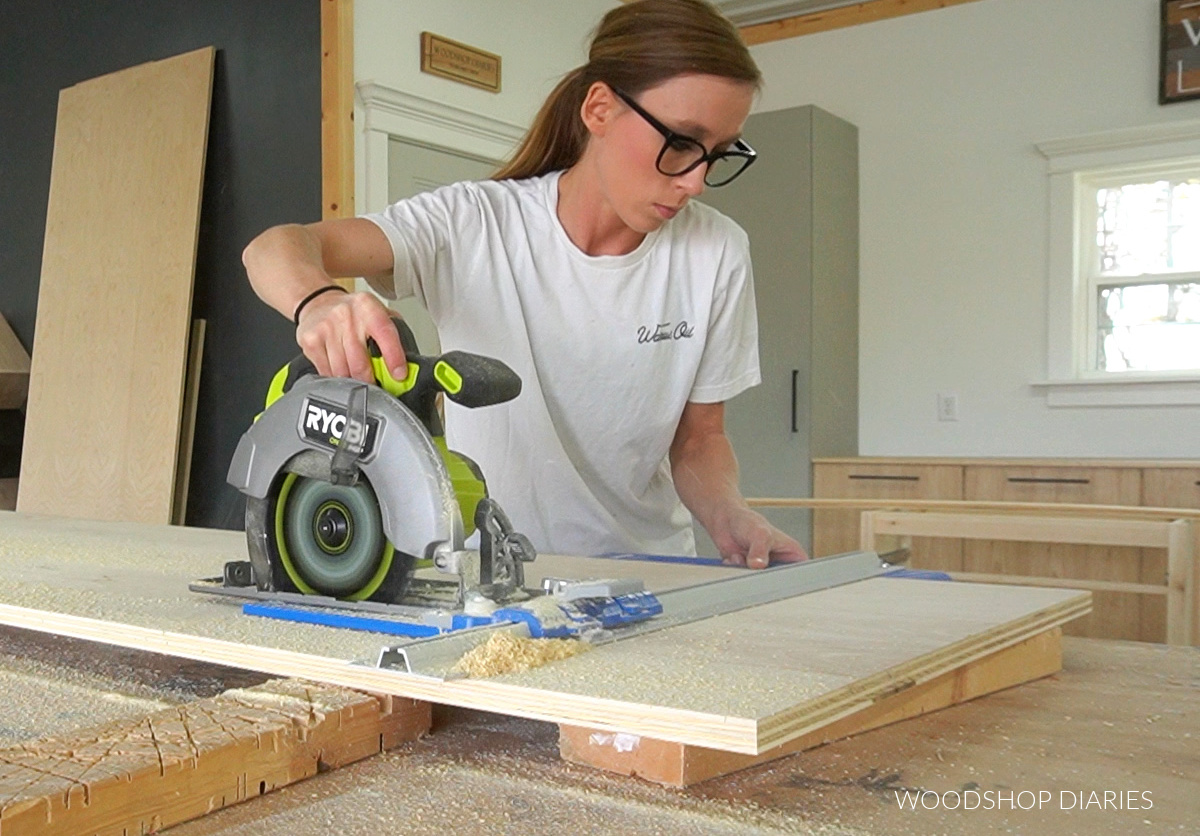
The main cabinet consists of two side panels, a top, bottom, and middle panel, and three thinner strips. The front edge of the middle and top panels will be exposed in the finished build, so I applied edge banding to them.
RELATED: How to apply iron on edge banding
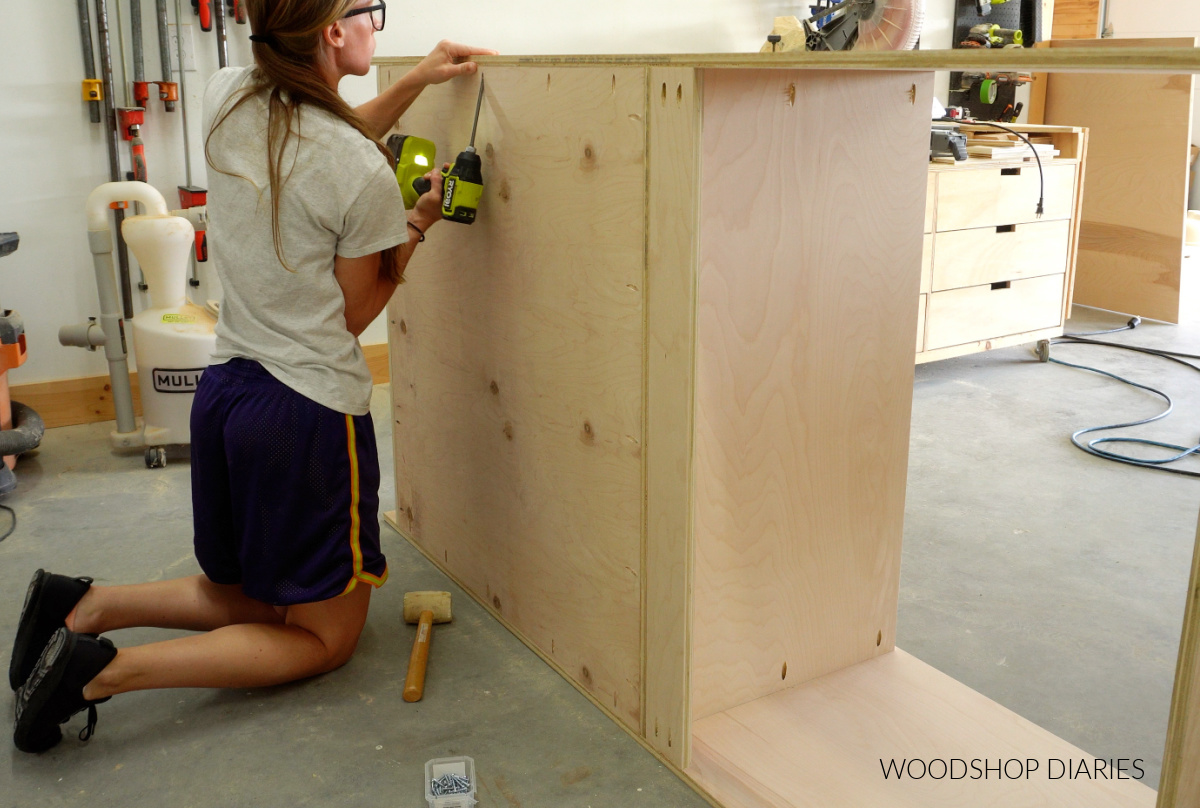
I assembled this cabinet using pocket holes and screws, so I drilled ¾″ pocket holes into the ends of the top, middle, and bottom panel and into each end of the three strips.
RELATED: How to use a pocket hole jig
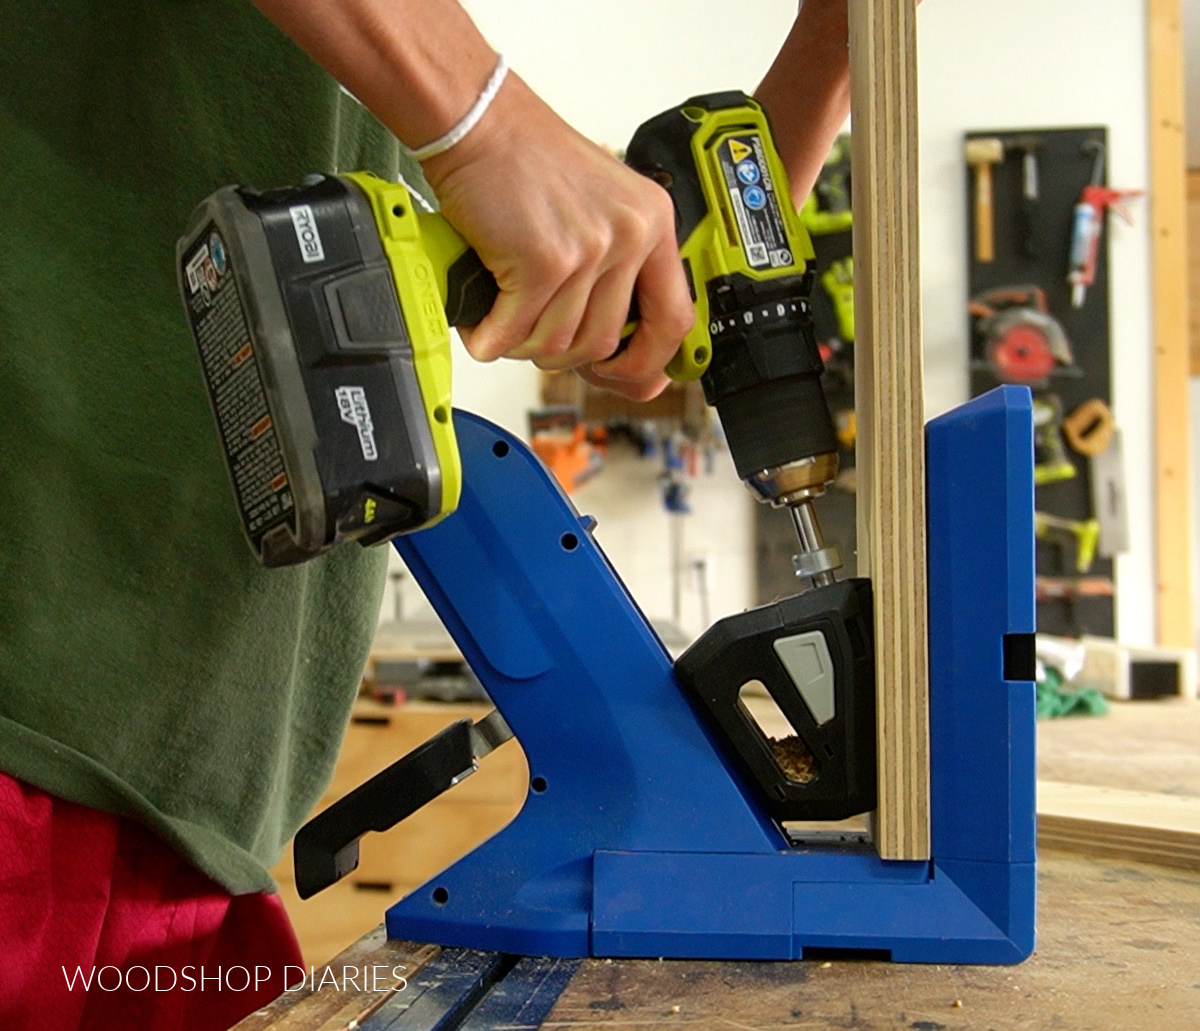
Then I assembled the cabinet with pocket hole screws.
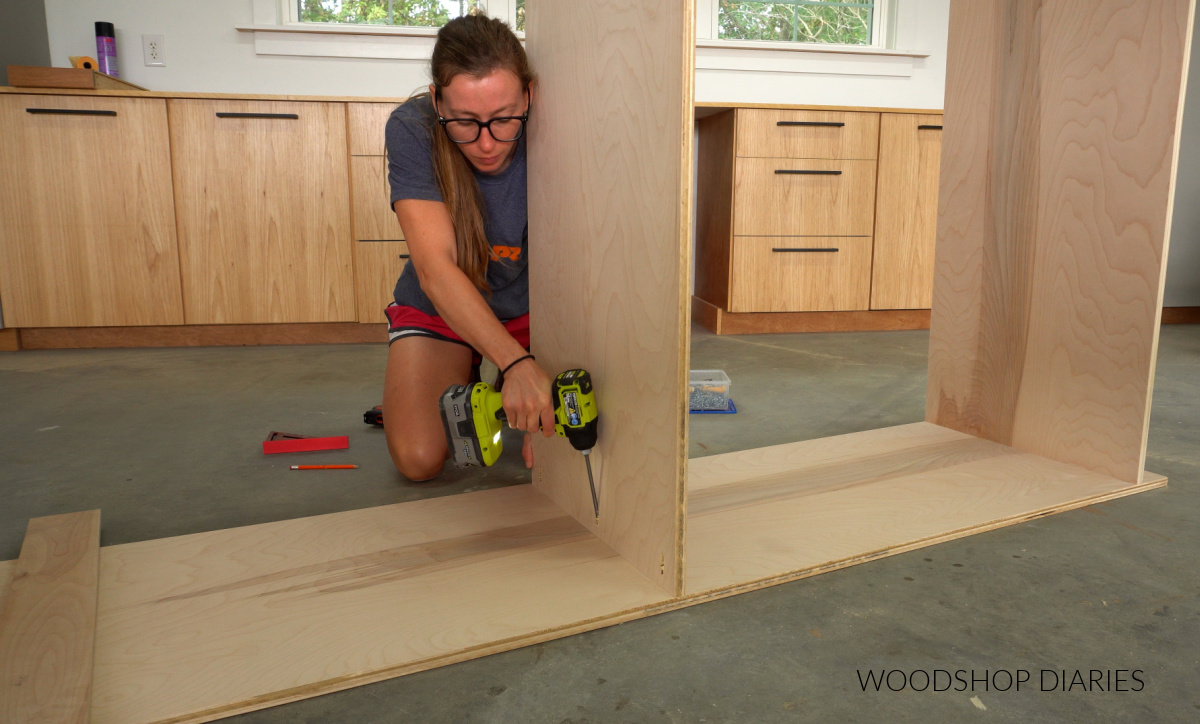
One of the plywood strips goes above the top panel flush to the front. One of them goes under the middle panel flush to the back. And the last one goes under the bottom panel about 3″ from the front.
The top strip gives you somewhere to nail the face frame, the middle strip gives you a way to secure it to the wall studs once it’s built, and the bottom one is the toe kick.
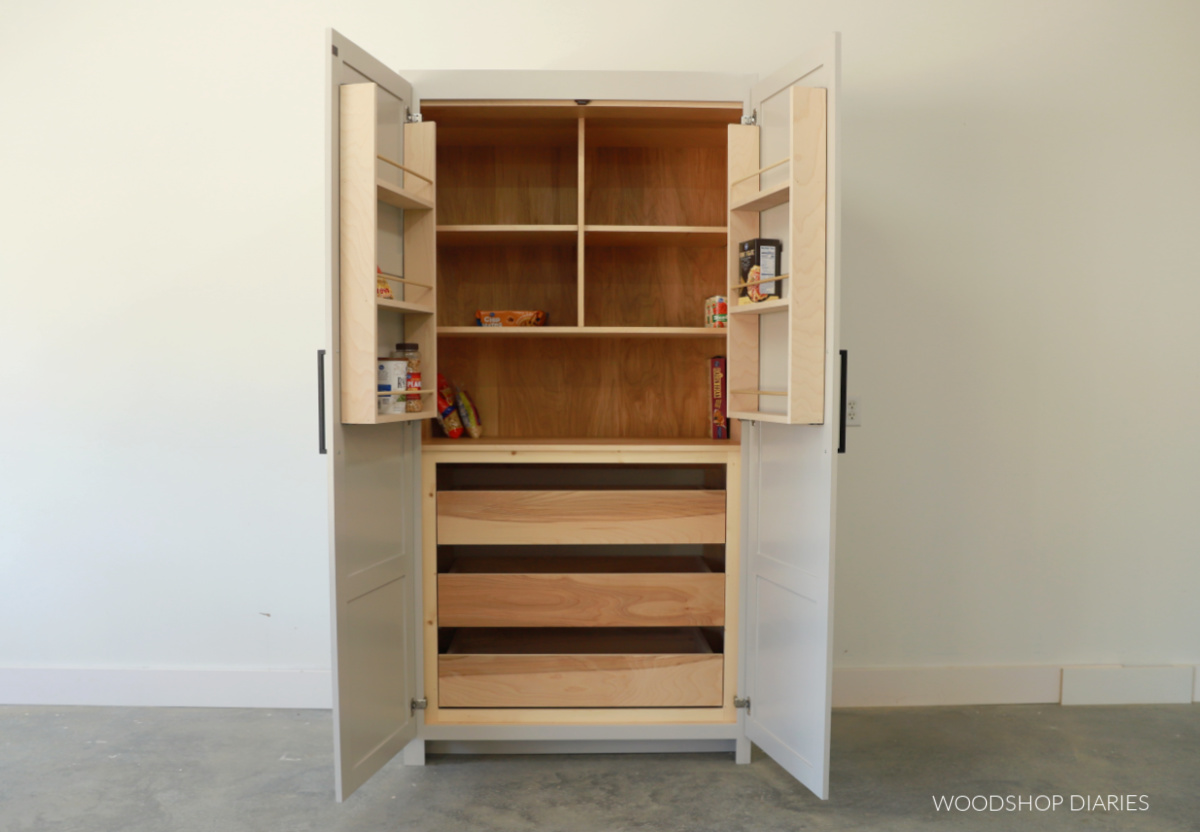
Step 2: Install Shelves in Top Section
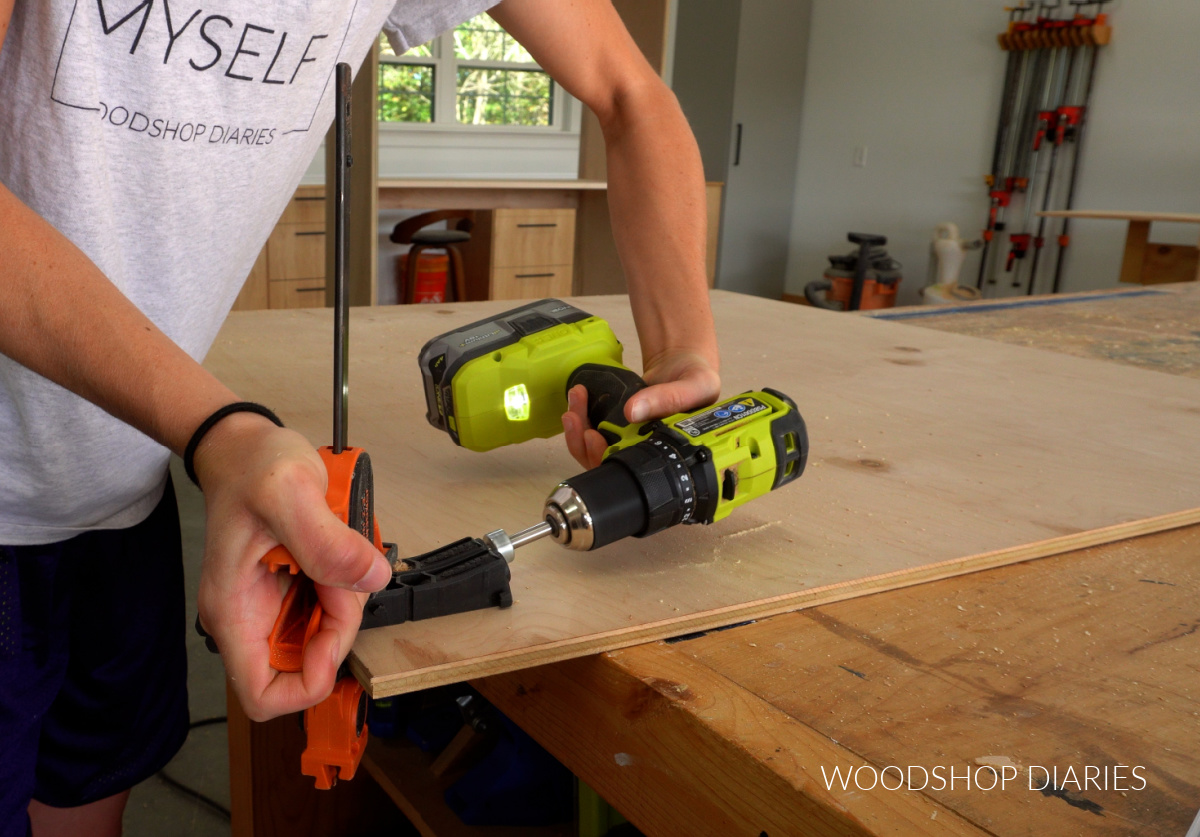
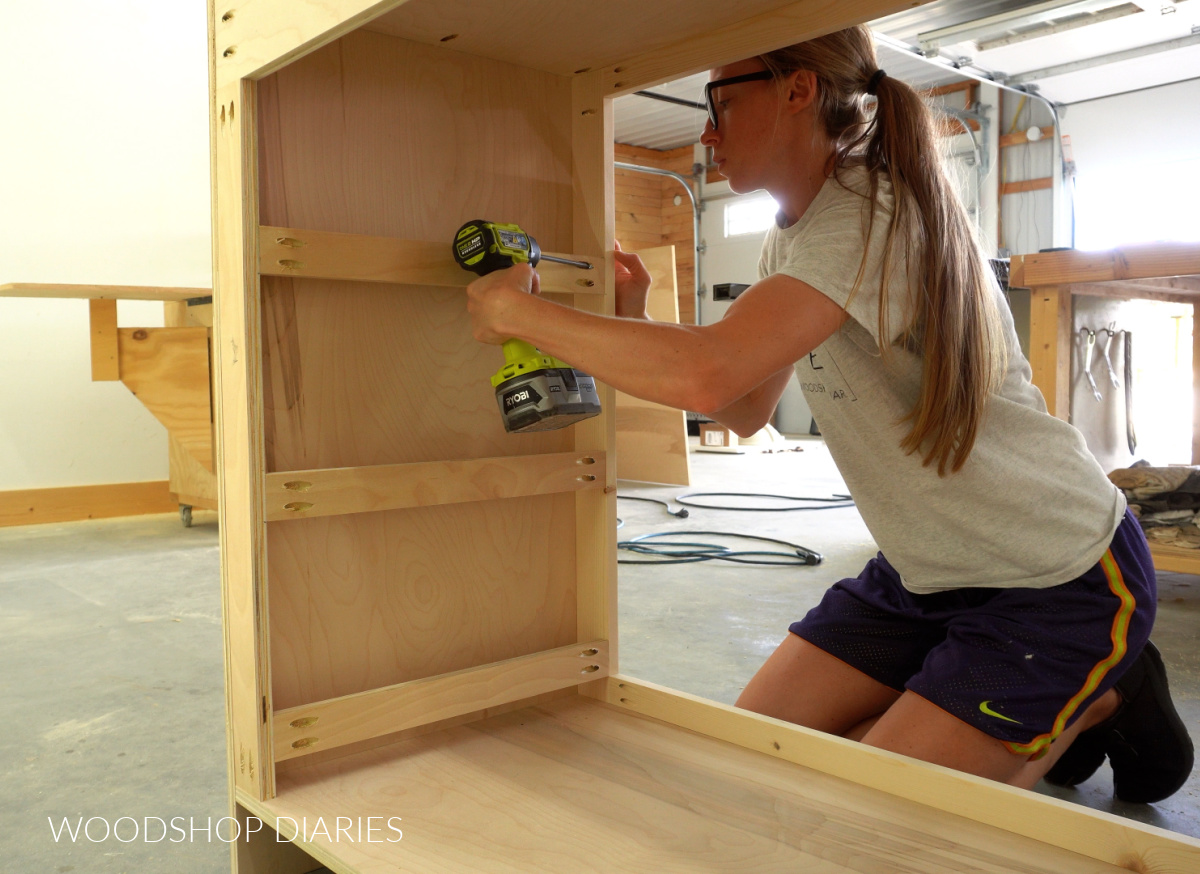
The top section of this pantry is intended for shelving, but before adding the shelves, I cut a back panel to fill the opening from ½″ plywood.
I drilled pocket holes along all the edges to install it.
TIP: The Kreg Micro pocket hole jig isn’t required for this, but it drills smaller pocket holes, so it’s great for thinner material like ½″ plywood. Learn how, when, and why to use the Kreg Micro Jig here.
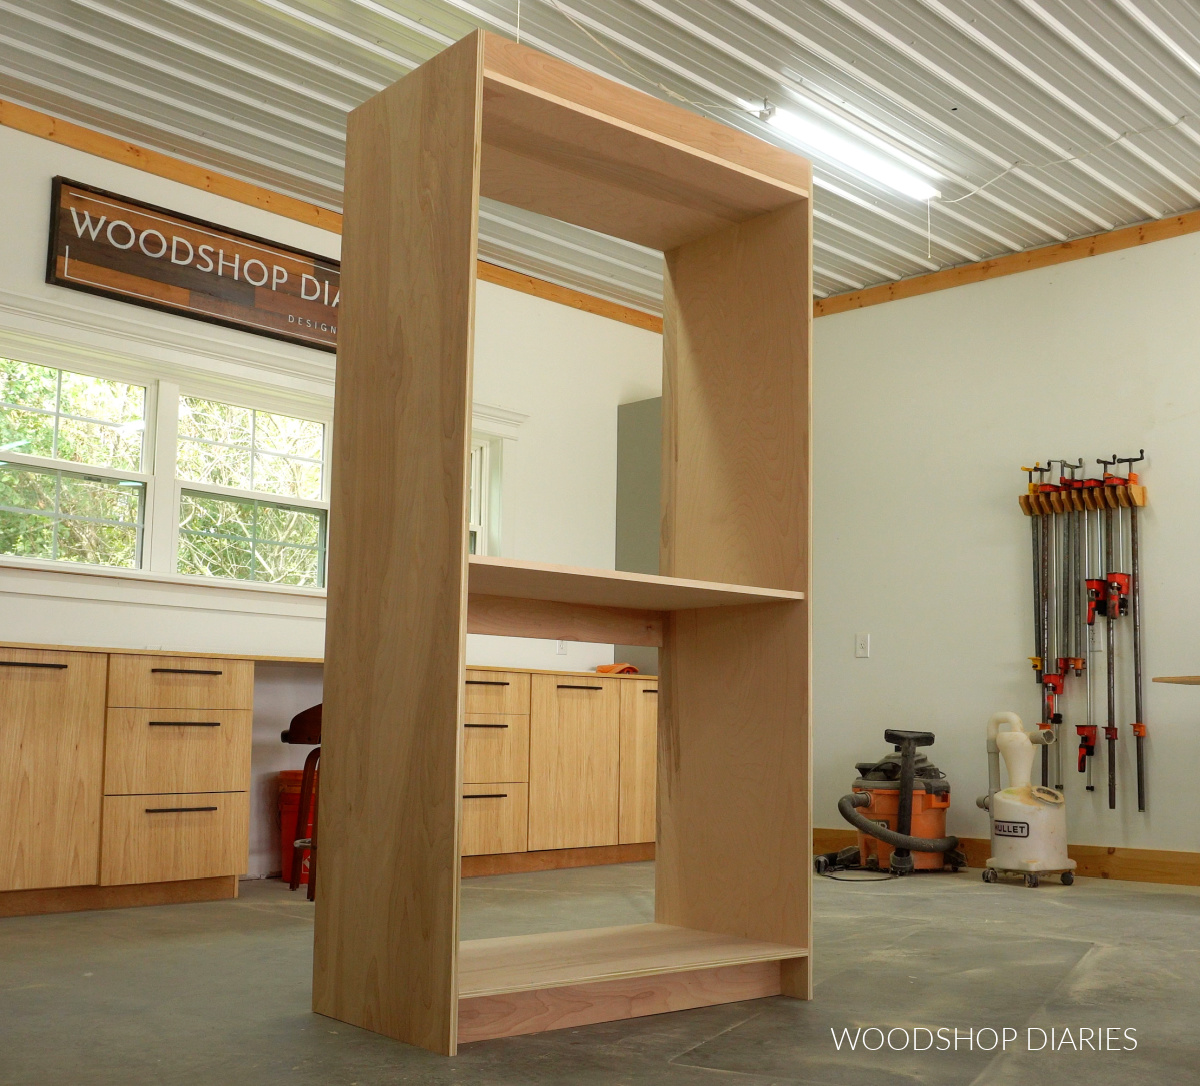
Then, I cut and installed a full length shelf across the top section and added a divider panel above it.
You’ll notice these pieces were cut several inches shallower than the cabinet box because later, when the shelves are added on the back of the doors, they need room to be able to close.
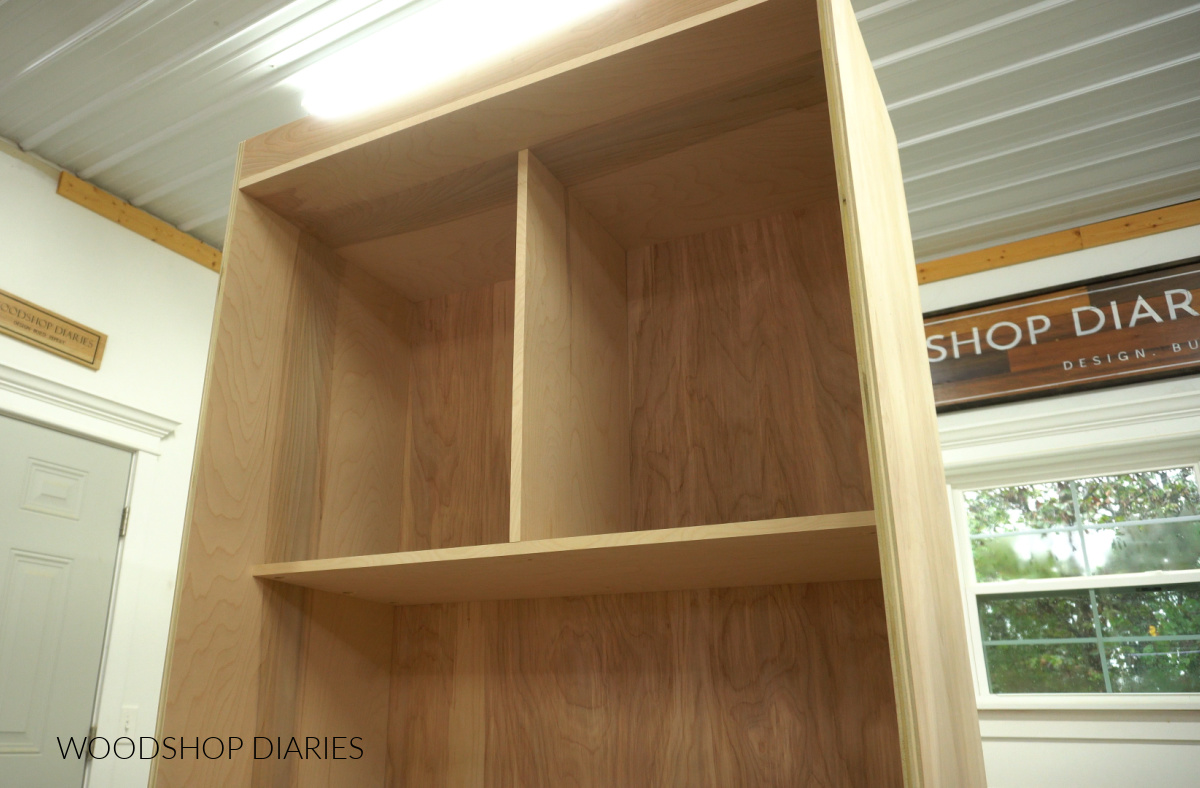
I wanted to add some adjustable shelves on each side of the divider, so I drilled shelf pin holes in these sections to add some small shelves later.
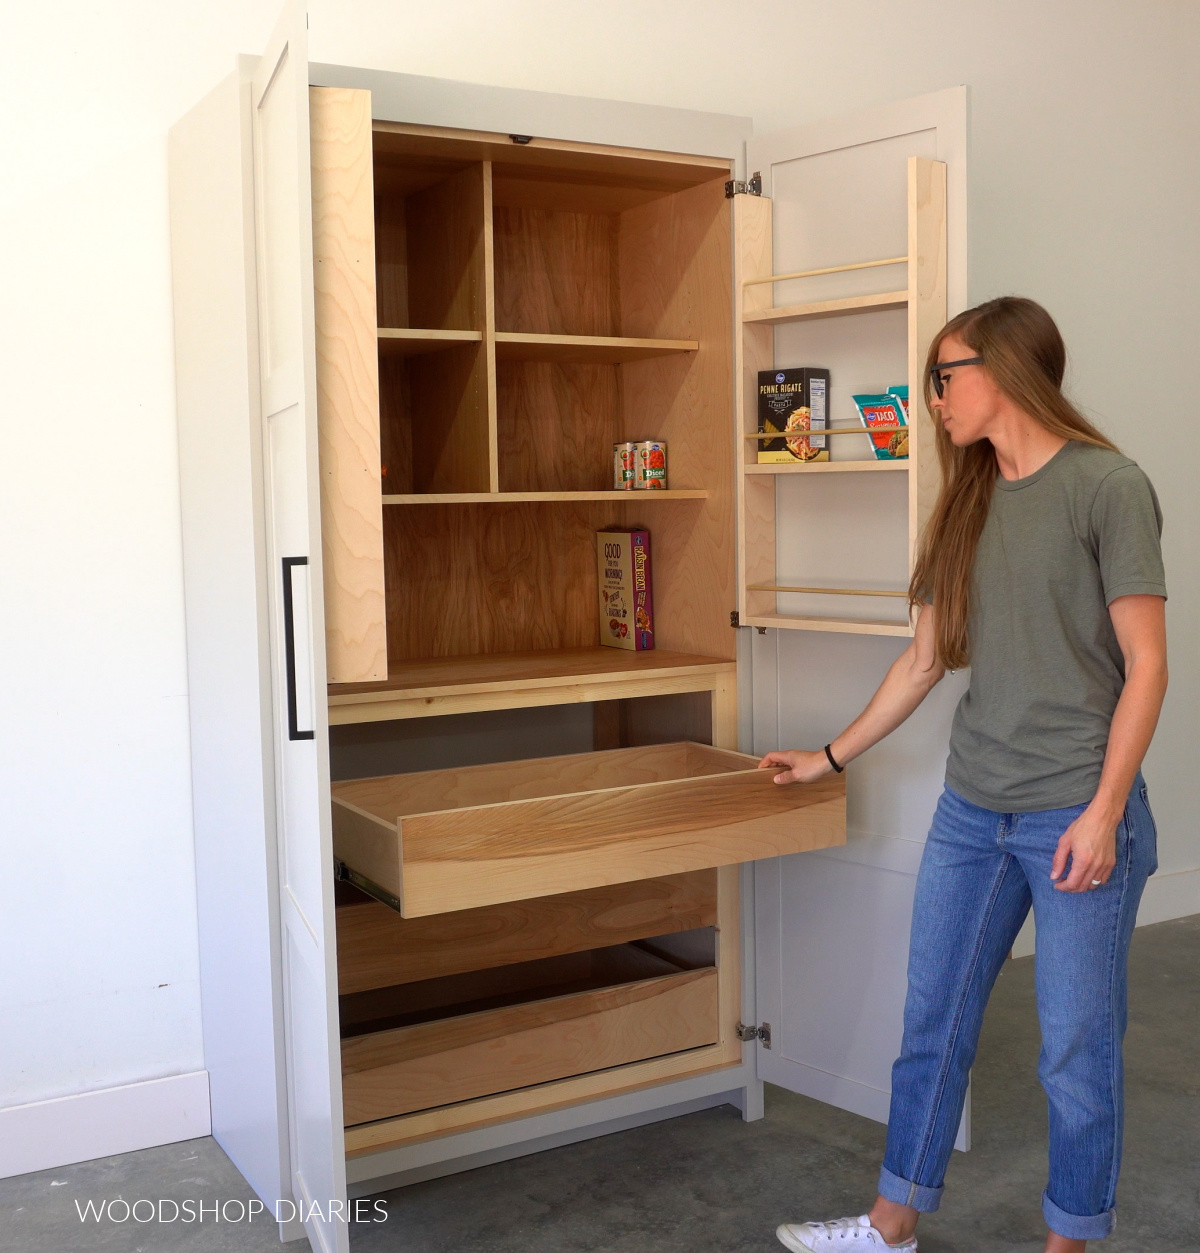
Step 3: Install Drawer Bracing
The bottom section of this pantry is where I added the drawers. These would be great for canned goods, bulk items, and boxed goods.
First, I assembled a simple frame to fit into the bottom opening of the cabinet using pocket holes and screws. I made the sides 1x3s and the top and bottom 1x2s.
I screwed this into the cabinet so that it was about 1″ inset from the front edge.
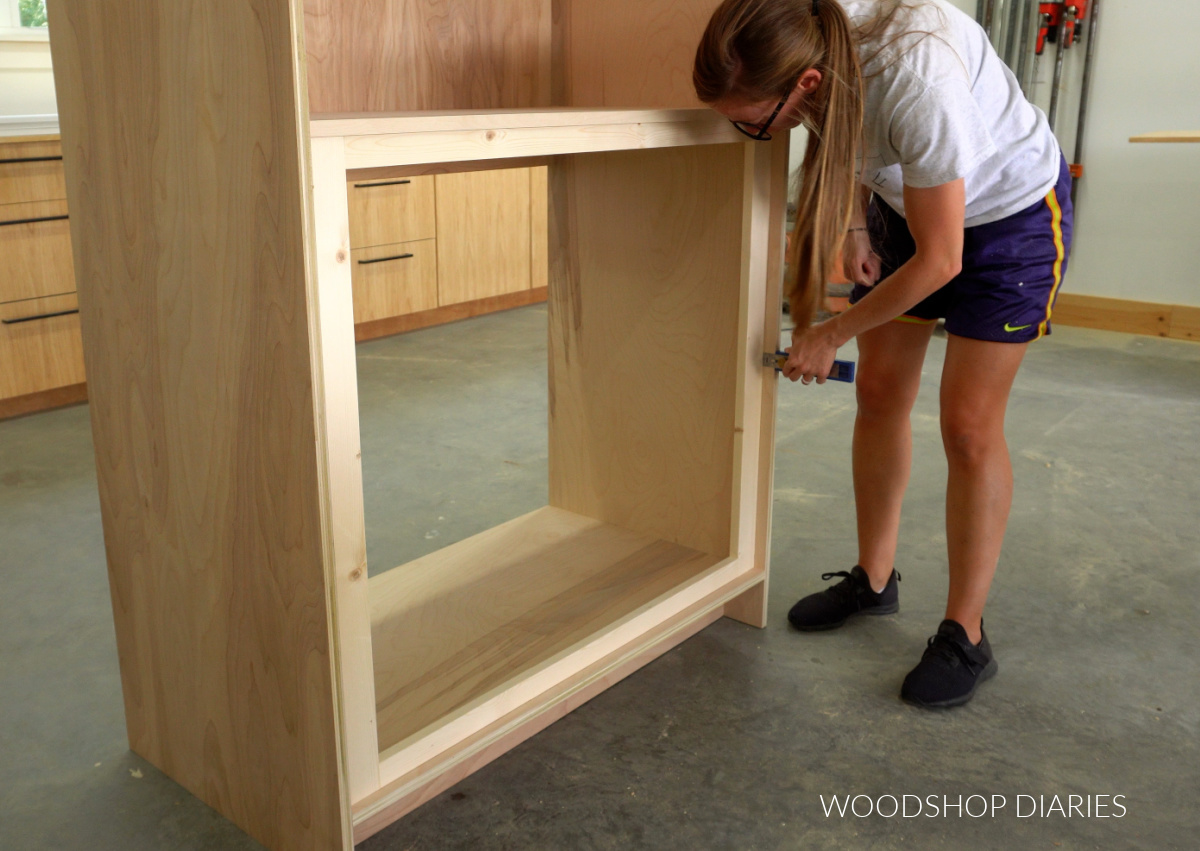
This frame is partially for looks (it makes the drawers look “built in”), but also helps space the drawers out so they don’t interfere with the hinges on the doors when they’re added.
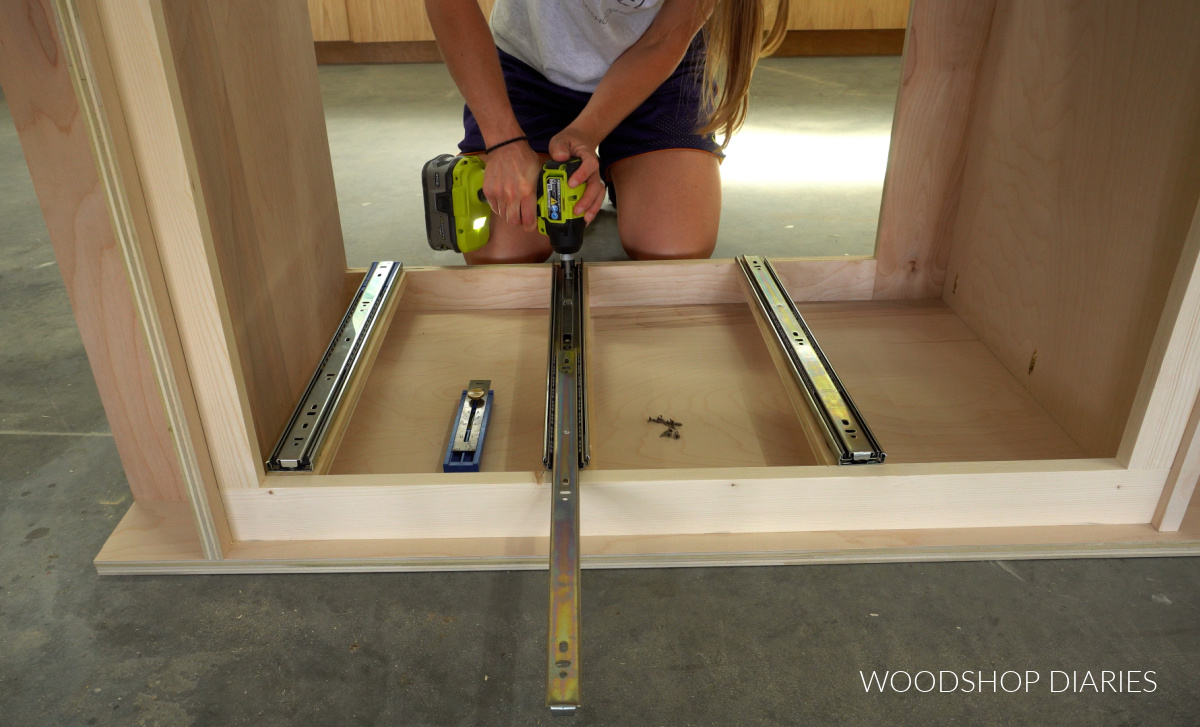
But now that this frame is in place, I needed to add some bracing to screw the drawer slides to. For this, I ripped some plywood strips and two at the back–one on each side.
Then, I cut six strips (three for each side) to run between the front and back like shown in the photo below. I spaced these out where I wanted my drawers to go because this is where I will mount the slides.
Then, I installed 3 pair of 20″ ball bearing drawer slides onto these braces.
RELATED: How to install drawer slides
I’ll add the drawers in a later step.
Prefer to print? Grab the printable building plans for this project here.
Step 4: Attach Face Frame
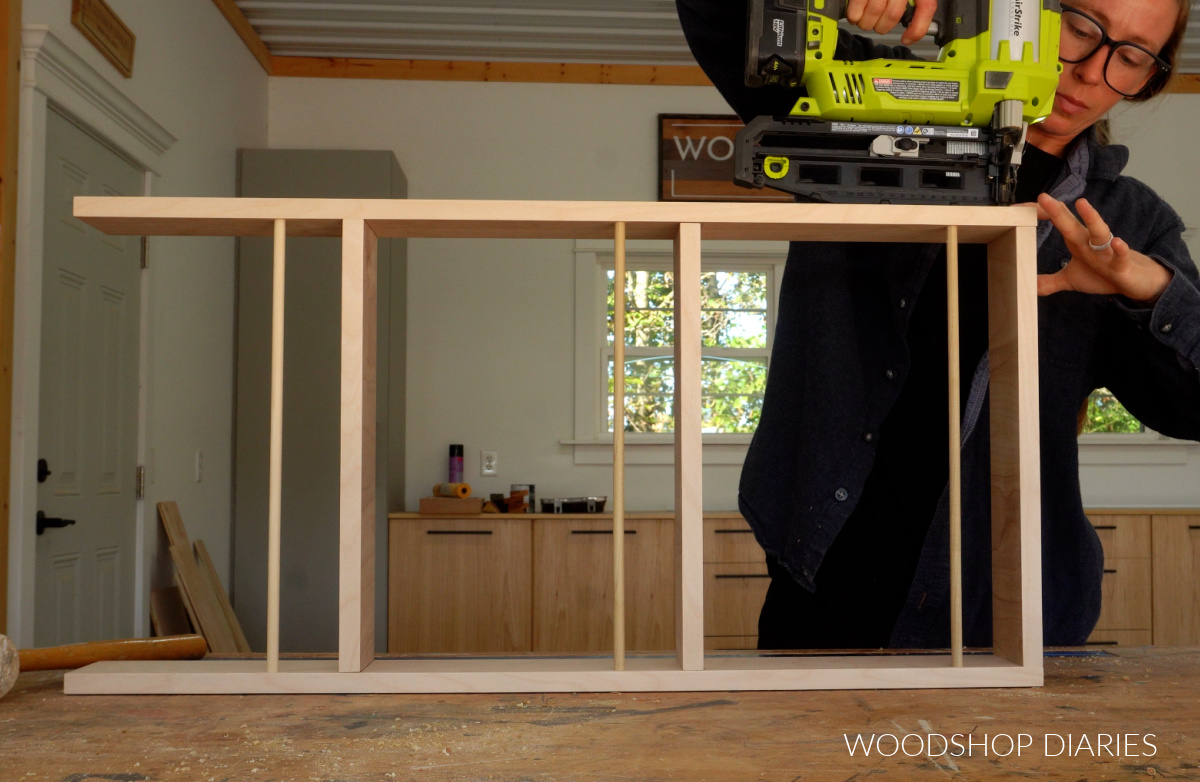
I assembled a simple face frame using 1x2s for the sides and bottom and a 1×4 at the top.
TIP: This is another place where the Kreg Micro jig would be helpful. The smaller pocket holes are less likely to split this thin material.
Once the face frame was together, I applied glue liberally to the front of the cabinet, then nailed it in place.
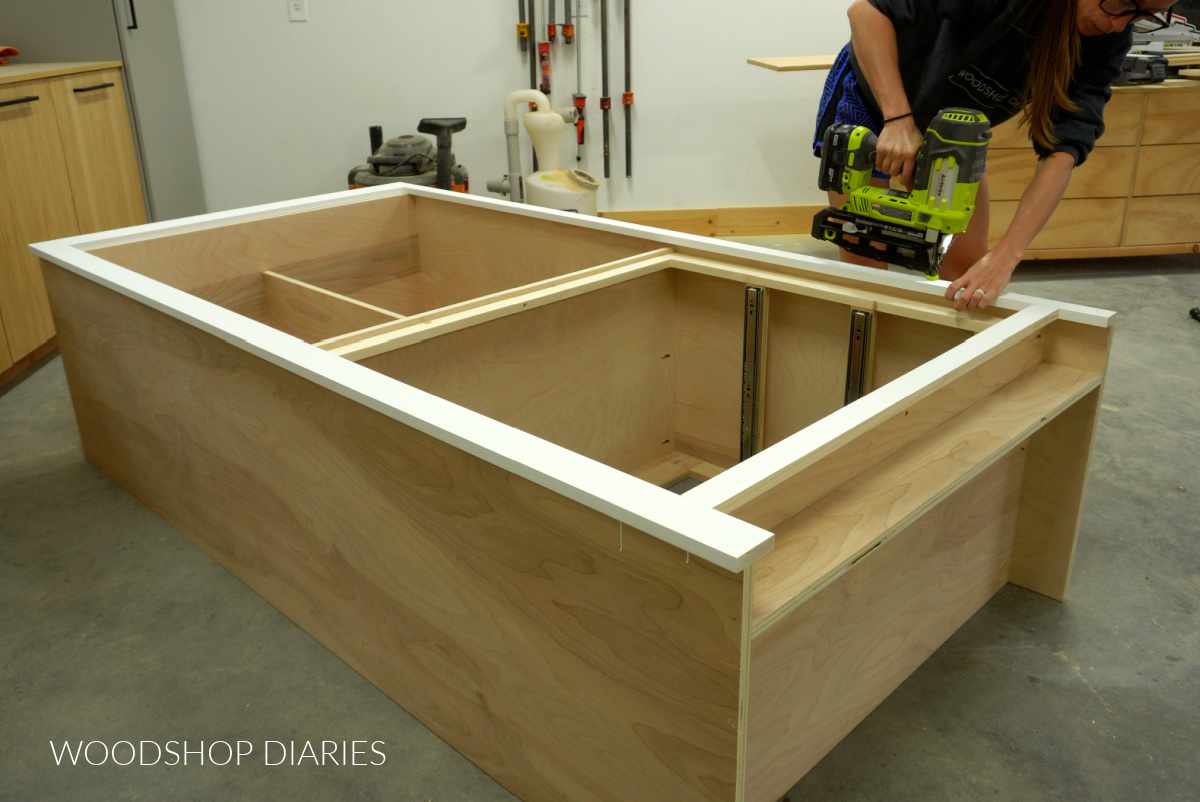
NOTE: I used a 1×4 at the top because I plan to add crown molding to this cabinet once it’s installed in my pantry. Having this extra material at the top gives me somewhere to nail that to.
Step 5: Build and Install Drawers
I built the drawers for this project a little different than usual. Normally, I install ¼″ plywood bottoms into my drawers in dadoes. See how to build a drawer box here.
But in this case, I glued and screwed ½″ plywood onto the bottom of my drawers. I had two reasons for doing this:
- I planned to store heavy items inside these drawers (like canned goods), so a thicker bottom might be a good idea
- This is the key reason. I already had the leftover ½″ plywood (left after cutting the back panel), but I didn’t have enough ¼″ plywood without buying another sheet
My usual ¼″ plywood bottom would have been fine (it could have held the weight), but using ½″ plywood saved me from buying another sheet.
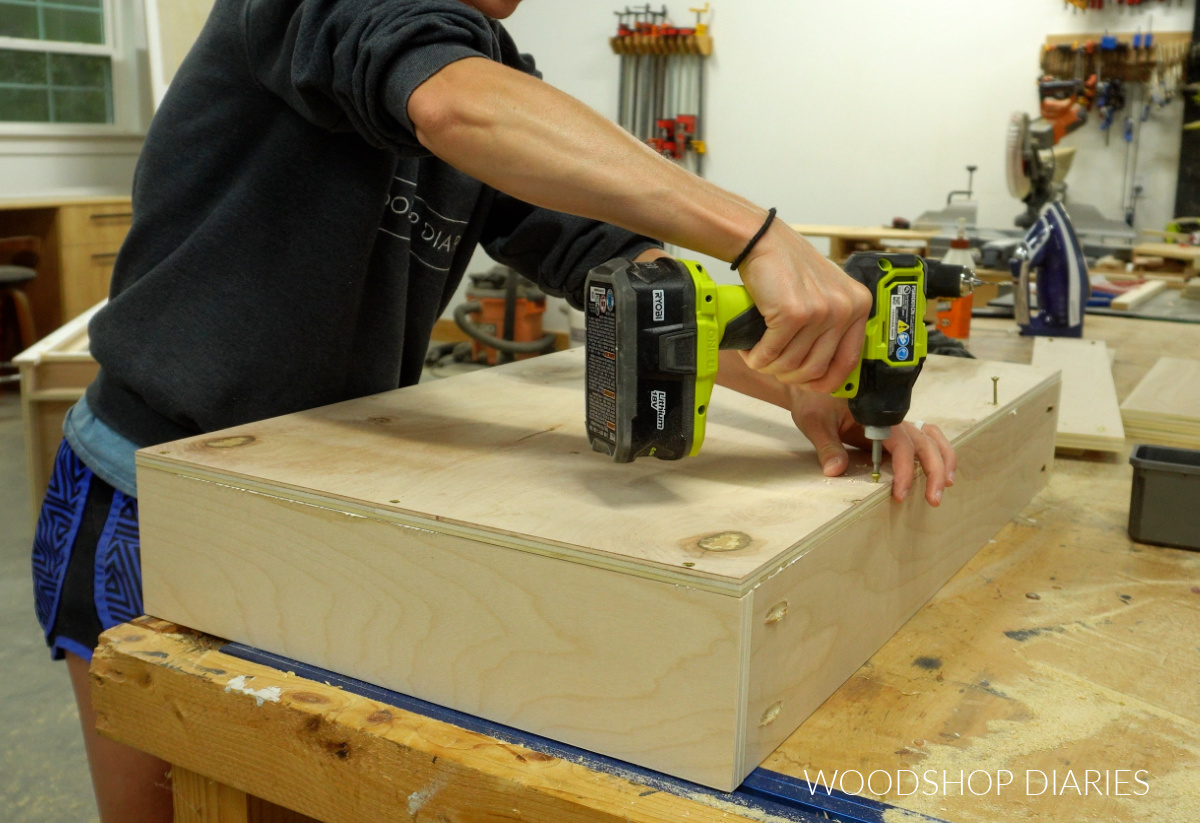
So I assembled three shallow drawer boxes using ¾″ plywood for the sides and ½″ for the bottom.
Then, I installed these into the pantry cabinet onto the slides.
Need help installing? Check out this guide to installing drawer boxes and drawer slides.

Then, I cut three drawer fronts from ¾″ plywood and added these onto the front of each box using screws from the inside.
Step 6: Assemble Pantry Cabinet Doors
The doors were built from 1x3s for the frames and ¼″ plywood for the panels. I mentioned earlier that there are much simpler ways of building these than what I did.
If I were to build this over again, I’d use a different method. See 7 ways to build a cabinet door here. (I’d choose method #2 or #4 if I had to do it over.)
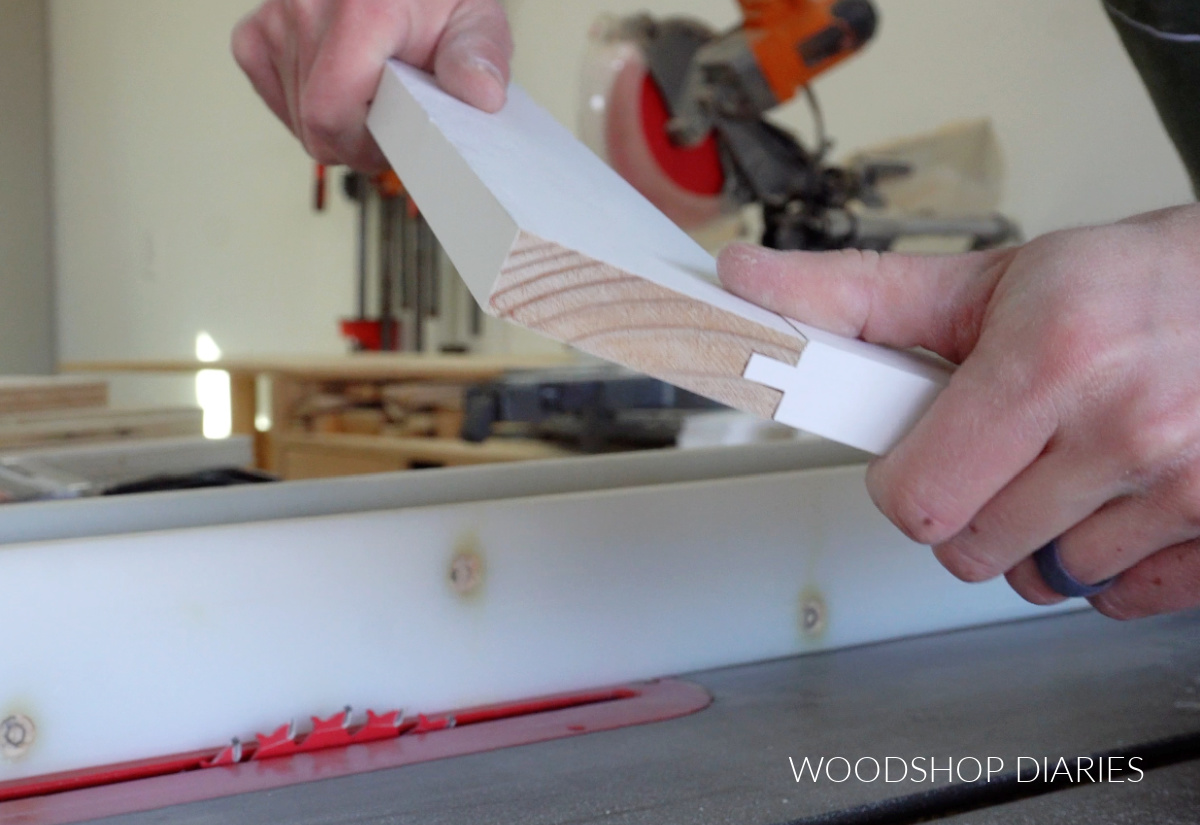
I cut all my 1x3s to make the door frames and I cut “tongues” on each end of the rails (horizontal door pieces) that were ¼″ wide and ⅜″ long.
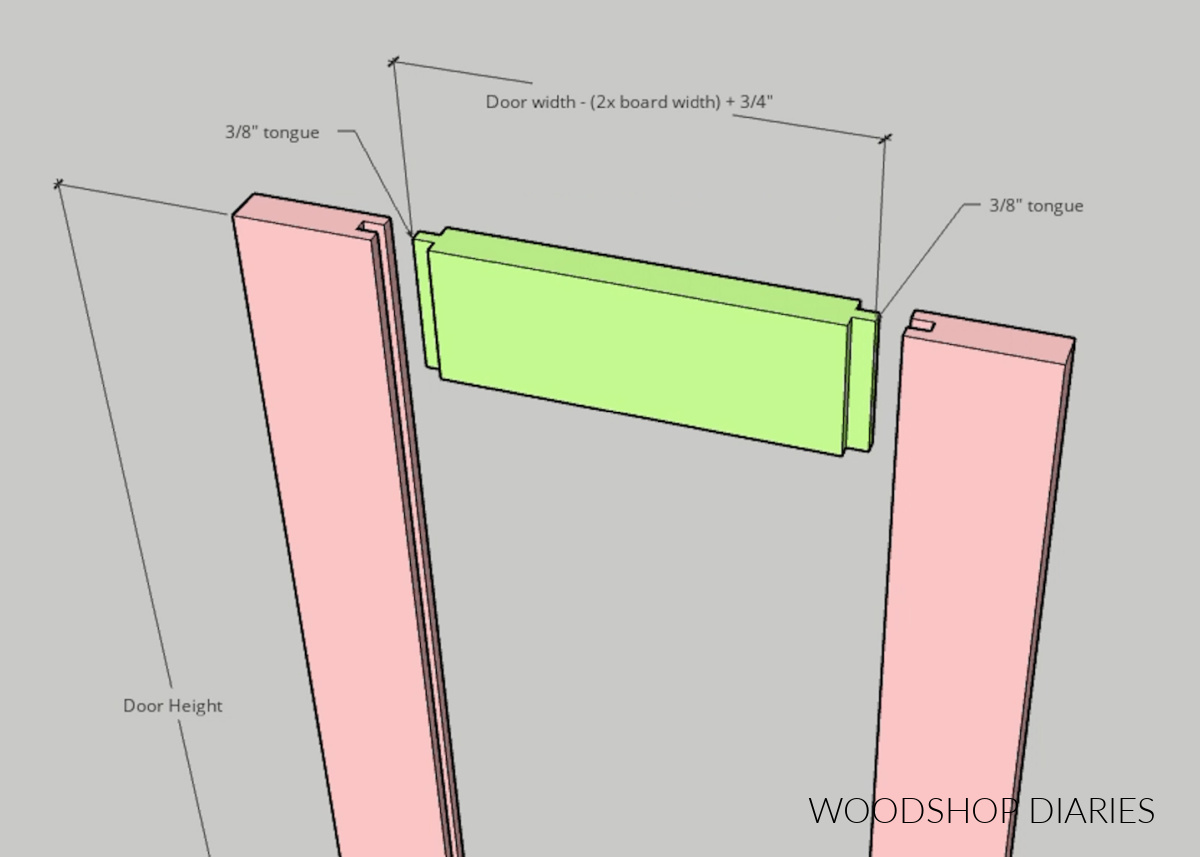
Then I cut ¼″ wide dadoes down the center of each frame piece so that the tongues and the ¼″ plywood would fit into the grooves.
I assembled two identical doors using wood glue. (I recommend cutting the pieces and dry fitting without glue to make sure the pieces fit together well before actually adding the glue.)

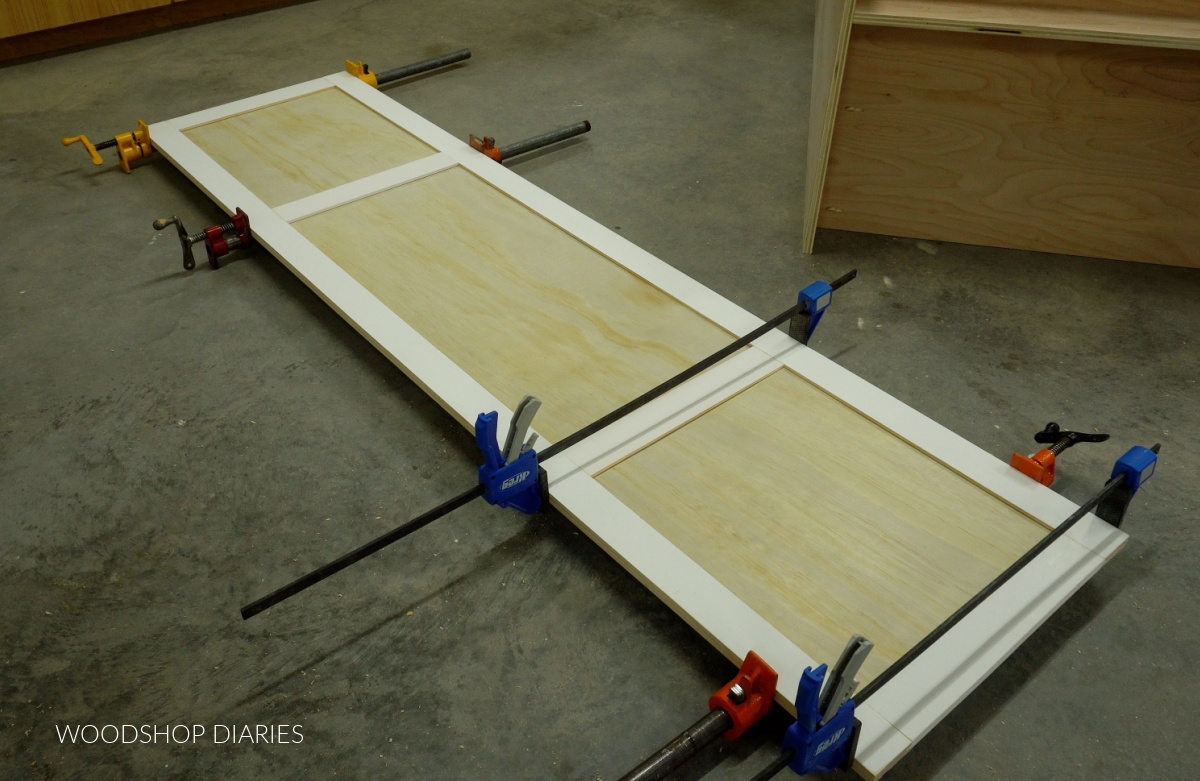
Once the glue dried, before installing, I went ahead and primed, caulked, and painted the doors and the cabinet. Learn how to paint your DIY projects here.
I painted the doors and the outside of the cabinet with SW Colonnade Gray and sealed the inside of the cabinet with Minwax Polycrylic.
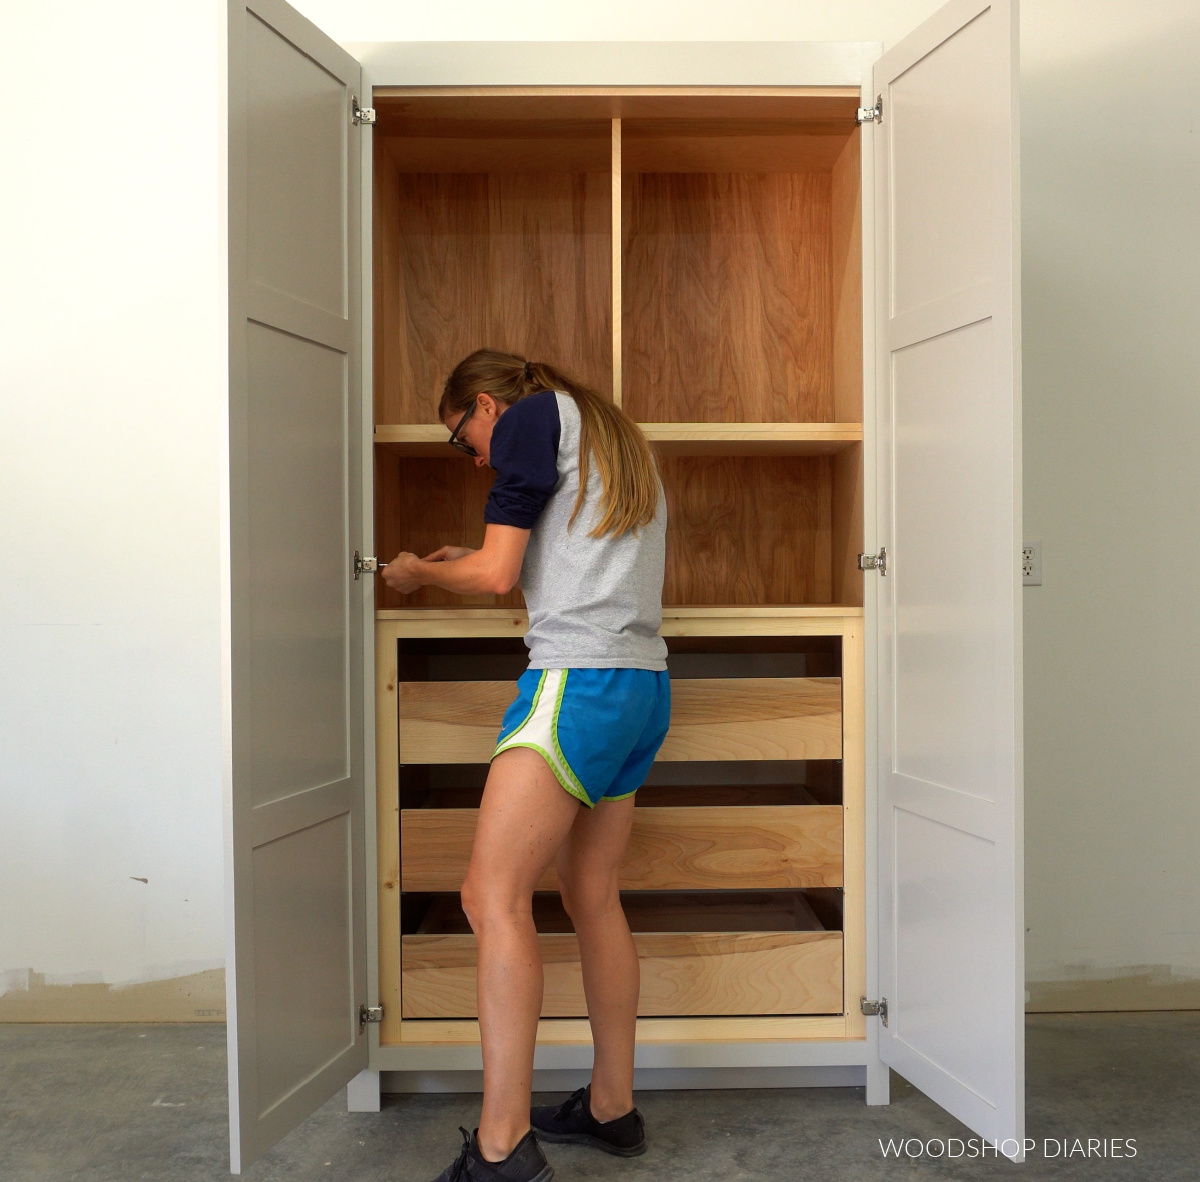
Then, I installed three hinges on each door using a concealed hinge jig.
RELATED: How to install concealed hinges

I used 1 ¼″ overlay hinges for face frame cabinets. Learn how to choose the right hinges for your project here.
Step 7: Add Door Shelves (optional)
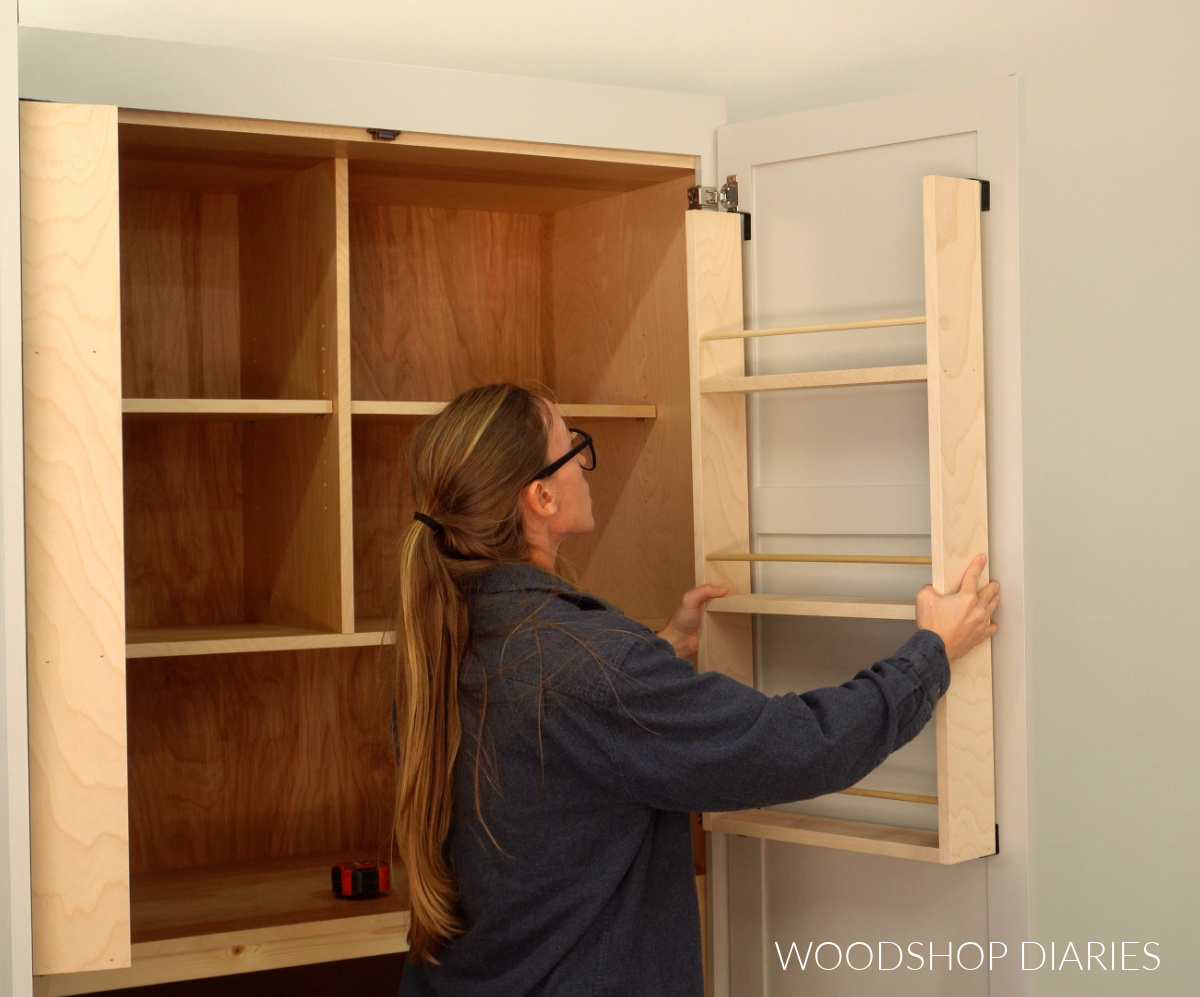
Now the last part is adding the shelves that will go on the back side of the doors. This is optional, but is a simple way to pack this cabinet with even more storage.
I made these door racks from ¾″ plywood and ⅜″ dowel. I nailed three tiered shelves together and placed the dowels a few inches above each shelf to help keep the items in place.
Then, I used 1 ½″ corner brackets to install these shelves onto the door. One bracket will go on each corner–two at the top and two at the bottom. Check out the video for more details.
Once the brackets were on the doors, I could slide the shelf in place and screw them to it.
And with that, after a couple of handles were added to the door, this project was ready to go!
To prevent tip over, this cabinet should be secured to the wall studs wherever it’s going. You can secure through the back panel (the ½″ plywood) and through the back support under the middle shelf.

Ready to build your own? Grab the printable building plans for this project here.
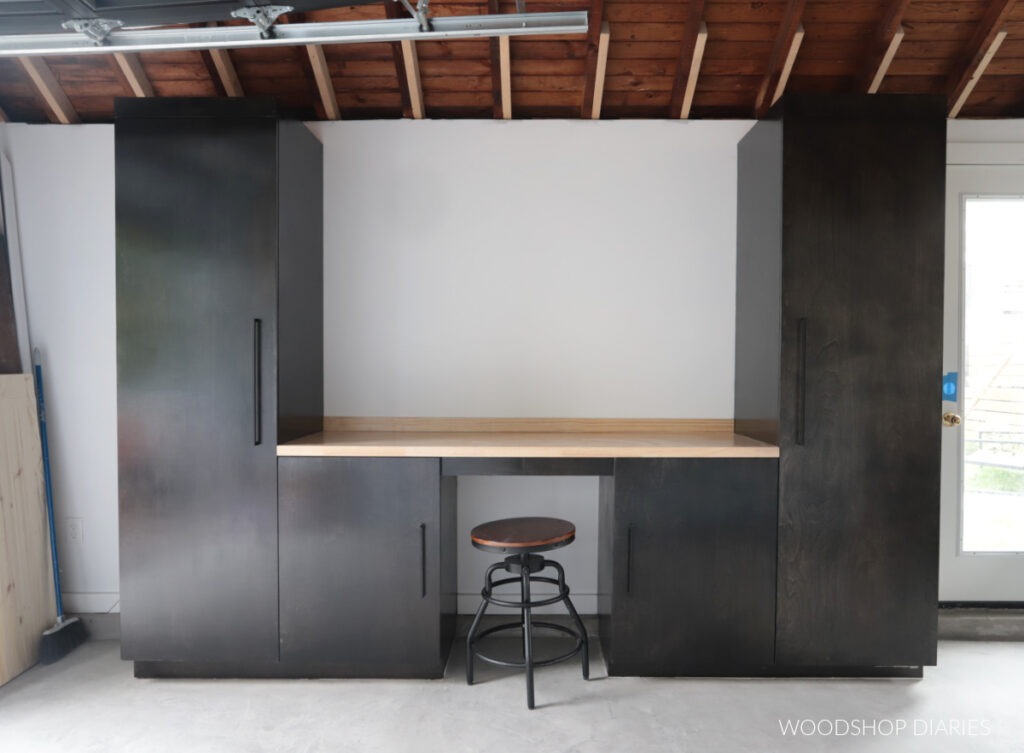
Looking for more cabinet projects?
If you’re looking for more DIY cabinet project ideas, here are a few favorites you might enjoy browsing. Click on the images below to take you to the tutorial to build it.
If you enjoyed this project and want to save it for later, don’t forget to pin it or share to your favorite social channel!
Until next time, friend, happy building!