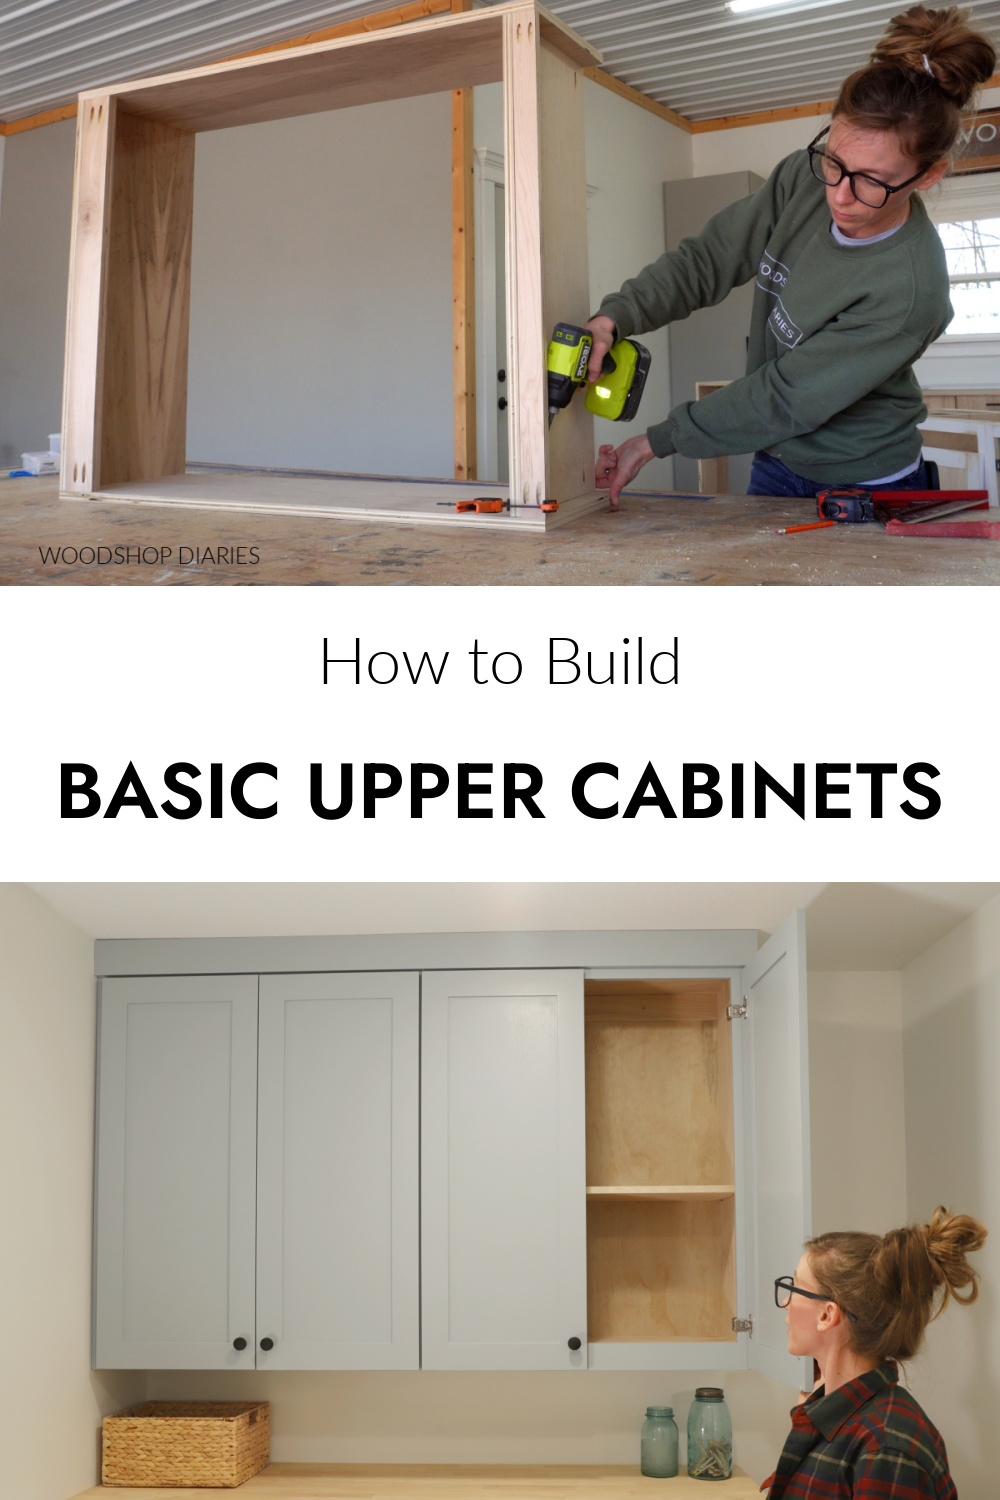
In this post, I’m sharing how to build simple upper cabinets with face frames.
Upper cabinets are common for storage in kitchens, laundry rooms, bathrooms, garages, and pantries. This basic style of cabinet is easy to build and customize to fit your space and your needs.
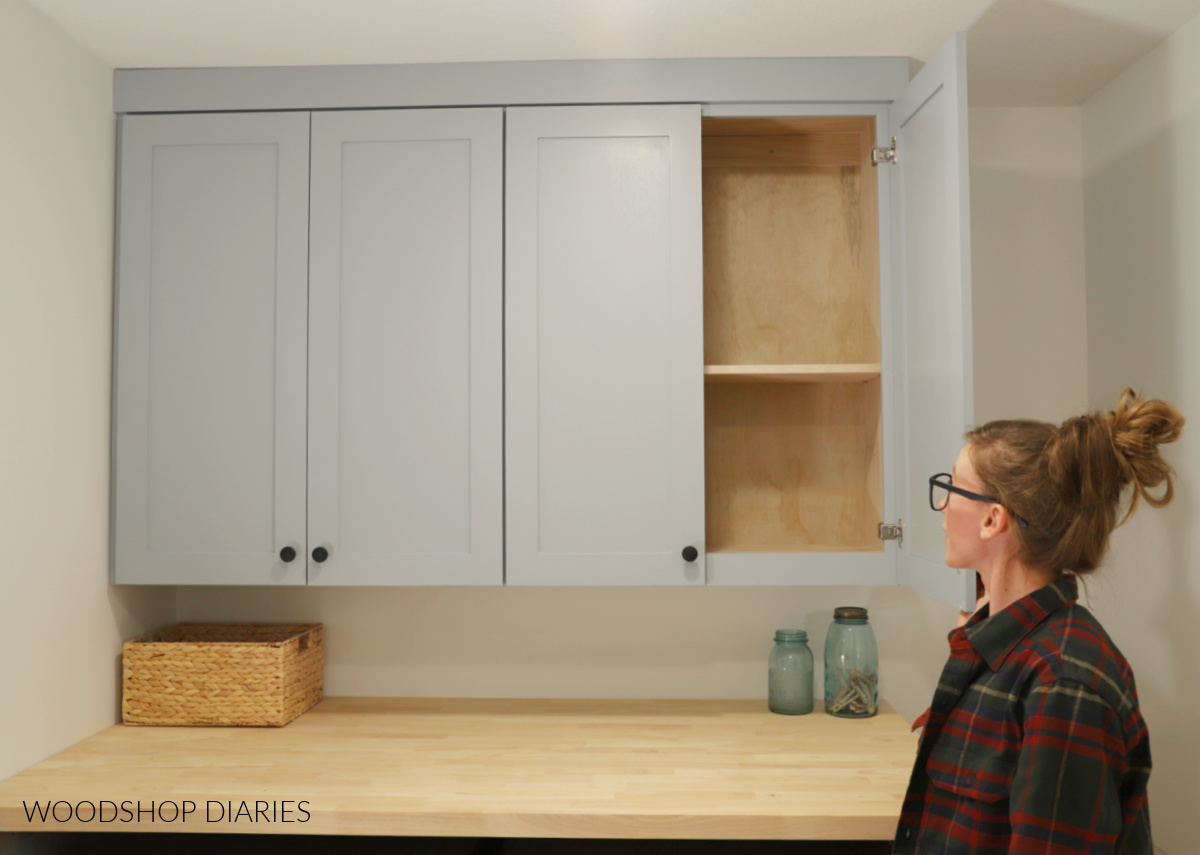
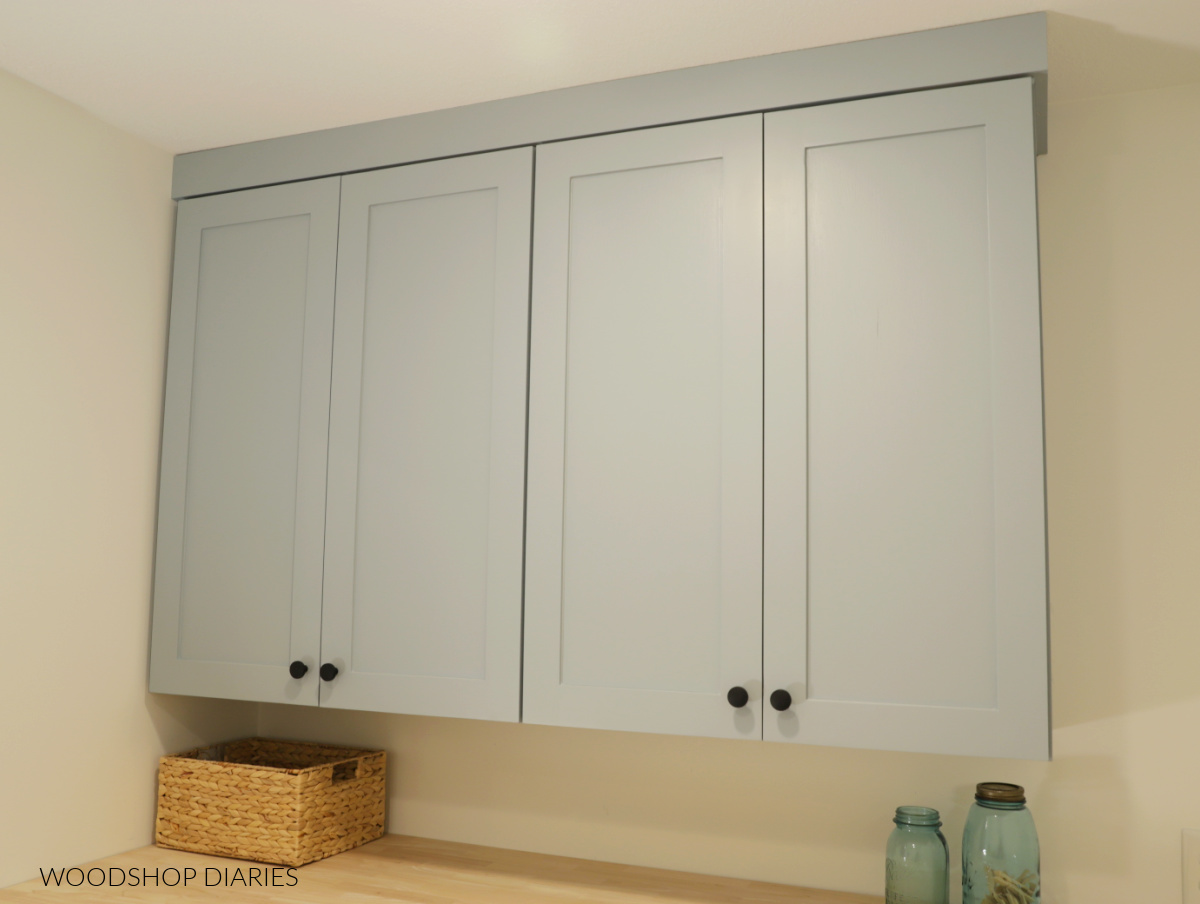
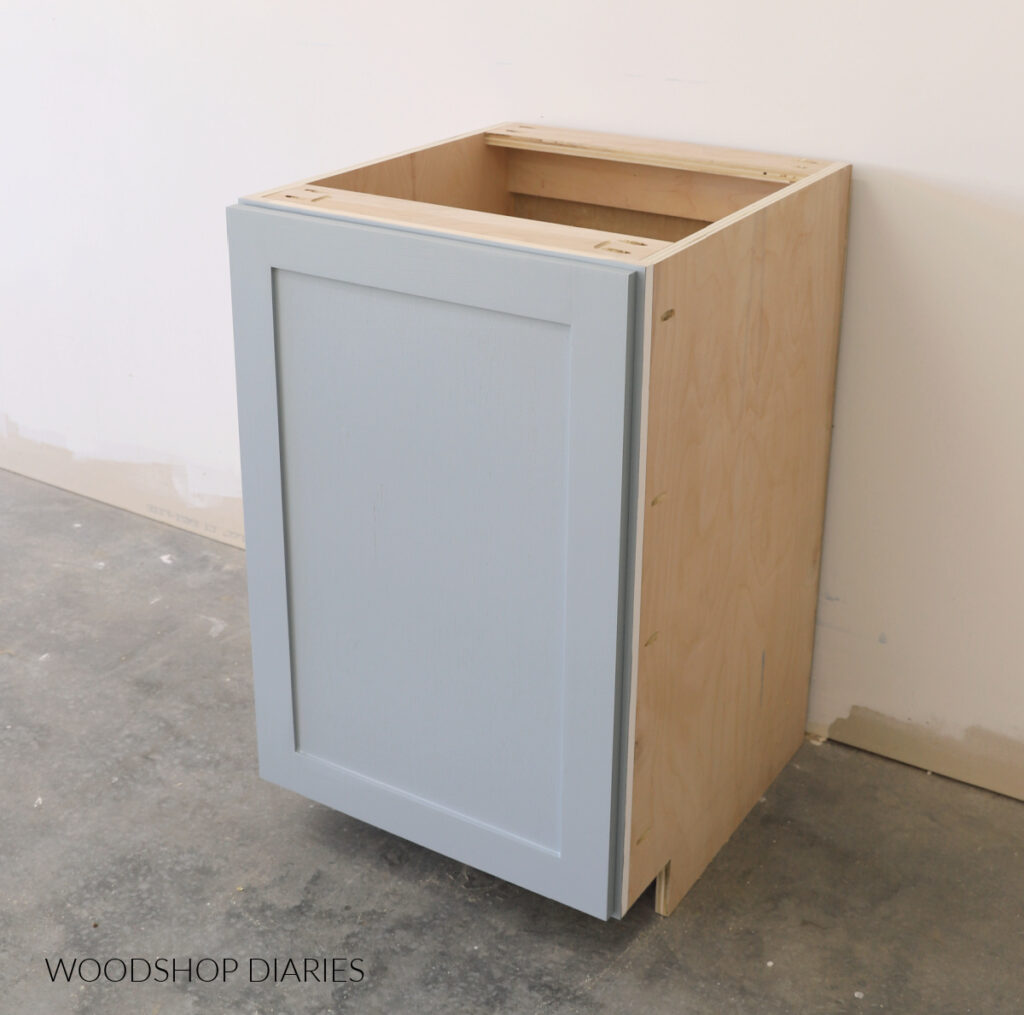
I built these particular cabinets to go above the washer and dryer in my laundry room to give me extra storage for detergent and cleaning supplies.
For this particular post, we are focusing on upper cabinets. But, if you’d like to learn about lower cabinets as well, check out this tutorial on building basic base cabinets to match!
*This post contains affiliate links. See policies.
Standard Sizing for Upper Cabinets
While there are some “standards” to follow when building upper cabinets, there are also a lot of ways to customize them depending on your space and how you plan to use them. I’ll share some tips, ideas, and how to implement them below.
Upper Cabinet Height
There isn’t one standard cabinet height for upper cabinets. You sometimes see shorter ones above a fridge or microwave. But in most cases, they’re usually 30″-42″ tall.
How tall you make your upper cabinets is a factor of three things:
- Ceiling height
- Whether you’re adding molding at the top
- Personal preference
The general rule of thumb with upper cabinets is that they should be installed at least 18″ above countertops. Countertops are typically 36″ off the floor, so the bottom of upper cabinets are usually 54″ off the floor.
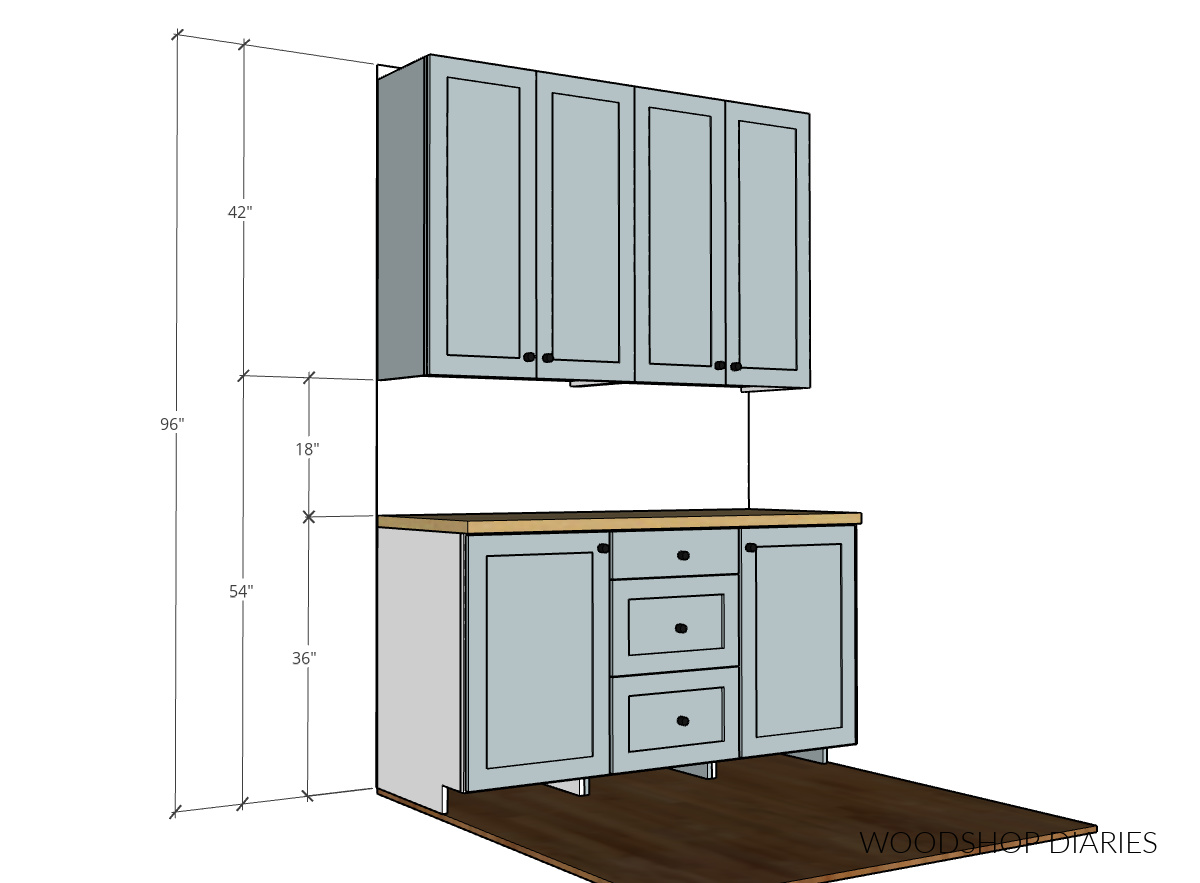
So if your ceilings are 96″ tall, that means your upper cabinets could be UP TO 42″ tall.
If you’re adding trim (like crown molding) around the top, the cabinet boxes would need to be a little shorter to allow room for that.
Then, of course, it also depends on your personal preference. If you don’t want to take your cabinets all the way to the ceiling, you don’t have to! Feel free to make them only as tall as you can easily reach.
Upper Cabinet Depth
Standard upper cabinet depth is 12″. However in more recent years, I’ve seen 14″ become more and more common.
Personally, I like to make mine about 13″ since it’s right there in the middle.
Take note that cabinets above refrigerators and microwaves are often deeper since they’re more of a “specialty” type cabinet.
One thing I like to note about cabinet depth is to consider whether you’re going with inset or overlay doors. Learn the difference between inset and overlay here.
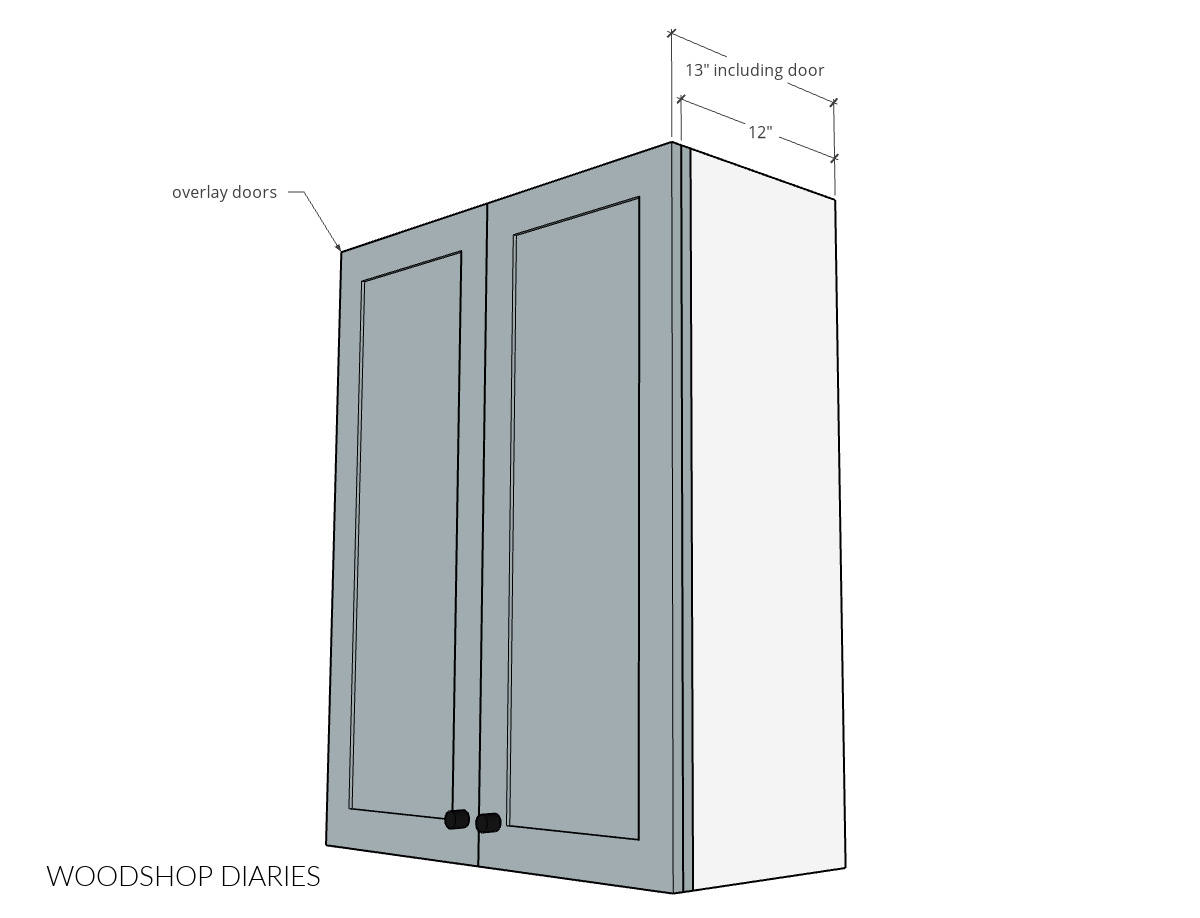
If I’m building cabinets with overlay doors, I include the door in my overall cabinet depth. So I make my overlay cabinet boxes slightly shallower (about 1″) than my inset cabinet boxes. That way when the door is added on the front, it’s still only 13″ deep overall.
Upper Cabinet Width
Upper cabinet width varies greatly and is usually where most customizations take place to fit your space.
However, if you’re buying premade cabinets, they do come in some standard width options: 12″, 15″, 18″, 21″, 24″, 30″, 36″. You may sometimes find them in a few other sizes, but these are most common.
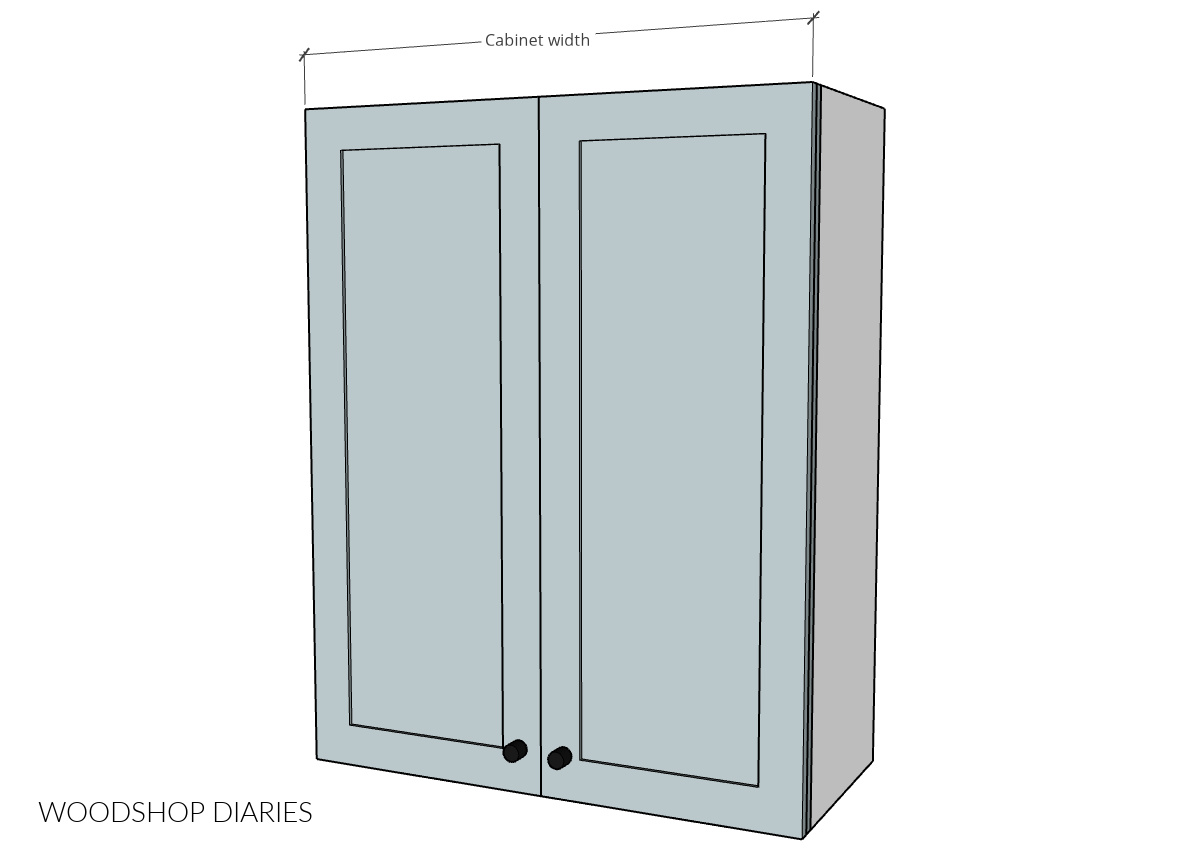
If you’re building them yourself, the size possibilities are endless. The best part about building your own base cabinets is that you can customize them to fit your exact space and make them whatever width you need.
Face Frame vs. Frameless Cabinets
Cabinets can be made with or without face frames. In the United States, face frame cabinets are most common, but in other parts of the world, frameless (also sometimes called “Euro”) cabinets are used often.
Construction of the cabinet box is very similar, but cabinets with face frames have an extra frame added onto the front.
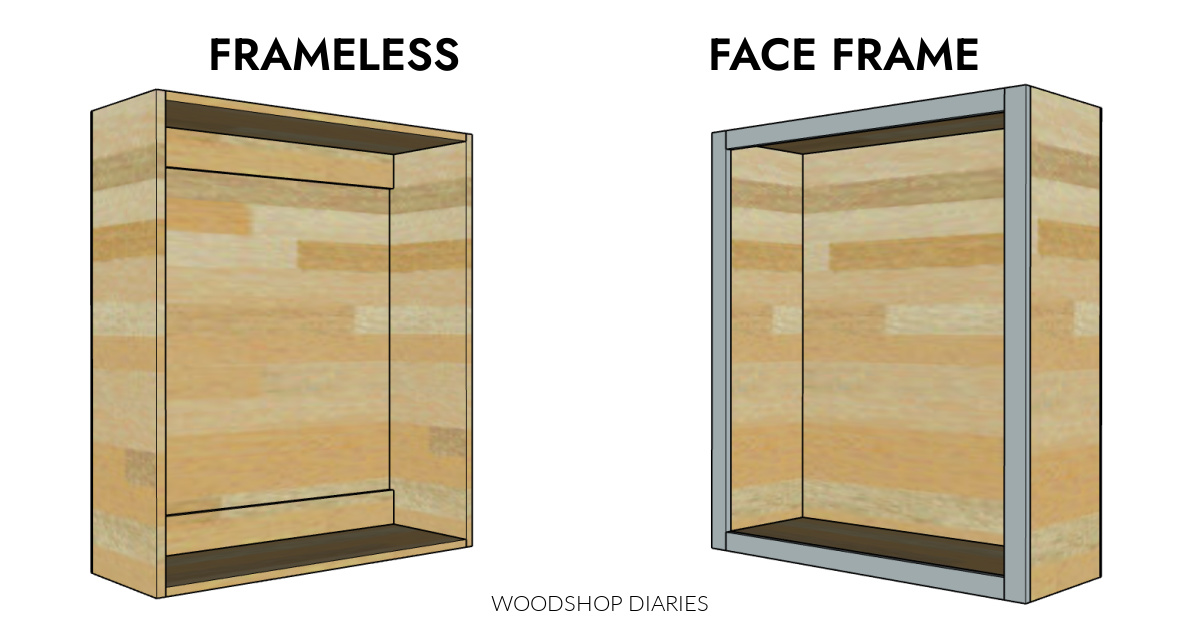
In this post, I’m sharing how to build cabinets with face frames, but you can check out this tutorial for how to build frameless cabinets as well.
What to consider before building upper cabinets
Building your own upper cabinets is a pretty simple project. But, while the cabinet assembly itself is easy, a little pre-planning of your design can help you avoid common “oops” moments during assembly and installation.
Creating Built In Filler Strips
Often, built ins and cabinets will have some filler strips in certain places. These are basically spacers to either fill a gap between cabinets, or create space for clearance.
When upper cabinets are going against a wall, they will often need a filler strip for a few reasons:
- to accommodate for unsquare inside drywall corners
- to allow clearance for cabinet doors and drawers
If you can think ahead in your design, you can build these “filler strips” into the face frame instead of having to piece them together after they’re built.
In this example, I am installing two cabinets above my washer and dryer. The far left cabinet will be against a wall, so I used a wider piece on the face frame there and let it overhang the cabinet sides by about 1″.
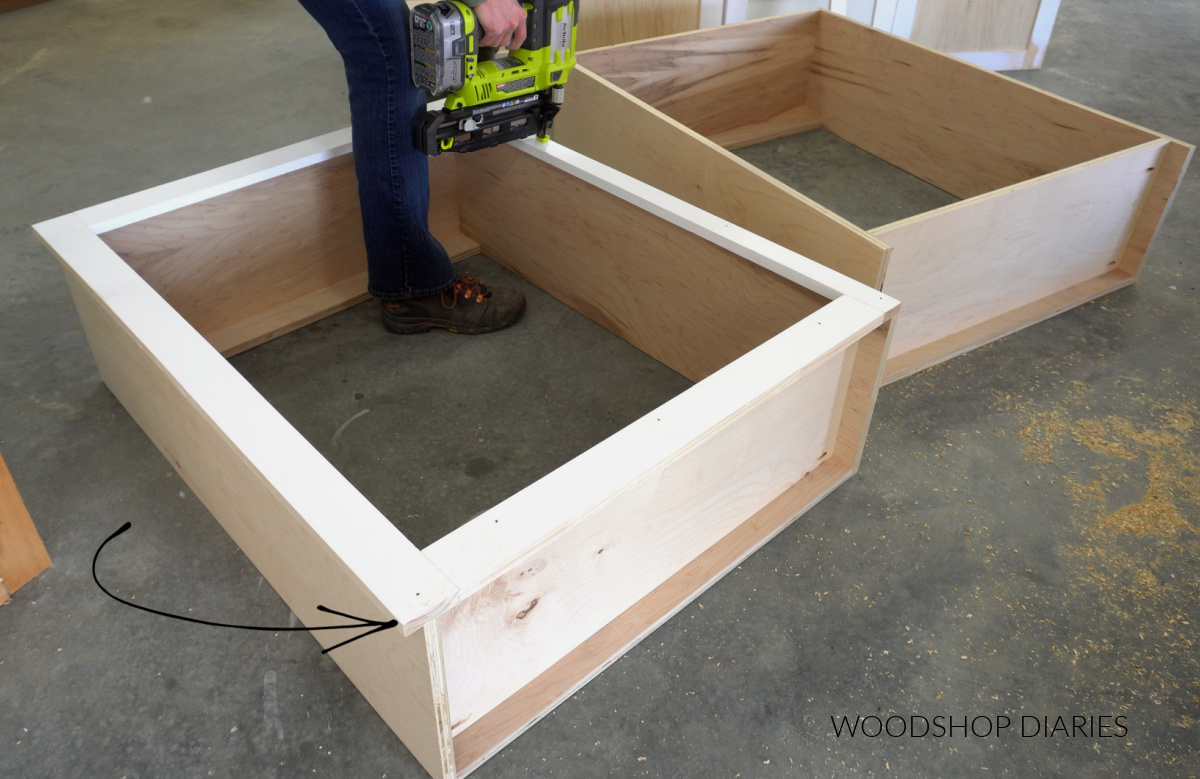
That’s essentially building a 1″ wide filler strip right into the face frame.
Inset vs Overlay Doors
Cabinets can have either inset or overlay doors. Inset door set inside the face frame and overlay components lay over the front of the face frame.
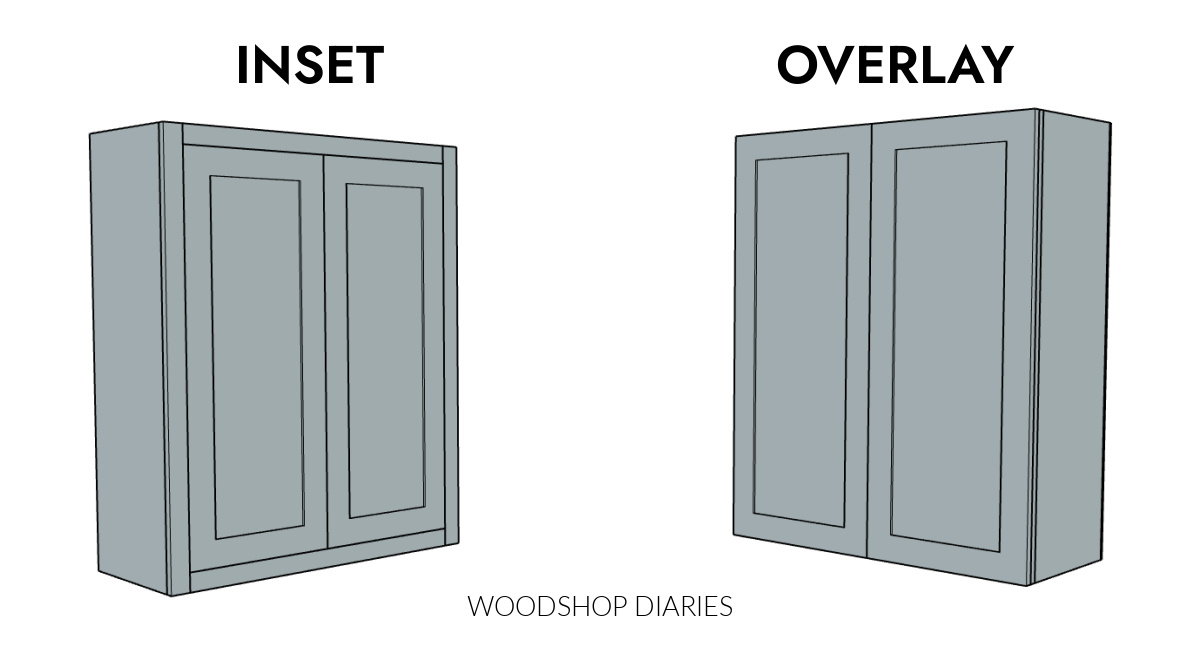
Overlay doors and drawers can lay over the face frame by varying amounts. It’s important to choose how much overlay you want before building so you know what size to make your pieces and what type of hinges to use.
Are DIY projects your thing? Sign up for our newsletter for priority access to the latest projects and build plans!
How to Build Upper Cabinets with Face Frames
Prefer to watch? I’ve put together a full build video showing how to build basic upper cabinets here on my YouTube channel:
Love watching how-to videos? Subscribe to my YouTube channel for plenty more where that came from!
Prefer to print? Grab printable wall cabinet box building plans here:
Tools & Materials
Tools:
Check out this post for the top ten tools I recommend for cabinet building
- Circular Saw
- Cutting Guides–Kreg Rip Cut & Kreg AccuCut (optional)
- Miter Saw (optional)
- Pocket Hole Jig
- Drill/Driver
- Stapler or Brad Nailer (optional)
- Shelf Pin Jig
- Concealed Hinge Jig
Materials*:
- ¾″ plywood for cabinet boxes (birch or maple recommended for cabinets)
- ¼″ plywood for back panels
- 1x2s & 1x3s (for face frames)
- 1 ¼″ pocket hole screws
- Wood Glue
- Shelf Pins
- Concealed Hinges (type will depend on door style–learn more about hinge types here)
- Material for doors–varies depending on style. See notes above.
*Material amounts will vary depending on your cabinet size and number of cabinets needed. In most cases, one ¾″ sheet of plywood will make about 2 cabinet boxes.
Step 1: Cut Plywood to Size
The first step to building cabinets is simply cutting down the plywood. Below I’ve shared an example plywood cut diagram for the ¾″ plywood.
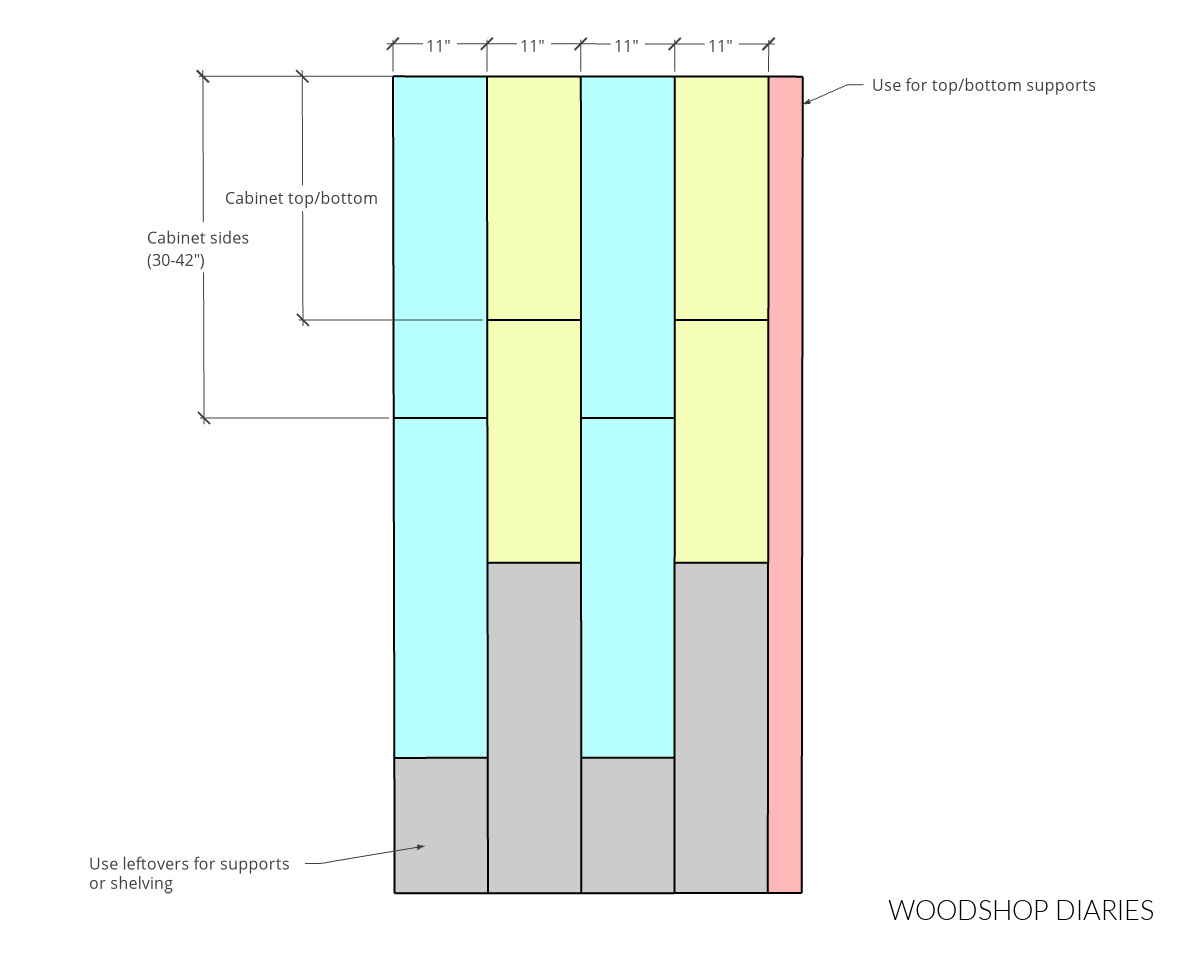
First, I ripped my sheet into four 11″ wide strips using a Kreg Rip Cut with my circular saw. These strips can be cut down into side panels and cabinet top/bottoms as you can see in the diagram above.
In my case, I cut my sides to 40″ and I cut my top/bottom pieces 1 ½″ smaller than I wanted my overall cabinet width to be. You can adjust this to make whatever size cabinet you wish. The remaining pieces can be used for shelving and supports.
Note that you can get almost two cabinet boxes from one sheet in most cases unless you’re building a really wide cabinet.
Each cabinet box needs two side panels, a top and bottom panel, a top support strip, and a bottom support strip (both strips cut the same length as the top/bottom panels).
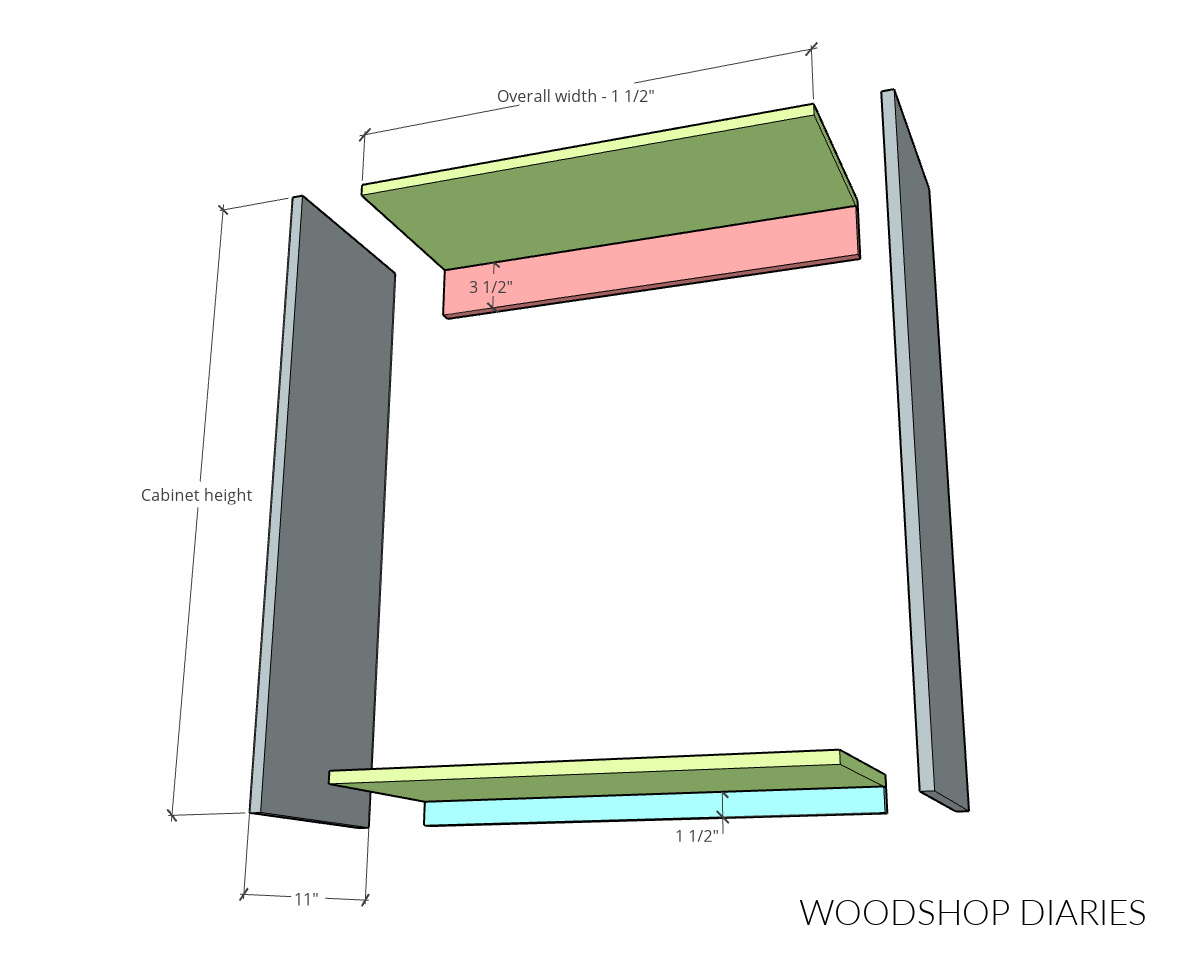
The support strips will be what you screw through to install. I made my bottom strip 1 ½″ wide and my top approximately 3 ½″–but the exact widths aren’t critical if you want to make them different sizes.
Step 2: Assemble Upper Cabinet Box
There are many ways you can assemble an upper cabinet box, but I prefer to use pocket holes and screws.
RELATED: How to use a pocket hole jig for cabinets
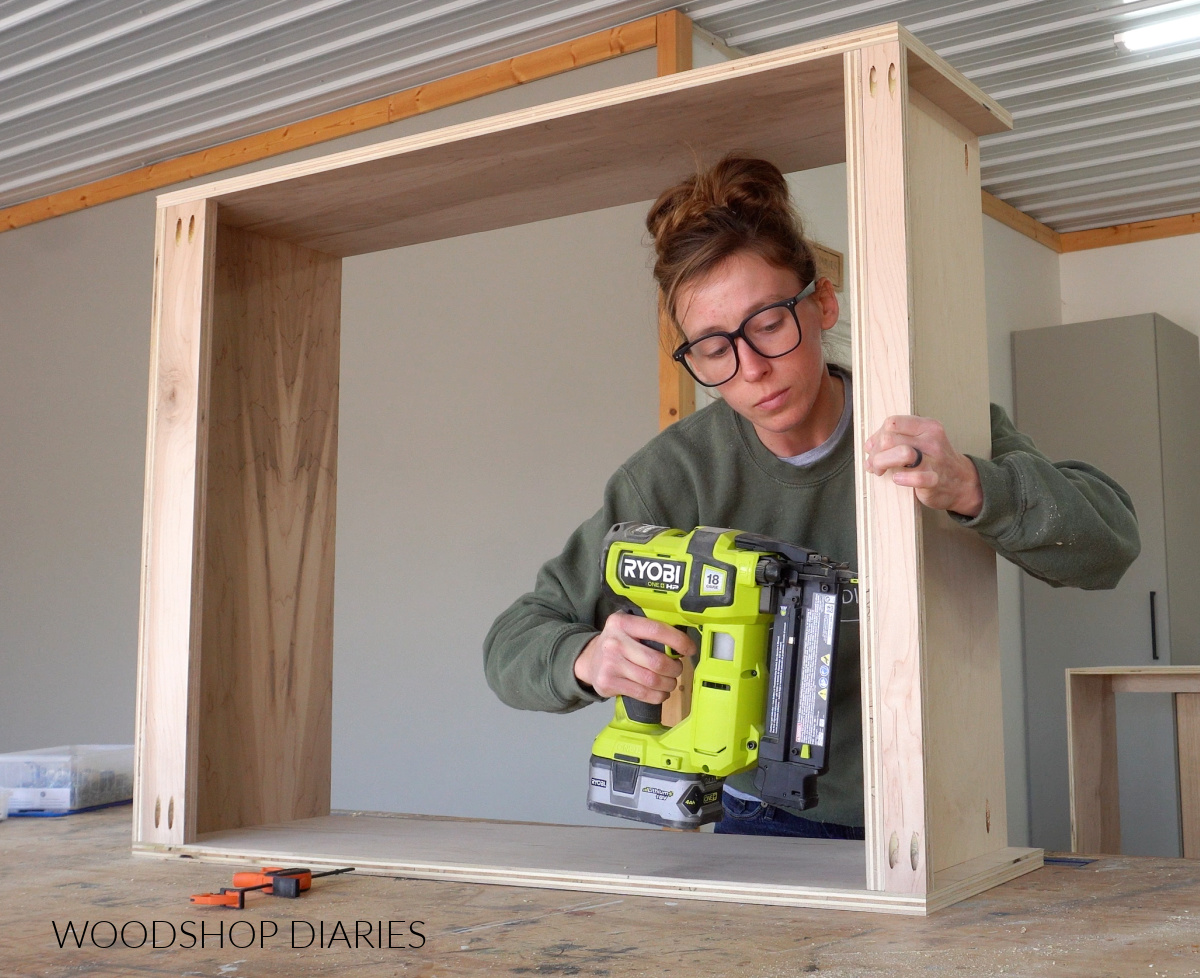
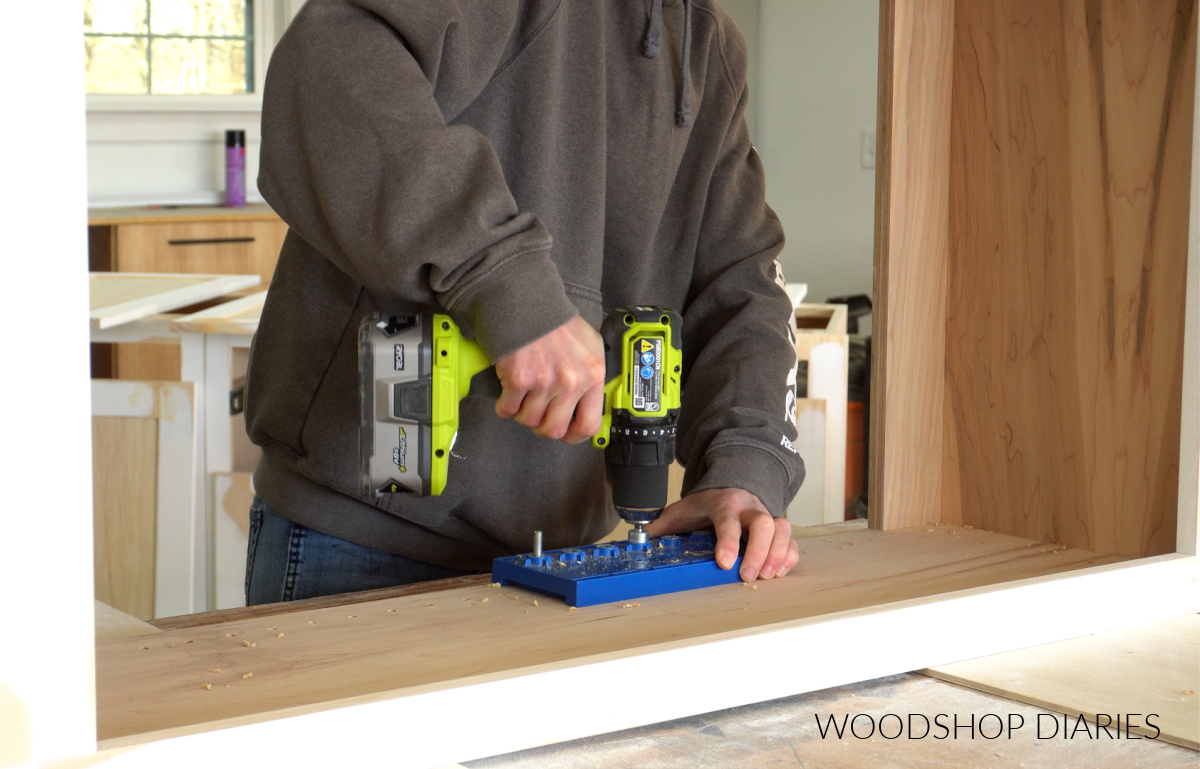
So I drilled ¾″ pocket holes into the ends of my top and bottom panels and support strips. If you’d like to attach the face frame (see step 3) using pocket holes, I suggest drilling pocket holes along the front edges of the sides, bottom and top now, before assembling.
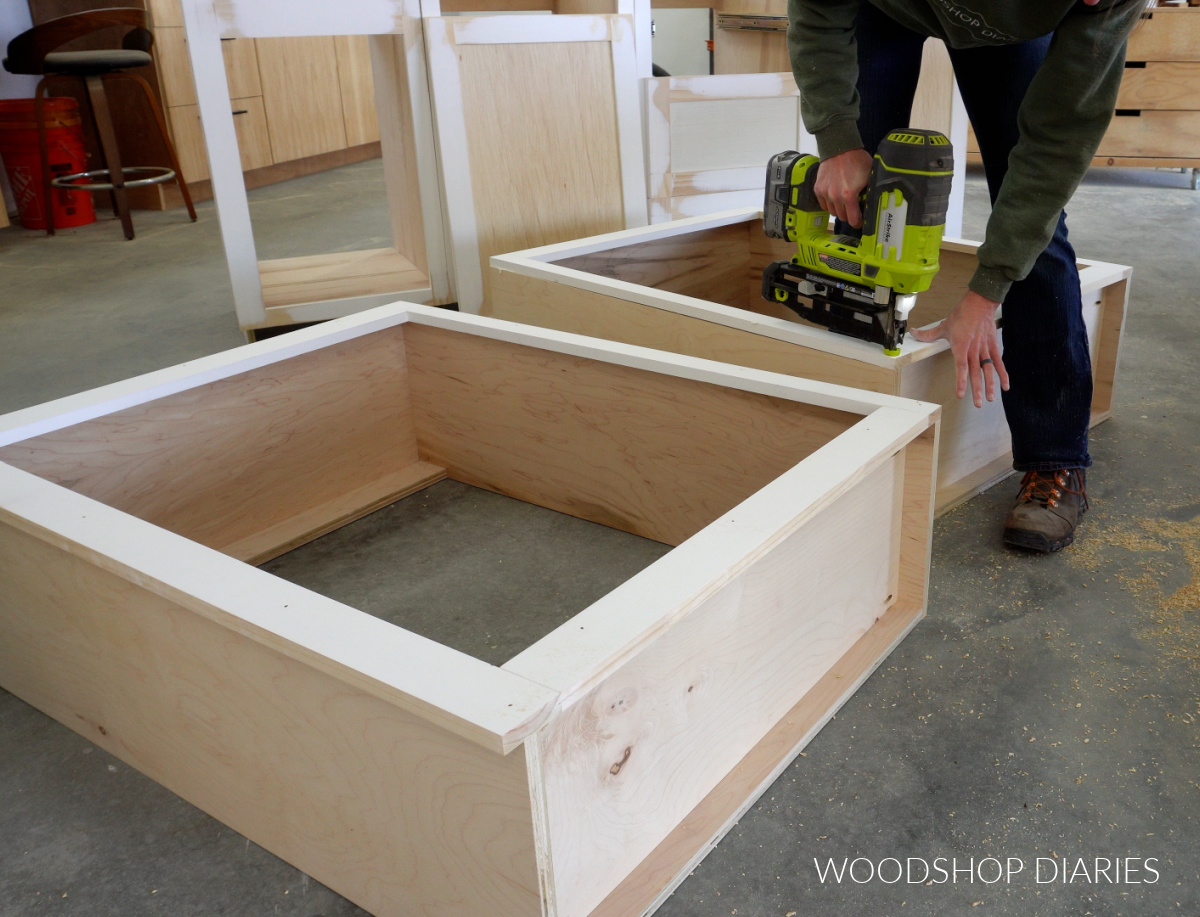
Then I assembled the cabinet box using pocket hole screws like shown below. Note that the bottom panel sits on top of the bottom support. It won’t be flush to the bottom of the sides.
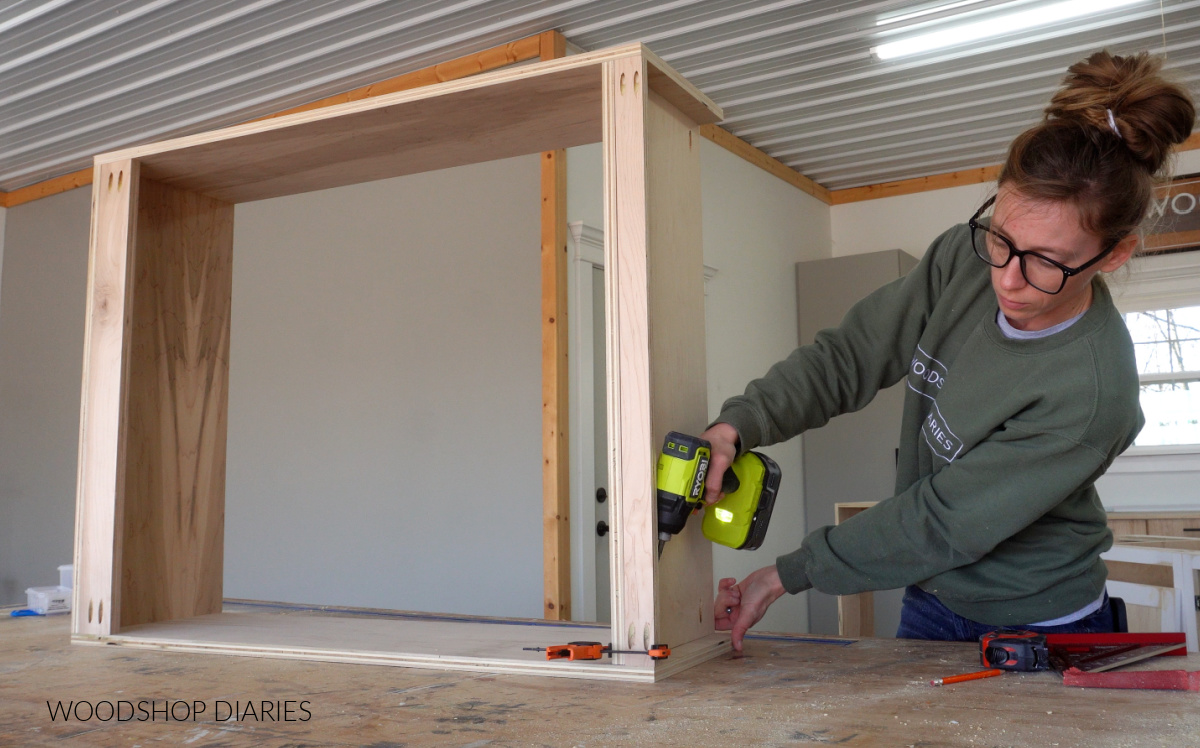
Once it was assembled, I used a brad nailer to kind of “tack” the bottom panel to the bottom support just to pull them nice and tight.
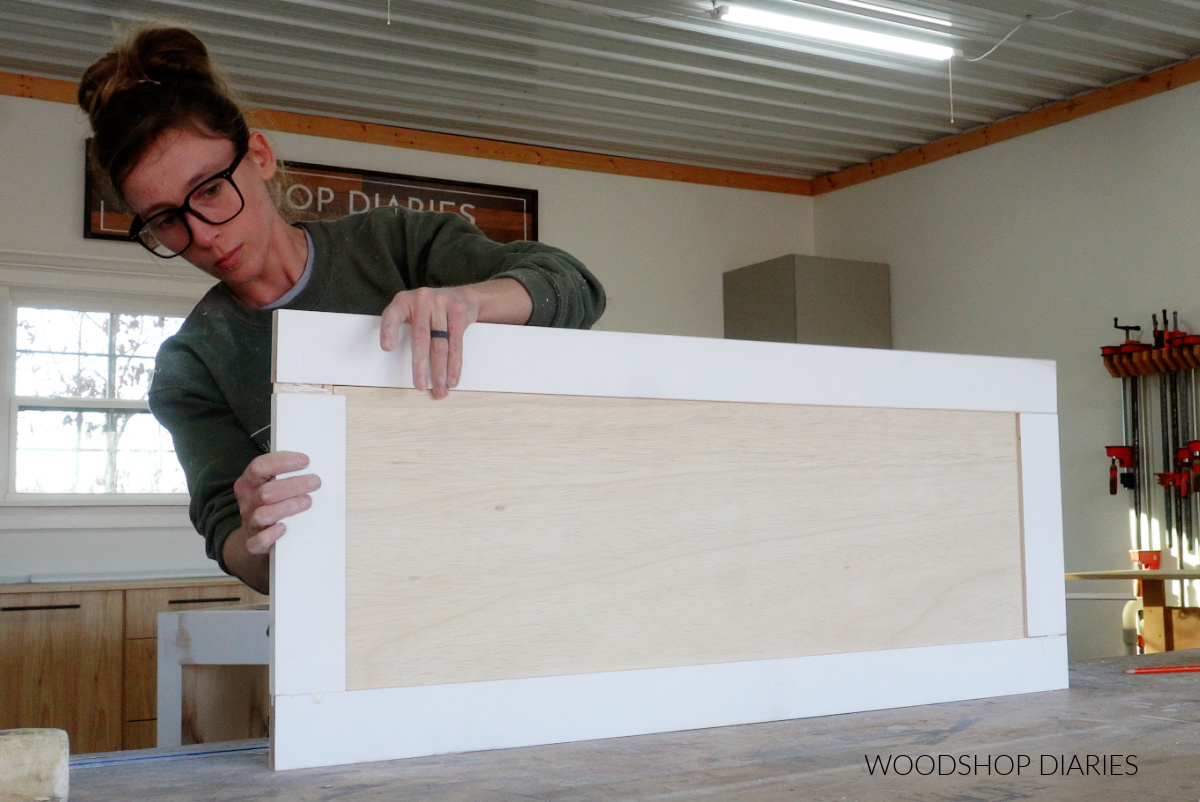
Step 3: Assemble & Attach Upper Cabinet Face Frame
Once the upper cabinet box was together, I measured the overall size of the front of the cabinet, and cut 1xs to make face frames this size. I used 1x2s for the sides, but 1x3s for the top and bottom pieces.
RELATED: Understanding lumber sizing–why a 1×2 isn’t 1″ x 2″
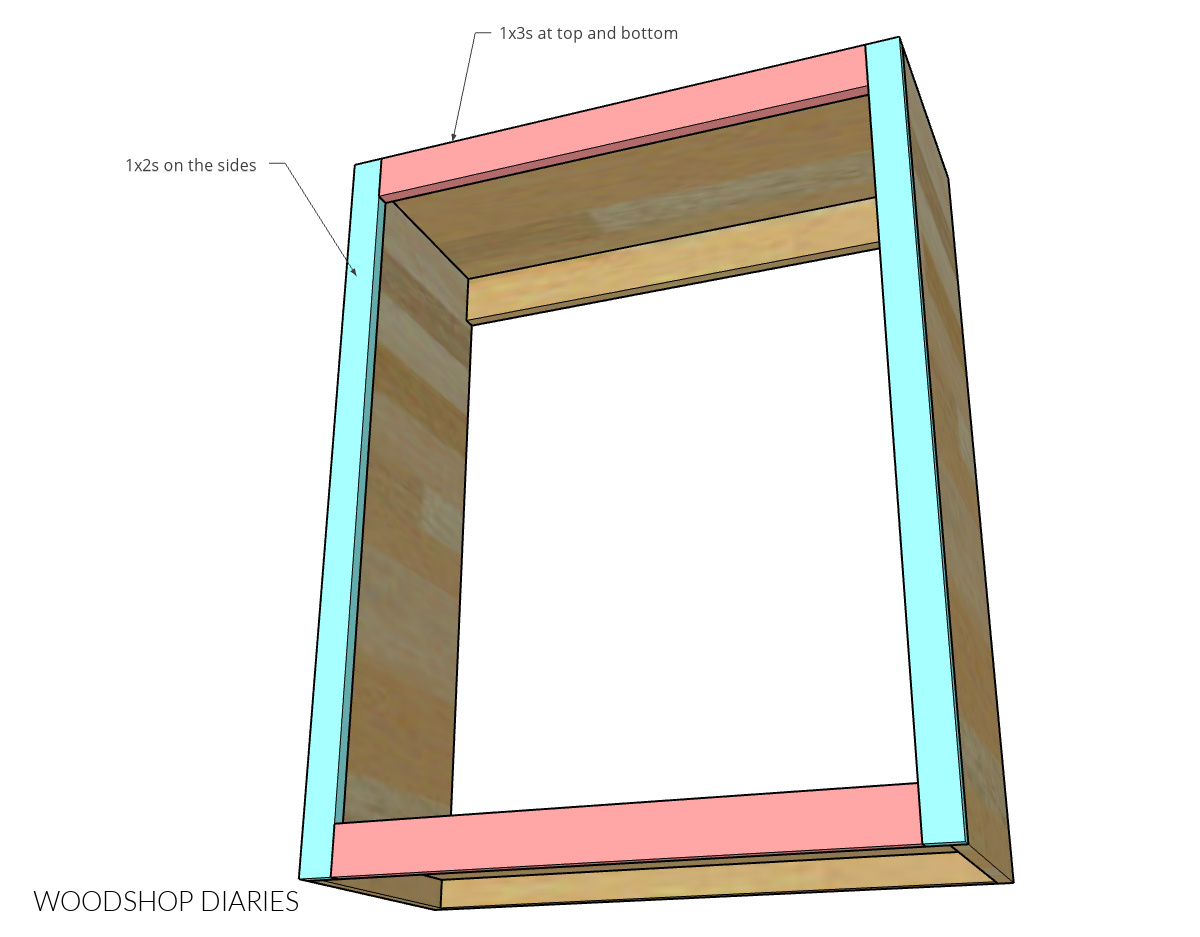
*See notes above about adding a built in filler strip. If you need to add filler onto one side of your face frames, I recommend using a 1×3 instead of a 1×2 for that piece and making the face frame 1″ wider than the cabinet. Allow the extra 1″ of material to overhang the wall side of the cabinet when attaching.
I assembled my face frames with pocket holes and screws. Then, I glued and nailed them onto the front of the cabinets.
When I assembled my DIY base cabinets, I used pocket holes and screws to attach the face frames. You can certainly use that method here instead of wood glue and nails.
PRO TIP: When building and attaching face frames, it’s better to err on the side of a little too big than a little too small. If your face frame overhangs the edges of your cabinet a little, that’s okay! But if it doesn’t completely cover the front of your cabinet, you’ll have gaps when you install and it will be difficult to hide.
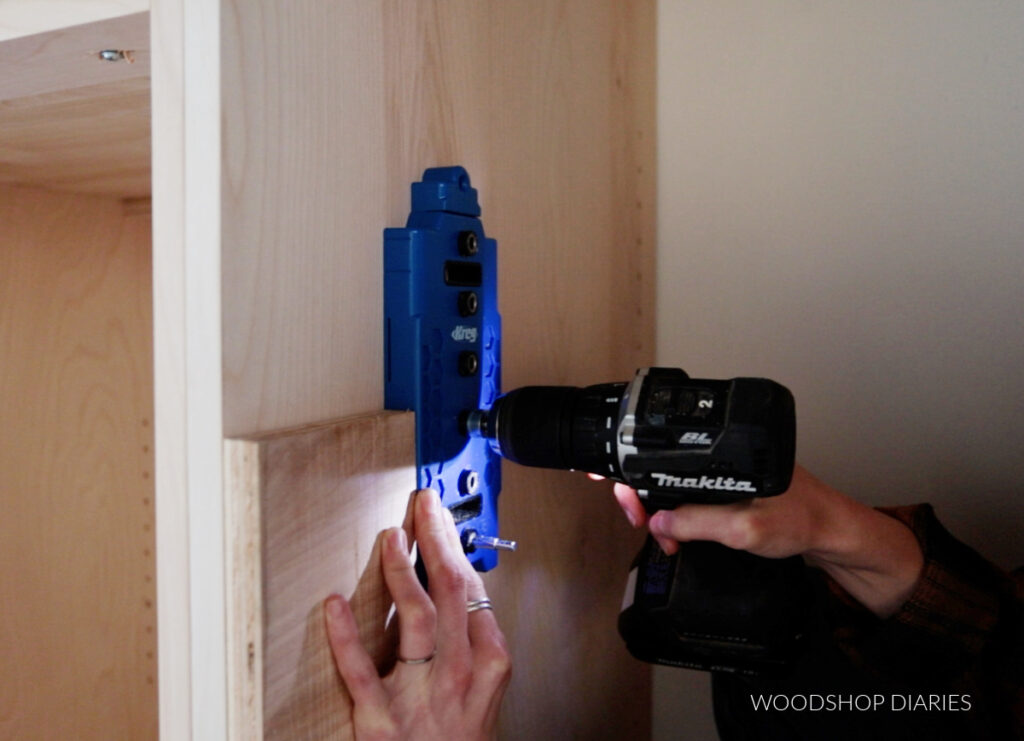
Step 4: Add Adjustable Shelving
I drilled shelf pin holes along the sides of the cabinet boxes to allow for adjustable shelves to be added later. I find it easier to drill these holes before adding the back panel.
Check out this post for more information on adding adjustable shelves to cabinets and furniture.
Step 5: Attach Back Panel
I measured the back side of the cabinets and cut ¼″ plywood panels to cover them. You can skip adding back panels if you didn’t want to grab any ¼″ plywood. But back panels to help to strengthen the cabinets a little and hold them square.
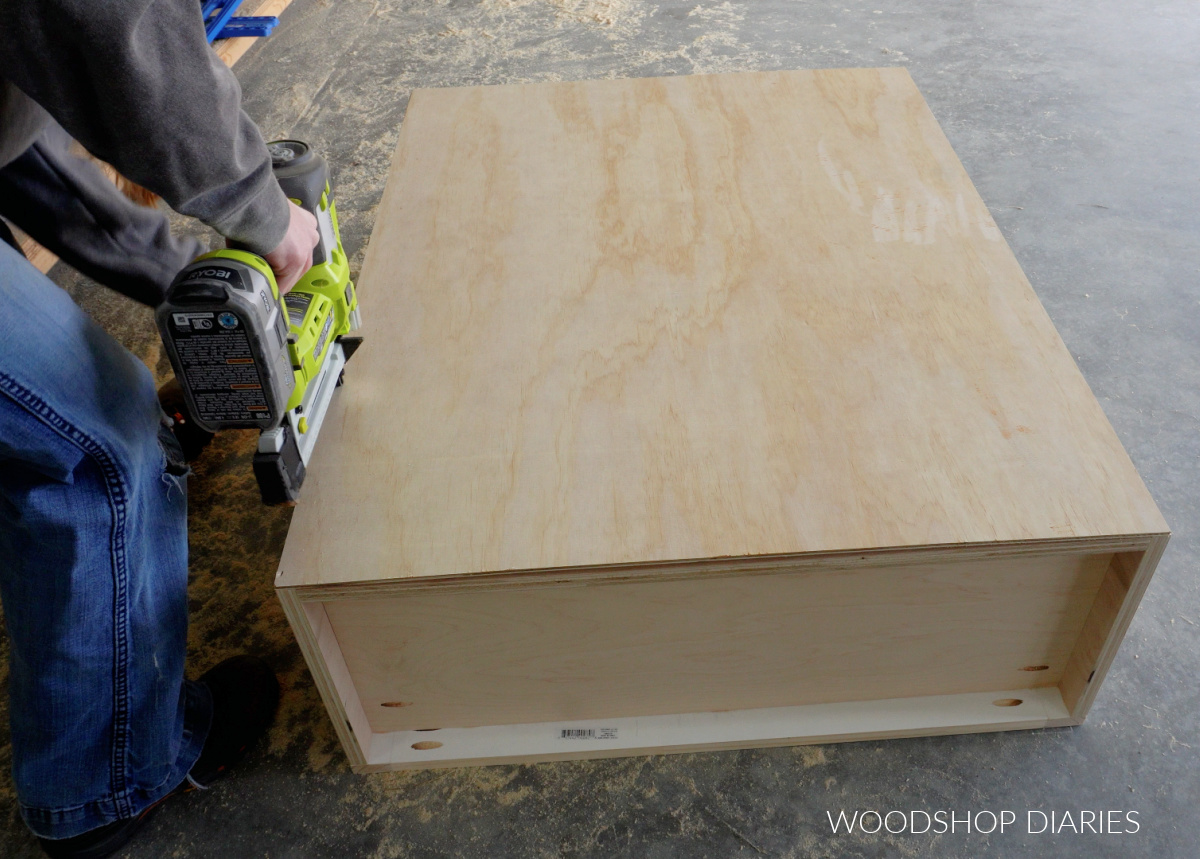
I stapled these over the back side, but you could also screw or brad nail them if you don’t have a stapler.
PRO TIP: Make sure the back panel is cut square (check that the diagonals are equal) and use it to help pull your cabinet square to it if it’s not already.
Prefer to print? Grab the printable plans to build your own custom size wall cabinets here.
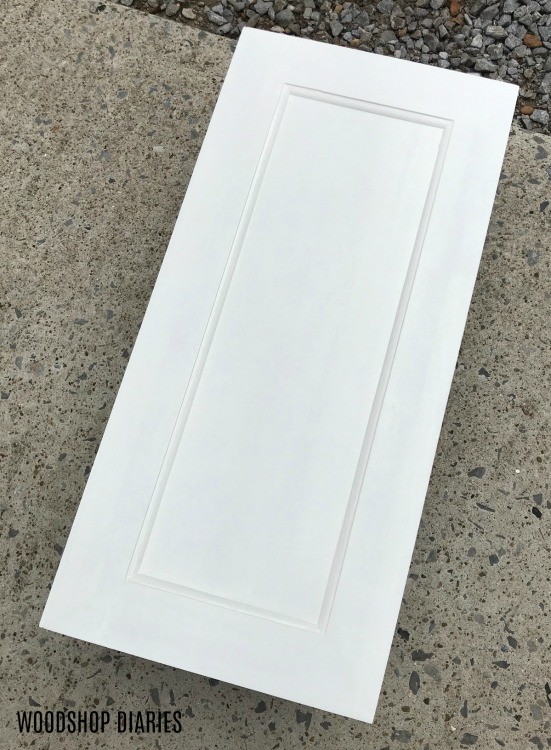
Step 6: Build & Install Cabinet Doors (optional)
Next, I assembled doors for the cabinets. This is a great place to customize your style.
Learn more about how to add cabinet doors in these posts:
Step 7: Finish, Install & Trim Upper Cabinets
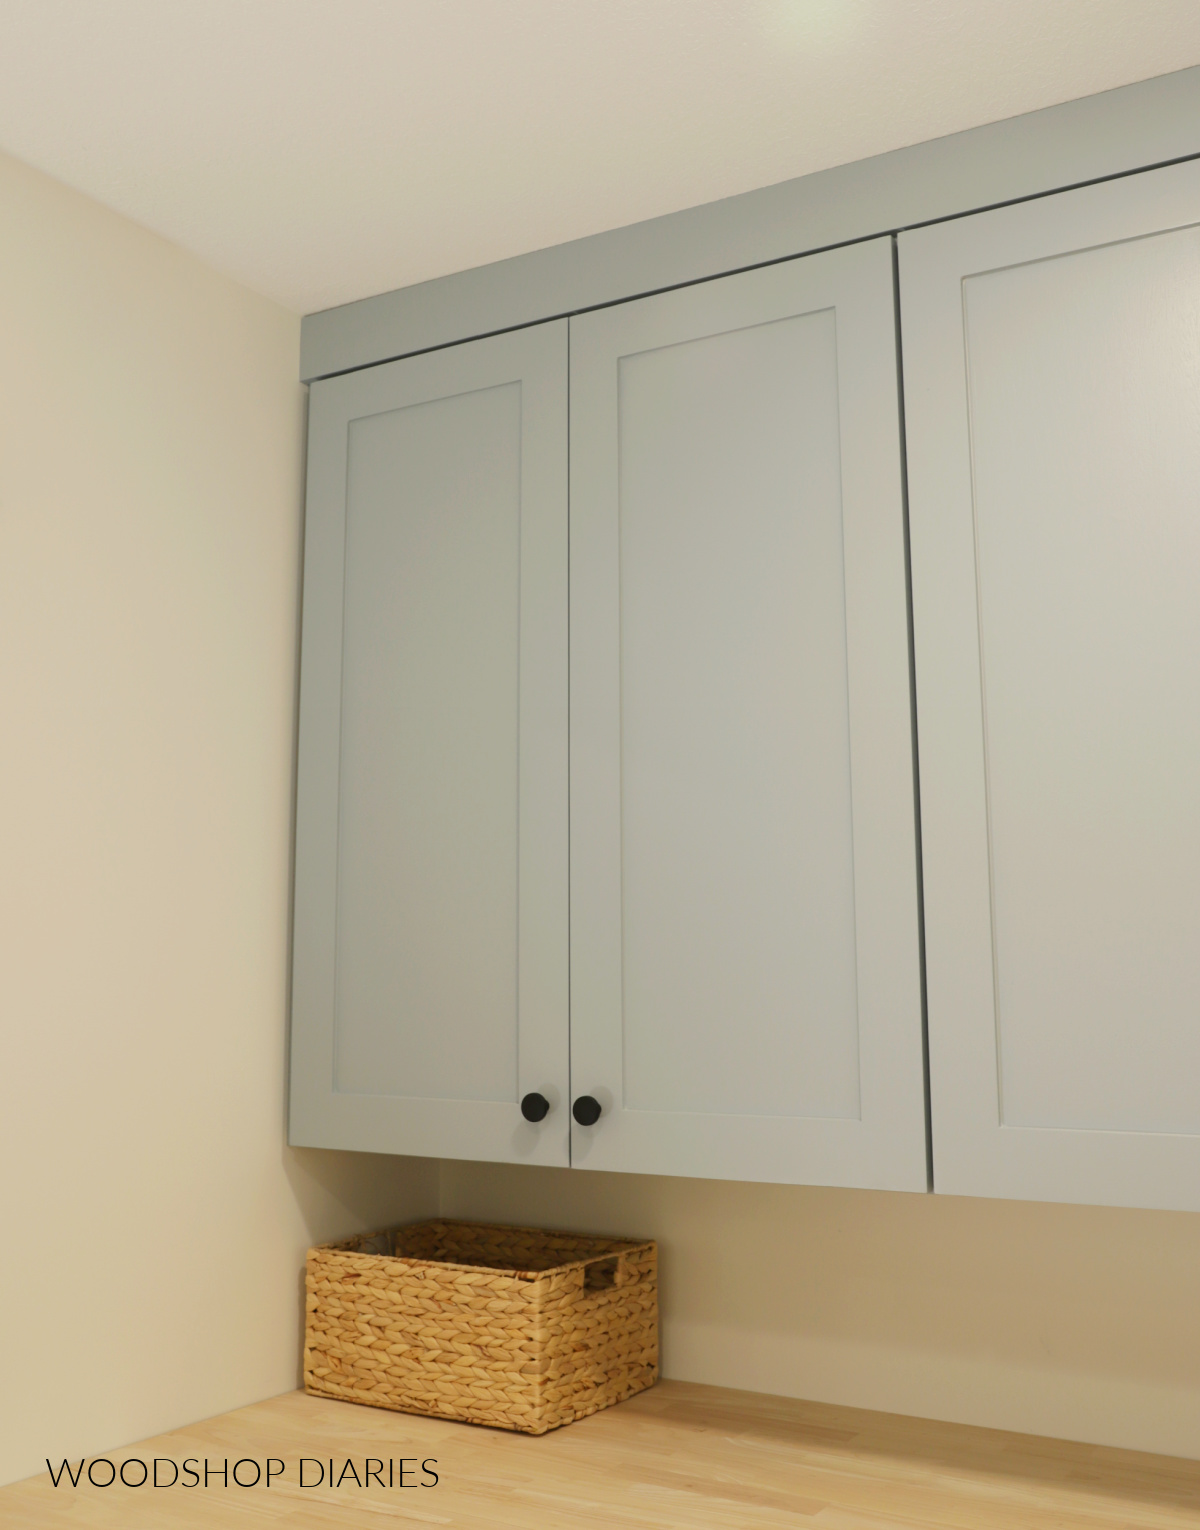
Once you’re finished assembling everything, putty and sand all nail holes and joints smooth, then prime, caulk, and paint as desired. I painted the cabinets shown in SW Stardew.
Here are some tips for making your DIY cabinets look their best:
Then, I hung the cabinets in my laundry room. To install, locate the wall studs, and raise your cabinet box to the height you want. Make sure the cabinet is level, then screw into the wall studs through the top and bottom supports.
If installing multiple cabinets side by side, screw them together through the face frames (be sure to predrill to avoid splitting the wood!).
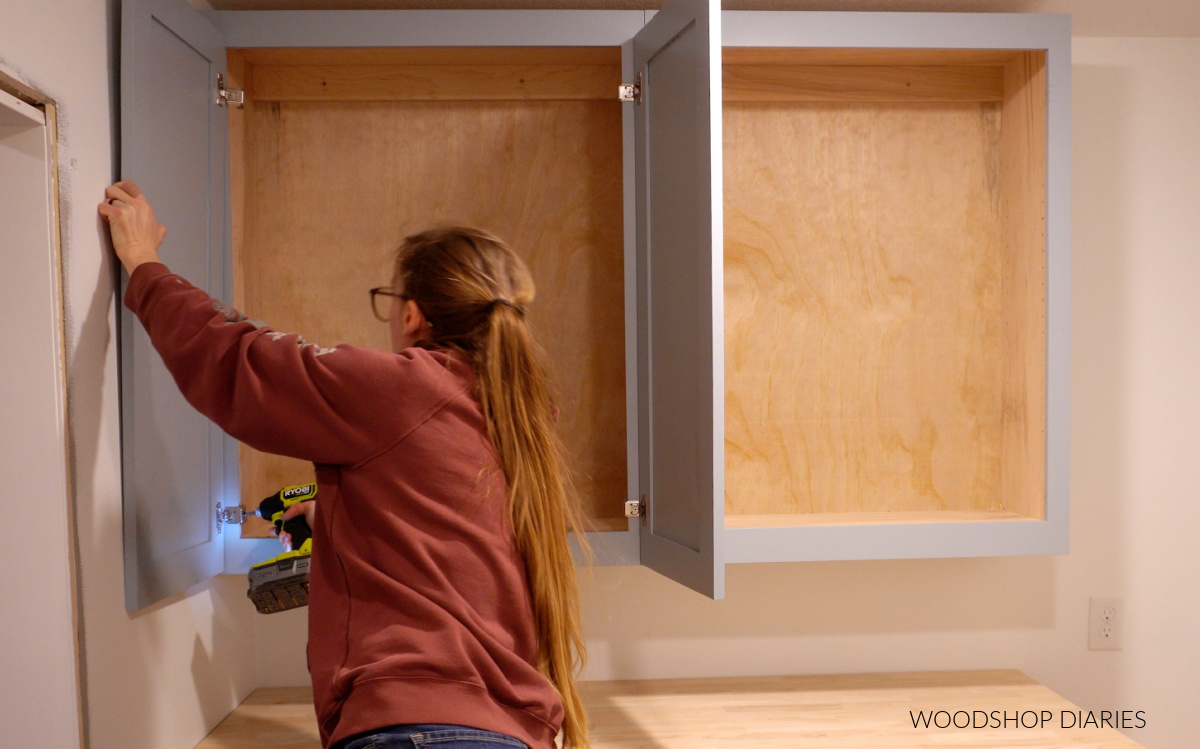
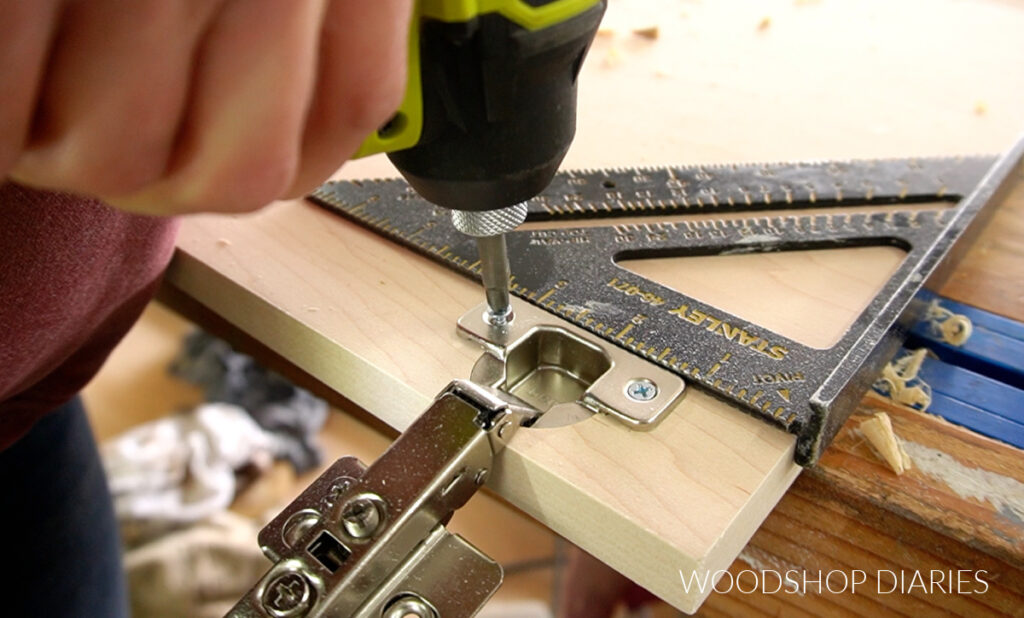
Then, I installed my doors onto my cabinets with concealed hinges. Learn how to install concealed hinges here.
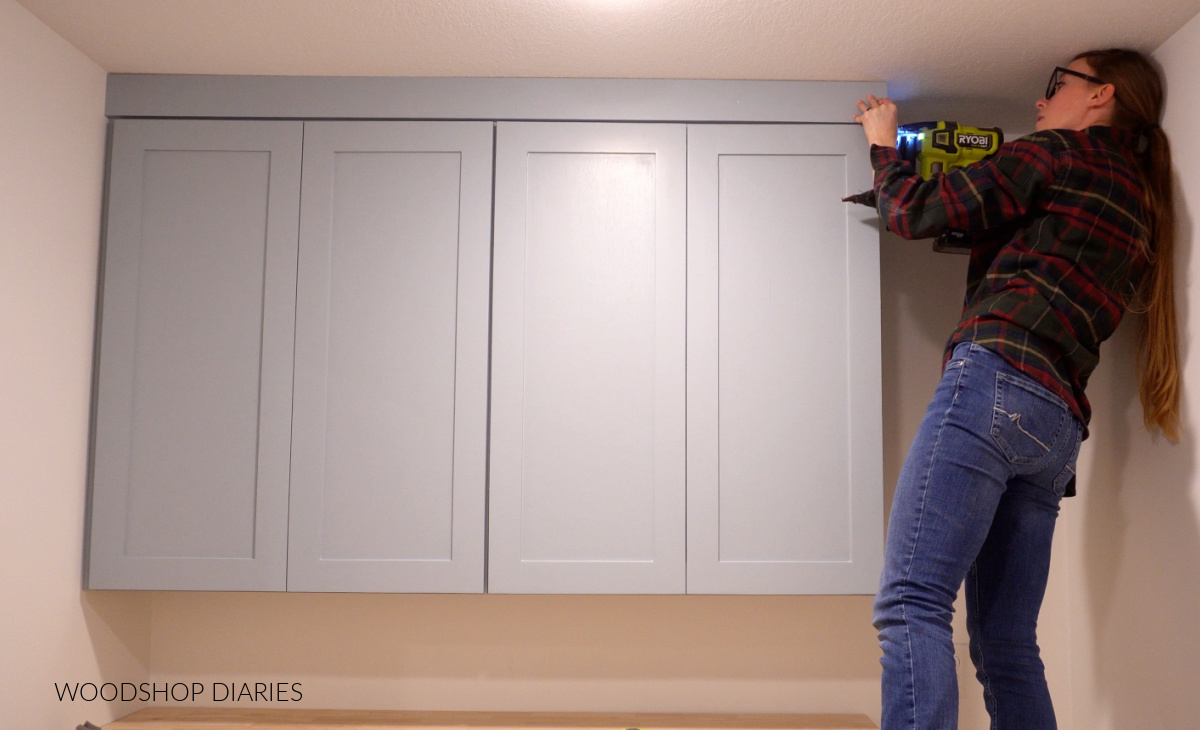
I added the shelves into the cabinets using shelf pins, then finished up by nailing trim around the top. I used 1x4s to trim the top, but crown molding would also work well.
And with that, these basic upper cabinets are finished and ready to fill up!
Looking for more information about building cabinets?
Building upper cabinets can seem overwhelming, but don’t let it intimidate you! Building a cabinet is simply building a box.
Here are some resources for cabinet building to help you tackle your project with confidence!
If you’d like to save this post for later, don’t forget to pin it or share it to your favorite social channel!
Until next time, friends, happy building!