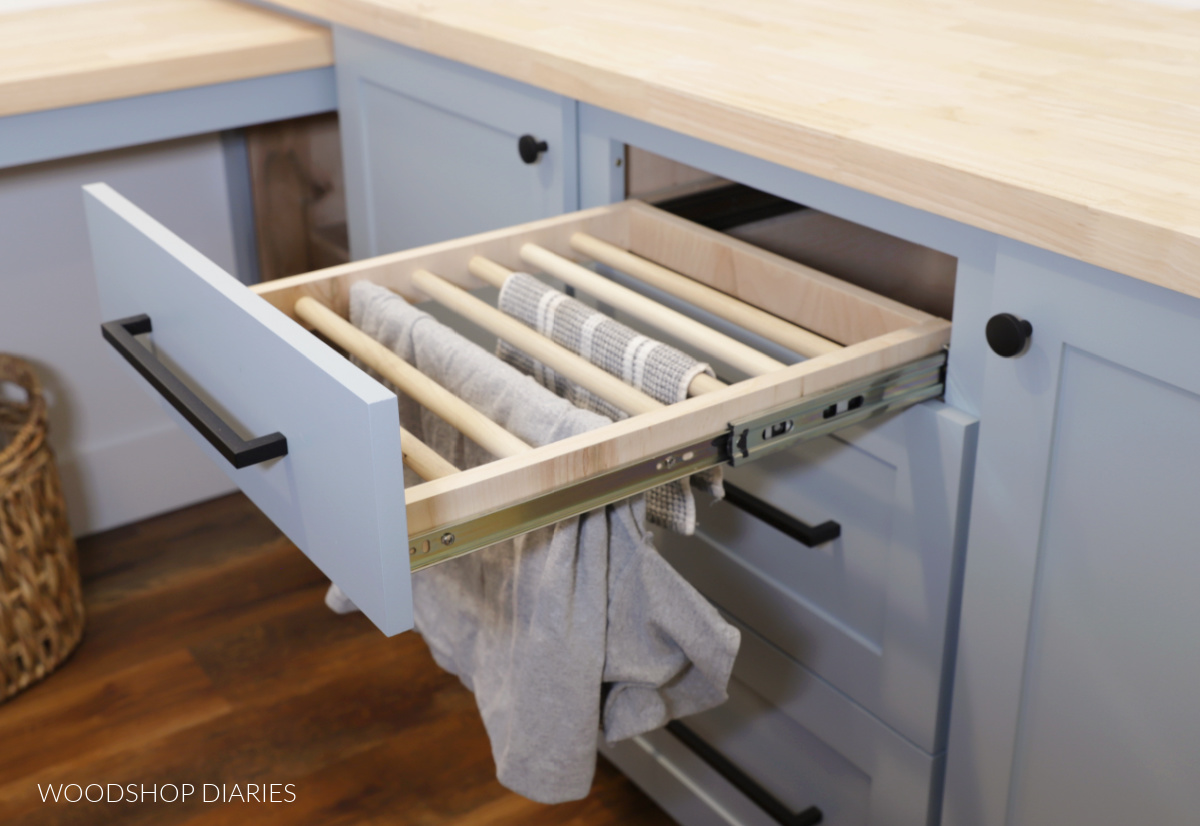
In this post, I’m sharing how add a drying rack to a new or existing drawer!
This is a simple and fun addition to your laundry room, but could also be handy in a bathroom vanity or kitchen cabinet as well!
Have you ever wanted to air dry a delicate piece of clothing or a decorative item that you didn’t want to shrink in the dryer? A drying rack is the perfect solution.
But…maybe you’re not a fan of them hanging on the wall–like me! Here’s a simple solution to give you a place to air dry that you can pull out when you need it and hide away when you don’t.
This drying rack drawer is an easy DIY project that you can add to a new cabinet or an existing cabinet and I’ll show you how to make it in the steps below!
*This post contains affiliate links. See policies.
What to consider before building
Whether you’re wanting to add this drying rack to an existing cabinet where a drawer is already or you want to add this from scratch, either way is doable.
But there are a few things to look at and consider differently in each case.
Replacing an existing drawer box with a drying rack
If you’re wanting to replace an existing drawer box in one of your cabinets with a drying rack, first check to see what type of drawer slides you have. If you have side mount slides, this will be really easy to swap out.
For existing side mount slides:
Remove the drawer box from the cabinet. Then unscrew the slide brackets from the existing drawer box.
If you have undermount drawer slides on your existing drawers, I recommend swapping for side mount slides for this particular drawer.
Undermount slides mount along the bottom of the drawer and this drying rack doesn’t have a bottom, so side mount slides work best in this case.
For existing undermount slide drawers:
Remove the drawer box from the cabinet, then remove the slides. Measure the length of the slides, and pick up a pair of side mount slides this same length or shorter to replace them with.
Learn how to install side mount drawer slides into new or existing cabinets here.
Adding a drying rack to a new cabinet
If you’re installing a drying rack into a new base cabinet that you are building from scratch, you will install it just like you would a basic drawer box using side mount slides.
The only difference is that the drying rack will be shorter in height than a typical drawer box.
How to Build a Drying Rack Drawer
Building the drying rack is very simple and should only take 10-15 minutes to assemble. Feel free to modify the spacing between dowels to suit your own needs and preferences.
Tools & Materials
Tools:
- Drill/Driver
- Miter Saw (or any saw to cut straight lines)
- ¾″ Forstner bit
- Pocket Hole Jig (optional)
Materials:
- 1x2s or 1x3s (amount depends on drawer size–see step 2)
- ¾″ dowel rods (amount depends on drawer side–see step 2)
- 1 ¼″ pocket hole screws or wood screws
Step 1: Determine Drawer Size
First, determine the size to make the drying rack. You really just need to find what length and width to make it because the height won’t matter in this case.
Basically, you can think of this drying rack as a drawer box. This guide details how to determine drawer size to fit your cabinet.
Normally, with side mount slides, the width of the drawer is the width of the opening -1″. The length of the drawer should match the length of the drawer slides.
Step 2: Cut Drying Rack Pieces
Once you have the overall dimensions for the drying rack, you’ll need to cut down your pieces. For the drawer/drying rack sides, 1x2s or 1x3s would work great, but you could also use scrap ¾″ plywood strips, too.
Cut two pieces the length you want your drying rack for the sides. Then, cut two more pieces 1 ½″ shorter than the width you want your drying rack for the front/back pieces.
Then, determine how many dowels you want for the drying rack–these are the pieces you’d hang your things on to dry. Cut your dowels ¾″ longer than the front/back pieces.
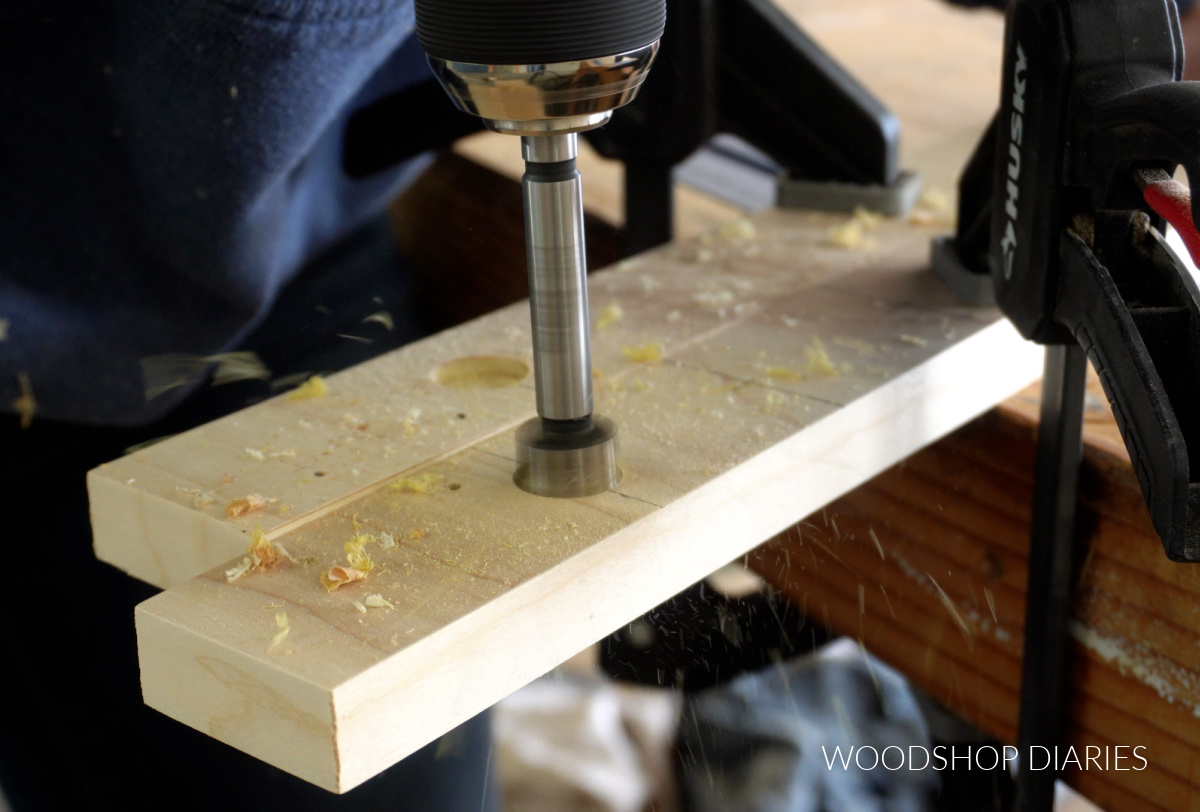
Step 3: Drill Holes for Rack Dowels
The dowels will be installed into holes drilled along the sides.
Determine how far apart you can (and want to) place your dowels. Mark their locations along the centerline of the boards.
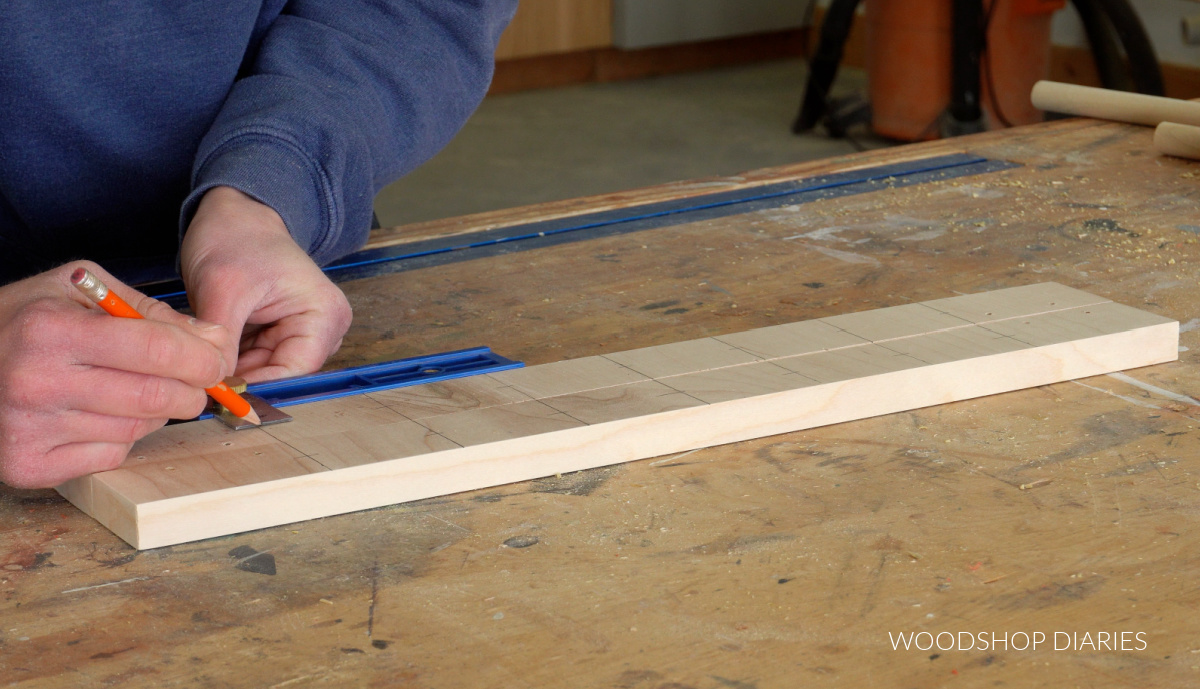
TIP: If you don’t like math, here’s how to figure your spacing.
(Length of sides – 1 ½″) / (Number of dowels + 1) = Distance between centers
I had 7 dowels and spaced them about 2″ apart center to center. PRO TIP: Use an odd number of dowels and make your first mark in the middle of the board. Then mark out your spacing from there on each side.
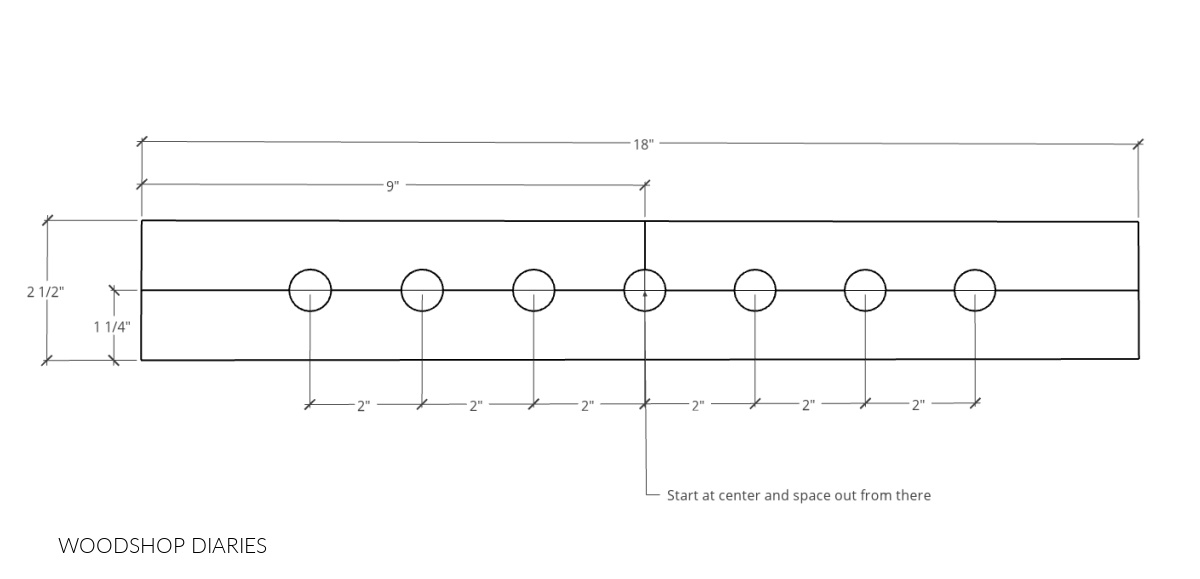
Use a ¾″ Forstner bit to drill holes ⅜″ – ½″ deep at these marks.
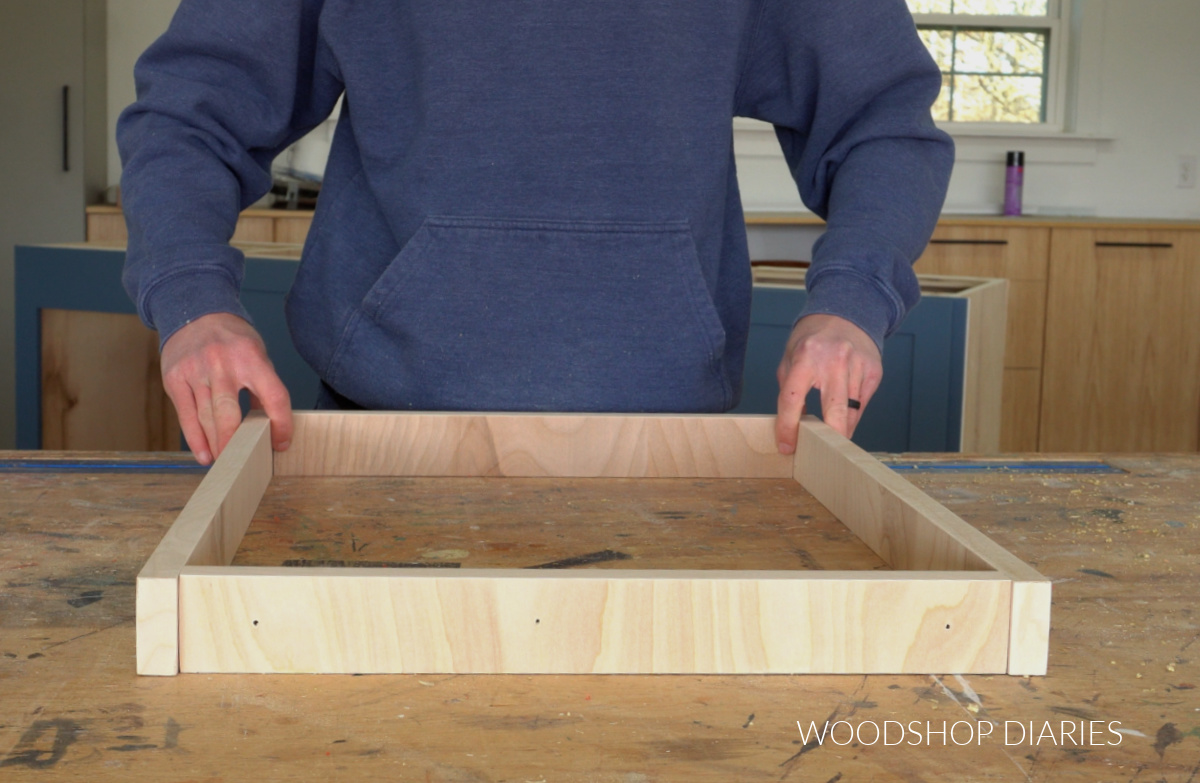
Step 4: Assemble Drying Rack
Drill ¾″ pocket holes into the ends of the front and back pieces from step 2 to assemble. If you don’t have a pocket hole jig, you can just use 1 ¼″ wood screws to assemble instead.
RELATED: How to use a pocket hole jig
Attach the front and back pieces to one side using 1 ¼″ pocket hole screws. Then, install the dowels into the holes.
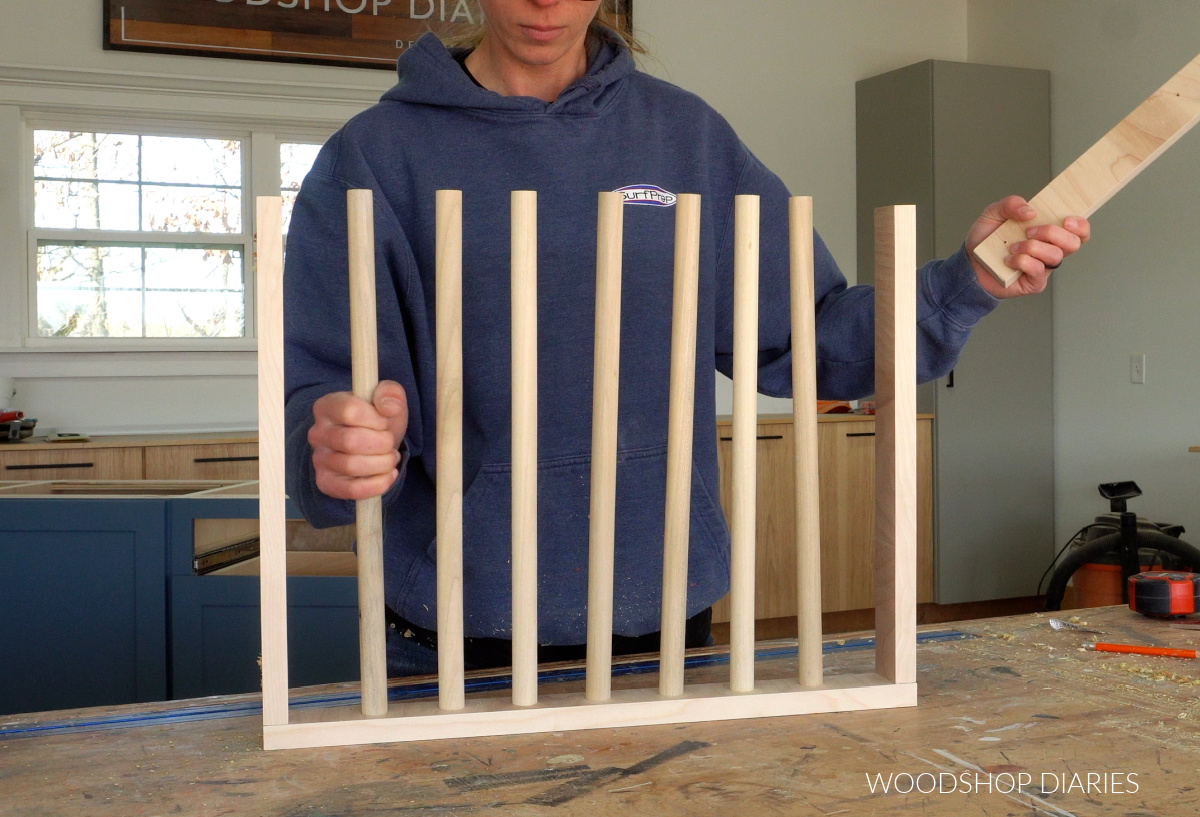
Place the other side on so that the dowels seat securely into each hole, then attach with 1 ¼″ pocket hole screws.
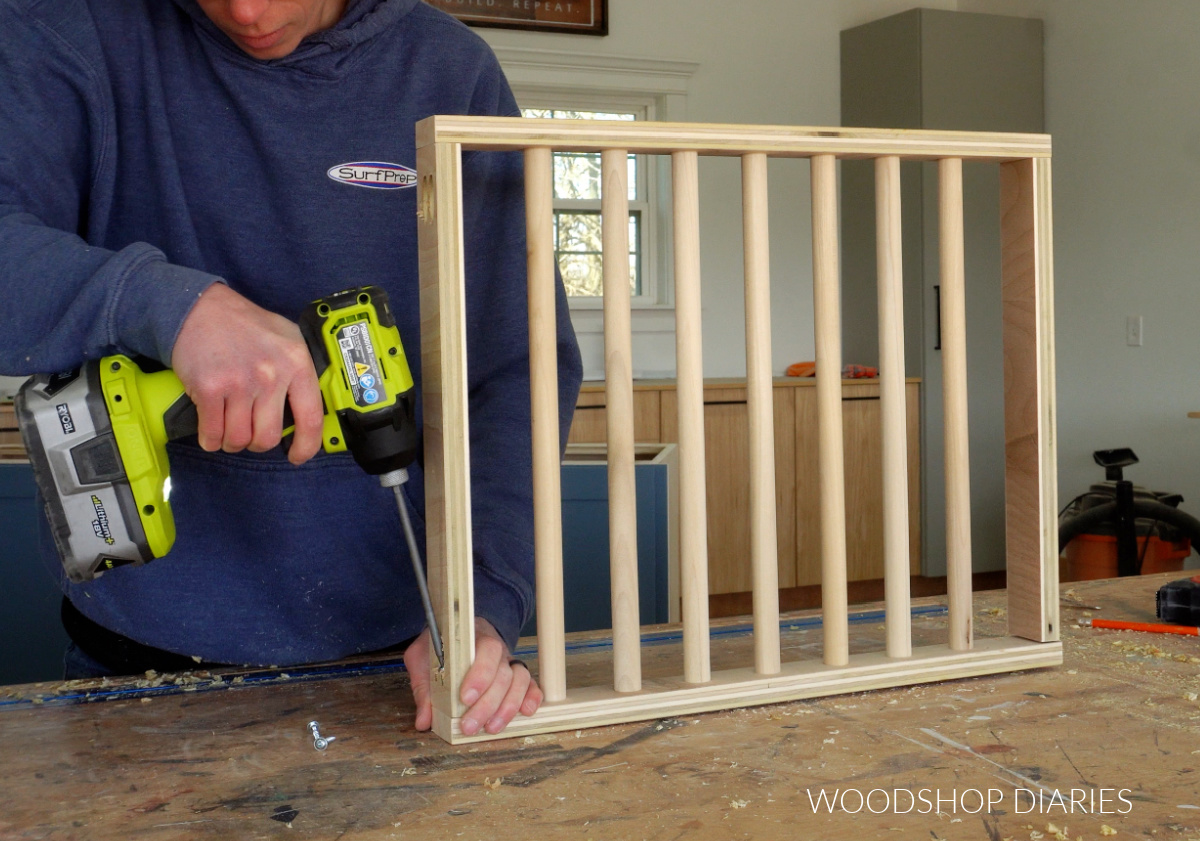
You can add glue to the dowels if you’d like , but it’s not necessary.
Step 5: Finish & Install Drying Rack Drawer
Apply a clear coat sealer to the drying rack (a spray clear coat is easiest to apply to these dowels).
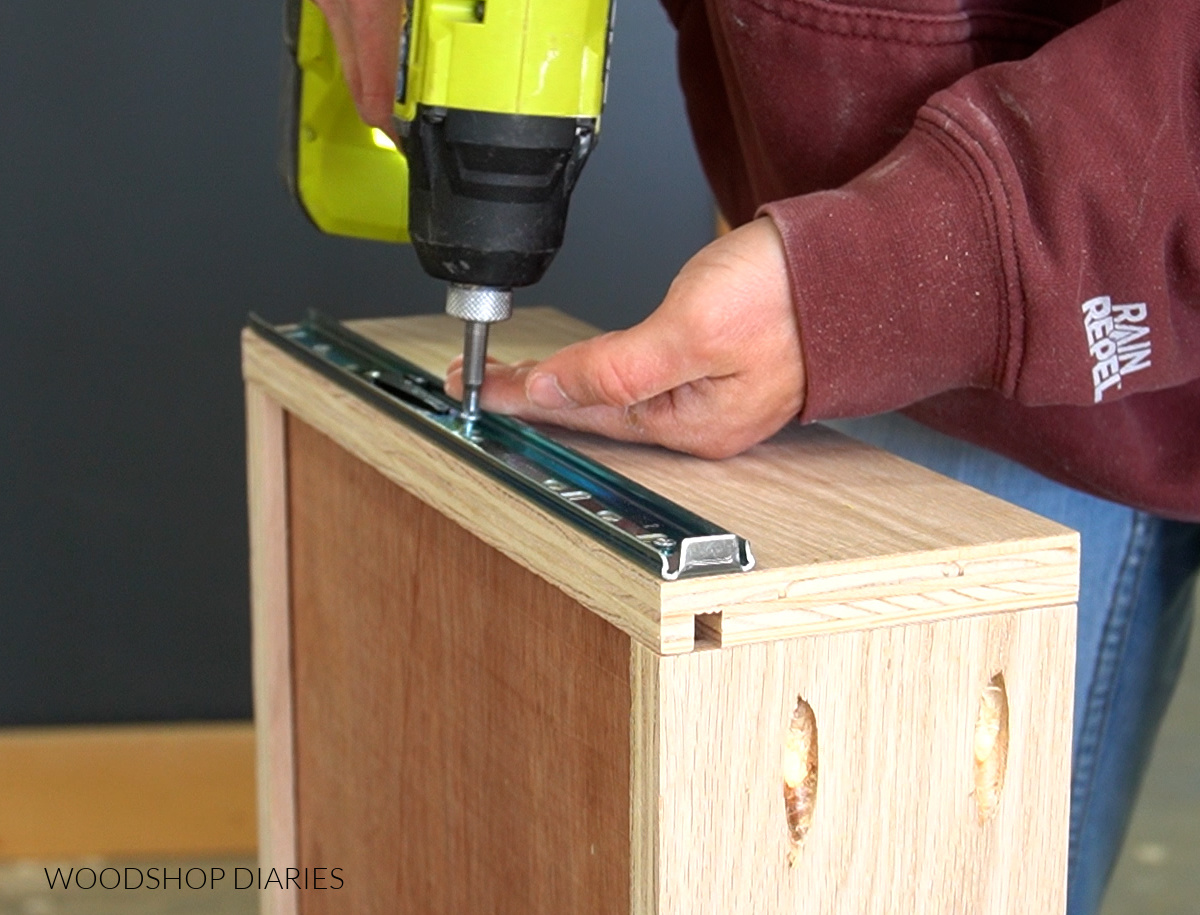
Then, install onto the drawer slides. In this case, I like to install the part of the slides that mount to the drawer onto the sides of the rack.
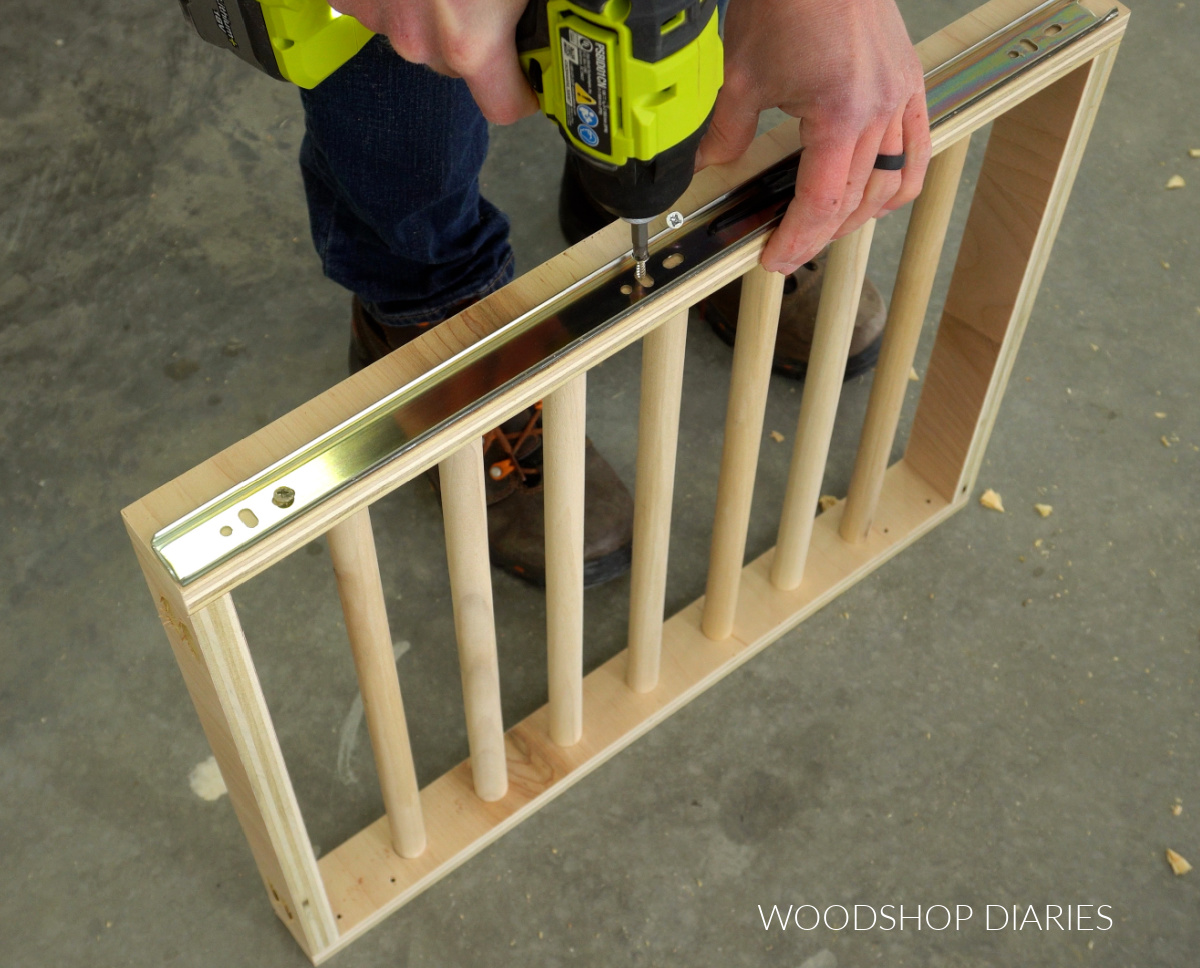
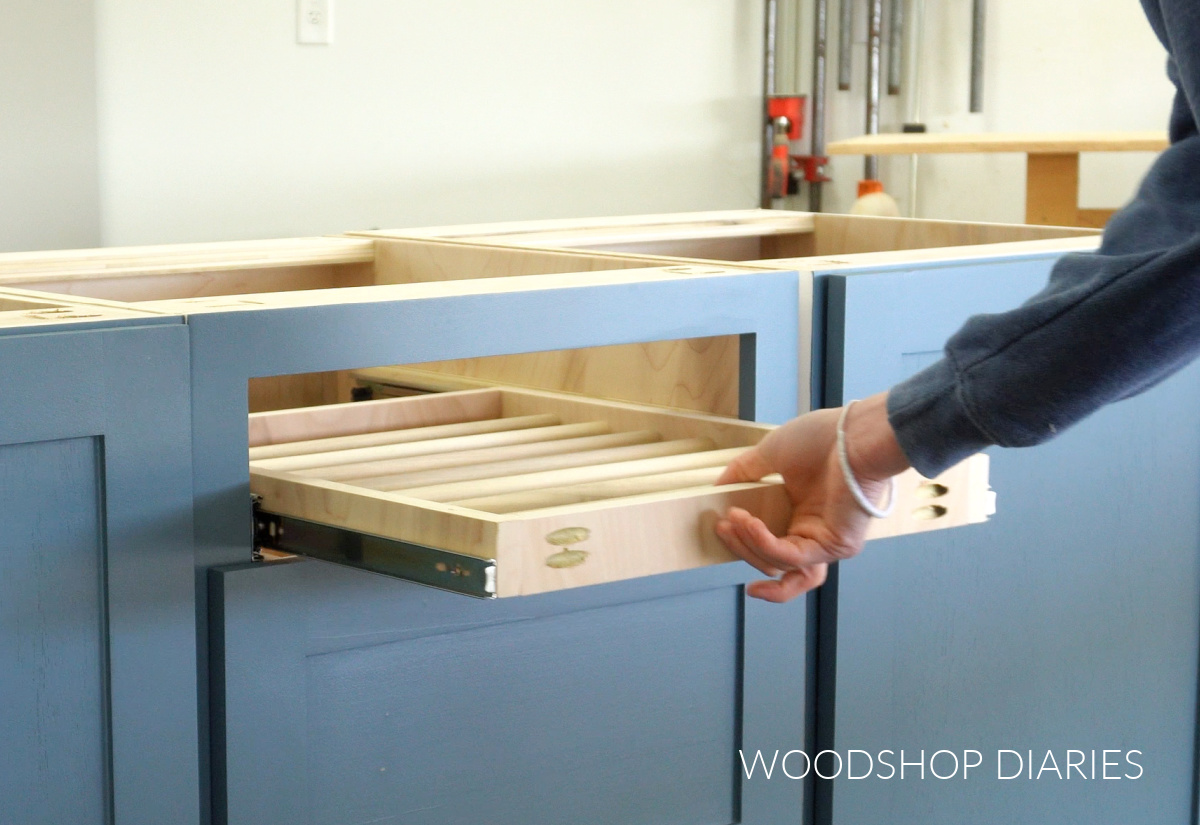
Then you can just slide the rack into the slides in the cabinet.
RELATED: How to install drawers on side mount slides
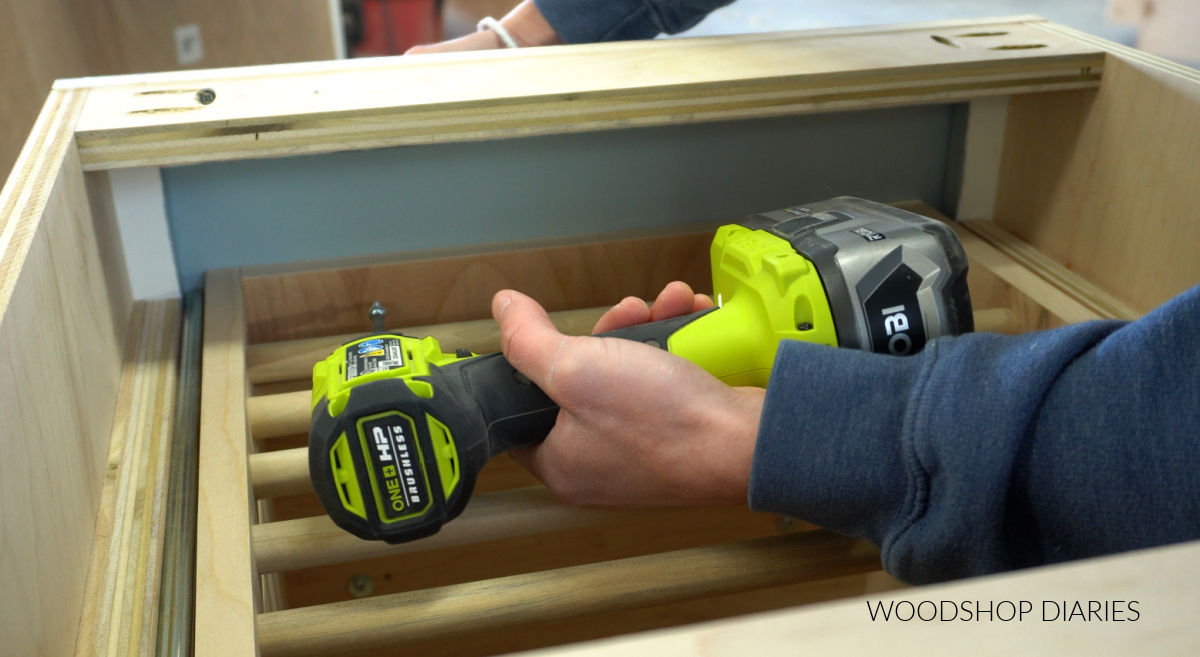
Finish up by adding the drawer front. If this is replacing an existing drawer box, reattach the old drawer front using screws through the front of the drying rack.
If you’re adding this to a brand new cabinet, build and install a drawer front whatever style you like. I screwed in a solid ¾″ plywood drawer front using 1 ¼″ screws through the inside of the front piece of the drying rack.
RELATED: How to attach drawer fronts
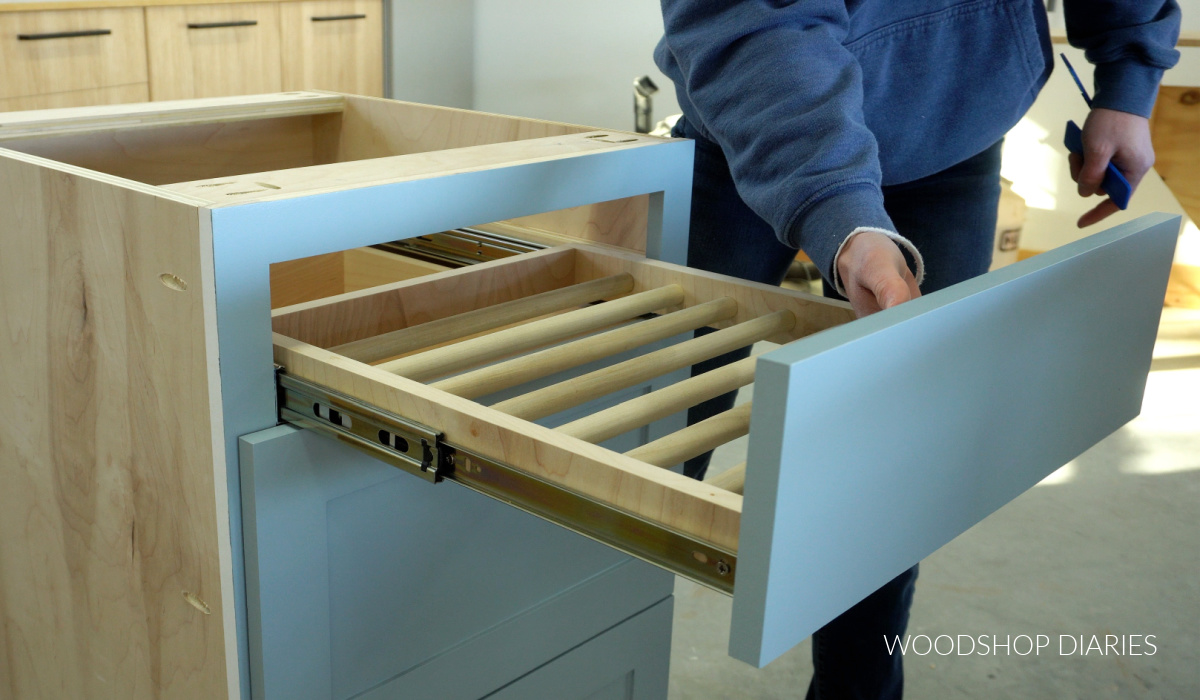
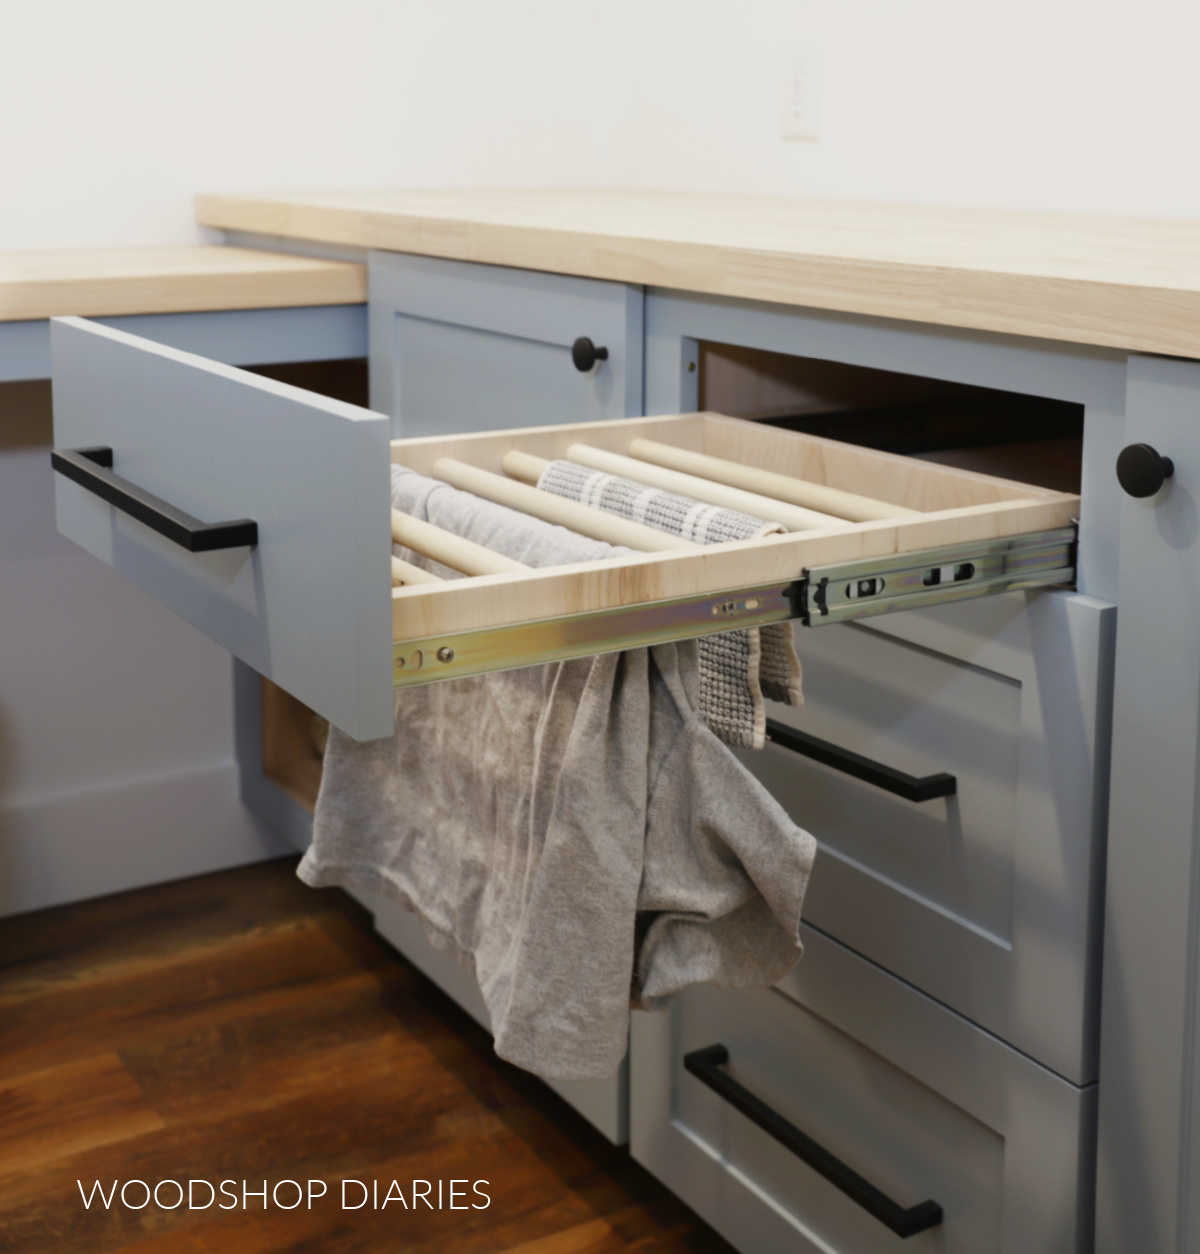
And now your drying rack is ready to use! I love how simple this is, but it’s such a handy addition in the kitchen, laundry, or bathroom to dry clothes, rags, and towels.
Looking for More Simple DIYs for the Home?
Here are a few more simple and practical DIYs for the home you might enjoy building, too!

If you’d like to save this project for later, don’t forget to pin it or share to your favorite social channel!

Until next time, friends, happy building!