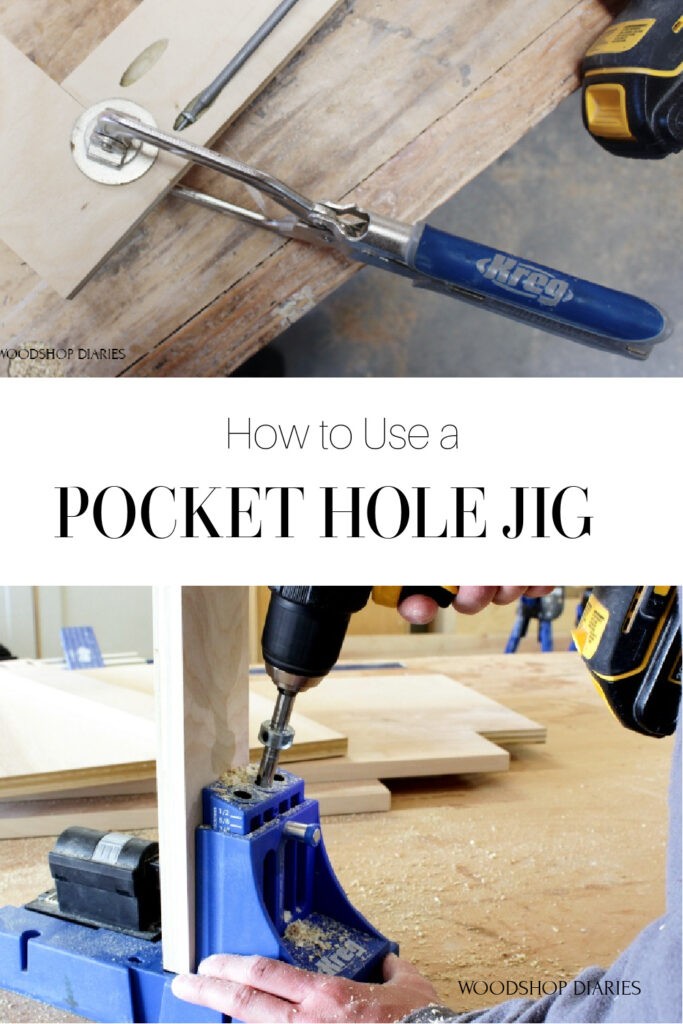
In this post, I’m showing you how to set up and use a pocket hole jig so you can confidently build with pocket holes in your DIY projects!
Whether you’re brand new to pocket holes, or you’ve tried them over and over and just ended up frustrated, this post is for you.
Pocket holes are a really popular joinery method for both beginners and advanced woodworkers alike.
While they can tend to be somewhat controversial within the “fine” woodworking community, it’s hard to deny that pocket holes are an extremely strong, versatile, and quick option for simple butt joints.
*This post contains affiliate links. See policies for details.
What is a Pocket Hole?
Pocket hole joinery is a method of joining wood together that involves drilling a hole into the end of a board at a 15 degree angle. This is called the “pocket hole.”
The pocket holes are drilled using a pocket hole jig.
The pieces are then assembled by driving a screw through this hole and into the adjoining board.
Why Use Pocket Hole Joinery?
Pocket hole joinery is:
- Quick
- Easy
- Strong
- Only Requires Two Tools
If you break it down to the bare basics, to use pocket holes, you just drill a hole, and drive a screw, and all you need is a pocket hole jig and a drill.
Many other joinery methods require the use of a table saw and/or router, maybe some chisels, specialty hand saws, plus LOTS of patience, practice and test cuts and a bunch of messy glue.
When to Use Pocket Hole Joinery
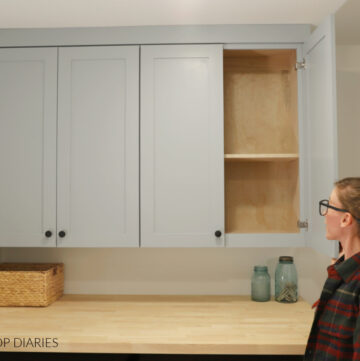
Pocket holes are great for attaching two boards together so that you don’t see any exposed screw heads.
I like to use them for attaching large panels together to make things like basic cabinet boxes and DIY furniture.
And they’re also great for attaching two boards together on the same plane like for a face frame as well.
When used correctly, pocket holes work really well in plywood, softwoods (like pine and spruce), and hardwoods, too.
And, they can usually be placed where they won’t be seen in the finished project.
When NOT to Use Pocket Hole Joinery
Here are a few examples where pocket holes may not be your best bet:
If you aren’t able to hide your pocket holes and you plan on staining the piece, you might want to opt for a different joinery technique. You CAN plug pocket holes, but sometimes the plug may stain differently than the wood. Check out this post for four ways to plug a pocket hole.
If you don’t really care if you see the screw heads and just need the pieces attached, a simple butt joint with a screw through it may be a simpler option than pocket holes.
If you’re working in tight spaces and don’t have room to drive a pocket hole screw (the drill plus the bit will require about 10-12″ of space to work), you may want to consider a different option. Although, a 90 degree drill attachment can help solve that issue in some cases.
How to Set up and Use a Pocket Hole Jig
If you’re ready to start building using pocket holes, here’s what you’ll need:
Tools required for pocket holes:
- Pocket Hole Jig*
- Drill (corded OR cordless–either would work fine)
- Clamp (optional–it depends on the type of jig you use)
*Not sure which jig to get? Check out this post to help you decide which pocket hole jig is best for your shop!
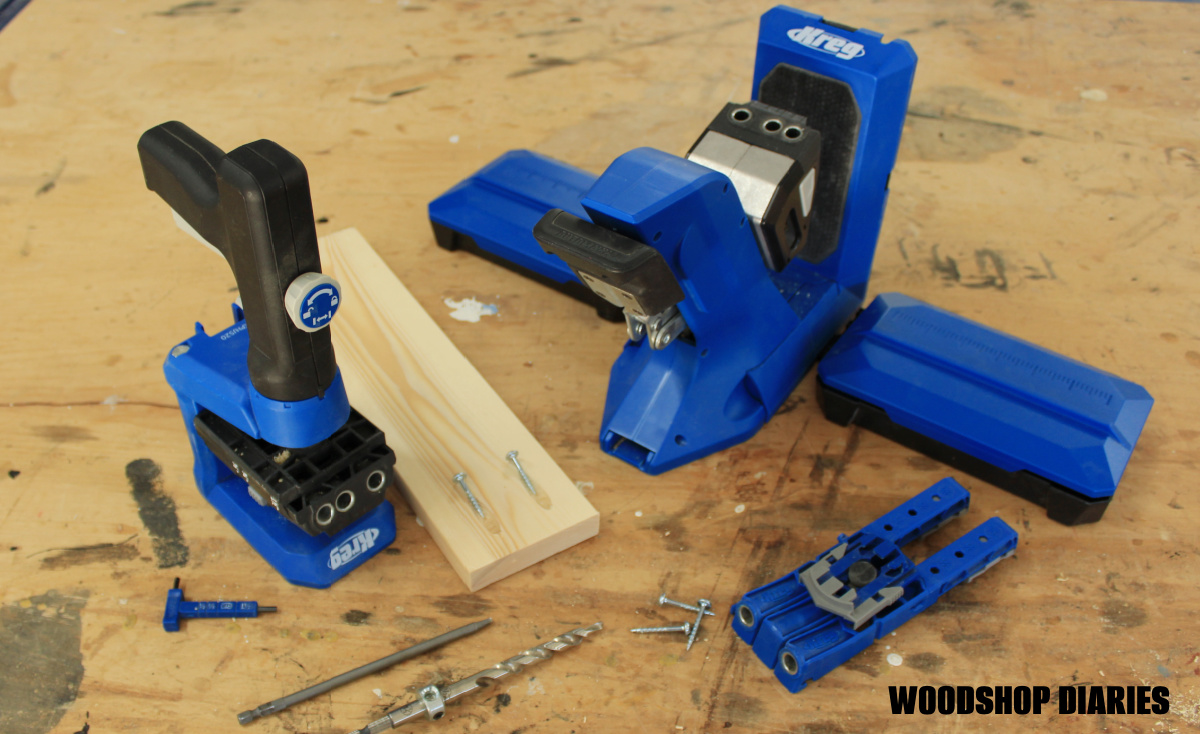
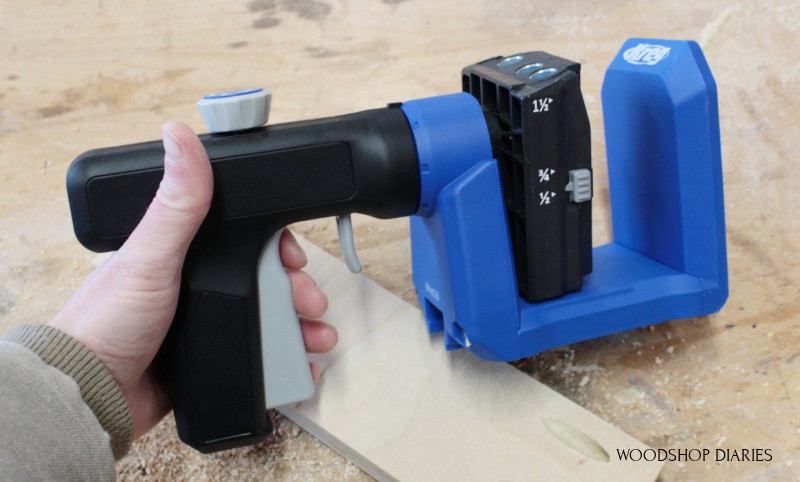
No matter which model you’re working with, all Kreg pocket hole jigs come with a jig, a drill bit, a stop collar, and a square head screw driving bit.
The newer jigs come with a handy thickness gauge that doubles as the set screw wrench. Depending on which jig you buy, you may also have additional accessories.
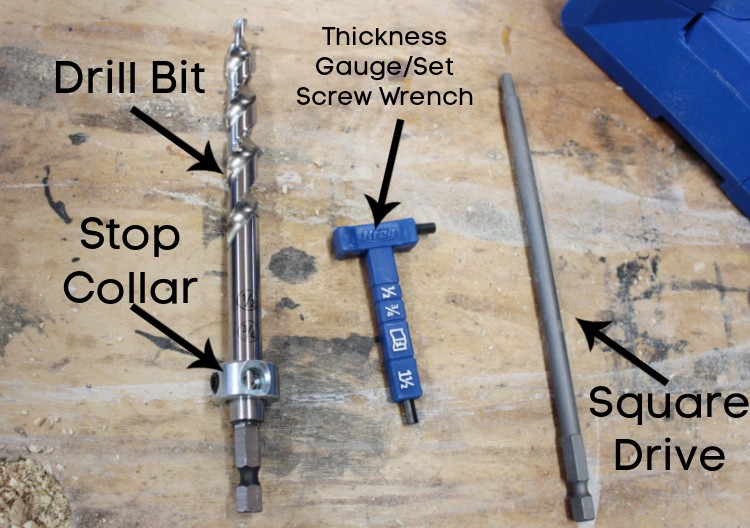
NOTE: The standard size pocket hole drill bit is ⅜″ diameter. This is the bit used with most of the pocket hole jigs.
But the Kreg Micro uses a smaller drill bit (it comes with the jig when purchased) and the Kreg XL uses a larger drill bit (it also comes with the jig when purchased).
RELATED: Learn more about how to use the Kreg Micro Jig here and learn about how to use the Kreg XL Jig here.
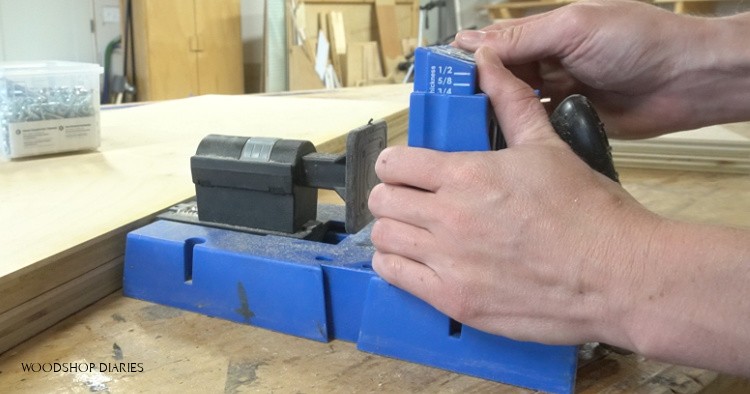
Step 1: Set Pocket Hole Jig for the Board Thickness
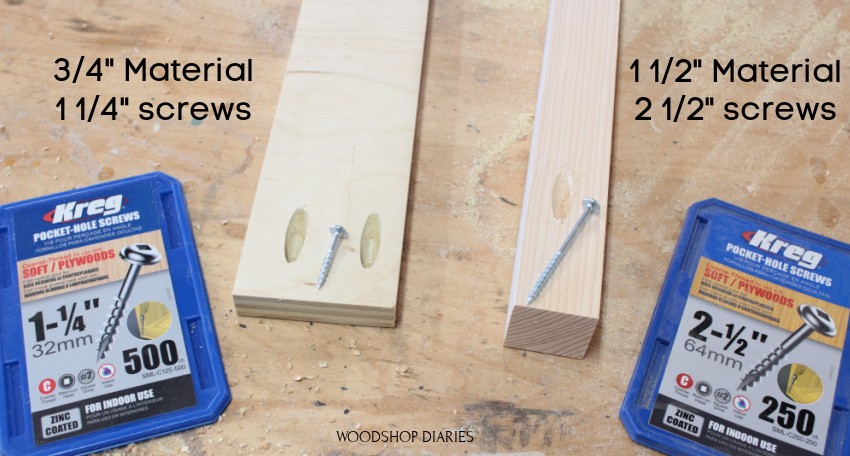
The first step to using pocket holes to to determine the thickness of the boards you are joining. The most common sizes you’ll usually be working with are ½″, ¾″ and 1 ½″ thick.
Keep in mind that 1x lumber is actually ¾″ thick and 2x lumber is actually 1 ½″ thick. Learn more about understanding lumber sizing here.
Although less common, you may also be working with 4x4s (like when building this outdoor sofa), which are 3 ½″ thick.
Then, decide which piece(s) you’ll be drilling the pocket holes into and adjust the pocket hole jig to match this board thickness. For example, if you are drilling pocket holes into a ¾″ thick board, set your jig up for ¾″ material.
Which piece gets the pocket holes?
Which piece(s) you drill your pocket holes into will depend on your exact project and design. But here are some rules of thumb:
- When using pocket holes, don’t drill them so that your screws will be driving into end grain on the adjoining piece.
- In general, most pocket holes in solid boards (not plywood), should be drilled parallel to the wood grain UNLESS you’re edge joining pieces (like when making a table top).
- GENERALLY, if you’re joining two different thicknesses, the thinner piece usually gets the pocket holes.
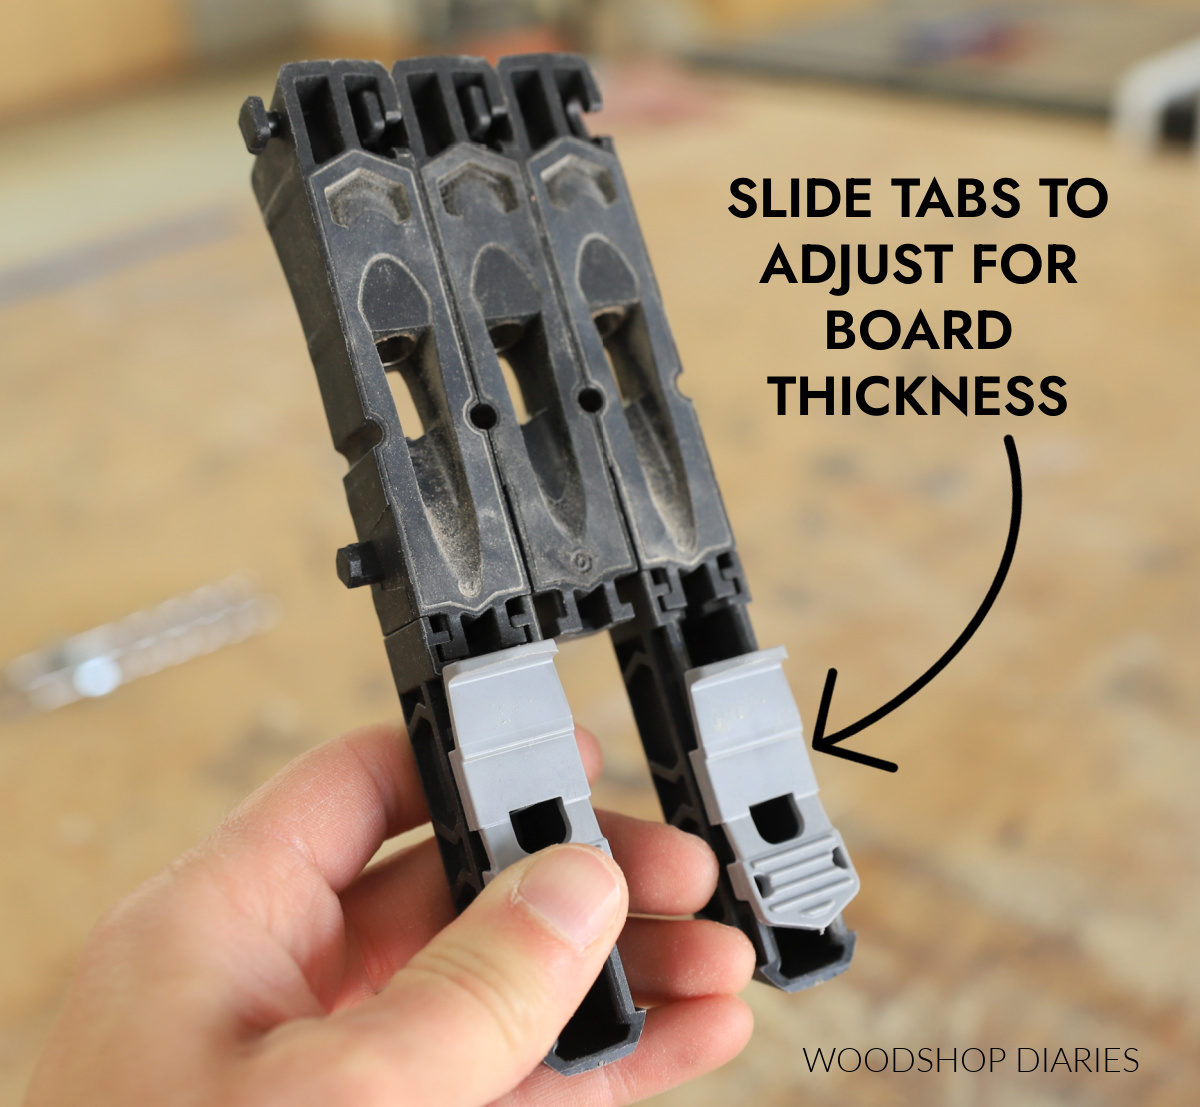
If you aren’t sure how to adjust your jig, refer to the manual. The Kreg 320, Kreg Micro, and Kreg XL jigs all have adjustable tabs on the back to adjust for the correct board thickness.
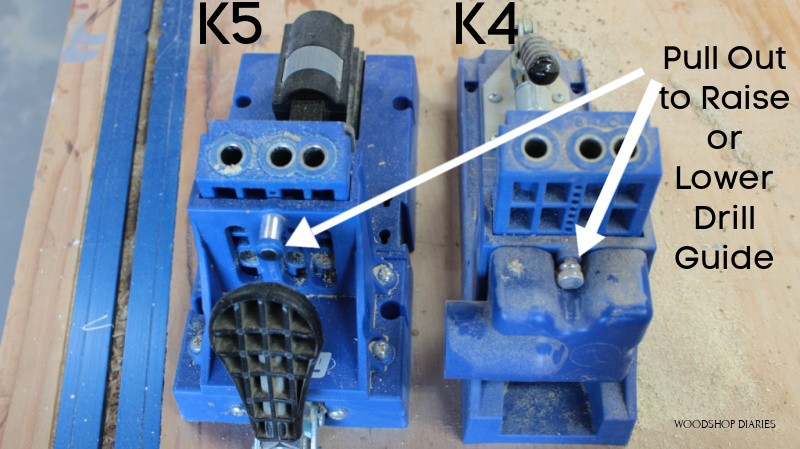
The older K4 and K5 jigs both have pins on the front that you pull out to allow you to slide the drill guide up and to match up the markings on the sides.
The Kreg 520 has tabs on the sides of the drill guide that you squeeze in to adjust it up and down.
But, the Kreg 720 Pocket Holg Jig automatically adjusts for the board thickness so you don’t have to manually change it. The guide adjusts as needed when you clamp your piece into it.
Check out this post to learn more about the 720 series and to find out which jig is best for you!
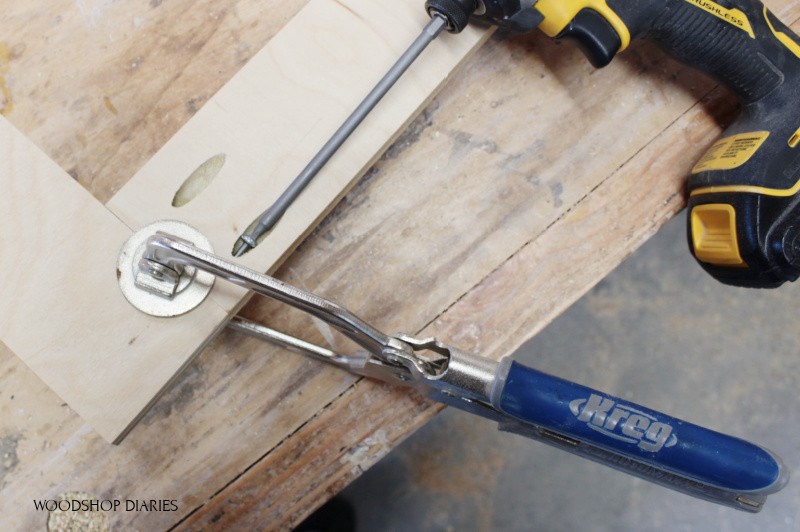
Step 2: Set Your Drill Bit for Proper Board Thickness
Now that your jig is set, you need to set your drill bit to match.
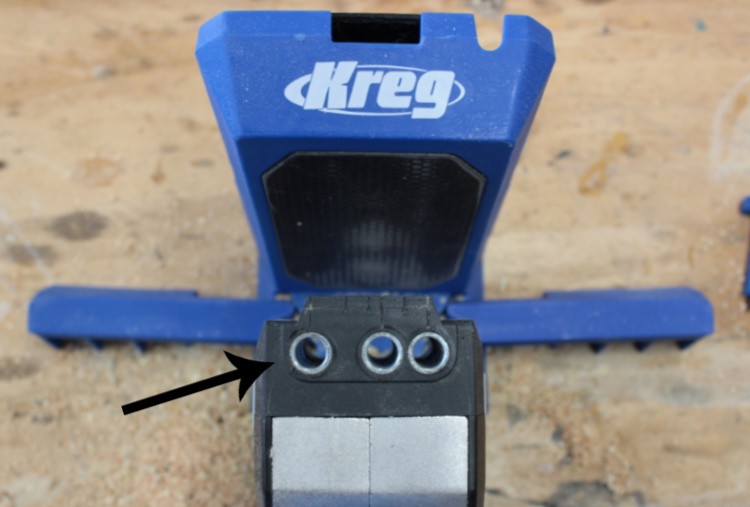
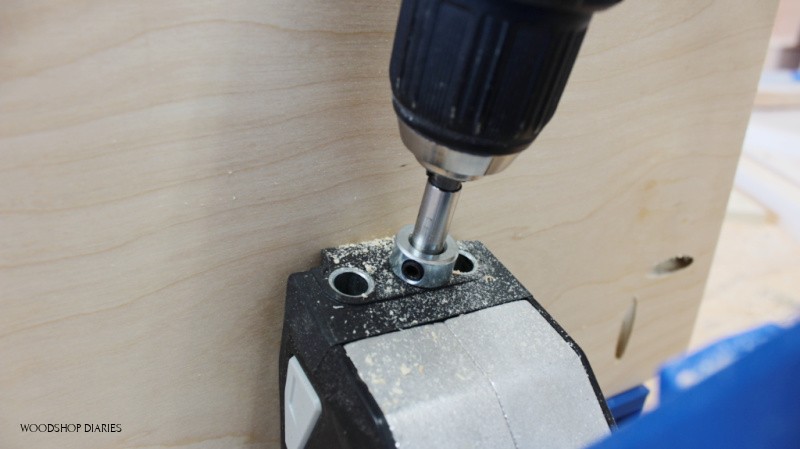
You should already know your board thickness from step 1. But just in case you need some reassurance about it, the newer Kreg Pocket Hole Jigs come with a handy little gauge to help you see where to set your drill bit collar. See below, this board falls in the ¾″ area.
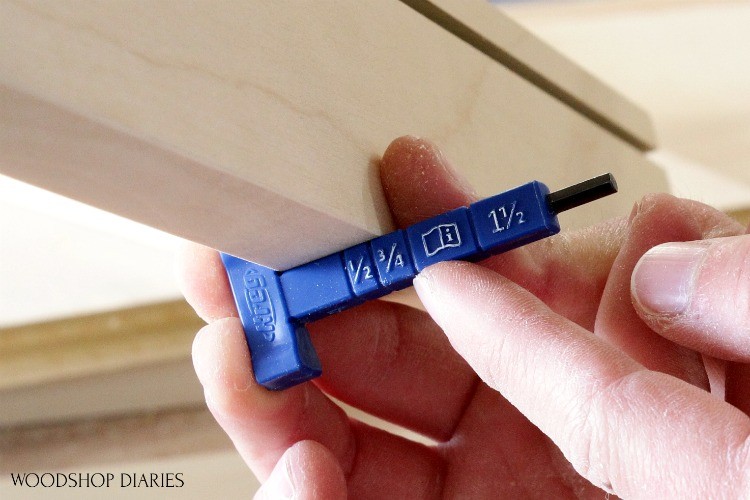
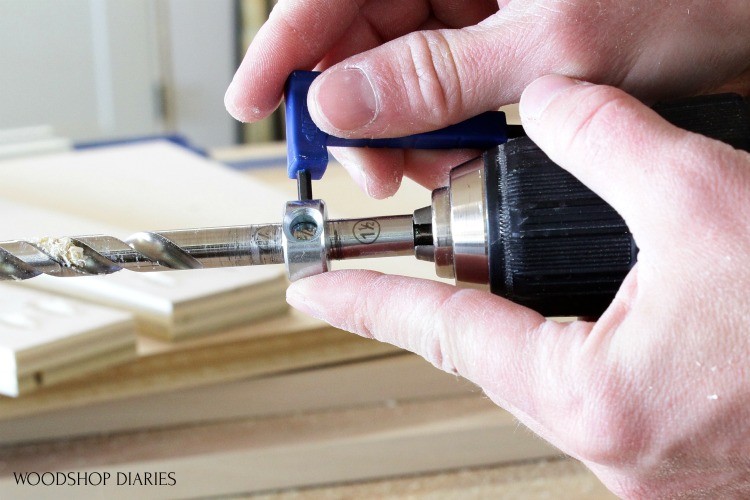
Use this handy gauge (or an Allen wrench) to adjust the stop collar on the drill bit that comes with the pocket hole jig.
Loosen the set screw on the side of the collar and adjust it up and down until the circle hits the thickness you need. Then, tighten the set screw to lock it in place.
Remember the drill bit should be set to MATCH the jig. So, if you are drilling into a ¾″ thick board, you need to set BOTH your jig AND your drill bit for ¾″ material.
NOTE: On older versions, the drilling bit may not have these marks and the collar may not have a hole. If that’s the case, refer to your specific jig’s instructions for how to adjust the stop collar for your board thickness.
But, this is a super handy feature, so I’d recommend buying a new drill bit that comes with the marks.
A special note about board thickness:
If you aren’t working with typical thicknesses and need additional options, you can adjust the collar as needed, but err on the small side.
For example, if you’re drilling into a 1″ thick board, adjust your collar between the ¾ and the 1 ½ setting. You can estimate about where the 1″ would be and drill a test hole to make sure it doesn’t come out the end of the board.
See your jigs manual for more information.
A Note About Plywood:
¾″ plywood is usually a bit undersized. I keep my drill bit collar set at ¾″ and don’t run into any issues even though the wood thickness is slightly under.
HOWEVER, if you are using undersized ¾″ plywood and are having issues with screw tips popping out the end of your boards, try adjusting your collar SLIGHTLY closer to the tip to avoid drilling your holes too deep.
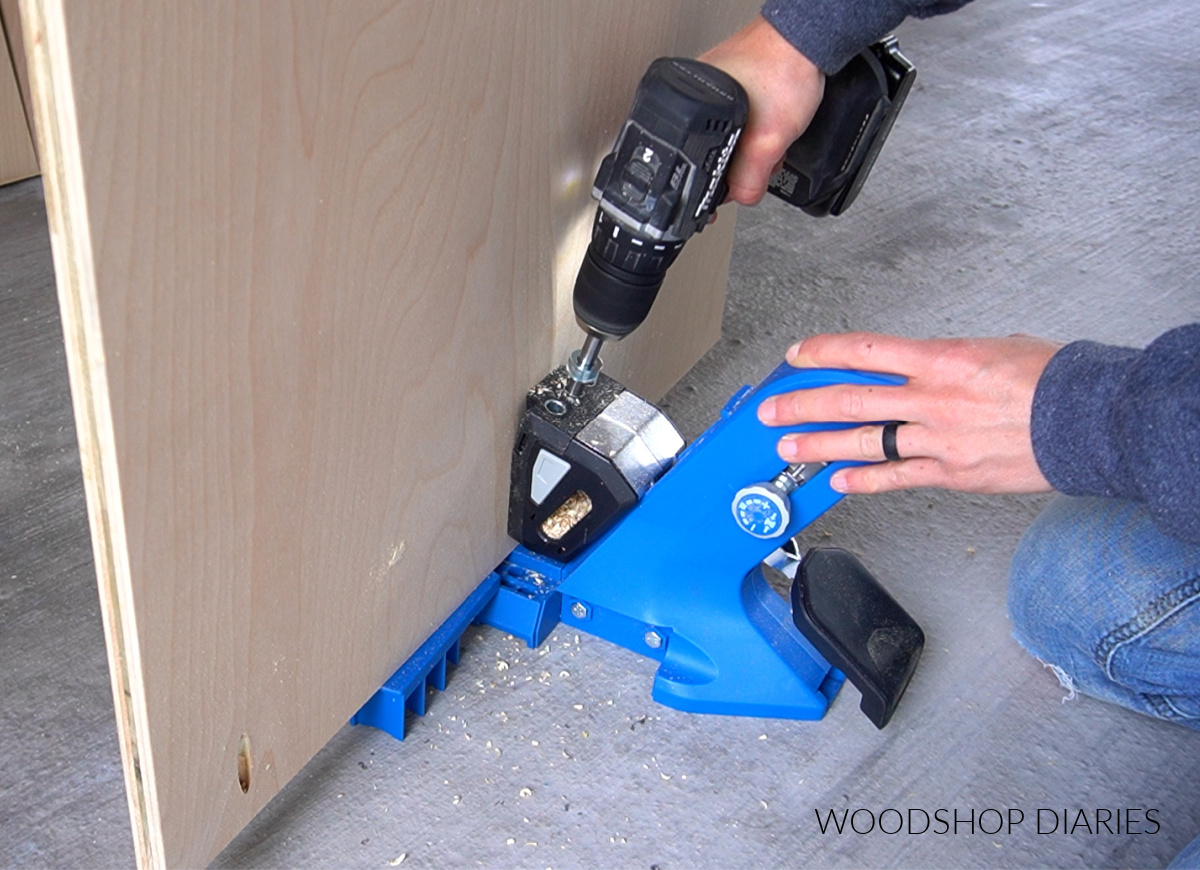
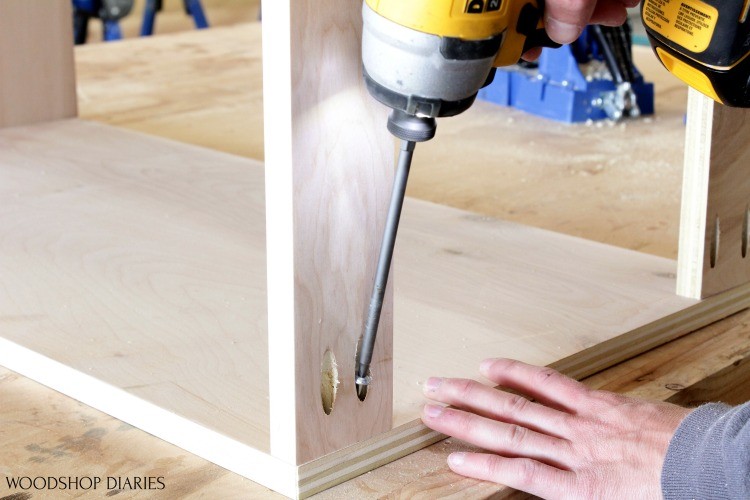
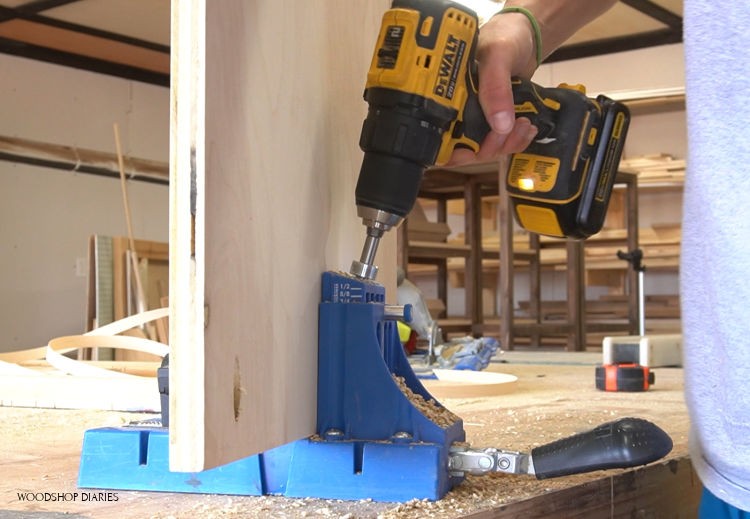
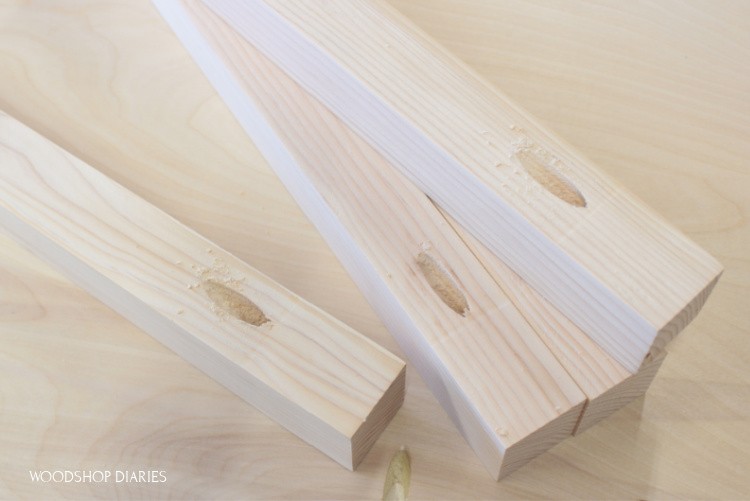
Step 3: Drill Your Pocket Holes
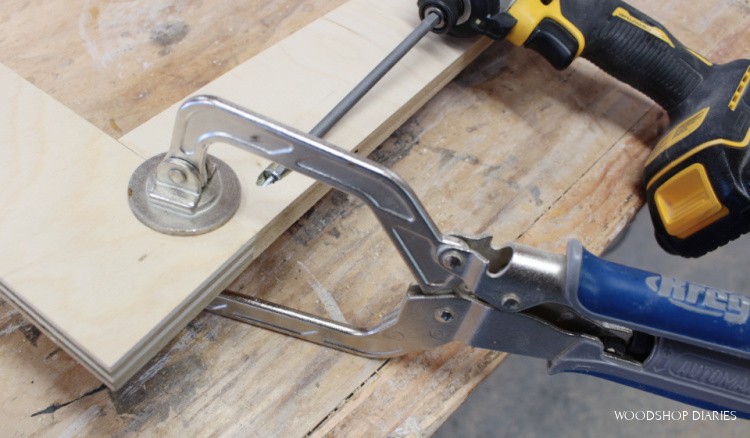
Once your jig and your stop collar are both set for your board thickness, simply clamp your wood in the jig and drill your holes.
NOTE: Some jigs have the clamp built in–like the K4, K5, 520 and 720. But the 320, Micro, and XL jigs will need to be clamped onto the board with a separate clamp.
Board Placement in the Jig:
- For 1 ½″ wide boards (like 1x2s and 2x2s), center the board on the two right holes of the drill guide and drill those two holes.
- For 2 ½″ wide boards (like 1x3s and 2x3s), center it on the two left holes of the drill guide and drill those two holes.
- For boards 3 ½″ wide (like 1x4s and 2x4s), center the board on the two outside holes of the drill guide and drill those two holes.
For boards or plywood panels wider than that, drill holes spaced out as needed depending on your application. Kreg recommends spacing holes about 6″ apart and at least 2″ from each edge when possible.
Of course, different applications may need less or more–but that’s a good guideline.
Be sure to drill each hole until the stop collar makes contact with the jig.
Some of the jigs come with a dust collection port to suck the particles out as you drill. I don’t usually use the dust ports, but I do try to vacuum or clean out the pieces every couple of boards to keep things from getting clogged.
Things to watch out for…if you notice after drilling, that you have a dimple or a hole in the bottom end of your board, you have drilled too far.
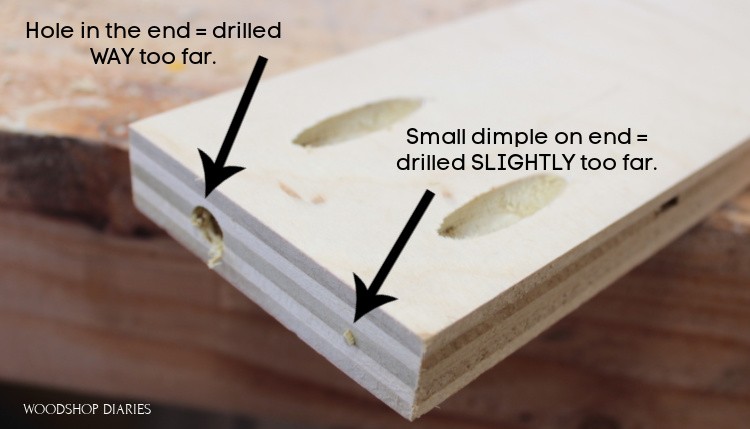
Adjust your stop collar on your drill bit closer to the tip and try again on some test pieces until this is gone. If you just have a dimple and not a hole, you’re really close to where you need to be…just adjust SLIGHTLY.
The Issue with 2x2s…
While we talk about drilling pocket holes, I just want to throw this tip out there. When I use 2x2s in a project, I only drill one pocket hole on each end. Theoretically, each joint should have at least 2 screws.
But, in the past, when I’ve tried to use two screws in 2x2s, they crack or split. So, I’ve started only using one.
That said, if you plan to only use one screw at a joint, DON’T SKIP THE GLUE.
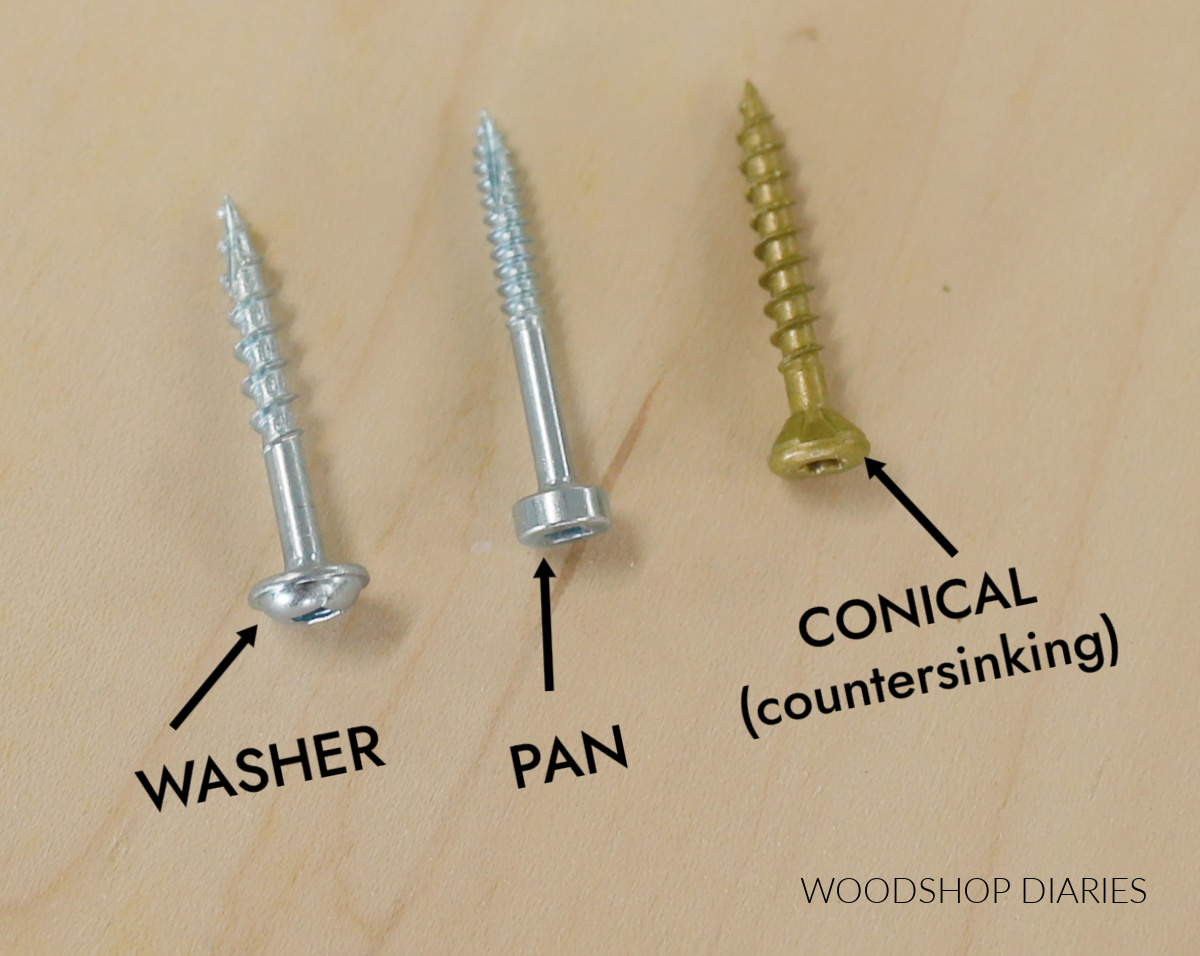
Step 4: Choose the Correct Screw
Before we discuss screw length, let’s first discuss what a “pocket hole screw” is. Pocket hole screws are just washer or pan head screws.
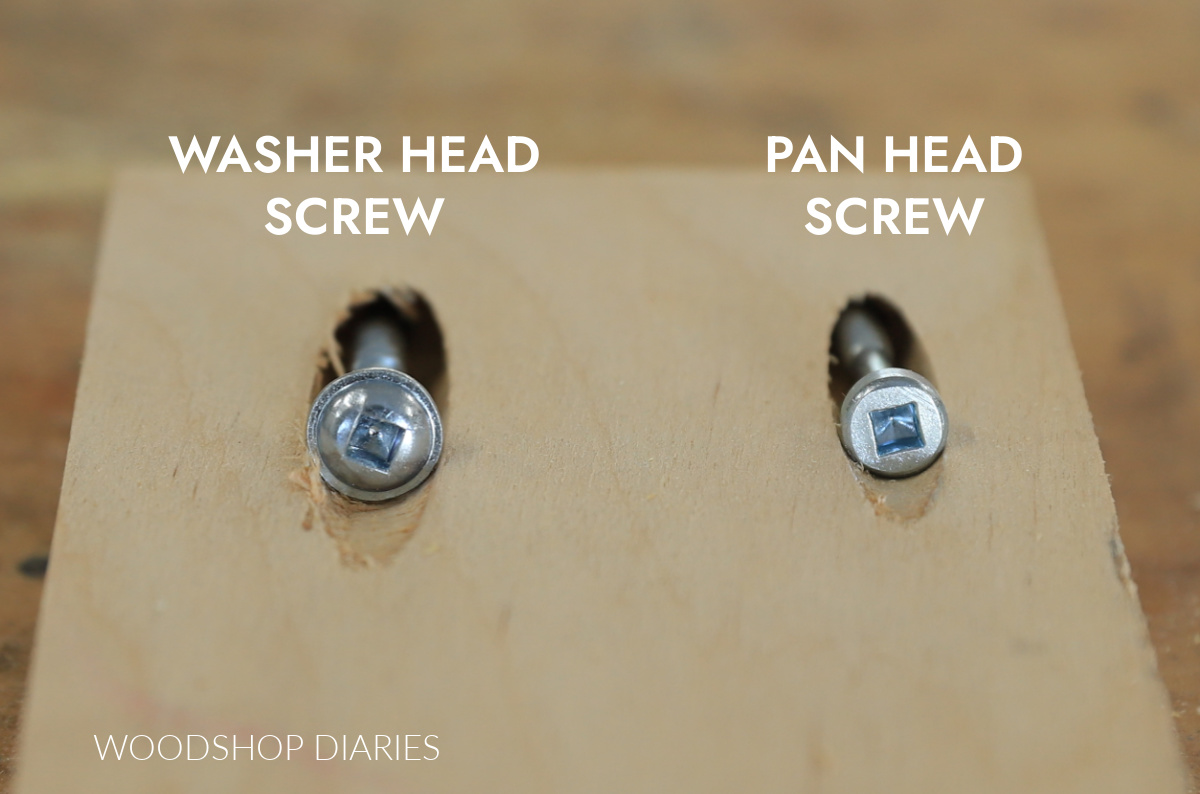
These washer and pan head screws are designed to fit into the pocket hole and the flat bottom prevents it from countersinking and driving through the hole. This also allows it to pull the adjoining piece nice and tight.
It’s important to use WASHER OR PAN HEAD POCKET HOLE SCREWS for your pocket hole applications. Don’t use countersinking screws in pocket holes.
Kreg makes pocket hole screws for both indoor and outdoor applications. The silver (zinc) screws work well for indoors, but if you are going to use them for outside, grab the Blue Kote outdoor screws to prevent rusting and corrosion.
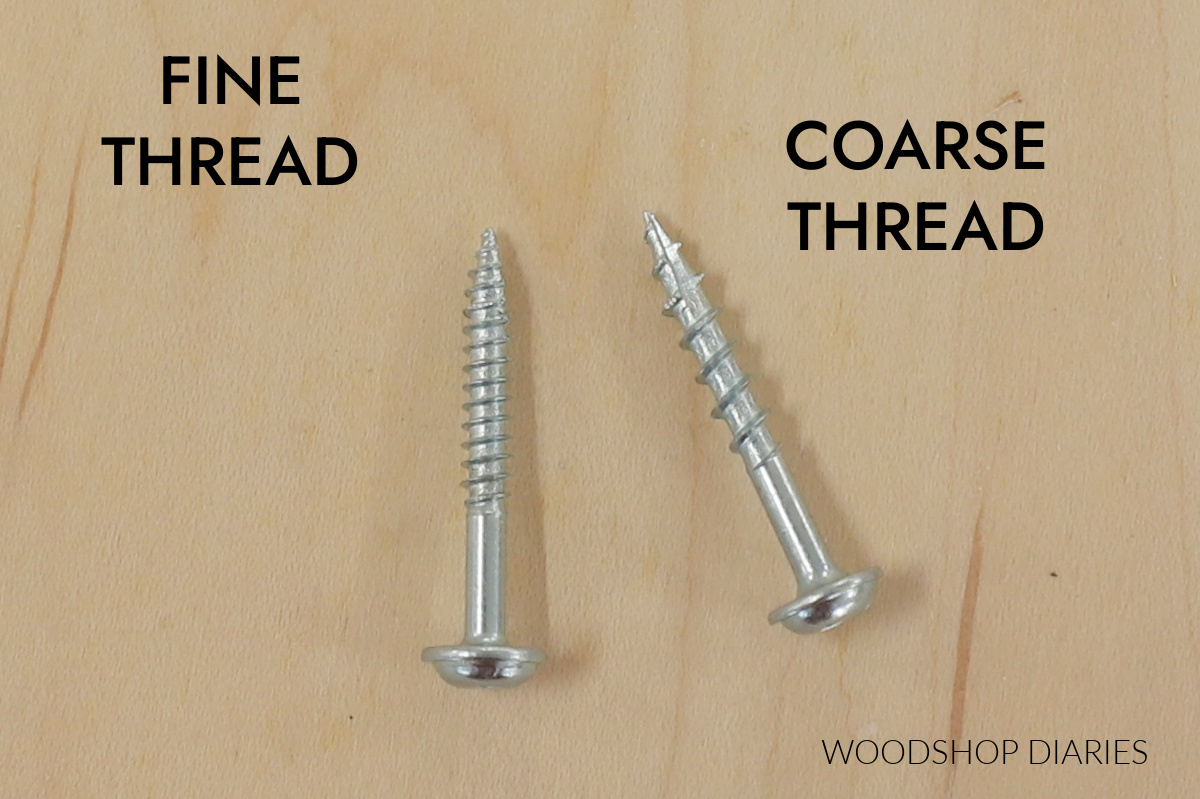
When possible, use COARSE threads on soft woods (like pine, spruce, fir) and plywood. And you should use FINE threads with hardwoods (like oak, maple, wanut, etc.).
Now, we have to also choose the correct screw LENGTH. Kreg has a really handy chart on their website for this.
But the basic rule of thumb in most cases is:
- Use 1″ pocket hole screws for ½″ pocket holes
- Use 1 ¼″ pocket hole screws for ¾″ pocket holes
- Use 2 ½″ pocket hole screws for 1 ½″ pocket holes
- Use 4″ pocket hole screws for 3 ½″ pocket holes
Learn more about how to choose the correct screw type for your DIY projects here.
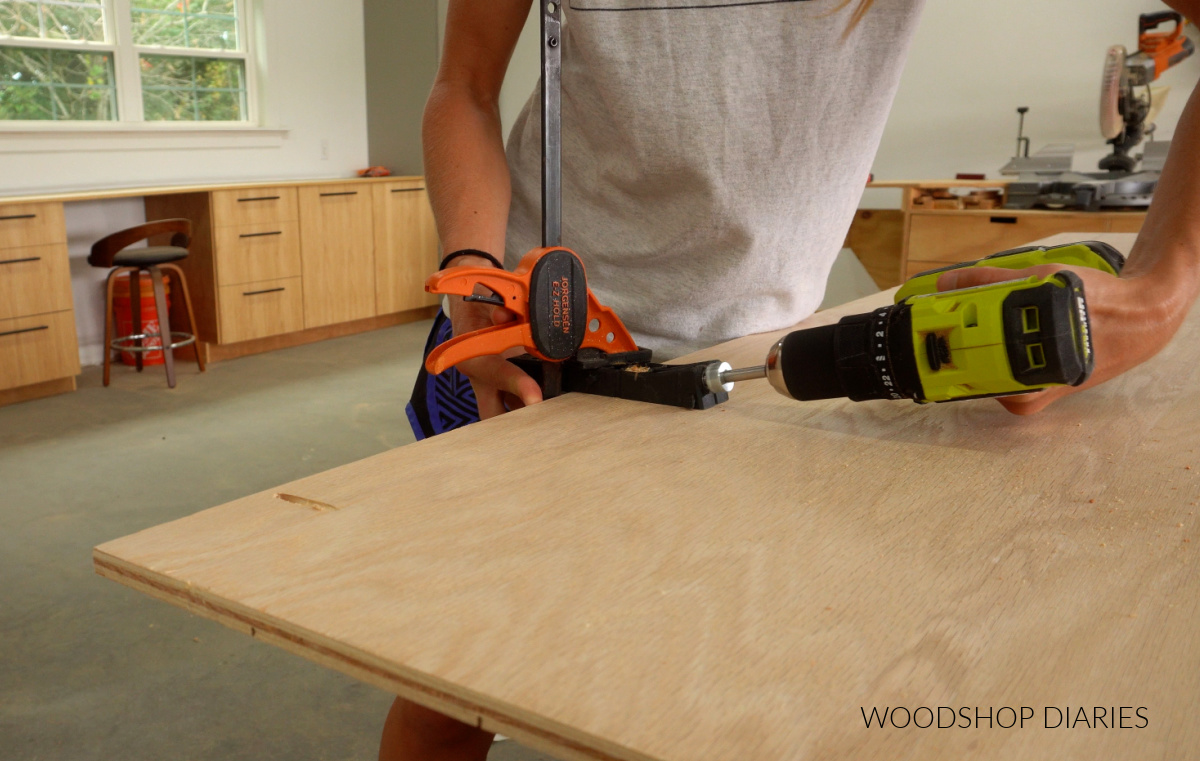
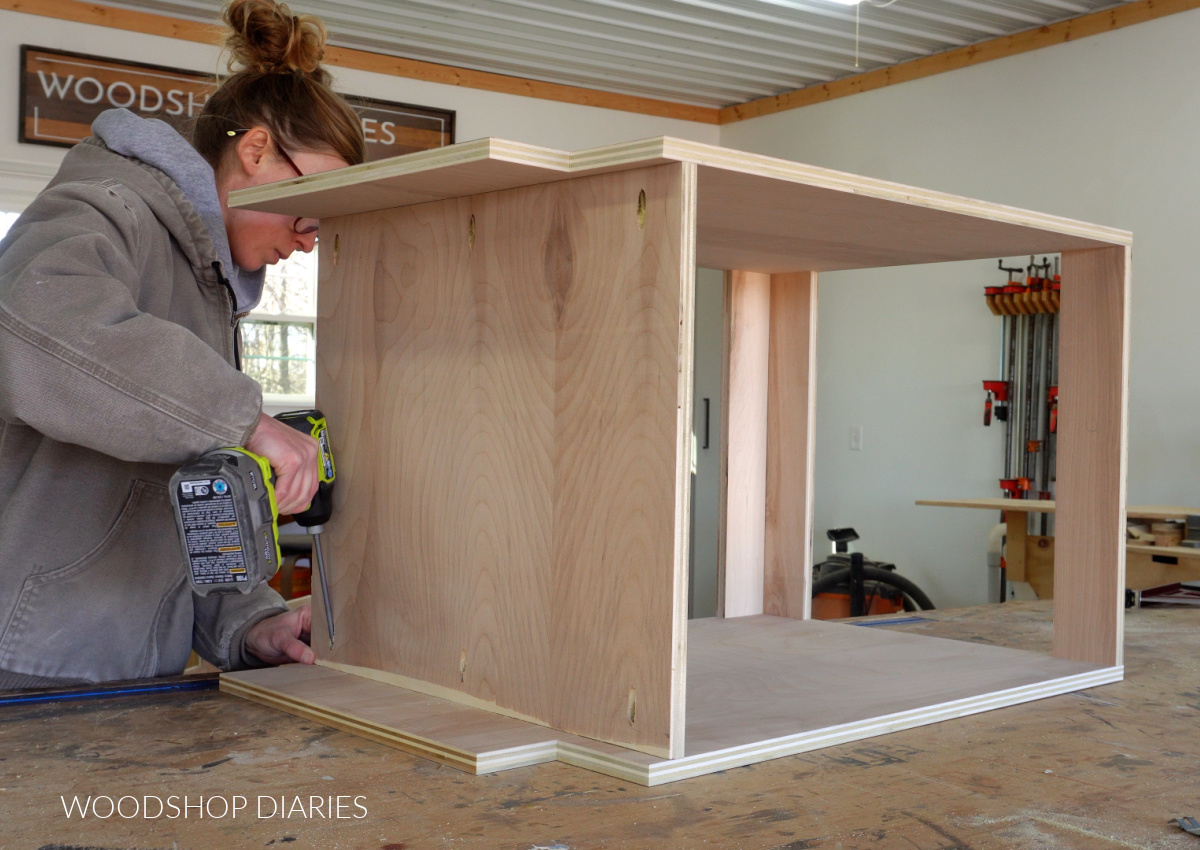
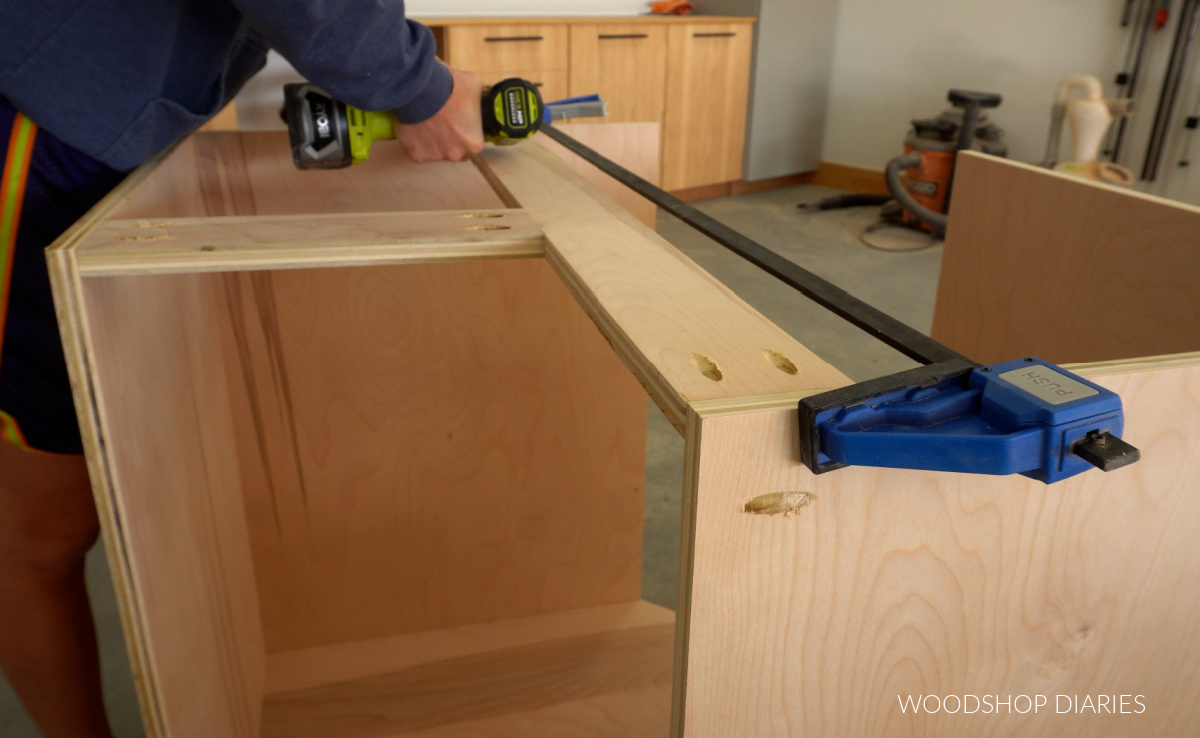
Step 5: Assemble Your Pieces
Once the pocket holes are drilled and the correct screw is chosen, it’s time to assemble!
Pocket holes don’t REQUIRE wood glue, but you can definitely add some for a stronger hold if you’d like.
Place your pieces together and use the long square driving bit to drive the pocket hole screw through the pocket hole and into the adjoining piece. You can use an impact driver OR a drill/driver to drive the screws. Just go slow and steady so you don’t overdrive or strip them out.
A few helpful tips:
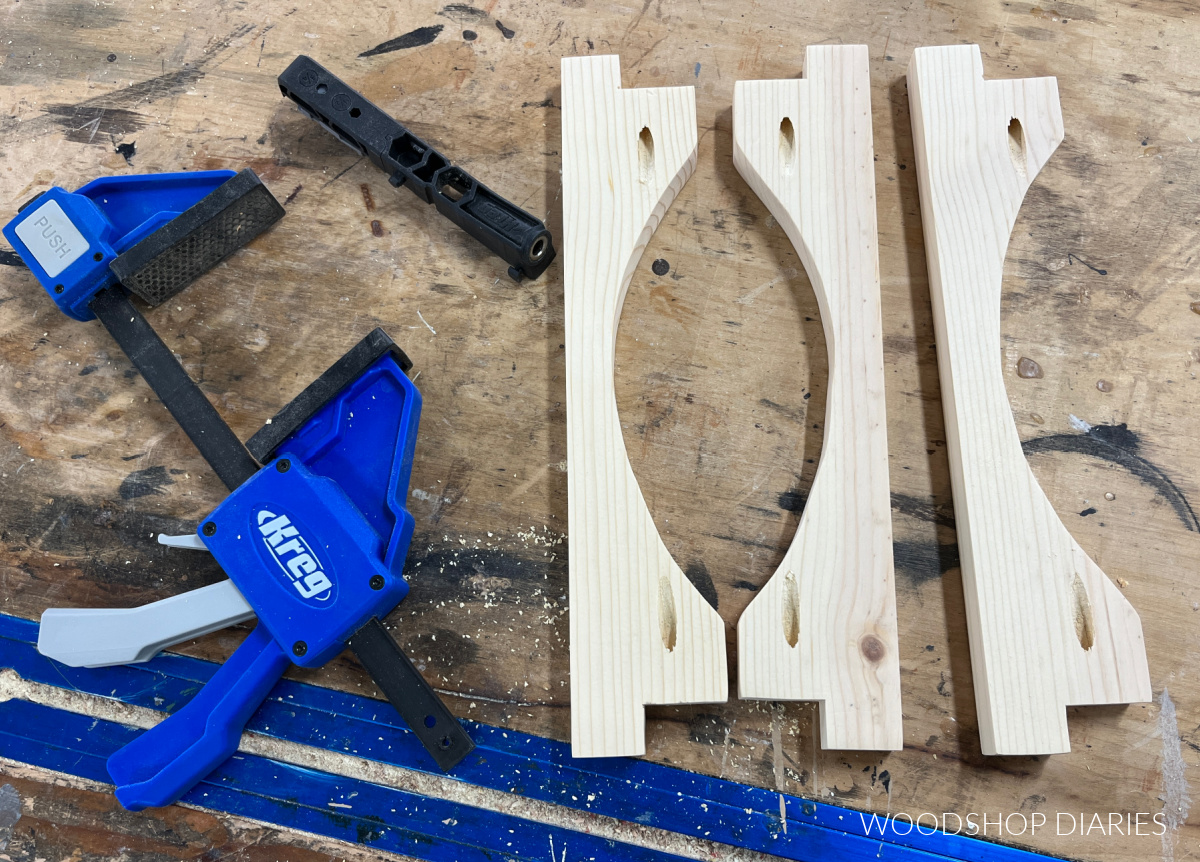
Clamp the piece(s) before driving the screw. If you are assembling pieces on the same plane (like a face frame), Kreg makes a really handy face clamp that works great.
If you are assembling pieces at a 90 degree angle (like when building a cabinet box), you can try corner clamps, or bar clamps to hold the pieces tight while you drive the screw.
Be careful not to overdrive your screws. Drive the screw until it pulls the pieces together tightly, then stop. Overdriving can cause the screw to pop out the other side or completely strip out making your joint useless.
If your pieces move when attaching, the best advice I have is to CLAMP and DON’T OVERDRIVE. In some cases, you can also try to brad nail the pieces together first to help hold them in place while you drive the screws.
Step 6: Plug Your Pocket Holes (Optional)
Once your pieces are assembled, there are several ways to fill any exposed pocket holes.
I’ll show you four easy ways to plug pocket holes in this post!
Final Thoughts on Using Pocket Holes in Woodworking Projects
Pocket holes are an excellent option for weekend woodworkers and DIYers who don’t have a shop full of tools, but want to build awesome stuff.
I hope this guide was helpful in getting you started to use pocket holes in your woodworking projects.
If you’d like to read more about pocket holes, be sure to follow along for posts coming out soon with these helpful guides:
- Which pocket hole jig should I buy?
- 4 ways to fill pocket holes
- 7 common pocket hole mistakes you may be making
If you aren’t already following along in our newsletter, be sure to sign up below to be the first to know about new projects and posts!
Be sure to pin this guide for later so you can reference it when you need it!
Until next time, happy building 🙂