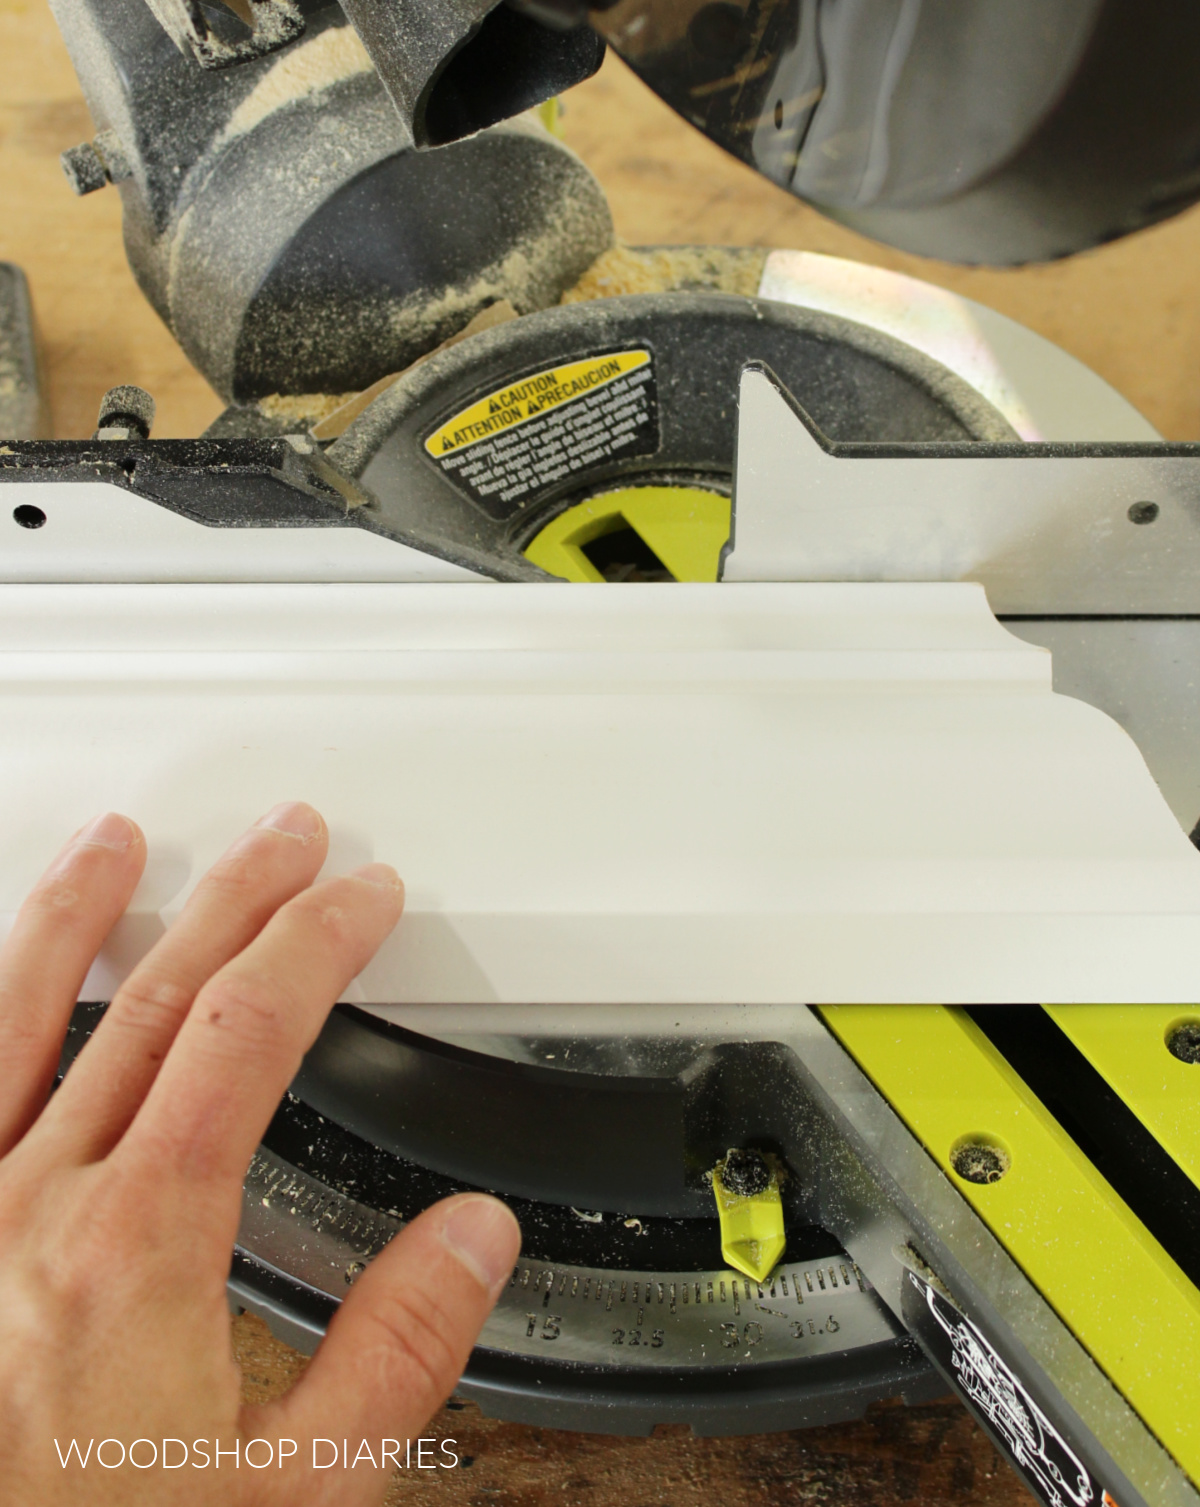
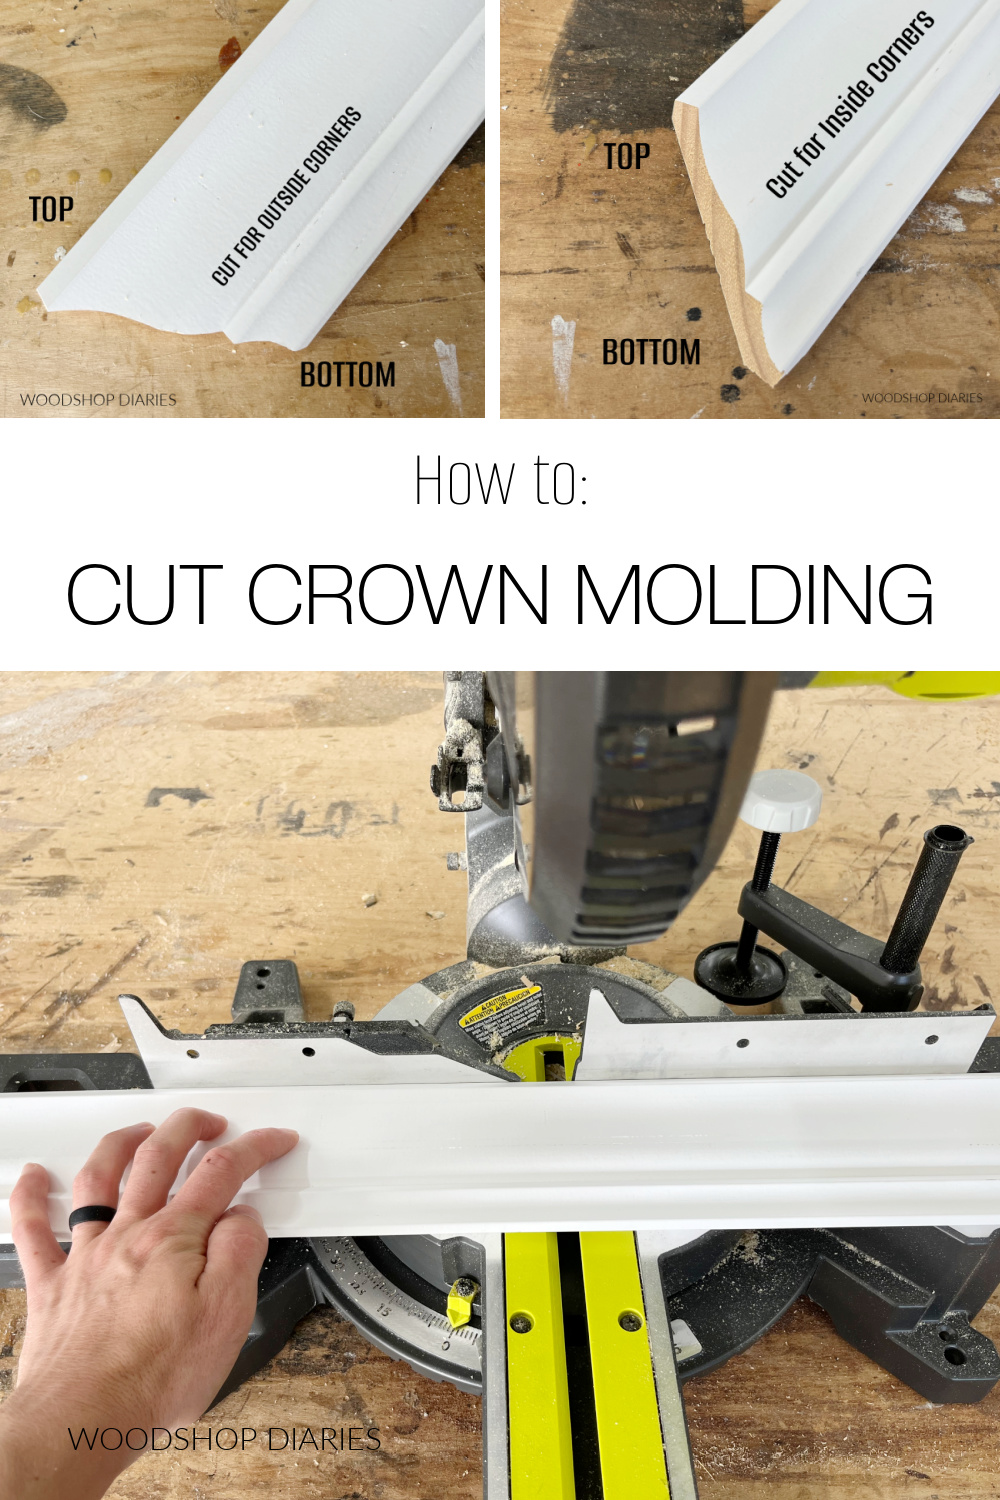
In this post, I’m sharing how to cut crown molding laying flat using a compound miter saw!
Crown molding is used add a decorative trim where walls meet a ceiling, on the tops of furniture pieces, and even on some window and door trims!
.
It really adds a lot of dimension to whatever you choose to put it on. The only downside…it can be confusing to cut correctly.
.
I shared in a previous blog post here how to cut crown molding standing up in a miter saw.
.
I’ve used that method for cutting crown molding for years and found it to be pretty simple, easy to remember, and straightforward.
.
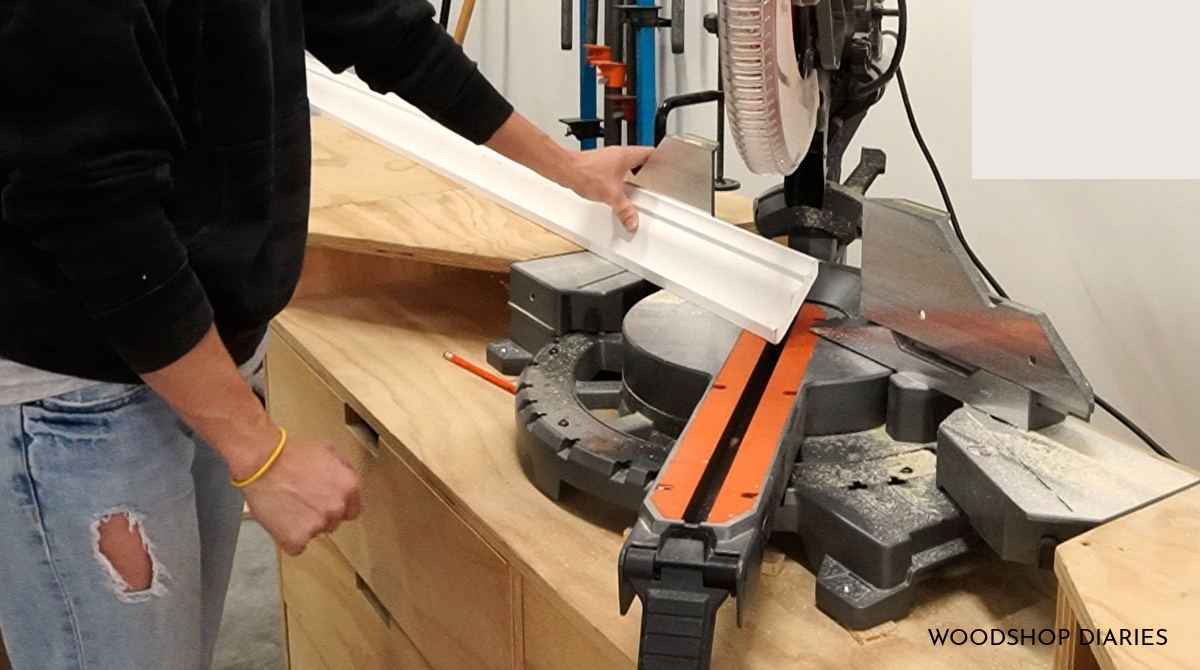
But just in case you ever run into a case where your saw is too small to cut it standing up, or you just want to try things differently, here’s an alternative way to cut crown molding laying flat in a miter saw.
.
*This post contains affiliate links. See website policies before starting any project.
What You’ll Need to Cut Crown Molding Laying Flat:
- COMPOUND Miter Saw (this method only works if your saw can both MITER AND BEVEL your saw)
- Crown Molding
- Measuring Tape
- Speed Square (helpful to double check angles on miter saw and molding)
Types of Crown Molding
Before we dive into the specifics, it’s important to know what kind of crown molding you are working with.
.
The angles you need to use to cut crown molding laying flat will vary based on the specific style and shape of the crown you are using.
.
There are thousands of sizes and styles of crown molding.
.
However, the most common type of crown molding you find precut in the lumber yard and the big box stores is this profile:
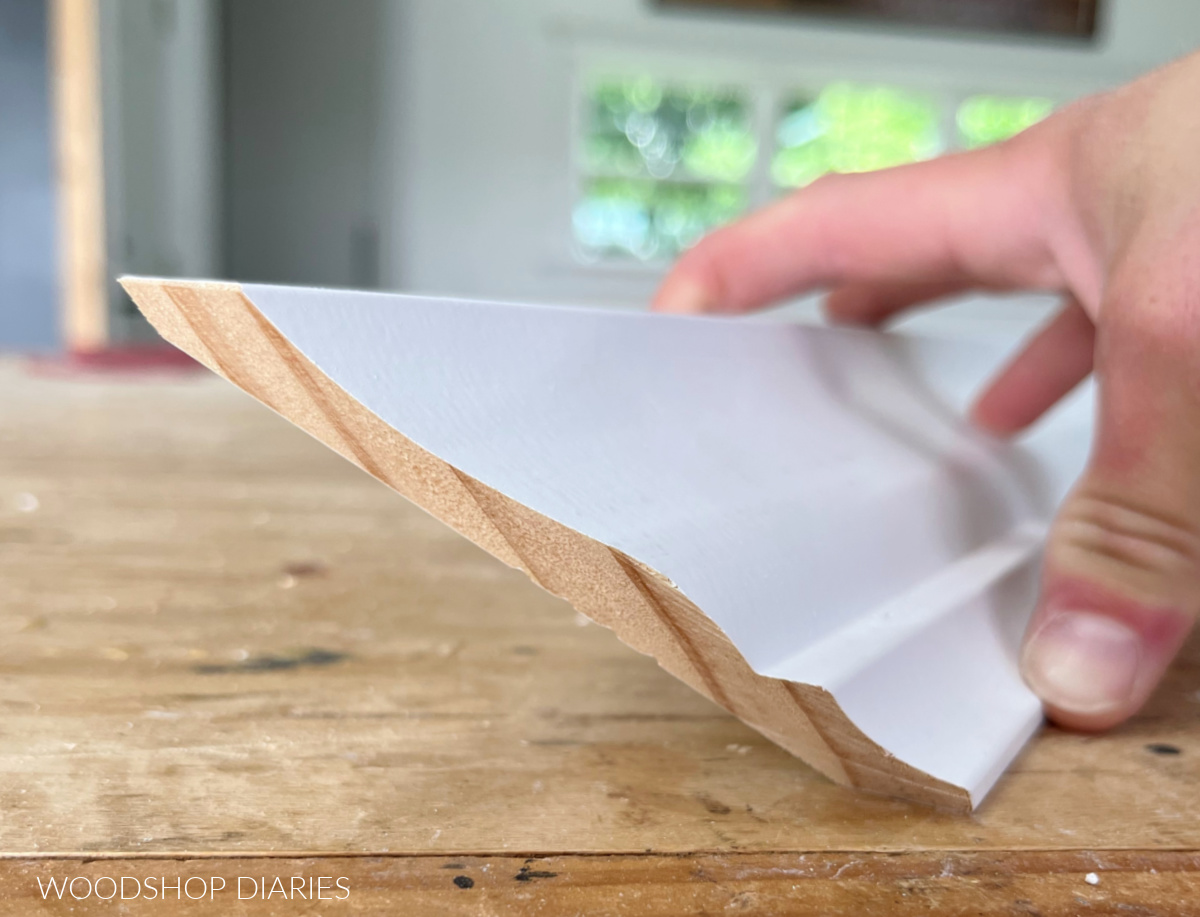
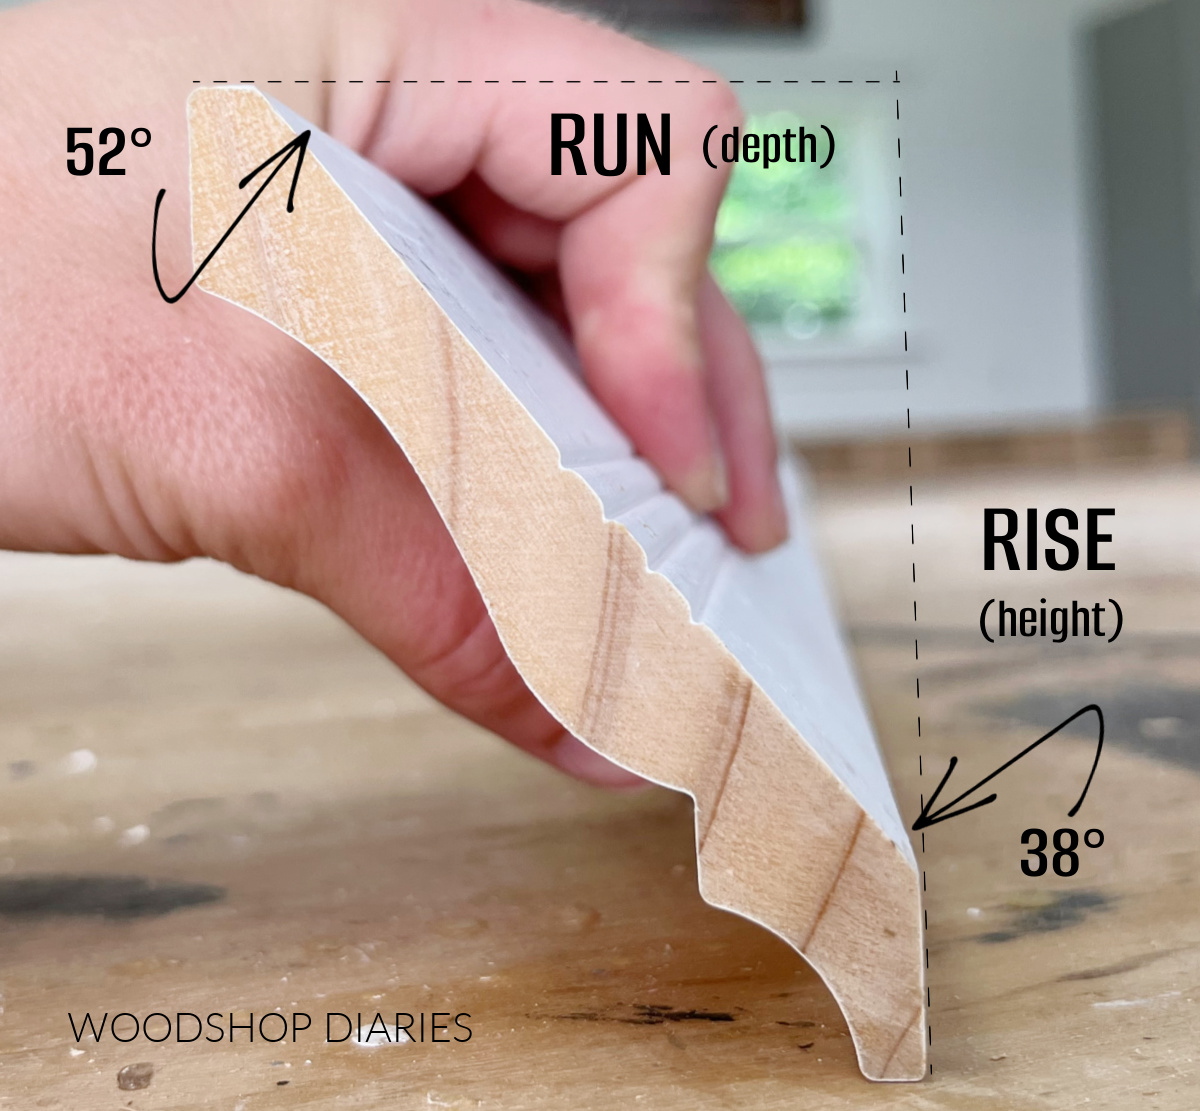
You’ll usually find this profile in several sizes with different rises and runs. The rise is how TALL the molding is when it’s installed and the RUN is how DEEP the molding sticks out once installed.
.
Note that this style particular style is taller than it is deep, which means that the inside angles can’t be 45 degrees.
.
They’re actually 38° and 52°.
.
So the following instructions work for this type of crown molding.
There are other, less common molding styles that may be 45 degree angles (or something else), but most likely, your off-the-shelf crown will be 38-52.
.
If you aren’t sure what yours is, you can measure your rise and run dimensions and do a little geometry to figure out your molding’s angles.
How to Set up Your Miter Saw To Cut Crown Molding
For basic 90° corners, there are some “magic numbers” you want to remember. But, luckily, most miter saws have them specifically marked to make it easier.
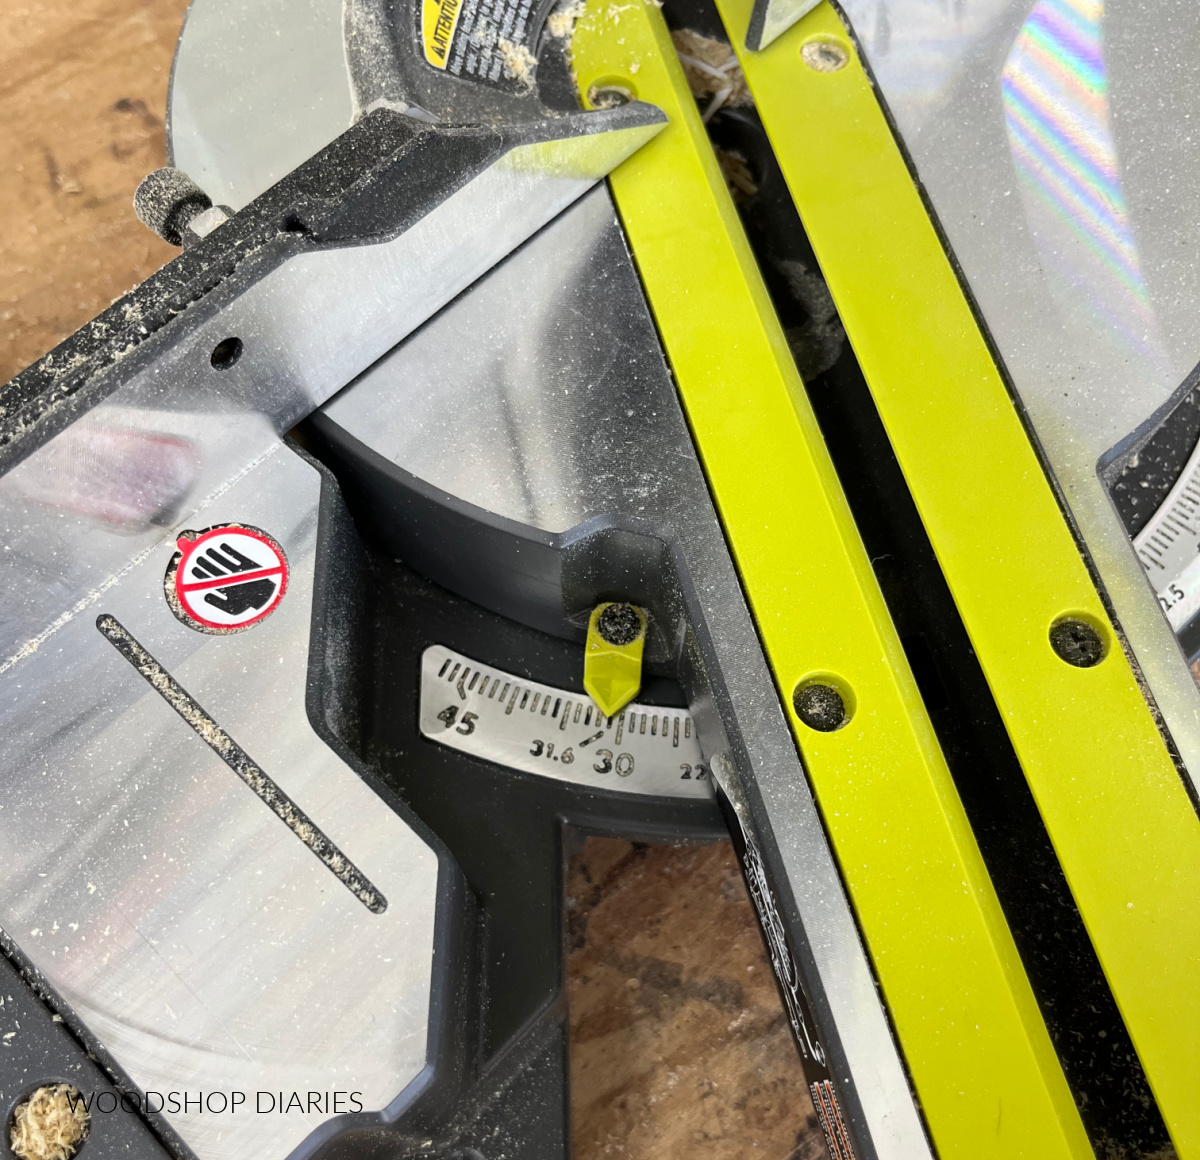
MITER ANGLE: 31.6°
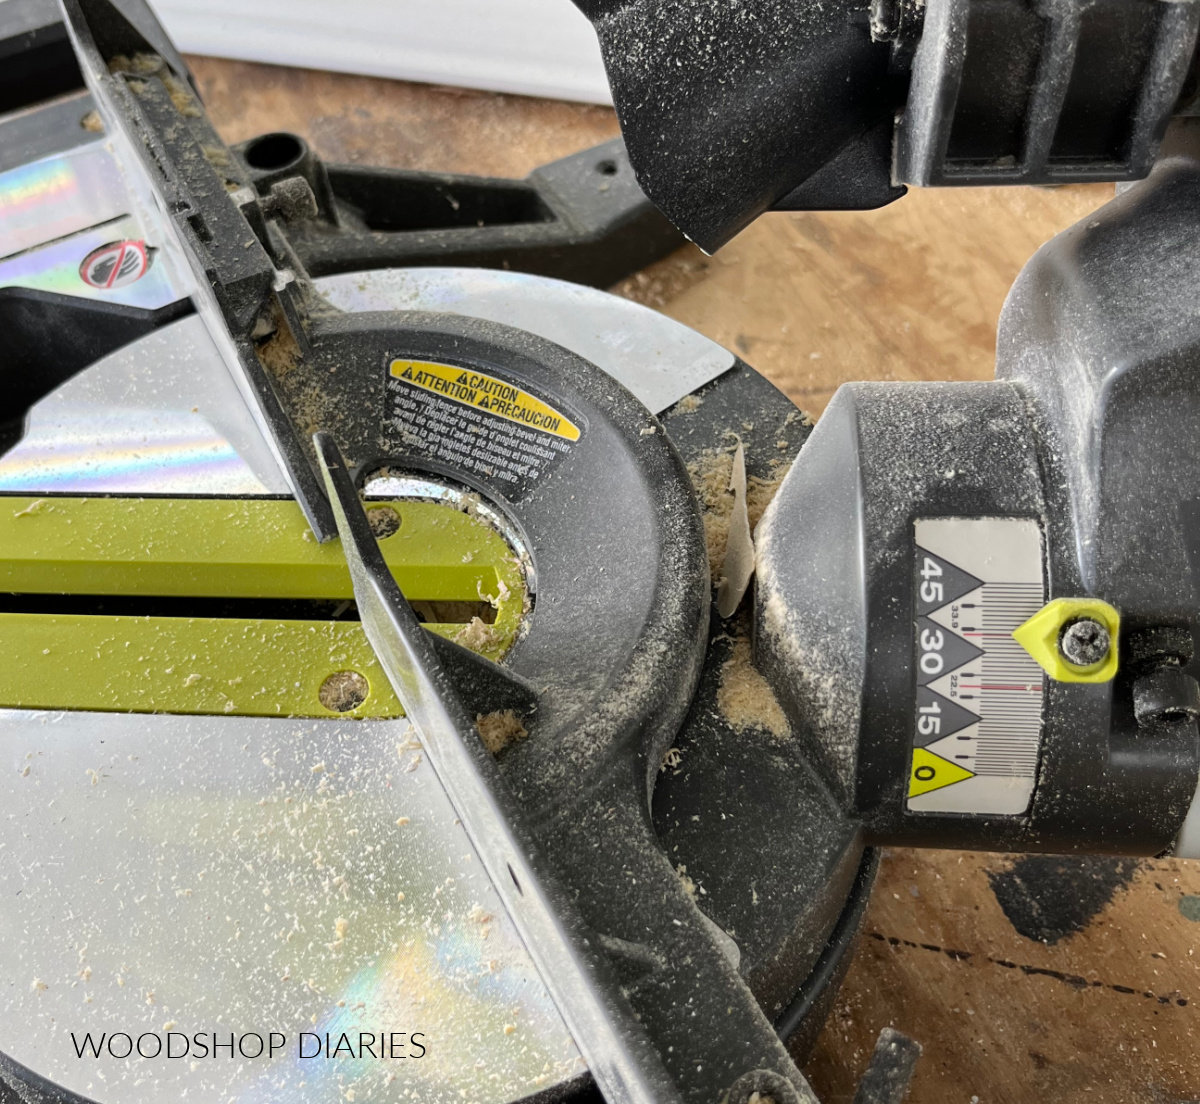
BEVEL ANGLE: 33.9°
.
*NOTE: THIS ONLY APPLIES IF THE CROWN MOLDING IS A STANDARD 38/52 DEGREE MOLDING.
.
The miter is the pivot angle of the blade. Notice that the 31.6 degree is specifically marked.
The bevel angle is the blade tilt. You typically adjust this on the back of the saw and some saws will tilt both directions and others will only tilt one direction.
.
Note that the 33.9 degrees is specifically marked.
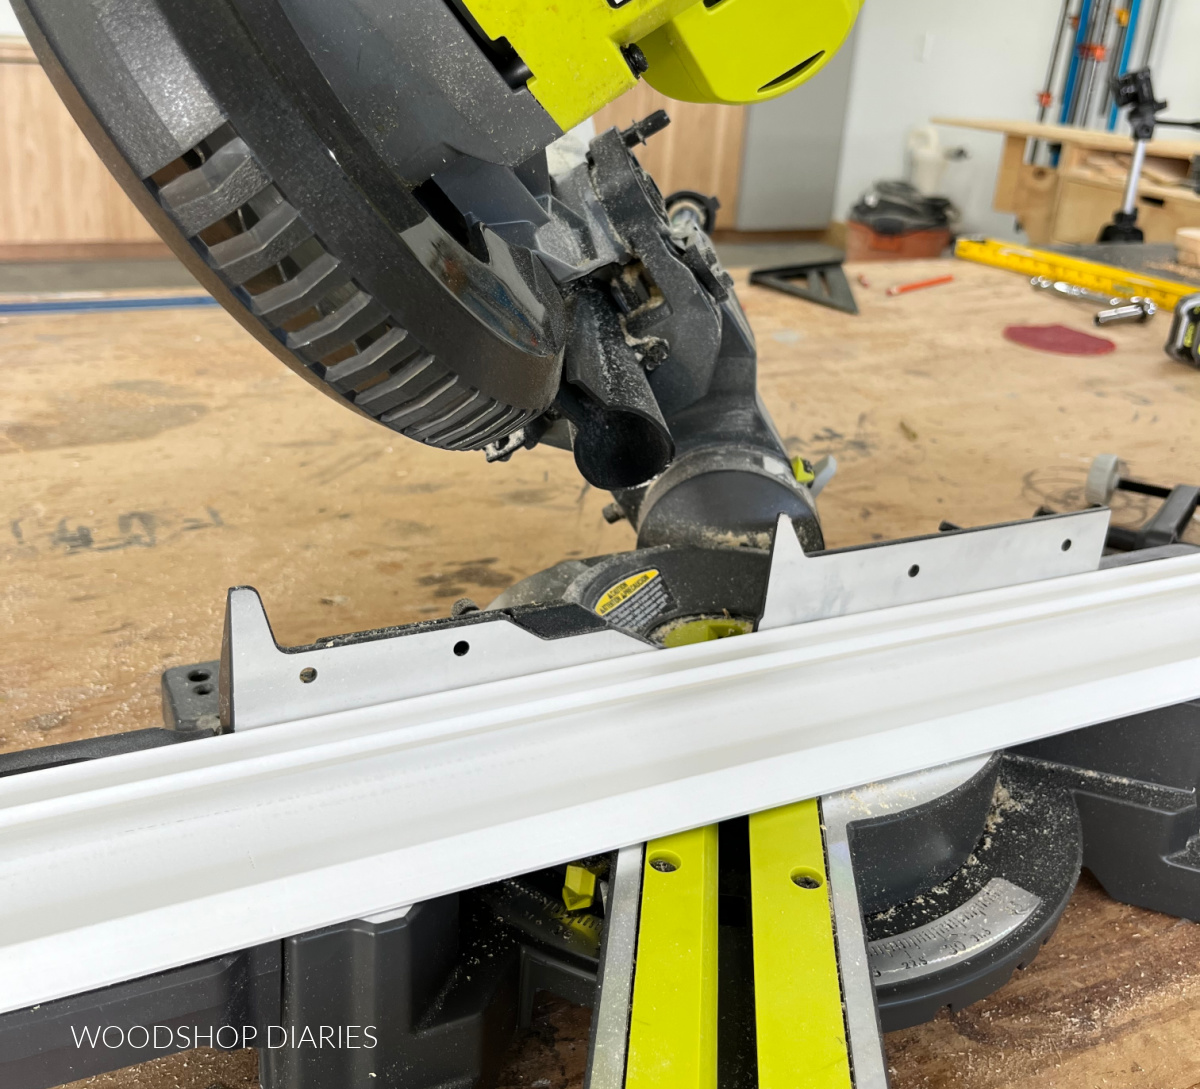
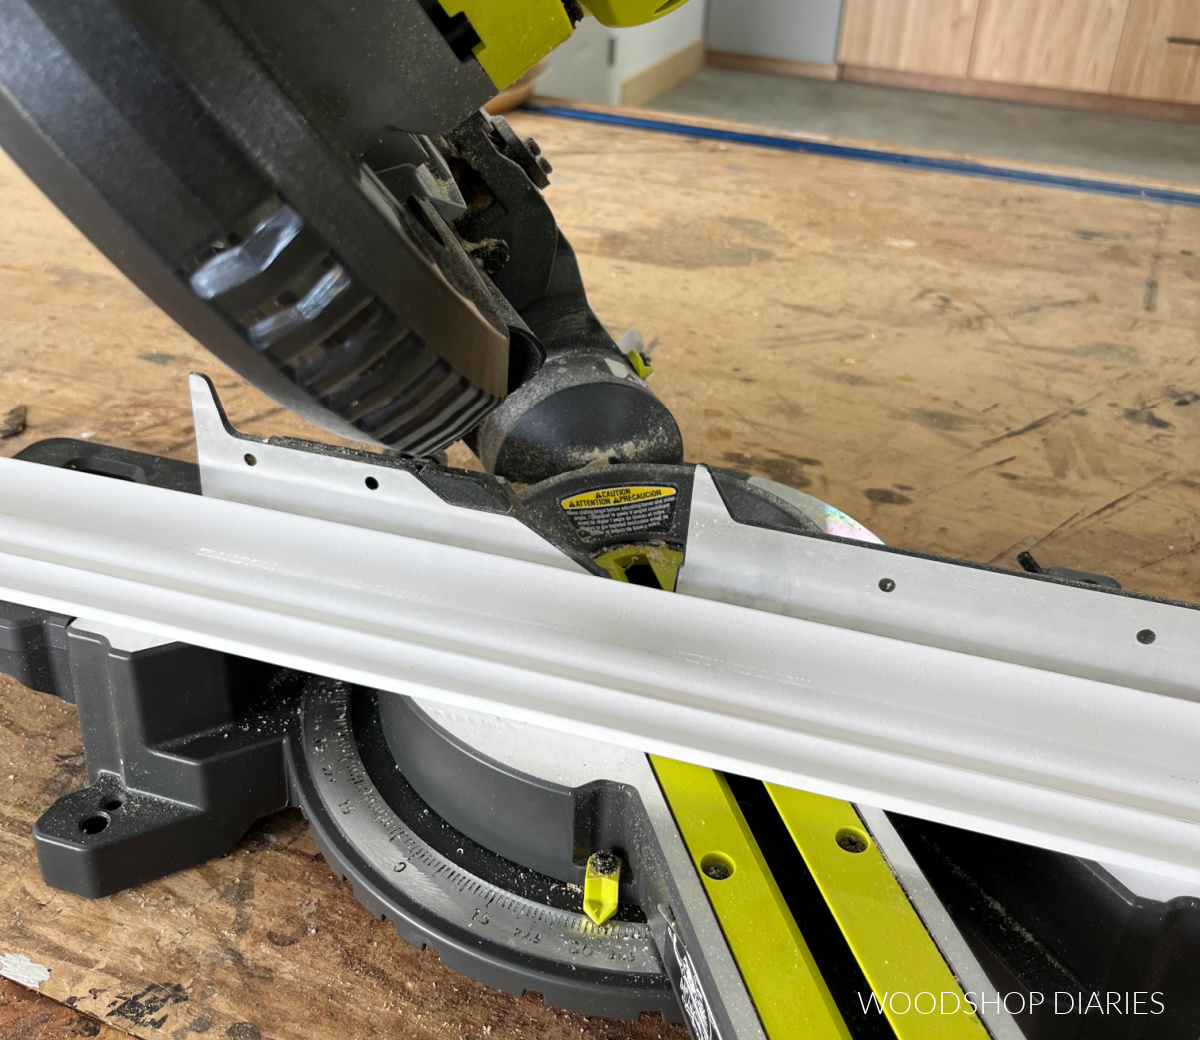
Now you can make your cuts! Just make sure to pay close attention to the direction of the cut on the piece and whether you are cutting for an inside or an outside corner.
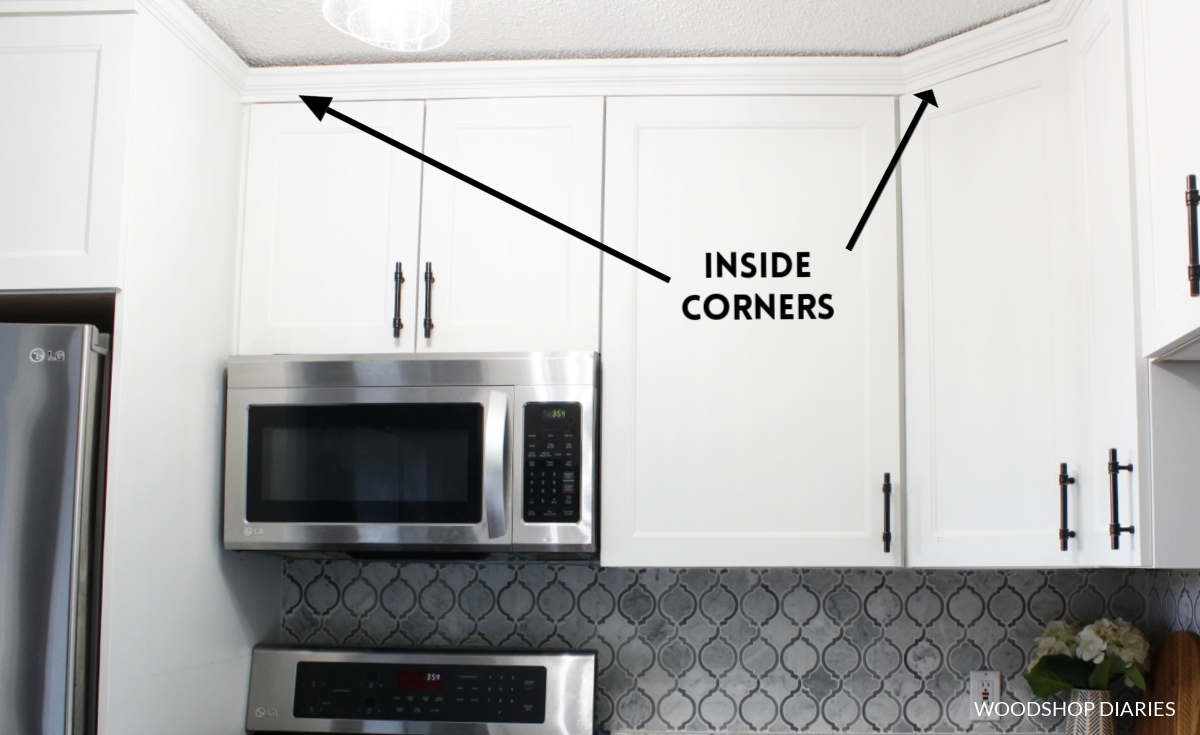
Cutting Inside Corners
Inside corners are like the corners that form on the interior of a room. They form more of an “enclosed” type space.
.
When installing crown molding on an INSIDE CORNER, you need to keep two things in mind:
- The bottom is longer than the top
- The back side is longer than the front

So, take note that when you make your cut, that the saw will cut the piece this way.
.
Here’s a real like example of these pieces on an inside corner for a visual:
You can flip the piece around in the saw, or swap mitering from the left or right side (as long as you keep the angle the same) in order to cut the piece the correct direction.
.
Below is an example–note that the bottom of the crown molding is toward the back, so when the cut is made, the piece on the left of the blade will be cut for an inside corner–bottom longer than top and back side longer than front.
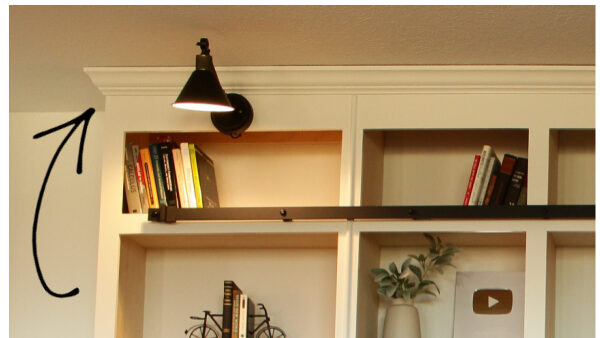
Cutting Outside Corners
Outside corners are the corners that “stick out” into a space.
.
When cutting crown molding for OUTSIDE corners, you need to keep two things in mind:
- The top is longer than the bottom
- The front side is longer than the back
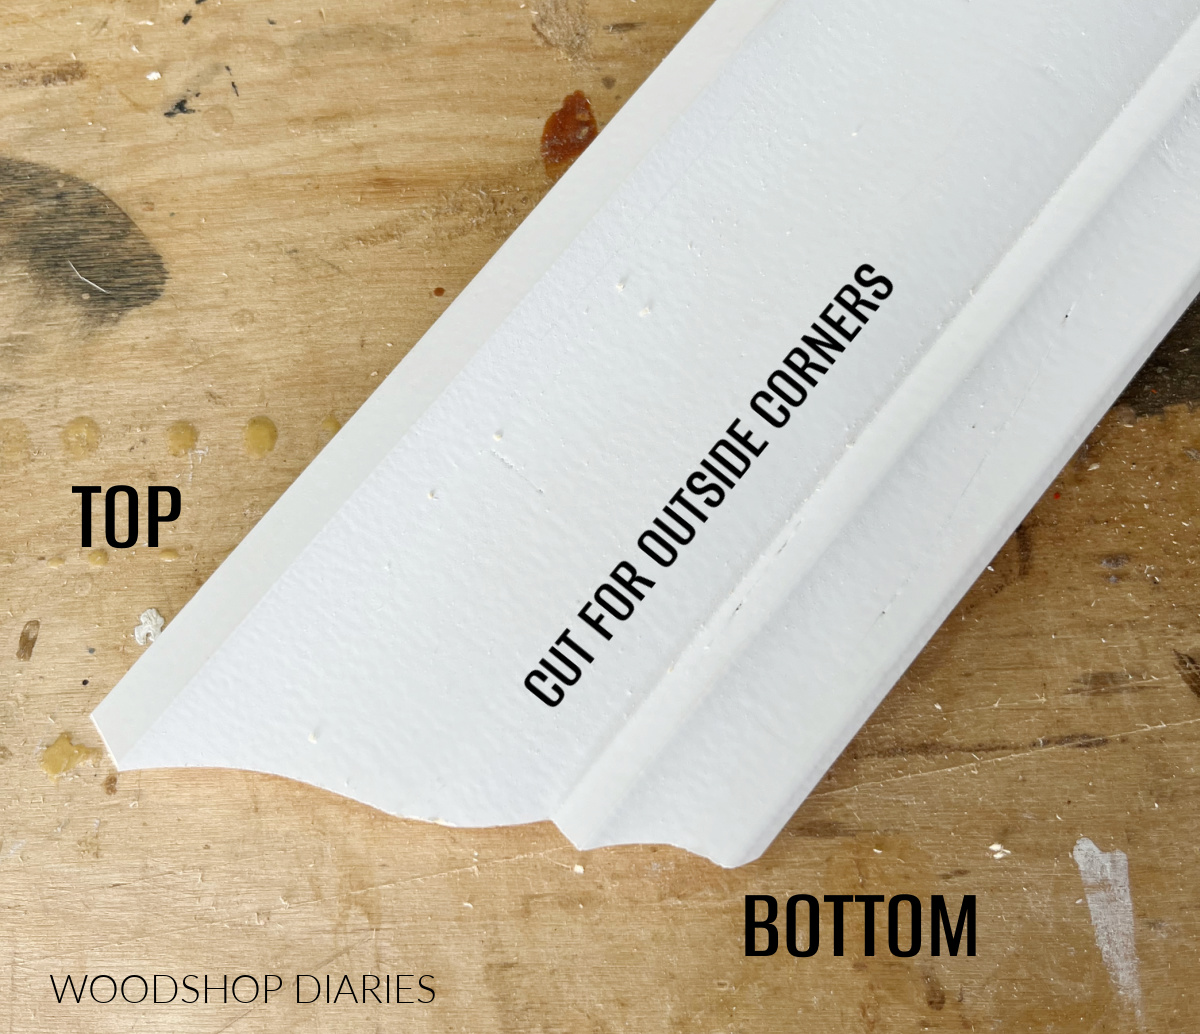
So, take note that when you make your cut, that the saw will cut the piece this way.
.
Here’s a real life example so you can get a visual:
You can flip the piece around in the saw, or swap mitering from the left or right side (as long as you keep the angle the same) in order to cut the piece the correct direction.
.
Below is an example–notice that the top of the crown is toward the back and when cut, the piece on the right will be cut for an outside corner. The top will be longer than the bottom and the front will be longer than the back.
And, the piece on the left would be an inside corner cut–so, you can see, there are multiple ways to set up your cuts. Flip it around as needed and just pay attention to cut them the way you intend to.
For Cuts on Corners Not 90 Degrees
To be honest, once you steer away from 90 degree corners, cutting crown molding flat in the miter saw gets a little complicated.
.
You can find a chart here with some numbers that may help, and another here, or, you can figure out the angles yourself using a little trigonometry.
.
However, I find that it’s a lot easier to just cut it standing up in the saw instead.
I have a full post on how to cut crown molding standing up in the miter saw here. That post also includes tips on how to adjust as needed if your walls (or cabinet, etc) are a little off square.
.
I also explain how to splice two pieces of crown molding together in that post as well, so it’s full of additional info you might find helpful while cutting crown molding 🙂
.
Once you’ve cut your molding, it’s time to install it. Check out this post to learn what type of nail gun is best to use to install moldings and trims.
.
And if you’re ready to practice your cuts, here are some project ideas you can try them out on!
I hope you found this helpful and if you’d like to see more woodworking basics, head over to the Getting Started Page!
.
To stay up to date on the latest projects, plans, and DIY tips, be sure to sign up for the FREE Woodshop Diaries newsletter:
Don’t forget to pin this or share to your favorite social channel to save it for later!
Until next time, friends, happy building! 🙂