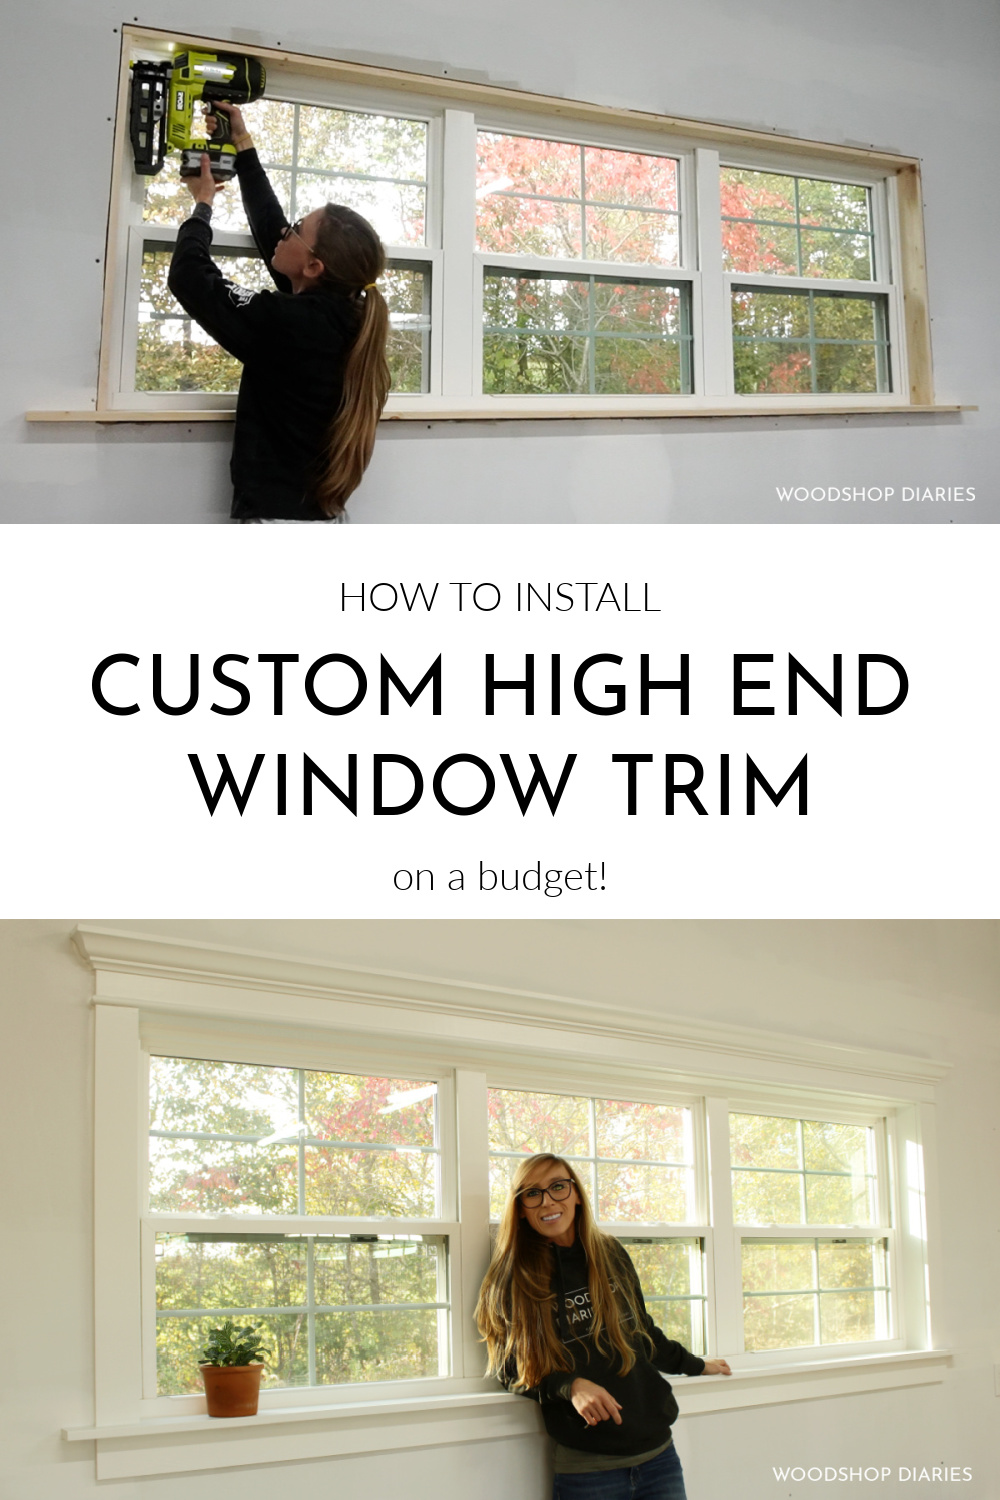
In this post, I’m sharing how to install your own custom DIY window trim using basic lumber on a budget.
*This post is sponsored by The Home Depot as part of the #THDProSpective program. This post contains affiliate links. See website policies page for details.
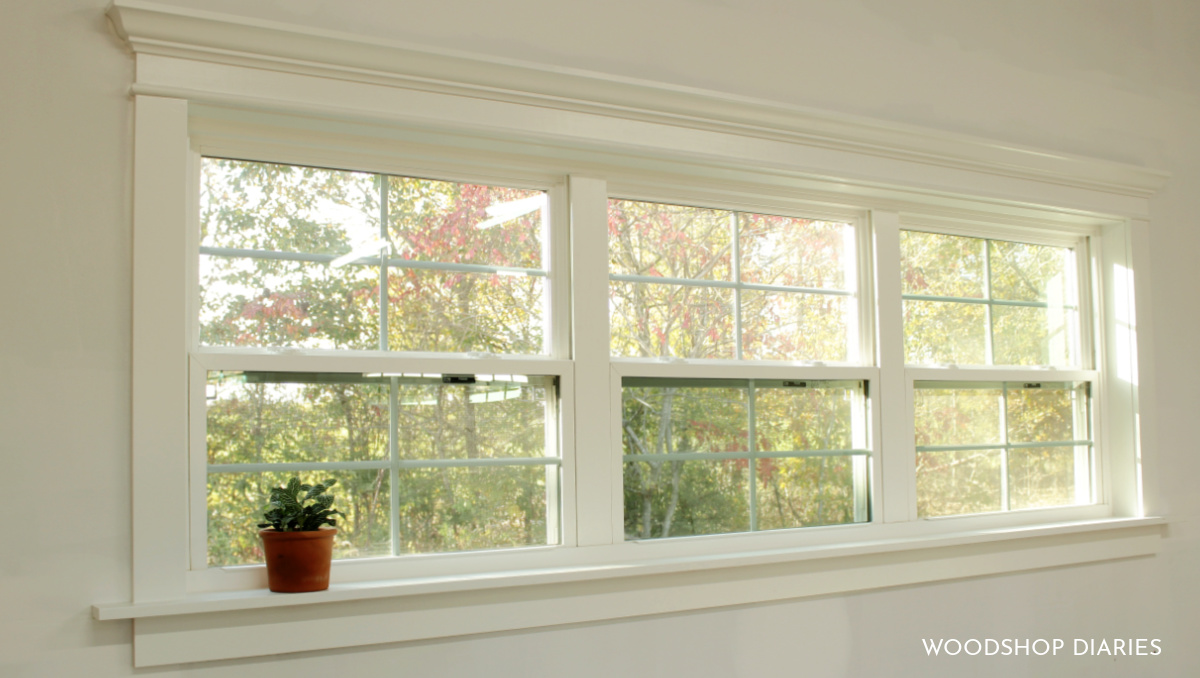
Installing new window and door trim is one of my favorite ways to upgrade the interior of a home—or in this case, the interior of my workshop.
.
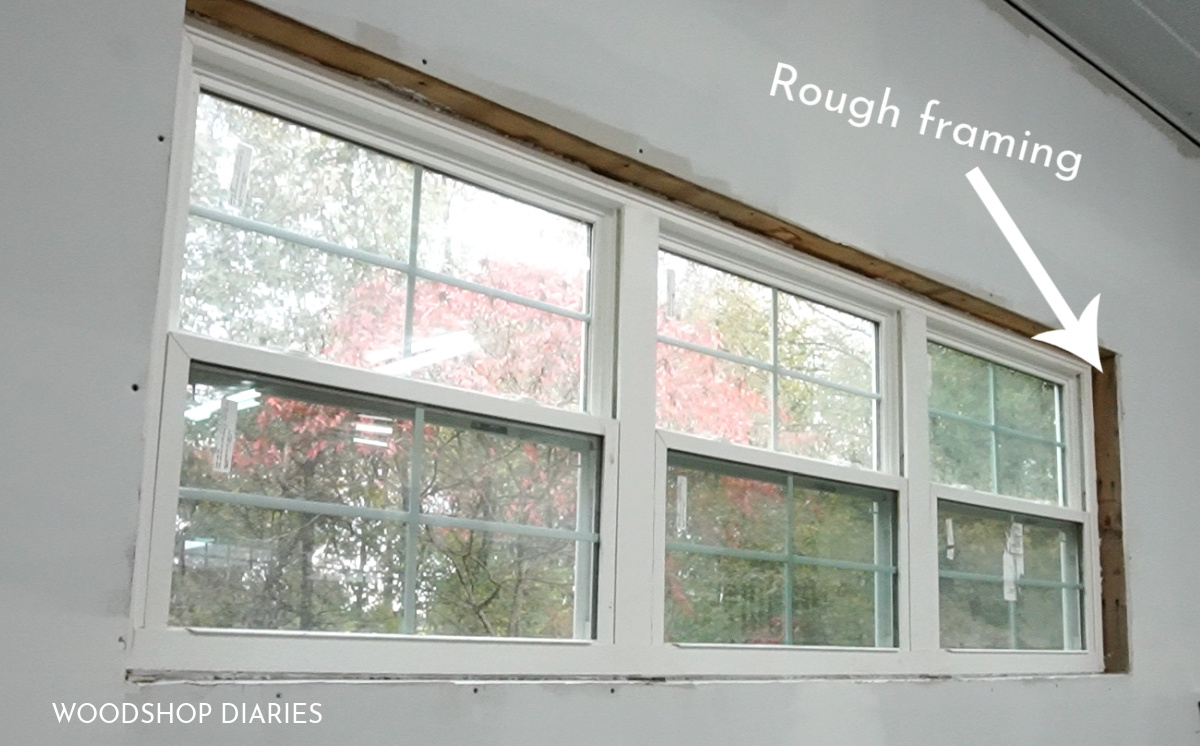
I’m installing this DIY window trim on new construction windows and doors in my new workshop—so there wasn’t any existing trim here yet. However, I’ve done this many times on doors and windows with existing trim.
.
If your window already has trim on it, you simply remove it first. You can use a prybar and a hammer to carefully remove the trim around your window to get it down to the rough 2×4 window frame like you see here.
I’ve provided a YouTube video here showing how to install this custom DIY window trim to your own windows, and also have the written step by step tutorial below:
BEFORE TRIMMING OUT YOUR WINDOW:
If there are any gaps between your window and rough framing, you should seal these before adding trim. You can use some straw foam to fill these in, allow to dry, then cut it flush to the window.
.
Also, be sure to clean your window and remove any residue from the frame—mine was…pretty filthy haha.
A NOTE ABOUT WALL THICKNESS:
Normal wood framed homes and buildings have either 2×4 or 2×6 exterior walls. In my case, I have 2×4 walls and I used a 1×6 for my window sill/ledge and used 1x4s for the inside trim on my window.
.
However, if you have 2×6 walls, you will need wider boards since your wall is thicker. I’d recommend using 1×8 for the ledge board and 1x6s for the inside frames. (*This is noted in the materials list below)
MATERIAL QUANITITIES:
I’ve listed basic board sizes I used in this project below, but the number/length of boards you will need will vary depending on your window size and how many you are trimming out.
.
I recommend reading through the tutorial, then measuring your window and figuring rough sizes for each piece in the tutorial, adding them up, and figuring how much wood/material you will need.
For this DIY window trim project, you will need:
Materials:
- 1×6 board for window ledge/sill (or 1×8 if you have 2×6 walls)
- 1×4 boards for inside window trim (sides and top)–(or 1×6 if you have 2×6 walls)
- 1×4 boards for outside window trim (sides, top, bottom)
- Crown molding
- Half round molding
- 16 gauge 2″ nails
- 18 gauge 1 ¼″ nails
- Wood Glue
- Painters tape
- Wood Putty
- Caulk (NOT SILICONE–make sure it’s paintable)
Tools:
- Ryobi AirStrike 18 gauge nailer
- Ryobi AirStrike 16 gauge nailer
- Miter Saw
- Table Saw
- Jig Saw
- Tape Measure
- Speed Square
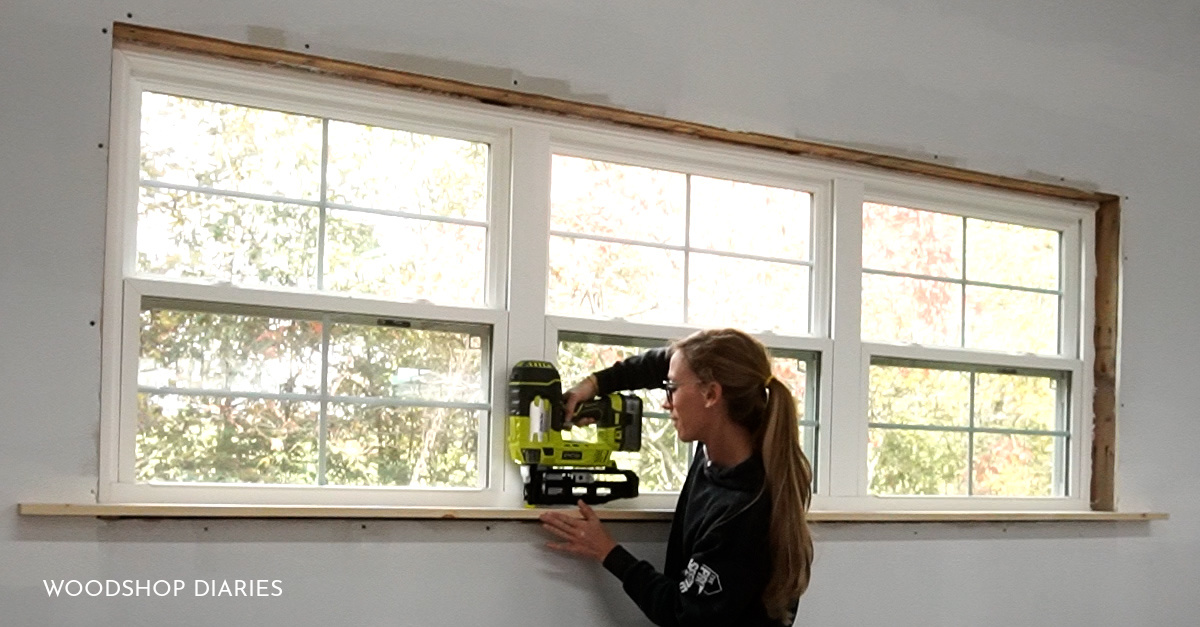
Step 1: Cut and Install Window Sill
I add the window sill first, so I grabbed my 1×6 for this. I measured the inside opening of the rough window frame—so between the 2x4s the window sits inside. Find this WIDTH (left to right measurement).
.
Because I’m adding 1x4s (which are 3 ½” wide) on each side of the window on the outside, I need to add 7” to this opening measurement. But, I also usually have about a 2” overhang on each side, too.
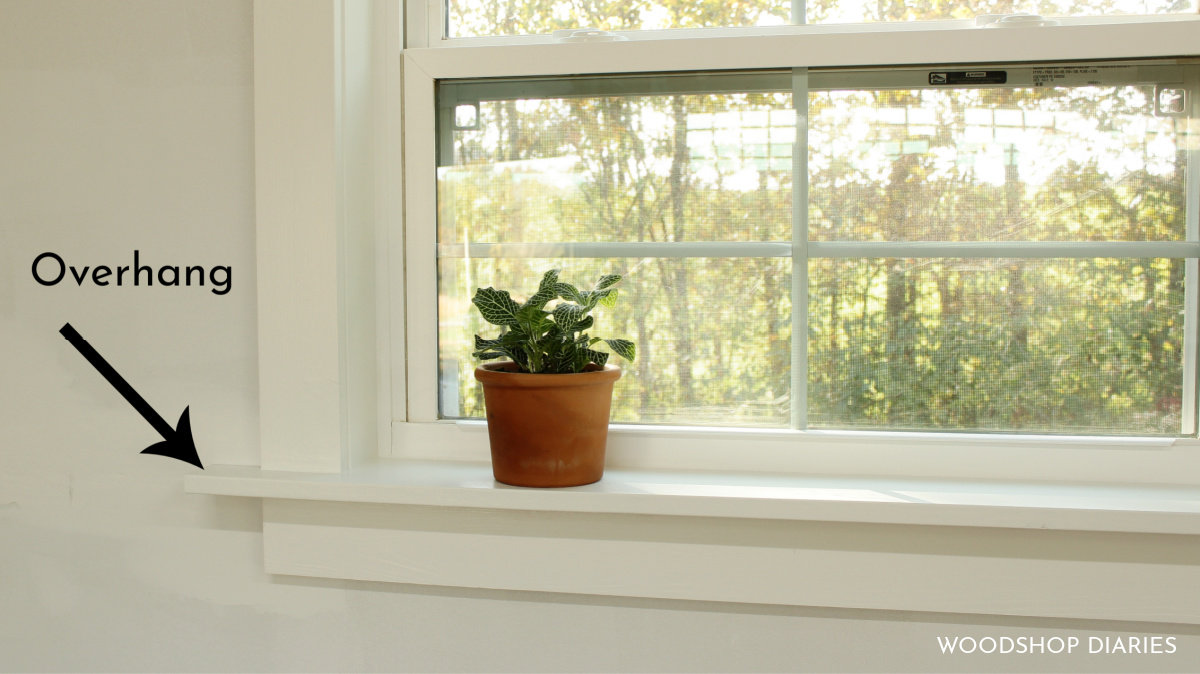
So the overall length of this 1×6 window sill board needs to be = Inside opening + 7” + about 4” for overhang on each side.
.
I trimmed my 1×6 to this length, then marked the center of the board. (Ex. If you cut your board 60″ long, mark it at 30″.) I took the inside opening measurement, divided by 2 and marked this distance on the board on each side from that centerline.
.
I went back to the window and measured from the front of the window to the front of the drywall in multiple places and took the average.
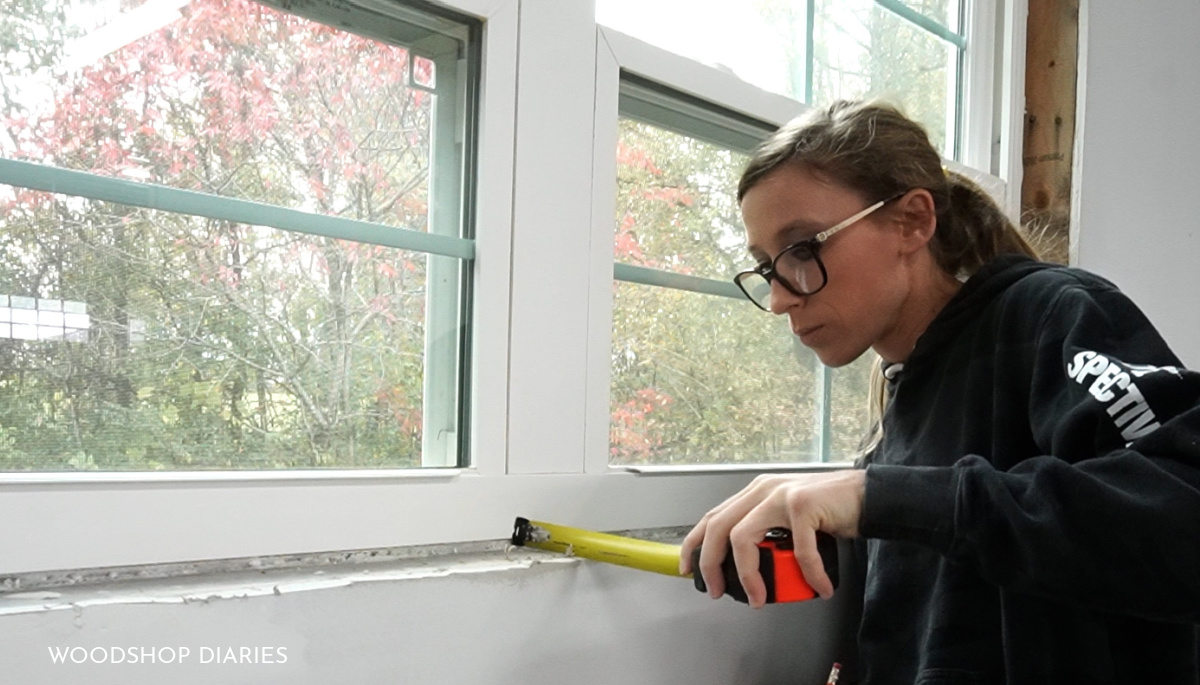
Theoretically this should be the same across the entire length, but in reality, it rarely is. Using the average seems to work pretty well.
.
I marked this measurement from the edge on each end of my 1×6 and used a square to draw out these marks so I can see where to cut for the window sill to sit into the window opening.
.
You are basically measuring and marking your 1×6 so that it will sit INTO the rough frame opening, but will wrap around and stick out each end across the drywall.
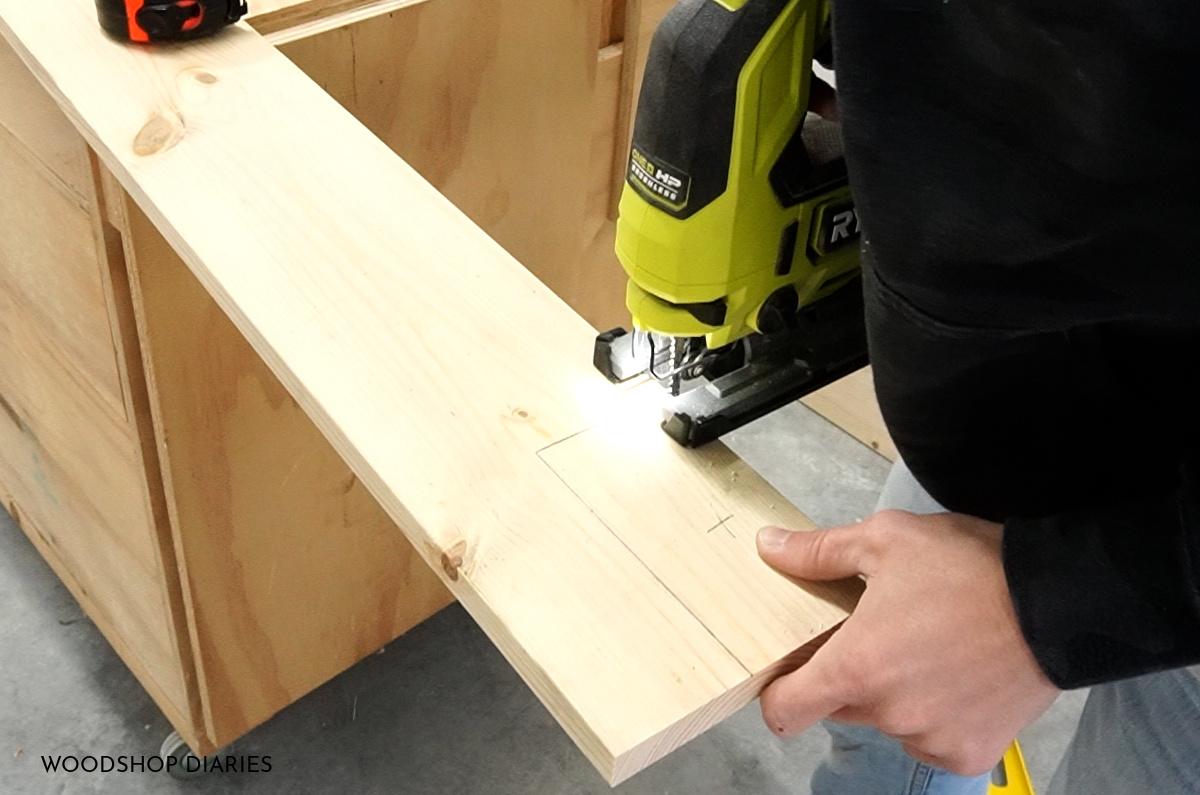
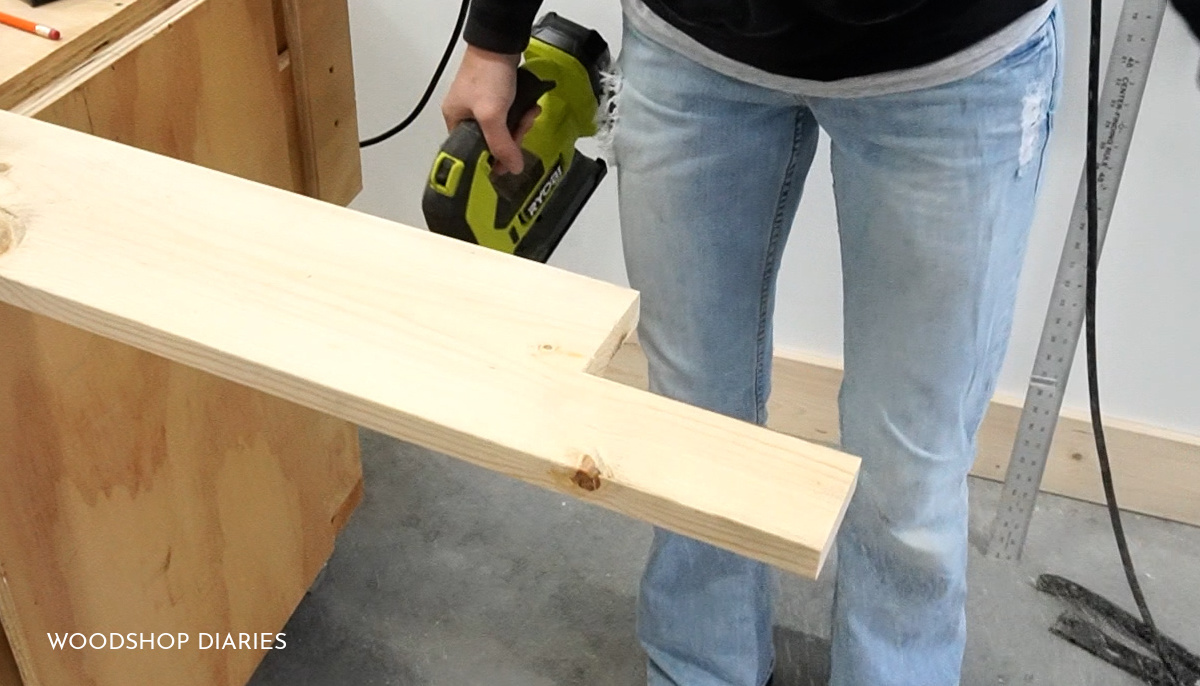
I used a jig saw to cut along these lines, then tested the fit in the window.
.
You may need to trim and adjust slightly, but once it fits well, It’s time to nail in place.
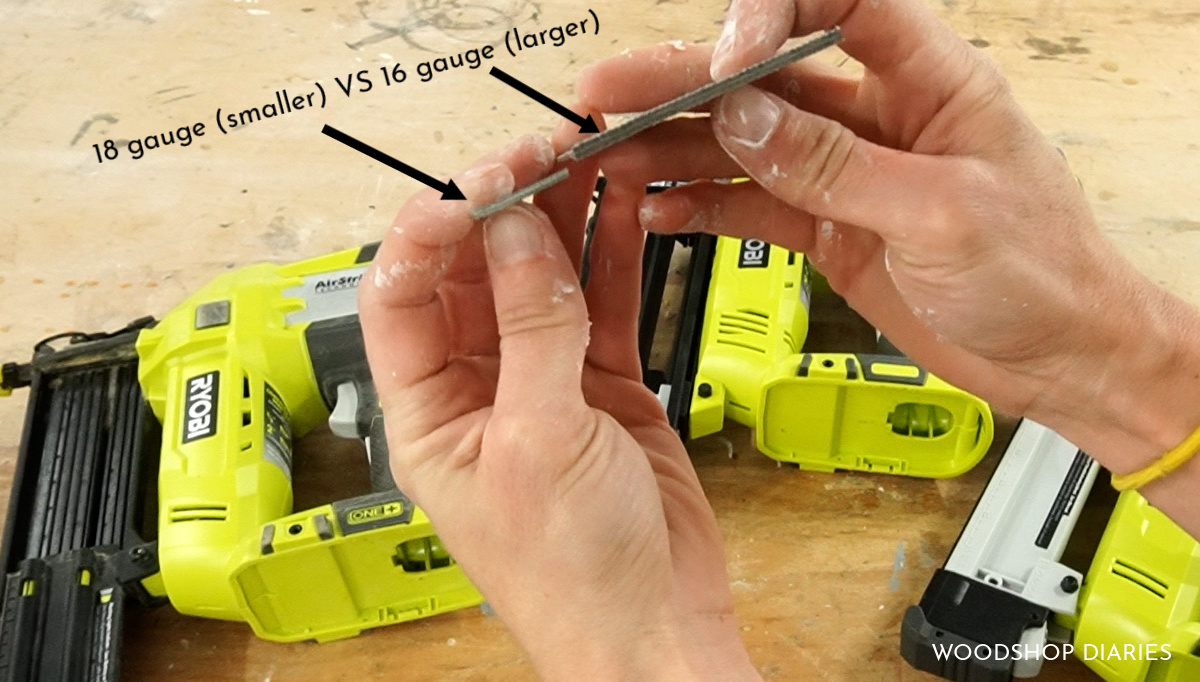
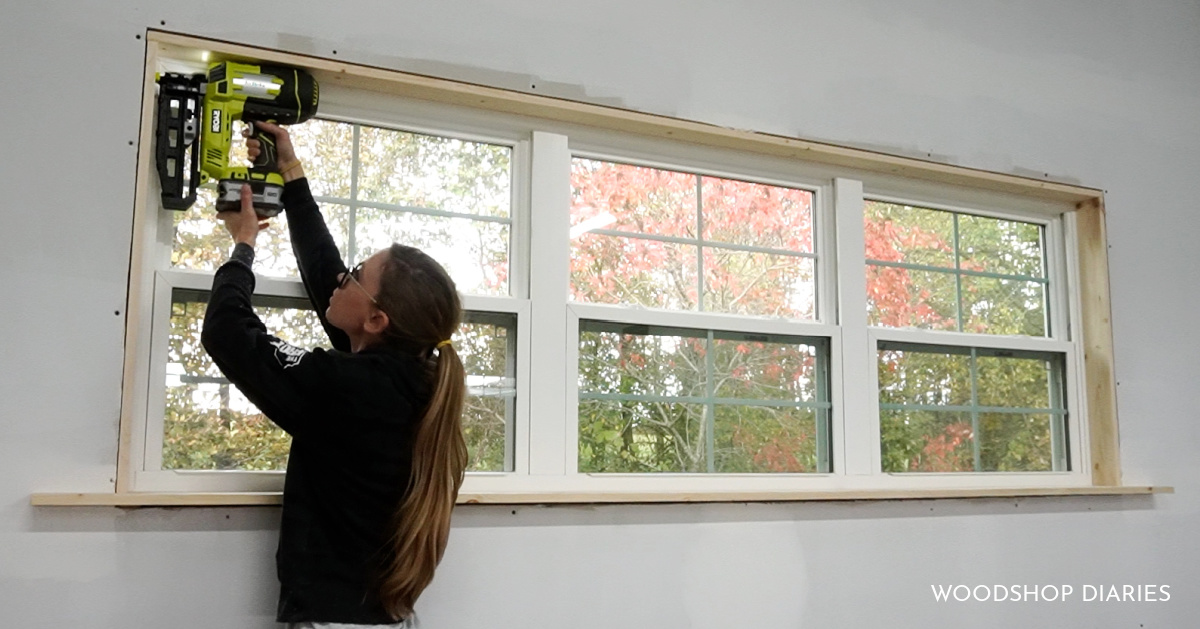
A NOTE ABOUT NAIL GUNS:
Throughout this project, I relied on my Ryobi AirStrike battery nailers. I ditched my air nailers several years ago because I got tired of dragging the cords and heavy compressor around. I picked up an AirStrike and never put it down.
.
I’ve been using my 18 gauge Ryobi AirStrike nailer for over 4 years now, and recently added the 16 gauge Ryobi AirStrike to my shop. The 16 gauge (larger) is on the left and the 18 gauge (smaller) is on the right below.

I really like using 16 gauge for door, window, and larger, thicker trim as it’s a larger nail, so it holds a little stronger.
.
But I like to keep the 18 gauge handy for smaller, more delicate pieces like the crown and half round molding I’m adding later.
A nail gun is actually one of my top five recommended tools for beginner woodworkers! Check out my full list here.
.
I’m grabbing this 16 gauge AirStrike to secure this window sill in place along with the rest of the main pieces of window trim.
.
I used several nails along this sill board to secure it in place.
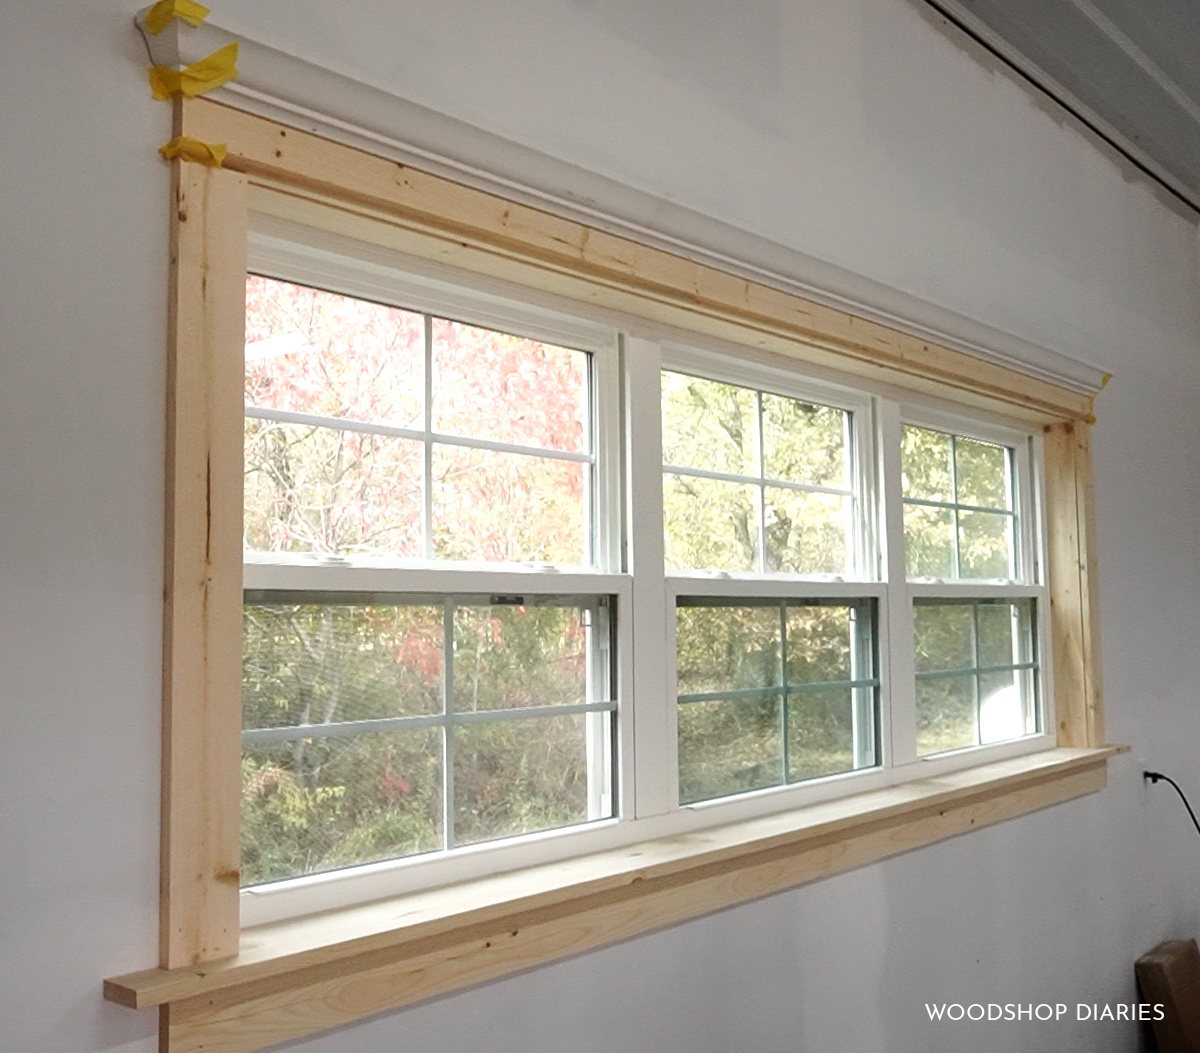
Step 2: Trim Out Inside of Window Frame
Once the window sill was installed, next, I moved on to adding the trim around the rest of the inside of this window.
.
I cut a 1×4 to the length of the opening at the top. Now, as I mentioned earlier, my walls here are 2×4 studs. If you are working with 2×6 walls, you will likely need a wider board for this, like a 1×6.
.
Once it was trimmed to length, I measured the distance across the top between the front of the window and the front of the drywall in several places again and took the average.
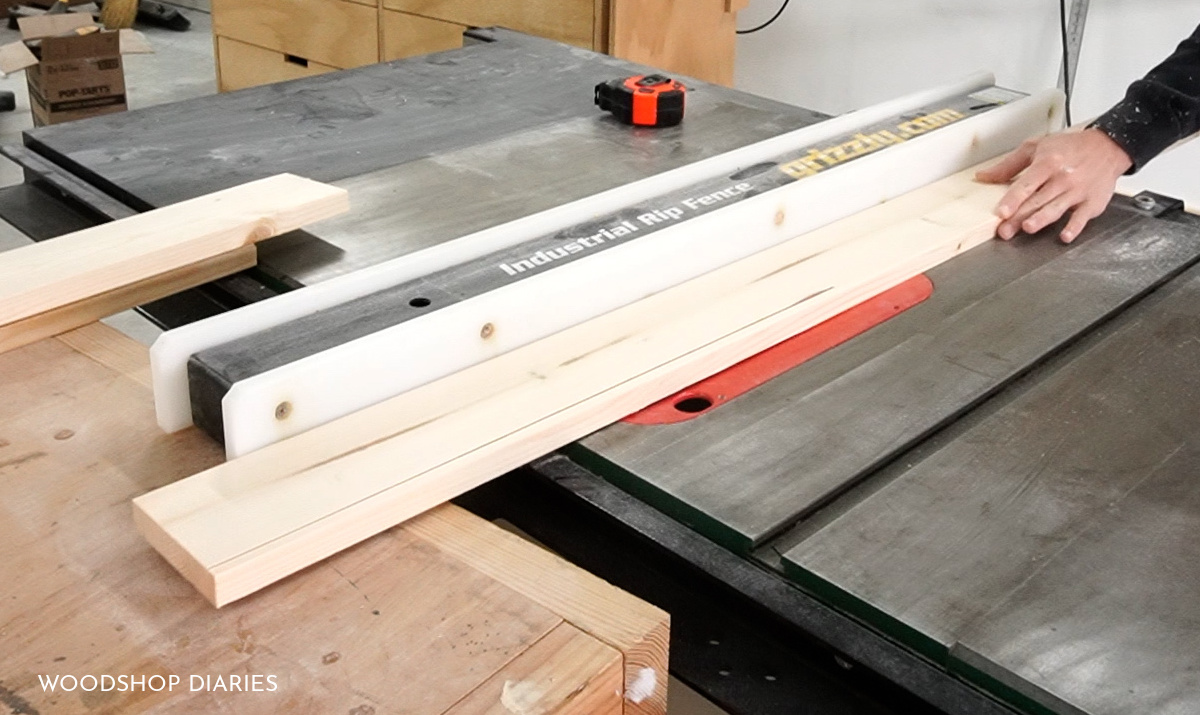
I ripped this board to this width on the table saw, then nailed it in place. You want all your inside boards to butt up to the window frame, and come as flush as possible to the front of the drywall.
.
That will allow the boards added in the next step to fit nice and flush.
I repeated this same process to install the two pieces on the sides as well.
Step 3: Install Window Trim Frame Sides
Once the INSIDE of the window was trimmed, I moved to installing the outside—which is the pretty part haha.
.
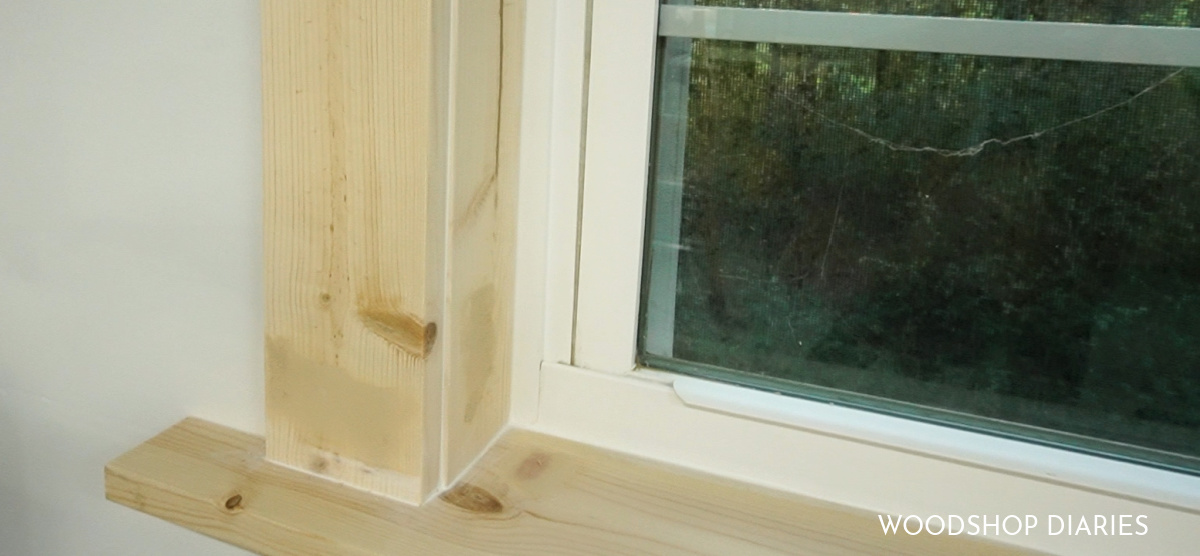
First, what is “TRIM REVEAL?”
I typically install the OUTSIDE of the trim so that it “reveals” about ⅛” of the edge of the boards on the INSIDE trim pieces.
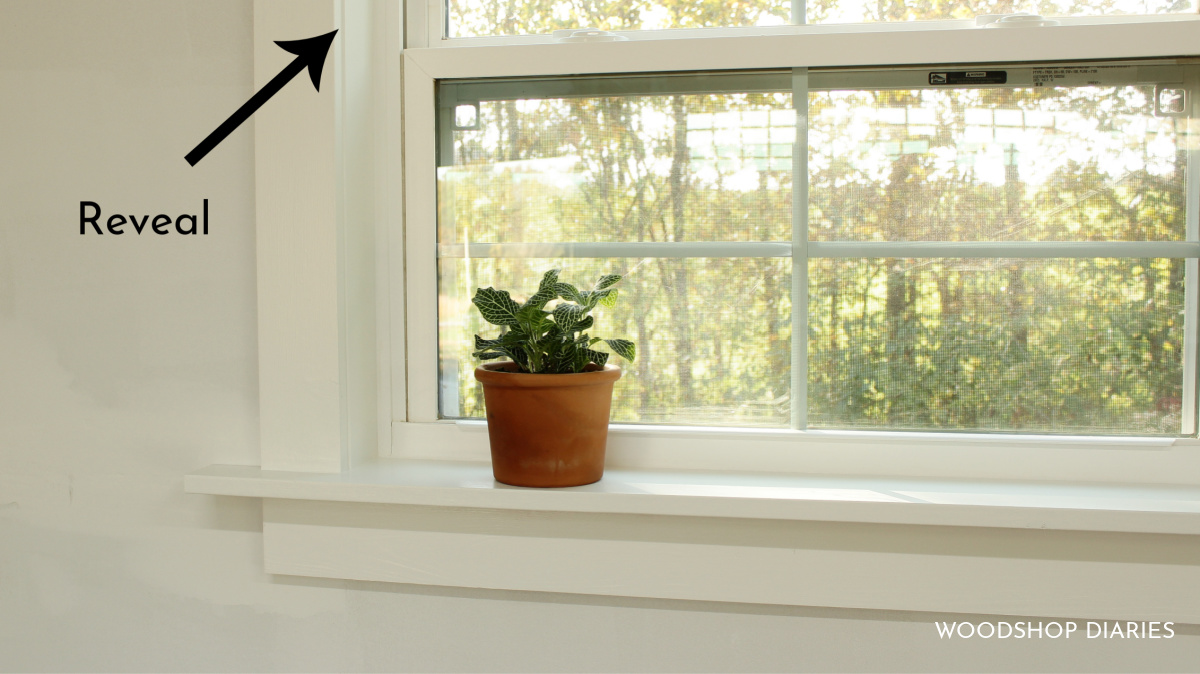
This ⅛” reveal just helps hide minor imperfections if a board is slightly warped or bowed, and allows you to come back later and caulk that joint easily for a cleaner paint job.
.
I use ⅛” typically, but you are welcome to use ¼” or ⅜”, etc.
.
So for these side pieces, I measured from the window sill board up to the inside of the top board, then added ⅛” for the reveal.
.
I measured and cut a 1×4 this length for each side—theoretically, they should be the same length, but in reality, it’s likely they’re slightly different, so it’s best to cut each side to fit.
I installed these using my Ryobi 16 gauge AirStrike nailer so that they were about ⅛” out from the inside edge to leave my reveal.
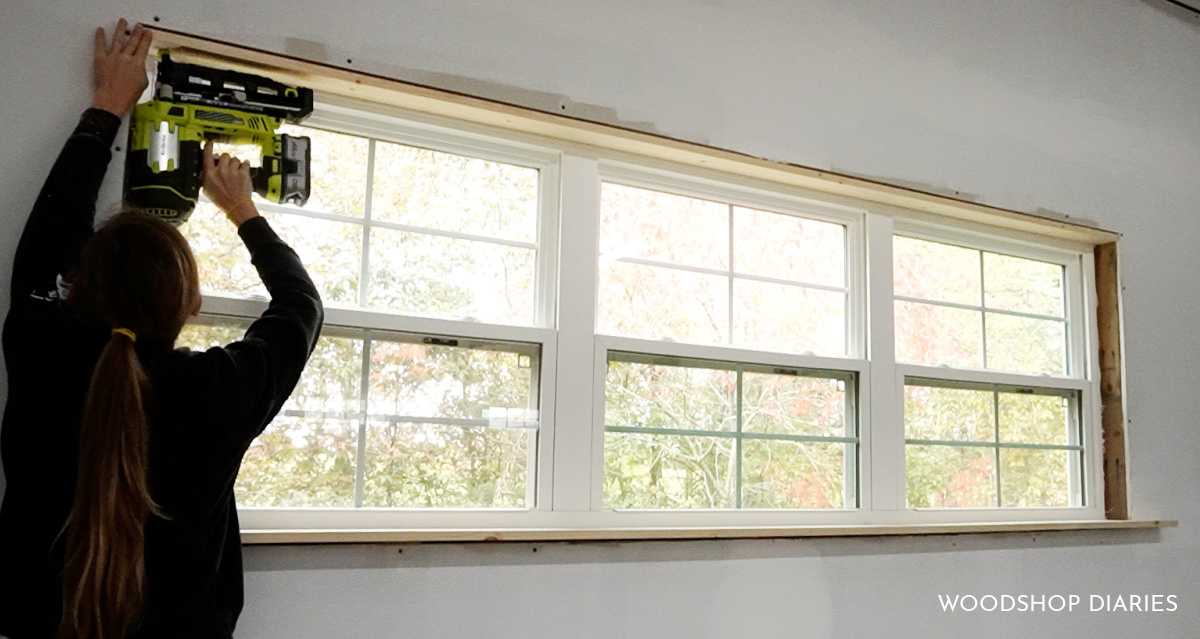
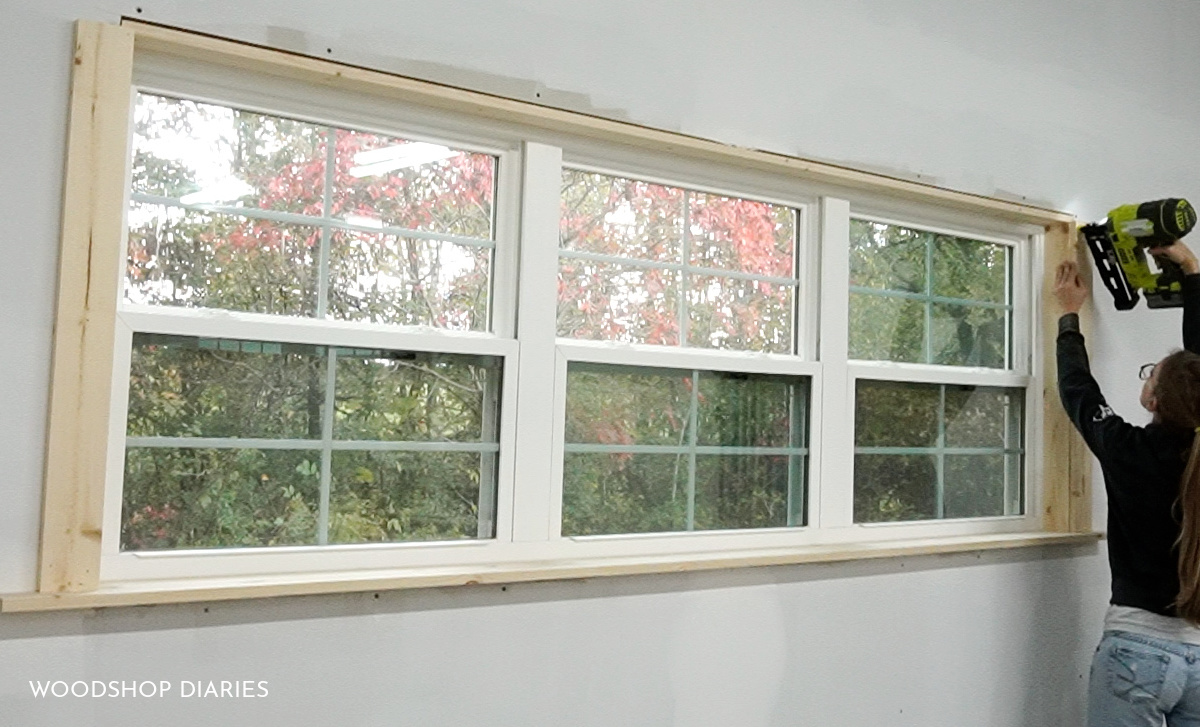
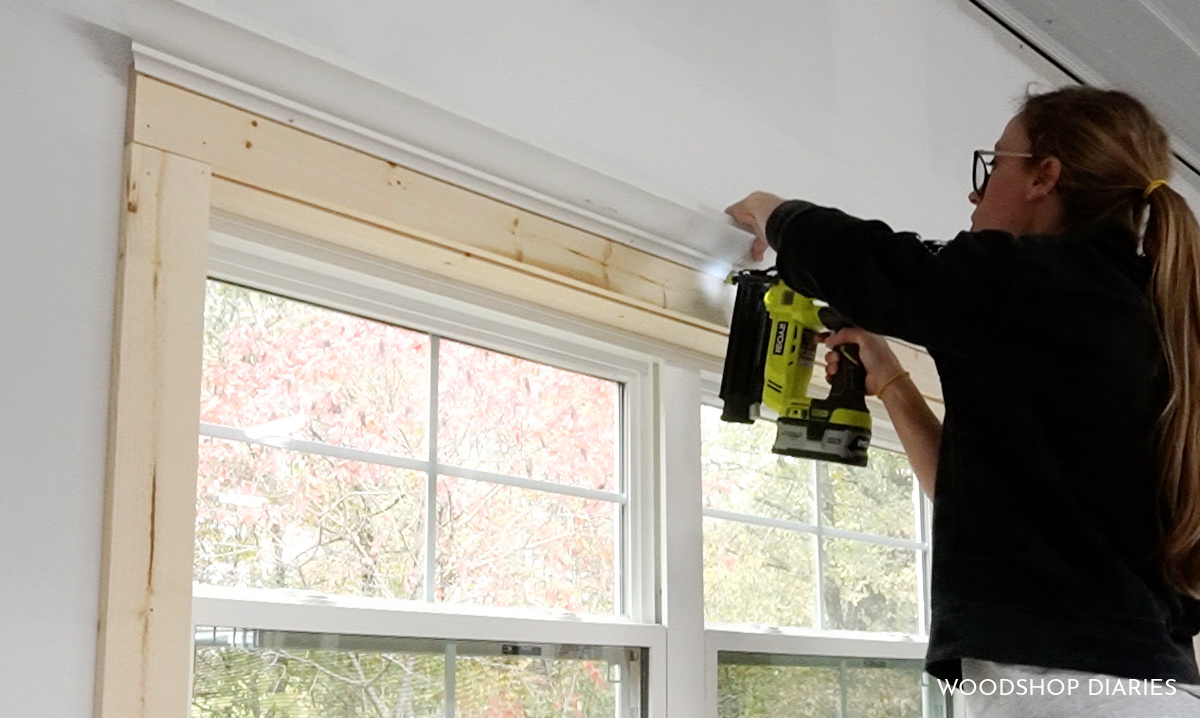
Step 4: Install Window Trim Frame Top/Bottom
Then, I measured across the side pieces from step 3 to find the length for my top and bottom pieces. I cut two 1x4s this length and installed one across the bottom and one across the top.
As a note here, it’s important when nailing these outside pieces in place to use nails long enough to reach through the board, through the drywall, and into the studs or framing behind it.
.
Securing these boards to just the drywall will not hold.
.
Since these boards are ¾” thick and the drywall here is ½” thick, I’m using 2” long nails so that about ¾” is going into the wood behind the drywall to hold it in place.
.
And on that note, you also want to make sure you are hitting studs and/or headers with your nails.
.
Typically (in most cases), there will be a solid header running across the top of a window, but underneath the window, you can use a stud finder to locate where to drive your nails.
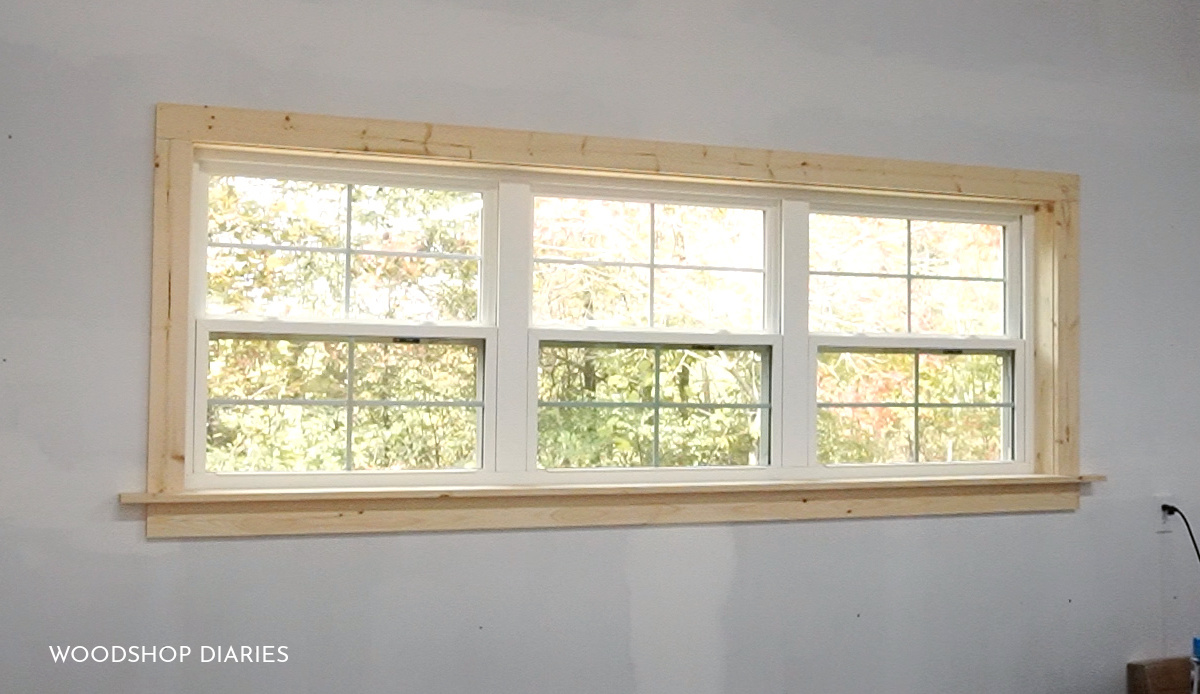
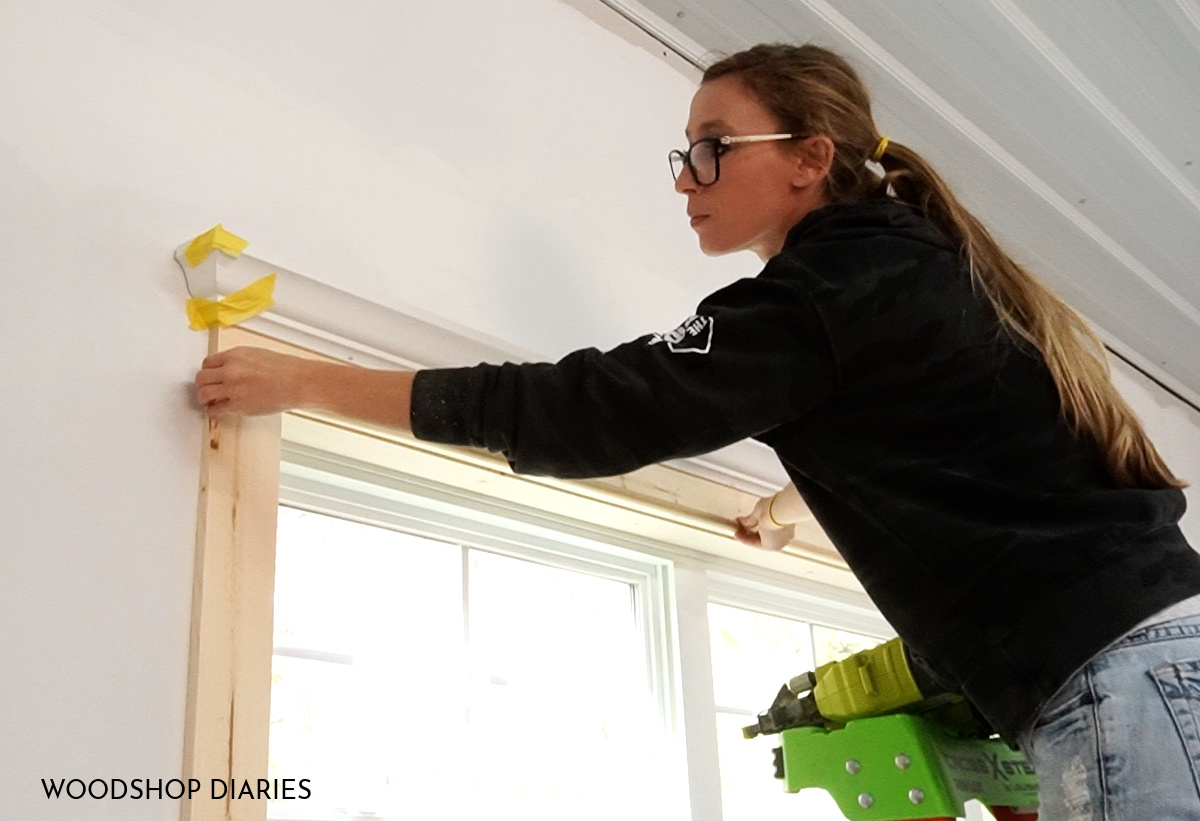
Step 5: Add Crown Molding
Once the outside frame is installed, you can call it quits and leave as is, but I like to add some detail with crown molding and half round.
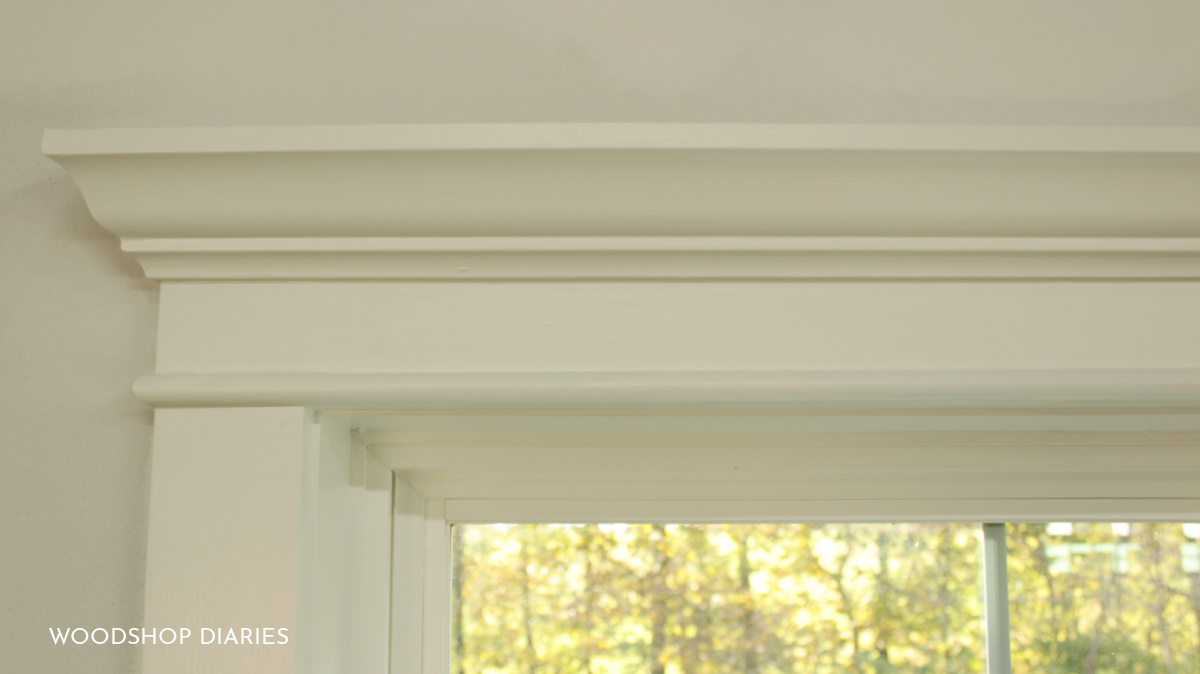
I’ll start with the crown molding and first, I want to cut the piece that will run along the front.
.
I recommend checking out the video for details on how to cut crown molding if you aren’t sure.
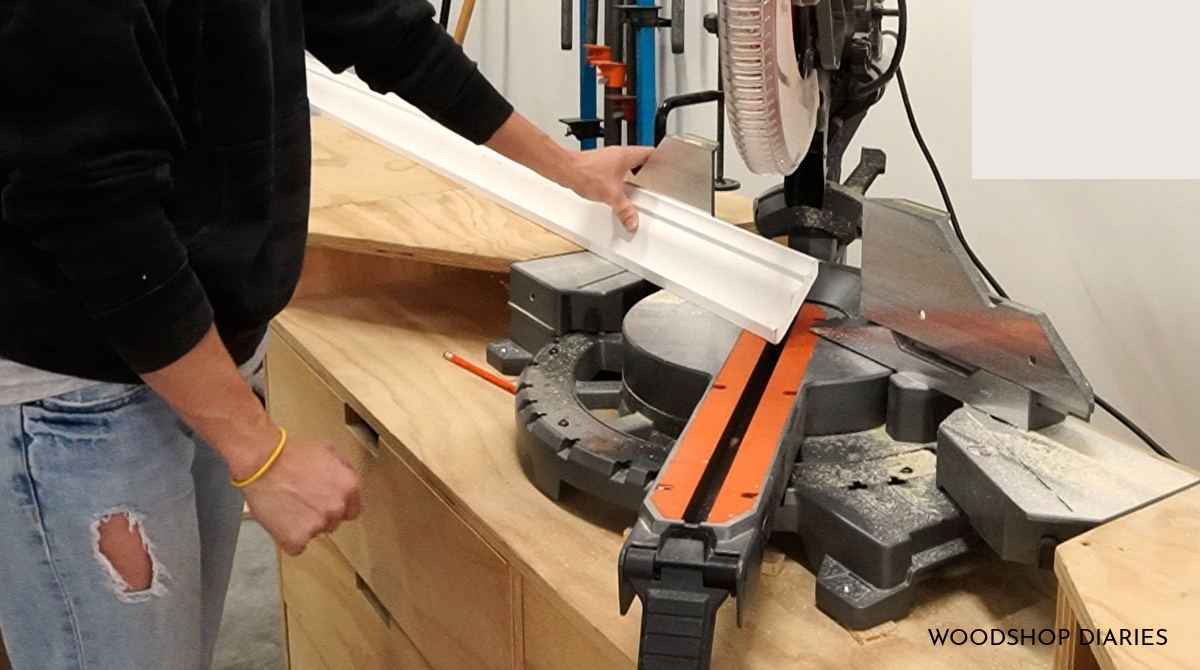
But, I cut a piece of crown molding to run along the length of the top board and nailed it in place using my Ryobi 18 gauge AirStrike nailer.
.
The 18 gauge nailer shoots a smaller nail, so it’s great for thinner, more delicate pieces like the crown and the half round in the next step.
For the end caps, you simply cut a couple small pieces of crown to “wrap around” the edge of the top board—one end mitered and one square.
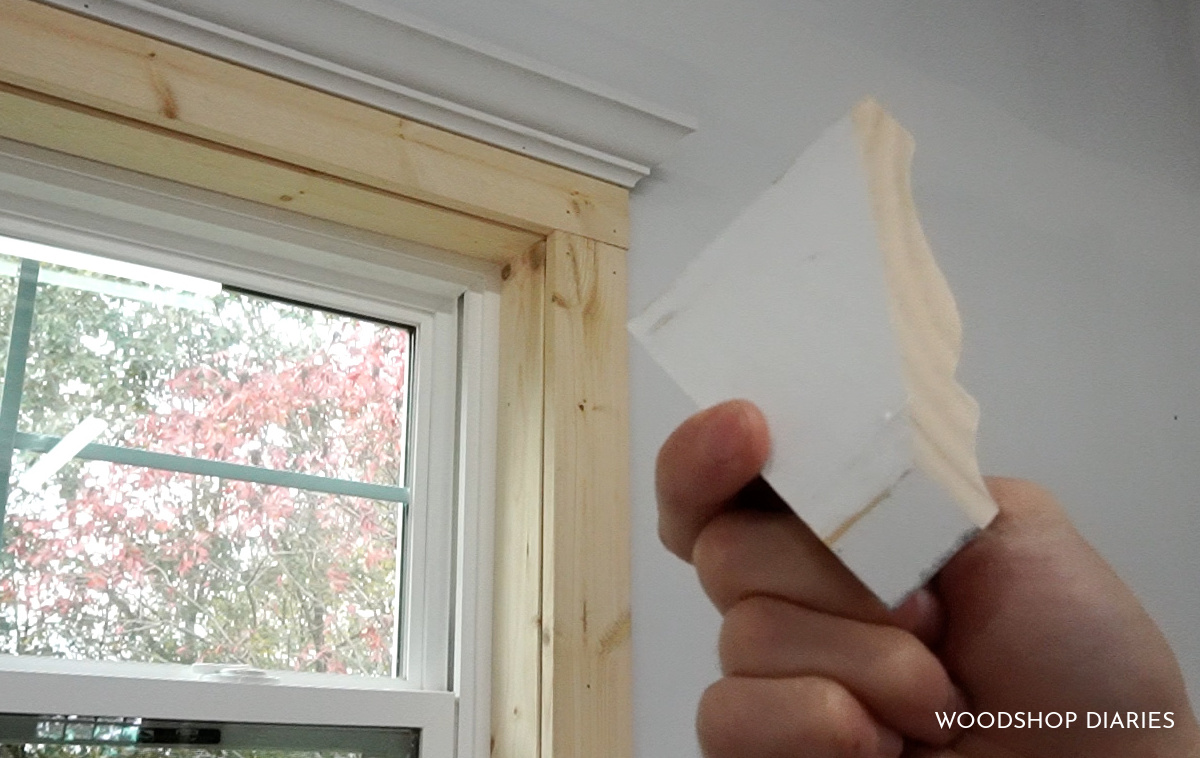
The flat piece on the bottom back side should be ¾” wide to match the thickness of the 1×4 at the top.
.
I like to rip off a couple pieces of painters tape and have them handy, then apply some wood glue along the corner edge and the bottom, and tape these pieces in place on the ends until the glue dries.
Step 6: Add Half Round
I mitered the ends of the half round to 45 degrees, and nailed it along the bottom edge of the top 1×4 here, again, using the 18 gauge nailer as the smaller nails are a little better on these delicate pieces.
.
I’ve only ever found these in 8 foot pieces, and since my window was so long, I ended up having to splice them together in the middle, which isn’t a big deal.
.
Check out the video for how to do that.
The end caps of the half round molding are attached the same way as the crown—one square end and one 45 degree, ¾” long. Simply glued and taped in place.
Step 7: Putty, Caulk, Prime, Paint
After the glue dried on the trim, I went back and puttied over the nail holes and around the outside corners of the molding, then caulked between the drywall and trim and between the trim and windows.
.
You don’t want to skip caulking window trim as this can result in moisture issues and air leaks. Be sure to caulk where the wood meets vinyl for a good seal, and between where the wood meets drywall for a cleaner paint job.
Once the caulk was dry, and putty was sanded smooth, I primed the wood—since it’s raw wood, priming will make for a smoother paint coat and help better seal it.
.
Then, I applied two coats of high quality white paint (although, feel free to get creative and use a different color than white!), and it was done.
RELATED: Check out this post for how to finish/paint raw wood
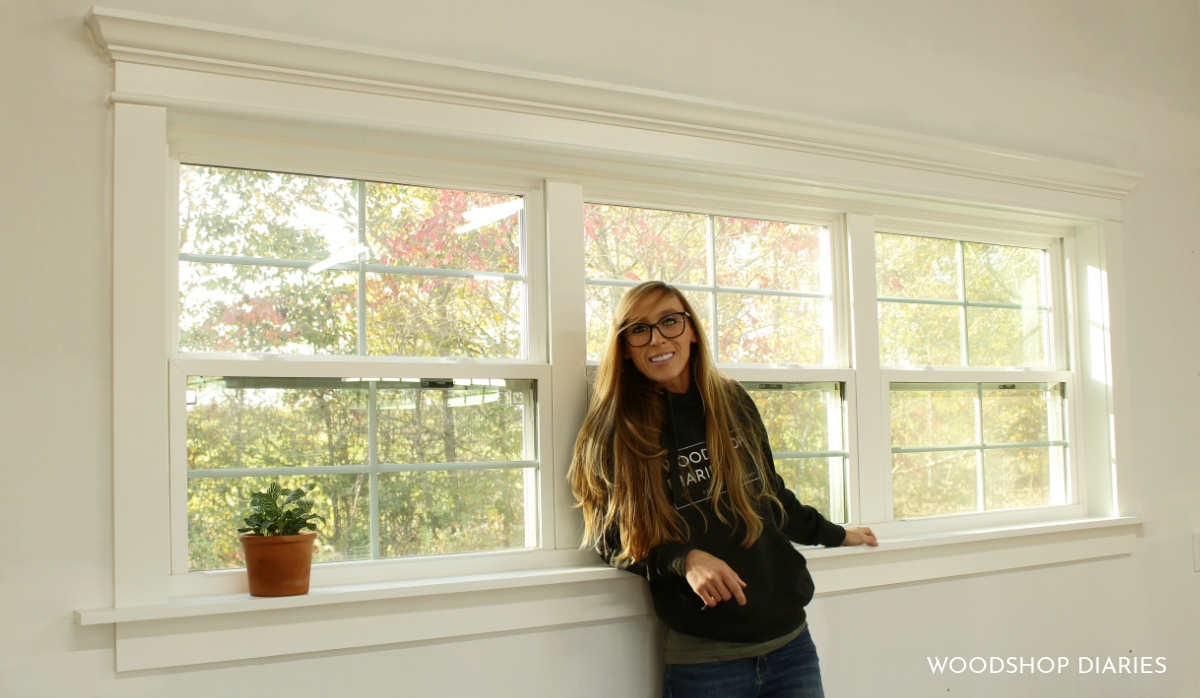
I love the difference a little trim makes on not only this, but basically any project.
.
As we work our way through projects in the new house, I’ll be replacing all our window and door trim to match this, but for now, my shop is getting the fancy treatment haha.
.
I’m planning something fun for this window wall in the back of my workshop, so while the trim looks nice, I know the wall is still a work in progress, so bear with me. Check out other workshop projects here.
.
If you want to see all the upcoming projects and videos, be sure to subscribe to the newsletter if you aren’t already.
And if you’d like to save this for later, don’t forget to pin it or save it to your favorite social channel!
Until next time, friends, happy building!