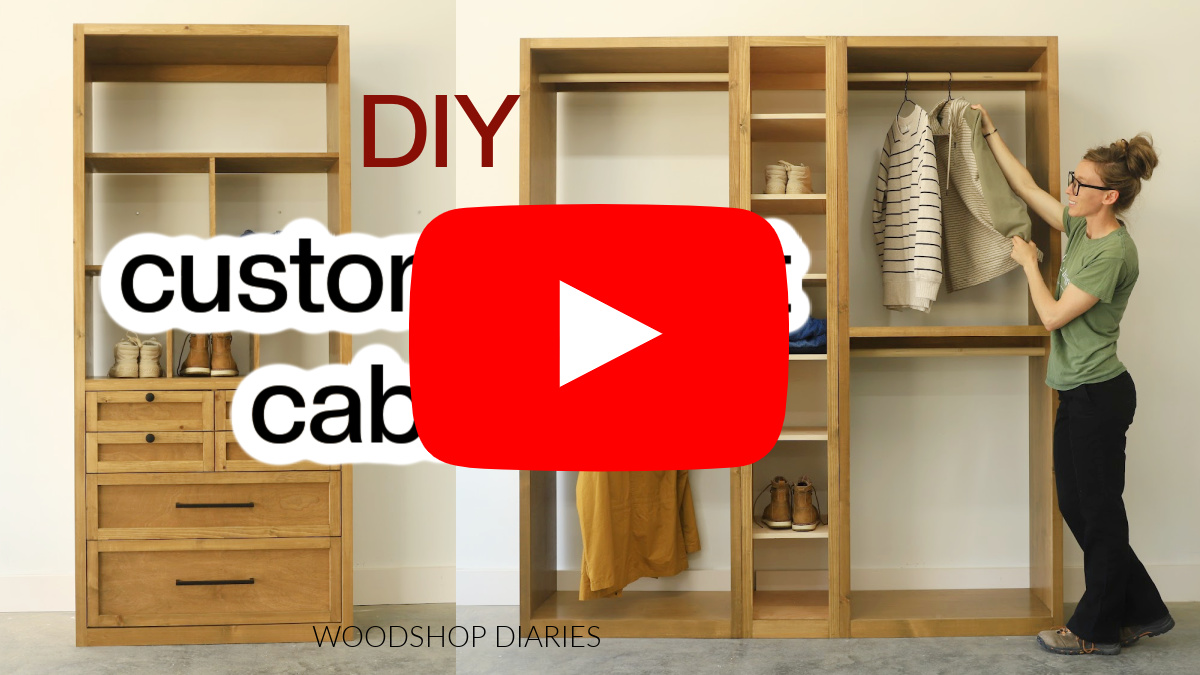
In this post, I’m sharing how to build your own custom closet tower cabinets with hanging rods and adjustable shelves!
Custom closets can be PRICEY. What I always find fascinating, though, is that most of those expensive cabinets are just huge boxes…nothing super fancy.
And many of the flat pack self-assembled options (looking at you, IKEA), may be slightly cheaper than fully custom (but still a pretty penny), but they aren’t even made of wood. It’s particle board or MDF.
Building your own DIY closet tower cabinets can not only save you thousands, but will also get you better quality (actual wood!) and custom sizing. PLUS, they’re really pretty quick and simple to make and don’t require a lot of tools.
Like I said…they’re just big boxes!
So if you’re ready to upgrade your closet on a budget, I’ll show you how to make these modular closet tower cabinets with hanging rods and adjustable shelves. These are great pieces to mix and match to fit your space.
*This post contains affiliate links. See website policies.
What to know before building
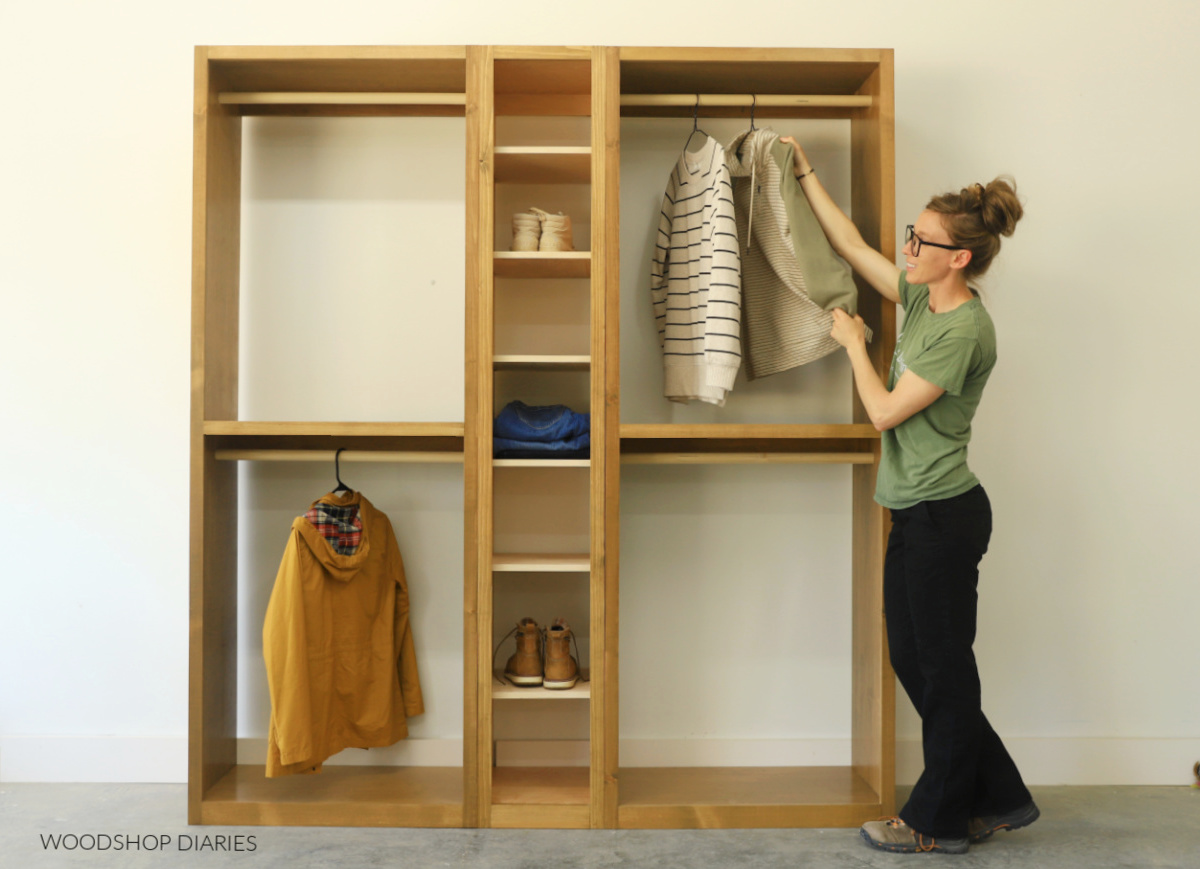
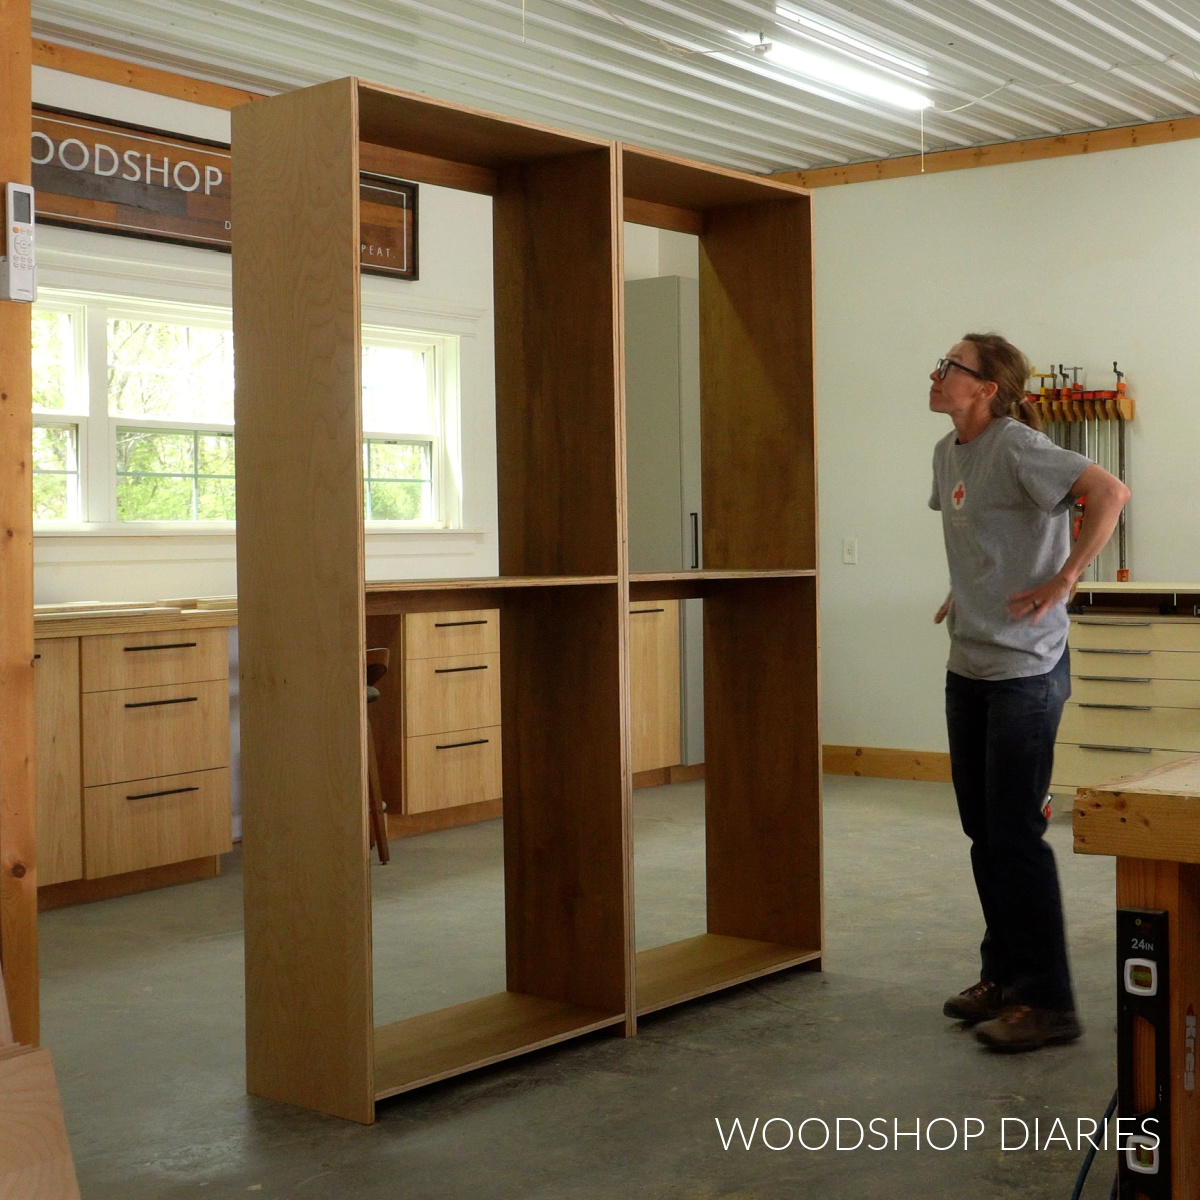
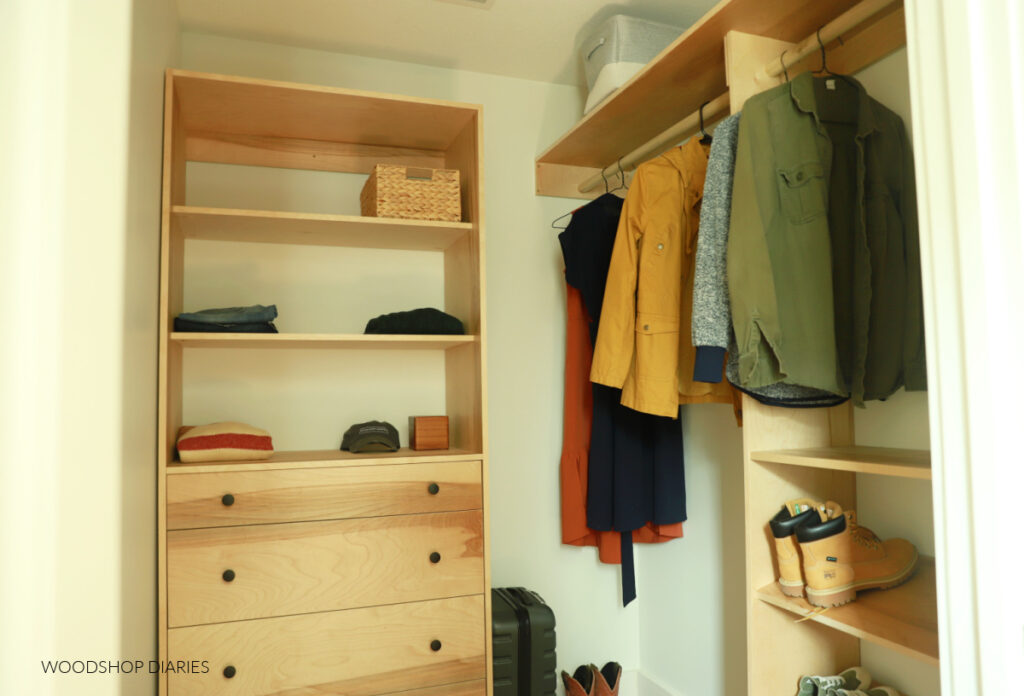
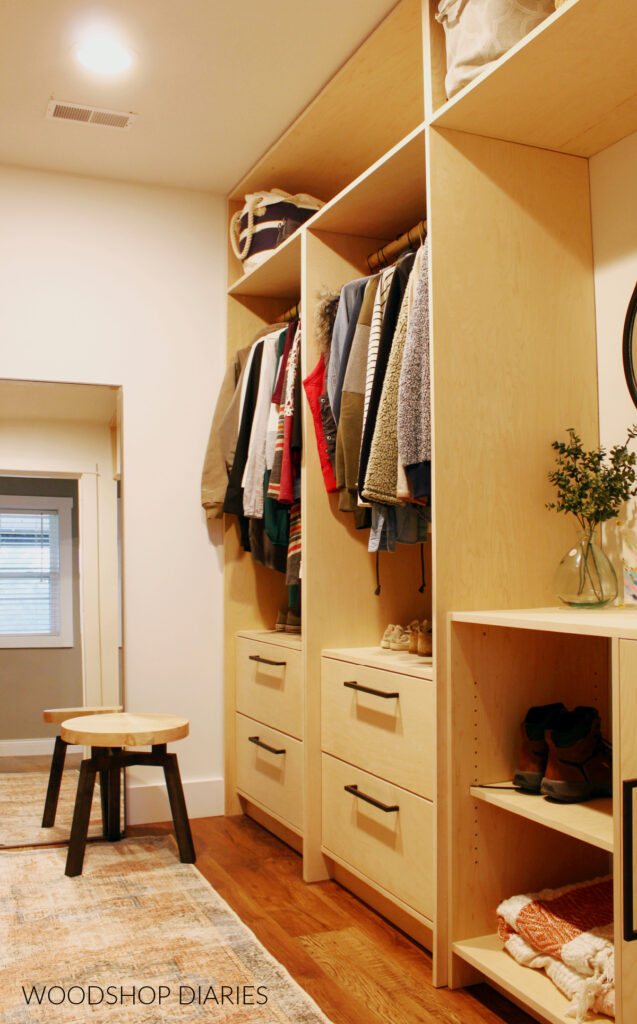
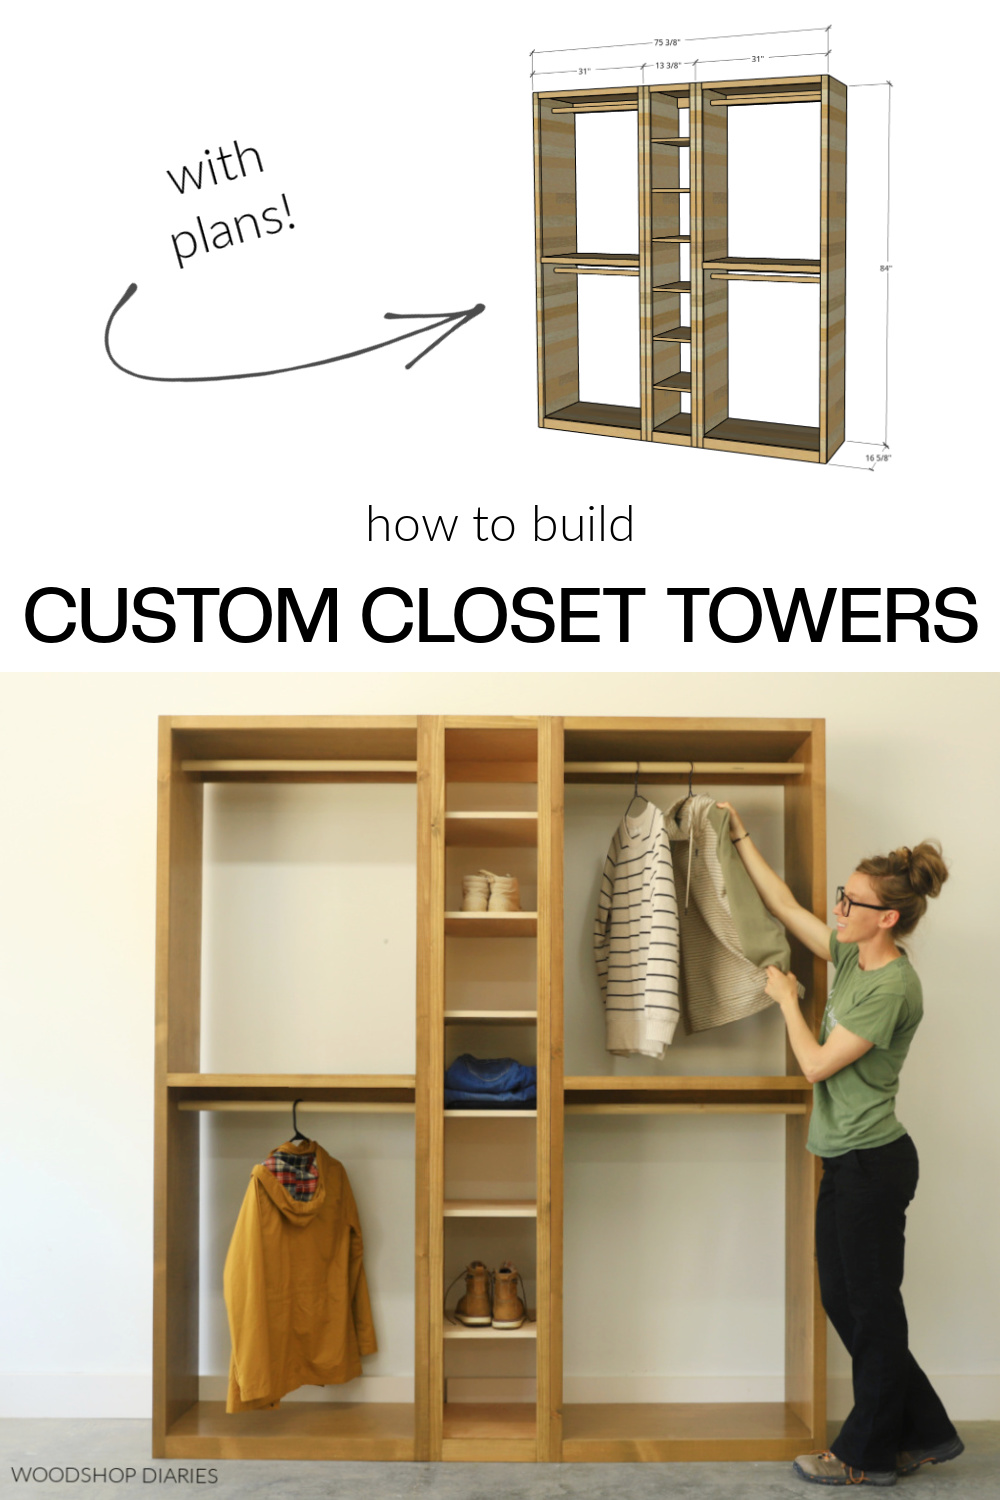
I built these closet towers for my dad’s small walk in closet. I made him two hanging rod cabinets and a narrow adjustable shelf cabinet to go between them (which was perfect for shoes!).
These three cabinets spanned along the back wall of dad’s closet, which was about 76″ wide.
So I built them with an overall width (when placed side by side) of just under 76″ to give us some wiggle room when installing. We can cover any gaps later with trim if needed.
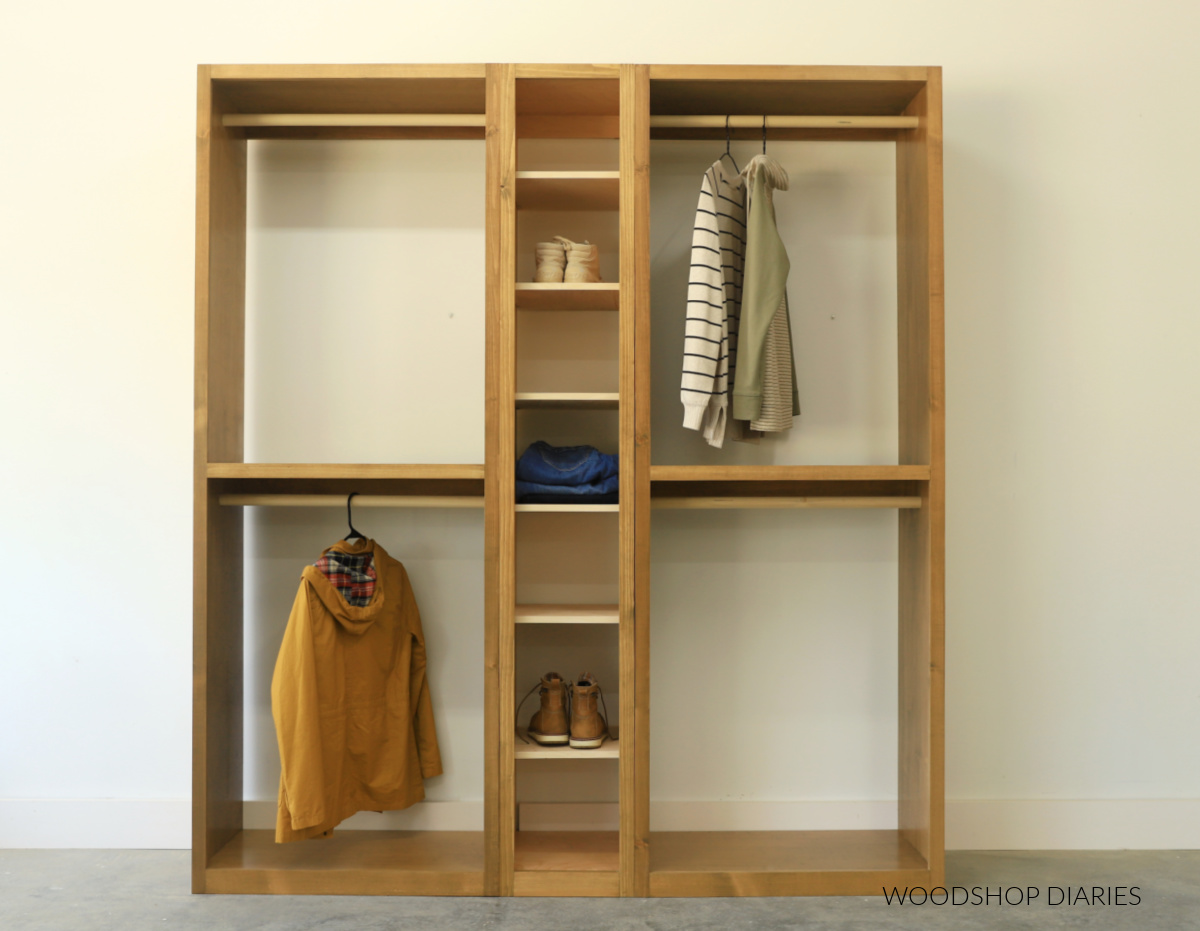
That said, the overall dimensions of these closet towers are 16 ⅝″ deep x 75 ⅜″ wide x 84″ tall.
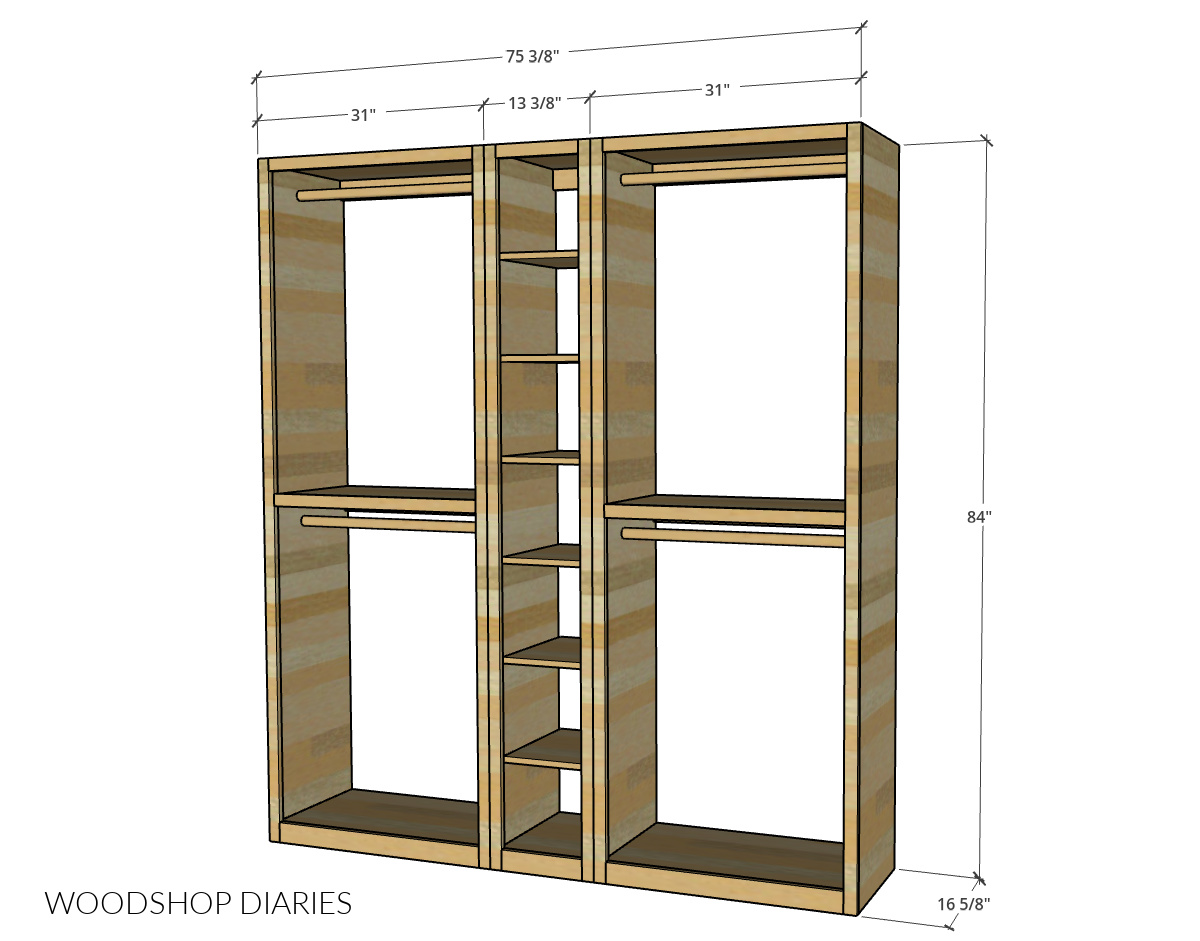
Since they are in three separate pieces, it’s easy to mix and match and adjust the sizing as needed to fit your space.
You may find these resources helpful throughout the build:
Enjoy DIY projects and woodworking plans? Sign up for priority access for the latest posts on Woodshop Diaries!
How to build closet tower cabinets
If you prefer to watch, I’ve shared the full build video with tons of tips, behind the scenes, and additional details on my YouTube Channel here.
Love watching how-to videos? Subscribe to my YouTube channel for plenty more where that came from!
Prefer to print? Grab the printable closet tower building plans available here:
Tools & Materials
Tools:
- Drill/Driver
- Circular Saw and Rip Cut Guide
- Miter Saw
- Pocket Hole Jig (standard & micro sized recommended, but micro is optional)
- Brad nailer
- Shelf Pin Jig
Materials:
- (3) 4’x8′ sheets ¾″ plywood
- (2) 6′ long 1 ¼” diameter dowel rod (or closet rod)
- (8) 1x2x8 boards
- (3) 1x3x8 boards
- Shelf Pins
- Wood Glue
- 1 ¼” brad nails
- 1 ¼” pocket hole screws (100 count box)
- 1 lb box 2 ½” long screws
- Edge banding (optional, but recommended)
Not sure what type of wood to use for this project?
1x LUMBER: If painting, preprimed pine, spruce, or poplar are great budget friendly options. And if staining, usually, you want to use the same wood type as your plywood or something that will stain similarly so that they match. Check out this post to learn how to shop for and purchase lumber for your project.
PLYWOOD: I recommend using cabinet grade hardwood plywood (like birch, maple, oak, etc). Check out this post to learn how to choose the right plywood for your project.
This project was built with birch plywood and pine/spruce for the 1x material.
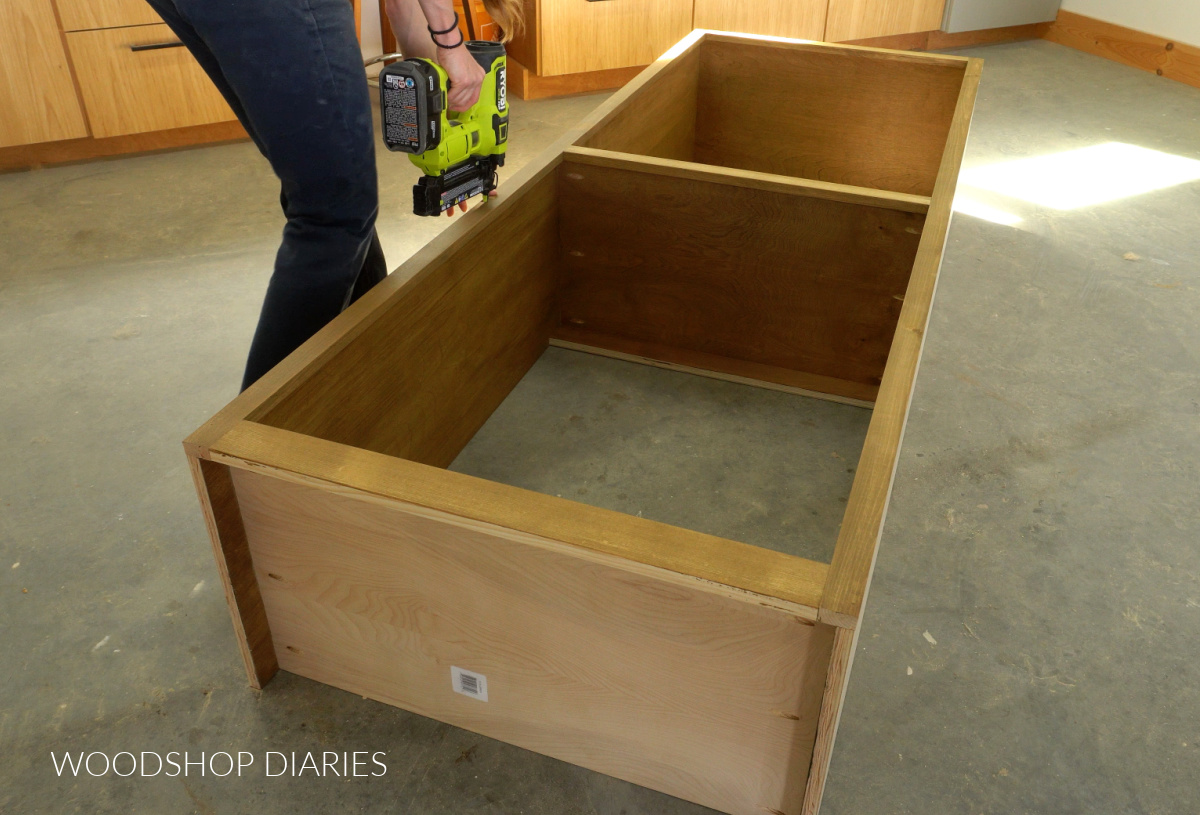
Step 1: Assemble Hanging Rod Cabinets
I mentioned this in the video above, but to make the most use of my ¾″ plywood sheets, I ripped them into three strips 15 ⅞″ wide. I can use two strips for my side panels and the third strips for the shelves.
That way, I can make one full cabinet from one full sheet (which makes it easy to adjust the material list for however many cabinets you’d like).
RELATED: How to cut plywood sheets
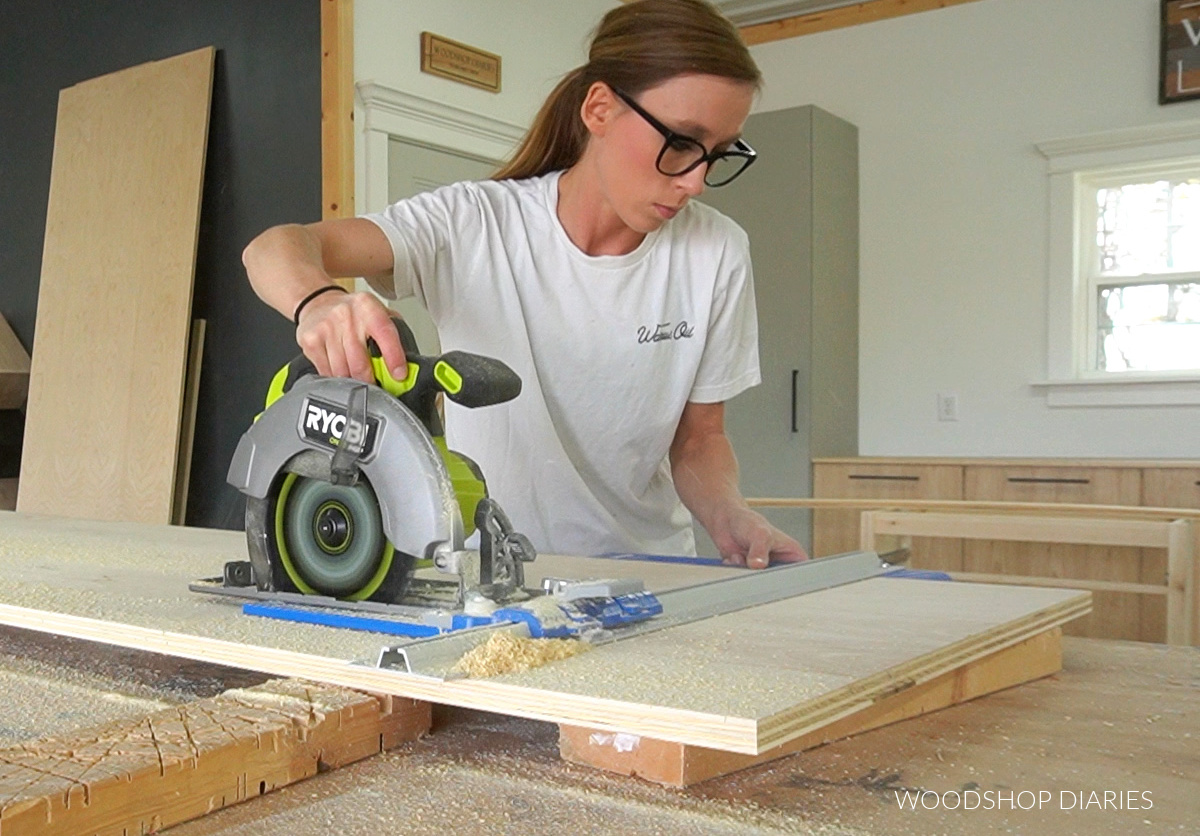
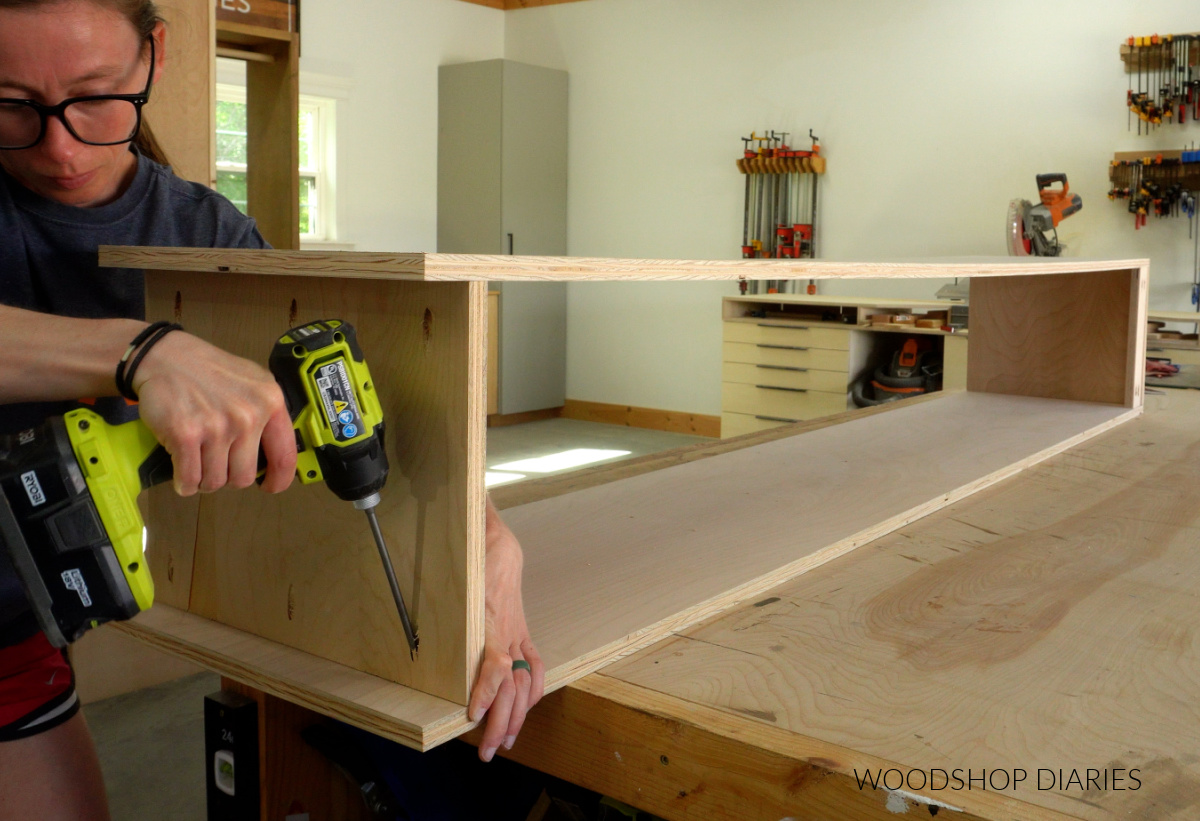
The ceilings in dad’s closet were 8′ tall, so I cut my two side panels to 7′ long. That way, dad still has room to store stuff on top of the cabinets, but also, we have room to get them inside and tilted upright to install.
Then I cut three shelves from my third plywood strip and assembled a large cabinet box like you see below using pocket holes and screws.
RELATED: How to use pocket holes in DIY cabinets
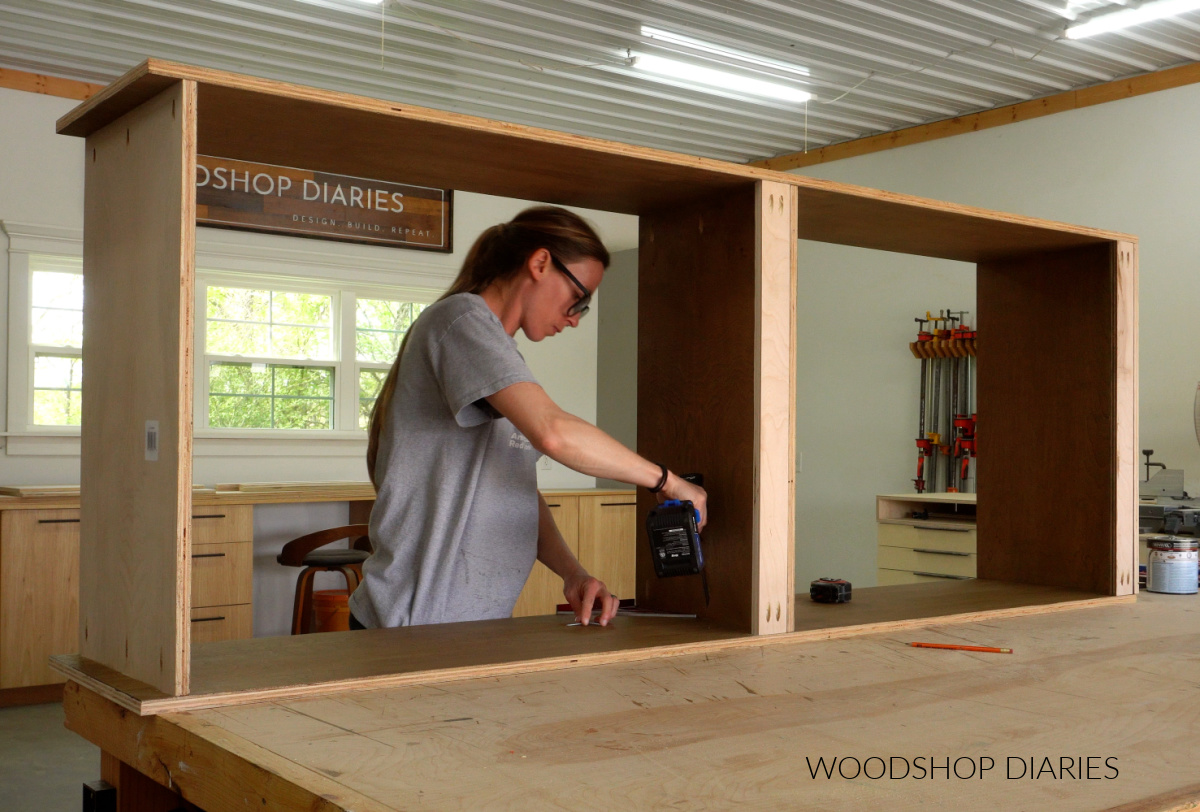
You’ll see that I also added two strips under the top and middle shelves at the back. These will allow me to screw them to the wall when we install.
I repeated to make two of these cabinets just alike.
FYI: I used Minwax Water Based Wood Stain in Driftwood on these pieces. I’ve found water based stain is easier to apply to individual pieces before assembling, so I stained each piece here before putting them together. Feel free to paint/stain/poly however you’d like.
Prefer to print? Grab the printable closet tower building plans here.
Step 2: Install Face Frames
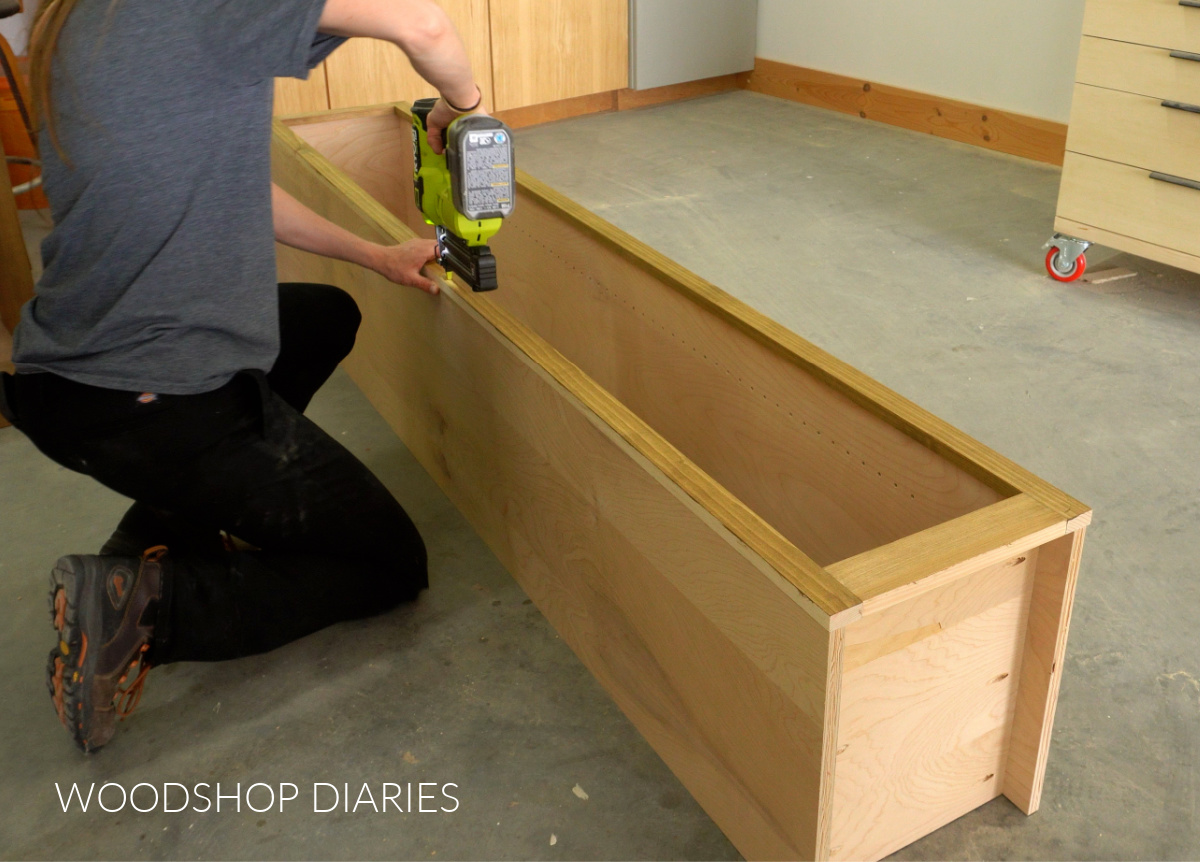
Next, I added face frames onto the fronts of my two cabinet boxes. I used 1x2s for the sides, top and middle and a 1×3 at the bottom and assembled my frame with pocket holes and screws.
RELATED: Understanding lumber sizing
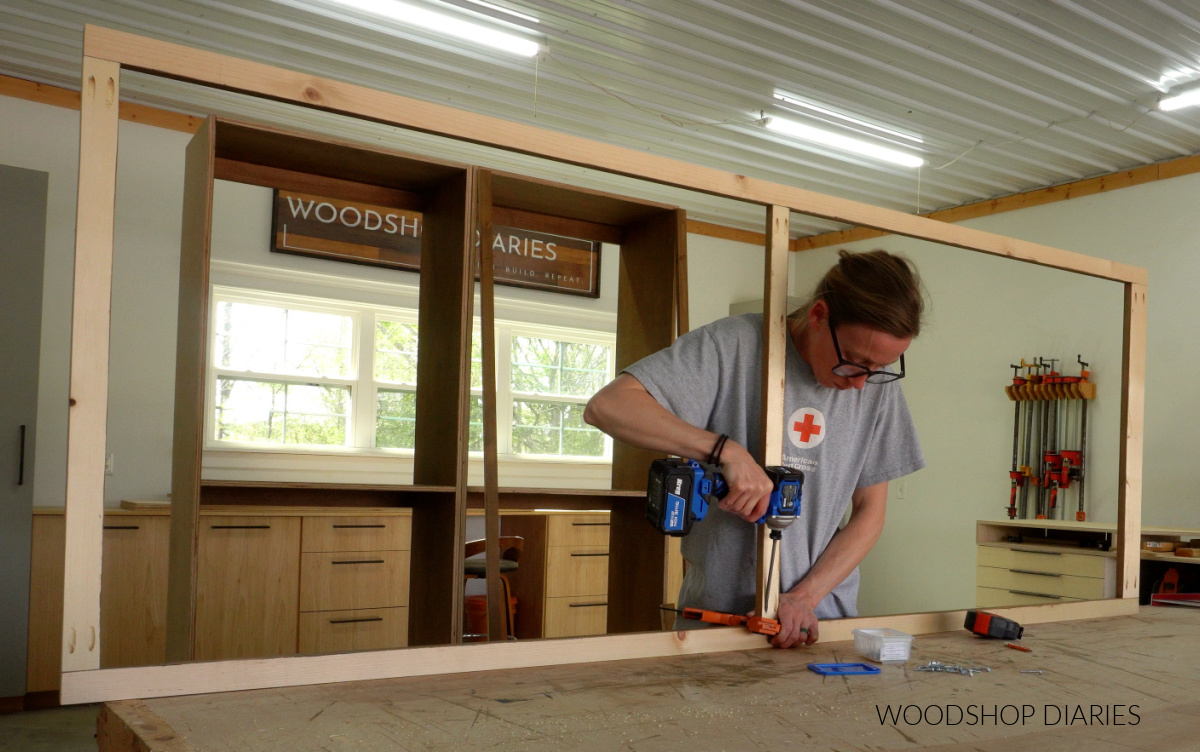
TIP: A standard size pocket hole jig can work if you’re careful, but I recommend using a Kreg Micro Jig for these face frame pieces with pan head pocket hole screws. The smaller holes and screws are less likely to cause splits.
Learn how, when, and why to use the Kreg Micro Pocket Hole Jig here.
Then I glued and nailed these frames onto the fronts of each cabinet.
Step 3: Add Hanging Rods
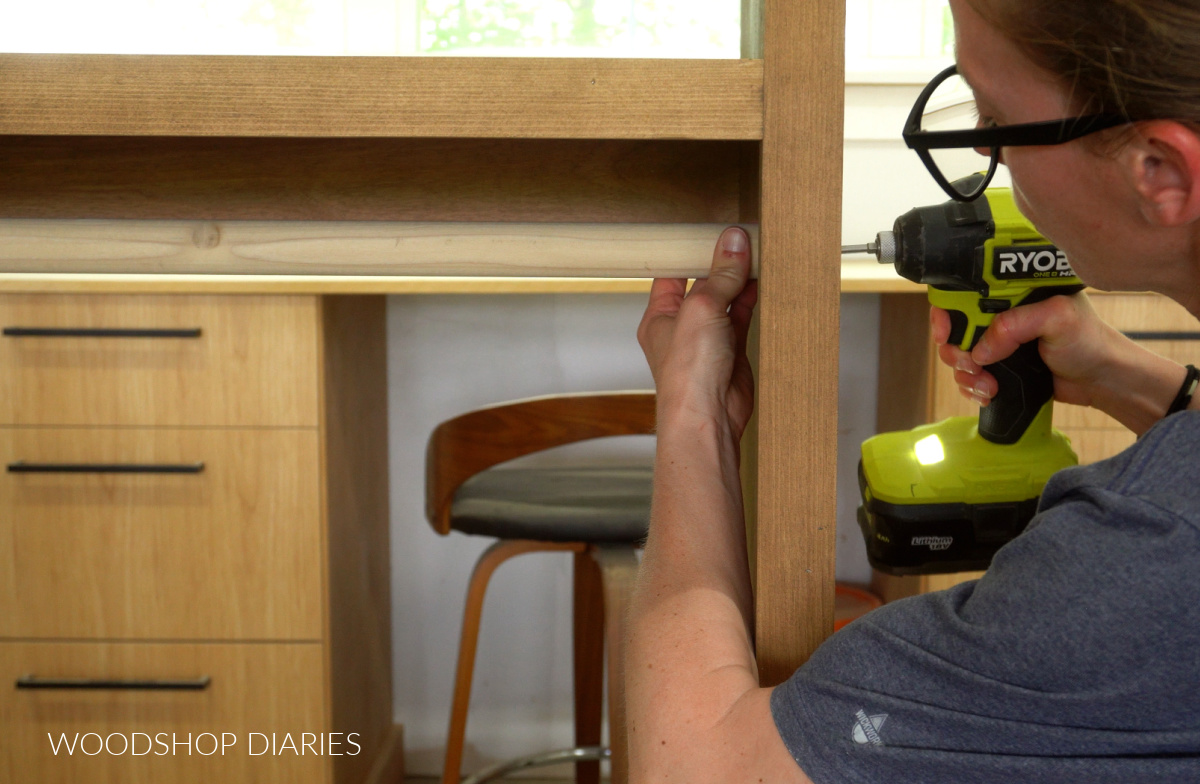
Now the boxes are built (see, I told you they were simple!), and all that’s left is adding the rods for hanging clothes. I opted for a 1 ¼″ diameter dowel rod for hanging, so I cut two dowels the width of my cabinet opening.
Then, I took a hanger and used it to figure out where was best to mount the rods and marked this location on each side of the cabinet in both the top and bottom sections.
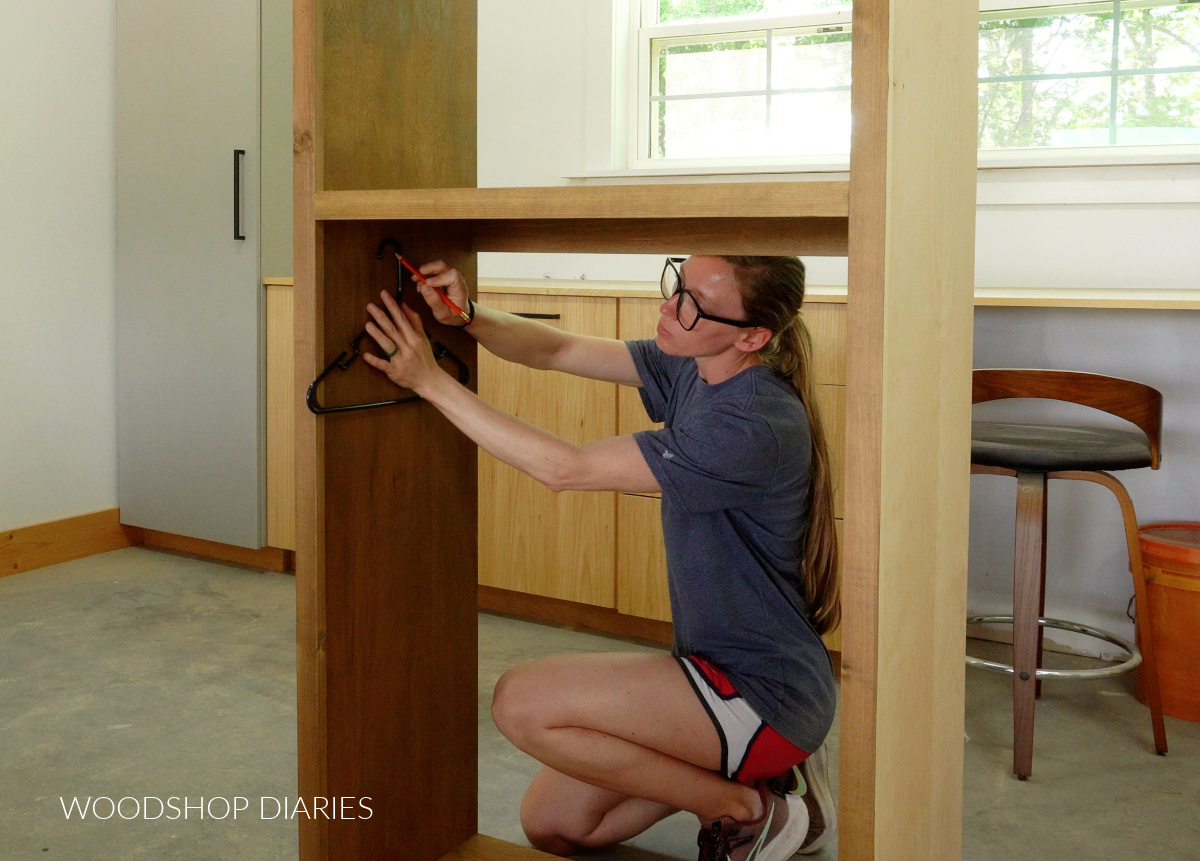
Next, I predrilled pilot holes through my cabinet sides at these marks. This made it easy to drive 2 ½″ screws through these holes and into the center of my dowel rods.
Each section is ABOUT 40″ tall, which is ideal for shirts pants, and every day clothing. For longer pieces like dresses, you may consider adjusting the middle shelf up or down or removing it altogether to give you more hanging room.
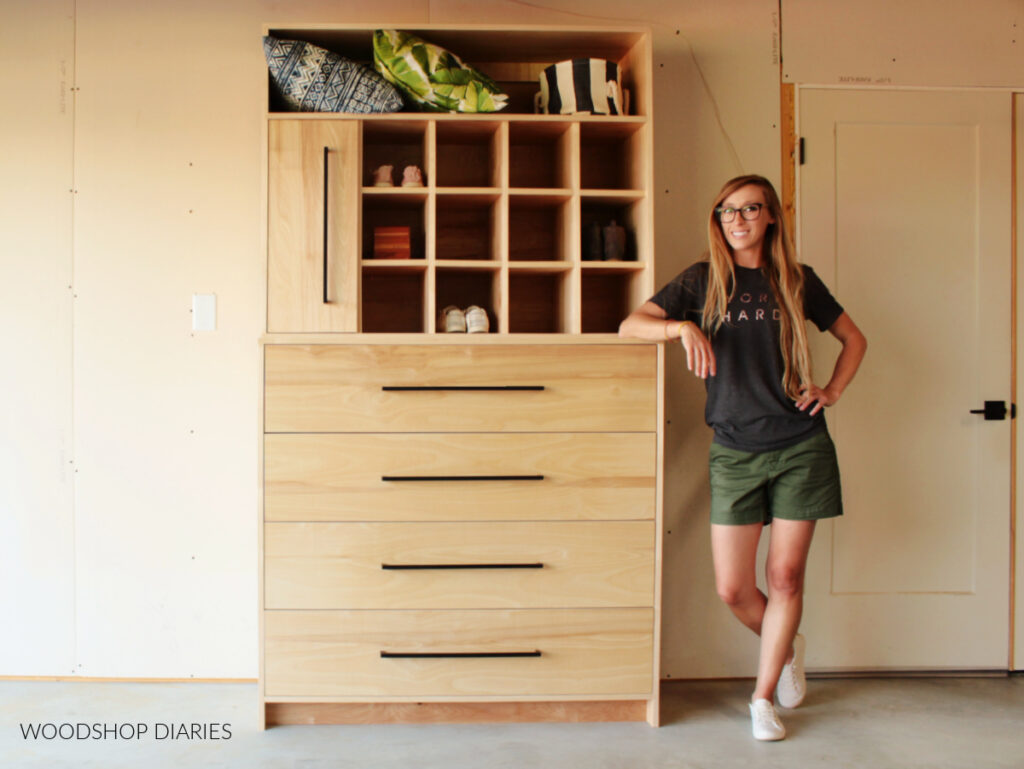
Step 4: Assemble Adjustable Shelf Closet Cabinet
Now Dad had places to hang his clothes, but he also needed somewhere to put his shoes.
So I cut another sheet of ¾″ plywood to build a tall, skinny cabinet box (very similar to my hanging rod cabinets, just without a middle shelf) using pocket holes and screws.
I wanted this cabinet to have adjustable shelves so that dad could add as many shelves as needed and space them out however he’d like for dress shoes, boots, sneakers, etc.
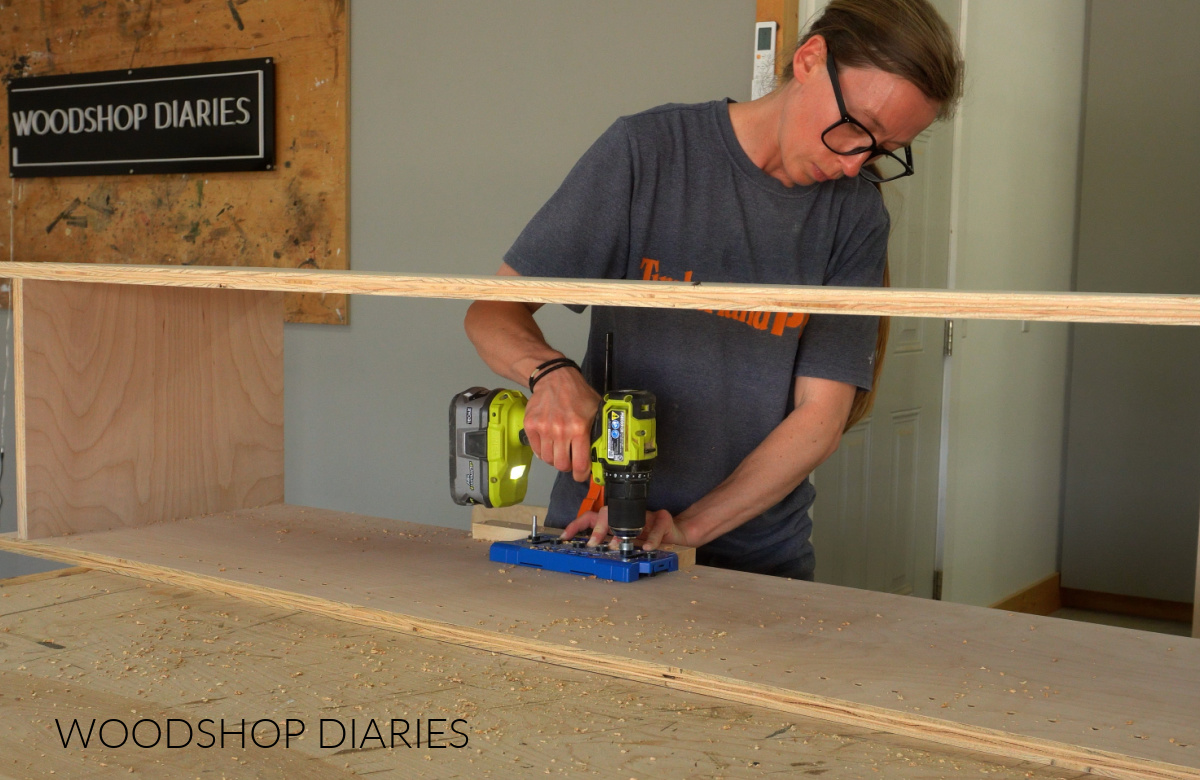
So, I used a shelf pin jig to drill shelf pin holes up each side of the cabinet box.
RELATED: How to use a shelf pin jig
Then, just like the previous cabinet box, I built and nailed a face frame on the front of this cabinet as well.
I didn’t forget! I’ll add the adjustable shelves in just a minute!
Step 5: Install Closet Tower Cabinets
Because it was a tight fit to get a good picture in dad’s closet, I’ll show you a diagram that better explains how we installed these (you can also check out the video here).
These cabinets need to be installed directly to the wall, so first, we cut away the baseboard in the closet where they were going.
Then we could place them against the wall side by side. I secured the boxes together using 2 ½″ screws through the face frames (shown in pink).
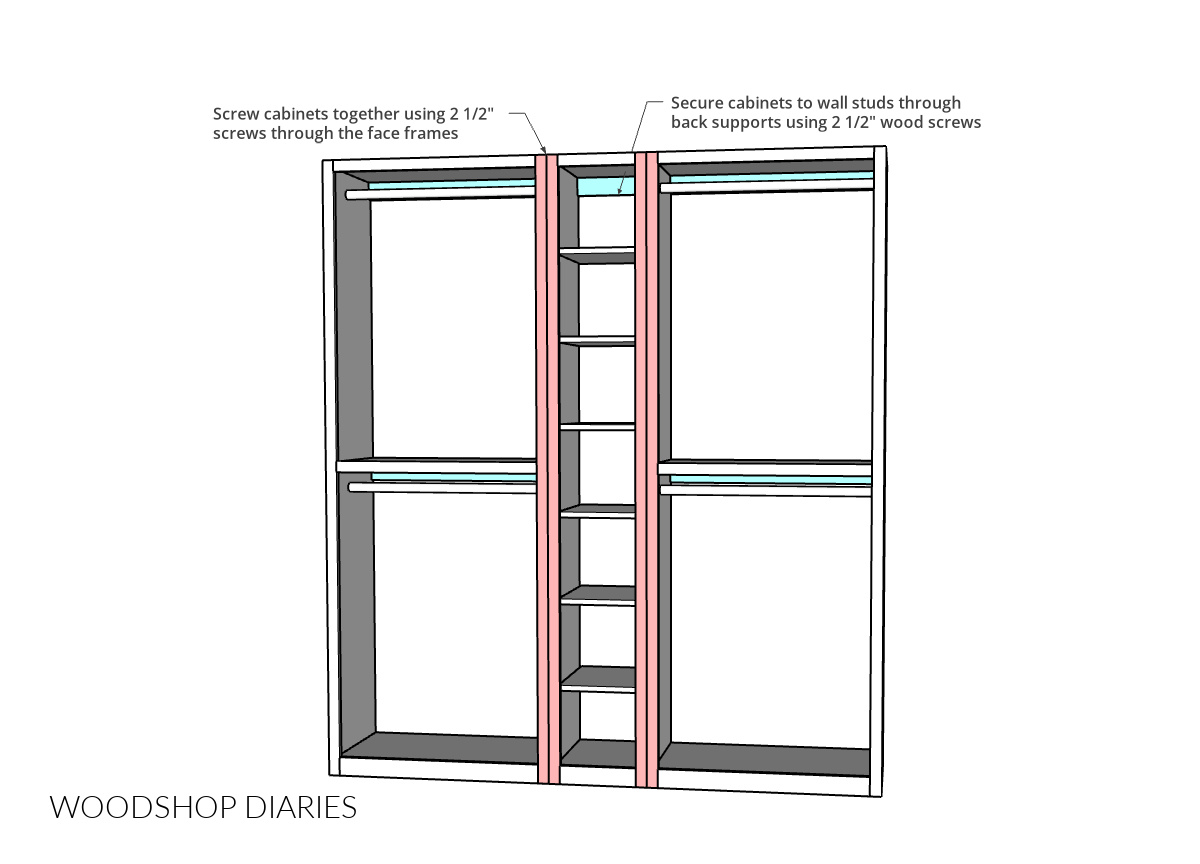
Then, I secured the boxes to the wall studs with 2 ½″ screws through the back supports (shown in blue).
And finally, I cut six pieces of ¾″ plywood for my adjustable shelves, applied edge banding to the front, and installed these into the middle cabinet with shelf pins.
RELATED: How to apply edge banding to hide plywood edges
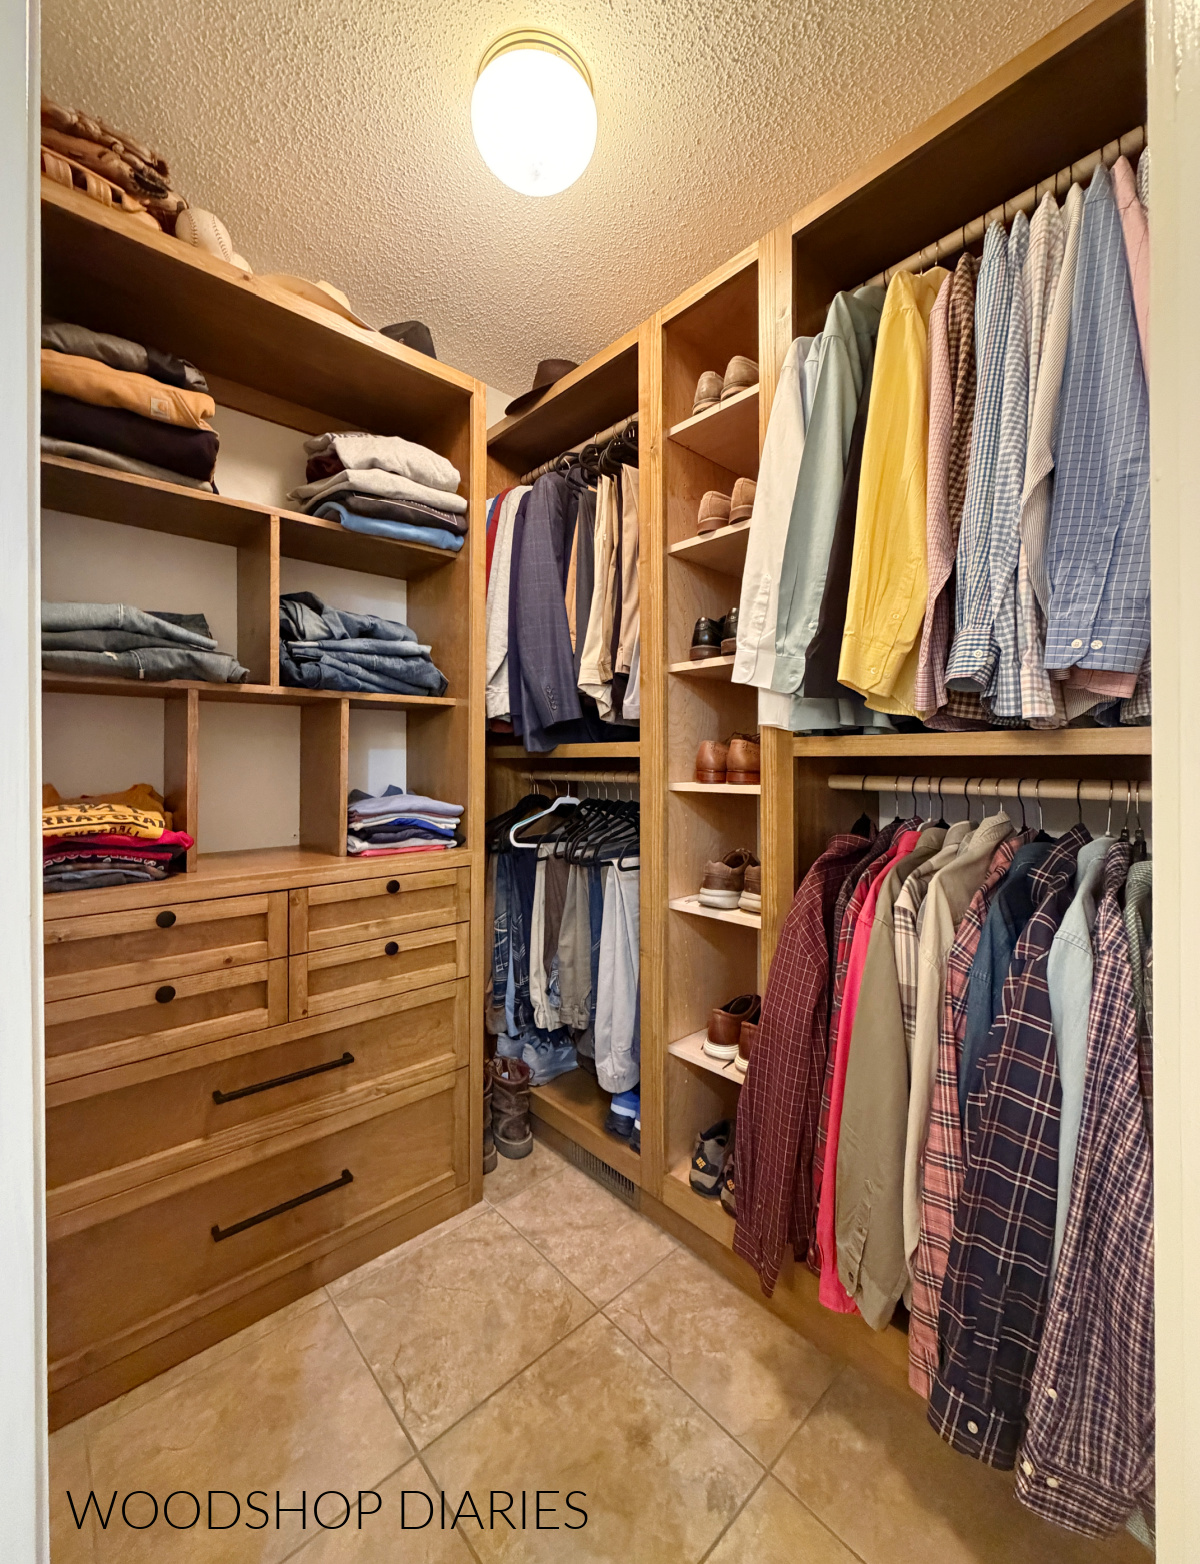
Dad said it feels like he’s walking into a fancy men’s clothing store with these nice wood cabinets lining the wall haha! It’s definitely an improvement over the old wire shelving he had in here.
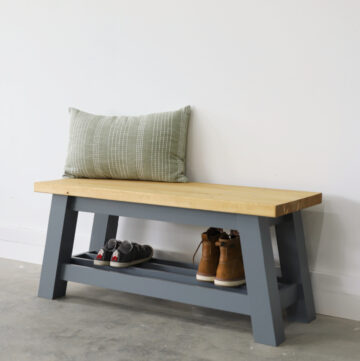
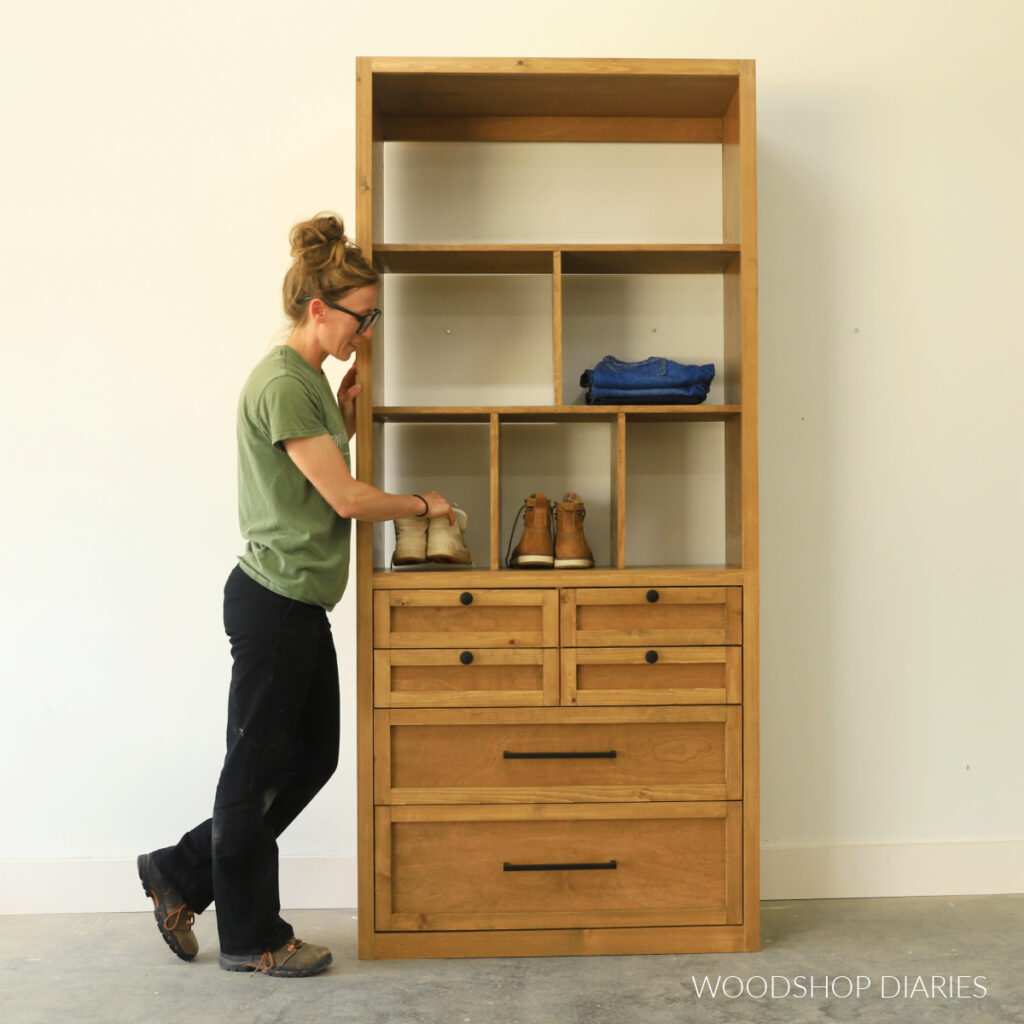
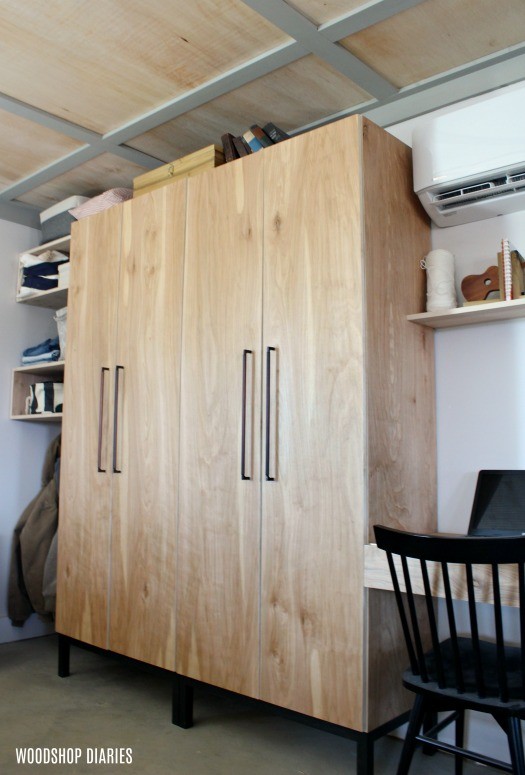
Oh…and if you’re interested in that cabinet on the left, you can see how to build it in this post. It’s another great closet cabinet addition!
I know it’s hard to capture it fully in a tight space, so here’s a better look at just the cabinets. So simple, but so practical!
If you’re ready to build your own simple custom closet tower cabinets, be sure to grab the printable building plans here.
Looking for more closet cabinet ideas?
Enjoyed this build, but looking for more custom closet ideas? I’ve got you covered! Click on the image(s) below to learn how to build each project:
If you enjoyed this post, be sure to save it for later by pinning or sharing to your favorite social channel!
Until next time, friend, happy building!