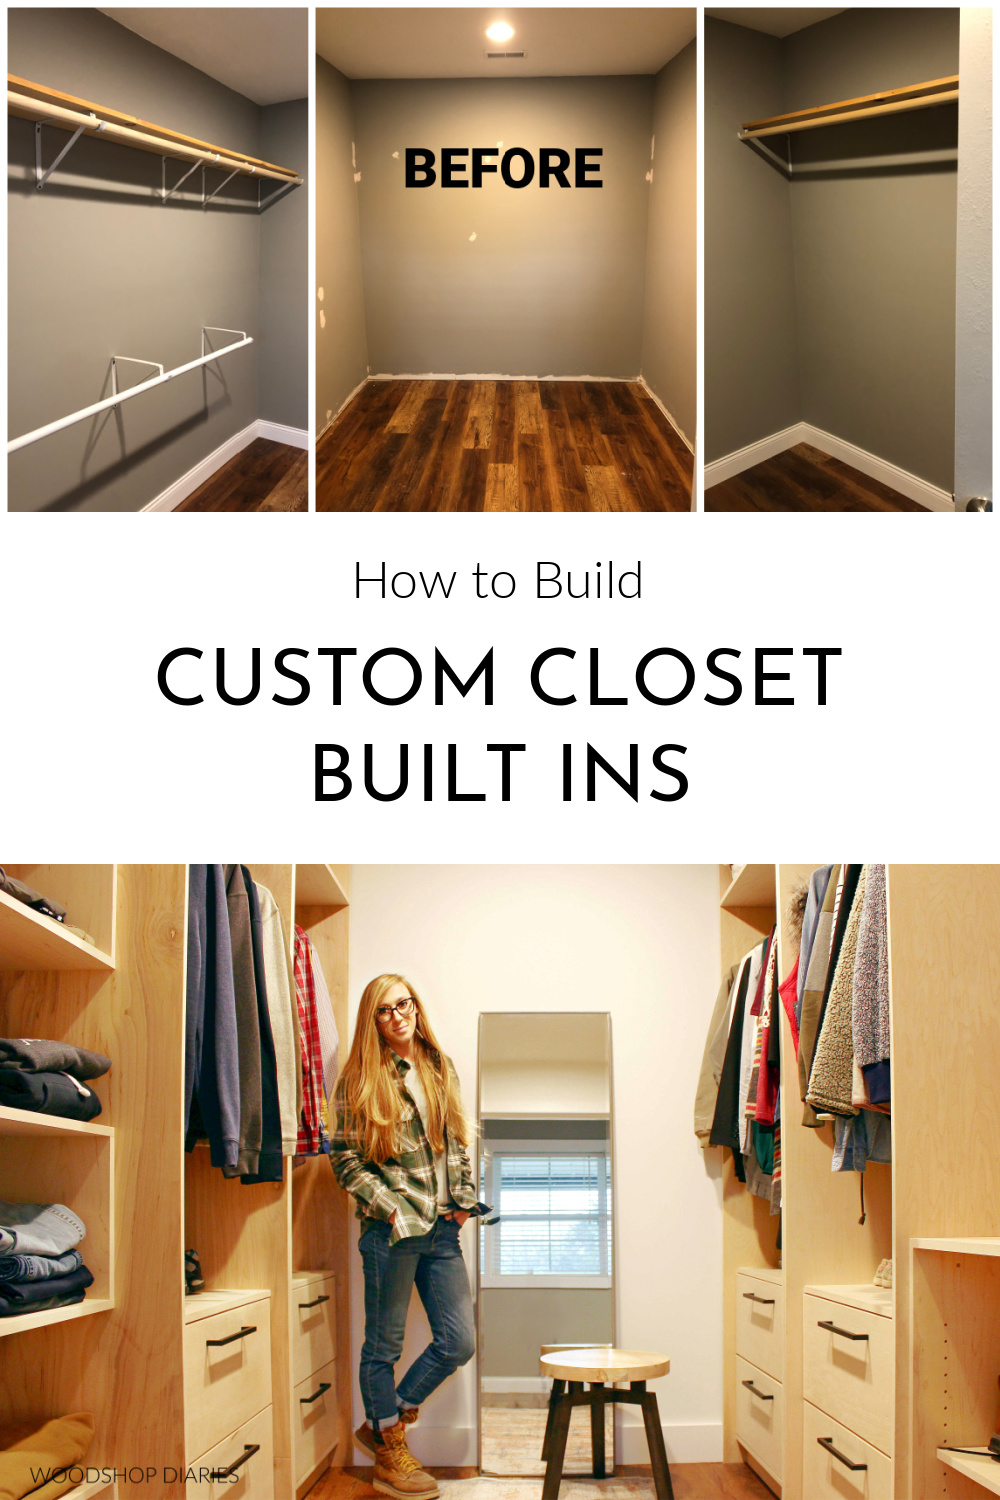
In this post, I’ll show you how I built my own DIY custom closet cabinets and built ins to add both storage and style to my boring, basic walk-in closet.
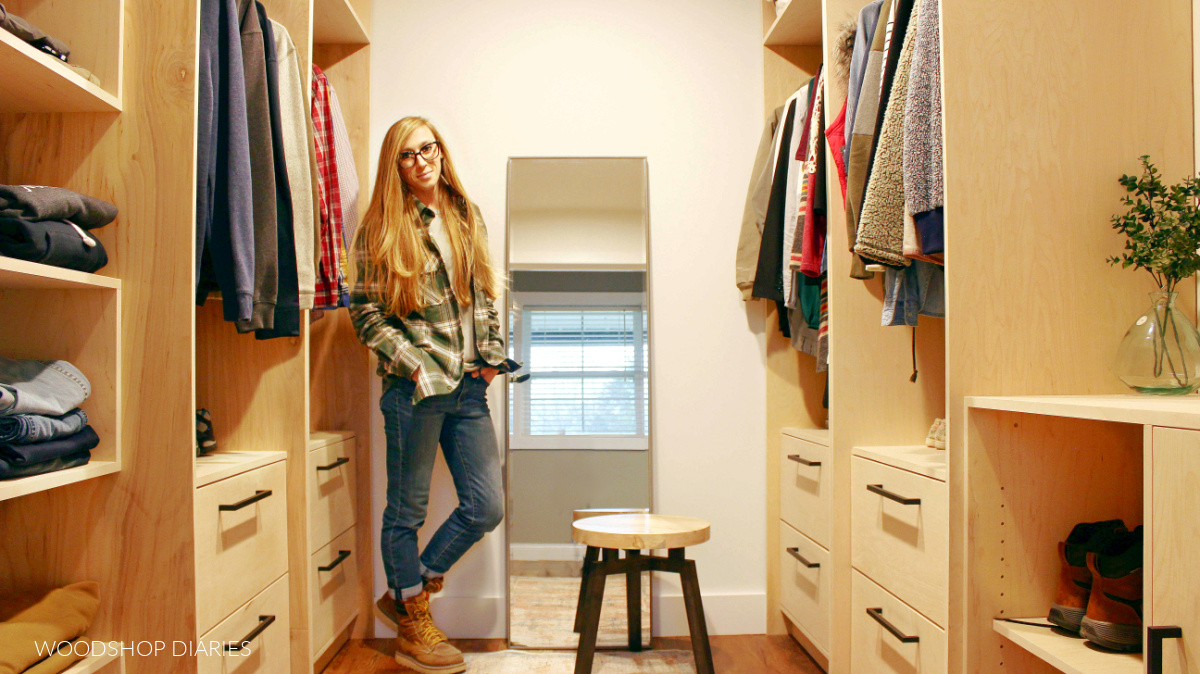
We recently moved into a new home and one of the first projects I decided to tackle was to add some DIY custom closet cabinets to the walk in closet.
.
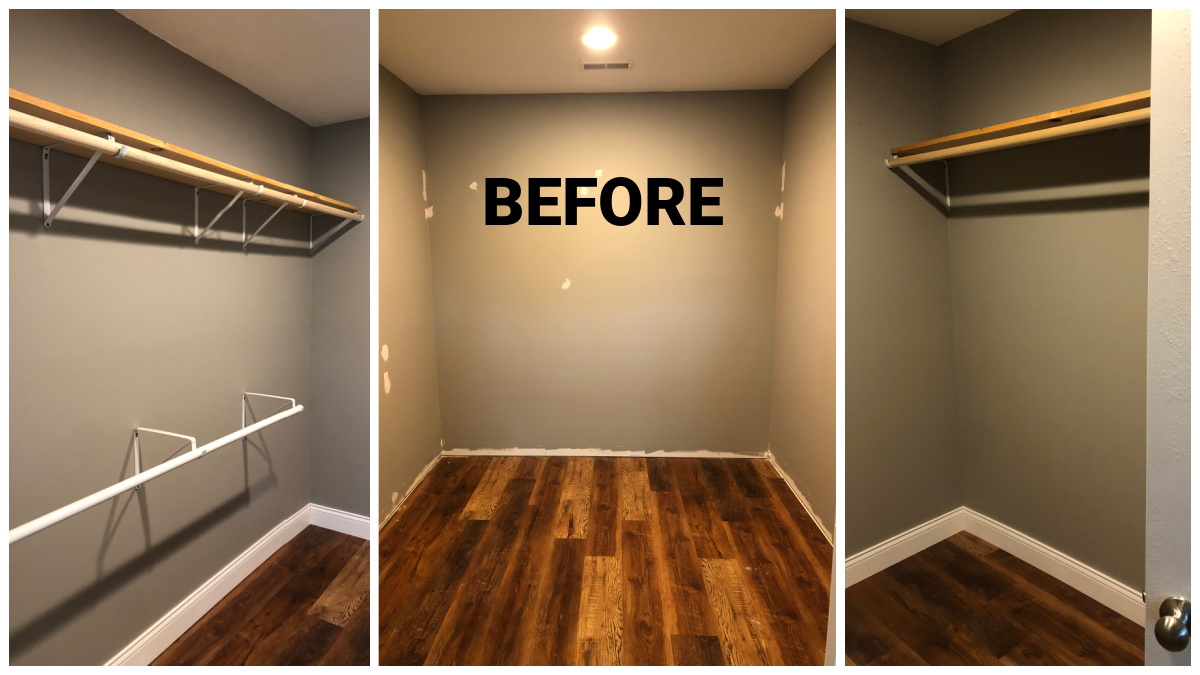
Just to give you an idea of what I was working with, let’s kick things off with a quick glance at what it looked like before.
The Closet Before:
This closet is almost 9 ft deep and almost 8 ft wide. But sadly, the only storage it had was two tiny shelves and a couple rods for hanging. (Image below left & right)
.
Clearly, we could do better than this…
The first thing I did was remove the closet door, and take down the existing shelves and brackets.
.
I also removed the baseboards and all the trim since I was going to take these new cabinets wall to wall (see image above center).
.
Once the room was empty, I patched the holes in the wall and painted it SW Pure White to give me a clean slate to work with.
.
Then, I started building out the closet.
.
I’m sharing the plans and building details below, but I also have a video sharing the process here as well:
*This post contains affiliate links. See policies.
Tools & Materials:
Tools:
- Circular saw
- Cutting Guides (Kreg Rip Cut & Kreg AccuCut)
- Kreg pocket hole jig
- Drill/Driver
- Miter saw (optional)
- Kreg Shelf Pin Jig
- Kreg Concealed Hinge Jig
- Stud Finder
- Level
- Table saw (optional for cutting dadoes in drawers)
Materials:
*Note that quantities will vary based on your own sizes/space
- ¾″ cabinet grade plywood (birch, maple, or oak)
- ¼″ plywood
- 1 ½″ diameter dowel rod(s)
- 1 ¼″ pocket hole screws
- 1 ¼″ & 2 ½″ wood screws
- 16″ drawer slides
- Concealed Inset Hinges
- Modern drawer/door pulls
- Shelf pins
- Edge Banding
Some notes about these DIY Custom Closet Cabinets:
I built everything here using cabinet grade plywood. I had to use a combination of birch and maple since my store ran out of birch, and I switched over to maple mid-project.
.
The number of sheets of plywood you’ll need will depend on how you customize your cabinets/sections for your space. I lost count, but I believe I used around 9 sheets of ¾″ plywood for my closet.
.
These closet built ins were made in 5 main parts. And because these were built specific to my closet’s dimensions, it’s kind of useless to share my exact dimensions with you as they’ll very likely not the the same to fit your space.
.
That said, I’m going to share the how to and some diagrams for each section of the build, but you’ll have to figure out your own dimensions and customize it to fit your own closet space.
.
Bear in mind that most walls are not perfectly square and it’s best to build things a little too small and cover any gaps with trim than to build things too big to fit in the space.
.
Here are some guides to help you in this project:
Step 1: Build Main Closet Cabinets
I mentioned that I built out the closet in 5 basic sections.
.
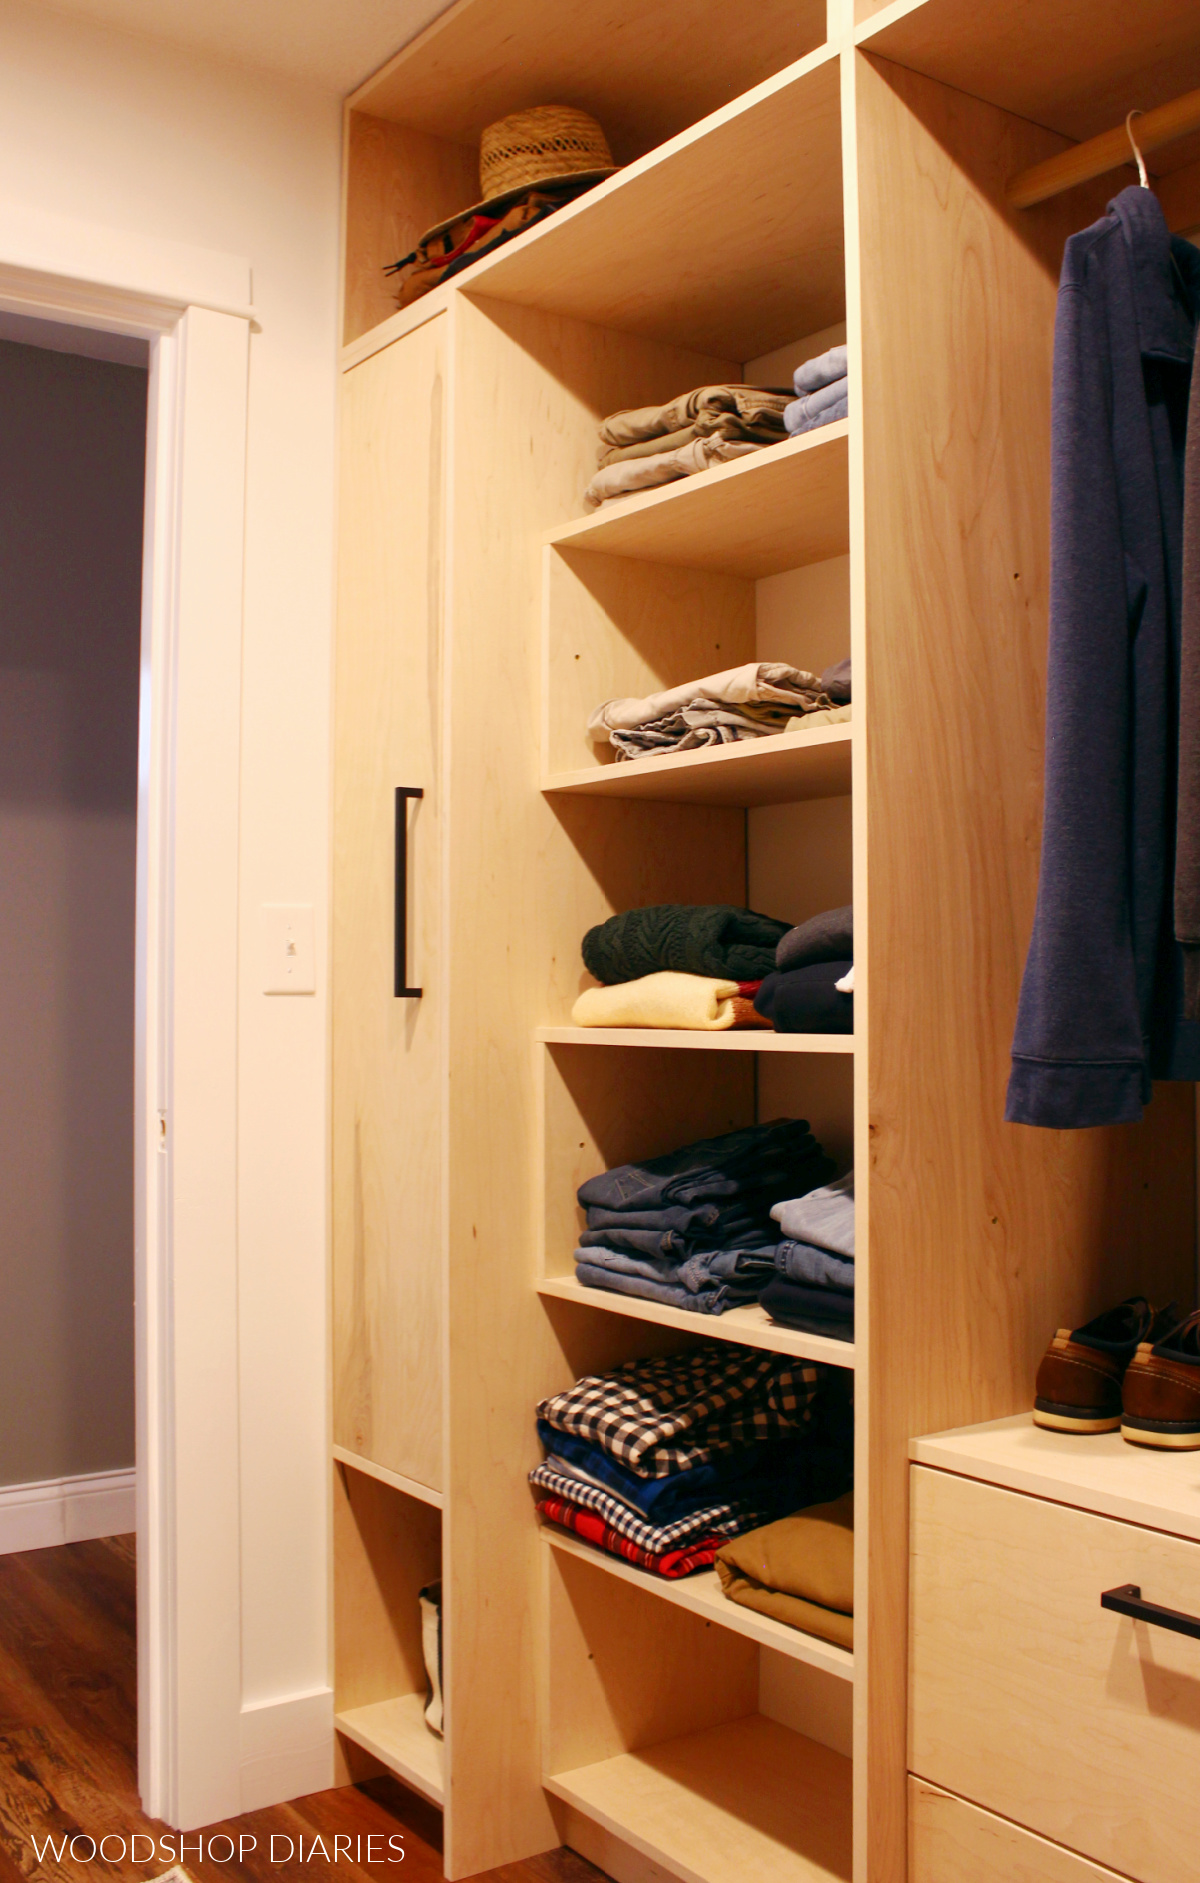
The first section was the clothes rack cabinets with drawers at the bottom. I built four of these—two for each side of the closet.
.
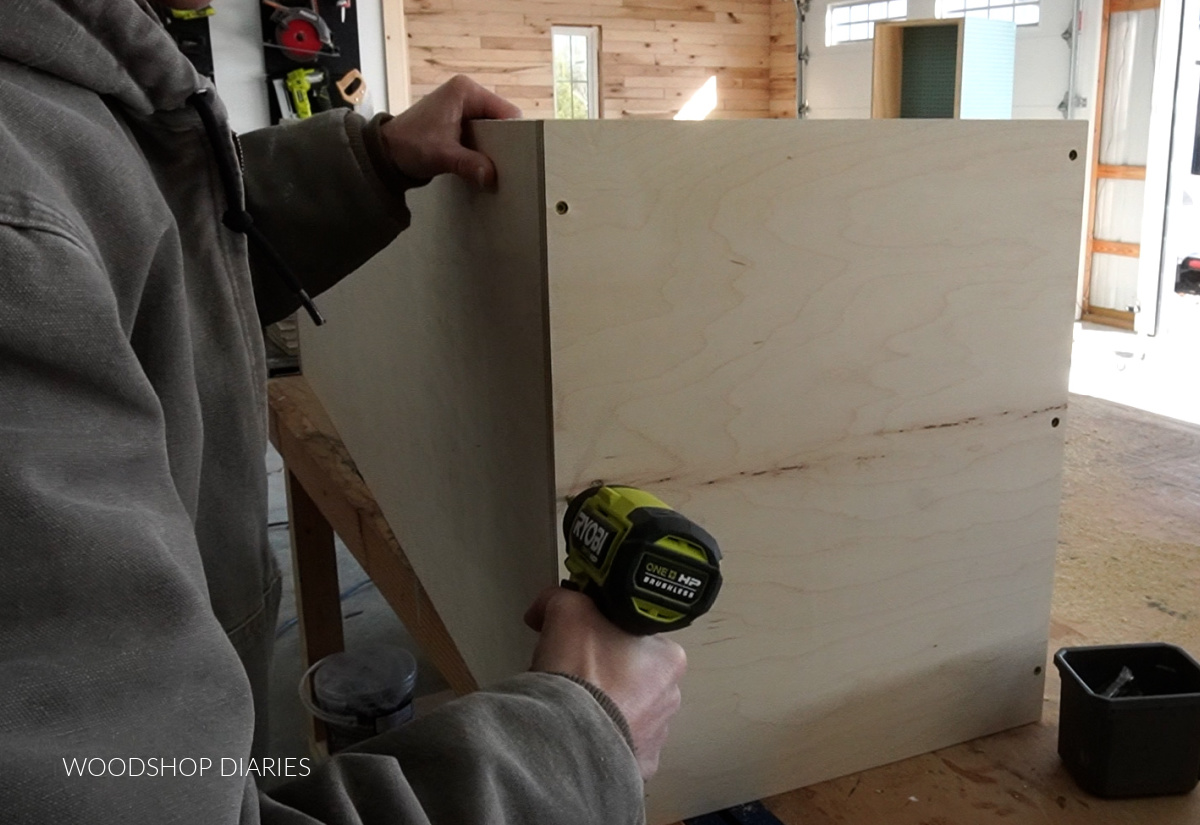
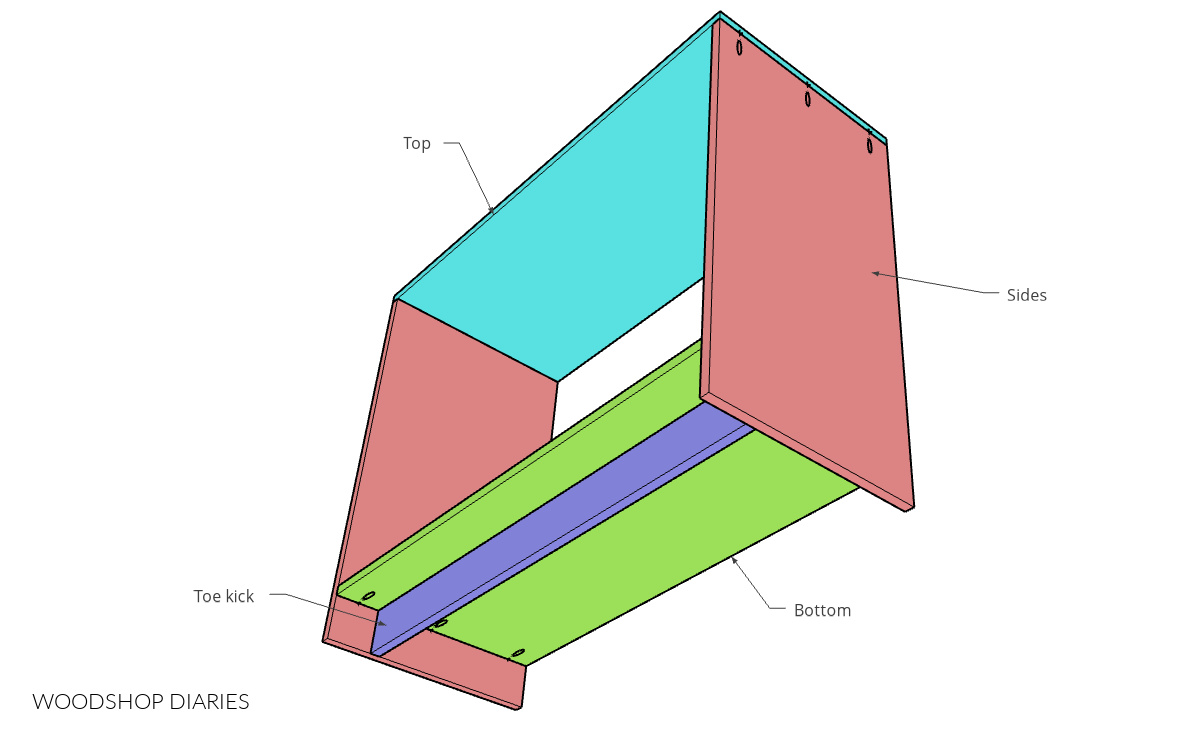
For each of these four cabinets, I used my Kreg Cutting Guides and circular saw to cut two side panels and two shelves like shown below.
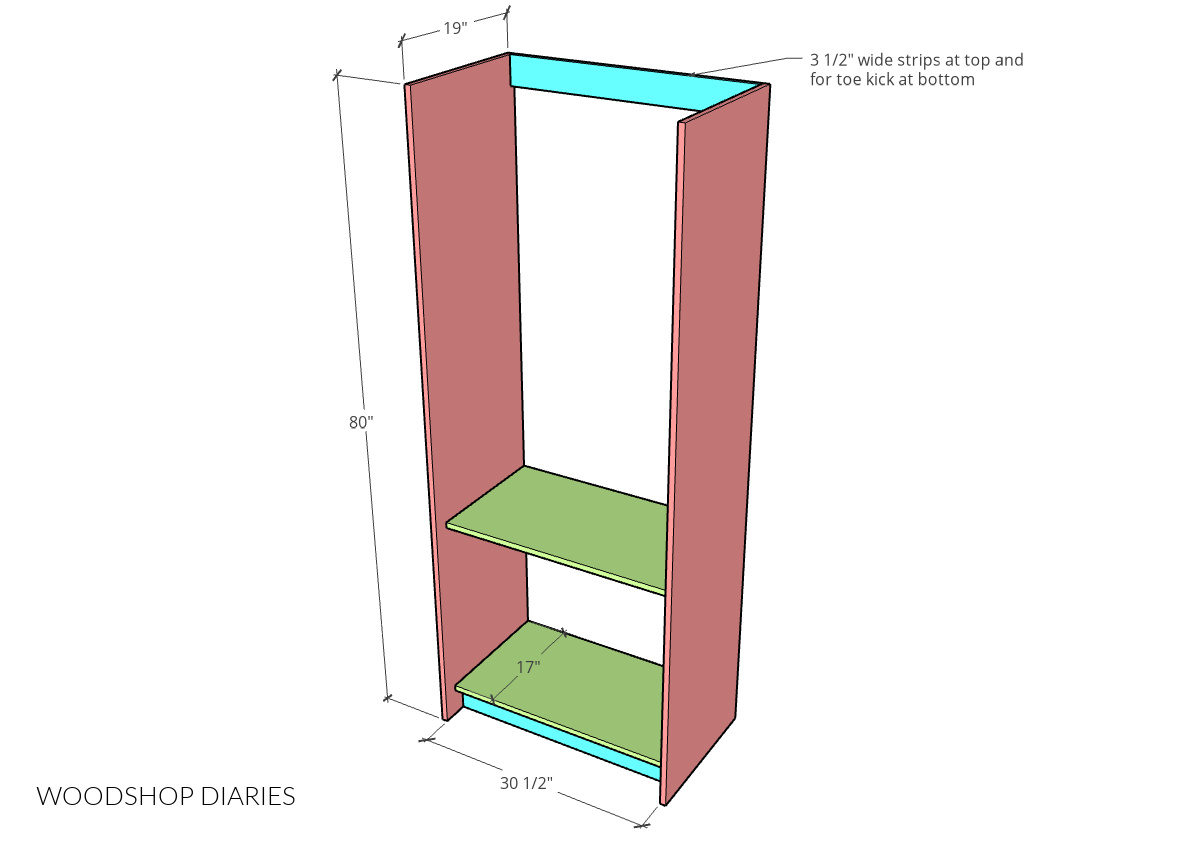
I also cut two plywood scrap strips 3 ½” wide..one for the toe kick and one for the top back support.
RELATED: How to cut plywood sheets
.
Before assembling anything, I applied iron on edge banding to the front edges of the side panels and shelves and sanded all my pieces well.
RELATED: How to apply iron on edge banding
.
Then, I pulled out my Kreg 720 pocket hole jig and drilled ¾″ pocket holes along the ends of the shelves and the two thin strips.
RELATED: How to use a pocket hole jig
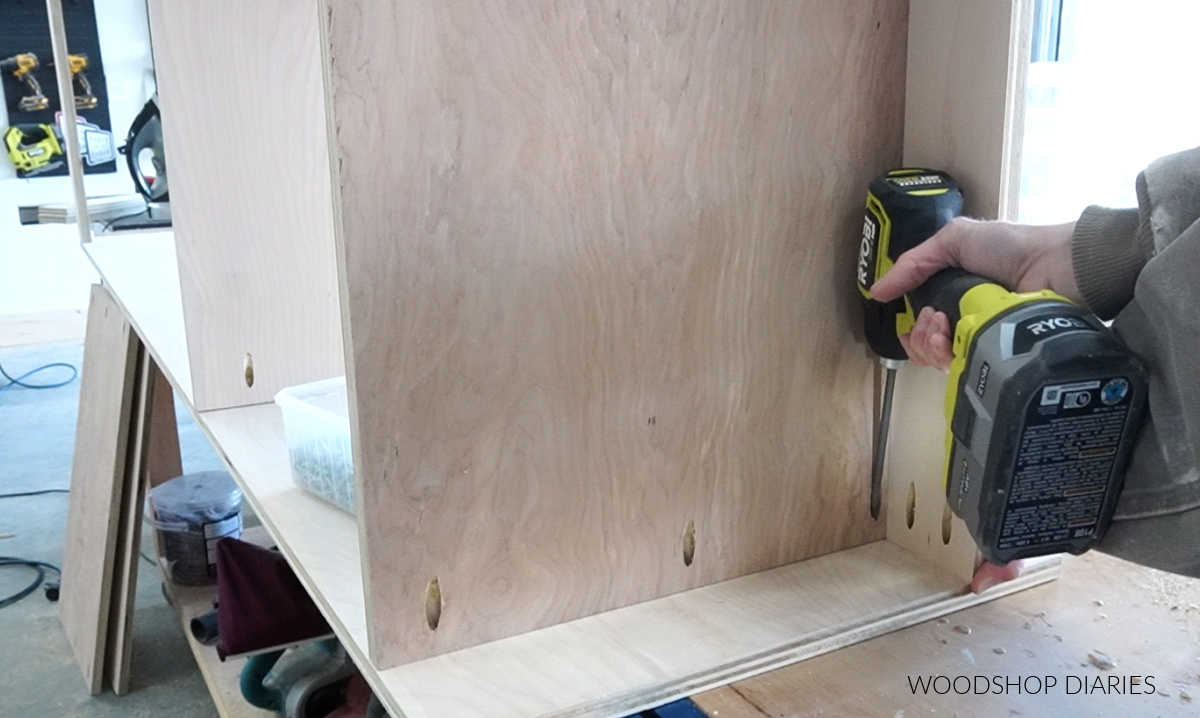
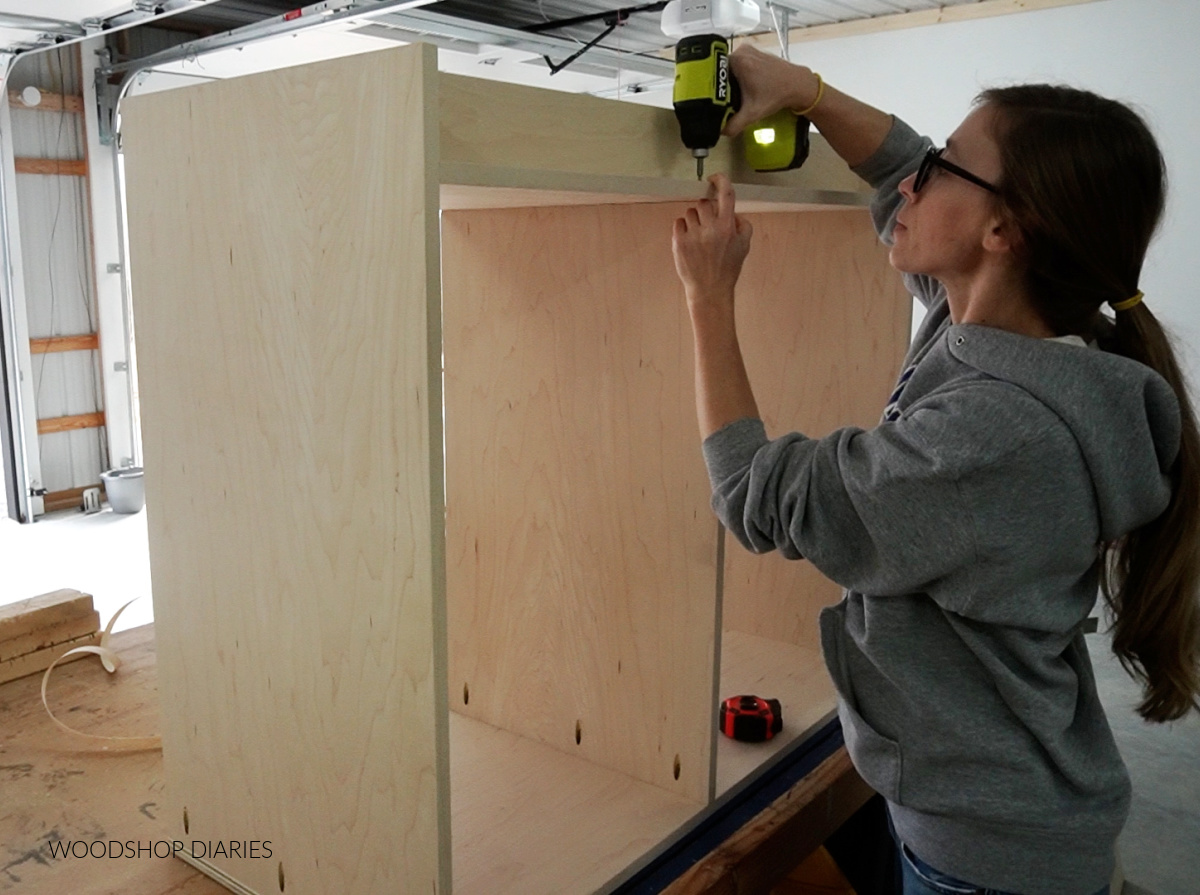
I used 1 ¼″ pocket hole screws to assemble the cabinet. I installed the bottom shelf 3 ½” from the bottom edge, then installed the toe kick strip underneath it 3 ½” in from the front edge.
.
Then, I installed the top shelf 52” down from the top edge.
.
I’m just picking numbers here—52” seemed like a good height to be able to hang most of our clothes.
.
Notice that I kept these shelves flush to the back edge of the side panels so they are inset from the front.
.
There’s no reason for making the shelves shallower than the side panels except that I liked the way this looked…you can make them all the same depth if you wanted.
.
I screwed the second plywood strip at the top back corner—I’ll use this strip to secure these cabinets to the wall once they’re in the closet.
.
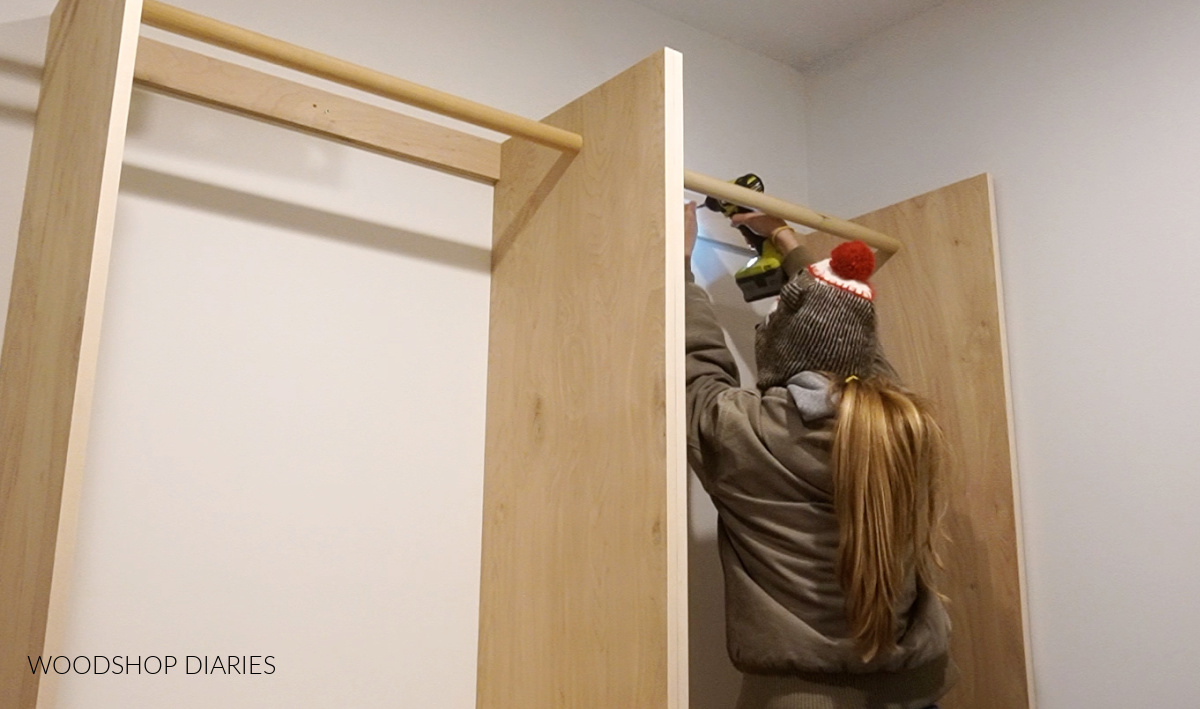
I was able to reuse the 1 ½″ diameter dowel rods that I removed from the original closet and cut them down to install into these cabinets.
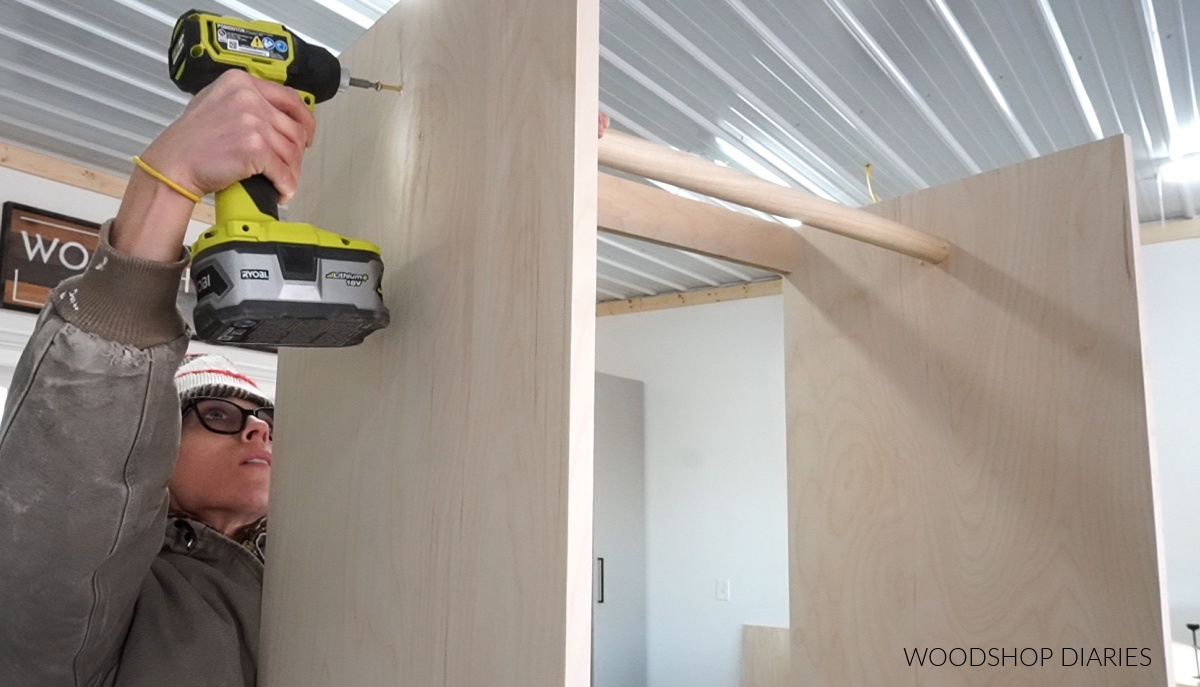
I screwed these in through the side panels about 2 ¾” down from the top edge and centered front to back. This left enough room to be able to add some standard size hangers.
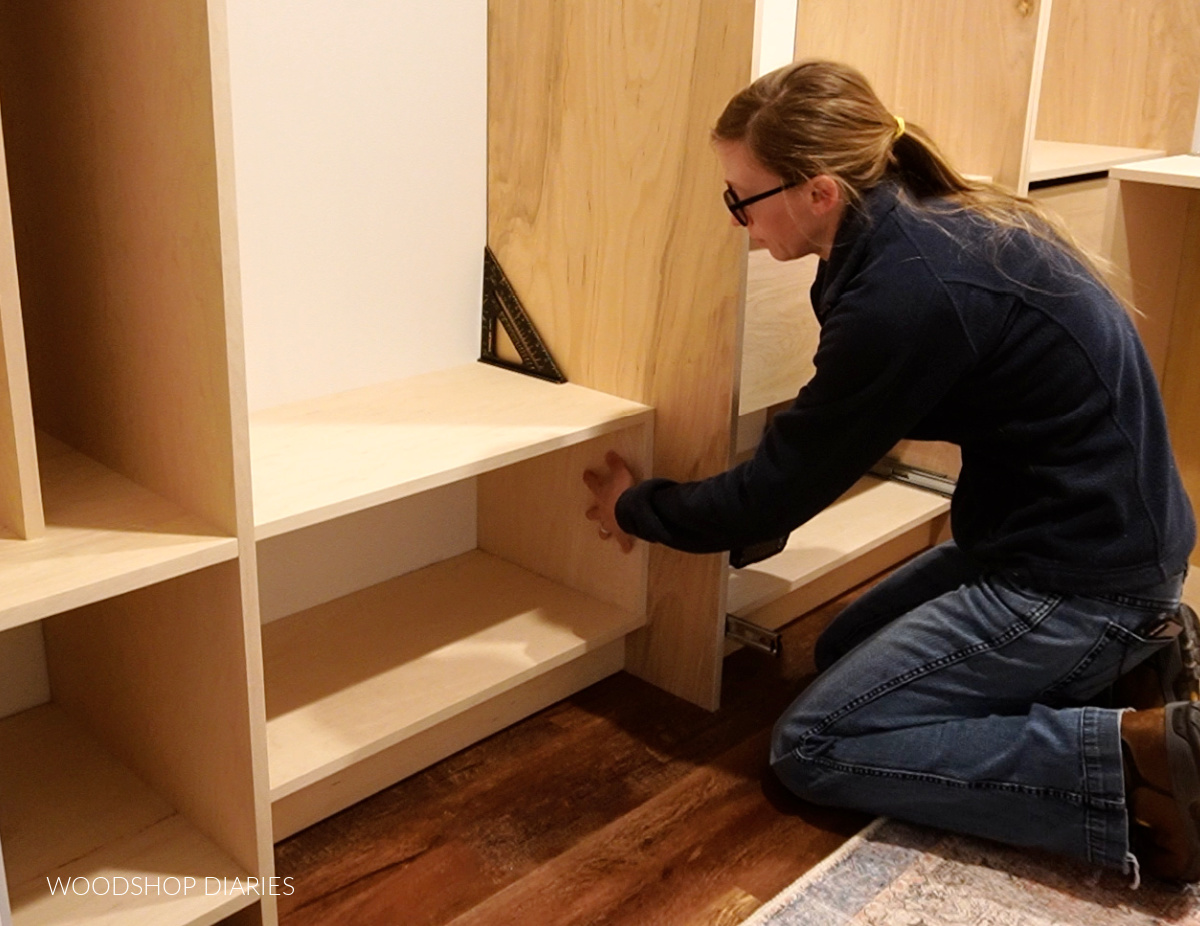
Step 2: Add Drawers to Closet Cabinets
The top section of these cabinets is obviously meant for hanging clothes. But the bottom section can be used for adjustable shelves, drawers, or left open for baskets.
.
I opted for drawers here.
.
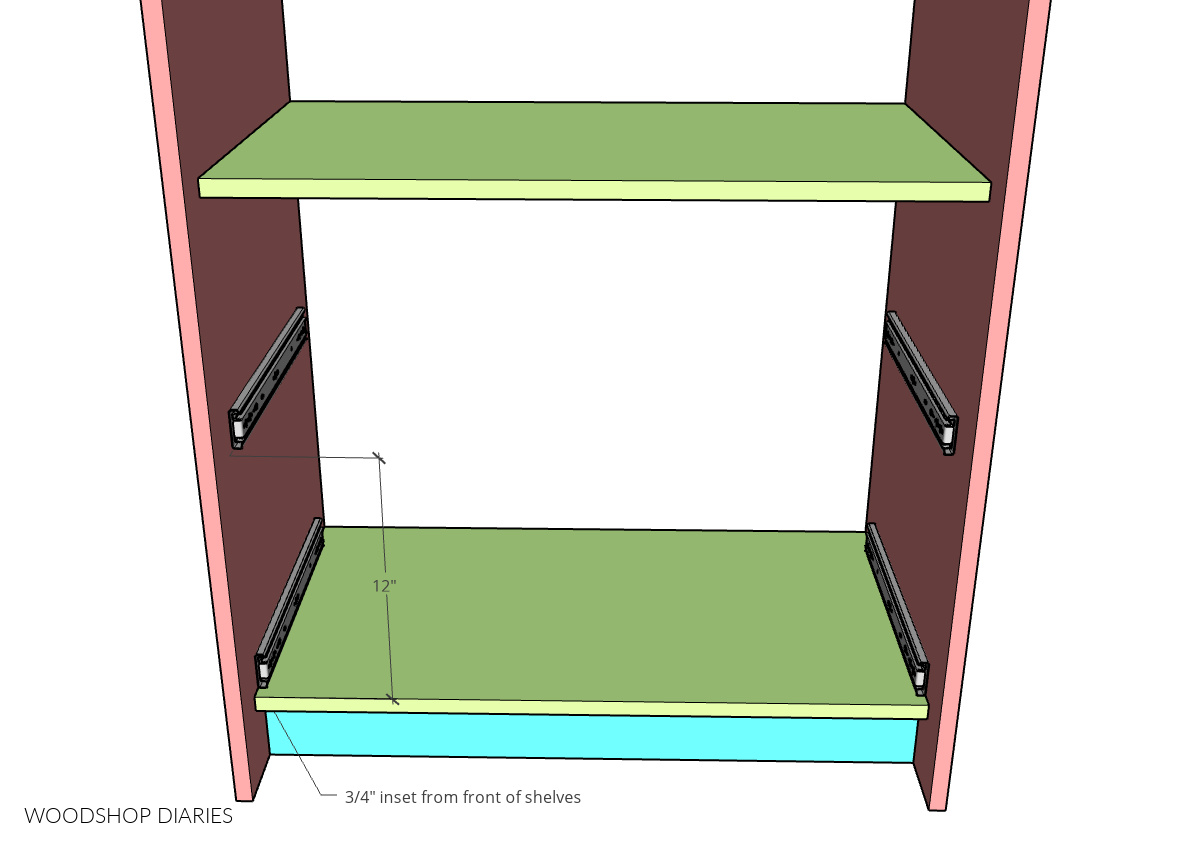
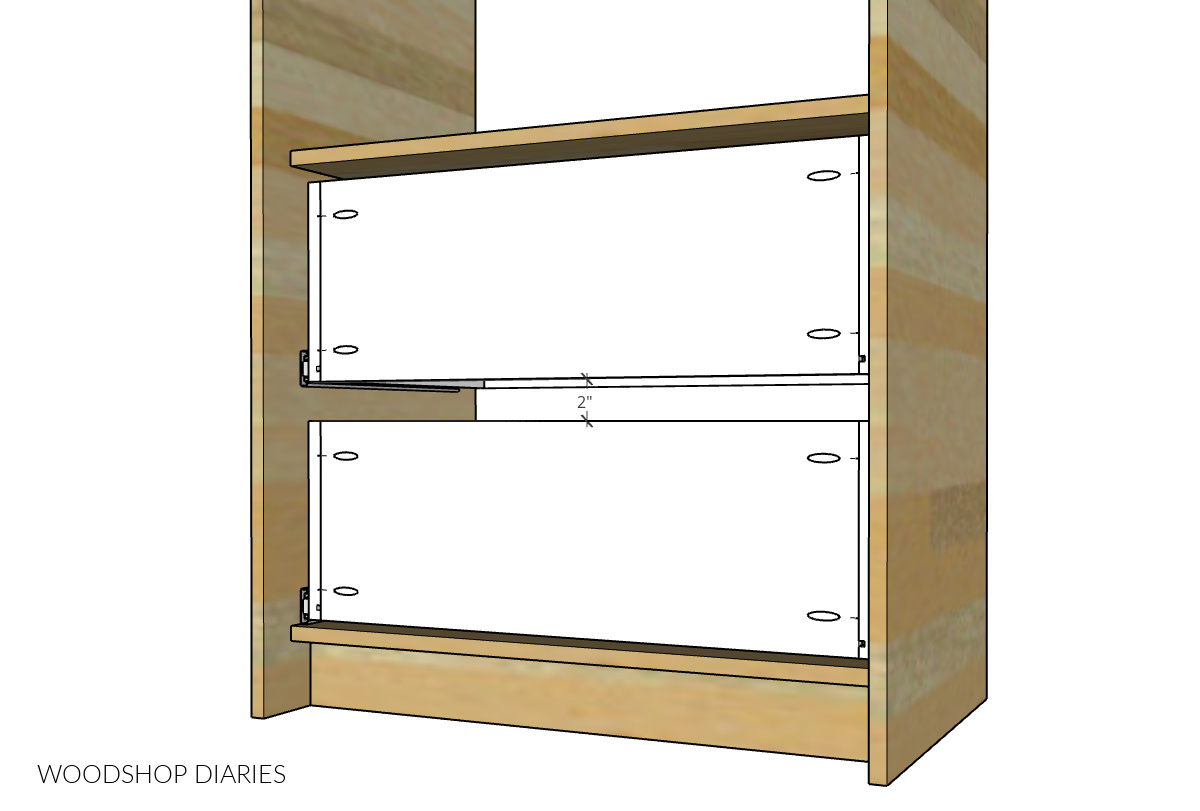
So, I installed two 16″ drawer slides into the bottom section of each cabinet. I was installing inset drawers, so I made sure to install these ¾” in from the front edge of the shelves.
RELATED: How to measure, build, and install drawer boxes and drawer slides
I used my leftover 10” wide plywood strips to cut down pieces to make two drawer boxes for each cabinet.
.
I have a complete guide for how I build drawers here, but once I had the pieces trimmed to length, I cut ¼″ dadoes ¼″ deep ½″ from the bottom edge of the sides to install a ¼″ plywood bottom.
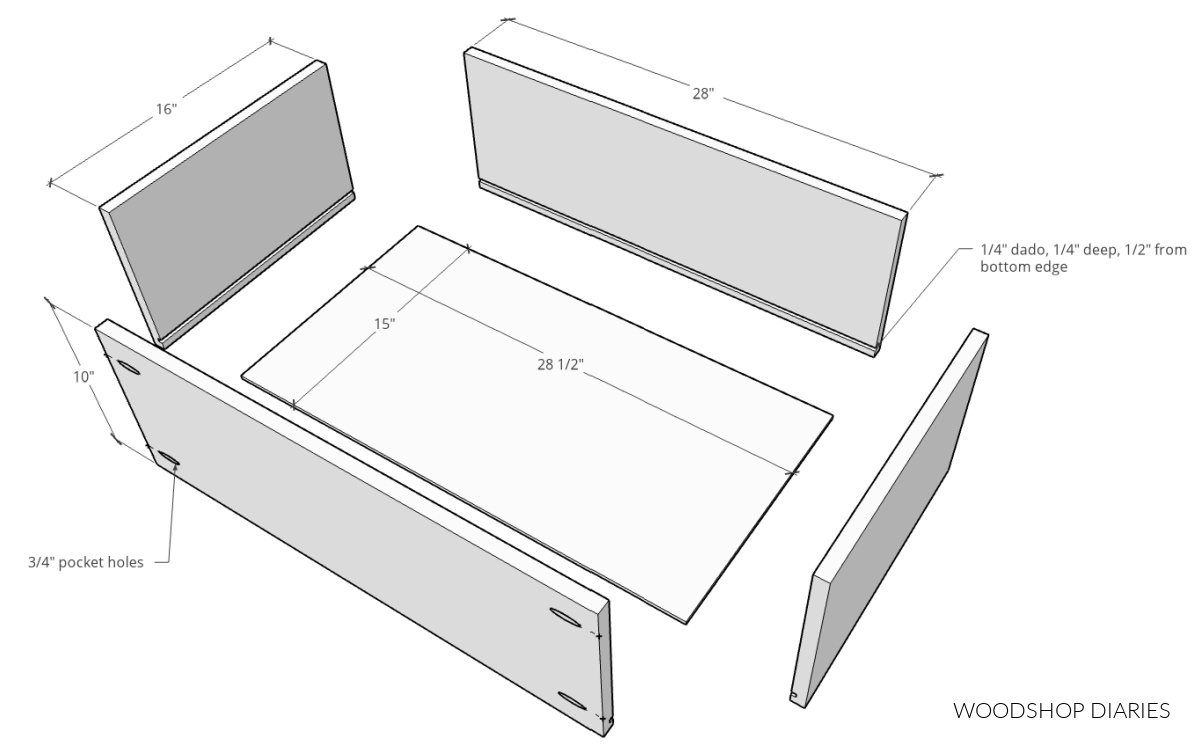
Then, I assembled the boxes using ¾″ pocket holes and 1 ¼″ pocket hole screws. Edge banding on drawers is totally optional, but I think it looks a lot nicer, so I did edge band the tops of these pieces before putting them together.
.
Then, I installed the drawer boxes into the cabinets.
This guide walks you step by step how to install drawer boxes onto slides.
.
To finish these up, I cut two ¾” plywood drawer fronts to install on each cabinet.
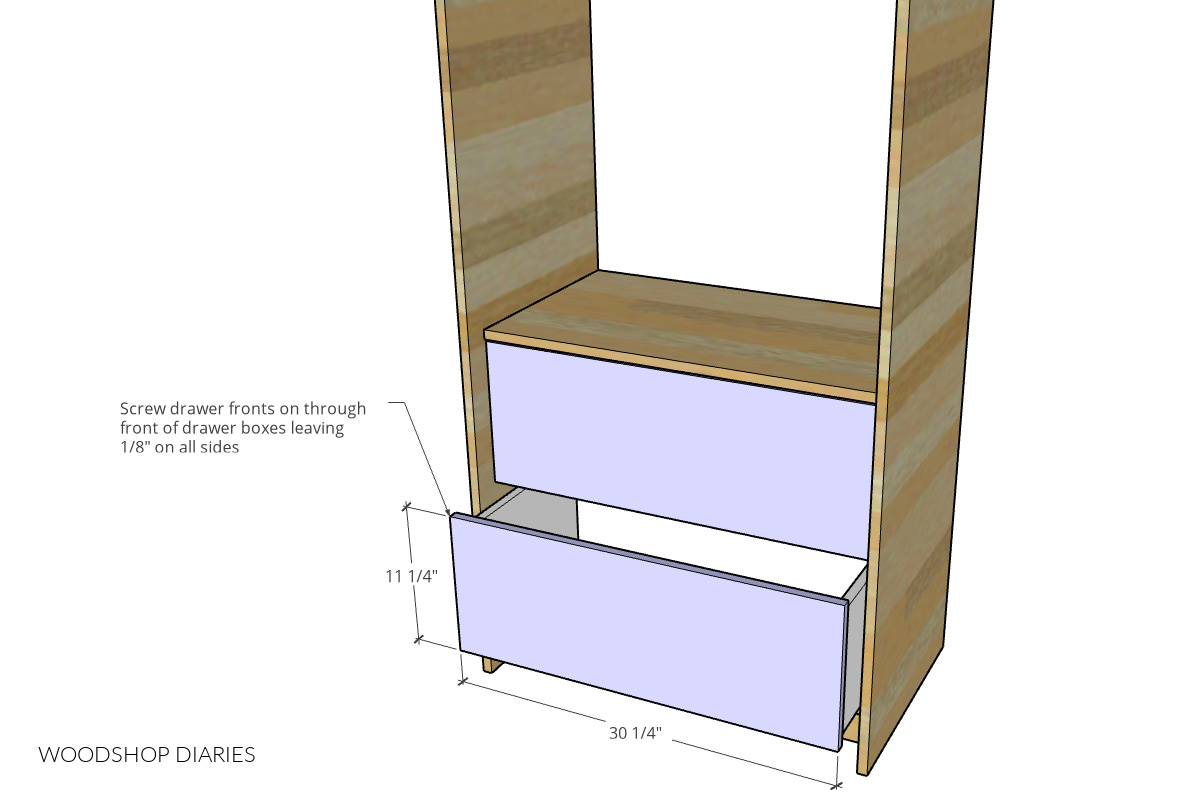
I edge banded them, brought them inside and screwed them in through the front of each drawer box leaving ⅛” gap on all sides.
.
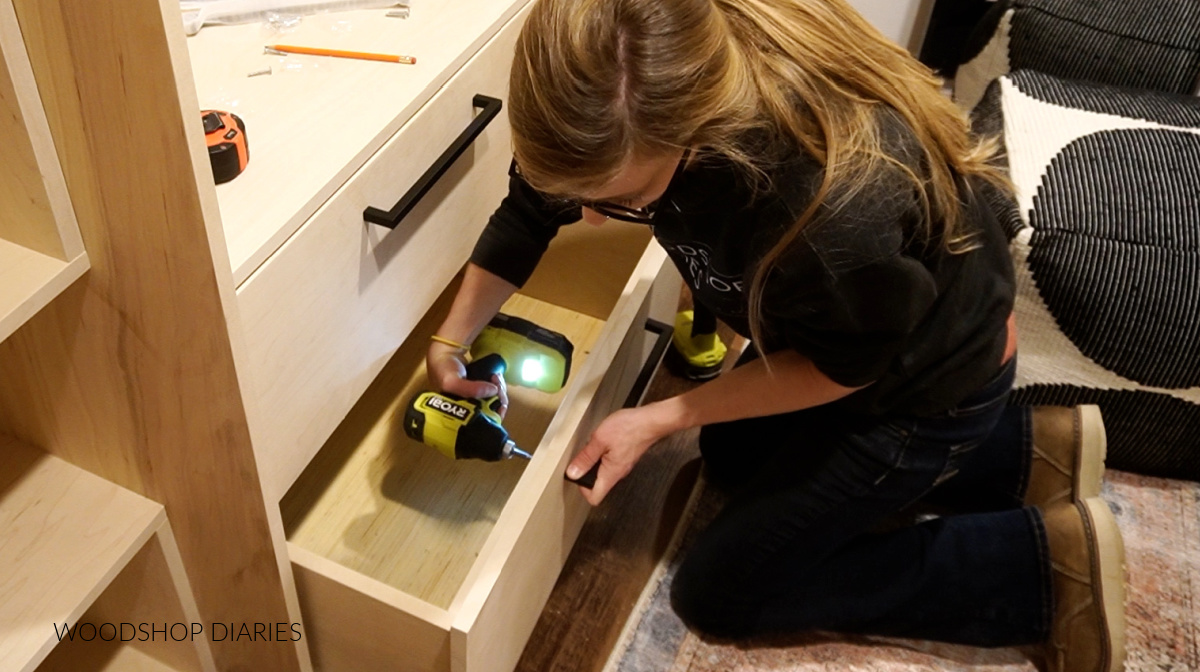
I went ahead and added the drawer pulls here, too because if I didn’t, I wouldn’t be able to open the drawers again since they’re inset haha.
Step 3: Install Closet Cabinets into Closet
Each side of the closet had two of these cabinets side by side. I screwed both cabinets together with a couple 1 ¼″ wood screws.
.
Then, I used a level and a stud finder to drive one screw per cabinet through the back support into a stud making sure the side panels were straight up and down.
Step 4: Build Tall Narrow Closet Cabinet
Those large closet cabinets were the main part of the closet build out. The next sections were a little simpler.
.
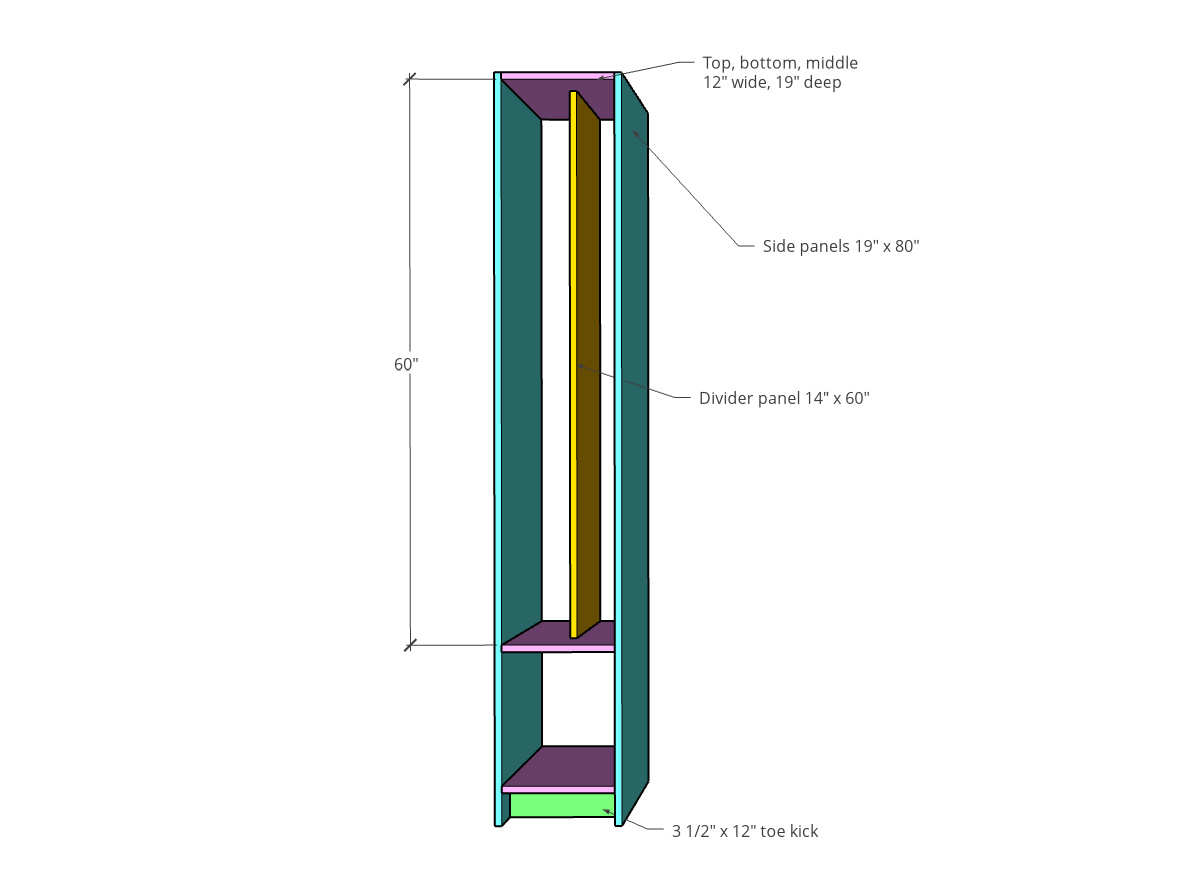
Danny had requested a tall, narrow cabinet with shelves to store some of his smaller items to keep organized.
.
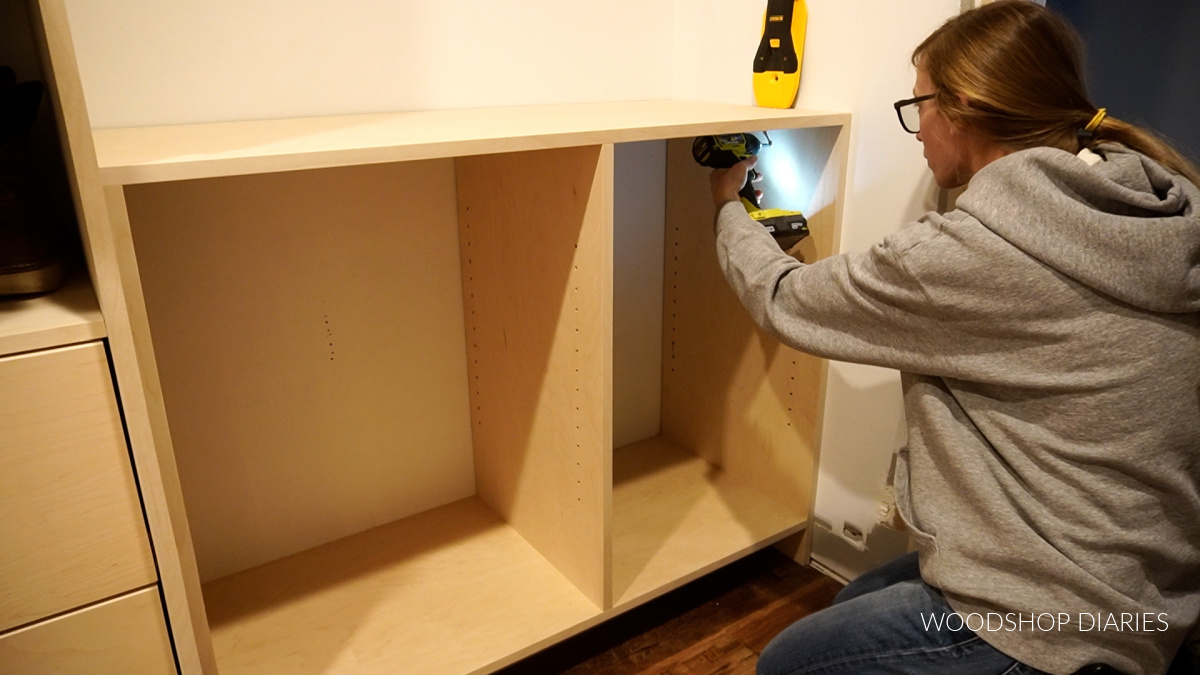
I built this the same height and depth as the clothes rack cabinets, but cut a narrower divider panel to split the top section in half.
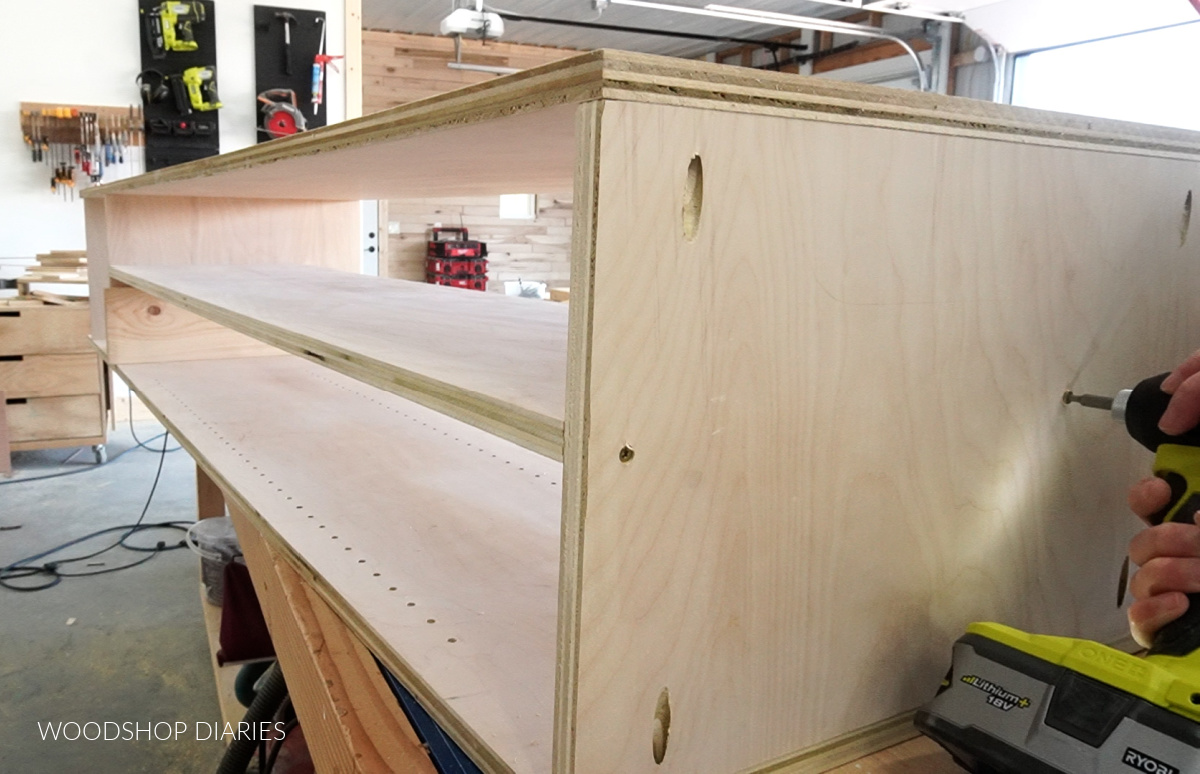
Because this cabinet was so narrow, I knew I wouldn’t be able to get the shelf pin jig and the drill into the space to drill holes after it was assembled, so I drilled them first before screwing anything together.
.
I assembled the main body of the cabinet using ¾″ pocket holes and 1 ¼″ pocket hole screws, then added the middle divider panel using 1 ¼″ screws through the top and middle shelves.
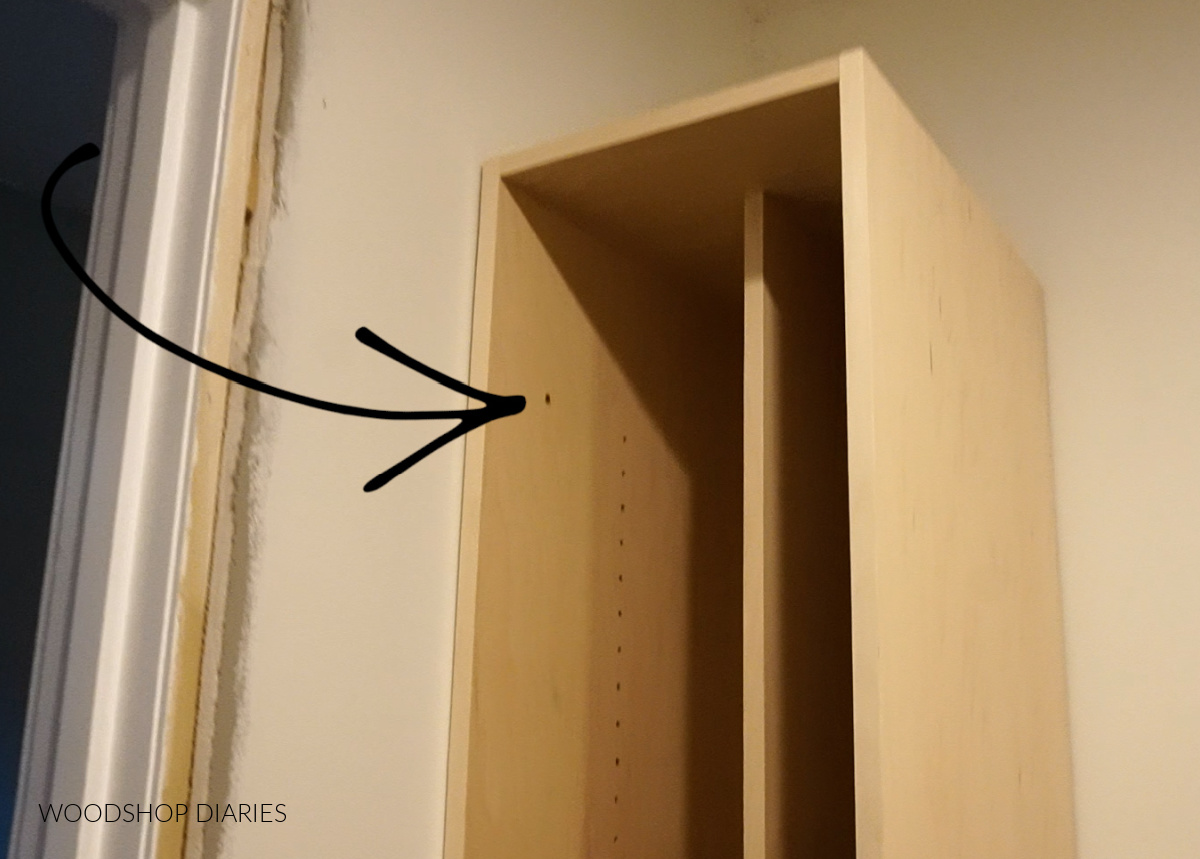
Since this cabinet was so narrow, I knew there wasn’t going to be a stud behind it to attach to, so I used a screw through the side panel to secure it to a stud that way.
I cut an inset door from ¾″ plywood and a few shelves to add onto this cabinet.
.
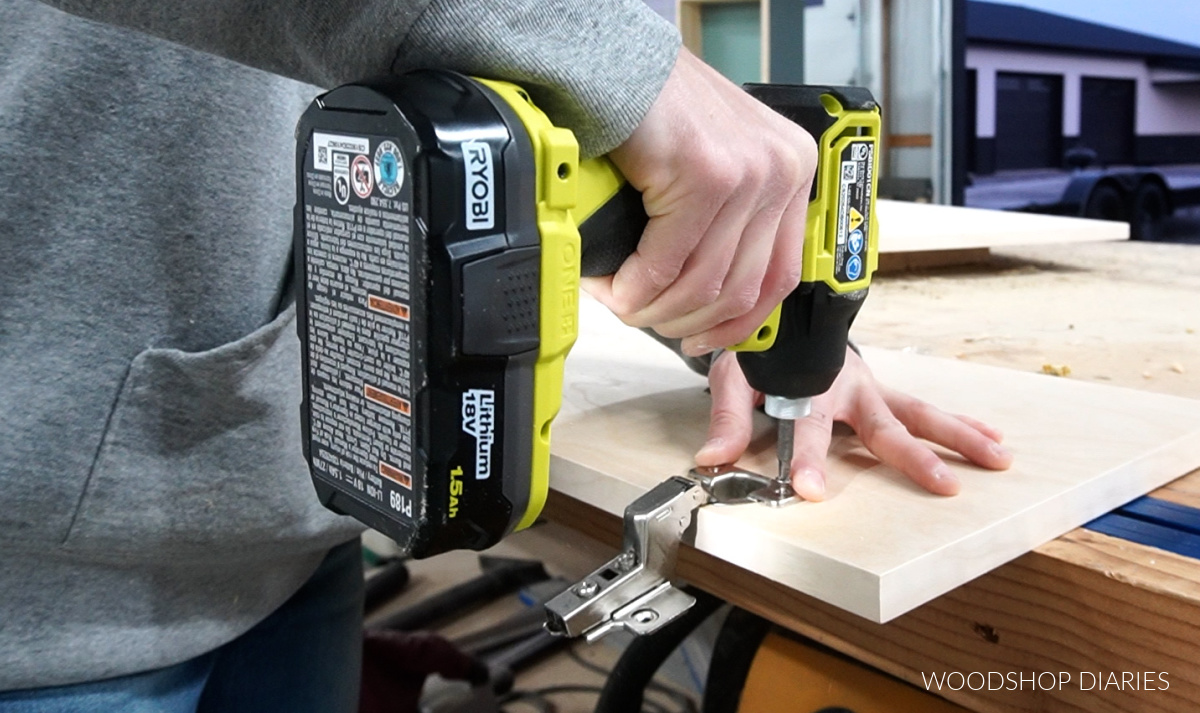
You can check out this post for how to size a cabinet door. I used a Kreg concealed hinge jig to drill out holes to insert the inset concealed hinges, then installed it onto the cabinet.
RELATED: How to install concealed hinges
Step 5: Add Top Closet Cabinet Boxes
But now that the cabinets were all in place, I could move on to the third main part of the closet—the top boxes.
.
These are obviously one of the simpler pieces of the closet as they consist of just four pieces of plywood screwed together.
.
I could have saved some lumber here by simply adding a single shelf across the top of these cabinets on each side, but I really wanted the look of these boxes going all the way to the ceiling, so that’s what I did.
.
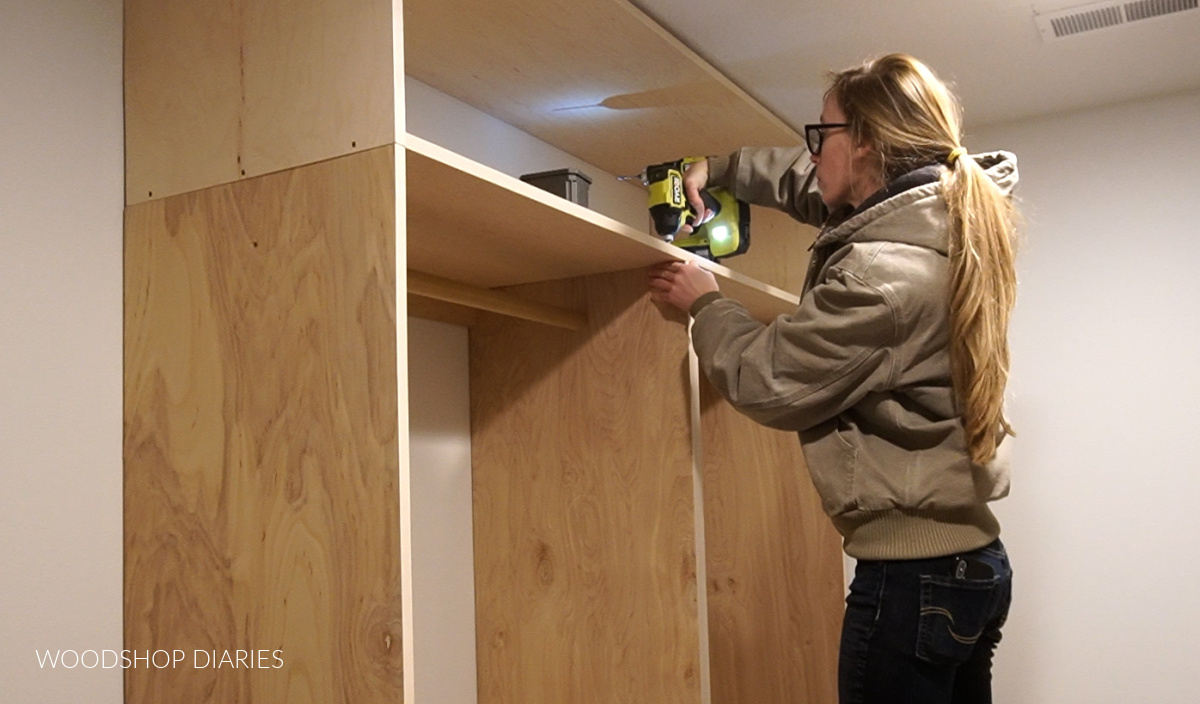
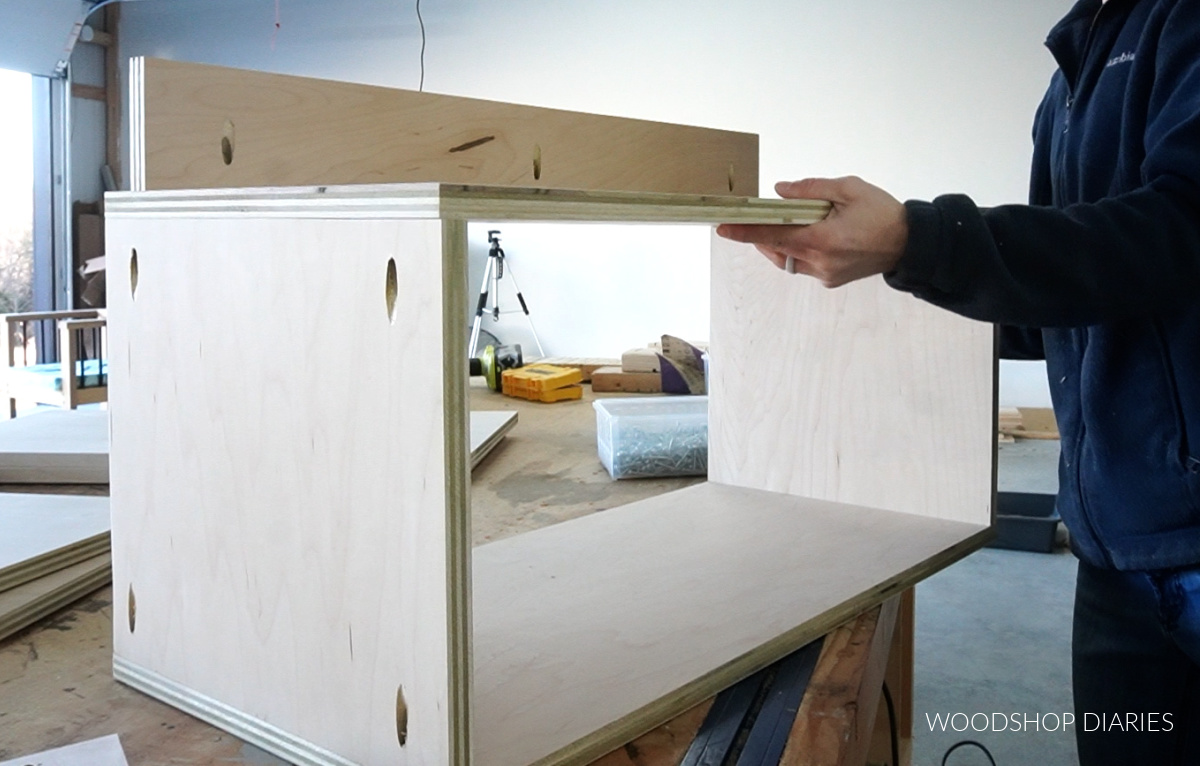
I measured and built a simple plywood box to fit over the top of the two clothes rack cabinets first. I cut the four pieces to assemble the box, added iron on edge banding, then screwed them together using wood screws.
You could use pocket holes here instead, and you could also build these so that the top and bottom span the entire width vs butting up to the sides. It doesn’t really make a big difference here either way.
.
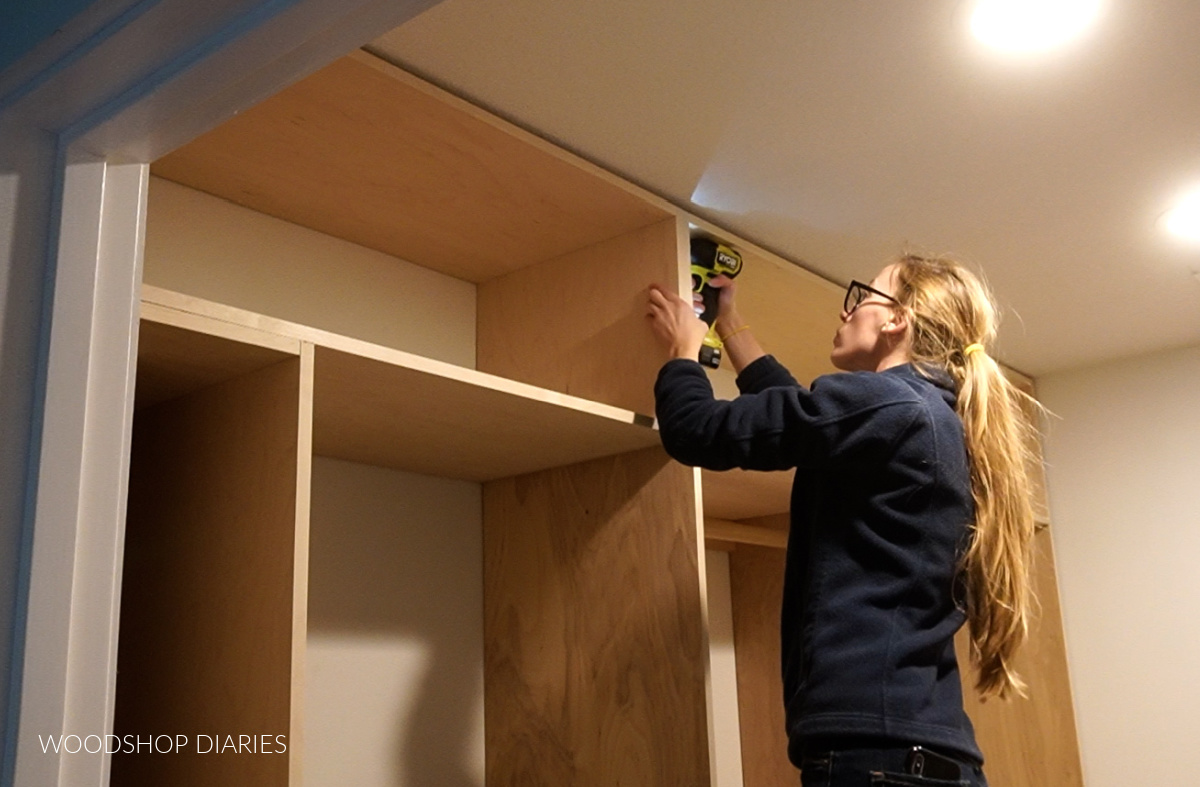
I slid the box on top of the cabinets, and used screws to secure it to them. I drove them at and angle on each end at the front, used a few in the middle, and also used a couple at the back to secure it to the back supports of the cabinets below.
After that box was in, I measured and built a second one to slide in right beside it.
.
I secured this box to the one beside it, and to the top of the narrow cabinet in the front corner.
As a general note, none of these walls were perfectly square and they got narrower in the corners. So I had some small gaps around the edges of each cabinet in here.
.
The small gaps also allow a little wiggle room when installing these pieces side by side. It’s better to build it a little too small and add some trim later than build it too big to fit.
.
I left the gaps as they were small and didn’t’ bother me, but if they bother you, you can always add trim around it at the end to cover them up.
.
I repeated this for the other side of the closet, and got a little help from Danny on the box that didn’t have a cabinet below it.
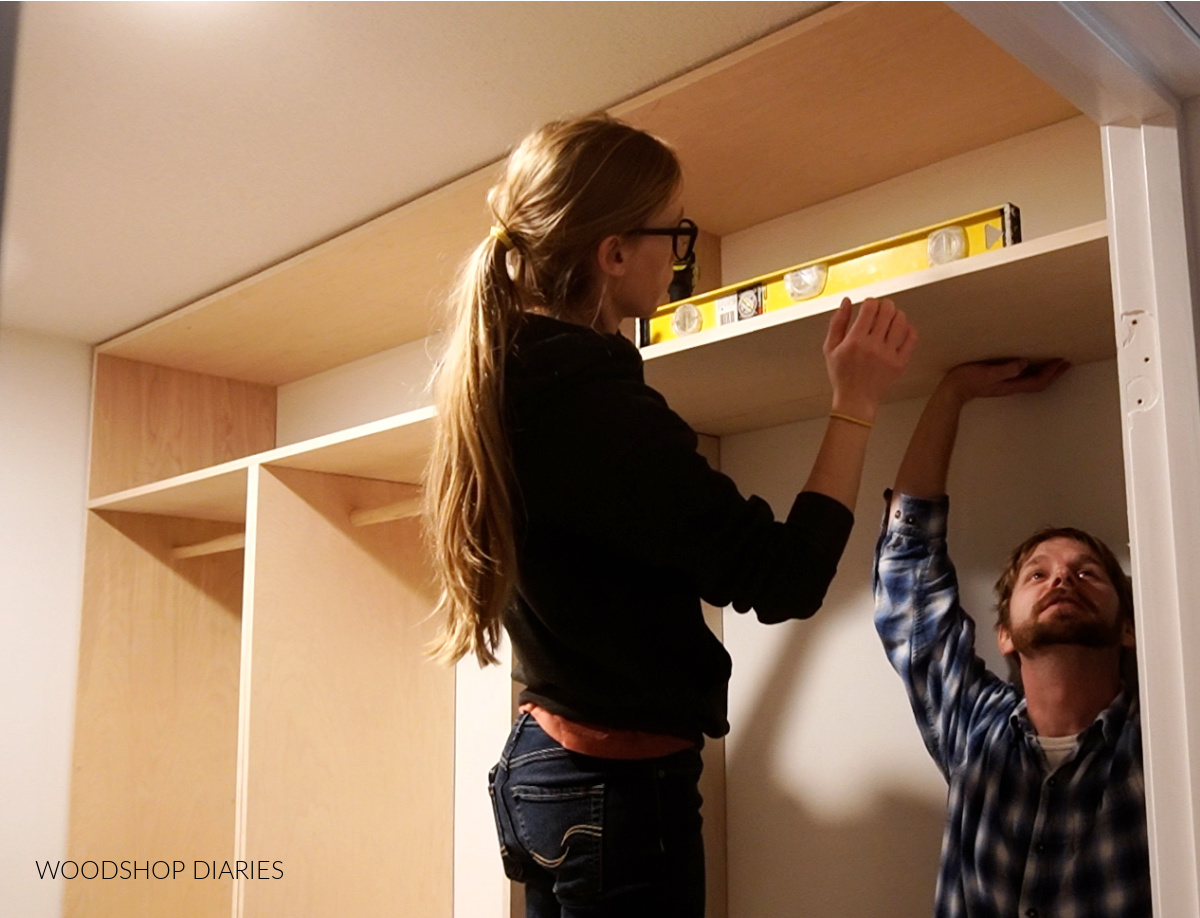
For this side of the closet, since there wasn’t anything underneath the front box, I used a couple screws through the side to secure the box into the wall studs like I did with the narrow cabinet earlier.
Step 6: Install Closet Shelf Boxes
The fourth part of the closet was adding these shelf boxes on the left side between the main clothes hanging cabinets and the tall narrow cabinet.
.
This again, was a super simple part. I used some leftover plywood about 14″ wide to assemble three boxes.
.
I cut the top and bottom box pieces to fit perfectly in the open space between the two cabinets on the left side of the closet and cut 12” long pieces for the sides.
.
I edge banded the front edges of each piece and assembled the boxes using pocket holes and screws.
.
Notice that I faced the pocket holes on the outside here so they won’t be seen once they’re installed.
On the bottom box, I also added a 3 ½” toe kick across the bottom side just to keep things consistent between all the cabinets.
.
I slid the bottom box in place and made sure it was level and square, then screwed it in between the two existing cabinets on each side. I had to remove the drawer to put the screws where they wouldn’t be seen.
Then, I added the top box the same way, and finally the middle box. Each shelf was spaced 12” apart.
.
Now, you could save some lumber here by using shelf pins and adding adjustable shelves or simply screwing in single stationary shelves and not assembling the whole box—there are a million other ways to do this.
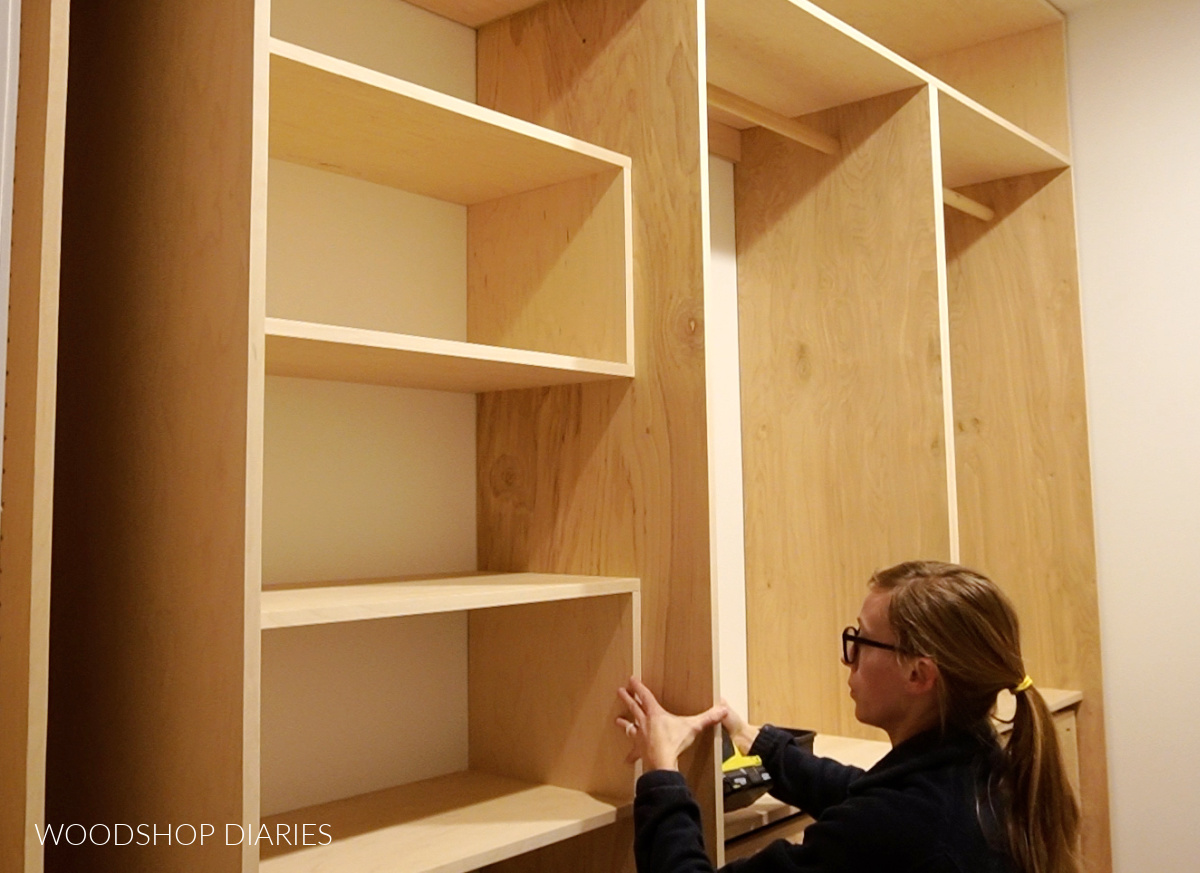
But I really just liked how this looked, and it was simple to put together.
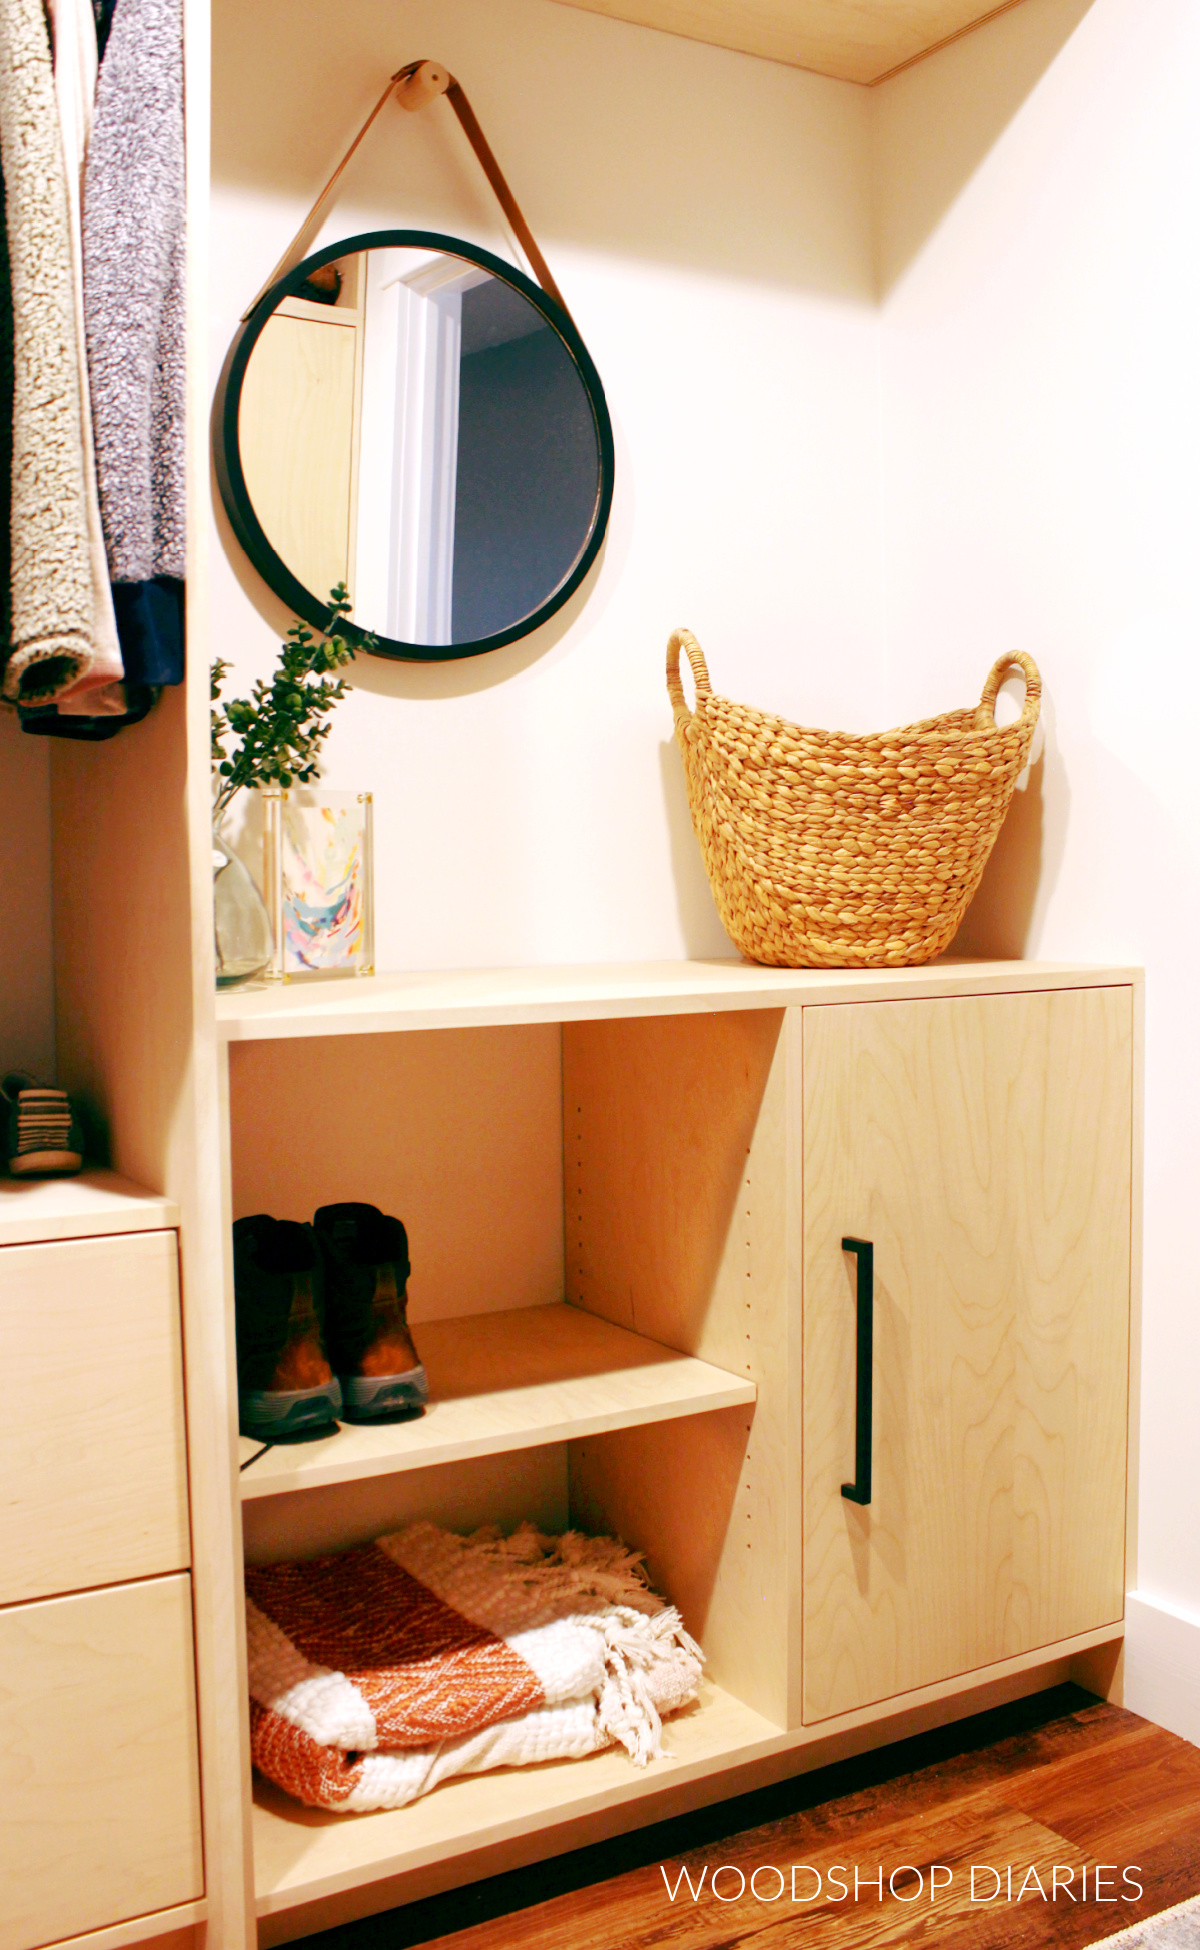
Step 7: Build Closet Cabinet Dresser
Now the closet is ALMOST done, but the last piece was adding the dresser cabinet in the open space at the bottom right side.
.
I built this to fit perfectly in the space that was left.
.
I cut two sides, a top, bottom, divider, and a toe kick and edge banded the front edge of everything except the toe kick. It tried to use leftover plywood wherever I could for this and it ended up being about 17″ deep.
.
I used ¾″ pocket holes and 1 ¼″ pocket hole screws to assemble this dresser.
Once the main body was together, I installed the middle divider.
.
I decided which side I wanted to put the door and made sure to hide the pocket holes in that side of the dresser. I only used pocket holes at the top and just used wood screws at the bottom—making sure to keep the divider panel square. (It’s upside down in the image below.)
I used my Kreg Shelf Pin Jig to drill shelf pins along the sides of each section to be able to add adjustable shelves later as needed.
.
Then, I installed this dresser in the closet. I secured it to the cabinet next to it, and to the wall stud to the right.
Now all that was left was the finishing touches, I added a baseboard to the back of the closet, and replaced the door trim that I removed at the beginning
.
I have a separate post on door and window trim I’ll link here if you want to know more about that.
.
Then, I cut an inset ¾” plywood door for this dresser cabinet just like I did for the tall narrow cabinet earlier.
.
I edge banded and sanded it well, then pulled out my Kreg Concealed hinge jig to drill out holes to insert the hinges.
.
I installed soft close, concealed inset hinges into the door, then brought it inside to install it into the cabinet.

I have a guide for how to install and adjust concealed hinges that I’ll link here if you want to know more.
.
At this point, all that was left was adding a couple shelves where I drilled holes for the shelf pins and filling it up!
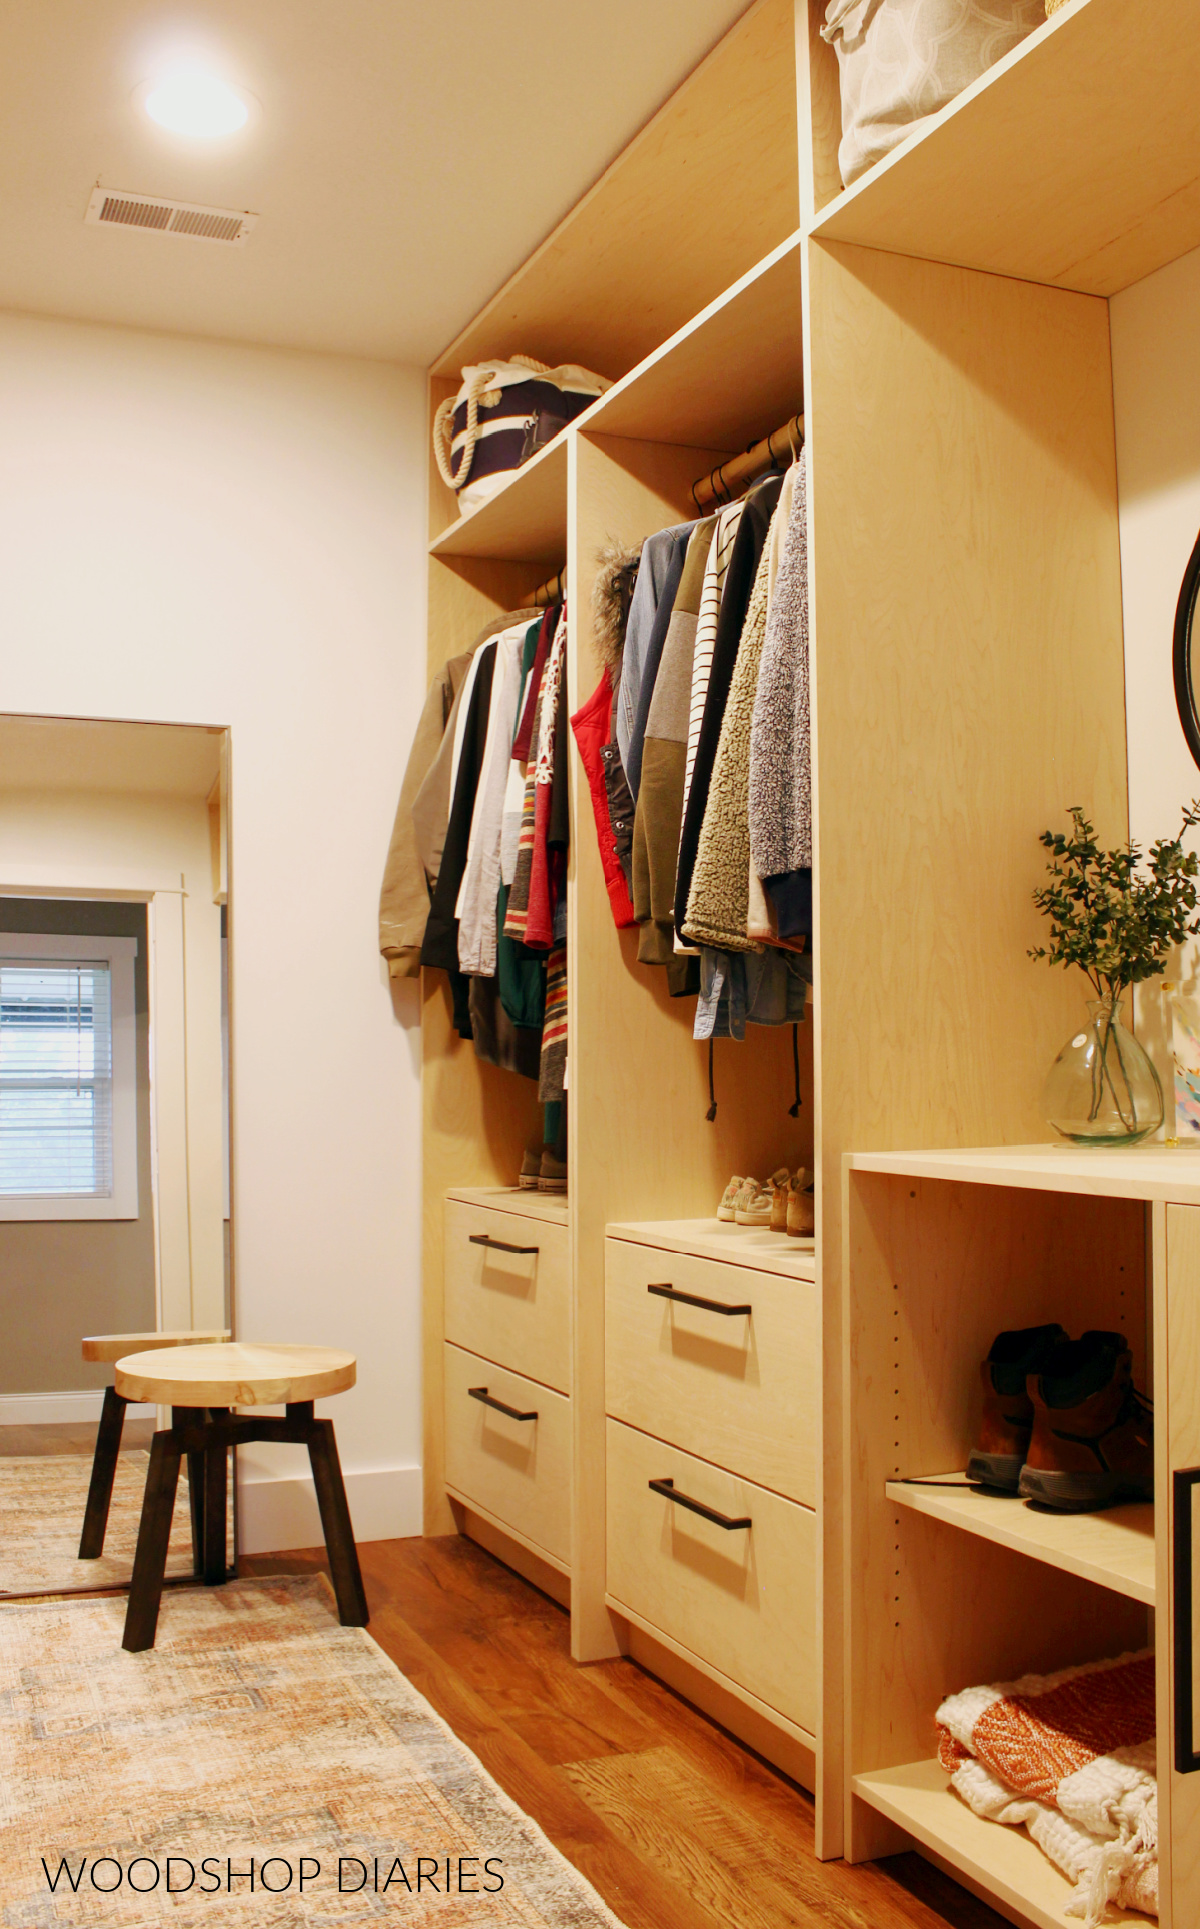
I’m sure over time, we will figure out how best to use this closet and add more shelves as needed, but for now, I just added a single shelf in the dresser, and a few shelves in the tall cabinet.
.
Compared to the previous closet, we have TONS more storage in here, so there is plenty of empty space for now—and I kind of like it that way haha.
I didn’t bother finishing these custom closet cabinets—I may later, but for now, they’re unfinished and I’m fine with that.
I’m SO happy to finally have my clothes unpacked and out of boxes and to have things better organized and hidden away.
.
I really hope you guys enjoyed seeing these closet built ins come together and I hope it’s given you some inspiration for your own space! Don’t forget to pin it for later 🙂
And if you aren’t already subscribed, be sure to follow along so you don’t miss out on what’s coming next!
Until next time, friends, happy building!