Looking to make your own DIY cabinet doors? I’ll show you how in this post 🙂
.
This post is sponsored by The Home Depot as part of the ProSpective program. It also contains affiliate links. See policies.

Cabinet doors are the “face” of your cabinets. Thank you, Captain Obvious…
.
But, seriously. All cabinets are basically the same thing…just a simple box. (I’ve got a tutorial for cabinet boxes here *wink*) But the doors…OH THE DOORS. Those are the stars of the show.
.
So when my very traditional sister asked me to build her new cabinets, of course, the doors were a major concern.
.
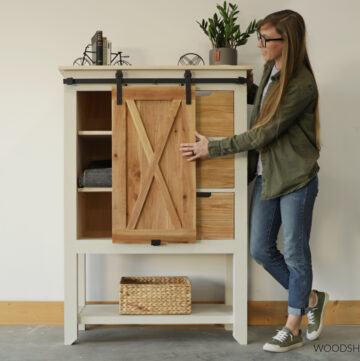
She didn’t want a standard shaker style door with a flat, square frame and inside panel….like this from my old laundry room cabinets.

No, she wanted a decorative edge along the inside of the door frame. I don’t have a lot of fancy cabinet door making tools, so I took the poor man’s approach to building these and they turned out, honestly, better than I expected.
.
But enough chit chat, let’s get to the how to. I’ve got the step by step tutorial for you below and a video as well 🙂
Tools and Materials:
- 1×3 Poplar Boards (recommended for paint OR wood species of your choice)
- ¼” plywood (birch recommended for paint projects OR match 1×3 wood species)
- Miter Saw
- Trim Router
- Round Over Router Bit
- Table Saw
- Diablo Dado Blade
- Sander and Sandpaper
- Large Clamps
- Wood Glue
- Dowel Jig
- Dowels
- Drill
- Concealed Hinge Jig
- Concealed Hinges
- Werner 10 ft Podium Ladder
Step 1: Determine Your Lumber Choice
For this situation, I was building my sister brand new cabinets. And she wanted them painted white. So I went with poplar for the door frames and ¼” birch plywood for the panels. I chose these options because they are easy to work with and paint really well.

However, if you aren’t painting and are simply replacing doors on existing cabinets, you will probably want to match the wood species and color of what you already have.
Step 2: Cut Dadoes in Cabinet Door Frames
I built my cabinet doors with simple frames and floating panels (as in the panels “float” inside the frame). There are a million ways to make a door, but this method is fairly simple and worked with the tools I already had.

The first thing I did was cut a ¼″ dado (basically, a groove if you aren’t familiar with a dado) on one edge of all my 1×3 poplar pieces for the panel to fit into.

I installed my dado blade into my table saw and set it up to cut ¼″ dado, be ¼” from the rip fence, and cut ¼” high. Since my 1x3s were ¾” thick, this would put my dado in the center of the board and ¼″ deep.

However, if you don’t have a dado blade, You can set your regular blade ¼″ from the rip fence and run the board through once, turn it around 180 degrees and run it again, then adjust slightly to clean out what’s left in the middle between the two cuts.

Step 3: Route Edges of DIY Cabinet Doors Frame Pieces
Once all the dadoes were cut (there were 28 boards for all my sister’s cabinet doors—TWENTY EIGHT…), I began routing the decorative edge. Because my sister likes to make things difficult (love you, Sissy!), she didn’t just want a plain shaker style door. She wanted the inside edge to have this little somethin’ somethin’.

So I used my trim router and a round over bit to cut a nice round over edge on the same side of the board as the dado.

Again….TWENTY EIGHT BOARDS later, we were ready to start making doors 😊
.
Side note: I will admit, this really did make these doors look nicer than a standard, plain square edge…BUT it added quite a bit of work. See step 5…
Step 4: Determine Cabinet Door Size
Check out this post to learn more about determining cabinet door sizing.
I know you will ask how to determine the size your door needs to be. I LOVE math, so it’s fun for me, but I know it can be a little overwhelming sometimes. So I made these graphics to help 🙂 Cabinets typically come one of two ways–with a face frame on the front or frameless. (I prefer frameless, but most people have face frames.)

For cabinets with face frames, if doing inset doors, subtract ¼” from both the height and width of your frame opening to get your door size.

For cabinets with face frames, if doing partial overlay, add 2 times whatever you want your overlay to be to the height and width of your inside opening (and be sure get hinges to match your overlay.) Typical overlays are ½”, ¾”, and 1”.

If doing full overlay on either framed or frameless cabinets, subtract ¼” from the height and width of your overall cabinet front box (not including toe kicks). This is the style I went with. Check out my post here about to build frameless cabinets.

And if you are making a double door cabinet (like one where you have two doors that meet in the middle), measure just like above, then subtract ⅛″ from the width (to give you an ⅛″ gap between the doors), then divide that number by two to get the width for your each of the two separate doors.
Step 5: Cut Cabinet Door Frame Pieces
Because my sister wanted this decorative edge, I couldn’t simply butt join the frames together because then the round over edges wouldn’t line up. So they had to be mitered.
.
So I measured the sizes I needed my doors to be (see step 4) and began cutting my pieces with 45 degree miters on each end.

I measured and cut based on the long sides and made sure the short sides had the dadoes and the round over edge.
.
Basically, I cut the pieces to the size my door needed to be. So let’s say I need my door 14” wide x 26” tall. I cut two pieces 26” long (on the longest edge) and two pieces 14” long (on the longest edge), so that when they fit together, the door is 14” x 26”. Make sense?
Step 6: Cut Middle Panel for DIY Cabinet Doors
Once the frame pieces are cut, it’s time for the panel. I’m going to hit you with some more math, so don’t freak out, okay? If you are using true 1x3s (which are 2 ½” wide), your panels should be about 4 ⅝” narrower and 4 ⅝” shorter than your door frame pieces.

This should allow about ⅛” of room for the panel to move within the frame (for wood movement and some wiggle room when you glue it up).

I cut my ¼” plywood panel down using my jig saw, but a table saw or circular or miter saw works fine, too depending on the size you need.
Step 7: Assemble the Door
Now for the fun part. I laid my frame out on my workbench and used a square to mark lines along the diagonals in the corners. This is just to line up my dowel jig.

Then, I centered the center line on my dowel jig with these lines, clamped it, and drilled two dowel holes in each board end. Centering the center line on the jig to the line I drew at the diagonals just helps ensure the dowel holes will line up when it’s put together. It’s also helpful to label each frame piece so you know how they go back together 😉

Once the holes were drilled, I used wood glue and dowels to join all the corners. I found it easiest to put three pieces together (one short and two long), then slide the panel in place, then add the last piece of the frame.

Maybe there are better ways of doing this, but it worked.

Once everything was together, I used some pipe clamps to clamp it in place and make sure it was nice and square and my corners lined up well. I wiped any excess glue away so it will be easier to sand later.

Step 8: Finish and Install Cabinet Doors
Once the glue was dry, I gave the corners a good sanding to get everything nice and smooth and sand out any unevenness at the joint. (And to remove any glue squeeze out).

Then, I puttied the corners as needed (if there were any small gaps or dents), sanded again, and caulked along where the panel meets the frame for a cleaner paint job later.
.
I like to hang my cabinet doors using concealed hinges because they offer three different adjustments to get your door to hang just right. (I have a post here all about concealed hinges and how to install them.) To do this, I drill a hole using my Kreg Concealed Hinge Jig.

Then I install the type of hinges I’m using (inset, partial overlay, full overlay), and follow manufacturers instructions (or my instructions) for attaching those hinges to the cabinet.

I’ve actually got a post right here to show you how I installed my own kitchen cabinet doors using full overlay hinges.
.
For this particular situation, I installed the doors on the cabinets in my shop to ensure a good fit, transported them to my sister’s garage, removed the doors from the hinges, painted, installed the cabinets, then re-attached the doors. In that order. Helpful hint: when removing doors, LABEL THEM so you know what cabinet they go back onto later 🙂

To finish the cabinets doors, I simply applied a coat of general latex primer, then lightly sanded with 220 grit sandpaper once it was dry. Then I applied a high quality latex enamel paint with a small ⅜″ nap roller. I used three coats of paint to get good coverage and sanded between each coat.

A huge help during the cabinet door installation was this Werner 10 ft Podium Ladder.

It was the perfect height to be able to stand securely to install the doors and the cabinet pulls, but the podium also provided a great place to place my tools, drill bits, screws, etc. It’s also got a 300 lb load capacity, but it’s fiberglass, so it’s pretty light weight.

The podium would also be perfect for standing on if working with 10 ft or higher ceilings–one day when we build our house, this podium ladder will see its fair share of foot traffic I’m sure 😉
.
And once the hardware was in place and the doors were hung…well, there was still a lot of work to do with trim and caulk and shelves and such. But at least the doors were done haha.
I really love this style door and I really like that I didn’t have to invest in expensive tools to make them. The extra decorative edge along the middle really makes them look professional.

So, if you are looking to build your own DIY cabinet doors, I hope this post has been helpful and inspiring. Be sure to check out the video tutorial as well and stay tuned for more info on how I designed and built these cabinets coming soon.

Be sure to subscribe to my YouTube channel so you don’t miss it. And, I’d be ever so grateful if you’d share this or pin it for later 🙂

Until next time, friends, happy building 🙂