
In this post, I’m sharing how to make your own 2x2s and square off the edges of your boards for cleaner joints in your woodworking and building projects!
I love building with construction lumber–it’s easy to find, inexpensive, and can look really nice if finished correctly.
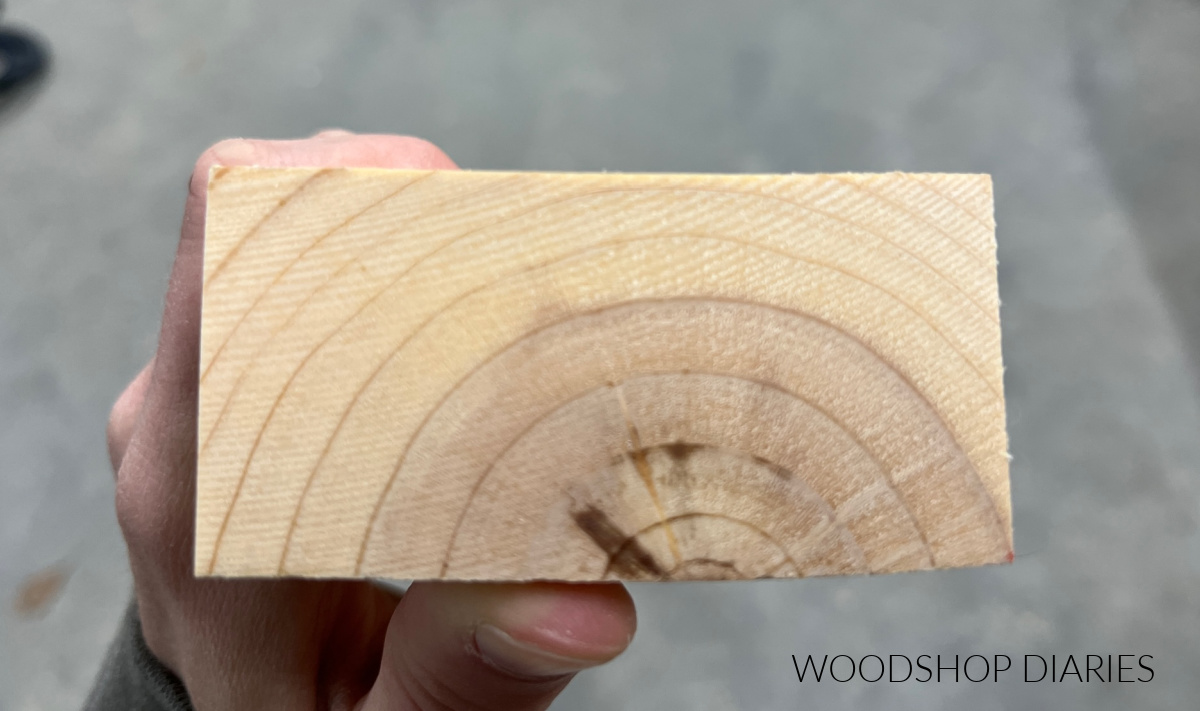
BUT, most of the boards you find at the lumber yard are going to have rounded corners which can cause some issues when using it to build furniture.
In this post, I’ll show you how to deal with this and how to cut your own lumber (in some cases) to avoid this issue and make cleaner, nicer looking DIY projects.
What is “Construction Lumber?”
Construction lumber (at least in the Midwest of the United States) is typically pine, spruce, or fir wood and is sometimes referred to as “dimensional lumber.” They are cut to specific dimensions (discussed below).
This is the lumber you typically find at your local big box stores like The Home Depot that are used in building houses and other structures–think: 2x4s and 2x6s.
Why does dimensional lumber have rounded corners?
These boards come with rounded corners because their main purpose is construction. The rounded corners are easier to work with–less splinters and injuries.
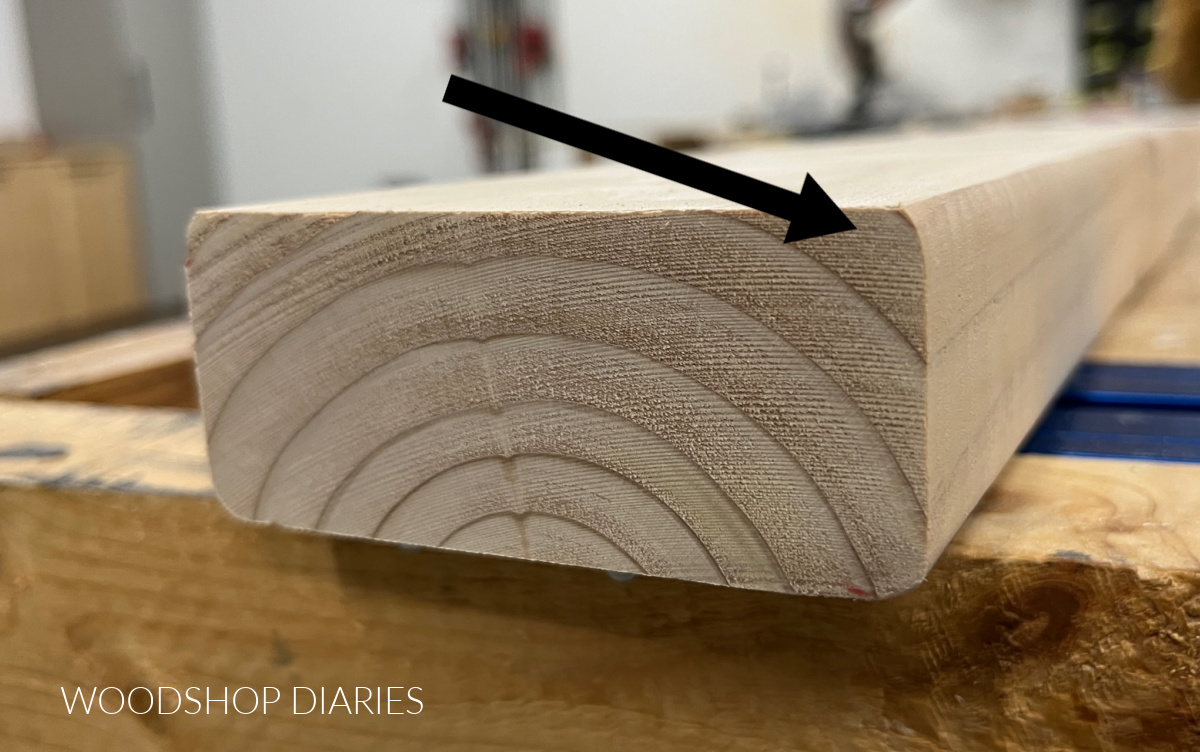
But they are also more forgiving when installing drywall and other finishes when studs aren’t perfectly square and plumb.
Nominal Sizing vs Actual Sizing
Construction or dimensional lumber are found in common nominal sizes–2×4, 2×6, 2×8, 2×10, and 2×12.
The “2x” reference is the thickness–but it’s not actually 2″ thick. The term 2x is a nominal measurement–it’s actually 1 ½″ thick.
In addition to 2x, there is also 1x material which is ¾″ thick.
Nominal vs Actual Board Thickness
- 1x = ¾″
- 2x = 1 ½″
- 4x = 3 ½″
Just like the thickness, the widths of these boards have nominal references as well, but these aren’t the actual dimensions.
Nominal vs Actual Board Widths
- x4 = 3 ½″
- x6 = 5 ½″
- x8 = 7 ¼″
- x10 = 9 ¼″
- x12 = 11 ¼″
So, for example, a 2×4 is actually 1 ½″ thick x 3 ½″ wide. A 1×6 is actually ¾″ thick x 5 ½″ wide, etc.
Why is is important to square board edges before building?
Now, you may be wondering…okay, that’s cool, but why do I care about rounded vs square board edges?
And truth be told, in some cases, it doesn’t matter–so you shouldn’t care.
But in other cases, those rounded edges can cause some really ugly joints in your project that not only look bad, but can also cause some serious issues over time.
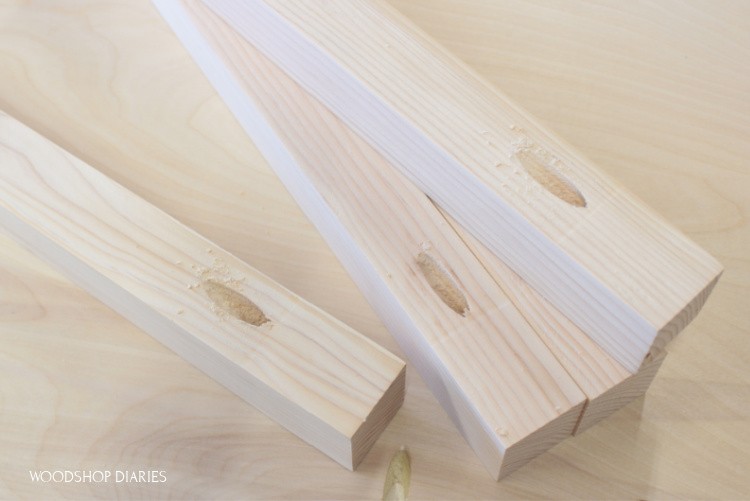
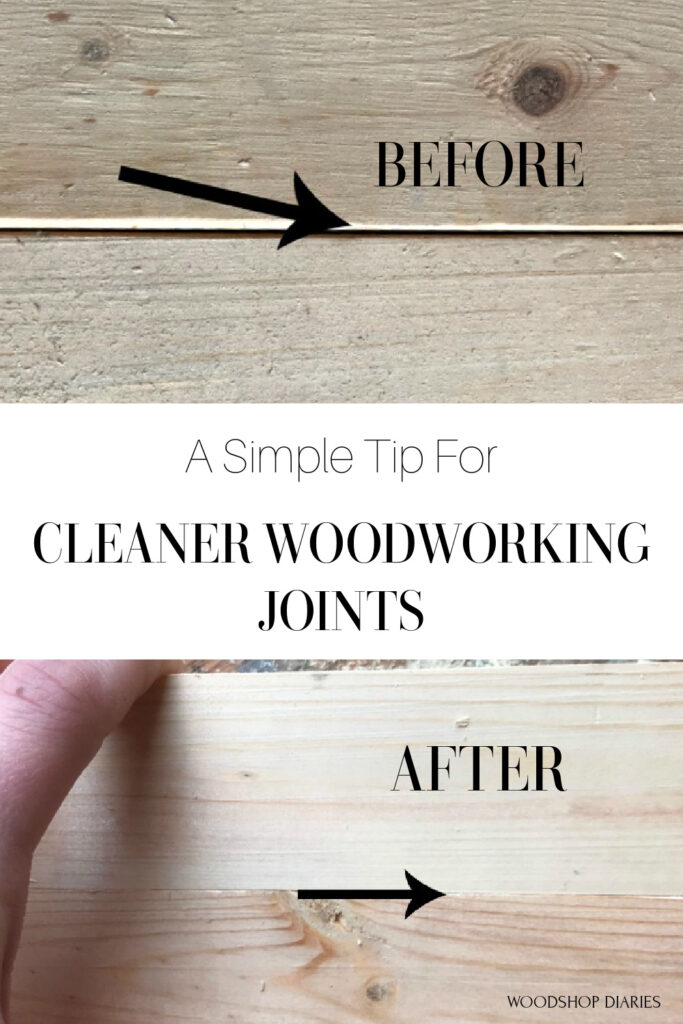
One of those issues is caused when building table tops using lumber with rounded corners. Butting two rounded edges next to each other leaves a crack like shown below.
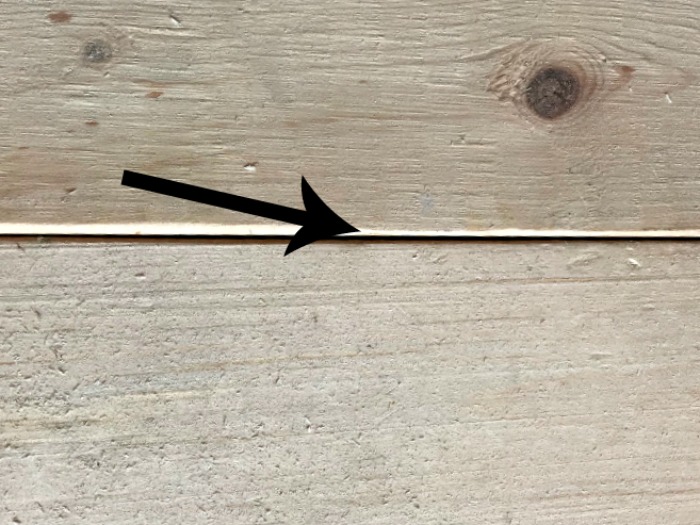
This is what I call a crumb hoarding crack. You can get crumbs and spills stuck in these cracks and they’re impossible to clean. Over time, this can cause damage to the wood and bacteria and/or mold growth.
You don’t want that on your table top!
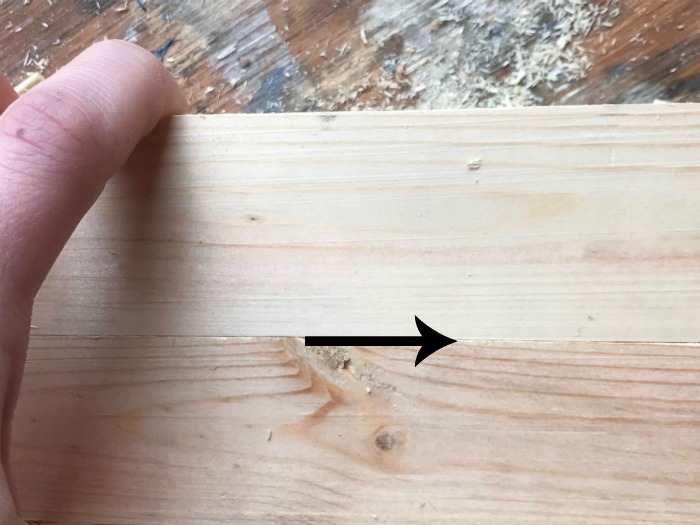
But even if you aren’t creating a table top, squaring off board edges will make any joint where you attach two boards together look a lot cleaner as you can see below.
When should you remove the rounded edges?
It’s not crucial to square the edges of every board on every project. Sometimes the small gaps are desired (like in rustic style pieces) and that’s totally fine.
For workshop projects and things that aren’t built to “look nice,” it may not be worth the extra effort to square the board edges.
Sometimes the construction of the project isn’t done in a way that would reveal the rounded corners in any of the joints.
So, ultimately, it comes down to your personal preference and your discretion whether it’s beneficial for your particular project.
Think of how the pieces of your project will come together and note if there are any places where two rounded edges will butt together or where one square and one rounded edge will join.
In these cases, if you want a clean, nice looking joint, it’s best to square those edges.
However, in every case where assembling a table top of some kind, I ALWAYS square my board edges to avoid cracks for food, spills, etc to get stuck in.
How to Square Edges on Construction Lumber Boards
To square board edges, I like to use a table saw. You don’t need a specific type of blade. A general purpose saw blade will work just fine.
NOTE: Be very careful when using a table saw. They are dangerous if you aren’t familiar with them. Be sure to use a push stick and not get your fingers close to the blade.
For this example, we will use 2x4s. If you want to square off wider boards, the process is the same, but the numbers will be different.
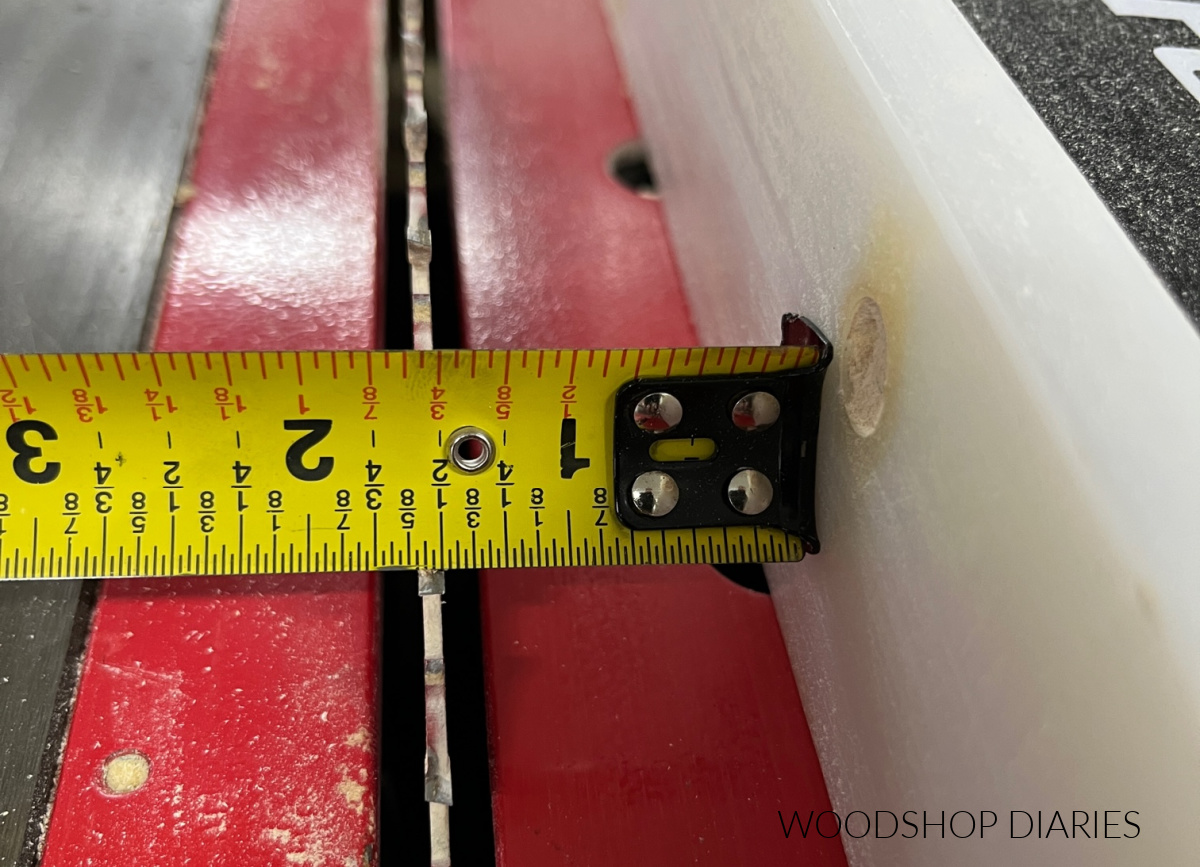
Step 1: Measure Board Width
I explained earlier about the different sizes of construction lumber. In this example, I am squaring a 2×4.
This should be 1 ½″ x 3 ½″, however, keep in mind that the tolerances for these boards is pretty large, so it’s not always EXACTLY the correct dimension.
In this case, you can see that my board was actually a little narrower than 3 ½″.
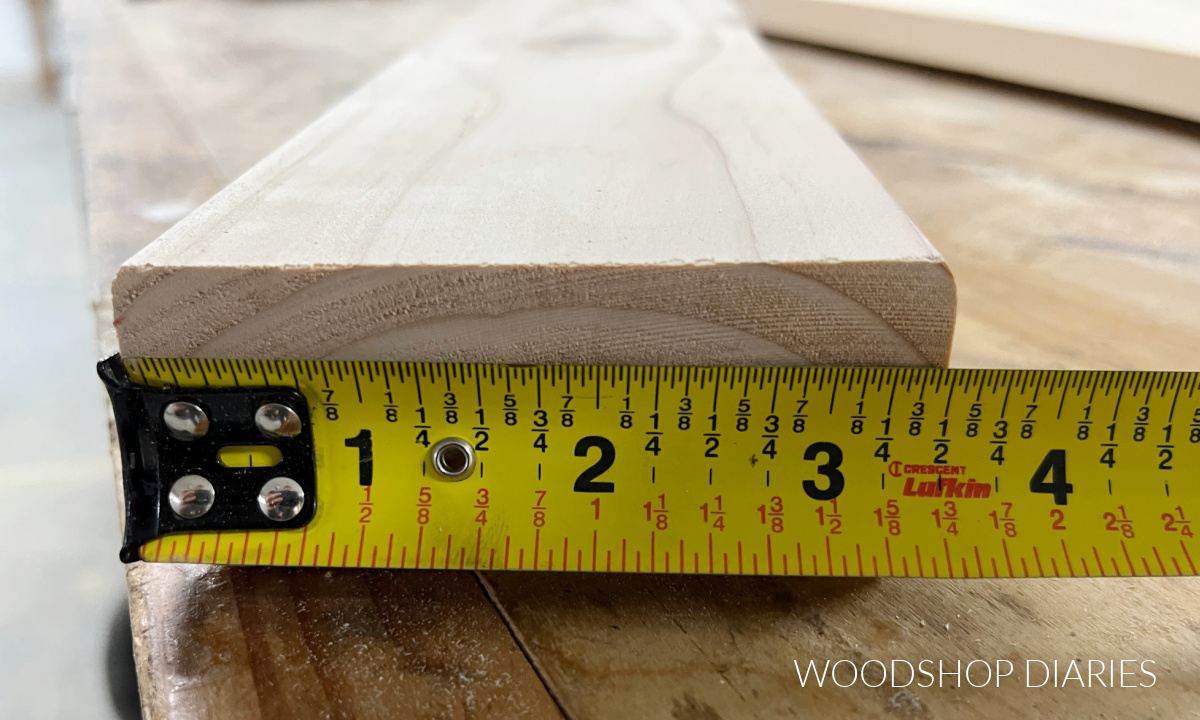
So the first step is to actually measure the board you are wanting to square to find out its exact width.
Step 2: Adjust Table Saw Rip Fence
Once I have my board width, I subtract ⅛″ – ¼″ and adjust my table saw rip fence this distance from the blade.
In my example here, I took 3 ½″ MINUS ¼″ and got 3 ¼″. So I moved my rip fence 3 ¼″ from the blade.

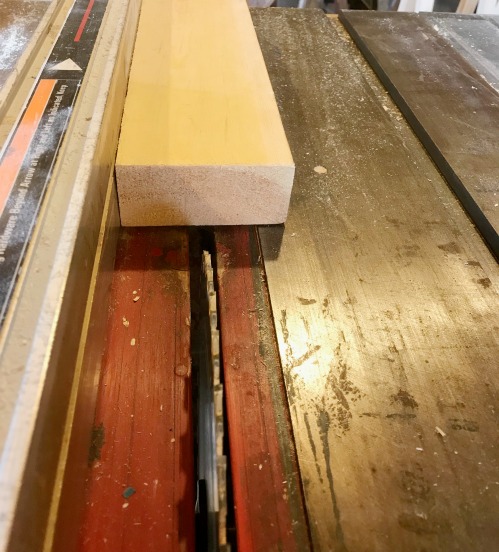
Step 3: Cut Board Edge
Once the rip fence is adjusted about ¼″ narrower than the board width, I run my board(s) through the table saw.
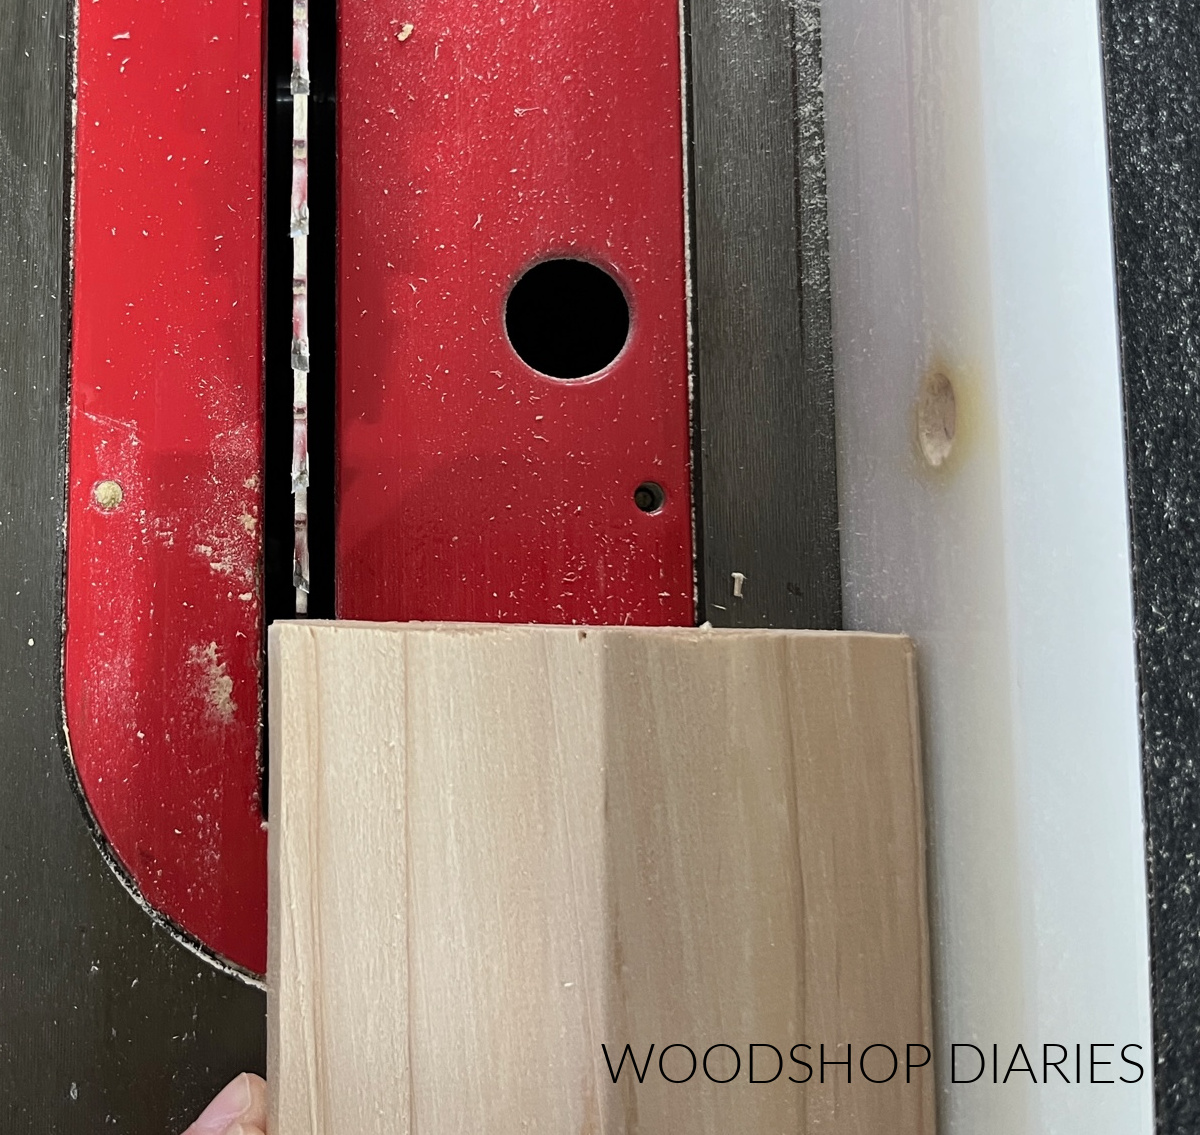
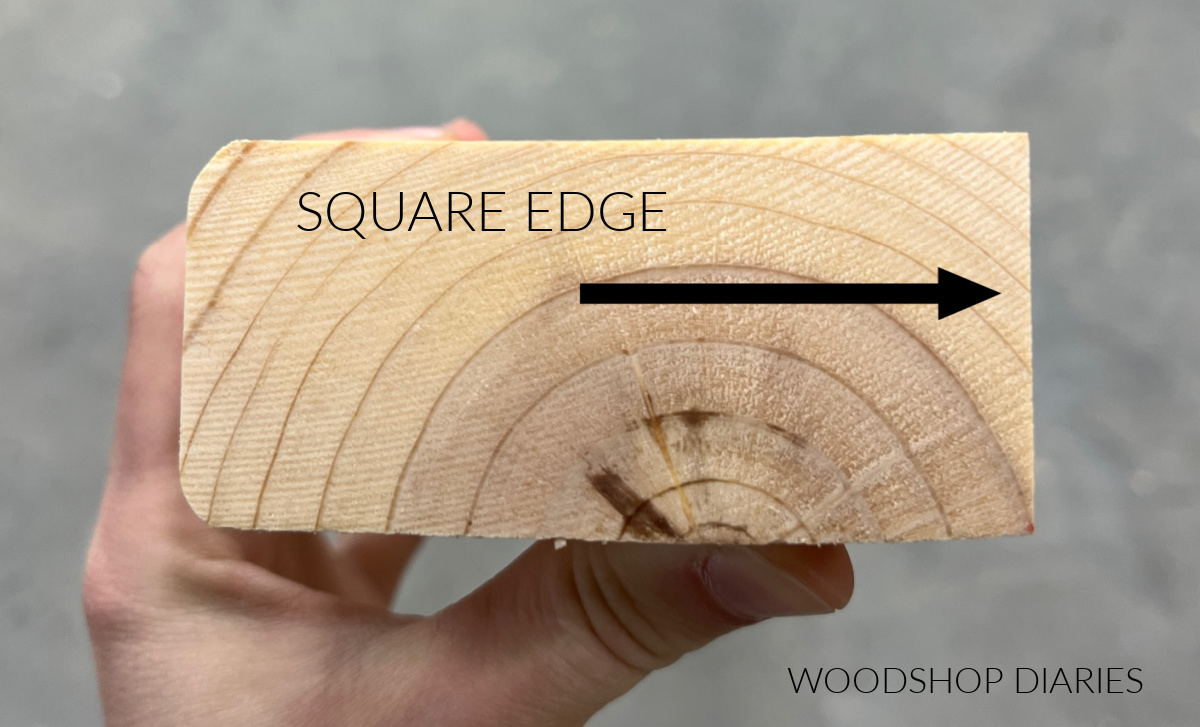
This removes ¼″ of material off the edge of the board, so the rounded edges are gone and the edge that’s left is nice and square.
TIP: Make sure your table saw blade is square to the table. If you do this and your blade isn’t exactly 90 degrees, your “square end” will not actually be SQUARE, it will have a bevel.
Step 4: Square Opposite Edge
Now that one edge is square, I can simply repeat step 2 & 3 to adjust the rip fence ¼″ closer to the blade.
Then, I can flip the board over and run it through again to cut an additional ¼″ off the opposite edge to square that side as well.
This gives me a board that has nice, square, crisp edges. And now it’s ready to use in my project.
Considerations When Squaring Board Edges
Keep in mind that if you squared your board’s edges, that it’s no longer a “full width” board.
So if a plan you’re following calls for 2x4s and you cut yours to 3″ wide, you may have to adjust some other measurements as you build the project.
It will just depend on what you are building, so pay close attention.
But, What About 2x2s?
If you were to take a trip to the big box store right now and look at their 2×2 boards, you will likely notice that many of them are twisted, warped, bent, and they also have those rounded corners. So, obviously, that’s no good.
You can follow the steps above to trim the edges, but by the time you remove ½″ of material, they’re likely too small to be worth using in your project.
Remember…2x2s are ACTUALLY 1 ½″ x 1 ½″. So they’re already fairly small.
For this reason, I prefer to cut my own 2x2s vs buying them precut from the store.
This allows me to make sure my 2x2s are nice and straight AND that they have square corners even at full size–1 ½″ square. It also saves quite a bit of money, too.
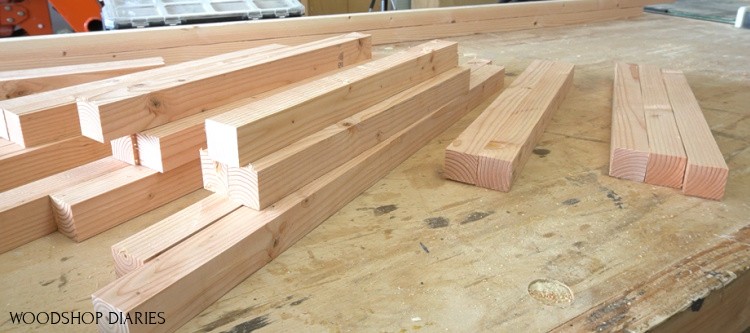
How to Cut Your Own 2x2s
You can cut your own 2x2s from any width 2x boards–2x4s, 2x6s, 2x8s, etc.
I prefer to cut 2x2s from 2x4s as this creates minimal wasted material.
Keep in mind that a 2×2 board is 1 ½″ x 1 ½″ and 2x material is already 1 ½″ thick. So you only have to worry with trimming the widths here. The thickness is already correct.
Step 1: Square One Board Edge
This step is exactly the same as step 1, 2, and 3 from above. Simply square one edge of the board by removing ¼″ from one side.
This gives you a square edge to start from.
Step 2: Adjust Rip Fence to Cut 2x2s
After one board edge is square, I adjust my table saw rip fence 1 ½″ from the blade.
Step 3: Rip Boards to Size
With the squared edge AGAINST THE FENCE, I run my board through the saw to cut a strip off the board 1 ½″ wide.
Once one 2×2 is cut, I run the board through again (again with the square edge AGAINST THE FENCE) to cut a second 2×2.
If I’m cutting these from a 2×4, I can only rip two 2x2s before I run out of material. But if I’m cutting from a wider board, I can continue cutting strips until there’s not enough material left to cut.
And this gives me full size 2x2s (1 ½″ square) with nice, square edges ready to put to use!
If you are wondering what you can build with 2×2 lumber, I’ve got TONS of project ideas.
Here are some great projects you can build with 2x2s and other construction lumber:
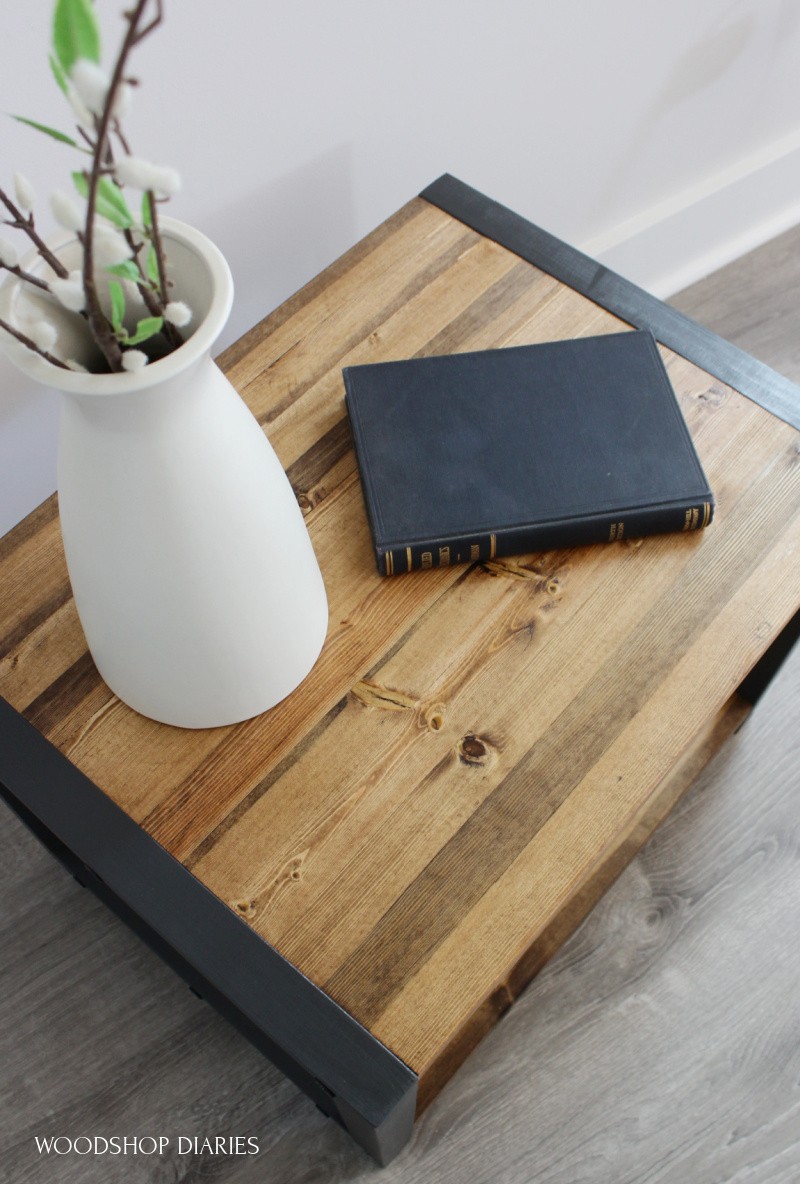
- DIY End Table Made from 2x2s
- DIY Corner Shelf
- DIY Tiered Plant Stand
- DIY Ladder Bookshelf
- DIY X Base Console Table
I hope you found this post helpful! This is a really great habit to get into doing if you make a lot of table tops, use a lot of 2x2s or just want some cleaner joints.
For more tips on building awesome DIY woodworking projects, check out these 5 secrets to professional looking DIY furniture.
If you want to stay up to date on the latest projects, tips, and plans, be sure to subscribe to the newsletter!
Don’t forget to pin this to save it for later!
Until next time, happy building!

Mike says
Great post, I always remove the edges of all 2x’s before doing any work with them (I also sand them with 80 grit as well to make them look like actual boards and not just throw away framing wood).
You can also glue the 2×4’s together to make (almost) 4×4’s. I used this method to make a new base for my dining room table, and it cost 1/3 of what I would have sent if I purchased actual 4×4’s
Shara, Woodshop Diaries says
Yes! Great point! I’ve done this before with a desk and it worked out great! It’s hard to find untreated 4x4s in this area, so a lot of times that’s my only option anyway haha. Glad you enjoyed the post 🙂 Thanks so much for reading!