
I’ve always considered myself a dog person. Growing up I HATED cats.
.
But, you guys, never say never. Growing up, I said I would NEVER have a cat and IF I ever did, I wouldn’t like it. Now fast forward past a long story about vicious animals and a ton of mouse turds in our kitchen ceiling (if you want to know the whole story, just ask…I’ll tell it), and now, we have PET…that’s right PET…cats. How did this happen?! Like, they go to the vet and everything…PETS.

So, in order to save some of our dignity (you know…after I said I would NEVER…then I did), we discussed getting another dog (because then I could say I was still a “dog person”), but never could bring ourselves to get one. Then one day, Lucy came into the picture.

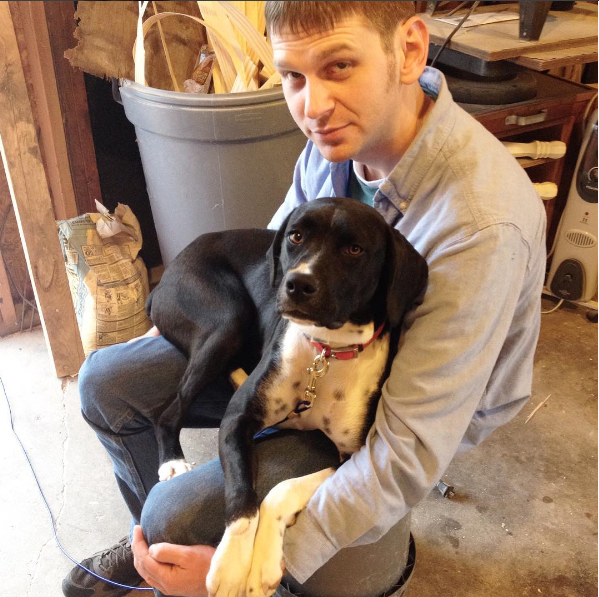
She showed up skin and bones and filthy. After she stayed around for a week or so, we took her to the vet to see if she was microchipped…no luck. And we posted it all over Facebook and never heard a peep back from anyone claiming her. So, we took her in. She really loves Danny. And laying in people’s laps.
Only problem was…we weren’t really prepared for a dog, so we didn’t have a dog house ready for her. And that’s kind of important.
.
So I reached out to Jen Woodhouse from The House of Wood to see if she would want to help me with some plans for Lucy’s new house. Jen is like the best at drawing plans…and designing furniture…and singing…and blogging…I was kind of starstruck working with her. #fangirl
.
Thankfully, she was happy to help me with the dog house and drew up some plans for it. You can click over here to her site for the full building plans. But first, I have a picture and video (YES, VIDEO!!) tutorial, but all the dimensions and details can be found in the plans on Jen’s site.
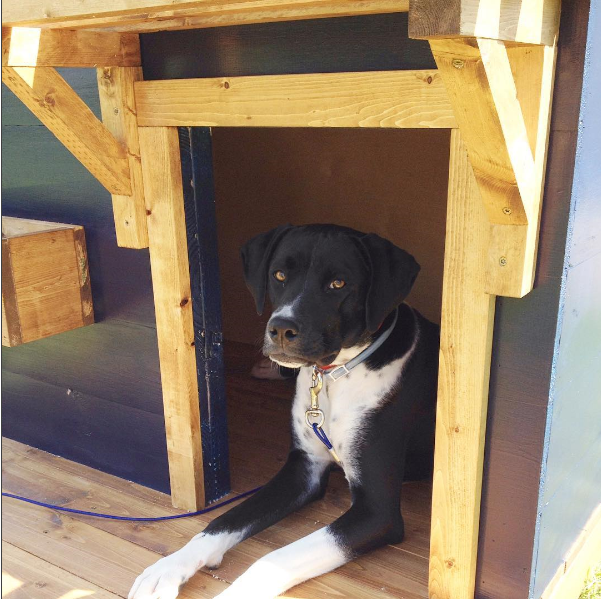
NOTE: You will see Lucy in these pictures on a tie out. As some have questioned this, let me be clear that she is ONLY on a tie out right outside my shop while I am working in there. That way, she can come inside with me, or go outside as she wishes. She always has water available and she enjoys just sitting outside my shop door and watching the cats run around the yard. She comes inside with us when we are inside the house and she only stays outside (under shelter and in a LARGE lean to by our barn–not tied up) while we are at work all day. Lucy is well taken care of. Now that you know Lucy’s daily schedule and living conditions, here’s the details on her dog house 🙂
.
This post contains affiliate links for your convenience. If you purchase through these links, I may receive a small commission at no extra cost to you. This helps keep the content here free. Thank you for supporting this site! See policies here.
For this build I used all the basic tools:
Table Saw
.
Nothing fancy was required for this build. But, I will warn you…it’s big and it’s heavy and it’s best to build it outside or you won’t be able to get it out of the door. You’ve been warned 🙂
.
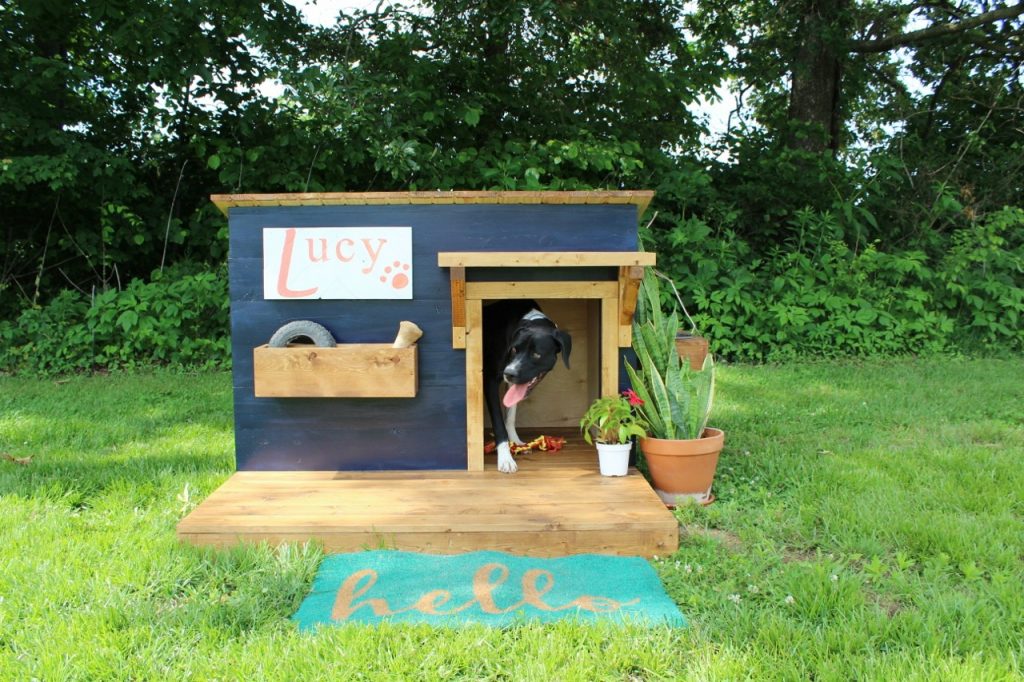
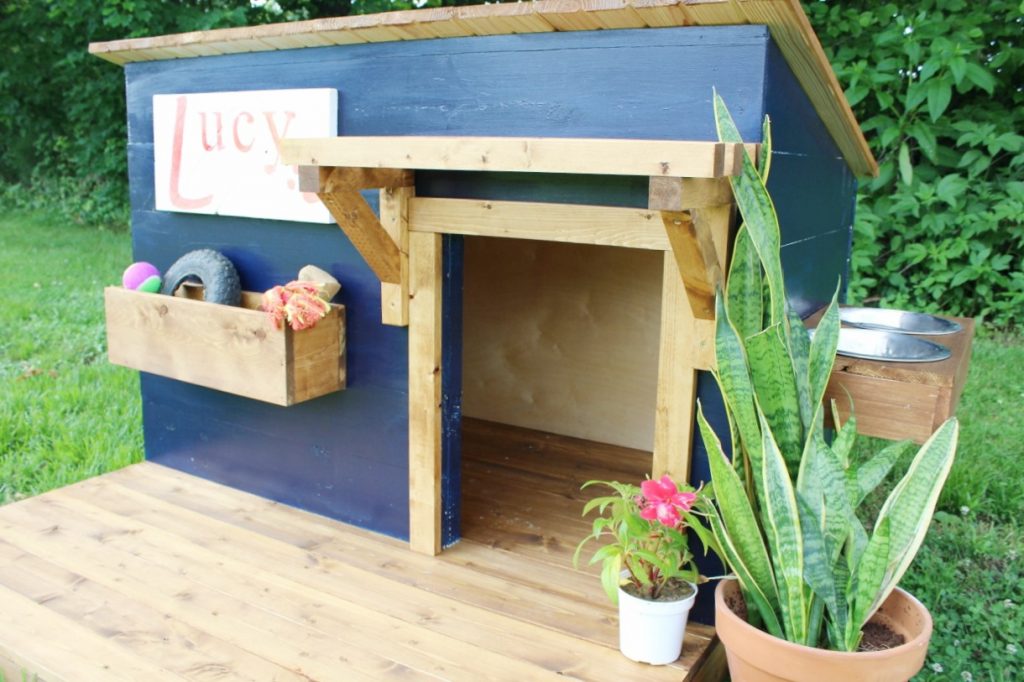
I wanted Lucy to have a place to lay outside the house on those hot summer days. The inside is mainly for winter time when it’s cold (it’s insulated, too…more on that further down). But in the summer, I thought she would like a nice deck to chill on.
.
So first, I built the deck. This is the easy part. I assembled the frame just like the plans show from 2x4s and screwed 1×4 slats in for the top. You can see more in the video 😉
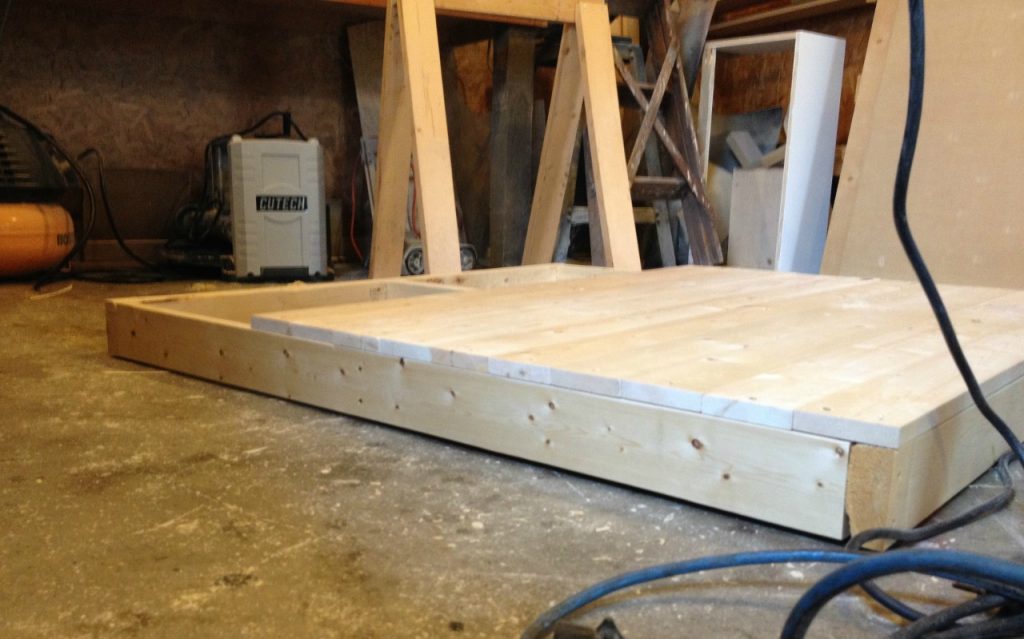
Before moving on, I moved this outside and stained it with outdoor stain and sealant. It’s easier to finish the deck before attaching the house…especially if you are doing two tone like I did. But it’s not required.
.
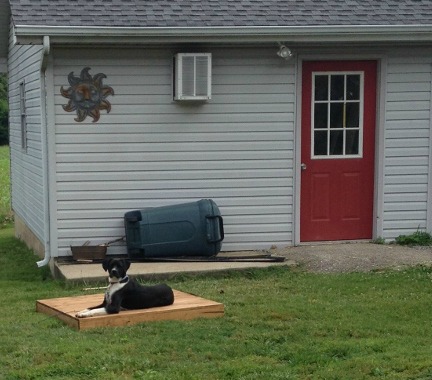
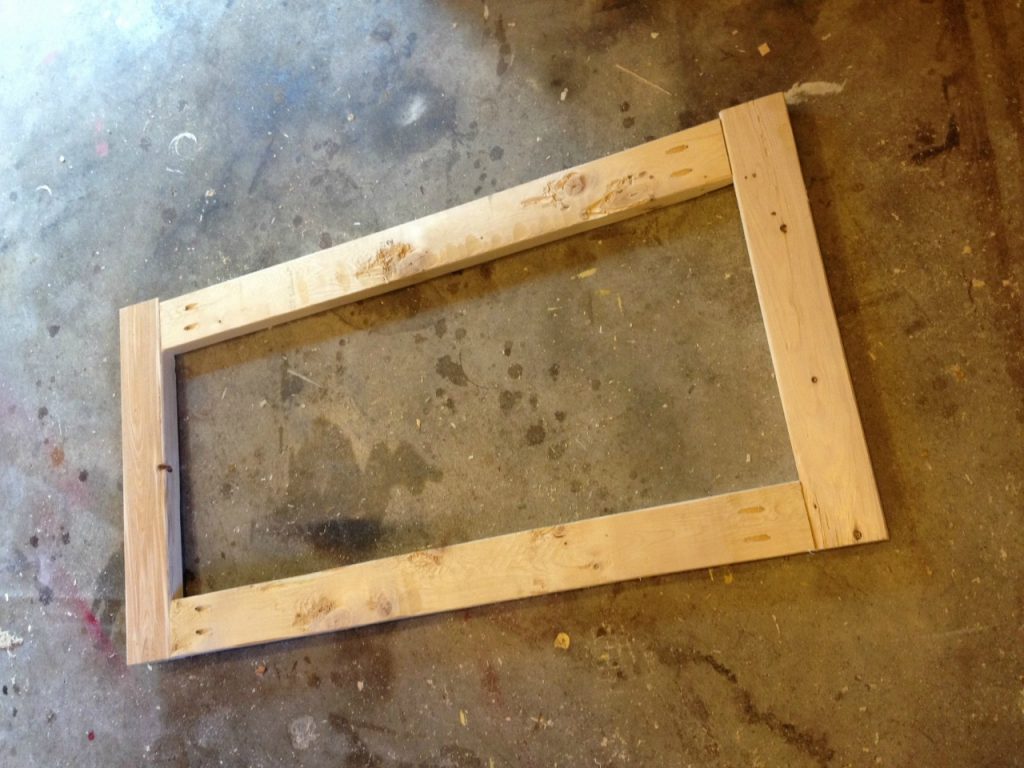
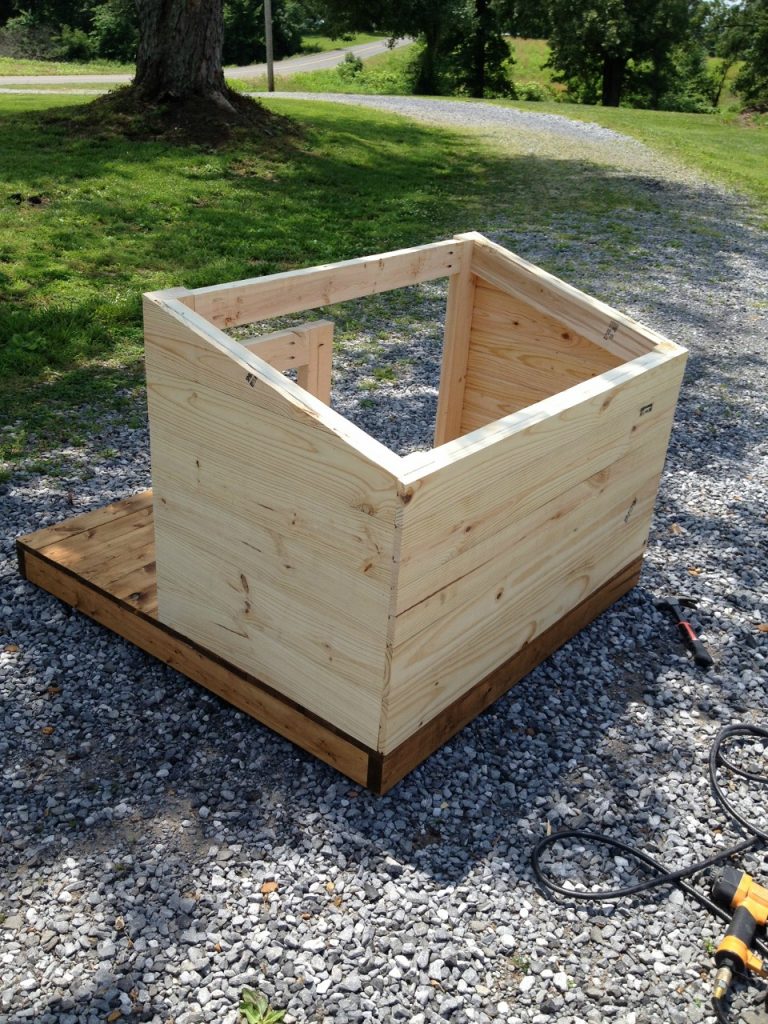
Then, I assembled the house frame according to the plans. Meanwhile, Lucy enjoyed her new deck. See? I knew that was a good idea 🙂
I screwed the back frame together first with pocket holes and screws, then attached the side 2x4s and the front frame. You can see more on this in the video below and in the plans. (You guys!!! I MADE A VIDEO…so go check it out at the end of the post and tell me what you think 🙂 )

I set the frame in place to make sure Lucy would fit. Good news…she does!
.
Then, I screwed the house in place. You could use pocket holes and screws here, but I just “toenailed” screws in at an angle through the frame into the deck.
.
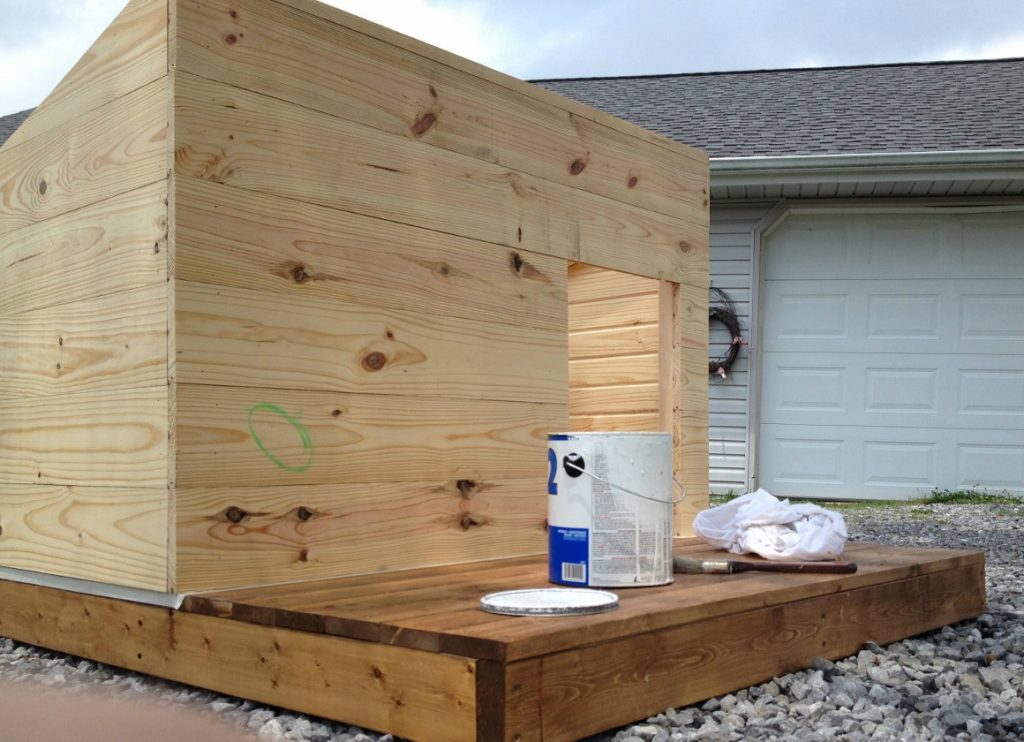
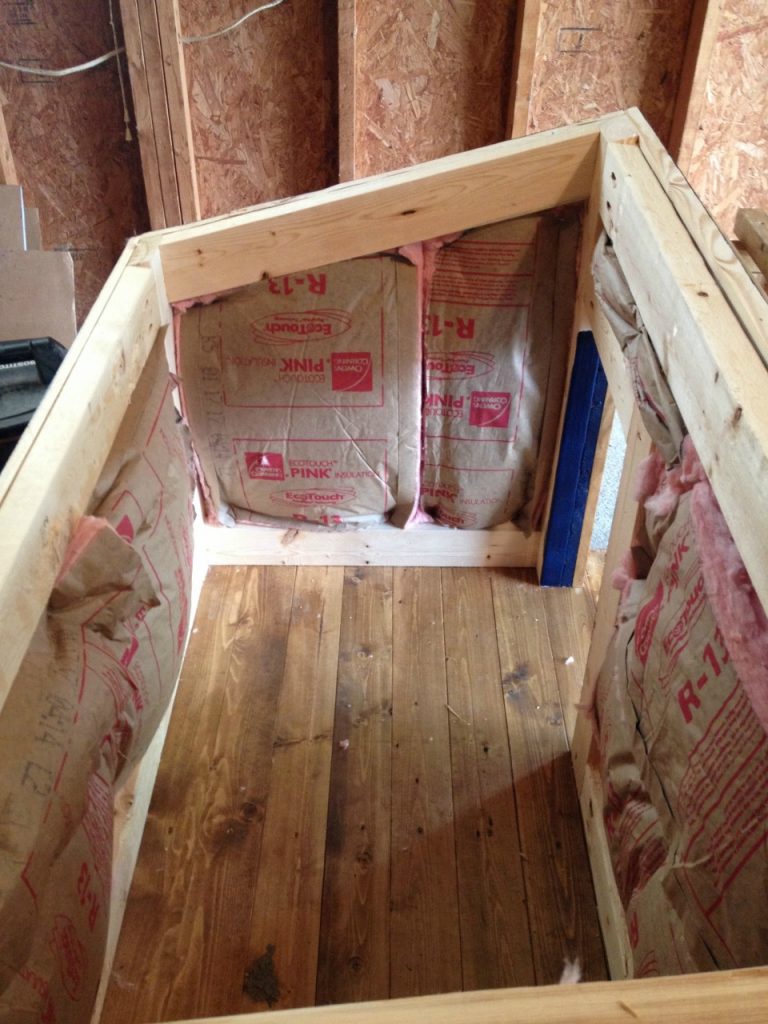
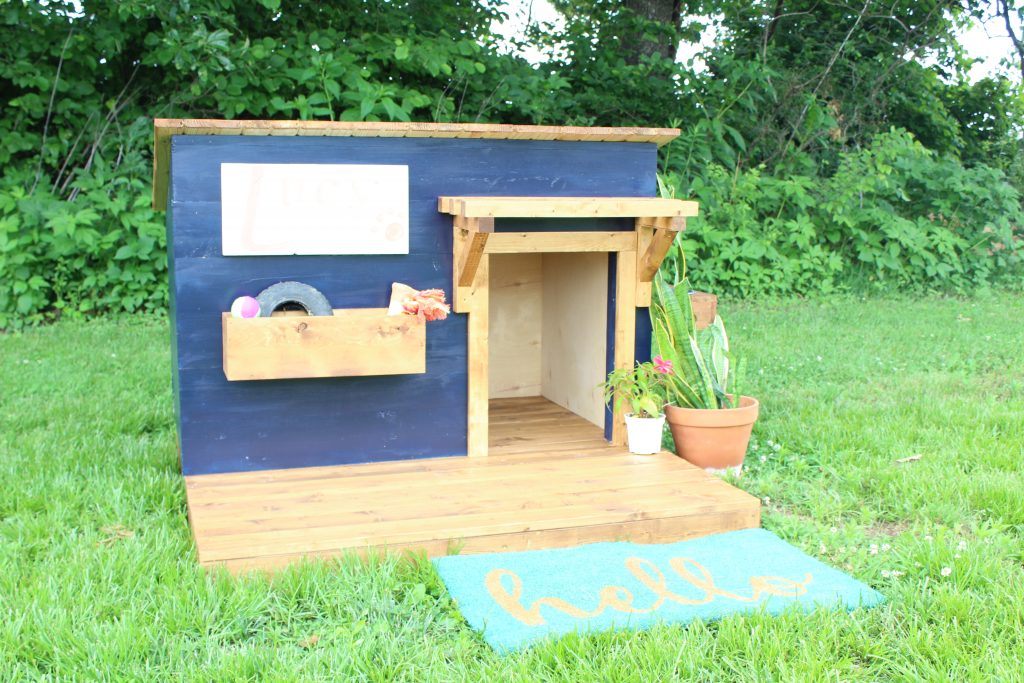
Then, it was time to add the siding. This is where it starts to actually look like a house. In order to make it a little more airtight (it gets cold in the winter, here, so we wanted to keep her warm), I used tongue and groove 1x6s instead of regular 1x6s. Either works fine, though.

I nailed on the siding along the sides of the house first, and as I got to the top, I marked along the boards where they needed to be trimmed to fit the angle and cut it with a jig saw.
.
Once the sides were finished, I added slats on the back. Once I got to the top, I ripped the last board to fit. I beveled the board at a 15 degree angle when I ripped it, so it would follow the angles on the side.
Then, I added the front slats the same way, leaving the door open and beveling the top board to fit.
.
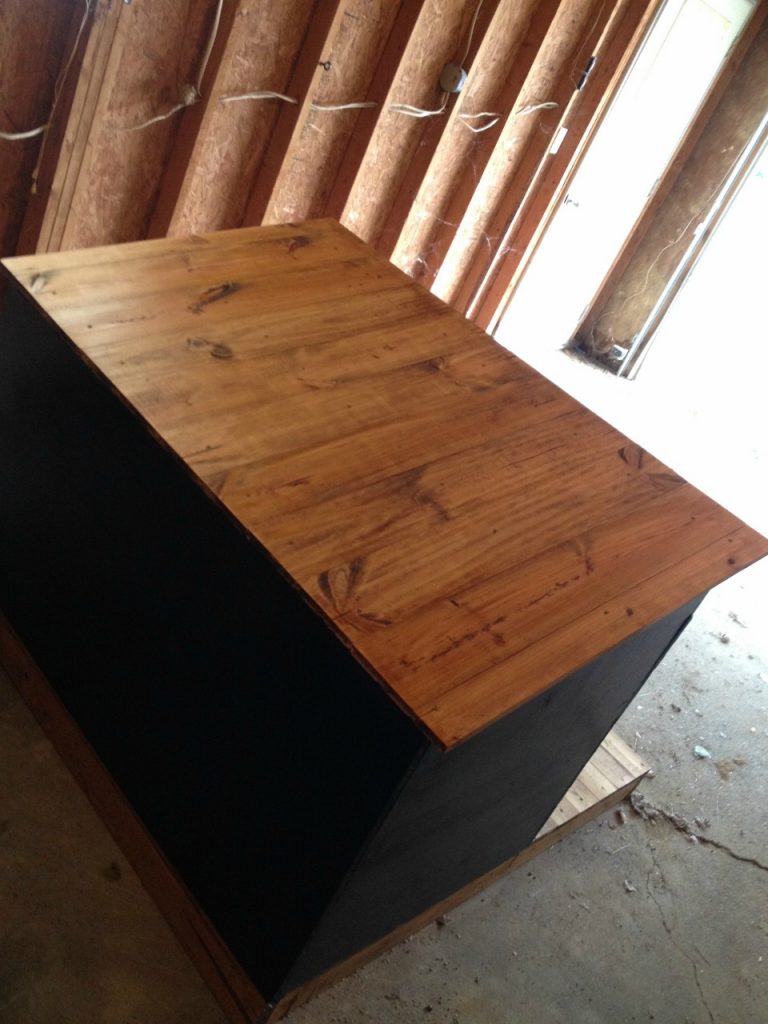
Next, I primed and painted the house. Because I was doing a two tone house, it was easiest to paint now. But again, depending on your color scheme, you can paint it later.
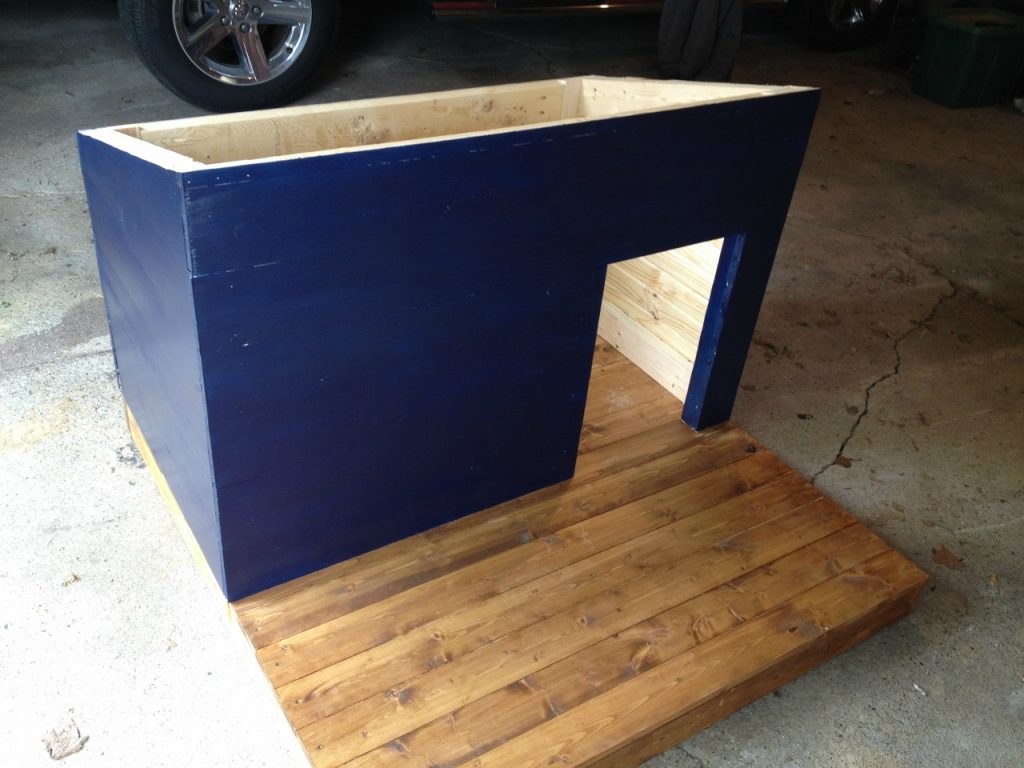
I painted the house in the same paint I used for my front door refresh—Sherwin-Williams Snap Dry in Anchors Aweigh. I love this navy color. Paired with the wood, it looks like of mid century modern…or is that just me?
.
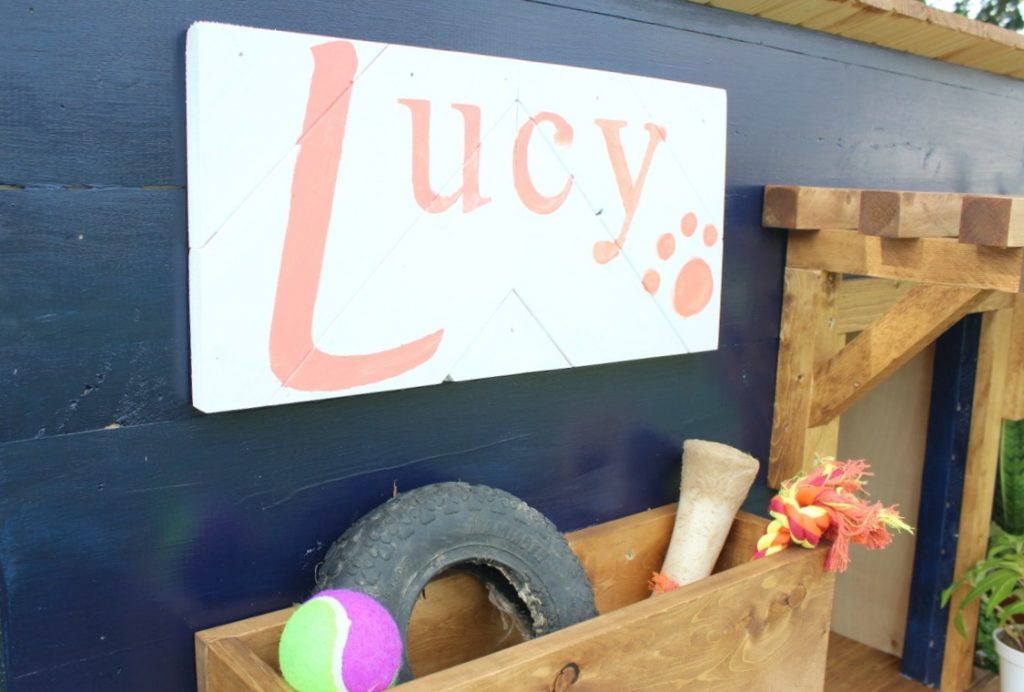
Once the paint was dry, I added some door trim and a canopy. I also made a small “toy box” with some scraps and screwed it into the front of the house. I would plant flowers here, but Lucy has a tendency to eat everything in sight (she actually was chewing on the house frame when I was seeing if she fit in it…), so I skipped the flowers haha.
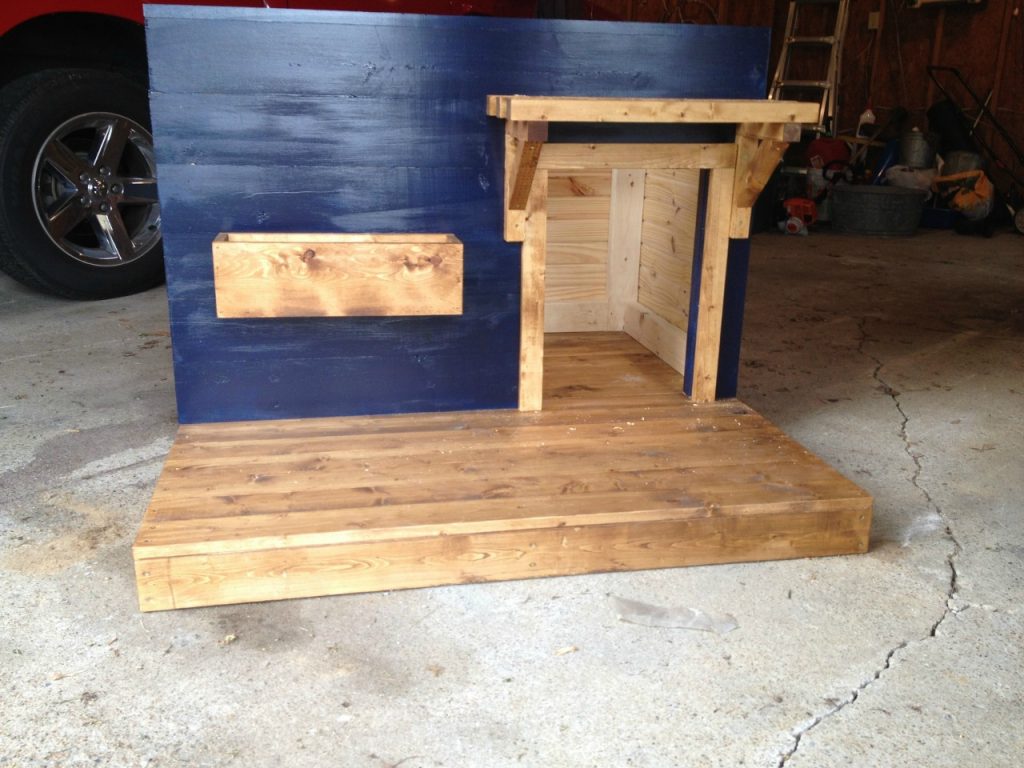
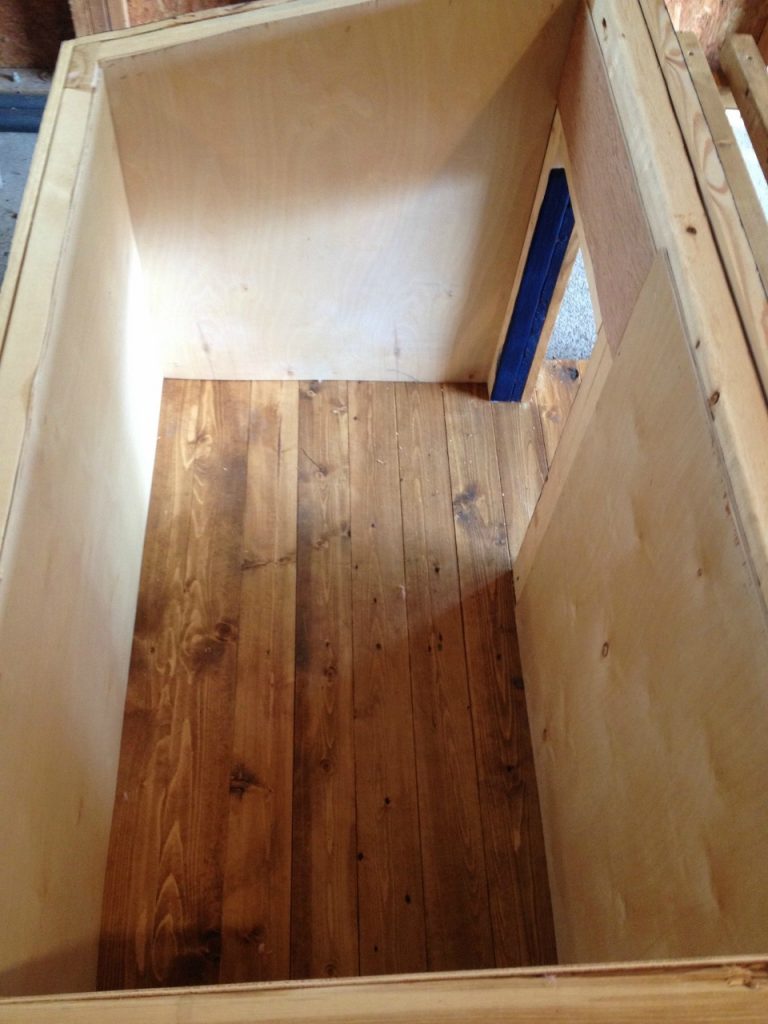
This isn’t in the plans and is totally optional, but in order to keep Lucy warm in the winter, I chose to insulate the house. I stapled insulation between the 2x4s in the frame, then lined it with ¼” plywood. I added the roof without insulation (I was in a hurry), but will go back before winter and do the same on the roof. This should keep Lucy nice and warm 🙂
Lastly, I added the roof slats just like the plans show and finished them in outdoor stain and sealant.
As a finishing touch, I made Lucy a little sign for the front of her house and a floating dog bowl shelf for the side from some scrap pieces.
Then I talked Danny into helping me move it and realized it was way too heavy, so we drug it across the yard. Whatever works, right?
.
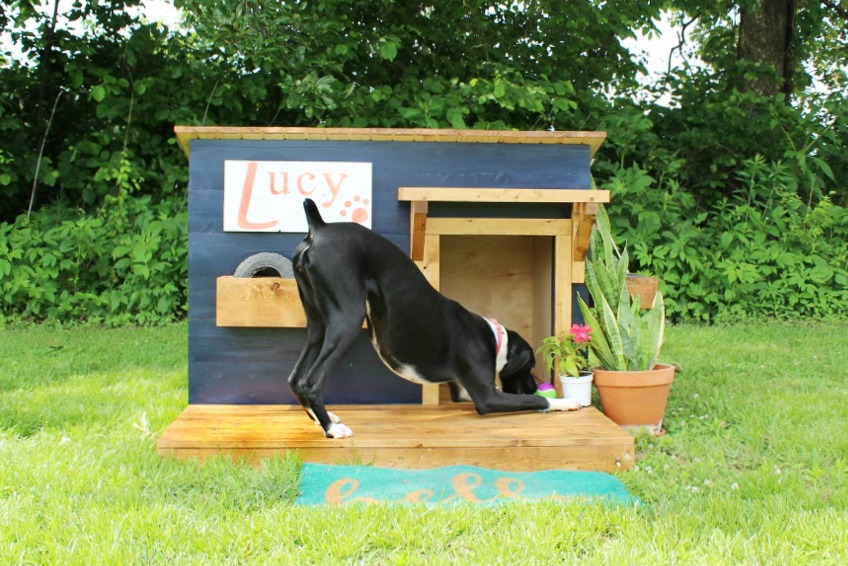
I think Lucy likes it 🙂
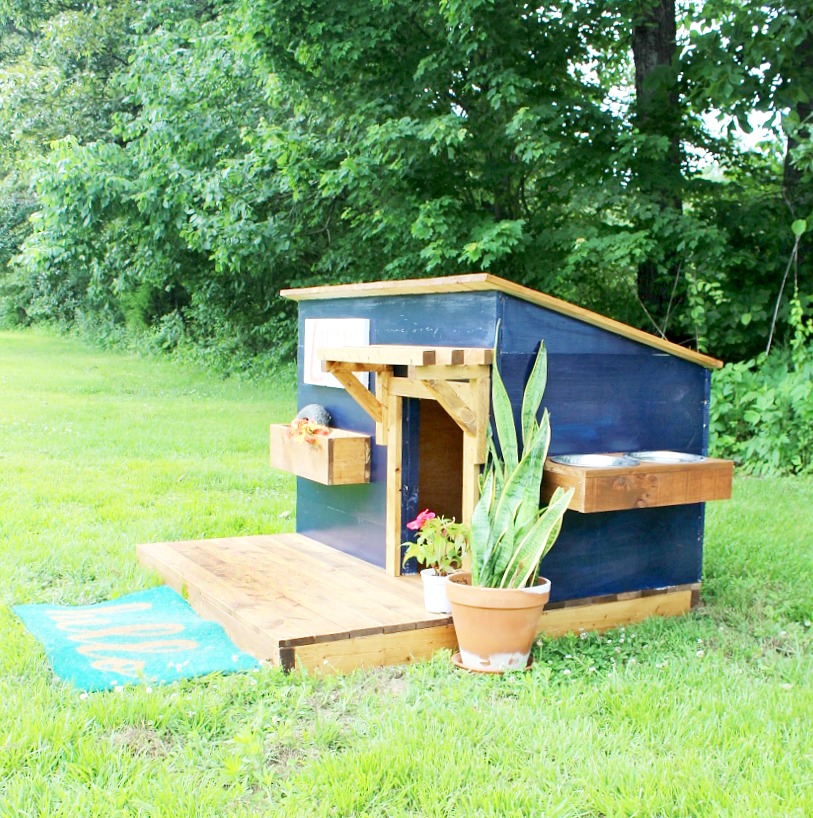
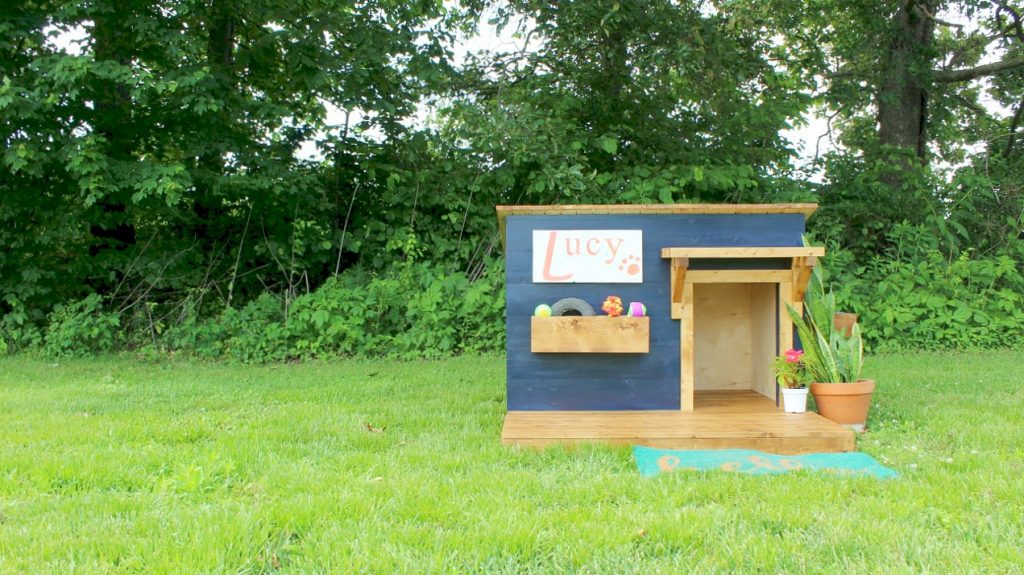

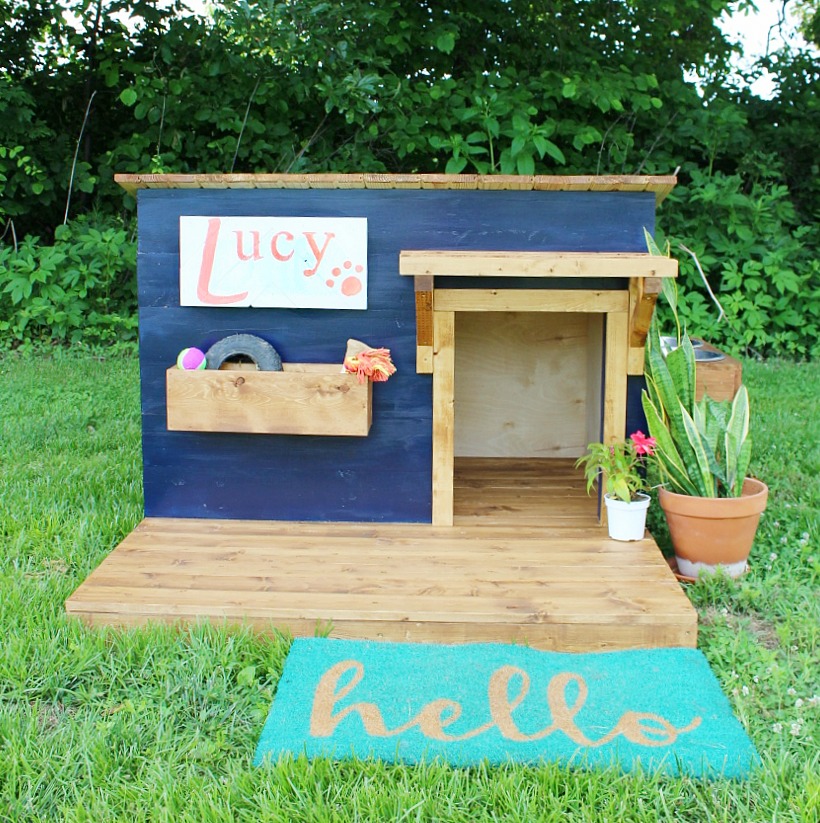
What do you guys think?? The house will be in a lean to by our barn, so it shouldn’t really ever get wet, but if yours will, I would recommend maybe adding shingles to the roof for a little more water protection.
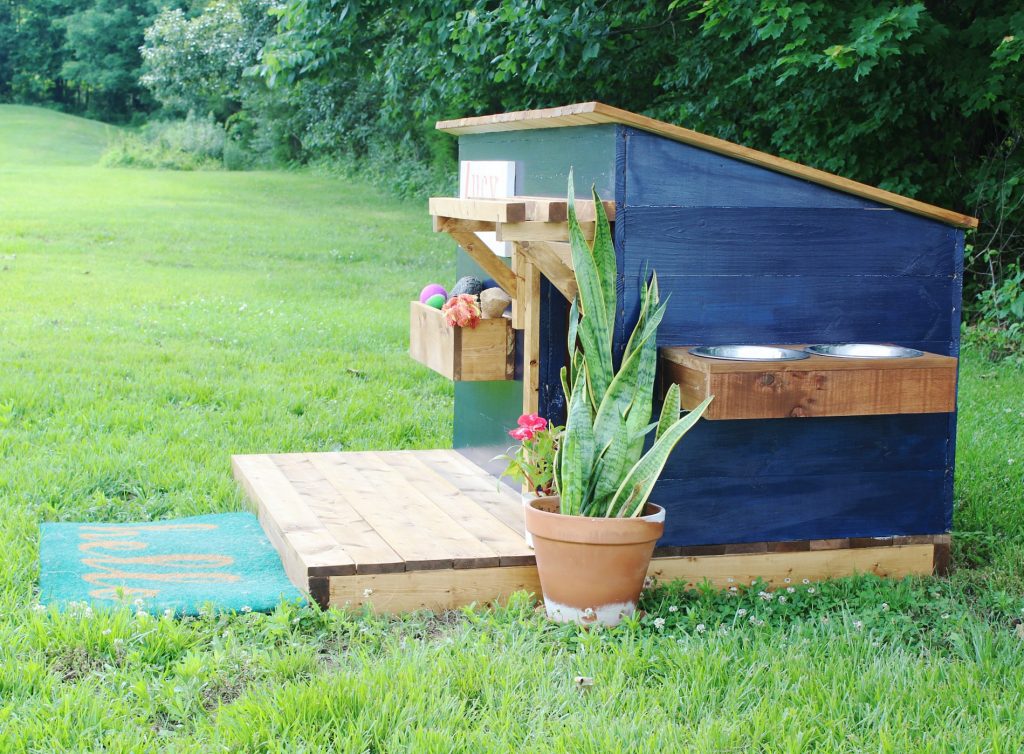
I’m pretty sure Lucy has the brightest dog house (or actual house for that matter) in the neighborhood. Only the best for our Lou 🙂
Check out the video below for more of Lucy’s reaction to her new house and for a few more building details. Also, be sure to click over and get the plans from Jen’s site if you plan on building your own! Thanks so much again to Jen Woodhouse for the plans for this build!! If you aren’t already following her, you should be (and honestly, if you aren’t already following her, WHERE HAVE YOU BEEN?!). Her builds will blow you away!
.
Oh yeah, one more thing…be sure to pin this for later 🙂

Until next time, happy building!

Jordyn says
Hi! How big is Lucy?? Trying to see if this plan will be big enough for my 80lb. pup or if I should modify to make it larger. 🙂
Shara, Woodshop Diaries says
Lucy is about 50 lbs. Depending on the height and width of your dog, you may need to make the house door a little bigger and possibly expand the sides out. It’s PLENTY big for Lou to get in and move around, but it may be a tighter squeeze for your pup.
Nathan says
Great post for people with dogs that like to be outside 🙂
Shara, Woodshop Diaries says
Thank you!!
Debora Cadene says
Love the dog house and your site. I just built one a few days ago for my critters as well. I’m sad that some folks feel the need to tell you how to take care of your own dog. You shouldn’t have to explain to anyone, why you are keeping him safe with the tie out. We can’t always keep our eyes on our pets all the time, especially if we are doing any sort of work outside and they can get into things, or disappear very quickly, especially if they are new to your home. We have a new puppy, and although I do have a 10 x 20 enclosed dog pen with the dog house inside, I also will put him on a tie out while I’m working in the yard. Now he is safe, and still has the freedom to wander around, and be close to me if he wishes. Keep up the great work Shara, I look forward to all your posts.
Shara, Woodshop Diaries says
Thank you so much! 🙂 Lucy enjoys the freedom to sunbathe and watch the cats run around, or come inside the shop with me. She’s good company out there with me while I’m building 🙂 Thanks so much for following along!
Mary says
Oh my gosh! This is the coolest project, Shara! Your dog is lucky to have you! I can’t wait to see what your creative mind will think up next! xoxo
Shara, Woodshop Diaries says
Hey Mary!! Thank you friend!! 🙂
Sarah says
Not sure what kind of dogs the first lady is thinking of, but most love to be outside. Especially dogs Lucy’s size. Bless you for taking her in and giving her such a happy home. Only on the internet can you be criticized for taking a dog into your family and building her such an incredible doghouse. I need to do the same for my dog!
Shara, Woodshop Diaries says
Thank you Sarah! I didn’t mean for this post to be so controversial. I was just excited that her dog house turned out cute and she liked it 🙂 We love our Lucy!
sheri says
I love this project. My dog loves to be outside, but I’ve been thinking about building something like this for her so she’d have even another place to lay out of the sun. She’d much rather be hanging out in the backyard watching the birds and squirrels than inside with me while I’m working and cleaning. She HATES when I vacuum! 😉 Anyway, awesome project! Lucky dog!
Shara, Woodshop Diaries says
Thanks so much Sheri!! I made this with a deck so Lucy could lay on it up off the ground, but wasn’t sure if she would use it much. Now I wish I built the deck bigger because she’s hanging out on it all the time! Lucy LOVES to watch our cats in the back yard. Dogs are so funny…they all have their own personalities. Thanks for the sweet comment 🙂
Sydney says
As a long-time dog-lover, breeder, owner….. I have to ask you to NOT tie her outside, especially with a collar. In many states this is illegal, because it is dangerous for the dog. At least use a harness, but perhaps you could use your wonderful creativity to build her a play yard with some fun fencing?
She is a gorgeous dog, and her eyes speak volumes. You are VERY lucky to have such a dog.
Shara, Woodshop Diaries says
She is on a tie out right outside my shop ONLY when I am working in there. She can come inside with me, or go outside if she chooses. While I am working in there, I check on her CONSTANTLY and make sure she has water available. Most of the time, she just watches the cats play. She comes inside when we are inside, and is outside under shelter in a LARGE lean to (not tied up) next to our barn while we work during the day. She is happy and healthy and spend as much time with us as possible. 🙂
sheri says
Sydney, your comment is clearly coming from a good place, but I remind you that a photo is only capturing one second of someone’s existence. Shara obviously cares about her dog and I’d add that her dog is VERY lucky to have her as owner.
Tiena says
Lucy looks very happy with her new family!! You have shown that you care very much about her well being by building her such a nice doghouse, taking her to the vet, loving her,
etc. Thanks for giving a stray dog a home!!
Shara, Woodshop Diaries says
Thank you 🙂 She’s such a sweet dog and we are lucky to have her!
Linda says
Sorry, dogs belong inside with the family they are part of, not outside. Will unsubscribe.
Shara, Woodshop Diaries says
I’m sorry this has offended you. But, the only time Lucy is actually outside is when her family is not home…while we are at work all day.
sheri says
My dog loves being outside! This comment is absurd.
Jamie says
For thousands of years dogs have survived outdoors. Dogs have fur! They belong outside. My dog loves being outside and we try to let him in from time to time. He hates it! Will bark, cry, and scratch the door until we let him out. I sometimes forget some dogs are wimp and might need inside, but not my dog and looks like not yours either. I will be subscribing because you’re not torturing your dog by putting him in an environment not suited for him.
Laura says
The dog house is beautiful! I’ve enjoyed watching your projects come to life. I’m looking forward to trying some of them for my home and pets. And it makes me happy that Lucy found you and is now part of your family!
Shara, Woodshop Diaries says
Thank you!! So glad to have you following along! And we are so glad to have Lucy in our family 🙂