
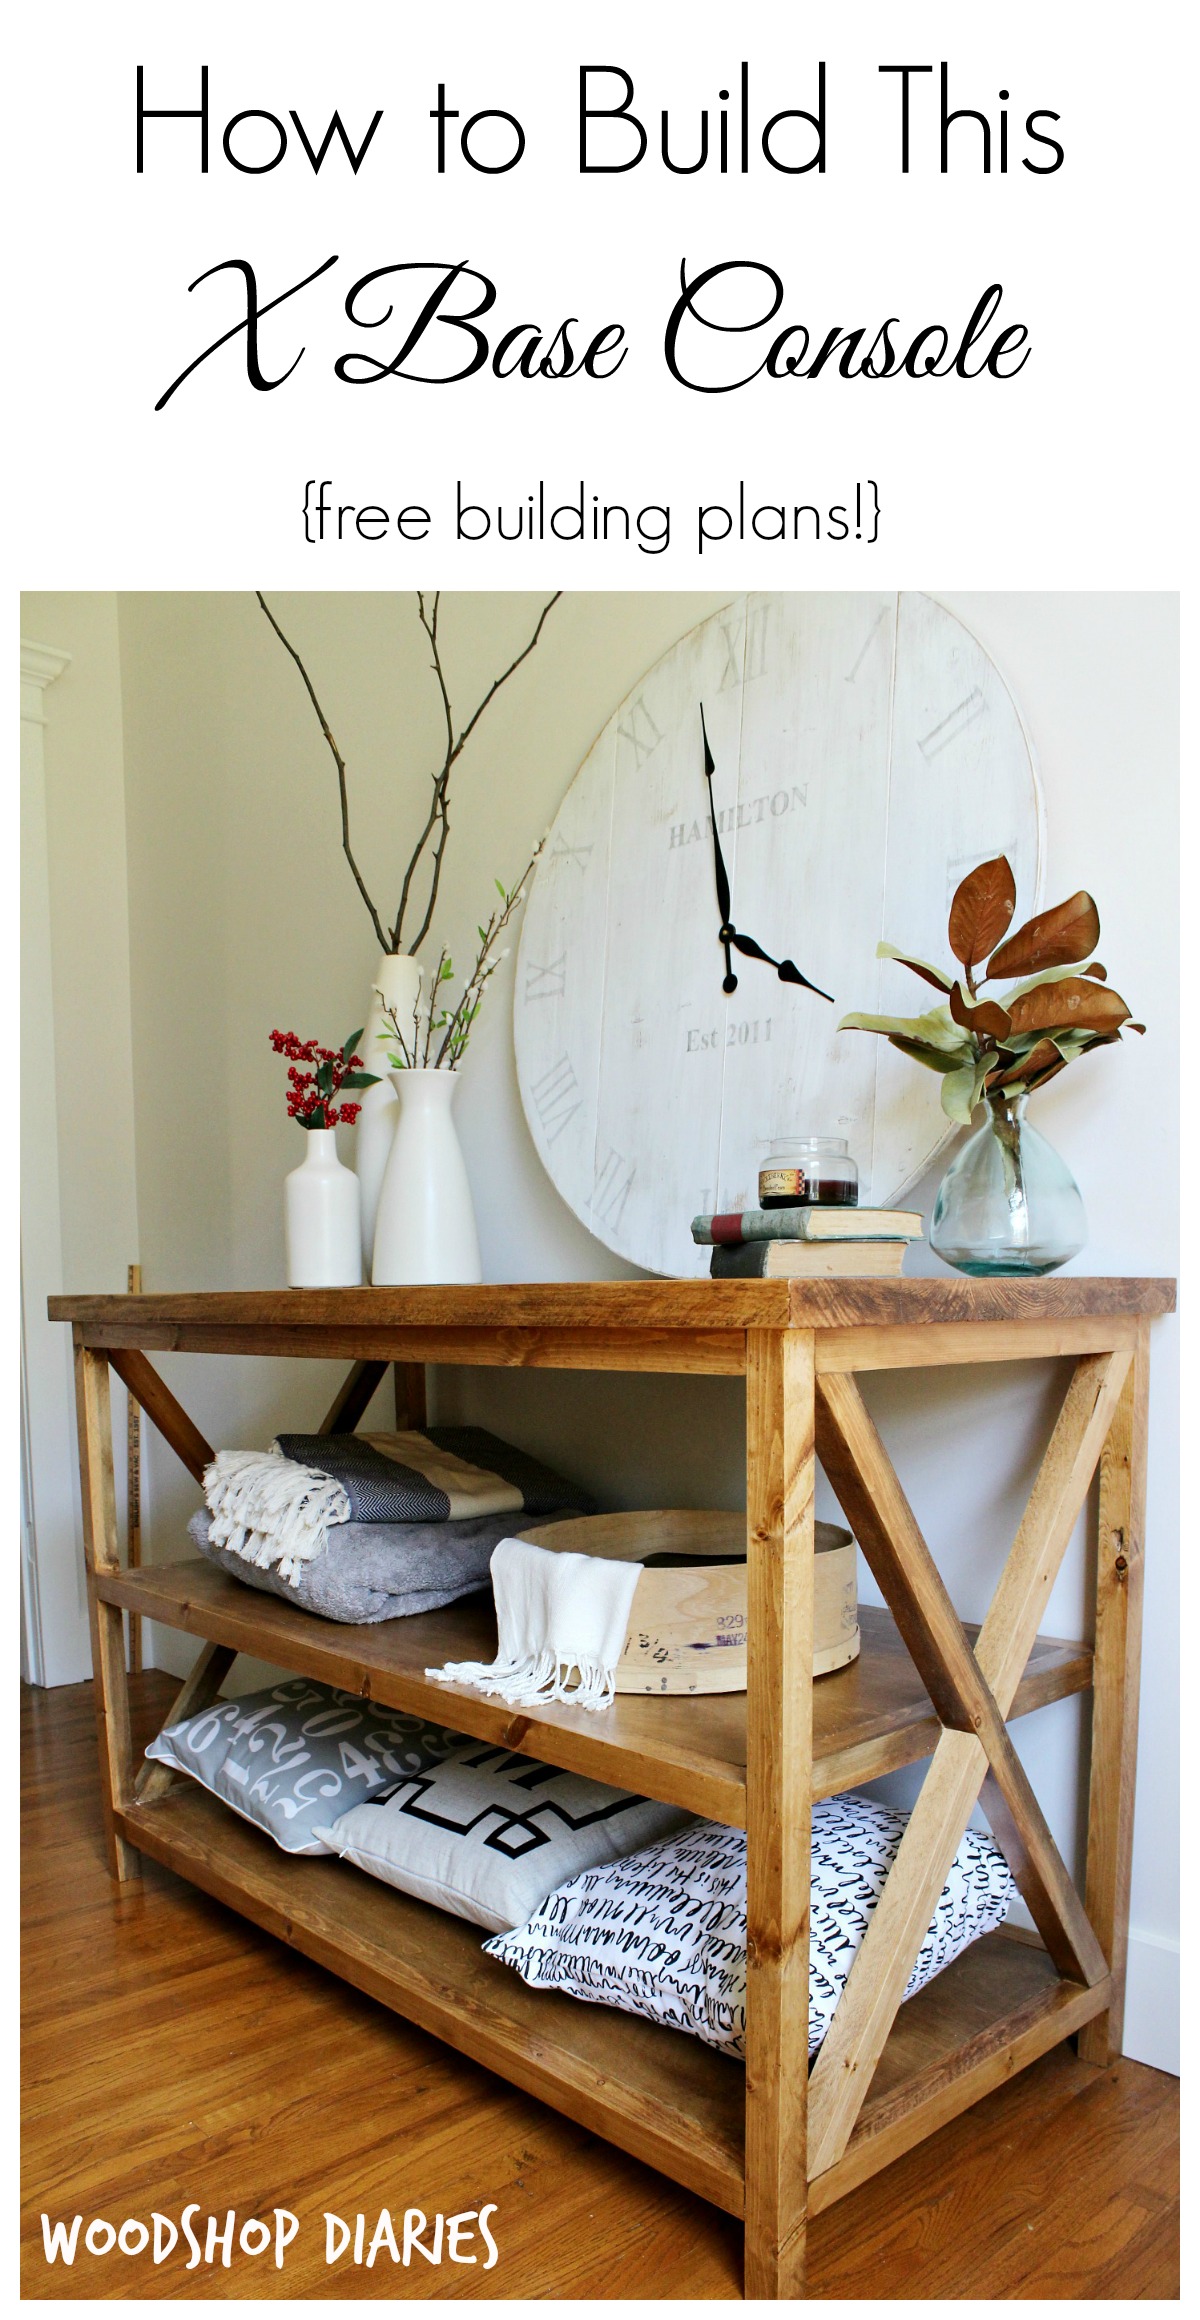
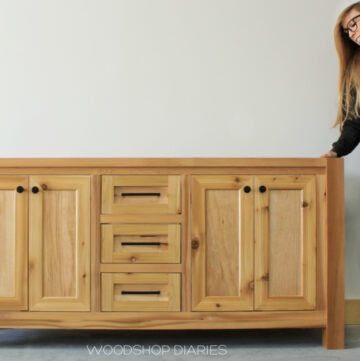
In this post, I’m sharing how to build an X base console table with middle shelf!
This would be a great place to store blankets in the living room, towels in a large bathroom, display a collection in a home office or use as a focal piece in the foyer.

Simple, clean, and classic in style, this x base console table is a fun build that requires limited tools and basic materials. So it’s a great project for any skill level!
And the size is easy to customize, too!
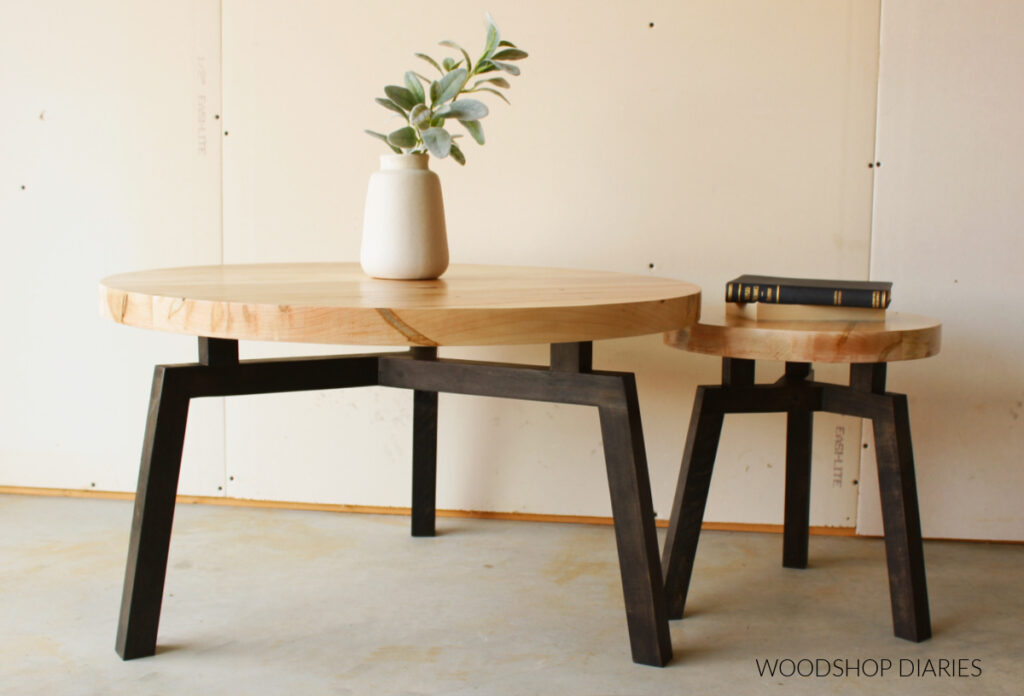
By the way, if you’re looking for a smaller version without the middle shelf, you can find that here.
I’m sharing the plans and project details below, so if you’re ready to build, let’s dive in.
*This post contains affiliate links. See website policies for details.
**This post was originally shared on Nov.19, 2017, but was updated on Jan. 25, 2025.
What to know before building
This project uses several pieces of 2×2 lumber for the framing and the sides. You can absolutely purchase these precut from the big box store or local lumber yard.
But, often, the precut 2×2 boards are warped, split, and come with rounded corners that don’t make the cleanest joints. (PS Did you know that a 2×2 is actually 1 ½″ x 1 ½″? Learn more about lumber sizing here.)
Instead, if you have a table saw, I recommend cutting your own 2x2s down from 2×4 boards. This post details how to cut your own 2x2s.
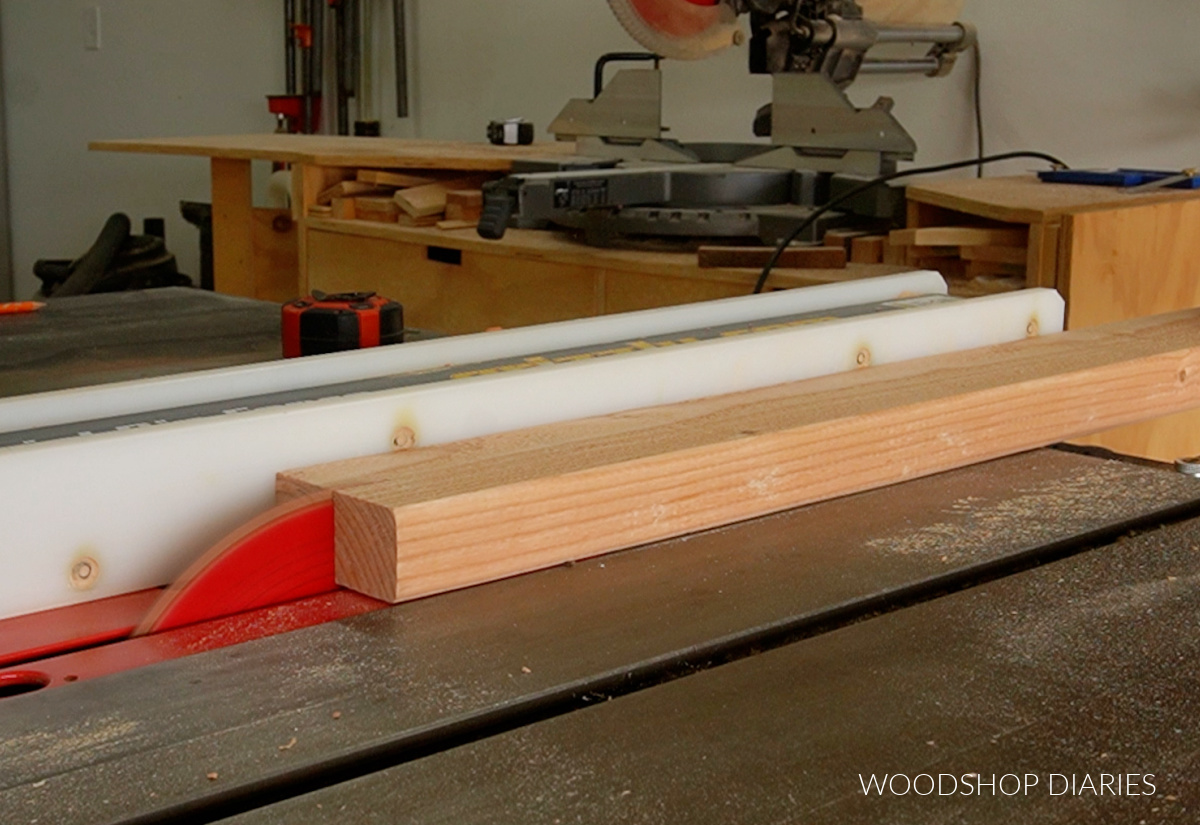
You can get two 2x2s from a 2×4 board, so not only does this result in better quality 2x2s, but it also saves a few dollars in most cases.
Overall Dimensions & Adjustments
The overall dimensions of this X base console project are approximately 23″ deep x 33 ½″ tall x 53″ wide.
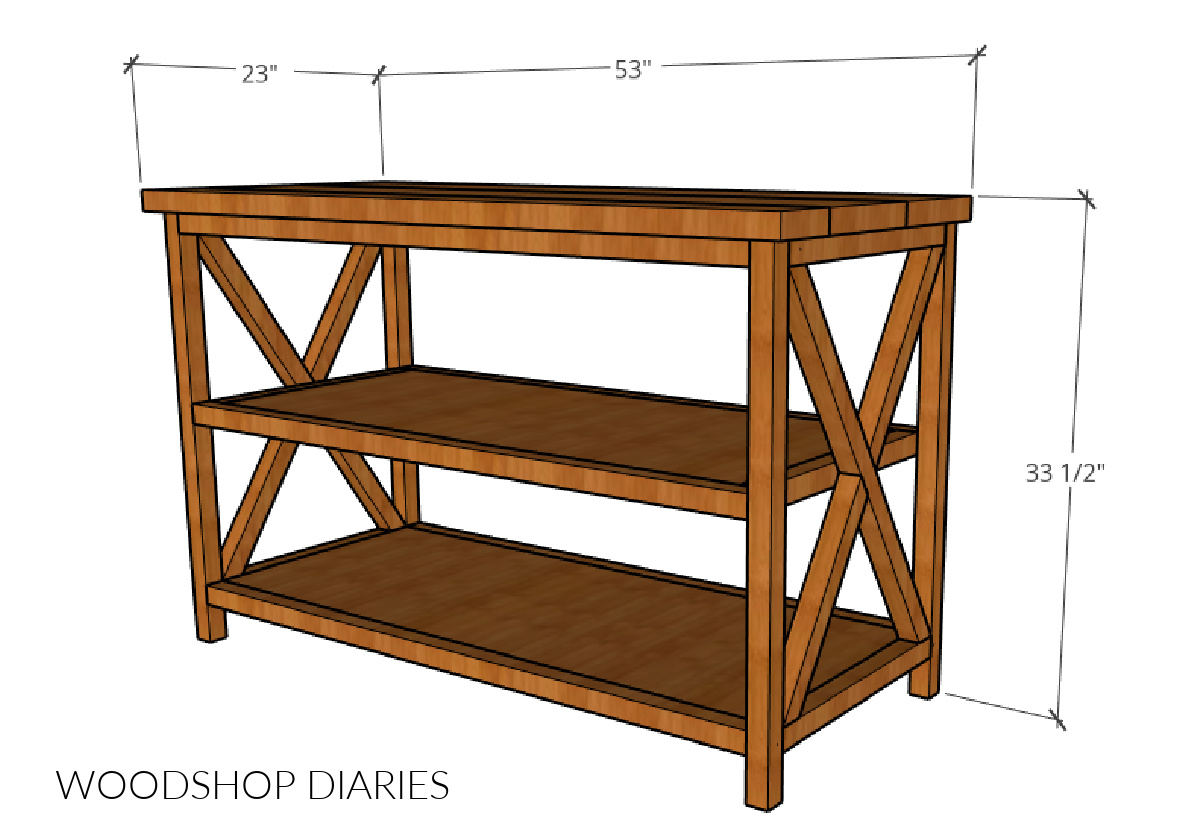
But, this is easy to customize, so if this doesn’t fit your space, no worries!
How to adjust overall size:
- Adjust the width by adjusting the length of the horizontal pieces in step 1.
- Adjust the depth by adjusting the length of the horizontal pieces in step 2.
- Adjust the height by adjusting the length of the legs in step 1.
Once the frame is built, you can simply adjust the top and shelf panels by trimming them down to whatever size you need to fit your frame.
The “tricky” part is adjusting the angles and lengths of the X to fit your frame. The good news is that you don’t have to do any math to figure this out if you have a speed square.
Check out this video that demonstrates how to “measure” for X trim on any project:
Enjoy DIY projects and woodworking plans? Sign up for priority access for the latest posts on Woodshop Diaries!
How to Build an X Base Console Table with Shelf
This project was originally built back in 2017 before I started making videos. So I don’t have a full build video for it (I’m sorry!).
But, I have put together printable building plans with diagrams, a cut list, and step by step instructions to guide you through the build.
Grab the printable built in cabinet building plans available here:
Love watching how-to videos? Subscribe to my YouTube channel for plenty more where that came from!
Tools and Materials:
Tools:
- Miter Saw
- Circular Saw
- Plywood cutting guides (optional, but helpful)
- Kreg Jig for Pocket Holes
- Drill/Driver
- Table Saw (optional, but helpful)
Materials:
- (8) 2x2x8 (or (4) 2x4x8 boards ripped down)
- (1) 2x10x8
- (1) 2x8x10
- 4’x4′ (½ sheet) ¾″ plywood
- 2 ½″ pocket hole screws
- 2 ½″ wood screws
- 1 ¼″ pocket hole screws
- 1 ¼″ wood screws
- Wood Glue
Not sure what type of lumber to use for this project?
- PLYWOOD: I recommend using cabinet grade hardwood plywood (like birch, maple, oak, etc). Check out this post to learn how to choose the right plywood for your project.
- 2x LUMBER: If painting, pine, spruce, or poplar are great budget friendly options. And if staining, usually, you want to use the same wood type as your plywood (or something that stains similarly) so that they match once finished.
- I’ve found that pine and spruce match birch and maple plywood pretty well once stained. Spruce lumber and birch plywood were used here on this project. Check out this post to learn how to shop for and purchase lumber for your project.
Step 1: Build the Front and Back Frames
I started by cutting down the 2x2s and building the front and back frames of the console.
First, I cut four 2×2 legs to about 32″ long and six horizontal 2×2 frame pieces about 48″ long.
I drilled pocket holes into the ends of the longer pieces and used 2 ½″ pocket hole screws to assemble 2 identical frames like shown below.
RELATED: How to use pocket holes to assemble furniture
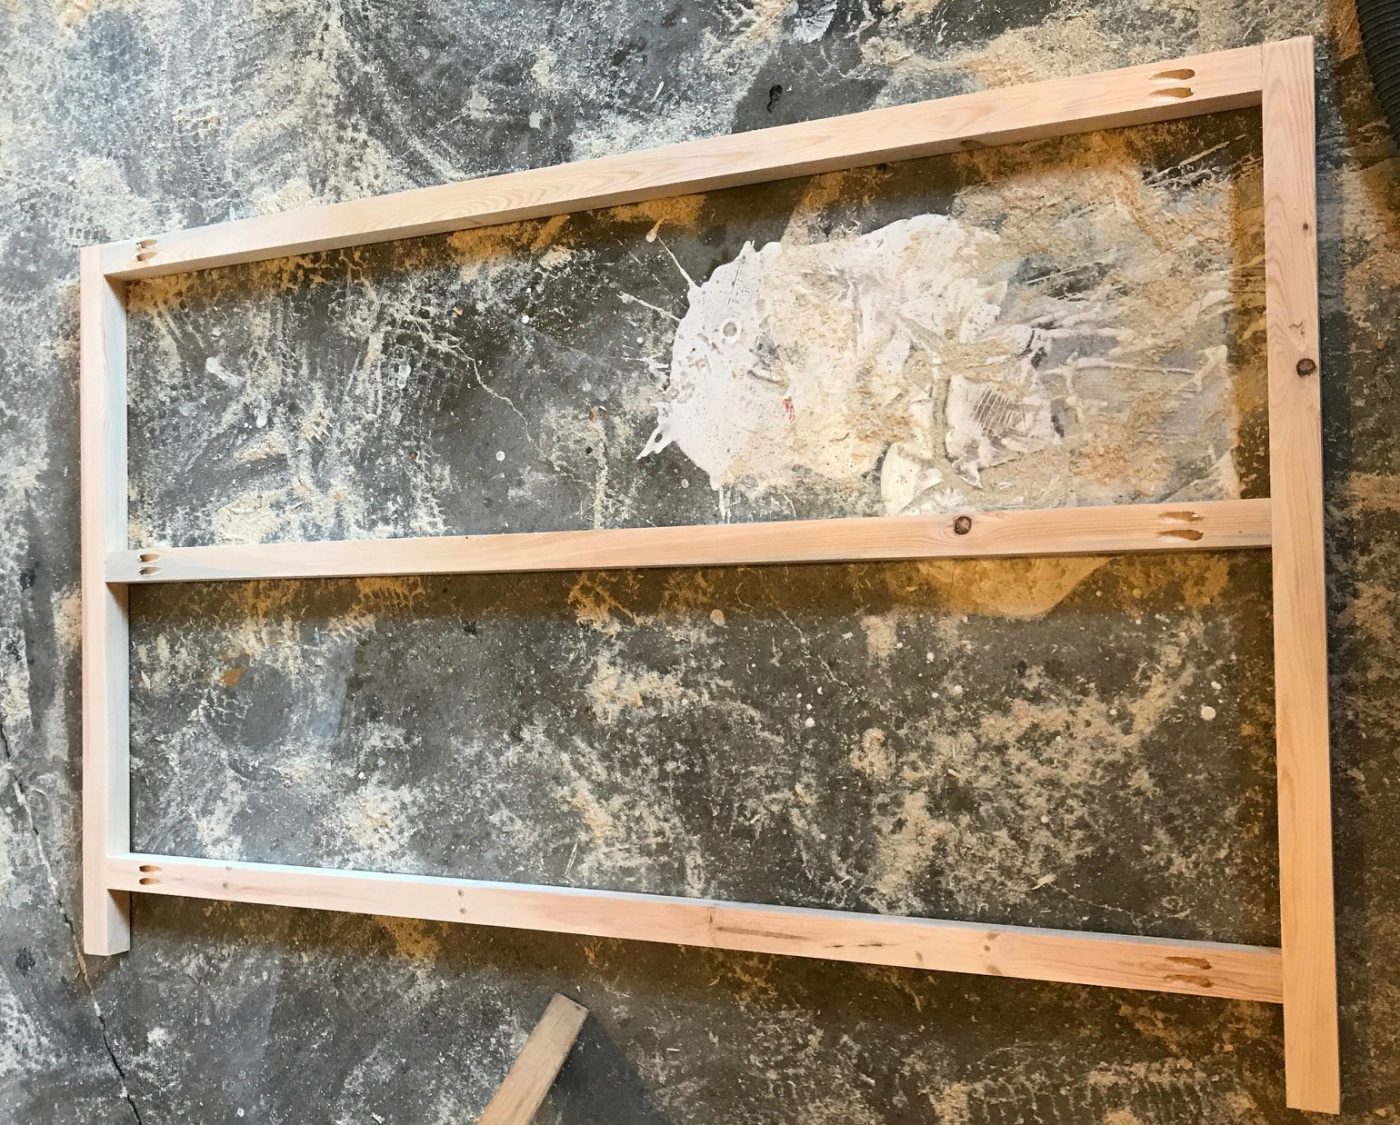
I recommend using a bit of glue on these joints, and being careful to drive the screws slowly to help prevent the wood from splitting.
You can space these sections out however you’d like, but I left 3″ of the legs hanging off the bottom and left about 12 ¼″ space between the 2×2 pieces.
If you want one shelf section to be bigger, you can adjust this spacing as needed.
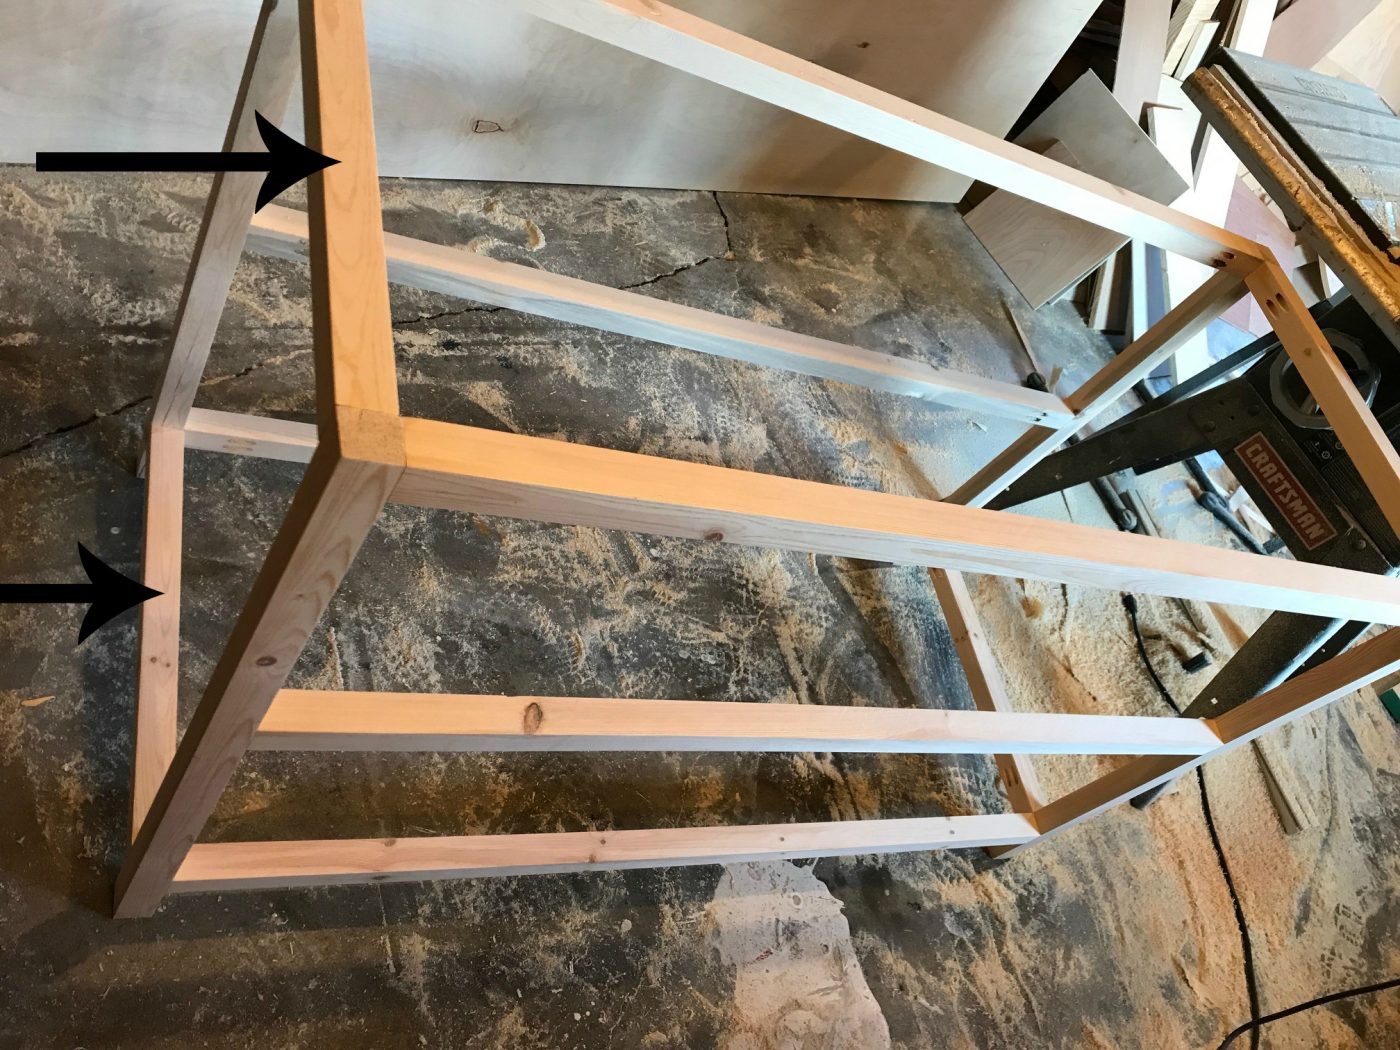
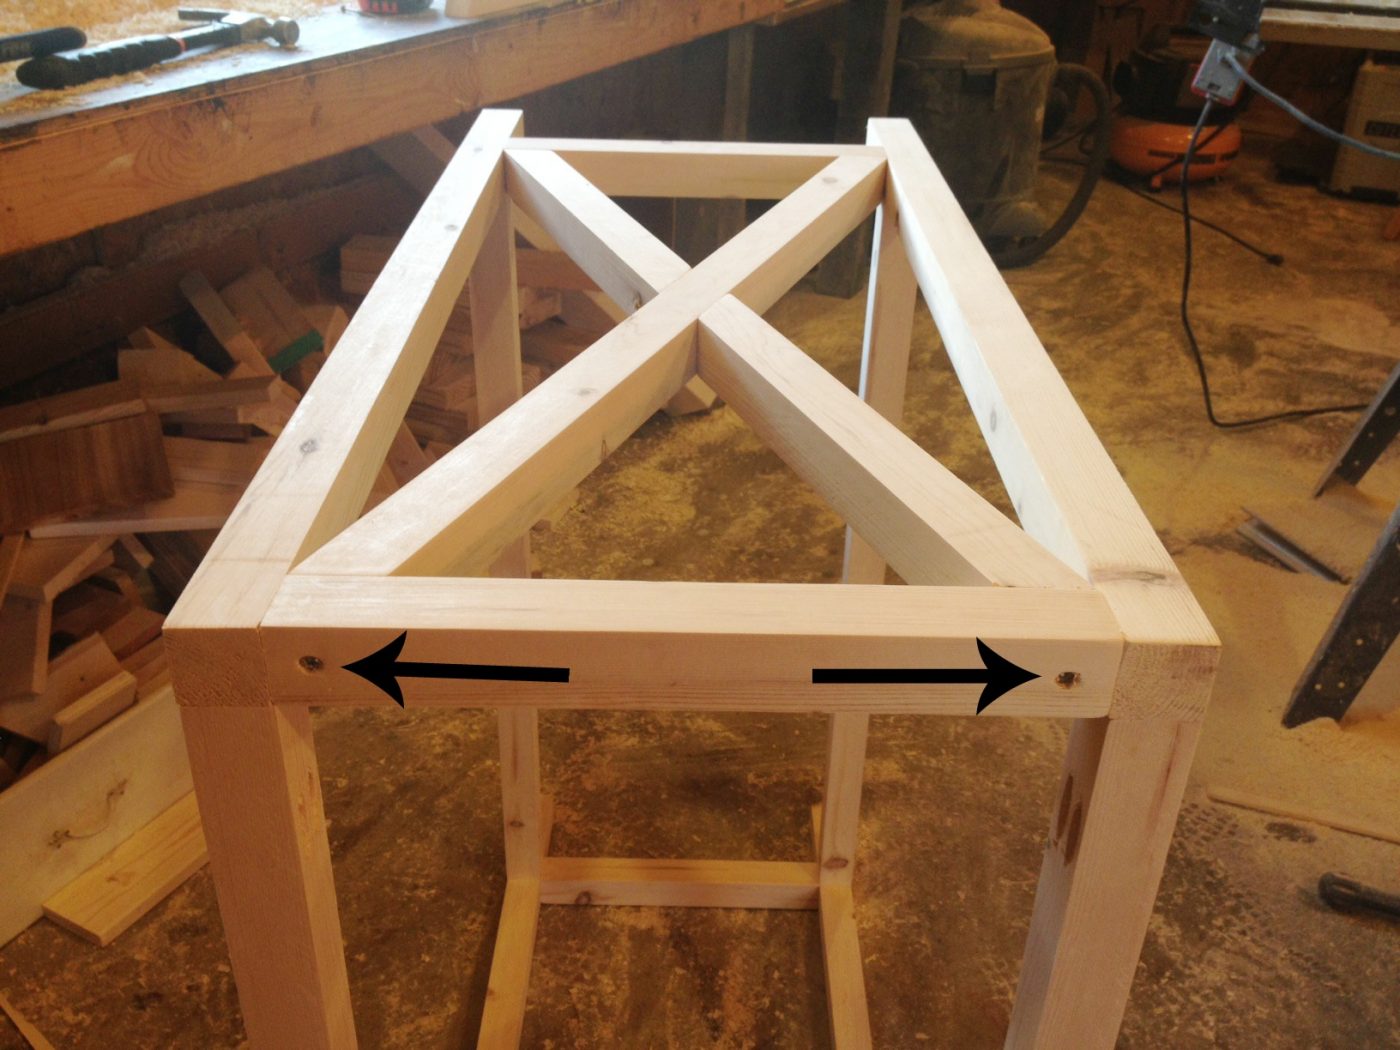
Step 2: Assemble X Base Console Table Front and Back Frames Together
Now that the front and back frames were together, I connected them with four side braces.
I cut these 2x2s to about 19″ long and drilled 1 ½″ pocket holes in each end.
Then, I used 2 ½″ pocket hole screws to assemble like shown below.
NOTE: Use wood glue and drive the pocket hole screws slowly. Two pocket holes can work (as is shown below), but the screws may run into each other at the corners. For this reason, you may consider using only one pocket hole on these pieces to avoid issues.
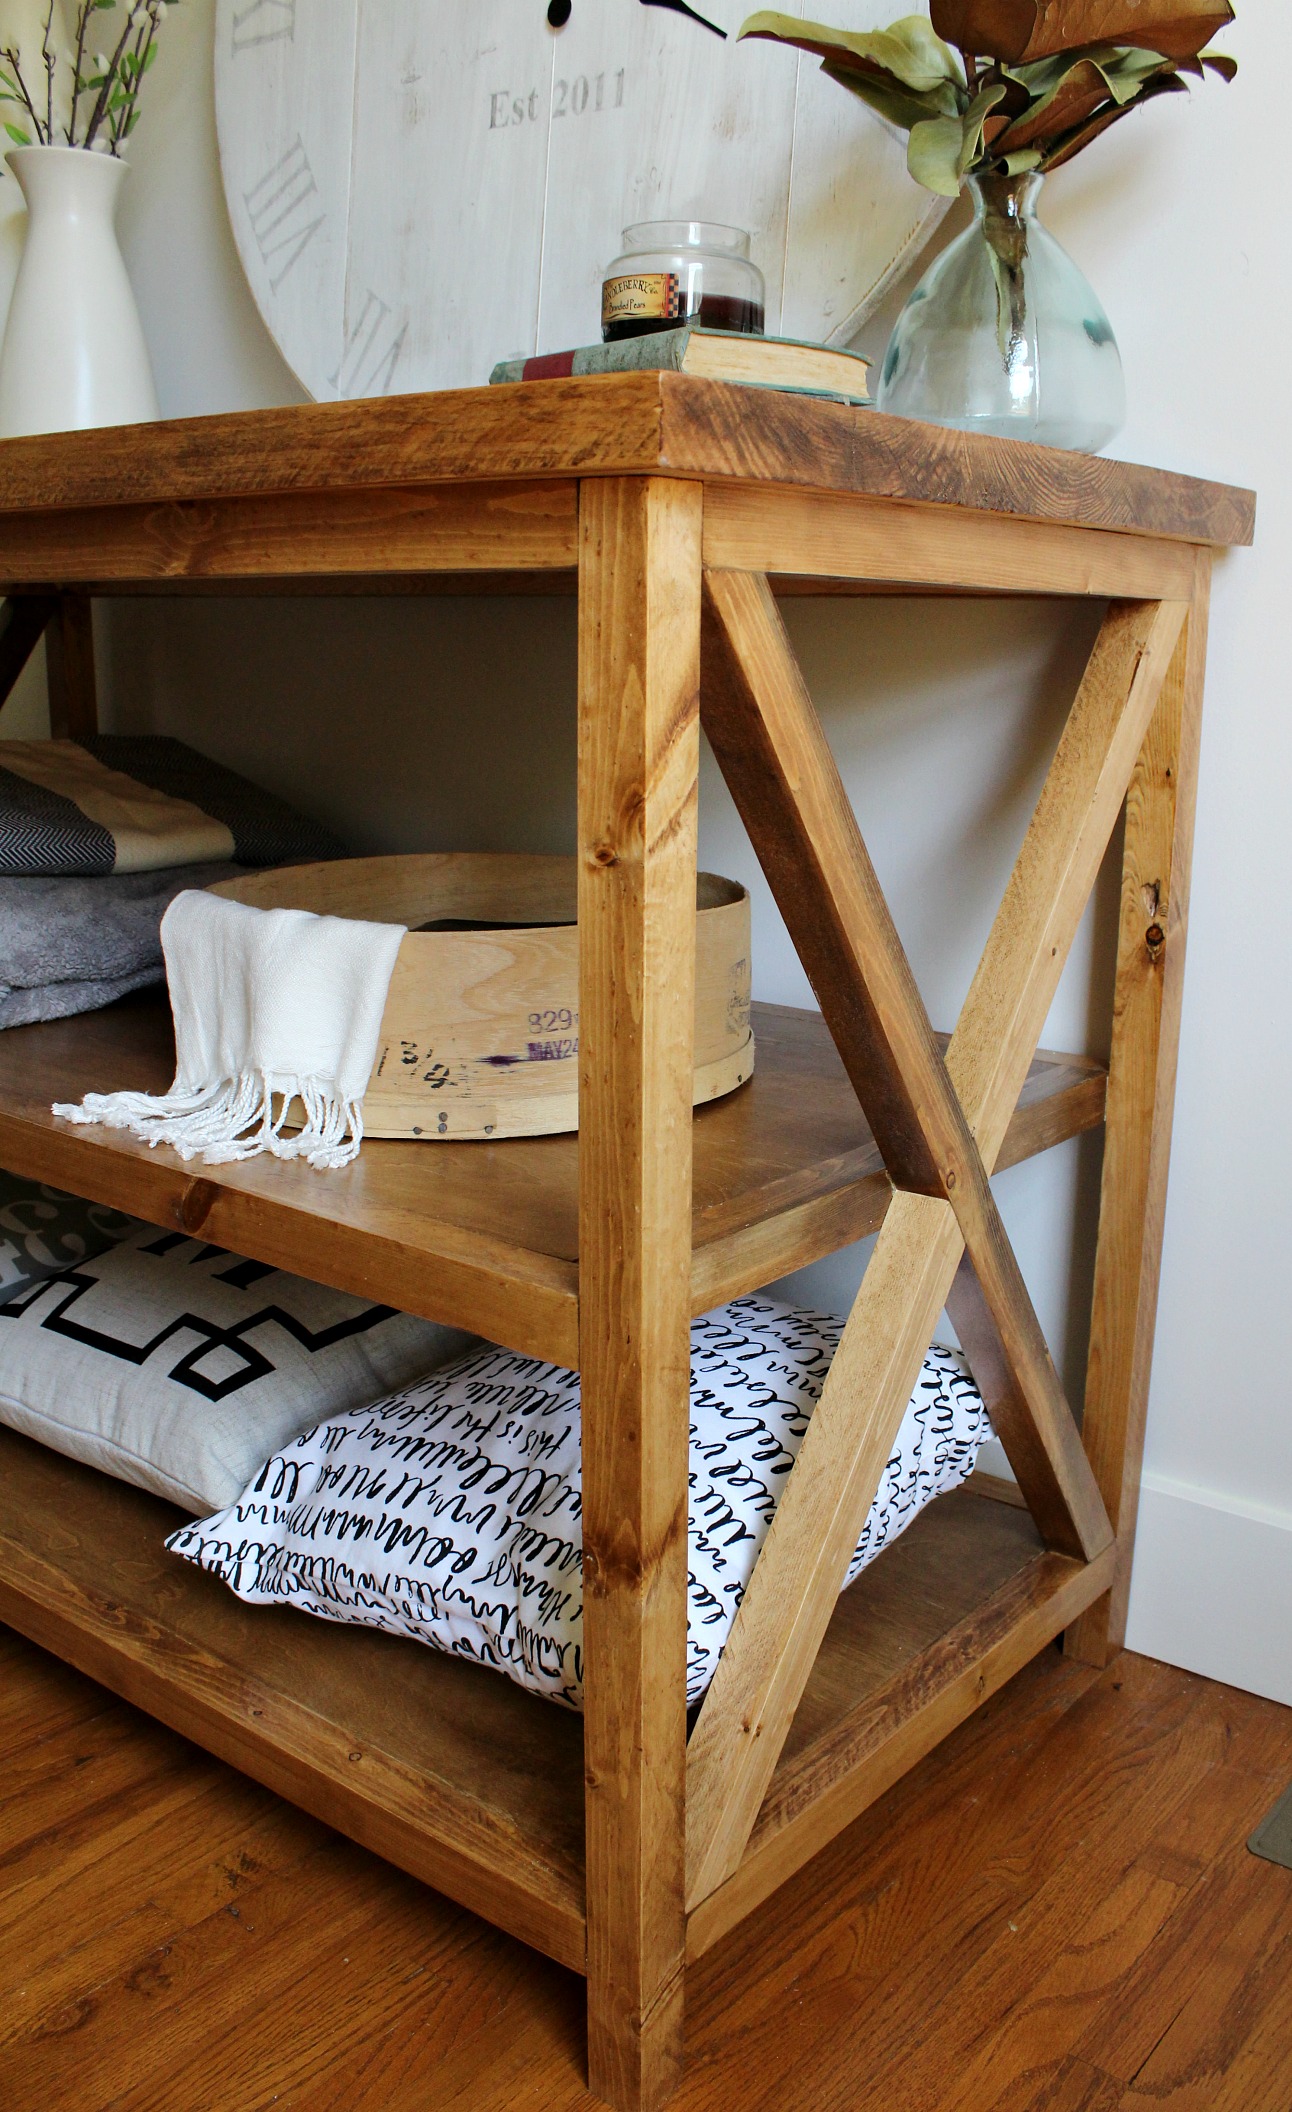
Step 3: Add the Xs to the Sides of Table
This is the “trickiest” step of the project, but only because it involves cutting some angles. For this, I recommend using a miter saw. You can learn how to cut angles on a miter saw here.
When cutting things like these Xs, I find it easiest to cut each piece to fit. I rarely ever MEASURE the lengths, but instead, I hold the pieces in place and mark where to cut.
TIP: If you cut your pieces a bit long, you can trim a tiny bit at a time until it fits perfectly.
However, if you prefer exact dimensions, I’ve included them with angles in the printable plans here.
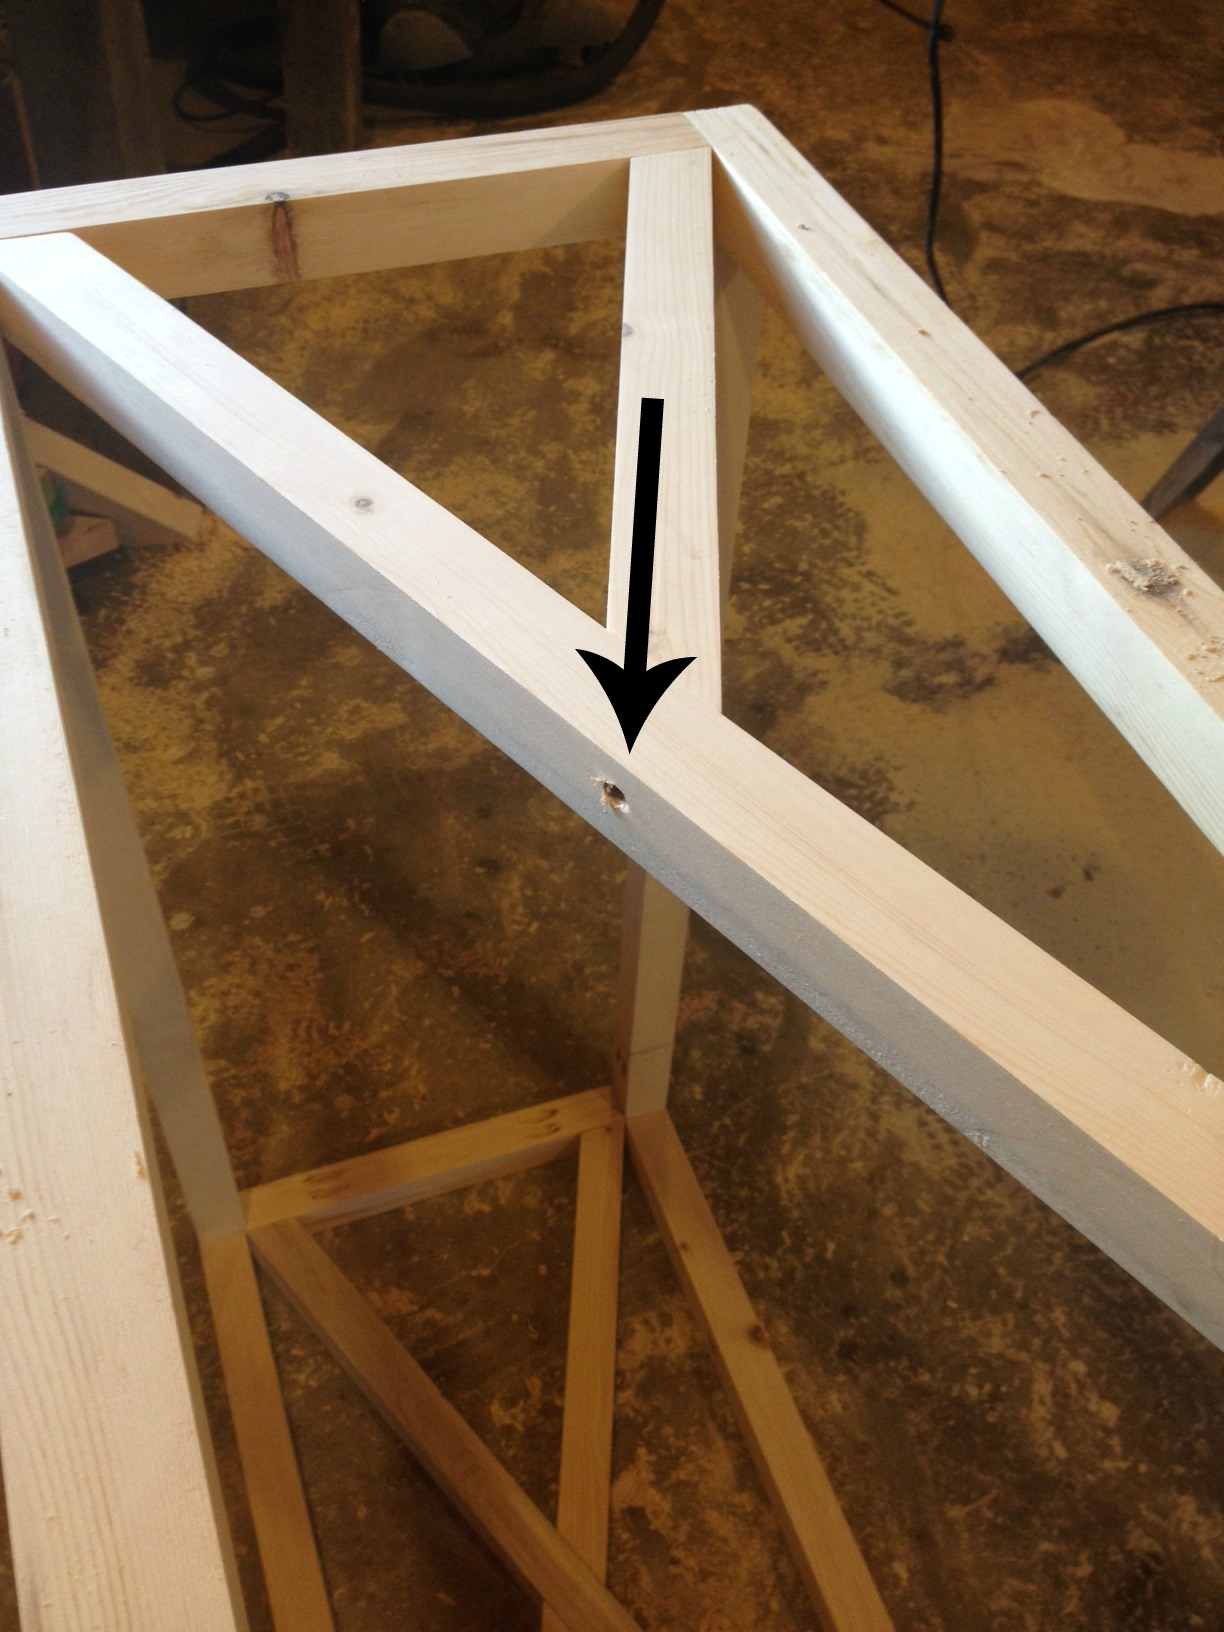
To cut to fit, I flipped the frame over on its side and held a 2×2 across it diagonally, lining up the edges with the corners. Then, I marked where it intersected the top and bottom framing so I knew where to cut.
Once I had my mark, I can figure the angle by taking it to the miter saw and seeing which angle it lines up best with–OR use a speed square like shown in the video I included in the notes above.
It’s okay if it’s not PERFECT–just get it as close as possible. I cut the long piece (shown below going from the bottom left to the top right in the photo) first and secured it using 2 ½″ screws through the top and bottom 2x2s.
Then cut to fit the two smaller pieces to complete the X and secured these with 2 ½″ screws like shown in the photos below.
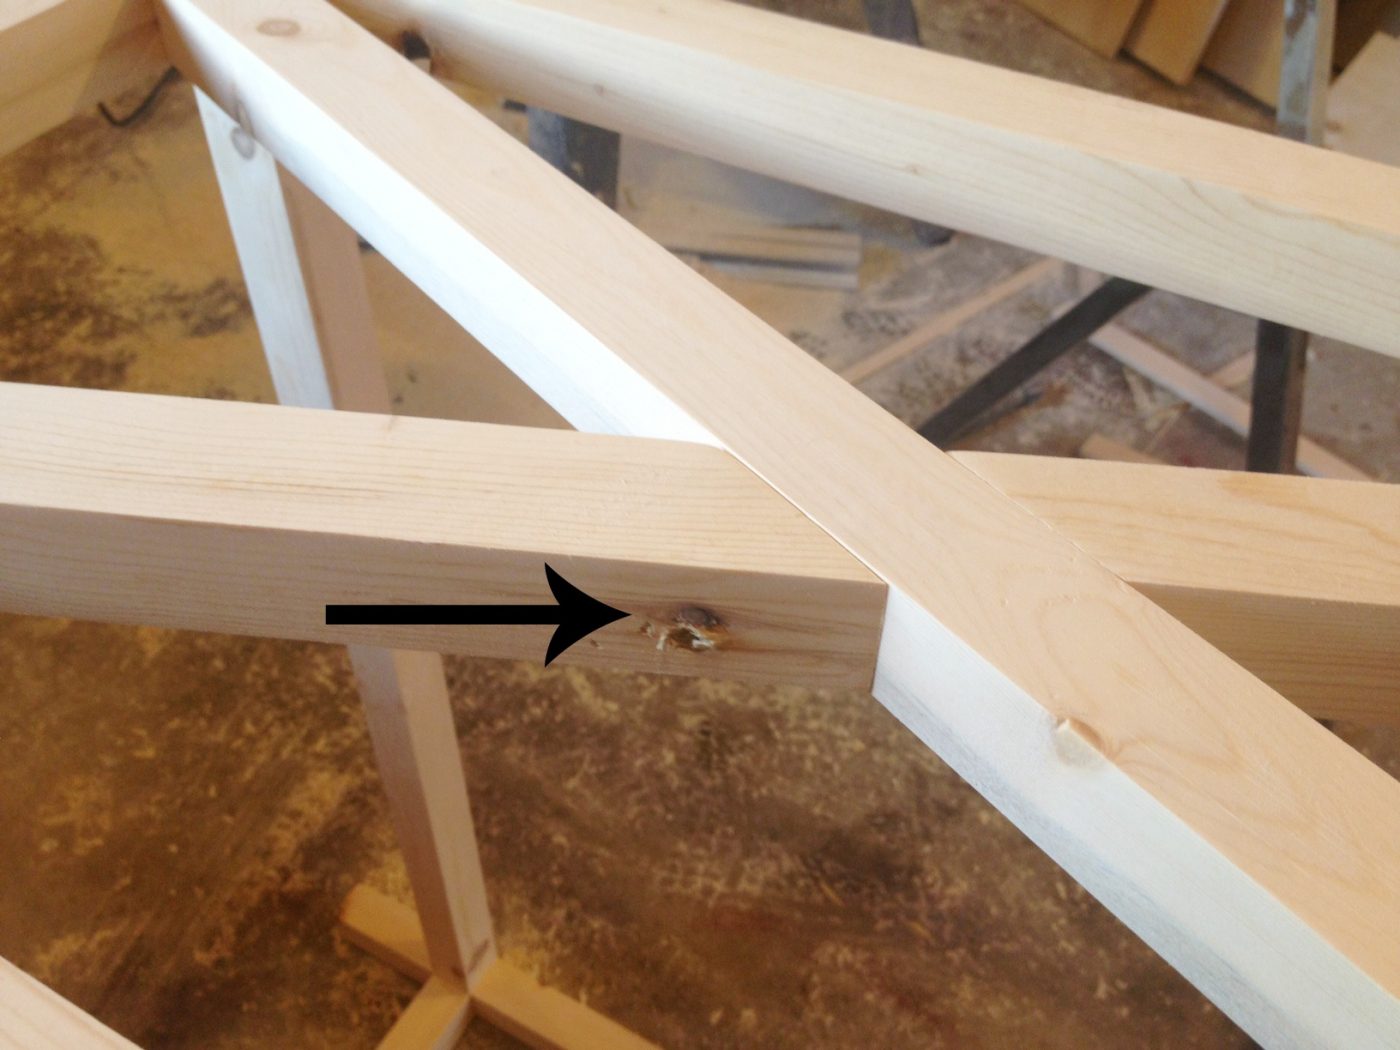
Then, I repeated to add the X trim to the other side as well.
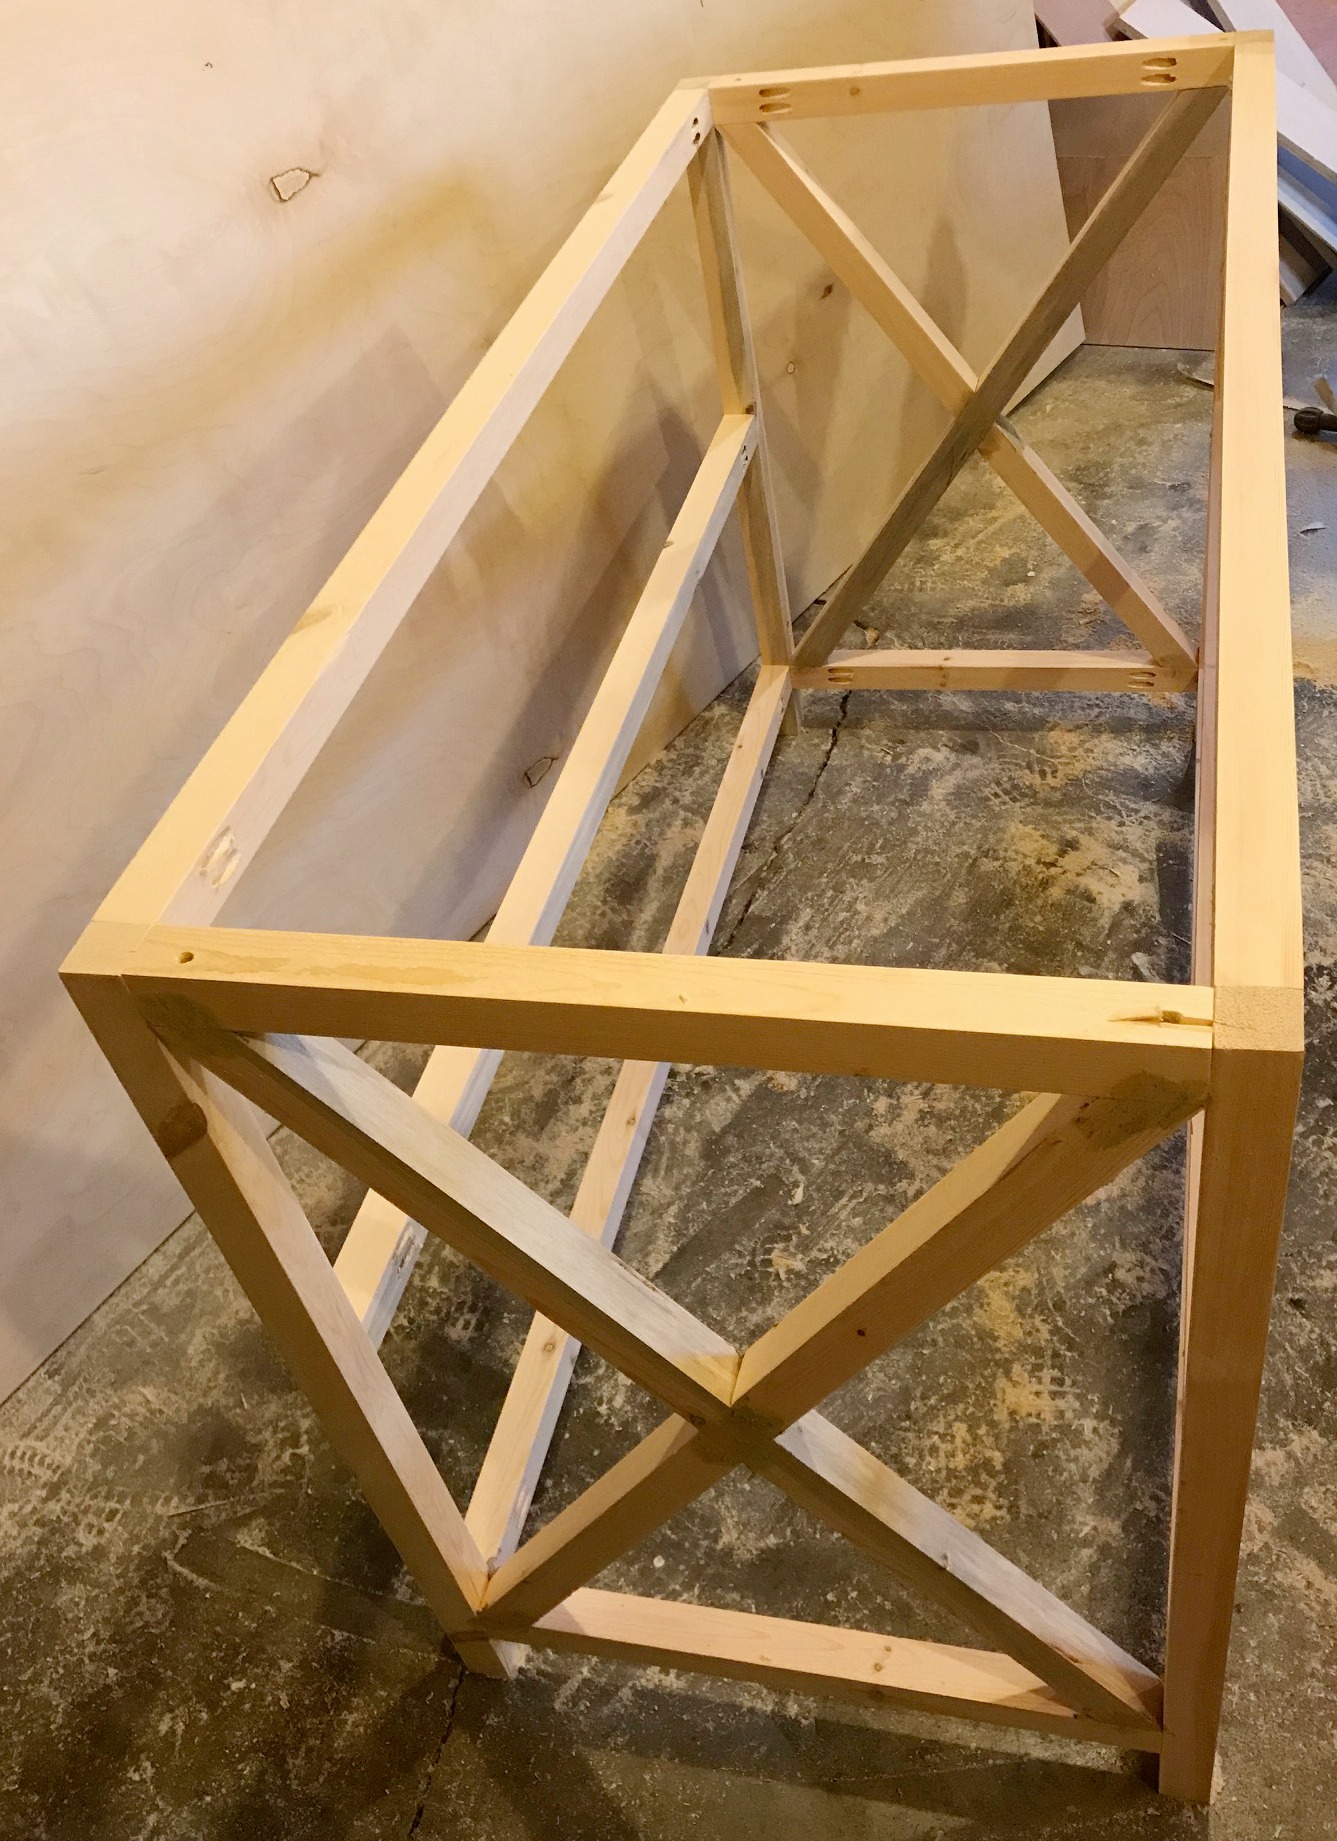
Step 4: Add Middle Shelf Supports
Once the Xs were in place, I cut two pieces of 2×2 and drilled 1 ½″ pocket holes in each end of both pieces. Using 2 ½″ pocket hole screws, I attached as shown between the front and back middle shelf support.
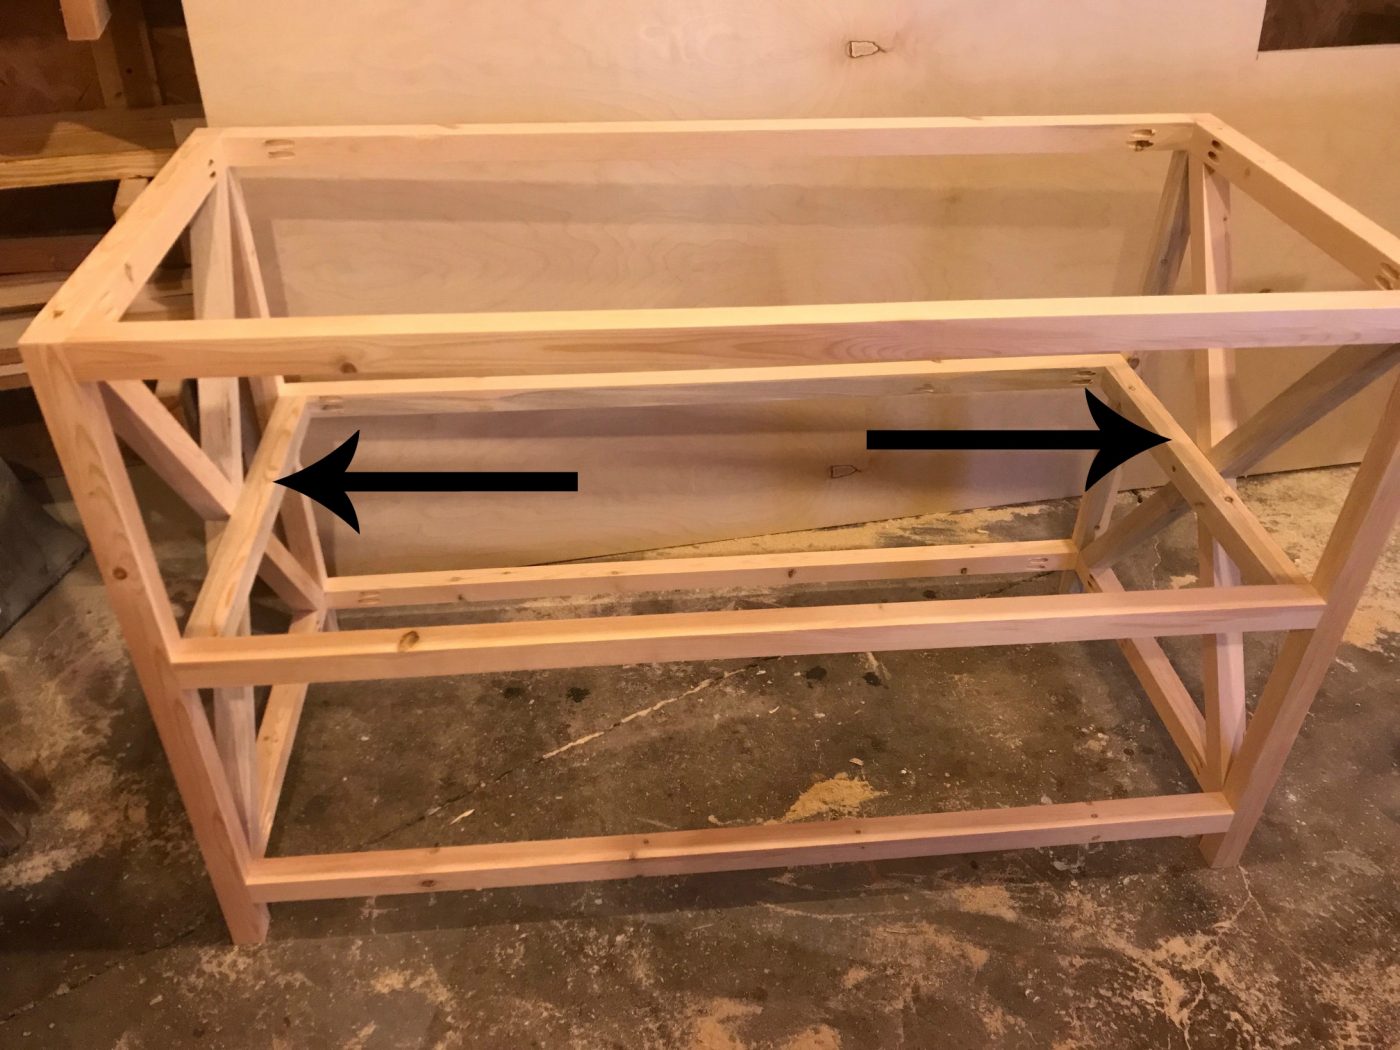
I also added another screw in the middle to attach this piece to the X on each side. This isn’t NECESSARY, but helps hold everything nice and snug.
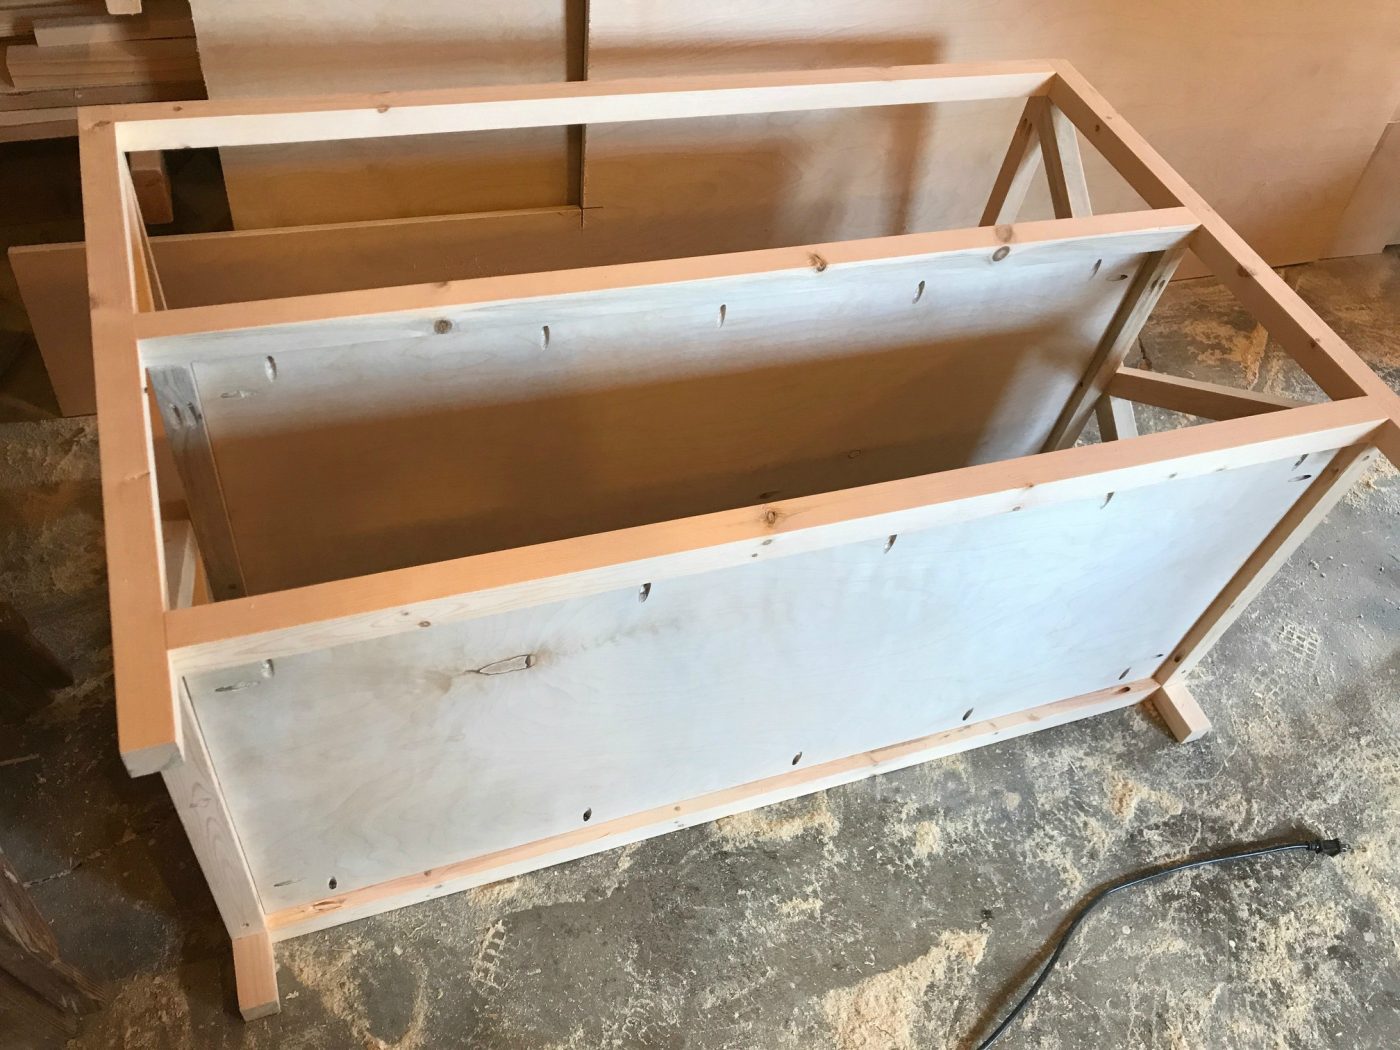
Step 5: Add Plywood Shelves to X Base Console Table
From the half sheet of ¾″ plywood, I cut two panels to use for the shelves. Again, this is another case where I recommend cutting to fit.
Depending on how precisely your pieces fit together, your plywood panels may need to be ⅛″ bigger or smaller in some spots. So measure carefully and cut your pieces to fit exactly inside the frame.
Check out this post for more details on how to cut down plywood sheets.
I drilled ¾″ pocket holes along the edges of the panels and attached in place using 1 ¼″ pocket hole screws like shown here making sure the plywood is flush to the top of the supports.
Step 6: Add Top to X Base Console Table
For this top, I glued up solid 2x thick lumber, then trimmed it down to be 53″ long and 23″ wide overall. However, if you didn’t want to glue up solid lumber, you could also cut this from ¾″ plywood.
To make it, I cut two 2×8 boards and one 1×10 board down to a little longer than 53″ and glued them together to make a panel.
NOTE: I recommend squaring off the board edges for the cleanest glue up and tightest joints. You can read about how I build table tops in this post here.
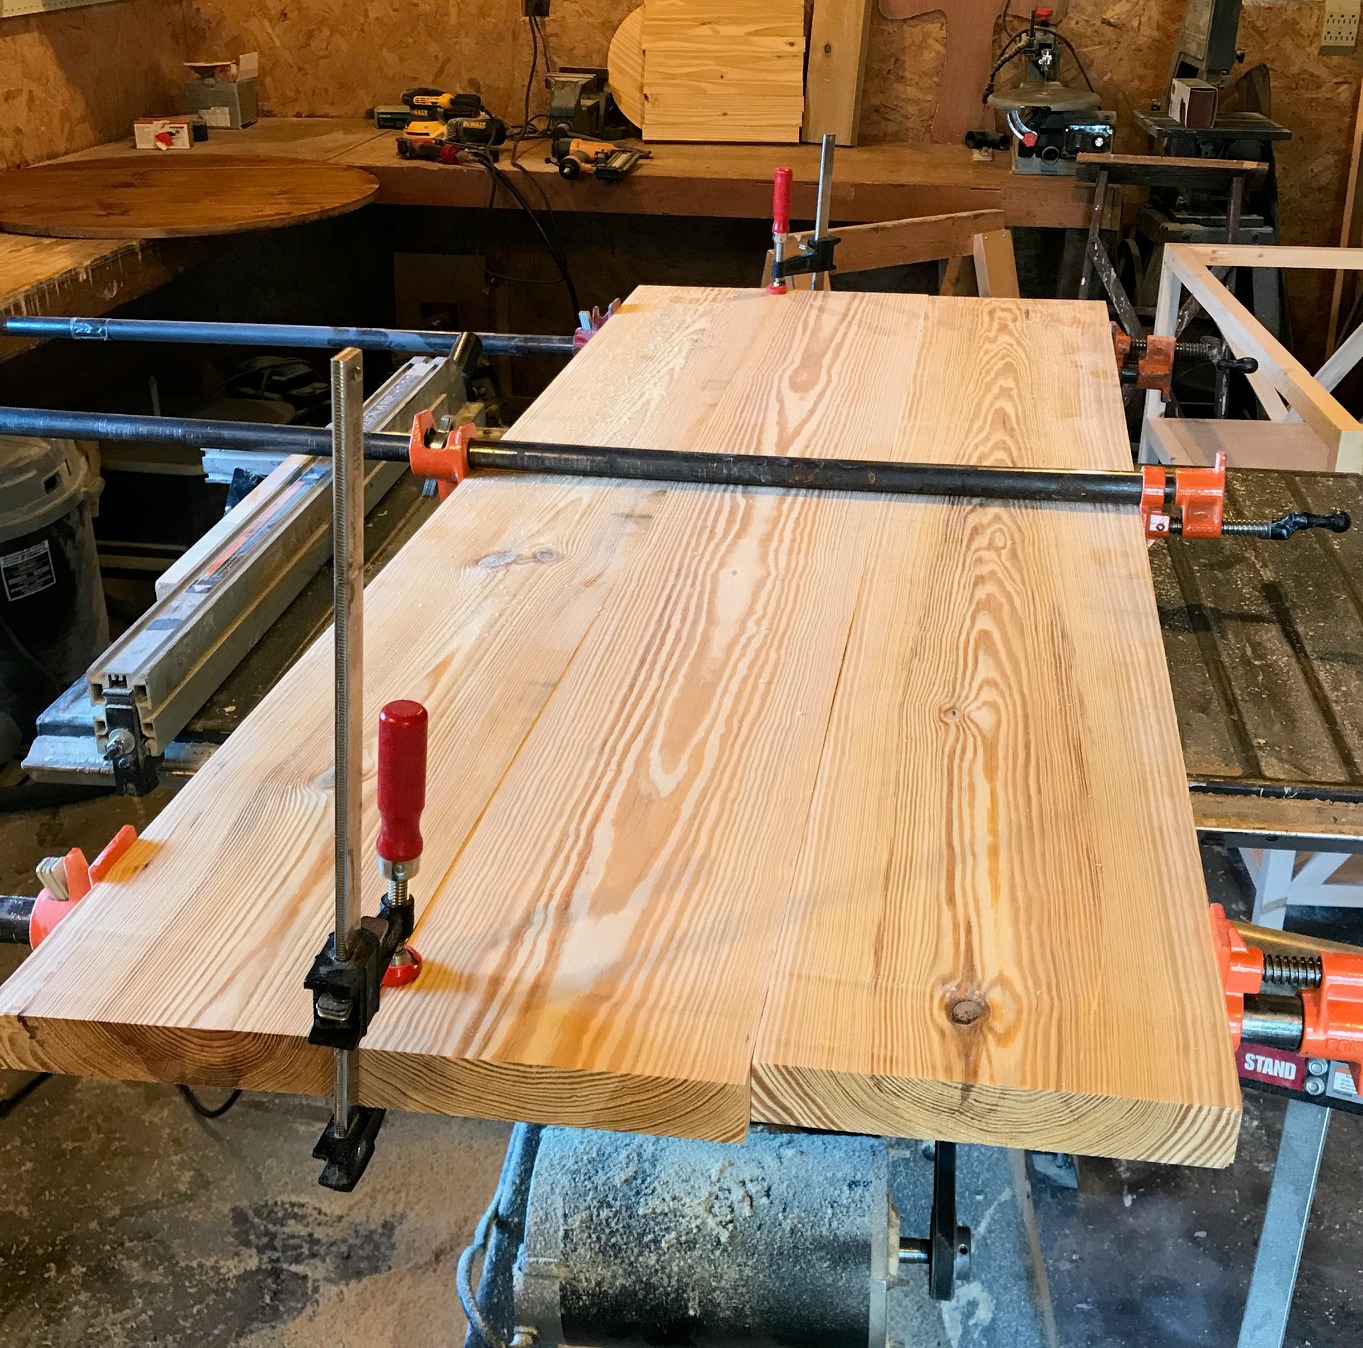
Once the glue was dry, I trimmed the edges smooth using a circular saw and sanded the top to even out any high or low spots.
RELATED: How to sand wood
Then, I placed the top on the base so that it was centered left and right and was flush on the back side. I used 2 ½″ wood screws through the top 2×2 supports to screw the top in place on all sides.
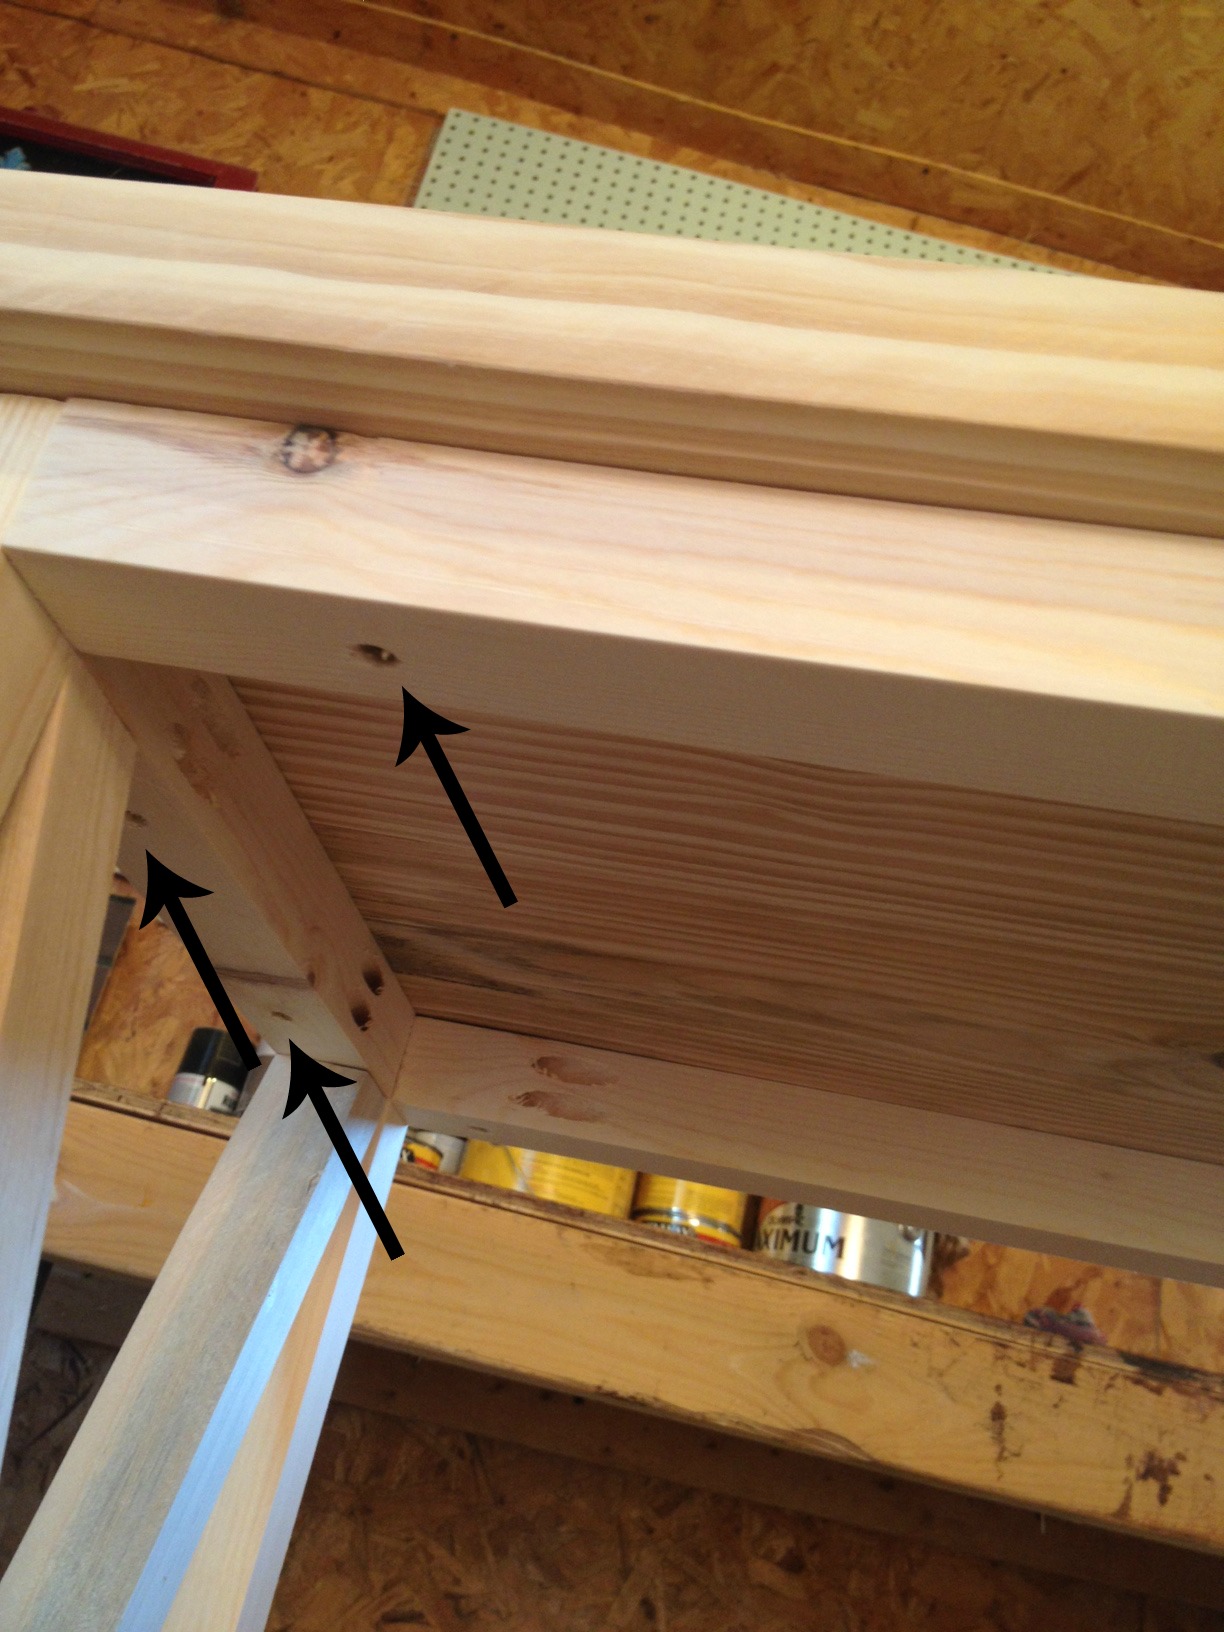
NOTE: In hindsight (I built this several years ago), attaching this way does not allow for wood movement. Although this piece has not had issues over the years, it’s best to attach the top a different way to avoid potential issues.
One way to do this is using figure 8 tabs or Z clips. But another easy method is to simply use screws like I mentioned, but drill SLOTTED or oversized holes through the 2x2s to allow the screw to move as needed inside the hole as the top expands/contracts.
If using screws with oversized or slotted holes, you’ll need to use a washer. See step 4 of this project for an example.
Step 7: Finish the Console Table
Now all that’s left is finish. I stained this table with Minwax Early American and gave it a few coats of Minwax Polycrylic once the stain dried.
RELATED: How to stain wood
ALSO RELATED: How to apply clear coat
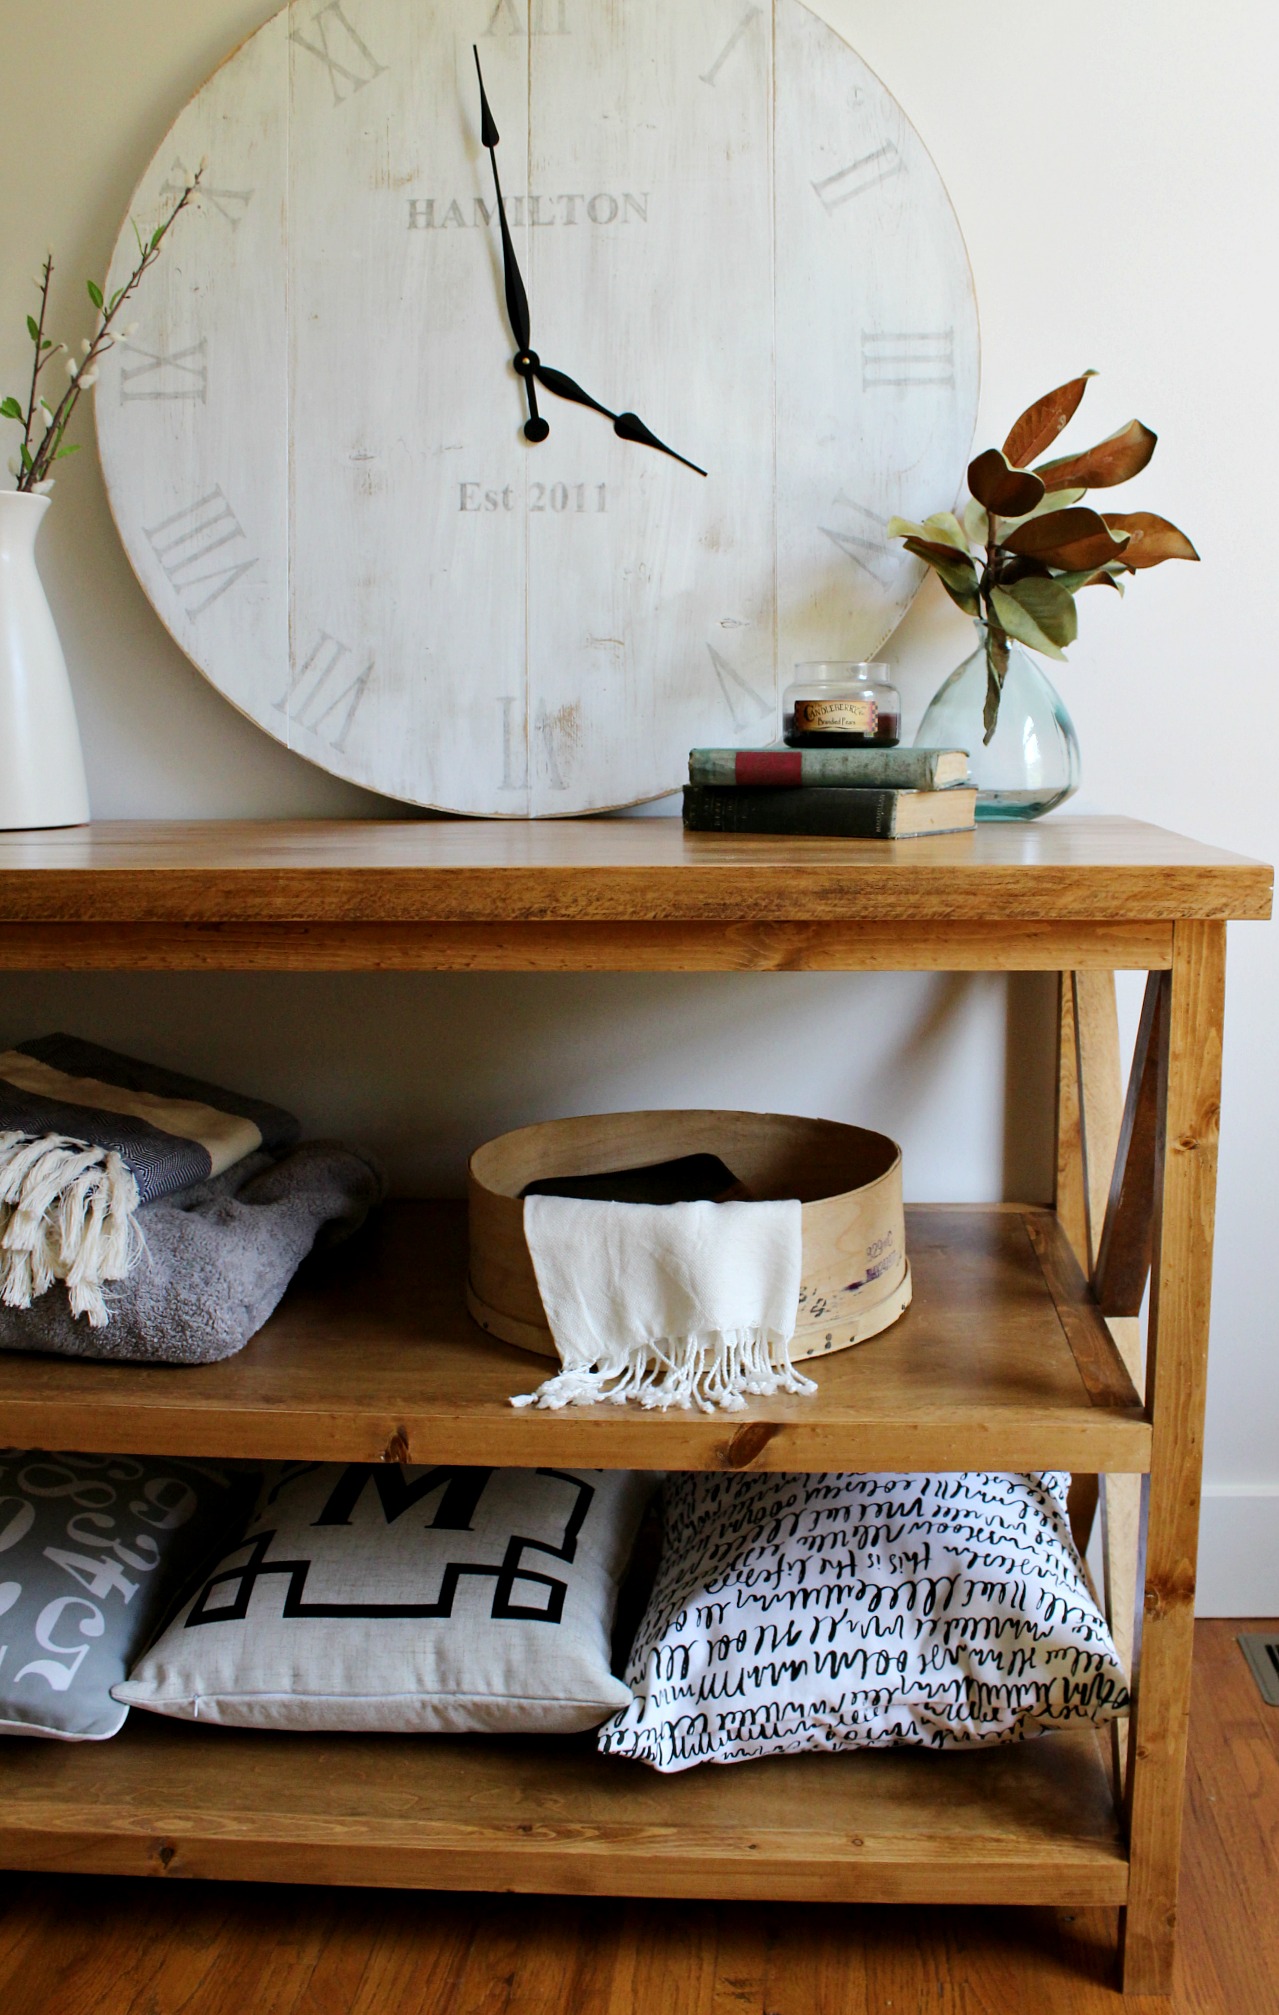
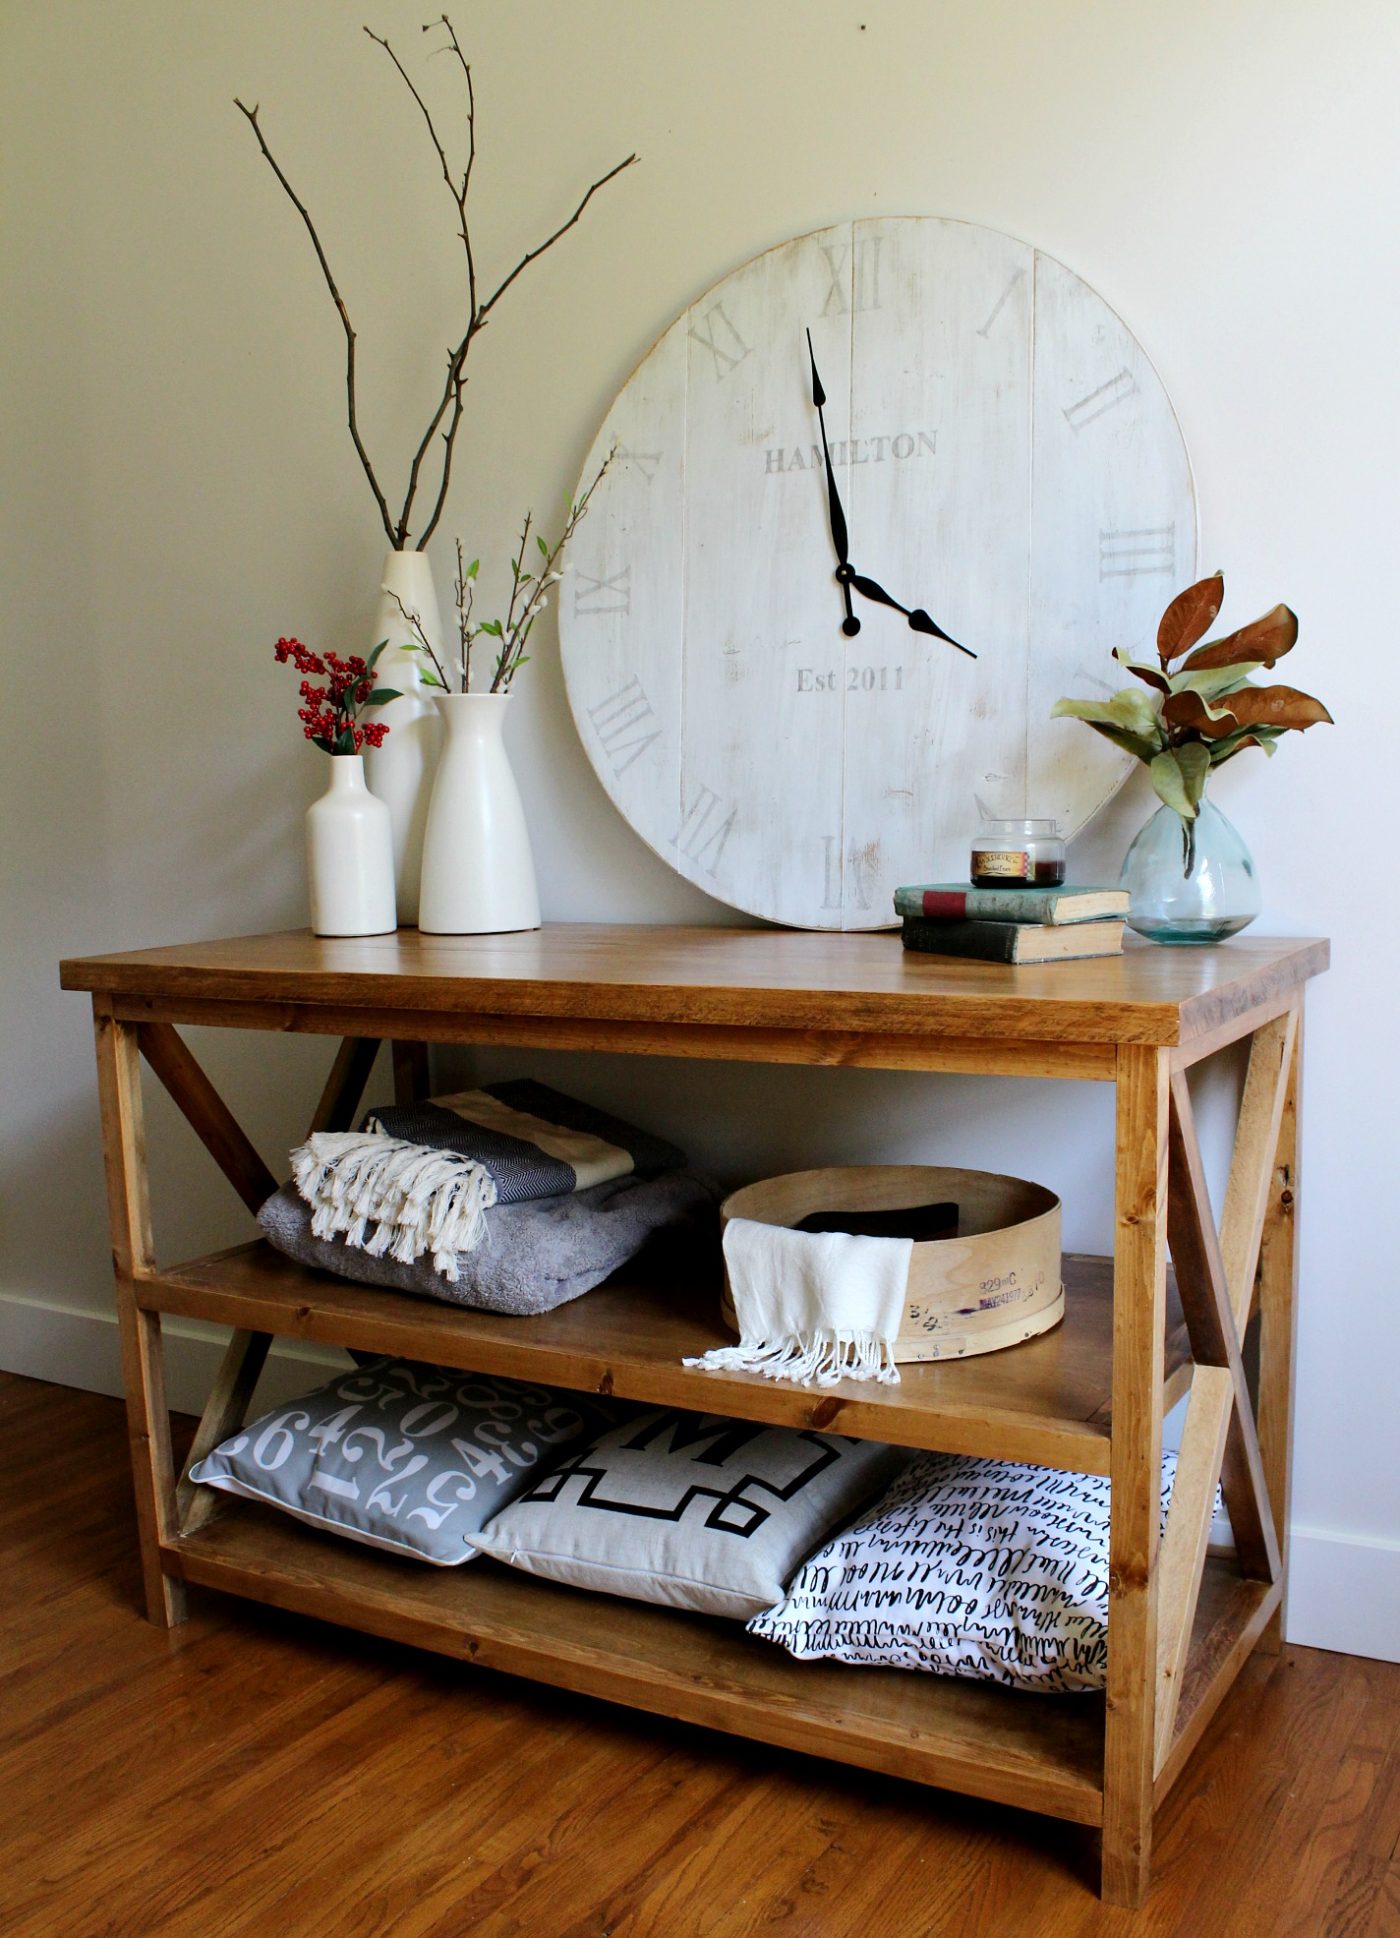
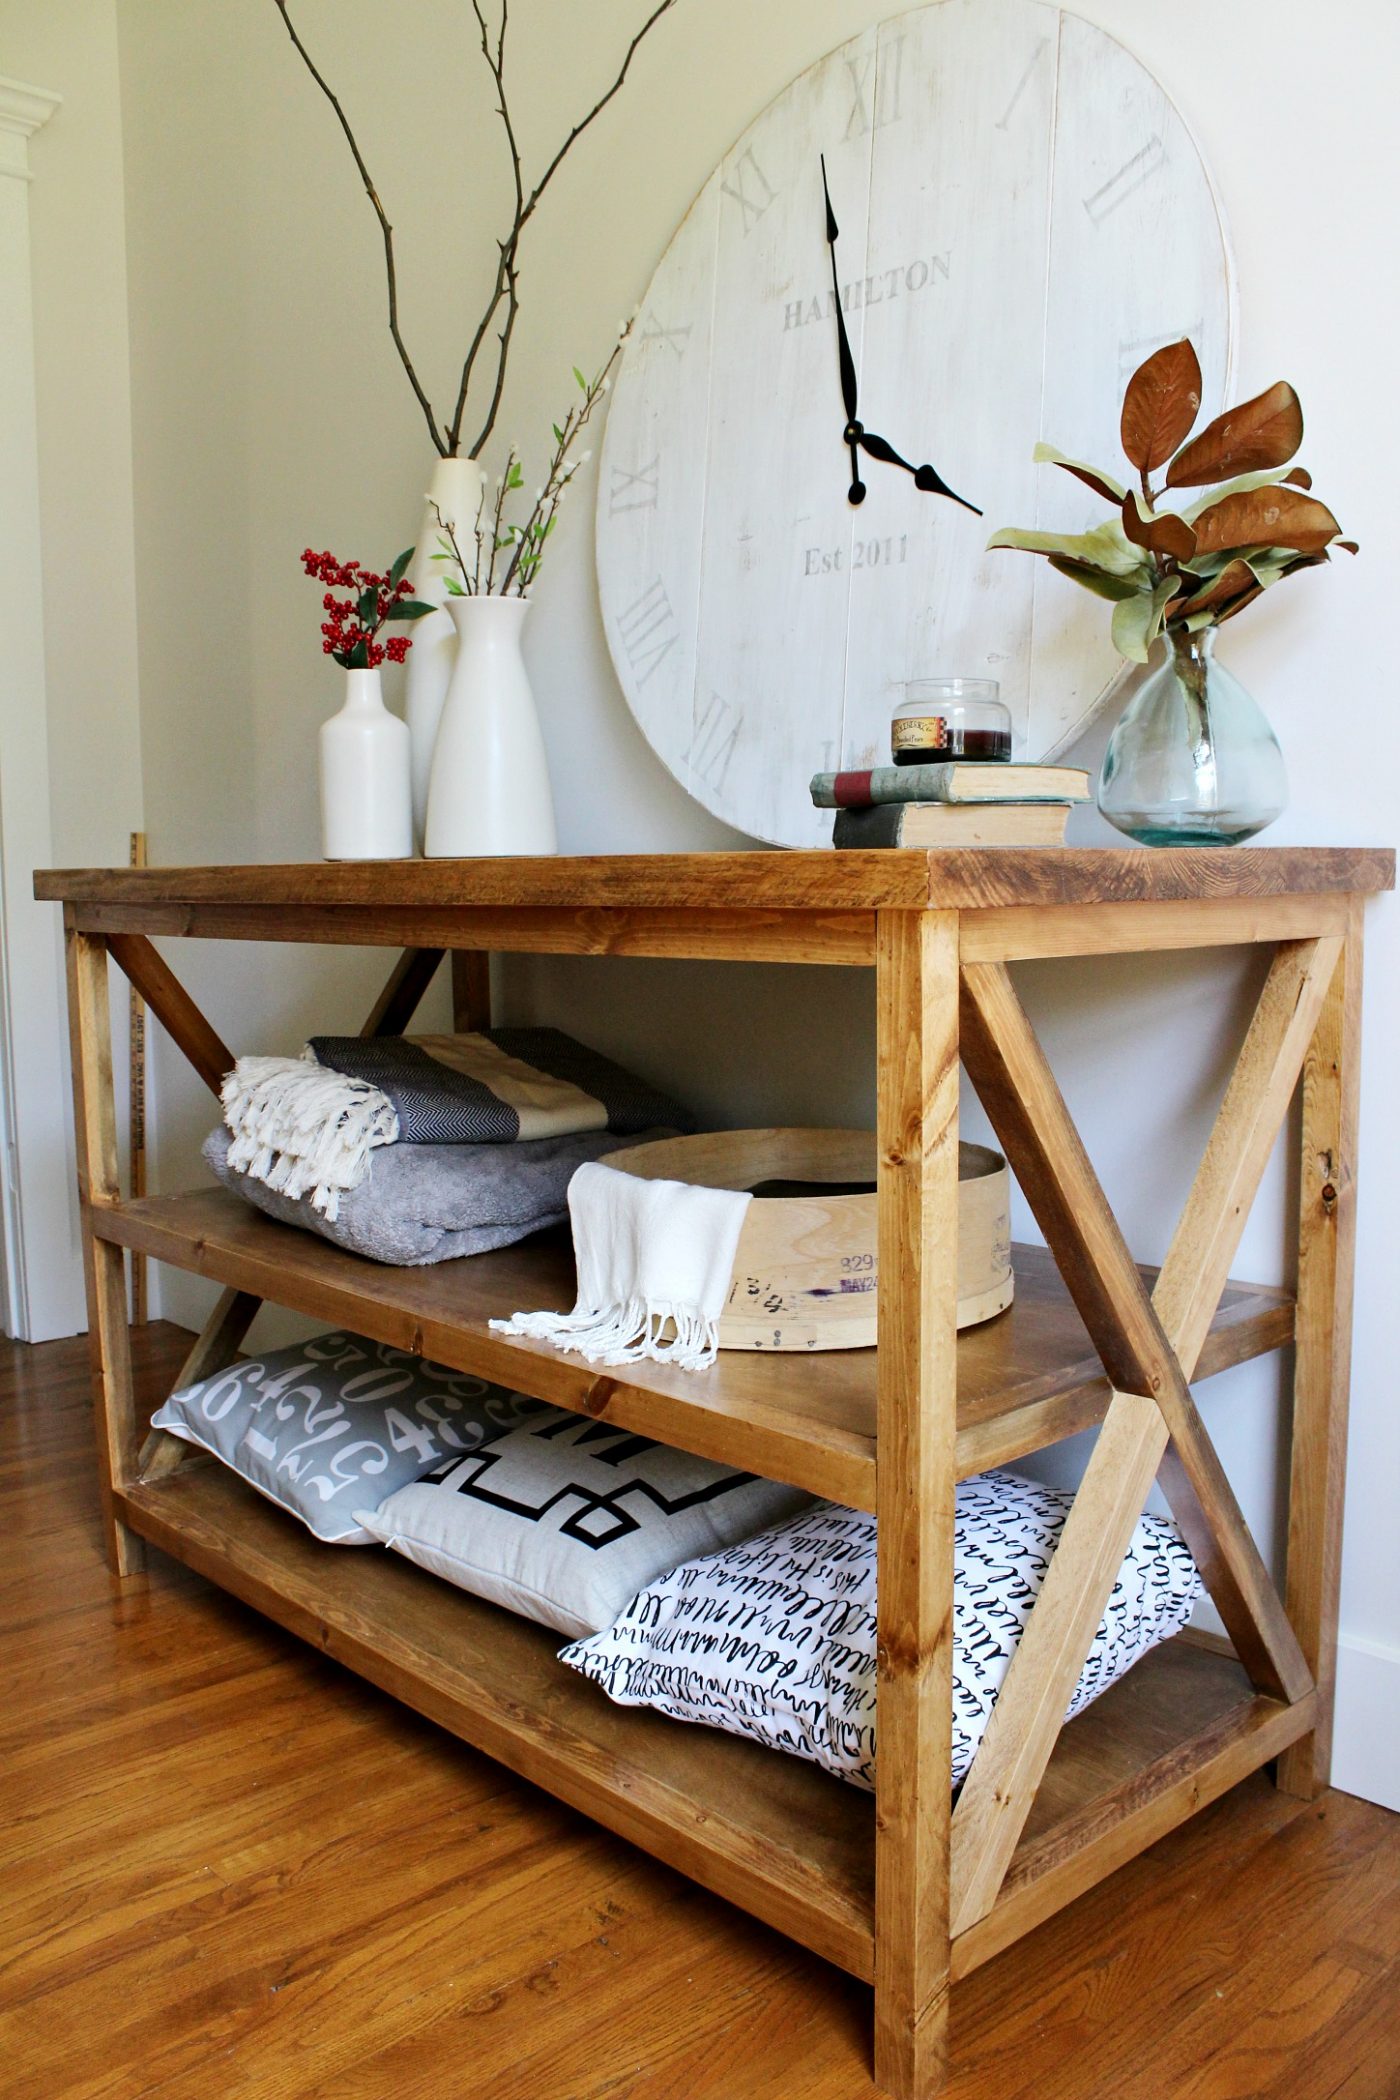
Don’t you love those Xs on the sides?? This table makes a simple, but beautiful way to store blankets and pillows, baskets, books, pictures, etc.
This was actually made for a friend’s bedroom to store family quilts on. It’s perfect for that!

Looking for more DIY furniture projects to try?
Here are a few favorites you might enjoy browsing. Simply click on each image to take you to the tutorial and plans!
If you’d like to save this for later, be sure to share it to your favorite social platform or pin it!
Until next time, happy building!! 🙂
Shane says
I love this table table! I think the 23″ depth would be a touch too deep for my application. Do you think reducing it down to 20″ would still work for the x design on the sides? Also, I’m a little confused about the material list. You posted 1 2x8x18 1 and 2x10x10 would be needed, but I’m not seeing where all of that material is used for the 23″ deep top.
Thank you!
Shara, Woodshop Diaries says
You can totally make the piece narrower, it’ll just change the angles on the Xs, but that’s not a big deal. I’m sorry, I had a typo on the materials–it should be one 2x8x8 and one 2x10x10. You’ll cut the 2×10 to get two 53″ pieces and cut one 53″ piece from the 2×8. When you glue that together, you get the 23″ deep top.