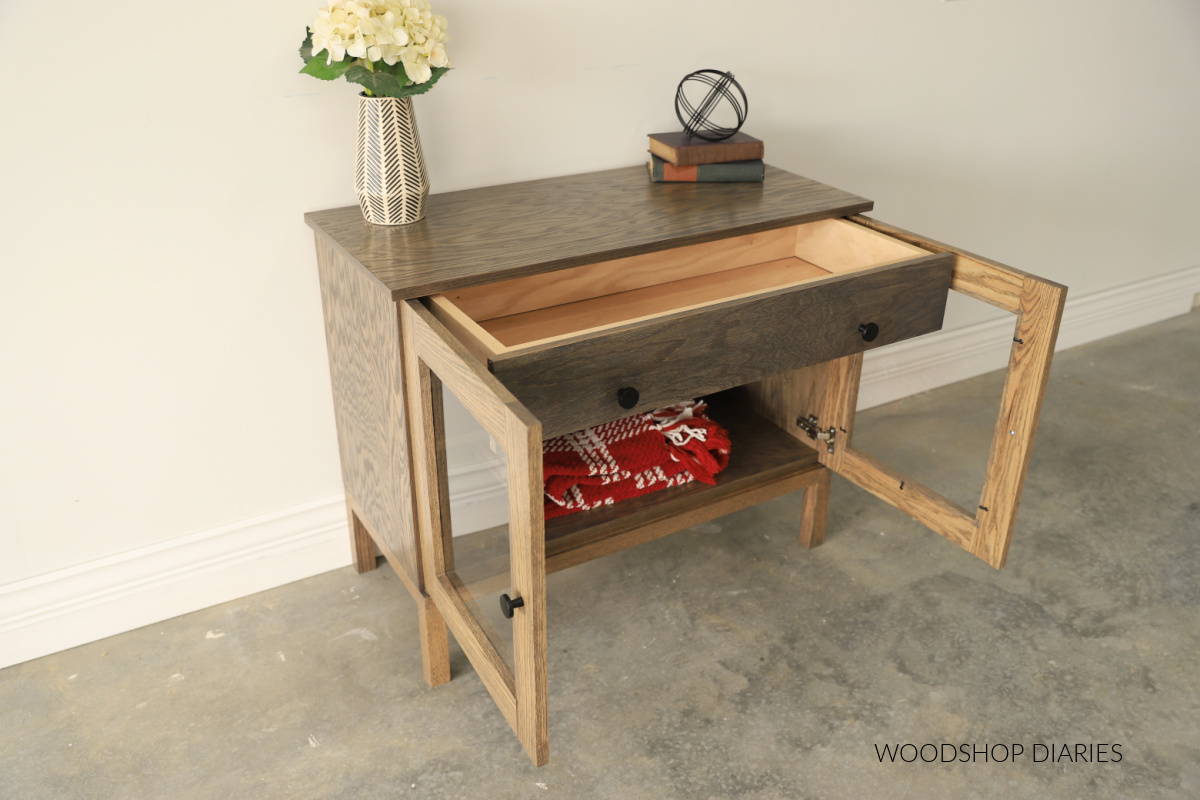
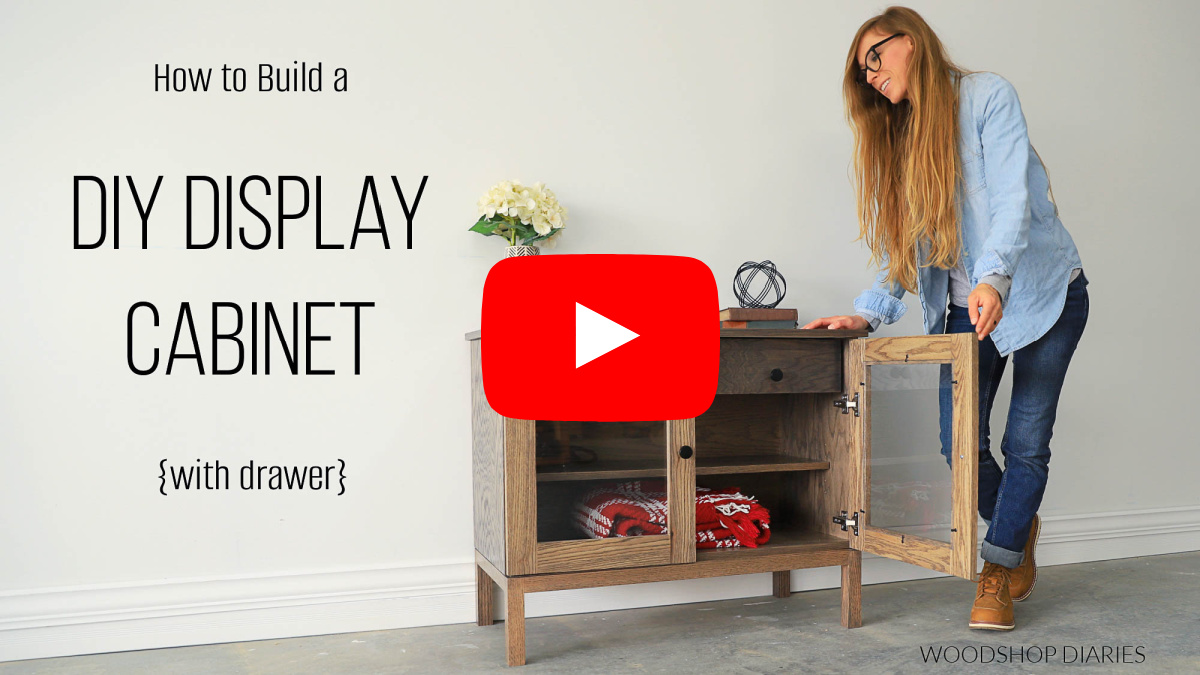
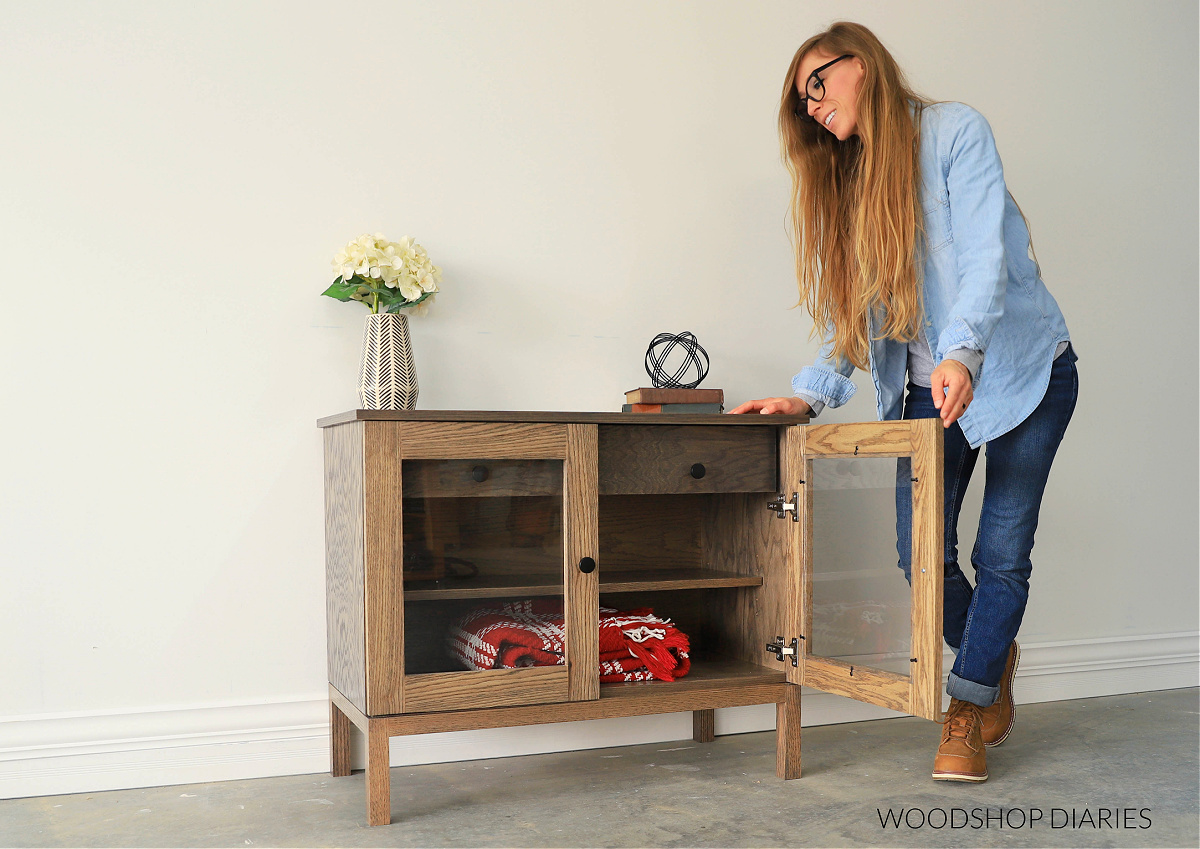
In this post, I’m sharing how to build a DIY display console cabinet with drawer and shelving!
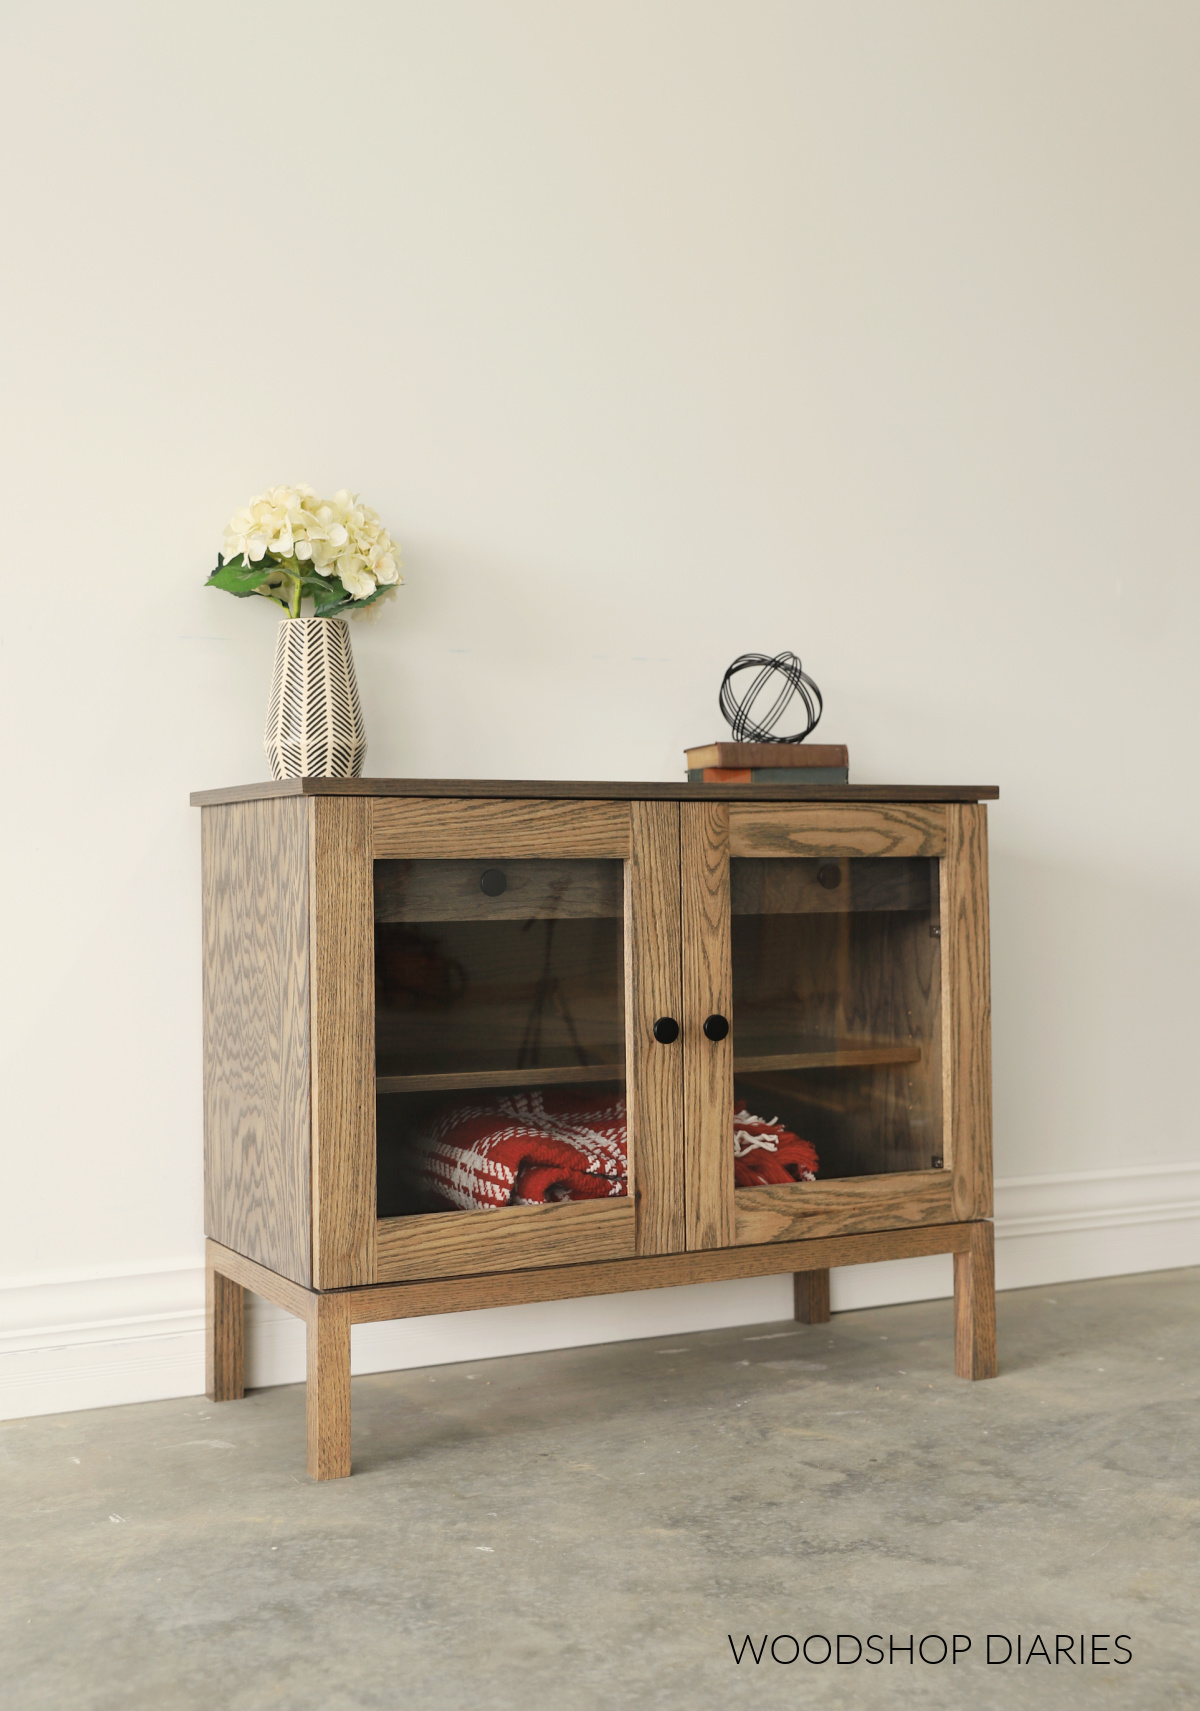
I’ve been wanting to build a simple DIY display console cabinet for a while. Truth be told, I really wanted to build one twice this long, but I just didn’t have the space to put it.
So I built a “mini” version and I actually think I love this one more than my original “double size” because this one can work for so many spaces.
It would make the perfect TV stand for a small living room, a cute entryway console, a linen cabinet in a bathroom, a coffee cabinet in the kitchen. The list could go on.
It’s small in size, big in style, and versatile with glass doors, shelving, and a large drawer!
If you want to build your own, I’m sharing all the details below! Here’s what you’ll need…
Tools & Materials
*This post contains affiliate links. See website policies.
Tools:
- Miter saw
- Drill/Driver
- Circular Saw
- Kreg Rip Cut and Kreg AccuCut (optional but helpful cutting guides)
- Pocket Hole Jig
- Dowel jig (optional)
- Shelf Pin Jig
- Concealed Hinge Jig
- Stapler or Brad Nailer
- Router with ⅜″ rabbeting bit
- Chisel
- Clamps
- Square
- Table Saw (optional)
Materials:
- (1) 4×8 sheet ¾″ plywood
- (1) 4×4 sheet ¼″ plywood
- (2) 1x3x8 boards
- (2) 2x2x6 boards
- 1 ¼″ pocket hole screws
- 2″ wood screws
- ⅜″ x 1 ½″ dowel pins (optional–see notes below)
- 2 ½″ pocket hole screws (optional–see notes below)
- (2) pair concealed hinges for frameless full overlay doors
- (1) pair 14″ ball bearing drawer slides
- Shelf Pins
- Plexiglass/Acrylic panel (20″ x 32″)
- Picture Frame Turn Buttons
- Edge Banding
- Wood Glue
Want a printable version? Grab the printable building plans here!
What to Know Before Building
This DIY display console cabinet is a great intermediate level build. It doesn’t require a lot of materials or complicated joinery methods, but it does require a variety of tools.
I built this glass door cabinet using red oak plywood and red oak lumber. But, any wood type would work well for this.
Birch plywood and pine/spruce are my usual lumber choices and they are great options if you are working on a budget.
Should You Use Pocket Holes or Dowels?
For the display cabinet door frames and the base, you can use either pocket holes and screws OR wood glue and dowels to assemble.
RELATED: How to use a pocket hole jig
I used wood glue and dowels so that I didn’t see any visible pocket holes in the finished project.
RELATED: How to use a dowel jig
Also, the red oak I was using here is a hardwood and hardwoods require fine threaded pocket hole screws. I only had coarse threaded screws stocked up in my workshop (and I didn’t want to drive to the store haha!). So that was another reason I opted for dowels here.
But, pocket holes and screws work fine and you can also plug them if you’d like.
RELATED: 4 ways to plug pocket holes
If you choose not to use dowels for these parts, you can scratch dowel pins from the materials list above. But if you do choose to use dowels for the base, you can scratch 2 ½″ pocket hole screws because you won’t need those.
Consider Finish Pieces Separately Before Assembling
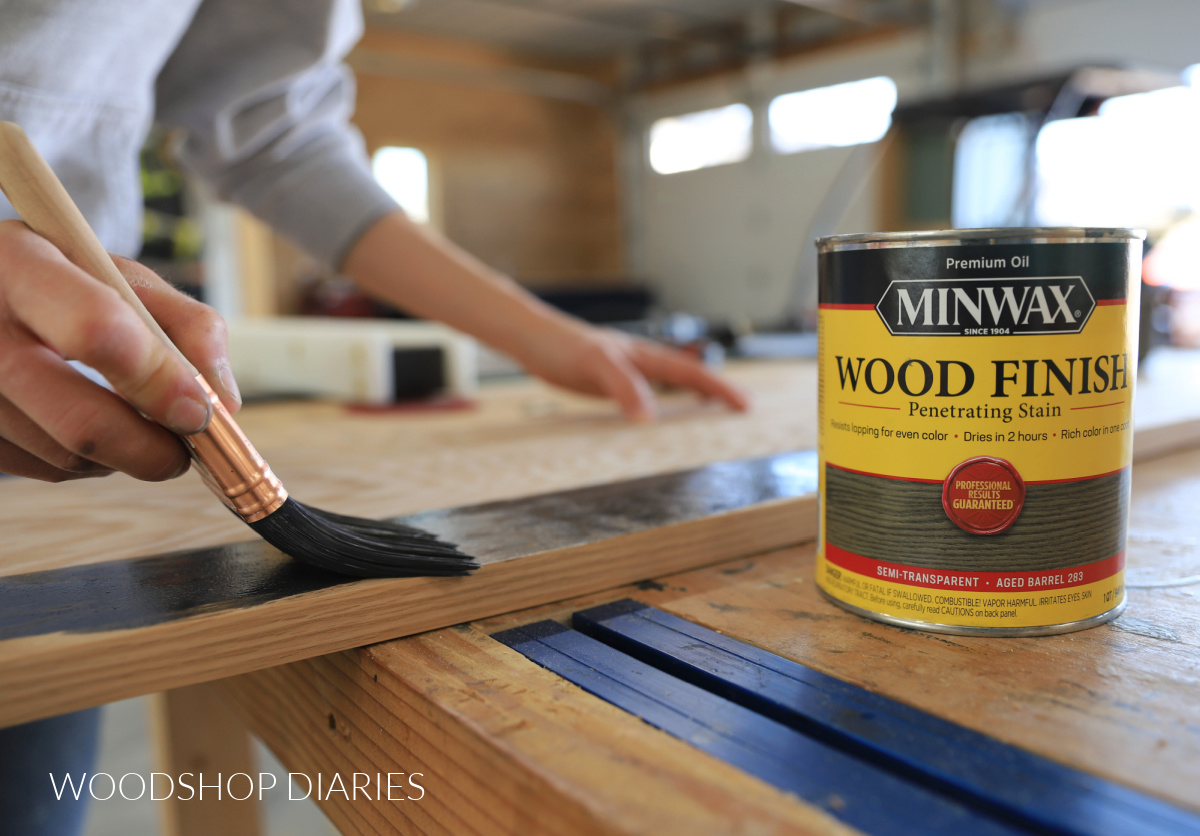
Since there are several “parts” to this project, I recommend building the cabinet, the drawer, the doors, the base, and the shelf separately and staining and/or painting them all first before assembling.
I used Minwax Aged Barrel wood stain for this project.
So some of these steps listed below in the tutorial can be mixed and matched in a different order as needed to make finishing a little easier.
Cutting Acrylic/Plexiglass Sheets
You can have your local big box store cut your plexiglass/acrylic sheets. Most (but not all) home centers usually offer cutting services if you buy it there.
But, I always recommend cutting your own pieces for more accurate results. You can cut acrylic using a circular saw and a fine finish blade. Simply cut it like you would plywood or other lumber.

PRO TIP: Make sure it’s well supported underneath to help prevent it from chipping or cracking. And make sure to leave the protective film later on until you’ve finished cutting to protect it from scratches!
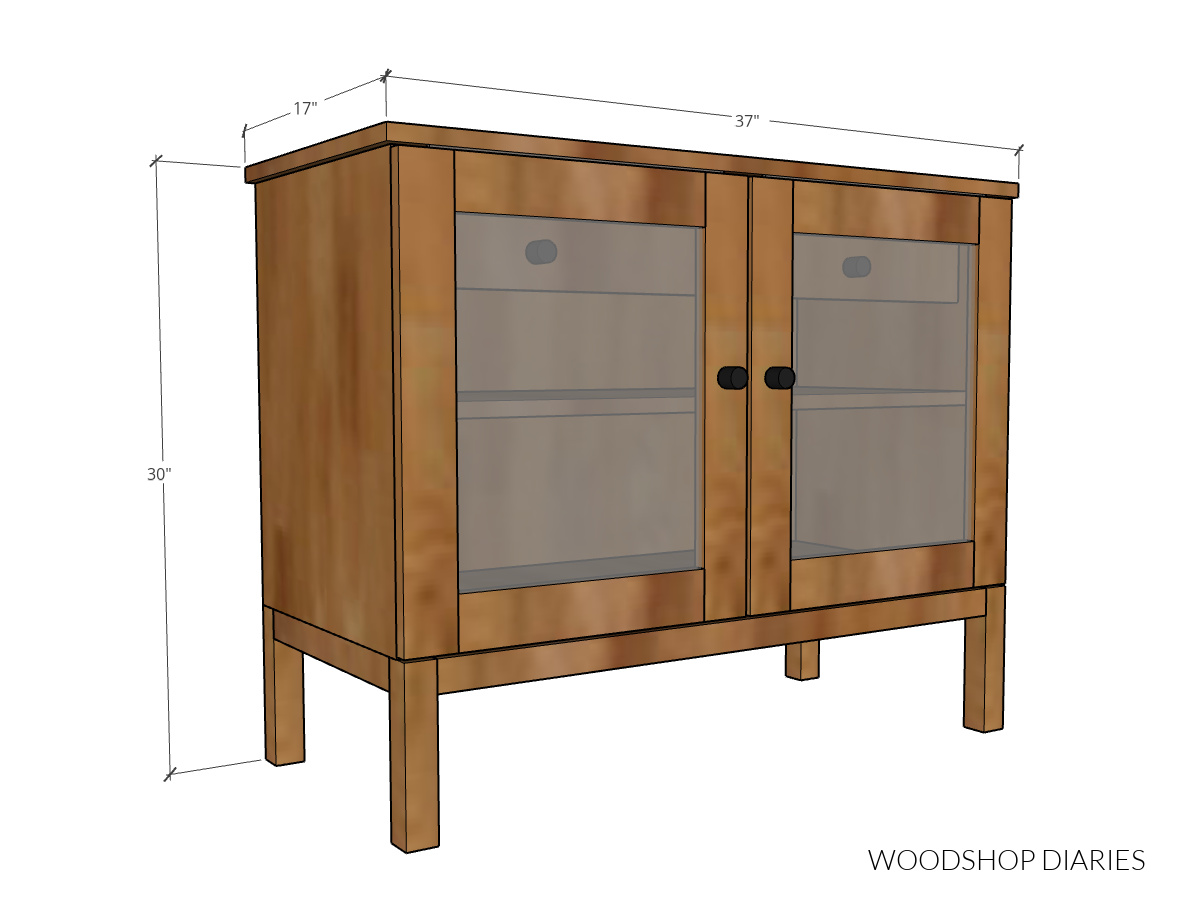
Overall Display Console Cabinet Dimensions
The overall size of this DIY display console cabinet is 17″ deep x 30″ tall x 37″ wide.
You may find these posts and resources helpful throughout this project build:
How to Build a Display Console Cabinet
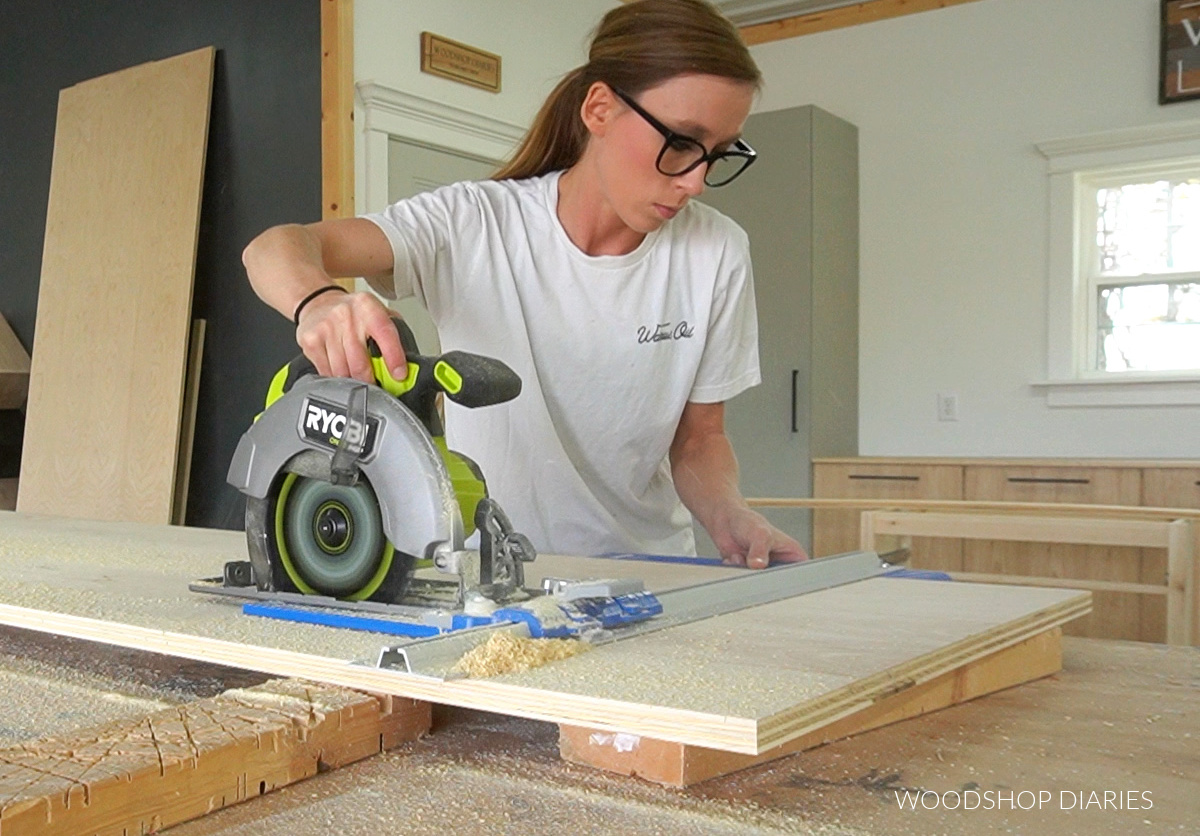
Since this DIY display console cabinet was made mostly from plywood, the very first step was cutting the plywood sheet down into more manageable pieces to start building.
I like to use my circular saw with Kreg Rip Cut and Kreg AccuCut guides to cut down my plywood sheets. But a circ saw and a straight edge or a table saw works fine, too.
RELATED: How to cut plywood with a circular saw
You can find the complete cut list and plywood cut diagram in the printable plans here:
I’m sharing the step by step build below but if you prefer to watch, I’ve got a build video for this project full of pro tips, tricks and some bloopers here:
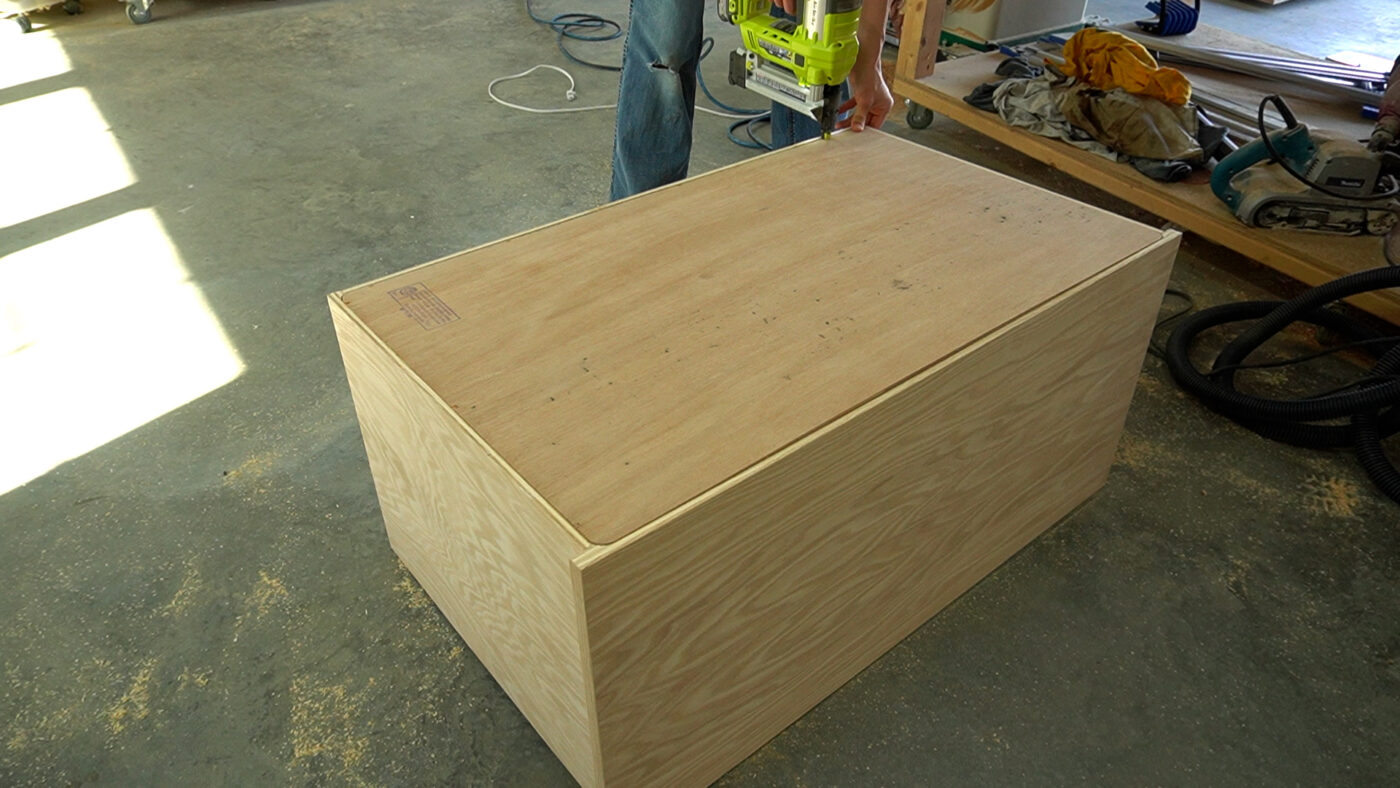
Step 1: Assemble Console Cabinet Main Body
The first part I assembled here was the main console cabinet body. This was made using ¾″ plywood.
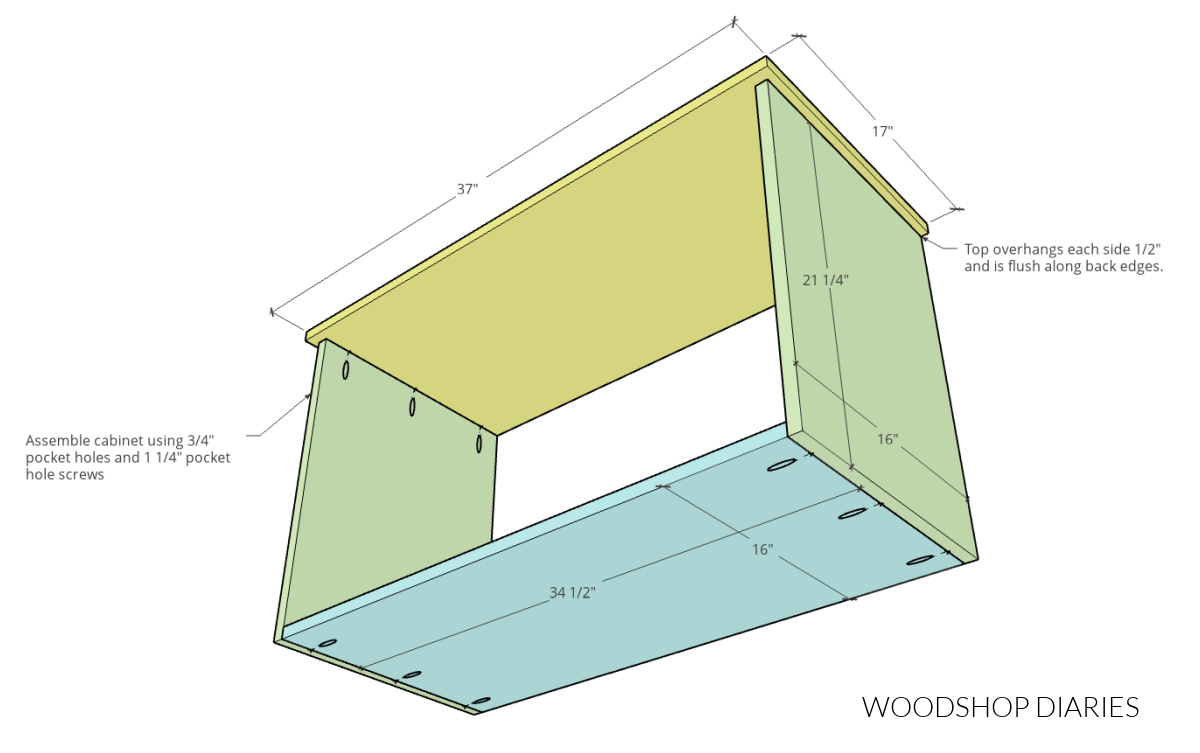
So first, I cut down a top, two sides, and a bottom panel and applied edge banding around the plywood edges that will be exposed.
Edge banding is optional, but when working with plywood, it hides the plys to make it look a little cleaner. I’ve got a guide for how to apply iron on edge banding here.
After sanding, I drilled ¾″ pocket holes along the top edges of the side panels and into both ends of the bottom panel.
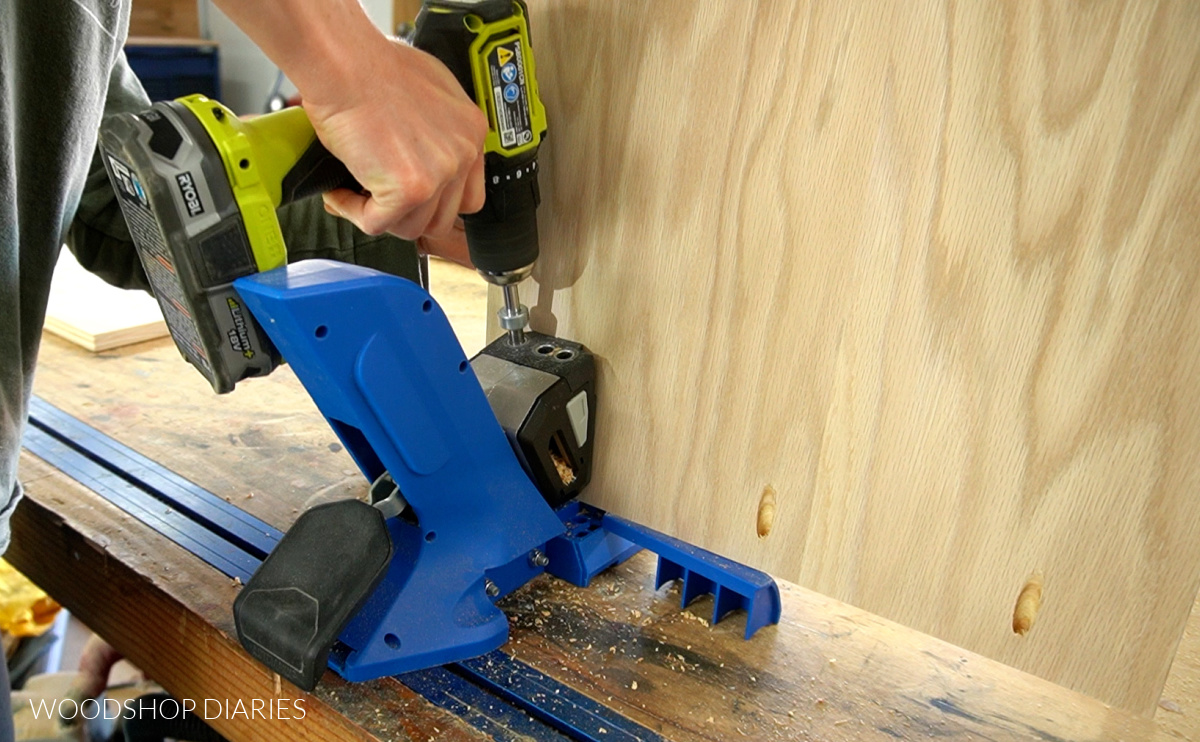
I flipped the top panel upside down and centered the bottom panel on it. Then I secured the side panels on each side using 1 ¼″ pocket hole screws.
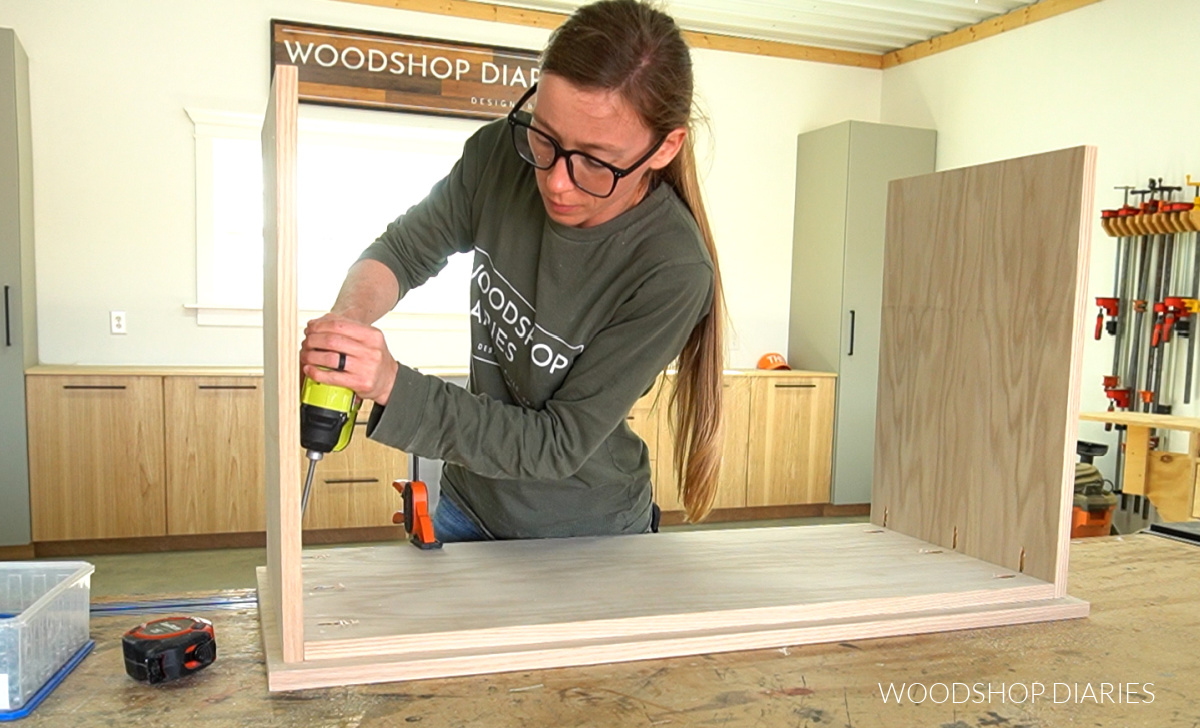
Once the sides and top were together, I flipped it on its side and installed the bottom panel between the sides using 1 ¼″ pocket hole screws.
Step 2: Add Back Panel
The back panel was cut from ¼″ plywood and it can simply be stapled or brad nailed onto the back side of this cabinet box from step 1.
However, if you’d like, you could also use a router with a ⅜″ rabbeting bit to cut a ¼″ deep rabbet along the inside of the cabinet to place this panel down into so it’s flush across the back.
I opted to cut the rabbet as you can see above. For more information on using a router, see this beginners guide to using a router.
Check out the video for additional details on installing this back panel.
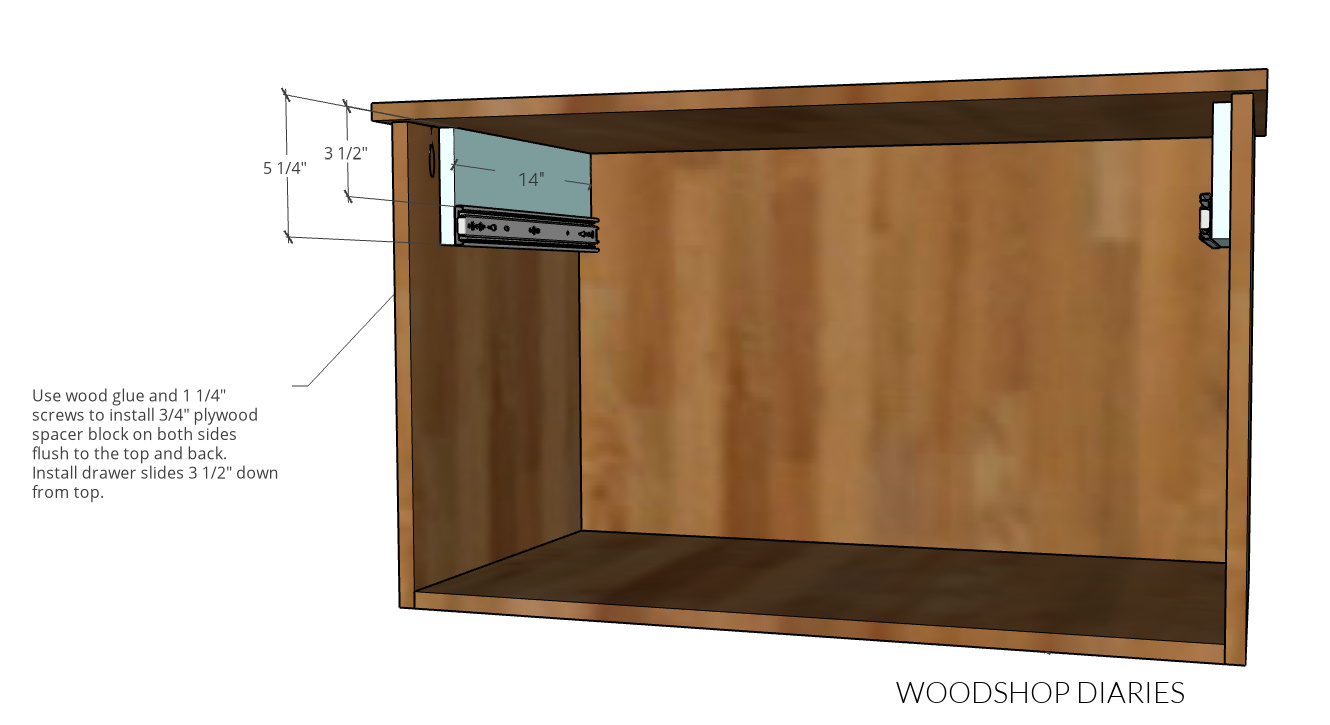
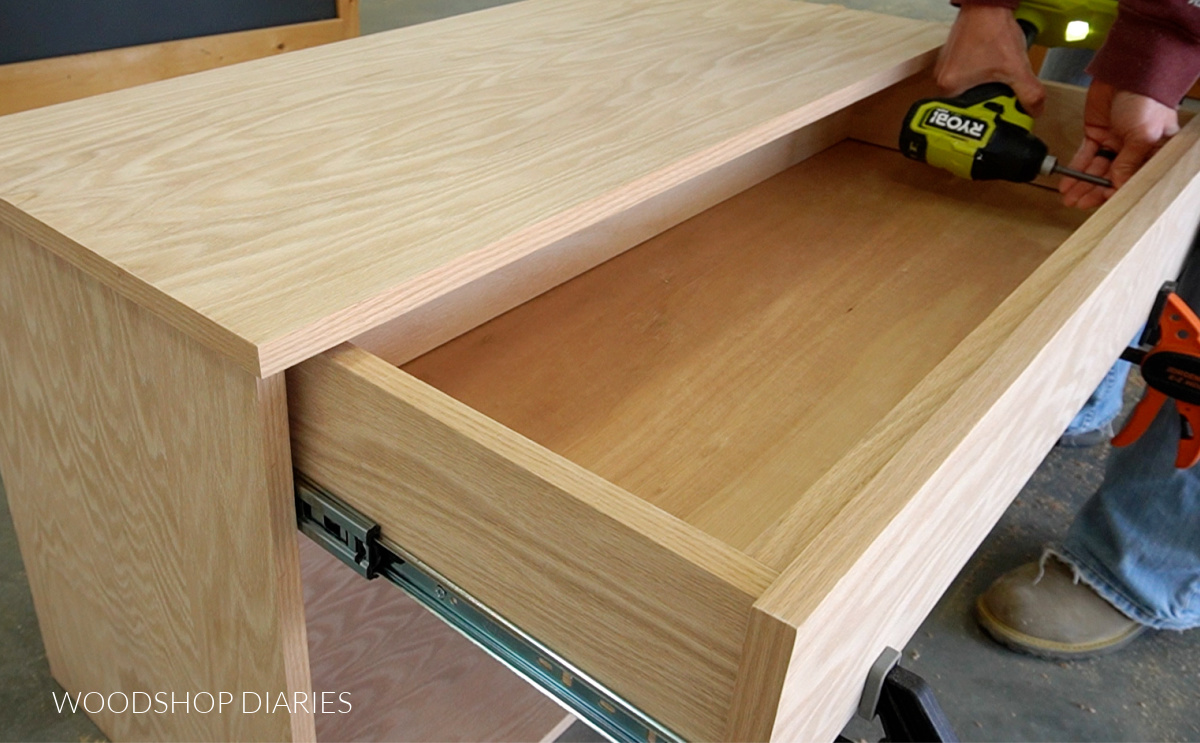
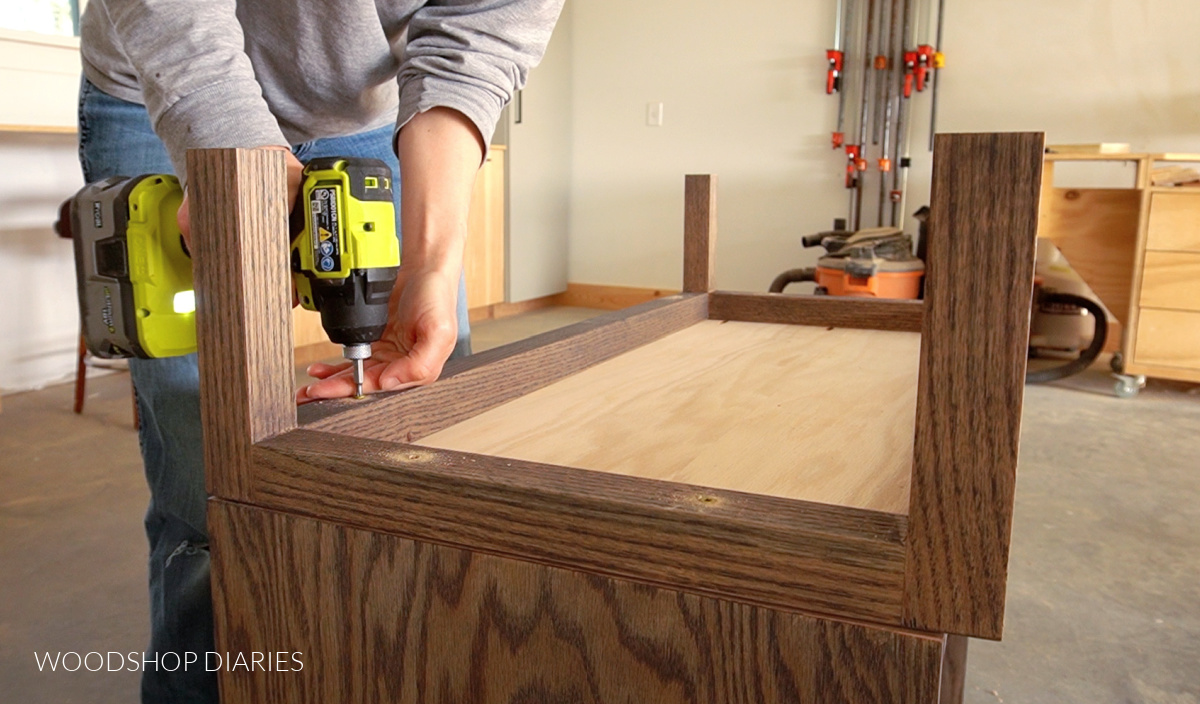
Step 3: Build and Install Drawer Box
In order for the drawer to clear the doors that I will add to this cabinet later, I needed to use some “spacer blocks” to push the slides out from the side of the cabinet.
So I cut two pieces of ¾″ plywood to 5 ¼″ x 14″ and installed the drawer slides onto then 3 ½″ from the top.
Then, I secured these plywood pieces into the cabinet–one on each side–flush against the top and the back using 1 ¼″ screws.
RELATED: How to install side mount drawer slides
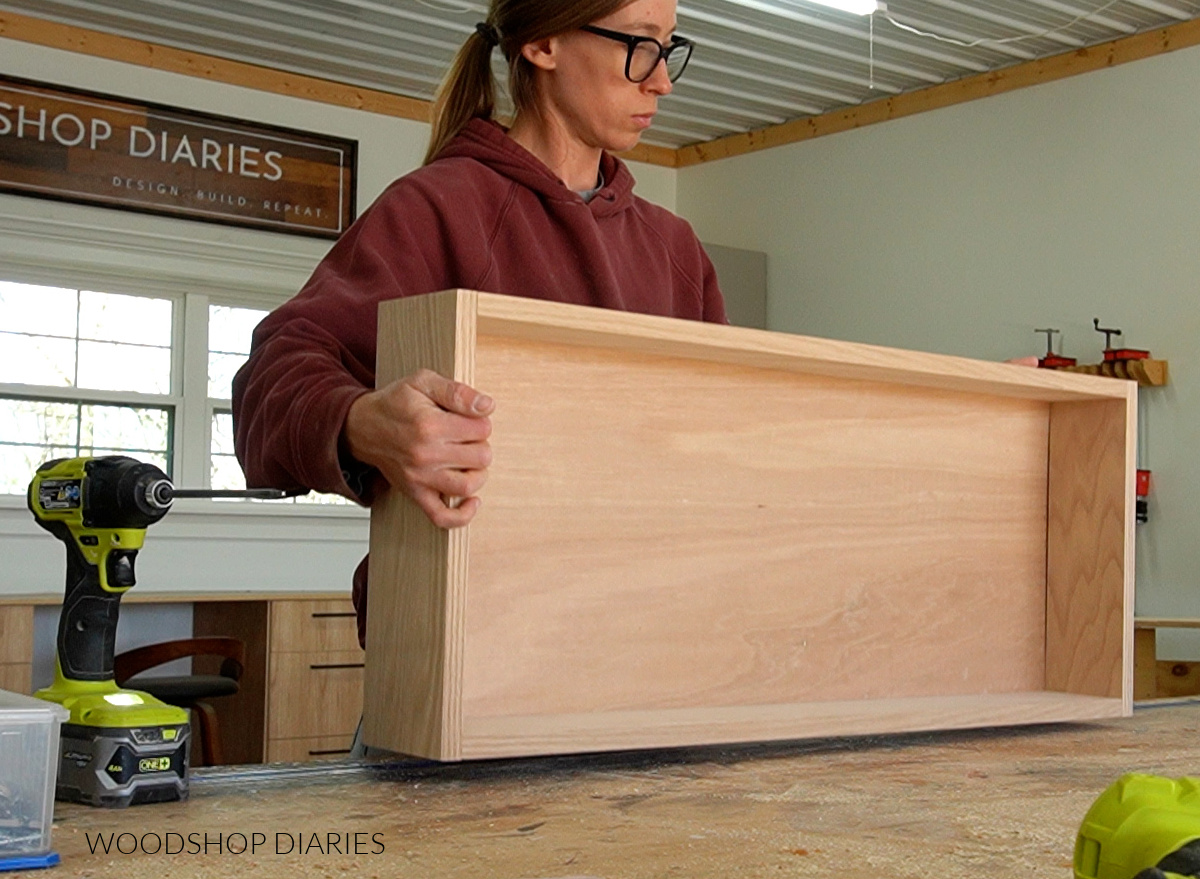
Once the slides were installed, I assembled a drawer box to fit the space using ¾″ plywood for the sides and ¼″ plywood for the bottom panel.
Check out how to assemble a basic drawer box here.
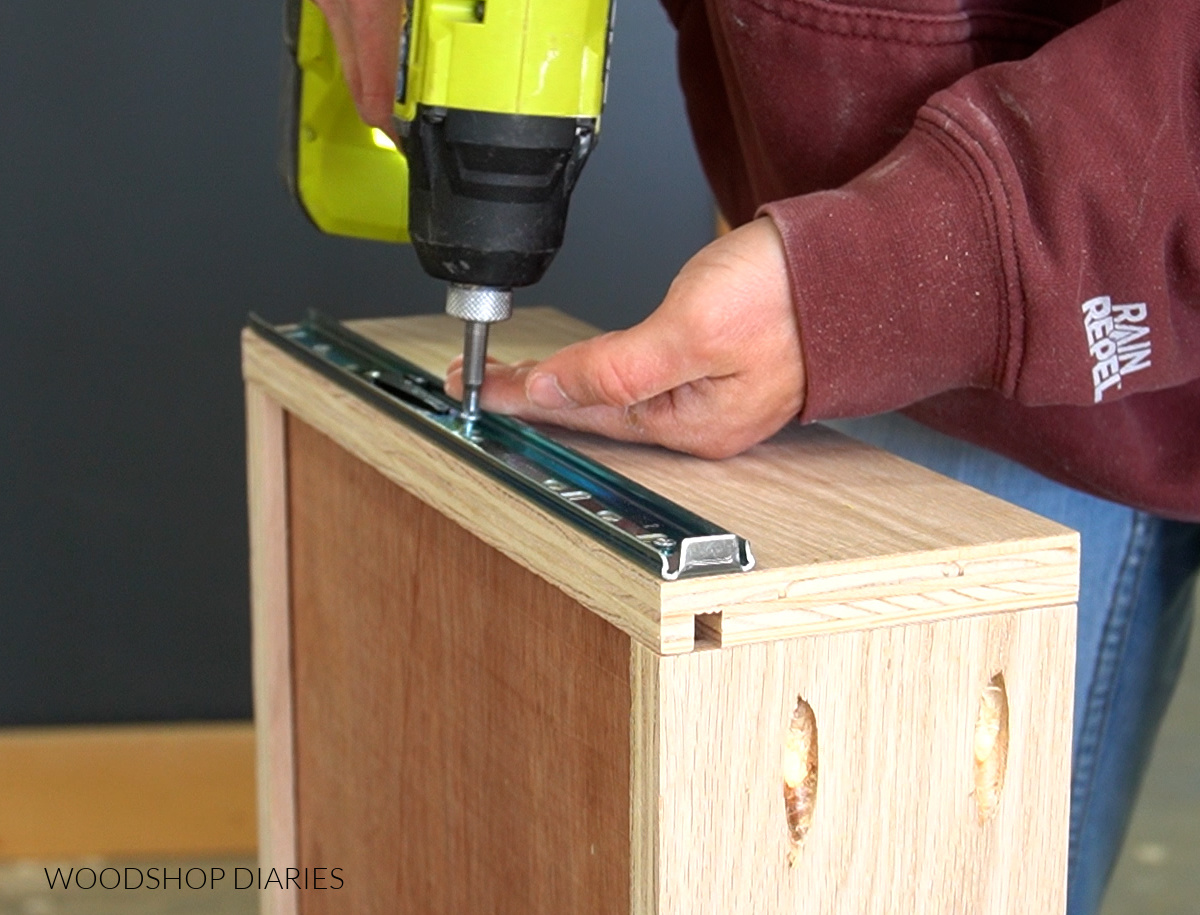
Then, I mounted the slides flush to the bottom of the drawer box and installed it into the cabinet.
To finish up the drawer box, I cut a drawer front from ¾″ plywood and applied iron on edge banding to all sides.
Note that this drawer front should be 5 ¼″ x 33 ¾″. This leaves ⅜″ gaps on the left and right side between the drawer front and the cabinet sides.
Typical gaps are ⅛″…but this is a special case since the doors on the cabinet require the drawer front to be cut undersized in order to open.
I centered the drawer front onto the drawer so that there was ⅜″ gaps on each side and ⅛″ gap along the top. Then I secured from the inside of the drawer box using 1 ¼″ screws.
Prefer to print your plans? Grab the printable building plans here!
Step 4: Add Shelf
In the cabinet space below the drawer, I added one adjustable shelf.
You could add multiple if you’d like, but there isn’t a ton of space to add very many depending on what you plan to store there.
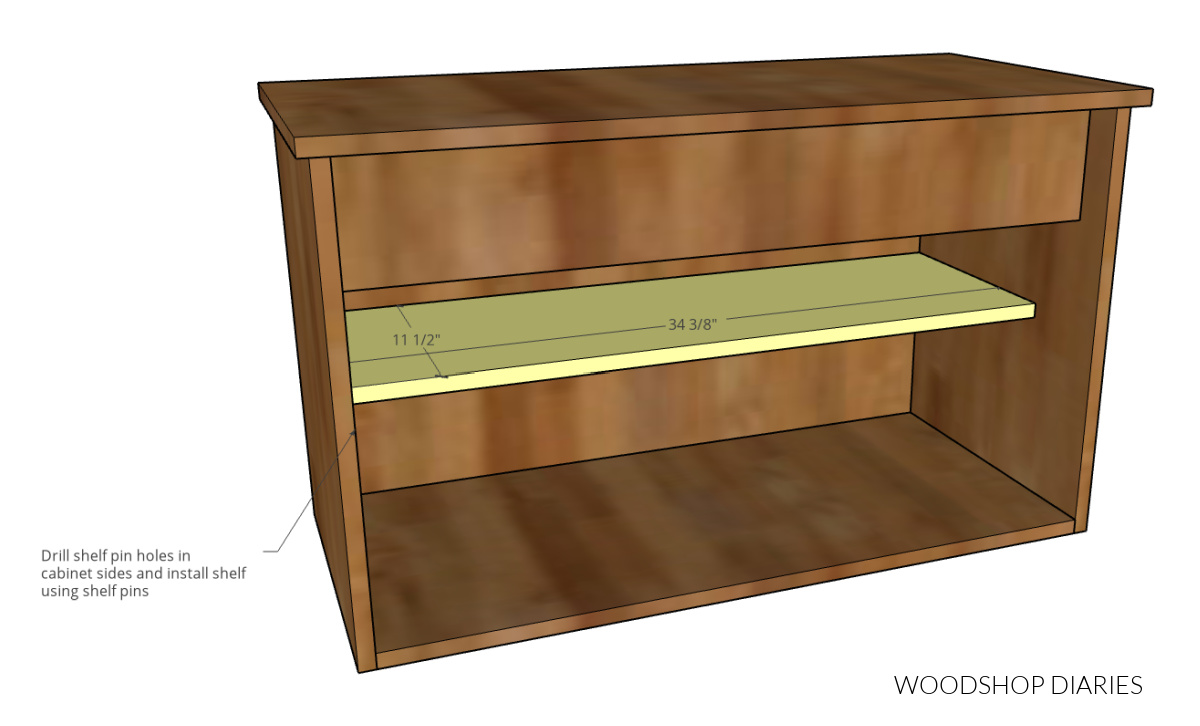
I used a Kreg Shelf Pin Jig to drill shelf pin holes along both sides of the cabinet.
These pin holes allow me to place shelf pins where I want to rest the shelf on. That’s what makes it adjustable.
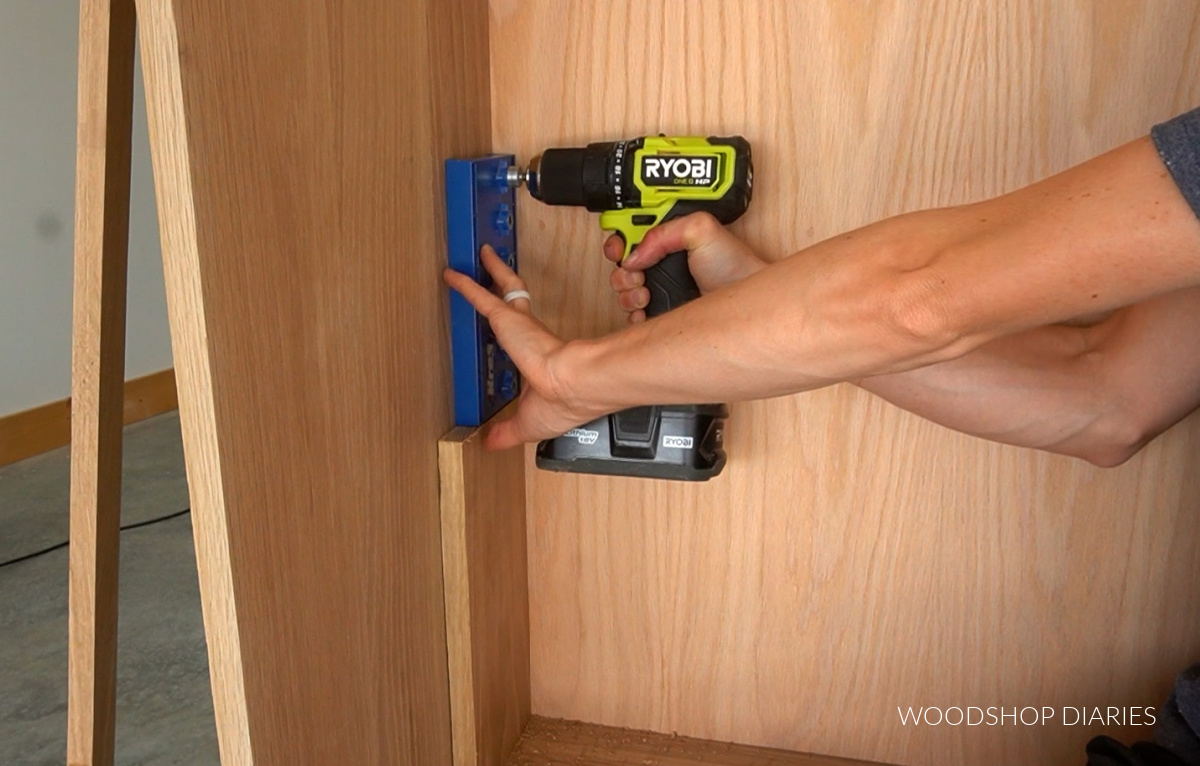
The shelf is 11 ½″ deep, so make sure not to drill the front line of holes more than 11″ from the back of the cabinet.
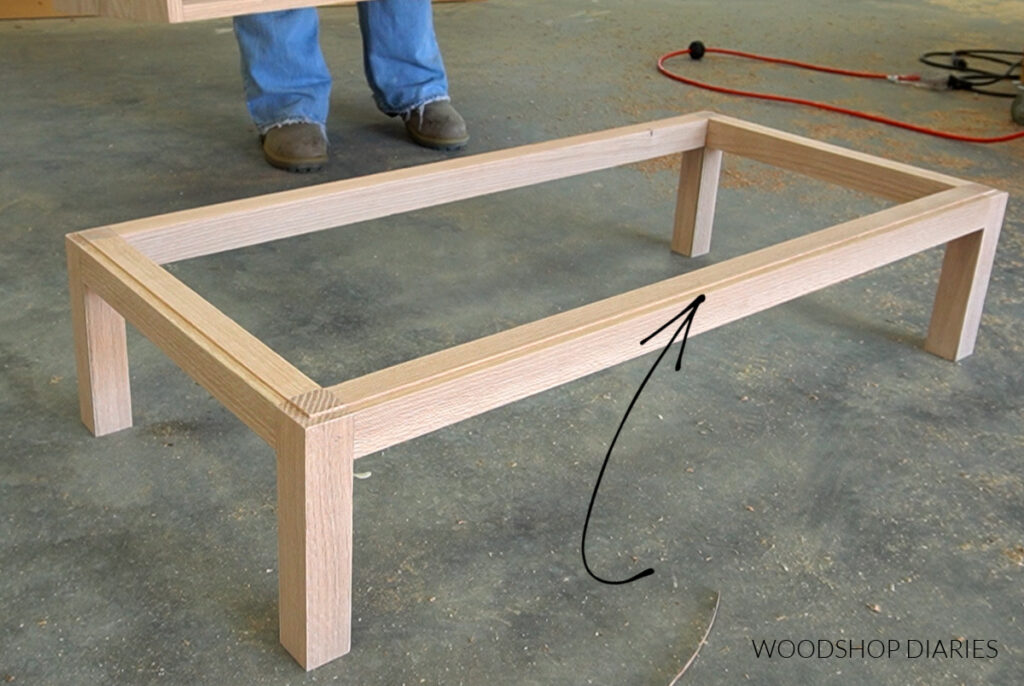
Step 5: Assemble and Install Base
The base of this cabinet was made from 2x2s. I assembled it using wood glue and dowel pins, but 1 ½″ pocket holes and 2 ½″ pocket hole screws would work just as well.
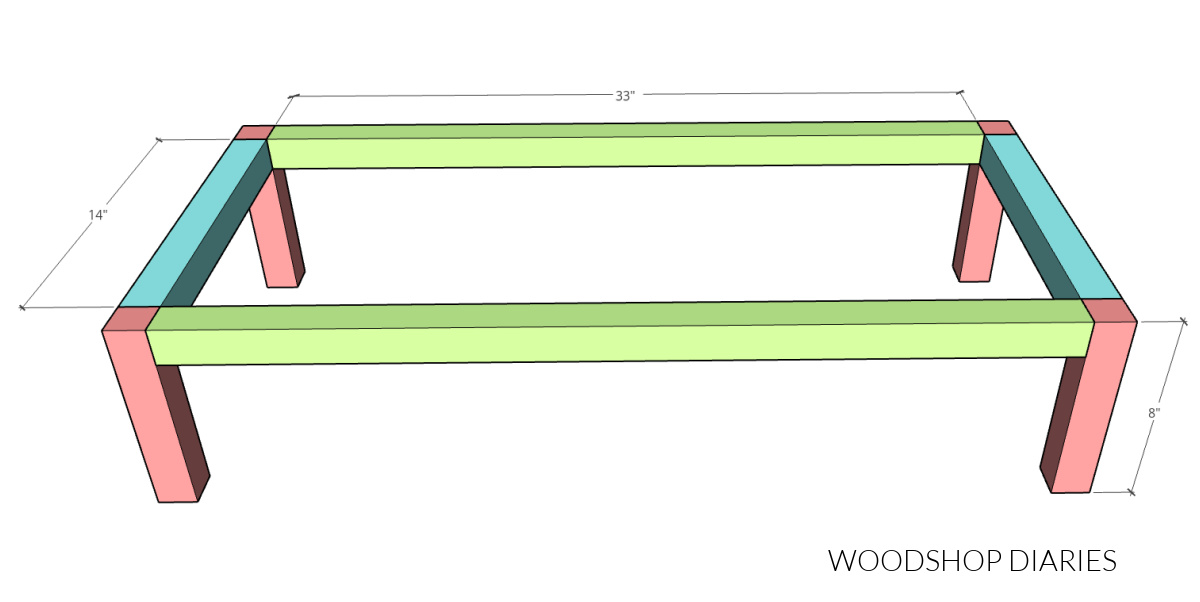
To give the base a little more detail and dimension, I used a router and a rabbeting bit to rabbet a shallow groove around the top outside edge of the base. This is optional.
NOTE: If you assembled the base with screws, take care not to accidentally hit a screw with the router if you do this!
Before installing the base to the bottom of the cabinet, I went ahead and stained the cabinet (Minwax Aged Barrel) and the base separately to make things a little easier.
I flipped the cabinet and the base upside down and drilled oversized pilot holes through the base–2 holes on each side.
Then, I secured the base to the cabinet through the pilot holes using 2″ wood screws.
Note that the base should be flush along the back of the cabinet and overhang the front about 1″.
Step 6: Build and Attach Display Cabinet Doors
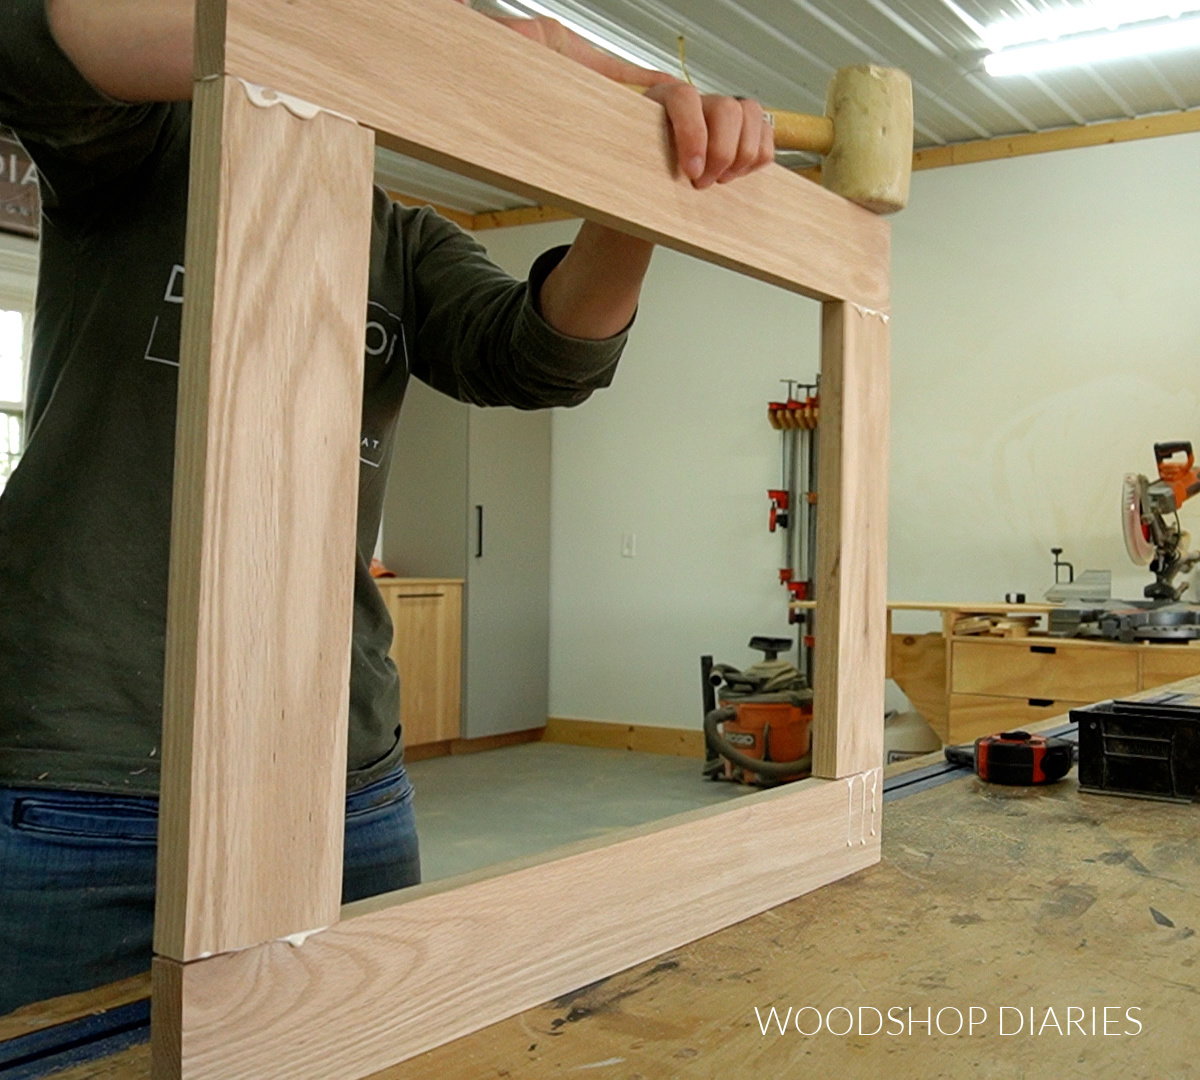
The doors were assembled from 1x3s. I cut pieces to build two identical doors to fit the cabinet and laid them out on the workbench.
I used wood glue and dowels to assemble the two door frames, so I laid my pieces out how I wanted them and used a speed square to make a mark at each joint to drill my dowel holes.
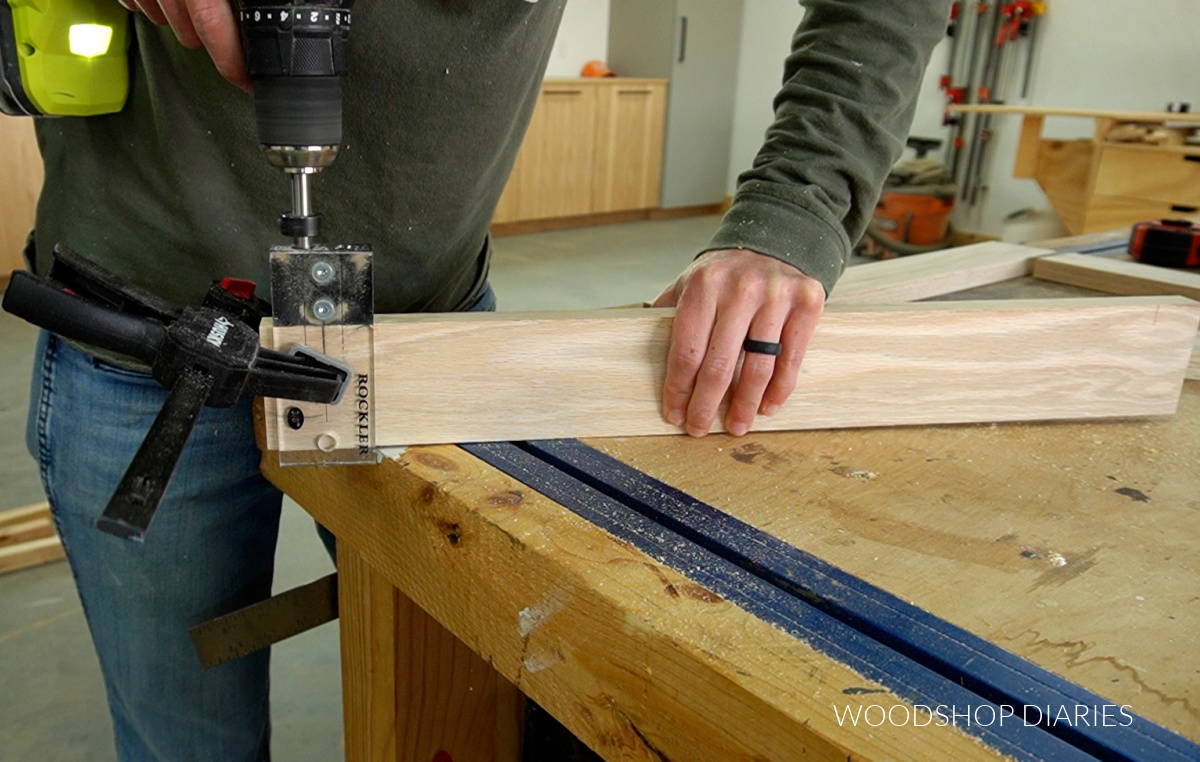
I used a simple dowel jig to drill ⅜″ dowel holes at each mark. Check out this video for how to use a dowel jig.
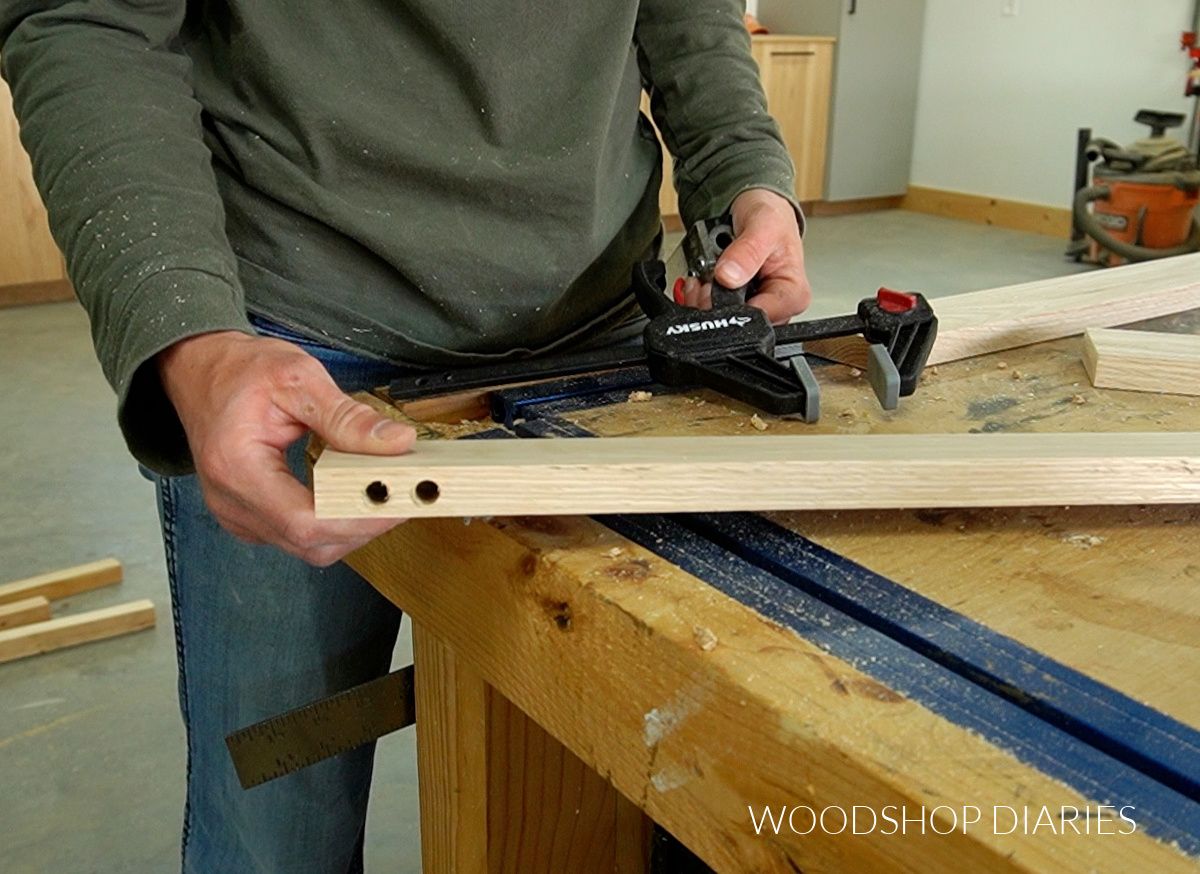
Then, I assembled the two frames using wood glue and ⅜″ dowel pins. I clamped them tight until the glue dried, then sanded well to remove any leftover glue residue.
I used a router and ⅜″ rabbeting bit to route a rabbet along the inside edge of each door frame the same depth as the thickness of the plexiglass/acrylic I was using for the doors.
The corners needed to be square, so I used a chisel to square off the corners (the rabbeting bit leaves them rounded) of these grooves.
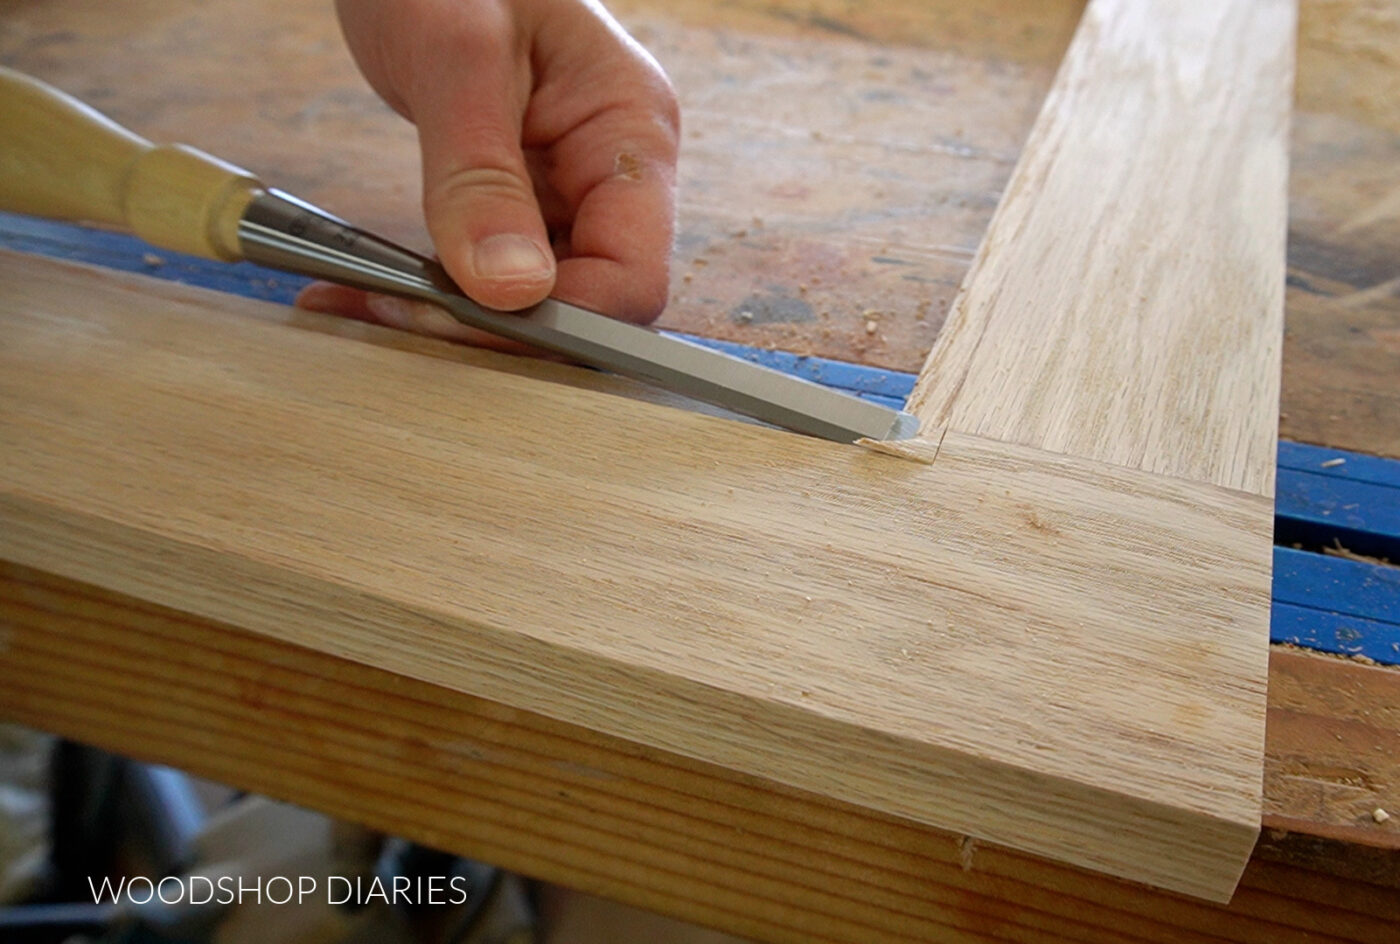
Then I cut two plexiglass/acrylic pieces to fit into these grooves. See notes in the “What To Know Before Building” section above on how to cut plexiglass.
TIP: I recommend staining and/or painting the doors before installing the plexiglass and hinges.
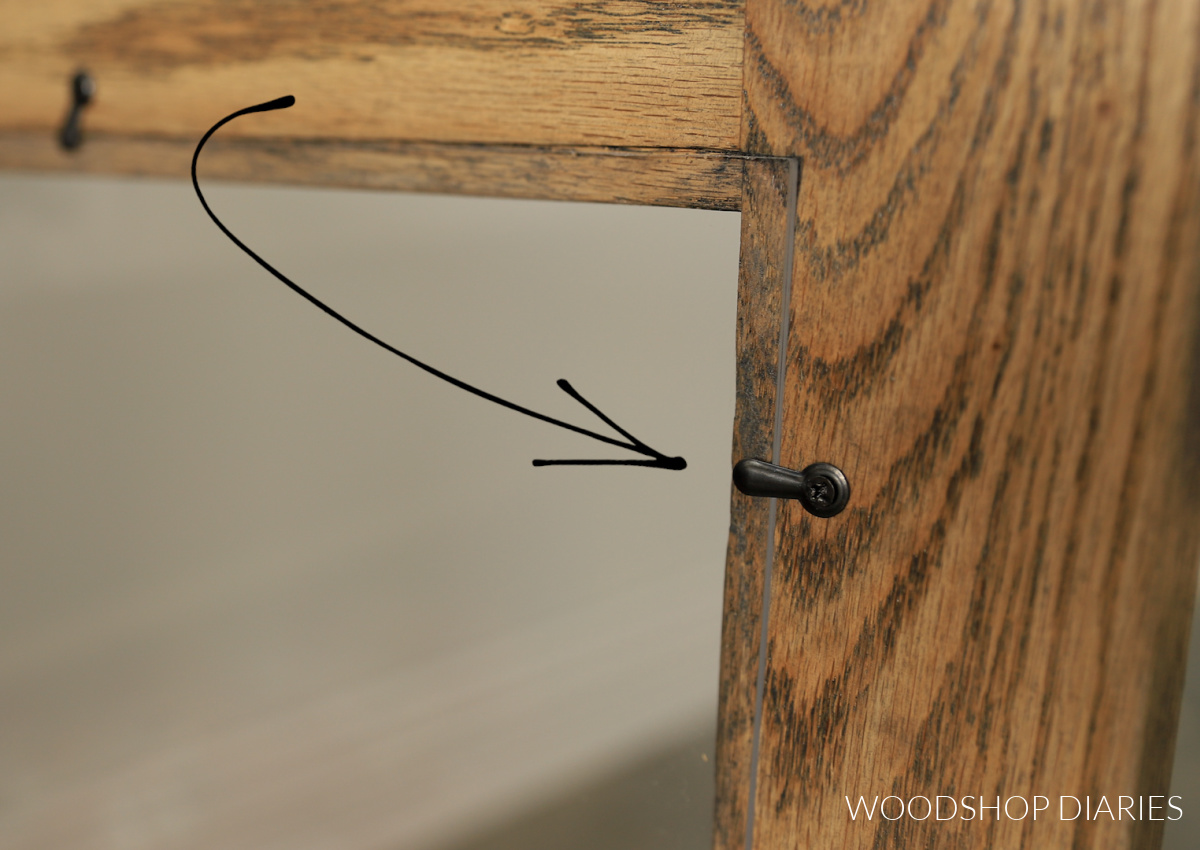
After I stained the doors, I installed the plexiglass using these simple picture frame turn button tabs.
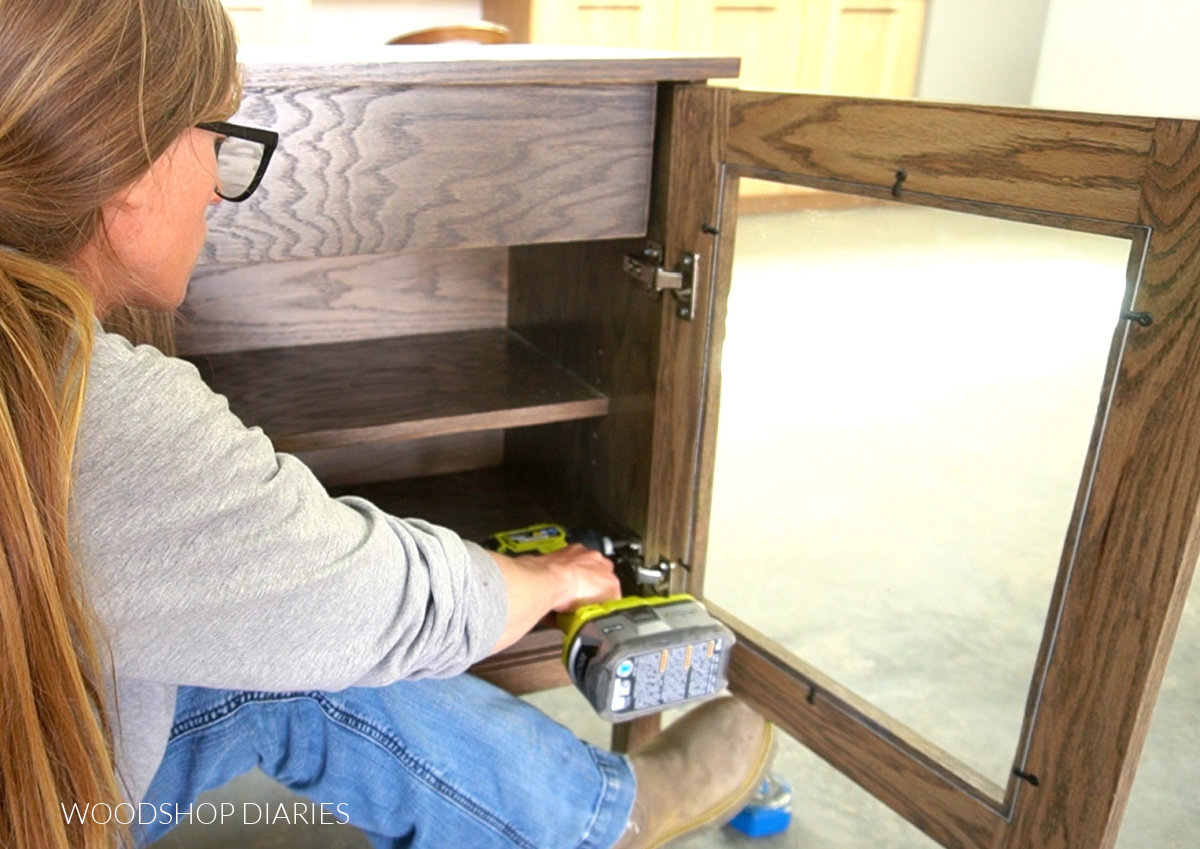
Finally, I used a Kreg Concealed Hinge Jig to drill cup holes to install the concealed hinges for frameless full overlay doors.
NOTE: In order for the drawer to be able to open, install the top hinge so that the center of the cup hole is AT LEAST 6 ½″ from the top of the door.
RELATED: How to install concealed hinges for cabinet doors
Then, I added the hinges and installed these doors onto the cabinet so that there was ⅛″ gap at the top and bottom and ⅛″ gap between doors.
Step 7: Finish and Add Hardware
At this point, the assembly is complete and all that’s left is the finishing touches!
I applied a couple coats of clear coat to seal and protect the surfaces of the project.
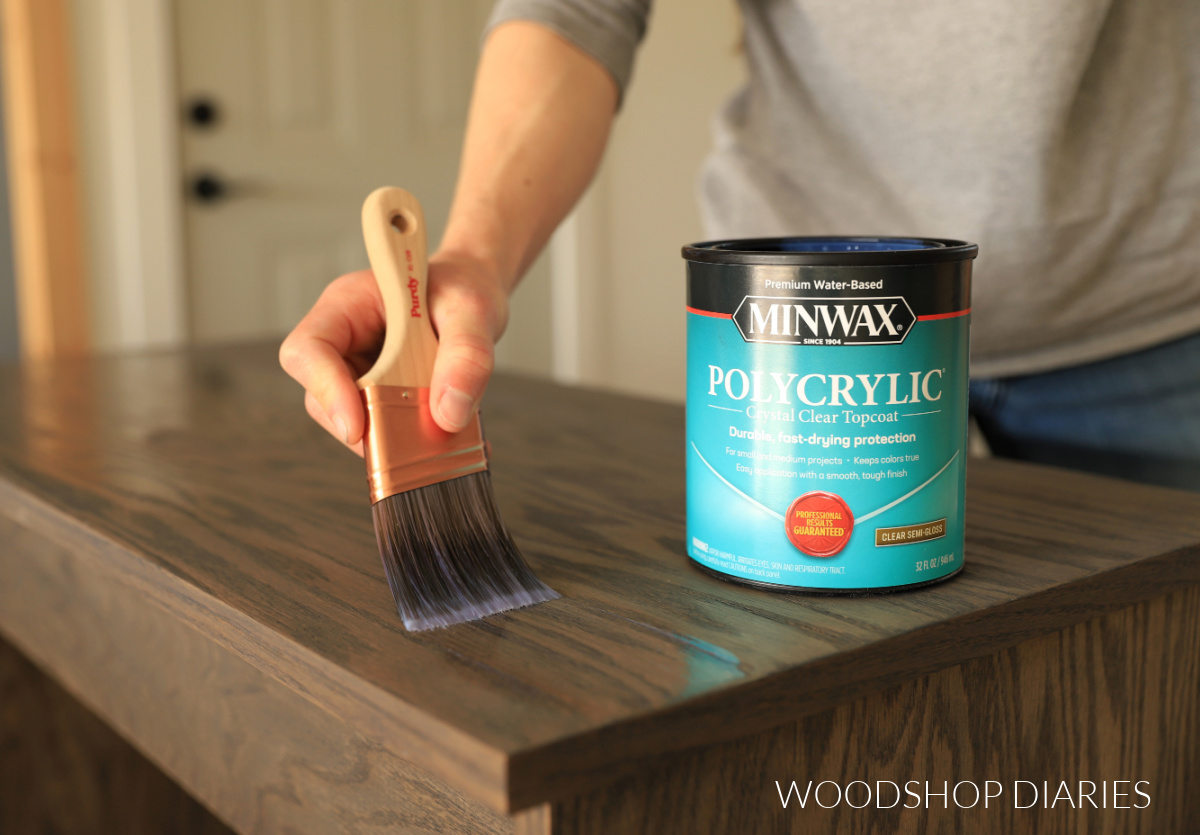
Then, I added these simple modern knobs to the drawer and the door and it was ready for use!
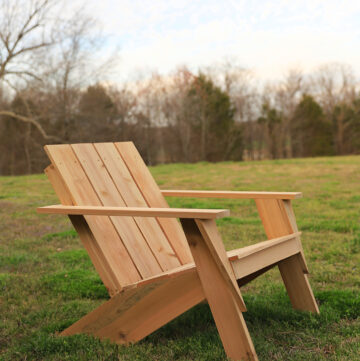
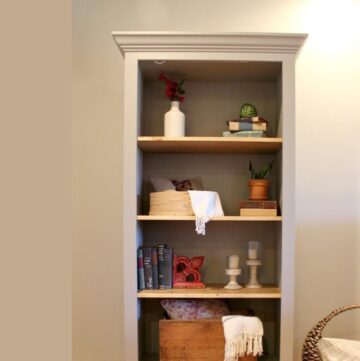
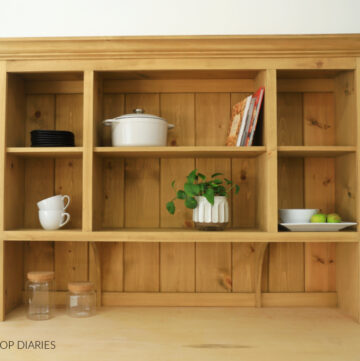
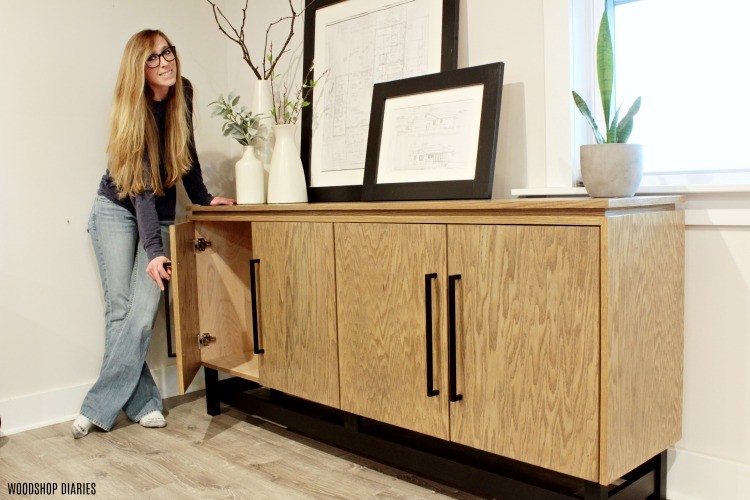
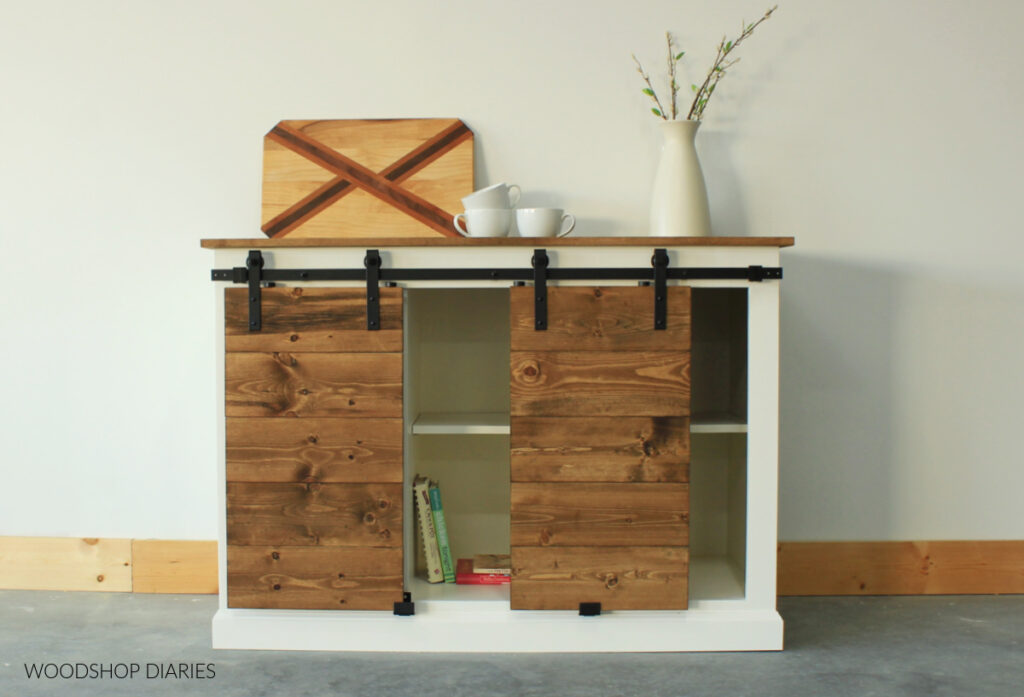
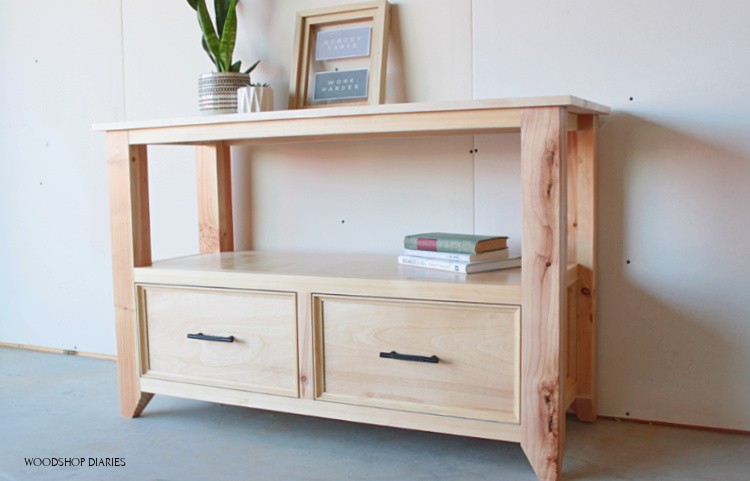
Looking for more console cabinet ideas?
Want some more console cabinet project ideas? Here are a few favorites!

If you enjoyed the project and want to be the first to know when new projects and plans are out, be sure to sign up for the free newsletter below for priority access!
Be sure to save this for later by pinning it or sharing it to your favorite social platform!

Until next time, friends, happy building!