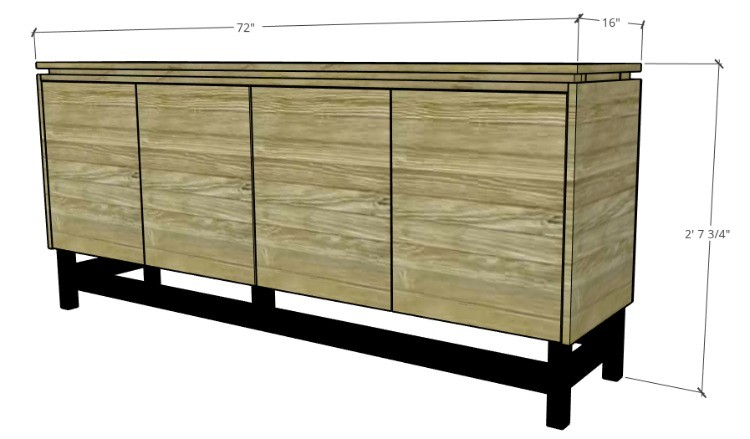
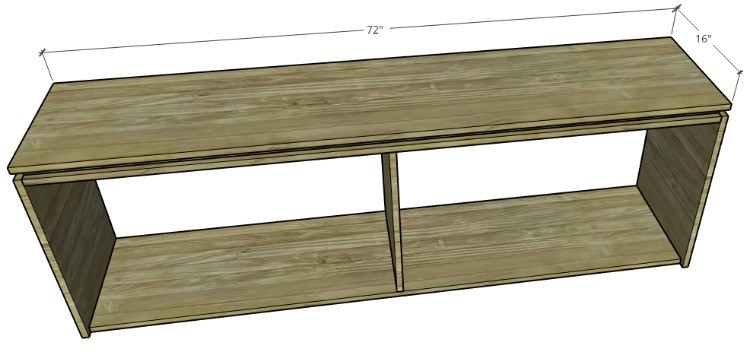
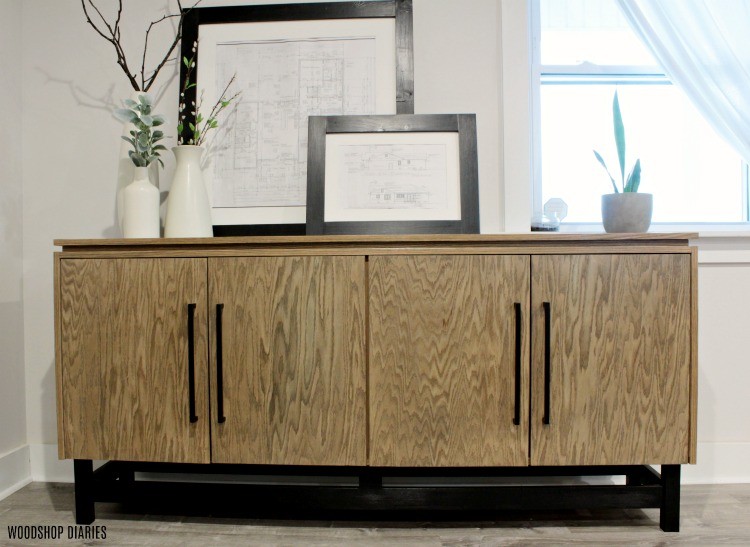
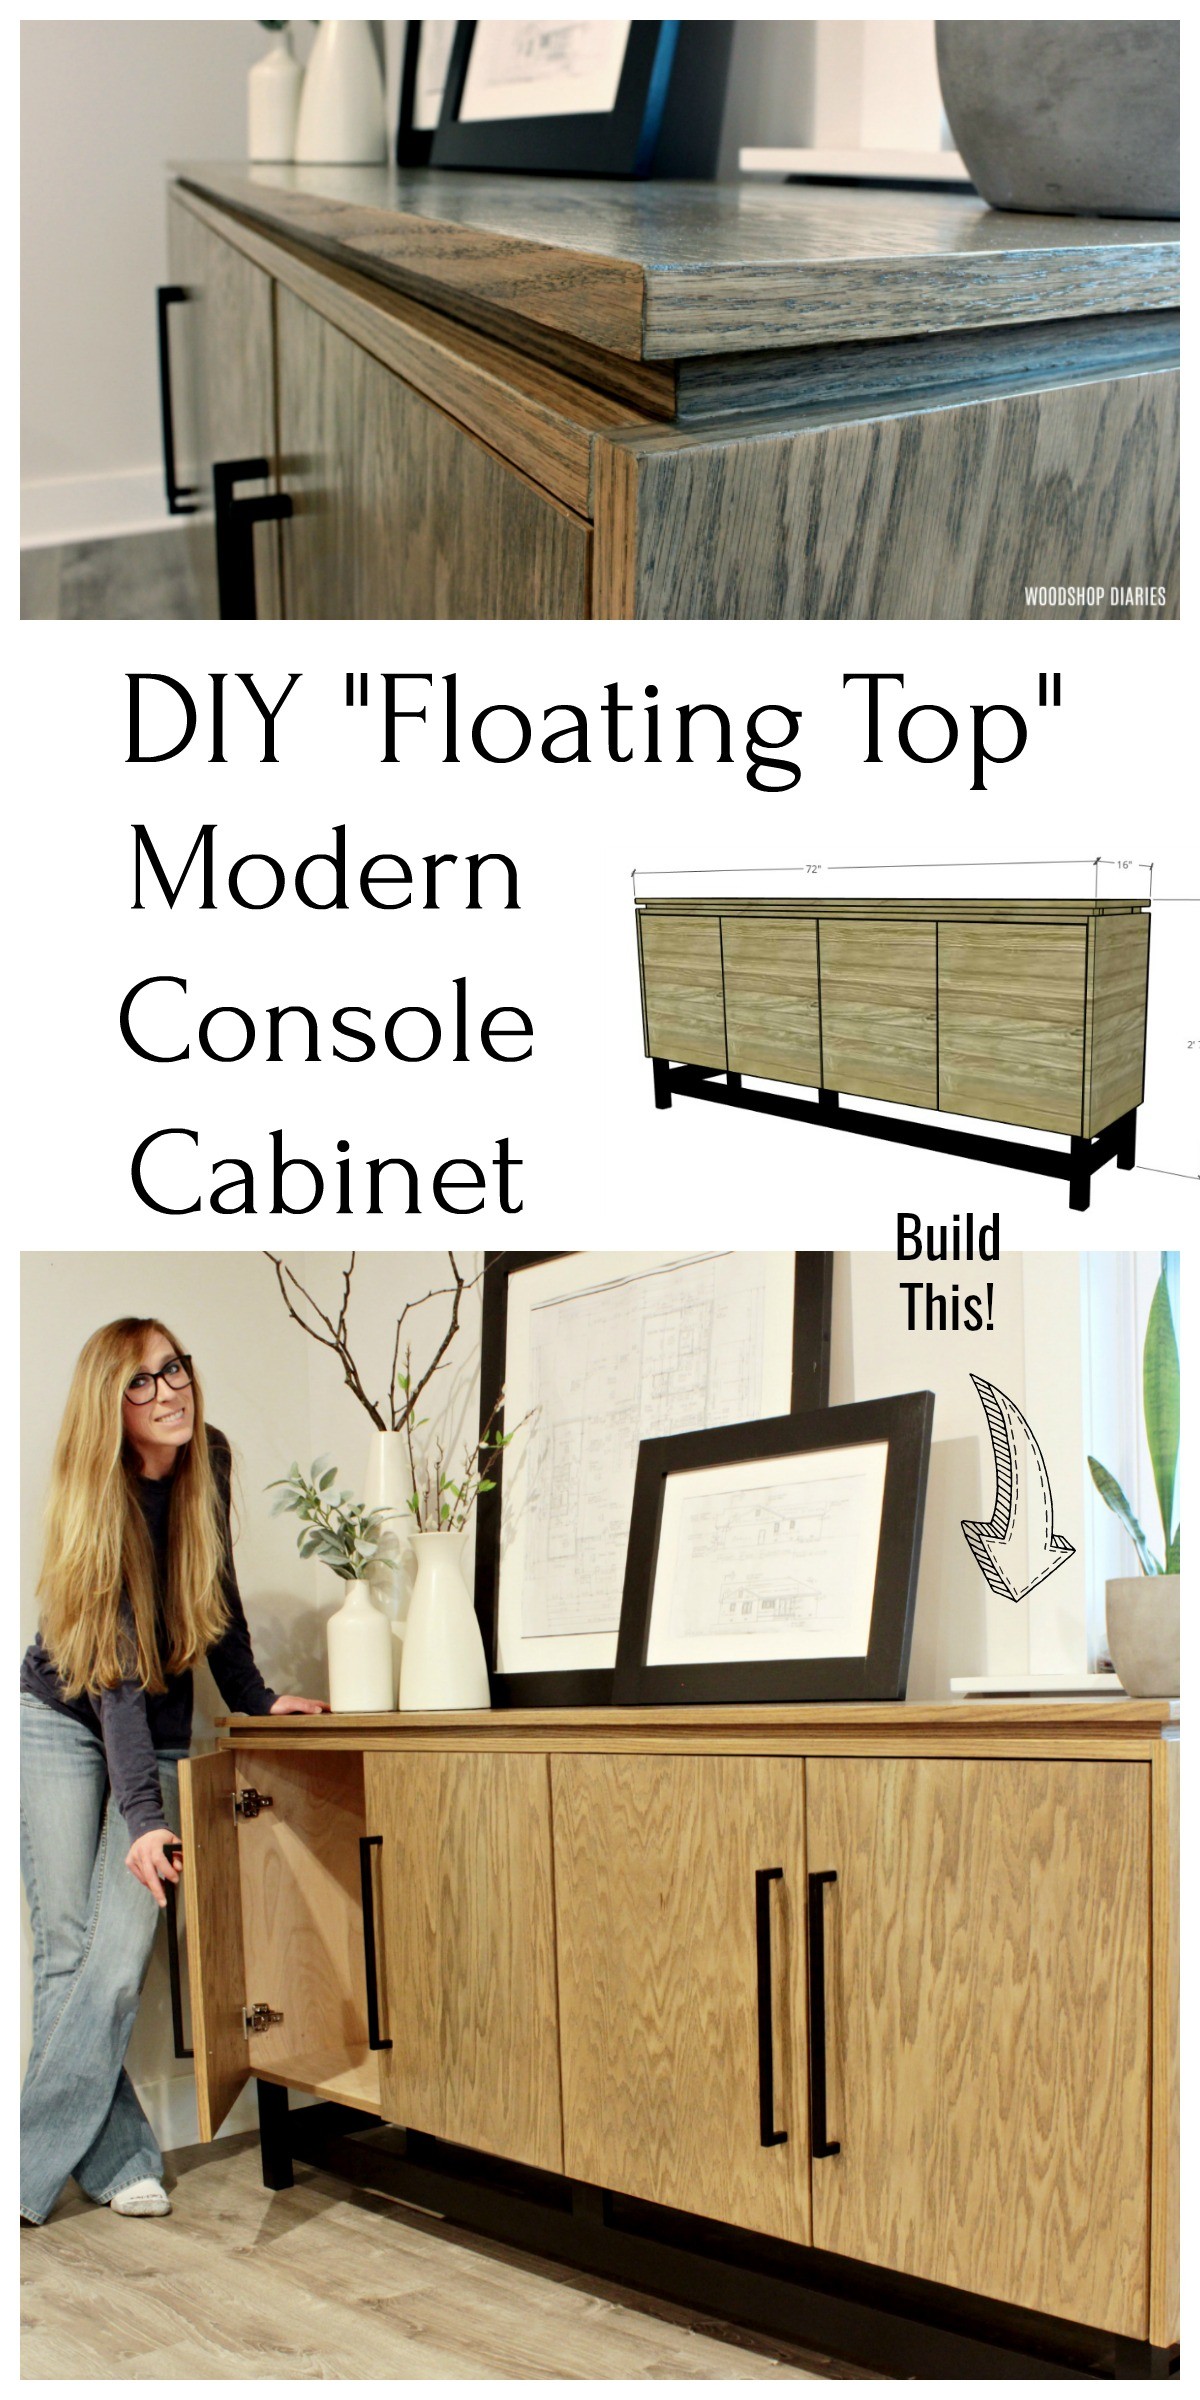
In this post, I’ll show you how to build this DIY Modern Sideboard Cabinet!
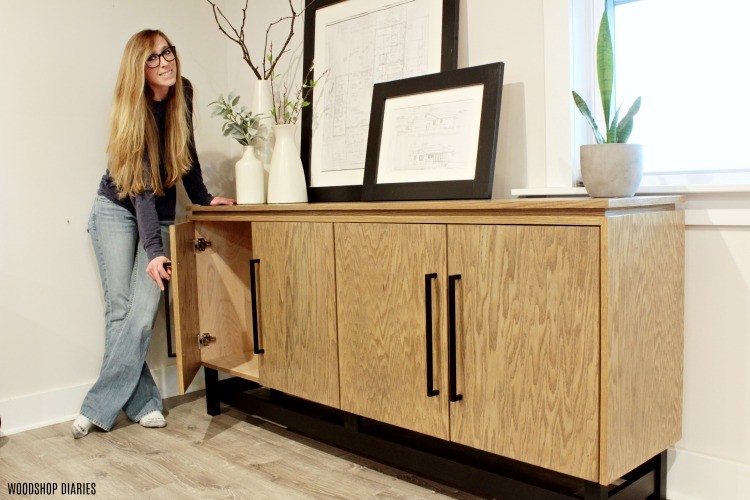
This piece would be perfect for a media cabinet, TV stand, or as a sideboard in a dining room. It’s got plenty of storage behind those doors!
.
I built this sideboard cabinet in two sections—it’s an oak plywood cabinet sitting on a simple painted base. It’s a very simple design and one of my favorite features is the way the top kind of floats above the cabinet.
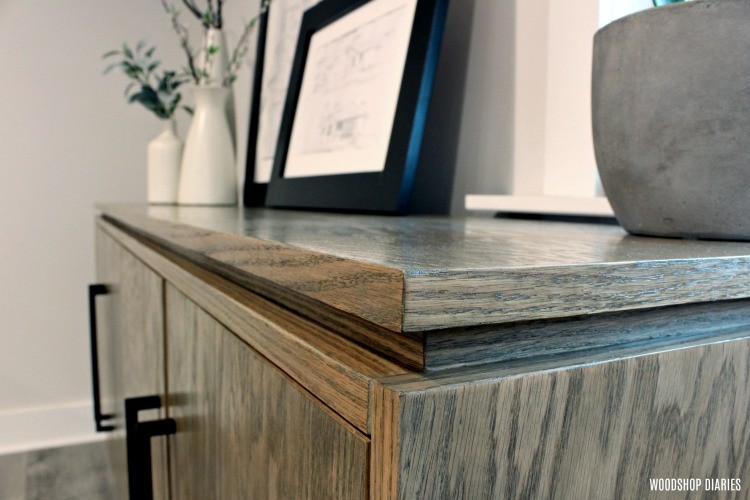
I achieved this by adding an inset frame between the top and the body of the cabinet. You’ll see what I mean in the video and tutorial…so let’s just dive right in, shall we?
.
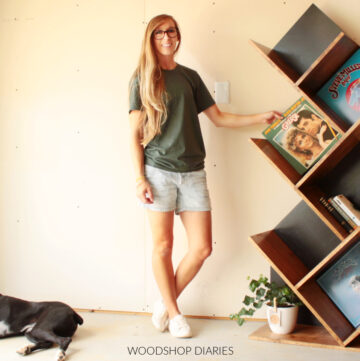
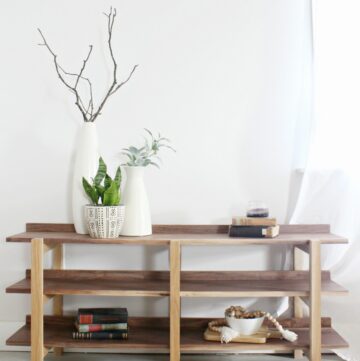
If you’re interested in other console or storage cabinet projects, check these out:

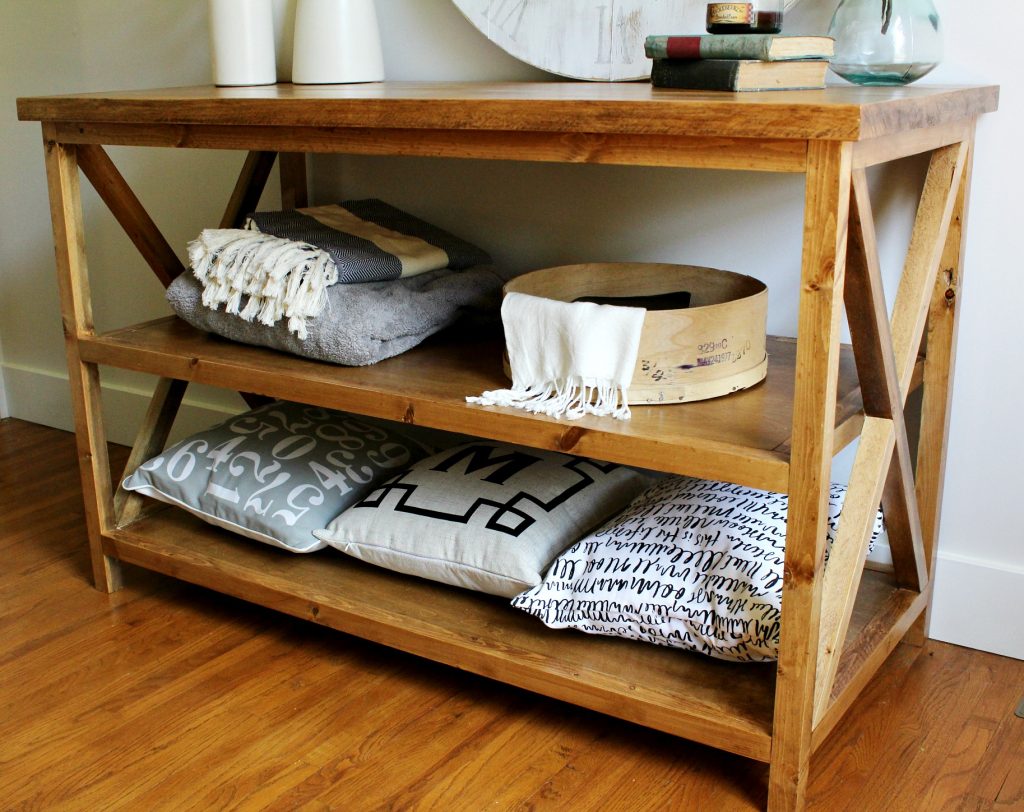
DIY Console Table 
Stenciled Door Console 
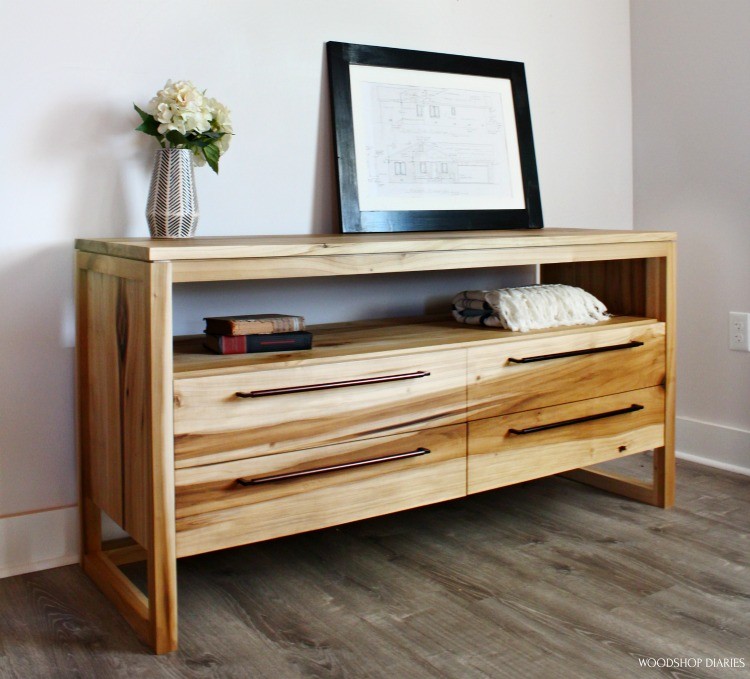
Open Shelf Dresser 
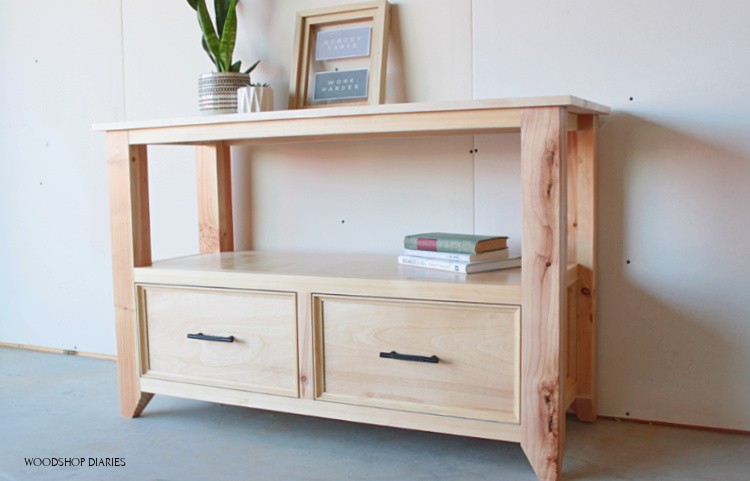
DIY Display Shelf with Storage

I’ve got the video for you right here with the plans and tutorial below:
*This post contains affiliate links. See policies page.
Tools and Materials:
Materials:
- 1 ½ sheets ¾″ oak plywood
- ½ sheet ¼″ plywood for back
- (1) 2x2x8 board
- (2) 1x3x8 board
- (2) pair inset concealed hinges
- (2) pair overlay concealed hinges
- (4) door pulls
- Wood Glue
- Edge banding
- 1 ¼″ pocket hole screws
- 2″ wood screws
- 1 ¼″ wood screws
- Wood finish of your choice
Tools:
- Circular Saw and Saw Guide
- Miter Saw
- Pocket Hole Jig
- Drill
- Concealed hinge jig
- Stapler/nail gun
Notes About this Modern Console Cabinet Build:
The overall project dimensions are 72″ wide, 31 ¾″ tall, and 16″ deep.
Some posts you might find helpful for this project:
Step 1: Cut Down Plywood Sheet
The body of the cabinet—so everything except for the doors—can be cut from a single ¾” sheet of plywood. So the first thing I did was cut down my first sheet and start building the cabinet.
RELATED: How to use a circular saw to cut down plywood sheets
.
I used my Kreg rip cut to rip the sheet into three strips–two 16″ wide and one 15 ¼″ wide. Then I trimmed them to length on the miter saw according to the cut list in the printable plans.
Step 2: Assemble Modern Console Cabinet Carcass
Before putting anything together, I used some glue on edge banding along the edges that will be exposed in the finished project.
RELATED: How to apply iron on edge banding
.
This is totally optional…some people like exposed plywood edges. I just prefer to cover them.
.
The cabinet was easily assembled with ¾″ pocket holes and 1 ¼″ pocket hole screws, so once everything was cut to the right size, edge banded, and sanded, I drilled pocket holes to begin assembly.
RELATED: How to set up and use a pocket hole jig
.
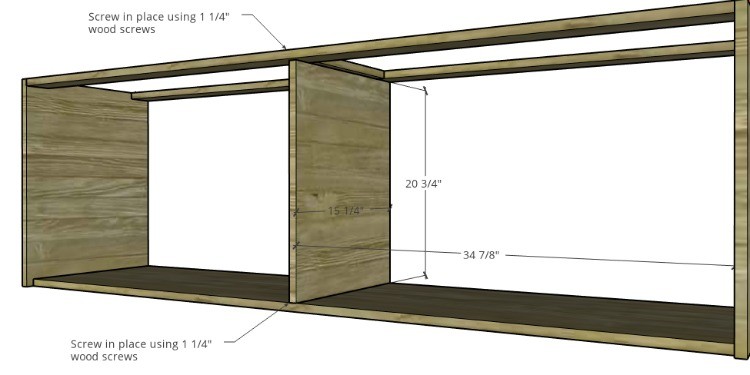
I first assembled the bottom piece to the sides. Notice that the bottom is ¾” narrower than the side pieces. This is because the doors will overlay the bottom, but are inset flush to the sides.
Once the bottom was screwed in place, I attached two pieces of 2 ½” plywood strips along the top—one in the front and one in the back. Then, I added a support in the middle between these two strips.
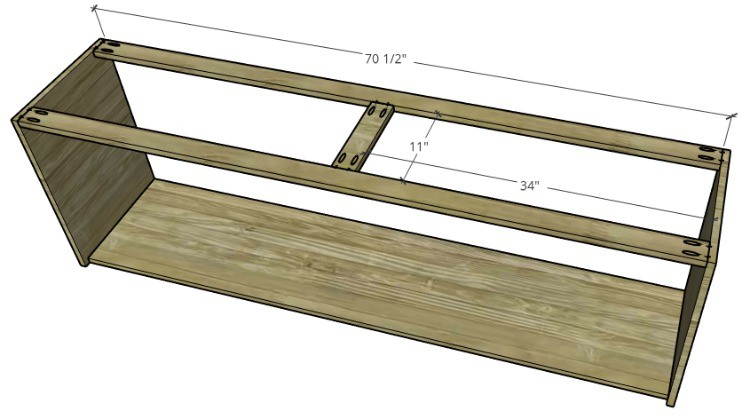
Next, I installed a middle divider panel to divide the left and right cabinets. I simply screwed this into the center of the cabinet using 1 ¼” wood screws along the top and bottom.
.
Note that this divider is inset from the front of the cabinet ¾” like the bottom. The doors will overlay this piece once it’s complete.
Then I realized I had forgotten something and had to regroup. When I applied edge banding to the sides, I didn’t think about doing the top edge. I also didn’t think about covering up the pocket holes on the top.
.
When I install the “floating top frame” in the next step, these edges will show and so will the pocket holes.
.
So I needed to cover them. I applied glue on edge banding along all the top edges of the carcass to solve this problem before moving on to the next step.

Step 3: Add “Floating Top Frame” to Modern Sideboard Cabinet
Now the main body of the cabinet is assembled, so I moved it out of the way to work on the top. Between this main body and the top, I added a little frame to make the top look like it’s floating over the body of the cabinet.
I assembled a frame that was 1 ½” narrower on both sides than the body of the cabinet using some of the 2 ½″ inch wide strips and ¾″ pocket holes and 1 ¼″ pocket hole screws.
.
Once it was together, I applied edge banding along the edges and glued it onto the cabinet like shown so that it was ¾” inset along all sides.
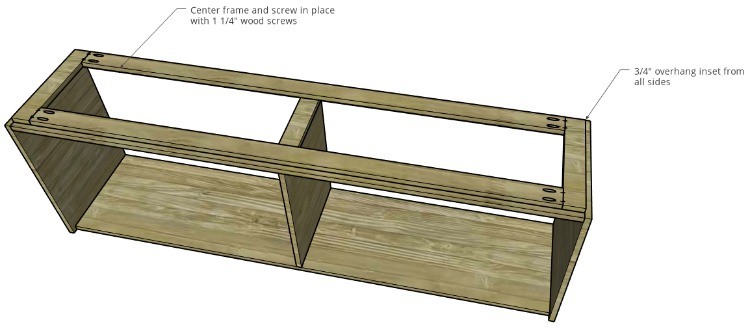
The glue alone probably would have been sufficient, but I went ahead and added some screws along the top of this frame to give it some extra holding power. You can see this in the video above.
Step 4: Attach Sideboard Cabinet Top
To attach the top of the cabinet, I applied some wood glue along the frame from step 3 and centered the top in place.
.
I clamped it to hold it while the glue dried, then used some 1 ¼″ wood screws from the underside to secure it to the frame.

Step 5: Attach Back of Sideboard Cabinet
Before moving onto the doors, I cut a piece of ¼” plywood and stapled it onto the back of the cabinet as a backer panel.
.
Below I’ve shown this as one single piece, but if you wanted to purchase a half sheet (4×4 sheet) of plywood, you can cut this in two pieces that meet in the middle and the middle divider of the cabinet will cover the seam on the inside.

Step 6: Add Doors to the Sideboard Cabinet
I brought out another sheet of ¾″ plywood to cut the doors from. I had a full sheet to use for this, but you could also use a half sheet (4×4) to cut the doors from.
.
I used my rip cut to rip plywood strips to 17 ½″ wide, then cut the strips to 21 ¼″ long pieces for the doors. I cut four identical doors like shown below.
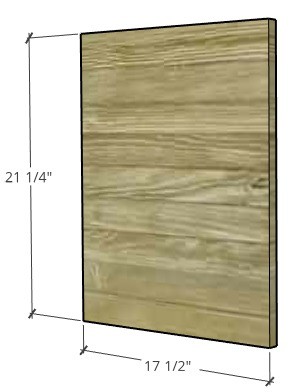
Once the doors were cut, I applied edge banding along the sides and stained the cabinet body with Varathane Smoke Grey.
.
Then I used my Kreg Concealed Hinge Jig to drill the cup holes to attach the hinges. I’ve got a post here on how to install concealed hinges.
.
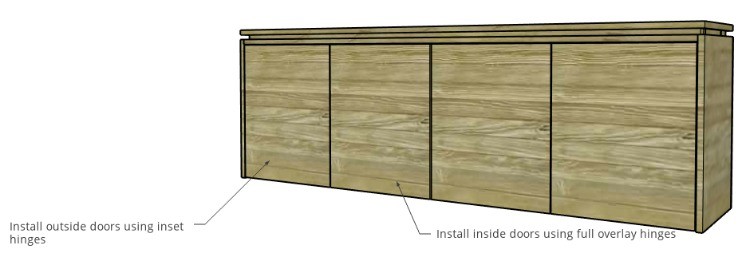
Now, because of the way these doors are attached, the two inside doors need full overlay hinges, but the two outside doors need inset hinges. This makes it appear that all the doors are inset to the cabinet body.
RELATED: Learn the difference between inset and overlay cabinet doors here.
.
So I paid careful attention to which hinges I put on which door and how I installed them. I adjusted the hinges to get equal spacing between all the doors.
Once I had my doors in, I added some simple modern handles and flipped it upside down to install the base onto the bottom.
Step 7: Add Console Cabinet Base
The base of this cabinet is made from simple 2x2s for the corners and 1x3s for the rest of the frame.
RELATED: How to make your own 2x2s
.
I cut the pieces to length and drilled pocket holes for assembling it together.
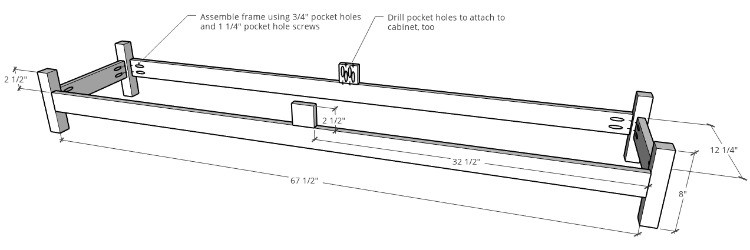
The short middle pieces on the front and back help support the middle of the cabinet to keep it from sagging.
.
They’ve got pocket holes drilled to attach them to the base, but also drilled the opposite way to attach them to the cabinet bottom as well.
.
Once the frame was assembled, I painted it black. And once the paint was dry, I was ready to attach it onto the bottom of the cabinet.
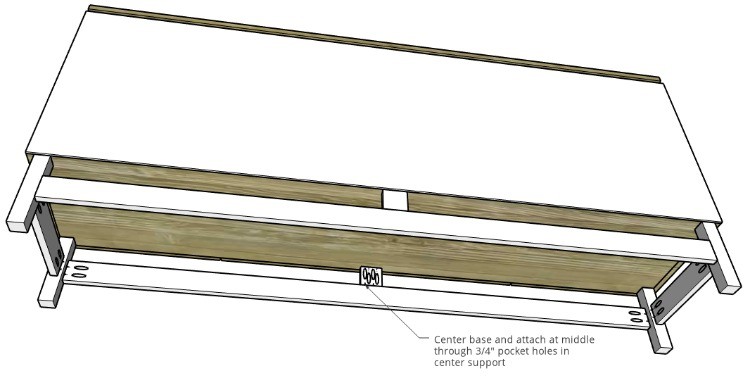
I centered the base onto the bottom of the cabinet and used pocket hole screws into the center supports of the base to attach it to the cabinet.
.
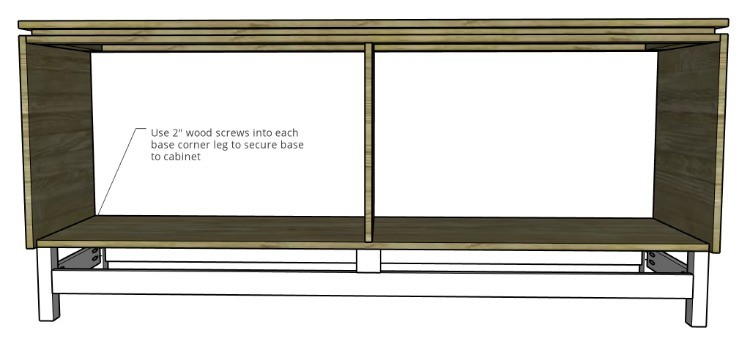
Then, I used 2” wood screws through the bottom of the cabinet into each leg of the base to secure it completely.
Step 8: Finish and Add Shelves (Optional)
I brought it inside to poly it and then decided to drill some shelf pins in one side so I could add a shelf. That’s another optional step. It’s nice to have options, right?
RELATED: Check out more about using a shelf pin jig in this post
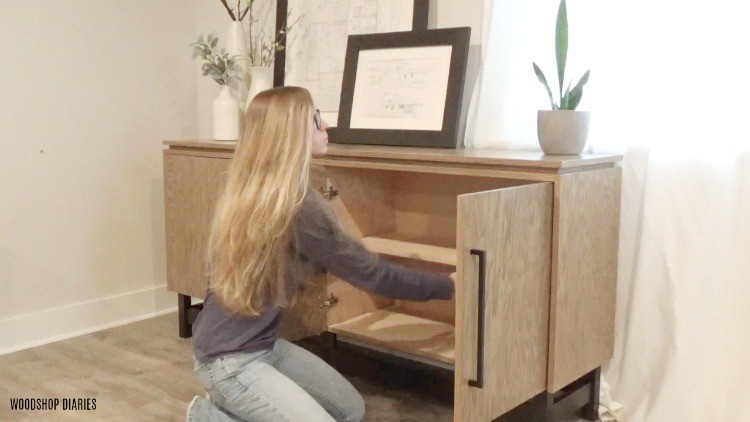
And once the shelf was in place, it was finished. It’s a really simple design and easy to build using plywood and pocket hole joinery.
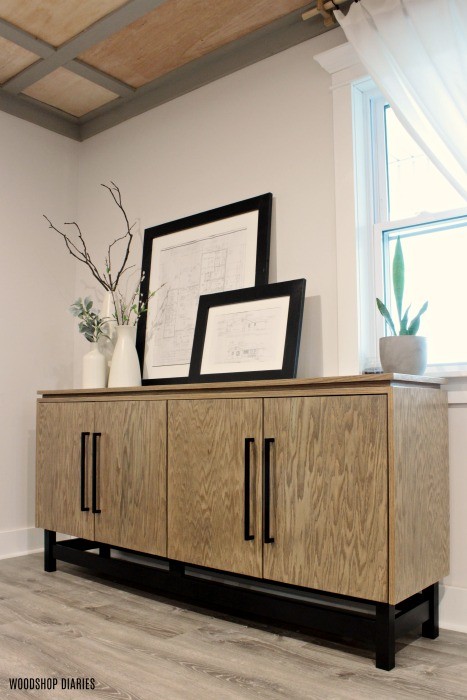
This would be perfect for a modern media cabinet or a dining room console cabinet.
If you enjoyed this DIY Modern Sideboard Cabinet project, be sure to check out my other building plans and DIY furniture projects.
.
Be sure to subscribe to the newsletter to be the first to know about new projects and plans!
Don’t forget to pin this for later or share it to your favorite social channel to save it 🙂
Until next time, happy building 🙂