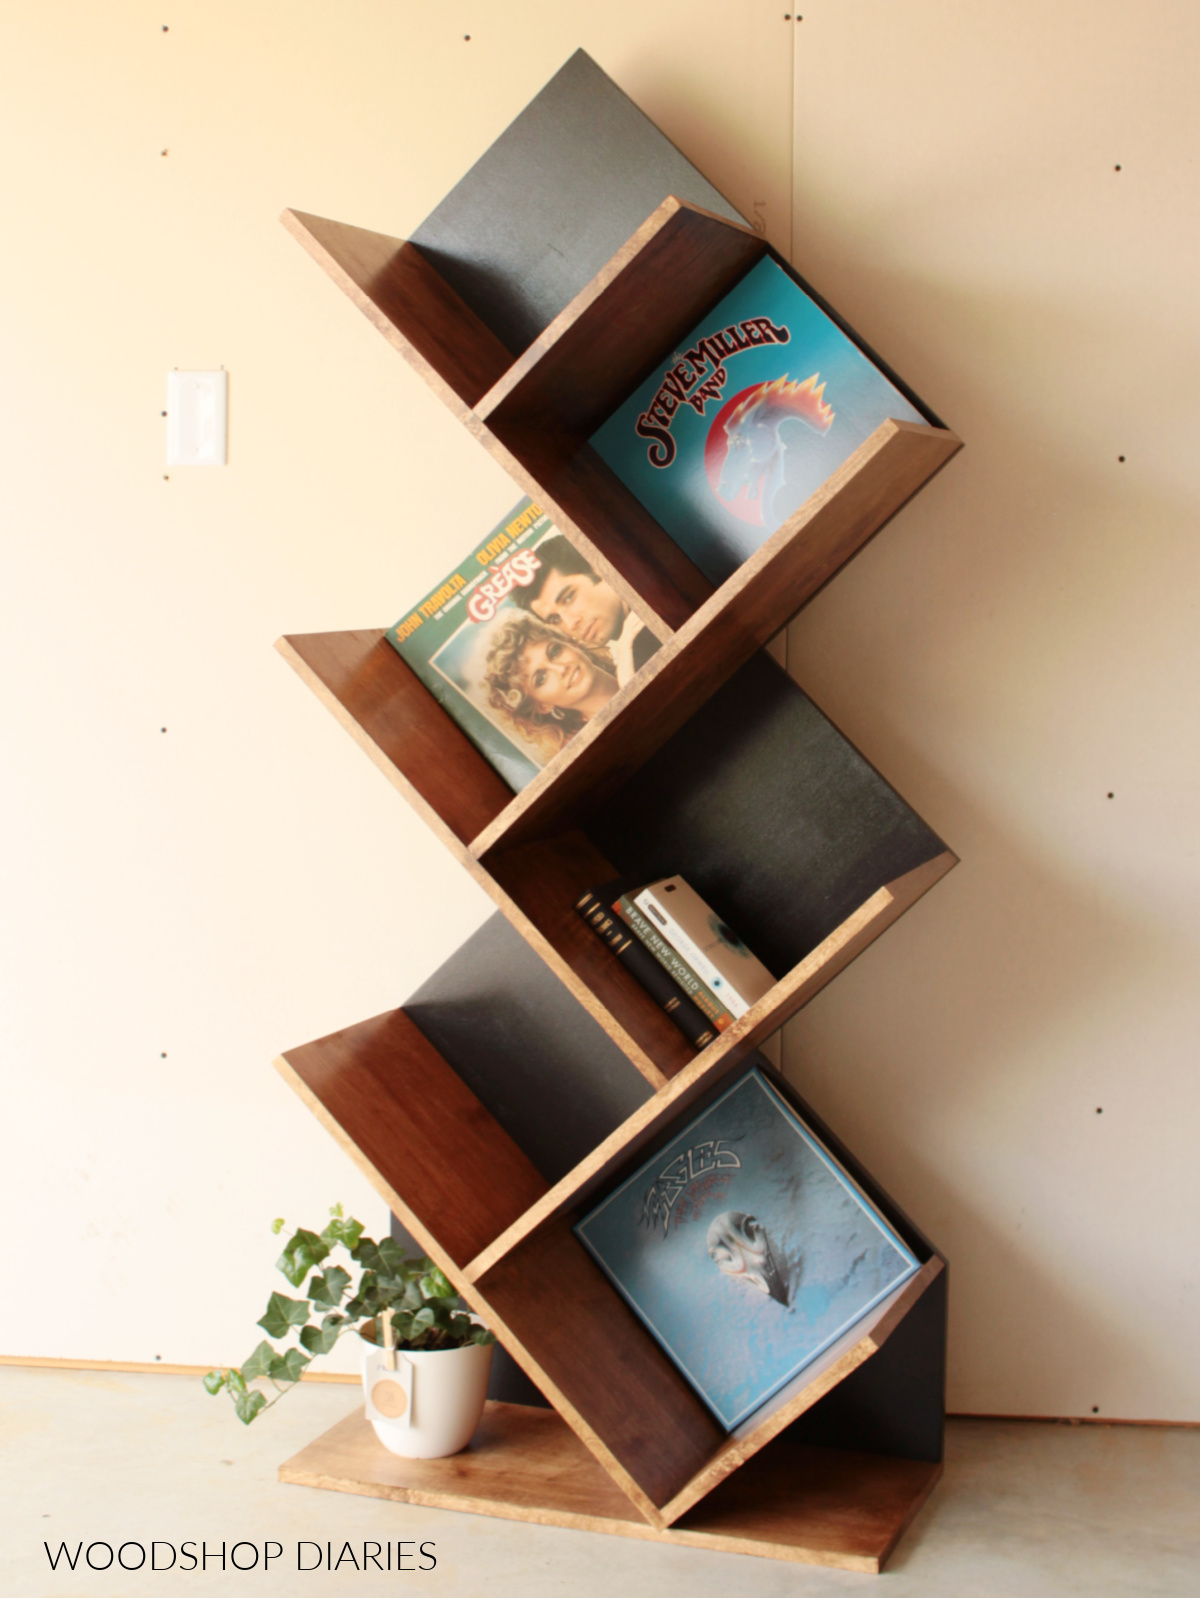
In this post, I’ll show you how to build a unique, modern DIY vinyl record shelf from a single sheet of plywood!
It seems vinyl records are trending again. Honestly, I wish CDs would make a comeback, but I won’t hold my breath HA!
.
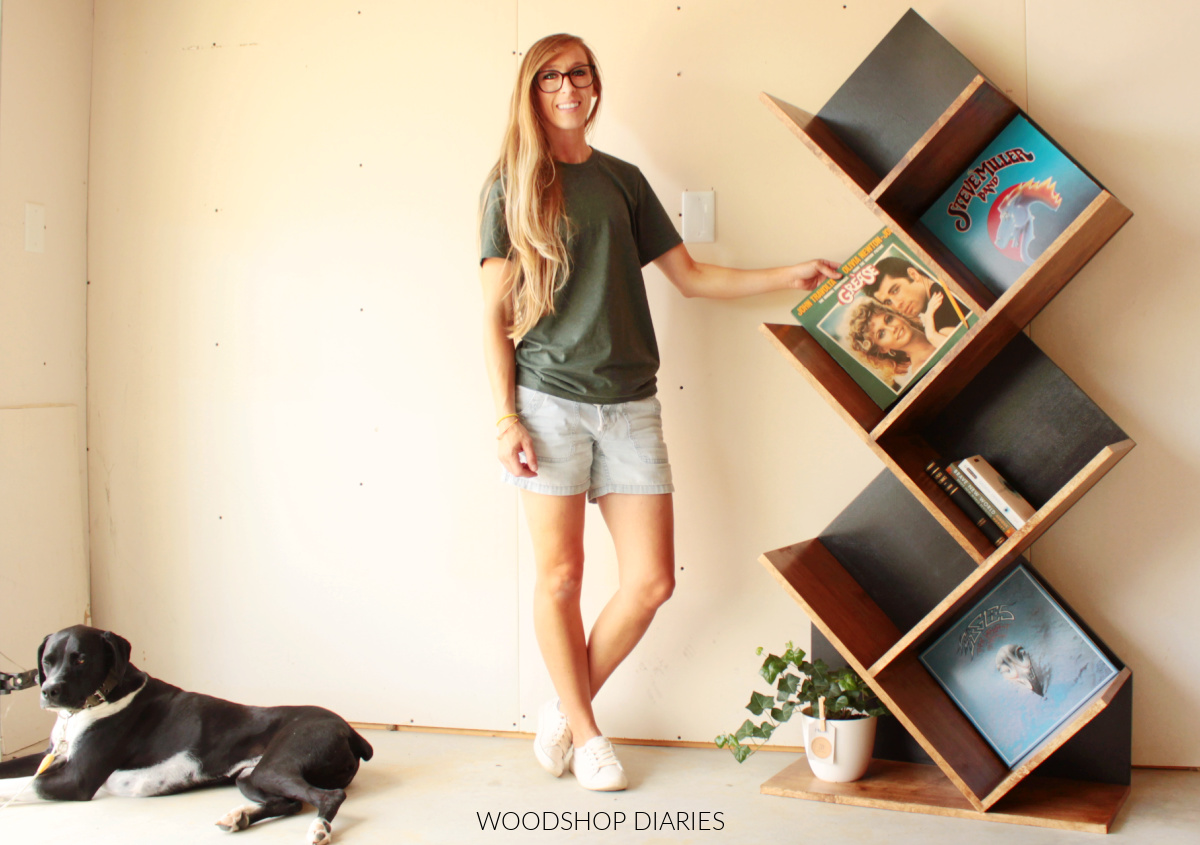
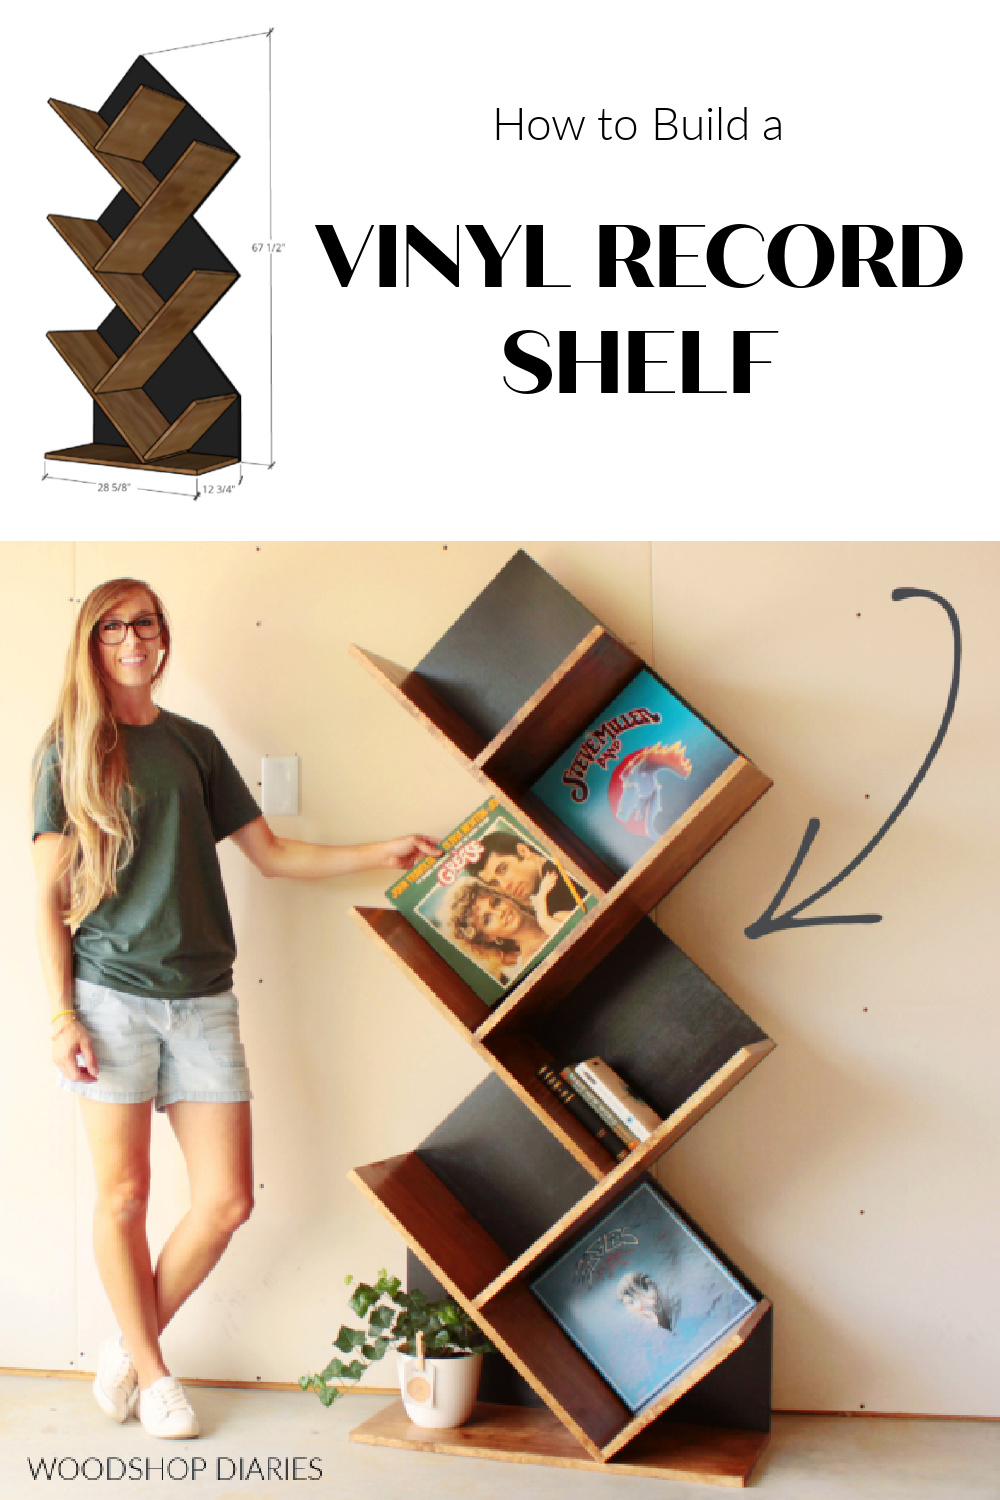
Anyway, a friend of mine has a large collection and asked me to make something unique to both store and display some of his favorites. So I built him this modern, angled, DIY vinyl record shelf!
.
If you’re like me, and don’t have any vinyl records, though, you could definitely still use it for books, pictures or anything else you may need a unique shelf for.
.
I’m sharing the complete plans, dimensions, and cut diagrams below and I’ll show you how it came together in this video:
This post contains affiliate links. See policies.
Tools and Materials:
Tools:
- Circular saw
- Cutting Guides (Kreg Rip Cut and Kreg Accu-Cut recommended)
- Jig saw (OR hand saw)
- Drill/Driver
- Drill bits for pilot holes
- ⅜″ forstener bit
- Square
- Oscillating saw (OR hand saw)
Materials:
- (1) sheet ¾″ plywood
- ⅜″ wood dowels (optional)
- 1 ¼″ and 2″ long wood screws
- Wood Glue
- Edge banding (optional)
Some Notes About This DIY Vinyl Record Shelf Build:
All the shelf openings in this project are designed to be 12 ¾″ x 12 ¾″. Typical vinyl record covers are between 12″ and 12 ½″ square, so they should fit perfectly with just a little wiggle room.
.
The shelves are designed to be 12″ deep.
.
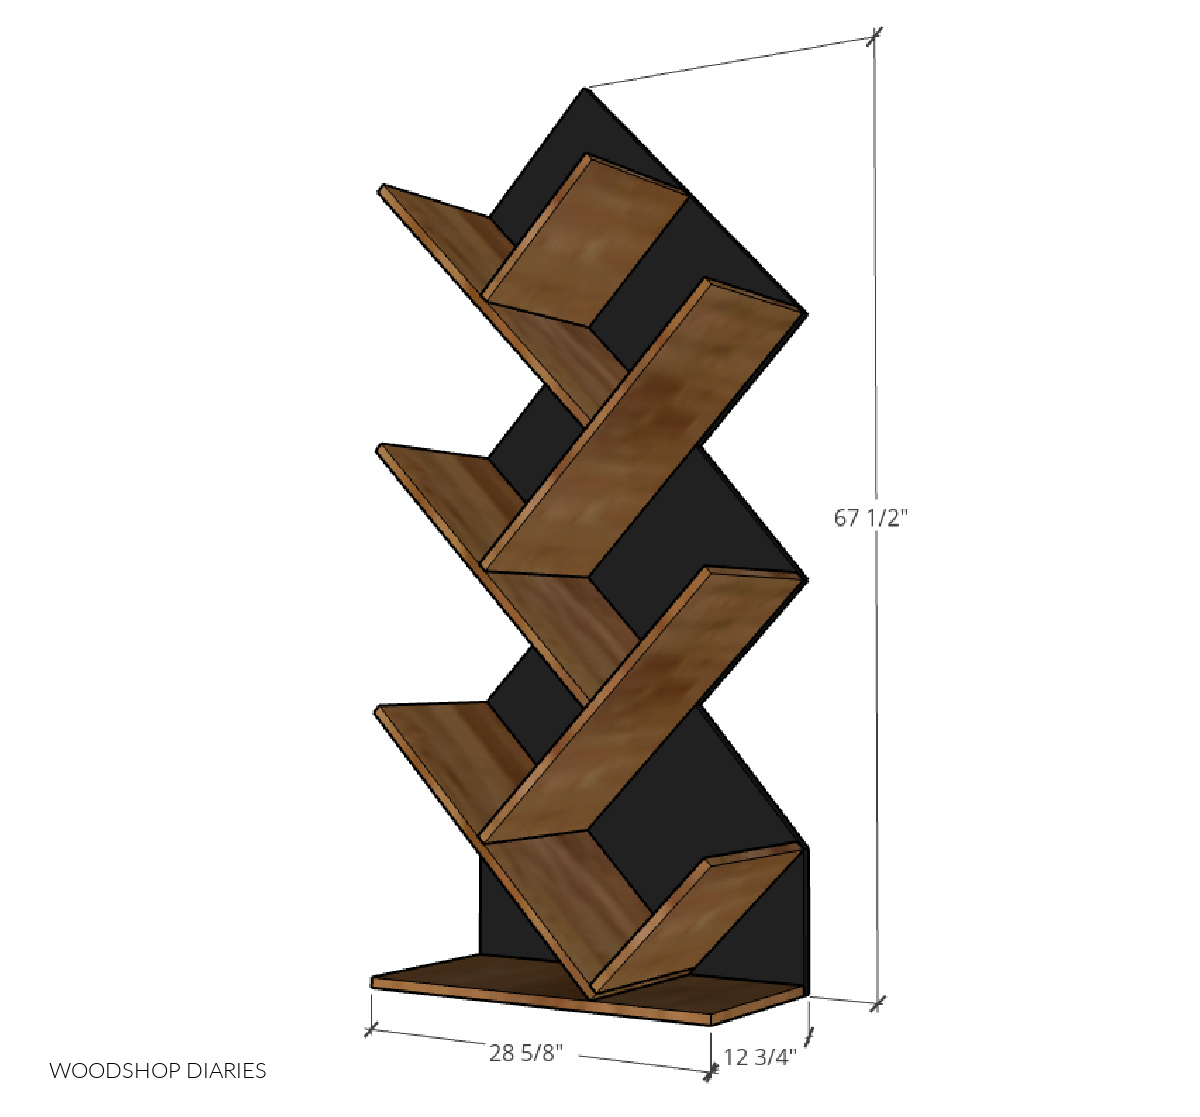
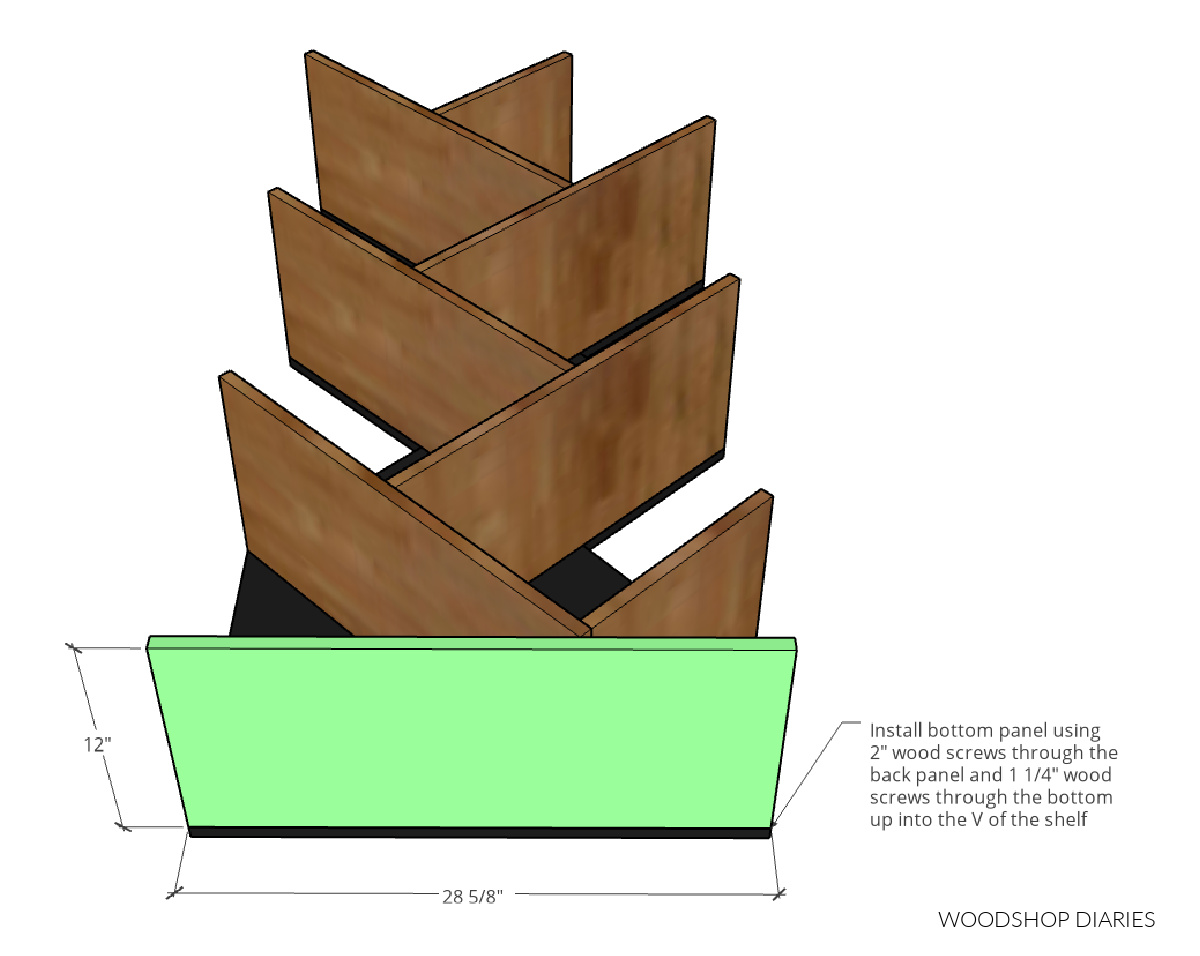
The overall size of this project is 12 ¾″ deep, 28 ⅝″ wide, and 67 ½″ tall.
Cut List:
With a little creative cutting, you can make this entire shelf from just a single sheet of ¾” plywood.
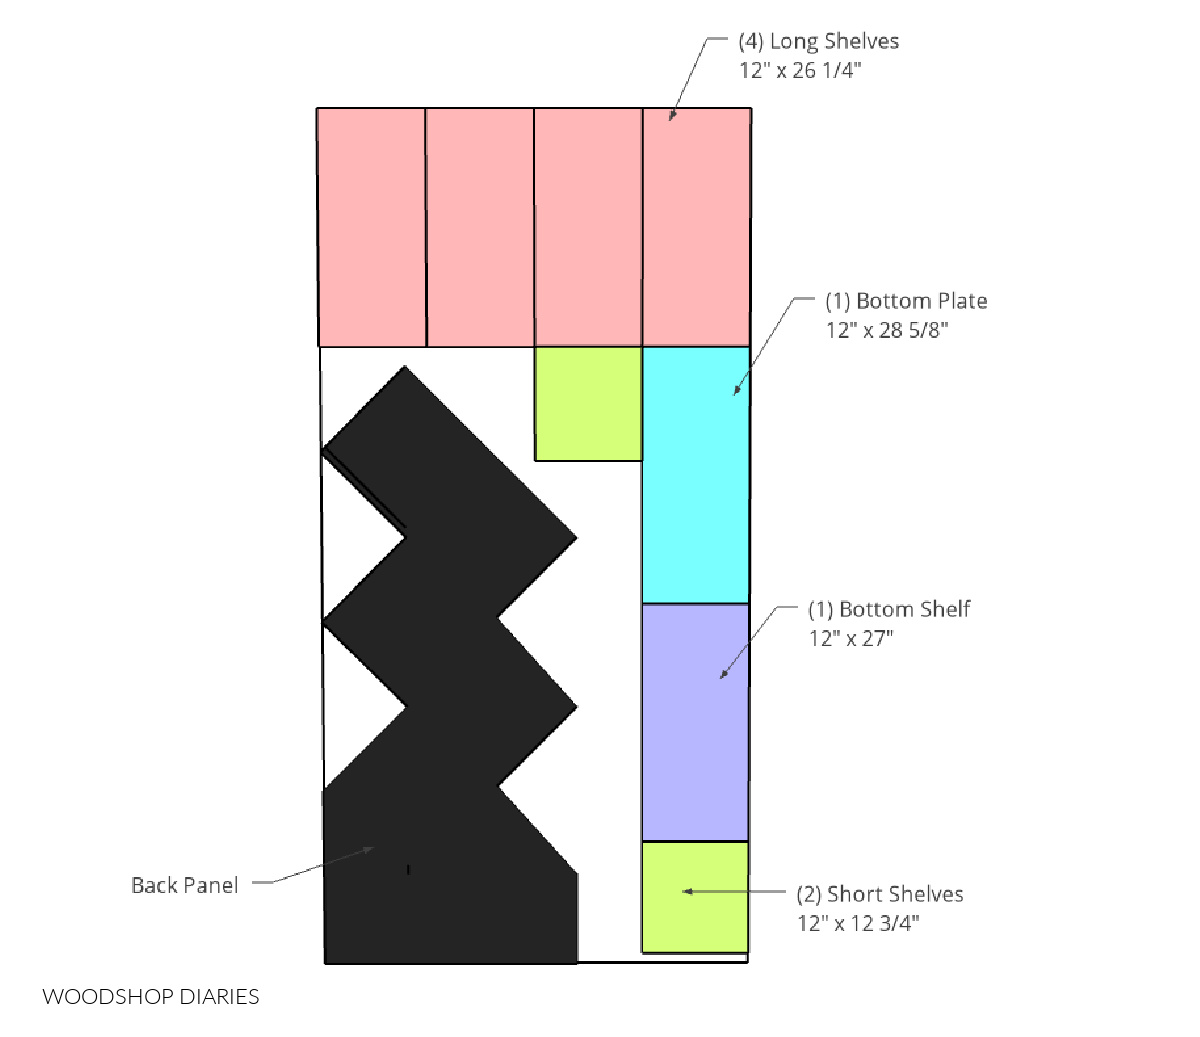
I recommend first ripping the 12″ wide strip off the right side shown above, then cross cutting the 26 ¼″ section off the sheet and ripping those into 12″ strips. Then, cut the last 12″ x 12 ¾″ piece from the corner.
.
If you cut in that order, then you can set the leftover piece aside to trace out the back panel onto later.
.
Note that it’s best to cut these pieces SLIGHTLY less than 12″ wide to account for the blade kerf. A plywood sheet is 48″ wide, so if you cut three 12″ pieces, because of the blade width, the 4th piece will be slightly narrower than 12″.
.
Some posts you might find helpful throughout the build:
Step 1: Cut and Edge Band Plywood Shelves
I first cut down my plywood sheet to get all my shelf pieces (see diagram above). I needed:
- (2) 12″ x 12 ¾″ pieces
- (4) 12″ x 26 ¼″ pieces
- (1) 12″ x 27″ piece
RELATED: How to cut down plywood sheets
.
I visualized the final project and tried to mark out which shelf edges will be exposed so I could edge band over them.
.
I applied iron on edge banding along these edges, then sanded everything smooth.
RELATED: How to apply iron on edge banding
Step 2: Assemble Vinyl Record Shelf Pieces
There were a few ways I could assemble these shelves, but I decided the easiest and quickest way was to use wood glue with 2″ wood screws.
.
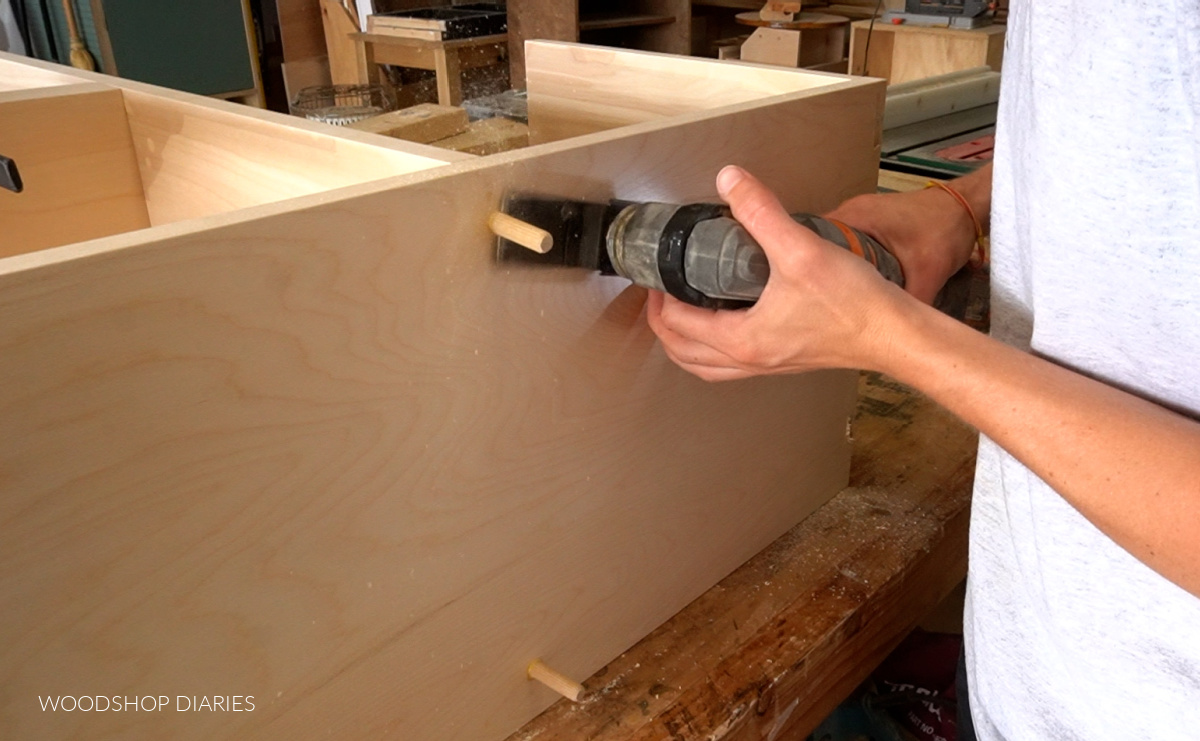
I didn’t want the screw heads to show on the finished project, so for each screw, I predrilled a pilot hole for the screw, then used a ⅜″ forstener but to countersink each hole about ¼″ deep. See video for details.

Once the screws were in, I could go back and glue in some ⅜″ wood dowels to plug the holes. Of course, if you prefer, you could leave the screw heads exposed or use wood putty instead.
.
The bottom shelf has a short shelf piece on the right edge and a long shelf piece at the middle.
.
Since it has this additional piece on the right end that the other shelves don’t have, this piece needed to be ¾” longer to keep all the shelf openings the same.
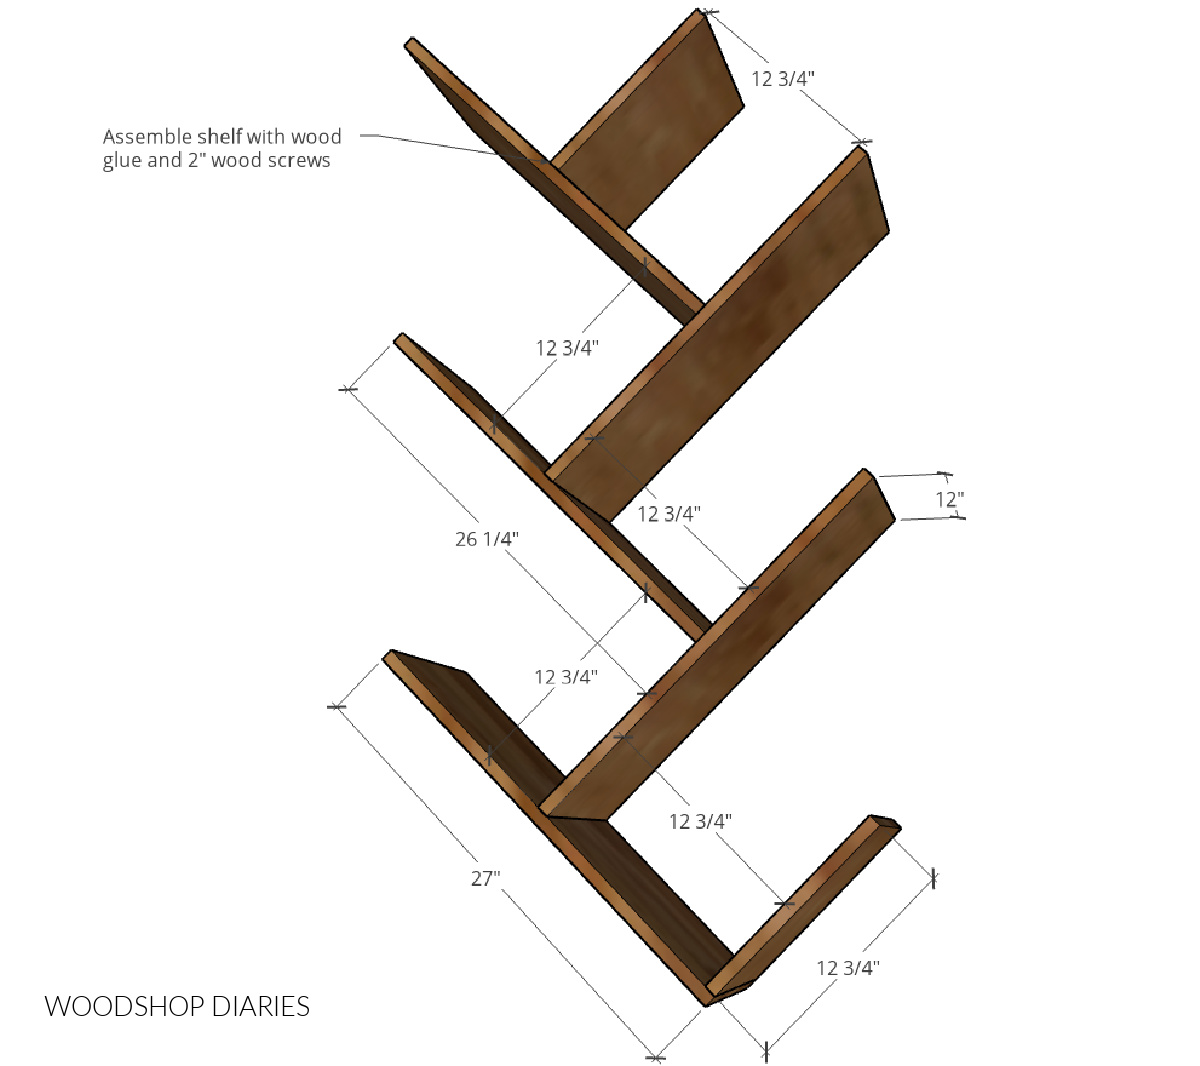
So notice that this bottom shelf piece is 27″ long and the rest are 26 ¼”. I used a speed square to make sure the pieces stayed square while assembling. I started at the bottom and worked my way up.
.
I used the second short shelf as a “spacer block” to space the rest of the shelves on this project 12 ¾” apart. I clamped it in place and lined the next shelf up with it.
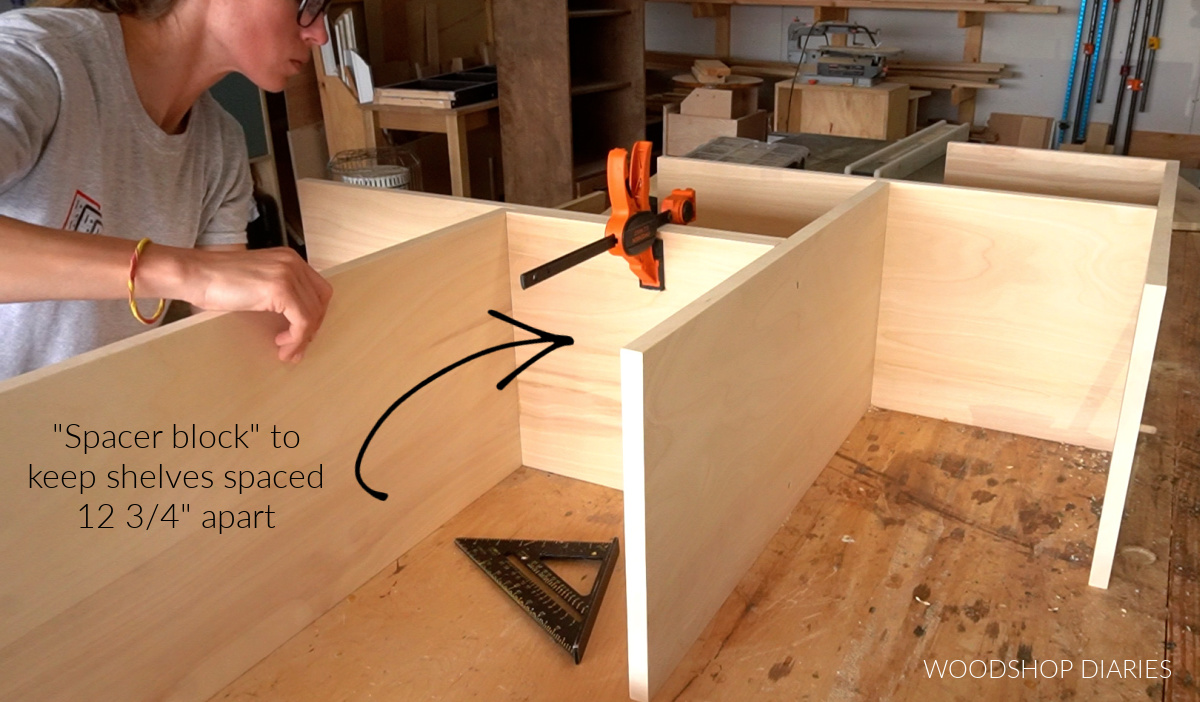
And when I got to the end (the top of the shelf), I had to attach this short piece, so I couldn’t use it as a spacer. So I just measured and marked instead.
.
I glued the dowels into the holes and came back later to trim them all down.
Step 3: Trace and Cut Out Back Panel
Once the entire DIY vinyl record shelf section was together, I placed the remaining plywood sheet on my workbench and laid the shelf assembly on top.
.
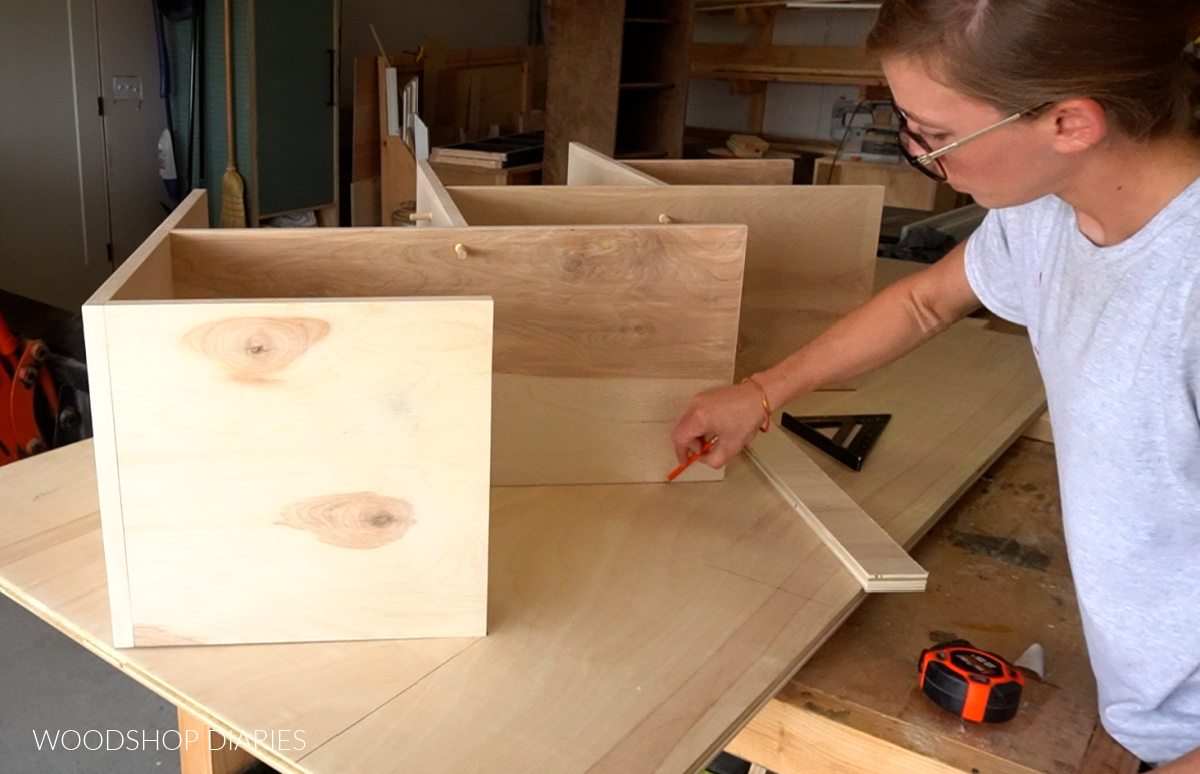
I lined up the left side against the edge of the sheet and checked that it was straight and square. Then I traced out where it needed to be cut for the back panel.
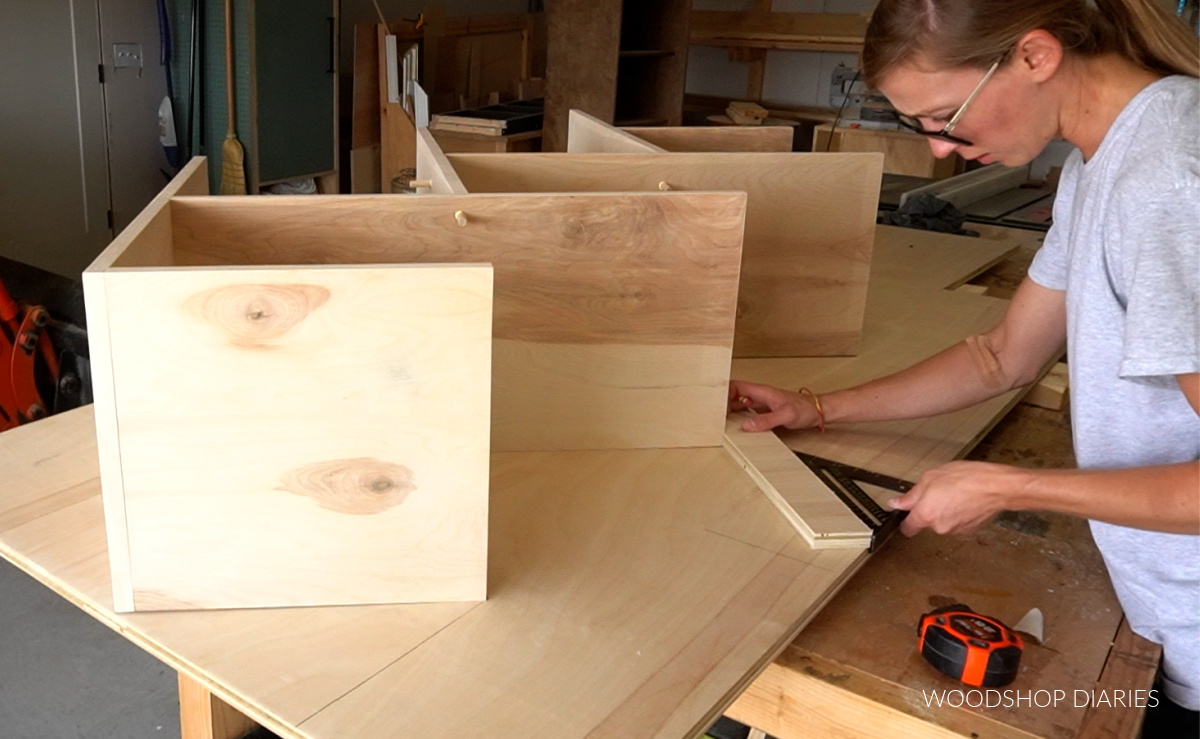
I used a straight edge and a speed square to help me trace the squares between all the shelves.
.
NOTE: I made a mistake in the video and lined up the bottom edge of the shelf with the bottom edge of the plywood. But, the back panel should extend ¾″ BELOW the bottom shelf corner.
.
So when you trace, make sure left side is lined against the left edge of the plywood and the bottom corner is ¾″ up from the bottom edge.
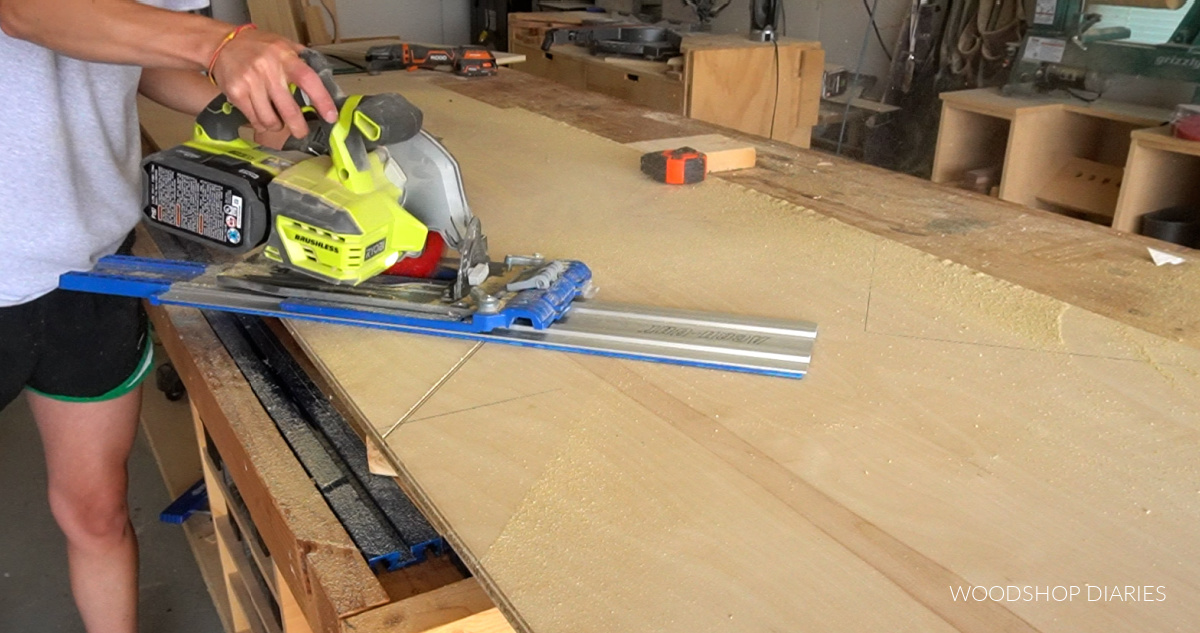
Once I had the back panel traced out, I used my circular saw to rip the excess off the right side of the sheet so I can use that for scrap later, then I used my Accu-Cut and circular saw to cut along all the lines.
.
If you don’t have a saw guide, you can use a straight edge and some clamps.
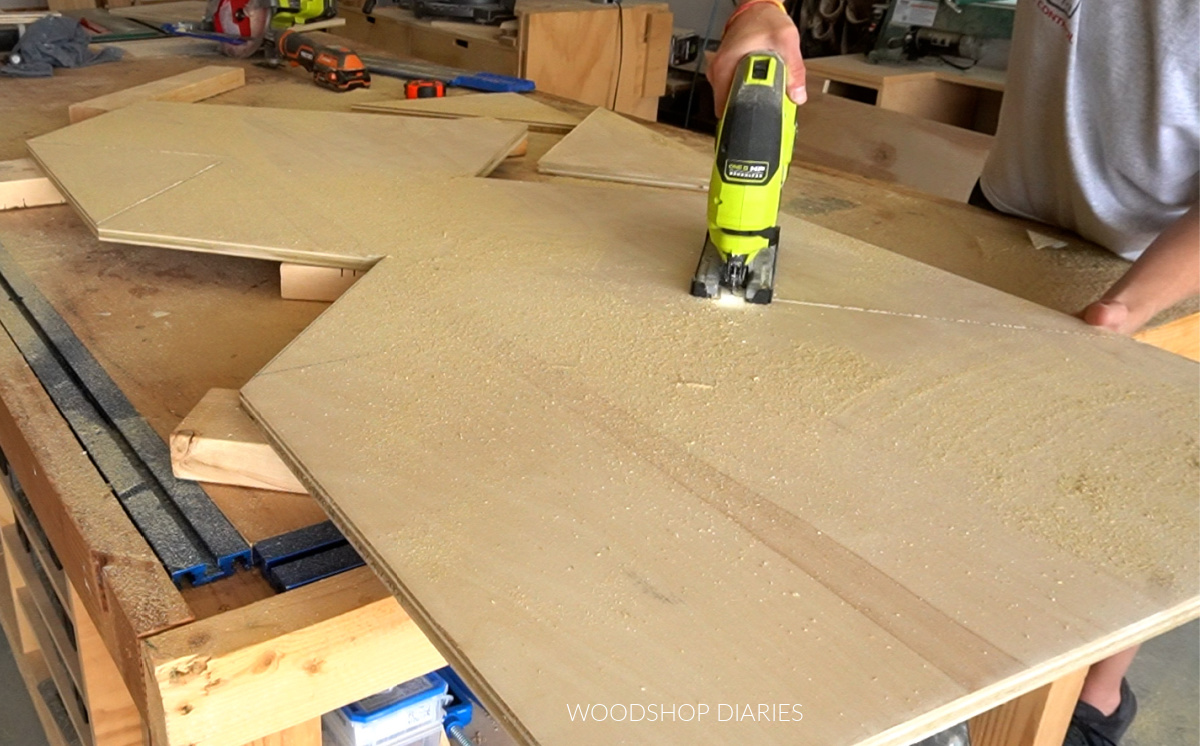
I cut right along the lines on the top side of the plywood sheet, then came back with a jig saw to finish the cuts along the inside corners.
.
You could make all these cuts with a jig saw if you wanted, but I was afraid my lines wouldn’t be straight if I did that.
Once the back panel was cut, I puttied over the plywood edges—you could edge band if you wanted, but I was running low on edge banding and since I was painting this, putty worked fine.
Step 4: Finish Record Shelf and Back Panel
I used an oscillating saw to flush cut the dowel plugs on the shelf, but you could also use a flush cut hand saw or whatever else you prefer to trim these down with.
I sanded both the shelf and back panel, then stained the shelf and base plate piece (shown in plywood diagram earlier) Minwax Provincial.
.
Then, I primed and painted the back panel with SW Black Magic.
RELATED: Check out how to finish raw wood furniture with this tutorial!
Step 5: Attach Back & Bottom Panels
Once the paint and stain had dried, I installed the back panel onto the back side of the shelf. Keep in mind that the back panel should extend below the bottom corner of the shelf ¾″.
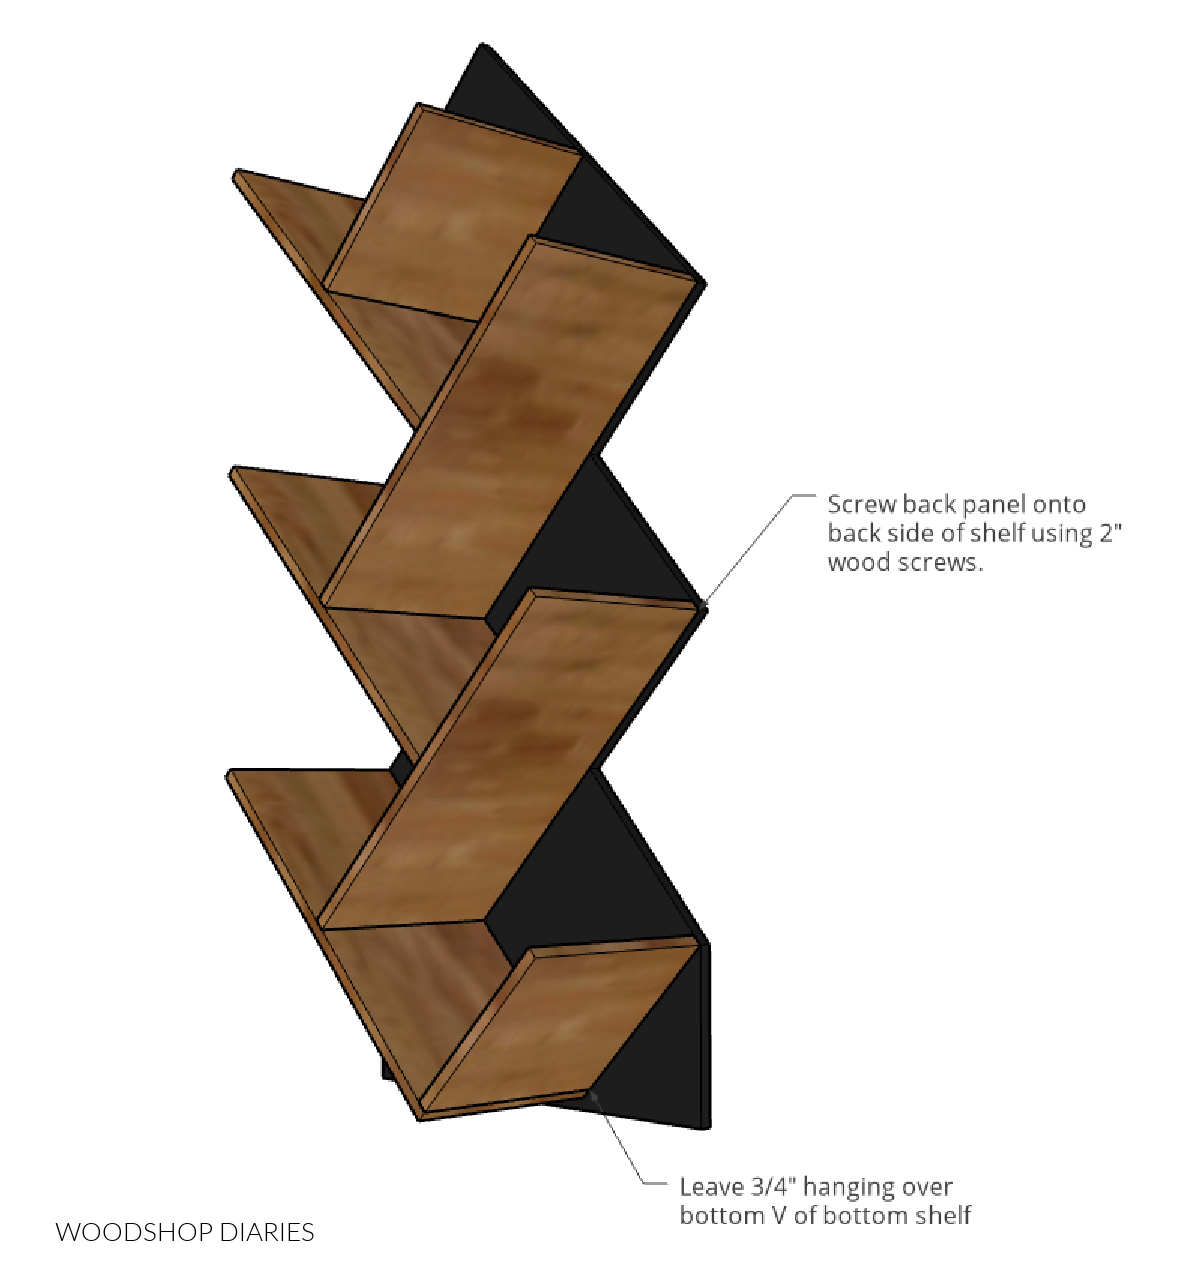
I used 2” wood screws here and when I was finished, I went back and painted over the back side of this as well.
.
Then, I installed the bottom panel onto the shelf using 2” wood screws at the back and a couple 1 ¼” screws through the bottom to secure it into the V of the bottom shelf.
I gave the entire piece a couple coats of poly, then it was complete!
.
As usual, the two tone finish was kind of a pain, but it was worth it for the end result.
.
It fits record albums perfectly, but, again, you can always use this for books whatever else you want to display.
If you want to build your own, be sure to head over and watch the YouTube video here.
.
And if you enjoyed this project, and want to see more, go ahead and subscribe to my newsletter below to be the first to know about the latest plans and projects!
Don’t forget to save this project for later by pinning it or sharing to your favorite social channel!
Until next time, friends, happy building! 🙂