
In this post, I’ll show you how easy it is to build your own DIY aquarium cabinet stand!
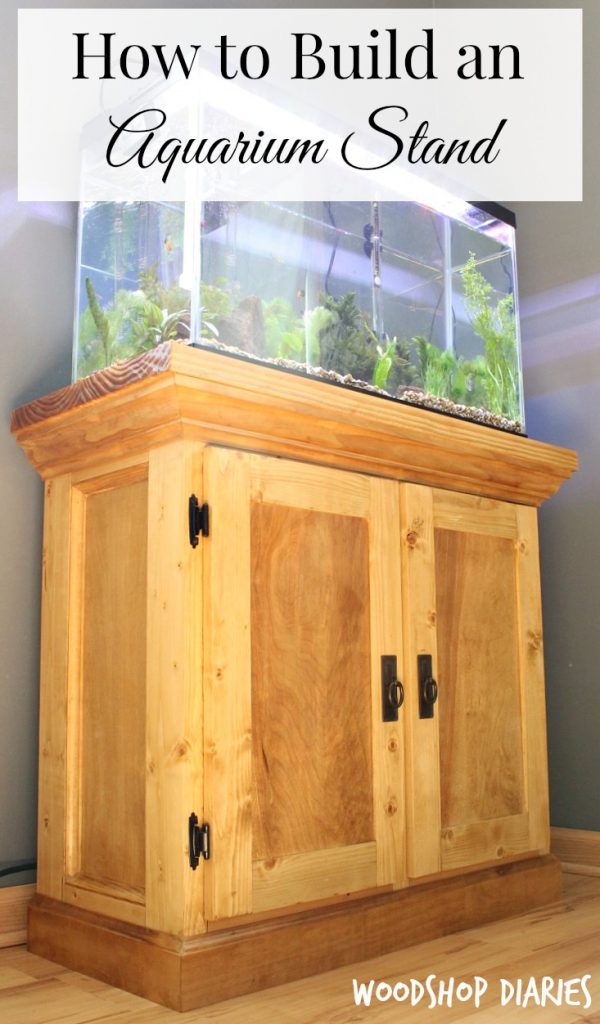
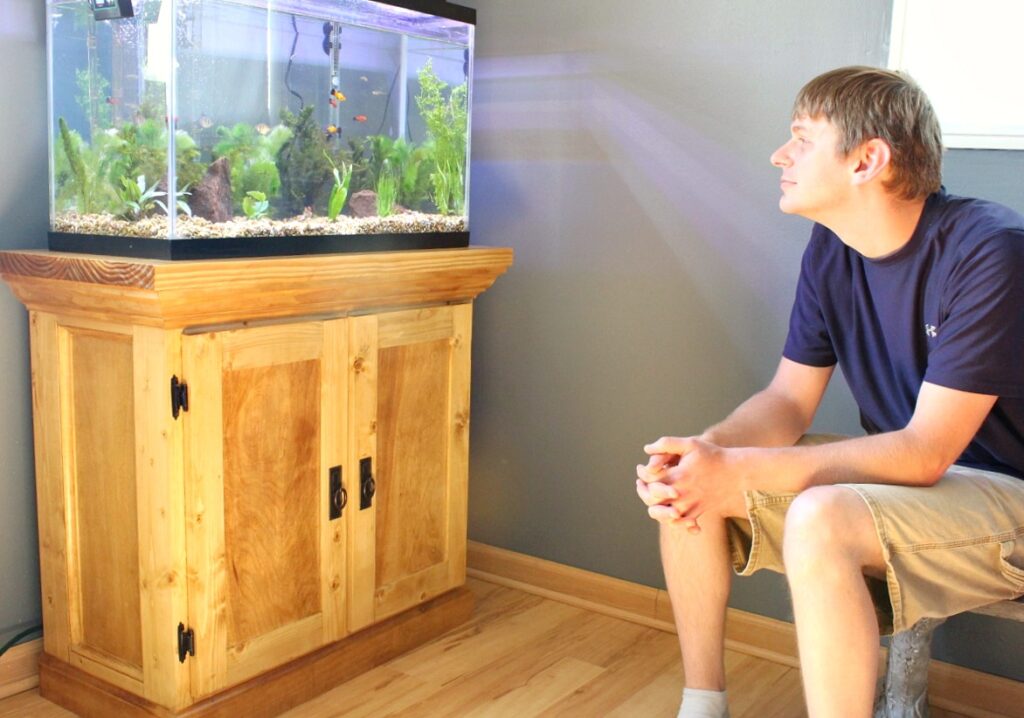
When my husband, Danny, decided he wanted a “man cave” with an aquarium, that meant I was tasked with building him a new DIY aquarium cabinet stand.
.
He was so excited about his aquarium, though, that it made it worth it…I think 🙂
.
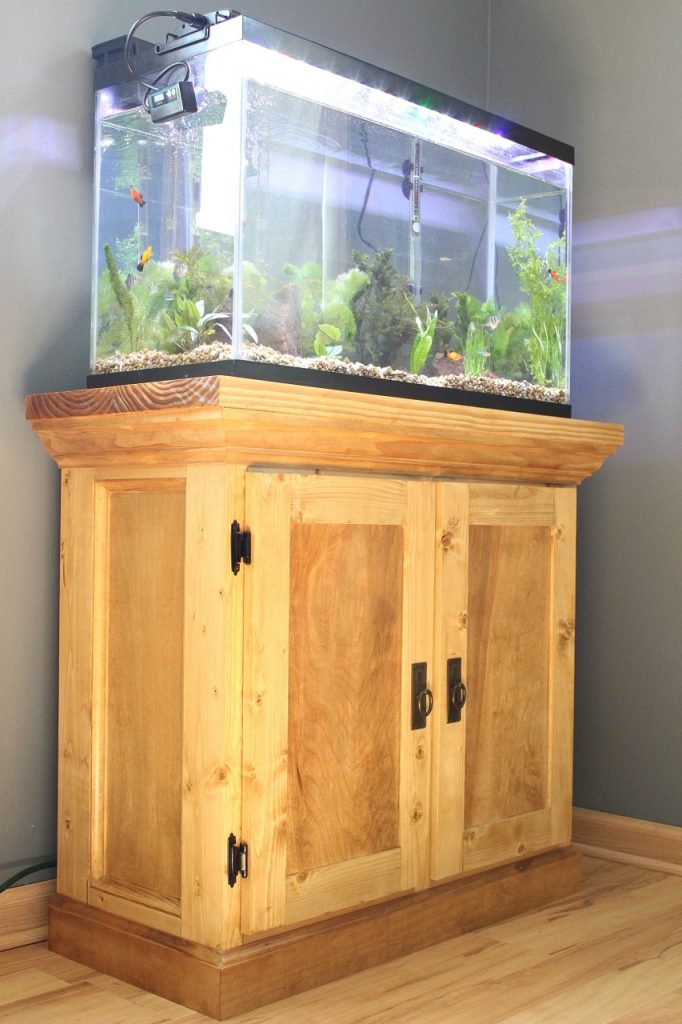
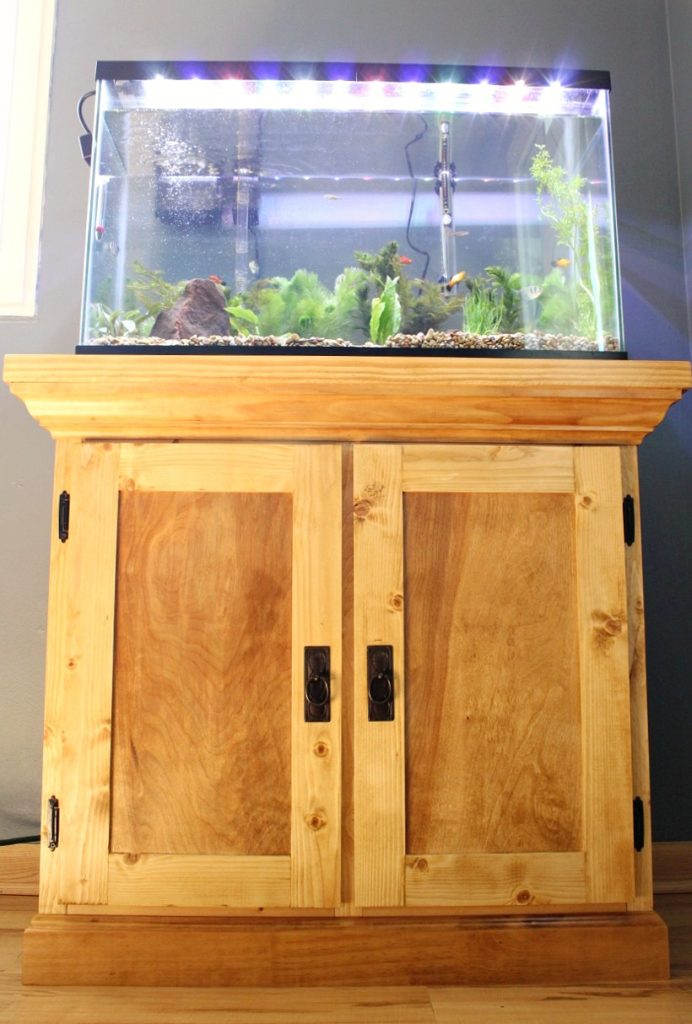
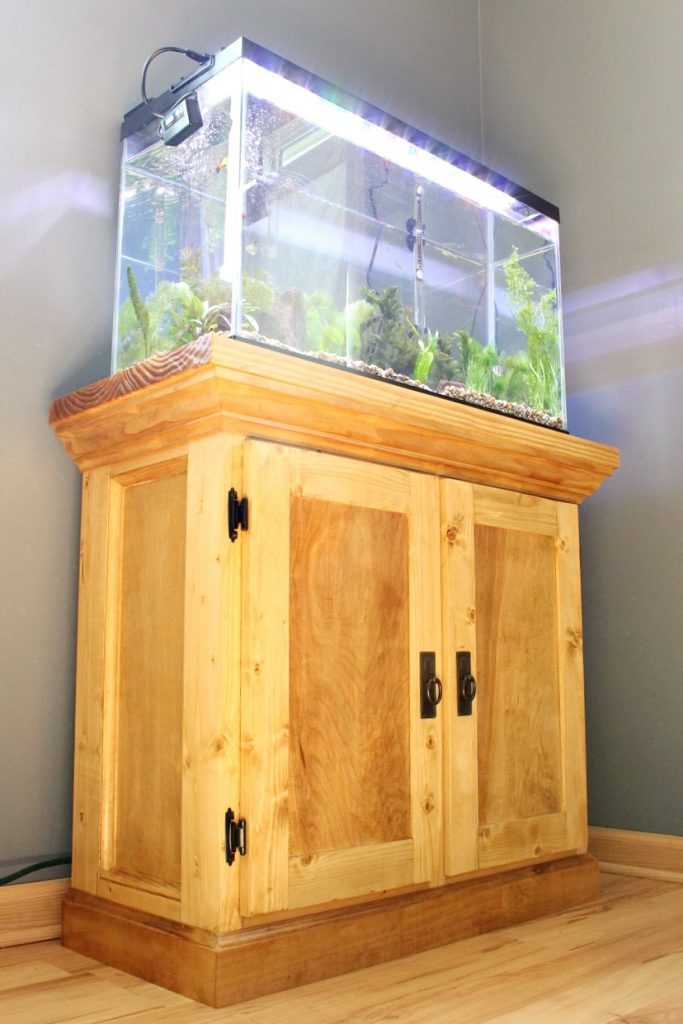
I built this stand to be extra sturdy since it was going to be holding quite a bit of weight with all the water. His tank was 30 gallons and fit perfect.
.
But even if you didn’t want to use this to hold an aquarium, it would also make a great TV stand, storage cabinet, coffee bar, whatever.
.
This post contains affiliate links. Please see disclosure policy for details.
What You Need to Build Your Own DIY Aquarium Stand
Materials:
- ¾” plywood (½ sheet)
- ¼” plywood (¼ sheet)
- 2x10x8
- (3) 2x4x8
- (2) 2x2x8
- (2) 1x3x8
- Cove molding
- Crown molding
- Base molding
- 2 sets hinges
- 2 knobs/pulls
- 2 ½” pocket hole screws
- 1 ¼” pocket hole screws
- Brad nails
- Wood Glue
- Wood putty
Tools:
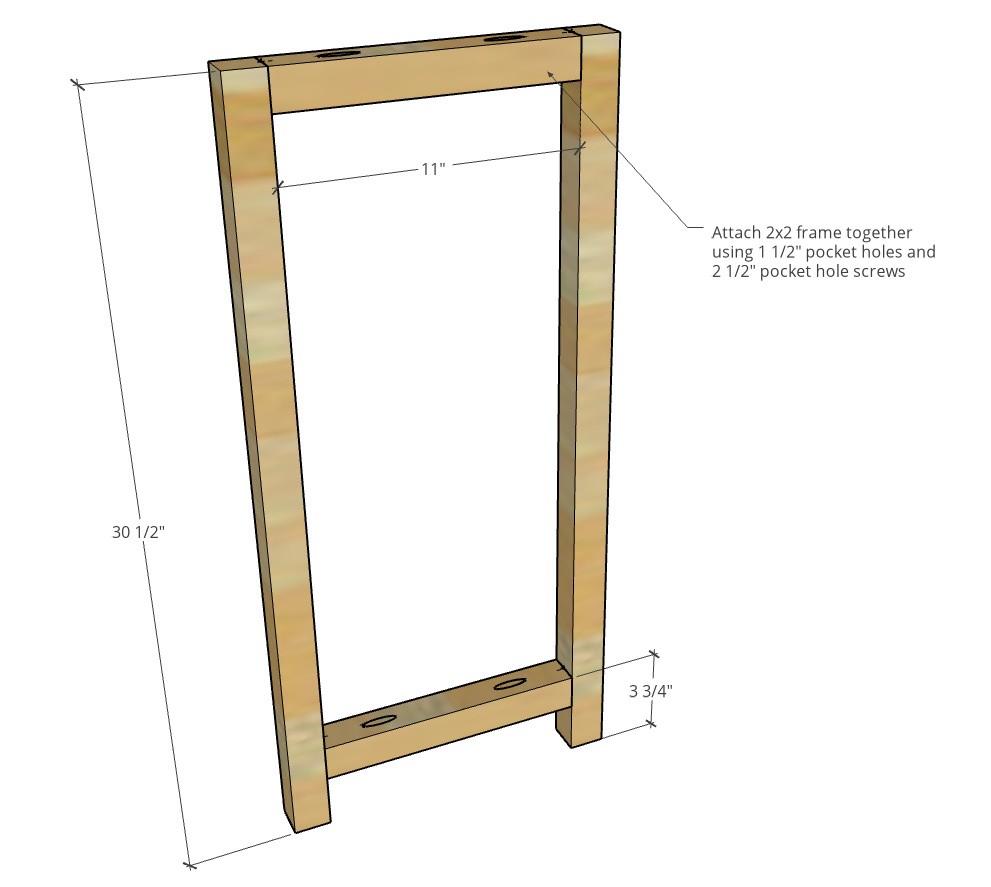
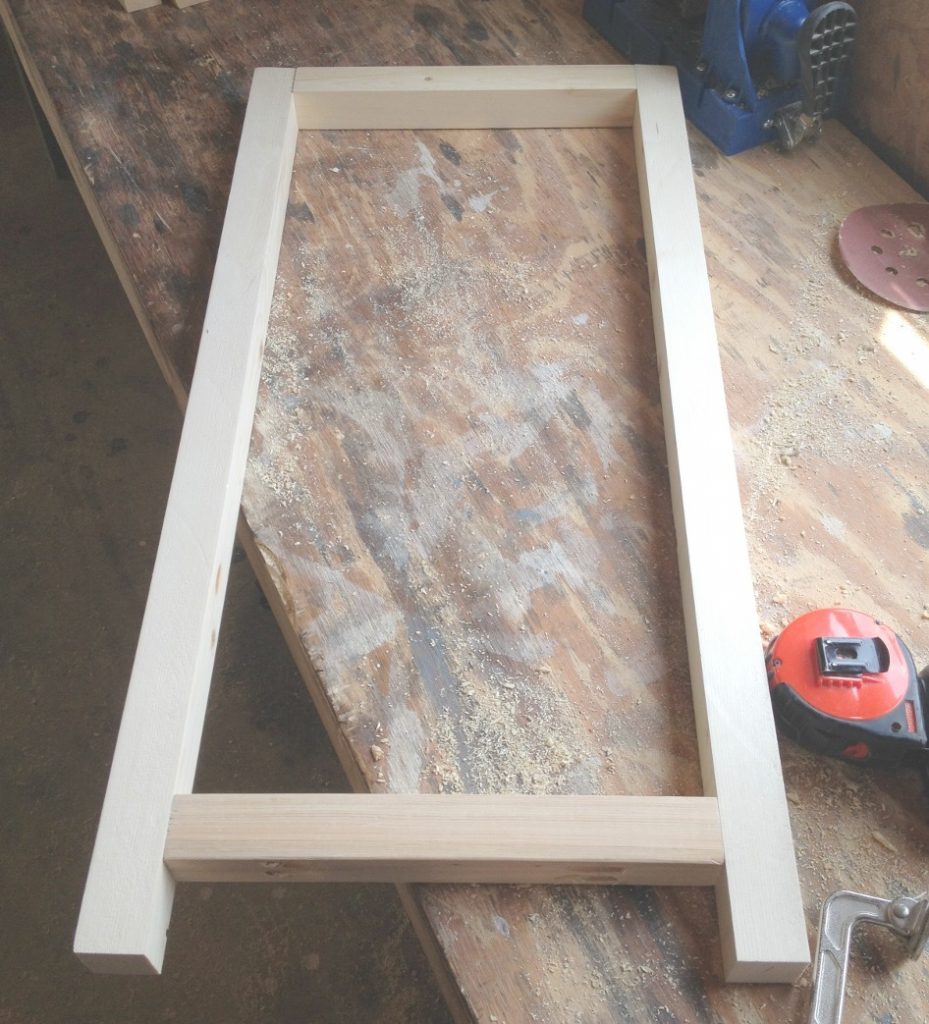
Step 1: Build Sides of Aquarium Cabinet
To keep this cabinet as sturdy as possible, I build the majority of the frame from 2x4s.
.
I used 1 ½″ pocket holes and 2 ½″ pocket hole screws to assemble the 2×4 frame and installed a ¾″ plywood panel in the middle using ¾″ pocket holes and 1 ¼″ pocket hole screws.
.
RELATED: Learn how to use pocket holes in your woodworking project in this post!
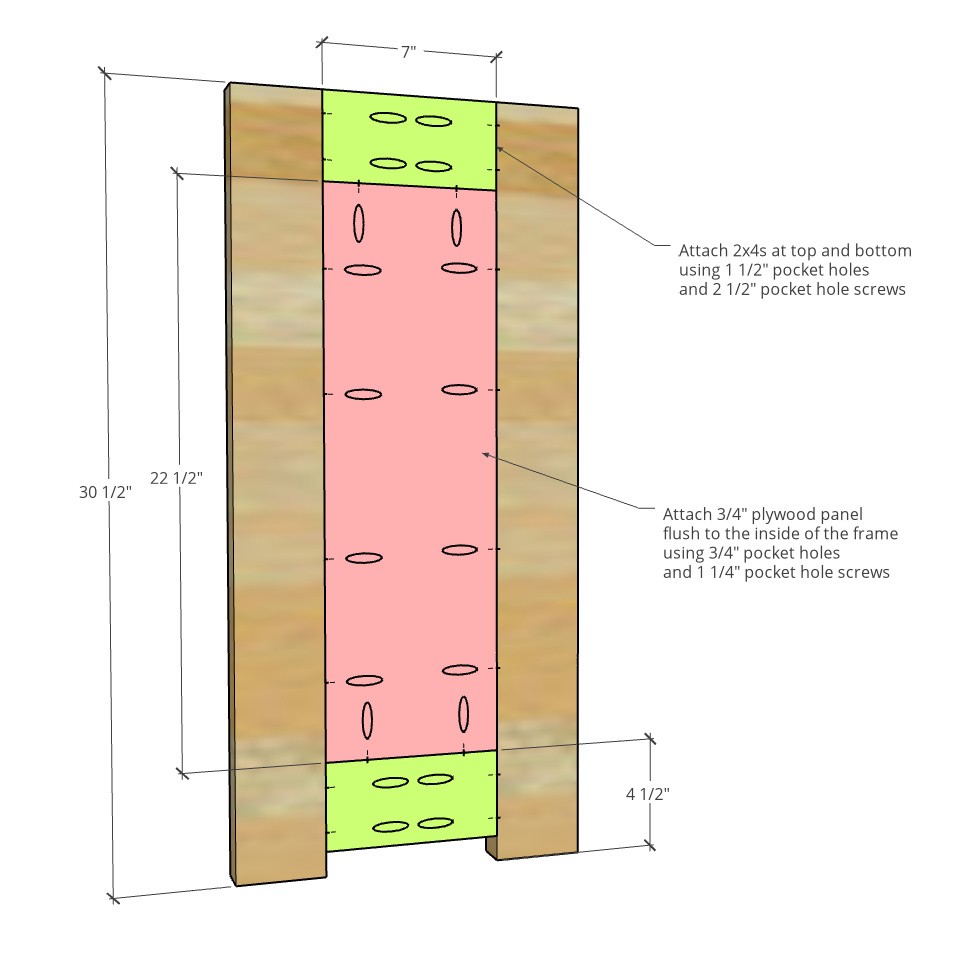
Notice that the middle panel is installed FLUSH to the inside of the frame and that the bottom 2×4 is installed so that the top is 4 ½″ off the ground.
.
I made two identical side panels like this.
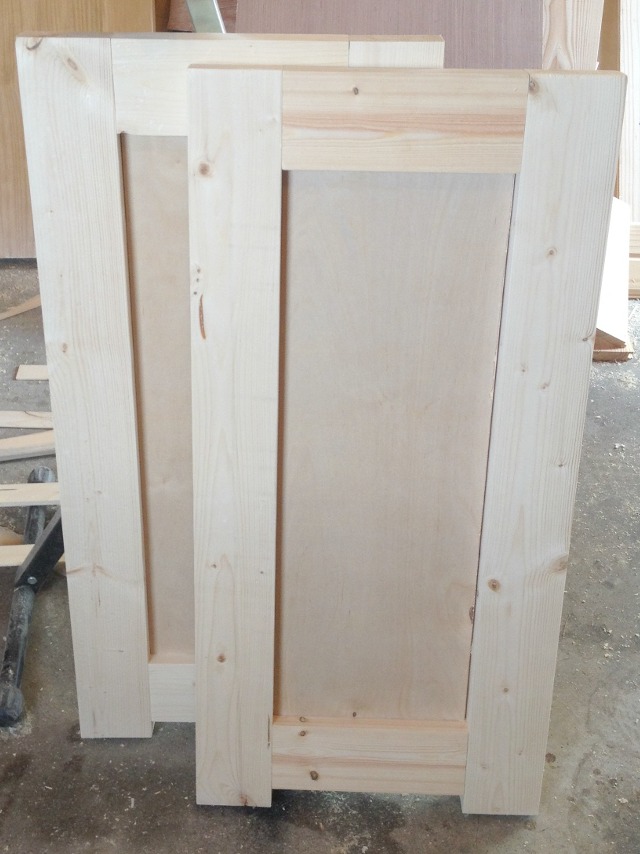
Step 2: Build Middle Support of Aquarium Stand
To help hold the weight in the middle, I built another frame piece from 2x2s.
I assembled this using 1 ½″ pocket holes and 2 ½″ pocket hole screws as well.
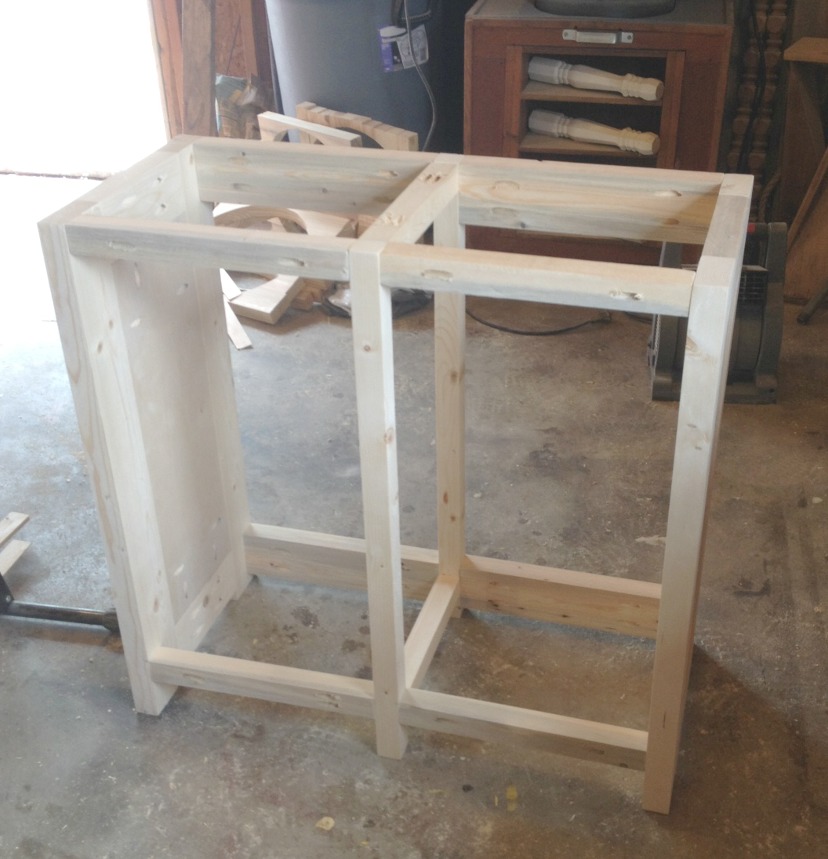
Step 3: Assemble the Aquarium Cabinet
Now it was time to assemble the middle panel and the side panels together to make the cabinet frame complete.
.
I used 2x4s at the top, bottom, front and back to attach it all together. I used 1 ½″ pocket holes and 2 ½″ pocket hole screws to assemble.
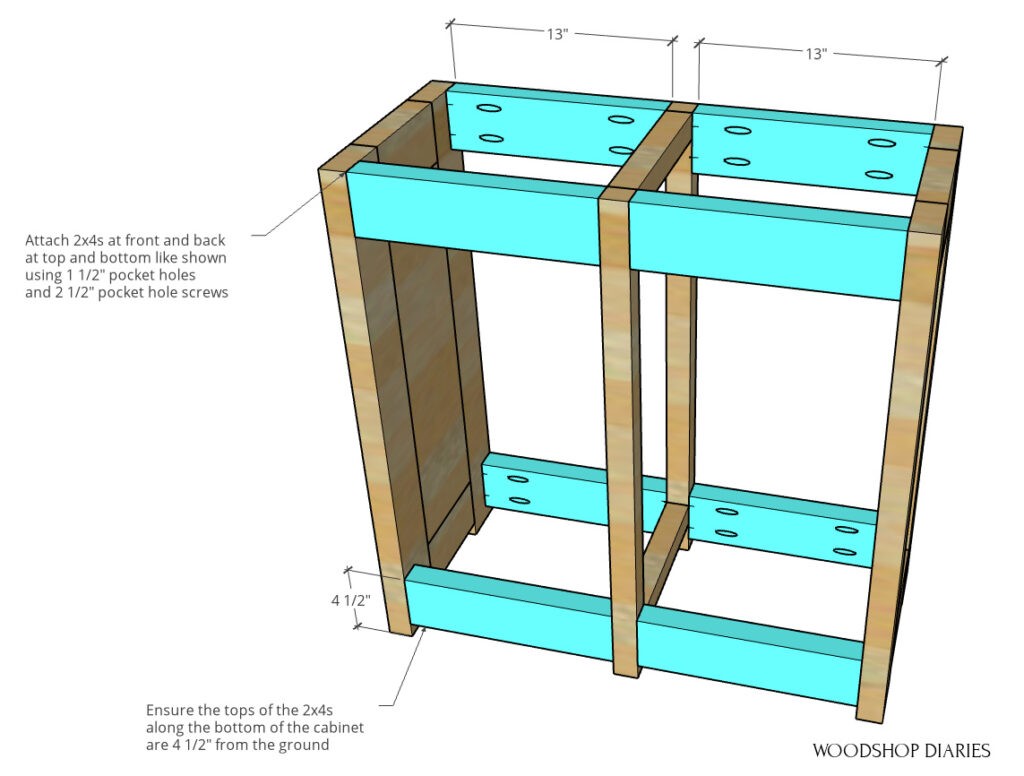
Notice that all the 2x4s along the bottom are attached so that the tops are 4 ½″ from the ground.
.
Side note: You can see below that when I built this, I used 2x2s along the back edge and 2x4s at the front. You could do that, but in hindsight, I think 2x4s are better for this project.
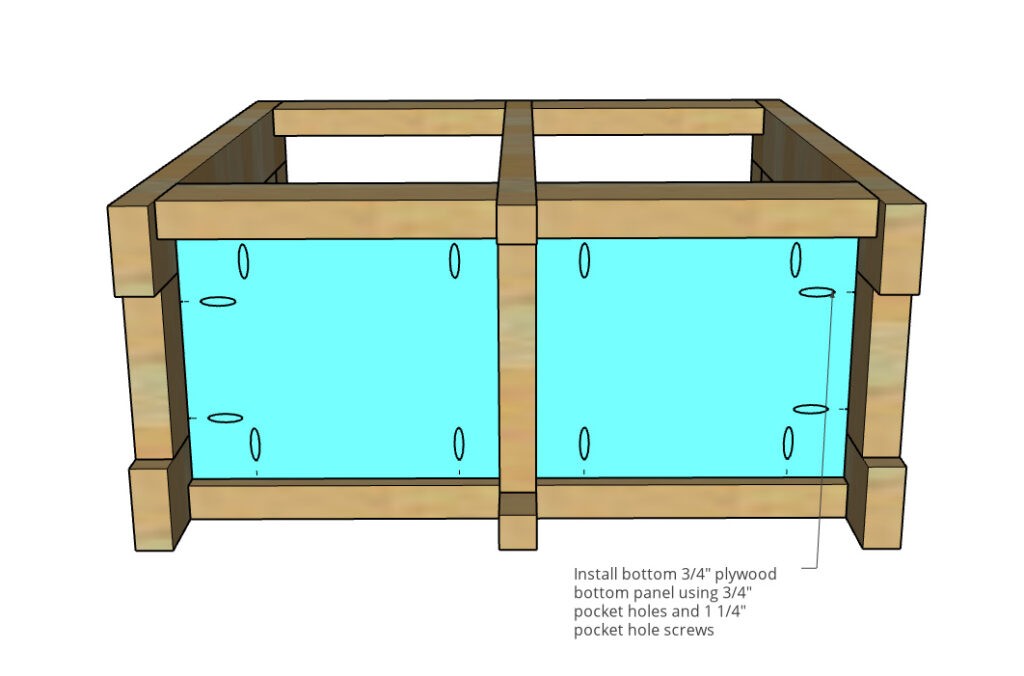
Step 4: Add the Bottom of Cabinet Stand
I cut a piece of ¾″ plywood to fit in the bottom of the cabinet and installed using ¾″ pocket holes and 1 ¼″ pocket hole screws so that the inside of the cabinet bottom was flush across the top.
You can see the panel rests on the 2×2 on the bottom of the middle frame.
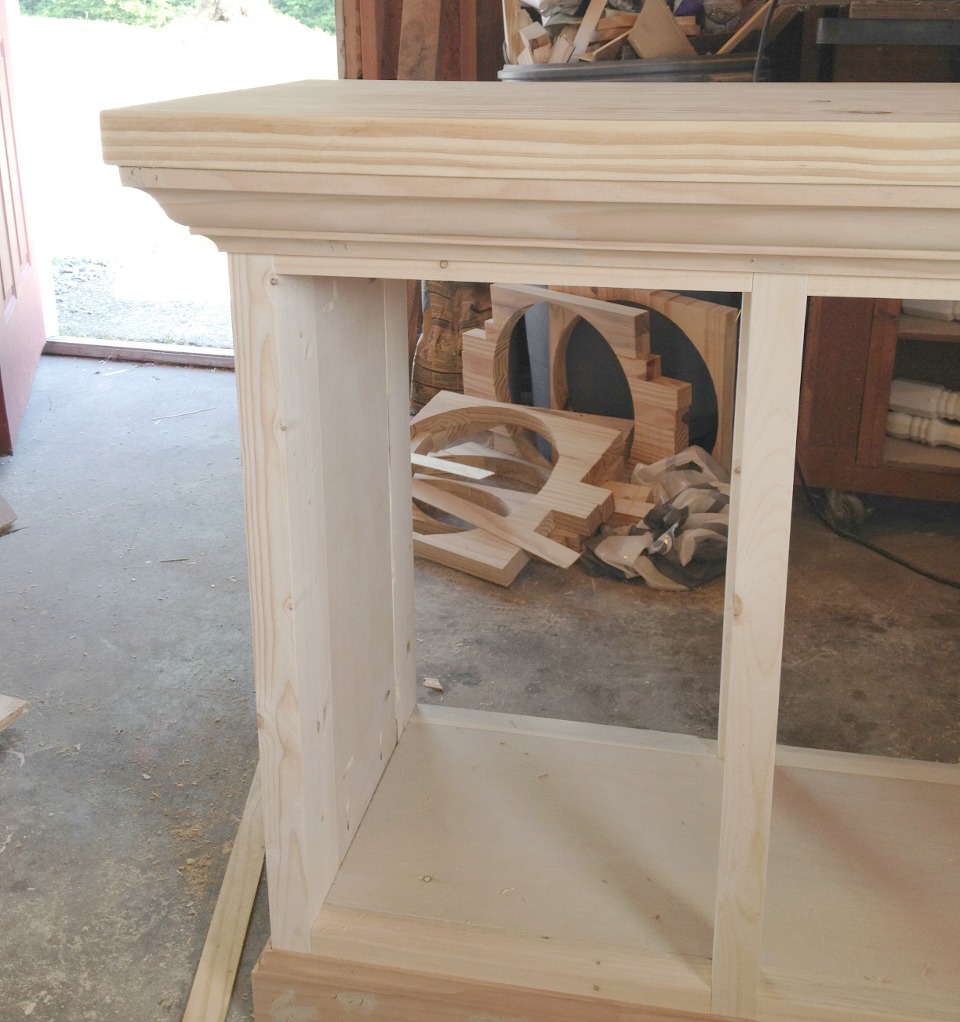
Step 5: Attach the Top
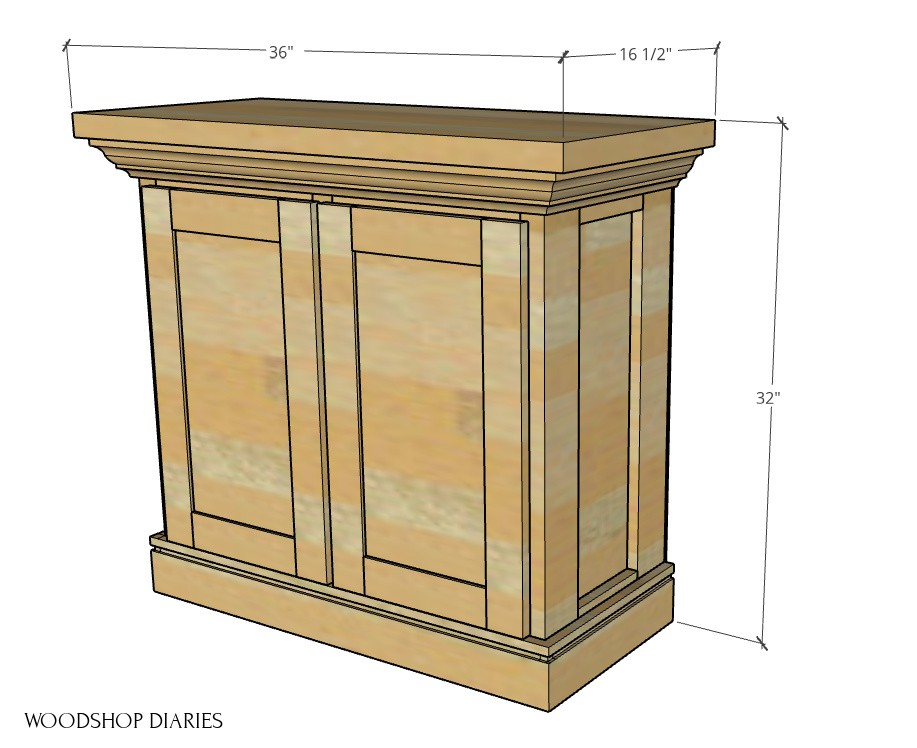
I used a 2×10 to build a top for the cabinet. I made it 36” long and 16 ½” wide. You can use a circular saw or table saw to trim it down to size. See my post here on how I build table/cabinet tops.
Once the top was trimmed down to its final size, I attached it to the cabinet.

You can attach this top several ways–you can either “toenail” (drive the screw at an angle) through the top 2x4s and into the top to secure it, drill pocket holes along the top of the frame and secure it with 2 ½″ pocket hole screws, OR use figure 8 tabs.
.
I discuss figure 8 tabs in this post. That is the better method to allow for wood movement, but pocket holes or toenailing will secure it as well.
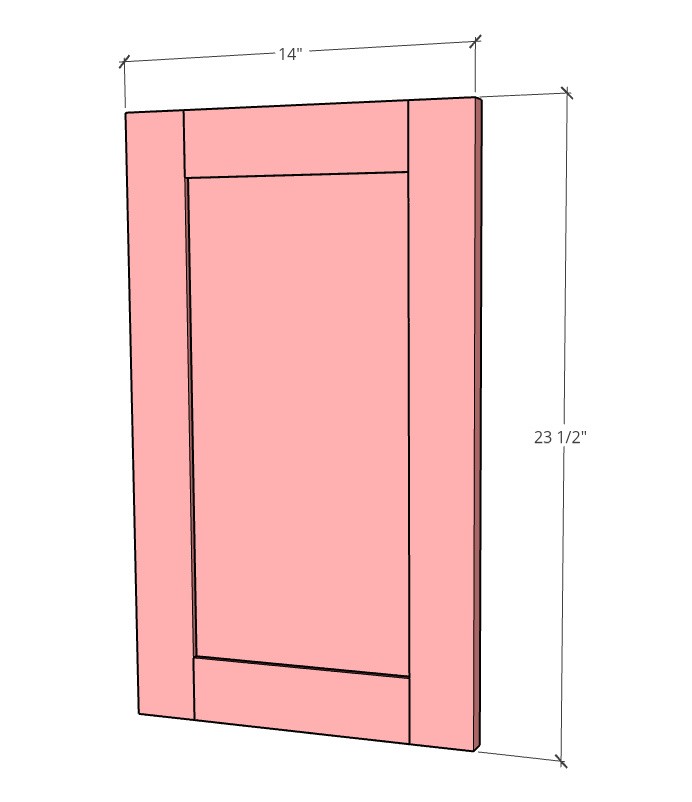
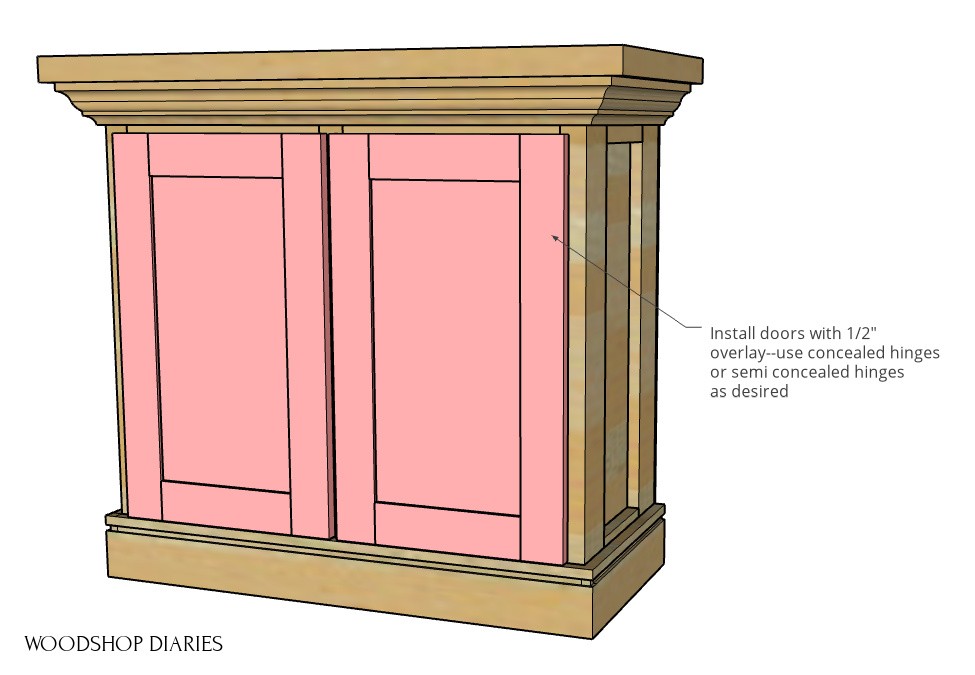
Step 6: Add Doors to Aquarium Cabinet Stand
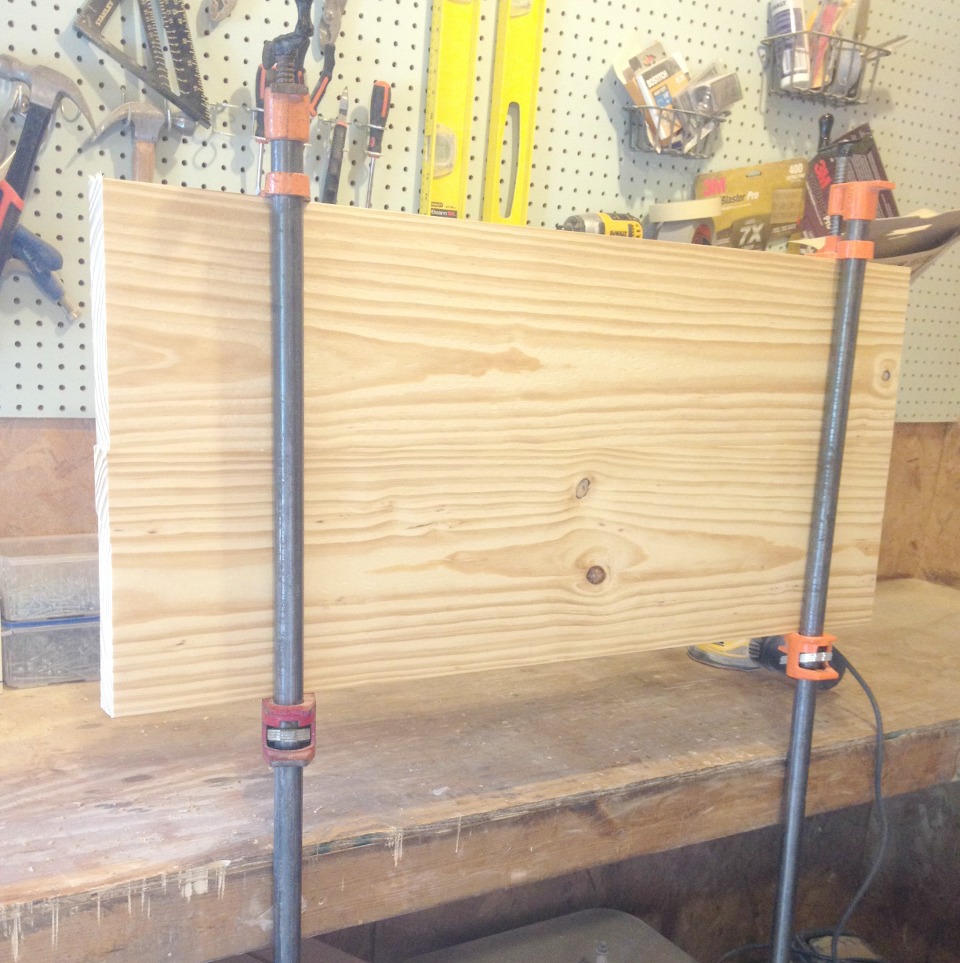
You can see my post here on how I build these simple Shaker style doors.
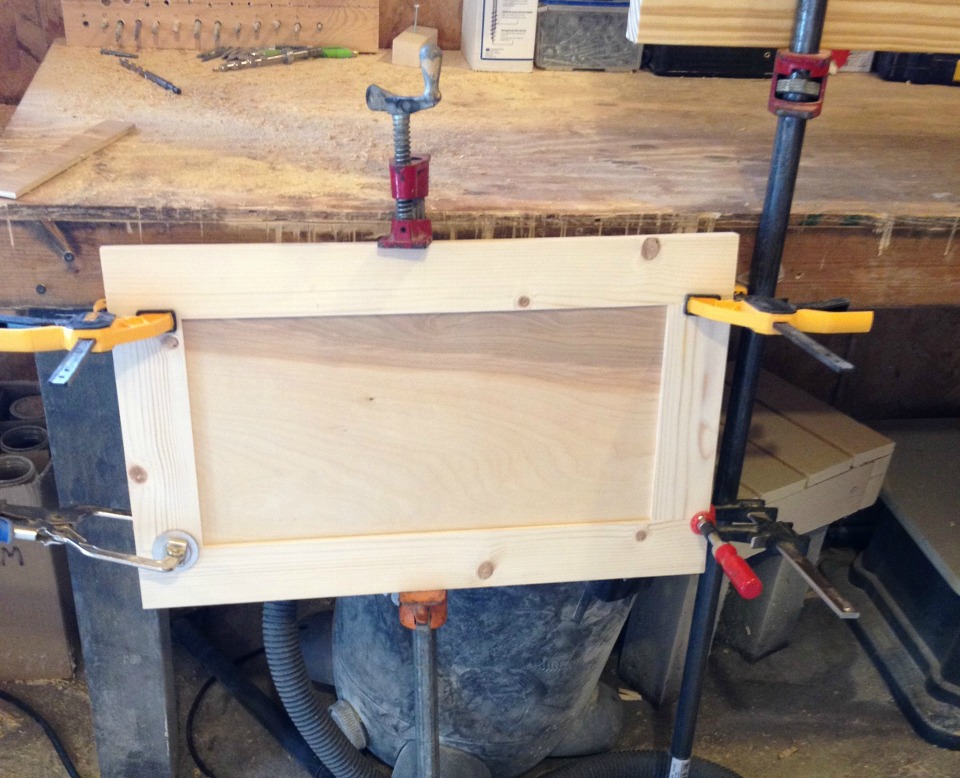
Or if you want to get a little fancier, I’ve got a tutorial to make another style cabinet door here. I made the doors 14” wide and 23 ½” tall.
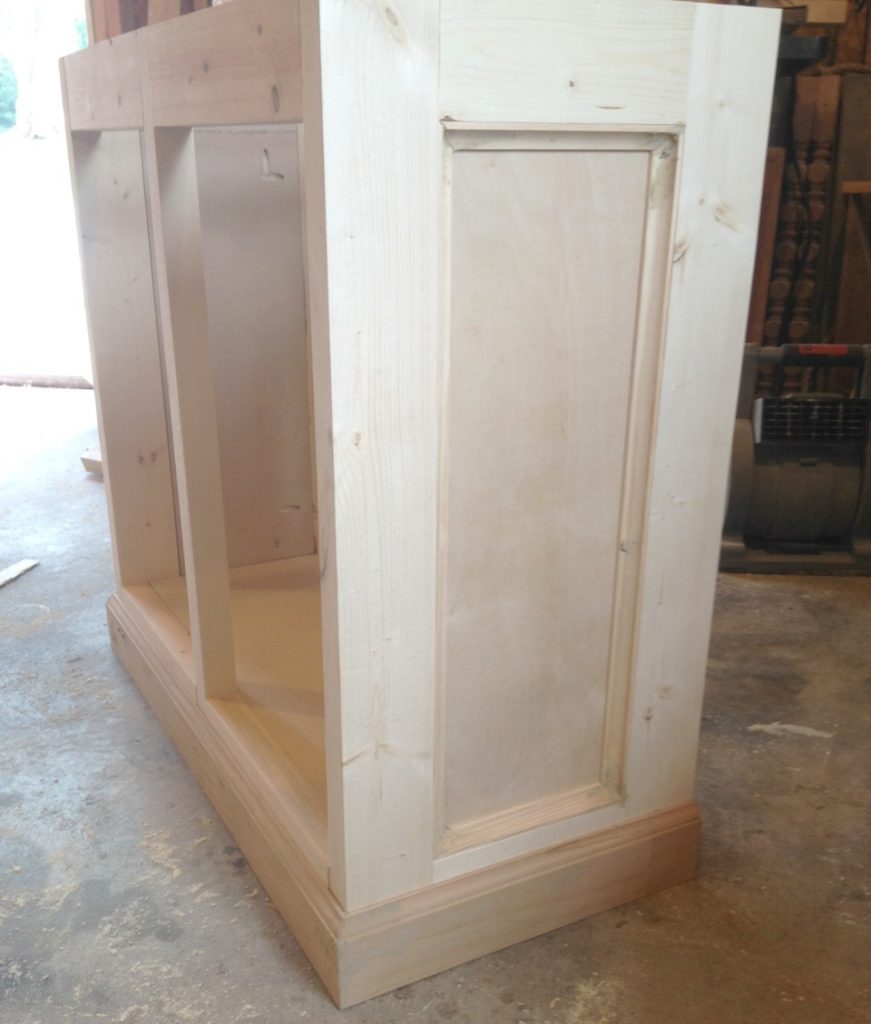
Step 7: Add Trim and Moldings
Finally, I added crown molding around the top, base around the bottom, and cove to the insides of the side panels. (Note: I added the cove and base before the top…it doesn’t matter whether you do it before or after except for the crown molding.)
Step 8: Finish Aquarium Cabinet
I puttied and sanded where needed then, I stained the cabinet in Minwax Golden Oak and polyed with Minwax Polycrylic.
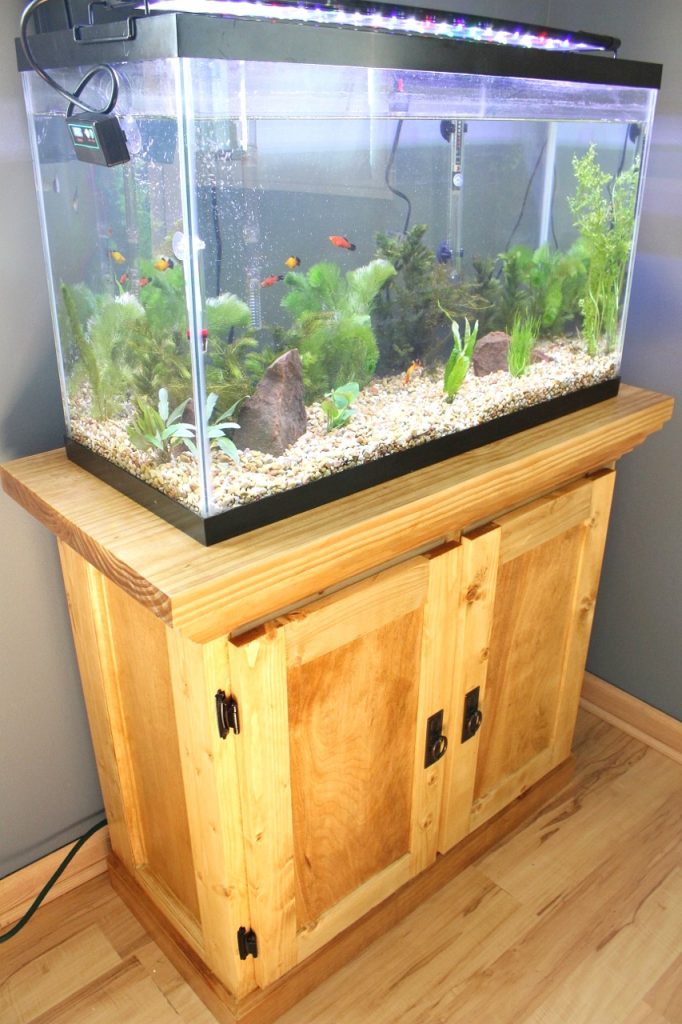
I attached the doors with semi concealed ½″ overlay hinges and added these pulls from D Lawless Hardware to the doors.
Then, Danny took it from there and filled his aquarium tank with plants and fish…and water of course.
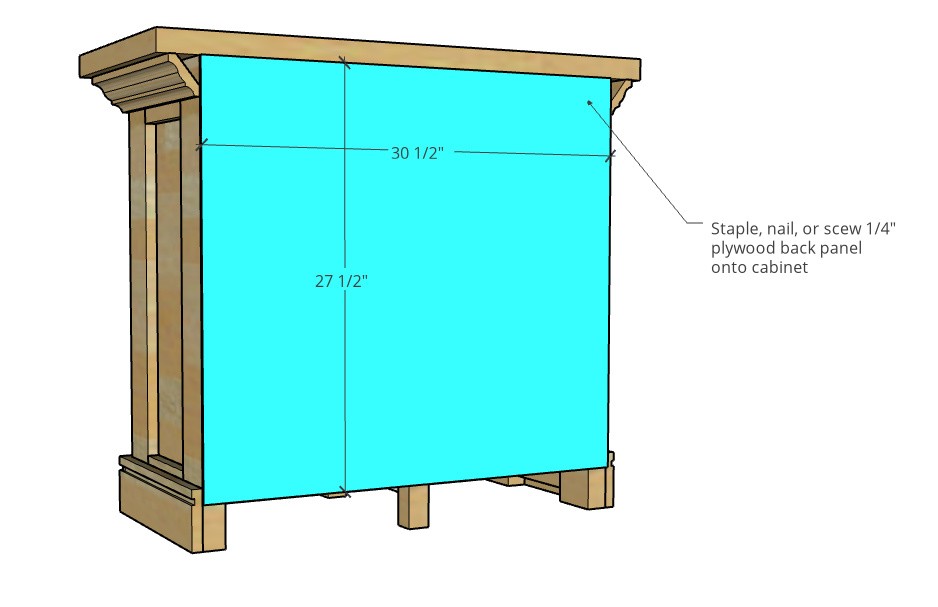
He requested that I didn’t add a back, because he wanted to hide the extension cord and power strip in the cabinet, but if you wanted a back, just staple or nail some ¼” plywood on the back side.
I catch Danny in here all the time just staring. I know he’s not staring at the awesome aquarium cabinet stand I built him–he’s just appreciating the fish.
.
But I know deep down he appreciates the cabinet I made him 🙂 Well, I THINK so anyway haha.
We ended up moving into our garage apartment before Danny completely finished his man cave, but whenever we build our future home, he will redesign himself a new man cave so stay tuned for that.
.
In the mean time, check out the DIY couch I built him for his man cave here.
.
But for now, I’ve got to get back to my to do list 🙂
.
If you enjoyed this project, don’t forget to pin it for later!
Until next time, happy building!
ben says
Looks prettyyy good, might use parts. But if your door tutorial says you need a table saw to make them then it would make sense to say you need a table saw to do this in my opinion.
Shara, Woodshop Diaries says
Thanks! Yes, a table saw would be necessary to do the doors the way I do them, but there are other ways to make doors as well (using routers, pocket holes, etc.) that don’t require a table saw, so you don’t HAVE to have one to complete the project. A table saw is a very handy tool to invest in, but a quick google search will show you many different ways to make doors if you don’t have one and don’t want to buy one 🙂
ben says
Thanks. A table saw is definitely what I’ve wanted for ages but it’s just a space issue since I live in a cramped city. I have a mitre and circular saw though and a few non powered ones so I have to make due. A router is probably what I’d probably get next until i have more space!
Rhonda Rogers says
Love it!
Shara, Woodshop Diaries says
Thank you 🙂