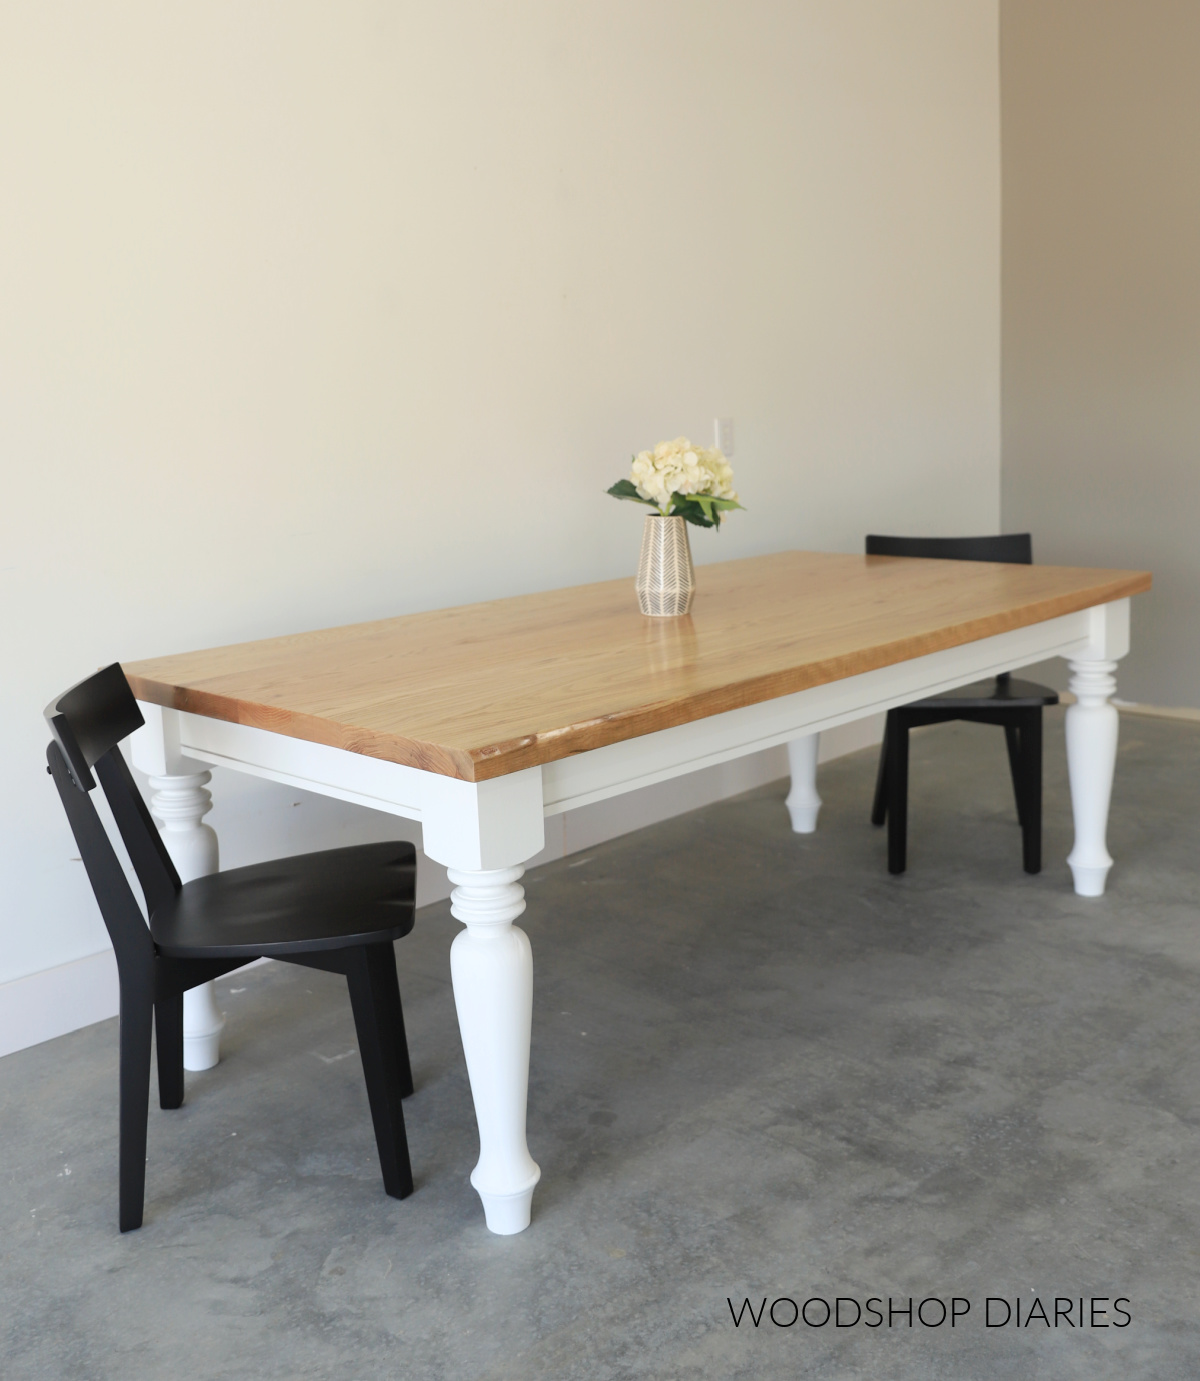
In this post, I’m sharing how to build a basic DIY dining table that you can customize to any size you need!
Dining tables can come in so many different styles, shapes and sizes. And while I love a unique design, it’s hard to beat a traditional, classic table style.
These are some of the easiest tables to build yourself, and also make a timeless piece that will never go out of style.
So if you’re ready to build a simple, but stunning focal point for your kitchen or dining room, let’s dive in to the how to!
I’ll show you how to build it below plus some tips on customizing to any size you need.
*This post contains affiliate links. See website policies.
This post was originally published September 13, 2017 but this project was rebuilt and republished October 16, 2024.
What to consider before building
A dining table was actually my very first DIY furniture project, so it’s definitely doable as a beginner. The base comes together pretty easily.
Making the table top is the hardest part. It can be a bit challenging to get everything to line up and be flat. So be patient and prepared for plenty of sanding…
Choosing Your Table Legs
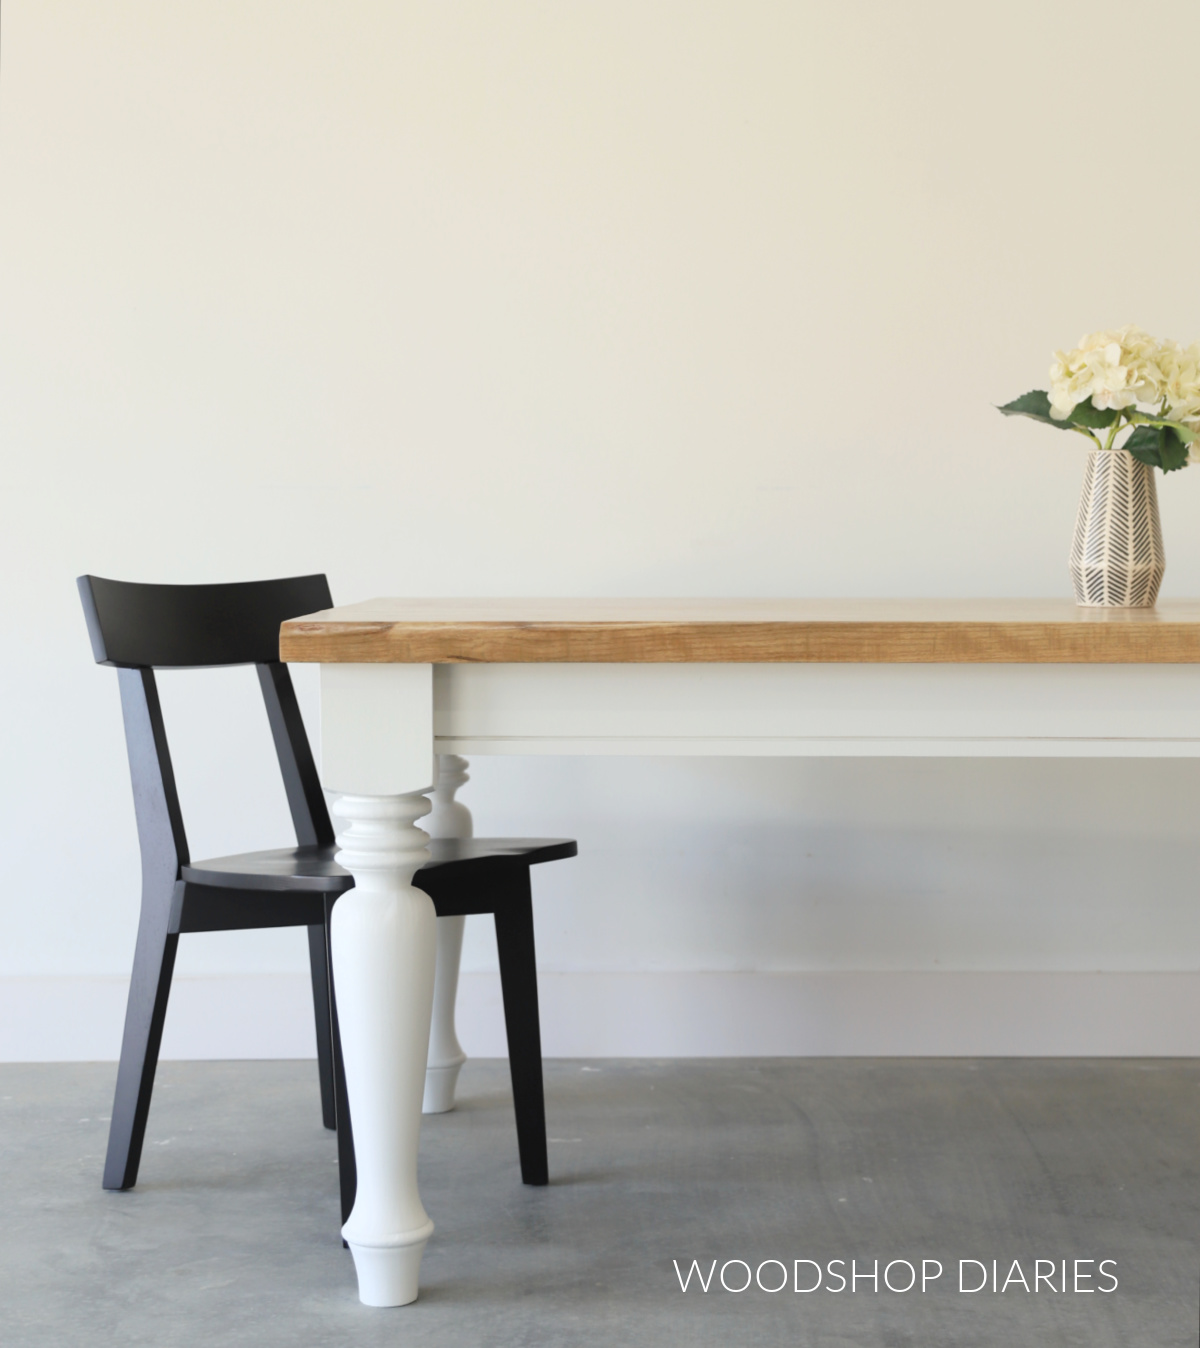
Table legs can be purchased in thousands of shapes, styles, and sizes. The table legs used here were these Timberwolf Massive Monte Cristo Dining Table Legs.

They are 5″ square at the top and 29″ tall, so they’re pretty beefy. If you want to use a thinner leg, or even just a basic 4×4 post, that’s totally fine, too.
Often, you can find these turned table legs available in different species. Unless you’re staining, I recommend choosing rubberwood or pine legs as these are usually the cheapest options and they paint well.
If you plan to stain your project, choose legs that are the same wood type as what you’re using for the rest of the project so they’ll match.
Overall Dining Table Dimensions
There is no one standard size for a dining table. Typically, widths range from 36″-42″ and lengths can vary greatly from as little as 4′ to as long as 12′ or more.
The one dimension that stays pretty much the same is the height. Standard dining table height is 30-31″ tall. This fits most typical dining chairs.
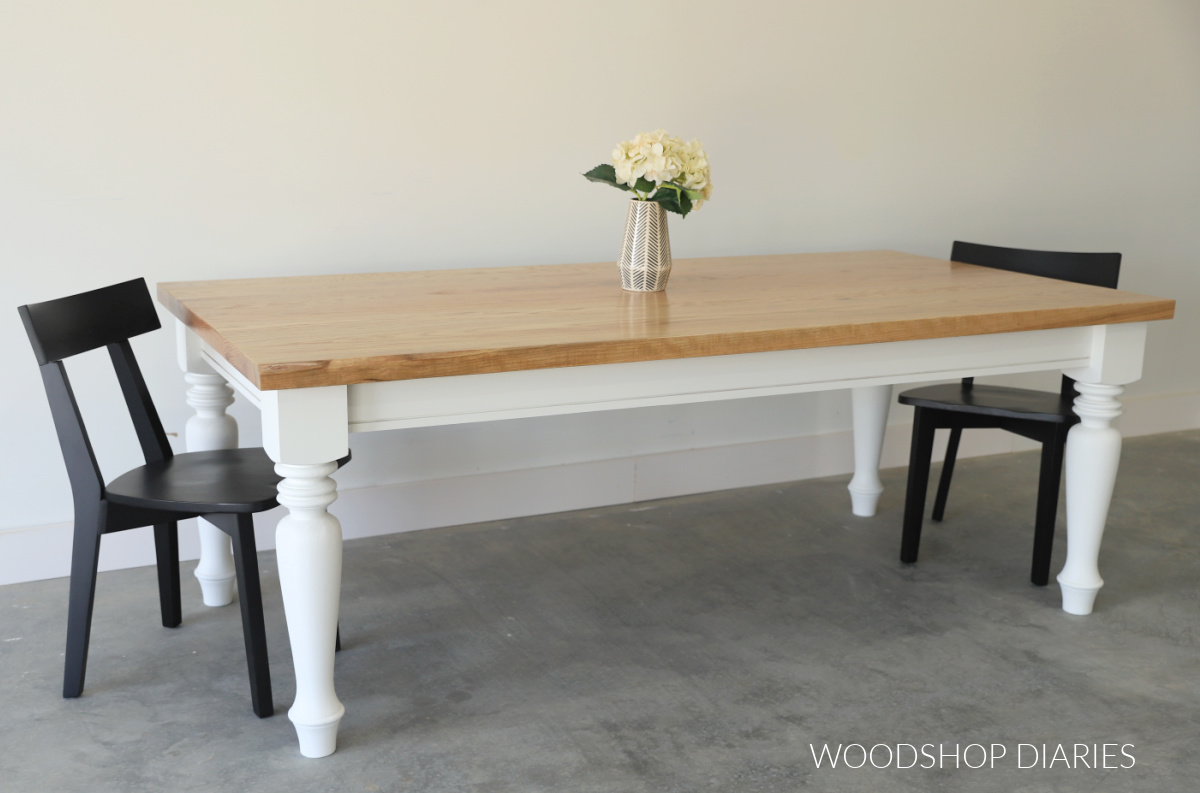
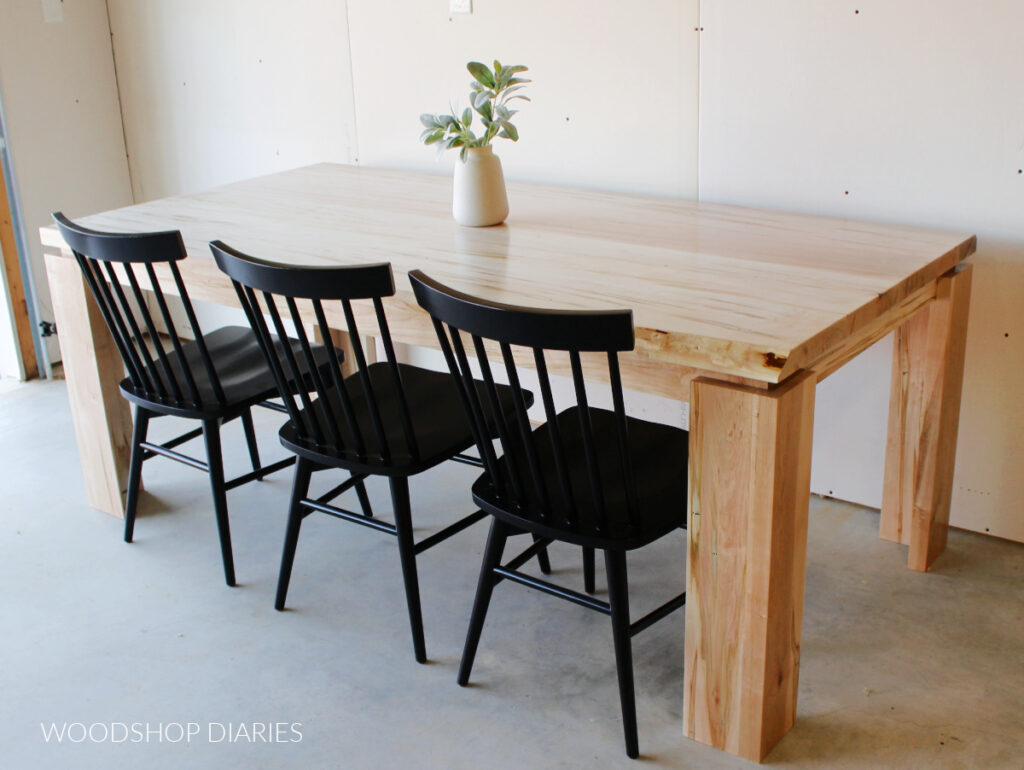
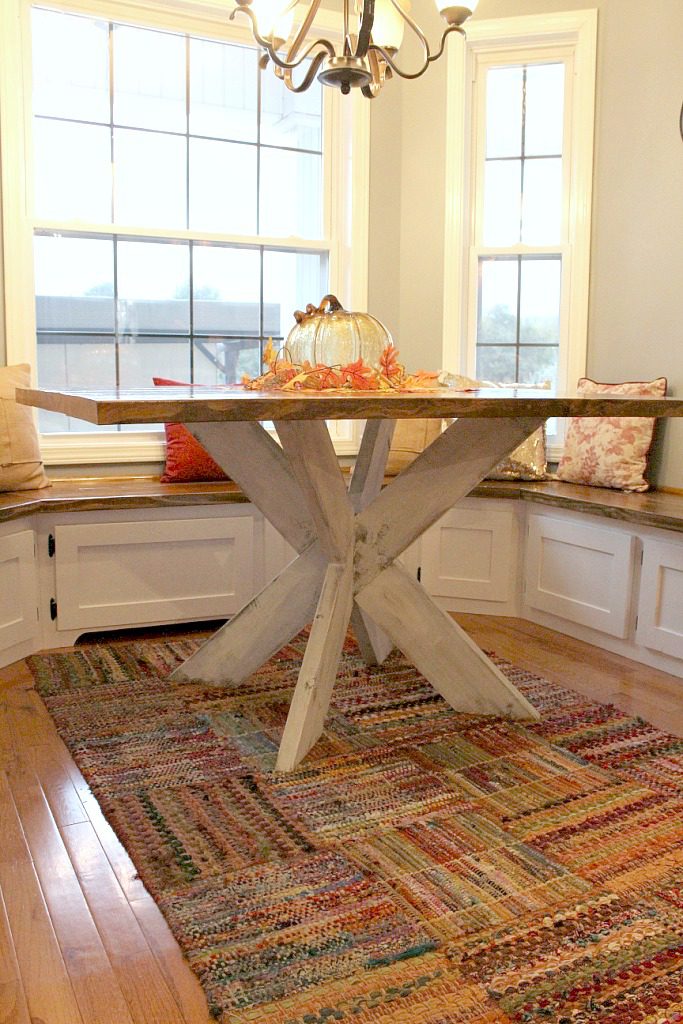
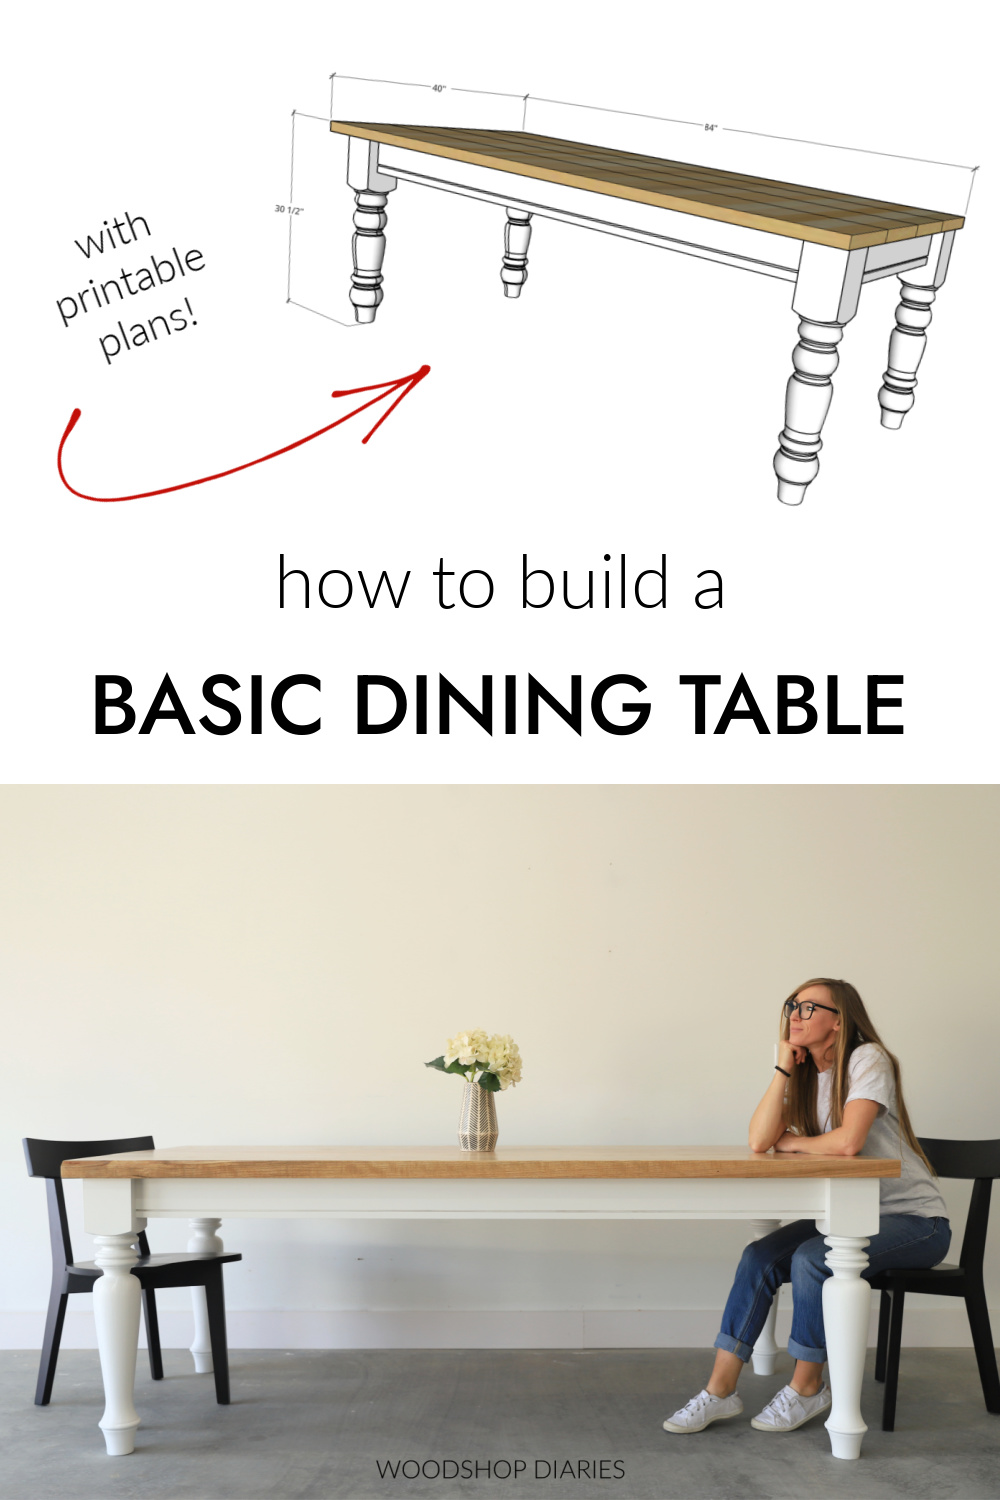
This particular table is 30 ½″ tall x 40″ wide x 84″ long.
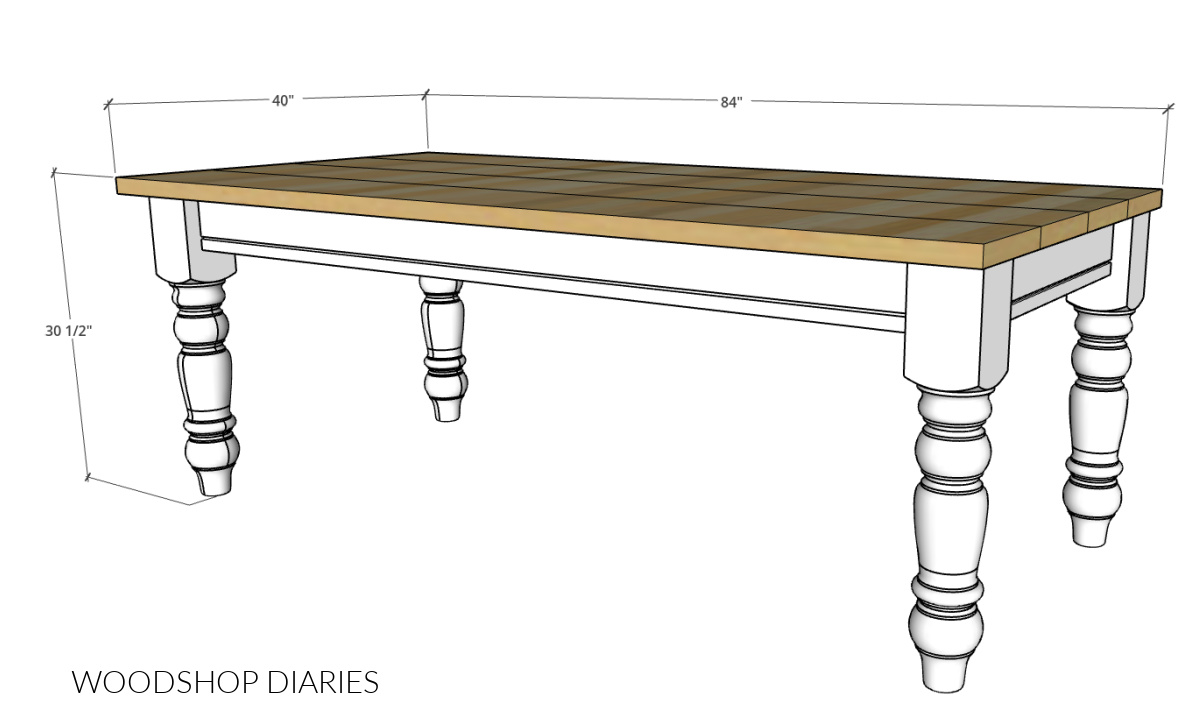
To customize the size, simply glue up a top to whatever size you want your table (see step 1), then build the base to fit (see step 2).
Helpful resources for this project
You might find these resources helpful throughout the build:
Enjoy DIY projects and woodworking plans? Sign up for priority access for the latest posts on Woodshop Diaries!
How to build a classic DIY dining table
If you prefer to watch, check out the full build video on my YouTube channel packed full of behind the scenes footage, tips, and great visuals to help with the build:

Love watching how-to videos? Subscribe to my YouTube channel for plenty more where that came from!
Prefer to print? Grab the printable dining table building plans available here:
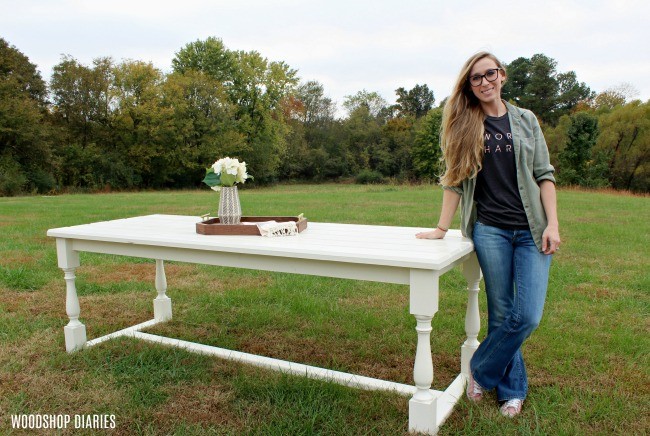
A bit of backstory about this project: You can see the full story of this table in the video I’ve linked above. I originally built it for a friend back in 2017. But, after a recent house fire, it had some damage and needed to be rebuilt.
I reused the parts that I could, but replaced the parts that were damaged. So in the photos below, you’ll notice some of the pieces were already painted when I assembled–those are recycled from the previous table.
Tools & Materials
Tools:
- Miter Saw
- Circular Saw
- Jig Saw
- Drill/Driver
- Table Saw
- Pocket Hole Jig
- Long Clamps (for table top)
- Sander(s)
Materials:
- (4) 5″ Square x 29″ Table Legs
- (4) 2x12x8′ boards (or equivalent amount of wood for table top)*
- (2) 2x6x10′ boards
- (1) 2x4x10′ boards
- 2 ½″ pocket hole screws
- 2 ½” wood screws
- Washers
- Wood Glue
*This table can be built using any wood type you’d like. I used construction lumber (pine/spruce) for the table base and red oak for the top.
But, hardwood (like red oak), can be pricey. I’ve built this exact same table using construction pine 2x12s for the top and that is a great budget friendly option. See video for more information about the top.
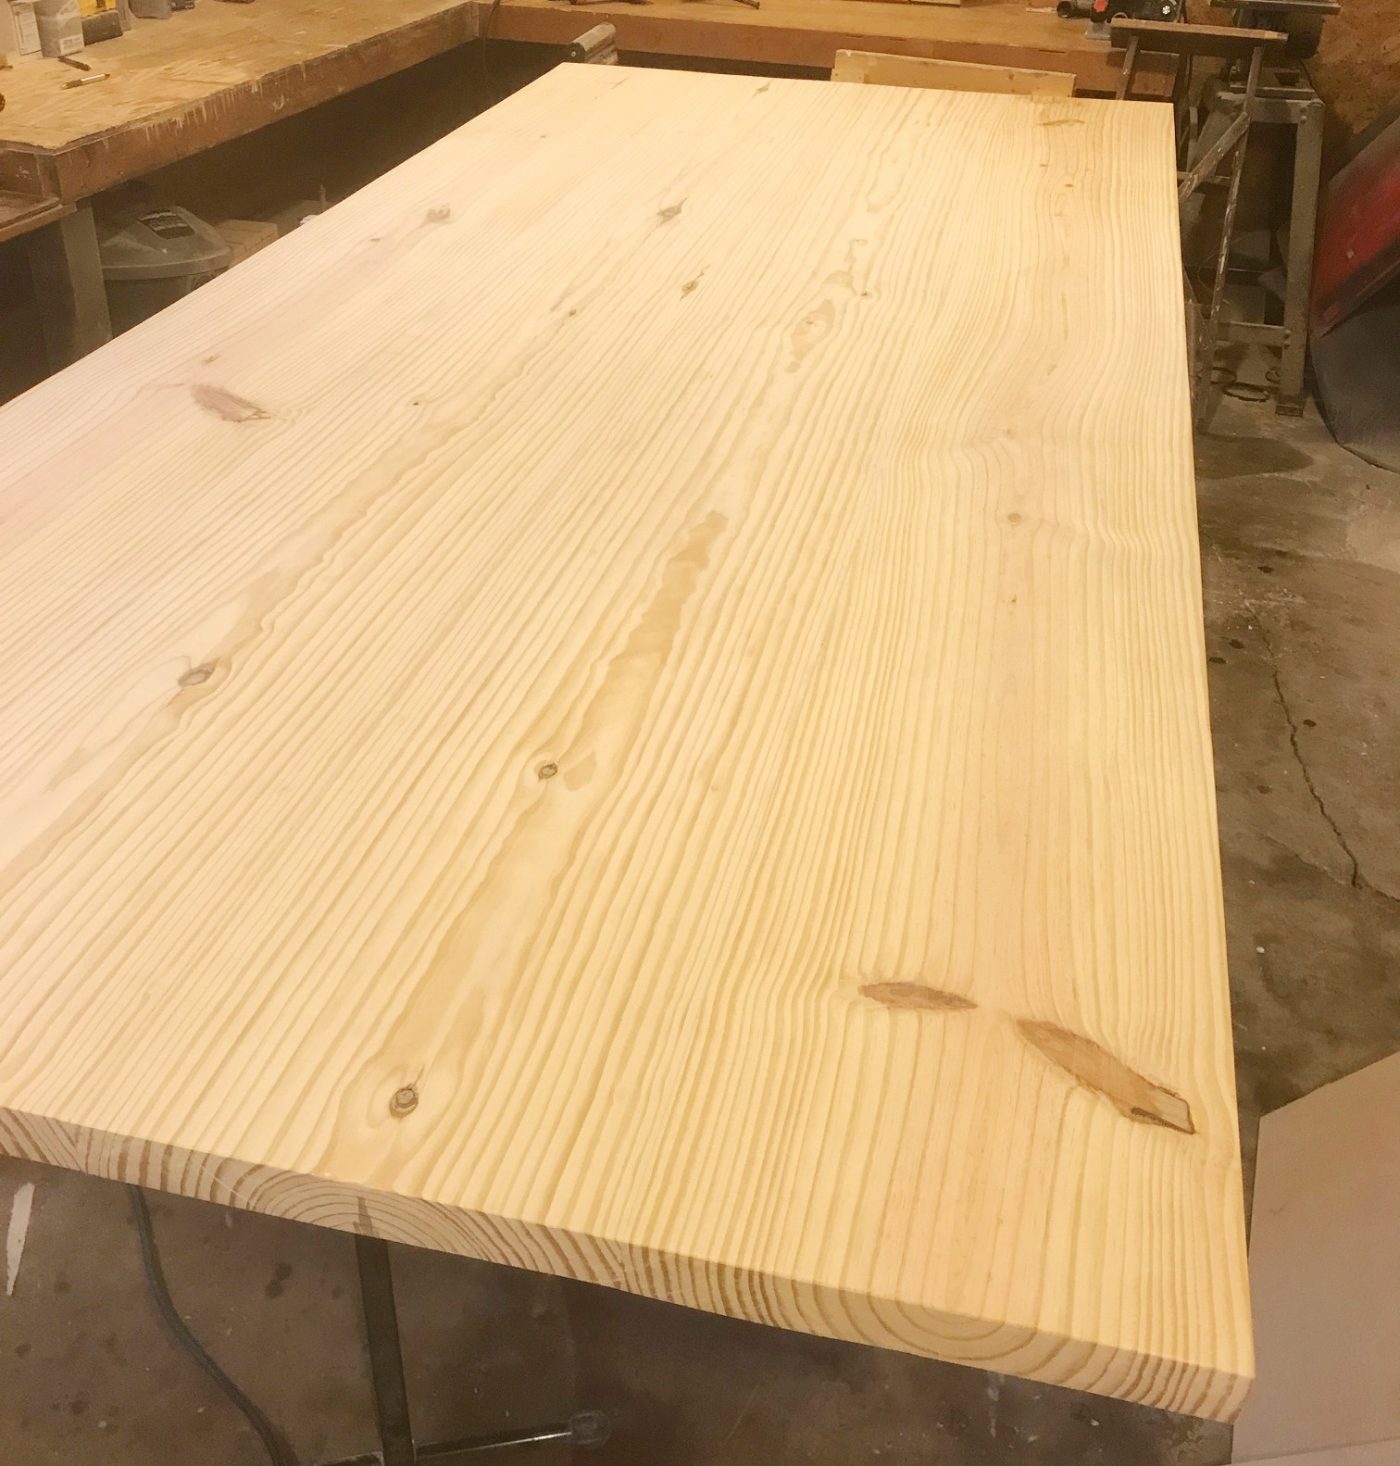
Step 1: Build the Table Top
You can build the top from any 1 ½″ thick material–so you can mix and match 2x4s, 2x6s, 2x8s, etc. The wider the boards, the less pieces you’ll need to glue up to get your total width.
That’s why I recommend using 2x12s–you just have to glue four of them together to make a large top like this:
But, if you’re using hardwood, the boards often come in various widths, so you may just have to mix and match pieces until it’s the size you want.
Once you’ve gathered the boards you want to build the top with, square the edges on the table saw or jointer.
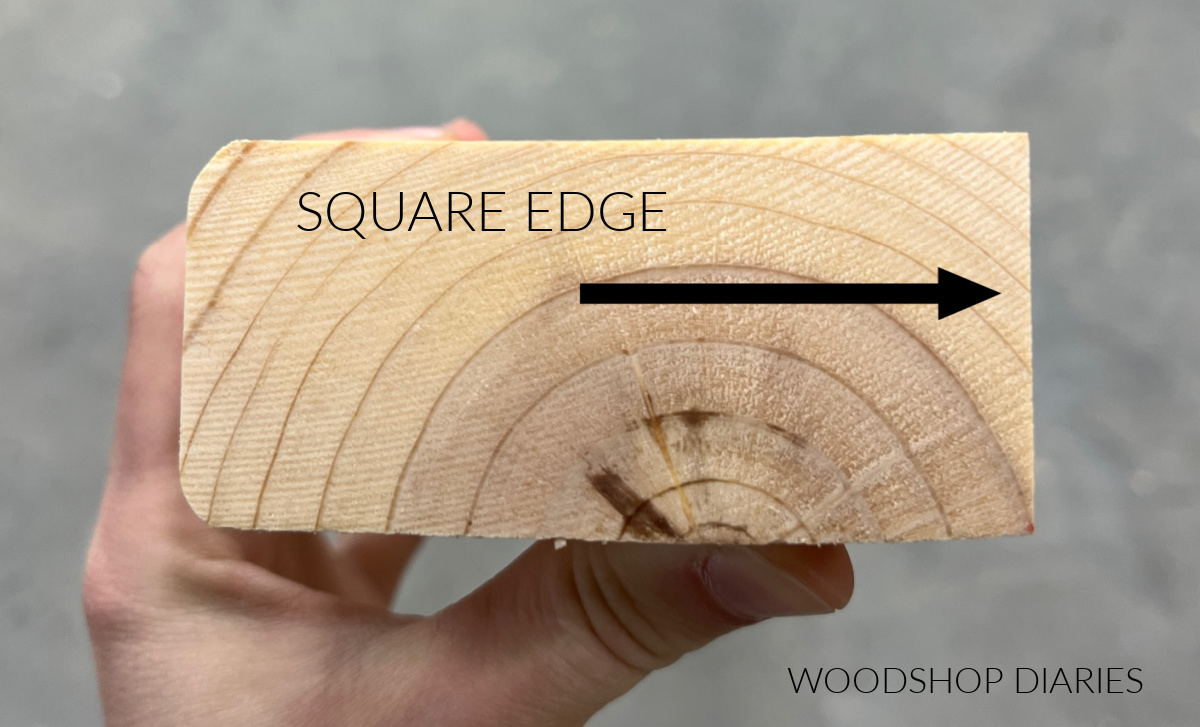
If you’re using construction lumber, the corners are usually rounded. Trimming these off gives you a crisp, clean edge so that when you glue them together, you don’t have any weird gaps for crumbs to get stuck into.
Then apply wood glue liberally to the board edges and clamp them together. I prefer to glue up my table tops one board at a time to make things easier to keep flat.
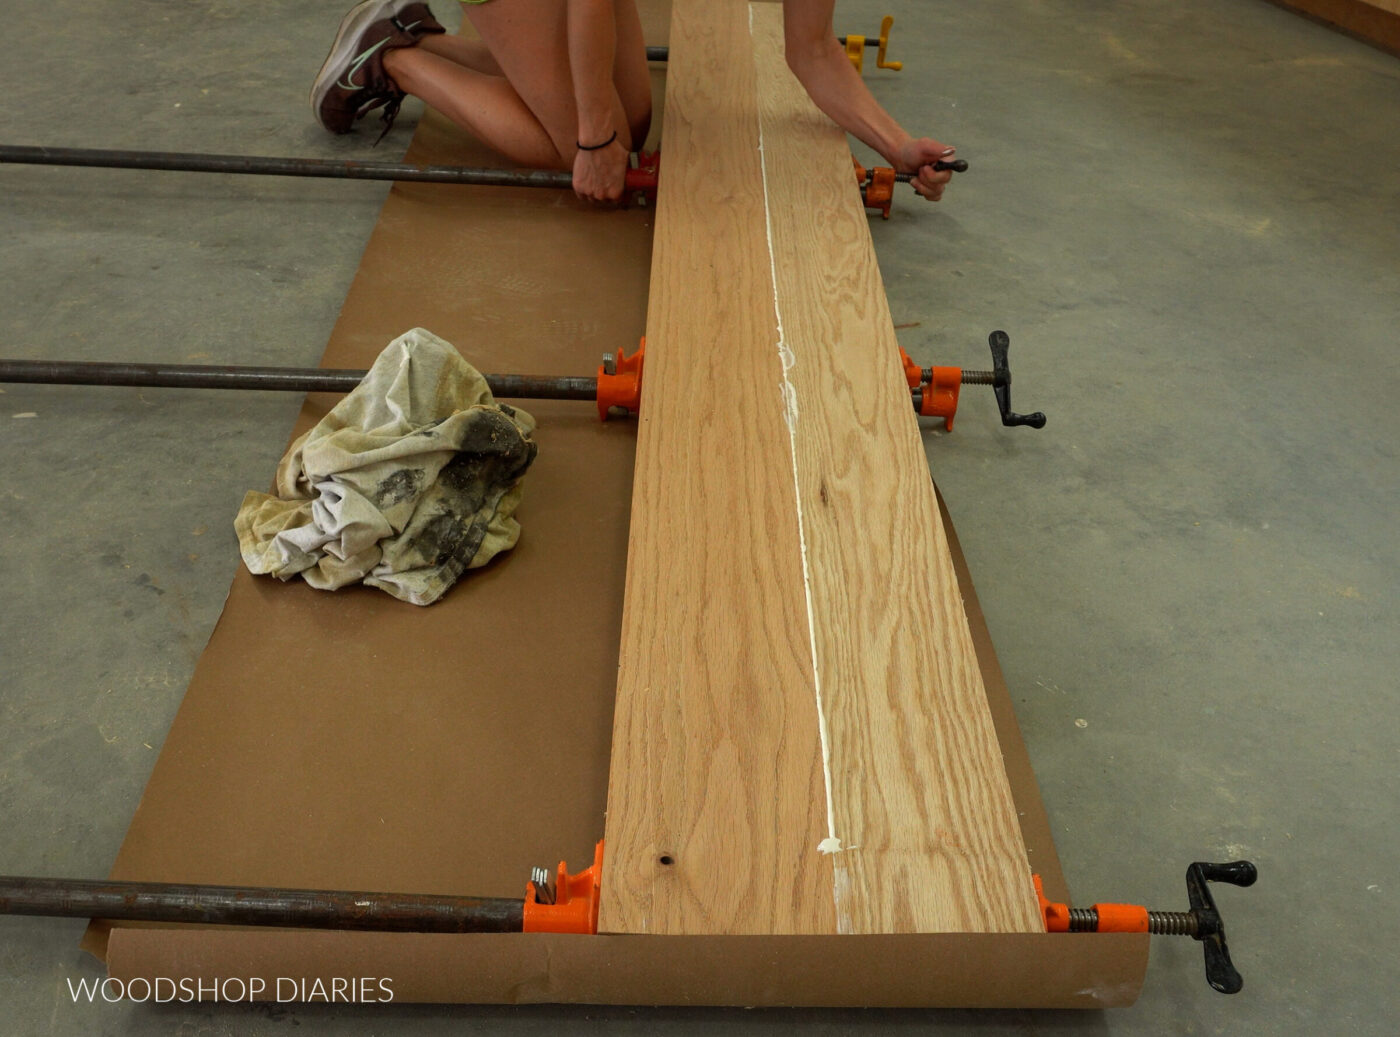
I allow a couple hours for the glue to dry before adding another board. Then after the final board is glued on, I leave it in the clamps at least overnight.
RELATED: How to glue up a table top
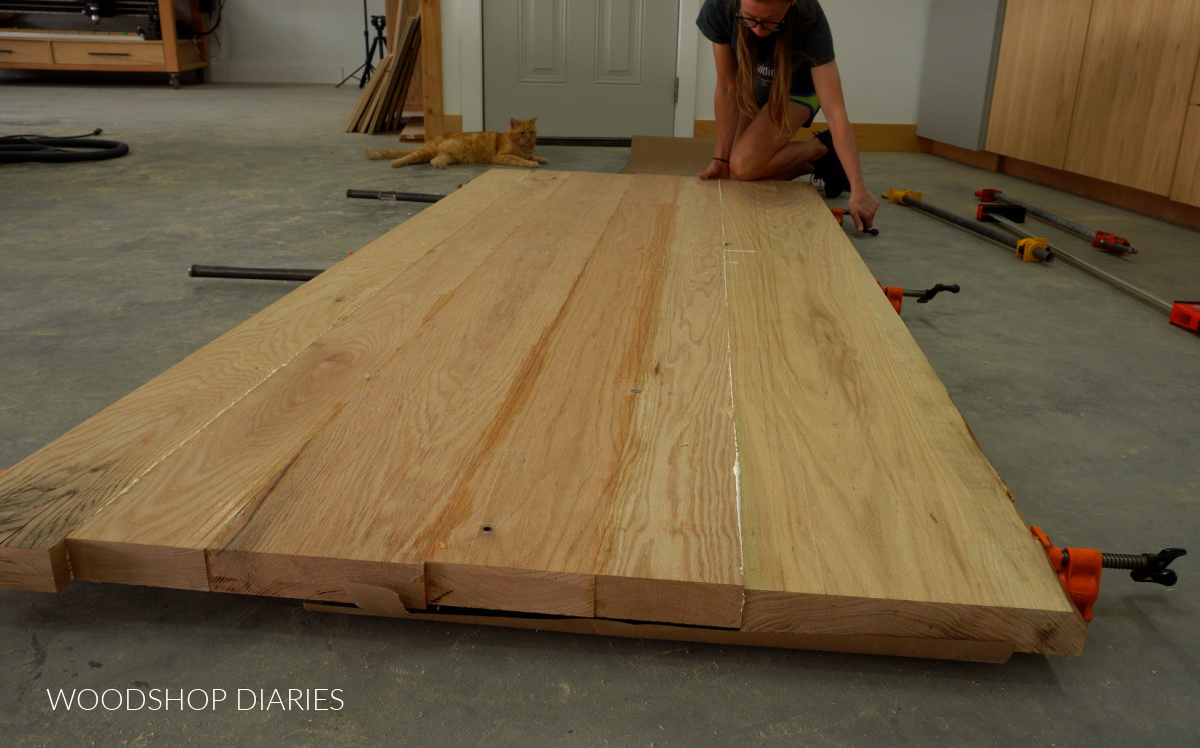
Once the top was glued together, I used my circular saw and Kreg Accu-Cut to trim it to length. I made sure to trim a little off each end so that the edges were clean, even, and square.

TIP: If there are any knots or cracks in the top, fill with wood filler and/or epoxy.
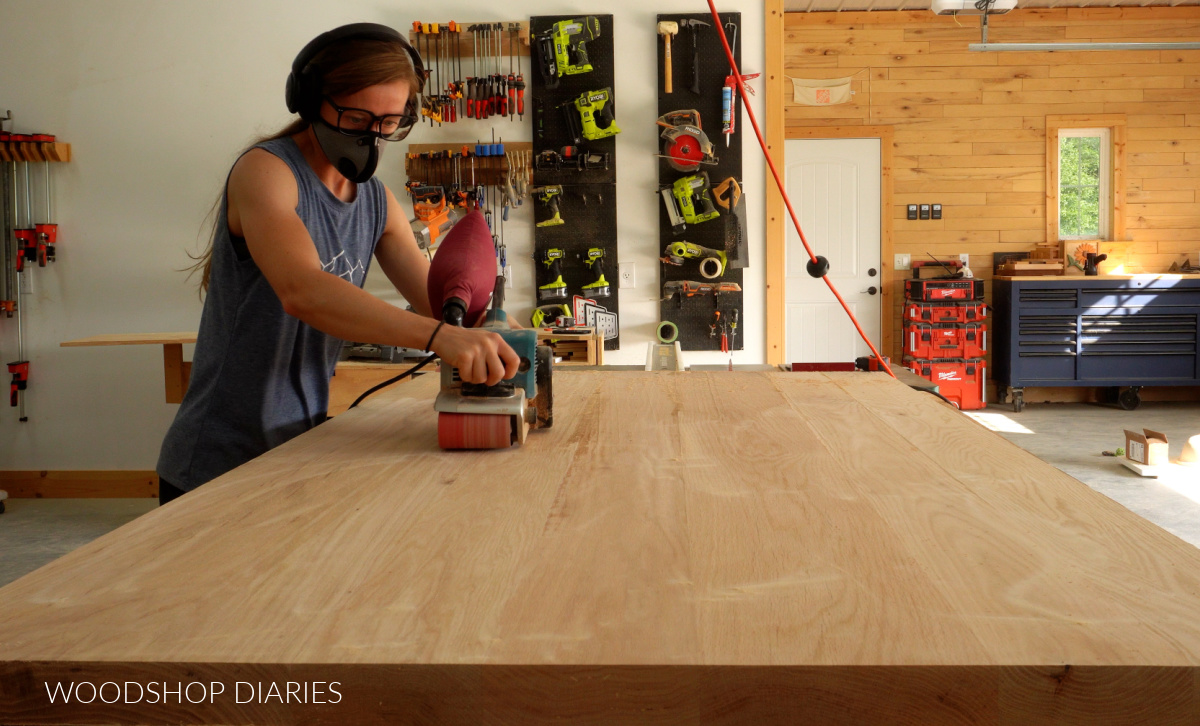
Then, I sanded it down to flatten everything out and remove all the glue residue. Any remaining glue residue left on the top won’t absorb stain, so make sure to sand off ALL the glue.
I started with 80 grit and worked my way up through 120, 180, then 220 grit sandpaper to get it nice and smooth.
RELATED: How to sand wood
Finally, I stained the top (Minwax Weathered Oak) and applied four coats of Minwax Polycrylic to seal it. Then I set it to the side while I built the base.
RELATED: How to apply clear coat sealer
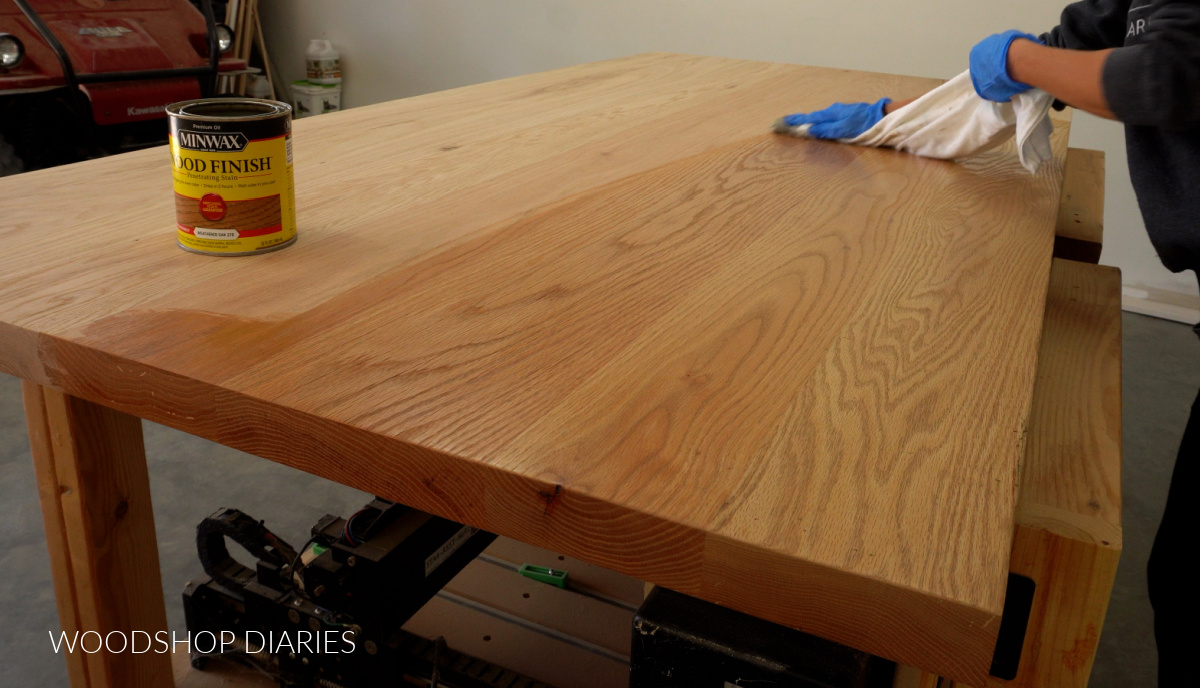
TIP: Be sure to seal all sides of the top to help prevent warping.
Prefer to print? Grab the printable building plans for this project here.
Step 2: Assemble the Base
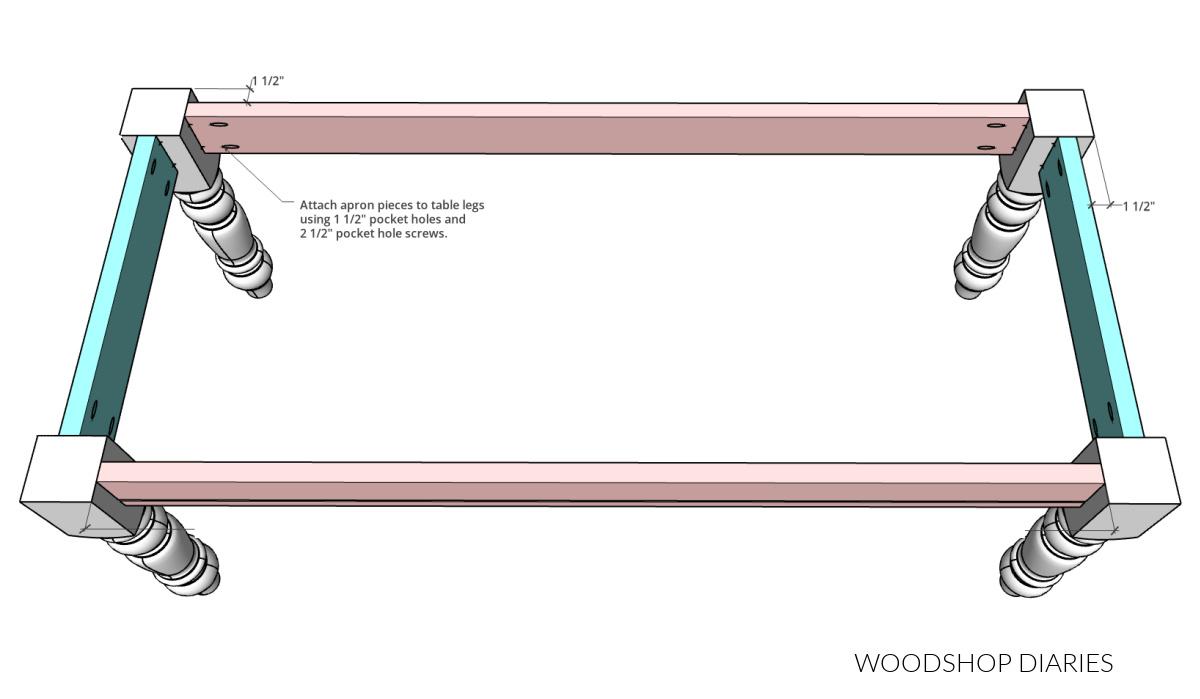
I cut four pieces of 2×6 to run between the table legs to make the table apron. This is basically the frame of the base and what supports the table top.
The table needs two long and two short apron pieces. To determine the length to cut these pieces, first decide how much you want your table top to overhang your legs. In my case, I wanted 1 ½″ overhang on all corners.
Short apron piece length = width of table top – (2x width of table leg) – (2x overhang)
Long apron piece length = length of table top – (2x width of table leg) – (2x overhang)
Once these pieces were cut to length, I cut a ¼″ dado ¼″ deep about 1″ up from the bottom edge of these pieces on the table saw.
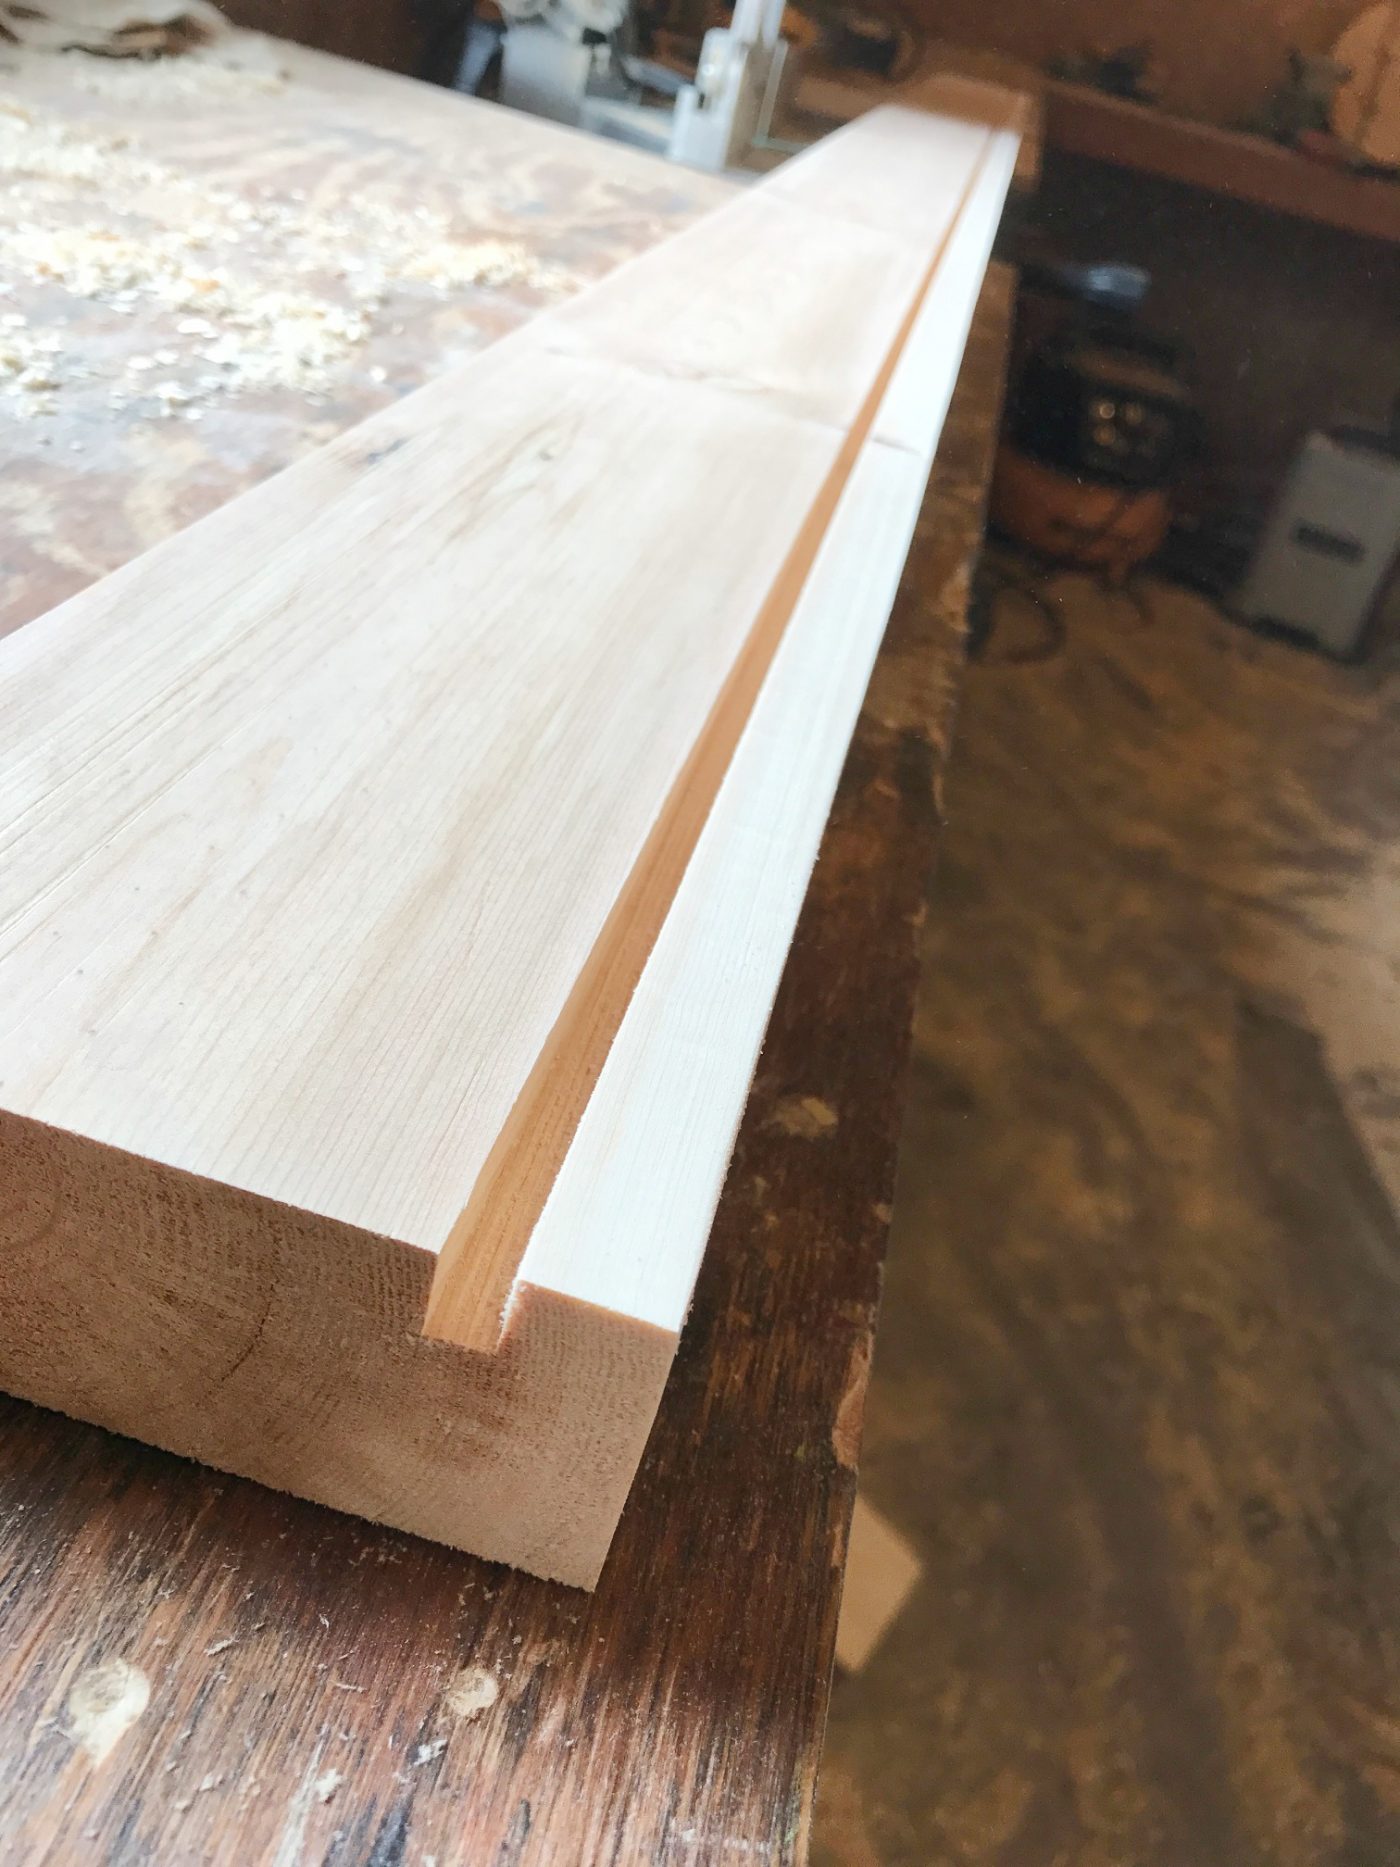
This is completely optional, but it gives a little extra detail and dimension to the table.
Then, I drilled 1 ½″ pocket holes into the ends of these 2×6 pieces, and attached them between the table legs.
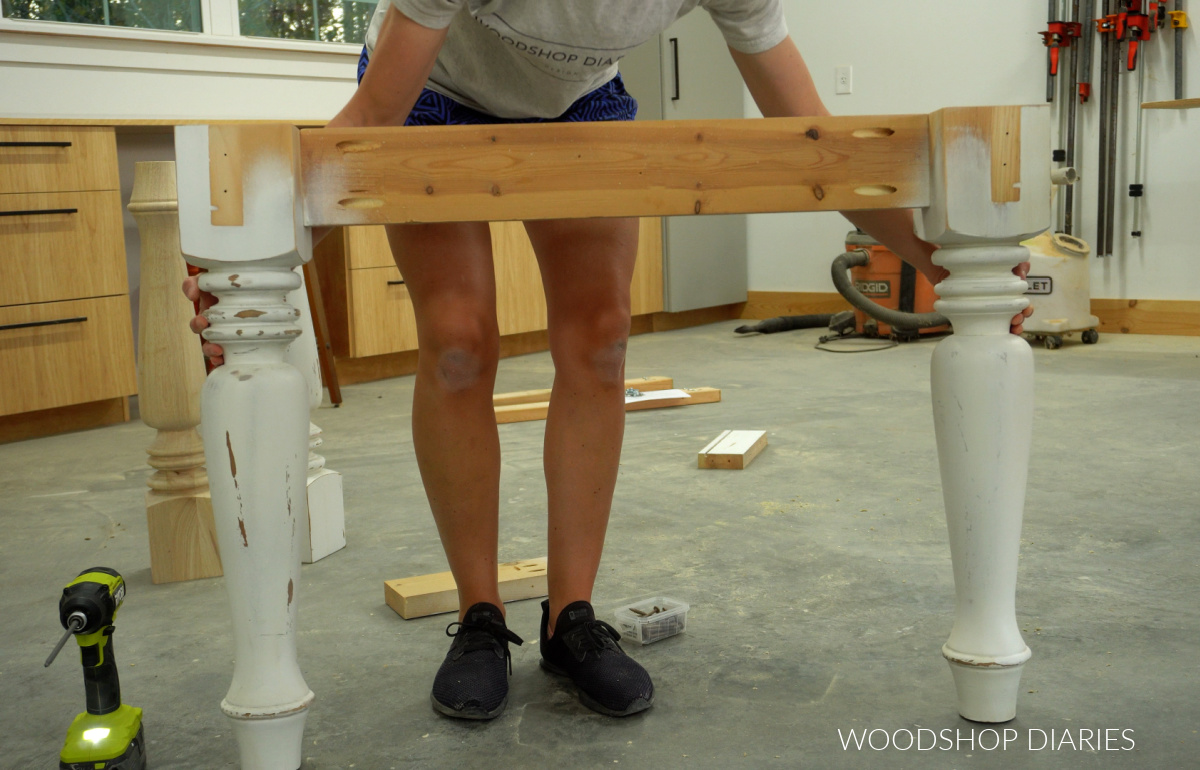
NOTE: Standard size pocket holes and screws work fine for this application, but for extra hold, consider using the Kreg XL Jig with XL pocket hole screws.
Step 3: Add Table Top Supports
For the middle table supports, I cut two pieces of 2×4 to run between the long table aprons. I installed these evenly spaced (and flush to the top) using pocket holes and screws.

Then, I cut four more 2×4 pieces to go into each corner. I cut these so that the ends were mitered 45 degrees and I notched out the middle just a little with my jig saw so they’d fit snug around the legs.
You could cut these longer and avoid having to notch them, but I liked how the notch kind of helped hold the leg snug.
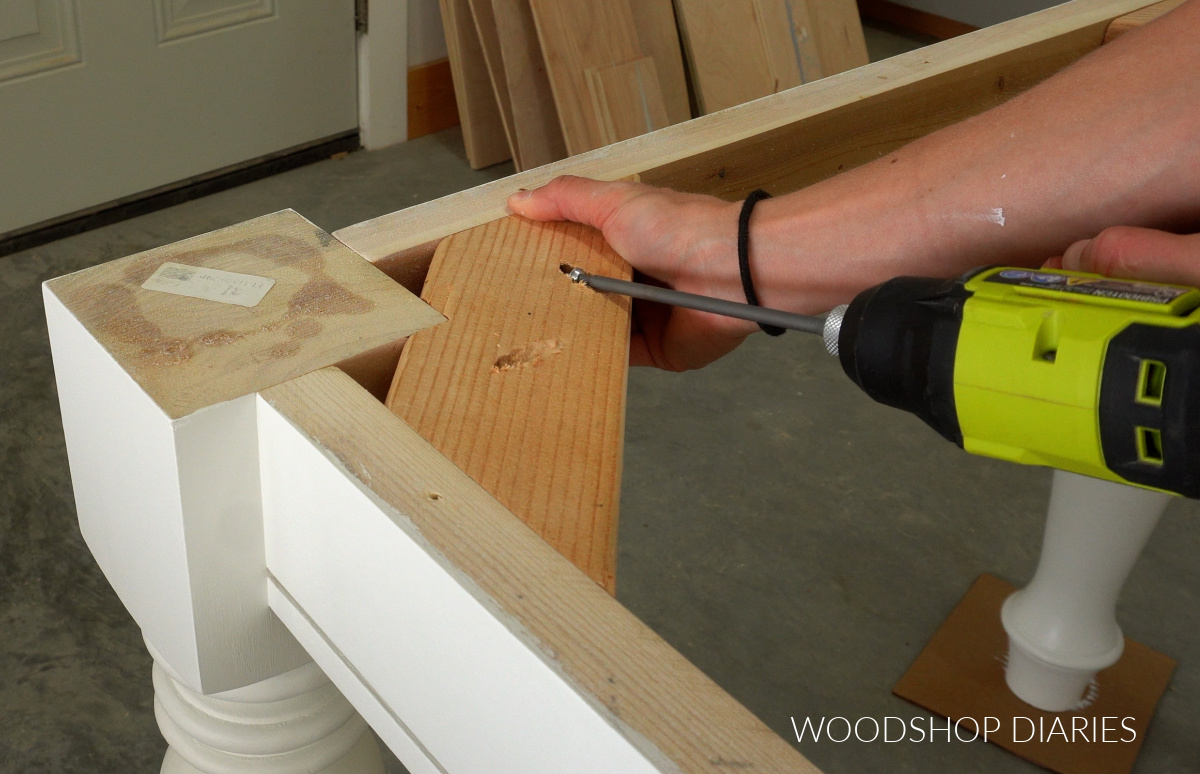
I installed these using pocket holes and screws as you can see above.
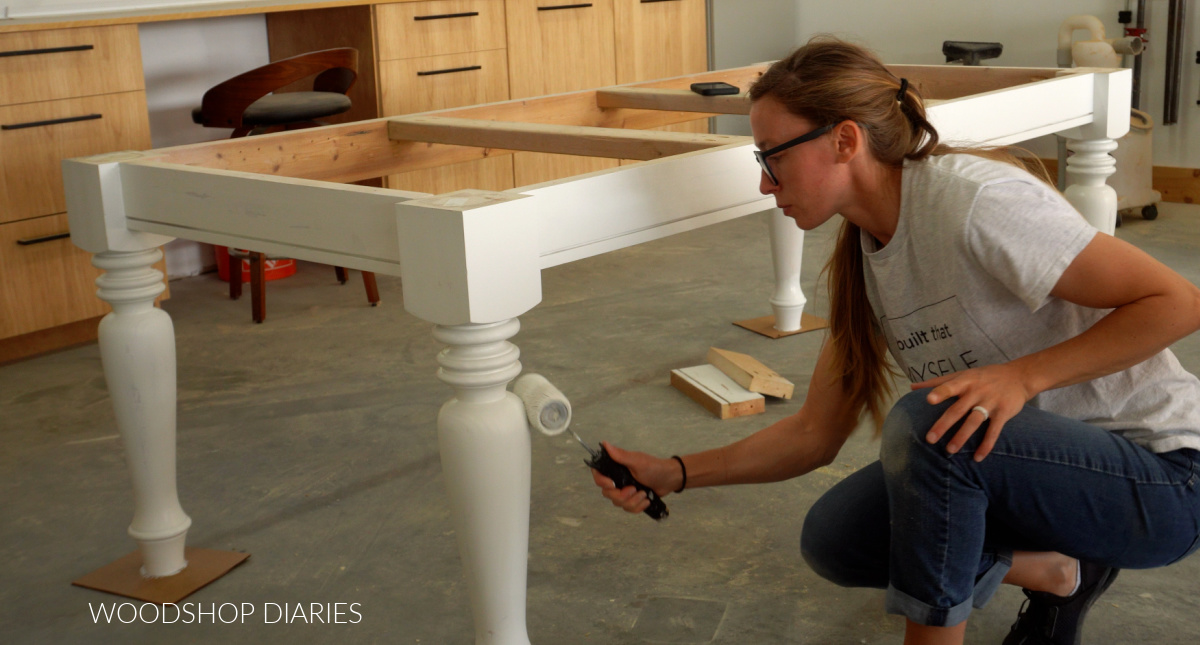
Once the base was together, I gave it a couple fresh coats of paint. I primed it first, then applied three coats of SW Pure White.
RELATED: How to paint DIY furniture
Step 4: Attach Table Top
Once the paint was dry, I drilled slotted holes into the supports from step 3 to attach the top. The slotted holes allow for seasonal wood movement to prevent the top from splitting over time.
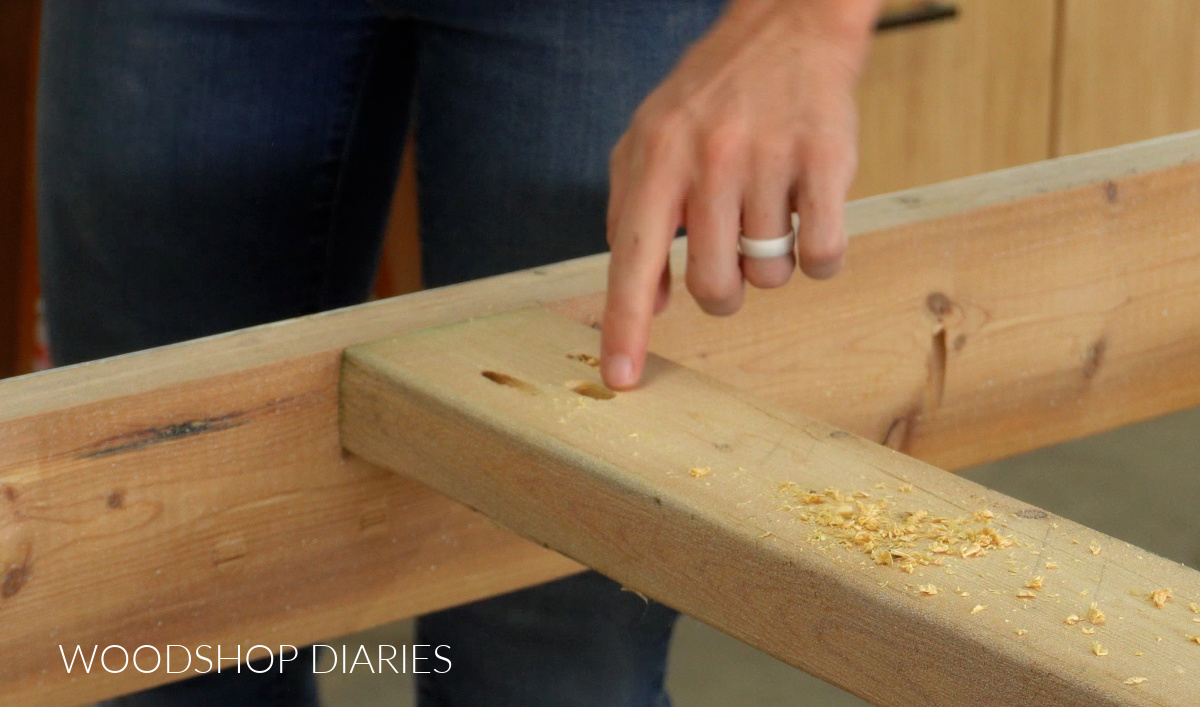
To drill a slotted hole, I used a ⅜″ drill bit and drilled two holes right next to each other. Then I kind of twisted the drill back and forth to “clean out” the material between the holes.
This creates a slot. These slots should run the width of the table as this is the direction the wood will move most.
I drilled 8 of these–one in each corner support and one on each end of the middle supports.
Then, I placed the table top on the base and made sure the overhang was even on all sides before securing them together.
I used 2 ½″ wood screws through these slotted holes, but because the screw would fit through the slots, I needed to add some washers.
RELATED: How to choose the right wood screw
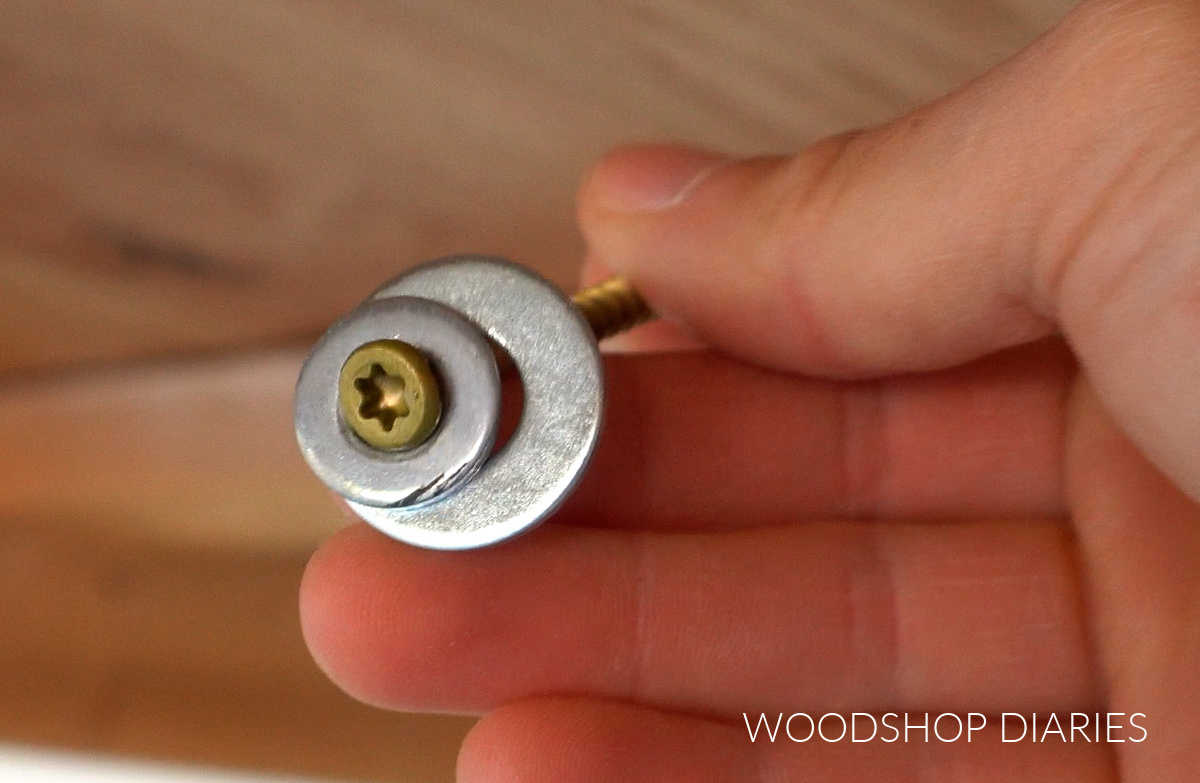
Basically, I needed a washer (or combination of washers) that were small enough that the screw wouldn’t go through, but large enough to not go through the slots.
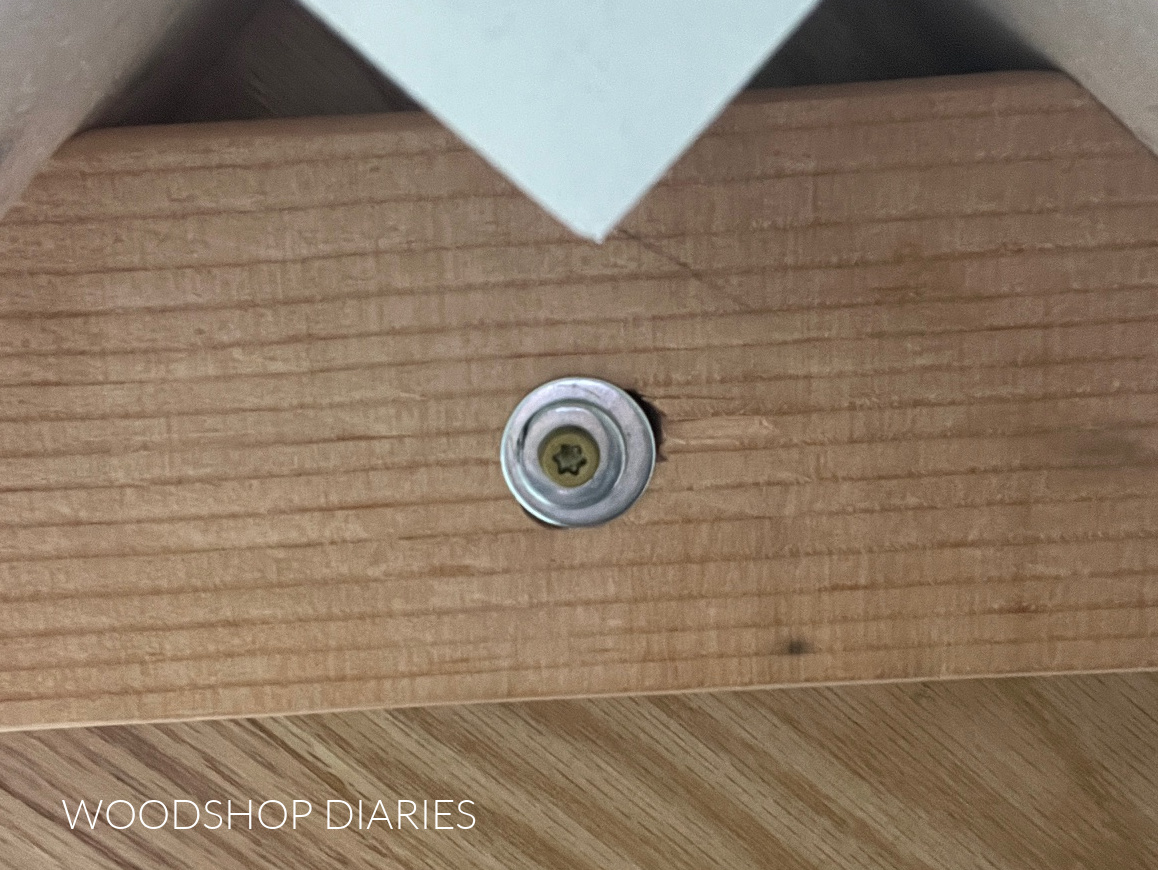
I drove these screws through the slotted holes from the bottom of the table and tried to place the screws as close to the center of the slot as possible.
They need to be snug, but not so tight that the washer is digging into the wood–it needs to be able to move as the top expands and contracts.
And with that, the table is finished and ready to gather around for your next family meal!
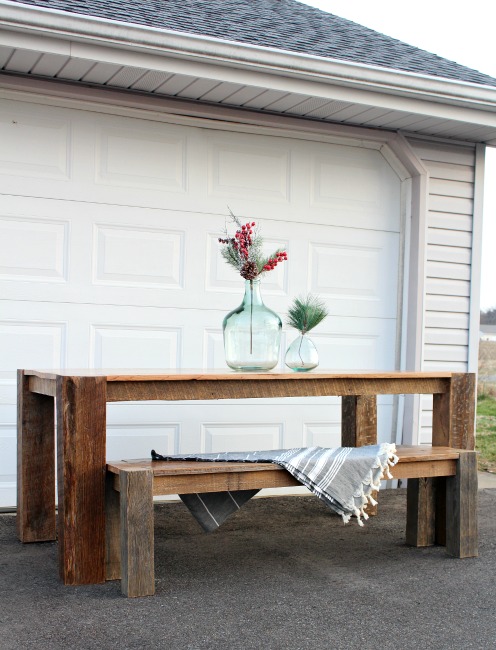
Looking for more DIY table ideas?
Looking for more DIY dining table ideas? Here are a few you might enjoy browsing. Click on the images below to see how to build them:
If you enjoyed this project and want to save it for later, don’t forget to pin it or share to your favorite social channel!
Until next time, friend, happy building!