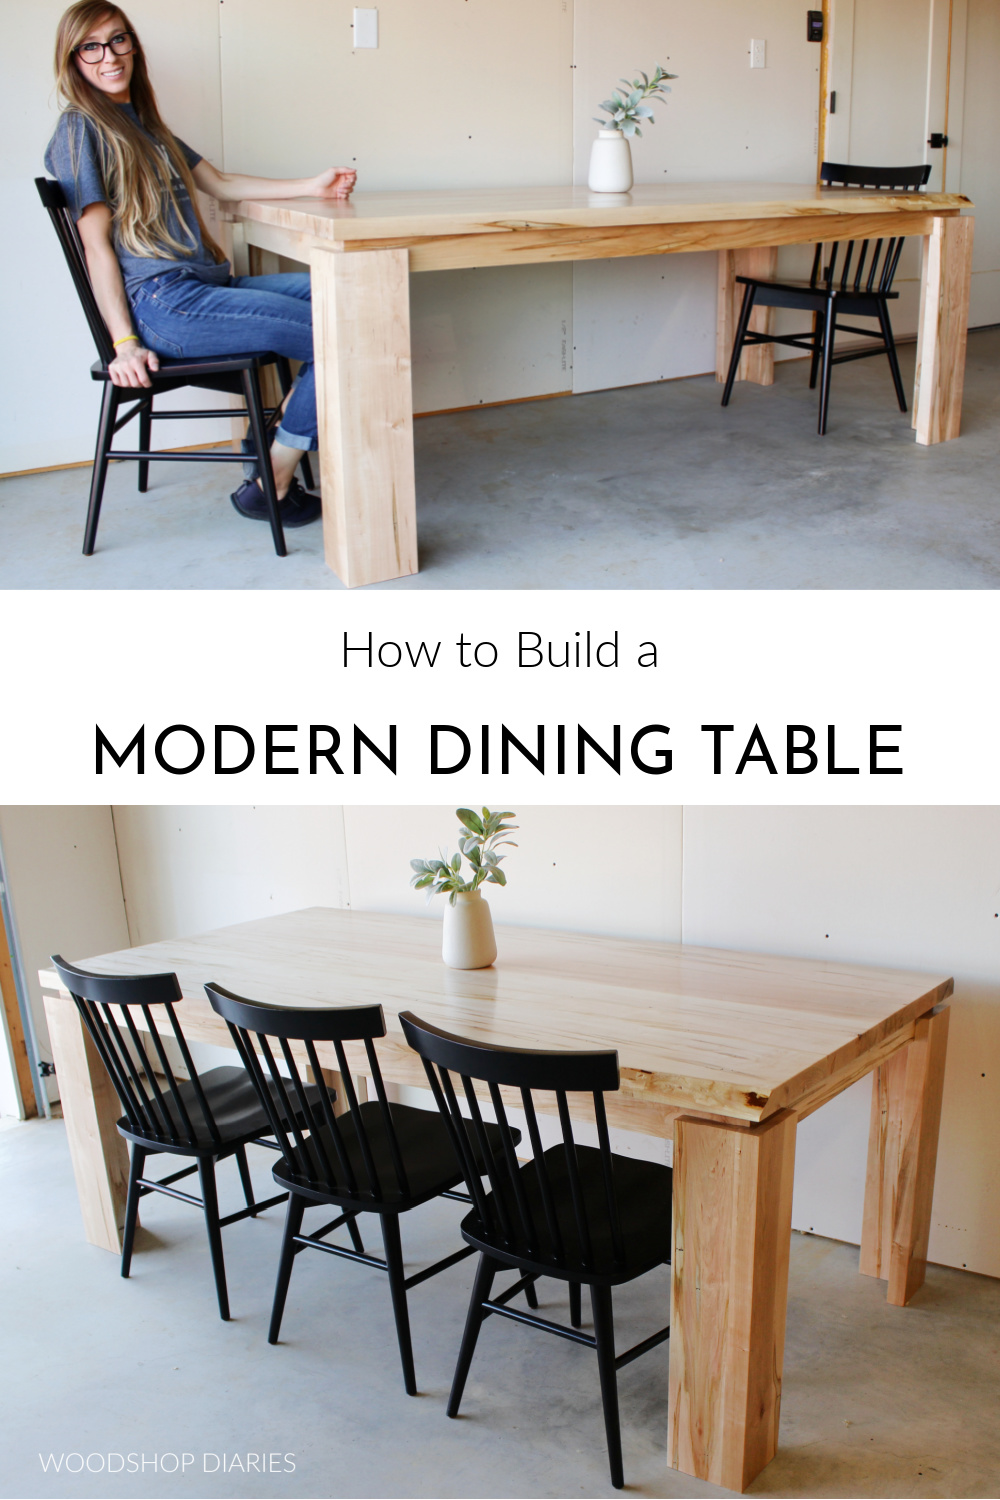
In this post, I’ll show you how to build your own DIY Modern Dining Table with a “floating top!”
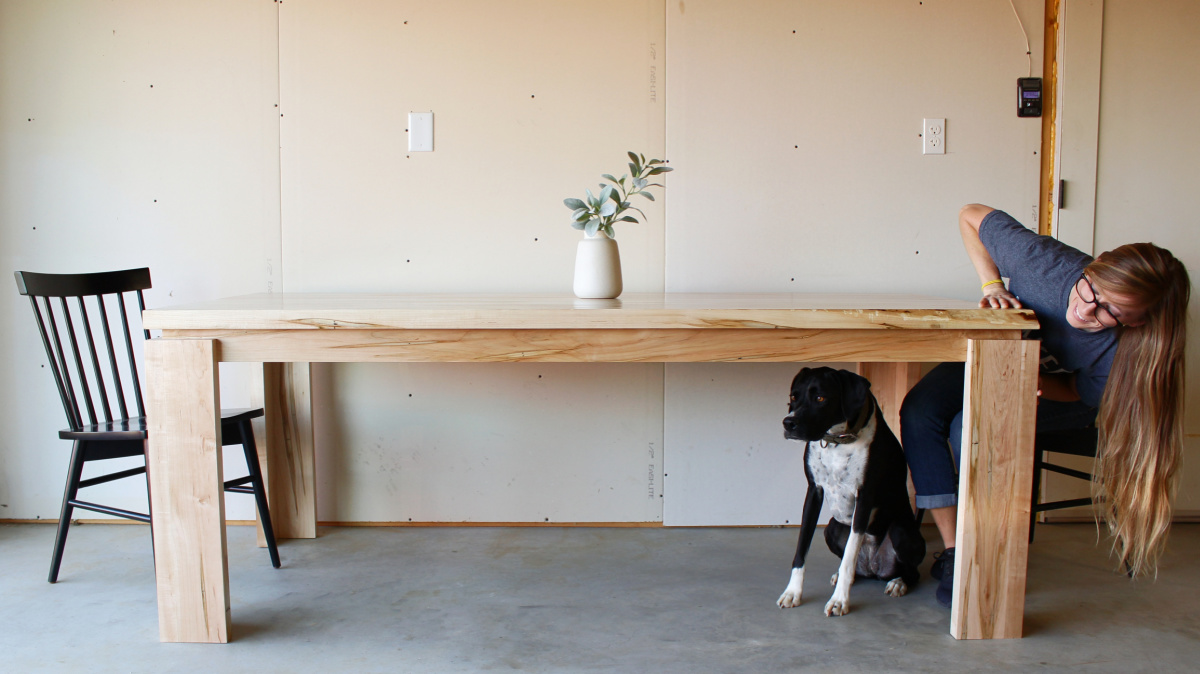
A few years ago, I built this same modern dining table design when we first moved into our tiny garage home. We used it for three years and loved it.
.
BUTTTTT…We recently sold that home and the buyers requested we leave that table and chair set behind. (I mean…I don’t blame them. It’s a nice set! Ha!)

PSSST…Like this kitchen?? You can learn how to make these DIY kitchen cabinets here!
.
So, before we packed up and moved out, I went ahead and built us a new dining table to bring with us to the new place.
.
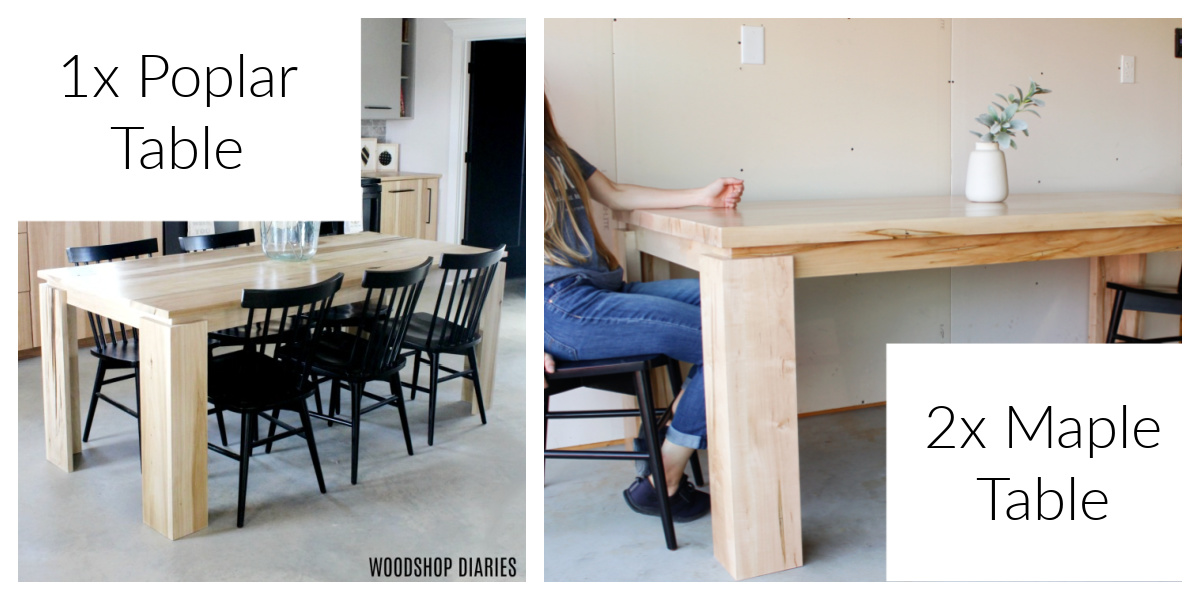
Since I’ve loved the old one so much, I built this new one in the same basic design–only, this time, I assembled it slightly different and used thicker lumber.
.
I’ll show you how I built both DIY modern dining table versions below in the plans so you can build your own, and I’m also sharing a video tutorial, right here that you can check out for more details:
**This post contains affiliate links. See website policies.
Tools and Materials:
Materials:
*Lumber amounts may vary based on the size table you are building (See notes & step 1)
- (4) 1x10x8 OR 2x10x8 boards (or equivalent of other widths)
- (3) 1x4x8 OR 2x4x8 boards (for apron)
- (3) 1x6x8 OR 2x6x8 (could use x8 instead of x6 for bigger legs)
- Wood Glue
- Wood dowels
- Figure 8 tabs to install table top (optional)
- ⅝″ wood screws (optional)
- 1 ¼″ OR 2 ½″ washer head screws (see step 6)
- Washers
Tools:
- Circular saw (AccuCut helpful, but not required)
- Drill/Driver
- Sander(s)
- Miter Saw (optional–can use circ saw for everything if preferred)
- Table Saw (optional, but helpful)
- Router and straight bit (optional)
- ⅜″ forstner bit
- ⅝″ forstner bit (optional)
- Clamps (various sizes)
- Chisel
Some Notes About the Modern Dining Table Build:
Lumber Choices:
As you can see by the materials list above, you can build this table from 1x material (which is typically ¾″ thick) or 2x material (which is typically 1 ½″ thick). I’ve built it both ways and it looks/functions great.
.
NOTE: I wouldn’t recommend using 1x material if you are making a really long table as it’ll be more prone to sagging over the longer span.
.
You can use whatever species of lumber you prefer for this. It just depends on your budget, availability, and preference. I used 1x poplar for the older table and 2x maple for the newer one.
See more about lumber options in step 1.
Table Sizing:
You can easily modify your table size as you wish (I’ll discuss in the steps below).
.
Standard dining table heights are 30″ tall–heights don’t really vary much as they’re made to use with standard size chairs.
.
Widths usually vary from 36-42″ wide…there’s no specific “standard.” And lengths vary greatly–typical is between 6-8 ft long.
.
I built mine approx 40″ wide and 80″ long and that was plenty to seat 6 chairs–potentially 8 if you want to add chairs on the ends.
Table Top Boards:
I listed x10 boards for the table top in the materials list just to keep things easy. Nominal x10 boards are actually about 9 ¼″ wide. Four of these together would give you a top about 37″ wide.
.
But, if you want bigger, you could use x12s instead, or you can use whatever combination of lumber you wish to piece together to make a top whatever size you want. A couple of x6s, a few x10s…it doesn’t have to be specific as long as you have enough to make your top the size you wish.
.
For my table, I used boards of varying widths and ended up gluing together 6 boards total to make a top 40″ wide.
Leg Size:
You’ll notice in the materials list, I listed EITHER using x6s or x8s. Either will work fine, but x8s will make wider/thicker legs.
Some links you may find helpful in the building process:
- How to square board edges
- How to build table tops
- Basic Guide to Using a Router
- How to finish raw wood furniture
- Tips for professional looking DIY furniture
Step 1: Determine Your Dining Table Size
First, I determined the overall size I wanted my table to be. You may want something different, depending on your space constraints, style, and how many people you plan to seat.
.
I made this particular table 40″ wide, 80″ long, and kept the standard 30″ table height.
.
Once you determine the size table you want, you need to determine the amount and size lumber you need to build it.
.
I purchased my lumber from a local saw mill, so the widths of the pieces varied.
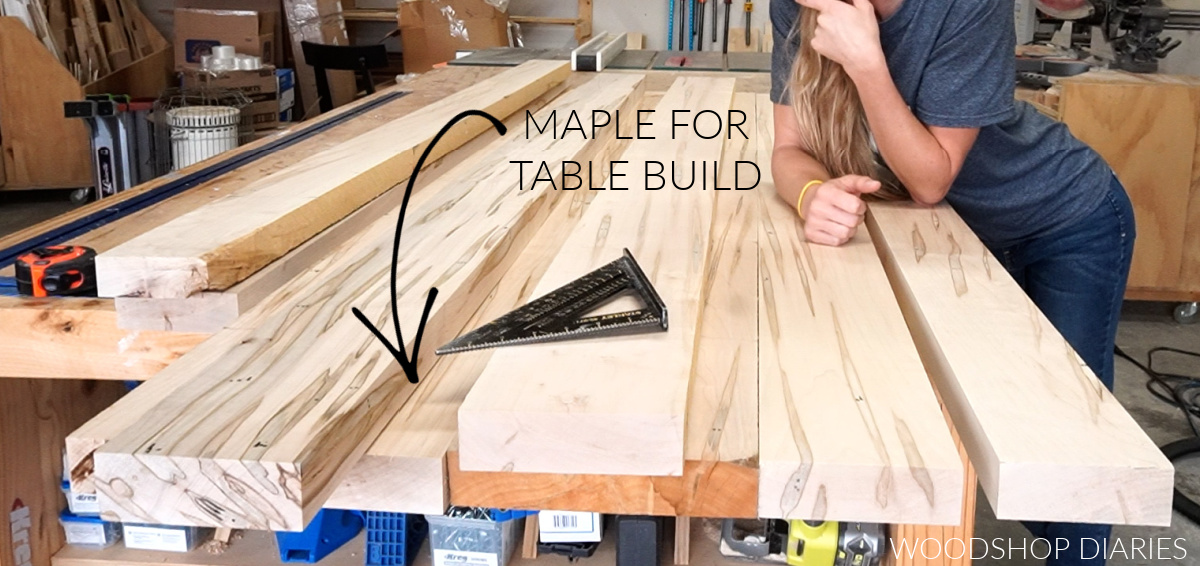
I picked out enough pieces that I could trim down and glue together to make a top approximately 40” wide and 80” long.
.
I also purchased some shorter pieces to use for the legs and a couple more long pieces to trim down for the apron—you’ll see that later.
.
Now, if you are on a tight budget, don’t have access to a local mill, or prefer to use readily available lumber, you can definitely build this using basic construction lumber from the big box store or your local building supplier as well. See notes above.
Step 2: Glue Up Dining Table Top
I like to begin table builds by making the top first, so I’m going to focus on that for now. I ran these boards through my table saw to get clean, square edges on every edge that will be joined.
RELATED: Check out this post to learn how to square board edges.
.
A table saw is definitely helpful for this, and if you have a jointer, that works as well.
.
However, if you don’t have either, a good straight edge or saw guide used with a nice finish blade on a circular saw can also work. You just need to make sure the circular saw blade is good and square so your edges aren’t beveled.
.
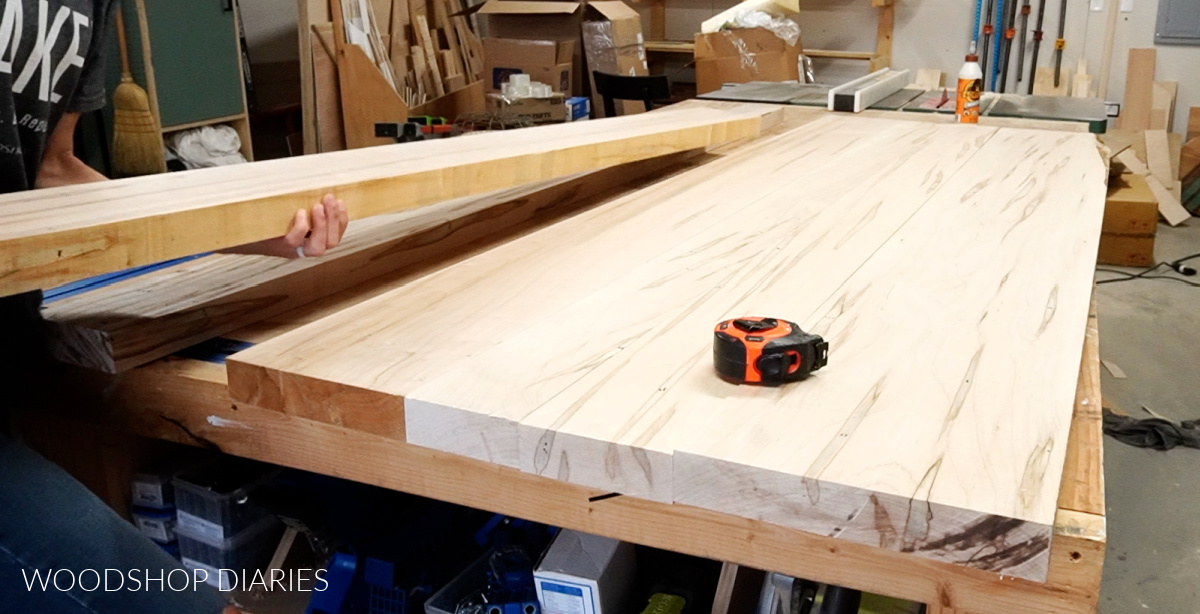
Once I had my edges prepped, I laid them out on the workbench to decide where I wanted each board to go so that they fit well and the colors blended nicely.
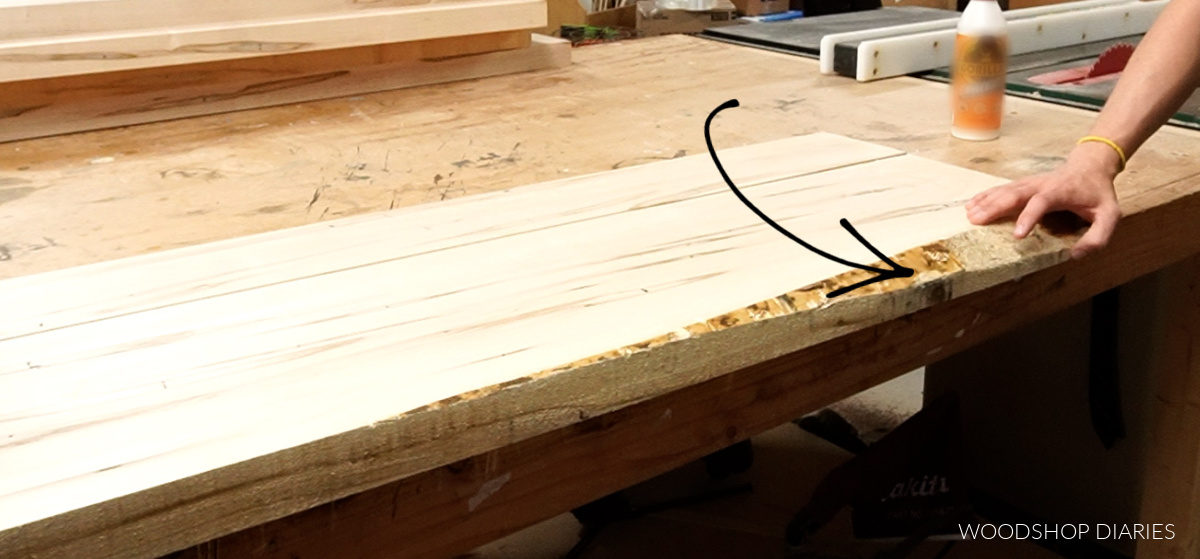
A couple of these boards had some “character” edges, that could have been trimmed off. But I decided to leave these and use them as a design element in the finished project.
.
So I laid these pieces so that they will be on the outside edge of the table.
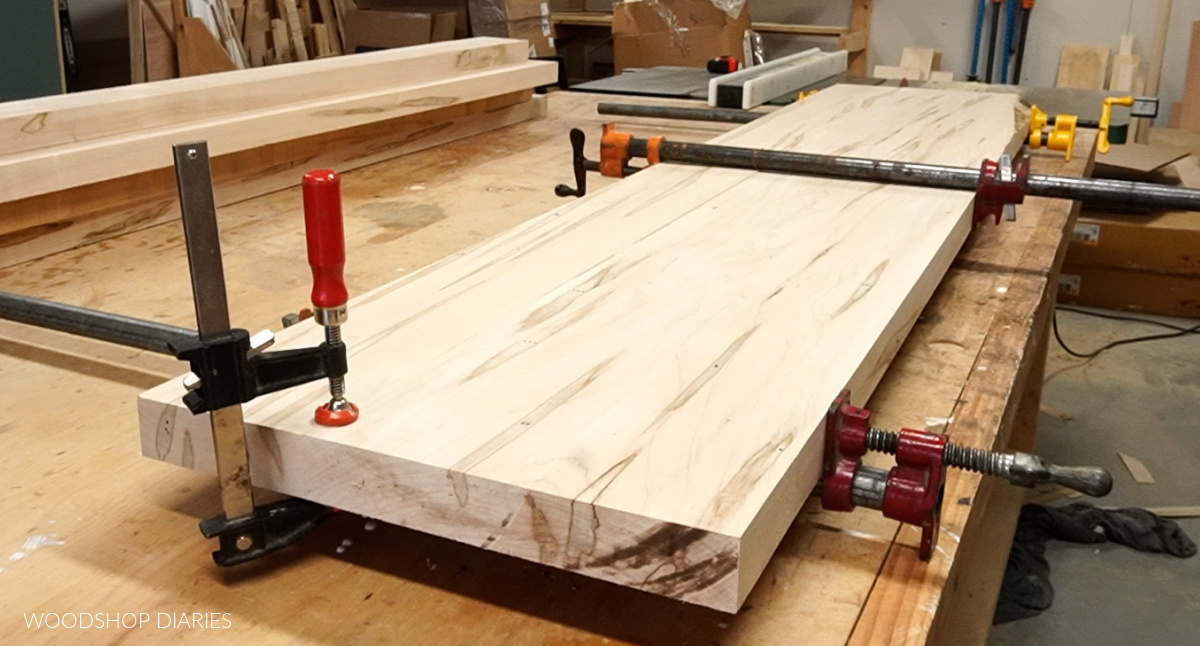
It’s a time consuming process, but I’ve found it easiest to only deal with one glue joint at a time. So I started by gluing just two boards together.
.
Once this had dried, I came back and added another board. Then another. Then another until I had the entire top glued up as one panel.
You can use biscuits, dominoes or dowels on these edges if you prefer. But I just use glue.
RELATED: Check out this post for tips and more information on how to build a table top.
.
I let the glue dry completely once I clamped on the last board, and while I was waiting, I moved on to the legs.
Step 3: Assemble Dining Table Legs
I trimmed down my leg pieces to eight 27 ½″ long pieces (or 28 ¼″ long if using a 1x thick table top).
.
Then, I ripped them on the table saw to their exact widths.
.
Since I was working with 2x (which is 1 ½″ thick material), I ripped my pieces to a 6″ wide piece and a 4 ½″ wide piece for each leg. That way, when butted together, they will be 6″ wide in each direction.
If you’re working with 1x material, this would be 6″ and 5 ¼″ since the material thickness is different. Of course, you can customize your sizing here however you wish.
.
Now, on my original table, I skipped this next part, but with my most recent build, I tried it out. So this is optional…I’ve done it both ways and either works fine.
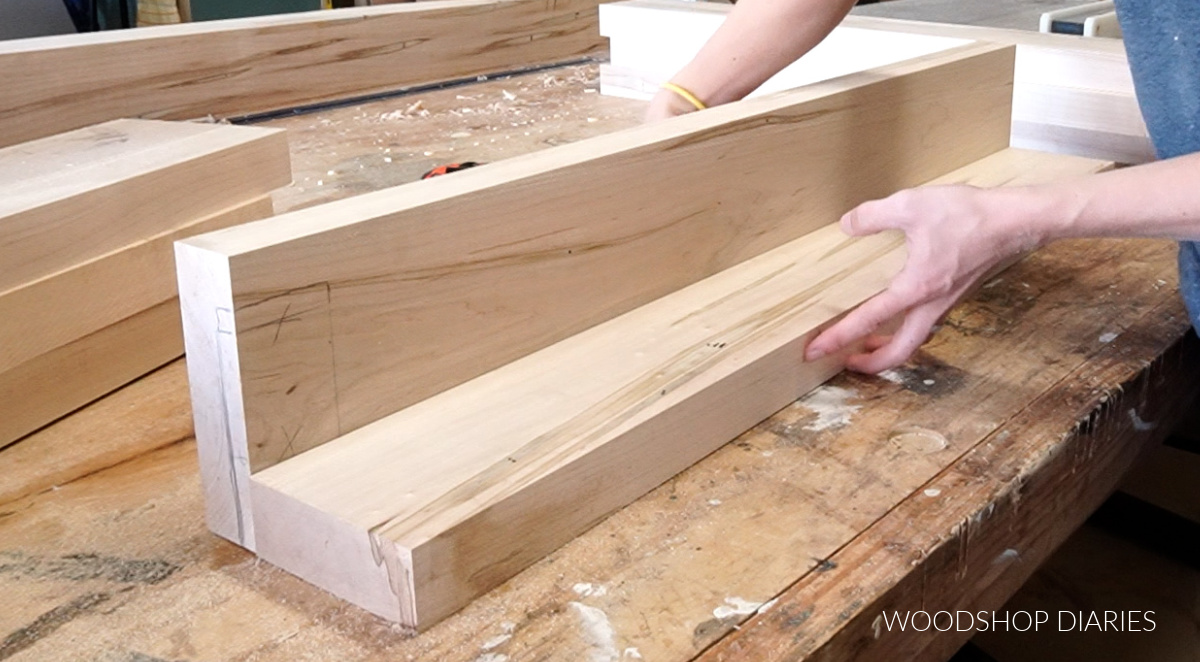
Cut (Optional) Rabbet for Table Apron
I added a rabbet on the inside corners of my table legs to rest the apron onto later.
Now, there are lots of ways to go about cutting this out, so whatever works, works. And honestly, if you don’t have the tools to make the cuts, it’s not really necessary. I just thought it would be fun, strengthen the corners, and add a small design detail.
.
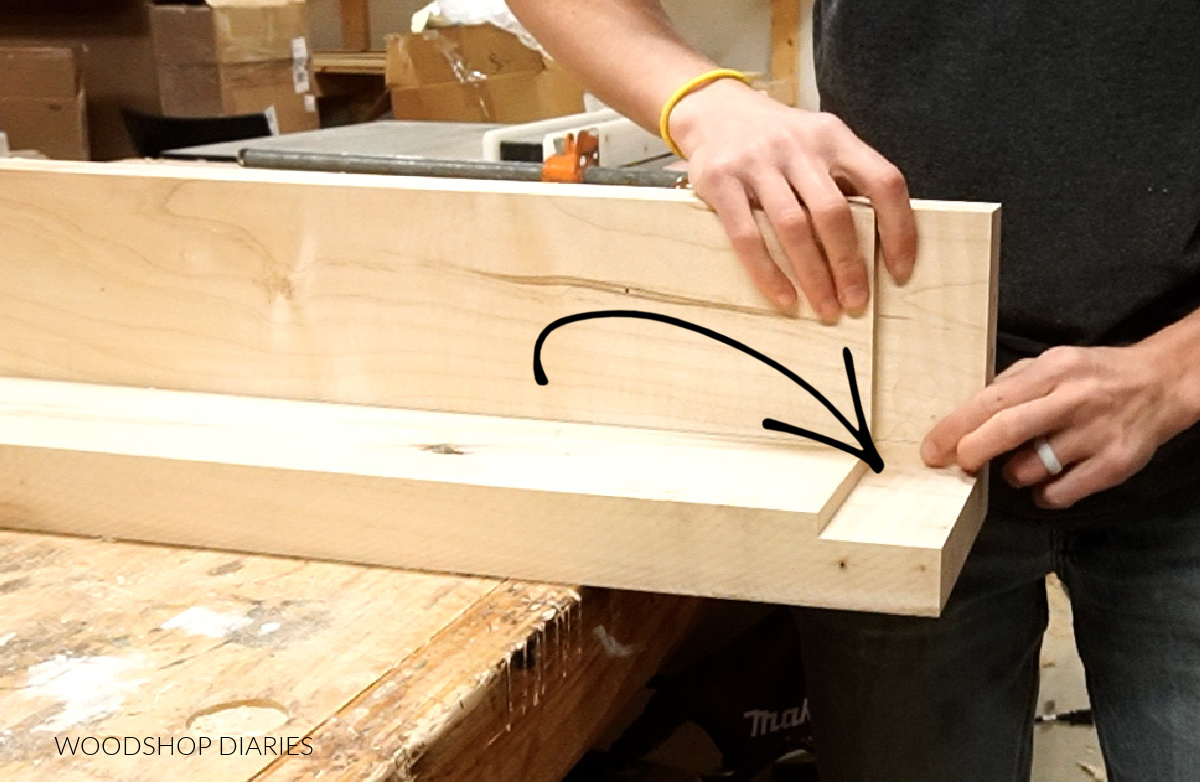
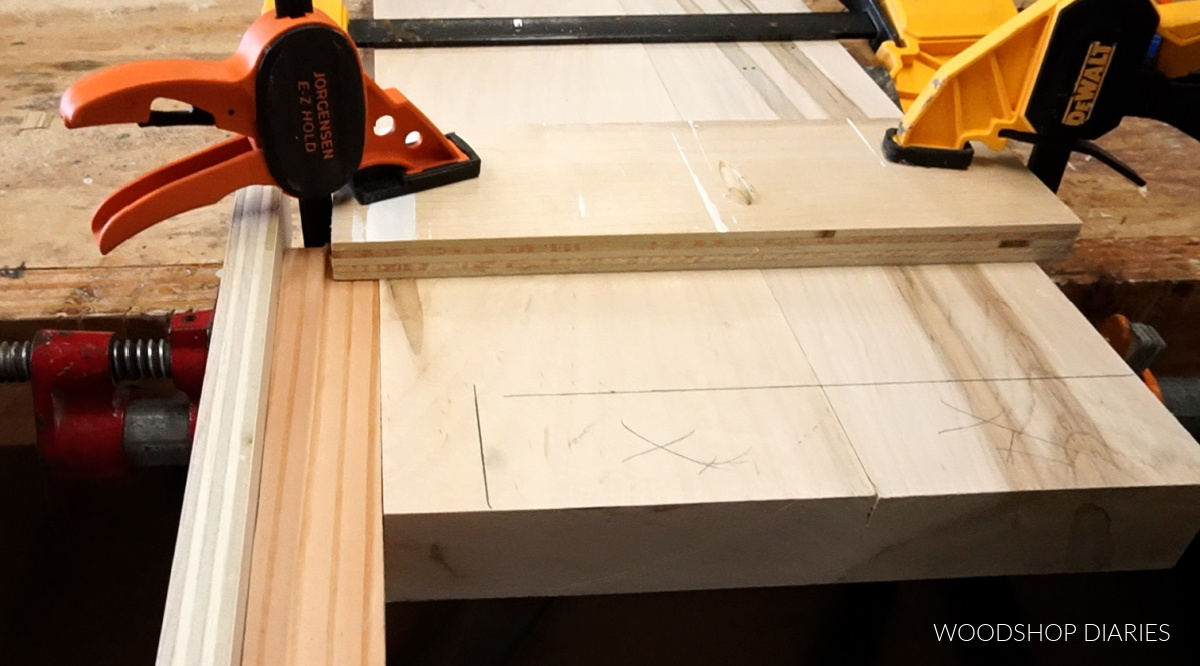
For each leg, I took my two leg pieces and marked out where to cut for the apron to sit into.
I highly recommend checking out the video for more specifics.
I made my apron 3″ tall, and I wanted a 1″ space between the top of the legs and the bottom of the table top. So I needed the apron to sit down into the legs 2″.
.
If your apron will be a different height, adjust this as needed to that it will stick out the top of the leg 1″.
.
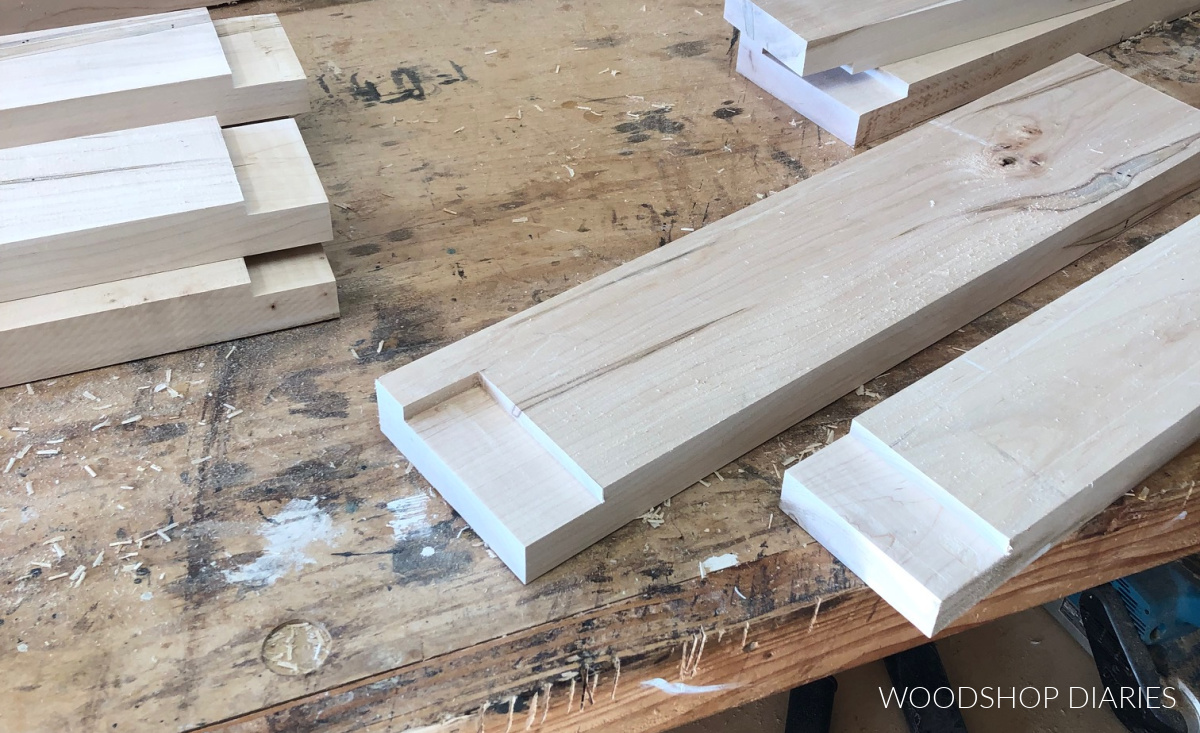
I used some scrap wood and clamps to make kind of a jig to run my router along.
RELATED: Beginners Guide to Using a Router
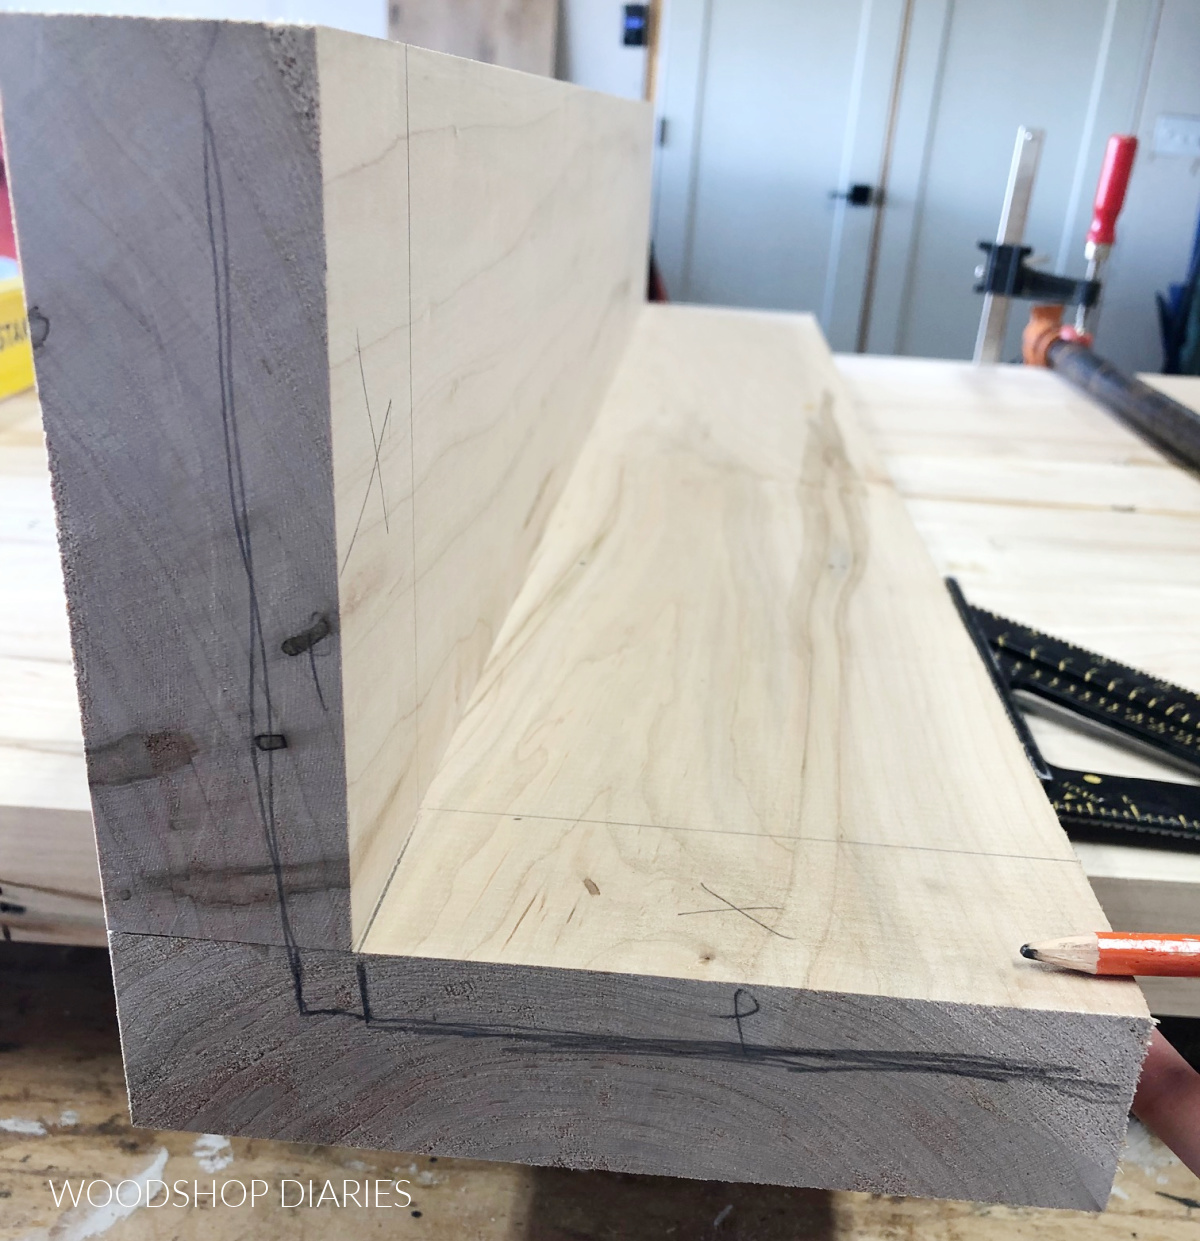
I set a ½” straight bit into my router with a cut depth of about ⅜” and cut away this material.
.
Now, I highly recommend doing a test cut on some scrap pieces first to make sure your fit is good and adjust as needed.

Once it was cut out, I could use a chisel to square off the corner. I did this for all four legs and tried to keep these measurements and cuts as consistent as possible.
Glue Table Legs Together
Just like with the table top, wood glue alone would probably have been fine, but I did add a few dowels here just for the heck of it.
.
I measured and marked out a few corresponding dowel locations down the length of the legs and drilled them out using a ⅜″ forstner bit.

Then, I used some ⅜″ dowels and glued and clamped each leg together tightly, wiped away the squeeze out and made sure the inside corners stayed nice and square.
I set the legs aside to dry and came back to finish up the table top.
Step 4: Trim and Prep the Table Top
The worst part about making tables is having to flatten it out and sand it down once the glue dries.
.
I tried out my new hand plane to help flatten out any unevenness. It was pretty fun and cut down quite a bit of sanding time. I definitely recommend trying one out if you haven’t before!
.
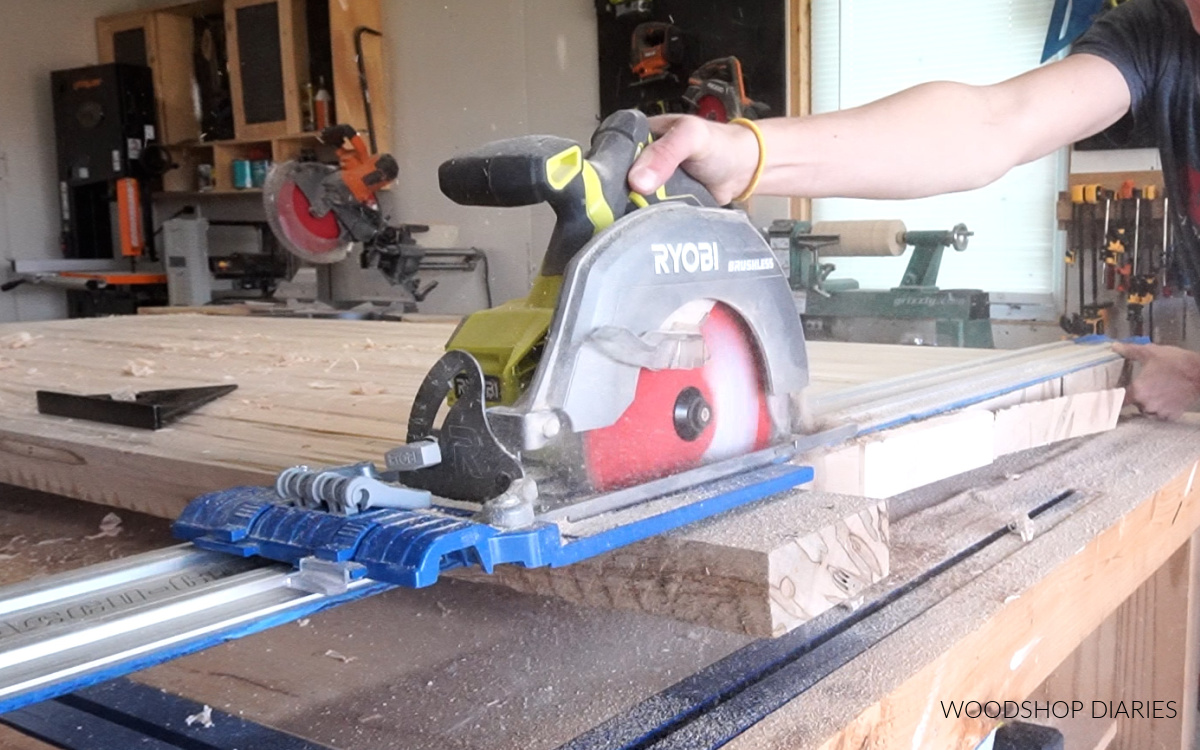
Once it was pretty flattened out, I used my circular saw and Kreg AccuCut to trim the ends of the top down to its final size. If you don’t have a saw guide, a simple straight edge clamped to the surface works fine.
Then I followed up with a belt sander to smooth out the surface, then used an angle grinder on the rough spots that I left on the edges.
.
SIDE NOTE: If you wanted to fake your own live edge over this whole table top, you could definitely give that a go.
.
I’m not a huge live edge fan…I think this little detail was plenty for me without going overboard. But if you wanted to do the whole edge, here’s a guide on how to fake your own live edge.
.
Then, I gave the whole thing a final sanding with an orbital sander. Sanding is boring but is OH SO IMPORTANT! Check out my other tips on how to make DIY furniture look professional here.
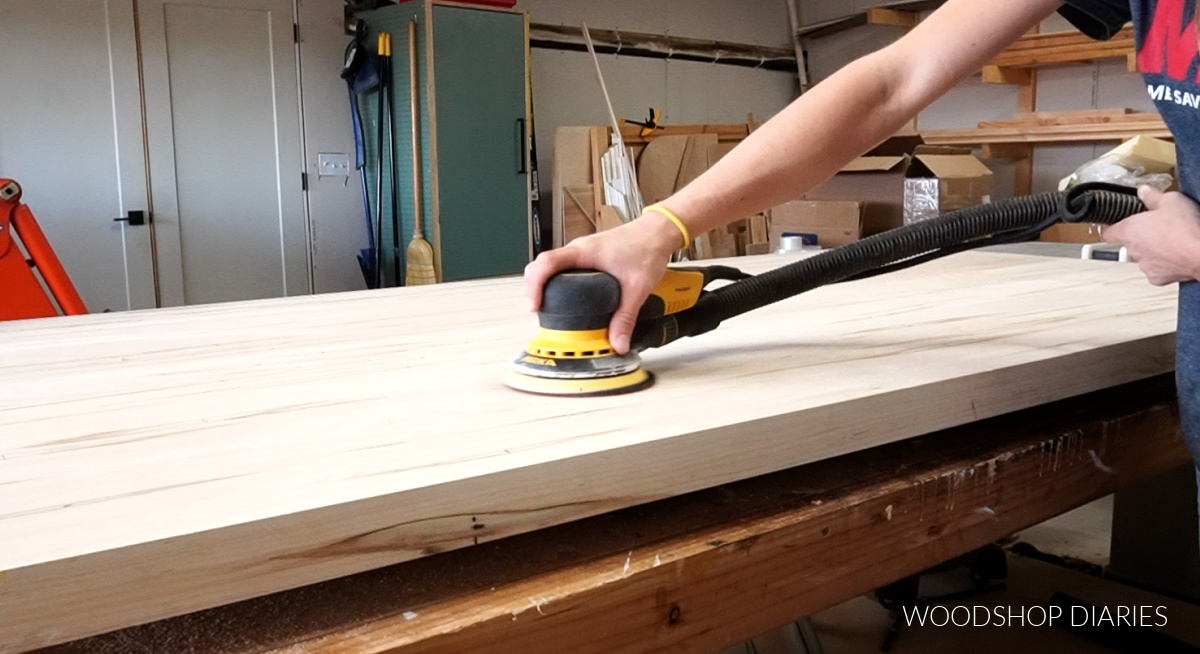
I repeated this process on the bottom side to at least get it flat–you want it to be able to sit flat on your apron later.
Step 5: Assemble DIY Modern Dining Table Apron
The apron size is based off the final size of the table top. I wanted the outside edges of the legs flush to the outside edges of the table top.
.
So I measured the overall size of the table top once it was trimmed down, subtracted 2x the thickness of the top of the legs, and figured up my apron size from there.
.
I trimmed what maple wood I had left down to make this apron and ripped it to 3” wide. This will give me an apron height of 3″.
.
I laid out these pieces on the workbench and double checked my overall size before gluing anything together. ALWAYS DOUBLE CHECK 🙂
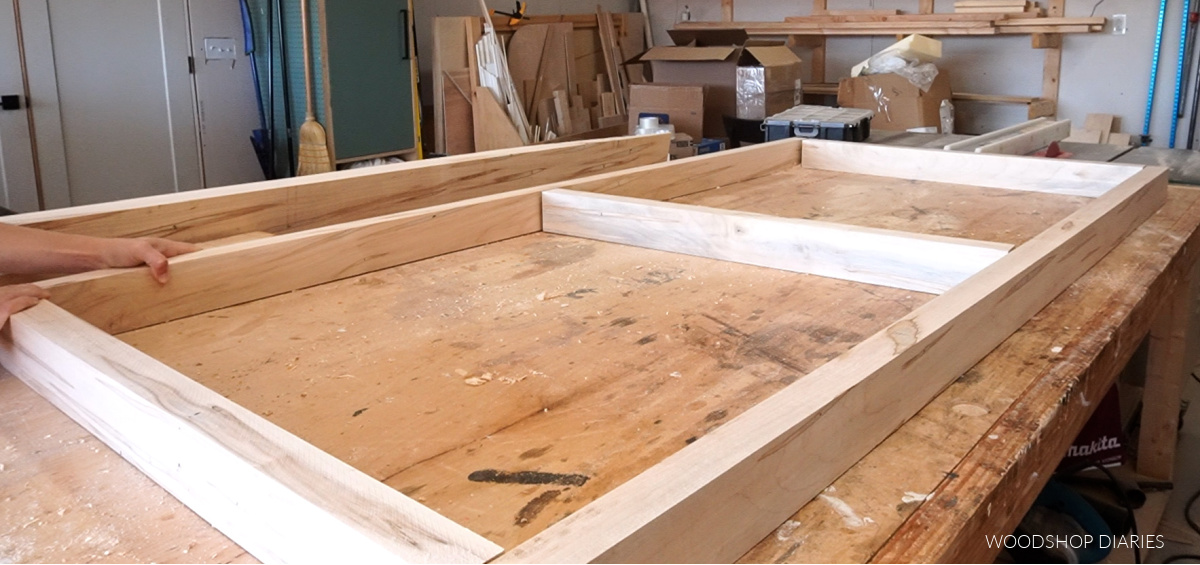
I assembled this apron using wood glue and dowels. You can get as simple or as complex as you wish for assembling this frame.
.
You could use pocket holes and screws if you wish as they won’t be seen on the inside anyway.
RELATED: How to use pocket holes in woodworking projects
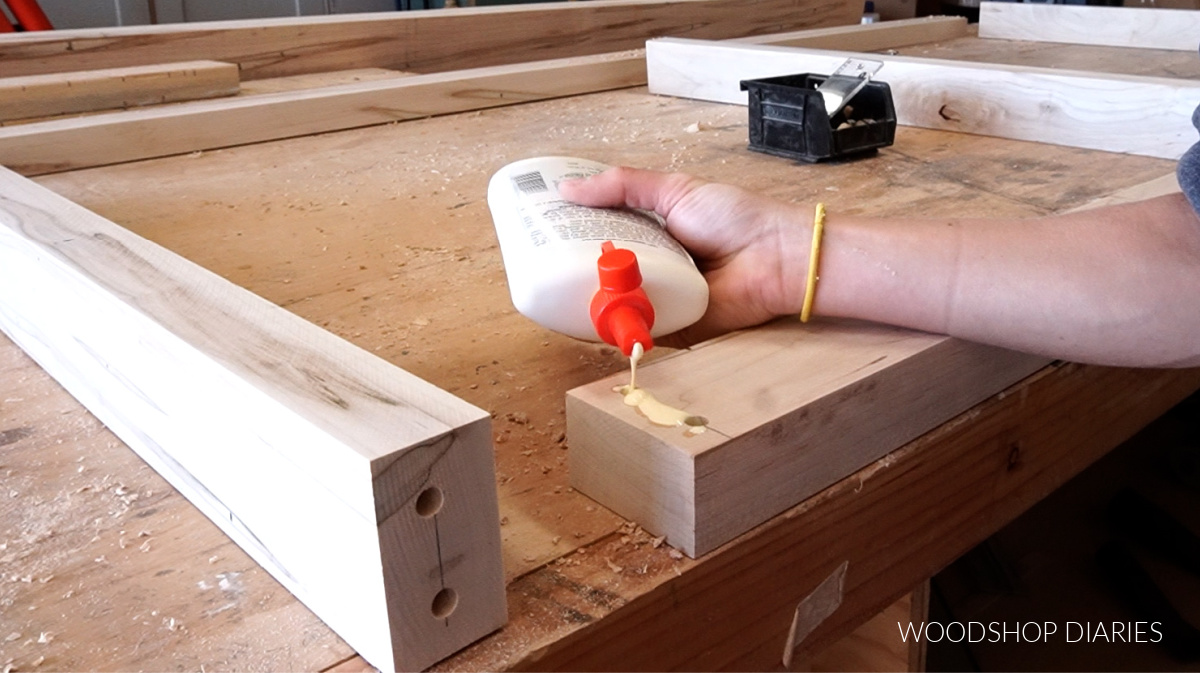
I measured and marked corresponding holes on the apron pieces and used a ⅜” bit to drill out holes to place the dowels into.
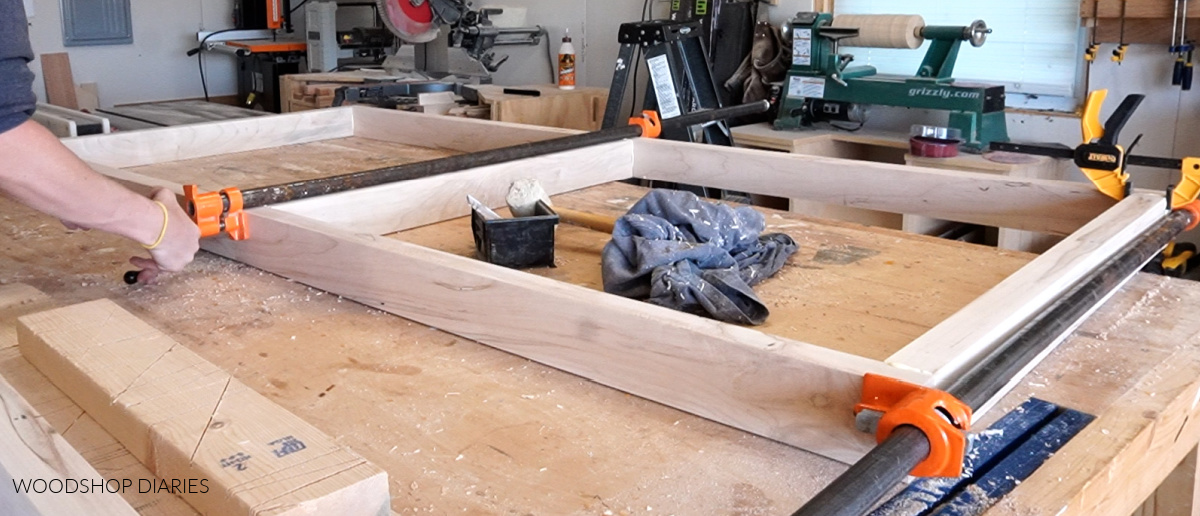
I glued and clamped this apron frame together using these dowels.
Step 6: Attach Apron to Dining Table Legs
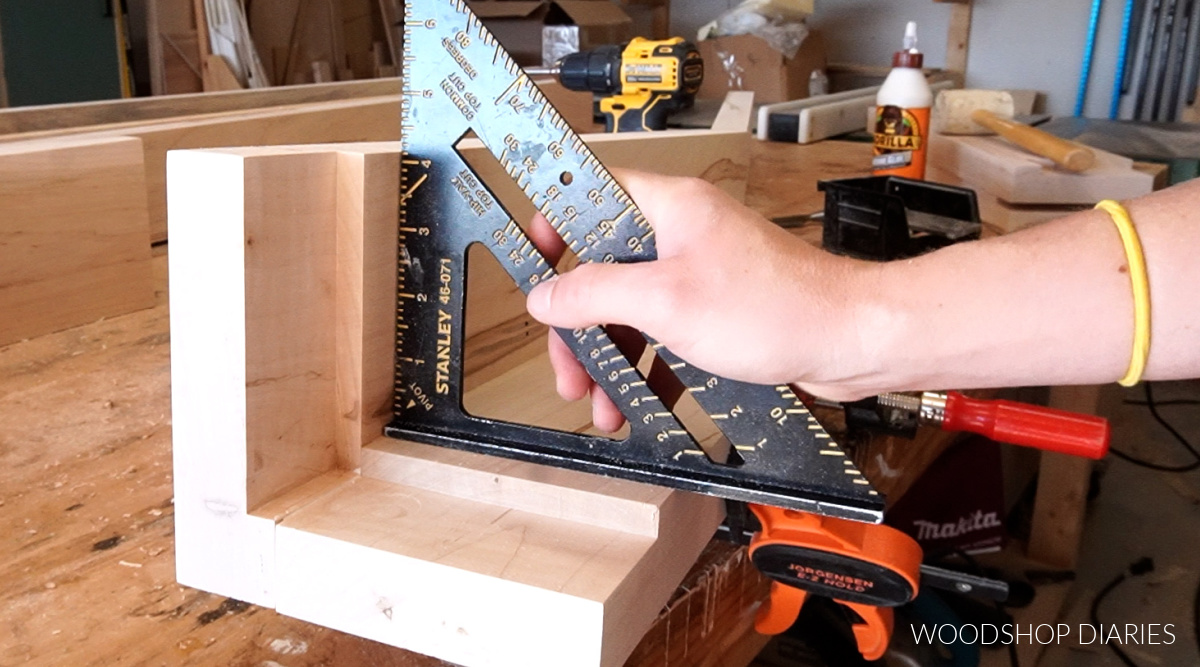
Once the glue on the frame was dry, I sanded down the legs and the apron, then, dry fit the pieces together. If you cut the rabbets in step 3, the apron should just sit down into them on each corner.
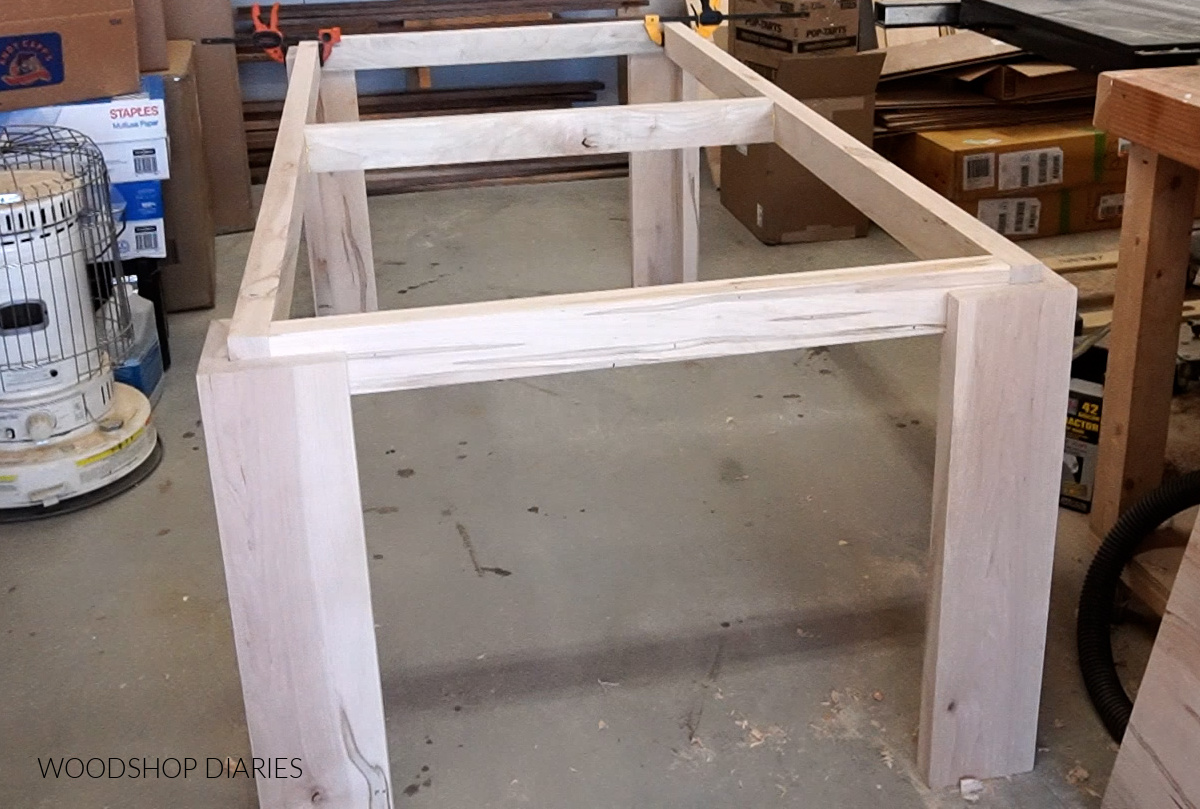
But if you skipped the rabbets, clamp the apron to the inside of the legs so that it sticks up from the top 1″.
.
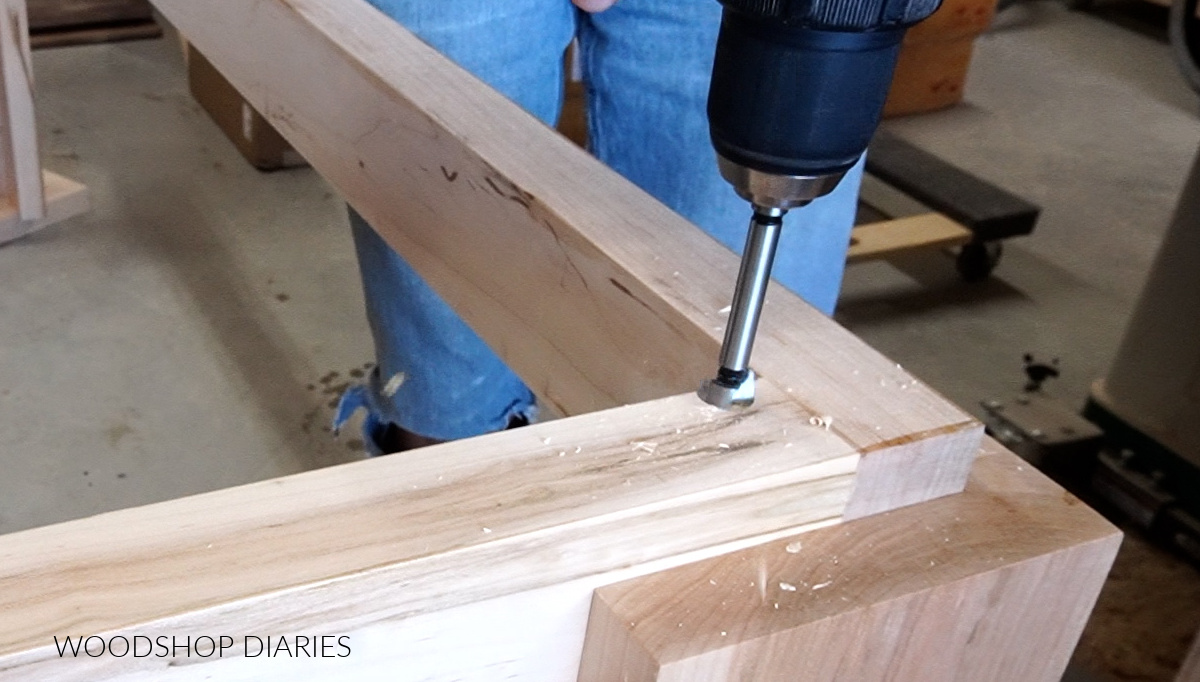
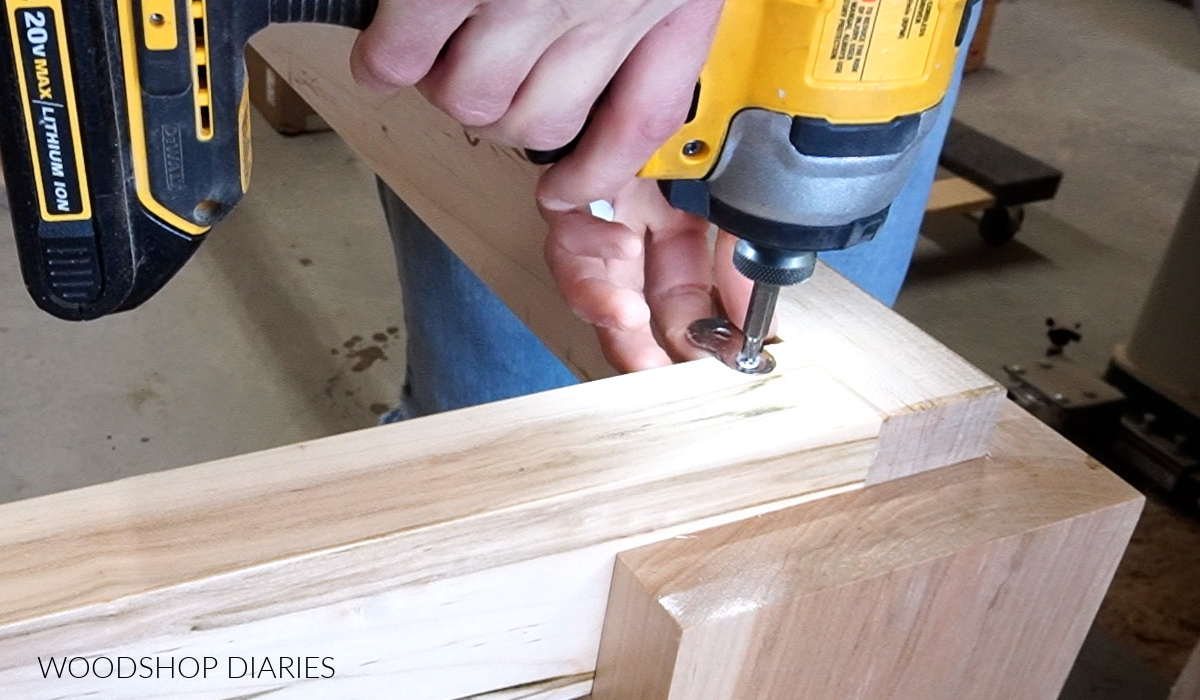
To assemble the apron to the legs, I used some 2 ½″ washer head screws (use 1 ¼″ if working with 1x material) through some washers.
.
I drilled a ⅜″ hole through just the apron (NOT THE LEG), then drove a screw through a washer to pull them together snug (don’t overtighten…just drive until they are tight together to allow for wood movement).
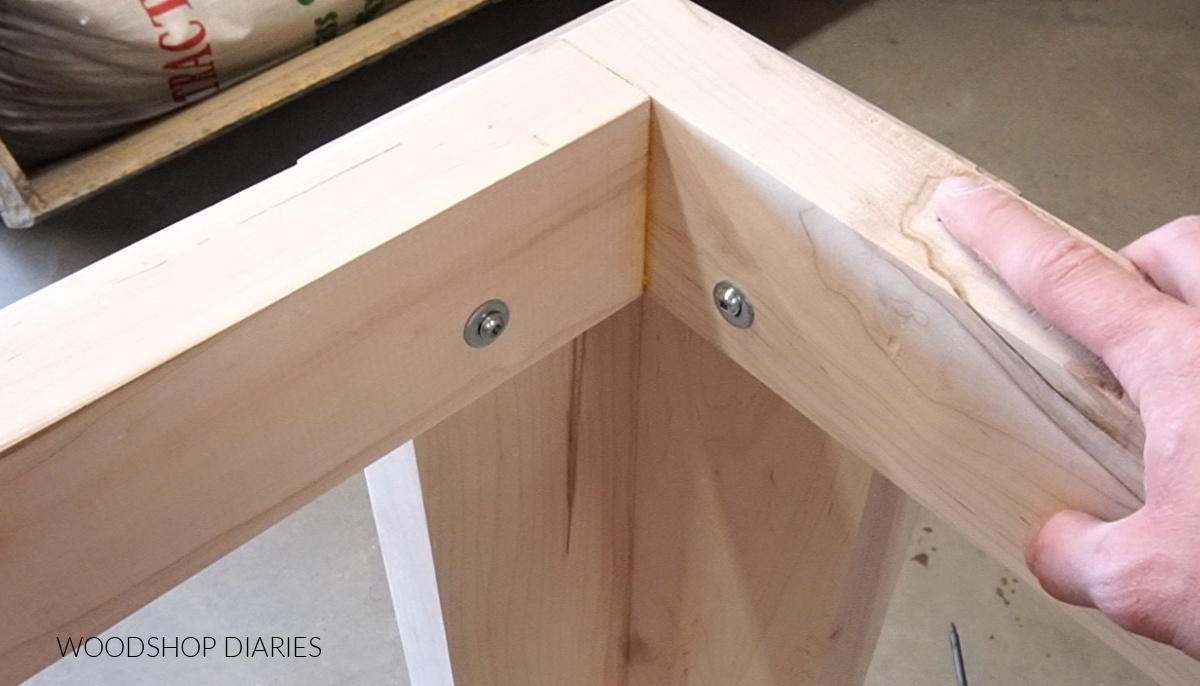
I did this on each side of each corner on each leg.
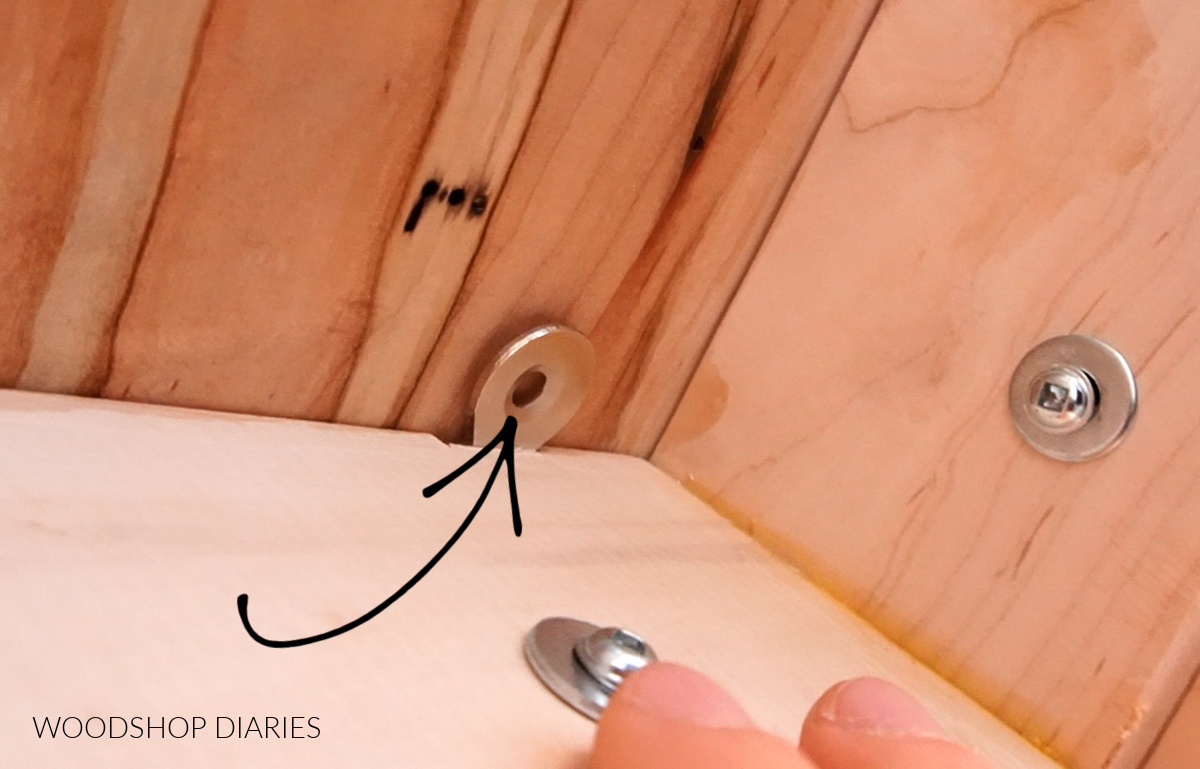
.
The oversized hole drilled through the apron will allow for wood movement as the leg pieces expand and contract so they shouldn’t pull apart at the seams.
Step 7: Finish Table As Desired
I applied 4 coats of clear coat and sanded between each one. You are welcome to paint/stain/finish the top and base however you wish.
RELATED: How to finish raw wood furniture
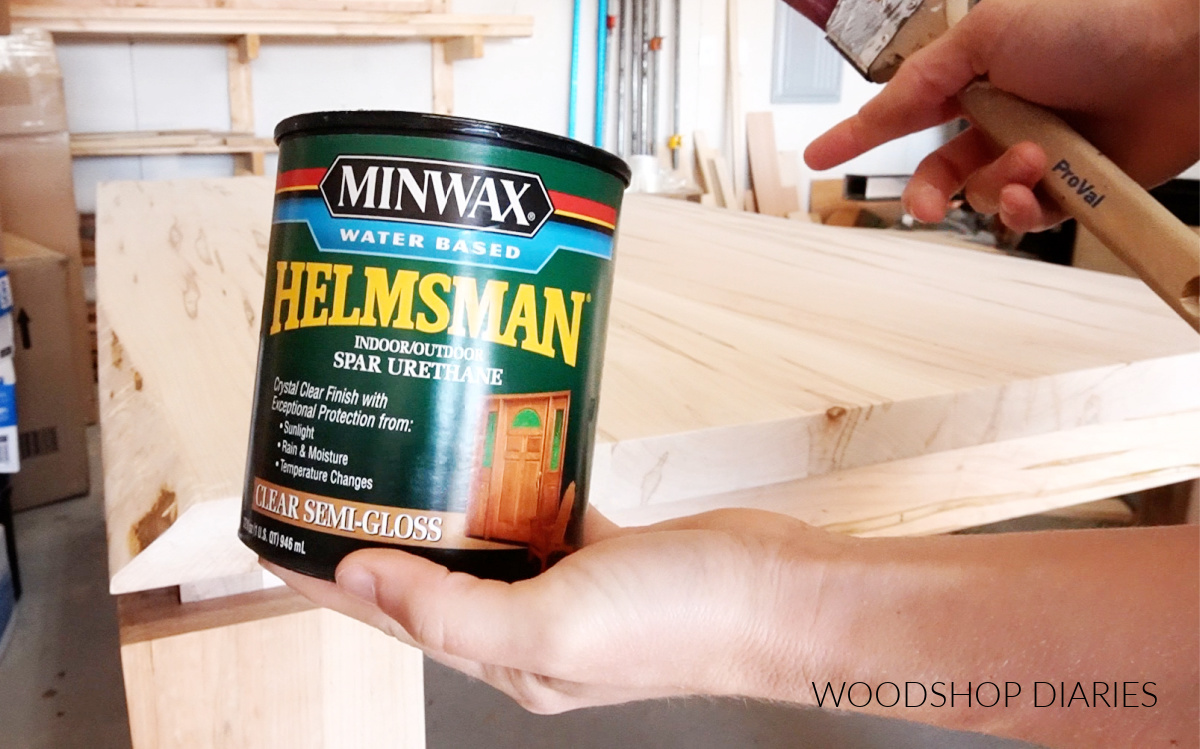
I also went ahead and applied a couple coats of clear coat to the bottom side of the table top as well to help prevent warping.
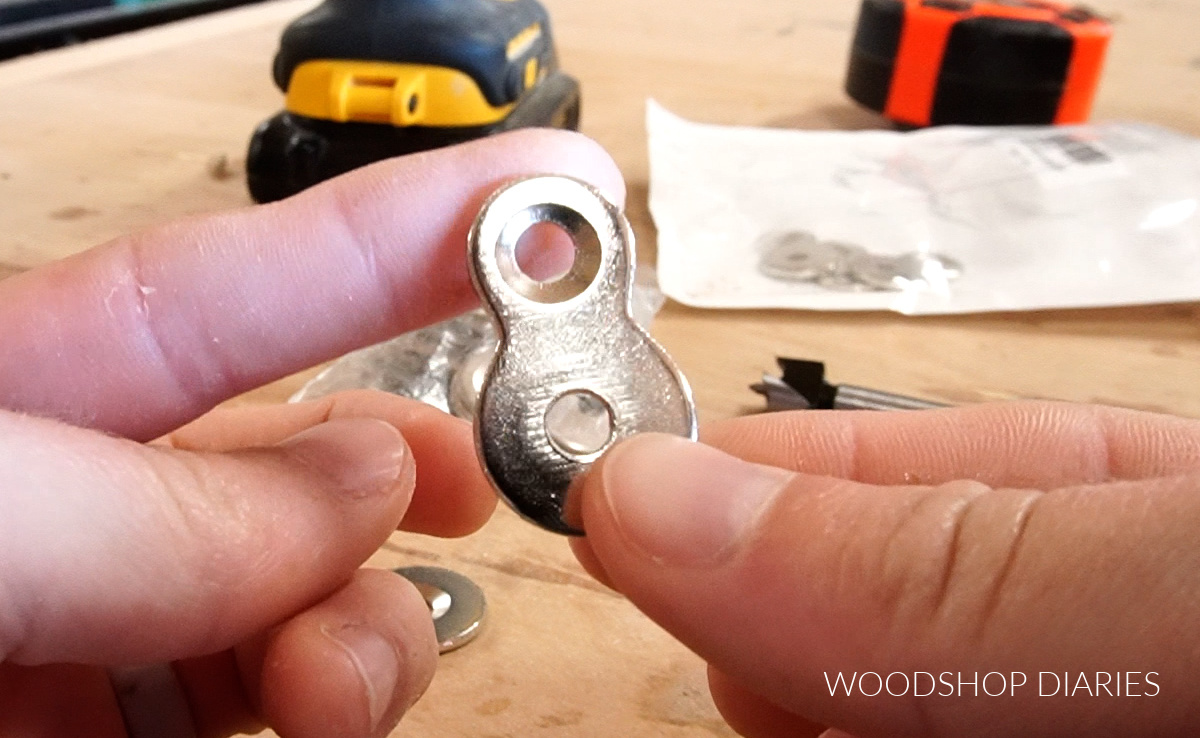
Step 8: Attach Table Top to Table Base
I installed several of these figure 8 tabs onto the base of the table. Now there are a few different ways and styles of brackets you can use for attaching table tops.
.
On my last table just like this one, I simply glued and clamped the top onto the base—but, later I learned that apparently that’s a huge no-no as it doesn’t allow the wood to move and can potentially crack it.
.
However, it’s been three years and it’s yet to have any issues. So sometimes I question the legitimacy of these rules haha.
.
Nonetheless on this table, these figure 8 tabs are supposed to allow the top to move while keeping it secure to the base and prevent it from cracking over time.
But, you’re welcome to try whatever method you feel comfortable using to attach the top.
.
To install these tabs, I used a ⅝″ forstner bit to drill just deep enough so that the tab sits flush into the hole.
The tab is supposed to be able to swivel, so I used a chisel to square off these sides to allow it some room to move.
.
Then I screwed it in place with some ⅝″ wood screws just loose enough that it can rotate.
I did this in several places along the table apron, then I put it all together.
RELATED: If you want to learn more about using figure 8 tabs, this post is really helpful.
.
The top should set on the apron and the edges should be flush to the outside edges of the table legs.
.
Once the tabs are secure to the base and the top is positioned on the apron, you can install the table top, by driving ⅝″ screws through the other side of the tabs on the underside of the table.
I didn’t screw my top in place yet because this table was SUPER heavy and it’ll be easier to move in two pieces. But I’ll attach it once we get it moved into the new place!
.
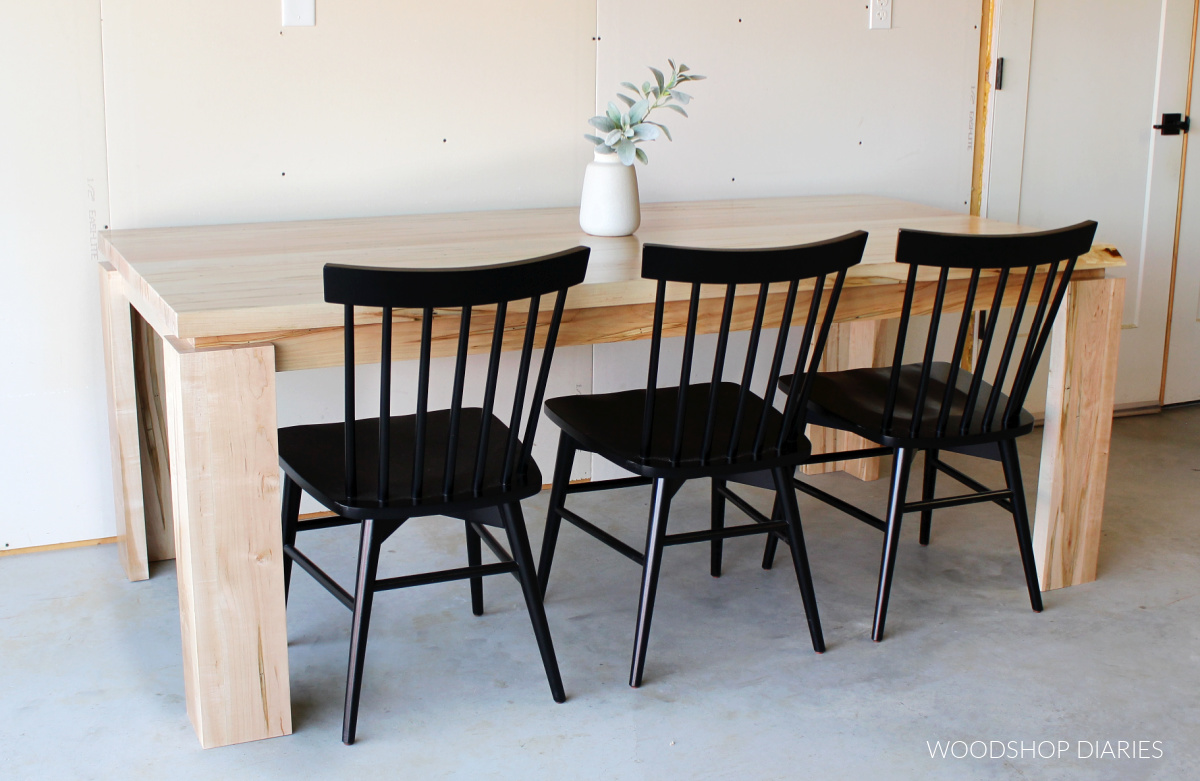
I am so happy with how this turned out and cannot wait to get it in my new home and set up with my new chairs and get to actually use it.

While I am sad to let my old dining table go, I’m really grateful for the opportunity to have been able to rebuild this design—this time, making some improvements and adding some details I hadn’t thought about before.
.
I really hope you guys enjoyed this DIY modern dining table build and I can’t wait to show you all the upcoming project ideas I have for the new home and the new shop.
Be sure to subscribe if you aren’t already to stay up to date on all the latest videos and projects.
And don’t forget to pin or save this project for later!
Until next time, friends, happy building!