
We’ve all heard the story of “If you give a mouse a cookie,” right? One thing leads to another and it’s never as simple as you give the cookie and go on about your business. Then it needs milk, then you’ve got to read it a story and fluff its pillow and let it draw a picture. (Side note…who would do any of this with a MOUSE?! I would die. I. CAN’T. EVEN.) So things have played out similarly with my mom’s recent projects….
.
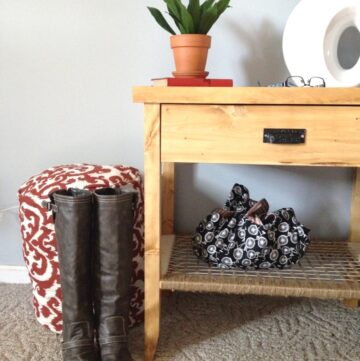
Do you guys remember the bench I made her?
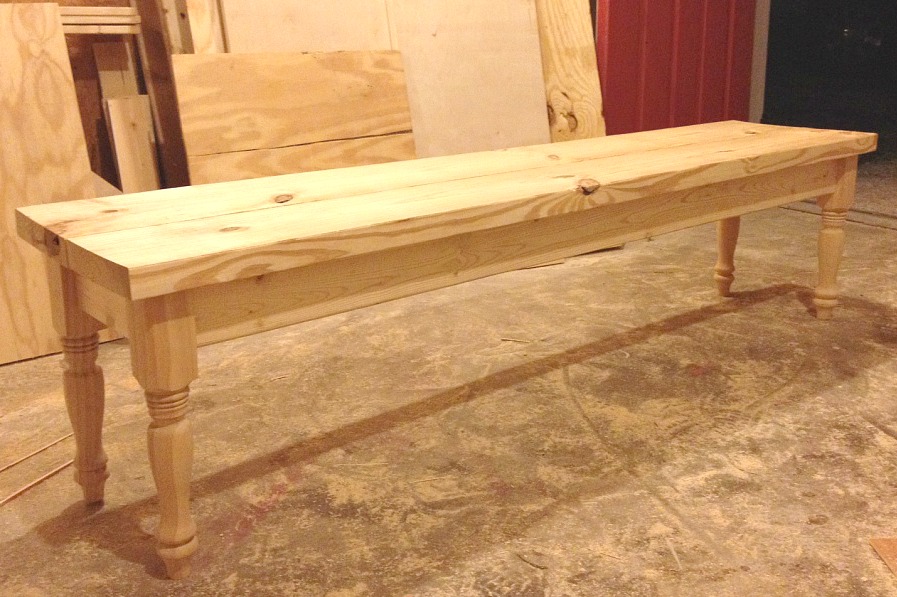
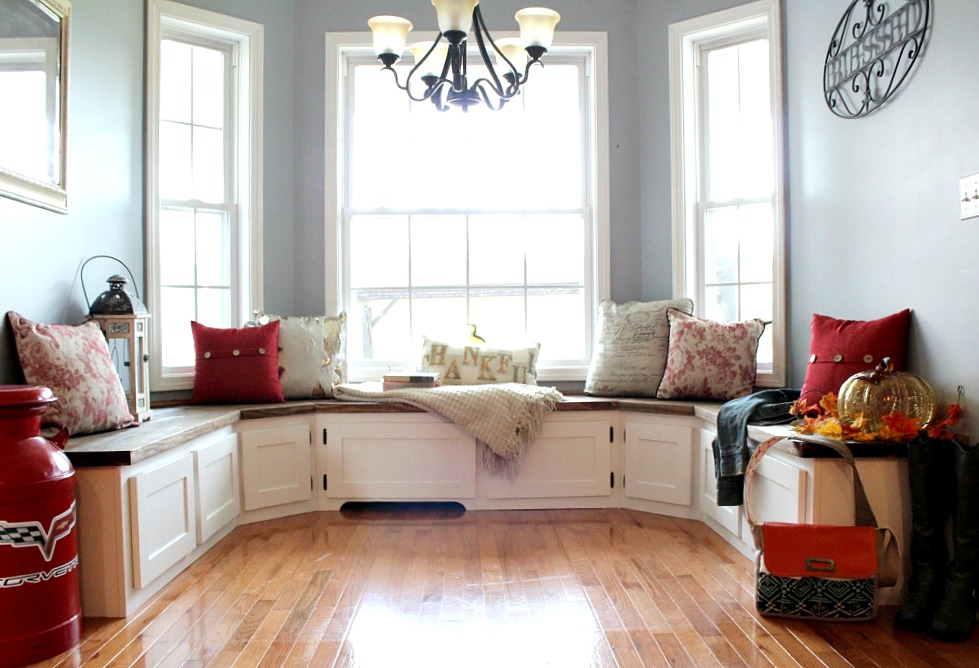
Then she wanted built ins.
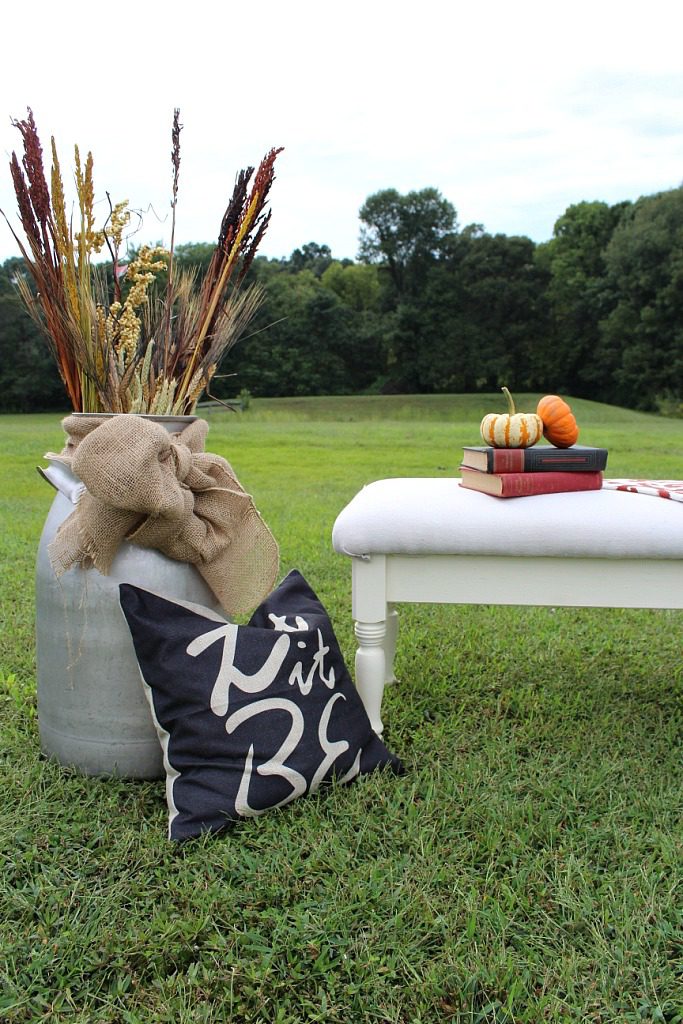
Then she wanted her first bench upholstered.
Well, here comes the latest project in the saga of “mom projects” and I’m thinking there is ANOTHER one coming after this, so that’s fun, right? 😐
.
After the built ins were installed, she wanted a new dining table for the space. Her old one just didn’t fit that well and she wanted a new style. I have to say it does hurt me just a little to cover up the view of those gorgeous built ins.
But, what good is a house if it’s not functional? And mom and dad needed a place to eat. So I suggested a table style that would be a little more “minimal” and wouldn’t block so much of the view. Basically it’s the same design as my clock table, but with a square top.
.
I used the same plans mentioned in the post here, but used 2x6s instead of 2x4s to make it a little more substantial. I modified the plans to make the base 28 ½″ tall and about 36″ wide. Mom needed her top to be 56″ long and 40″ wide. Here’s the quick how-to : )
.
Note: This post contains affiliate links. Please see disclosure policy for more details. If you purchase through these links, I may receive a small commission that allows me to keep this site free for its readers, but I only link to products that I personally use or highly recommend.
.
Tools Used for this Project:
.
Products Used:
Sand paper
.
Step 1: Glue up the table top
You can check out my post here about how to build a table top. For this top, I used two 2x12s and two 2x10s to make the total width of the top about 40″. I glued and clamped the boards while I worked on the base.

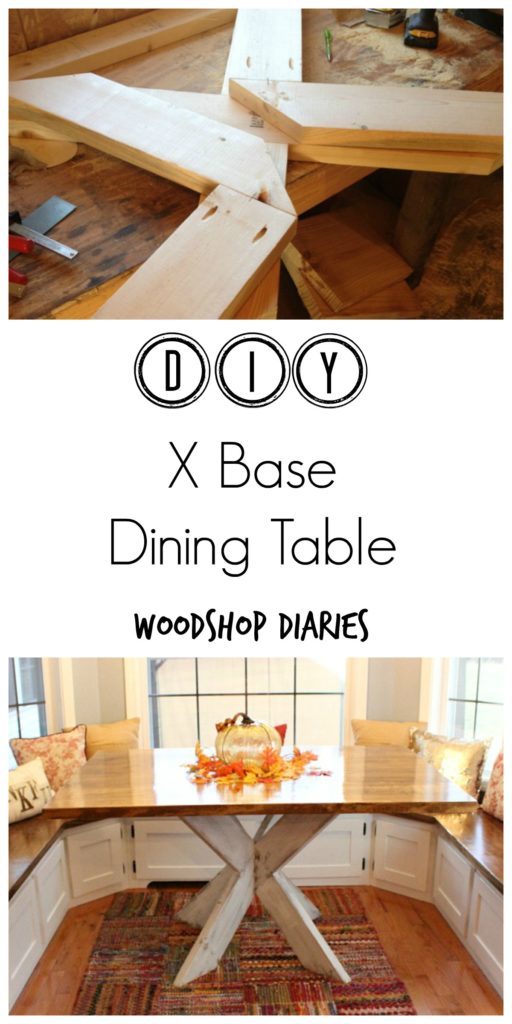
Step 2: Assemble the main X
If you check out the plans I mention in this post, you know that you have to make a “main X” first. This is where I modify the plans. Unless you want to do all the math, this is where you just trial and error. As much as I love math, I still prefer the trial and error method.
.
This table couldn’t be wider than the table top and needed to be about 28 ½″ tall so the total table height with the top would be about 30″. So I played with the angles and figured out that 45 degree angles worked great to get me the size I wanted. So I cut one long piece of 2×6 with my miter saw at a 45 degree angle and determined how long the piece needed to be to make it stand 28 ½″ tall. It’s easy to lay the piece out on a table top with the 45 angle against the wall. Then measure down from the wall at 90 degrees and mark where that intersects the 2×6 at 28 ½″.
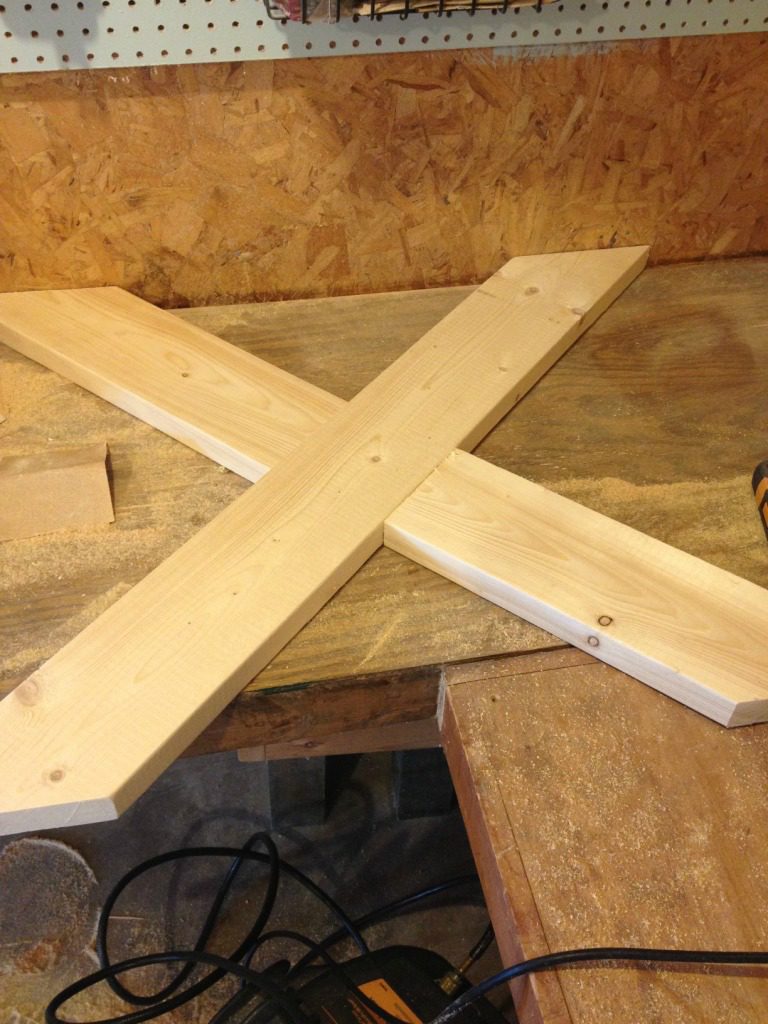
Then I cut two pieces like the picture shows with one regular 90 degree end and one 45 degree. I could have taken the length of the long board, subtract 5 ½″, then divided by two to get the lengths these pieces should be. But again, trial and error works, too.
.
Once I had my cuts made, I used my Kreg Jig and screws, to attach the two small pieces to the large piece.
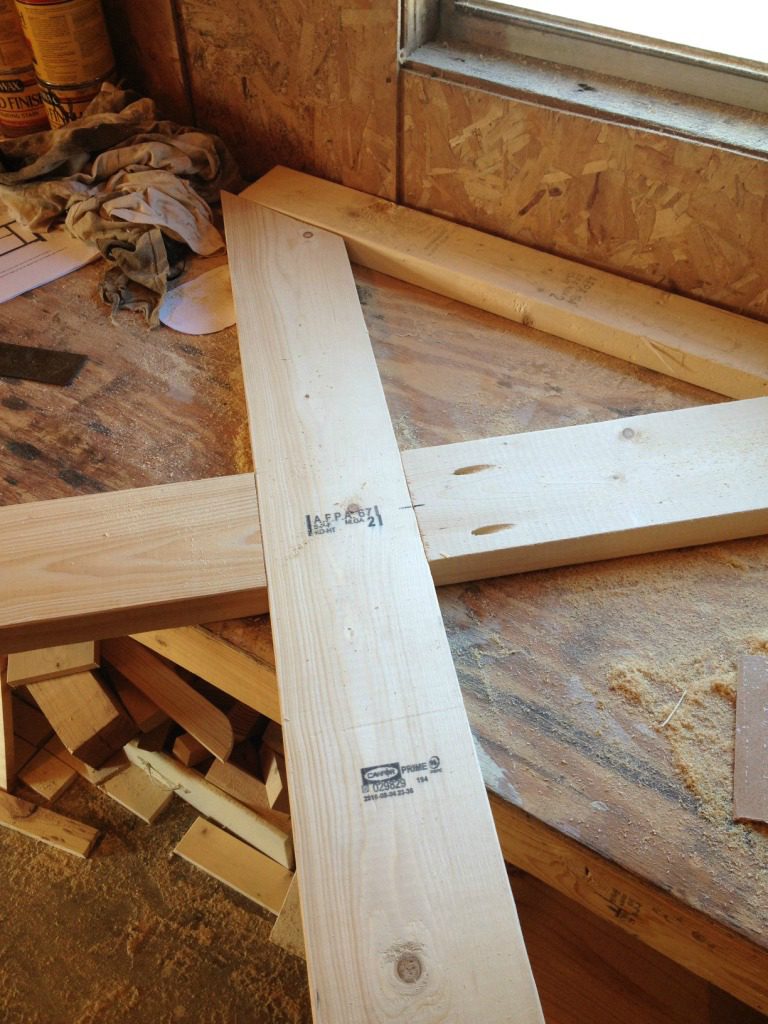
Step 3: Assemble the Side Xs
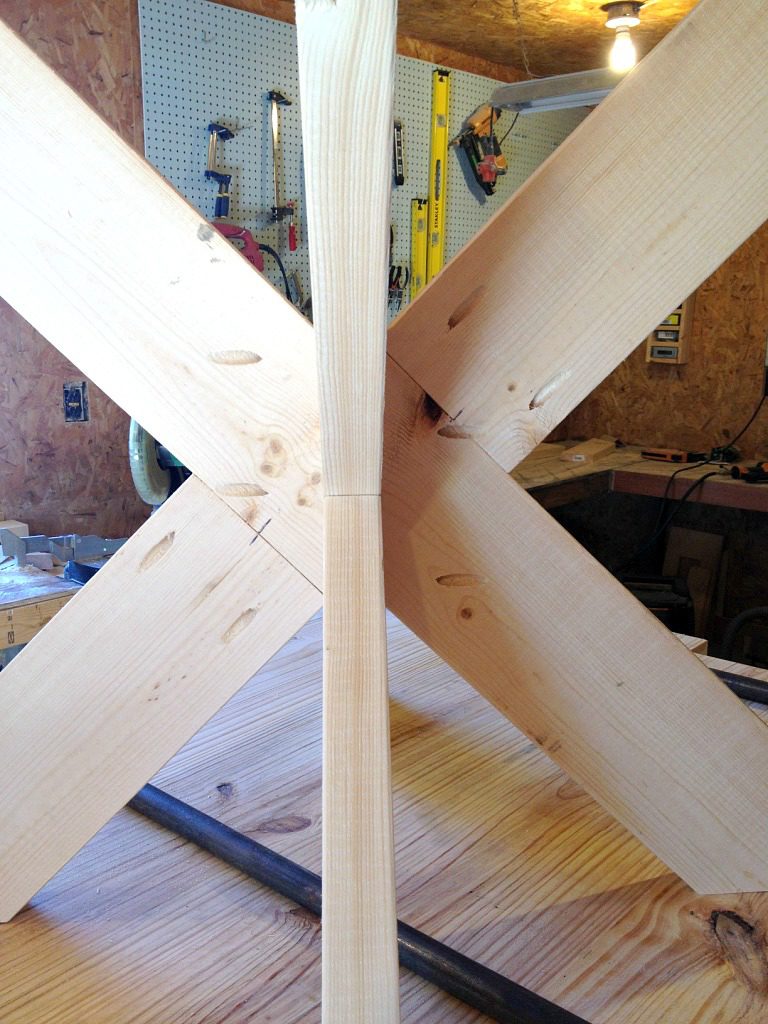
Once the main X is assembled, I needed to make two identical “side Xs.” In a nutshell, I need to make two pieces that when put together are the EXACT same size as the main X. See this picture?
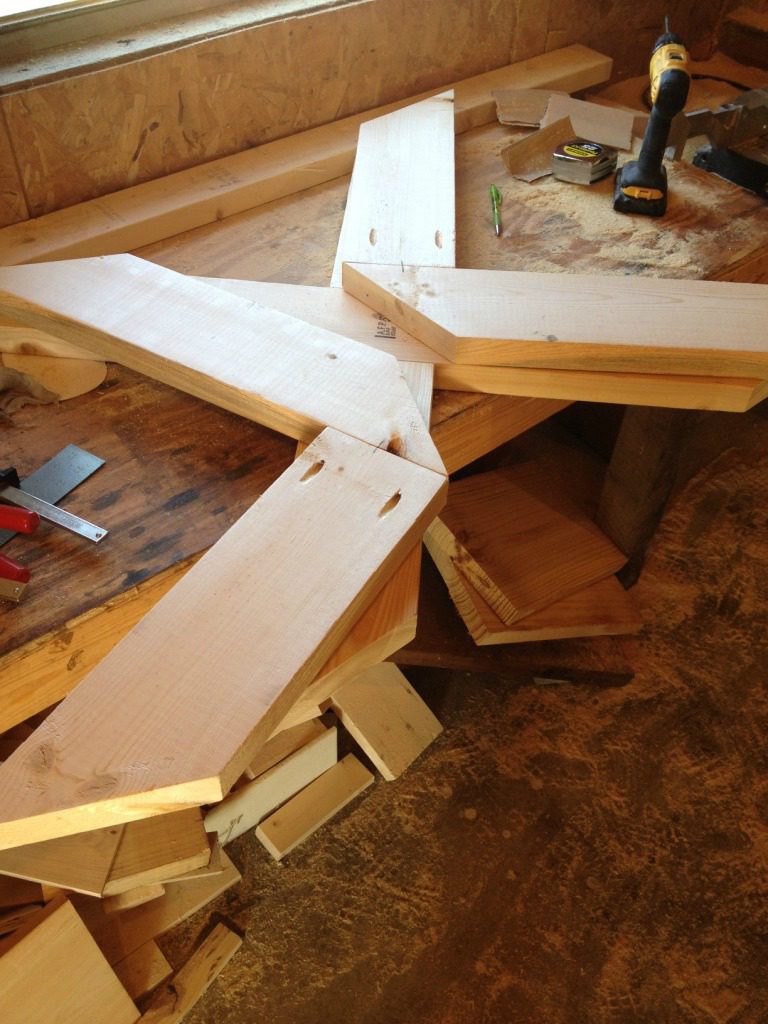
Those two pieces on the top are the “side Xs.” When I lined them up on top of the main X, they are exactly the same. To do this, I simply cut two pieces EXACTLY like the two small pieces from step 2. Identical lengths and angles. I laid them on top of the main X small pieces so they matched up. Then I cut a piece of 2×6 the same length as the long piece from the main X and cut it at a 45 degree angle IN THE CENTER. (See picture above) Once I got everything fitted together, I used my Kreg Jig and screws once again to attach the boards like the picture above.
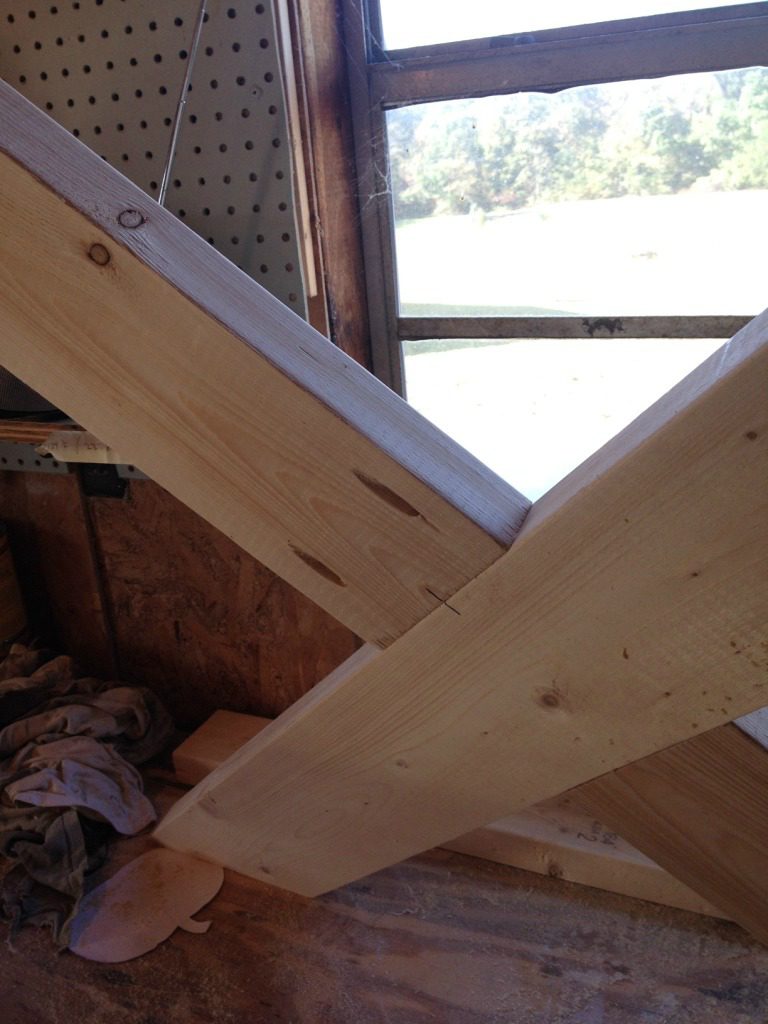
Step 4: Assemble the base.
Once all the pieces were made, I needed to attach them together. I used my Kreg Jig and screws again to drill pocket holes in the sides of the “side Xs” and attached them to the main X like the picture. I make sure to do this on a flat level surface so the table doesn’t wobble when it is assembled.

Step 5: Finish and attach top
Once I was done with the base, the table glue was dry. I trimmed the top to size with my circular saw and sanded it really good. Then I stained both the top and the base with Minwax Provincial. I apologize, I don’t have good pictures here (but I do in this post), but I drilled pocket holes with my Kreg Jig in the top of each leg and attached them to the underside of the top with screws.
.
I used Kreg Plugs to plug the pocket holes…you can see them here:
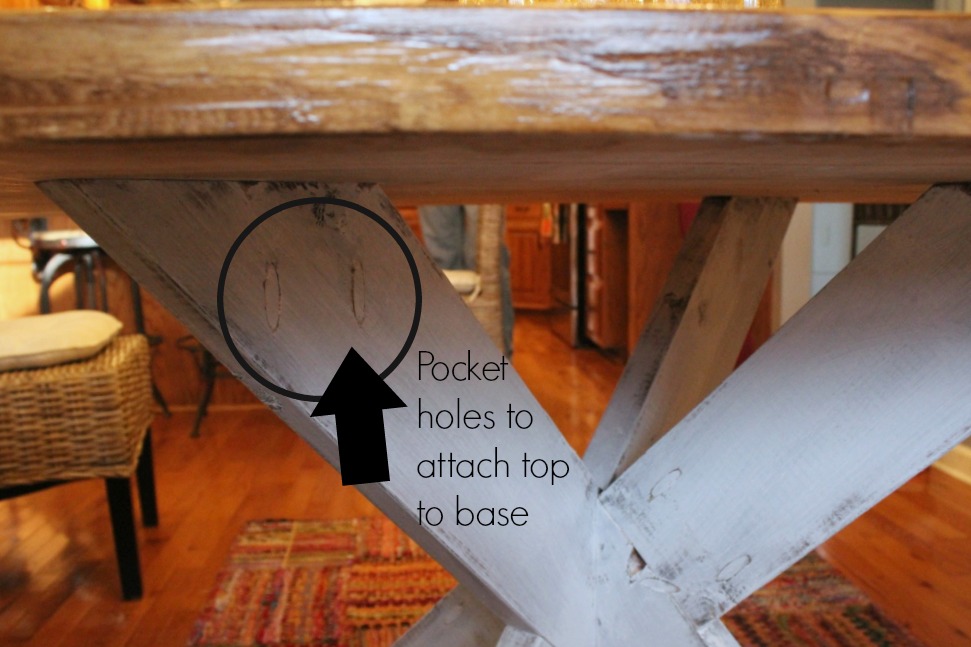
I made the table so most of the pocket holes were on the back side of the table. You really don’t notice them unless you are looking for them. For a more disguised look, I recommend puttying around them and sanding. Since this was a “distressed” look, mom told me not to bother with the putty.
.
After the plugs were in, I wiped over them with the stain rag, then dry brushed the base with white paint. Mom took it home and polyed the top with Minwax Polycrylic.
.
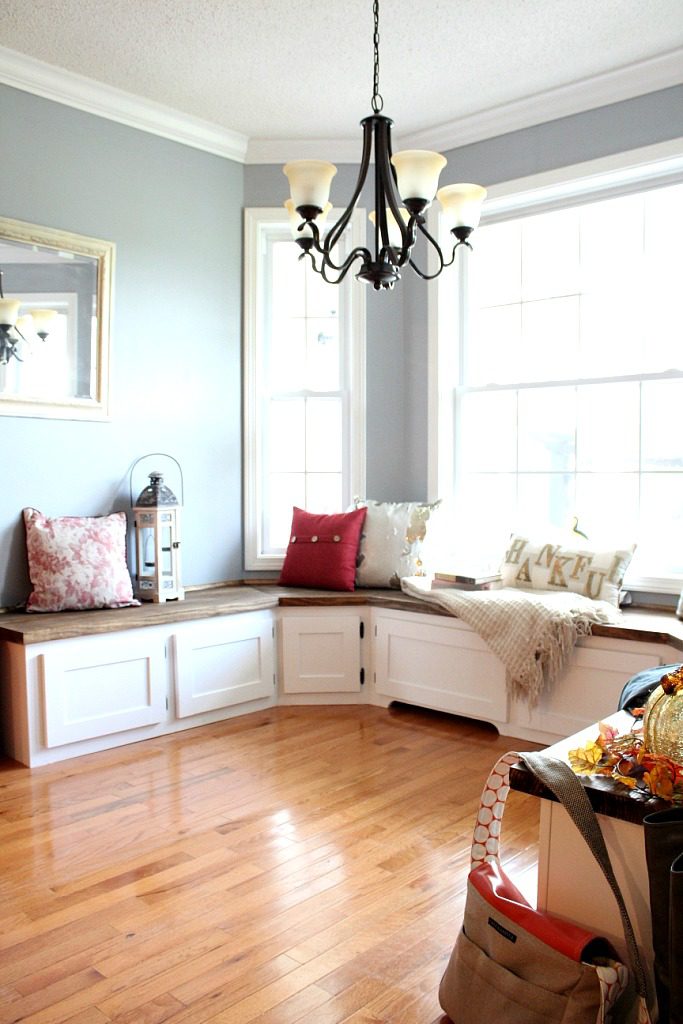
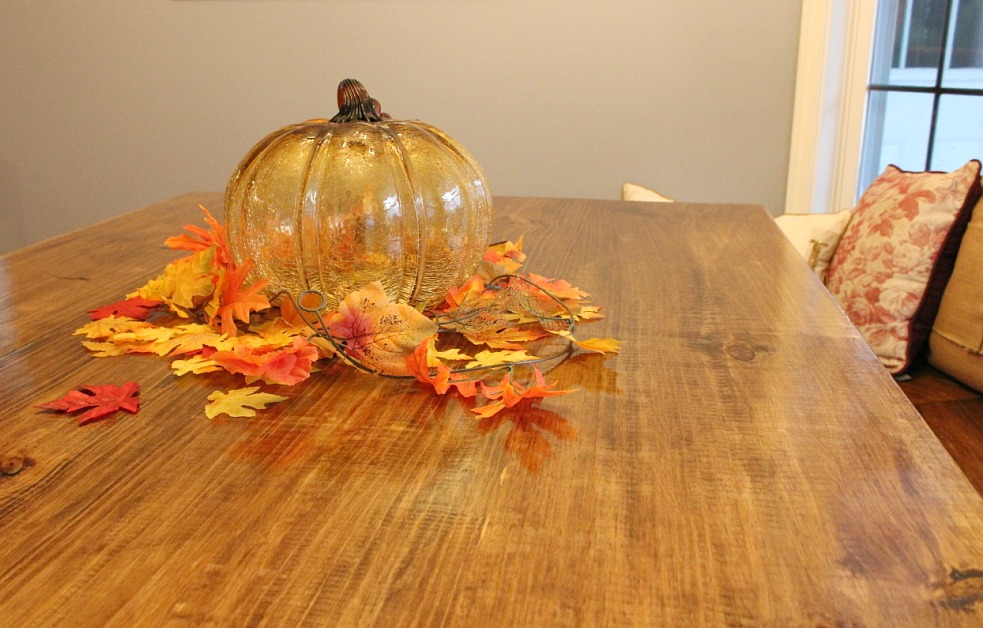
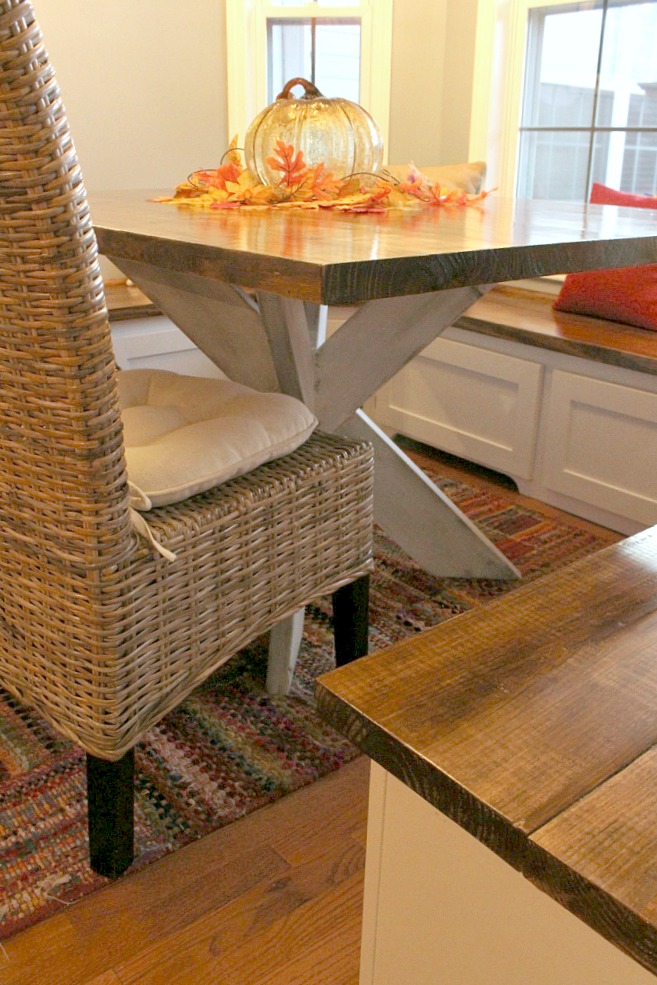
And here it is in its new home.
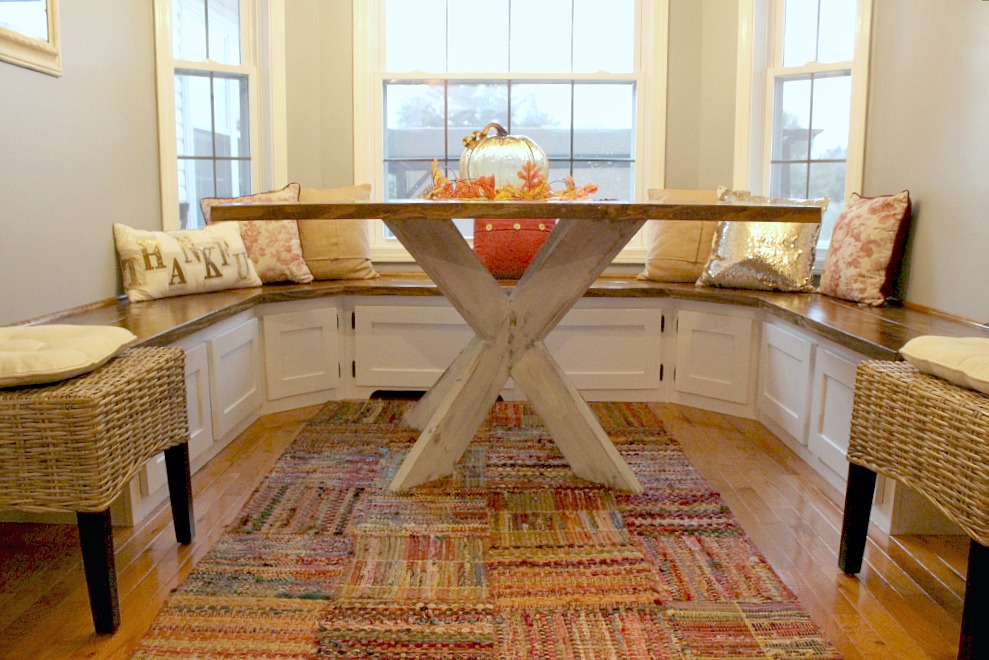
I recommended a different rug to mom, but she just loves this one…whatever makes her happy haha. I love that the table doesn’t block the entire view of the built ins, but still fits well in the space.
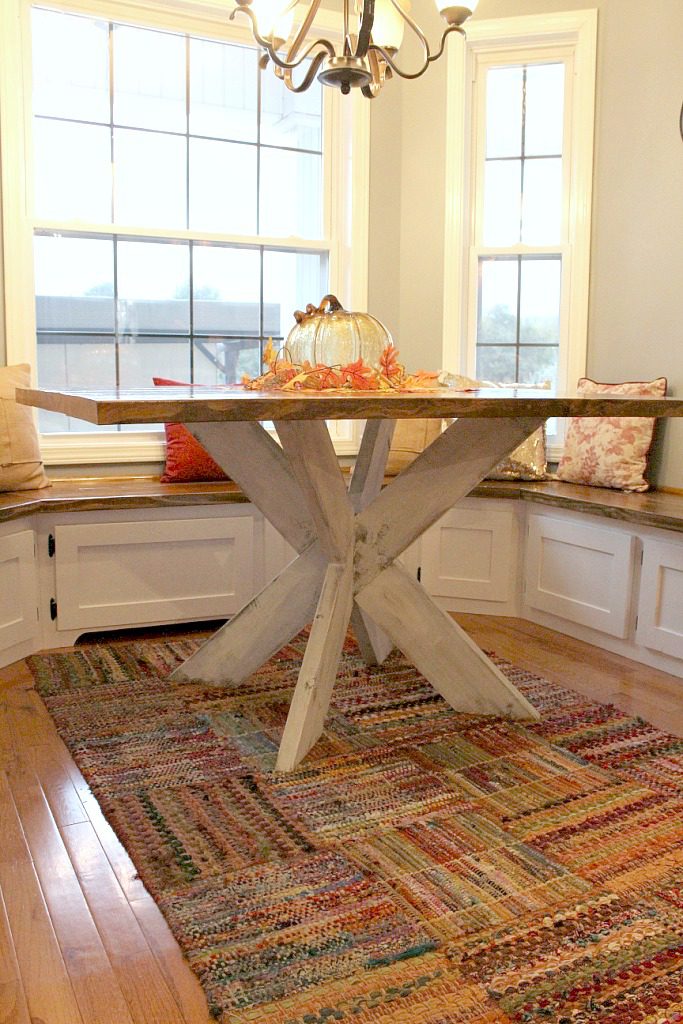
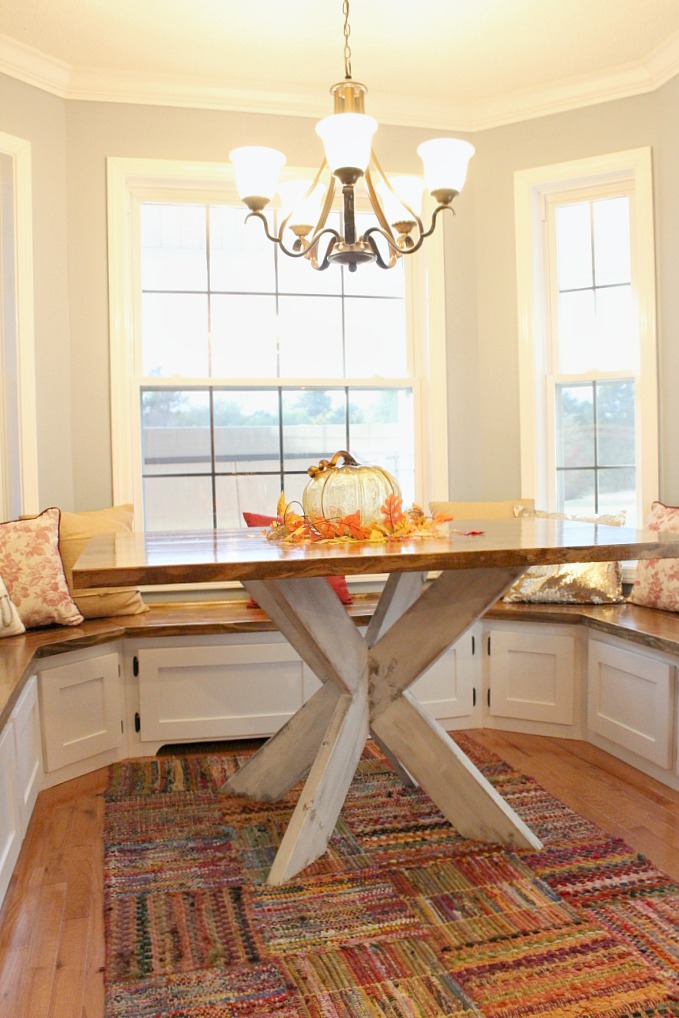
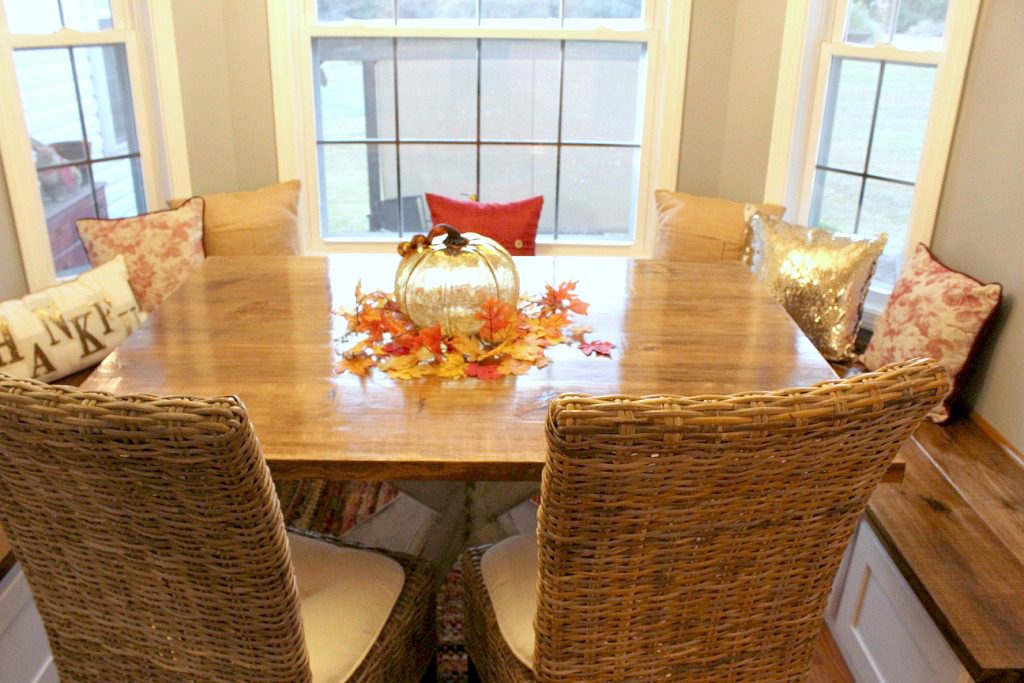
Now, obviously, they have some chairs to go along with the table, but you know how this goes….I have to get the picture of the table only first 😉 Here’s what it looks like in its normal state.
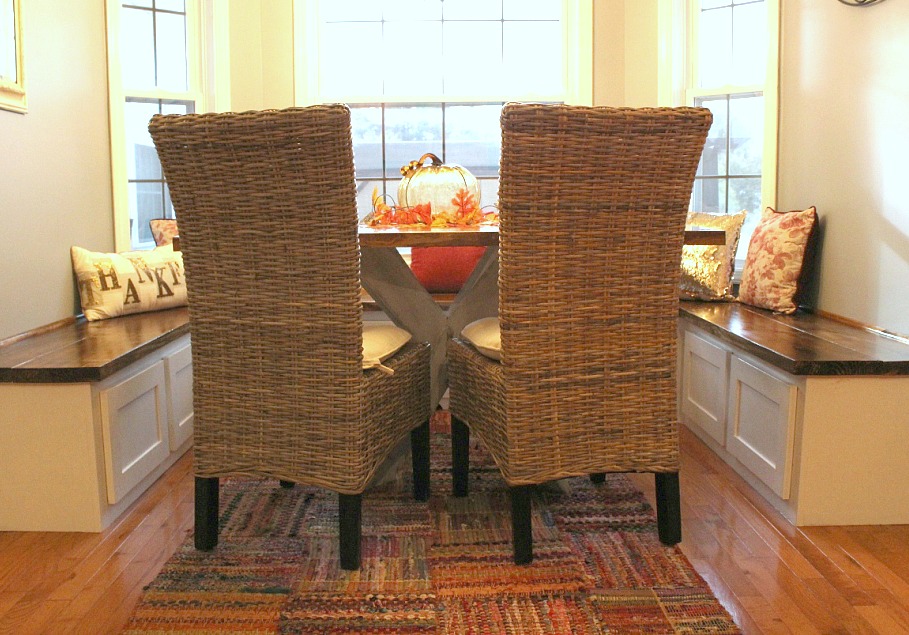
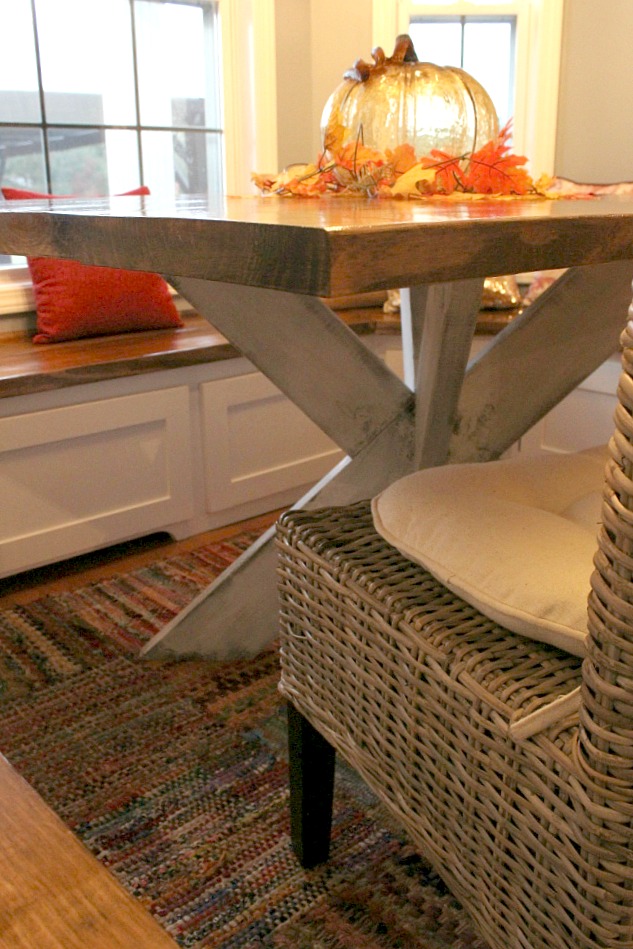
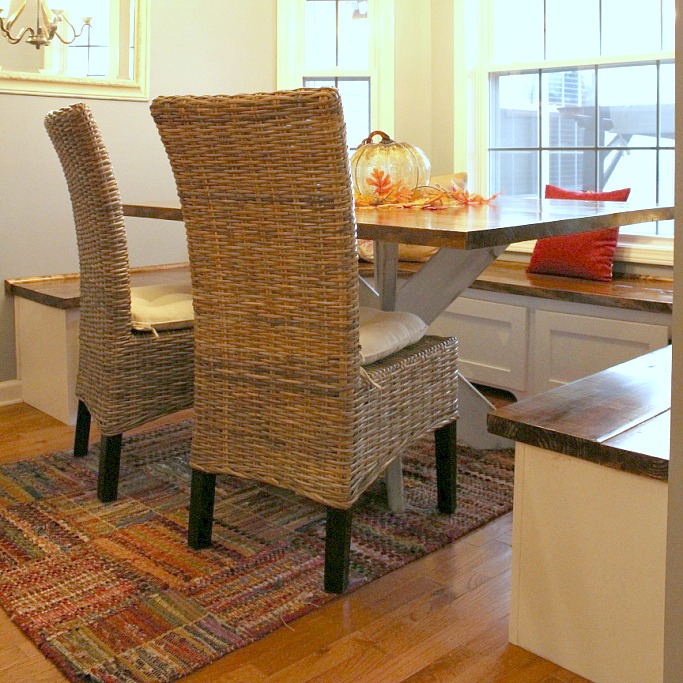
Gorgeous, right? I really love this X base style. It’s unexpected and a great conversation starter. I think it really fits this space well and allows room for people (*cough* me at these family dinners) to move around the table without knocking their knee on a table leg haha.
So what do you guys think about it? Besides that fact she totally needs a new rug under this new table?? Maybe we could start a petition and convince her to switch it out? HAHA just kidding…to each his own and she likes it, so that’s all that matters. BUT, Christmas is coming up and I think I see a rug under the tree this year with her name on it 😉
.
Let me know what you think (about the table, not the rug) in the comments below and be sure to pin for later!
Until next time, happy building!
Brittni says
I LOVE the look of this table! I am about to build the base but then wondered how stable this would be not in a nook corner with a toddler that may pull on the table sides…I am worried it could be tipped. What do you think based on yours?
Shara, Woodshop Diaries says
This is at my mom and dad’s house, so I don’t use it personally very often. It’s fairly sturdy though…we’ve never had trouble with it, but we also don’t have any children in the family that would tug on it, so I can’t speak from experience. But if you are concerned, you could make the top a little smaller, so that it’s not quite so top heavy or make the base slightly wider.
Shana says
I am in the process of making this table. I have the base competed and the table top glued together (the top is not cut down to the right length at about 1 1/2 feet too long still). I did a trial run of putting the table top on the base and I am worried about it being too wobbly (and I don’t think the extra top length had too much to do with that). Did you have any issues with this or did it become secure once you screwed the top to the base? I am just worried about stability and wondering if I need to take extra steps to strengthen the base.
Shara, Woodshop Diaries says
I didn’t have any issues with it being wobbly. I think it should strengthen up some once you get the top and base attached together. If not, you can always add some more screws at your joints on the base. Or go back and glue AND screw as well.
Crystal says
I really love the x base on this table and this wood be my first diy project any way you could tell the the measurements for a table that 6 feet long 3 feet wide and I want it to be 40 inches tall?
Shara, Woodshop Diaries says
Hey Crystal, I usually cut this style table base to fit my particular needs. It would be easier to cut to fit vs calculating out all the measurements, but if you are unsure how to cut to fit like in this tutorial, shoot me an email and I can see what I can do 🙂
Sara says
Would this support an 60″ glass table top? Love this look!
Shara, Woodshop Diaries says
So glad you like the table 🙂 I am not sure about it supporting a 60″ glass top…I don’t think it’s wide enough for that large of a top. I would be afraid if it being super top heavy and the glass fall off if someone bumped it. You could adjust the measurements to make it wider, but I’m still not real sure how you would attach the glass…silicone maybe?? I haven’t ever used a glass top, so I am not quite sure!
Nancy Spivey says
Usually glass tops just sit on the base….with the weight of the glass holding them in place. I’m thinking about getting my husband to try this base for a 45″ square glass top we have that sat on an old gold colored base we gave away years ago.
Kate Hollingsworth says
Shara I just found this on Pinterest and I love it! Great tutorial as always. We’d love it if you’d share this table (or any of your other awesome ideas) at our link party (To Grandmas House We Go) – you can link up any Wednesday. Hope to see you there. xx
Shara, Woodshop Diaries says
Hi Kate!! Thanks for the invite!! I will be sure to link up 🙂
Sam says
Ive followed this plan and got the first two small pieces to short…
I used 2x6s as well and when i subtract 5.5 from the length of the long board (42) and divide by two i get 18 and an eigth. When i go to attach it its about three inches short. It seems like if i just divide the length in half i will get 21 which is more of the correct length.
I am doing something wrong.?
Shara, Woodshop Diaries says
If you only divide by two, you aren’t accounting for the width of the long board you are attaching to. Could you maybe send me a picture??
Stephanie says
Love it! I even like the rug! lol
Shara, Woodshop Diaries says
Thank you!! Actually, the rug has grown on me over time 🙂 Maybe I was too hasty to want to switch it out haha
Shirley says
Well I certainly have to leave a comment! The table is absolutely gorgeous!! Nice build! Yeah, don’t be so hard on mom, she loves you unconditionally, believe me on that one! Her rug, omg I totally love it! Even though I love it, I really think she should at least try turning it the other way. Lengthwise to the sides and see if it fits and see if she might like it better. I personally think it would look better that way but then again until I saw it that way, I couldn’t be sure. Where did she get that??
I happened upon your post…again with this post but I must say, I’ve spent a good deal of time going through your posts and you are really good at what you do. Some women your age or even older, wouldn’t even attempt things like this. Some things you do have a very different technique than any I have ever seen which is ok as long as they do the job long term. Keep up the good work, I am a big fan!
Shara, Woodshop Diaries says
Thank you, Shirley! So glad you enjoyed this (and some of my other) post! I hope you stick around for all the other shenanigans I’ll be sure to post about 😉 And about the rug, Mom got it from Pier 1 a couple years ago. They may not have this exact rug still for sale, but I’m sure they will have some similar styles 🙂
Glenda Hendry says
All your work is so inspirational! But evidently your mom and I have similar tastes. Do you know where she purchased the rug?
Shara, Woodshop Diaries says
Hi! Thank you so much! She got the rug at Pier 1 a couple years ago…hopefully they still have some similar styles if you check them out!
Susan okeefe says
Beautiful! I have been considering this for our nook but our nook is smalller. Curious- can you sit comfortably on the built in seats to eat? Thank you!
Shara, Woodshop Diaries says
Thank you! Yes, the seats sit comfortably 🙂
Janisu says
Awesome project! I would love to have the buildins. Promise not to hide them. Lol
Shara, Woodshop Diaries says
Thank you so much!
Julie says
Wow, that table is amazing! Do you run your boards through a planer and/or joiner when making your table tops?
Shara, Woodshop Diaries says
Thank you! Actually, I wish I had a planer, but I haven’t justified the price for one yet haha. I look for the straightest boards I can find when I pick our wood for table tops and I run the edges through my table saw instead of using a joiner. You can search the blog for “table top” and find a post where I show exactly how I make them if you are interested 🙂
Jody says
Can I be your additional mom? I love the nook and so want one. I have a windowseat.
I bought a pedestal round table fro $10 at a thrift store and 4 chairs that go so well with it at Habitat for Humanity for $8 a piece. I am going to paint bace blue and top white I think and the chairs white.
Am exicited to be able to get what I wanted for such great prices.
You are so talented, I am jealous.
Shara, Woodshop Diaries says
Thank you so much! I’m sure your table and chairs will look awesome!
Varina says
When I grow up I want to be as good as Shara! Great job!
Shara, Woodshop Diaries says
Aww thank you so much 🙂 I promise, I still have ALOT to learn!
Linda says
Wish I had a daughter with your talents! Beautiful job. Your mom is a very lucky lady!
Shara, Woodshop Diaries says
Aww thank you so much! 🙂
Linda says
What a great look! What a beautiful, beautiful job you did! Your Mom is a very lucky gal! BTW, I want the rug too. Would she share where it was purchased? I’ve been looking everywhere for something like this. Thanks!
Shara, Woodshop Diaries says
Thanks so much! She got the rug a couple years ago at Pier 1. Not sure if they would have this exact one still, but I bet they will have something similar!
Nancy says
I love the look of the table in the nook. Since I have never build a thing in my life but have always thought I wanted to – what is a good first project? I obviously can’t start with an X leg table without some basics. Although that one board challenge looks awesome!
Shara, Woodshop Diaries says
Thanks! The twisty table from the one board challenge would be a little tricky for a first time project, but a good place to start that requires minimal tools (in case you don’t have very many yet) would be a wood tray or maybe some shutters. You can find both of those on my projects page 🙂 The dining bench I made for my mom recently would be a good first project as well.
kristin howard says
WOWSA! Love it.
Shara, Woodshop Diaries says
Thank you! 🙂
jan says
Really Gorgeous!!! Your Mom is one lucky lady!
Shara, Woodshop Diaries says
Thank you! I like to say that after raising me, her “luck” is probably well deserved haha!
Cheri says
The table is awesome….but really….. I want the rug! Ha! Gorgeous setting for the day’s first cup of coffee or last cup of tea. I love the contrasting finishes (top/legs)
Shara, Woodshop Diaries says
Thank you so much! Yeah, I shouldn’t be so hard on the rug haha. It’s cute, just not my style…but then again, my mom probably feels the same way about my style, too haha!
Ariana Goldberg says
I love the whole window nook, you have done a great job!! I can not wait to get mine kitchen nook started!
Shara, Woodshop Diaries says
Thank you so much! Good luck with your kitchen nook! I’m sure it will turn out beautiful! 🙂