
Ok, WHOA. We are still doing this thing. Like, it’s still happening. Still in process….still a long way from finished. I’m already at the end of my budget, end of my sanity, and the symbolic “end of my rope.”
I can’t say I regret starting this, but I’m really starting to question my judgement on thinking we could live in a remodel, get any sleep, keep anything clean, keep our sanity, afford what I’ve already bought, survive for weeks off whatever we can cook in a crockpot and microwave, and still function at our full time jobs during busy season (hey someone’s gotta pay for this remodel).
But, here we are….making progress. Isn’t it awesome?!


I know, still not much to see. But, the drywall is hung and finished and the ceiling is now finished and we have can lights!!!! I cannot tell you how happy I was to flip the switch and have enough light in the kitchen that I could actually see what I was doing! I used to cook in the dark….now I can see when I cook (which may not always be a good thing….I do not claim to be a good cook…).
So when we last left off, our kitchen was a mess and we had half the walls ripped down and some Sheetrock on and the column in the middle of the kitchen was still there and I still had a fully functioning kitchen. Since then, we moved the fridge in the foyer…

Then, we removed the stove, and the rest of the cabinets.

So now I’m left with a sink in the middle of the kitchen…and a dishwasher that has had the wire cut…what a tease. I put my dishes in, get it full, go to start it, and remember “oh, I can’t turn it on” and proceed to hand wash an entire dishwasher full of dishes. This is the life….
Meanwhile, Danny, being “Mr. Safety” and also our electrical expert on the project (he is an electrical engineer at his day job…or so he tells me haha) finds out the fridge is not on it’s own circuit (apparently that’s a problem…glad he knew that because I didn’t). He also finds out the stove was hardwired and had some loose connections and could have caught our house on fire!!! (I told him “see, there’s the reason we did this whole remodel!” He didn’t think it was funny…)
Here’s Danny doin’ what he does best…

We crawled under the house to run wires for the new circuits we needed to the panel in the basement. I say “we”….let me explain. I’m claustrophobic and I could make it to the point where you had to crawl under a duct and it was a tight squeeze. Then I told Danny I’d stay there and be moral support and shine the flashlight, but I wasn’t going further unless it was life or death. I kept imagining if I crawled under that I’d have a panic attack and end up getting stuck. Someday I’ll face that fear….but not today 🙂
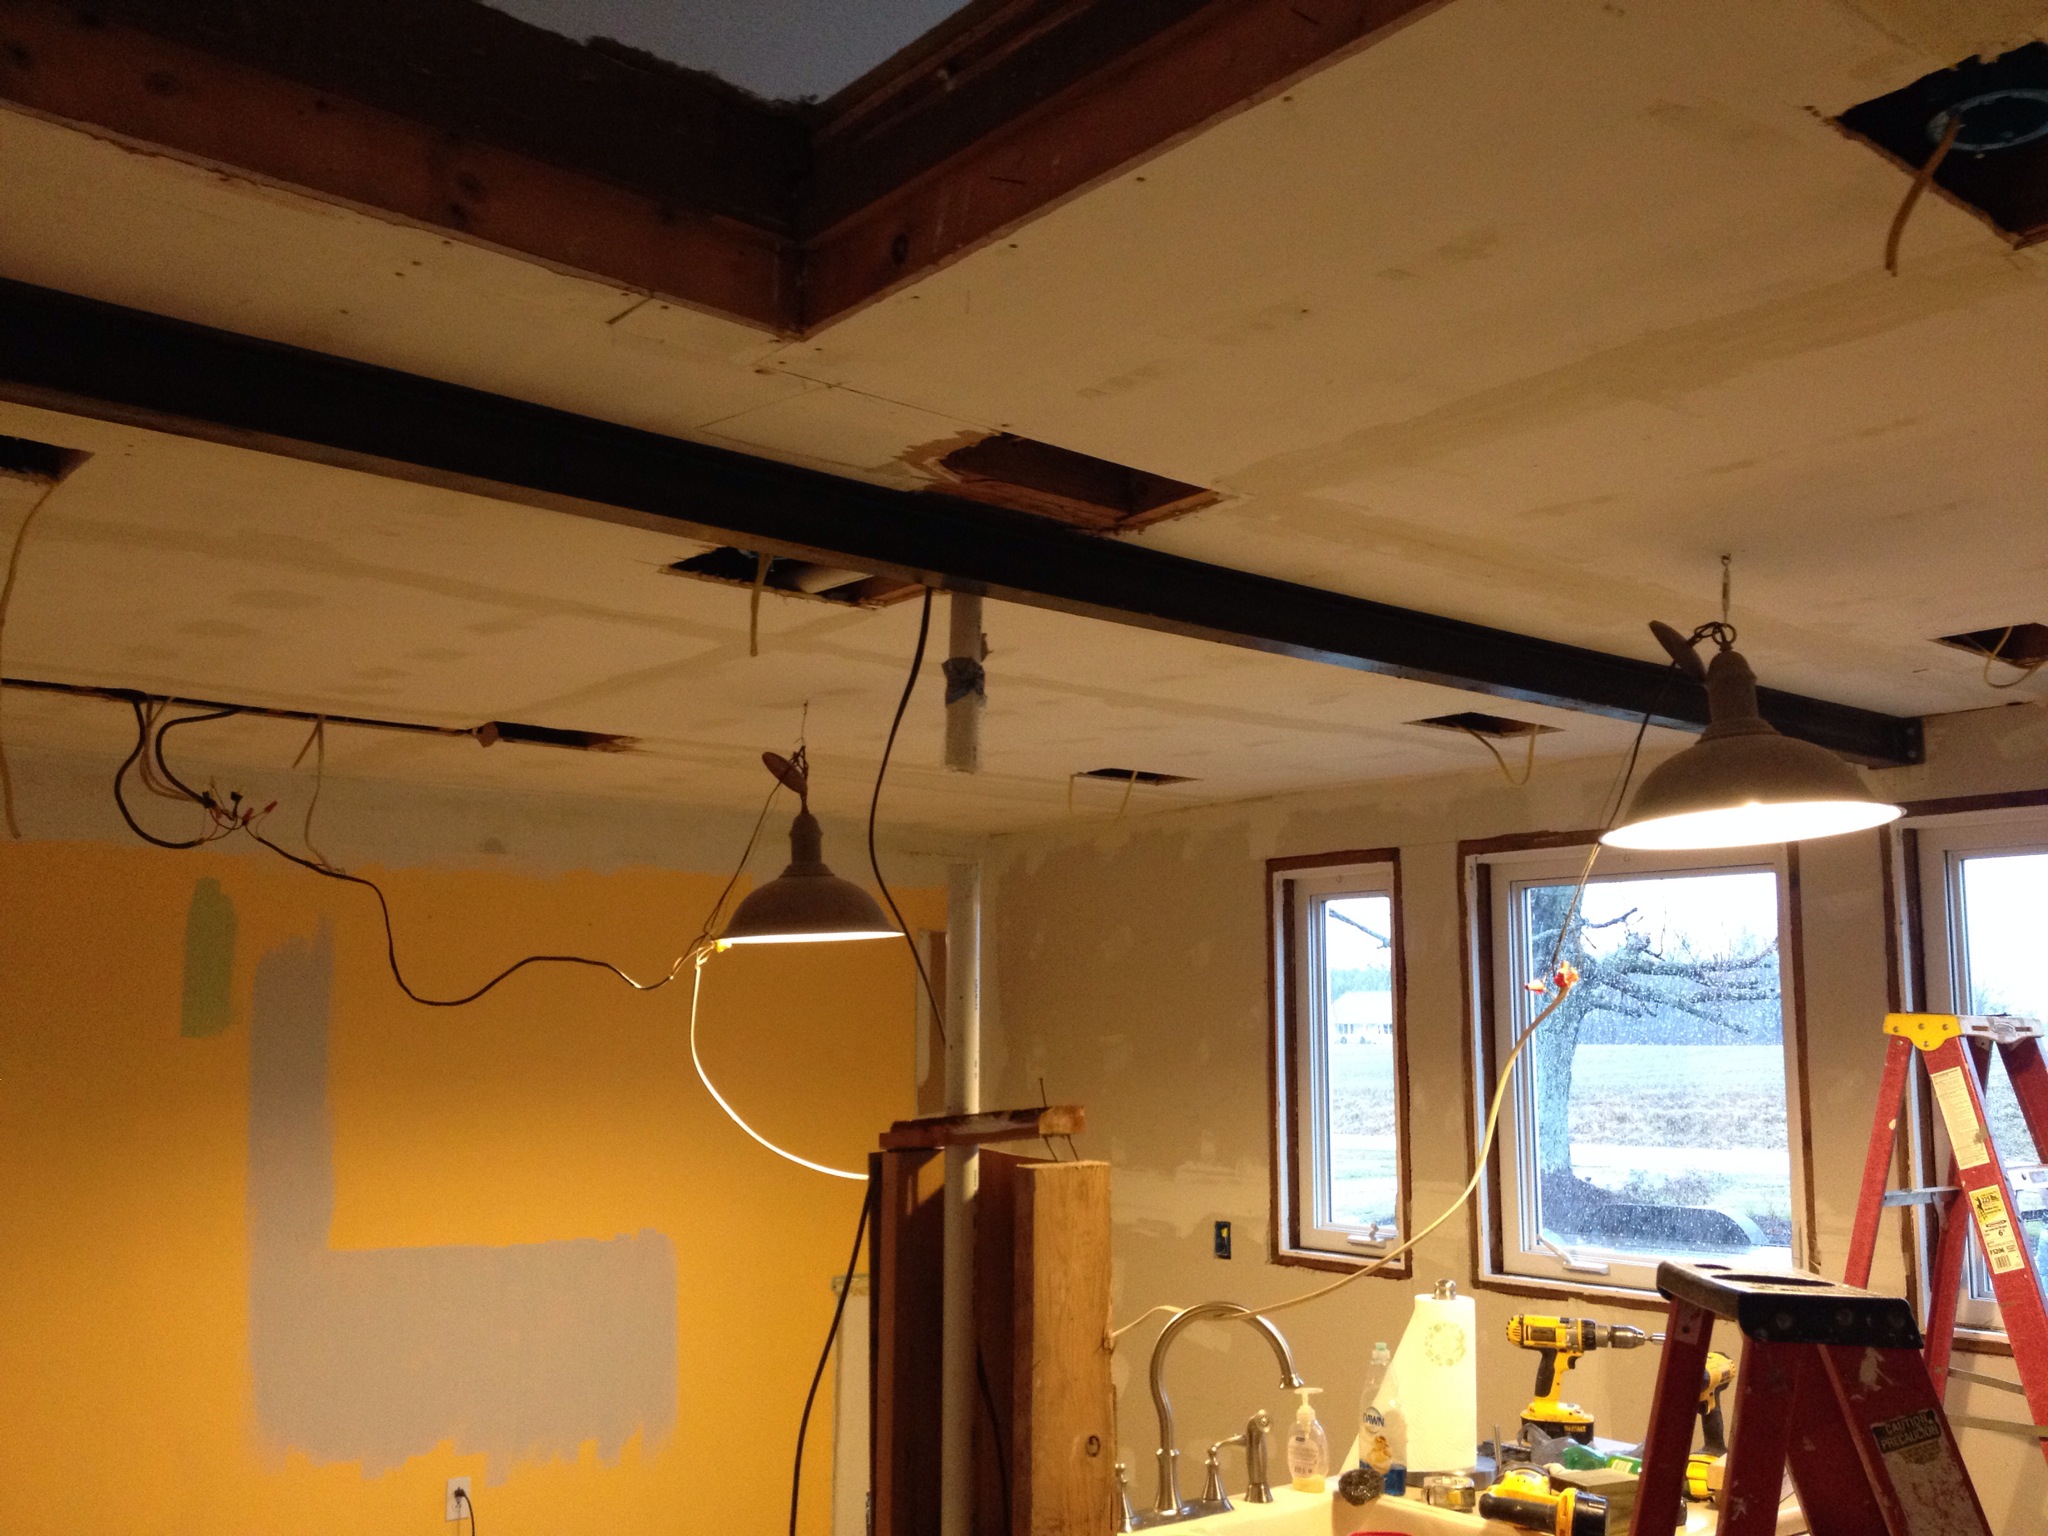
Let’s see, what happened next? Well, we got the drywalll up and patched he holes in the ceiling from the can lights. Can I just tell you how amazingly better this kitchen is with these lights?! I literally screamed from excitement when we turned them on for the first time. I have a problem…


You may notice the half-gone column in the picture above. Let’s discuss this column. I hated it. Hate isn’t enough to describe how much I loathe that column. It’s just in the way…right in the middle of the kitchen, ugly, in the way of every layout idea I had for the space. So, I wanted it gone.
All signs pointed to it being NON load bearing. (We looked at everything…) So, we started to cut it down. One side was cut fine…but when dad went to cut the other side, there was some pressure on the saw blade which would indicate some weight on it. Well we didn’t want our ceiling to cave in, so we got a steel I beam for support.
That was fun…


We jacked it up, cut it out, and screwed in the beam. After doing all of that, we’ve since determined it was likely unnecessary for us to actually put any support right there (long story), but whatever. A few extra dollars and now I get to cover it with rough wood and make to look even cooler. No harm done…I guess.

Sneak peak to the rough lumber I got for the beam!

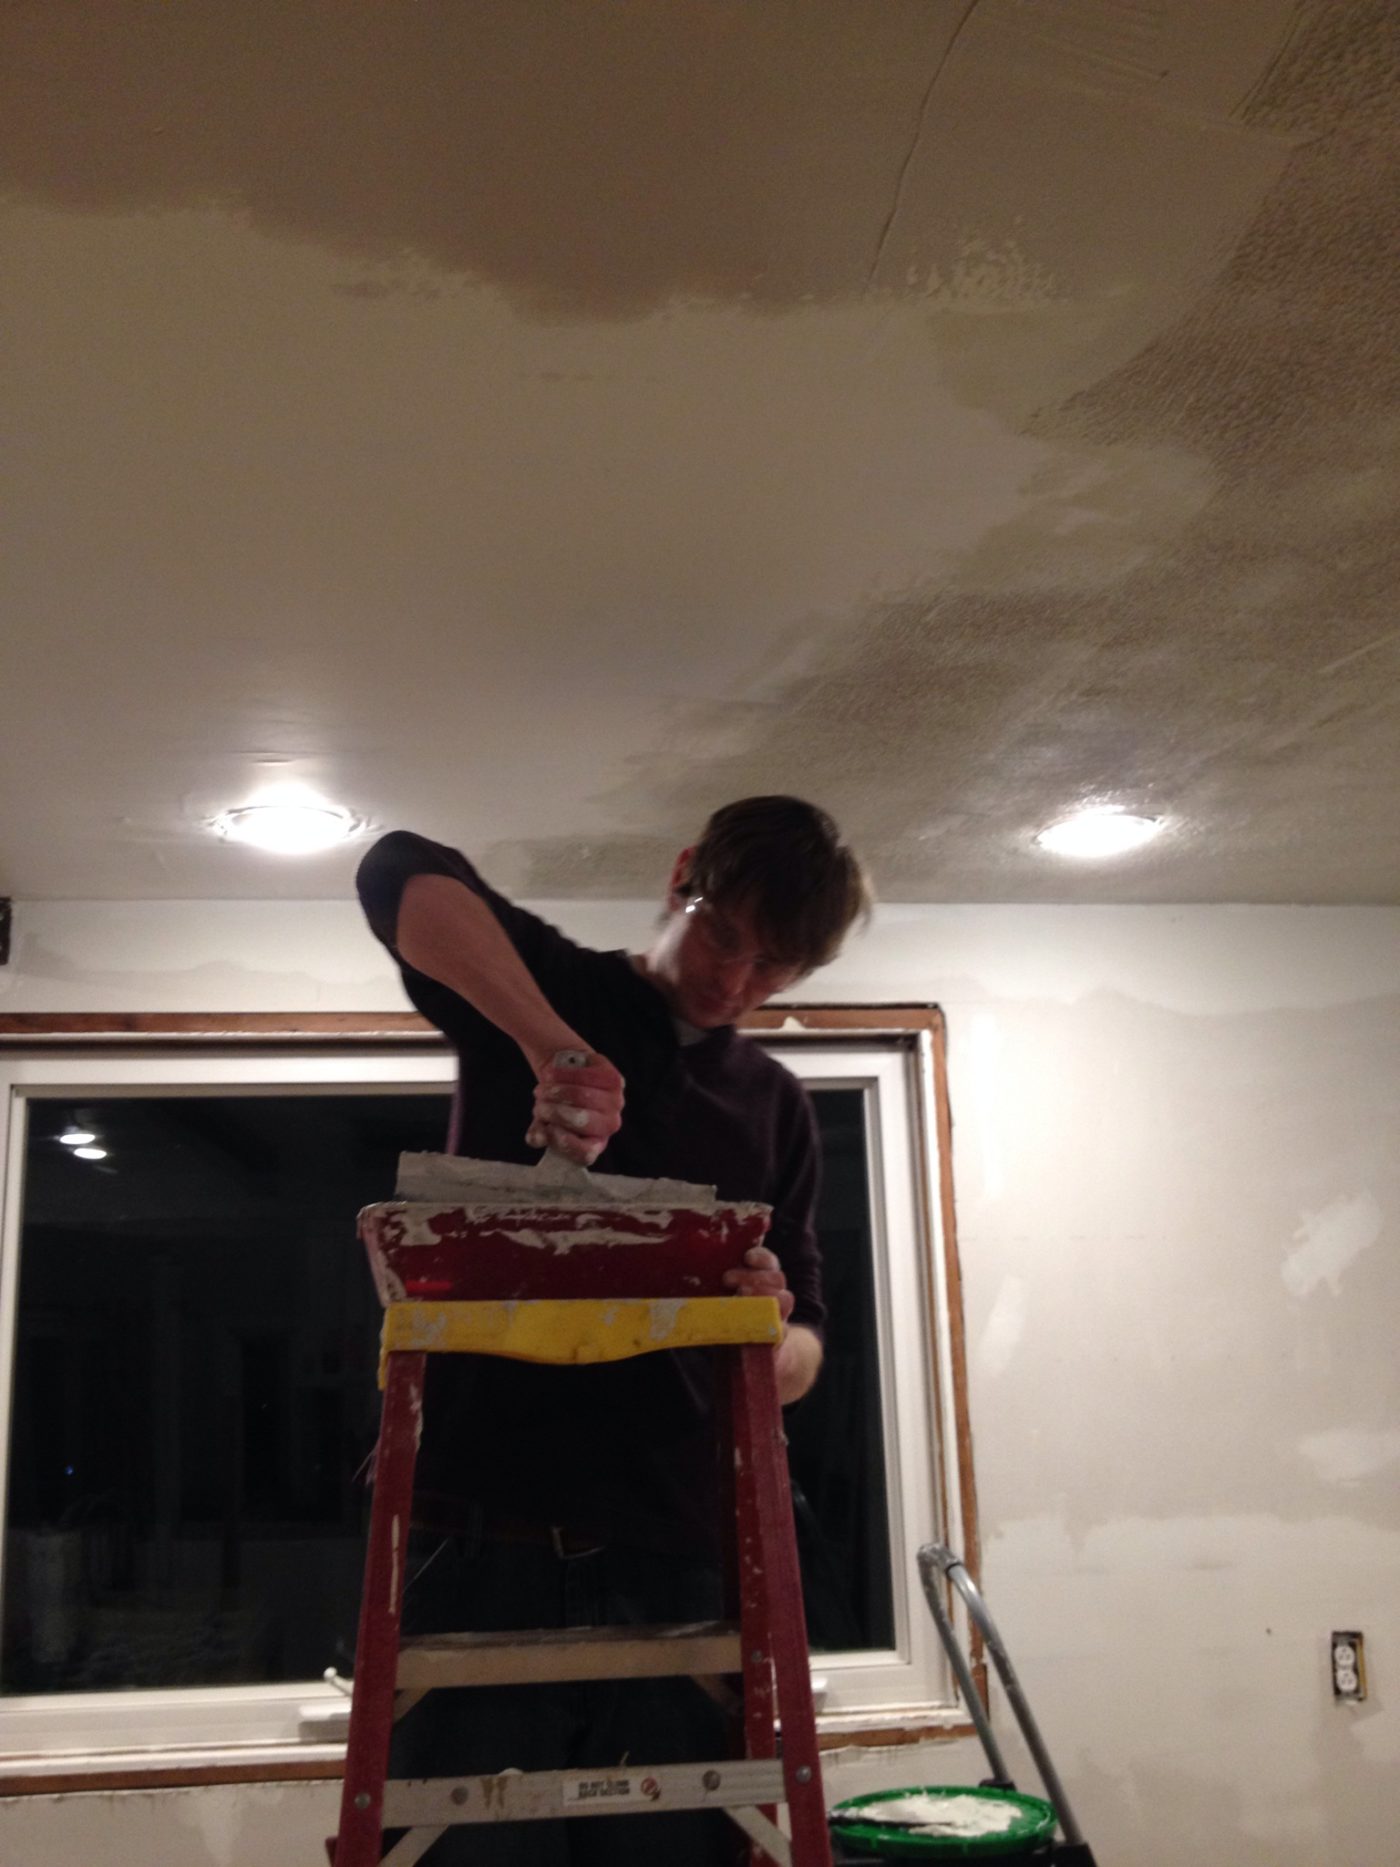
Anyway, we sanded the walls and ceiling (worst part of the whole thing…dust everywhere!) and painted walls and textured ceiling. Please enjoy the pictures I took of that process:


br />

Cabinets should be in this week, the countertop is in my floor in the process of being finished (it’s butcherblock!!!!!!!), the wood floor is acclimating in the living room, and the wood trim lumber is inside so it’s handy for me to cut to size.
Between the wood for the trim, the rough lumber for the beam, the butherblock countertops, and the wood floor, my house is currently full of random lumber. Danny said many trees died in the making of our new kitchen. Sad day…I didn’t think about that until now! Too late ha!

Sorry for the extremely long and rambley blog post. I’m just so excited…and busy that I haven’t had time to sit down and organize anything. BUT, within the next two weeks I hope (hope is a strong word…) to have a final reveal. I’ll try to update as I get time.
Up next: window and door trim, cabinets and countertop, then comes flooring and baseboards. And I need to make a new table. And touch up some paint and backsplash and….well it never seems to end.
Keep your eyes peeled for updates soon!!
Follow along the whole remodel! Part 4 is next!


Luna says
Hey! I love your kitchen remodel!what a transformation!!!i especially love the wood you got for the beam. Would you be able to share where you got it? I’ve been searching for long rough boards like that. I live near Elizabettown KY. So hopefully it’s somewhere accessible. Thanks!!
Luna
Shara, Woodshop Diaries says
Hi! Thank you so much! I went to the local lumber yard and got some regular spruce 1×6 boards (any local building supplier should have these–or your local Lowes or Home Depot) and beat them up with a hammer and prybar then stained them. Then i just nailed them together to look like a beam. So they aren’t even really “rough” to begin with. The prybar works wonders haha.