
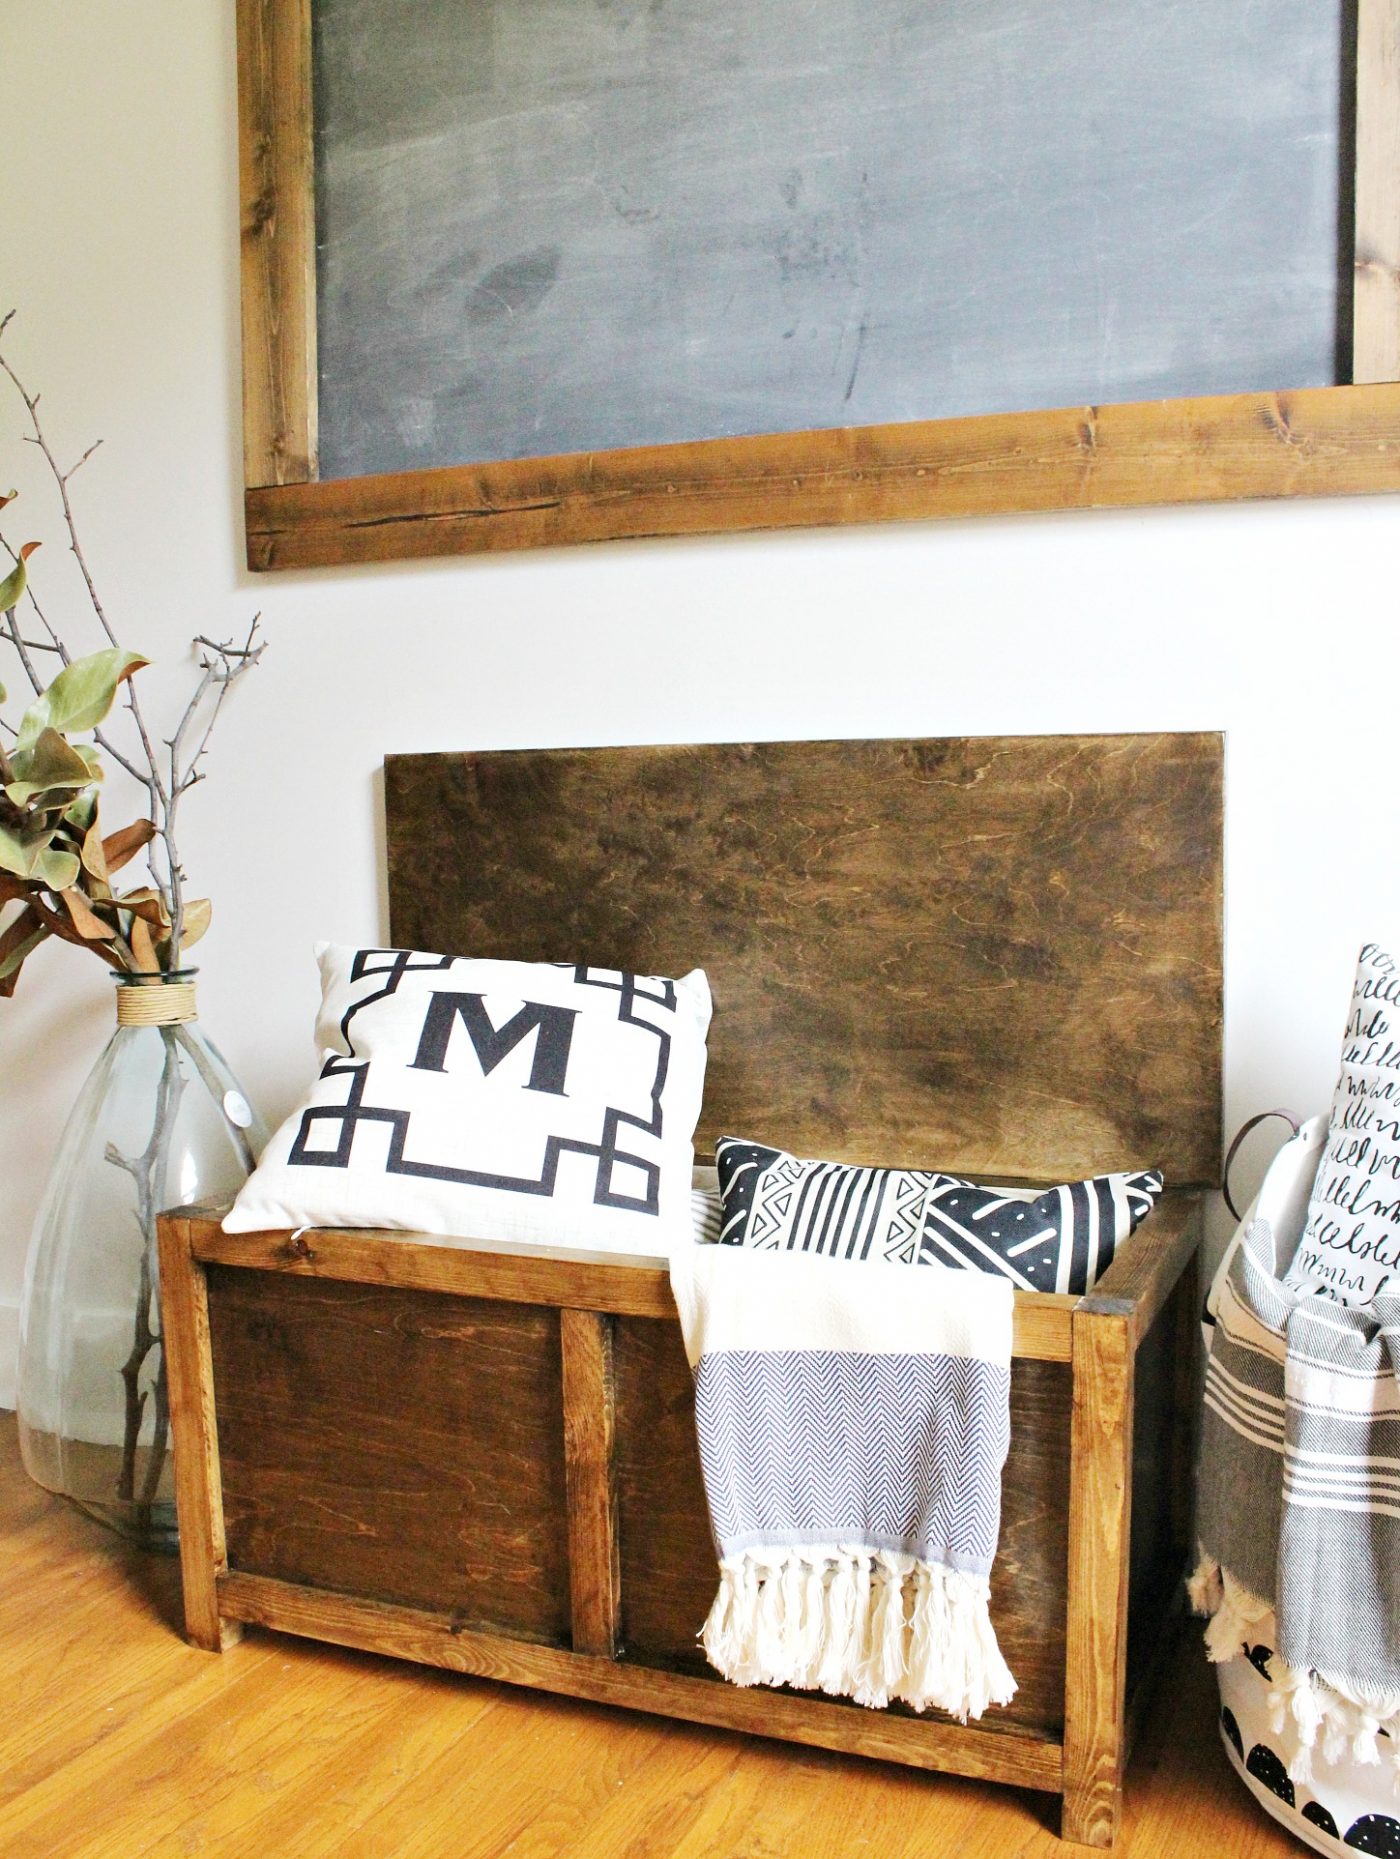
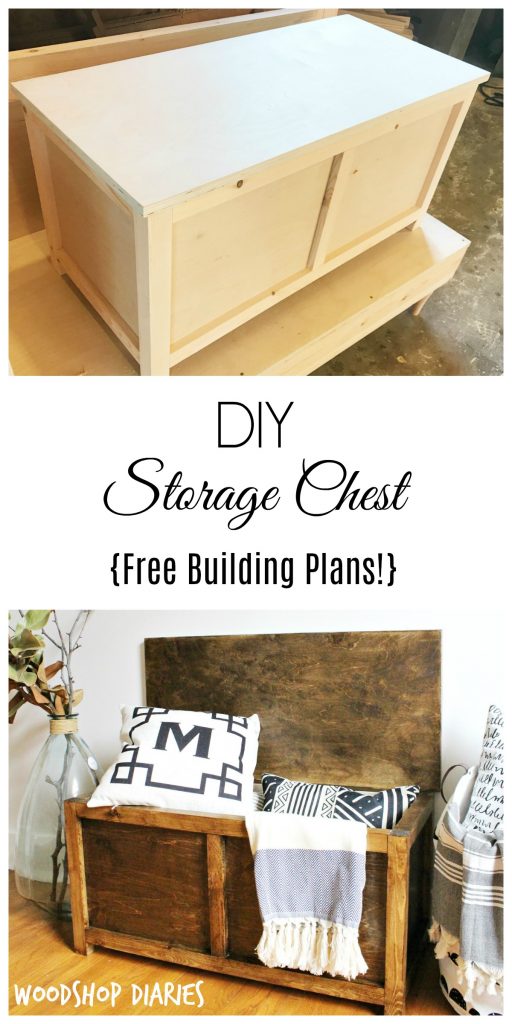
In this post, I’ll share how to build a simple DIY storage chest–with printable building plans!
I do a lot of storage builds…but, the truth is, you can just never have enough storage.
And some of these storage builds have been so pretty that it doesn’t matter what atrociousness you hide inside of it, it still looks nice 😉
Is there a stack of VHS tapes behind that door that we should have thrown away years ago?? Maybe.
Is there a bunch of boxes and cables from old cell phones and printers and tvs in that drawer that we don’t even know what all they do or go to? Could be.
Are we hiding a pile of old dirty socks in that cubby because we keep forgetting to wash the whites? Possibly.
But it doesn’t matter, because the storage itself is pretty *wink wink*
Well, now here is another pretty storage build to add to your DIY collection and as always, it’s super versatile!

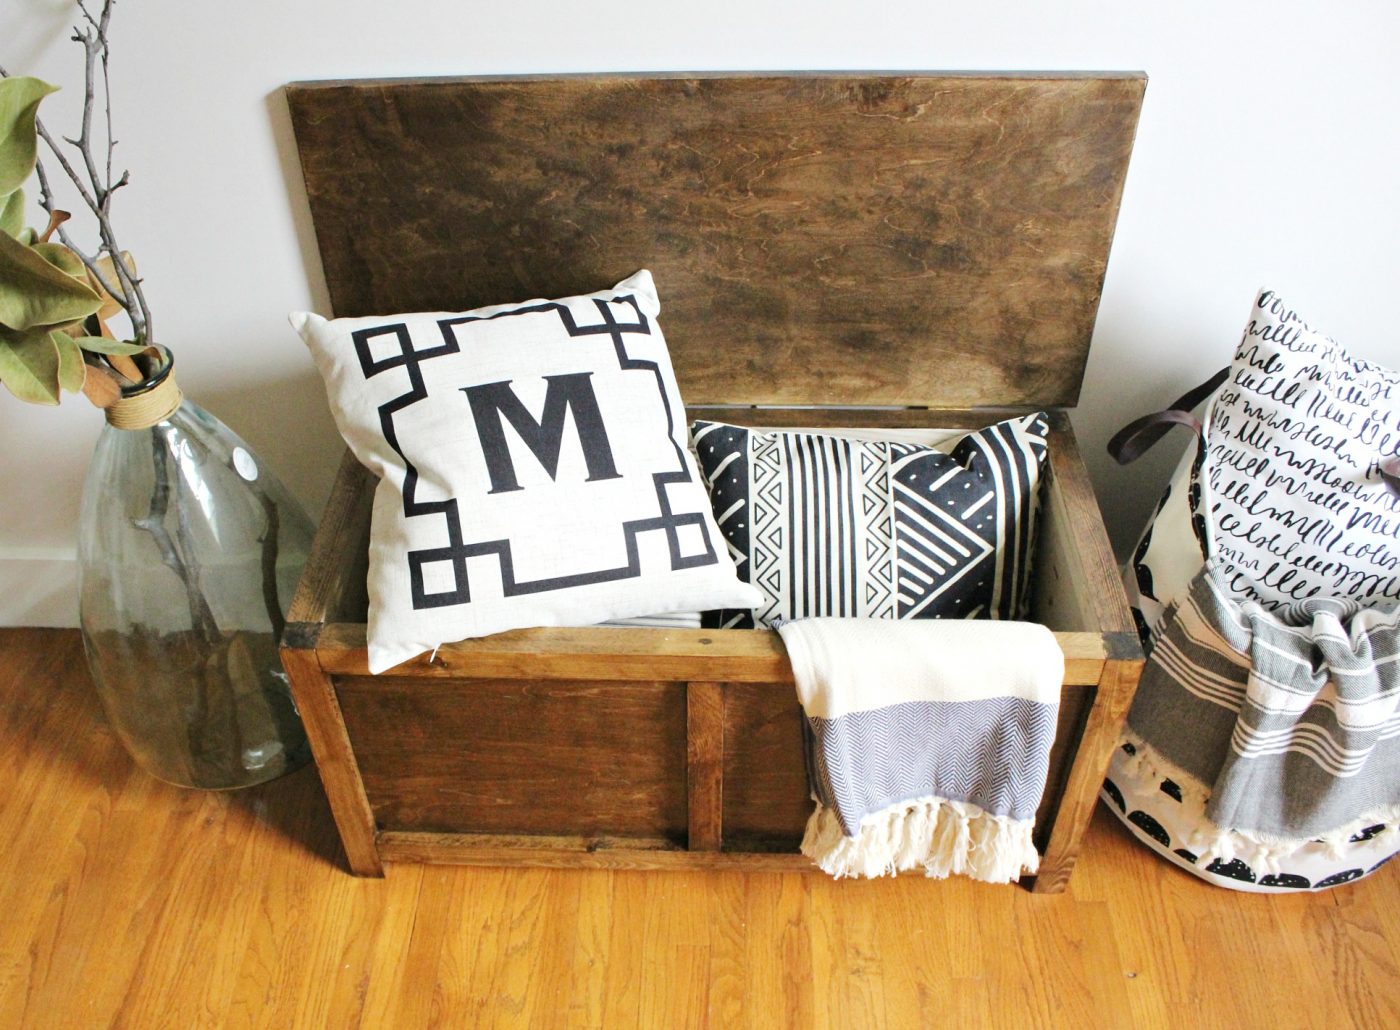
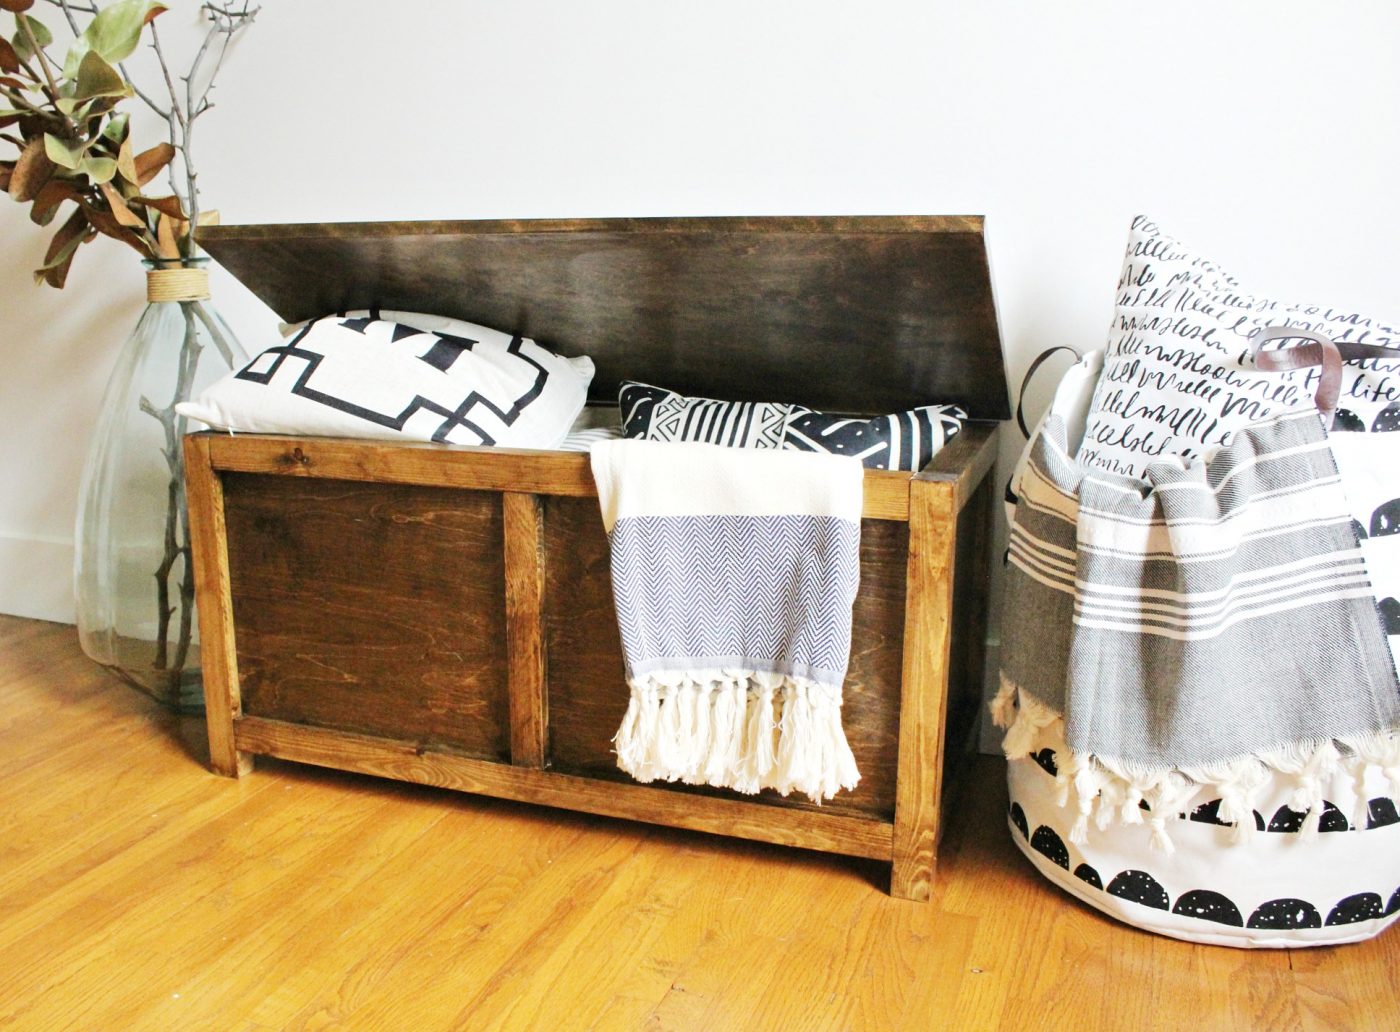
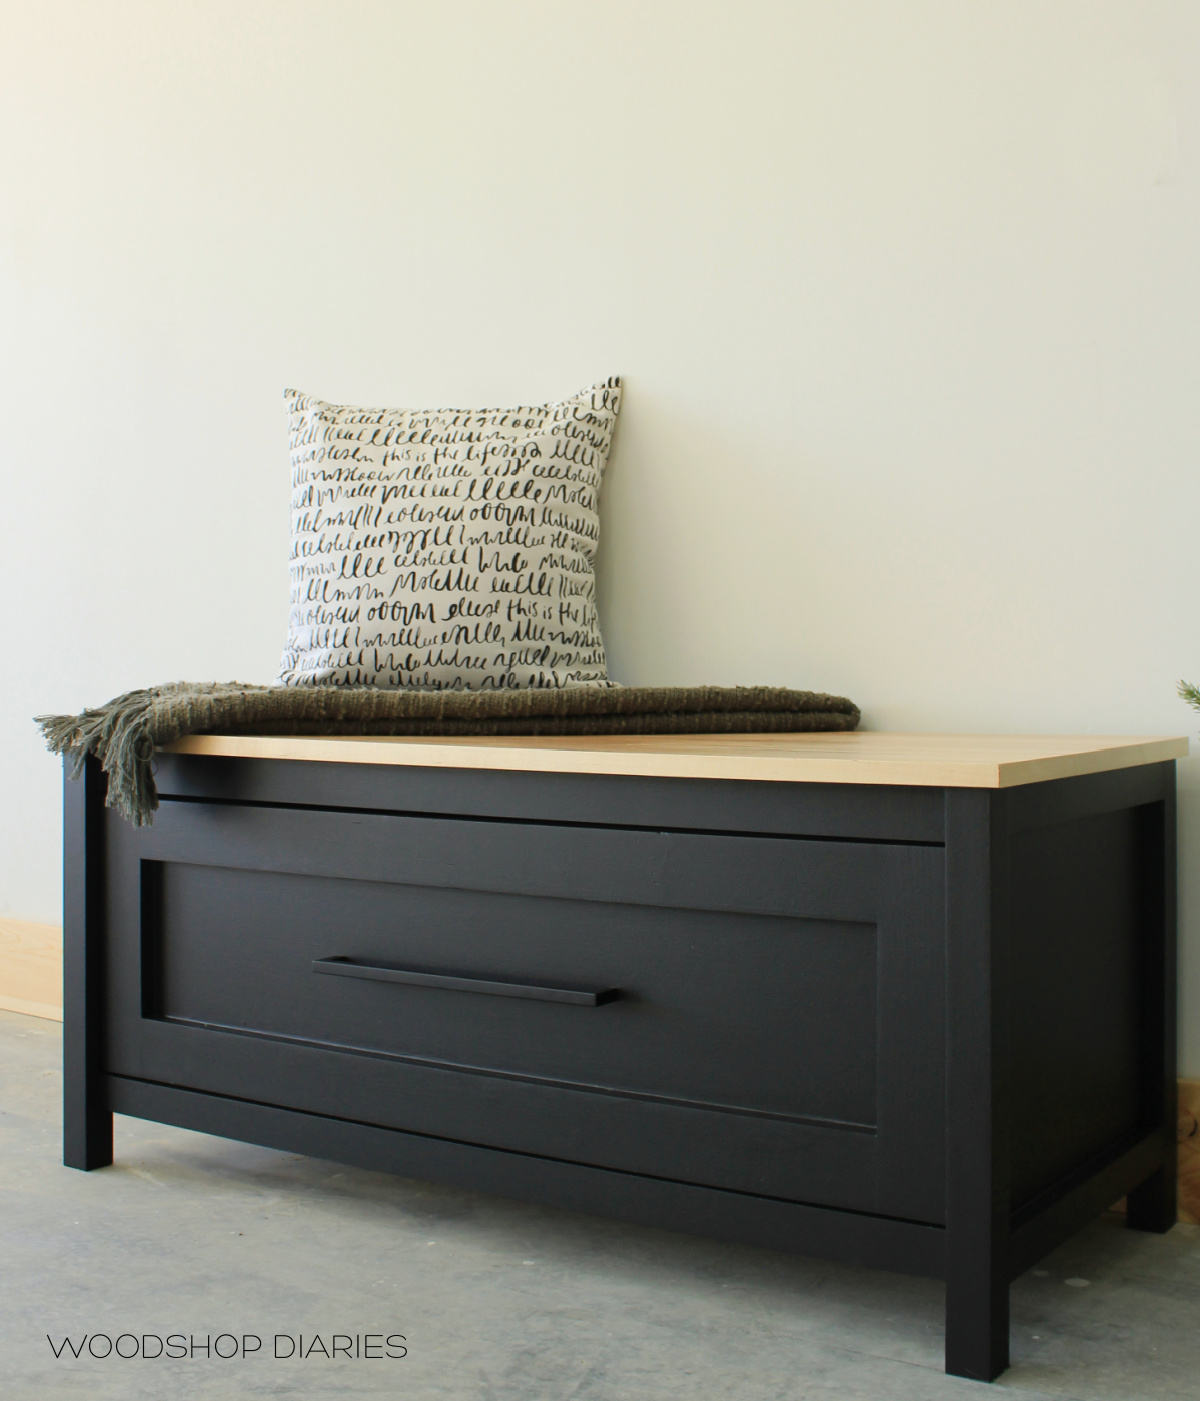
This DIY storage chest is the PERFECT size to use as a small coffee table, entryway bench storage, end of the bed storage, toy box storage, or just for keepsake storage.
I love a good pretty AND functional piece of furniture, don’t you?
If you’re ready to get to it, then here we go.
This post contains affiliate links for your convenience. Thank you for your support! Please see disclosure policy for more details.
.
Tools & Materials
Tools:
- Circular Saw
- Kreg Rip Cut (optional, but helpful)
- Drill
- Kreg Jig for Pocket Holes
- Miter saw
Materials:
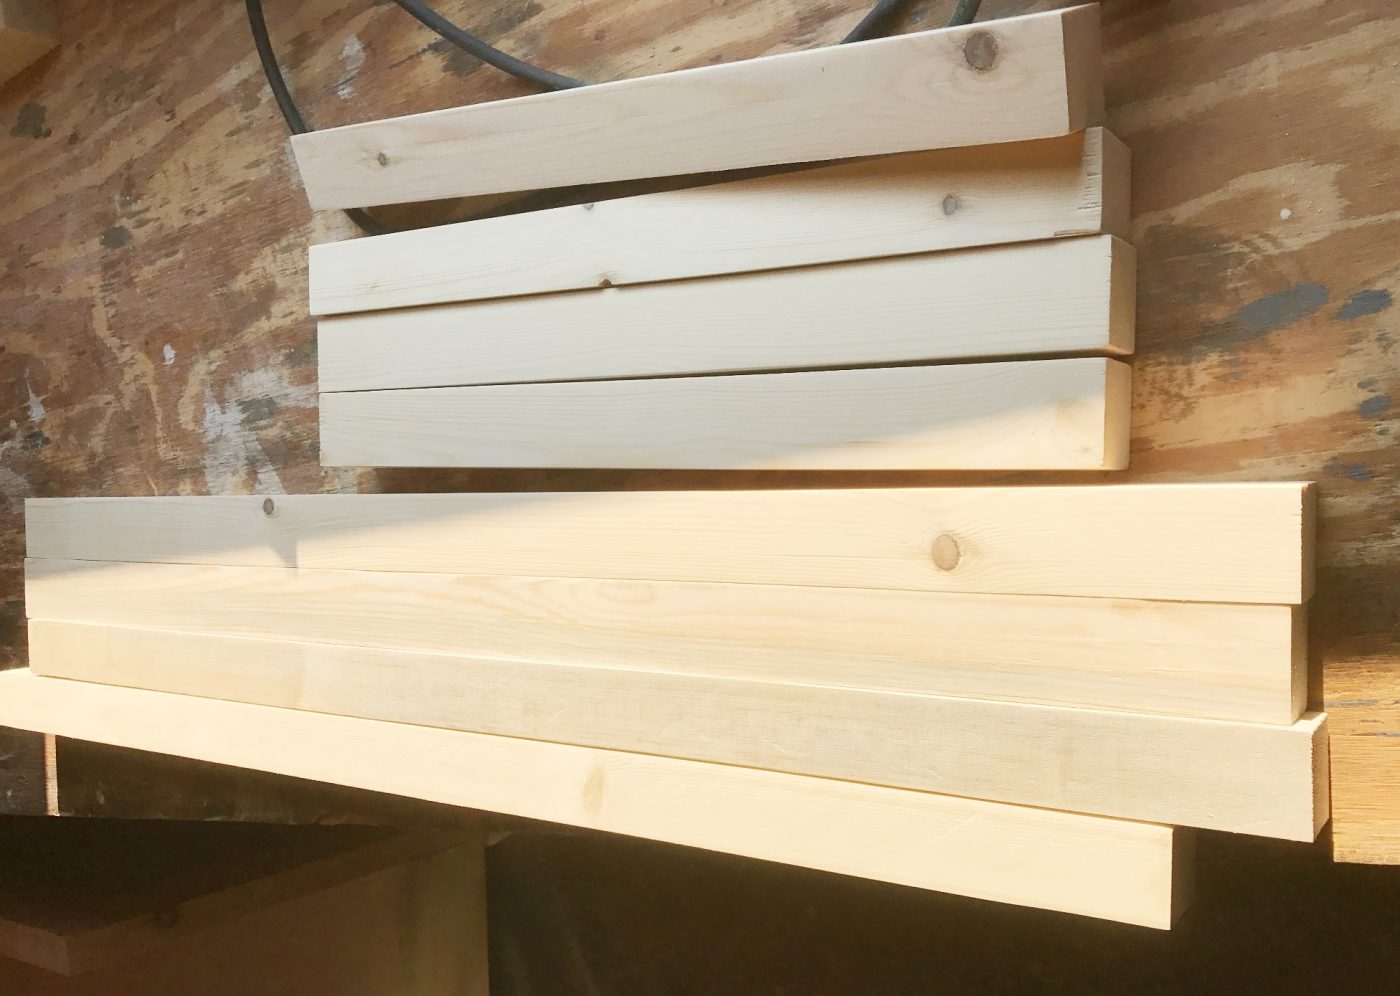
- 1 sheet ¾” plywood (you only will use a little over half, so you could get a half sheet plus a 2×2 piece if you wanted to save on scraps)
- (3) 2x2x8s
- Edge banding
- 2 ½” pocket hole screws
- 1 ¼” pocket hole screws
- 2 ½” wood screws
- Stain or finish of your choice
How to Build a DIY Storage Chest
You can find the complete cut list available in the printable plans, but I’m sharing the process plus tips and tricks in the tutorial below.
Prefer to print, grab the printable version of the plans here:
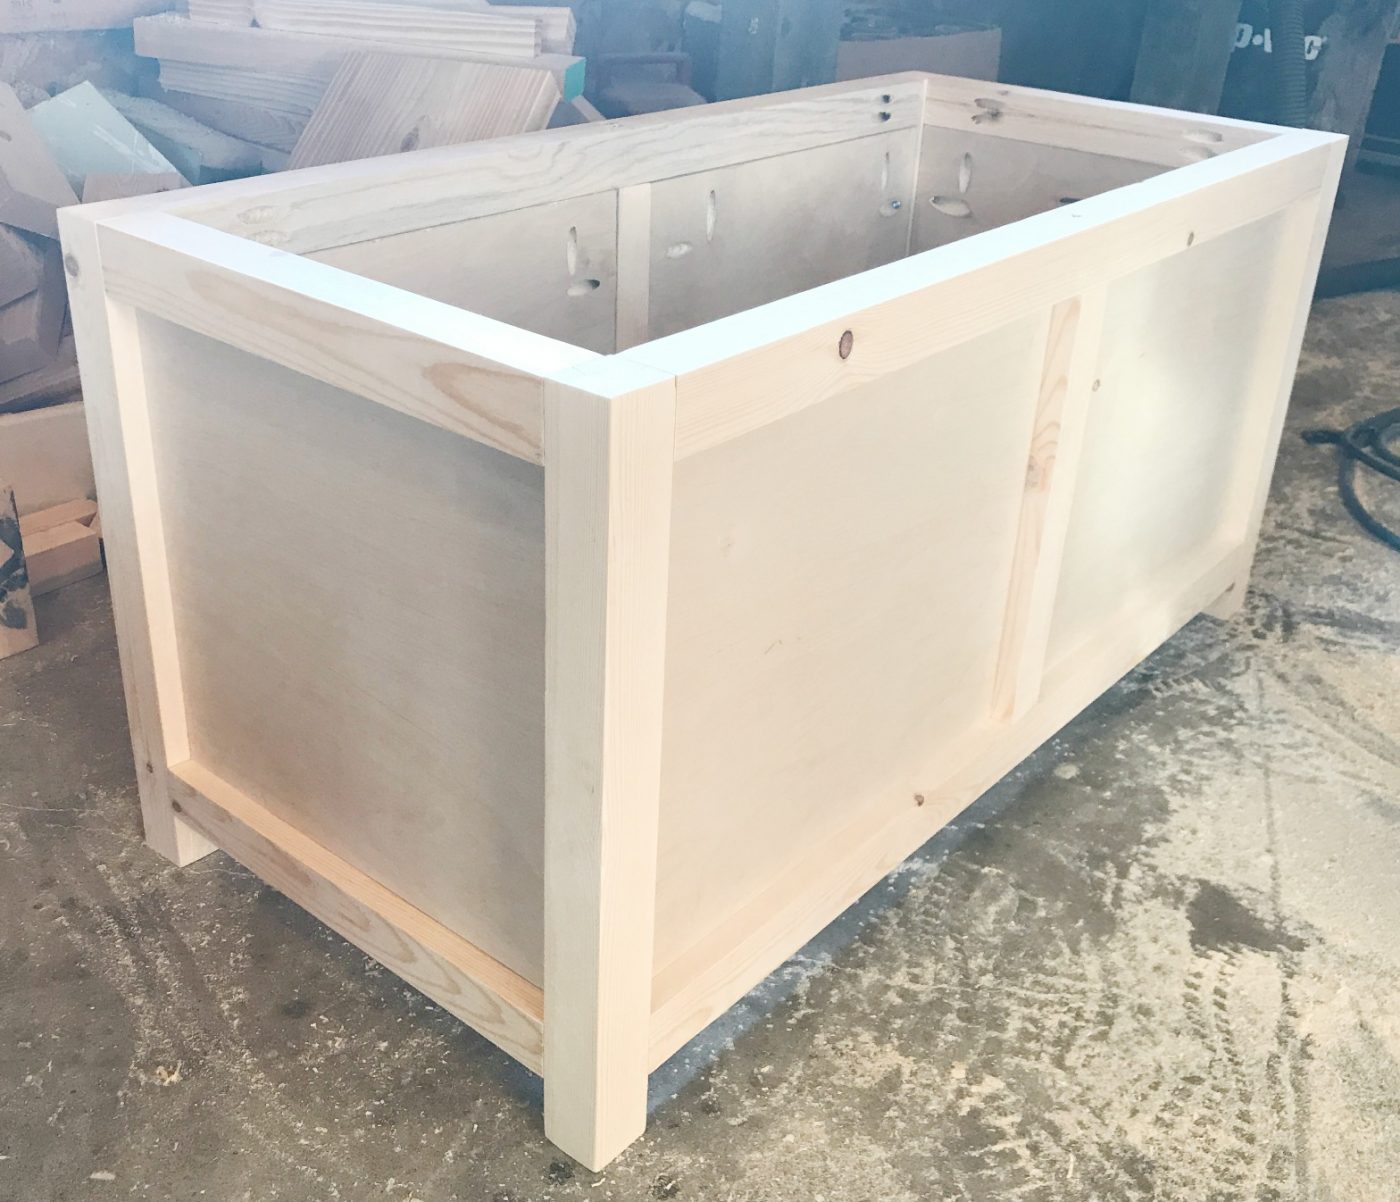
Step 1: Build Storage Chest Frame
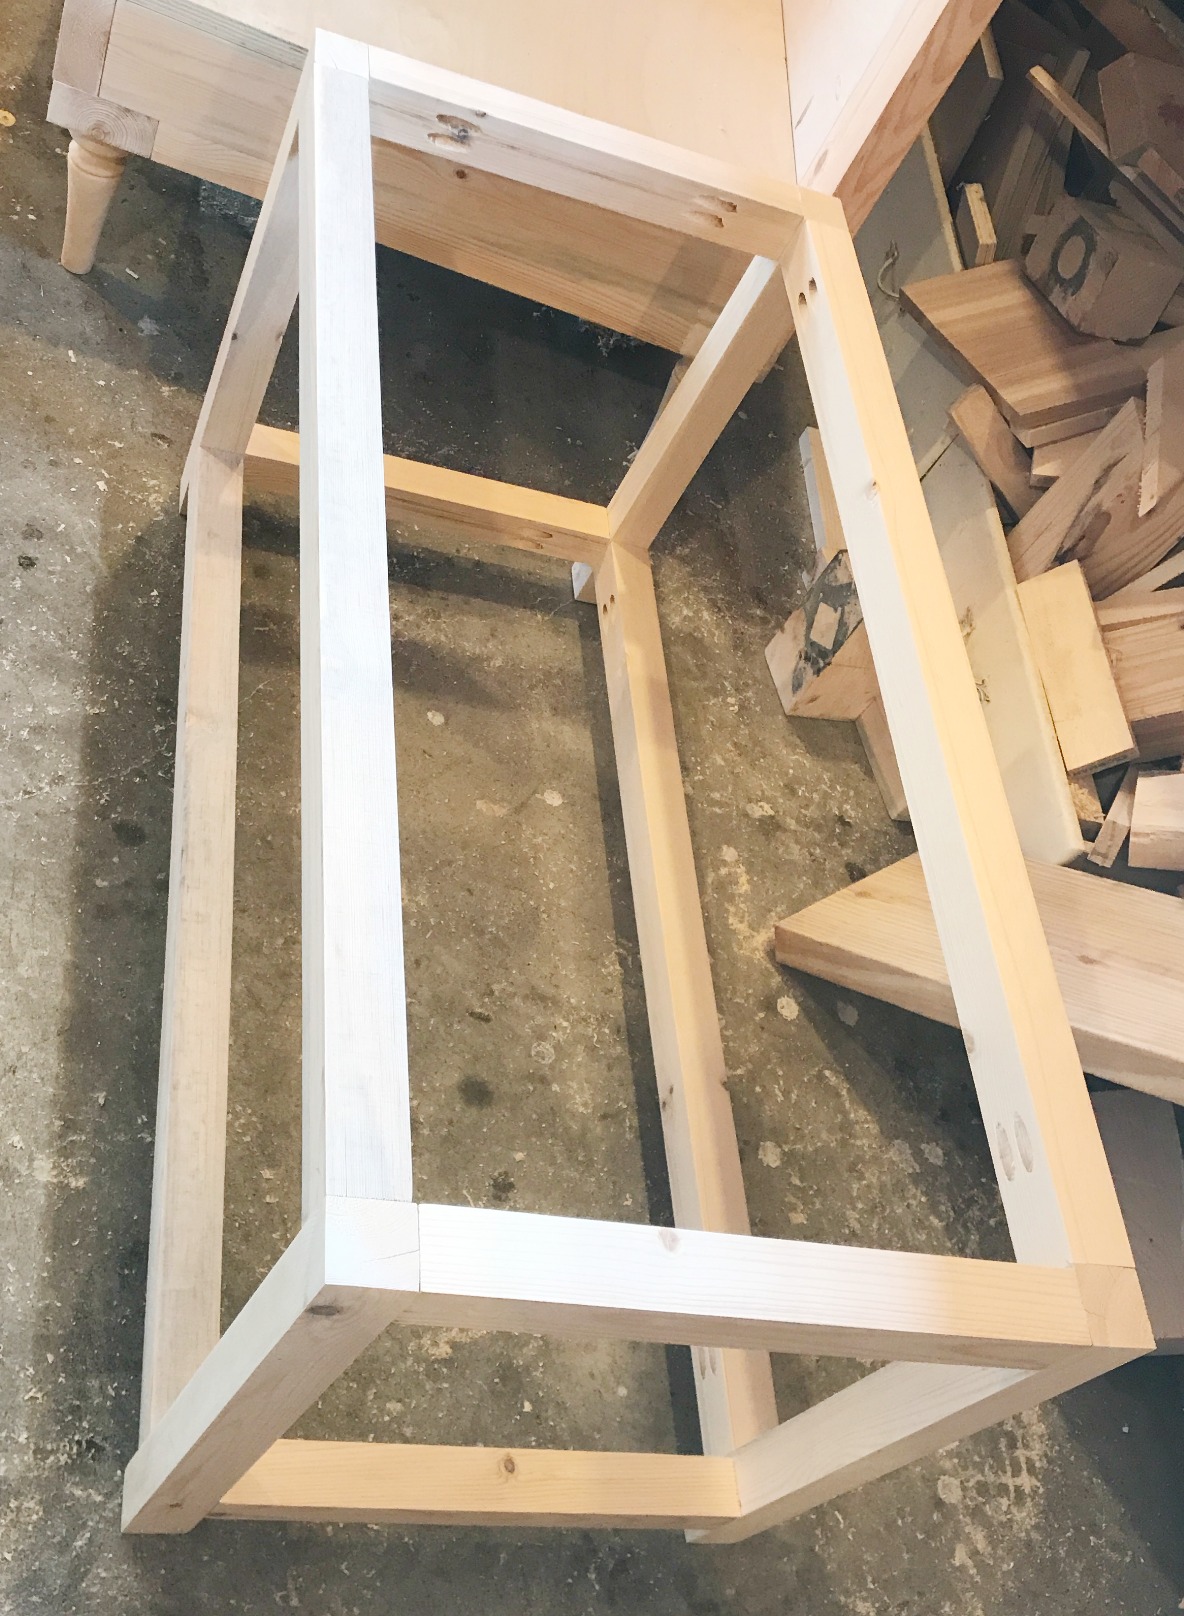
First, I cut the frame pieces for the front and back of the wooden chest. The entire frame is made from 2x2s.
So, I cut four legs, and four 30″ long front and back pieces. The complete cut list can be found in the plans above.
NOTE: You can certainly purchase precut 2x2s, but I like to cut my own 2x2s using this tutorial. This gives you straighter, cleaner 2x2s and saves a few bucks in the process.
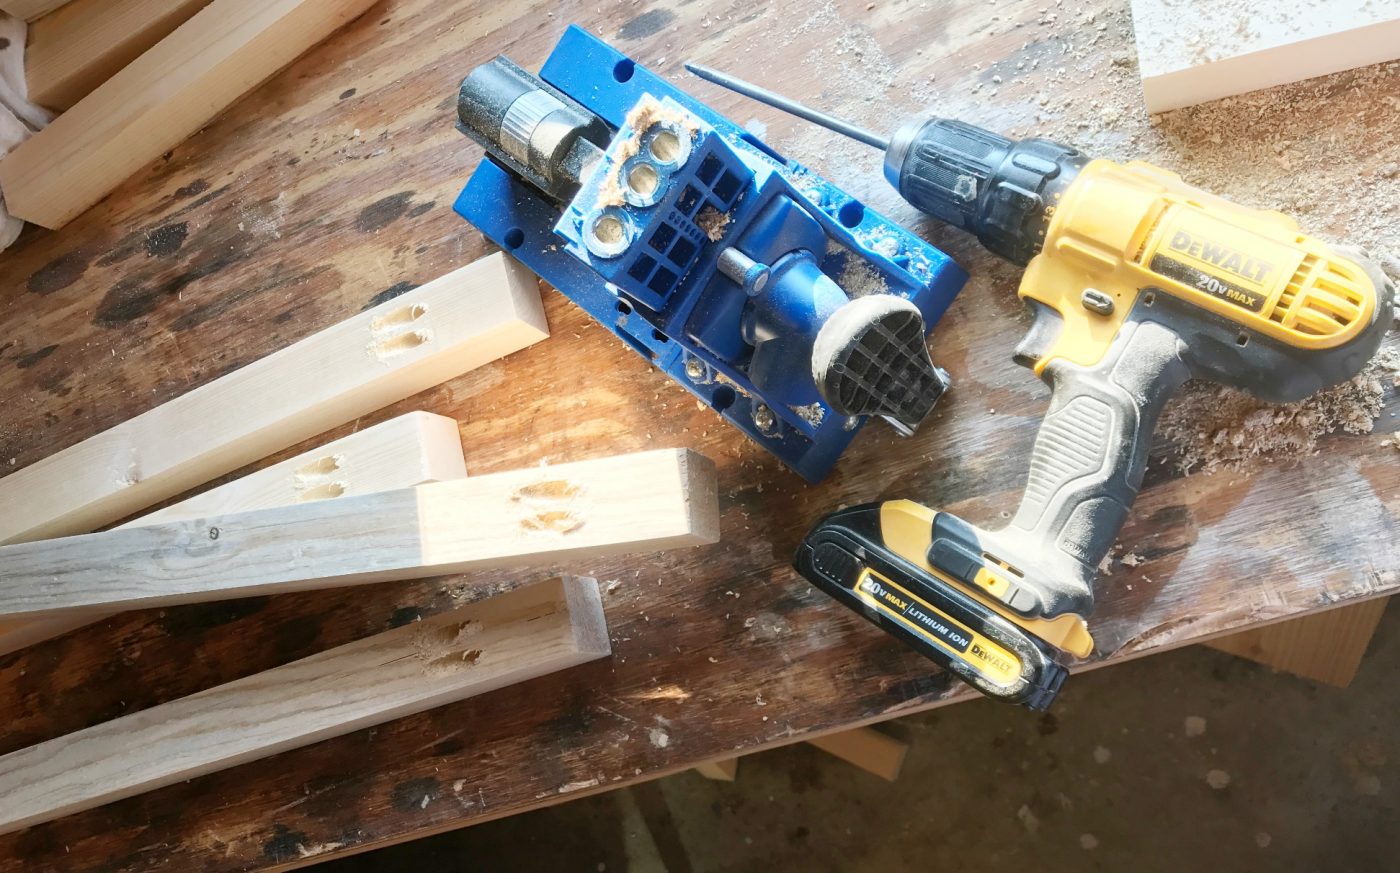
Once these 2x2s for the storage chest frame are cut, I drilled 1 ½” pocket holes into the ends of the 30″ long pieces.
RELATED: How to use a pocket hole jig
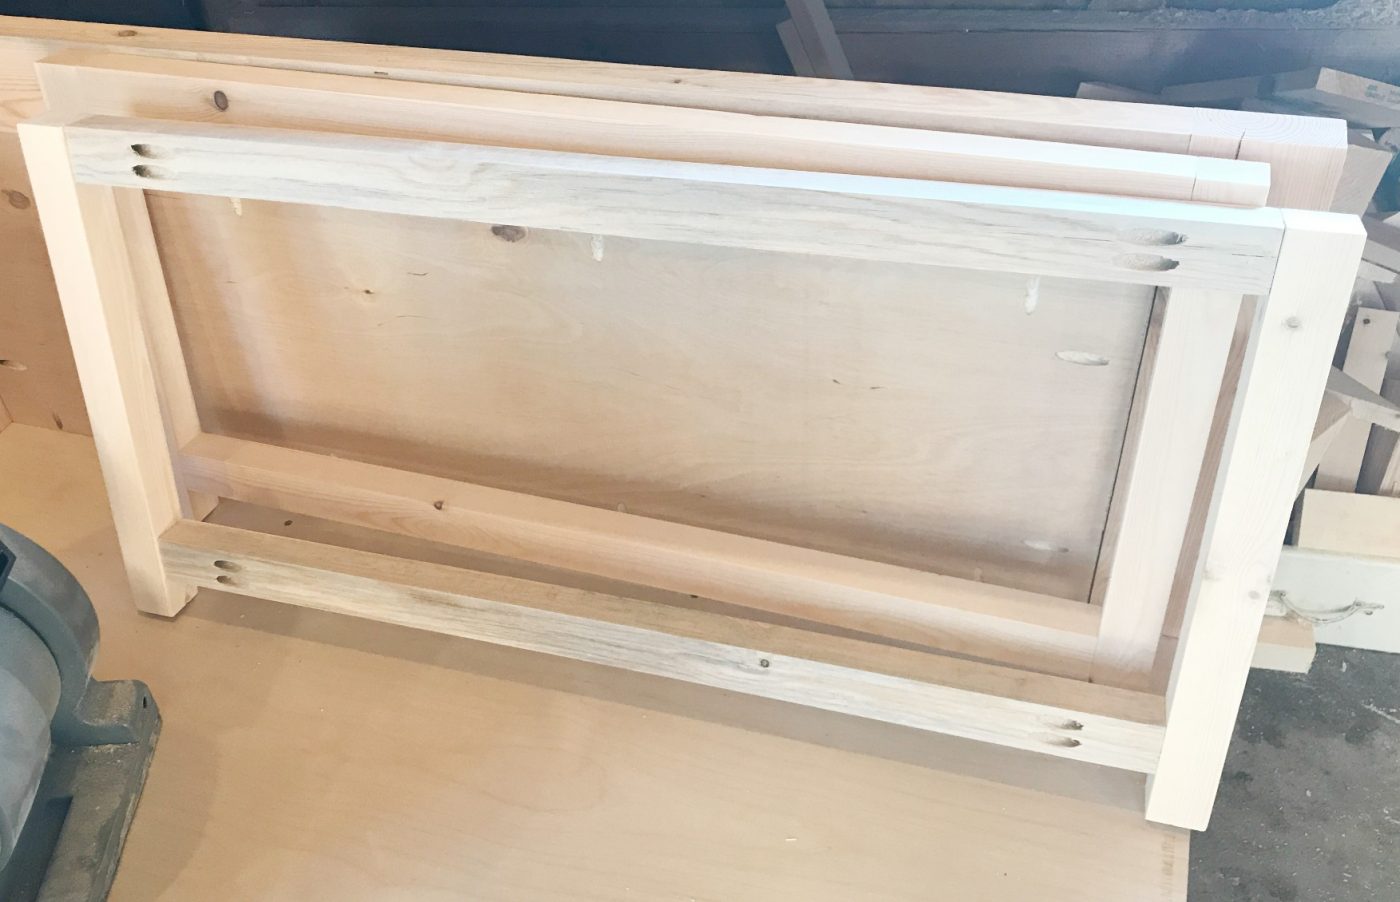
Then, I assembled two simple frames like shown below using 2 ½″ pocket hole screws.
TIP: I’ve learned over the years that drilling 2 pocket holes in the end of 1×2 and 1×2 boards can tend to cause splits. If you have issue with this, feel free to use one pocket hole per joint, BUT do not skip the wood glue!
I attached the bottom 2×2 so that it was about 1 ½″ off the ground.
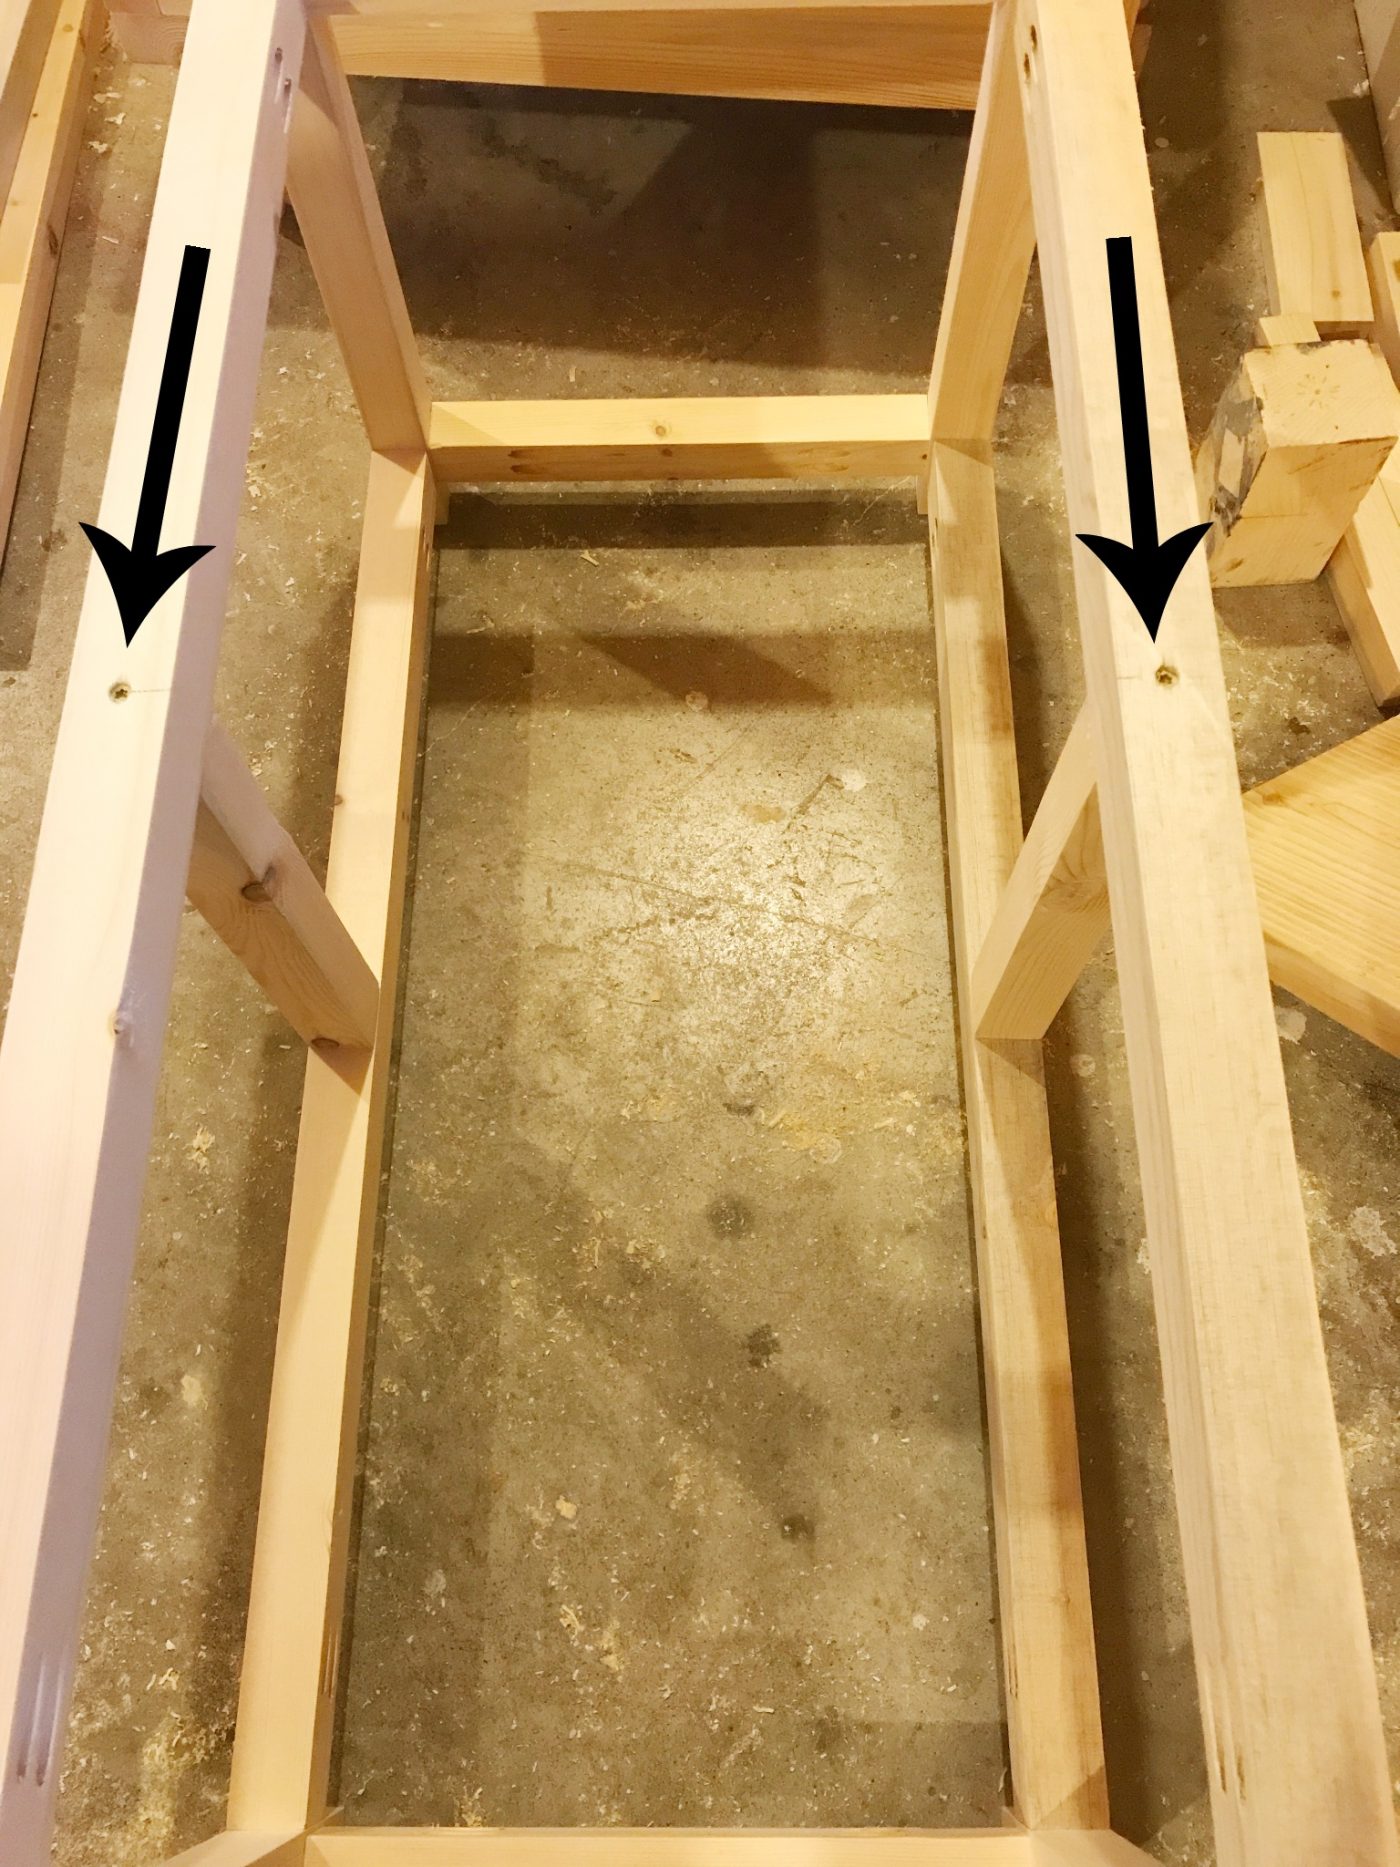
Then, I cut four pieces of 2×2 to 12″ long for the sides and drilled 1 ½” pocket holes into the ends of each of them.
I assembled these between the front and the back frames to create a “box frame” for the storage chest.
And just like with the front and back, I made sure the bottom 2x2s on the sides are were 1 ½″ from the bottom of the legs.
Step 2: Add Divider Pieces to Chest Frame
This step is optional, but it added a little more visual interest to the piece.
I cut 2 pieces of 2×2 and centered them on the front and back between the top and bottom pieces.
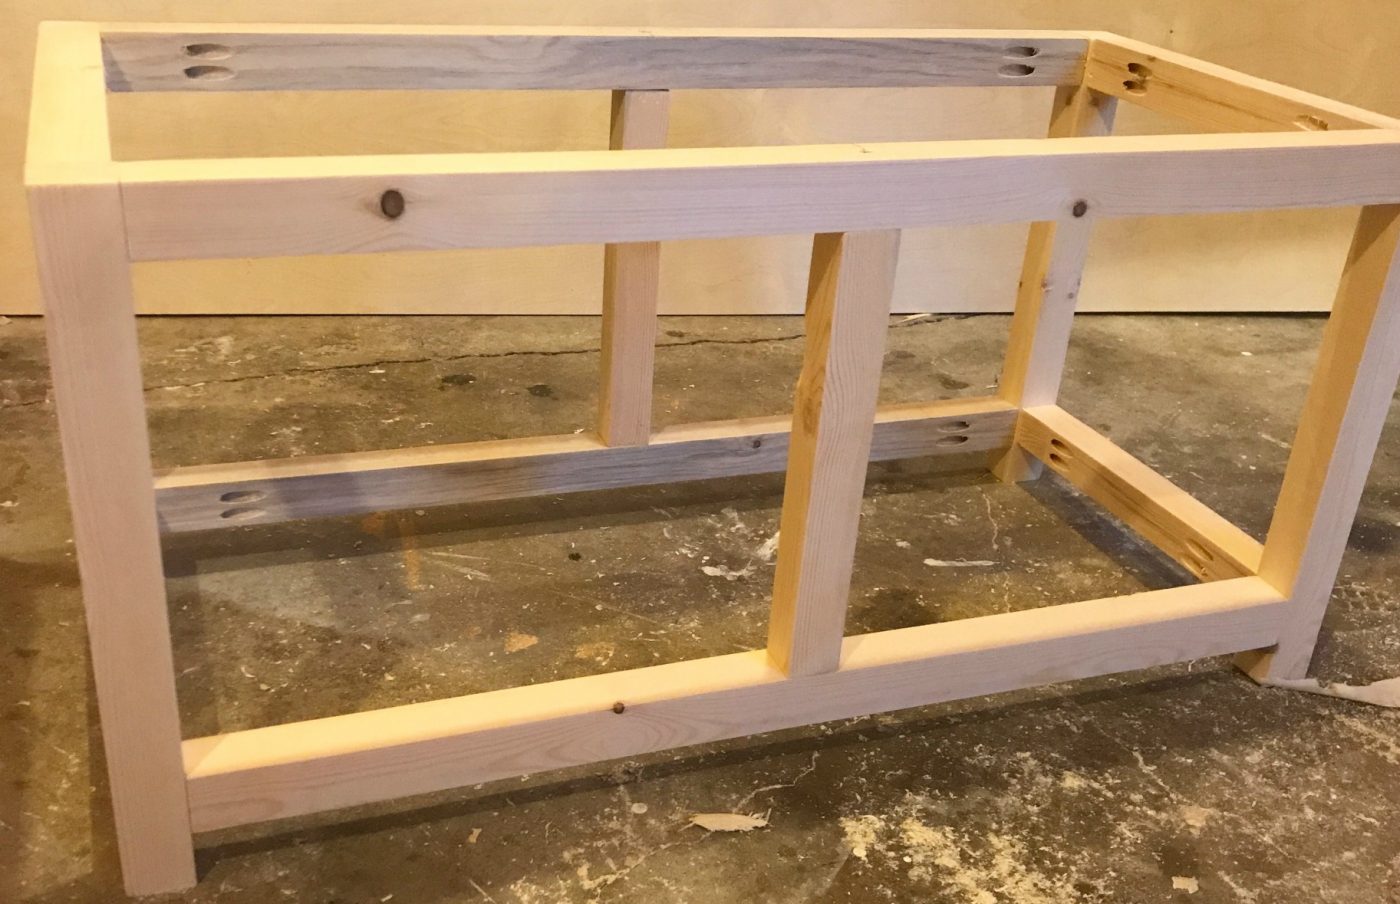
You could certainly use pocket holes to attach these, but I just used 2 ½” wood screws through the top and bottom supports.
Either way works fine, but if you just screws through the frame like I did, be sure to predrill to help prevent splitting.
Step 3: Add Side Panels to Frame
I cut ¾″ plywood panels to fit in all the holes around the sides of the trunk frame.
These panels will need to be a pretty tight fit to look as clean as possible, so be sure to measure and cut carefully for them to fit well.
RELATED: How to cut plywood sheets
Prefer to print? Don’t forget to check out the printable PDF plans here.
Once I cut and made sure the panels fit well, I drilled ¾” pocket holes around the edges of each piece.
RELATED: How to drill pocket holes
Then, I installed them in place inside the frame using 1 ¼” pocket hole screws. They should be flush to the inside of the frame.
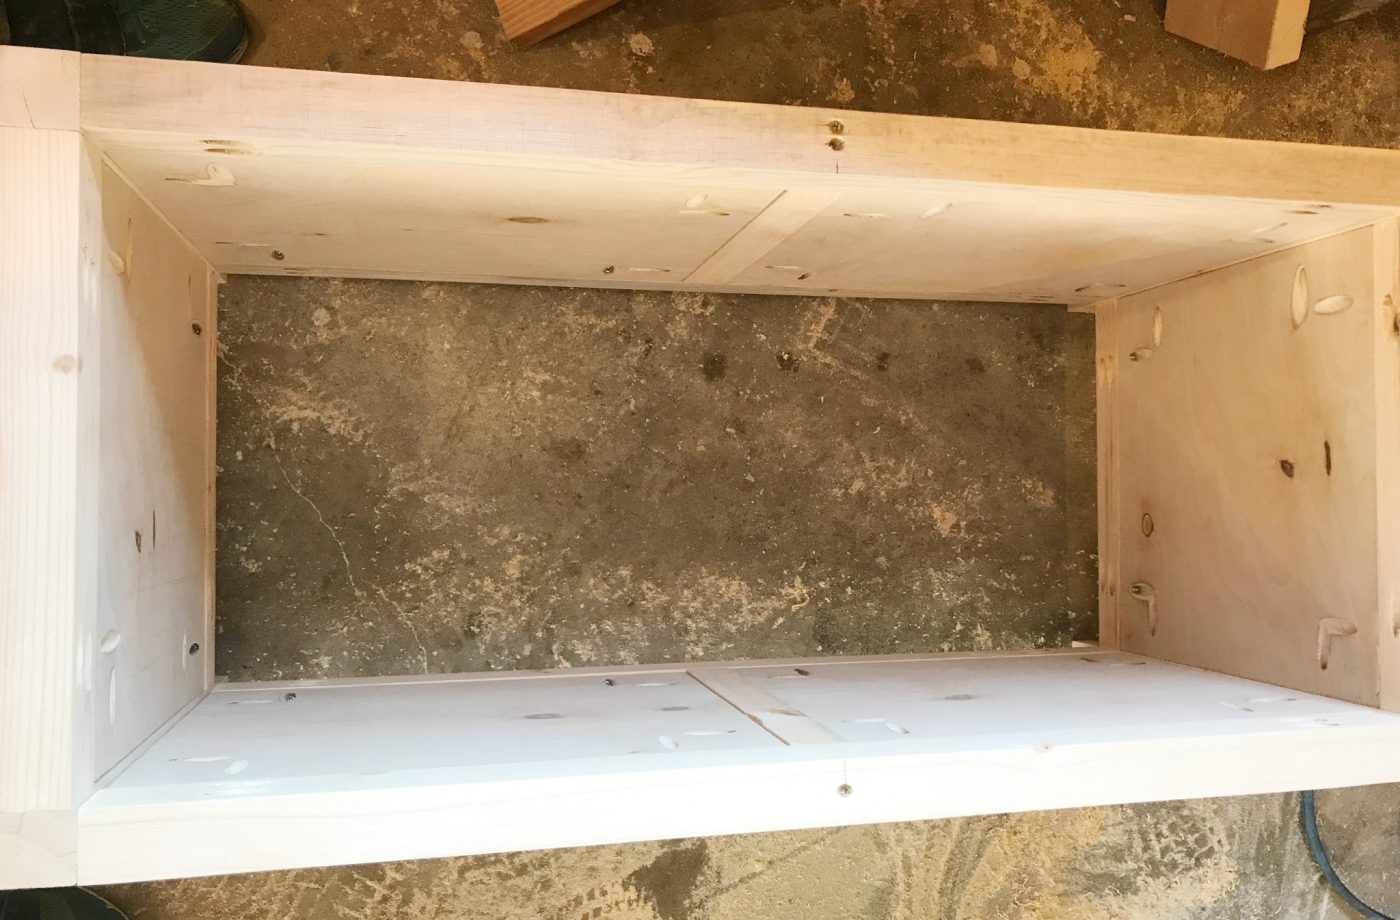
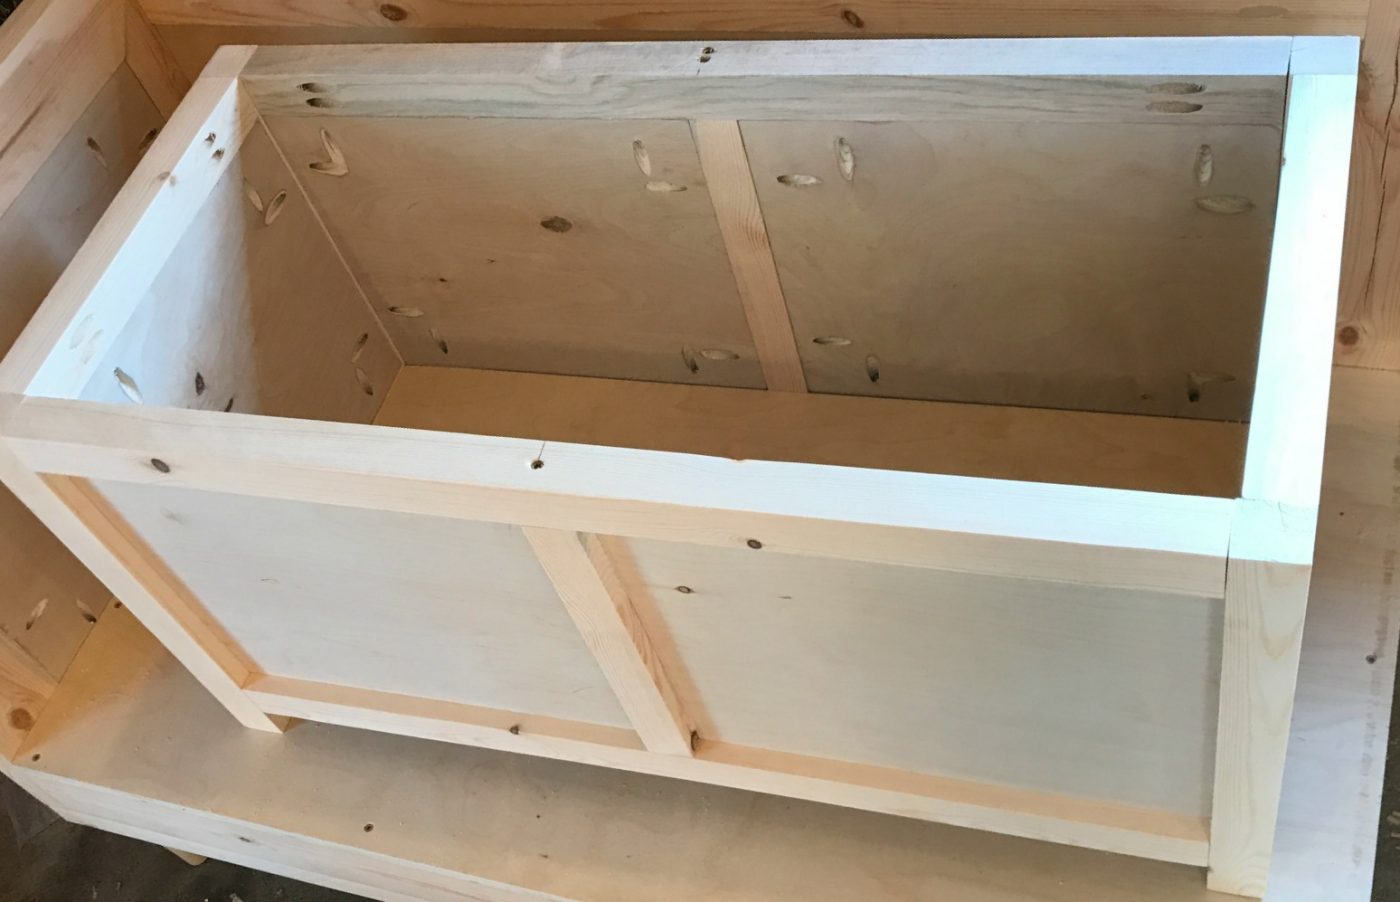
Step 4: Install Bottom Panel
Once the main body of the chest was together, I cut a piece of plywood for the bottom.
Just like with the sides, I drilled ¾” pocket holes around the edges and installed to the frame using 1 ¼” pocket hole screws.
I installed this flush to the top edge of the 2×2 frame, but you could install it flush along the bottom edge as well…either would be fine.

Now it’s ALMOST DONE!
Step 5: Add Top to Storage Chest
For the top, I cut a piece of ¾″ plywood approximately 1″ wider and 1″ deeper than the frame of the chest.
This will allow for ½″ overhang on all sides once installed.
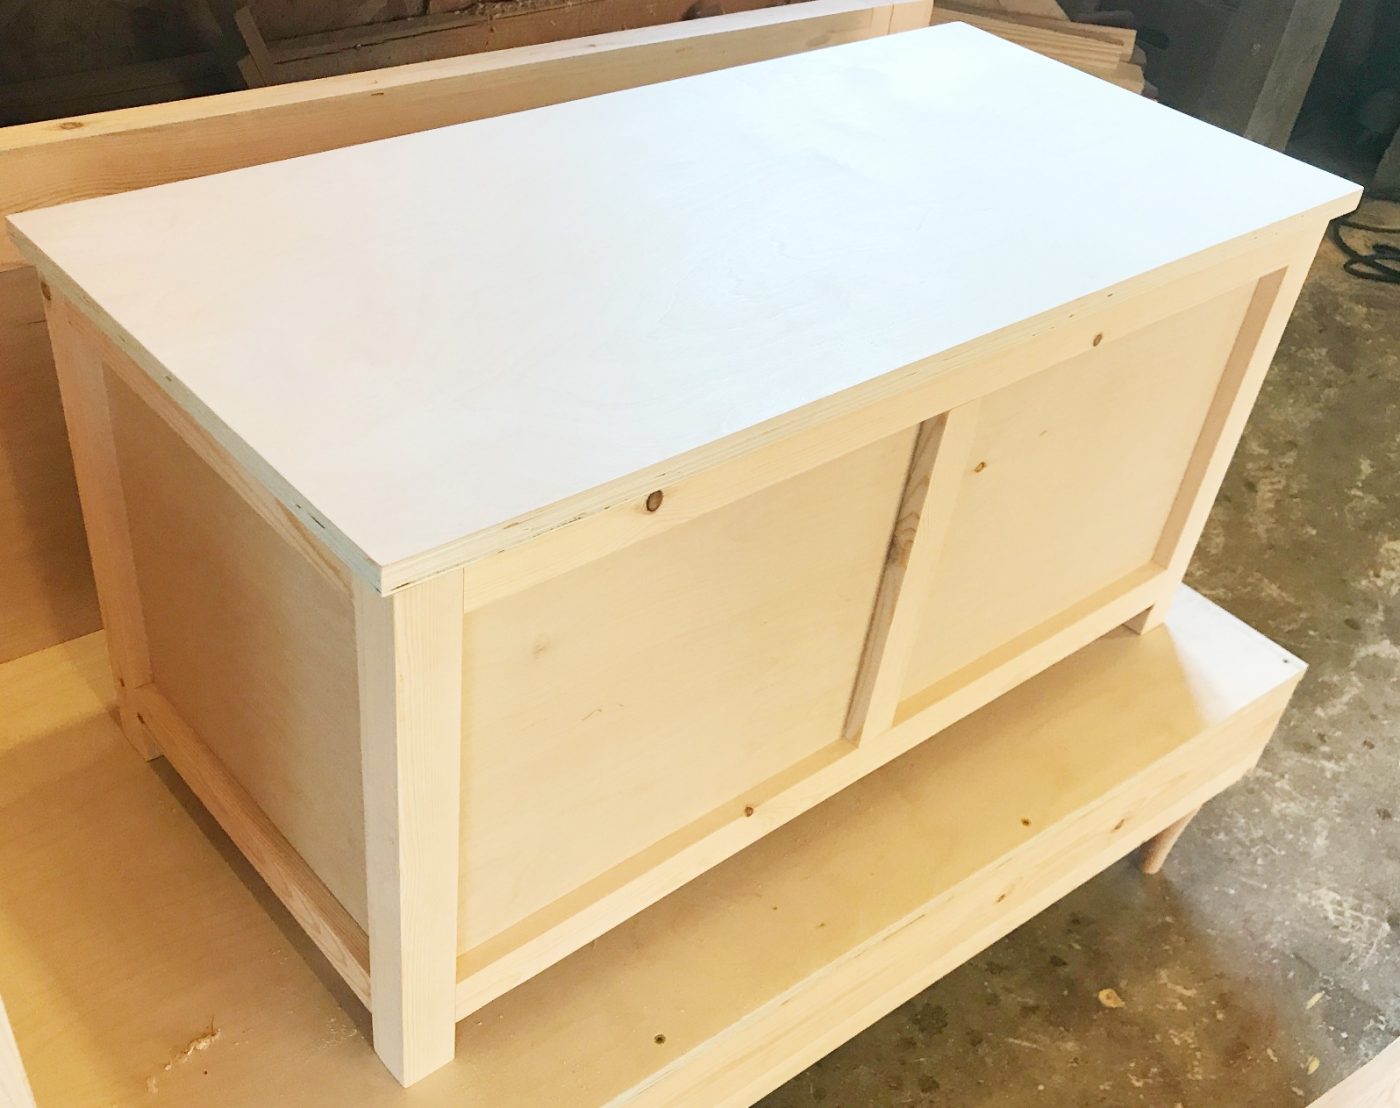
For a cleaner look, I applied edge banding to the plywood edges, but that’s totally optional.
RELATED: How to apply iron on edge banding
Speaking of cleaner look, since there are quite a few pocket holes on the inside of this chest, if you’d like to fill them, you certainly can.
Here are 4 ways to fill pocket holes.
Before attaching the top, I went ahead and finished it. It’s a little easier to do separately.
I stained the body and the top of the DIY storage chest with Minwax Dark Walnut and used Minwax Polycrylic to seal it. However, you can finish however you’d like.
RELATED: How to finish raw wood furniture
Once the finish was dry, I attached the top using a piano hinge on the back. Either a 24″ or 30″ hinge would work and you can also install some soft close braces as well if you’d like.
And there you have a simple, stylish, and functional storage trunk 🙂
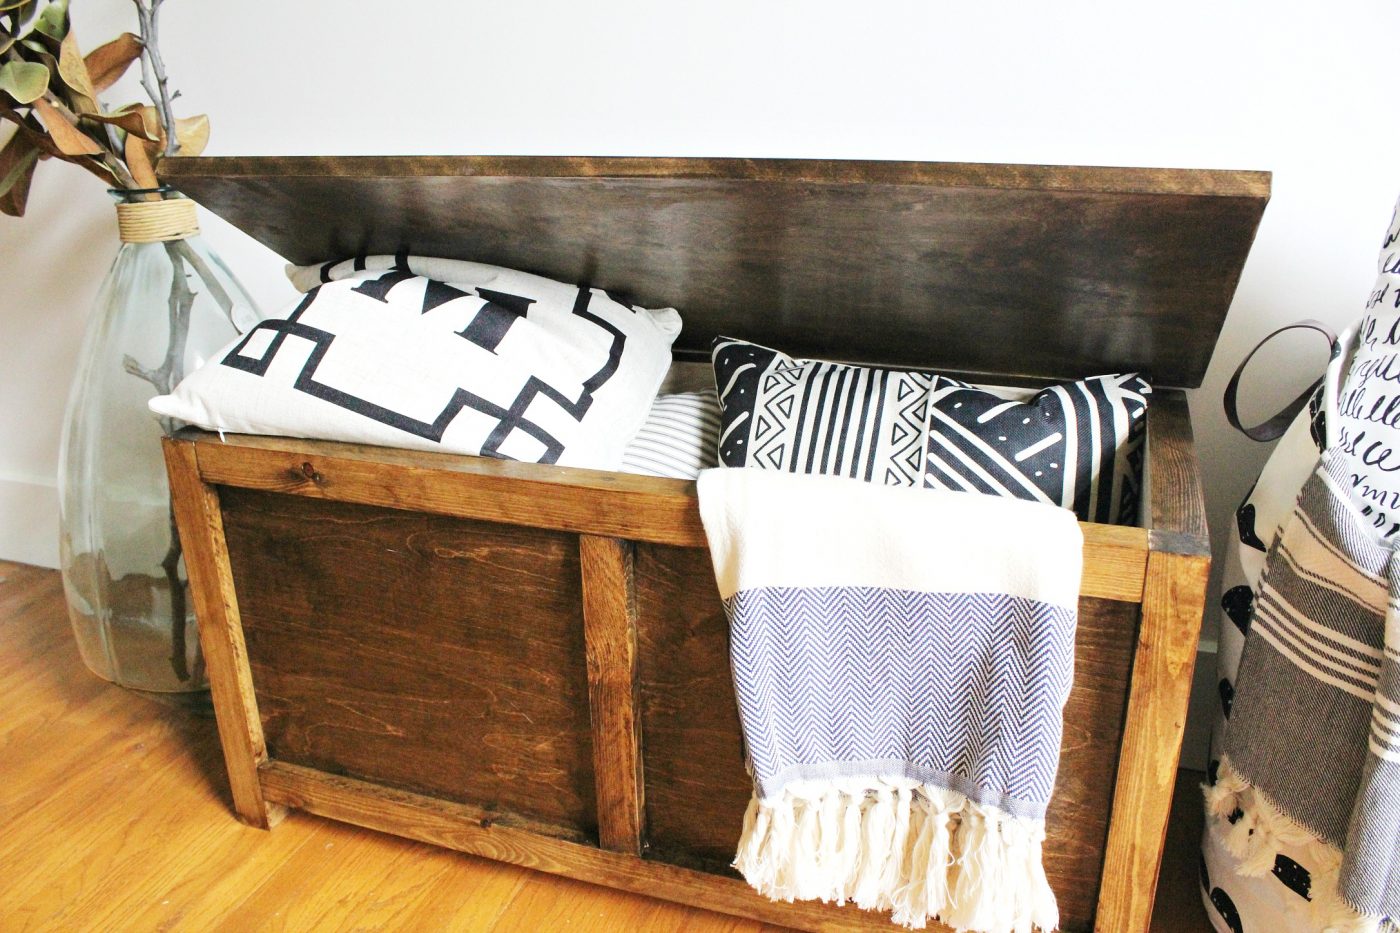
I love the clean lines on this piece. Nothing fancy, just simple and clean.
If you wanted to get fancier, you could add some cove molding around the edges of the panels for a more traditional look.
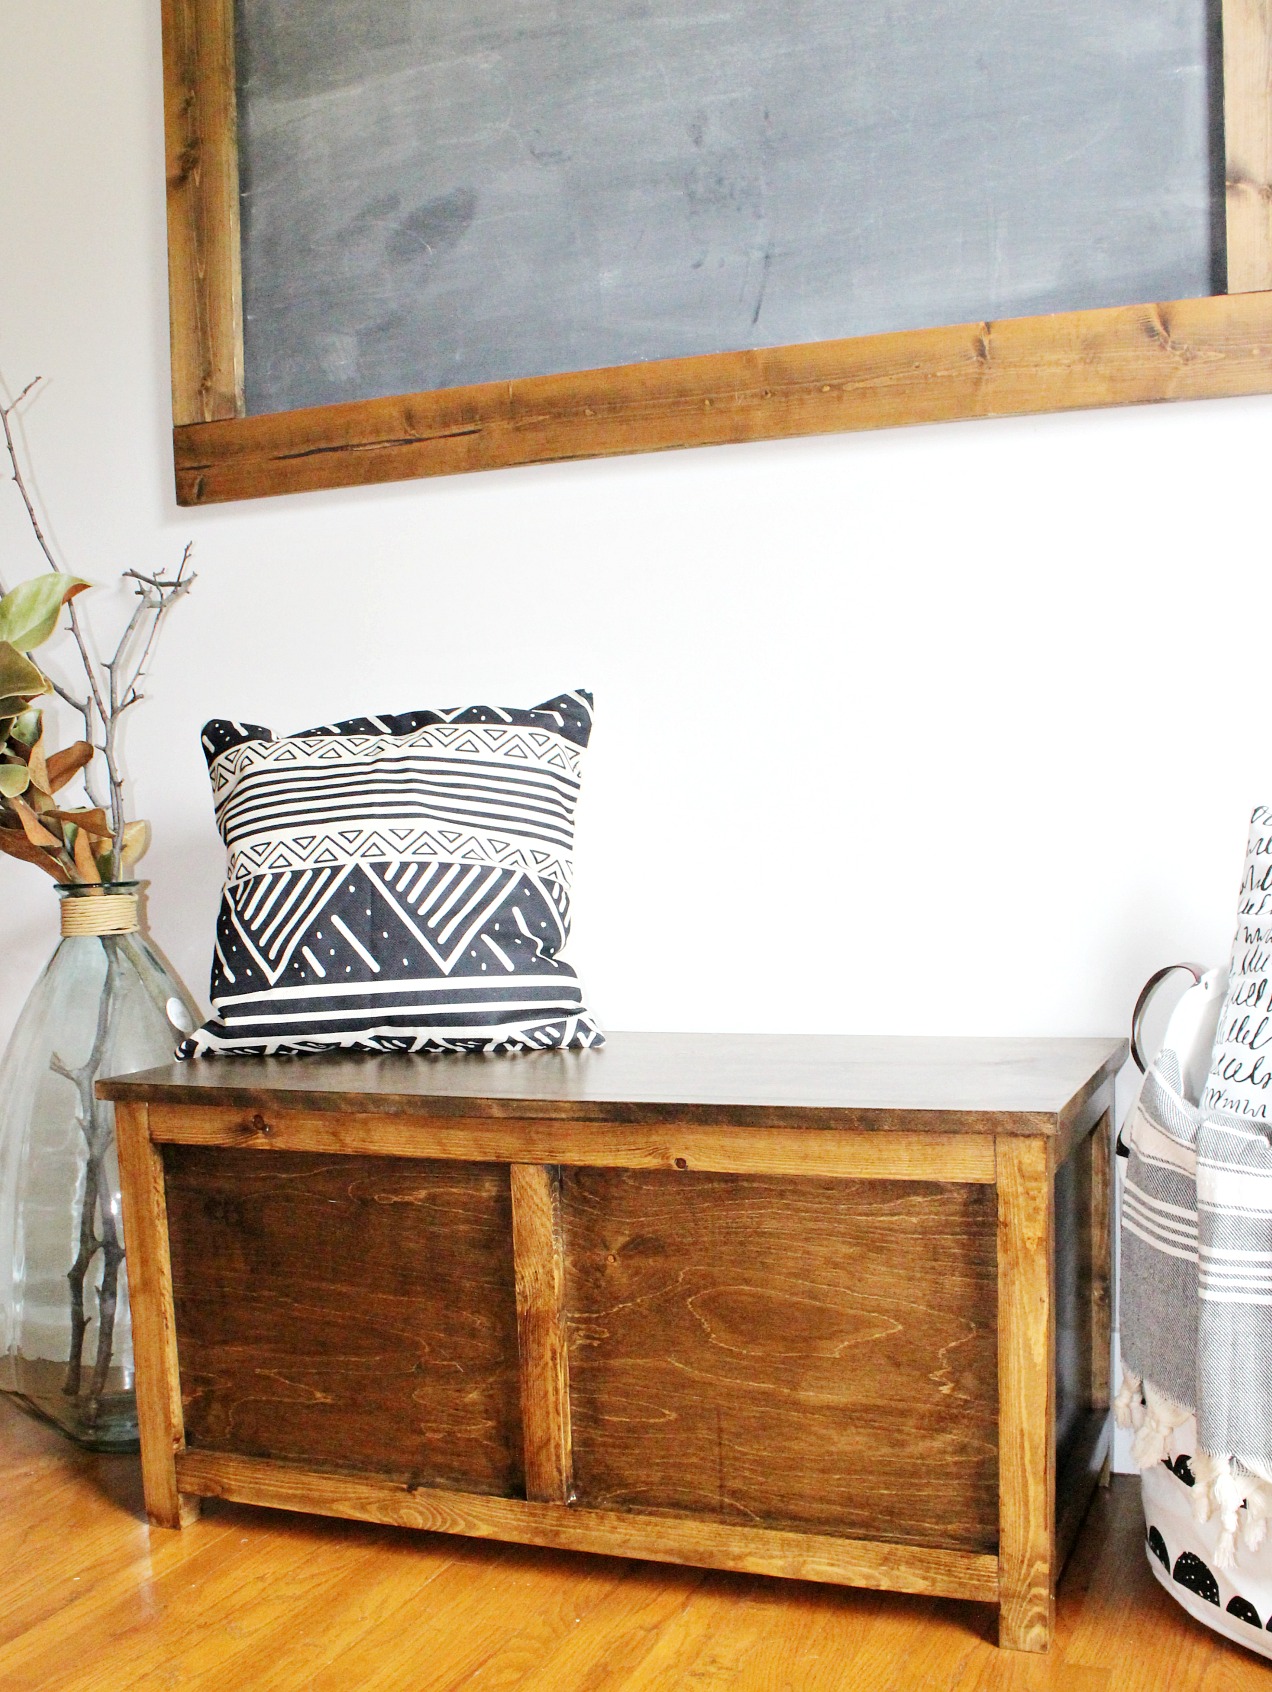
This is the perfect little piece for an entryway bench, toy box, or end of the bed trunk. And it also makes a great gift!
What would you use it for? Build your own with these printable PDF plans!
Want more storage ideas? Here are a few favorites!
If you enjoyed this build and want to stay up to date on all the latest projects and plans, be sure to subscribe to the newsletter below!
As always, I’d love if you’d pin this for later 🙂
Until next time, happy building!
Chris says
I built this using poplar and it came out pretty well, but the wood made it a little pricey. Any idea what lumber is being used here?
Shara, Woodshop Diaries says
I used birch plywood and pine for this build. Basically anything but these two wood types will end up being a little pricey.
DIYFan says
Great idea! I have been looking for a new project. I think I found my new entryway bench 🙂
Shara, Woodshop Diaries says
Awesome! I love this simple design 🙂