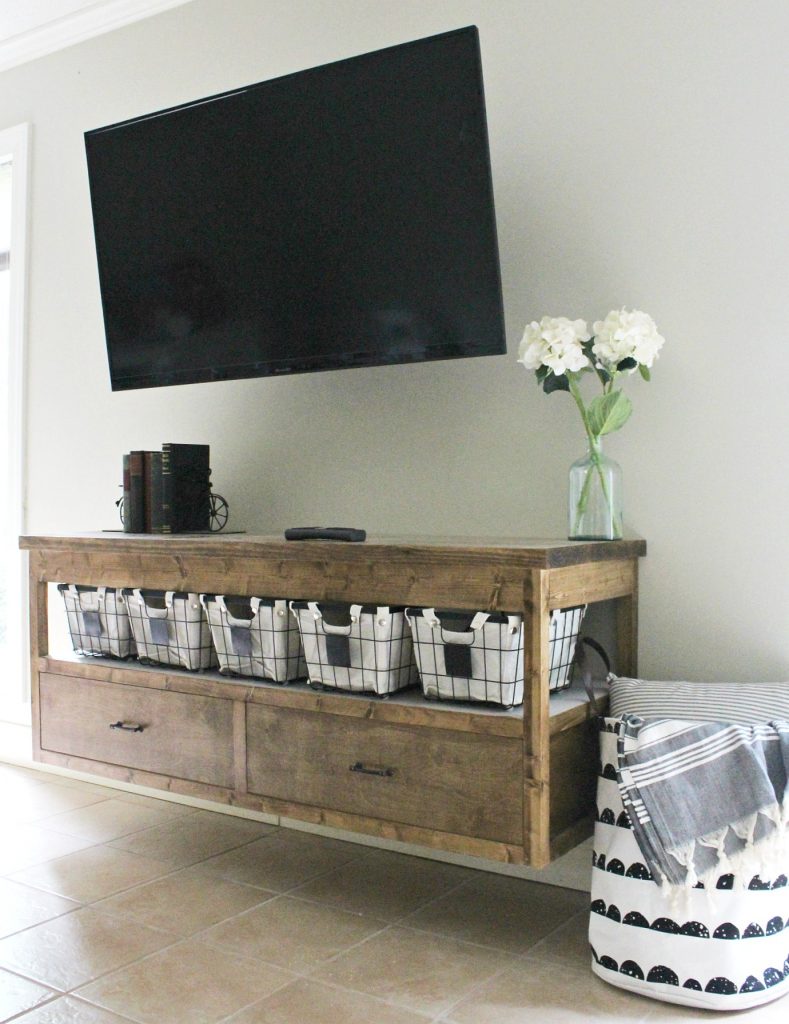
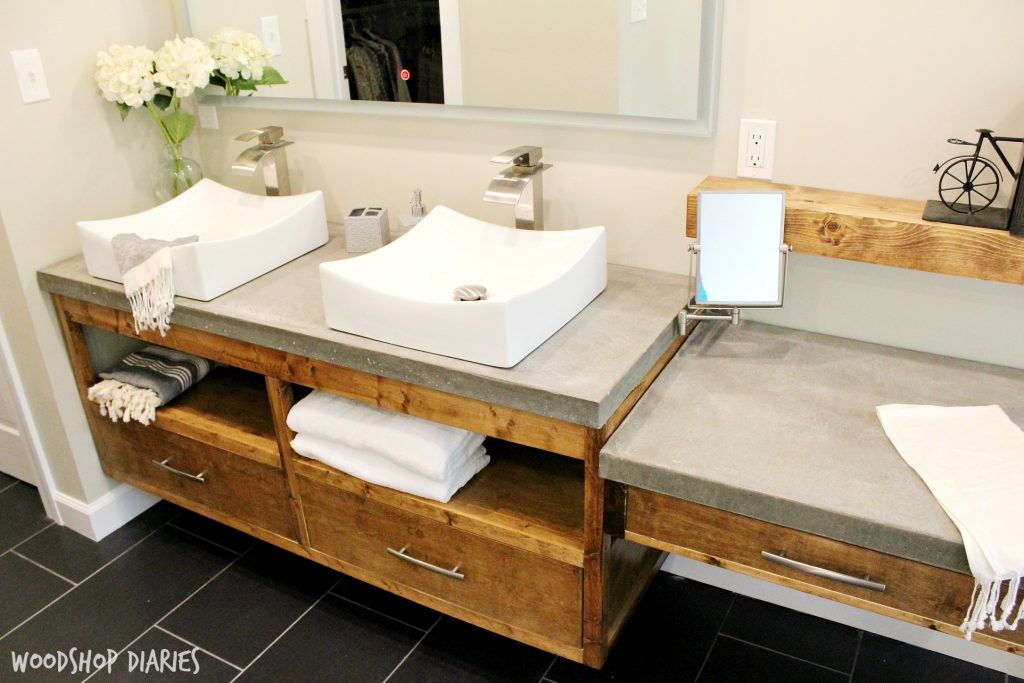
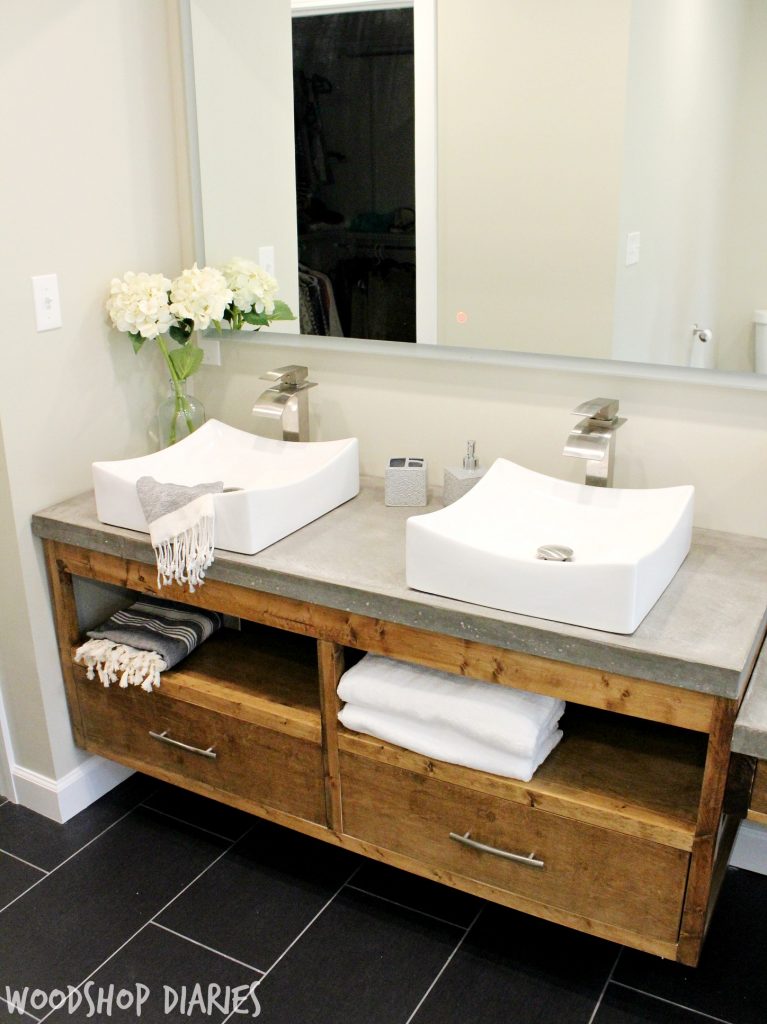
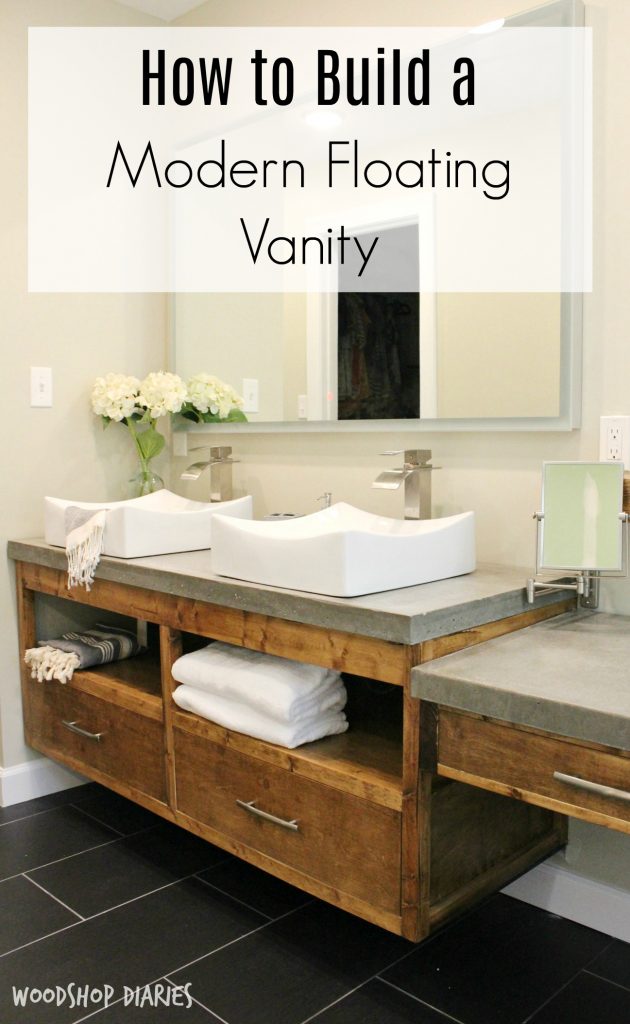
Have I mentioned to you before how I am really digging the modern furniture style lately? And modern FLOATING furniture is really becoming popular, too! So in this post, I’m sharing how to build a modern floating vanity that could also make a great floating TV stand as well!
.
Besides the look of it, another thing that modern furniture has going for it is that the clean, straight lines are easy to replicate when you are building your own DIY furniture!
.
So, when my friend wanted a modern floating vanity, I knew it would make a great DIY project! The straight clean lines and boxy shape make it an easy build. And I’ll show you how to tackle it right here.
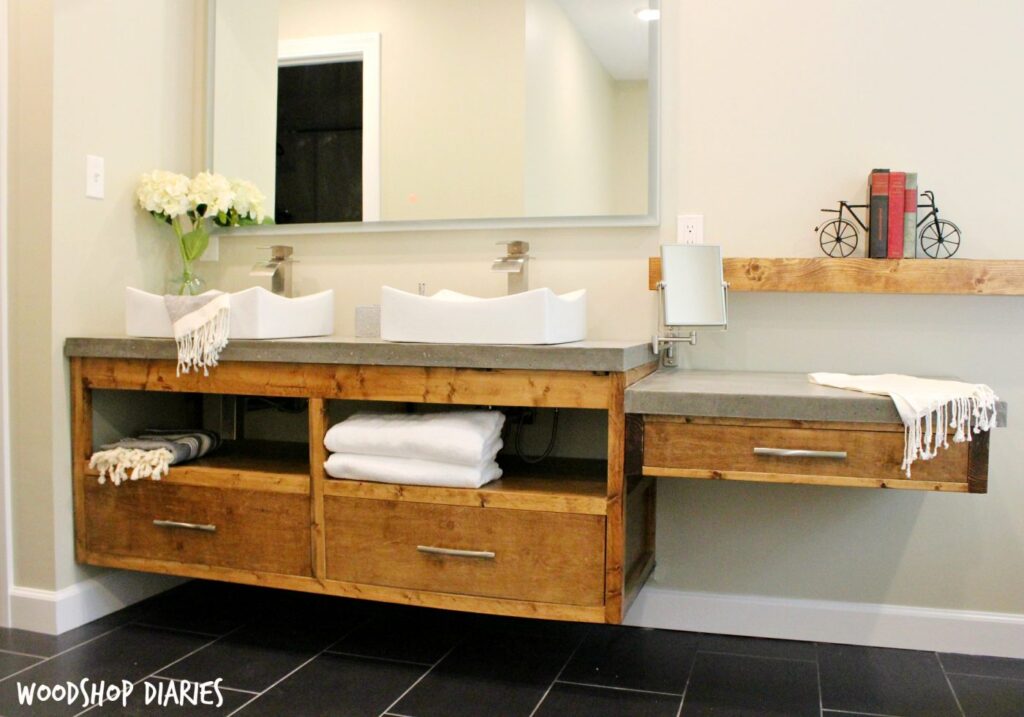
What’s cool about this design, is that it doesn’t have to be a vanity at all. I actually made her two (with one small difference I will explain later) and she used one as a TV console!
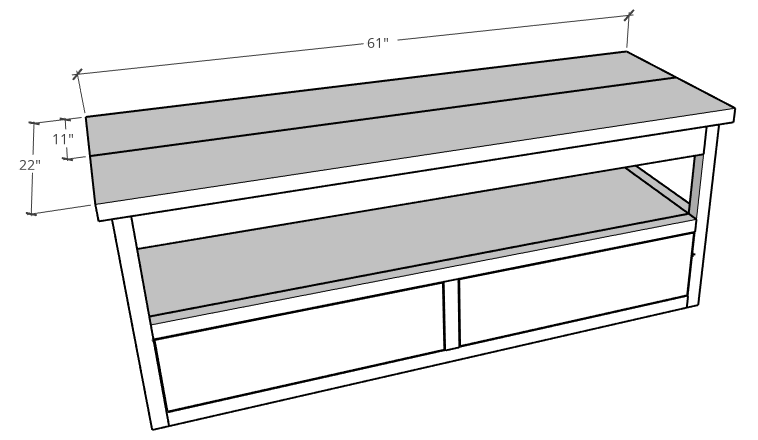
Because the space your vanity/TV console/whatever else you want to use this piece for will go may vary slightly in size, these plans are easily adjustable. However, these plans are for a vanity that is 21” deep and 22” tall and 59” wide (61″ wide with top added).
.
This post contains affiliate links for your convenience. If you purchase from these links, I may receive a small commission at NO extra cost to you. Thank you for supporting this site to help keep the content free. Please see disclosure policy for more details.
Tools & Materials:
Kreg Rip Cut (optional, but helpful)
Measuring tape
(4) 2x2x8
(3) 2x4x8
1 sheet ¾” plywood
½” sheet ¼” plywood
Wood Glue
2 ball bearing drawer slides (16” is what I used and I buy the 10 pack because it’s cheaper)
.
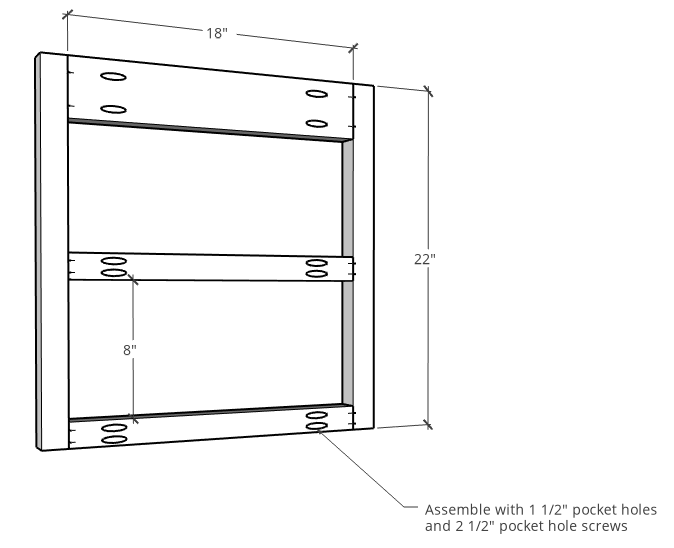
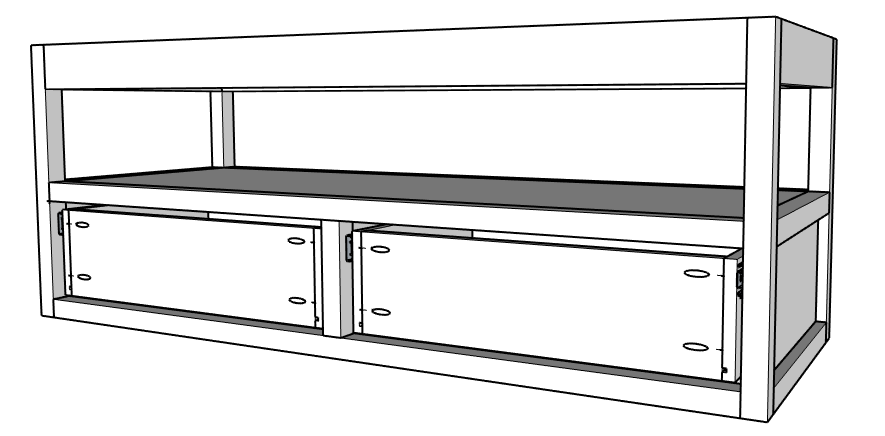
Step 1: Assemble the floating vanity sides
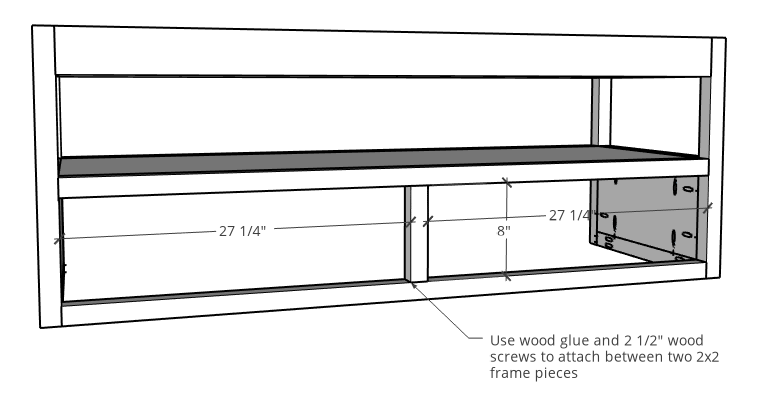
The sides are made of 2x2s with a 2×4 on the top. First, I cut 4 pieces of 2×2 at 22” long. These are the outside “legs.” Then I cut two 2x2s and one 2×4 at 18” long. I drilled 1 ½” pocket holes in both ends of the 18” long pieces and assembled like shown in the picture below using 2 ½” pocket hole screws. The middle 2×2 is screwed in so that there is an 8” opening between the bottom 2x2s.
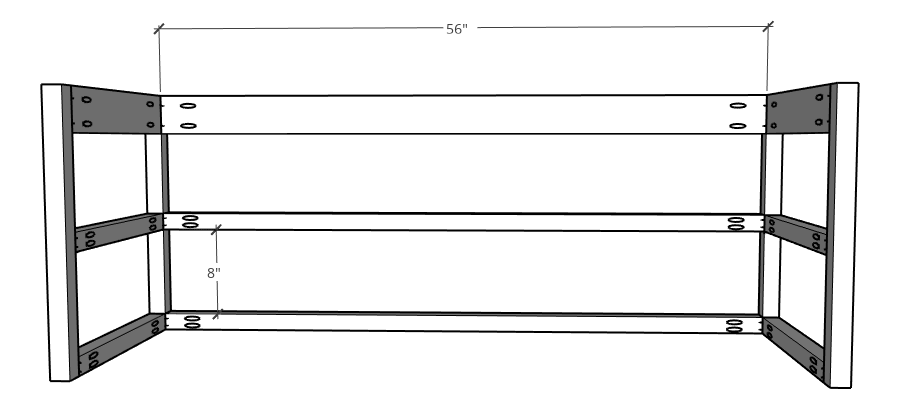
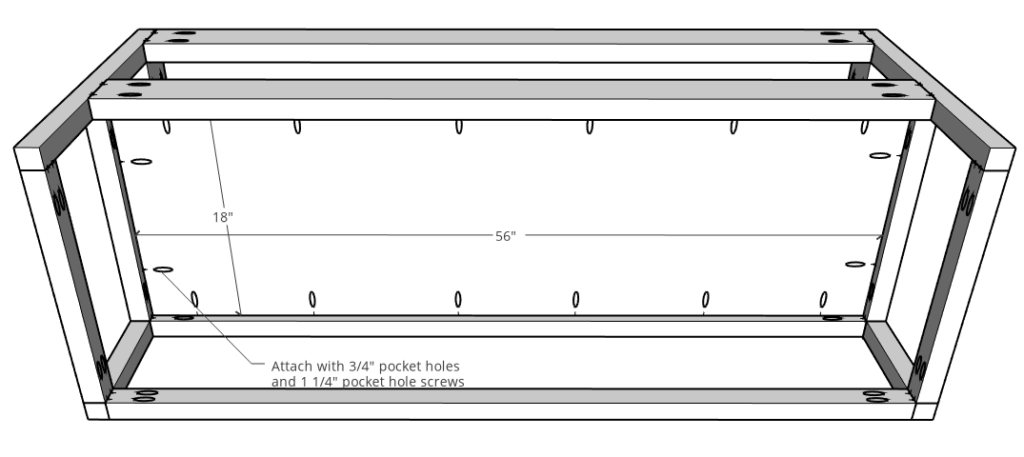
Step 2: Assemble the front of vanity frame
Now that the sides are together, I could continue with the rest of the frame. I cut one 2×4 and two 2x2s at 56” long. I drilled 1 ½” pocket holes in the ends of all these pieces and assembled like shown below using 2 ½” pocket hole screws.
 .
.
Step 3: Add vanity shelf
Cut two 2x4s at 56″ and attach with 1 ½″ pocket holes and 2 ½″ pocket hole screws like shown.
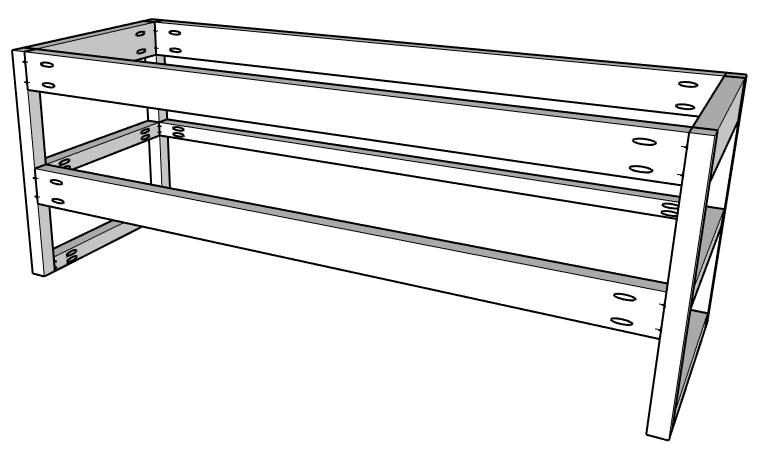
Cut a piece of ¾” plywood to fit in as the middle shelf. It should be about 18” x 56”. Drill ¾” pocket holes long the edge and attach using 1 ¼” pocket hole screws so that the top is flush with the 2xs on the top.
Step 4: Add side panels
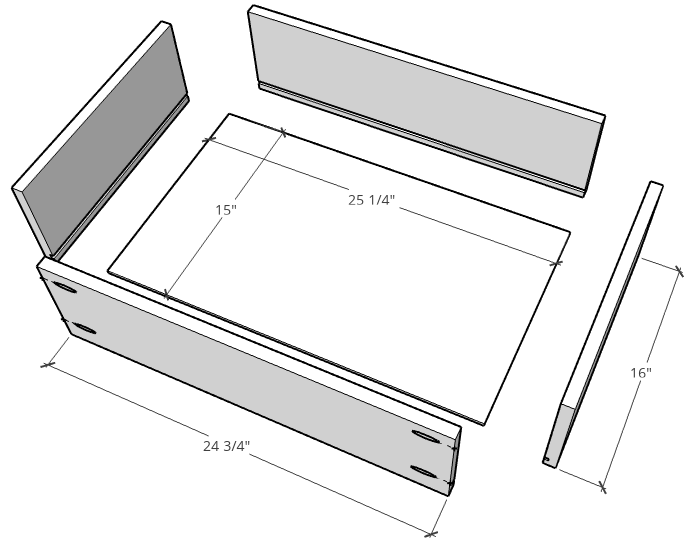
Cut pieces of ¾” plywood to fit in the openings in the side—they should be 8”x18”. Drill ¾” pocket holes around the edge and attach in place using 1 ¼” pocket hole screws like shown. Make sure the plywood pieces are flush to the INSIDE of the 2x2s. This makes installing the drawer slides easier.

Step 5: Add drawers to floating vanity frame
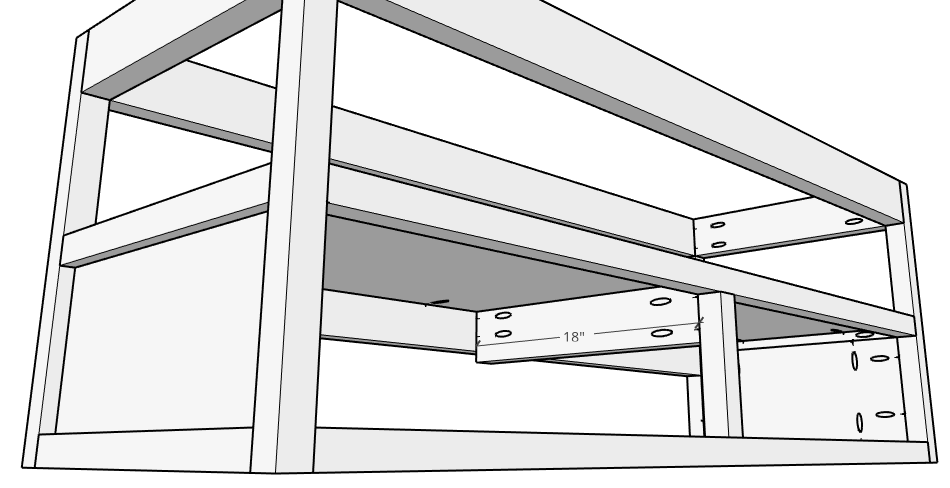
Here is where the vanity for my friend and the TV console for her differ. For the TV console, the middle drawer divider was only on the bottom, but for the vanity, it went from the top to the bottom.
.
You can decide which you like better. But attach a 2×2 in the center at the bottom to separate the drawers. If you want, attach another at the top going from the shelf to the top 2×4. You can do this using pocket holes and screws. If your drill can’t get in the tight spaces for the pocket holes, use wood screws through the top or bottom support—you can either “toenail” it in from the back side, or drill straight through the supports. If you do a top support in the front, you could also do one in the back for added support or just to be consistent.
 .
.
However you do it, you should have a 2×2 in the center to separate the drawers. Once this is in place, cut a 2×4 at 18” and using pocket holes and screws, attach it between this 2×2 and the back middle 2×4. This is to attach the drawer slides onto.
Now you can attach the drawer slides and build your drawers. You can see my post here on how to make drawers for more information. Attach 16″ drawer slides 5 ¼″ from the bottom frame like shown.
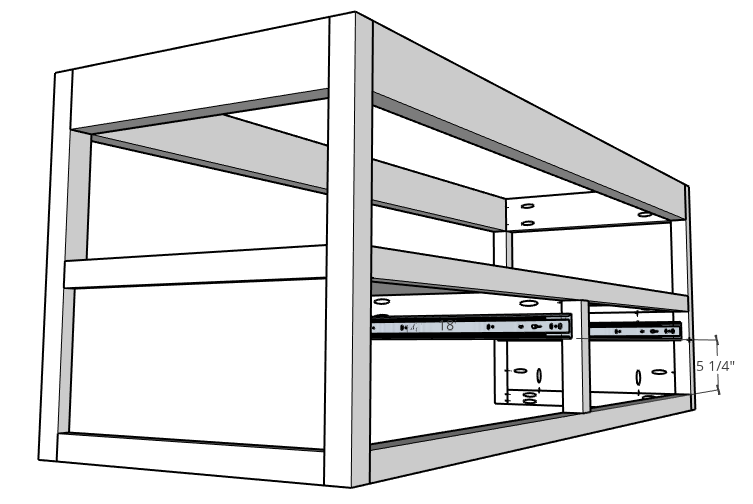
Build two drawers like shown. Again, refer to my post on how to build a drawer for more information.
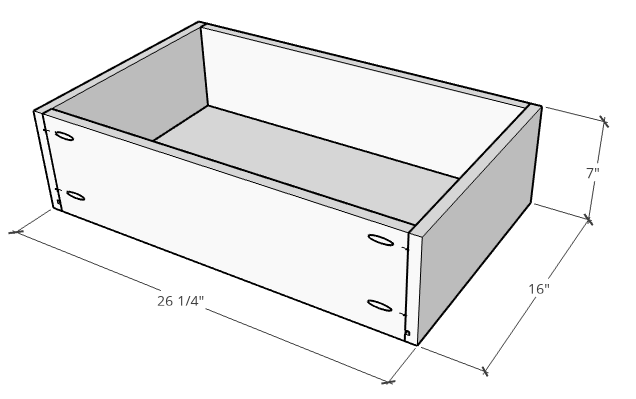
Install drawers into the vanity and add the drawer fronts to fit.
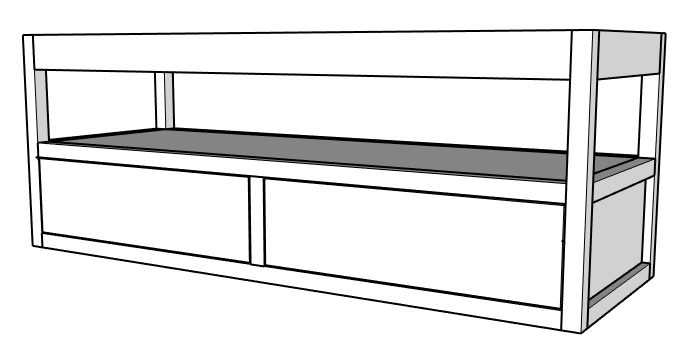
Step 6: Finish Floating Vanity
Once the drawers are in place, all that’s left is to give it a sanding and stain and poly it. I stained it in Minwax Provincial and used Minwax Polycrylic to finish it off.
If you wanted to make this a TV console or something else with a wood top, check out my post here on how to make table tops. I added a wood top to the TV console like shown. I trimmed down 2x12s to 11″ wide, glued them together, then attached to the top of the frame from underneath. You can attach using pocket holes, toenailing screws, or using L brackets.

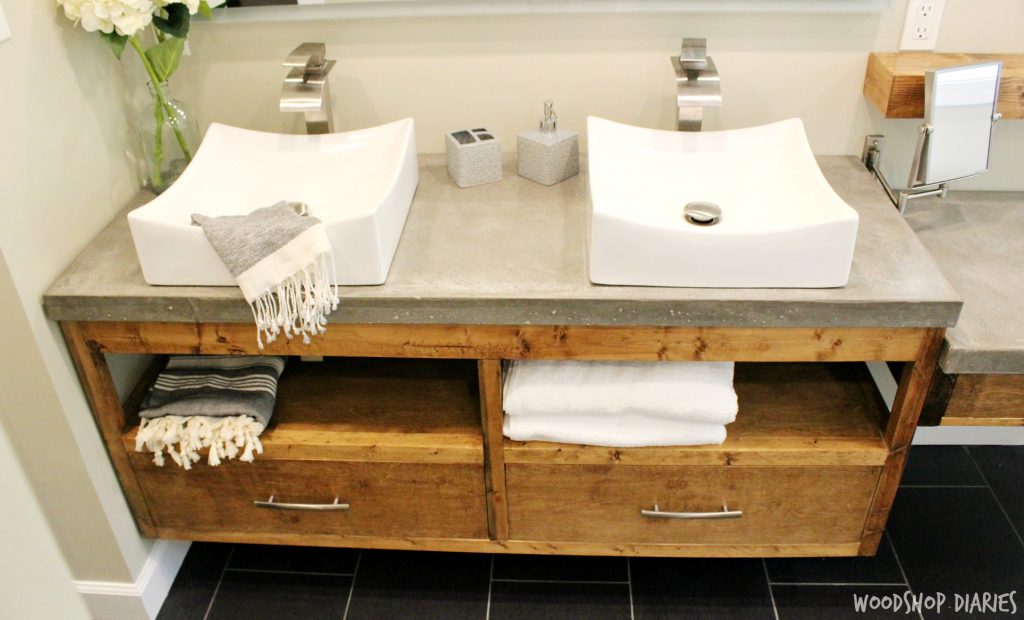
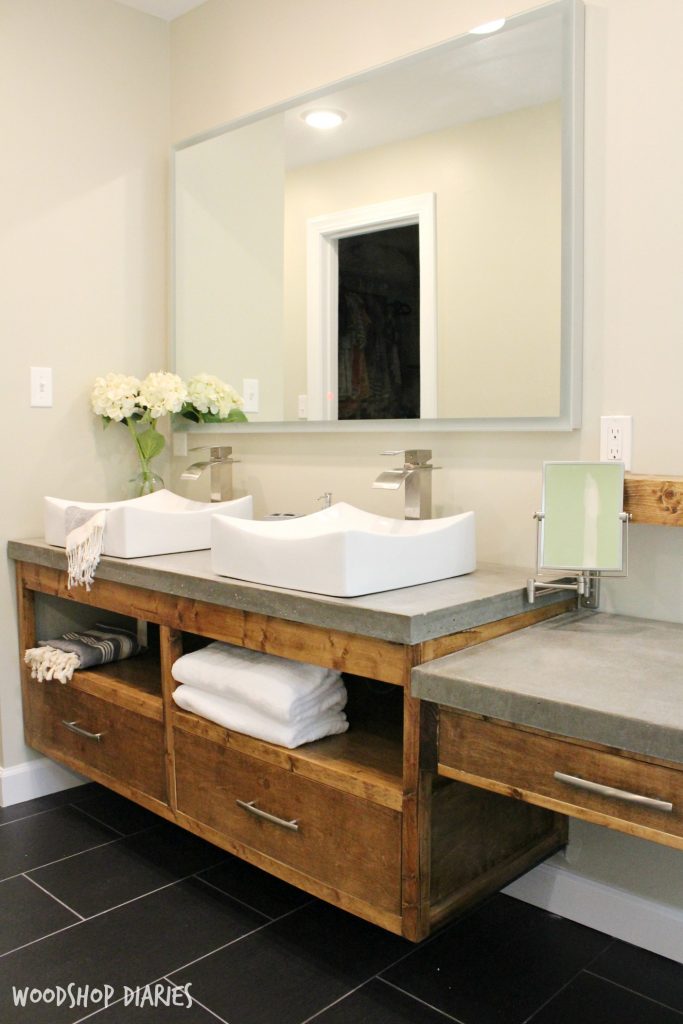
But for the vanity, she had concrete countertops installed. In case you wondered about the sinks she used, you can find them here.
.
I recommend you consult a professional on how much support you will need based on the weight you plan to set on the vanity/console. For this concrete top, my friend used some very heavy duty supports along the bottom.
But for the floating TV stand, she simply used 3-4″ wood screws through the back 2x4s into the studs on the wall. This has worked well so far, but I recommend several screws in several studs to hold the weight.

As an added feature, I made a small floating drawer for her to use as a little makeup vanity to go beside the main vanity. If you’d like the how to for that, it’s actually made the same way as I made these washer and dryer stands, except it’s hung on the wall.
What do you think about this modern bathroom vanity that doubles as a TV console?? I LOVE it! It’s such a simple style, but also so functional!
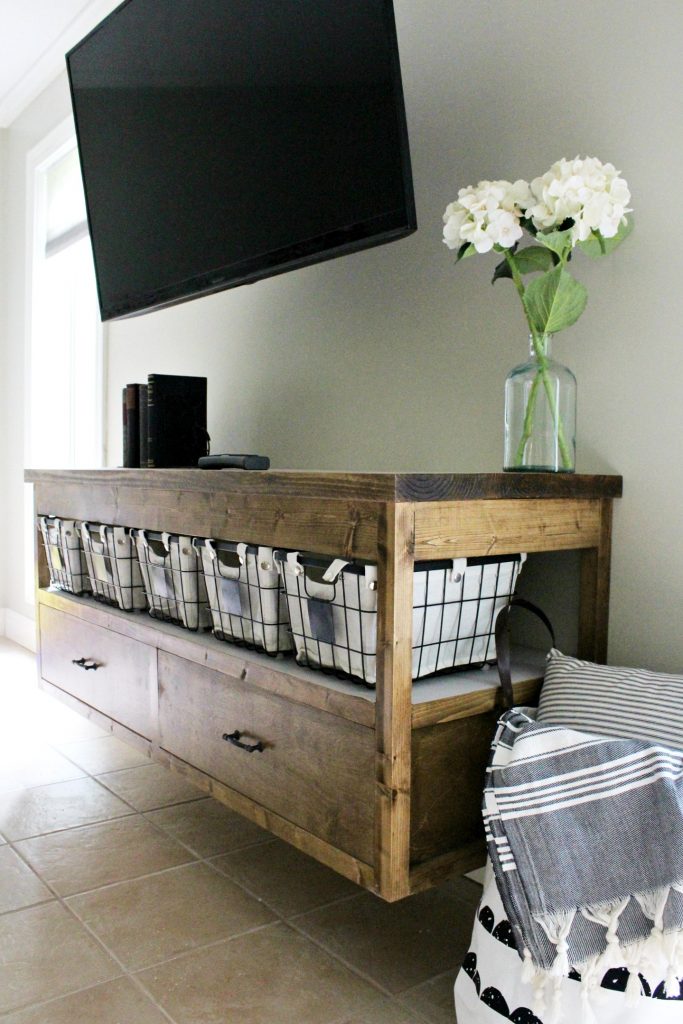
By the way, here is a link to these adorable storage baskets that I also used in my recent toy storage cabinet build. They are so cute! And this blanket storage bag fits in perfectly with the modern style. And finally, if you like these towels I used to stage with, you can find the small towels here and the larger towels here. I LOVE how they fit in just perfect with the style. Plus, they are super soft.
Floating furniture is really coming into style, so I don’t think this will be my only floating project 😉 Stay tuned for what’s to come *wink wink*
.
In the mean time, if you like this project, don’t forget to save it for later. I’d love it if you’d pin it 🙂
Until next time, happy building! 🙂