
Look at this!!!

Bet you thought this was FINALLY the final reveal post. Fooled ya! Try to think of this as the first part of the final reveal….there will be a sequel.
The kitchen is finally functional and back together and looking good, but it’s still a long way from finished. I have decorations scattered everywhere and haven’t decided where to put them all yet. I’m playing with ideas in my head but haven’t done anything yet….I’m so indecisive it’s ridiculous.
Danny says the counter and the floor is cluttered and I just keep repeating “I’m not done yet! Everything’s going to be moved to its place, but I haven’t figured out where that is yet.” Ugh decorating and I have a love hate relationship. I love to decorate, but I hate that there is no “right” way to do it so every way I do it always seems wrong! The struggles of a type A, need structure, black and white kind of girl…..
Anyway, enough of my rambling. Let’s get to the kitchen!
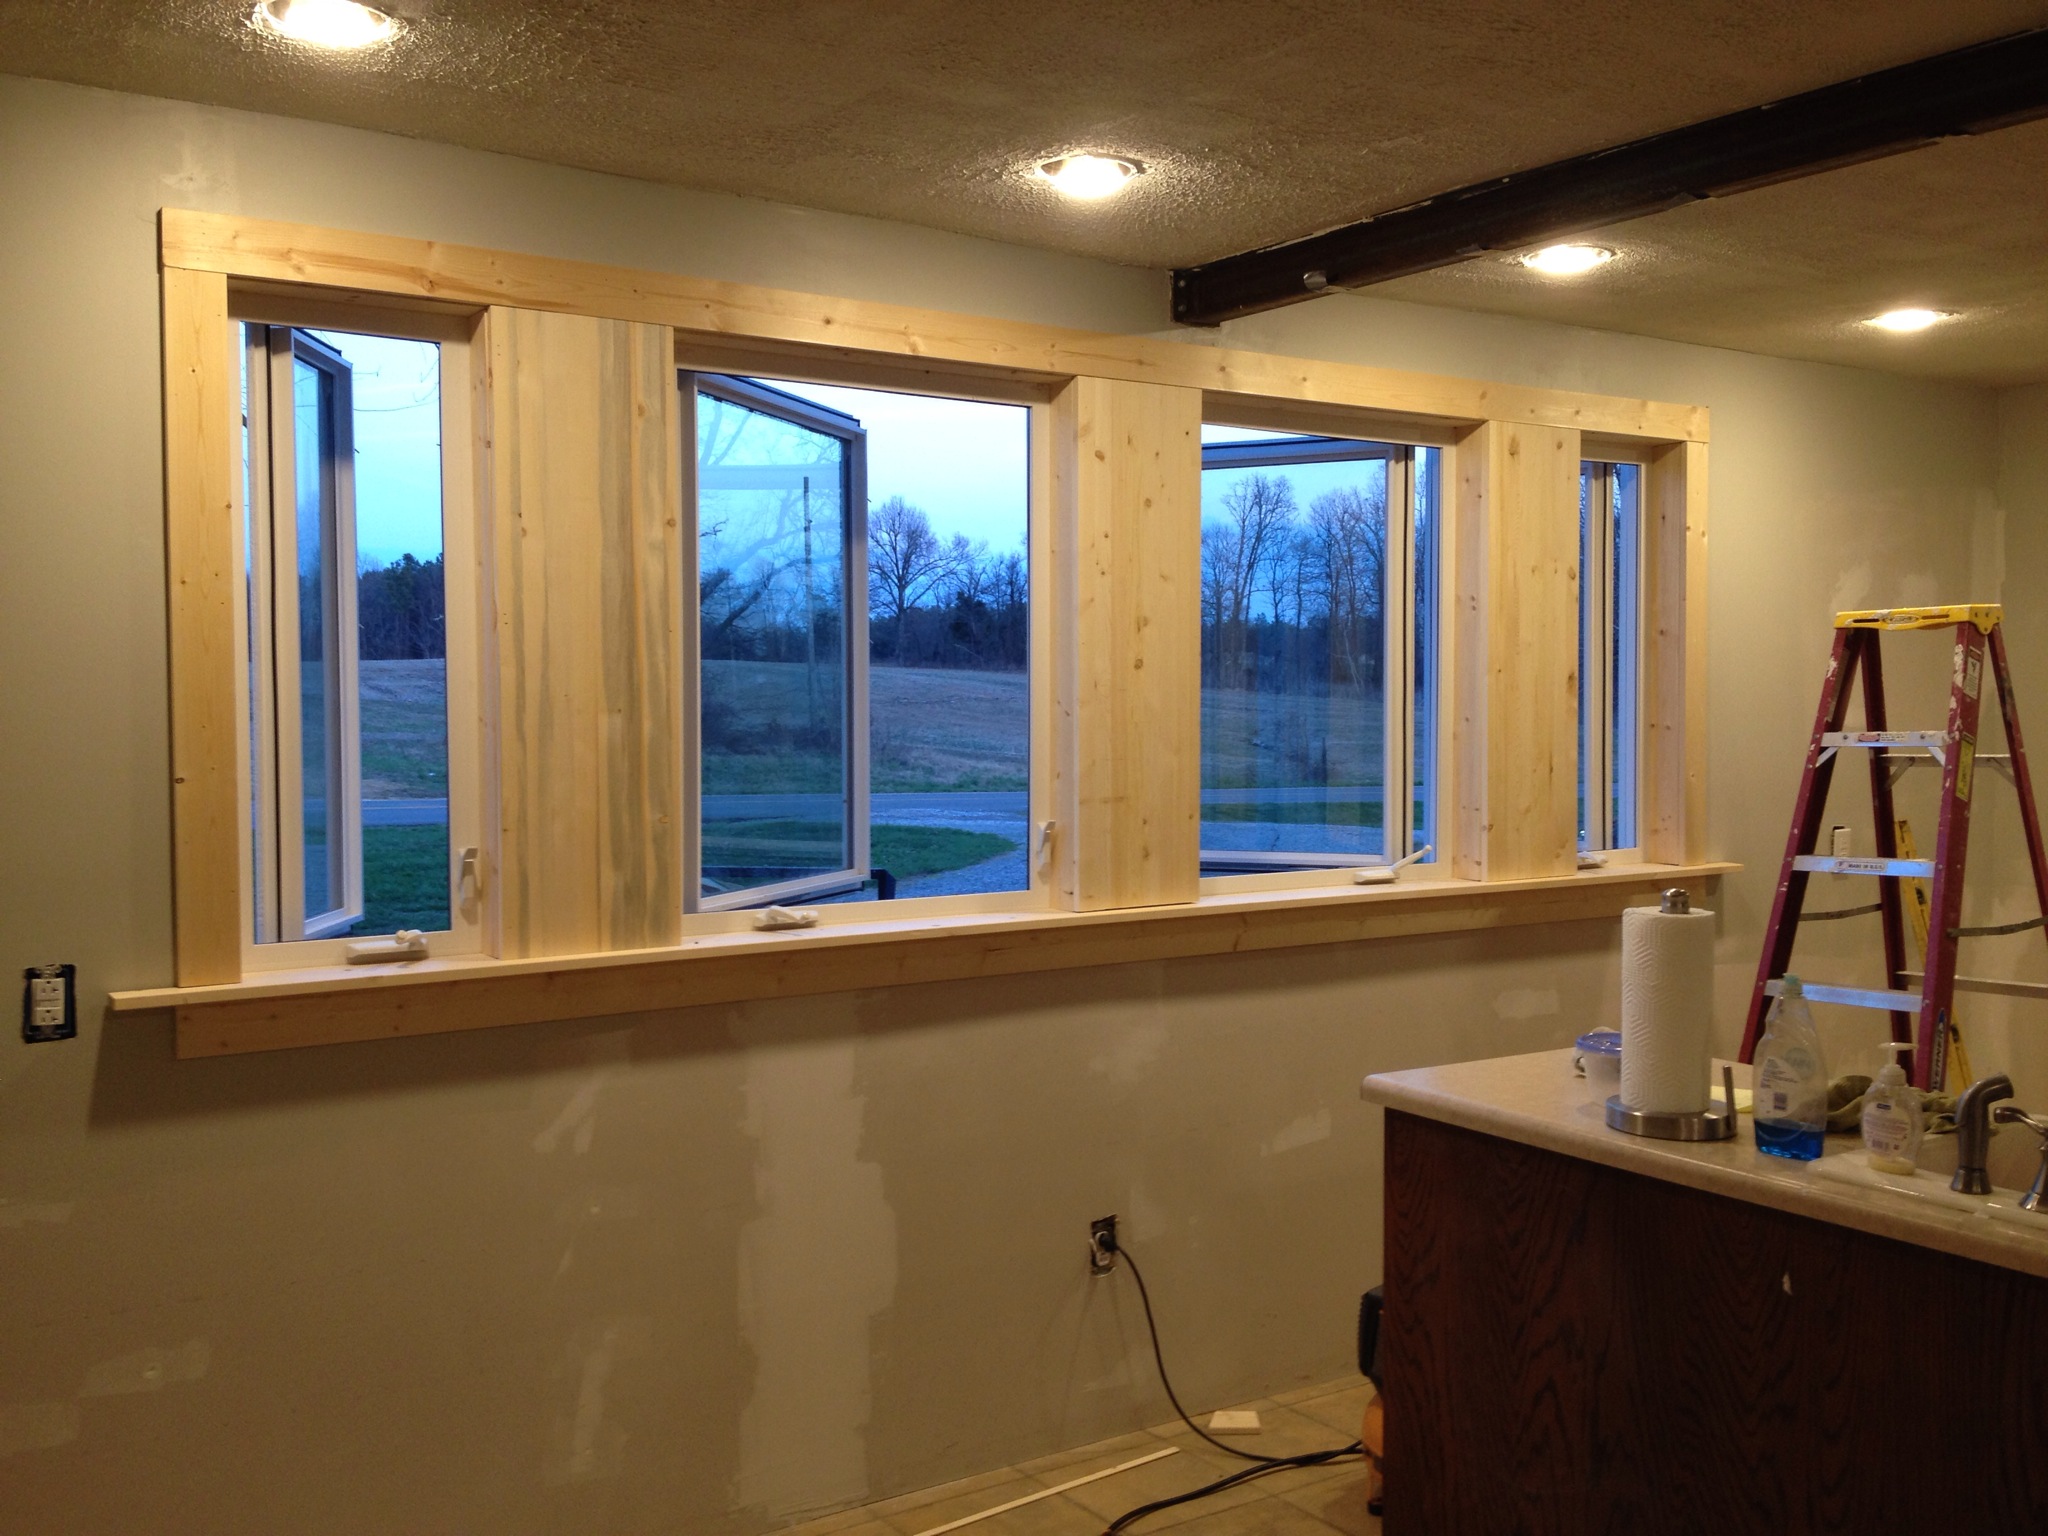
When we last left off, my house was full of wood floor, butcherblock counters, rough lumber, and a bunch of wood to be used for the trim. Above is some of that wood put to good use as new window casing. Now, here it is finished with moulding and shiny white paint!!

I am so proud of this project because:
1. I did it myself
2. It was my first time ever cutting moulding and caulking
3. This is the only project I’ve ever done that made Danny say (and I quote) “wow, I’m impressed.” (Which means…..maybe I can convince him I let me do this to all our windows :))
Oh and do you notice the wood beam? Let me tell you that story…
In my last post I mentioned that I had gotten rough lumber to cover the beam. Well, after I had stained it and cut it and screwed it all together, Danny decided it’s too much weight to hang from the ceiling. (I agree it was pretty heavy.) He didn’t bother to mention that BEFORE I cut and screwed and stained it even though he had helped me move it around several times so he knew how heavy it was….oh Danny…..
Anyway, it all turned out for the best because I had ordered more 1x6s than I needed for the baseboards, so I took three and beat the crap out of them with a hammer, pry bar, and this scraper thing with rough metal bristles (I’m sure those have a name, but I don’t know it) and used them to cover the beam. After I beat them, I stained them. I thought they looked kind of like rough old wood but not nearly as heavy.

Then I accidentally spilled like a whole can of stain all over my driveway. It was my new fav color and practically a brand new can!!! I may have gotten so mad I shed a tear and Danny told me not to cry over spilled stain…..true story. Don’t laugh.
After I gained my composure (and waited for dads help the next day) I nailed it together and we hung it and it was beautiful!

The cabinets came in and we learned how to install them trial and error style 🙂 luckily we had mostly trial and not much error. I think we (mainly Danny) did pretty good for our first time installing cabinets (we had some help from dad and his friend, too).


Once the cabinets were in, we installed the sink. That was STRESSFUL. You buy a brand new cabinet and a brand new sink and you have to cut the cabinet for it to fit and neither the sink nor the cabinet were cheap….
I didn’t take any pictures of that process because I was so nervous I couldn’t watch. No joke. Dad and Danny took care of it and it looks great (thank goodness).

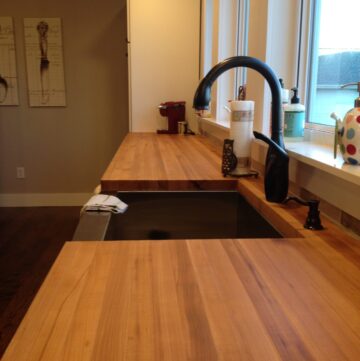
We had a local guy (who knew a lot more about how to install them than I did) come put in our countertops. I felt like a stalker because I just sat and watched the whole time. It was very educational haha.


After we got the plumbing done, we laid the floor and put in the appliances and we celebrated by cooking bacon on the new stove and watching our dishwasher run so we could check for leaks. Entertaining stuff.


During the dishwasher installation, dad and Danny took a short nap.

We laid wood floor in the kitchen, foyer and hallway since they are all attached and flow together. It took us DAYSSSSS and was super frustrating. But it’s done and it looks nicer than the old stuff 🙂


Once the floor was laid, Danny hung my red chandelier….and when we flipped the switch nothing happened. Long story short, we had to cut a hole in the attic floor to reattach a wire….See how I squeezed a whole night of work into that one sentence? Lesson learned: keep your junction boxes accessible. Now we know…
I cut, painted, and attached the baseboards and attached the cabinet hardware and we are basically finished except for adding our new farmhouse table (currently in process in my garage) and finishing decorating.
Can we all just shout hallelujah?!!! It’s been almost two months since we started and we are ready to be DONE. (Let’s face facts, here. I will never be “done.” As long as I have a house I can fix, update, rearrange, it will never end.) At least we are ready to be done with a major renovation and just tackle little things for a while 🙂


That’s it for now. Be sure to check out the final reveal of the kitchen here!


Leslie Knadler says
That is a beautiful kitchen! Great job. Where did you get the countertop? I looked for butcher block, was shocked at the price. I ended up using birch plywood with polyurethane for “temporary” countertops, it looks nice enough – temporary is often 3-5 years.
Shara, Chasing A Dream says
Thank you! I actually wrote a whole post about my countertops! You can find it here: https://chasingadreamblog.wordpress.com/2016/01/14/woodnt-you-like-to-know-my-take-on-butcher-block-countertops
Rebecca Wood says
what is the flooring you used I love the color and the style.
Shara says
Thank you! It is Bruce Engineered Hickory Hardwood. I will warn you…although it is pretty, it scratches VERY easily. It’s a distressed looking floor, so the scratches kind of just add more character (if you want to look at it that way haha), but the flooring is kind of dark and the scratches are white so they do kind of stand out.
Khadija says
That is an amazing transformation! Great job!
Dianne Bell says
All I can say is “WOW” !!! Your kitchen makeover is fabulous!! How could you not Love being in there cooking or baking, sitting at the beautiful table going thru a cookbook or writing someone a letter!! And, when no one else was around, doing what our Moms told us not to do – sitting on the counter
with a cup of coffee, daydreaming out those gorgeous windows. Enjoy
your awesome space! ☕️ ?