
There should be a support group for people who have trouble making decisions. Maybe there is one already out there. If so, I probably would have trouble deciding if I really wanted to go or not. It’s probably best I assume the support group doesn’t exist. Or maybe it would really be helpful. But then what if they ask everyone to bring a snack to the meetings? What would I bring?!
.
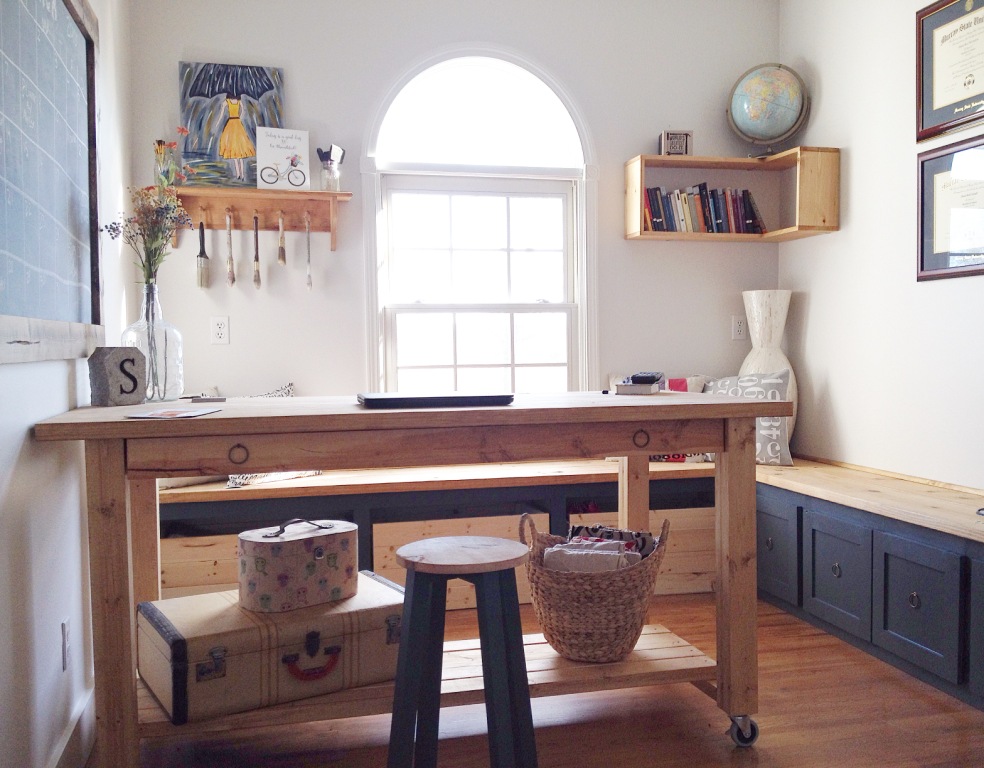
So when I decided to remodel the room I call “the office,” I had a room in mind that had a million shelves. I wanted it FULL of books and a rolling ladder so I could reach the top of every shelf. It would be dark and elegant and make you feel smarter just by gazing into it.
.
I would have a fancy desk with a fancy chair and it would be like walking into a Harvard library (not that I’ve ever been inside a Harvard library–but I’ve watched Legally Blonde, so that’s close enough, right?). I mean I was super sure that was exactly what I wanted!
.
Want to know what I ended up with?
None of the above.
.
But, I’m okay with that.
.
Once I installed the window bench and the cabinets on the right wall, I started doubting that I wanted to make built in shelves on top of them. And I kind of appreciated the simplicity of the bare white walls. UGH, that meant I had to change my plan that I had already taken months to decide to execute.
.
So I put off doing anything else to the walls until I made the desk. Oh, but what kind of desk do I want now? I had originally wanted a desk…like a fancy office desk. But now that I wasn’t doing a fancy “Harvard library thing” in here, I didn’t know what to do. So I started thinking of this more as a craft room/studio. Seriously….a “studio?” I crack myself up. I don’t even know the definition of a studio!
.
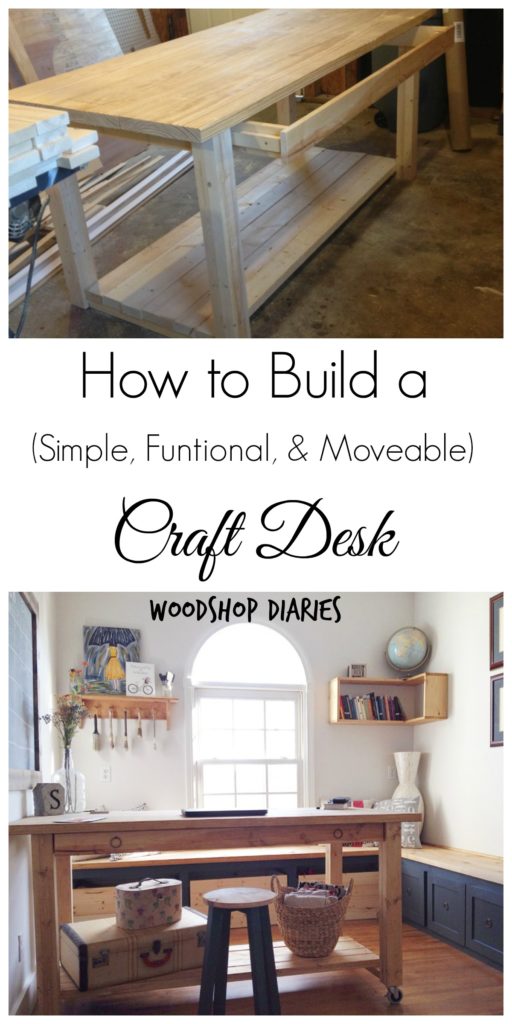
I finally settled on a large craft table that I can spread out on and that would move–because I couldn’t decide exactly where in the room I wanted the desk to go. See? I seriously have a problem!!!
.
So here is how I made my new desk/craft table/whatever this thing is 🙂
.
Note: This post contains affiliate links. If you purchase from one of these links, I may receive a small commission at no extra cost to you. This helps keep the website and it’s content free. Thank you for supporting this site. Please see disclosure policy for details.
Materials Needed:
(3) 2x12x8s for the top (could use one 8ft and one 10 foot instead)
(2) 4x4x8 (or could glue 2x4s together and get 4 more 2x4s)
(2) 1x4x8
(4) 2x4x8
(1) 2x2x8
¼″ plywood
Tools Needed:
Miter or Chop Saw
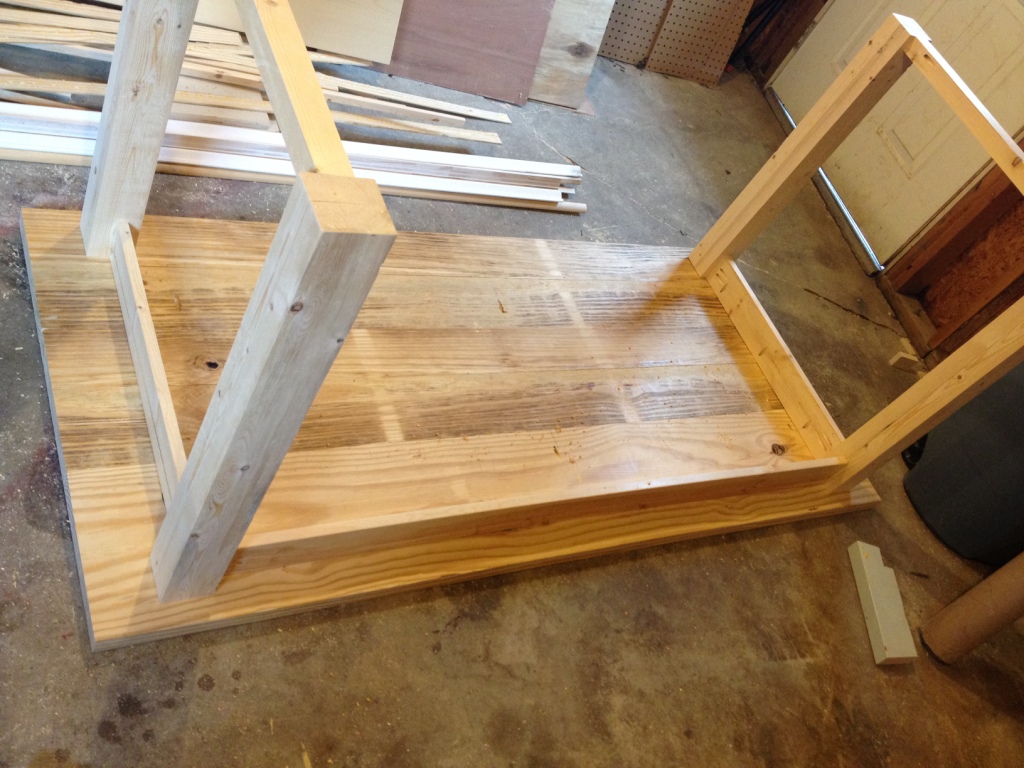
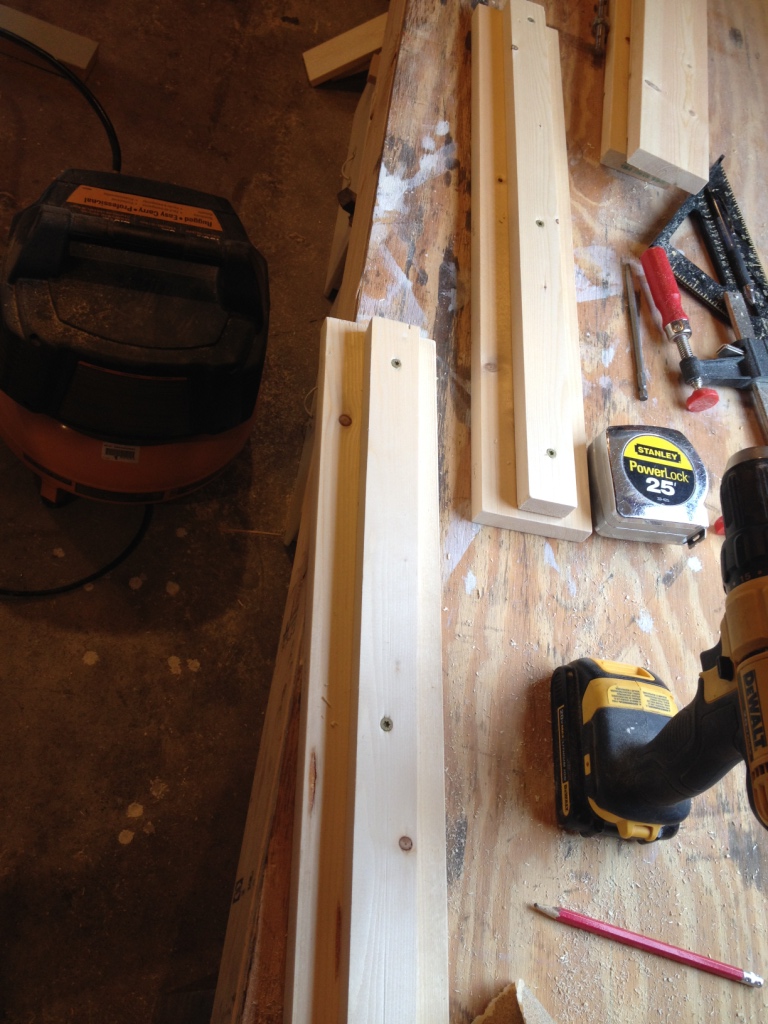
Step 1: Build the sides
It is difficult to find untreated 4x4s in this area, so I glued 2x4s together for the legs. Whether you use this method or actual 4x4s, either works fine. I cut these 4×4 legs at 31 ½″.
.
I cut two pieces each of 1×4 and 2×2 at 22″ and pocket hole screwed them to the legs like the picture shows. I used ¾″ pocket holes and 1 ¼″ screws for the 1×4 and 1 ½″ pocket holes and 2 ½″ screws for the 2×2. You could replace the 2×2 with another 2×4, but I liked the smaller profile of the 2×2.
.
Notice that I also drilled pocket holes in the 1×4 towards the top. This is to attach the top later.

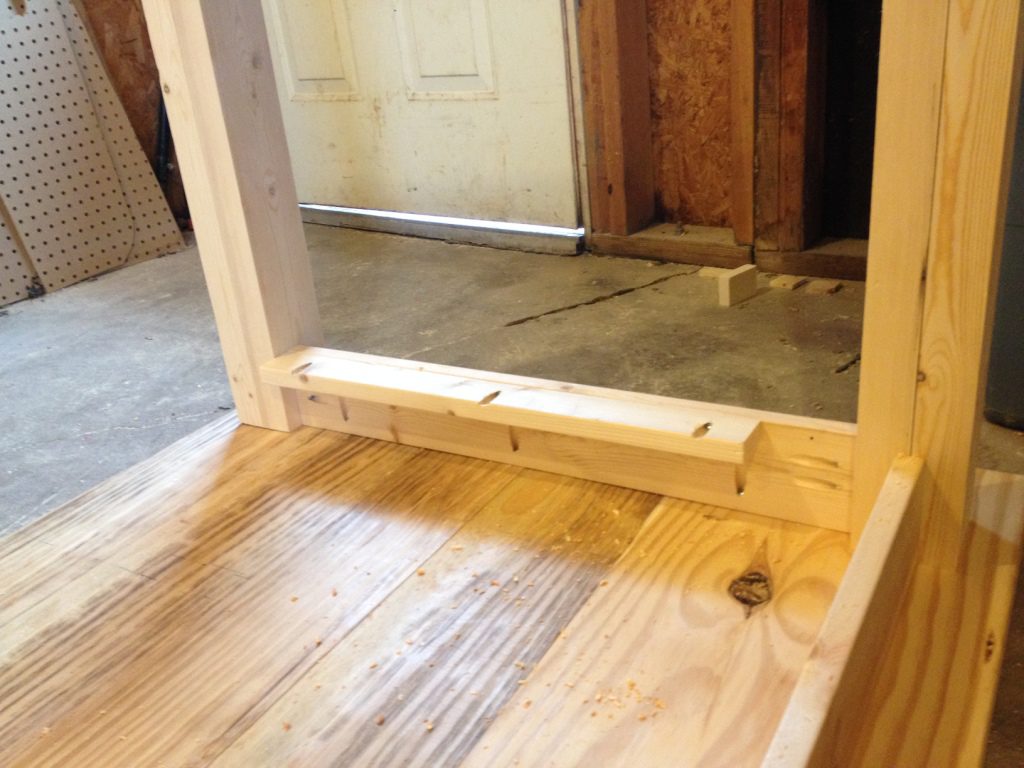
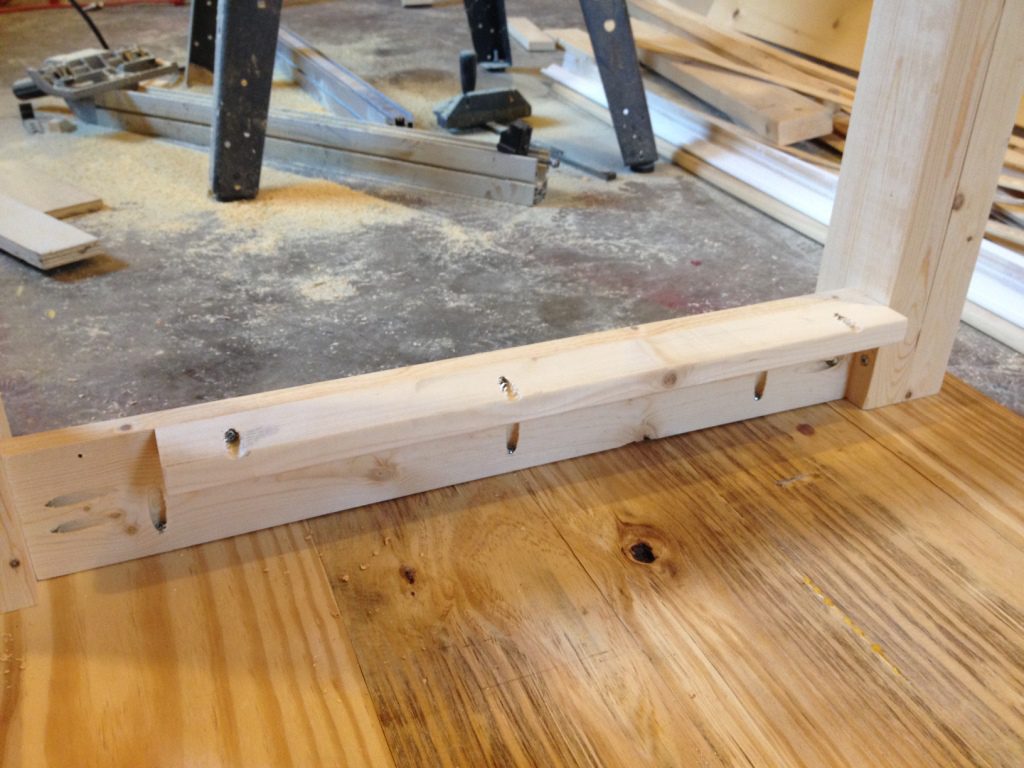
Step 2: Attach the sides
I attached a 1×4 as the back support using pocket holes and screws. I drilled pocket holes onto the back support like I did the side supports in the picture above. This piece is 40″ long. If you wanted your desk even wider or more narrow, this is easily customizable and you could make this support whatever length you wanted. My desk was about 54″ long. I drilled pocket holes going toward the top along this back piece just like from step 1 on the 1x4s.

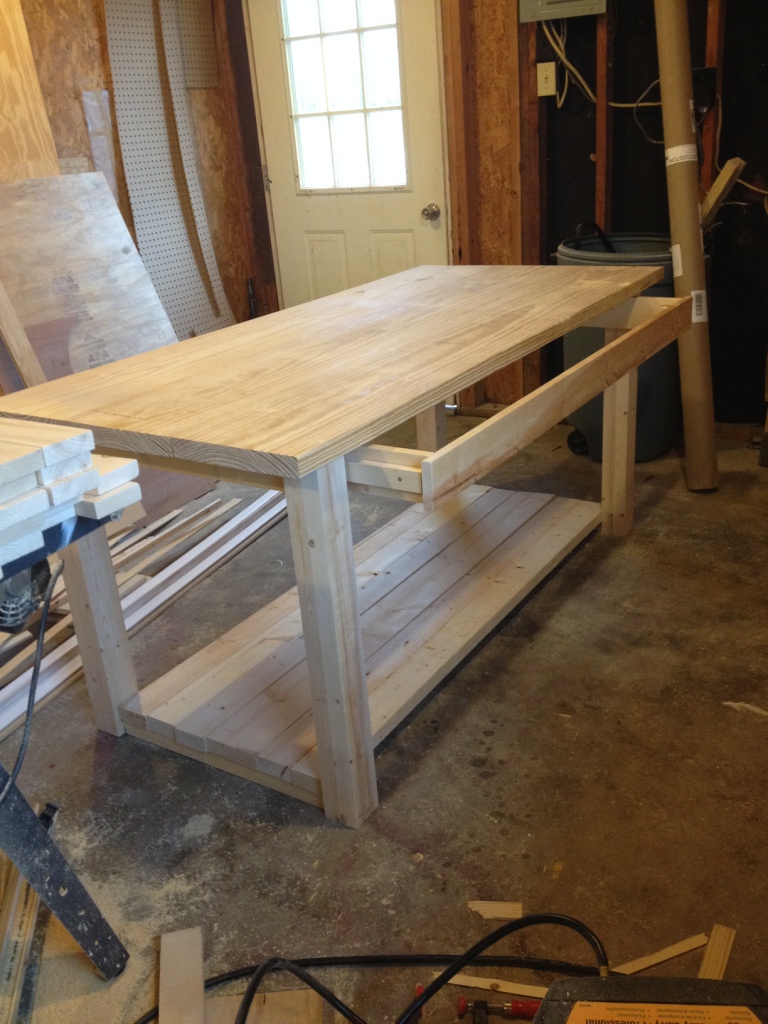
Step 3: Attach the top
You can read about how I make table tops in this post, but basically, I squared off the edges on my table saw and glued the boards together. Squaring the edges makes the top smoother, but it’s not absolutely necessary. So if you don’t have a table saw, no biggie.
.
It was cold outside and I didn’t want to wait for the glue to dry completely before moving on, so I secured the boards while the glue dried using pocket holes and screws. You can see the pocket holes in the picture below. I cut it to size (it was about 32″x54″) then flipped the table base over.
.
I centered the base I made from steps 1 and 2 on the top and made sure everything was square. Then, I screwed it onto the top using the pocket holes I drilled earlier and 1 ¼″ pocket hole screws.
Step 4: Add drawer
Next I made the drawer slides. I used wooden drawer slides. This was before I ever worked with REAL drawer slides. I totally recommend using real ball bearing drawer slides for this, but I’ll show you how I did wood ones just in case you are curious. I cut two 1x2s and screwed them into the side supports using pocket holes and screws.
To make the drawer, I cut two pieces of 1×4 to be the drawer sides. I made them an inch or so shorter than the side support. I placed a shim down on the bottom of the table top and placed the 1×4 on the shim (I wanted to hold the 1×4 about ⅛″ off the table top). I clamped a 1×2 onto the drawer slide to hold it in place and I shot a couple nails through the 1×4 into the 1×2 that is clamped. These will be the drawer slides on the side of the drawer.

After these are nailed, I put a couple screws in to make sure they held. I marked the front and the bottom side of the 1×4 so I wouldn’t get them mixed up on which direction they went.
Then I cut a piece of 1×4 to go across the back side of the drawer and used pocket holes and screws to attach it. I slid these pieces in the desk to make sure everything fit good before I attached the front.

I cut the front piece about ¼″ shorter than the total distance between the two front legs and attached it using pocket holes and screws from the inside.
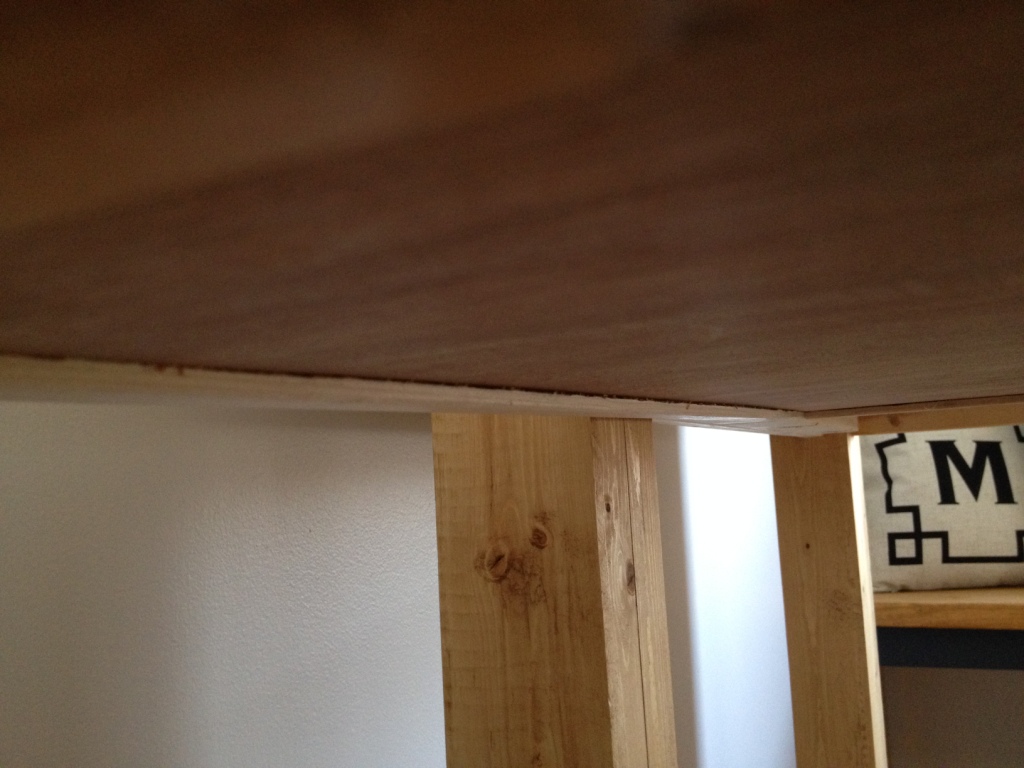
Once I made sure the drawer fit well and was square, I used a router to cut a ¼″ groove on all the sides of the drawer about ¼″ from the bottom. I cut a piece of ¼″ plywood to slide into these grooves. I could have nailed the plywood to the bottom of the drawers, but this was cleaner.
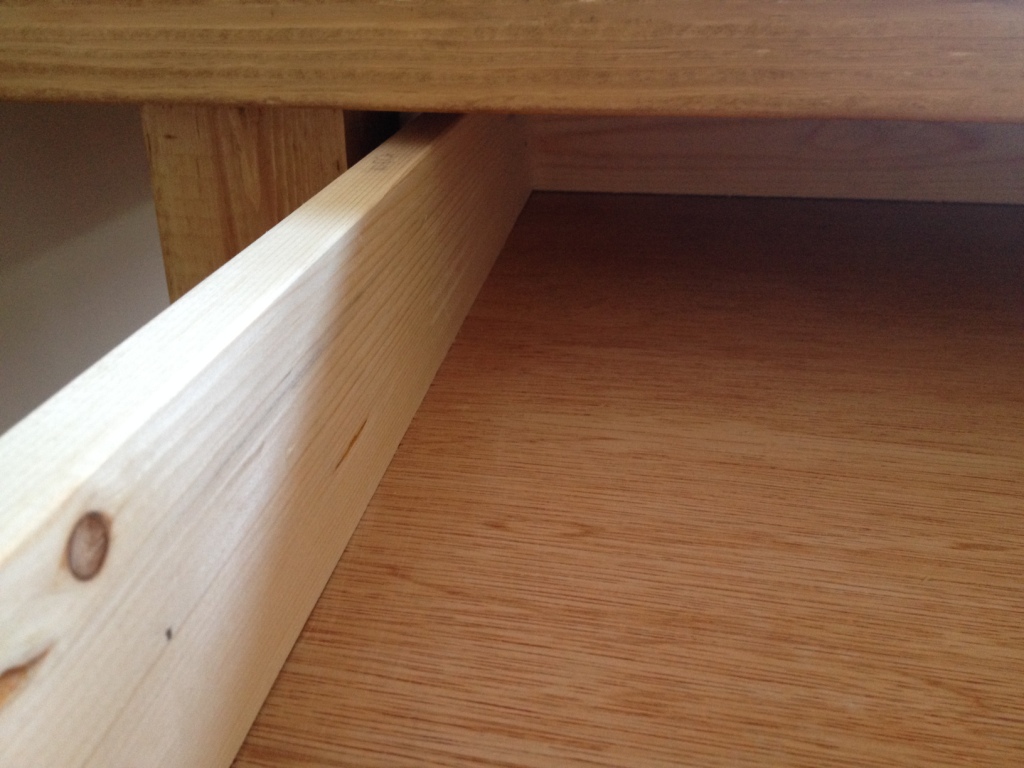
Now, if you would rather, simply attach a set of drawer slides onto the side supports and make any drawer style from this post and it will actually be easier in the long run. (I’ve learned a few things since I originally wrote this post 🙂 )
Step 5: Add shelf and casters
I cut pieces of 2×4 (and one piece of 2×6 because I didn’t buy enough 2x4s for the project…so don’t be like me) for the bottom shelf. I just laid the boards on the 2x2s and marked where to cut. But they should be somewhere around 43″ if my math is right 🙂
.
Helpful hint: This desk is big. I advise you not to screw the shelf in until you get it inside. In order to get it in a doorway, you’ll have to go at an angle and you can’t if the shelf is there. Trust me…don’t ask how I know this.
.
I stained everything with Minwax Puritan Pine and screwed the casters into the legs. (Another helpful hint….see helpful hint above. You might want to think about putting the casters on once inside as well 🙂 Again, don’t ask how I know)

Once I got it inside and put it back together, I screwed the 2x4s and 2×6 into the 2×2 support for the shelf.

I polyed it with Minwax Polycrylic and attached these super awesome DIY drawer pulls to the drawer, and I’ve finally decided that I made a good decision on the desk style. I think…
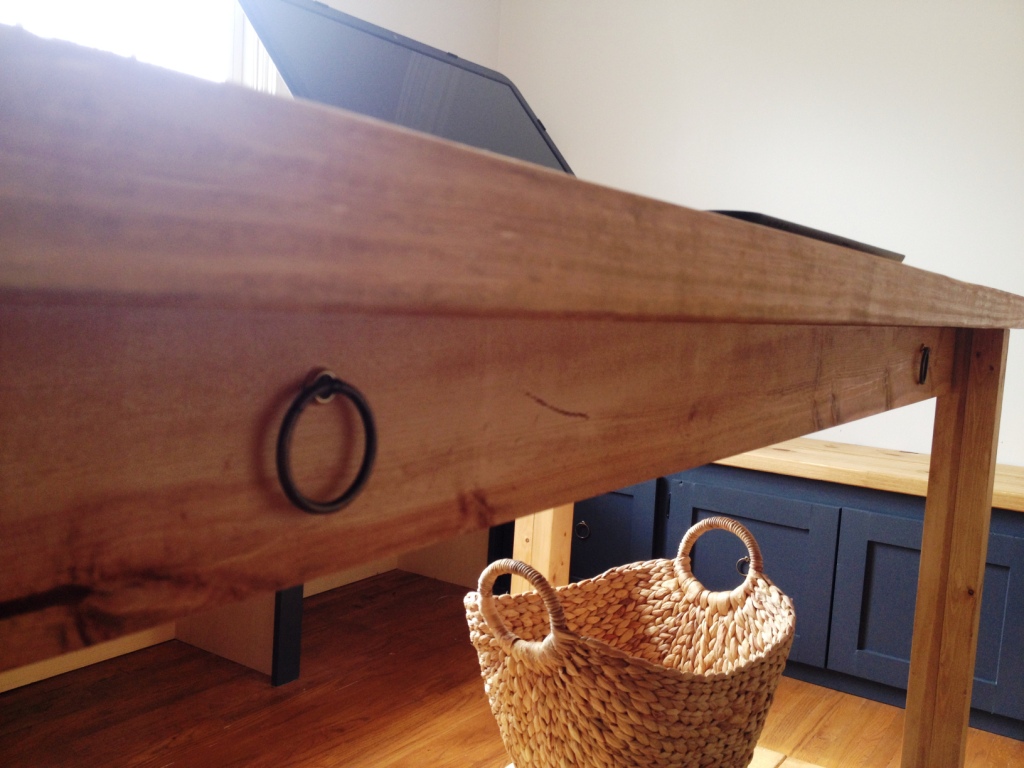
And I have decided that it fits well in the room. And if I change my mind, I can roll it to a new location 🙂 Perfect.


Okay, so do you love the desk or what? It’s very simple, and very functional. I am thankful that sometimes my indecision points me in a better direction 🙂
.
To see the whole office remodel, and all the DIY projects included, click here.
.
So until the next project, happy building! Get out there and embrace the indecision 🙂
Jody says
New house and 2 extra bedrooms. Ha ha! I want a craft room. Your table worked out beautifully. I had bought a table at Habitat that has sides that go up and down as you need them. Was my island in the other house. Already decided this will be my craft table. And I had put wheels on it. I am on my way. A door go close. I am so excited.
Shara, Woodshop Diaries says
That’s awesome! Good luck with your craft room! A table with folding sides sounds like a great addition to a craft space!
Re-Fabbed says
Over here wishing I was even half as talented as you!
Shara, Chasing A Dream says
Thank you! That’s so sweet, but I feel the same way when I read your blog! If only I was half as talented as you, too 🙂
Anthony says
Nice design. The drawer is handy touch. What stain & color did you use. The color looks great.
Shara, Chasing A Dream says
Thanks! I used minwax Puritan pine stain.
Wendy Johnson says
I have a really bad memory so I will be surprised I promise. Love the table/desk. Your cat looked like a bear peering in the window..too cute.
Shara, Chasing A Dream says
Thank you! I think this is one of my favorite builds so far! And I thought the same thing when I was looking at that picture of our cat. That’s funny 🙂 Both of our cats are very social and you can’t do anything without them butting in 🙂
Bev says
Shara, this desk is so practical and spacious. Just think of all the things you have room to do on it. We were really impressed with your carpentry skills! Here’s a thought…….you mentioned not wanting to build shelves over the storage areas. Where are you going to store your stuff? I’ve seen people attach a bought bookcase to a storage base like yours, maybe even attach a couple of them. You can also buy ready to assemble storage cabinets with doors to hide things you don’t want to be seen. But with your construction skills, it would be a piece of cake for you to build either bookcases or storage cabinets from scratch! Back to the wooden shelves thought. I bought some really nice quality wood ones in various sizes from Home Depot and stained them to match my existing wood. They are decorative and not at all like those ugly wire shelves. Can’t wait to see what you do. Bev
Shara, Chasing A Dream says
Thank you! I decided I didn’t want a whole wall of built in shelves over the cabinets because I thought it would make the room feel more busy and cramped. However, I have been looking at shelving ideas (you are right, I need a place to store all my stuff!!) and I have actually made one this weekend and plan to make a few more shelf “boxes.” Can’t wait to post about them when I am finished! But, thank you for all your ideas and suggestions! I will keep them in mind for the next remodel 🙂
Tom Clarke says
Shara, your first job is as an engineer, your second is as a DYI blogger and you should consider becoming a standup comedian. In addition to your great projects, your words that go with them make my day. Please keep them coming. My favorite picture is the one with all of the small scrap pieces in the drawers behind the project. I have a collection of similar pieces in my shop.
P.S. How are the votes going with Mrs. Meyers?
Shara, Chasing A Dream says
Thank you for your sweet and encouraging comment! 🙂 I’m glad you appreciate my humor. And YES, I have a ton of scrap wood. I hoard every little piece in hopes that eventually I can find a use for it haha. If you have any good scrap wood ideas/projects, I would be interested in them! And the voting is over for the Mrs. Meyer’s competition, but they will announce the winner in May.
Cecilia says
I love it. I may seriously want it. I have a problem with deciding too. Lol. I say have decorating ADD. Too many choices…aaaaahhhhh!
Shara, Chasing A Dream says
Thank you!! I know…I always have to make myself stop looking for ideas or I will make myself crazy because of all the options!!