
I’ve never done a remodel before. Like ever. When we took on a kitchen remodel, I had no idea what to expect. I mean, did you guys know that you can’t gut a kitchen and rebuild it in like two weeks when you only work on it at night after work during the biggest snow fall you’ve ever seen in your area in ten years? Well neither did I. I mean, WHAT’S THE BIG DEAL?! Why does this stuff take so long?
.
It’s been quite the learning experience. And quite the adventure. Do you want to know all the dirty details? Well, here’s a couple just for kicks and giggles…we found at least three whole mouse skeletons behind the paneling, vacuumed up my weight in mouse droppings after we took down the ceiling tiles, and found out that the wiring to our oven probably could have burned the house down any second. And that’s just the tip of the iceberg of all the fun stories and details I could tell you about the remodel. But that does also explain why we now have six cats….
.
BUT, we all know you don’t care about that. You’re all like SHOW ME THE PICTURES!!! So let’s get to it 🙂
.
Long story short, when we bought our home about 8 months ago, our kitchen looked like this. Yellow (nacho cheese to be exact) walls, Spanish style backsplash, 7 foot (SEVEN!!) ceilings, dark and dated cabinets. THAT COLUMN. But seriously…..let’s go back to the NACHO CHEESE WALLS AND SPANISH TILE…whaaaaaaa?? Oh and Dad kept hitting his head on the light fixtures when he came over…because you know….7 FOOT CEILINGS.
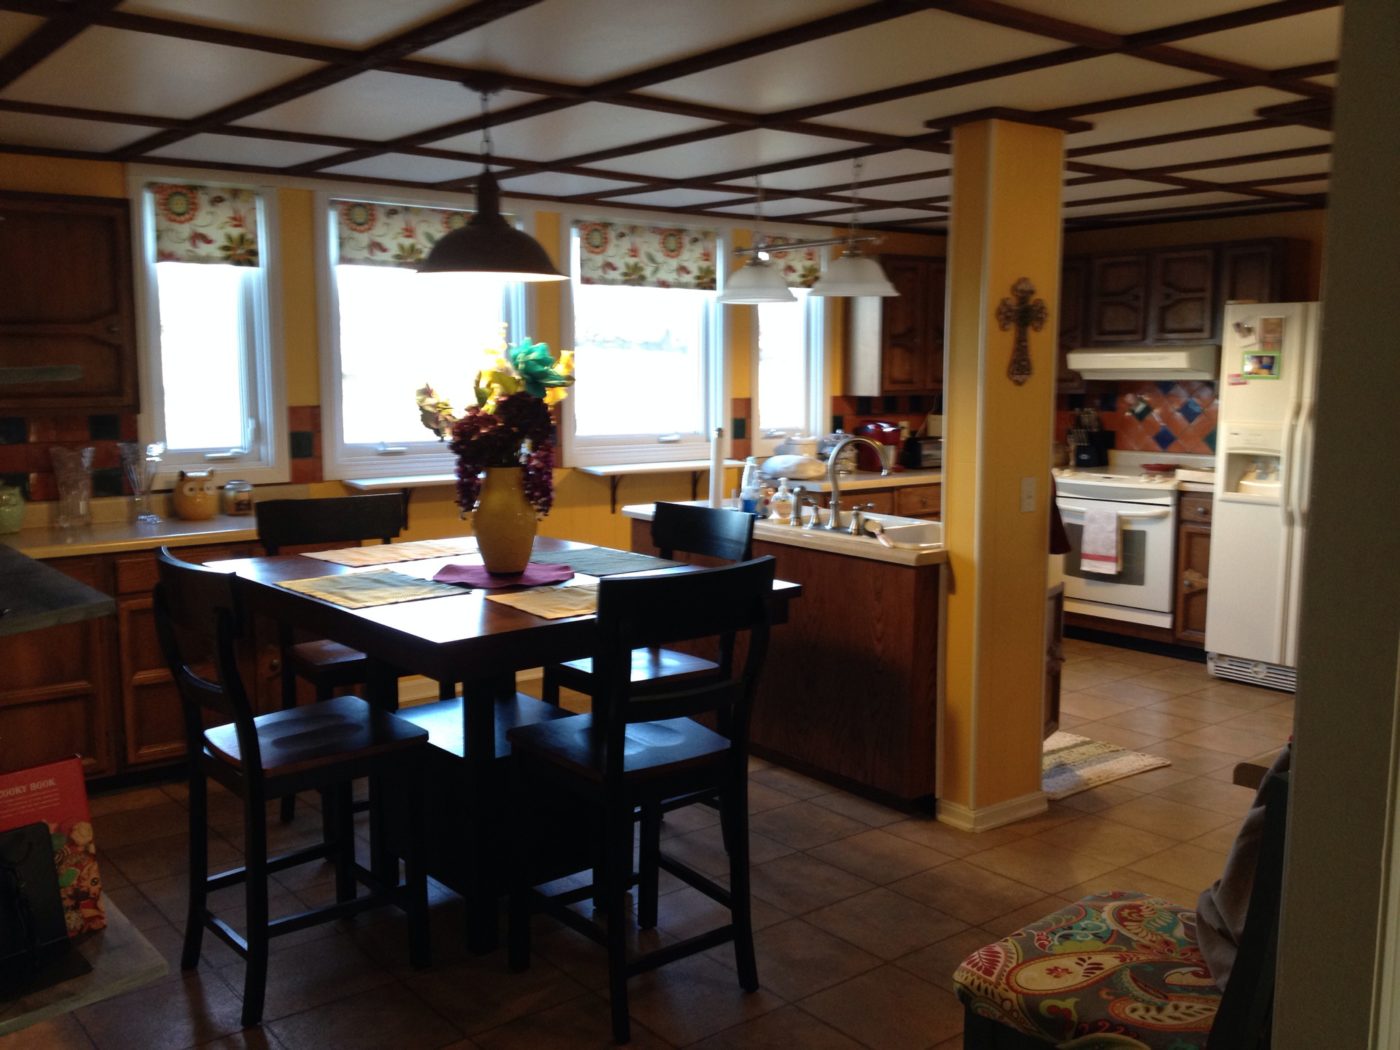


Not to mention the layout was SO WEIRD. The room was so big, but the layout made it feel so small and cramped. And those metal stairs to the never used attic took up half the kitchen!
.
So we began in March with the demolition and ended the majority of the remodel in April. It was so nice to rip out all these things I didn’t like. Putting things back was another story.
.
We bought new cabinets, and replaced our old appliances. That was the largest part of our budget. We laid our own flooring, and I did all the trim work. Danny, my dad, and his friend did the wiring for the new lights and moved the plumbing for the sink. Dad’s friend taught us how to do drywall and that was a nightmare (SO. MUCH. DUST.). I kind of understand why people use paneling now haha….I said KIND OF.
.
Anyway, here are the “initial” final reveal pictures. Further below you will find more recent pictures–from two years later 🙂
![IMG_3157[1]](https://chasingadreamblog.files.wordpress.com/2015/07/img_31671.jpg)
![IMG_3164[1]](https://chasingadreamblog.files.wordpress.com/2015/07/img_31841.jpg)
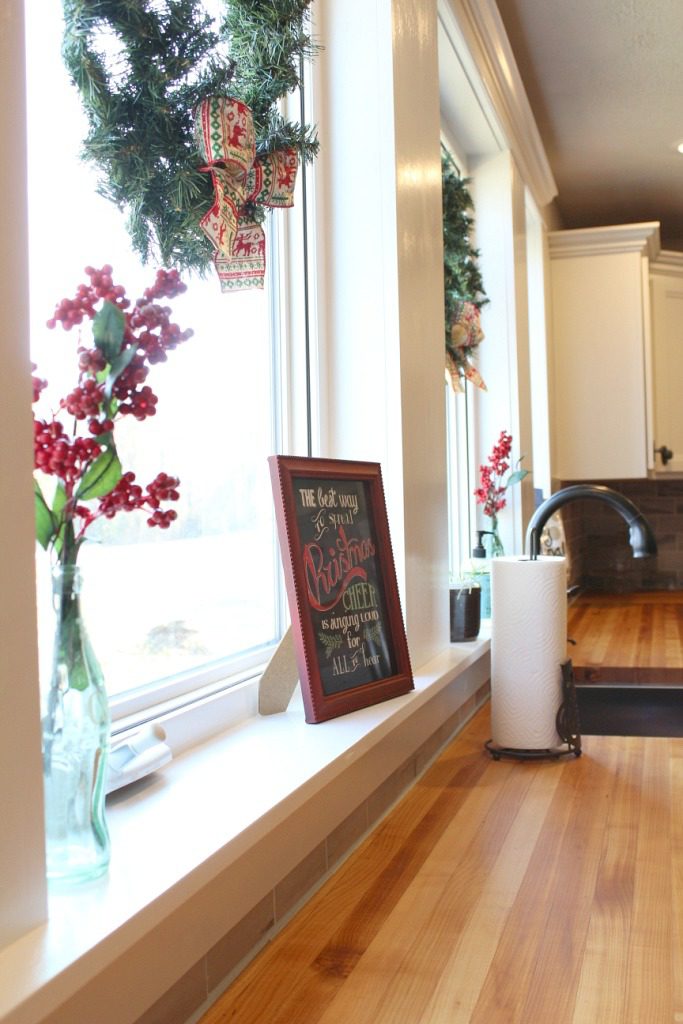
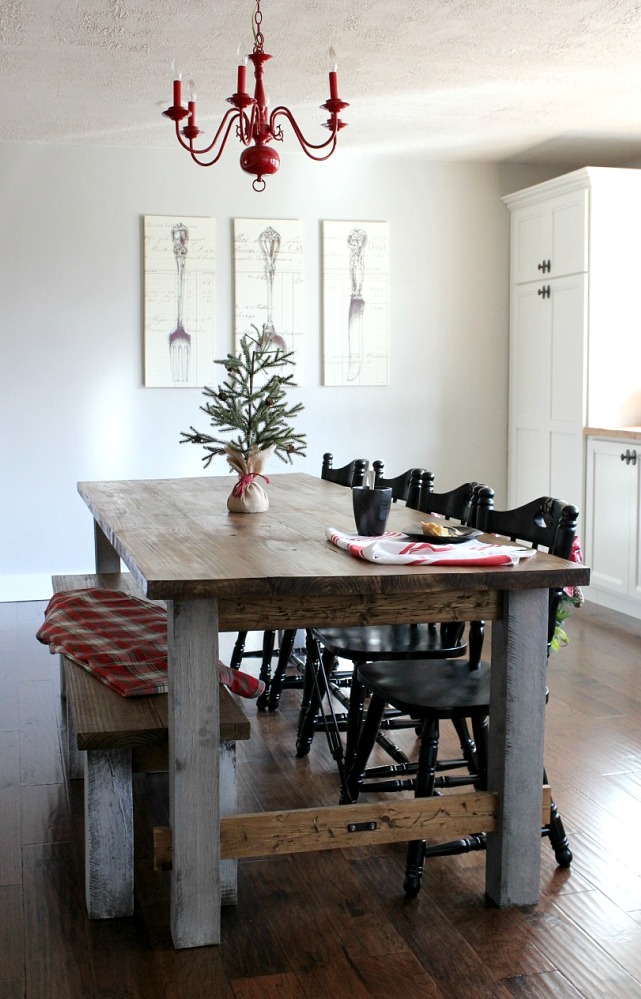
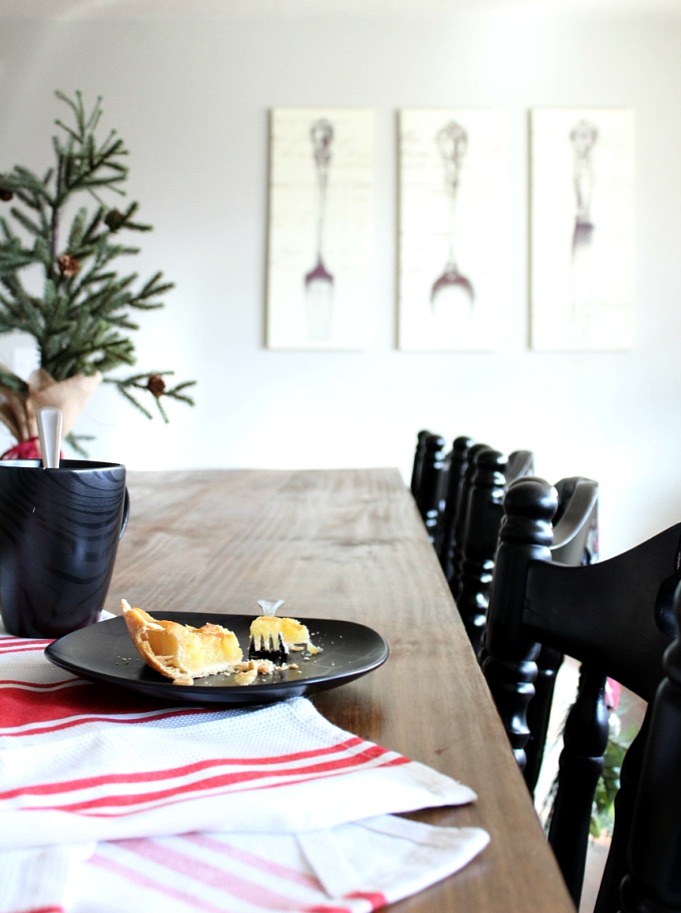
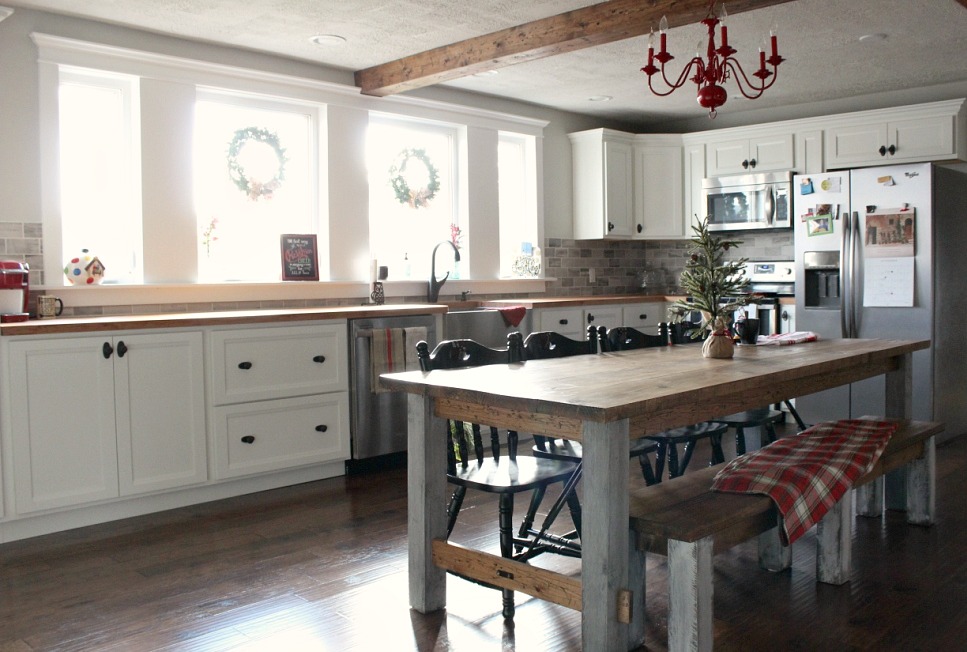
Here are some more recent pictures of the kitchen (about two years after the remodel) all decorated at Christmas 🙂
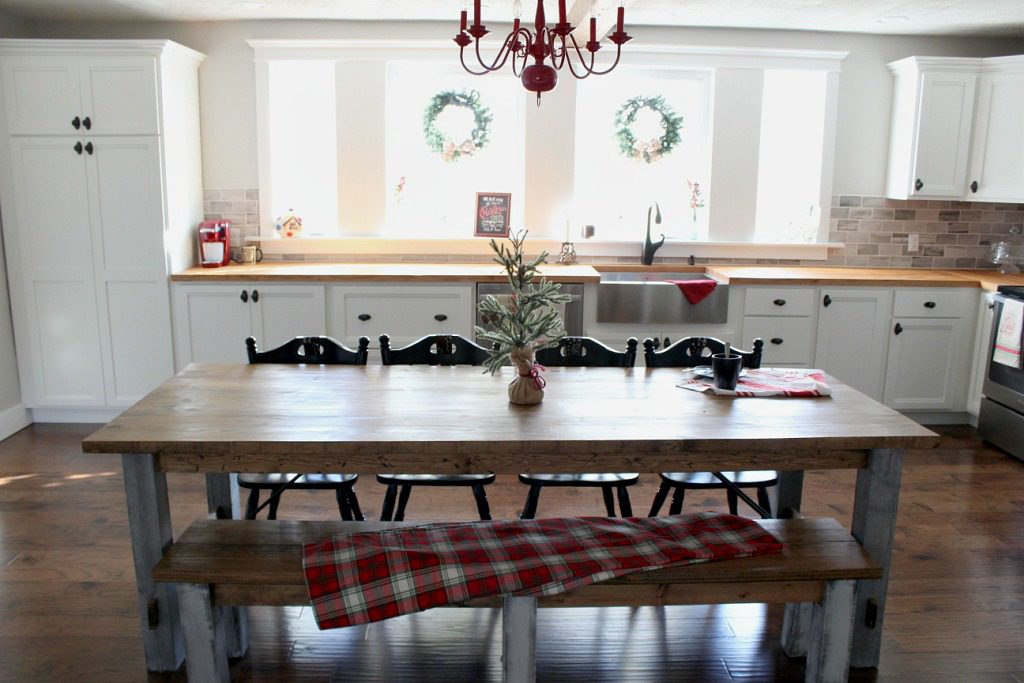
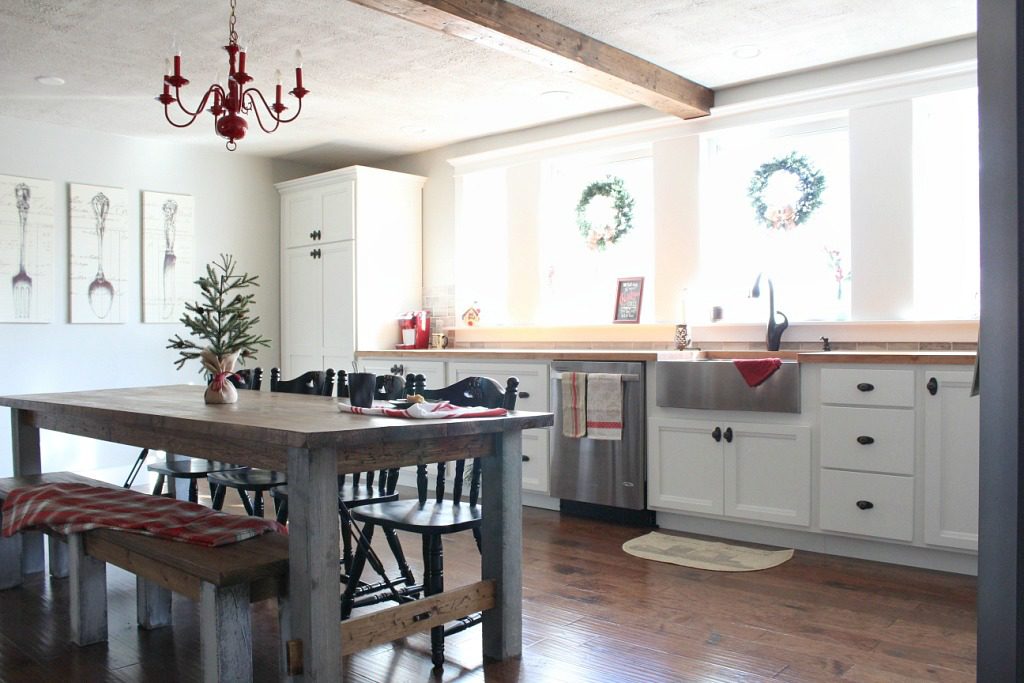

I am honestly surprised that it turned out as well as it did considering the only thing we’ve ever remodeled before was a hall closet and a master bedroom closet. We had no experience with installing trim, or cabinets, finishing drywall, or putting down flooring, putting up backsplash, or designing kitchens. But despite our lack of know how, it got finished, and it looks and functions so much better. And it’s held up great, two years later 🙂 AND now I am addicted and want to remodel everything!! (You can check out what else we remodeled after this at these links: Laundry room, office, bathroom, bedroom.)
.
So what’s my favorite part? Don’t laugh, but it’s the windows. They were already here before the remodel, but with the trim on them now, it’s like totally different windows! Plus it was my FIRST EVER trim work. And Danny was impressed. And it takes a lot to impress Danny. What’s your favorite part?
.
If you’ve missed any of the remodel, you can read the whole story in these links here:
.
Part 3: Putting it back together

Keep your eyes peeled…we are staying super busy and have lots to show you soon!

Sandy says
Wow! Very impressive. You and your husband did a wonderful job. Your kitchen is beautiful! My husband and I just bought our retirement home and at the young age of 60, will be doing a remodel similar to what you guys have done. Fingers crossed, lol. Thanks for sharing your process (btw, those are some mad woodworking skills you got there!). Best Wishes.
Shara, Woodshop Diaries says
Thank you so much!! Good luck on your remodel! It’ll totally be worth it once it’s done 🙂
Joe says
What kind of wood did you use on the beam in the middle of the kitchen?
Shara, Woodshop Diaries says
Hi Joe! It’s just regular 1×6 spruce/whiteboard. We just built a box around the metal I-beam we used.
Adele Zavada says
Love, love, love everything about this! The painted chandelier is so fun, and I adore the table, bench, and chairs. What color of paint did you use on your walls?
Shara says
Thank you! The walls are repose grey sherwin Williams. We painted our kitchen and living room both this color and I love it! Eventually the whole house will probably be that color too haha!