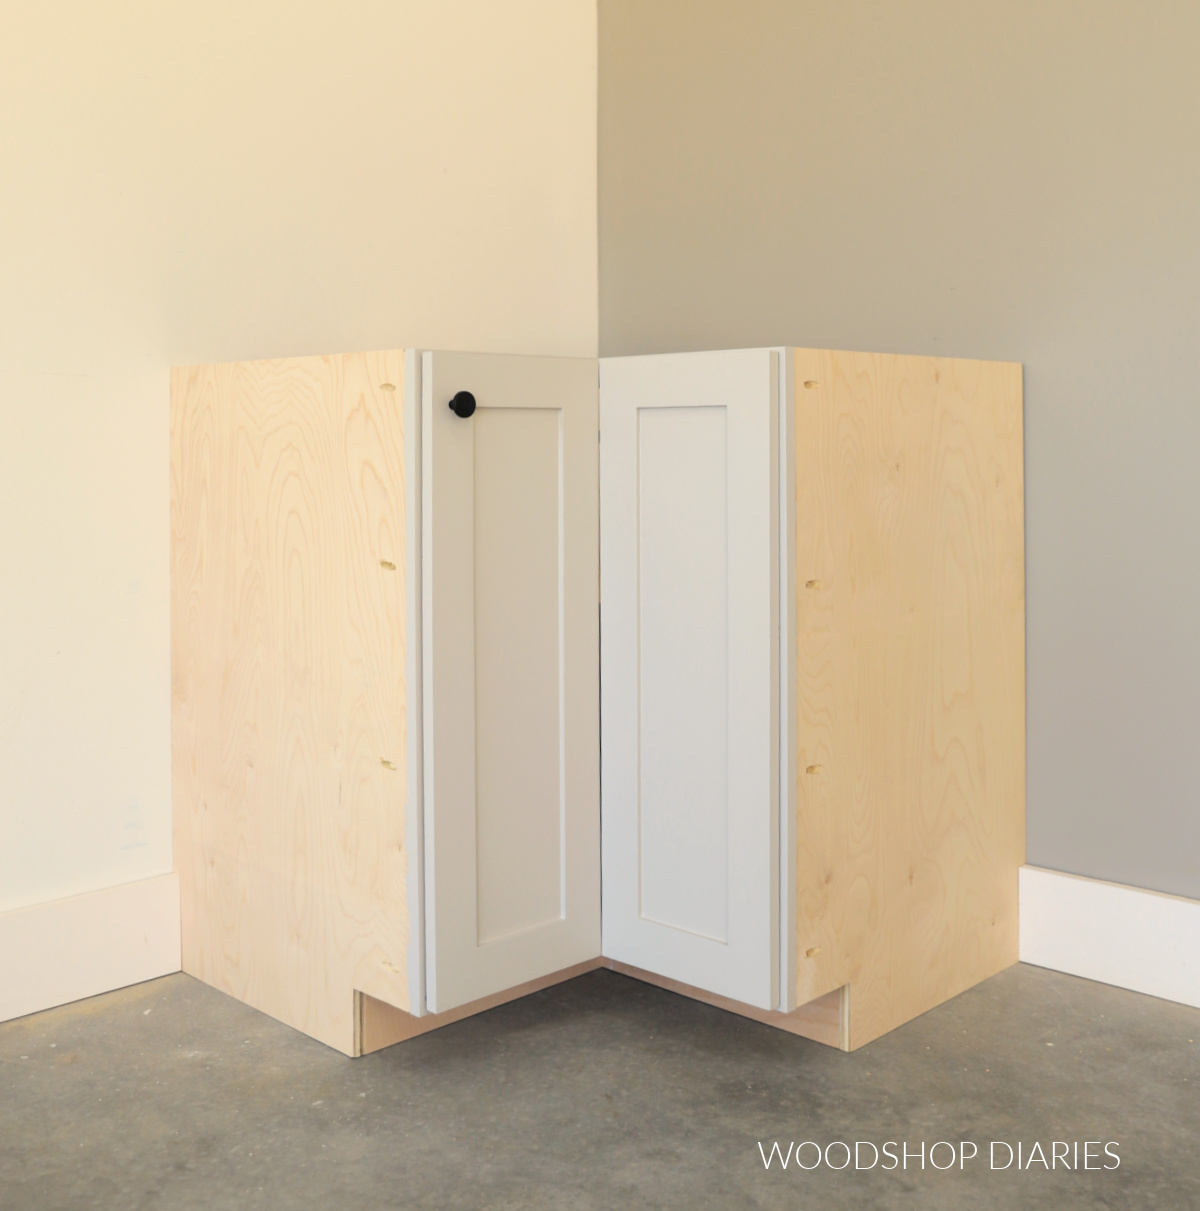
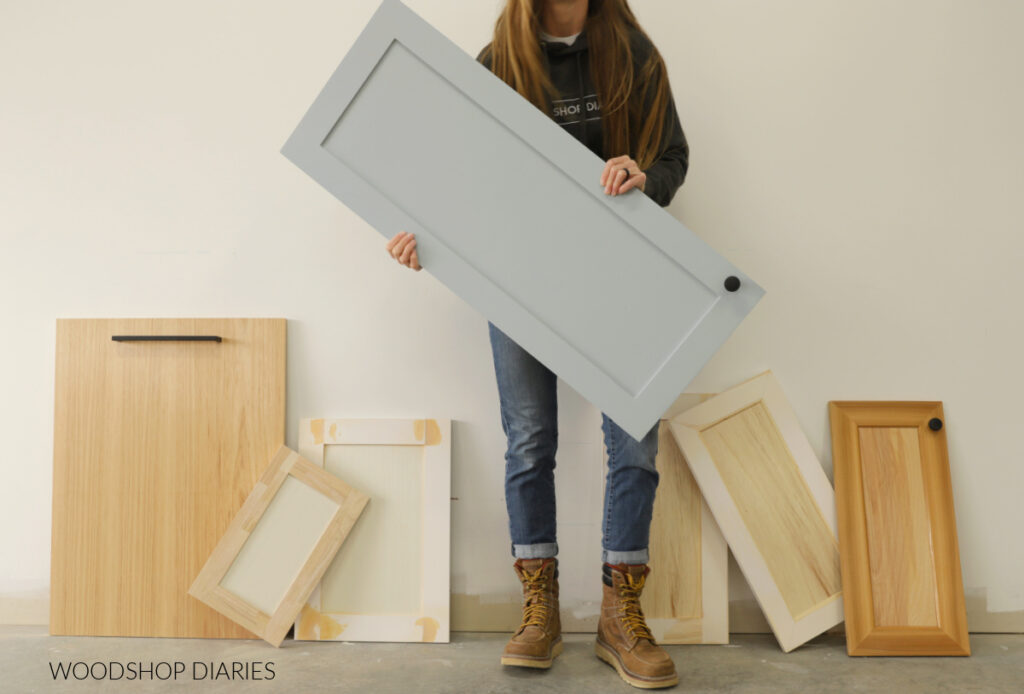
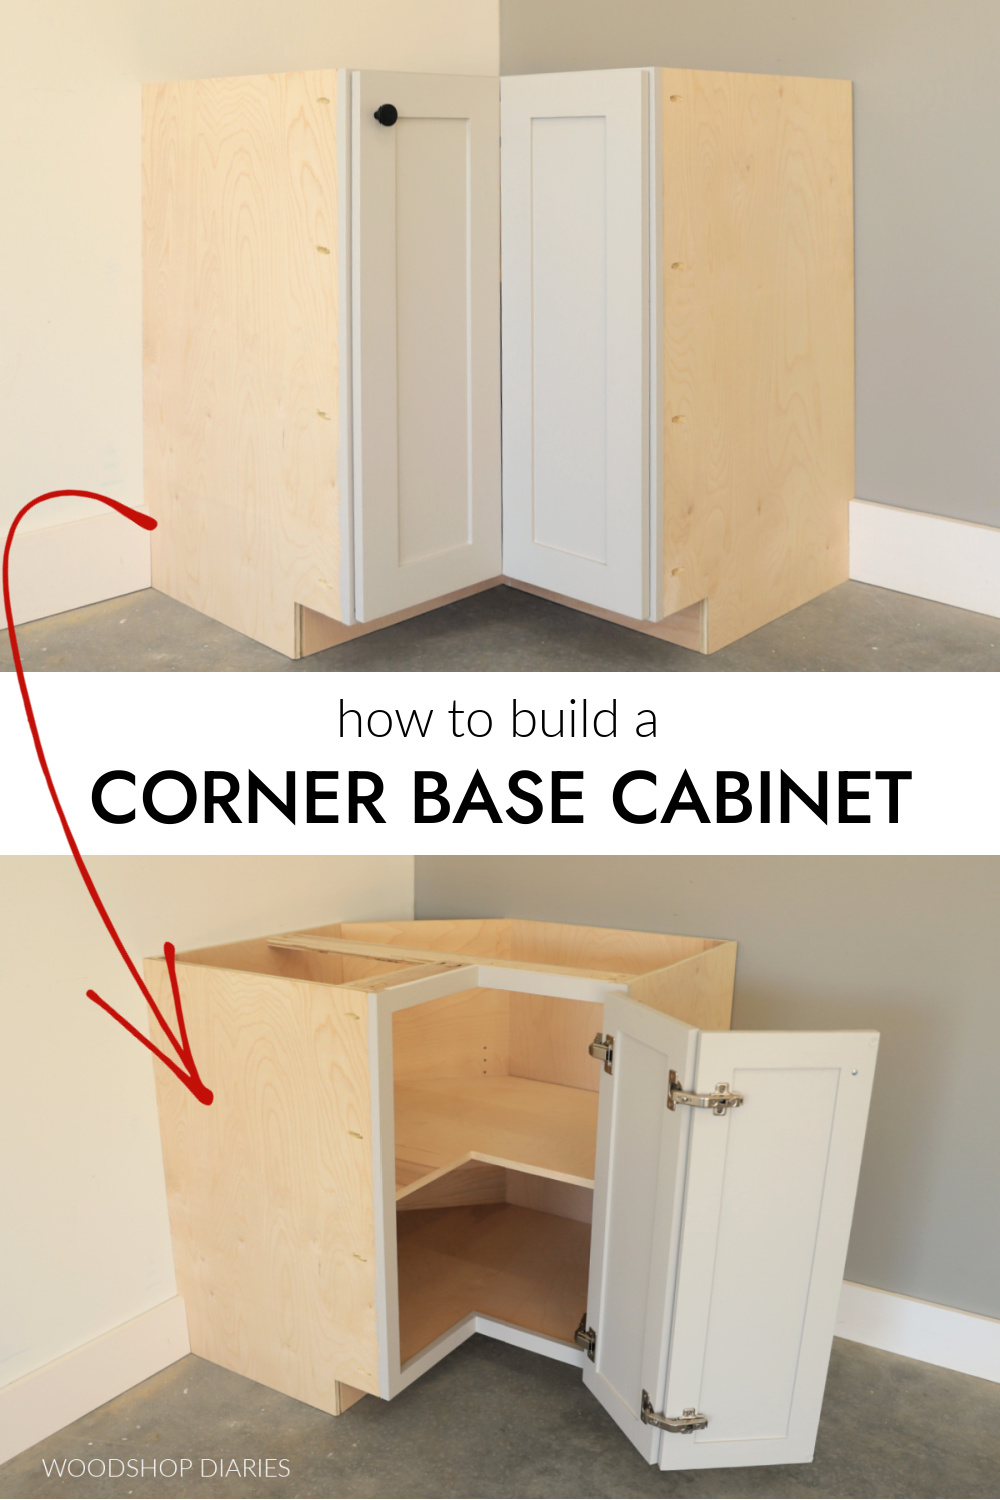
In this post, I’m sharing how to build a basic corner base cabinet with a bi-fold door!
This L-shaped corner cabinet can be customized with shelving, drawers or a lazy Susan. Just like basic base cabinets, corner cabinets have plenty of options, but the box itself is a simple build.
There are several types, sizes and styles of corner cabinet. An L shaped option is common for base cabinets, but is sometimes seen in wall cabinets as well.
I’ll be sharing how to build some additional corner cabinet options in the near future, so be sure to stay tuned for those!
If you haven’t already, I encourage you to check out this post for the basics of building base cabinets. It covers some additional details and extra tips on general cabinet building.
But if you’re ready to dive into building a L shaped corner cabinet, I’ve got all the details below.
*This post contains affiliate links. See website policies.
What to know before building
The corner cabinet box is pretty standard, but what goes inside is definitely not a one size fits all kind of thing.
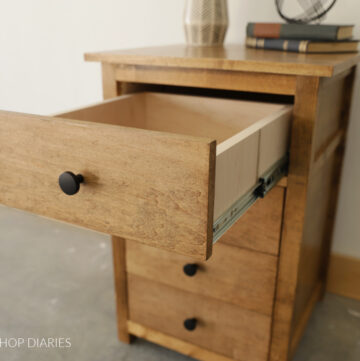
Like regular base cabinets, corner cabinets can have drawers (it’s not the most efficient use of space, but it’s doable), or shelves. But a more common option is adding a lazy Susan.

Lazy Susans for corner cabinets come in three basic styles: pole mount, pie cut, and kidney.
- Pole Mount: These come as a kit with two round shelves mounted to a pole. The pole is mounted into the cabinet between the top supports and bottom panel and the two shelves rotate around it.
- Pie Cut: This is the same as the pole mount style, except with these, the cabinet doors mount directly to the lazy Susan shelves. So when it’s spun around, the doors spin into the cabinet. This is only an option with inset cabinet doors.
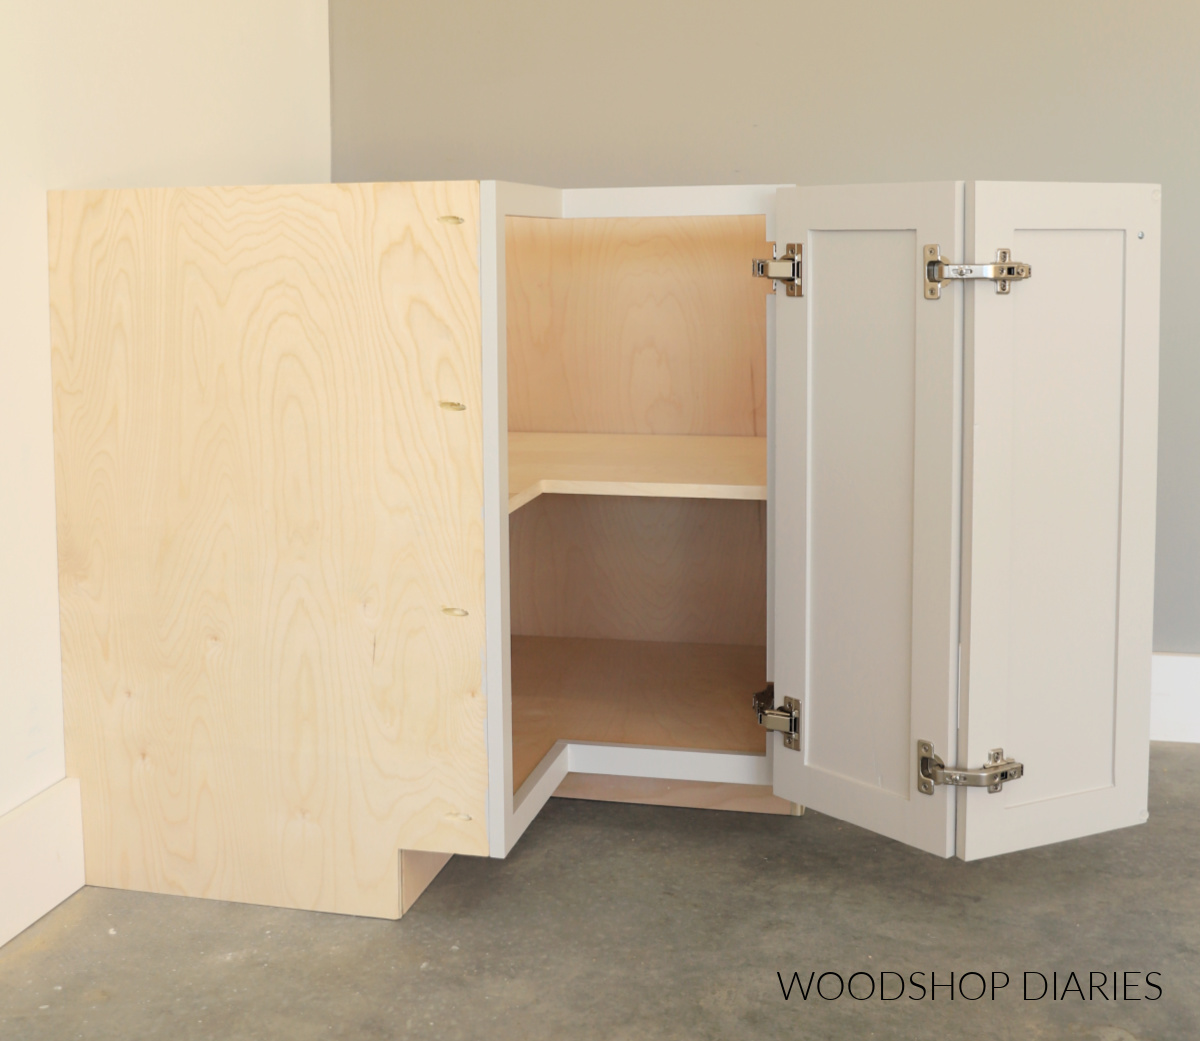
- Kidney: This is a stand alone lazy Susan shelf with hardware mounted to the bottom. They’re installed directly to the cabinet bottom and/or a shelf inside the cabinet (like shown in the image above)–they’re not mounted to a pole.
This design can fit a 24-28″ lazy Susan, but before ordering one for your cabinet, be sure to check the manufacturer’s specs to ensure it will properly fit your cabinet. Each brand and style has some variations.
Overall Dimensions
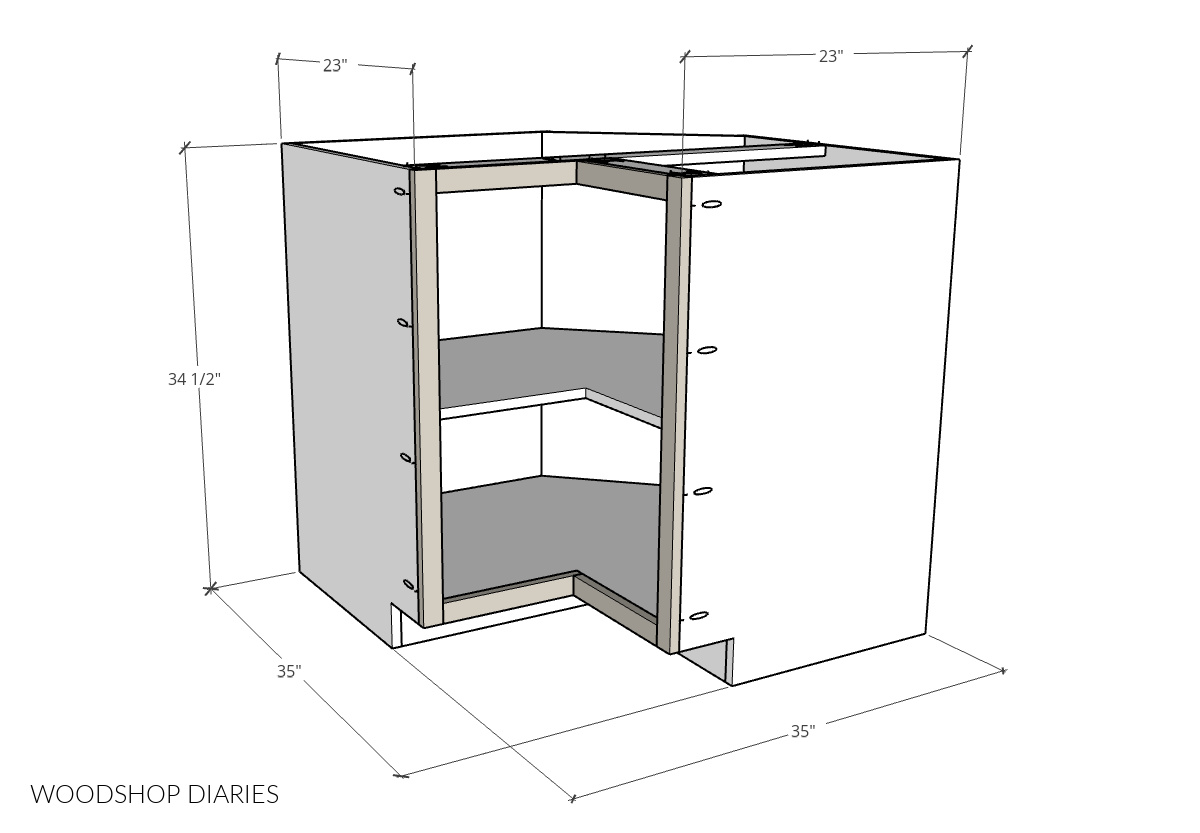
This corner cabinet’s overall dimensions are approximately 34 ½″ tall x 35″ wide x 35″ deep. Note that the cabinet depth on the sides (not including the doors) is 23″.
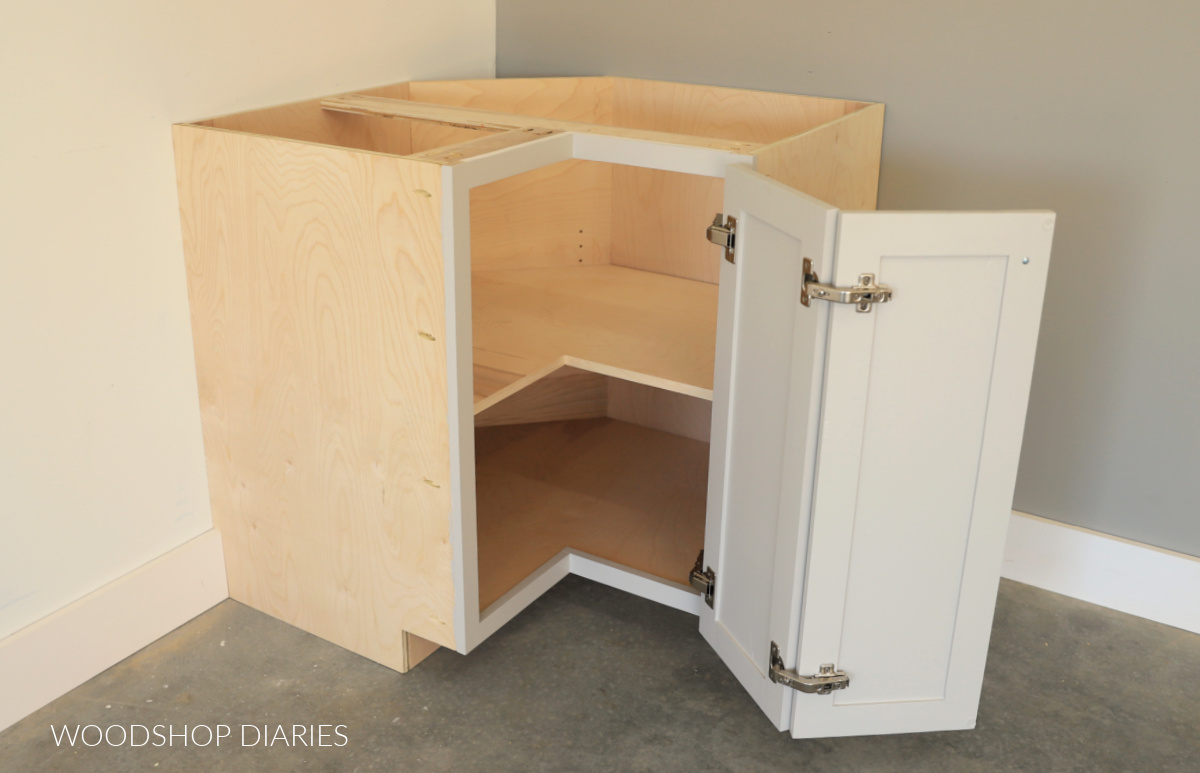
Bi-Fold Doors
This corner cabinet has a bi fold door with specialty hinges to give you full access to the cabinet opening.
The doors themselves are just simple cabinet doors–the same as you’d build for any other cabinet. The difference here is that this cabinet requires two of them and they’re attached together in the corner with hinges.
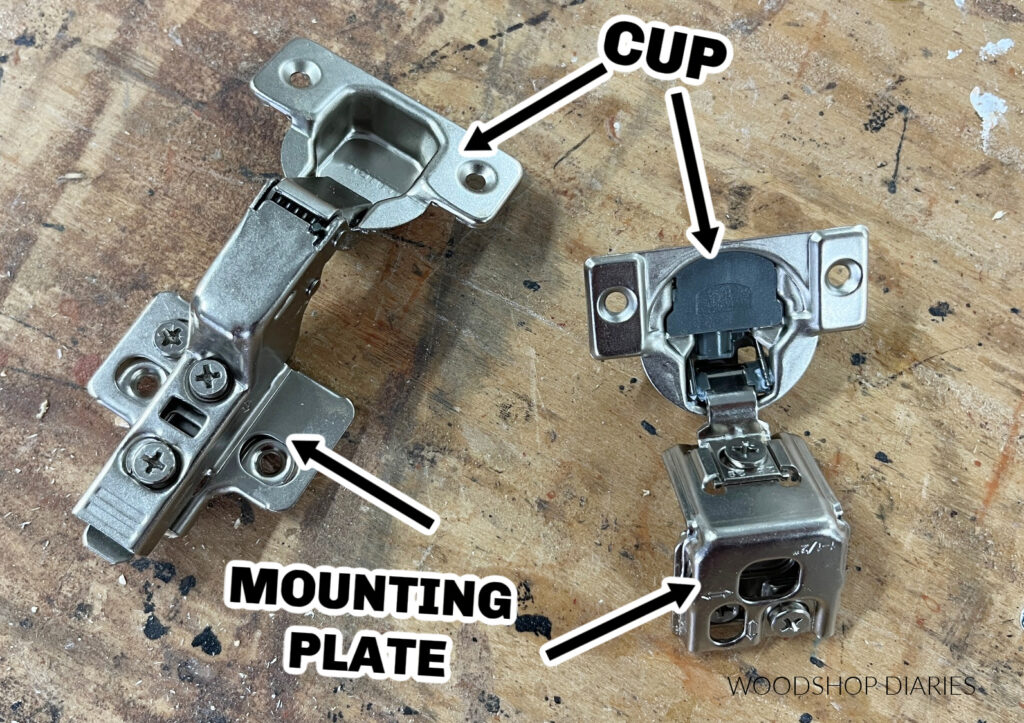
You can use butt hinges or piano hinges in this case, but I prefer to use concealed hinges because 1: they’re concealed, so they’re hidden when the door is closed and 2: they have adjustments to help get your doors perfectly aligned.
For the bi-fold, you’ll need two pair of hinges–one pair of 165 degree hinges to attach the door to the cabinet and one pair of 135 degree hinges to attach the two doors together.
You may find these resources helpful throughout the build:
Enjoy DIY projects and woodworking plans? Sign up for priority access for the latest posts on Woodshop Diaries!
How to build a corner Base Cabinet
If you prefer to watch, I’ve shared the full build video with tons of tips, behind the scenes, and additional details on my YouTube Channel here.
Love watching how-to videos? Subscribe to my YouTube channel for plenty more where that came from!
Prefer to print? Grab the printable corner cabinet building plans available here:
Tools & Materials
Tools:
Check out this post for the top ten tools I recommend for cabinet building
- Drill/Driver
- Circular Saw
- Cutting Guides–Kreg Rip Cut & Kreg AccuCut (optional)
- Pocket Hole Jig
- Jig Saw
- Miter Saw (optional)
- Concealed Hinge Jig
- Shelf Pin Jig (optional–only need if adding a shelf)
Materials:
- (2) 4’x8′ sheet ¾″ plywood*
- (2) 1x2x8 boards
- 1 ¼” pocket hole screws
- (25) 1 ¼” wood screws
- (4-5) 2 ½″ wood screws (to install)
- Wood glue
- (1) pair 165 degree concealed hinges
- (1) pair 135 degree lazy Susan hinges
- Shelf pins (optional for shelf)
- Edge banding (optional for shelf)
- Materials for doors (depends on how you want to make them**)
*I recommend using hardwood plywood for this build–I used birch here. Learn how to use the best plywood for your project here.
**You can build your doors hundreds of different ways using hundreds of different materials. I built mine using 1x3s for the door frames and ¼″ plywood for the door panels. For more information, see 7 ways to build a cabinet door.
Step 1: Assemble Corner Cabinet Box
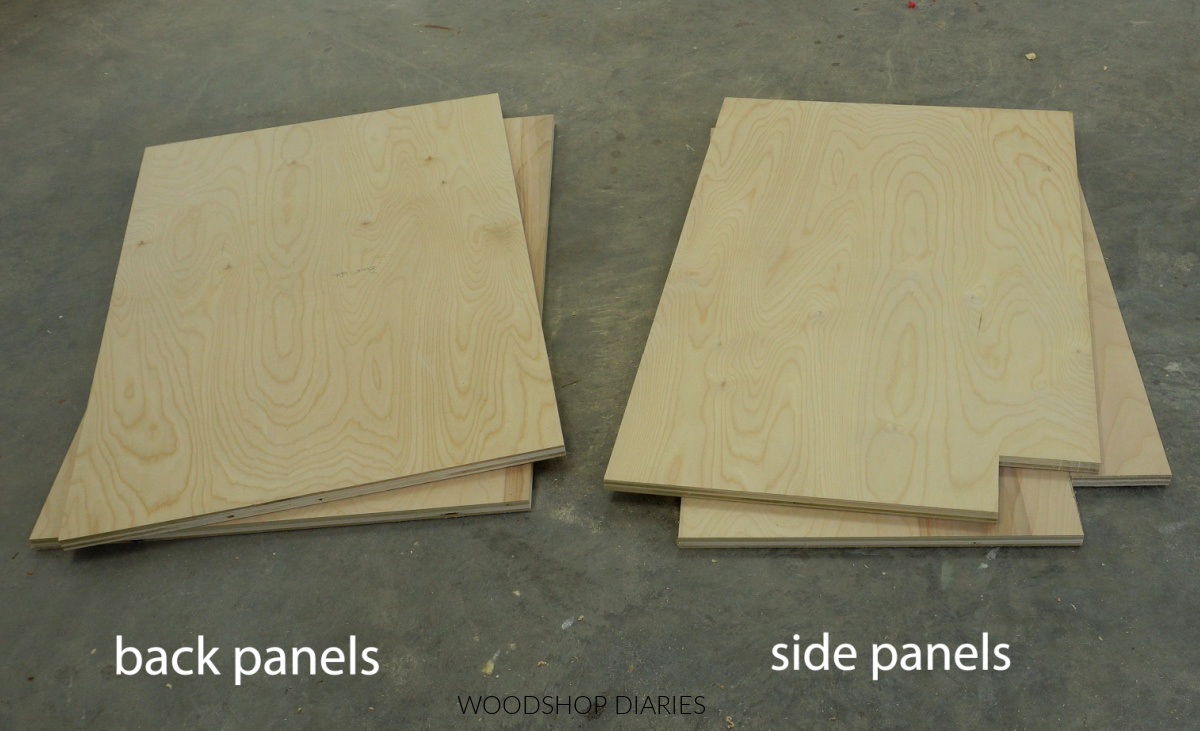
The entire corner cabinet box here is built from ¾″ plywood. So to get started, I cut down my plywood sheets into:
- (2) side panels (22 ¼″ x 34 ½″)
- (2) back panels (22 ¾″ x 34 ½″)
- (1) bottom panel (33 ½″ square)
The cut diagrams and exact cut list can be found in the printable plans.
Learn how to cut down plywood sheets here.
Most base cabinets have what’s called a “toe kick.” This is basically a notch out of the front corner to prevent your feet from kicking the cabinet when you’re standing at it.
The two side panels are the parts of the cabinet that will butt up against the adjacent cabinet boxes once installed. So I marked and notched out a 3 ½″ tall x 4 ½″ deep toe kick on the front bottom corner of these two panels.
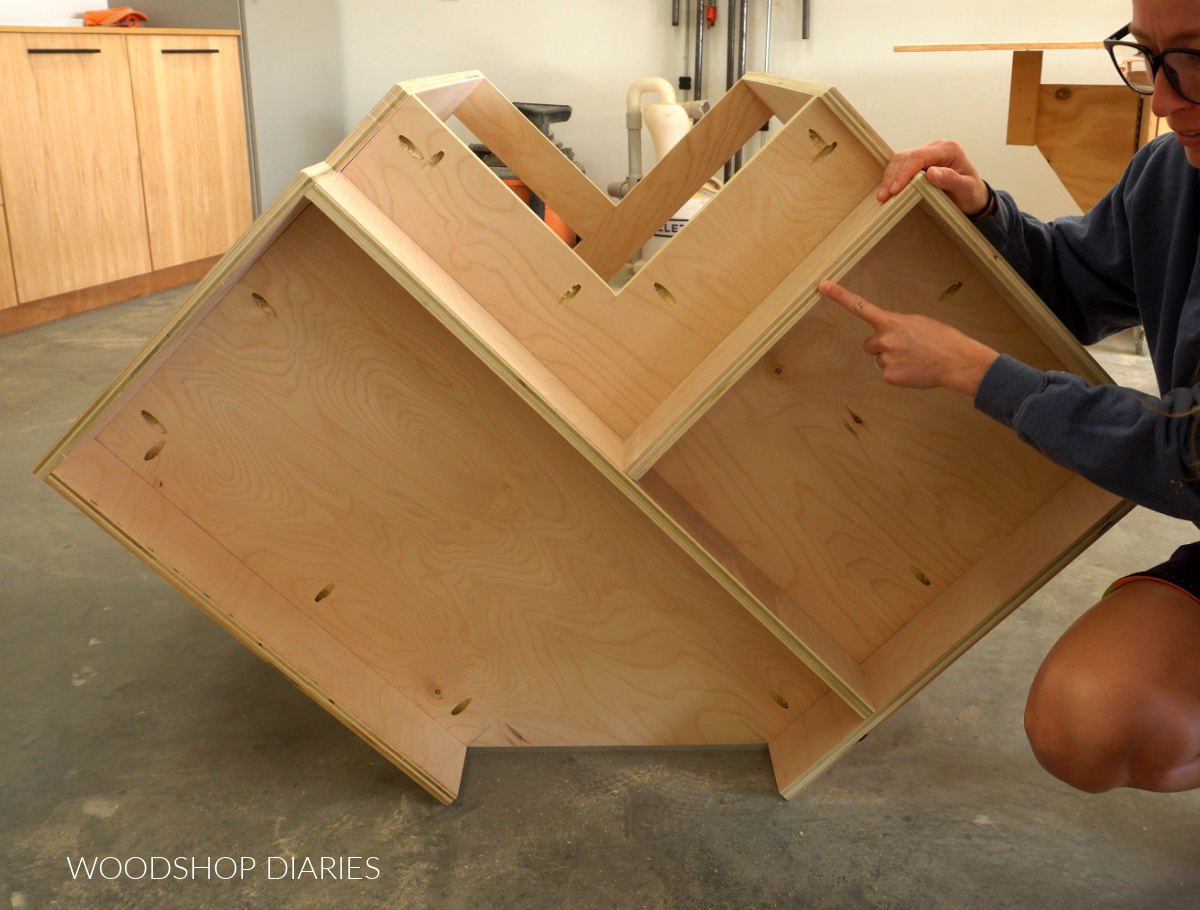
The bottom panel also needs some additional cuts to make this cabinet into an L shape.
So I cut a 12″ square out of the front corner of the bottom panel and a diagonal across the back corner.
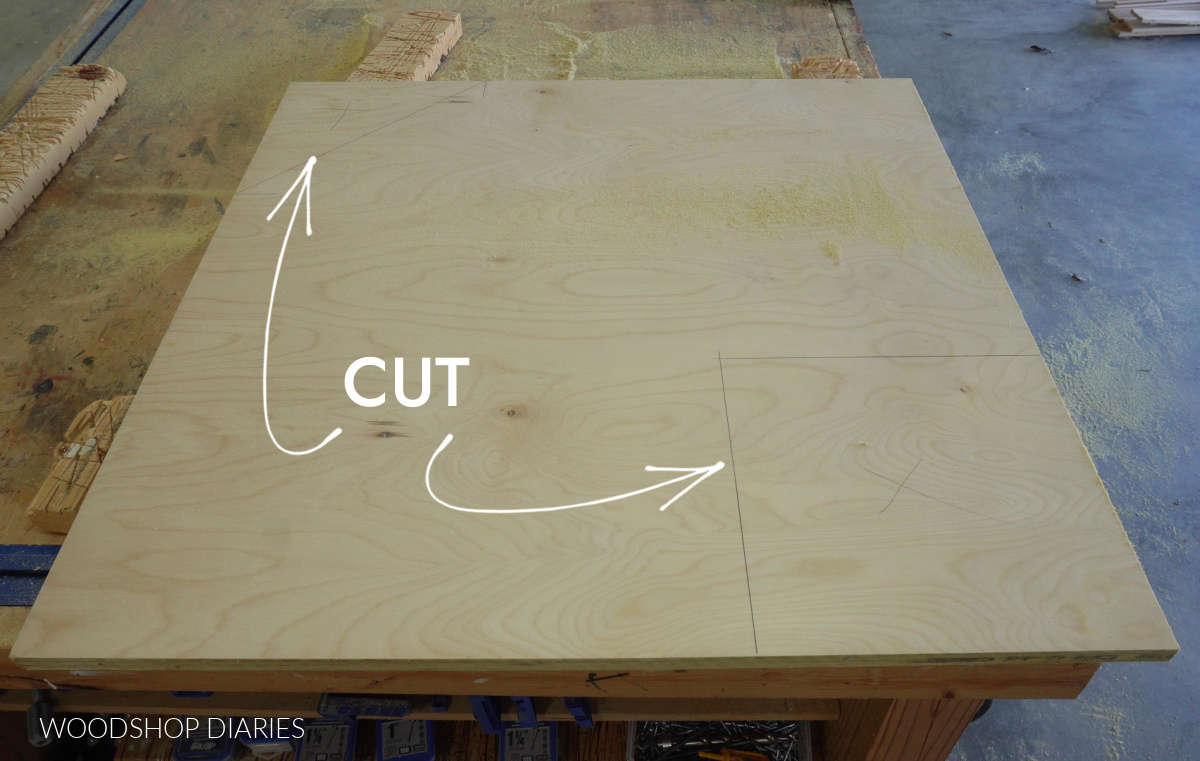
Often, corner cabinets have the back corner kind of “chopped off” and this usually makes installation much easier since the walls are rarely square.
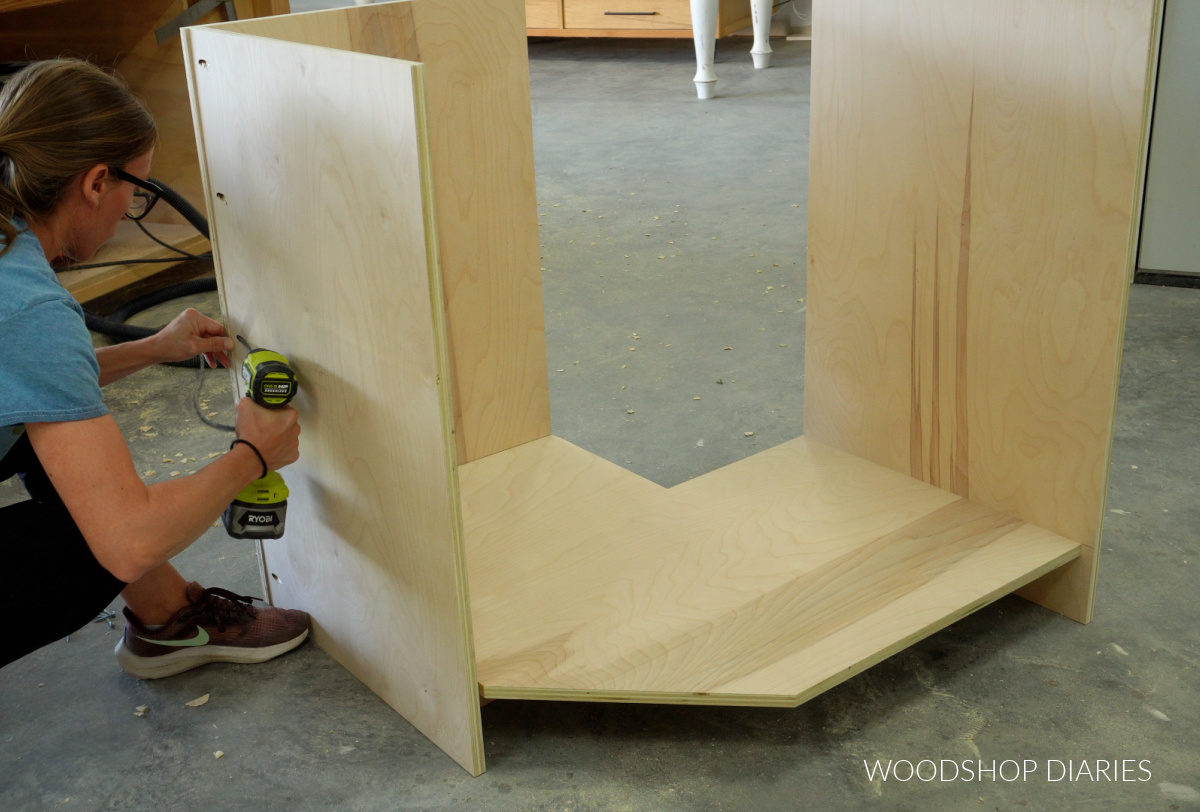
I assembled this cabinet box using pocket holes and screws and attached the bottom panel between the side panels first.
RELATED: How to use a pocket hole jig
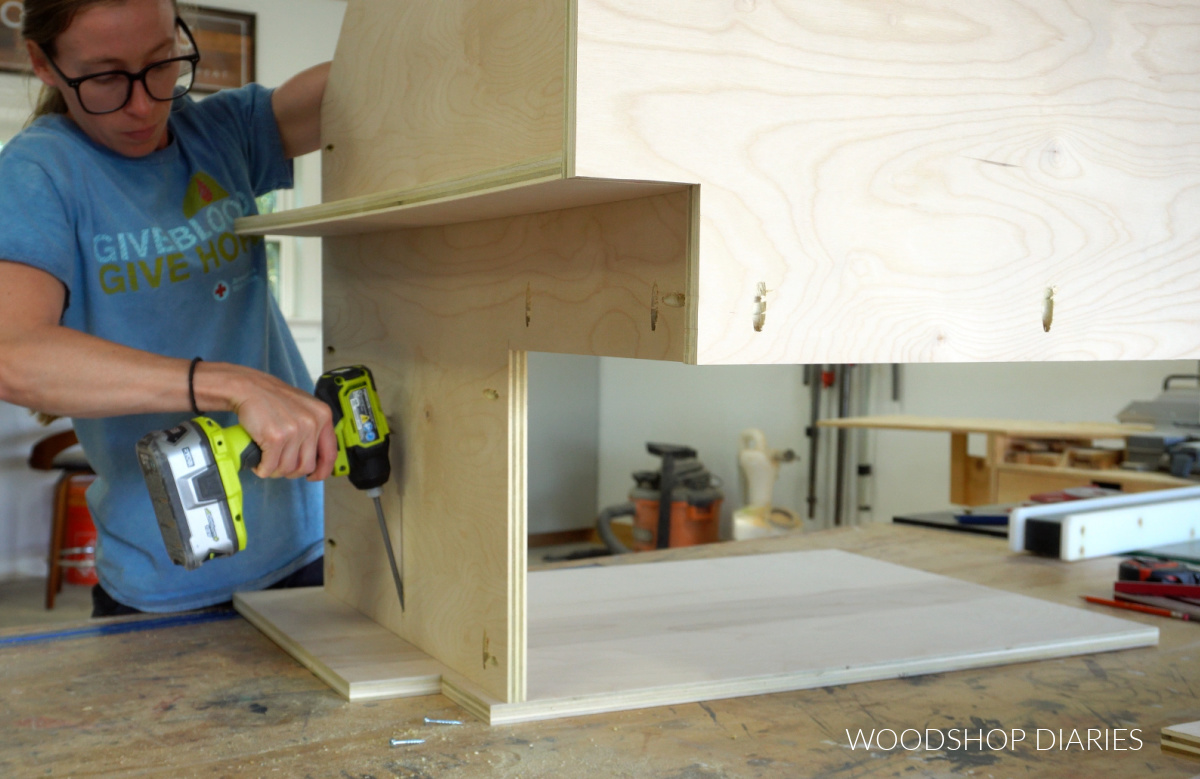
The bottom panel is large and oddly shaped, so attaching it between the sides was a bit challenging. It would be helpful to have an extra set of hands for this part.
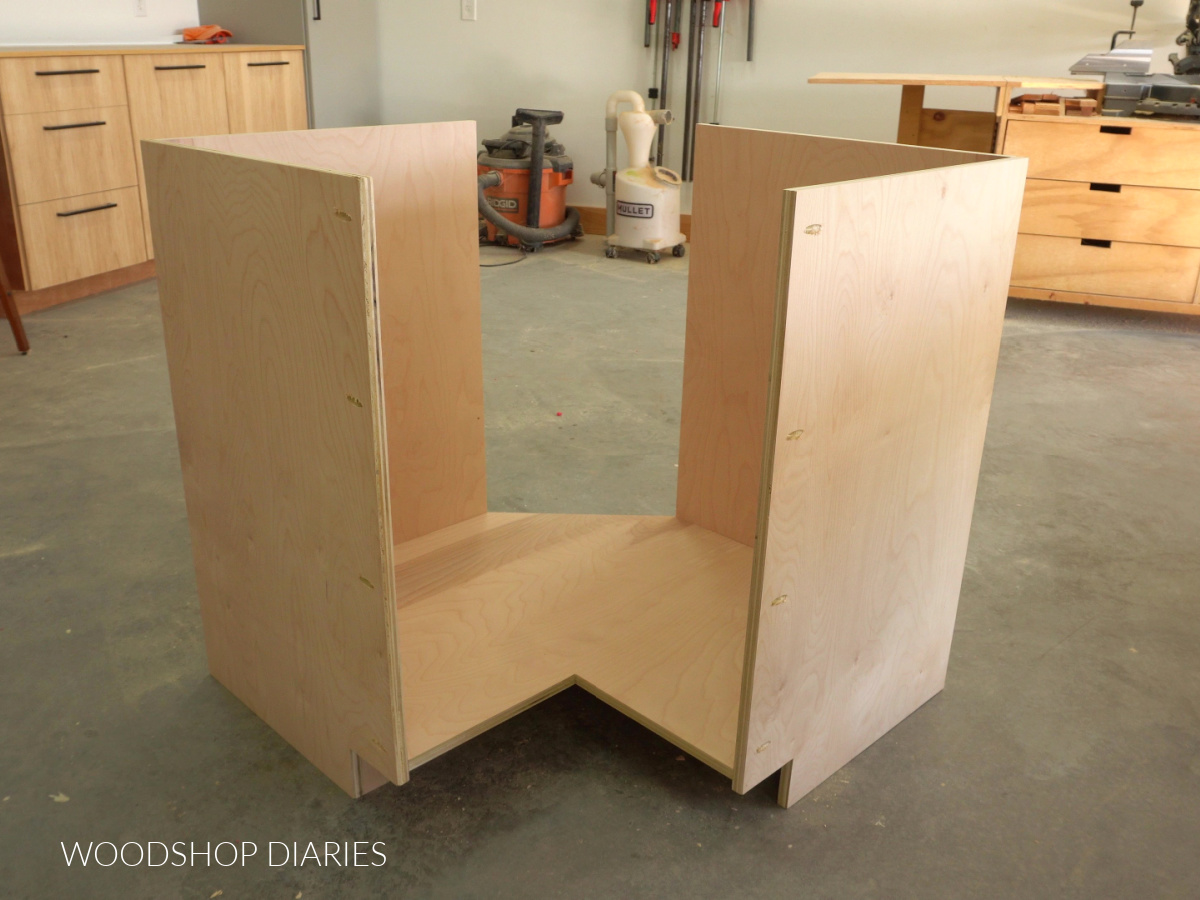
Then, I attached the back panels to each side panel.
Then, I secured the bottom to the back panels, too. Ignore that piece under the bottom panel for now–I didn’t mean to attach it just yet.
Prefer to print? Grab the printable corner base cabinet building plans here.
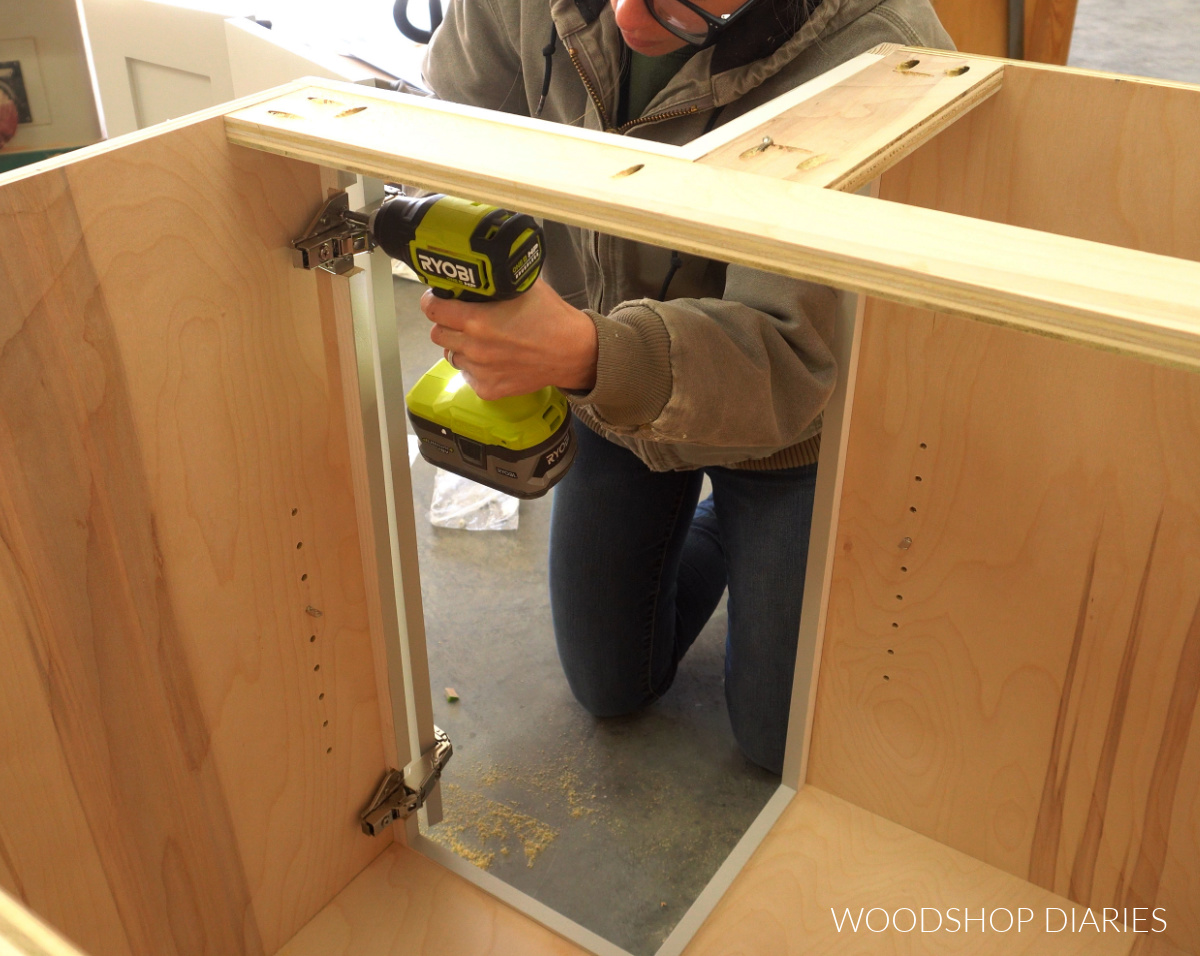
Step 2: Install top and bottom supports
Once the main box was together, I installed some ¾″ plywood strips as top supports. The long piece should be the same length as the bottom panel (33 ½″) and the short piece should be 12″.
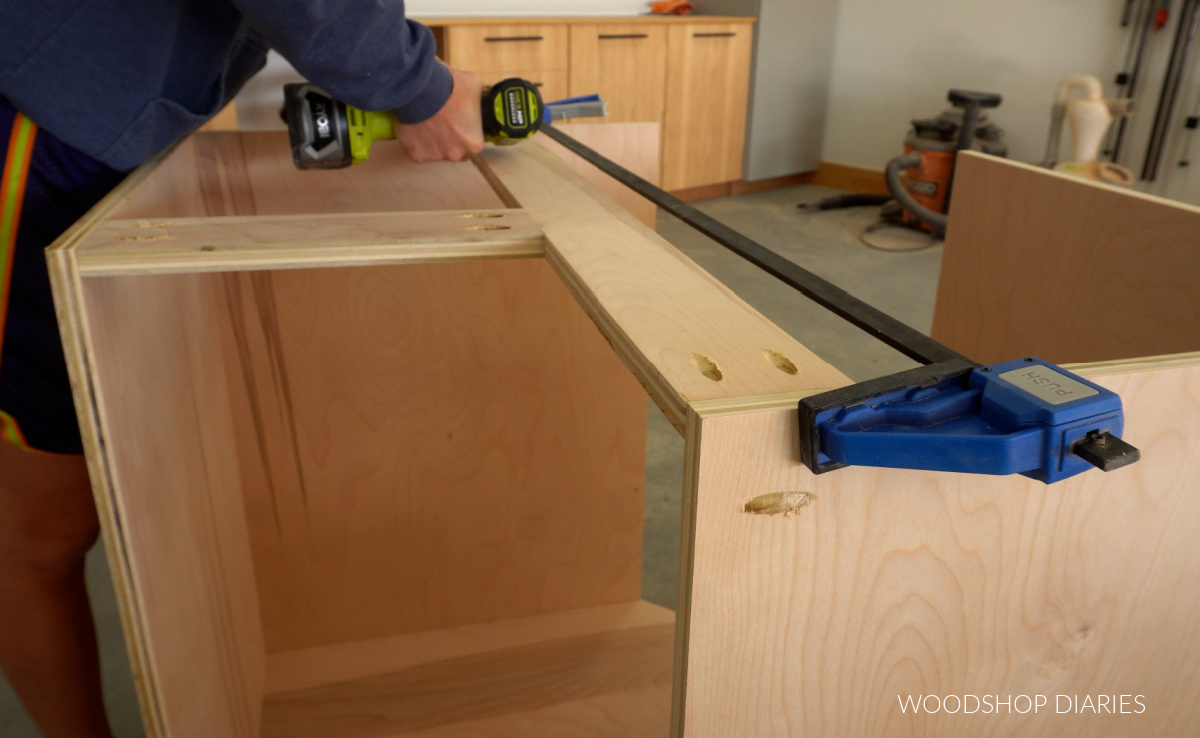
These help hold the back and side panels square at the top, but will also provide some support for the face frame in a later step.
I also installed some more ¾″ plywood strips at the bottom as well. These are what I’ll call “toe kick backers.”
They help support the large, awkwardly shaped bottom panel, but will also give you somewhere to nail the toe kick to once the cabinets are installed.
NOTE: These toe kick backers won’t be seen in the finished project. Once all cabinets are installed, you’ll cut a long piece of wood to nail across the front of all the cabinets as the toe kick.
Step 3: Install Angled Back Panel
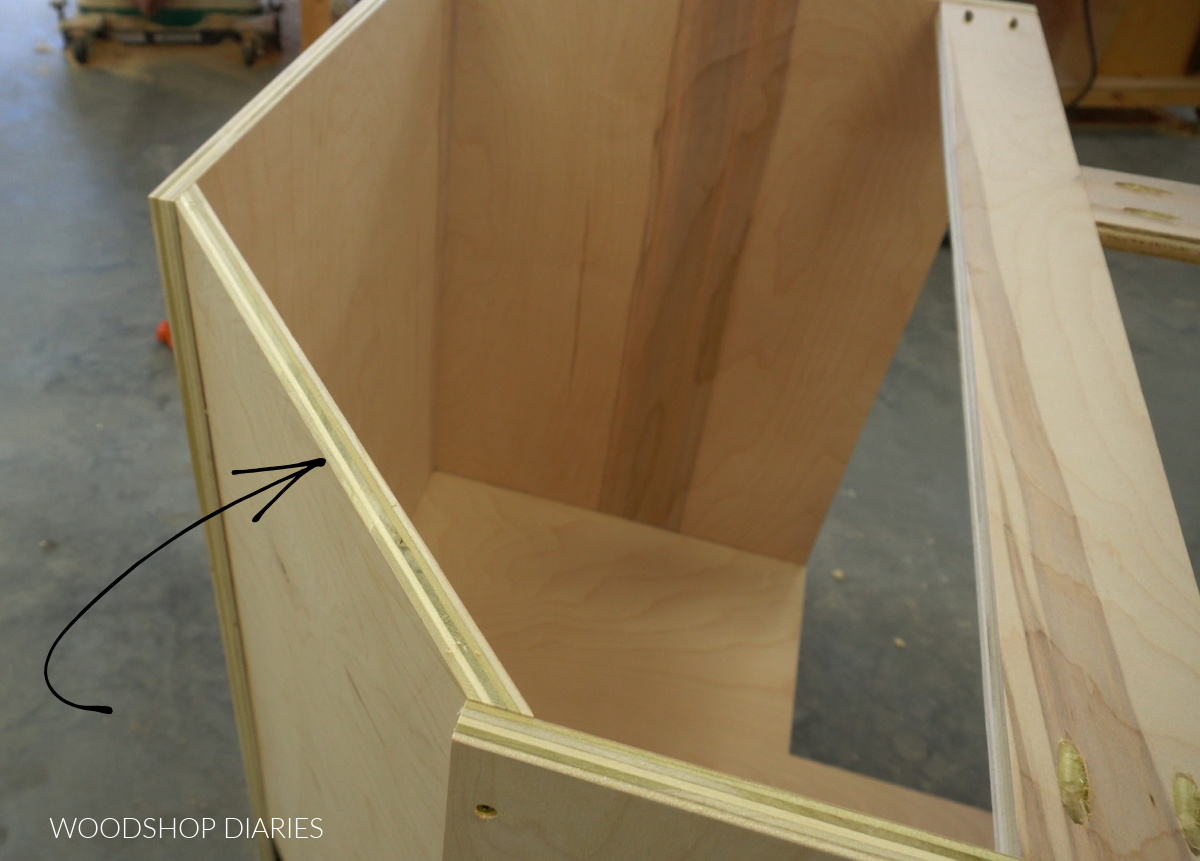
The last piece of the cabinet box is the back diagonal panel. This piece runs between the two back panels, but it will need to be cut with beveled edges for it to fit.
So I cut to fit a piece of ¾″ plywood into this opening so that the two edges were beveled 45 degrees opposite each other.
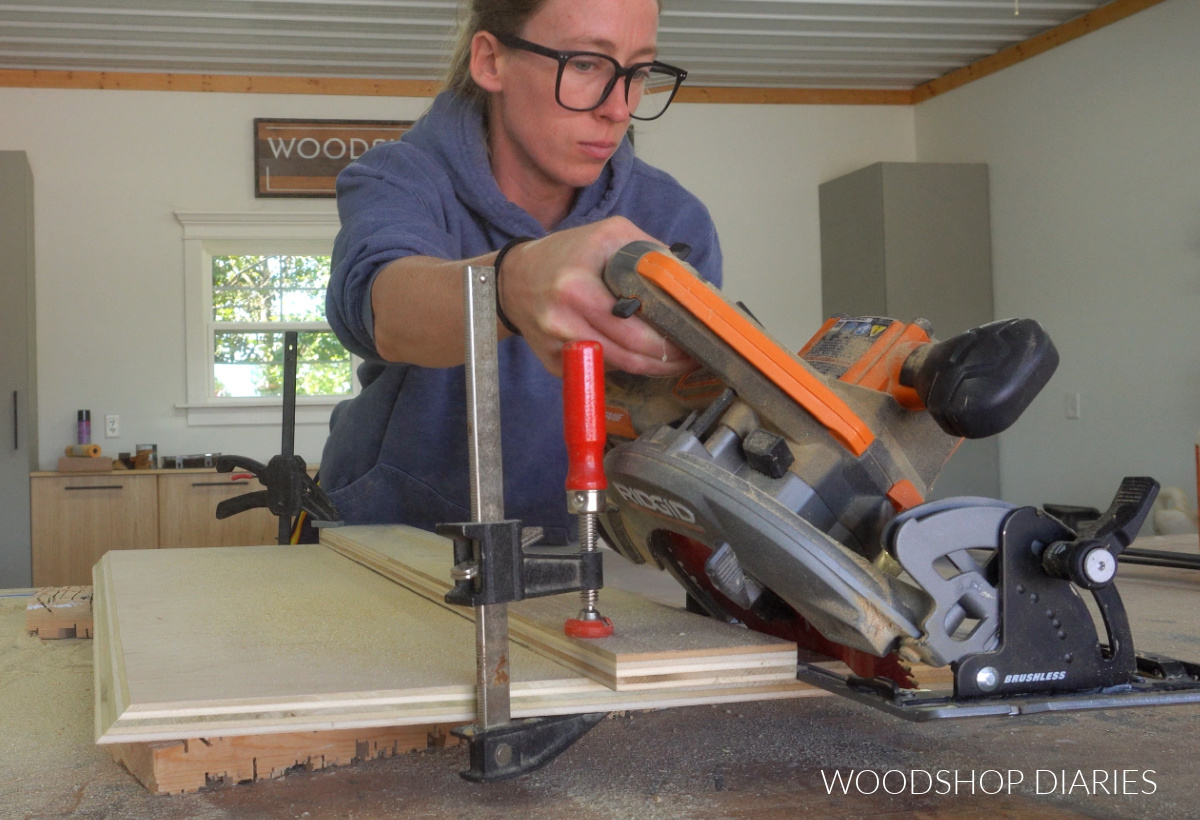
I used a circular saw and a straight edge to cut this, but you could also use a table saw if you wanted.
Then, I used a few screws through the back panels to secure it in place.
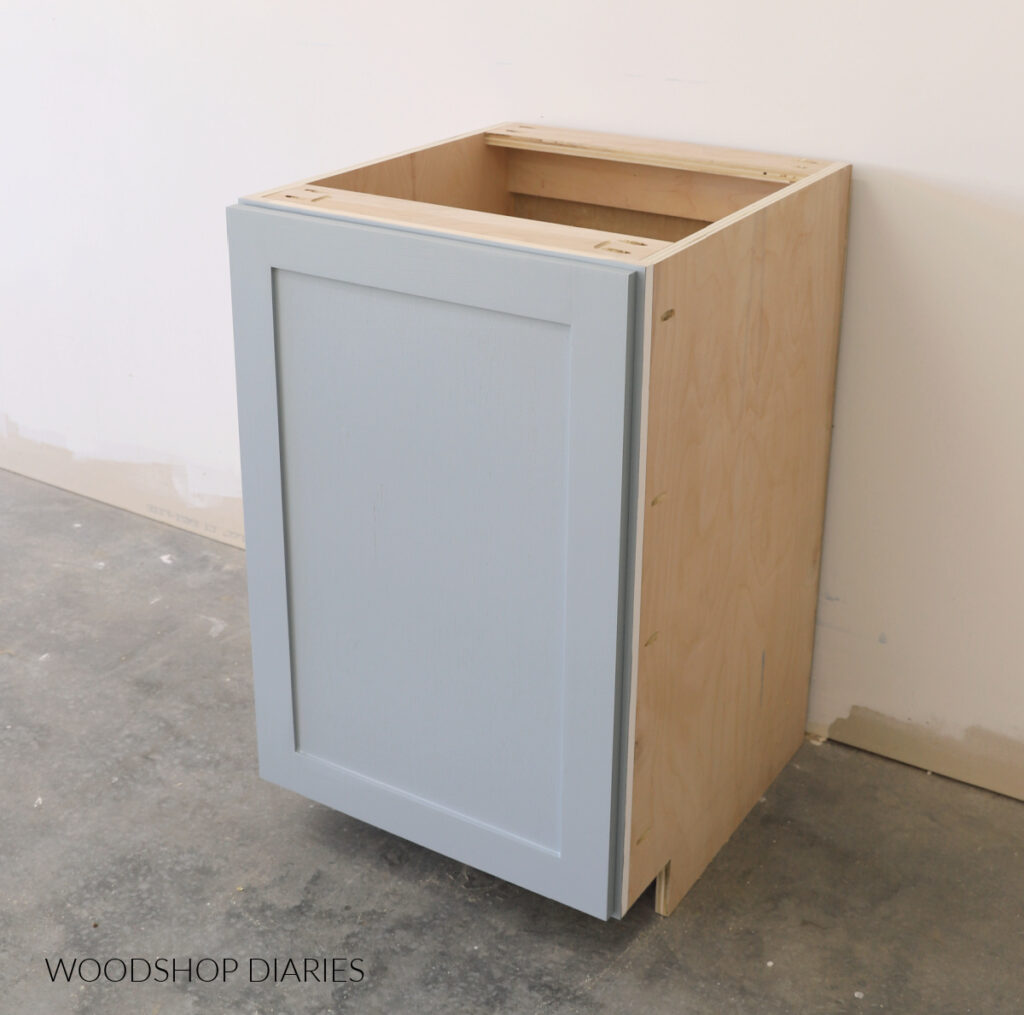
Step 4: Install face frame
Now the cabinet box is finished, but I need to finish out the front with a face frame. You can certainly build this corner cabinet in a frameless style, but the face frame here helps add a little extra support.
Not sure what the difference between frameless and face frame cabinets is? Check out this post for more information.
For the face frame, I used preprimed 1x2s and I made two “partial” frames with one vertical piece and two shorter horizontal pieces.
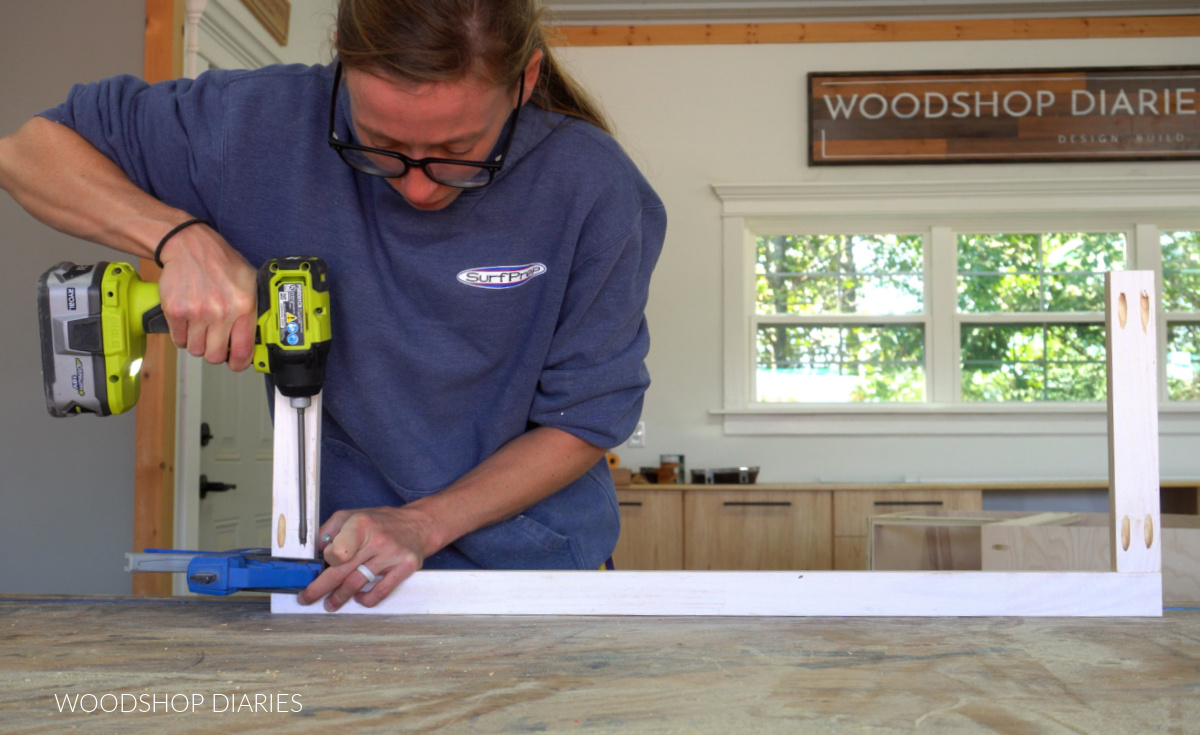
I assembled my face frames using pocket holes and screws. Note that this thin material can split pretty easily.
Prefer to print? Grab the printable corner base cabinet building plans here.
A standard size pocket hole jig can work if you’re careful, but I recommend using a Kreg Micro Jig for these thin pieces with pan head pocket hole screws. The smaller holes and screws are less likely to cause splits.
Learn how, when, and why to use the Kreg Micro Pocket Hole Jig here.
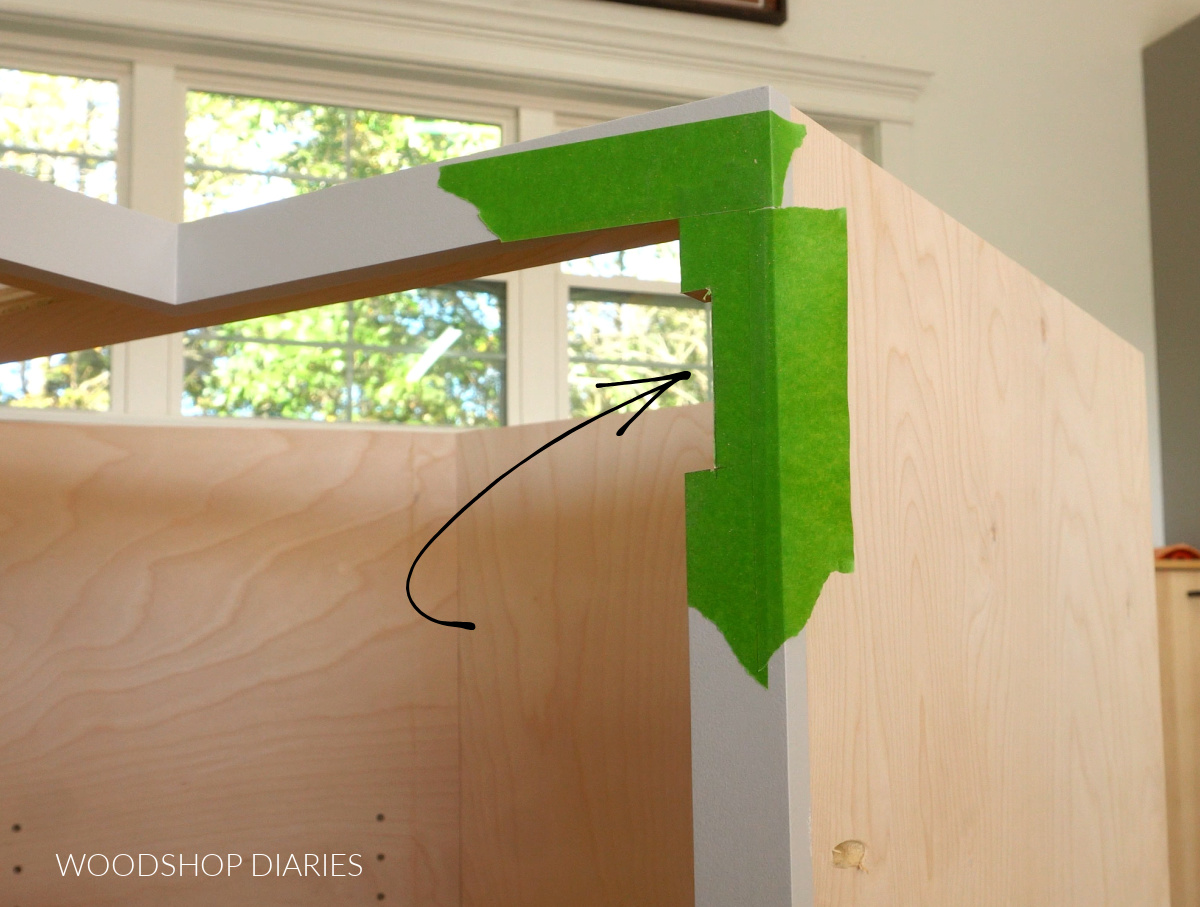
Then I attached the two “partial frames” together at the ends to make an L shaped face frame.
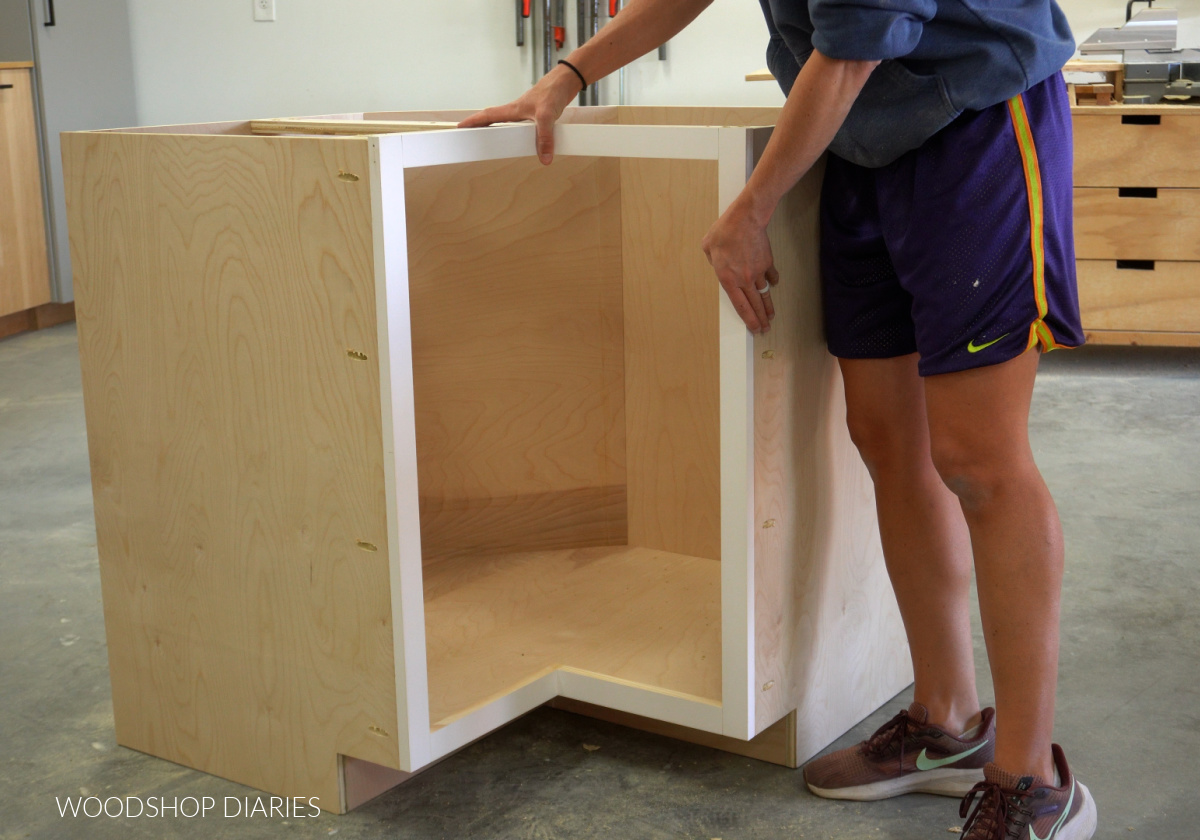
PRO TIP: When building and attaching face frames, it’s better to err on the side of a little too big than a little too small. If your face frame overhangs the edges of your cabinet a little, that’s okay! But if it doesn’t completely cover the front of your cabinet, you’ll have gaps when you install and it will be difficult to hide.
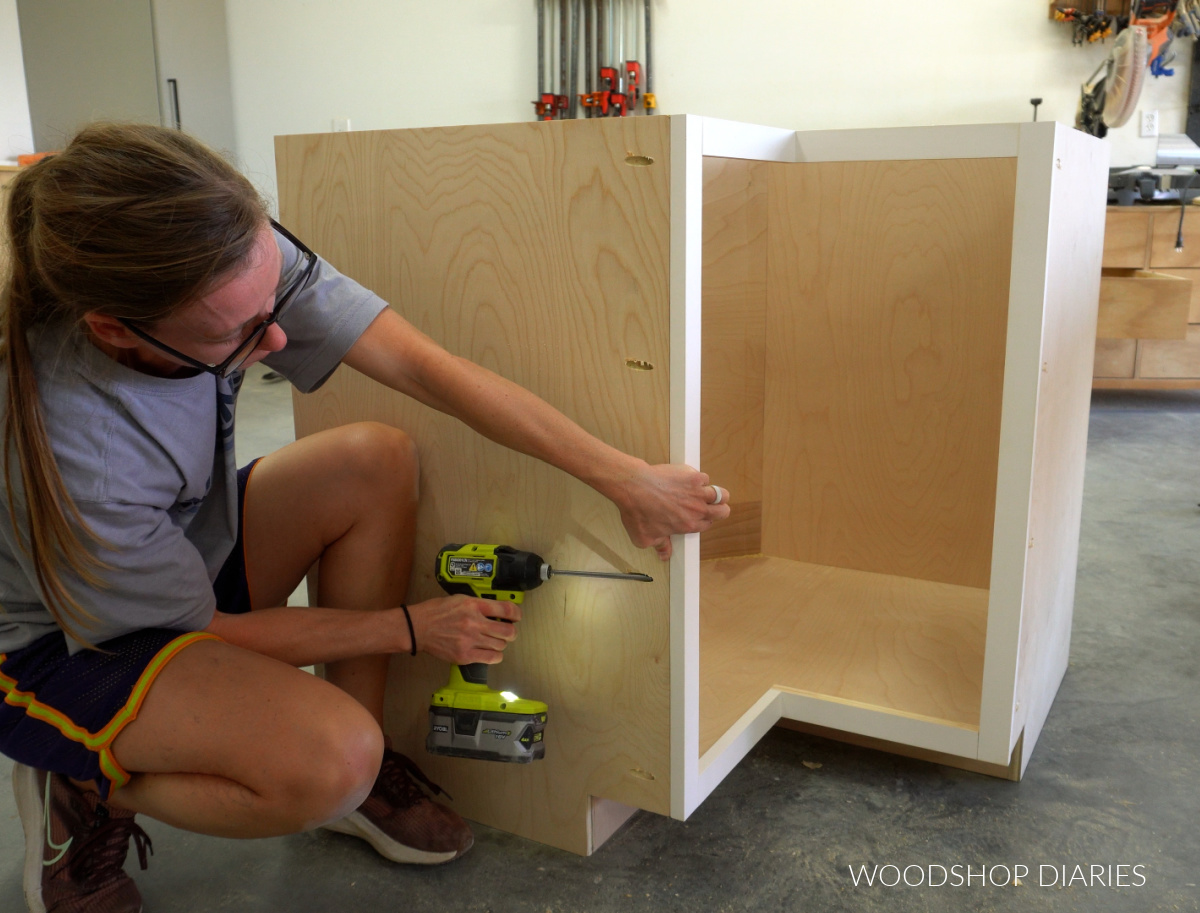
Then I attached this face frame to the front of the cabinet using pocket holes and screws.
Attaching at the top and down the sides is simple, but when you get to the bottom, it’s a little trickier.
I wasn’t thinking when I added the toe kick backers that it would be difficult to drive the pocket hole screws through these holes in the bottom panel.
Instead of removing them, I decided to drill access holes through them directly behind where the pocket holes were. That way, I could get a drill bit through the hole to drive the screws.
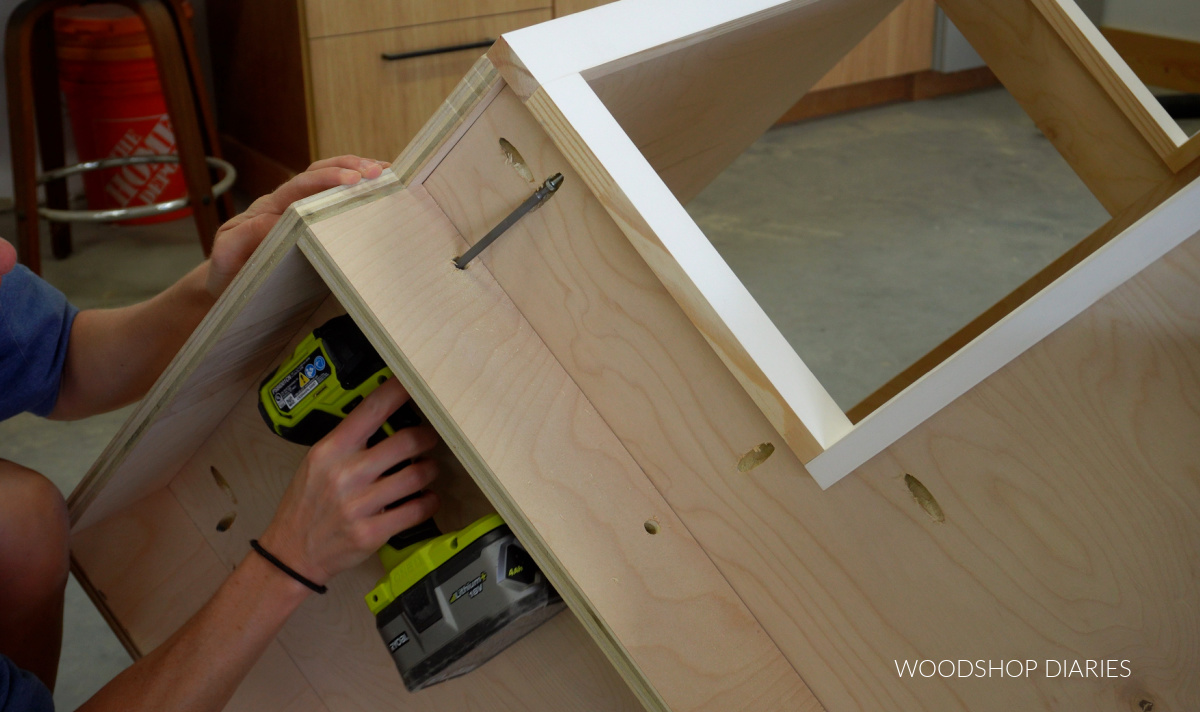
The actual toe kick will cover these holes after they’re installed, so you’ll never know they’re there.
Step 5: Add Corner Cabinet Shelf (Optional)
Like I mentioned earlier, adding a shelf inside this cabinet is completely optional. If you plan to add a pole mounted lazy Susan, skip the shelf.
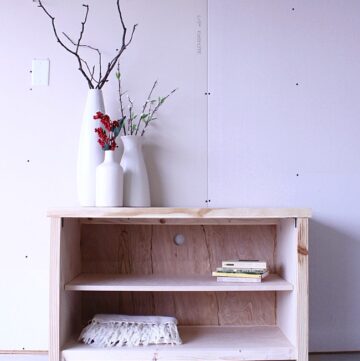
But if you’re like me and prefer having a shelf over a lazy Susan, it’s an easy add to this project.
I used a shelf pin jig to drill shelf pins into the two side panels. Learn how to use a shelf pin jig here.
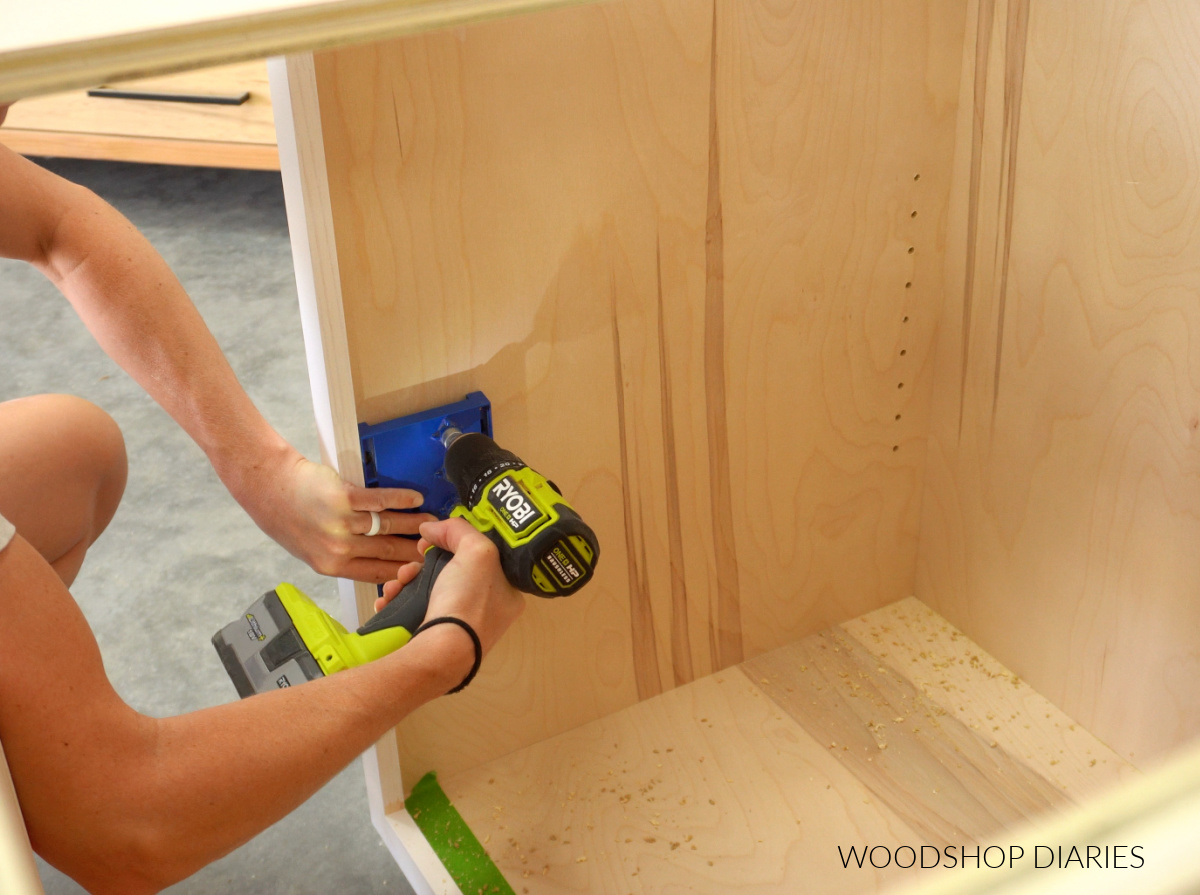
But, in addition to the side panels, I also drilled shelf pin holes up the angled back panel as well. If you don’t add shelf pins in the back, the shelf will tilt and not sit flat.
Then, I measured and cut to fit a shelf in a similar shape as the bottom and placed it in the cabinet with shelf pins.
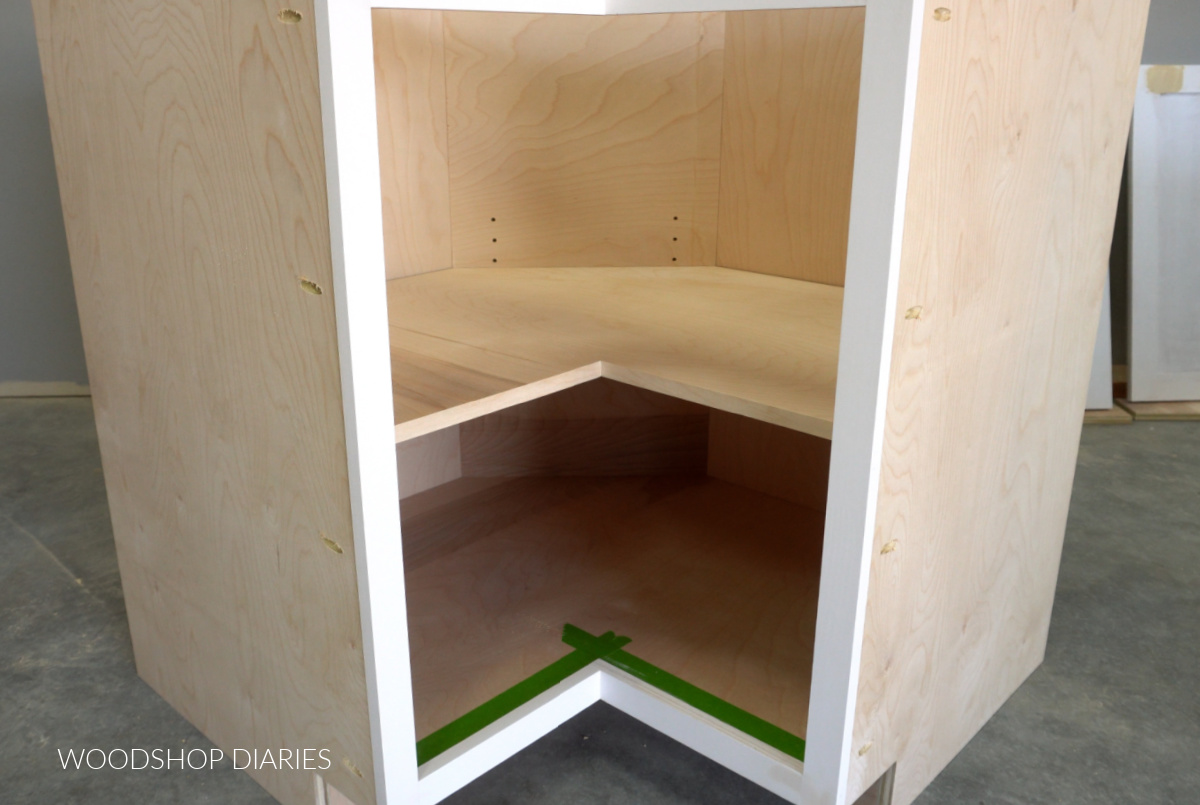
NOTE: Whatever you plan to put inside your cabinet, make sure to place it inside BEFORE ADDING A COUNTERTOP. You can adjust things once they’re inside, but you won’t be able to get a shelf and/or lazy Susan into the front opening of the cabinet. These need to go in through the top.
Step 6: Add Bi-Fold Cabinet Doors
This type of corner cabinet requires two small individual doors. These doors connect together to make a single bi-fold cabinet door.
So first, I assembled two identical cabinet doors. You can assemble your doors a hundred ways, but I built mine using 1x3s for the door frames and ¼″ plywood for the center panels.
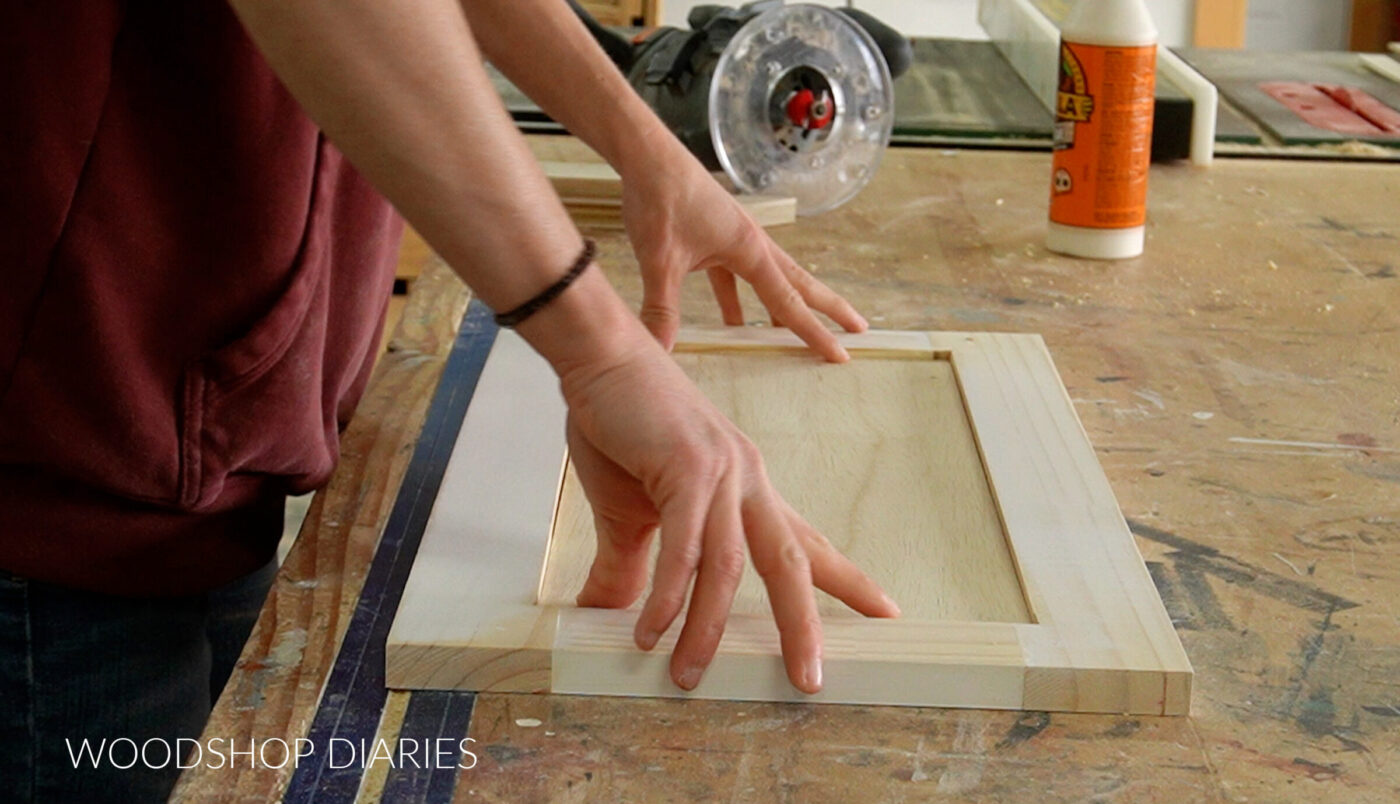
Learn how to build a cabinet door 7 different ways here. I used method #4 for these.
I built these doors for a 1 ¼″ overlay. Not sure how to size cabinet doors? This post explains how to determine cabinet door size.
Before installing them I primed and painted the doors and the cabinet face frame. In my experience, it’s easier to paint the doors before the hinges are on.
RELATED: How to paint without a sprayer
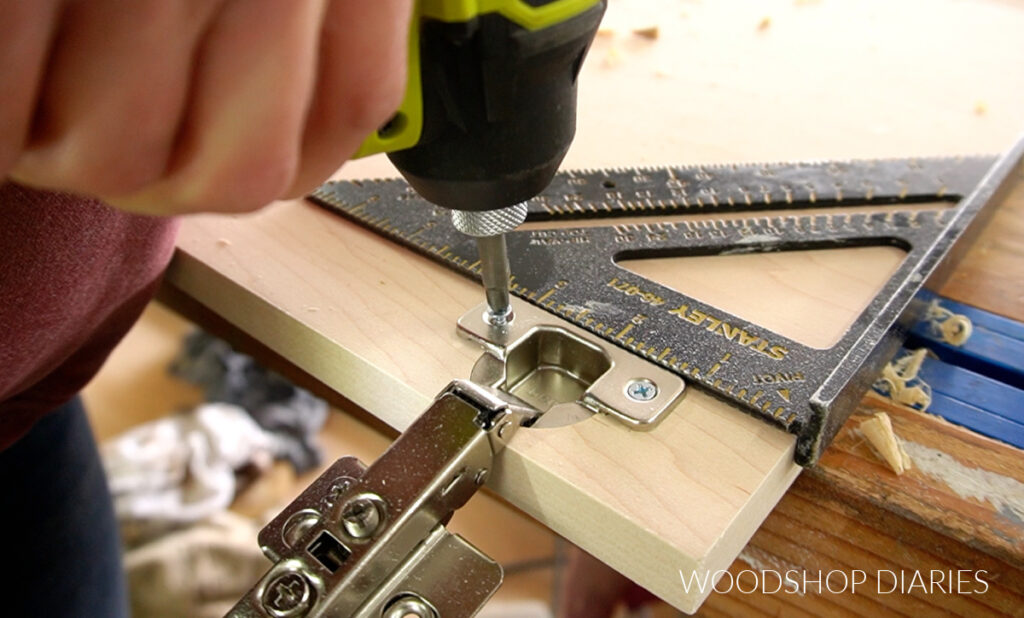
Once the paint dried, I used a concealed hinge jig to drill 4 hinge cup holes on one of my doors–two on each side.
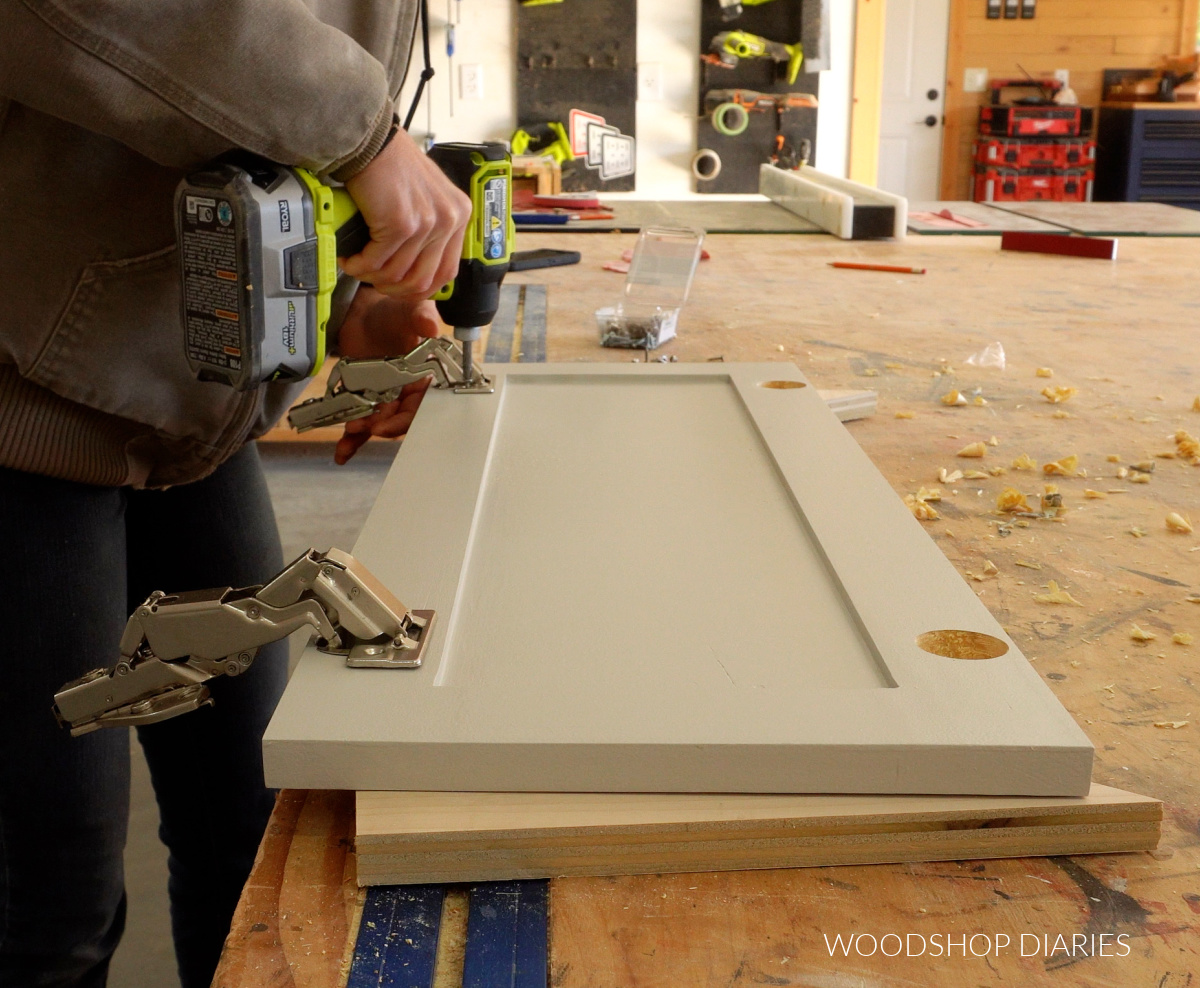
I installed 165 degree hinges into the holes on one side and 135 degree hinges into the holes on the other side.
Then, I installed the second door to the other side of the 135 degree hinges. This allows the two doors to bend at a 90 degree when shut, but straighten up when opened.
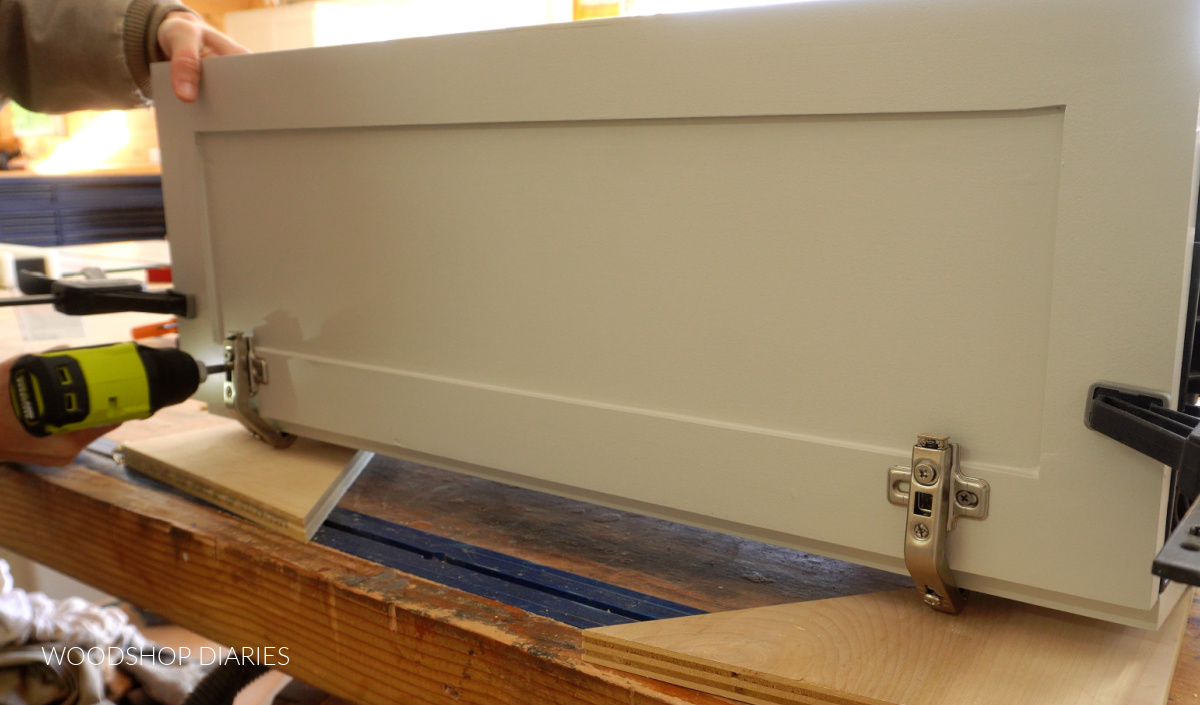
Now, these 165 degree hinges are made for only a ¾″ overlay. Since I needed a 1 ¼″ overlay, I needed to notch out the face frame the difference, which is ½″.
So I marked where the hinges would hit on the door frame and notched this out ½″ deep with a jig saw. The painters tape helps protect the frame from scratches while cutting.
Then, I could install the hinges into these notches. If you wanted a different overlay, you can adjust the size of your doors, and/or the depth of the notch as needed.
For each reference, here’s a quick guide to what door width you’d need for what overlay you want.
Door Width for:
- 1 ¼″ overlay = 10 ¾″ (cut ½″ deep notch)
- 1″ overlay = 10 ½″ (cut ¼″ deep notch)
- ¾″ overlay = 10 ¼″ (no notch needed)
- ½″ overlay = 10″ (no notch needed)
Once the doors are on, this cabinet is ready to install!
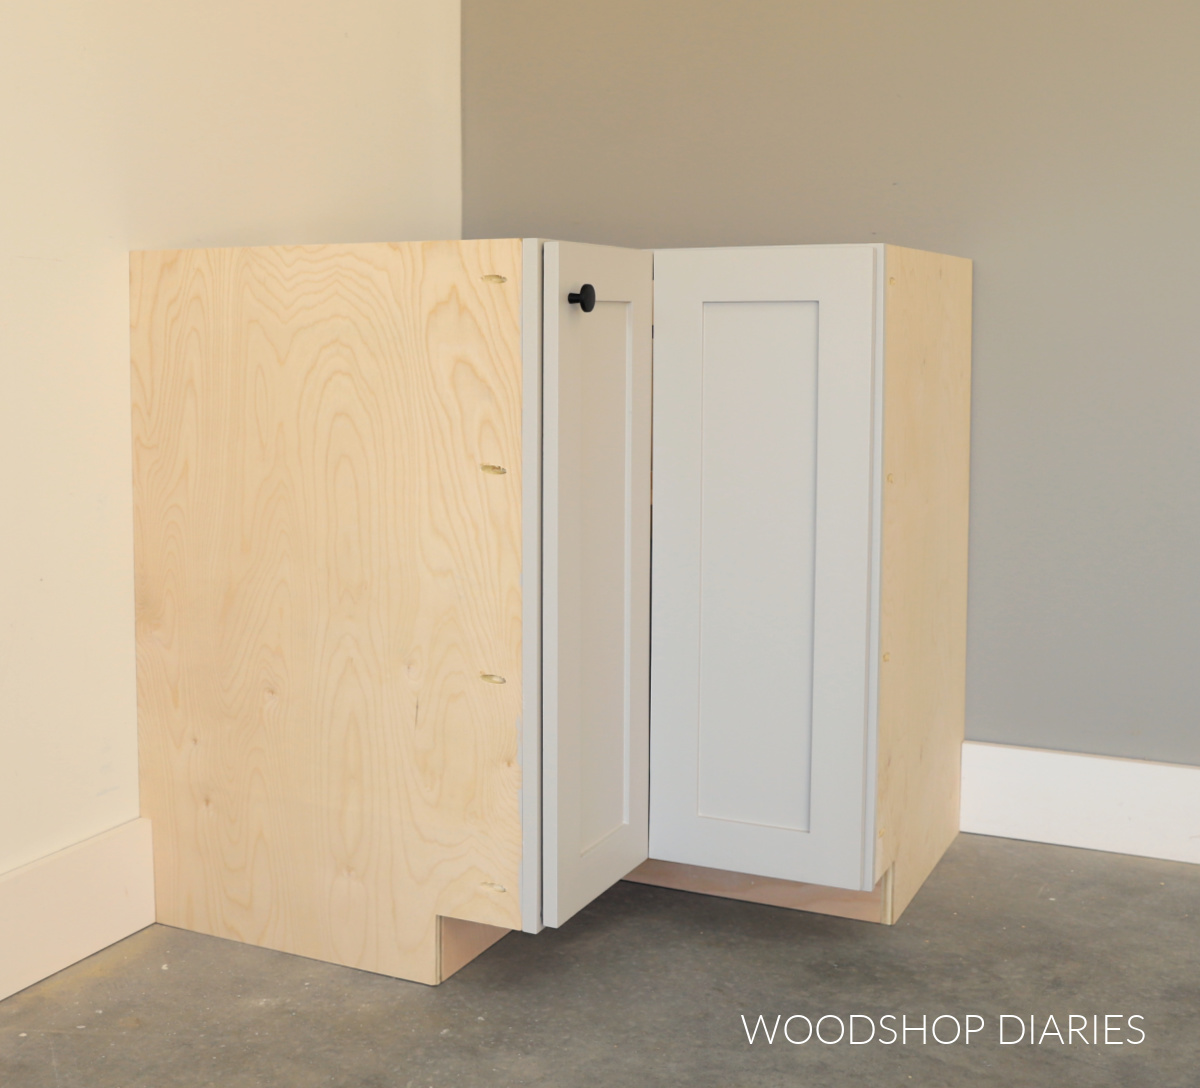
This cabinet should be secured to the wall studs once it’s in place and screwed to the adjacent cabinets on each side. Once secure, be sure to add whatever you want inside the cabinet (shelves, lazy susan, etc) before adding a countertop.
I’ll be eventually adding this corner cabinet into my pantry once we renovate it, so if you’d like to see it installed, be sure to stay tuned and follow along. I’ll be sharing that soon.
Want to learn more about DIY cabinet building?
You might find these posts helpful for additional information on building your own cabinets. Click on the images below to read more.
If you enjoyed this post, be sure to save it for later by pinning or sharing to your favorite social channel!
Until next time, friend, happy building!