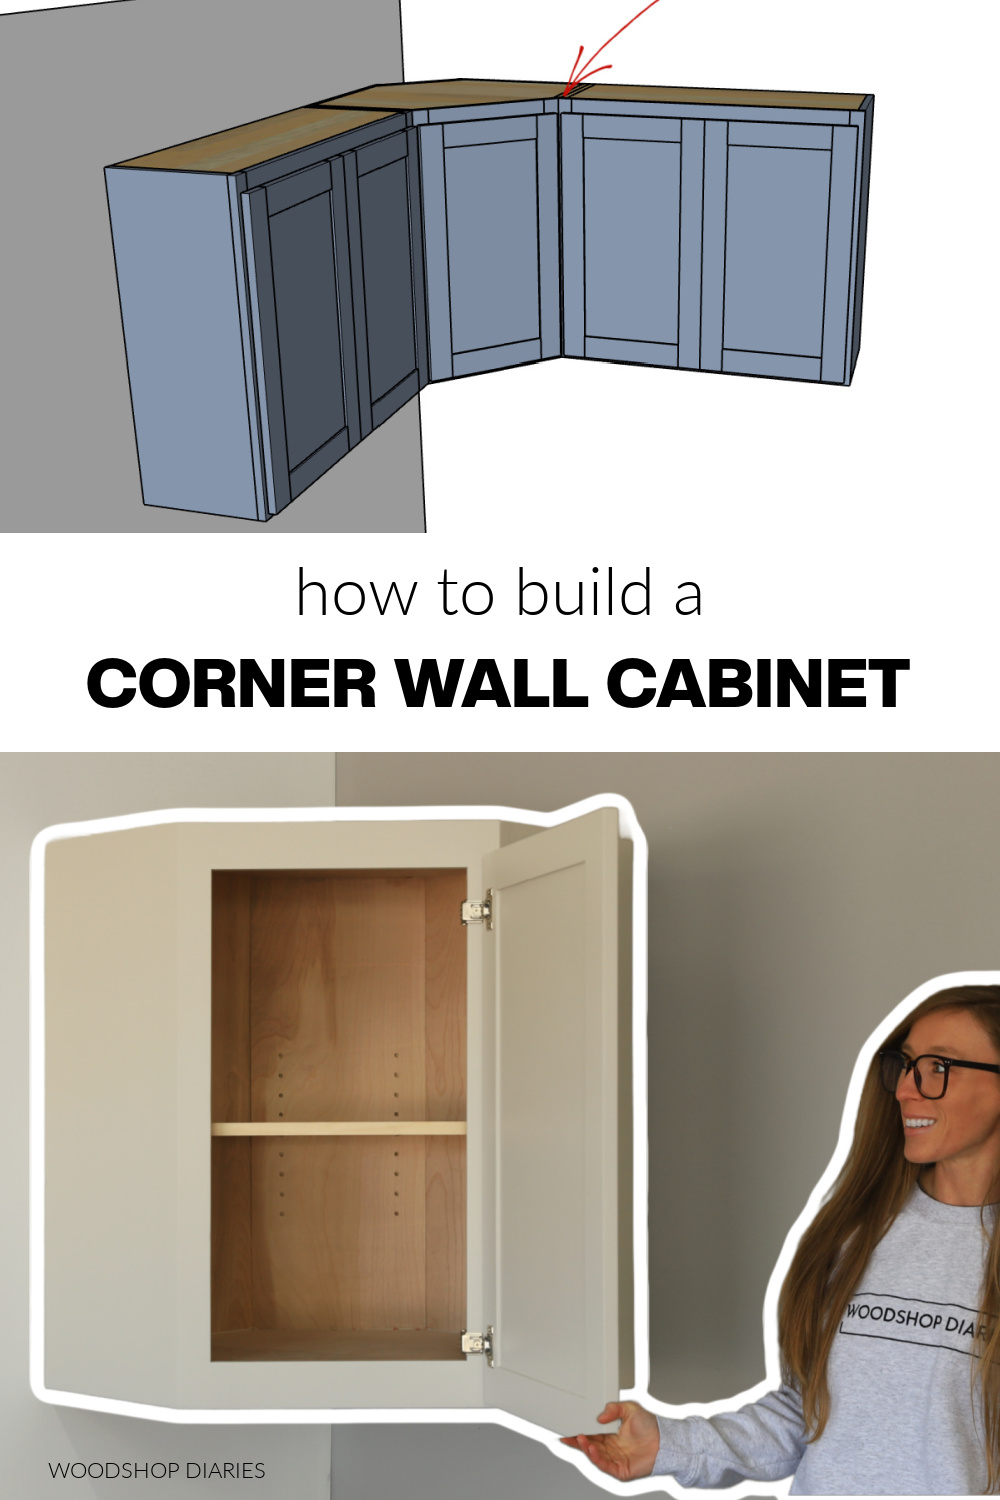
In this post, I’m showing you how to build a basic corner wall cabinet!
If you’ve ever considered building your own DIY cabinets for your kitchen, bathroom, garage, or…anywhere, really, you may have wondered how to handle the corners.
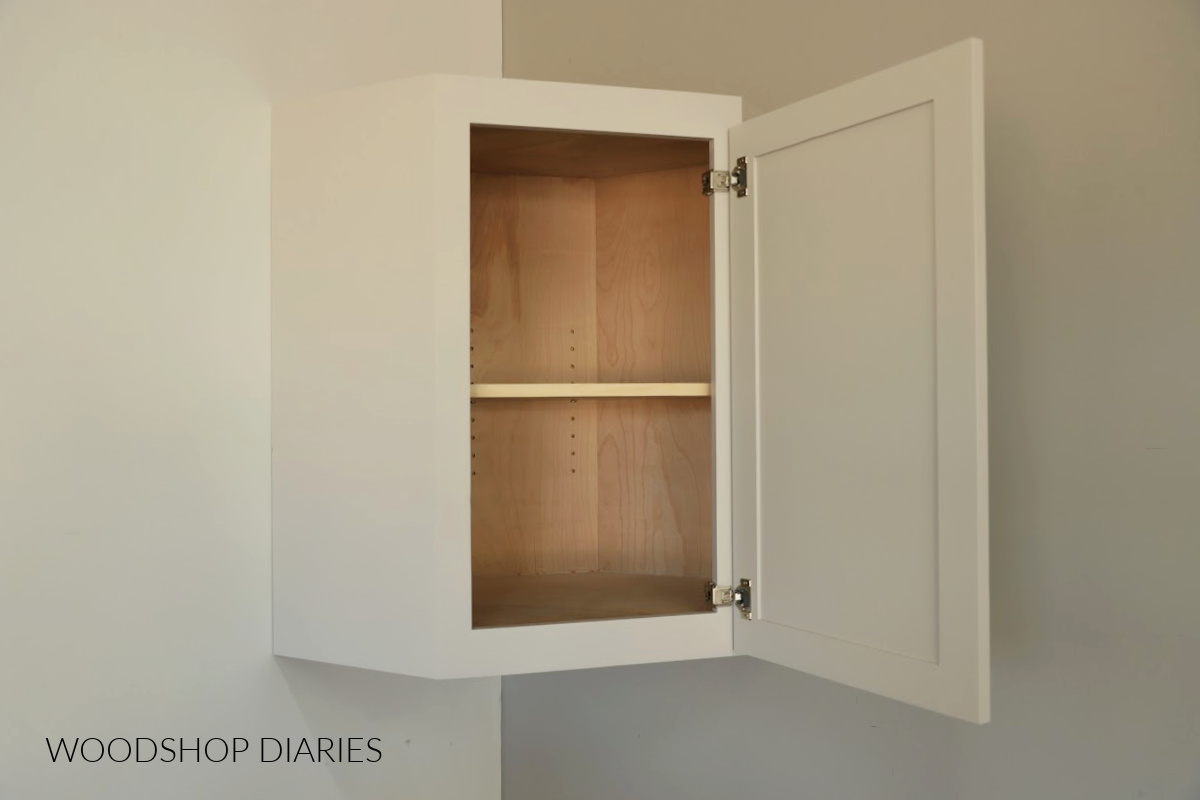
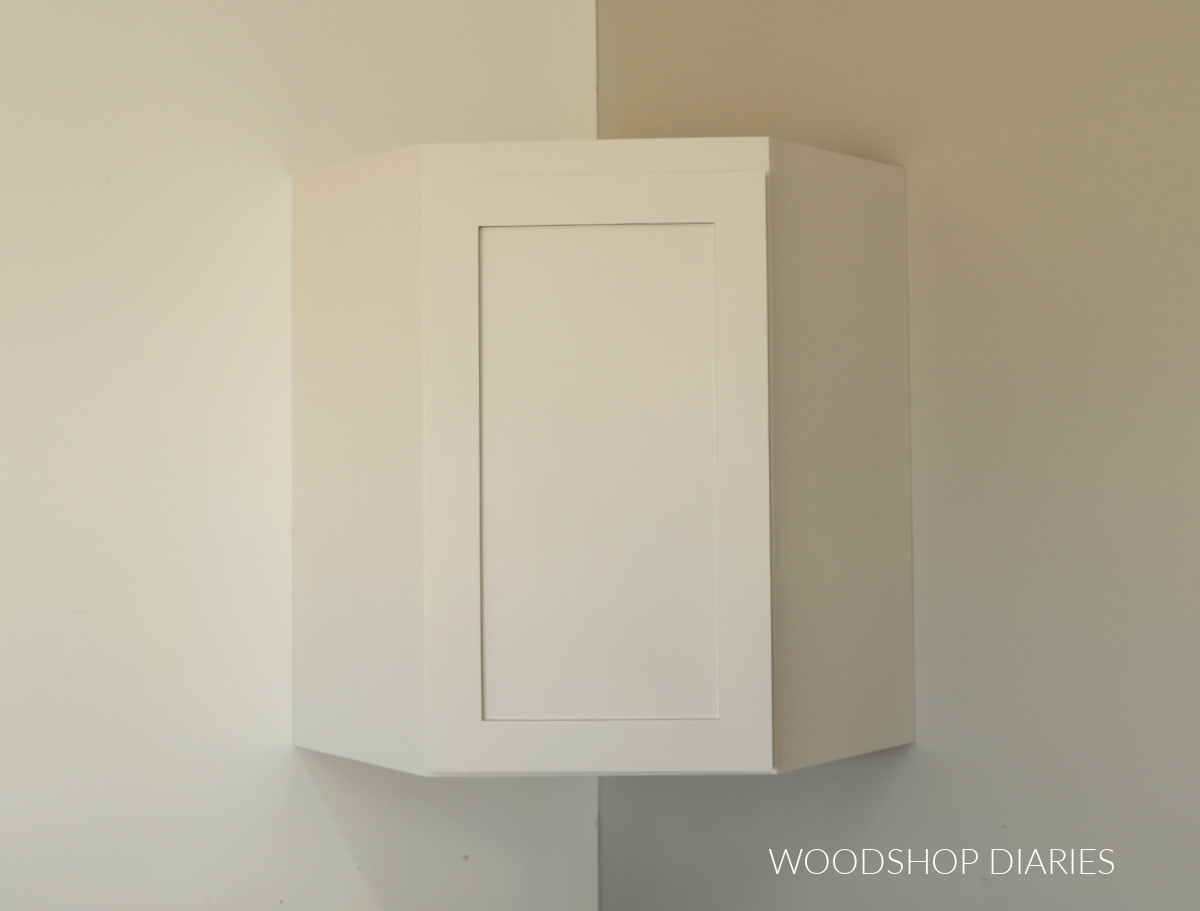
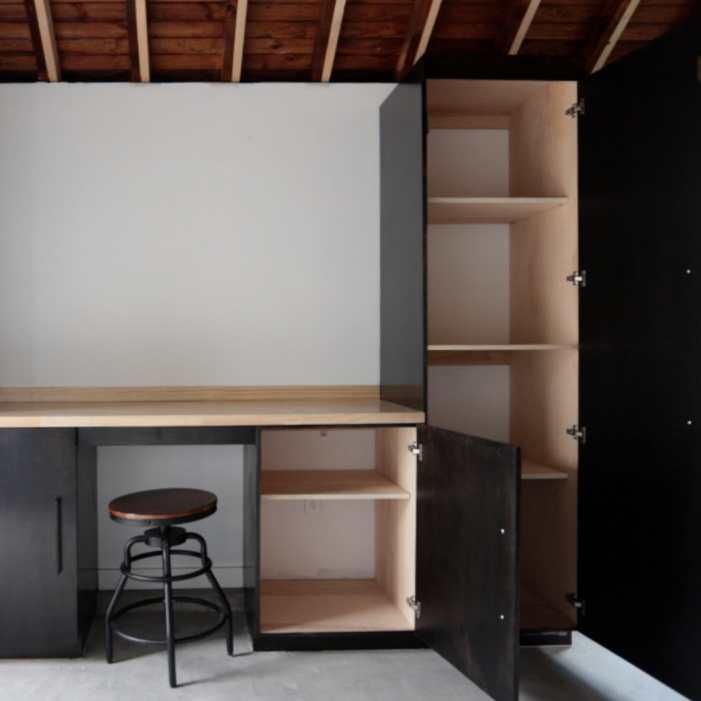
Corner cabinets can be found in several different types, sizes and styles. But a diagonal shaped corner cabinet like this one is a common option with upper cabinets.
The shape allows you to install regular wall cabinets on each side, while also fully utilizing the corner space for storage.
If you haven’t already, I encourage you to check out this post for the basics of building wall cabinets. It covers some additional details and extra tips on general cabinet building.
But if you’re looking to build a diagonal corner cabinet like this one, I’ve got the plans and tutorial below.
*This post contains affiliate links. See website policies.
What to consider before building
This type of cabinet can utilize shelves OR could also be used with a lazy Susan kit instead.
The diagonal shaped corner cabinet is more common for wall cabinets than base cabinets.
But this same concept can be used for a base cabinet, just keep in mind that the diagonal shape will take up some extra floor space.
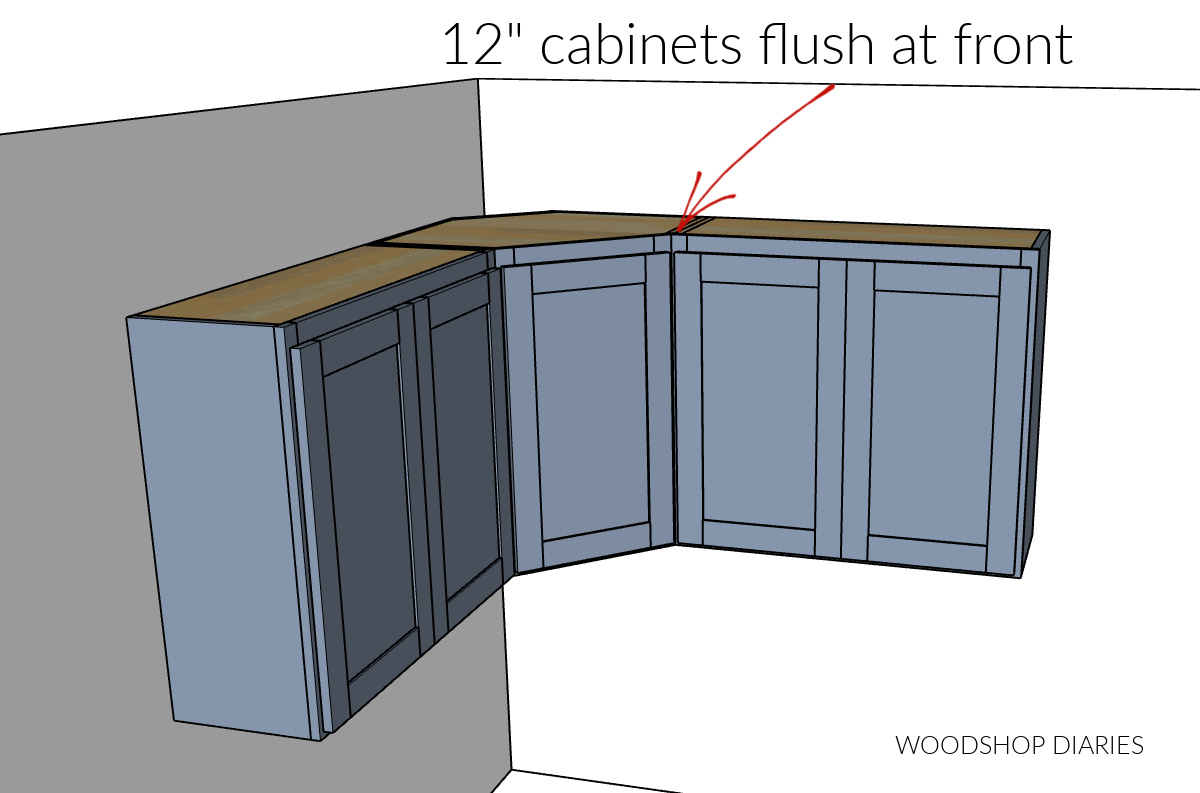
Cabinet Sizing Options
This type of diagonal shaped corner wall cabinet is typically found in two sizes: a 12″ and a 15″. These dimensions refer to the depth of the cabinet sides (the sides that will butt up to adjacent wall cabinets).
Because most standard wall cabinets are 12″ deep, the 12″ size is designed so that all of the cabinets butt together and are flush across the front.
But, the 15″ size is designed to be deeper than your adjacent cabinets so that it sticks out a little further. This adds more storage space, but can also add some dimension to your cabinet design.
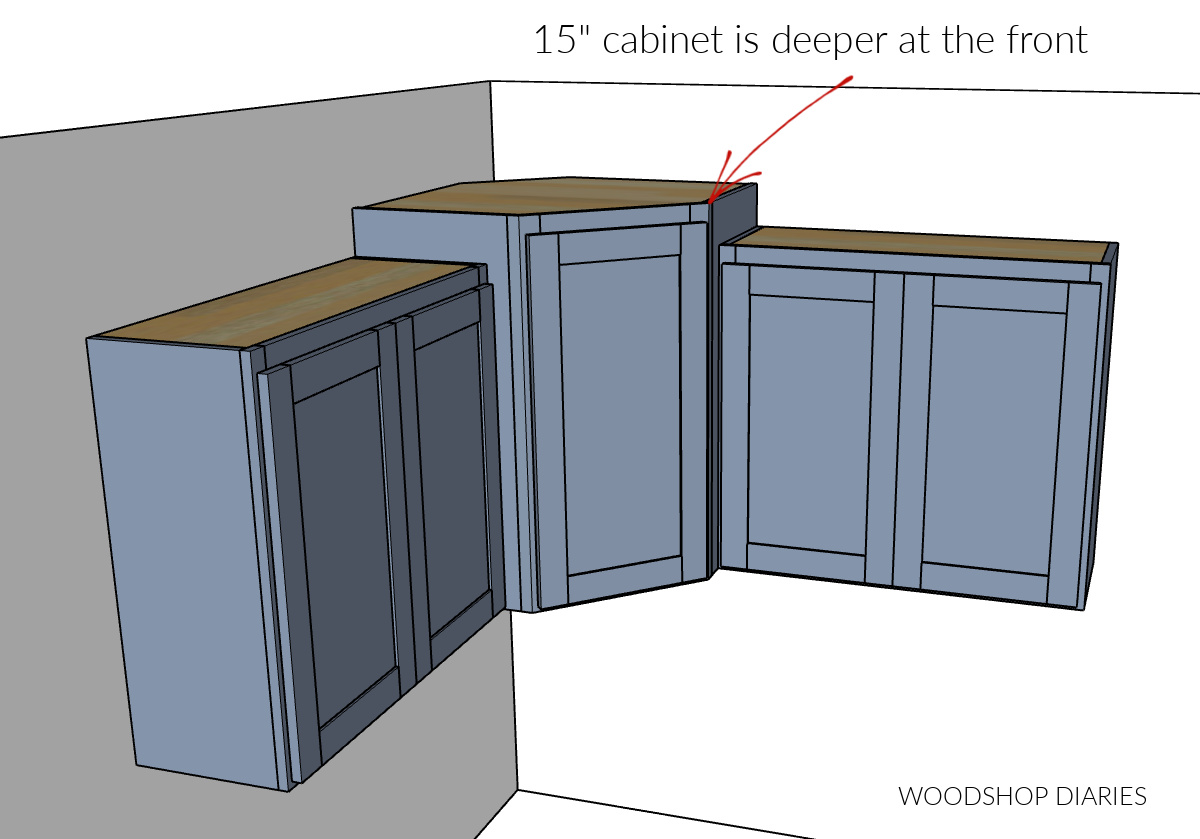
Sometimes the deeper cabinets are made taller than the adjacent wall cabinets like you see in the diagram above, but not always.
That said, you can customize your corner cabinet height, depth, or width to fit your needs, but these are the two most common sizes. I’ve included printable plans for both size options below.
You may find these resources helpful throughout the build:
Enjoy DIY projects and woodworking plans? Sign up for priority access for the latest posts on Woodshop Diaries!
How to build a corner wall cabinet
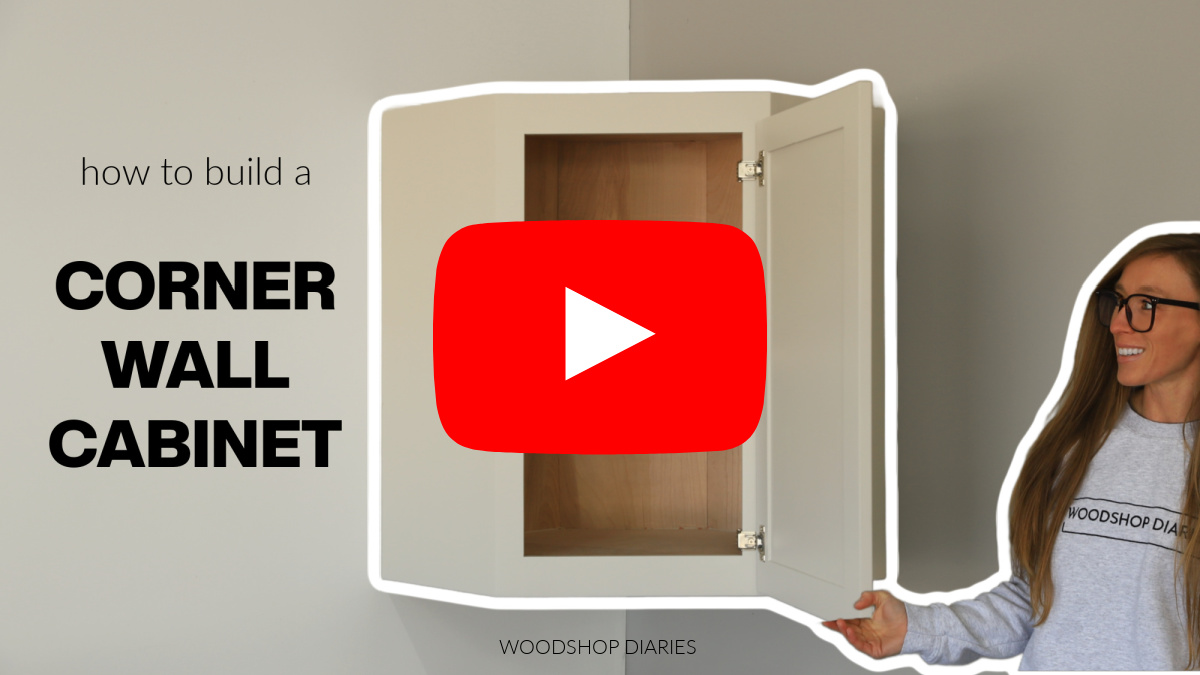
If you prefer to watch, I’ve shared the full build video with tons of tips, behind the scenes, and additional details on my YouTube Channel here.
Love watching how-to videos? Subscribe to my YouTube channel for plenty more where that came from!
Prefer to print? Grab the printable corner wall cabinet building plans available here:
Tools & Materials
Tools:
Check out this post for the top ten tools I recommend for cabinet building
- Drill/Driver
- Circular Saw
- Plywood Cutting Guides (Kreg Rip Cut & AccuCut)
- Pocket Hole Jig
- Brad or Finish nailer
- Concealed Hinge Jig
- Shelf Pin Jig
- Miter Saw
- Table Saw (optional)
Materials:
- (1) 4’x8′ sheet ¾″ plywood *
- (1) 4’x4′ sheet ½″ plywood *
- (1) 1x3x8 boards
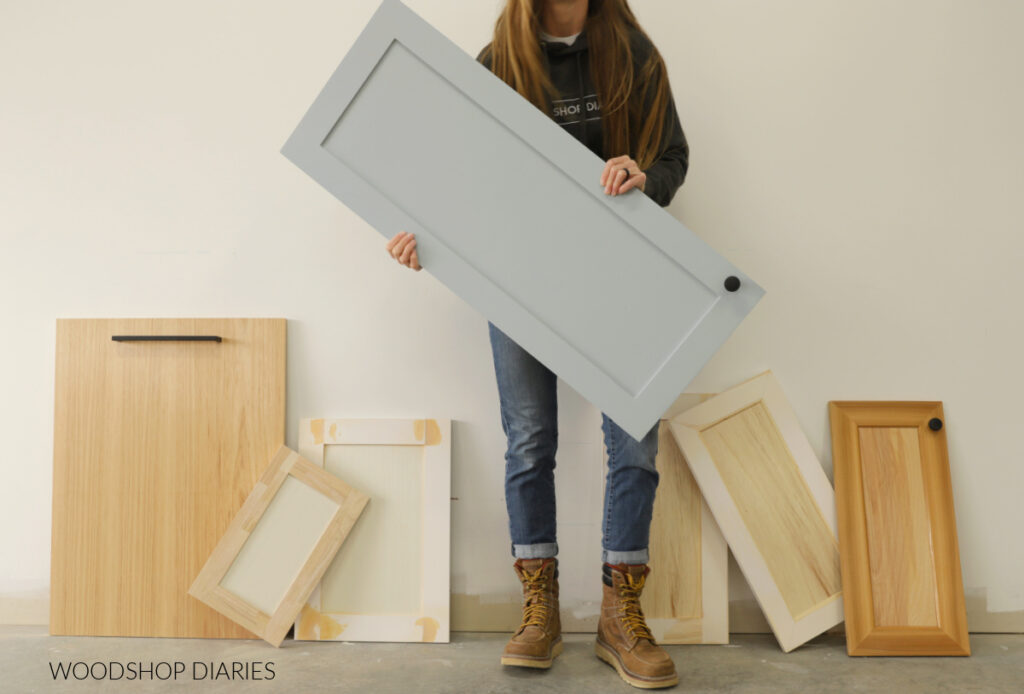
- Materials for door (depends on how you want to make them **)
- 1 ¼” pocket hole screws (50 count box)
- 1″ pocket hole screws (50 count box)
- (25) 1 ¼” wood screws
- 1 ¼” long brad or finish nails
- (4-5) 2 ½″ wood screws (to install)
- Wood glue
- (1) pair face frame 1 ¼” overlay (or other as desired) concealed hinges
- (6-12) Shelf pins
- Edge banding (optional)
*I recommend using hardwood plywood for this build–I used birch here. Learn how to use the best plywood for your project here.
**You can build your doors hundreds of different ways using hundreds of different materials. I built mine using 1x3s for the door frames and ¼″ plywood for the door panels. For more information, see 7 ways to build a cabinet door.
Step 1: Cut the Cabinet Box Pieces
I started this project by cutting down seven plywood pieces to build the box:
- (2) side panels (¾″ plywood)
- (2) top & bottom panels (¾″ plywood)
- (1) back corner panel (¾″ plywood)
- (2) back panels (½″ plywood)
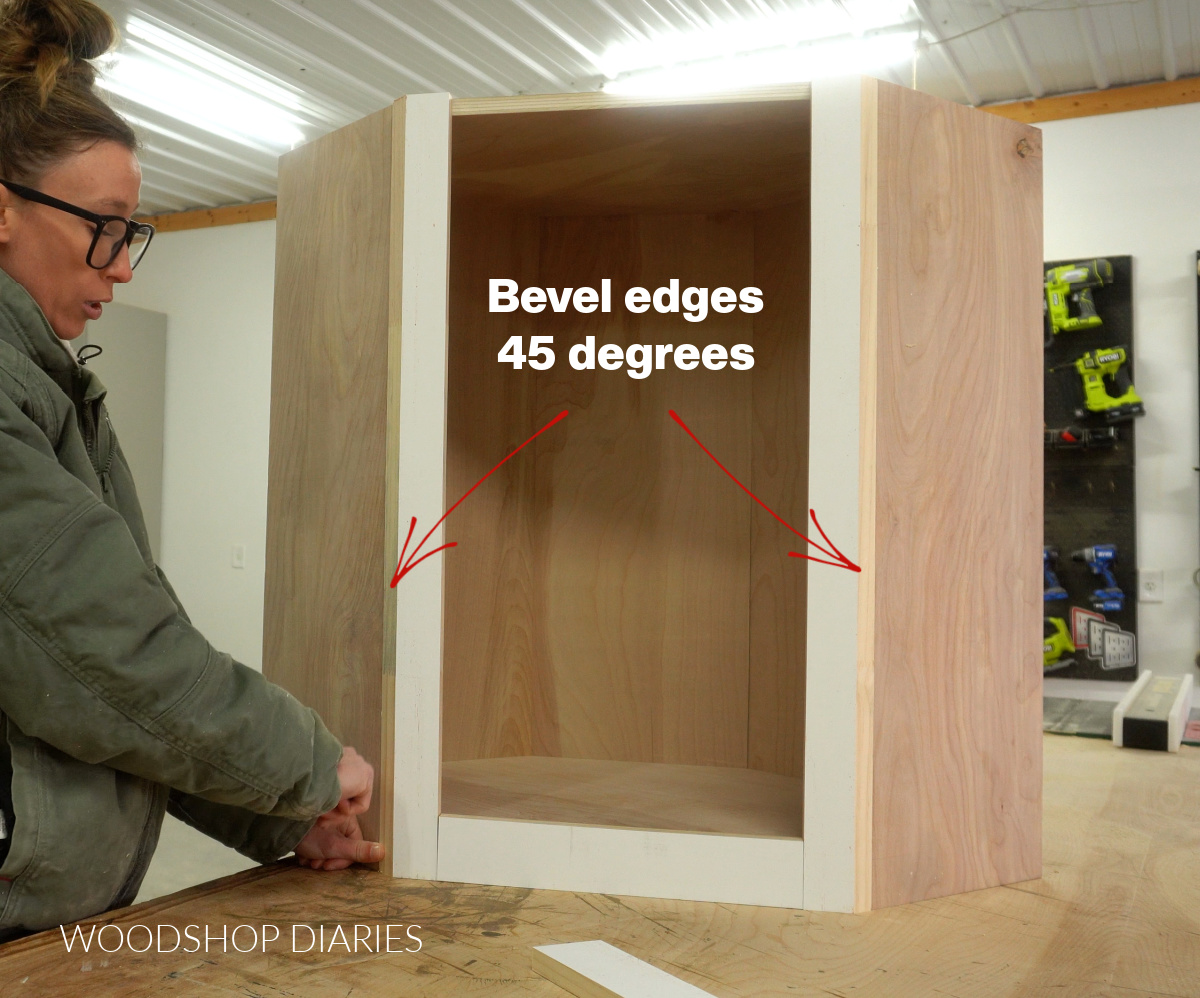
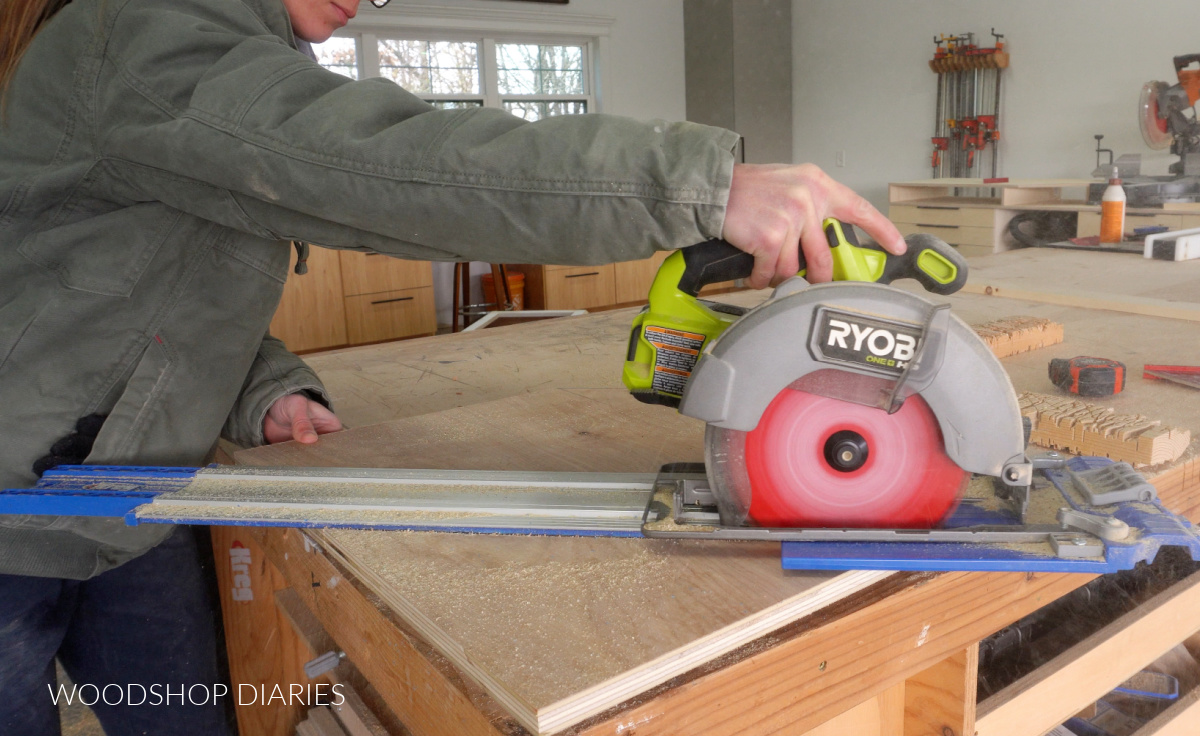
The most challenging part of this build is simply the fact that some of these edges need to be cut with a 45 degree bevel.
So I used my circular saw and Kreg Rip Cut to cut a strip off my ¾″ plywood sheet with a beveled edge. I cut two pieces from this strip to use as my cabinet sides.
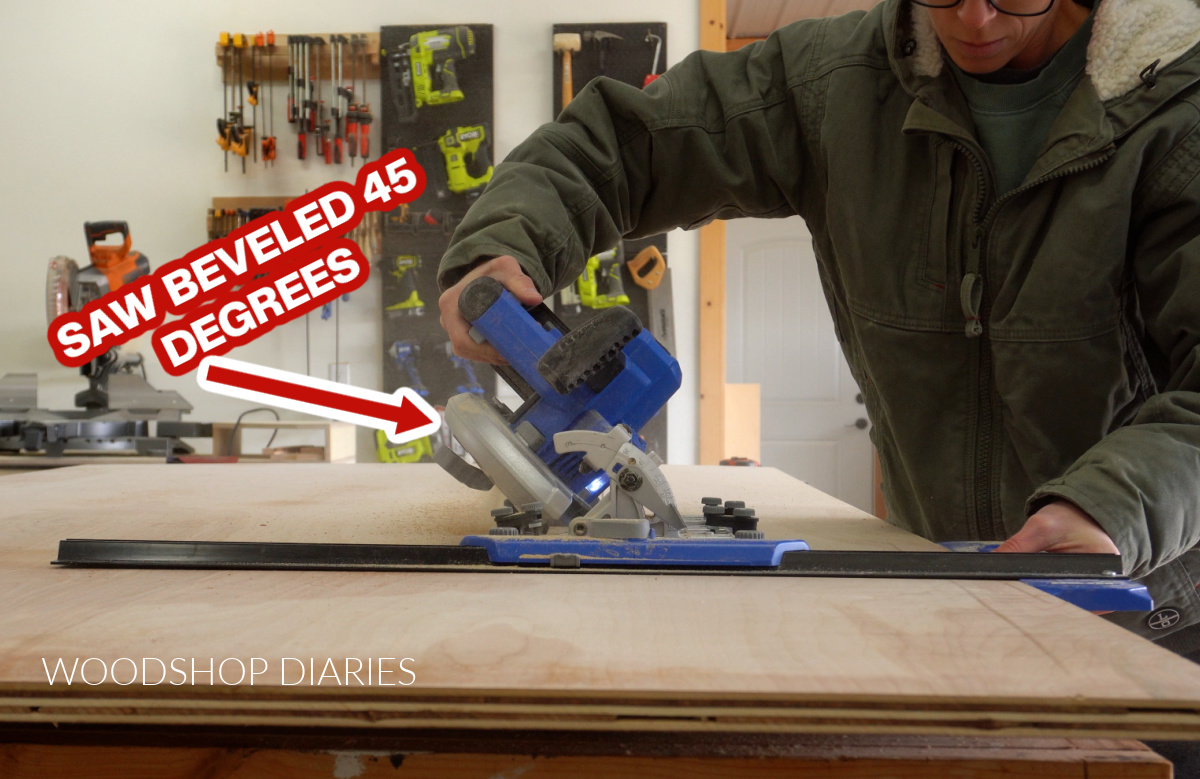
I discuss some cabinet sizing tips and more details in the video here. And you can also find the full cut diagram and cut list detailed in the printable plans.
I also cut two ½″ plywood panels for the backs and a ¾″ plywood corner piece with both edges beveled 45 degrees. This will make more sense in the next step.
Then, I cut two ¾″ plywood squares to use for my top and bottom pieces. Because of the shape of this cabinet, the front and back corners need to be trimmed off like shown below.
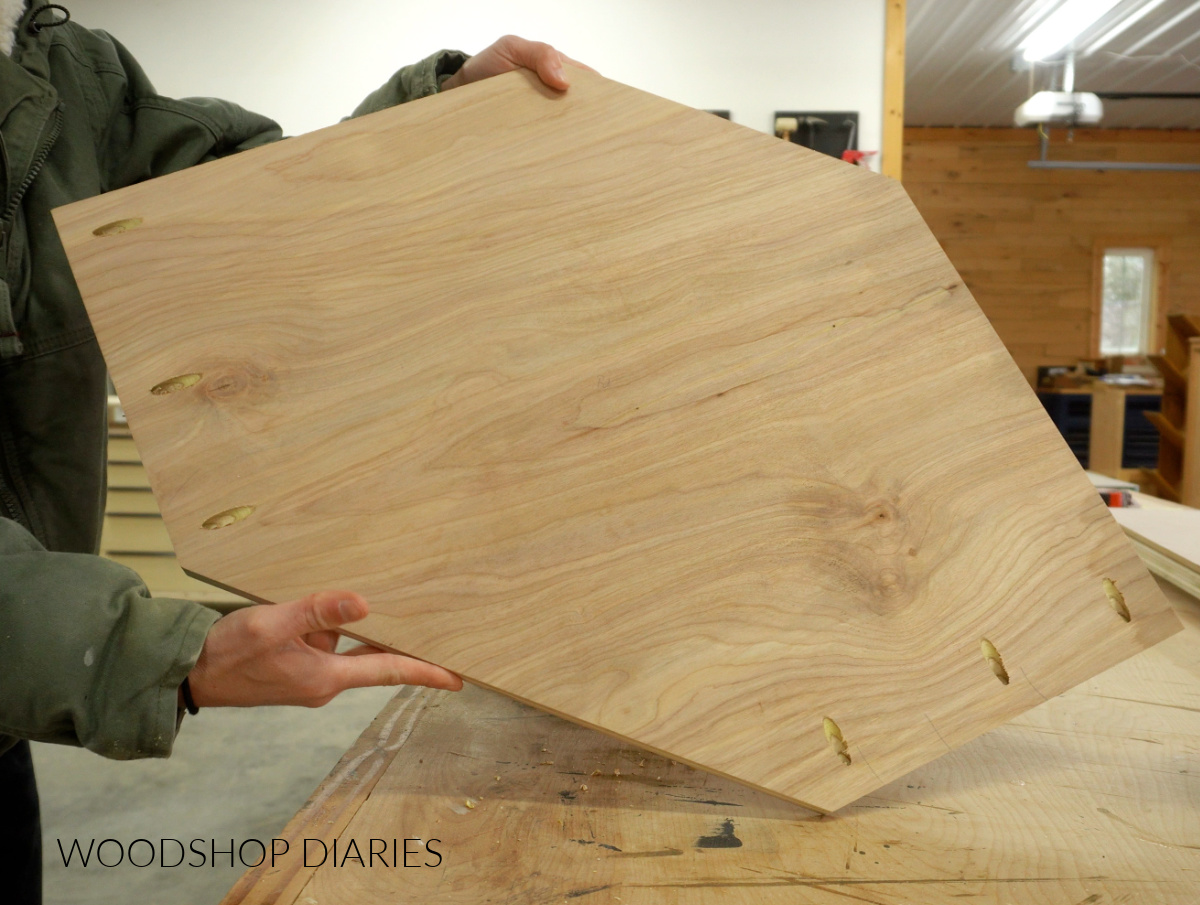
After I had all my pieces cut to size, I drilled pocket holes into the ends of my top and bottom pieces like you see above. And I also drilled pocket holes along one edge of my two back panels.
RELATED: Learn how to use pocket holes in DIY projects
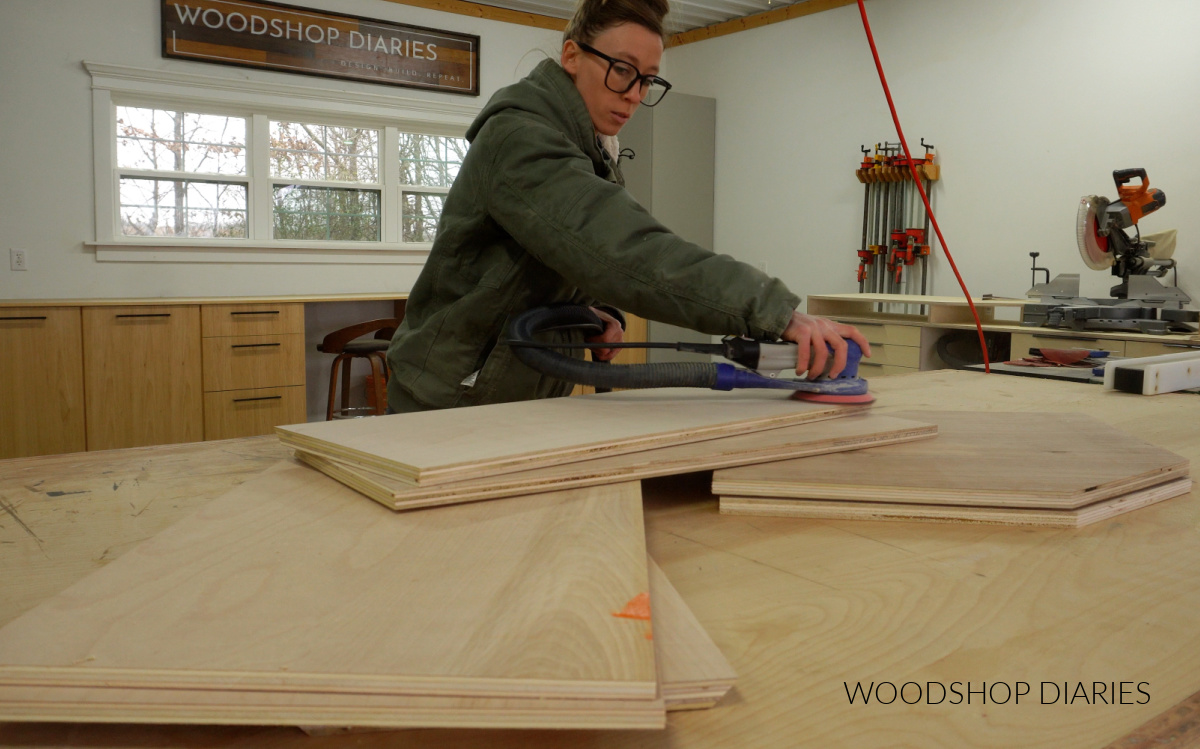
Then, I sanded each piece before assembling.
Step 2: Assemble the Corner Cabinet Box
I assembled these pieces using a combination of pocket holes and just basic wood screws.
First, I attached the top and bottom panels to one of my side panels using pocket hole screws.

Then, I added one of the ½″ plywood back panels. First, I secured this to the side panels with pocket hole screws. Then, I added some wood screws to secure it to the top and bottom panels as well.
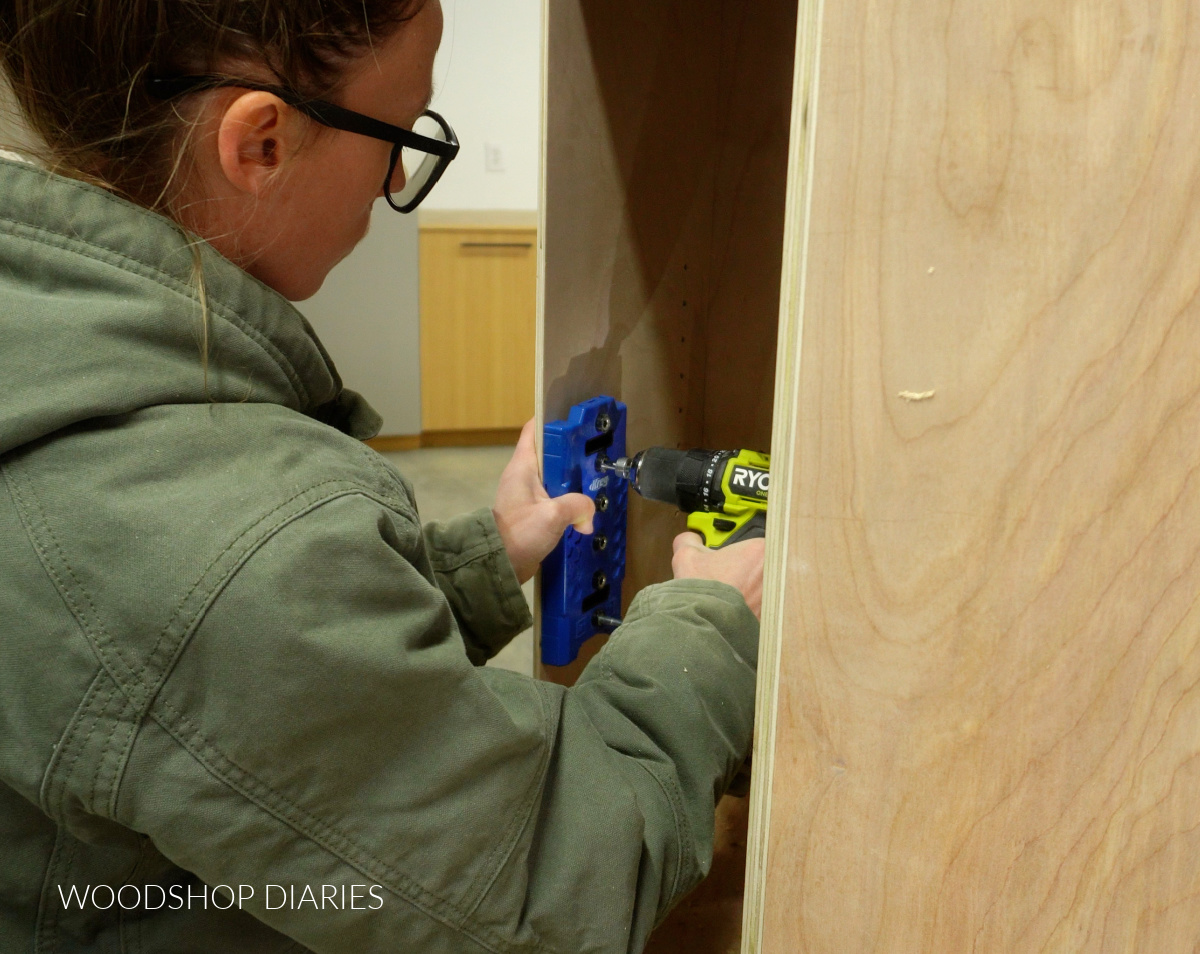
TIP: A standard size pocket hole jig can work if you’re careful, but I recommend using a Kreg Micro Jig for these ½″ plywood pieces with pan head pocket hole screws. The smaller holes and screws are less likely to cause splits.
Learn how, when, and why to use the Kreg Micro Pocket Hole Jig here.
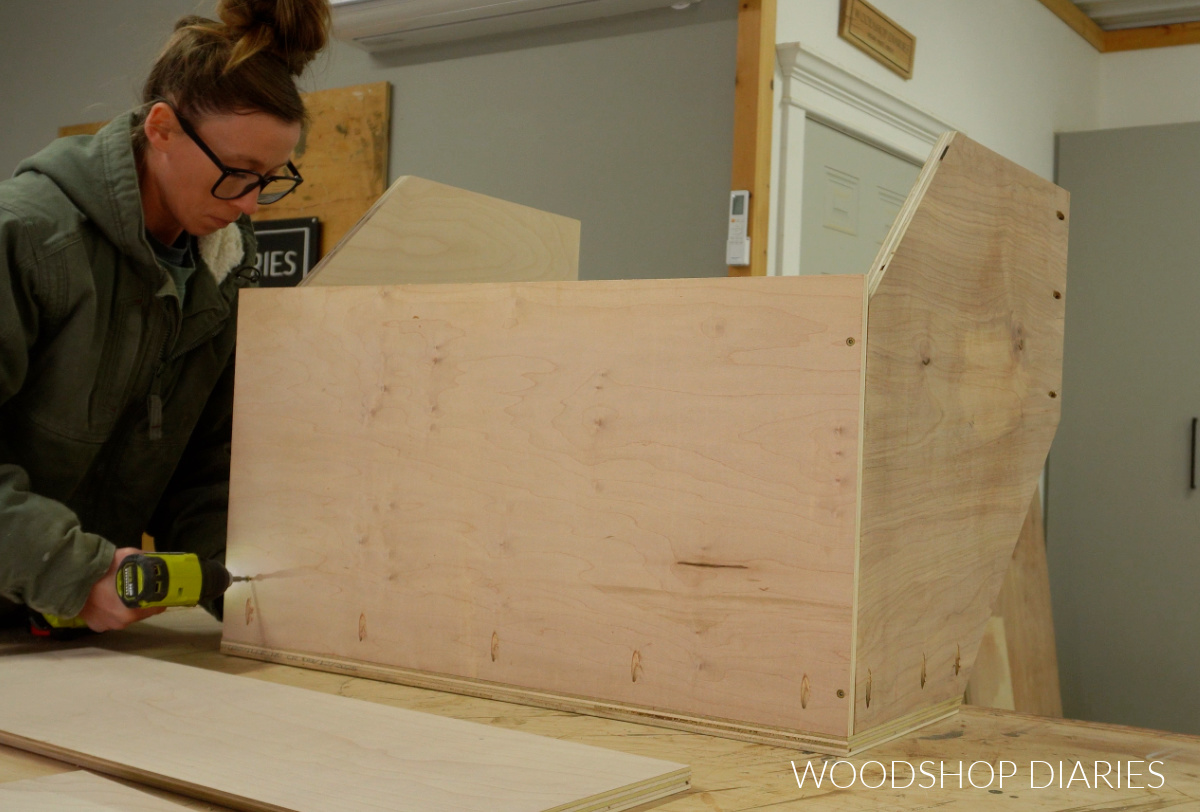
Next, I added the back corner piece (the one with two beveled edges) with wood screws at the top, bottom, and down the edge.
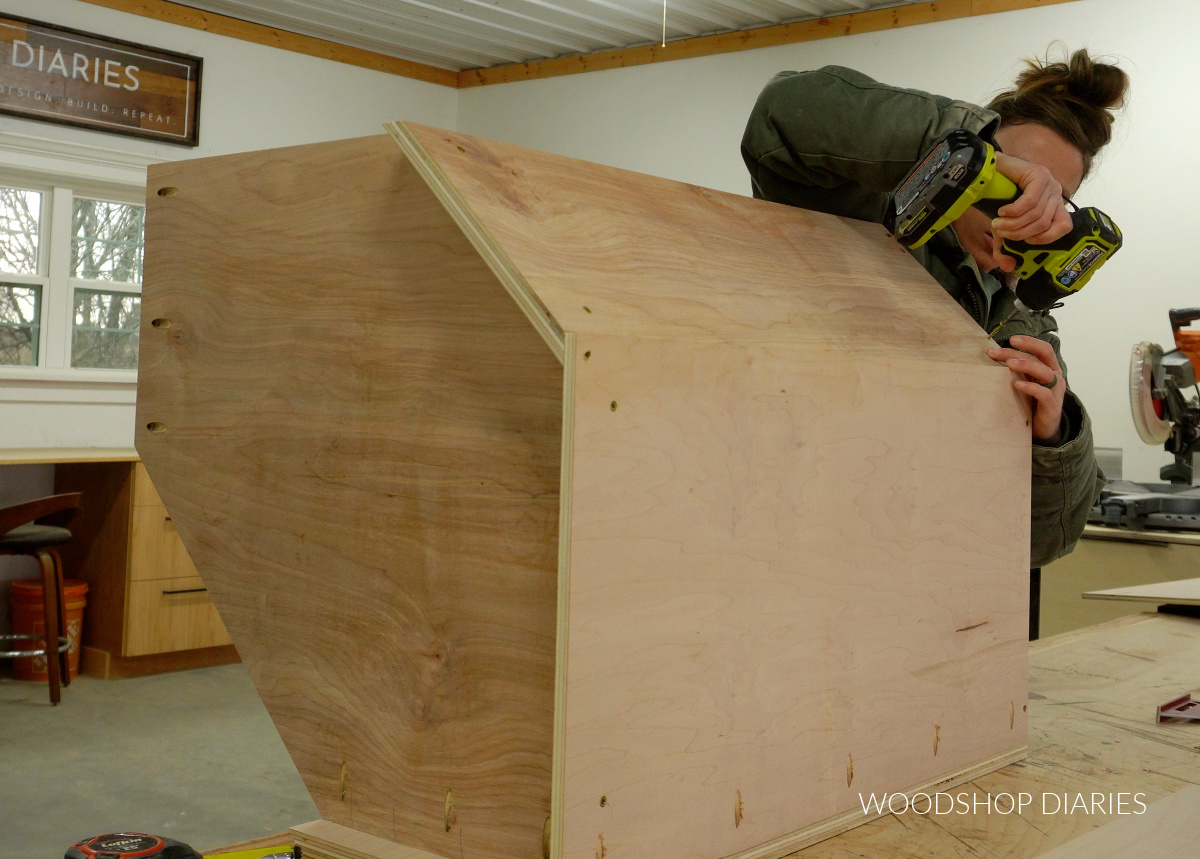
Then, I could add the second back panel and second side to complete the corner cabinet box. I hope all those pieces cut in step 1 make a little more sense now that the box is together.
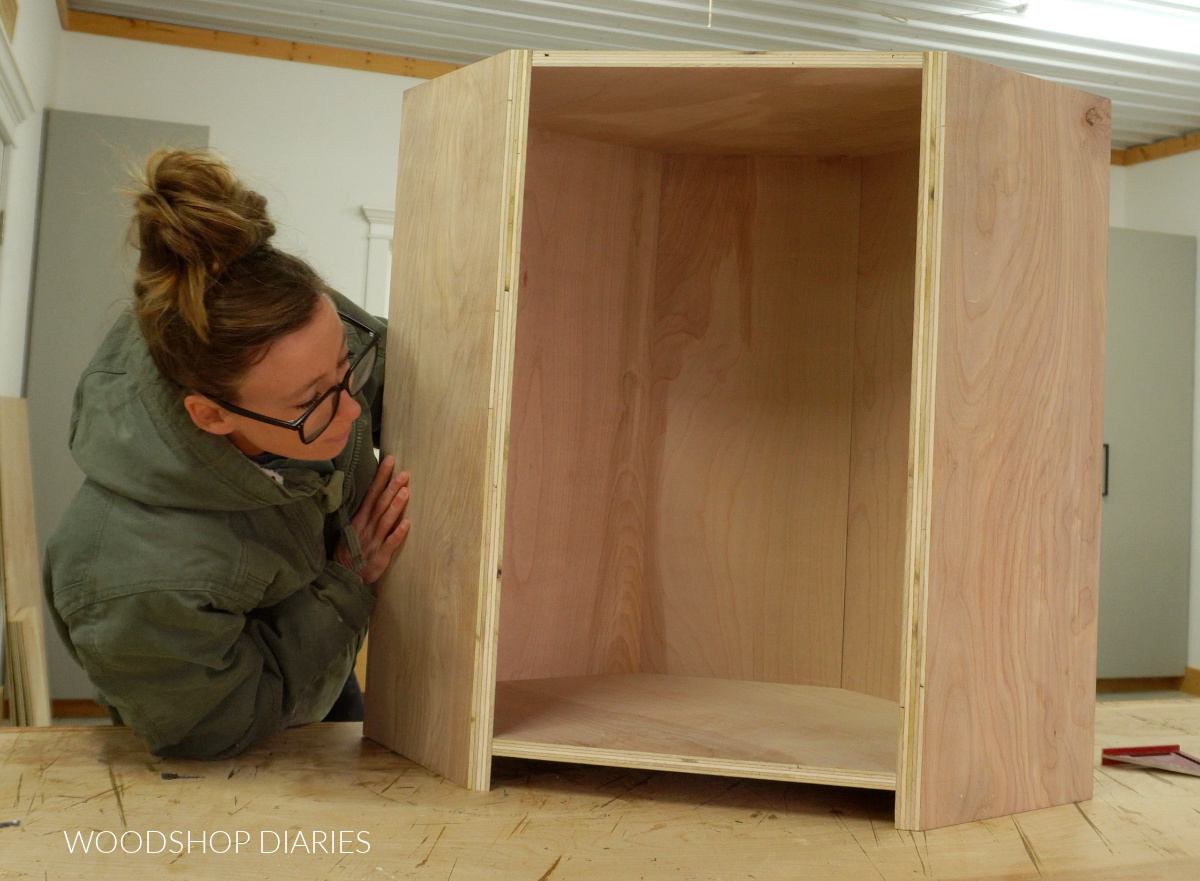
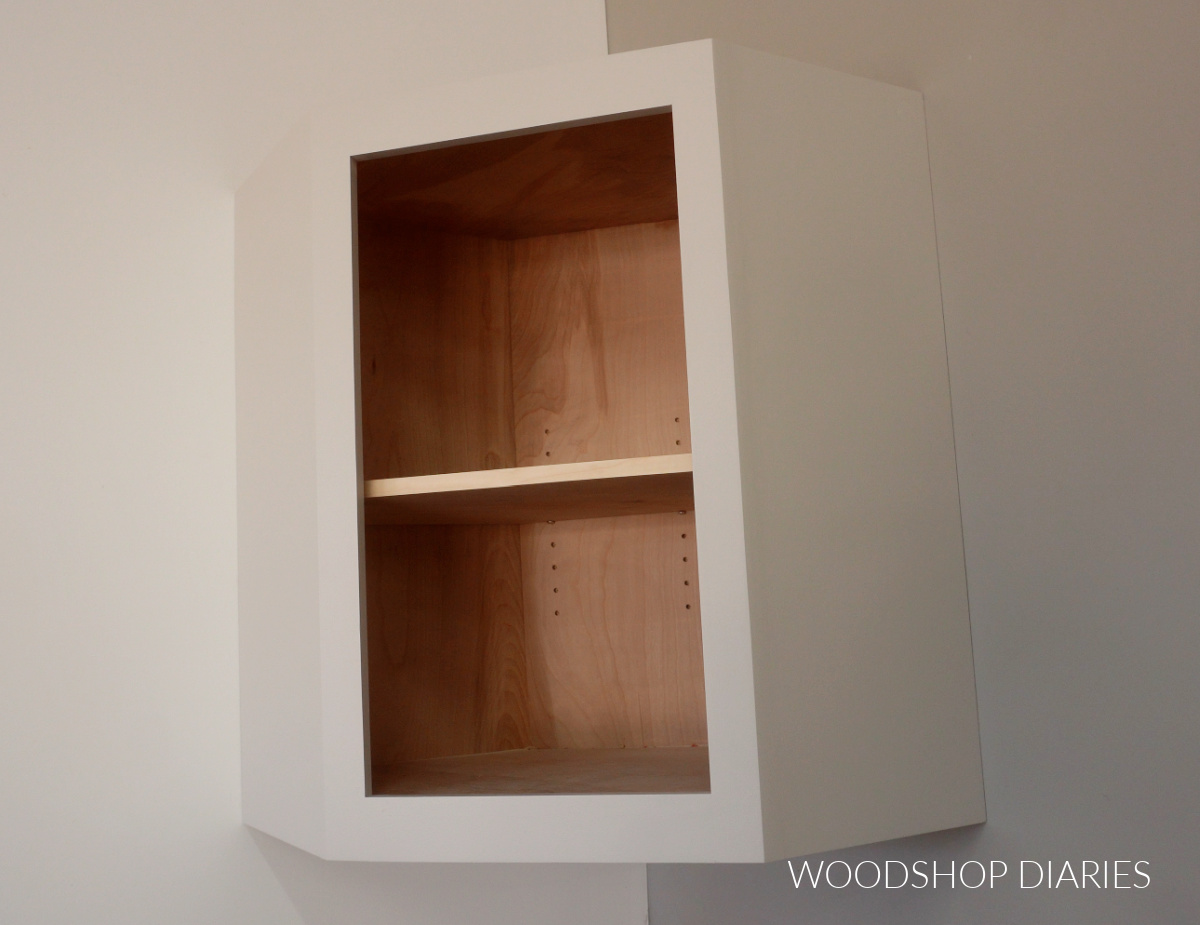
Before adding the face frame, I went ahead and drilled shelf pin holes along the inside of both side panels and along the back corner piece (see video for more details).
This will allow for adding adjustable shelves to the cabinet later. If you didn’t want to add shelves, you can totally skip drilling the shelf pin holes.
RELATED: How to drill shelf pin holes for adjustable shelves
Prefer to print? Grab the printable building plans for this project here.
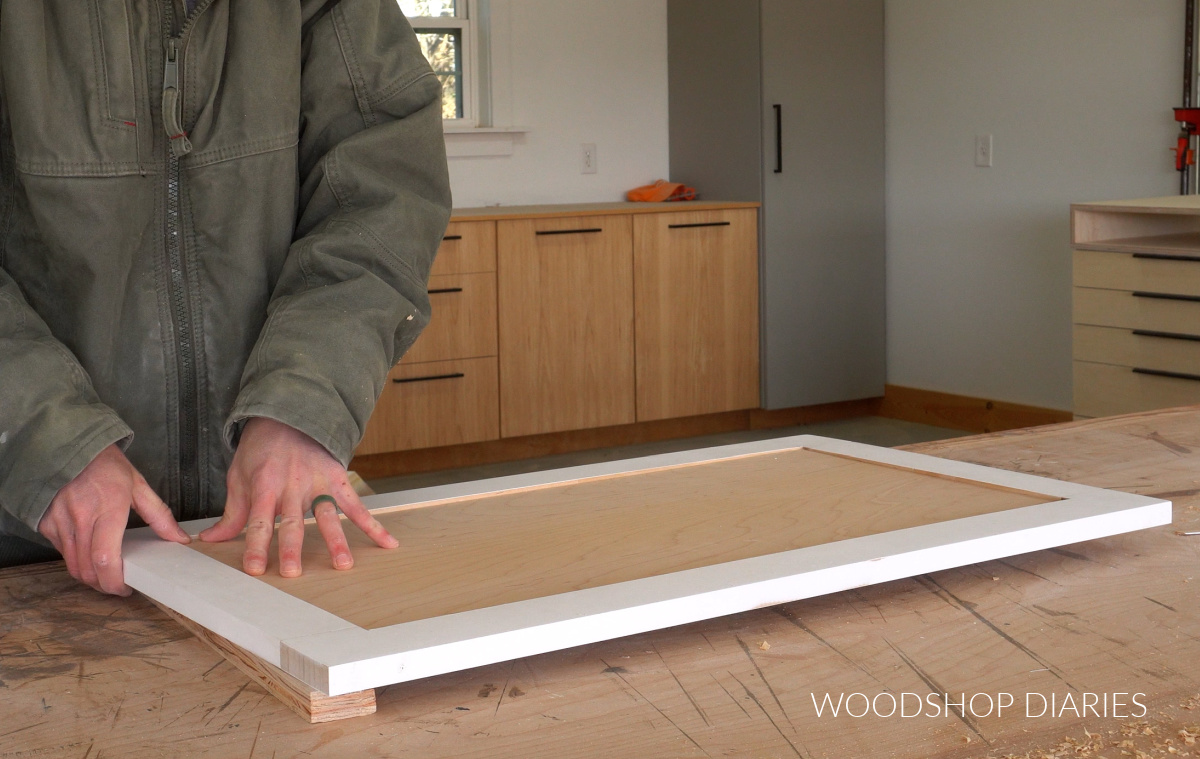
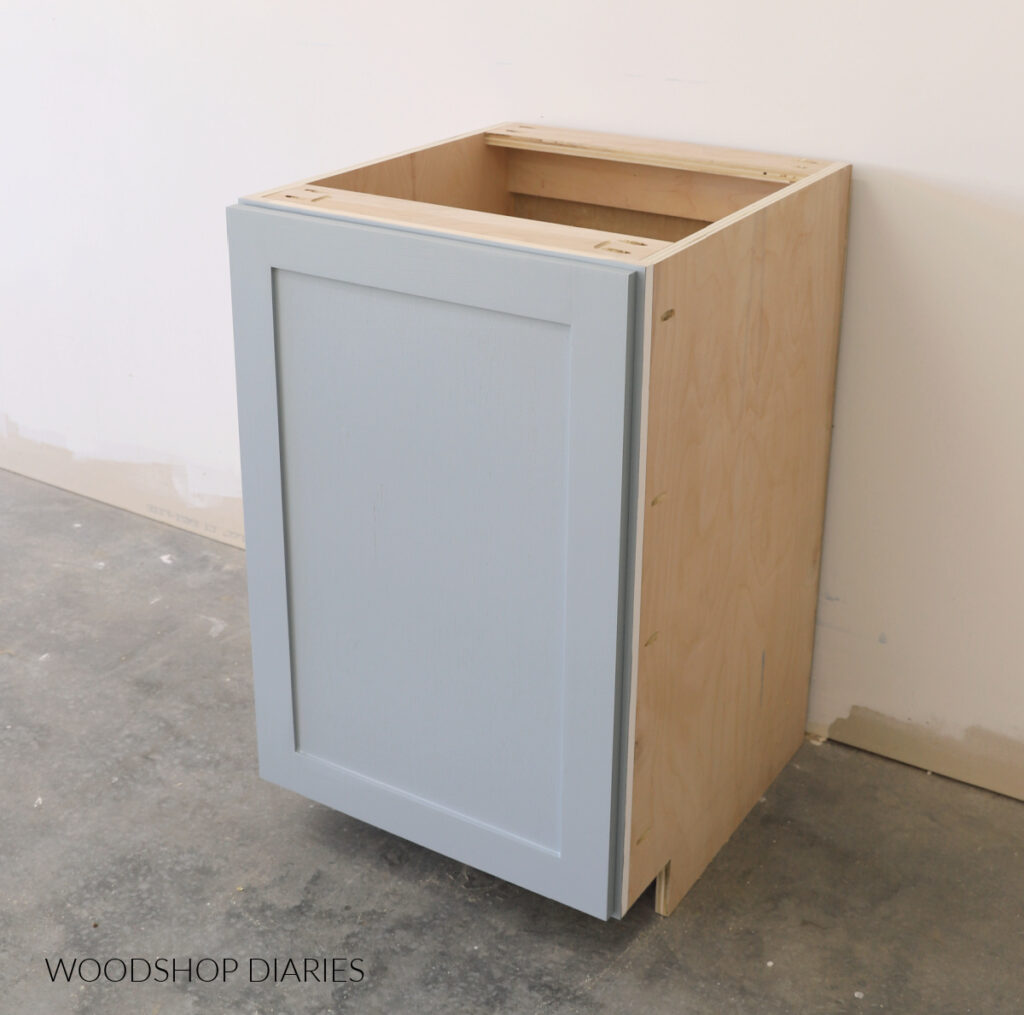
Step 3: Install Face Frame
Now that the box is together, it’s time to add the face frame to cover the front. I cut all of my face frame pieces from 1×3 boards, but the vertical pieces will need to be cut with a 45 degree beveled edge.
I found it easiest to cut these bevels on the table saw, but you could use a circular saw or a router as well.
Then, I cut two pieces of 1×3 for the top and bottom and test fit these over the front of the cabinet to make sure they fit well.
PRO TIP: When building and attaching face frames, it’s better to err on the side of a little too big than a little too small. If your face frame overhangs the edges of your cabinet a little, that’s okay! But if it doesn’t completely cover the front of your cabinet, you’ll have gaps when you install and it will be difficult to hide.
Once I made sure the fit was good, I drilled pocket holes in the ends of the top and bottom pieces and assembled the frame using pocket hole screws.
A standard size pocket hole jig can work if you’re careful, but I recommend using a Kreg Micro Jig for these thin face frame pieces with pan head pocket hole screws. The smaller holes and screws are less likely to cause splits.
Learn how, when, and why to use the Kreg Micro Pocket Hole Jig here.
Then, I glued and nailed this face frame onto the front of my cabinet box.
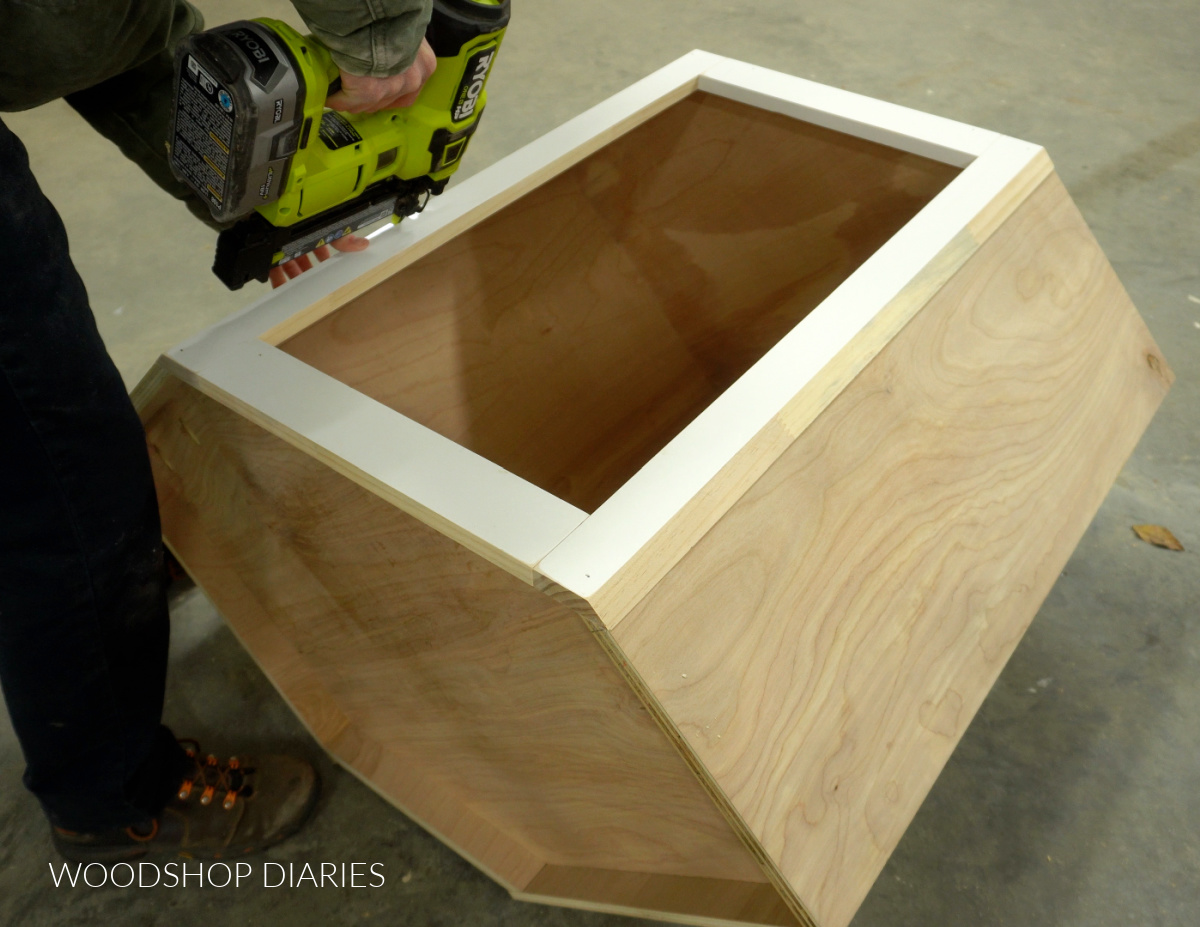
At this point, the cabinet box is complete, so I went ahead and puttied over the nail holes and joints, and gave it a final sanding. Then, I painted it.
Learn how to paint DIY furniture and cabinets without a sprayer here.
Step 4: Hang Cabinet & Add Shelf
Once the cabinet was painted, I hung it on the wall using 2 ½″ wood screws through the back panels and into the wall studs.
Learn more about upper cabinet installation here.
Then, I remembered I needed to cut my shelf. The shelf here should match the shape of the top and bottom pieces of the cabinet, but needs to be just a bit smaller.
So I cut a ¾″ plywood square about ¼″ smaller in each direction than I cut my top and bottom panels. Then, I trimmed the front and back corners off.
I edge banded the front edge of the shelf, but that’s totally optional. Learn how to apply edge banding here.
Then, I test fit this shelf into the cabinet using shelf pins. I just added a single shelf, but you can certainly add more than one if you wanted.
Step 5: Build and Install Door
Now, all that’s left is adding the door. You can build your cabinet door a hundred different ways and in a hundred different styles. So feel free to use whatever cabinet door building method you prefer.
You can find 7 ways to build a cabinet door here. And of those would work for this project. I used method number 4 to build this door.
Since this cabinet has a face frame, building and installing a door in this case is the same as any other regular type of wall cabinet. You don’t need to use any special hinge or do anything special with the door.
The only thing you have to keep in mind here is to leave plenty of clearance on both sides for the doors if you plan to add adjacent cabinets on each side. I recommend leaving at least ½″ face frame reveal when sizing this door.
You can find all the dimensions, details, and diagrams in the printable plans here.
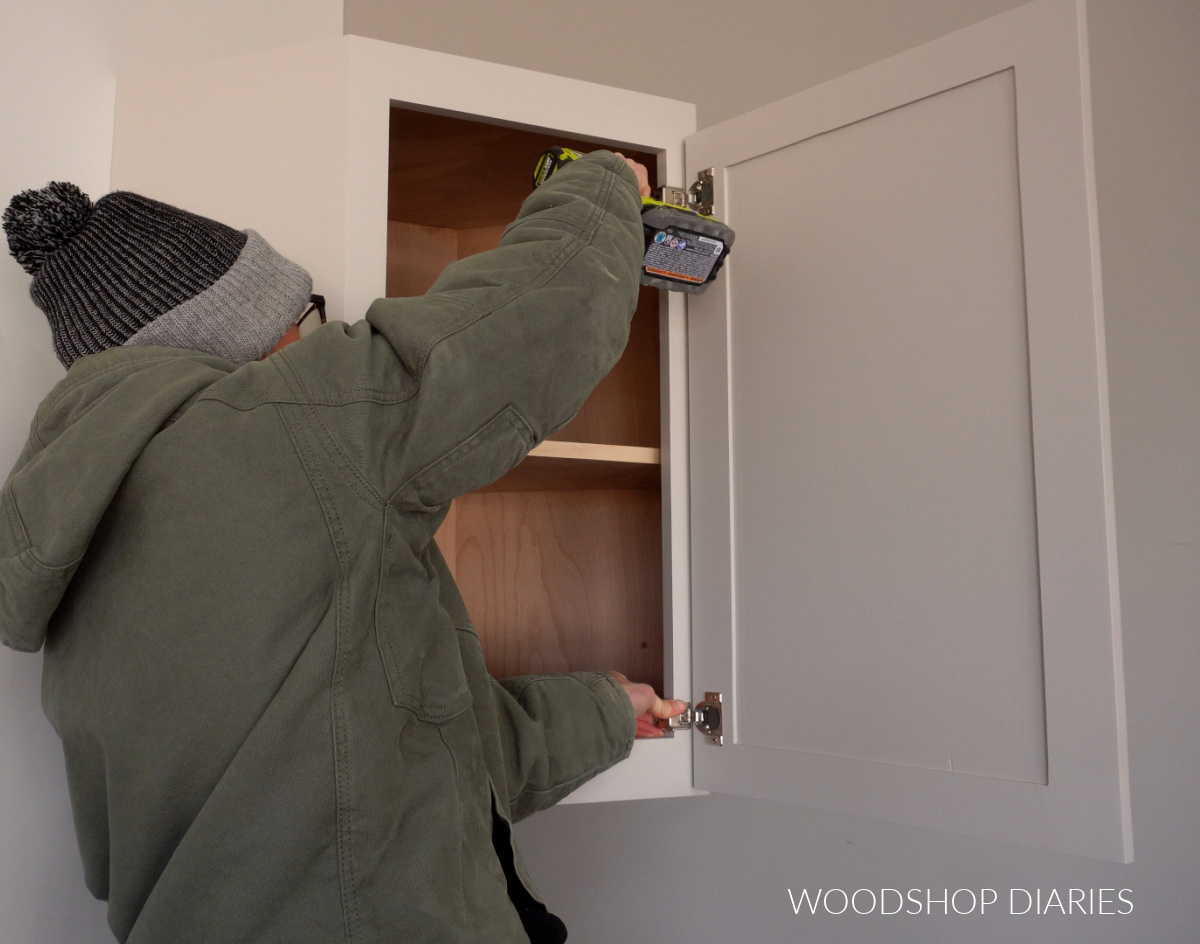
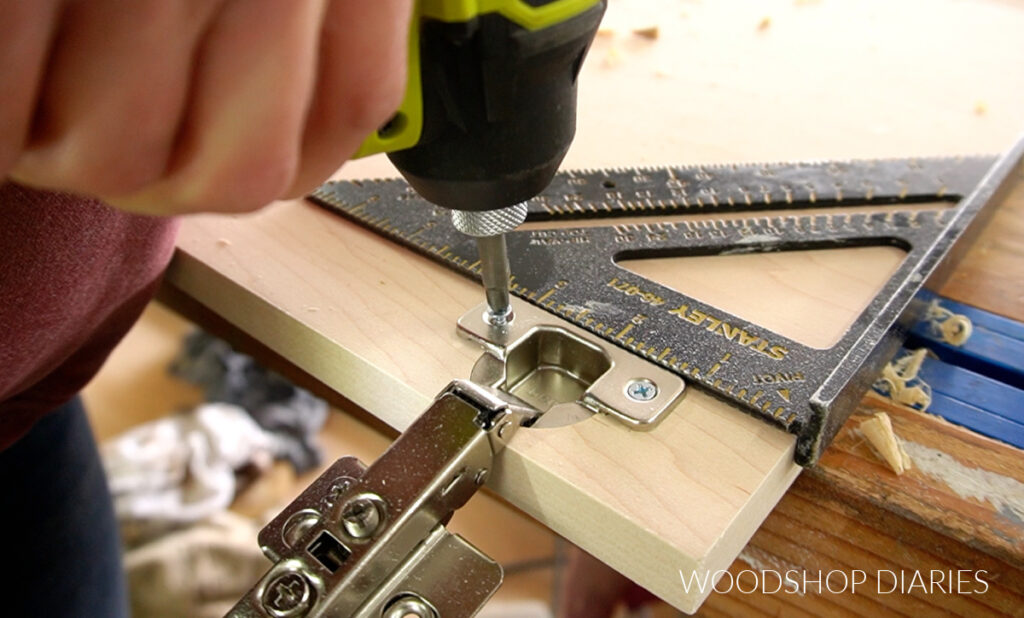
Once the door was built, I painted it to match the cabinet, then installed it onto the cabinet with 1 ¼″ overlay face frame hinges.
Learn how to install concealed hinges here.
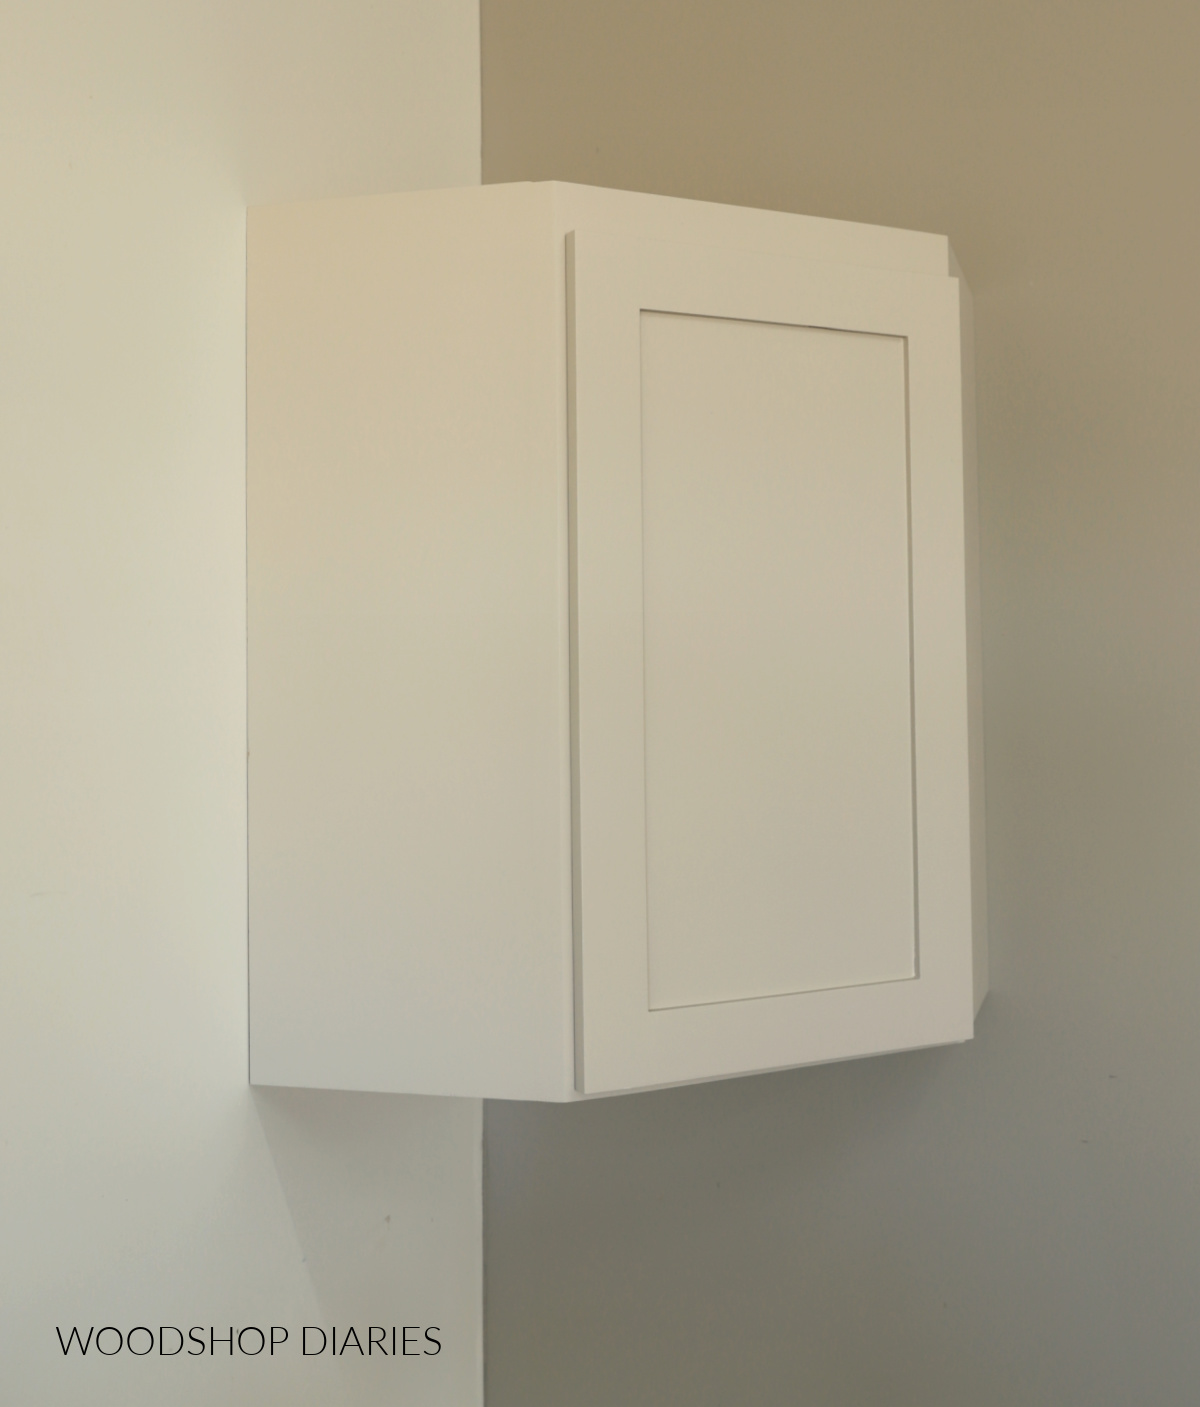
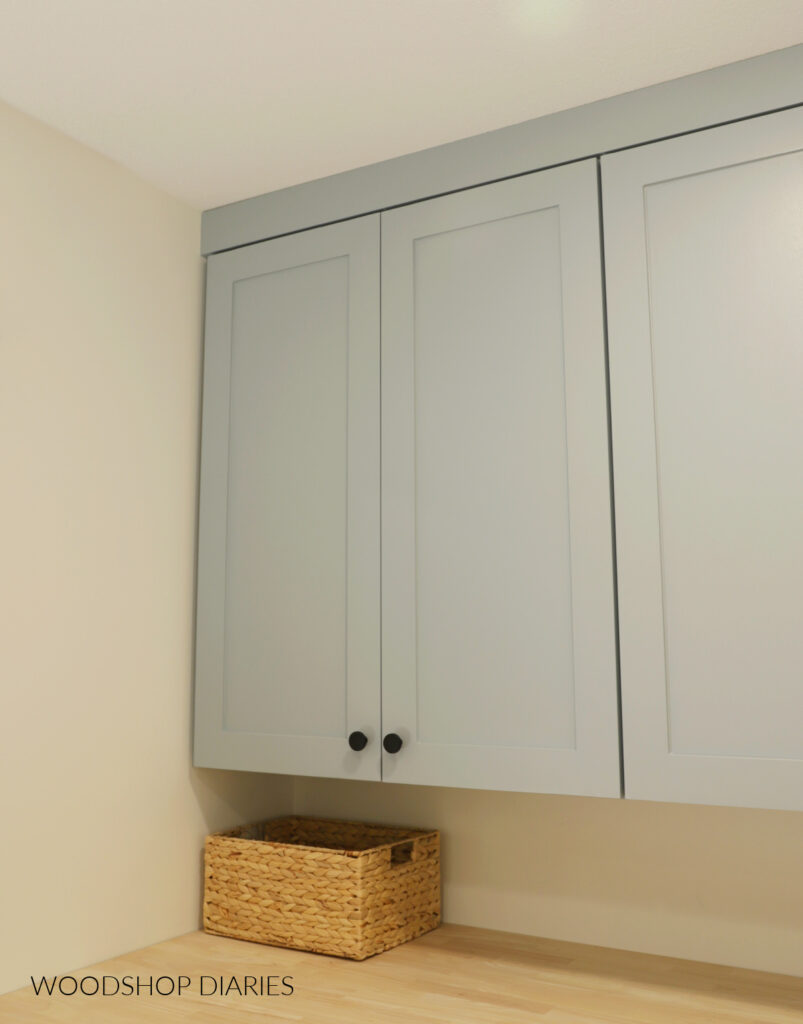
And with that, this corner wall cabinet is finished! This cabinet works well as a stand alone cabinet, but you can also butt regular wall cabinets up to it on each side.
I intentionally leave some room at the top of my upper cabinets like you see below so that there is room to add crown molding or other trim around the top once all the cabinets are in place. So if you want to dress it up a bit, go for it!
Looking for more DIY Cabinet Building Projects?
You might find these posts helpful for additional information on building your own cabinets. Click on the images below to read more.

If you enjoyed this post, be sure to save it for later by pinning or sharing to your favorite social channel!
Until next time, friend, happy building!