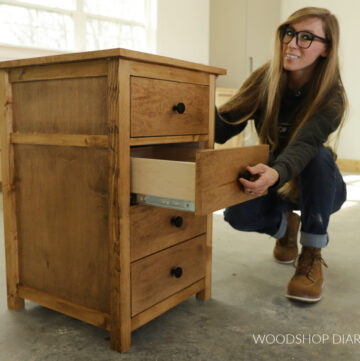
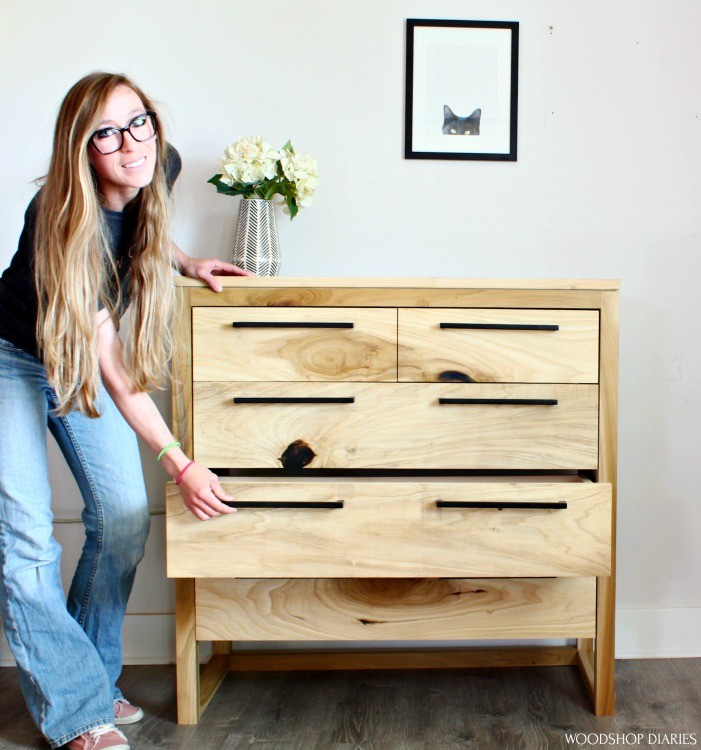
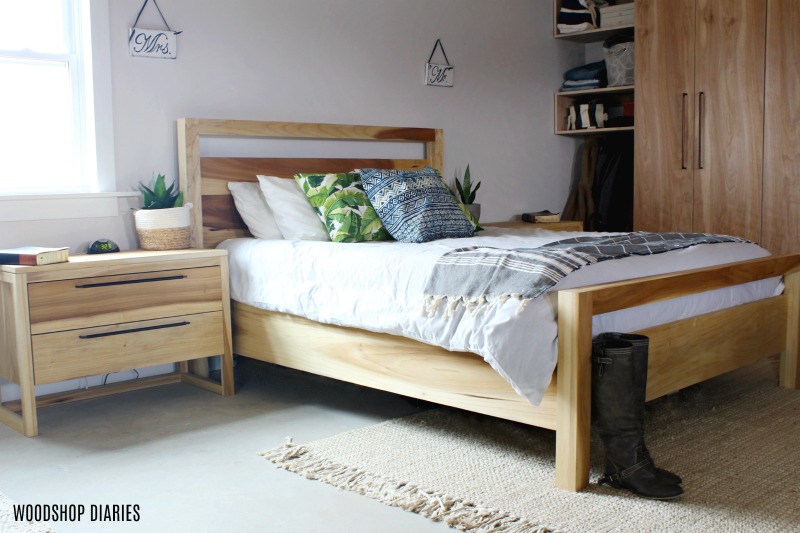
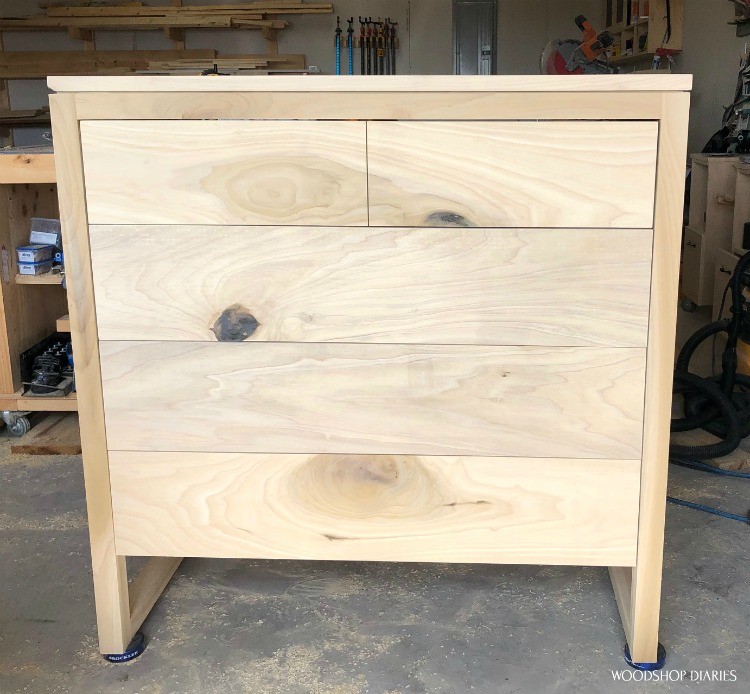
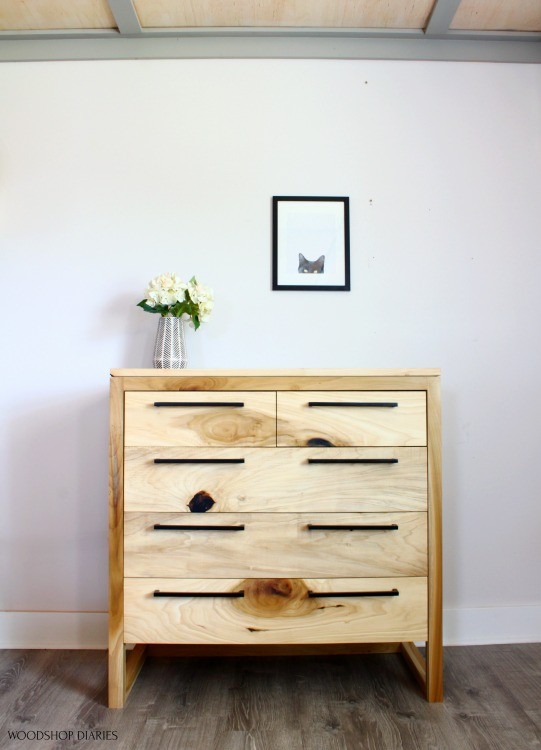
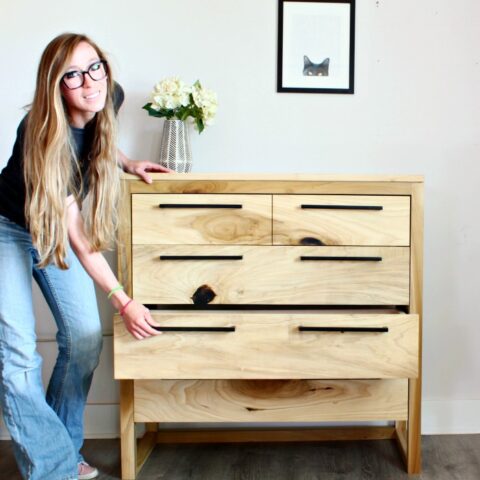
Do you remember the Modern Bed and matching Modern 2 Drawer Nightstand from a while back? Well, I’m finally getting around to sharing the matching Modern 5 Drawer Dresser…and it’s a stunner!
If you’ve been around for all the backstory of this entire DIY modern bedroom set, I’ll make this quick 🙂 But if you haven’t, there’s a lot you’ve missed out on…Two years ago, I sold our old bedroom suite and built a new one—just the bed and two nightstands.
At the time, we were in the middle of moving, buying land, and building our garage apartment. We really didn’t NEED a dresser and we really really didn’t have any room in the 750 sq ft garage apartment we were about to be living in.
.
But I’d always kind of wanted to build a dresser to match the bed and nightstands–you know…just so I could share an entire DIY matching bedroom SET.
.
I’ve waited as long as I could and I finally just built it even though we didn’t have room…I can always sell it, right?? Sometimes you just have to build what makes you happy…even if you have nowhere to put it.
.
I’m sharing the link to the printable plans for this dresser below. But, first, I’ve got a video for this build as well:
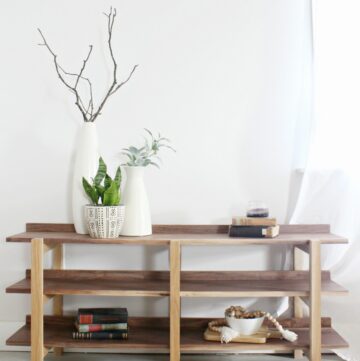
By the way, I’m planning a matching console for this set to come out soon so be sure to subscribe to the newsletter at the end of this post or my YouTube Channel so you don’t miss out on it.
.
Okay…time to get building. This post contains affiliate links. See policies.
.
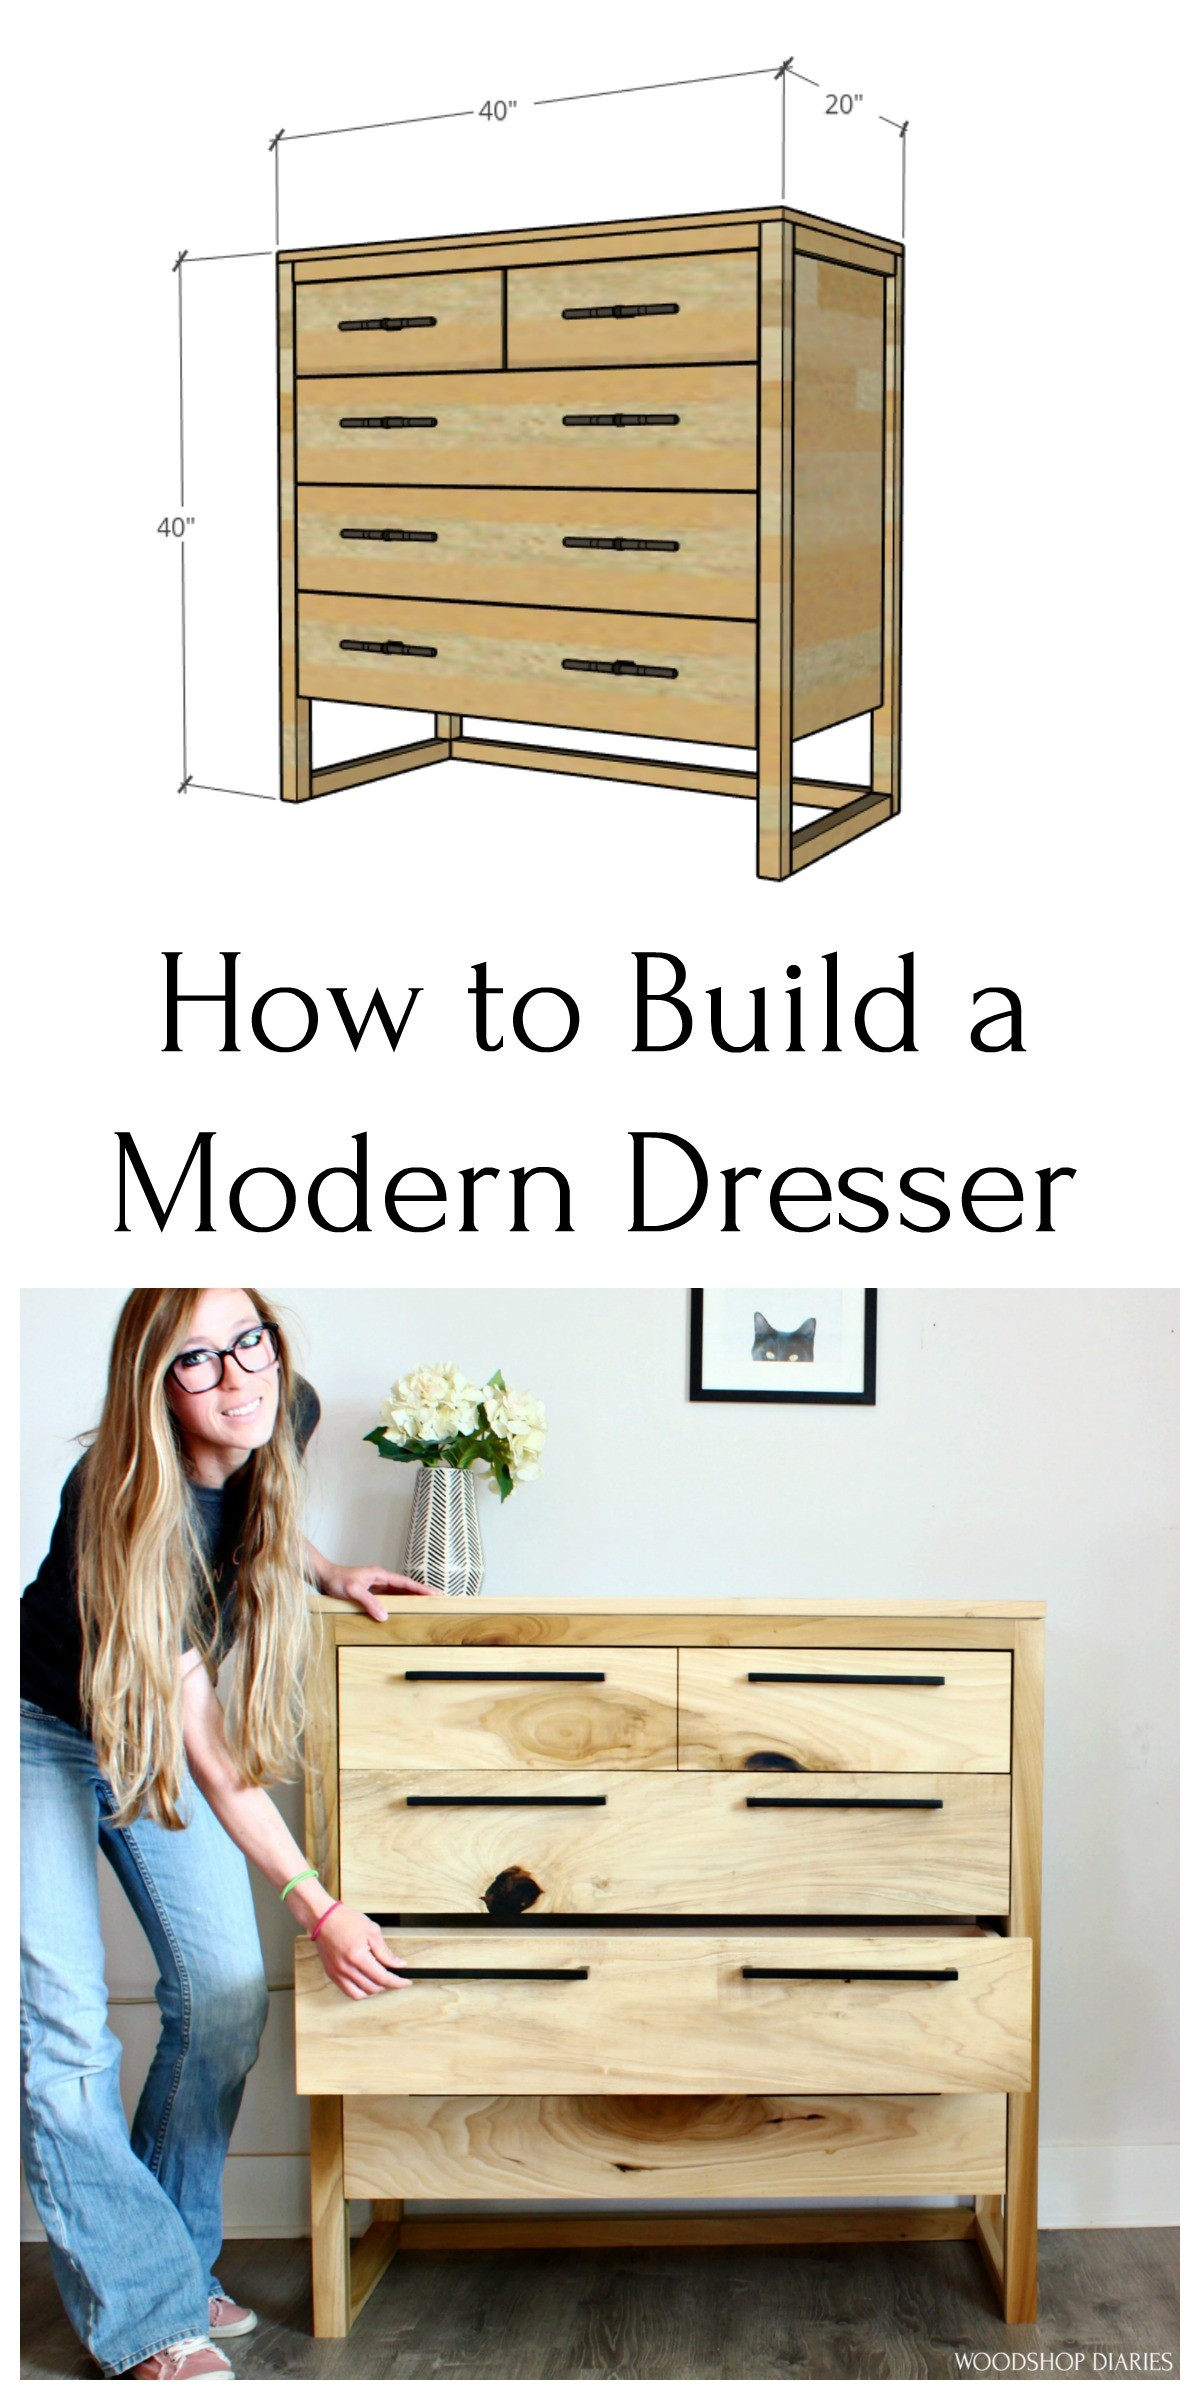
How to Build a Modern 5 Drawer Dresser
You Will Need:
- (4) 2x2x8 boards
- (1) 1x3x8 board
- (2) 1x8x8 boards
- (3) 1x10x8 boards
- (1) sheet ¼″ plywood
- (1) sheet ¾″ plywood
- 1 ¼″ pocket hole screws
- 2 ½″ pocket hole screws
- 2″ wood screws
- Wood Dowels (if using dowels for joinery)
- Wood Glue
- (5) pair 16″ drawer slides (I order 10 packs because they’re cheaper)
- (8) large modern drawer pulls
- Drill/Driver
- Miter Saw
- Circular Saw or Table Saw
- Clamps
- Router & Rabbeting bit (optional)
- Pocket hole jig and/or doweling jig
NOTE: Just like the poplar bed and nightstands I built, I wanted this piece to match. So I built this from poplar wood. It came rough sawn from my local sawmill for a little over $1 a board foot. To give some perspective, I bought enough for this dresser and a second one for about $100 in poplar lumber.
.
The downside to the wood being so cheap is that the boards come rough and in varying widths and lengths, so the first thing I did was run everything through the planer to get it smoothed out.
.
I had to cut my boards to “non standard sizes” as needed to glue up panels. But in the plans, I used standard board sizes to make things a little easier.
Step 1: Assemble Side Panels of 5 Drawer Dresser
The frame of the dresser is made from 2x2s and the wood I got was only 1x. So I had to laminate them. I did the same thing on the nightstands I built. I ripped strips from my board roughly 1 ¾” wide and glued them up in twos.
.
Once the glue was dry, I ran them through the table saw again to clean up the glue joints and to get both sides 1 ½” thick. If you’re using 2x2s to start with, you get to skip that part.
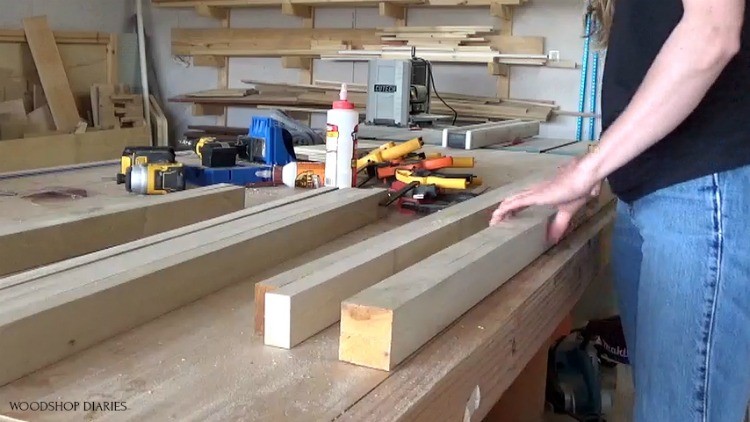
Then, I cut them on the miter saw to their final lengths. You can get the cut list in the plans. Now it was time to make the side panels. I ripped boards down on my table saw to glue up for the side panels.
Once the glue was dry and everything was sanded, I assembled the dresser sides. There’s a million ways to do this, but I used a combination of pocket holes and dowels.
.
I used pocket holes at the top of the frame and for the panel and I used dowels at the bottom so you wouldn’t see any pocket holes.
I used a bar clamp to clamp the dowel joints tight, wiped off the squeeze-out, and set it aside while I made the second one. I let both get good and dry before moving on.
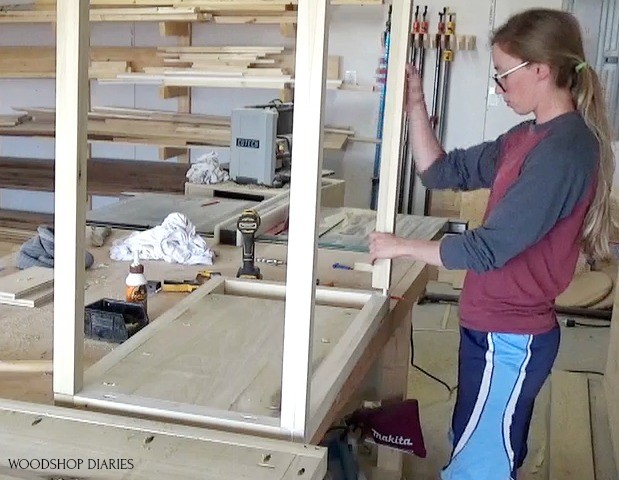
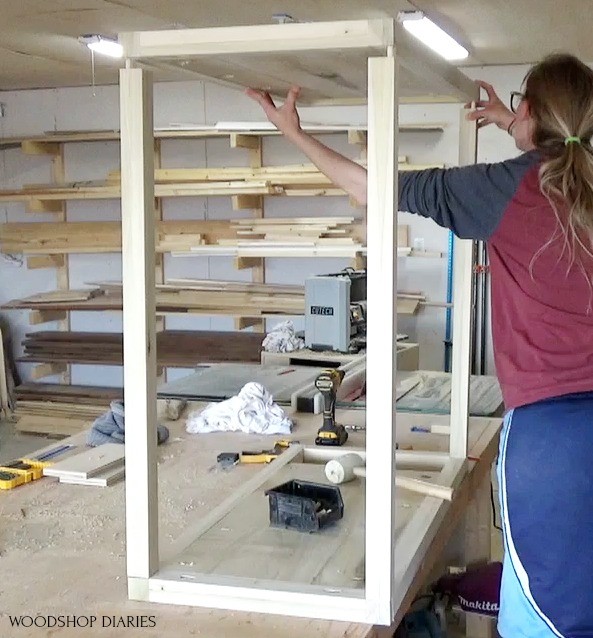
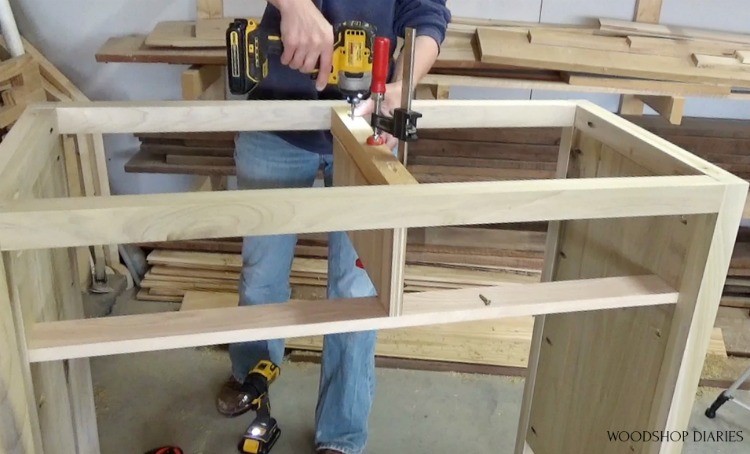
Step 2: Assemble DIY Modern Dresser Frame
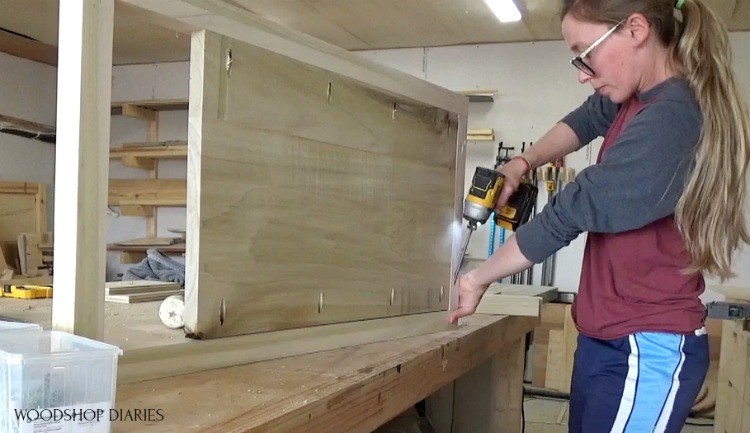
After both sides were dry, I assembled the rest of the frame using dowels and glue. I drilled what seemed like a million dowel holes into the side panels and the supports that will go between them. You can also use pocket holes and screws instead if you prefer.
.
Then I glued it all together. Because my workbench was so tall already, I grabbed a ladder for this part to help me reach.
Also, if you aren’t working in rainboots, you’re missing out. There’s something about the foot sweat mixed with sawdust HA!
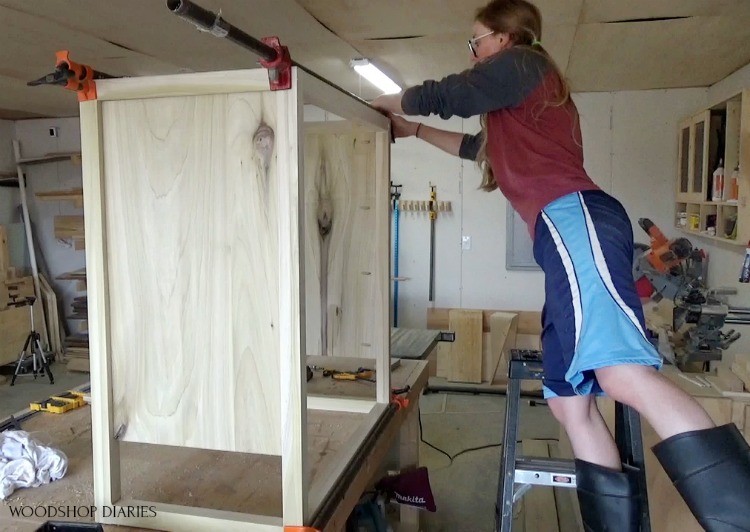
Okay, so once the dresser was clamped tight, I let the glue dry completely and came back the next day…without my boots 🙂
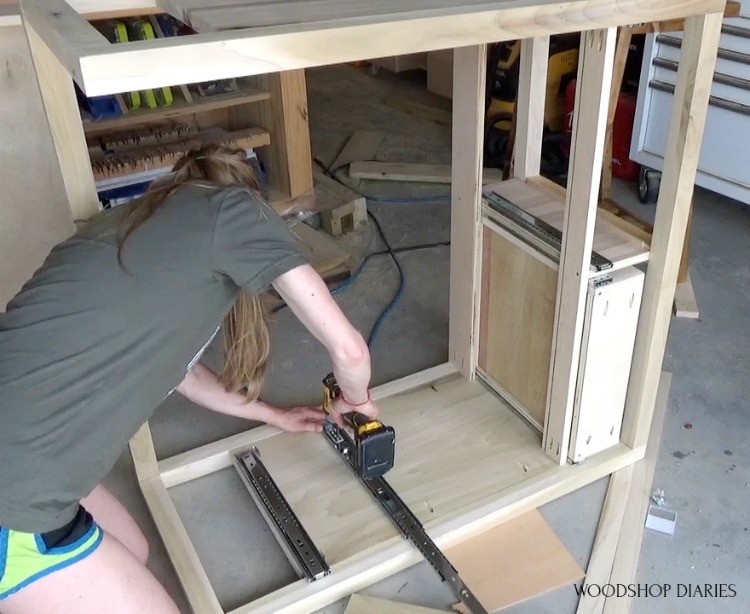
Step 3: Install Dresser Drawer Divider
Since the top two drawers were split in the middle, I needed some sort of divider to mount the inside slides onto. I cut some scrap plywood strips (or 1x3s work good here, too), a scrap 2×2 block, and a piece to use as a spacer.
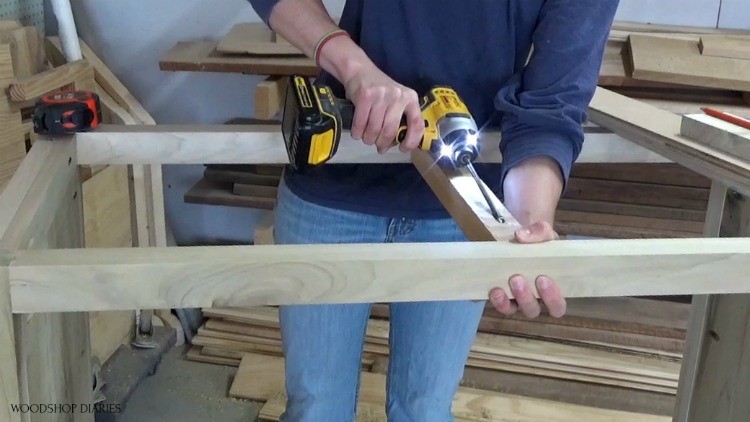
I drilled pocket holes into the ends of the plywood and 2×2 and started installing into the dresser. I centered the 2×2 in the top of the frame and used a 6″ spacer block to help me install the plywood strips 6” down from the top piece.
.
Because the drawer fronts are inset, I made sure the front piece was inset as well so the drawer front will cover it.
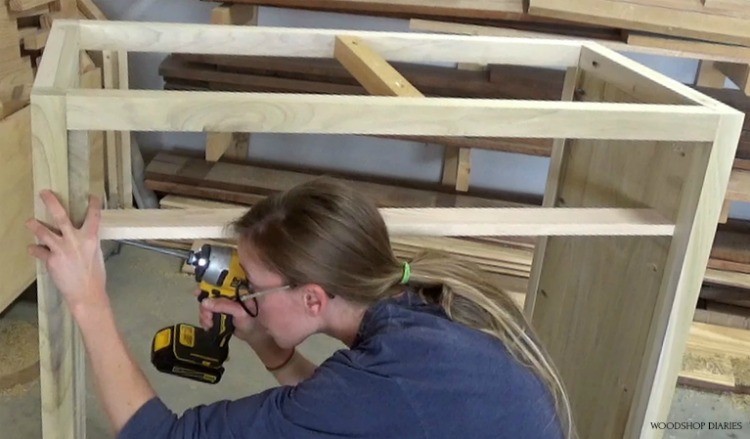
I cut another scrap piece of plywood to place between the 2×2 and the plywood strips. This piece had to be perfectly centered because this is where I will mount the slides.
If it’s installed off center or off square, it’ll screw up the drawers. I double and triple checked it was centered and installed using wood screws through the top 2×2 and bottom plywood strips like shown here.
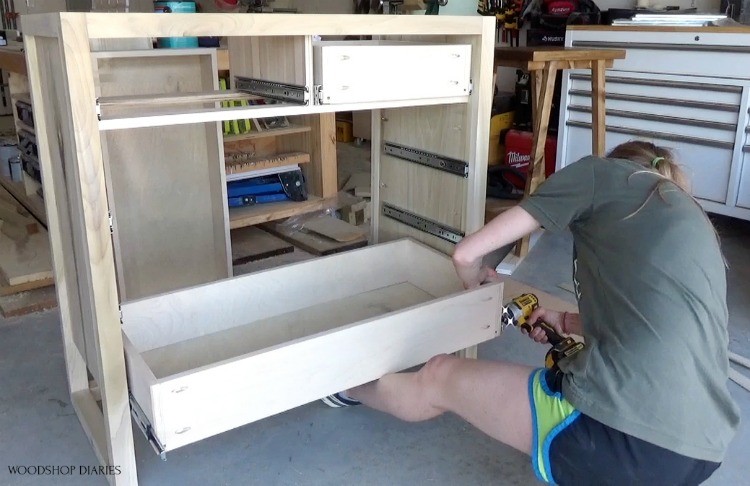
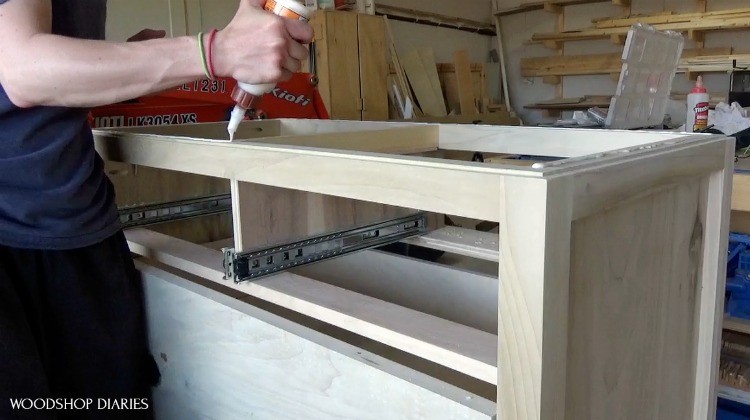
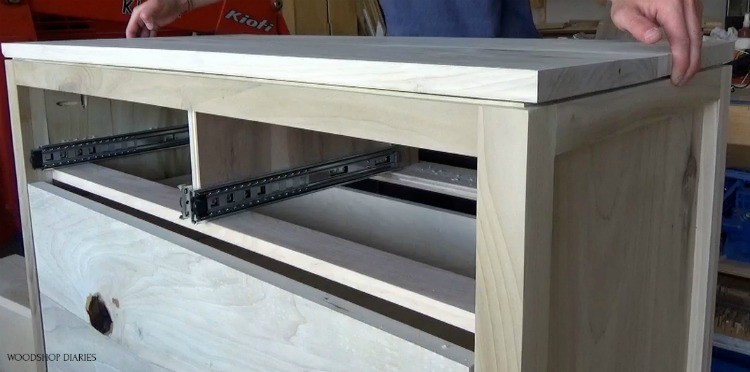
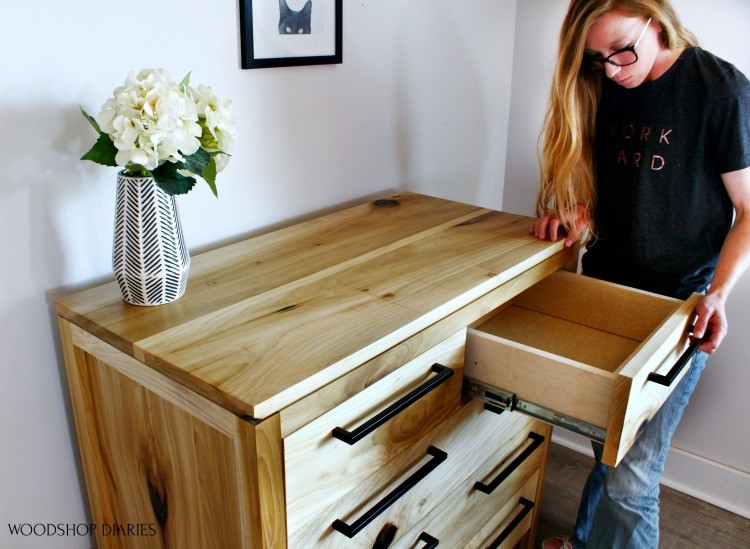
Step 4: Install Dresser Drawer Slides
Now I could install the slides. I used 5 pair of 16” ball bearing slides for this dresser (NOTE: I buy these in a ten pack because they’re cheaper that way…it never hurts to have some extras on hand for the next project).
.
I installed them so that they would allow for the inset drawer fronts. I won’t go into detail here because I’ve got a super detailed post I’ll link below for how to build drawers and install slides here.
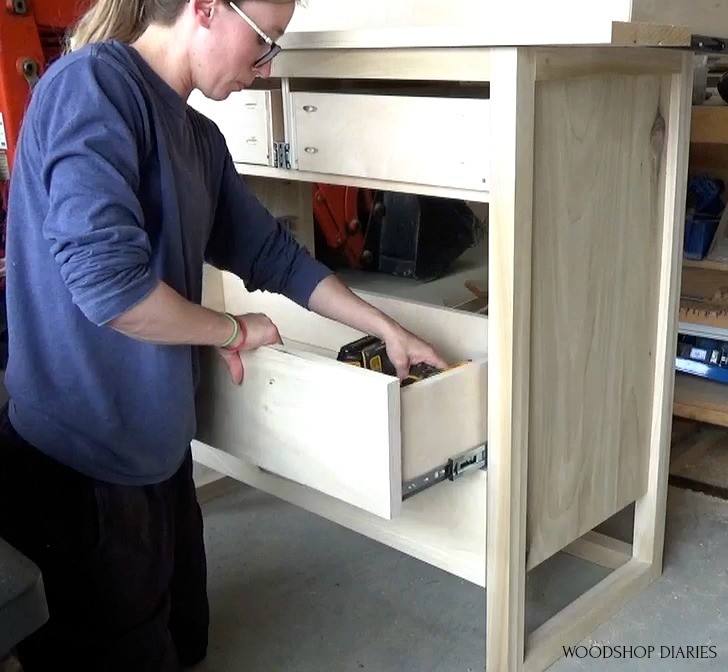
At this point, all that’s left is the drawers and the top.
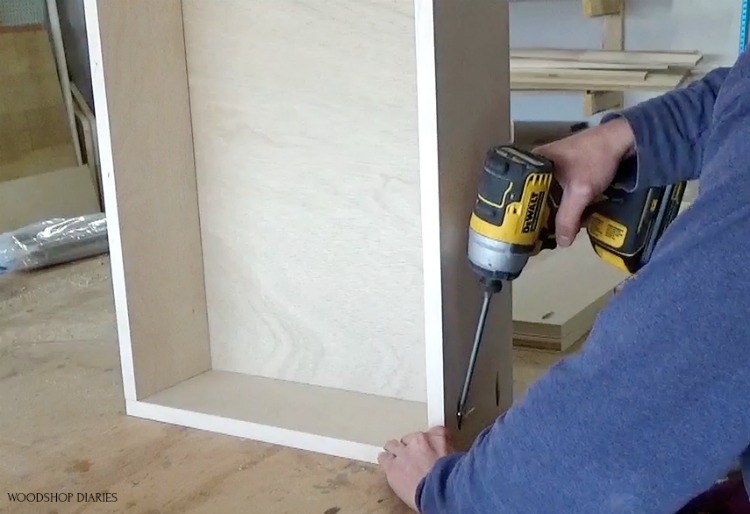
Step 5: Build and Install Dresser Drawer Boxes
Let’s go with the drawers first. I cut down all my drawer box pieces from a ¾” sheet of plywood. I’ve got a video about how I cut down my plywood sheets if you want more details on that.
.
Then I cut my pieces down to size and cut a ¼” dado to place the bottom. Check out the plans for exact dimensions for these drawers and check out my drawer building guide for details on how to build and install drawer boxes. You can skip the dadoes and simply staple the bottom on if you prefer.
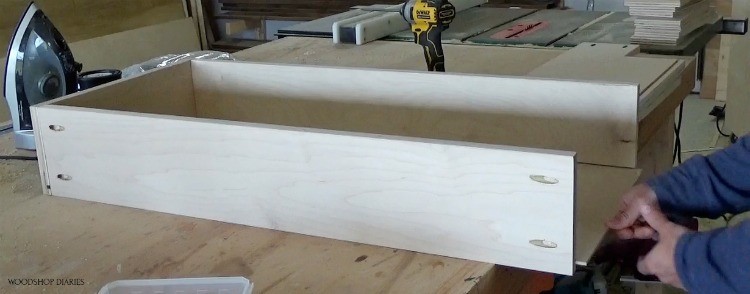
I assemble my drawer boxes with pocket holes and screws, so I drilled pocket holes and began putting the boxes together.
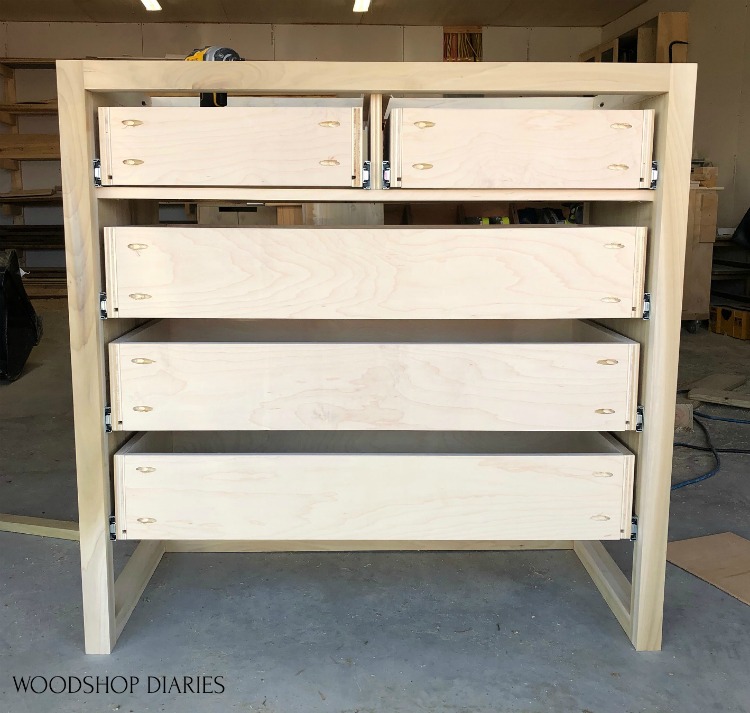
Step 6: Install Drawer Boxes into Dresser Frame
Once I had all five drawers built, I installed them into the dresser frame. I typically start at the bottom so I can use spacer blocks to install the drawers above it.
.
It’s challenging to install a large bottom drawer with only two hands, so I used my foot and shin as additional support.
Once the bottom was in, I could work my way up using scrap blocks to space them out.
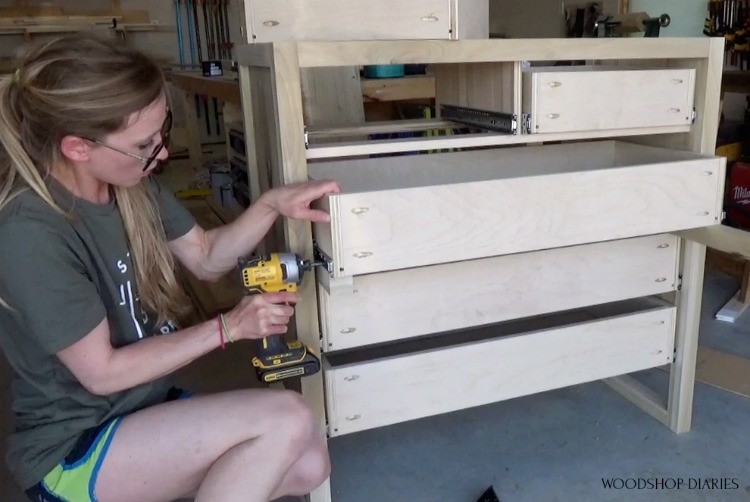
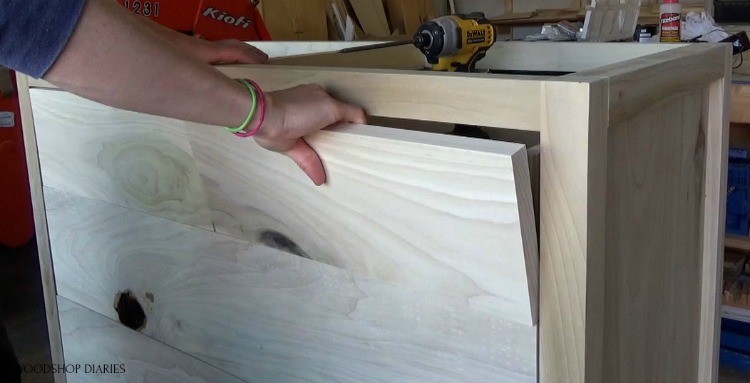
Step 7: Attach Dresser Drawer Fronts
I installed the drawer fronts the same way…working from the bottom up. There are a lot of tricks to evenly space drawer fronts, but I’ll be honest…I just eyeball it.
.
I held the bottom front up where it looked right (about ⅛″ gap on the sides), and screwed it in from the inside of the drawer. Then I did the same all the way up leaving about ⅛″ space between drawer fronts.
At the top, I measured the space and ripped a board to the correct width to use as the top drawer front. Plans are great, but it’s always good practice to cut to fit pieces and just use plans as a loose guide.
I cut it in two and installed it the same way using screws from the inside of the drawer box.
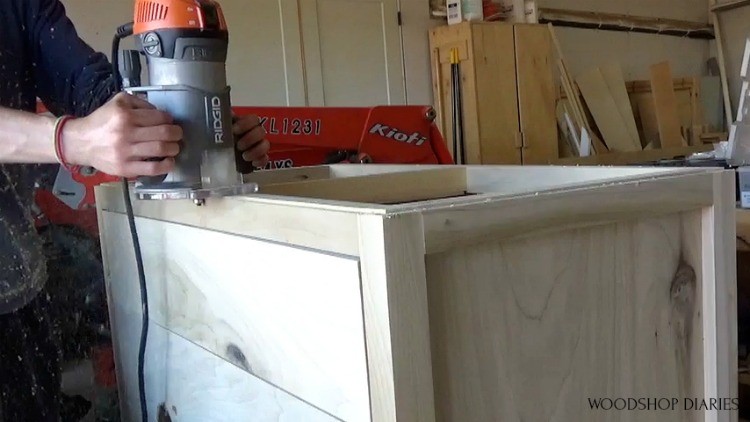
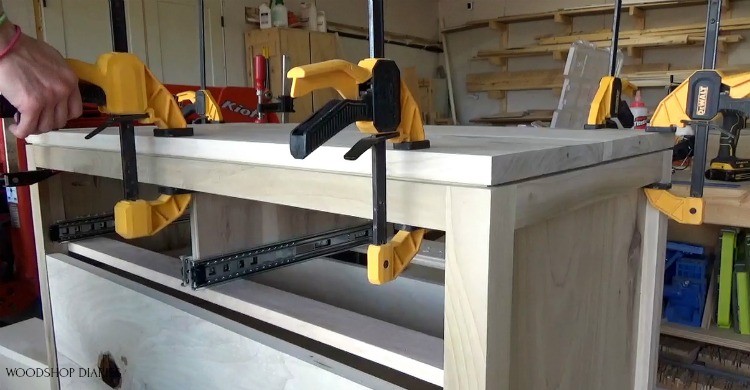
Step 8: Attach the Dresser Top
One little detail I added on my matching nightstand was a small rabbet along the top of the frame so that it looks like the top is kind of “floating” on the frame. It’s a subtle detail, but it’s easy to add. I installed a rabbeting bit into my router and ran it along the top of the frame.
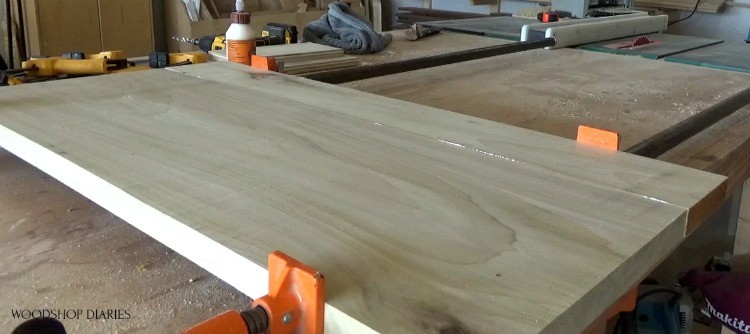
Now, I could add the top. I glued up a top panel that would be the exact same size as the frame—so no overhang.
.
Once the glue was dry and it was sanded down, I was ready to install it. And here’s a disclaimer. I’m fully aware this isn’t technically the correct way to install a top like this. I’m aware of the potential for splits and cracks as the wood moves.
However, I simply glued the top onto the frame. If you’re concerned about it, you can definitely use figure 8 tabs or attach however makes you feel more comfortable.
.
I used this method on my two year old nightstands and my current dining table—both about two years old and haven’t had even the hint of a crack or split. So I’m okay with taking my chances.
The beauty of building things yourself is that you can build them however works best for you. And you’re allowed to take the chances you want to take.
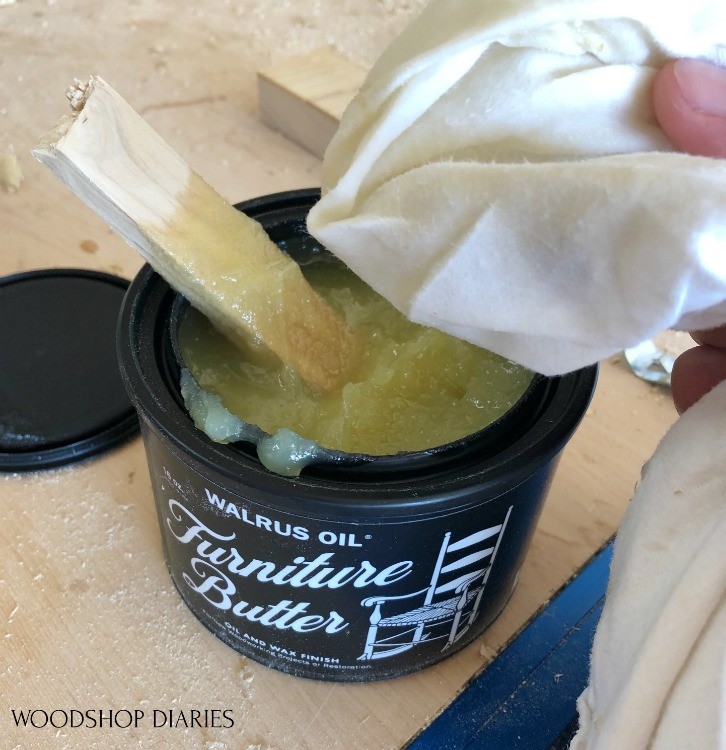
Step 9: Finish Dresser and Install Hardware
Once the glue was dry, I gave it a quick final sanding and finished it off with this Walrus Oil Furniture Butter. I stuck the dresser in the sun while I was finishing it up because the poplar was a little green and the sun turns it browner and gives it a warmer tone.
I installed these simple modern handles because I felt like they matched the vibe I was going for here. (PSST…I used these same handles on this Modern Console Cabinet and they looked AMAZING!) And I stepped back and admired the dresser I’ve waited two years to build.
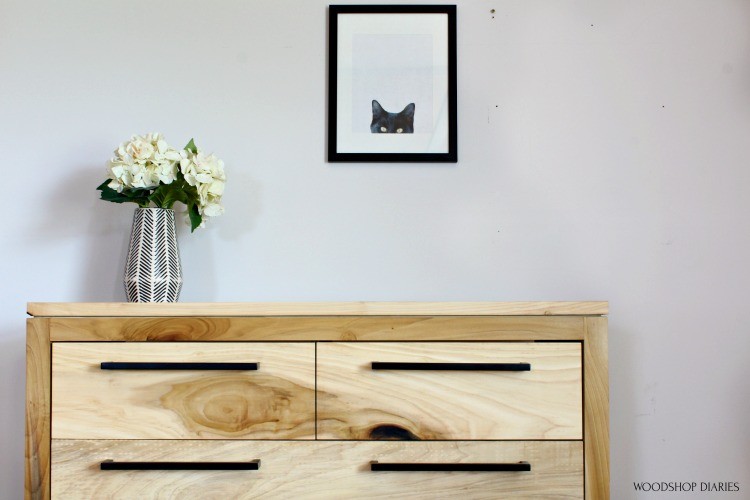
Note that this dresser IS TOP HEAVY…It’s HIGHLY recommended to anchor it to the wall. If you pull the drawers out at the same time, it’ll definitely fall forward.
I can now say that I’ve built a complete set—the bed, nightstand, and 5 drawer dresser. I’ve got one final piece to add to the collection next week, so be sure to stay tuned, and subscribe below so you don’t miss it.
If you’re interested in exact dimensions for this 5 drawer dresser project, be sure to grab the plans available here. And if you enjoyed this project, I’d love it if you’d pin this for later.
Until next time, happy building 😉
DIY Modern 5 Drawer Dresser
Step-by-step tutorial to build your own modern 5 drawer dresser.
Materials
- (4) 2x2x8 boards
- (1) 1x3x8 board
- (2) 1x8x8 boards
- (3) 1x10x8 boards
- (1) sheet ¼" plywood
- (1) sheet ¾" plywood
- 1 ¼" pocket hole screws
- 2 ½" pocket hole screws
- 2" wood screws
- Wood Dowels (if using dowels for joinery)
- Wood Glue
- (5) pair 16" drawer slides (I order 10 packs because they're cheaper)
- (8) large modern drawer pulls
- Drill/Driver
- Miter Saw
- Circular Saw
- Clamps
- Router & Rabbeting bit (optional)
- Pocket hole jig OR
- Doweling Jig
Instructions
- Assemble the side panels of the modern 5 drawer dresser.
- Assemble the frame using dowels or pocket holes.
- Install the dresser drawer divider. I used a scrap 2x2 block as a spacer.
- Install dresser drawer slides.
- Build and install dresser drawer boxes.
- Install dresser drawer boxes into the frame.
- Attach drawer fronts.
- Attach the dresser top.
- Finish the dresser and install hardware.
- Be sure to anchor it to the wall so it won't tip forward.