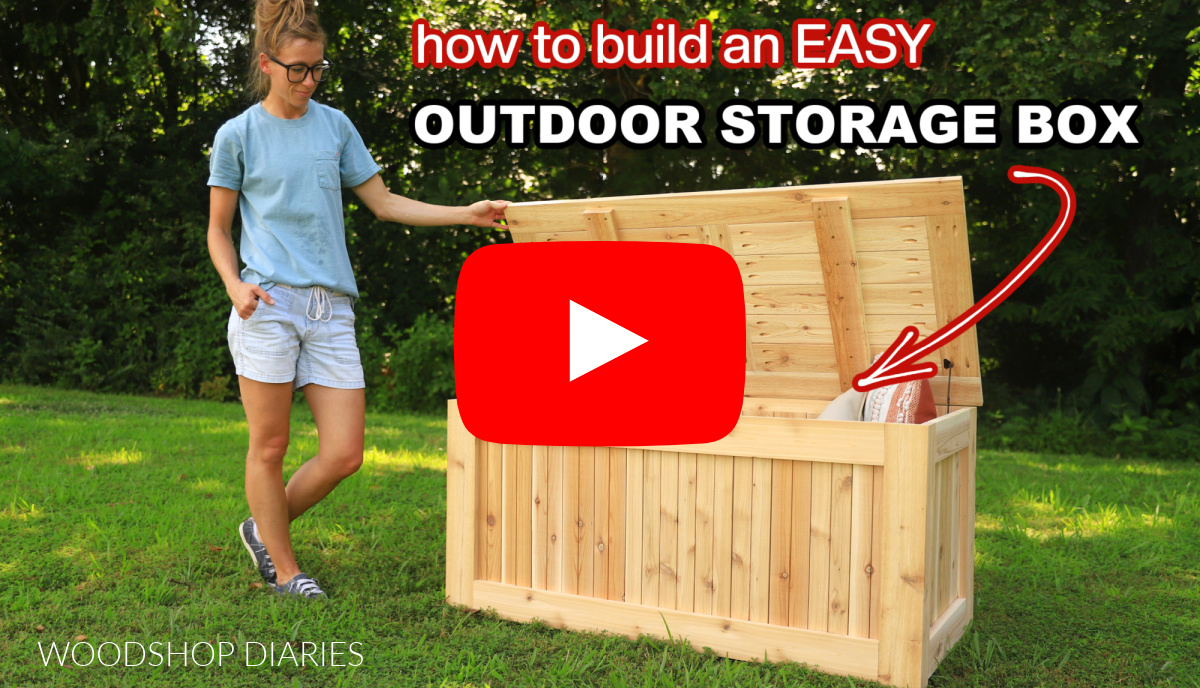
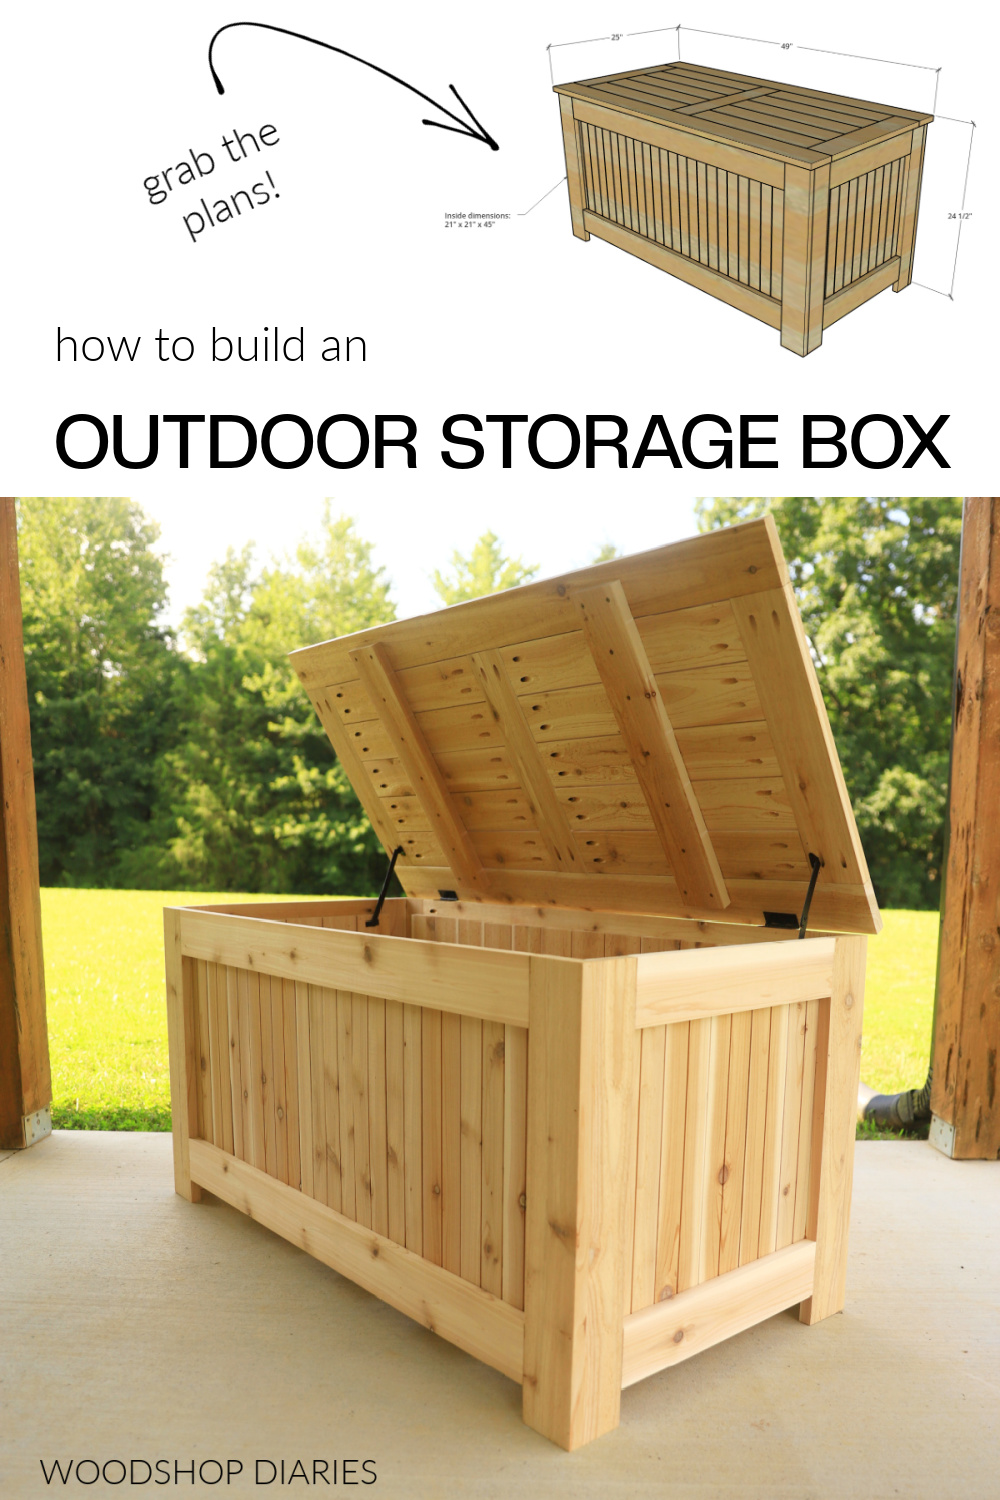
In this post, I’m sharing how to build a simple, sturdy, and stylish DIY outdoor storage box.
I built this storage box specifically to hold my outdoor cushions so they stop blowing away during wind storms, but it also works great for pool toys, yard games, outdoor décor and more!
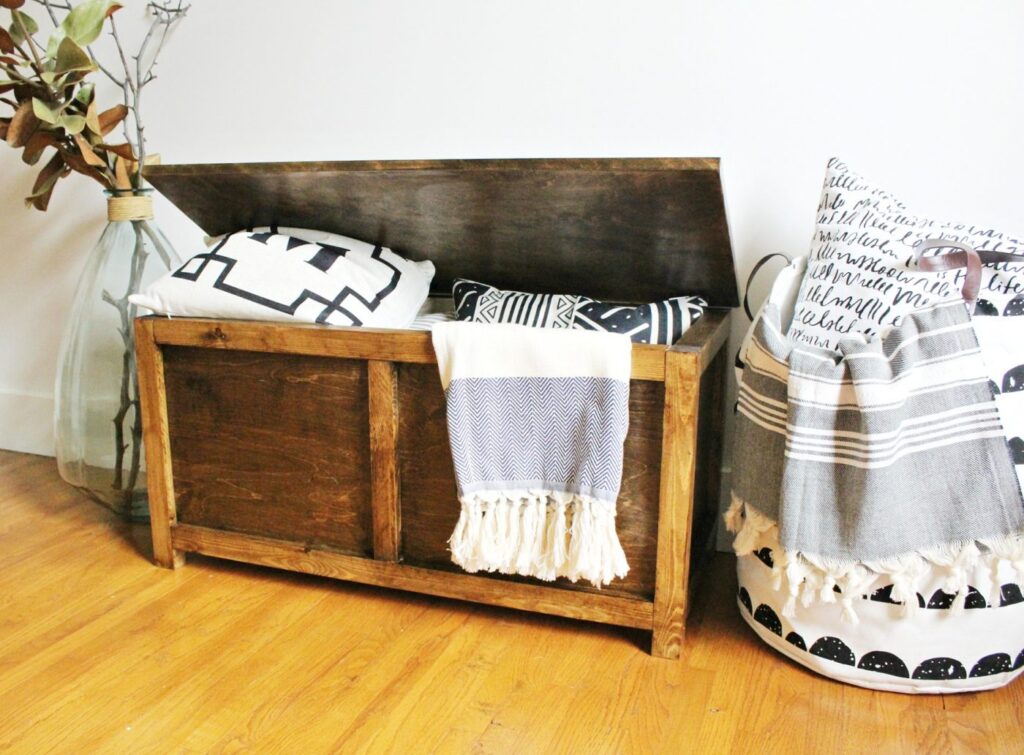
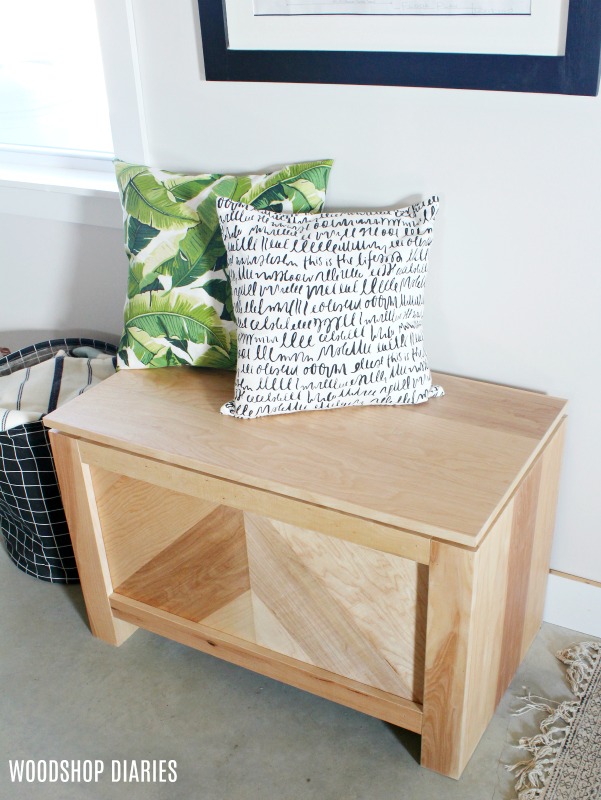
Even if you don’t need storage OUTDOORS, this would make a beautiful cedar chest for indoor use as well.
The entire project is made from cedar 1x4s to keep things simple and inexpensive.
It’s also an easy project to customize, so feel free to modify the size as needed. I’m sharing all the details, plans, and how to build your own in the post below.
*This post contains affiliate links. See website policies.
What to know before building
While this is an outdoor storage box, it’s important to note that it’s not a waterproof box. If you’re wanting something that is totally waterproof, you’d be best to get a plastic or a resin box vs a wooden one.
There are intentional small gaps between the slats on the sides and in the top. This allows water to drain THROUGH the box vs sitting and pooling ON the box (which can cause damage to the wood).
The bottom slats are also spaced apart so that the water can quickly drain out and the gaps allow airflow to dry out quickly.
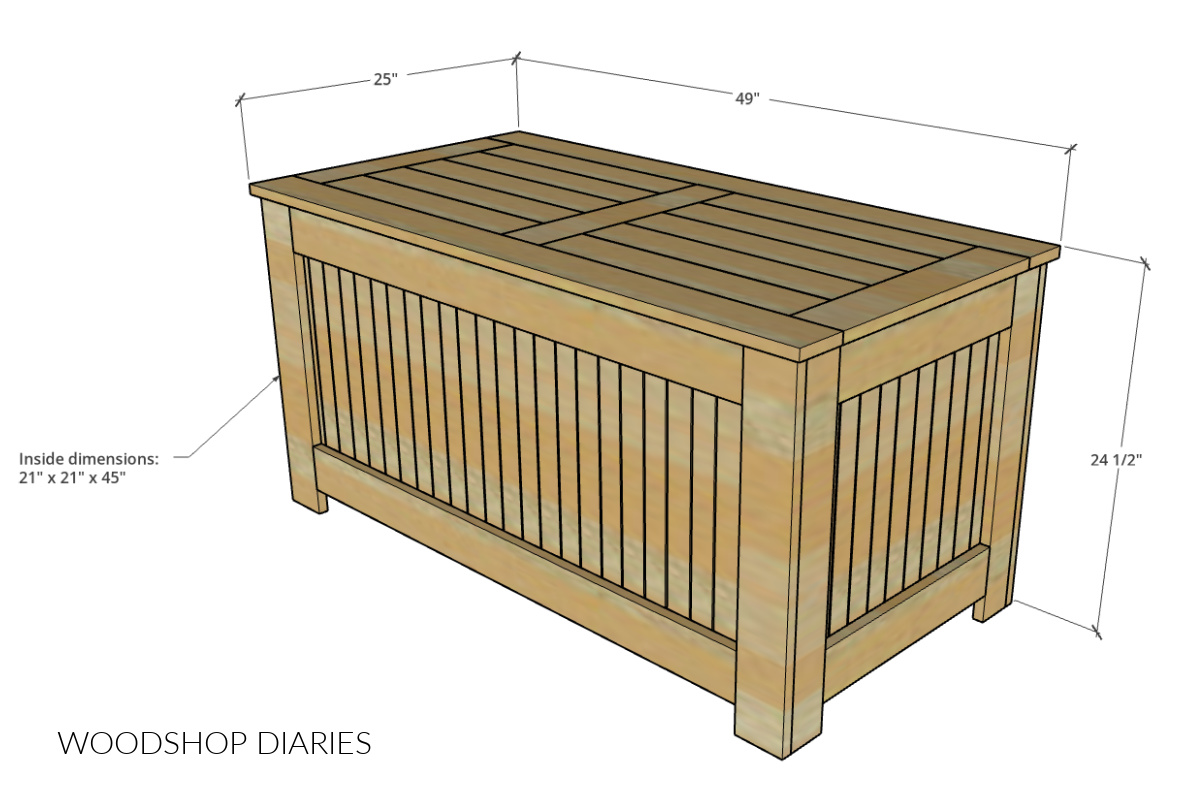
Overall Dimensions
The overall dimensions of this outdoor storage box are approximately 24 ½″ tall x 25″ deep x 49″ wide. The inside dimensions are 21″ x 21″ x 45″.
What Type of Wood to Use for Outdoor Furniture
You can build outdoor projects from any wood type, but some will last MUCH longer than others.
RELATED: How to shop for lumber
Untreated pine (basic construction lumber) will work fine for outdoor furniture, but is best for projects that will be under cover–like on a porch. If exposed to a lot of sun and rain, it will deteriorate quickly.
It’s the most budget friendly option, but may not be the most durable for outdoor use.
Pressure treated pine is a little more expensive, but is made specifically for outdoor use. It’s a very common material to build decks with.
It’s treated with chemicals to make it more rot resistant and will usually last SEVERAL years outdoors even if left uncovered.
While durable and budget friendly, this material is heavy, treated with chemicals and can take a while to dry out.
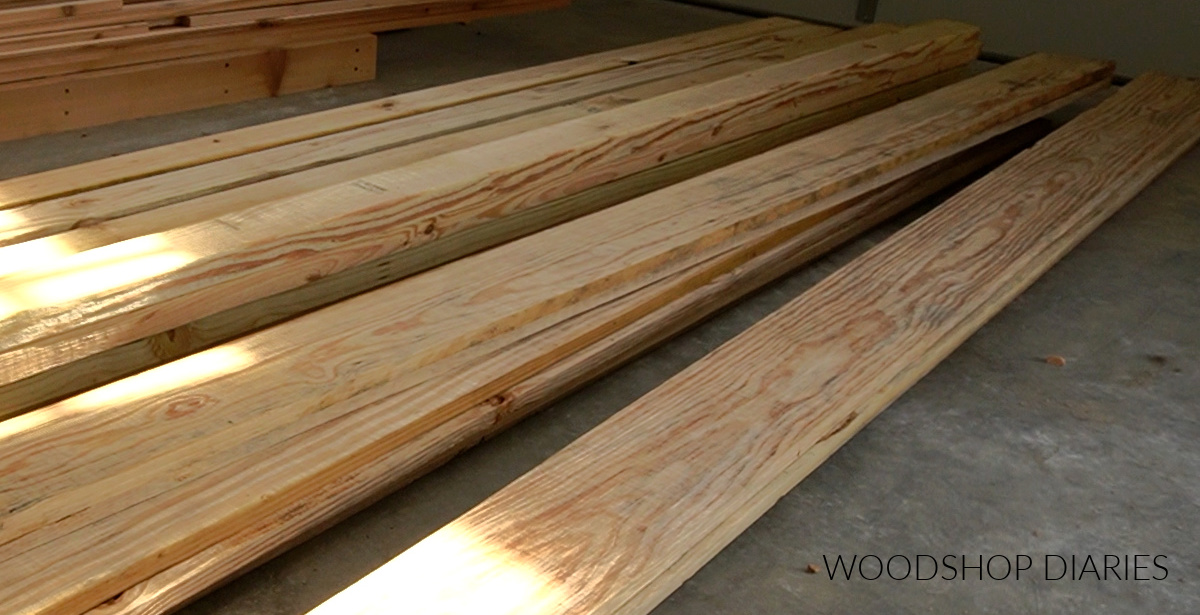
Cedar, red wood, and teak are all naturally decay and insect resistant wood options that look really nice.
But, these wood types can be a bit more expensive and sometimes hard to find depending on where you live. For example, I can’t get red wood where I live, but I can get cedar–so that’s what I used here.
So when building for outdoors, consider your budget, availability, and the pros and cons of each option before choosing your wood type.
Don’t forget when building outdoor projects–make sure the hardware (screws), glues and finish you use are rated for exterior use.
If building this for indoor use–like for an indoor storage trunk or chest–cedar, pine, poplar or oak are all great options to use.
You may find these resources helpful throughout the build:
Are DIY projects your thing? Sign up for our newsletter for priority access to the latest projects and build plans!
How to build a wooden outdoor storage box
If you prefer to watch, I’ve shared the full build video with tons of tips, behind the scenes, and additional details on my YouTube Channel here.
Love watching how-to videos? Subscribe to my YouTube channel for plenty more where that came from!
Prefer to print? Grab the printable outdoor storage box building plans here:
Tools & Materials
Tools:
- Miter Saw
- Table Saw
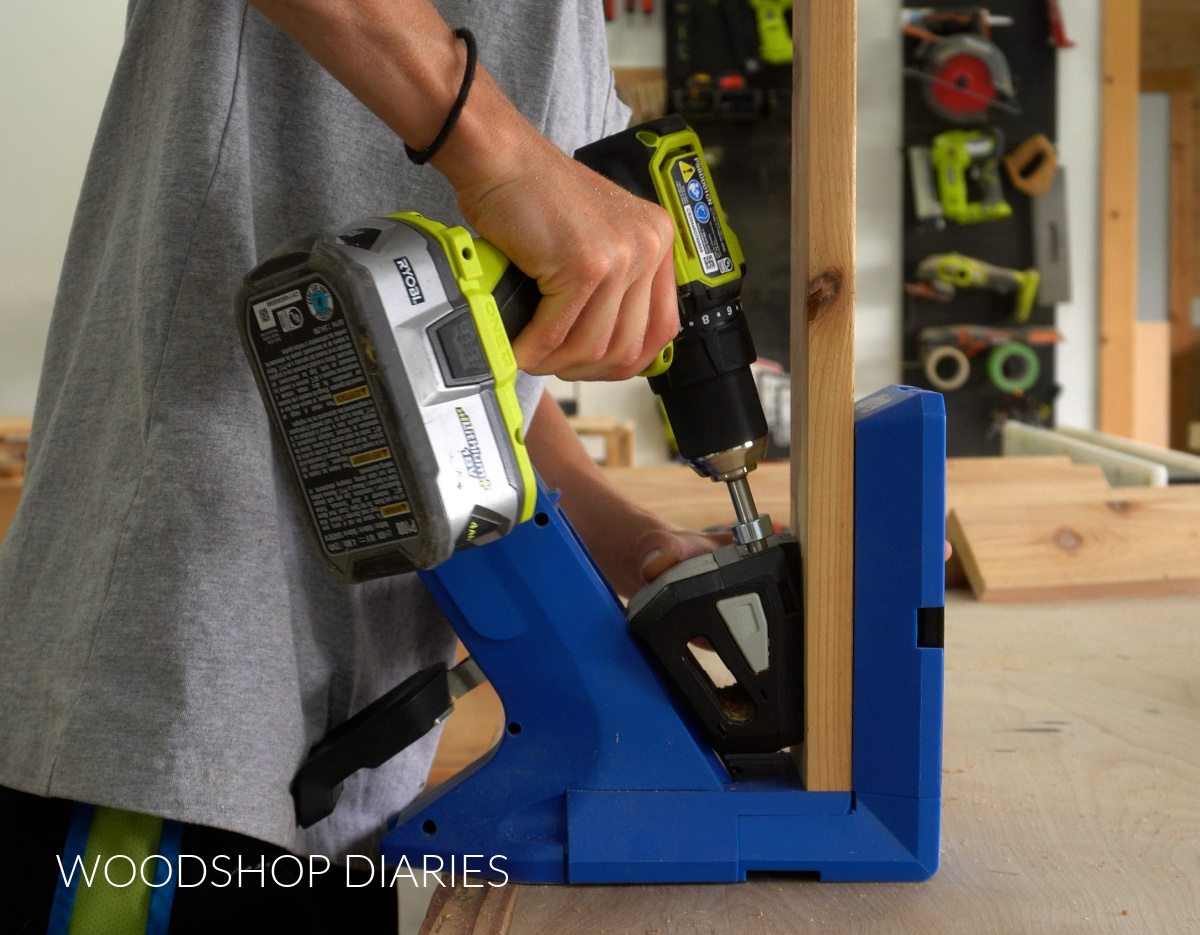
- Pocket Hole Jig
- Drill/Driver
- Brad Nailer (optional–can screw instead of nail if you prefer)
Materials:
- (18) 1x4x8 boards*
- 1 ¼″ exterior pocket holes screws (100 count box)
- Wood Glue (exterior rated)
- 1 ¼″ brad nails
- 1 ¼″ exterior wood screws (1 lb box)
- (3) 1 ½″ x 2 ½″ butt hinges
- (2) Lid supports
*I used cedar 1x4s for this project. See notes above about other wood options to build this with.
Step 1: Assemble Storage Box Legs
To get started, I chose two 1x4x8 boards to make my legs with. I left one of these full size, but I ripped the second one to 2 ¾″ wide on the table saw.
Then, I glued and clamped the narrower piece that I cut onto the full width 1×4 like shown below to make an “L shaped” piece.
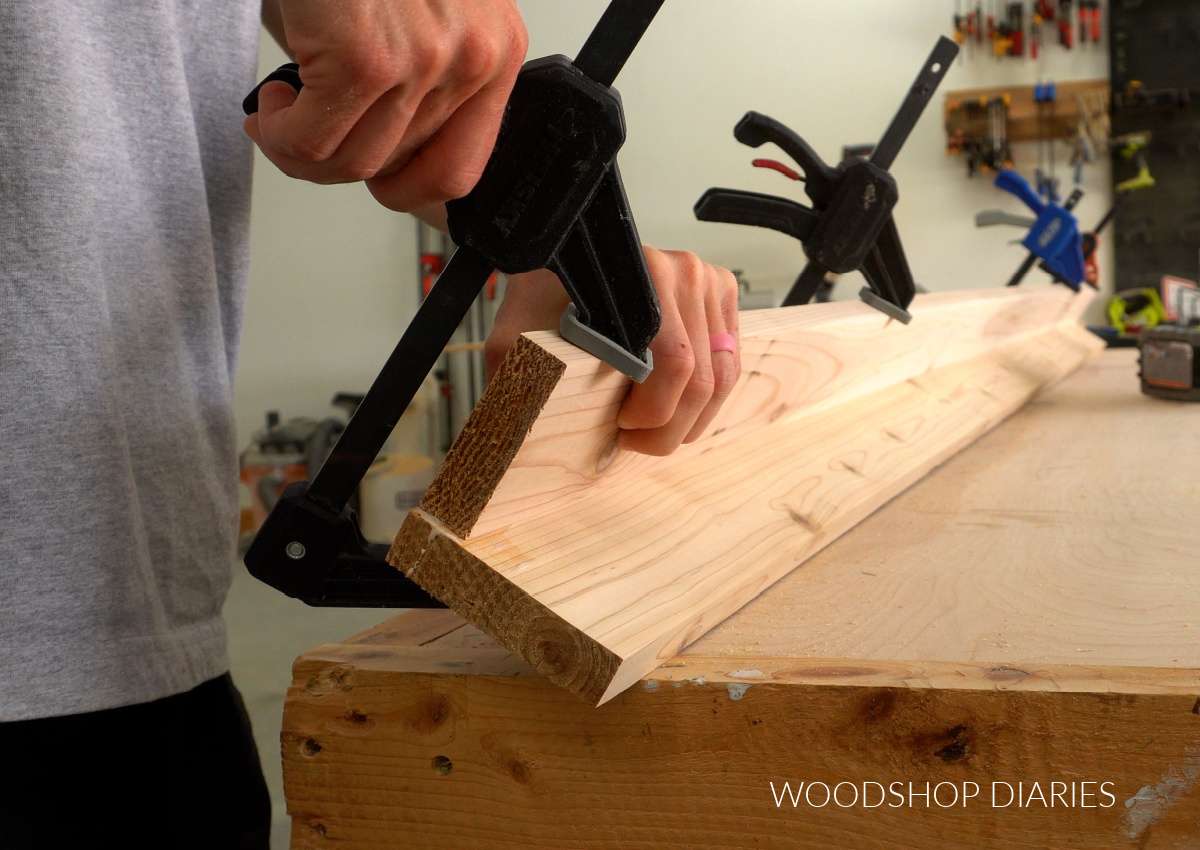
That’s why I ripped the one board narrower–so when it’s glued together, both sides of the “L” are equal width. You don’t have to do that, I just think it looked better for them to be even.
Once the glue was dry, I trimmed this piece down into four equal sized “L shaped” legs.
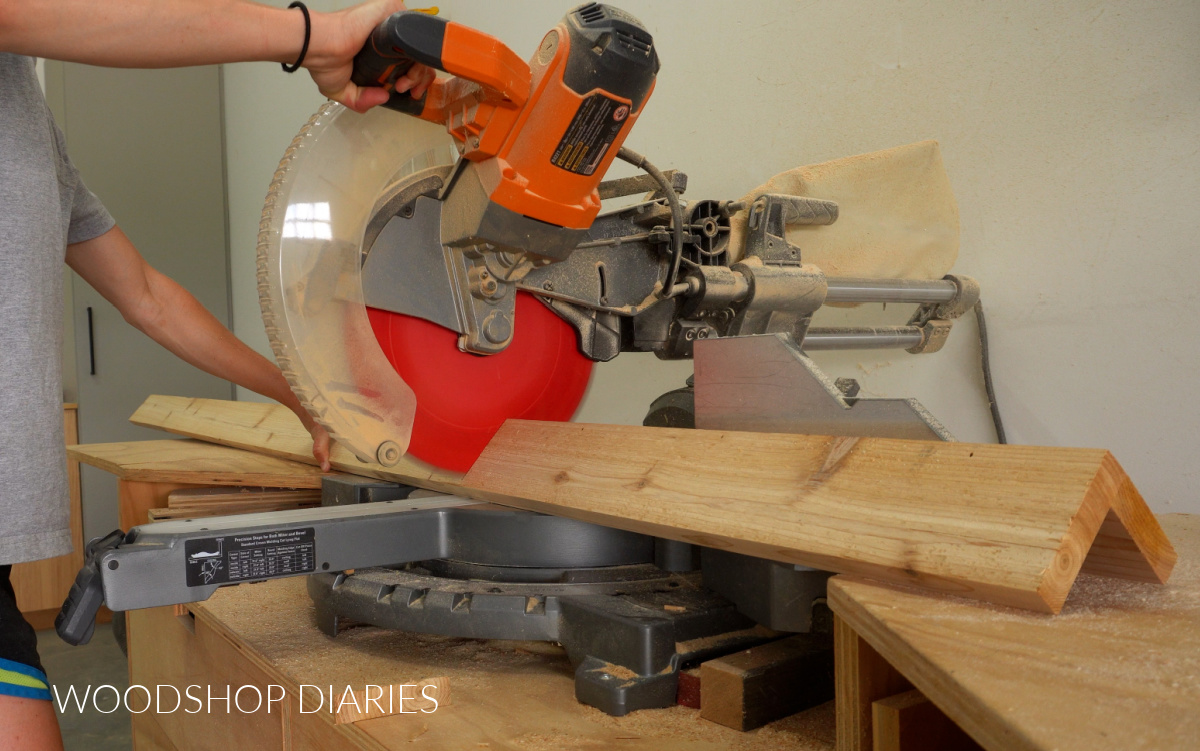
TIP: Once trimmed, I recommend sanding away any glue residue or squeeze out. If you wanted, you could add some nails or screws in addition to the glue to help secure these together.
Step 2: Assemble Storage Box Frame
Now that the legs were ready to go, I needed to cut the rest of the pieces to build the frame of the box.
By the way…This entire project was made from 1x4s, so everything I trimmed here was just more 1x4s to keep things simple.
I cut four long pieces to frame the front and back of the box and four short pieces to frame the sides. And I drilled ¾″ pocket holes into the ends of each board.
The easiest way to modify the size of this box is to adjust the lengths of these frame pieces. If you want it wider, make the front and back pieces longer. If you want it deeper (front to back), make the side pieces longer.
You can find all the dimensions used here in the printable plans.
Then I installed these pieces between the legs like you see below using pocket hole screws.
RELATED: How to use pocket holes to build furniture
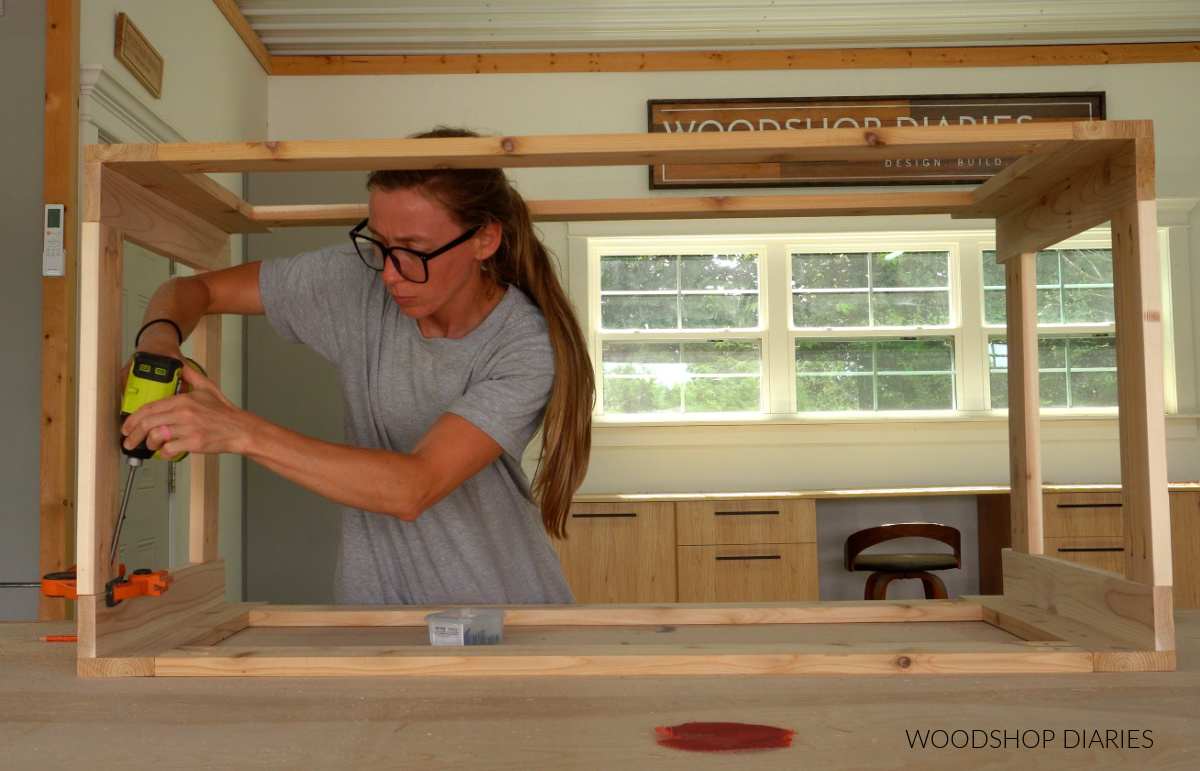
I installed the top pieces flush to the top of each leg and the bottom pieces so that they were about 2″ up from the bottom of each leg.
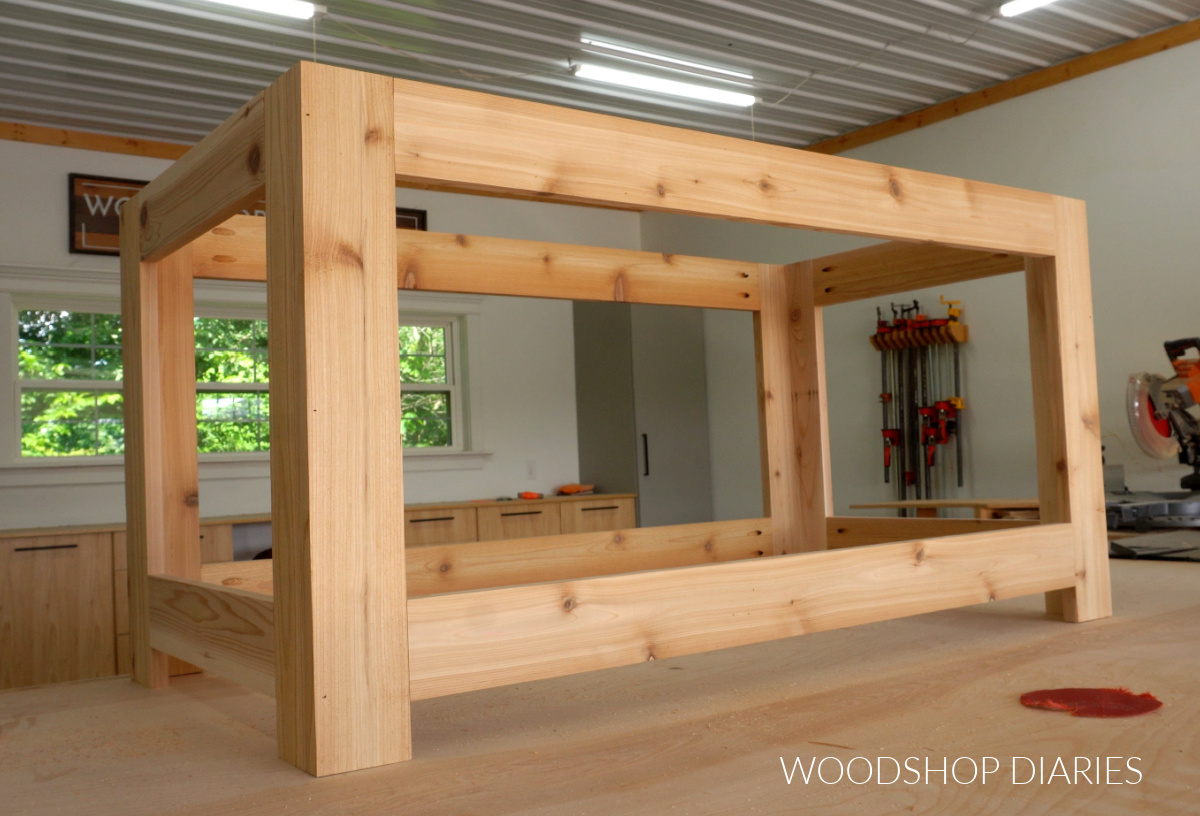
It’s already looking amazing with just the frame. Cedar projects are my favorite!
Step 3: Line Box Sides with Slats
I was basing this design loosely off of one that I had seen online that had narrow slats that lined the sides. I wanted that same look, but didn’t want to have to completely cut down all my 1×4 boards.
So instead, I “faked it” by setting my table saw blade height to about ¼″ and cutting a small kerf right down the middle of a few of my 1x4s.
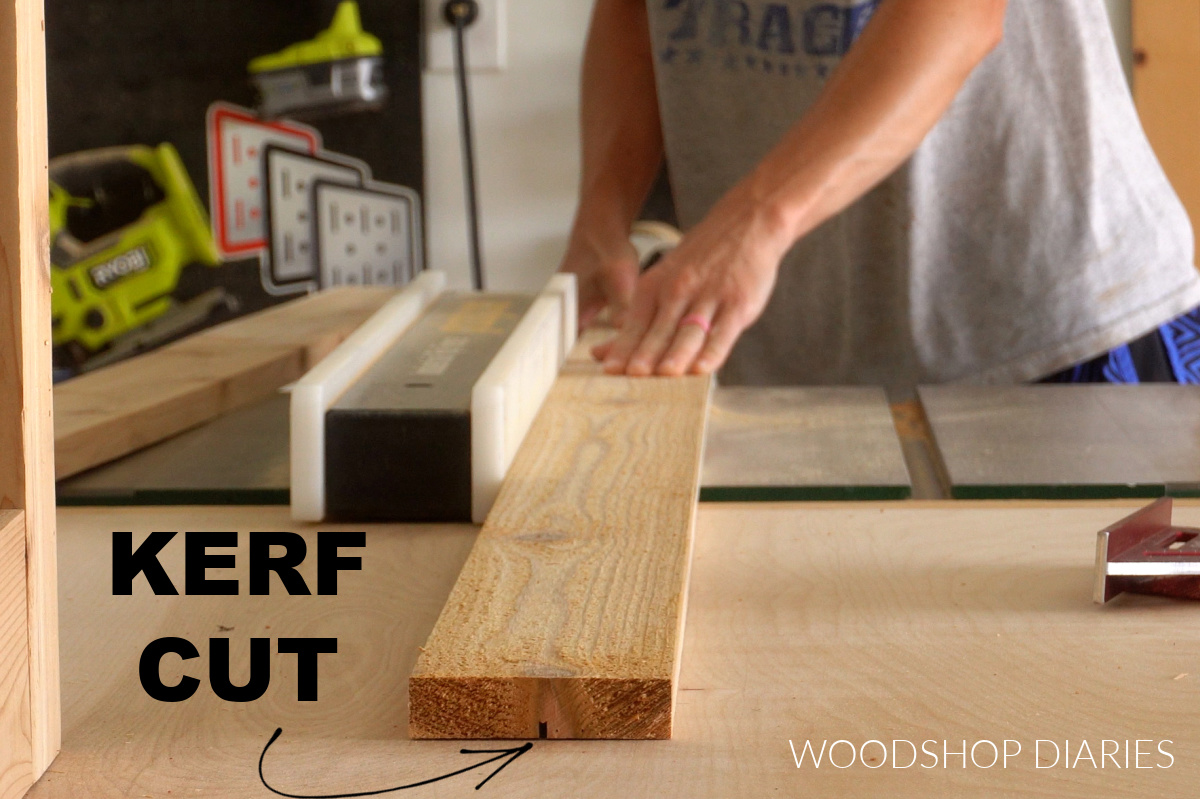
Then I trimmed these boards down to make my slats for the sides of the box.
I found a thin piece of scrap in my trash can that was about the same thickness as my saw blade, and I used this between each slat as I installed them so there was a little gap between each one. That way, visually, the kerf and the space between slats will be even.
I glued and nailed each slat around the sides of my box starting from the center and working my way out. I did the long sides first.
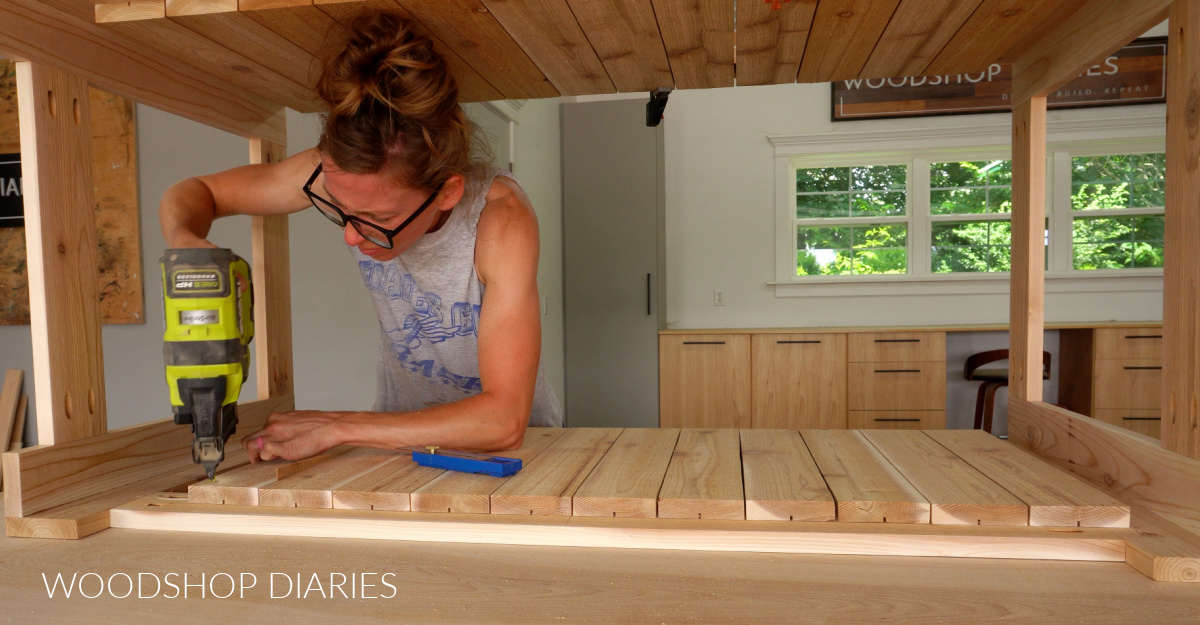
Then, I installed the slats on the short sides.
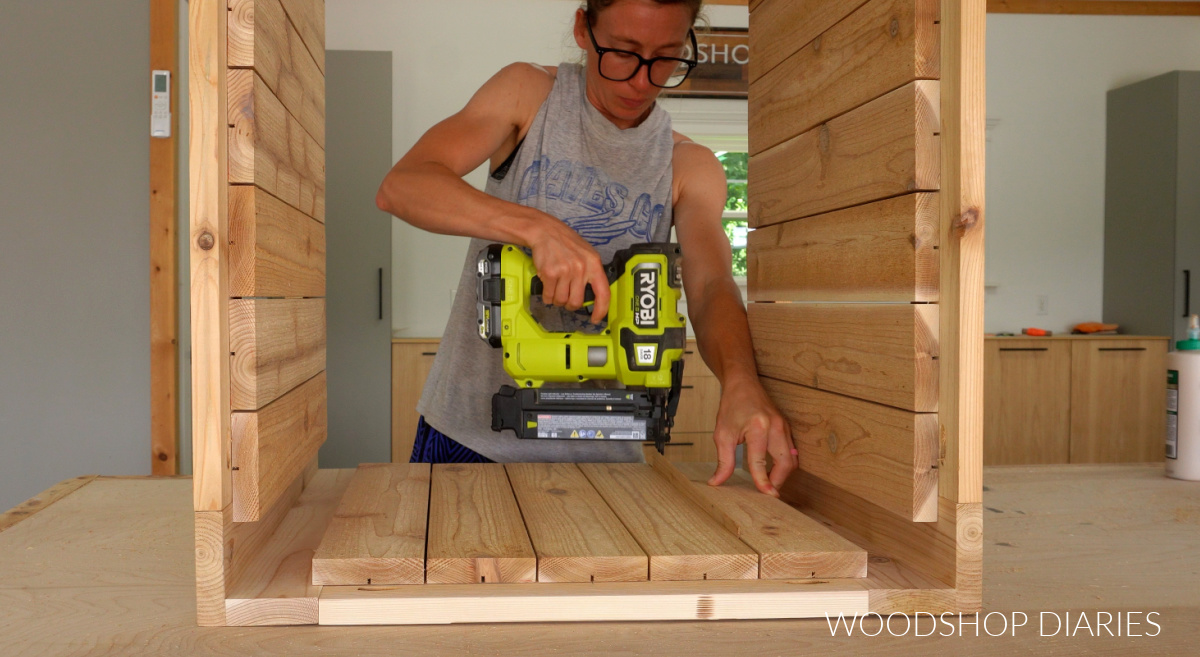
The glue will be what holds these in place (once dry), not the nails. The nails just help tack each piece in place while the glue dries. However, if you wanted to use screws for an even stronger hold, you certainly can.
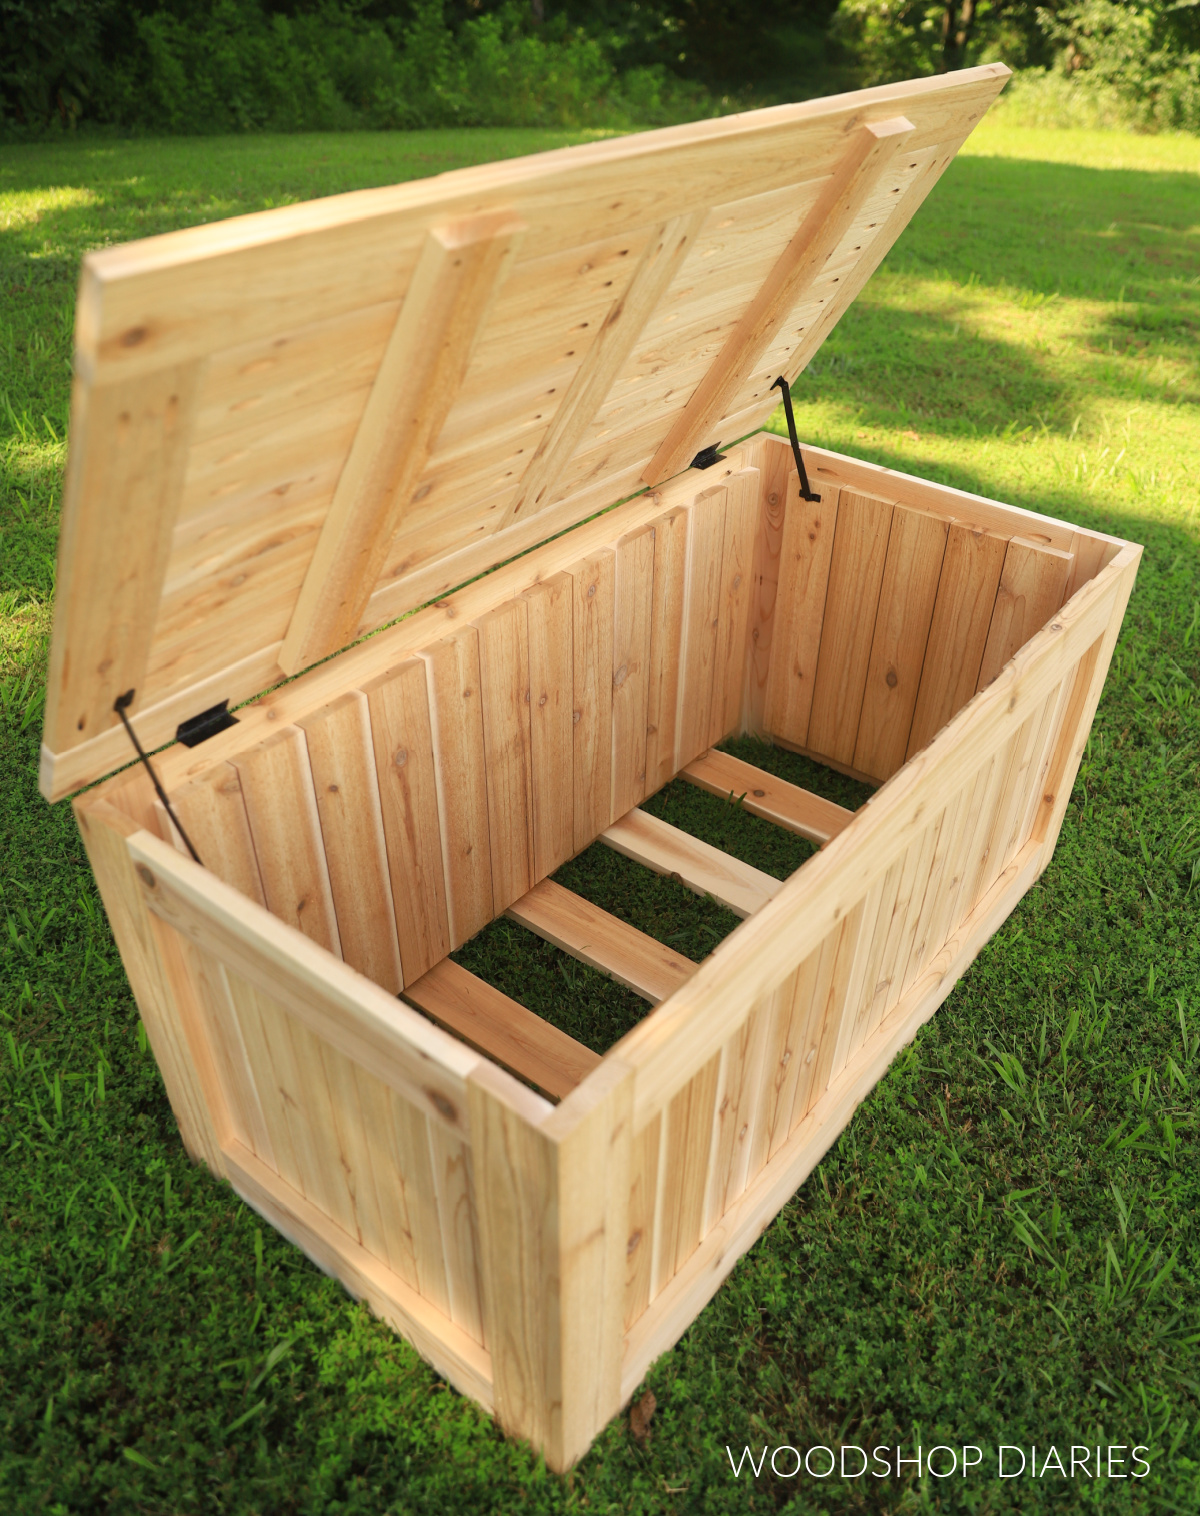
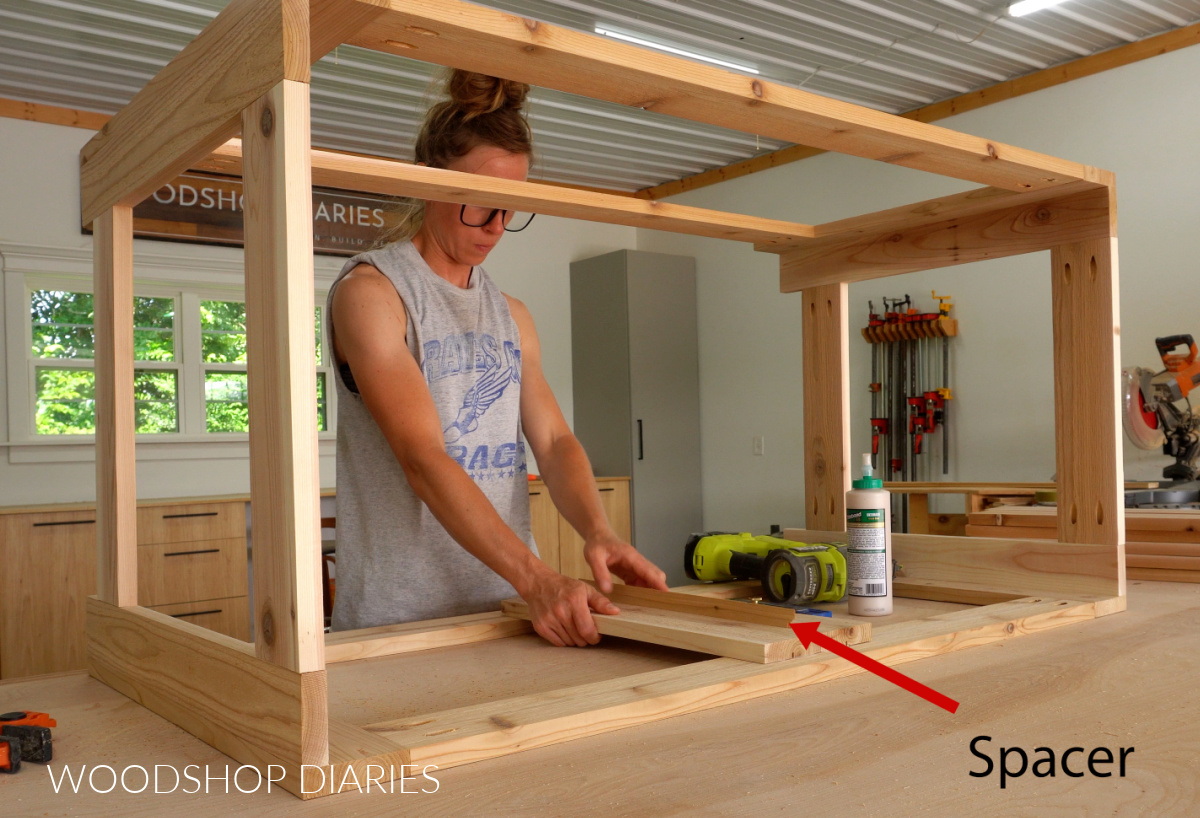
Step 4: Install Bottom Slats
Next, I cut 5 more pieces of 1×4 for the bottom slats. I drilled pocket holes into the ends of each and installed these between the front and back frames flush along the bottom with pocket hole screws.

I mentioned this earlier that these bottom slats are intentionally installed with plenty of open space between them for water to drain out and to promote air flow.
But if you wanted to add some more slats here, you absolutely can. Just make sure to leave SOME space between so it doesn’t hold water and air can move.
Prefer to print? Grab the printable building plans for this storage box project here.
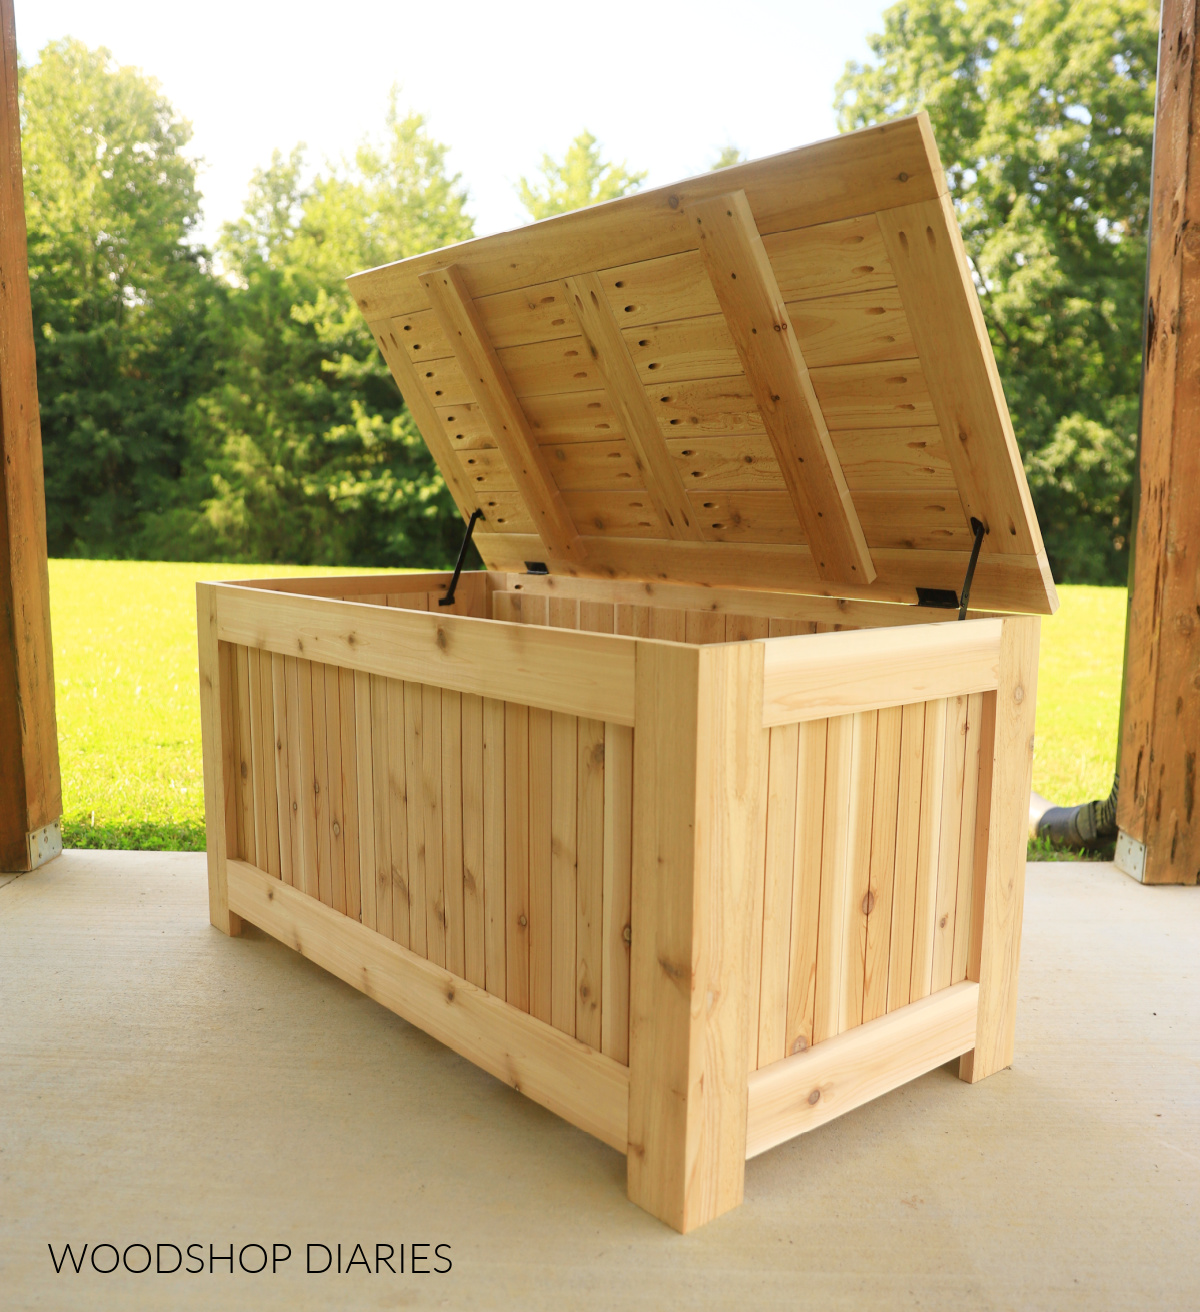
Step 5: Build and Install Box Lid
The top, or the lid (whichever you’d like to call it haha), of this box was made with…you guessed it…more 1x4s. Essentially, I cut two long pieces to the length I wanted my top (which was 1″ wider than my box so it would overhang both sides ½″).
Then, I cut three pieces to connect them–one on each side and one in the middle. I assembled this frame using pocket holes and screws.
Then, I added 1×4 slats to fill the two openings. Just like with the sides, I used a spacer to space these slats apart a bit as I installed them.
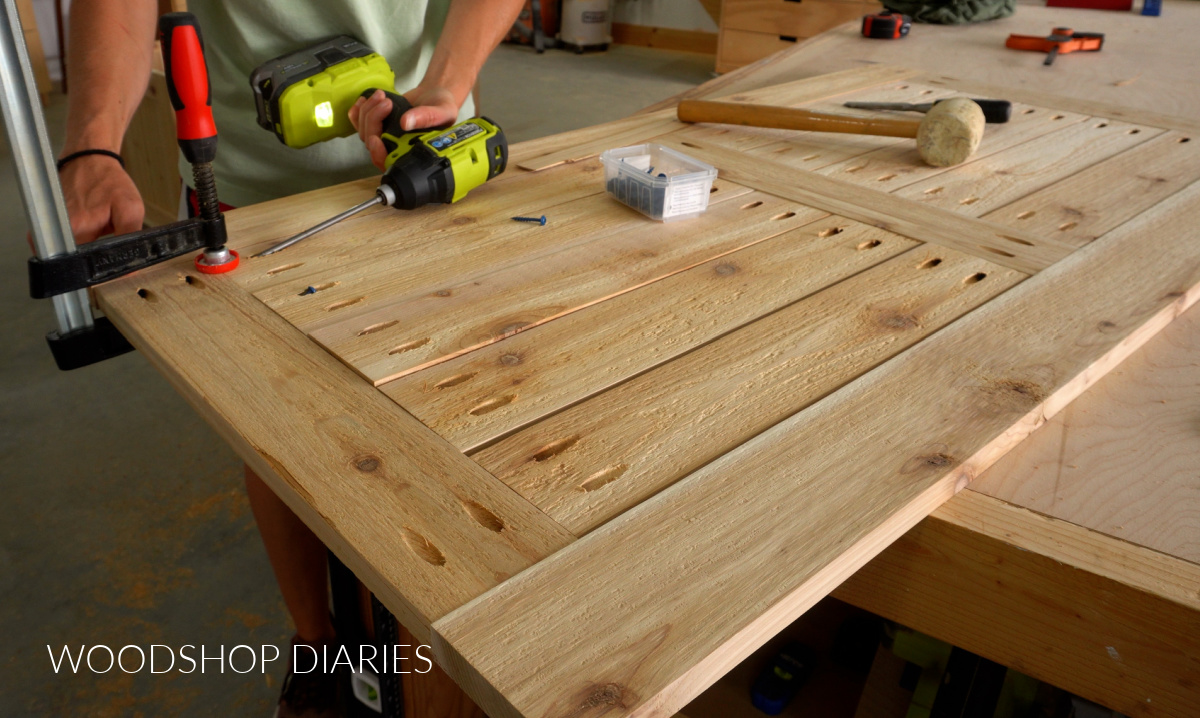
This allows the water to drain through instead of pooling on top.
After the top was together, I installed it onto the box using some simple butt hinges. Now, you’ll see below that I just used 2 hinges, but I actually recommend using three. I came back later and added a third one in the center.
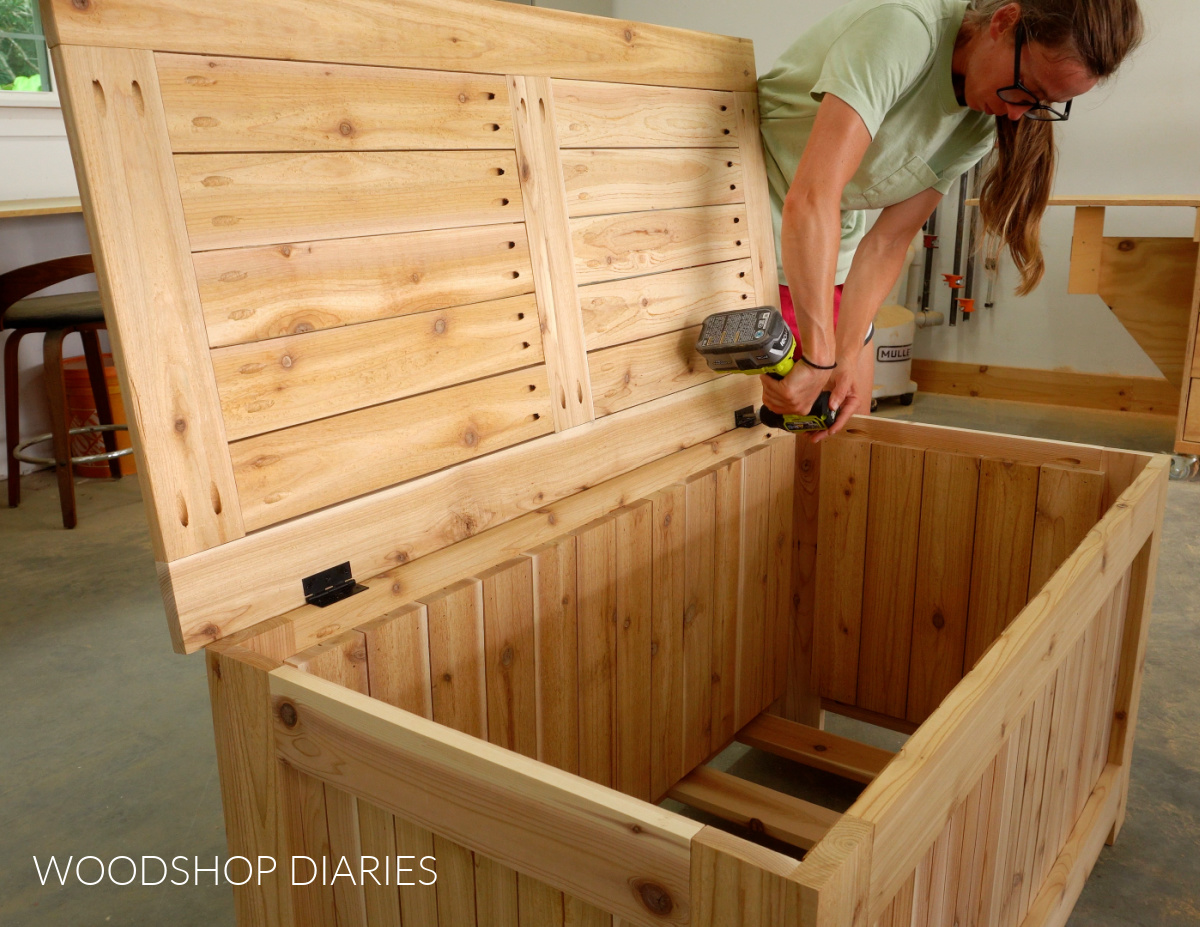
I made sure to install these so that the top was centered on the box (when it was closed) with equal overhang on all sides. You may find it easier to lay the box over on it’s back to get the top installed.
Once it was hinged, I added some basic chest lid supports to hold the lid in the open position when needed. You could also use gas struts or soft close lid supports as well.
Now at this point, the top is sturdy and I could sit on it, but I’m not sure how much more weight it could hold. So I thought it might be a good idea to add some additional supports just to help keep the slats nice and flat.
So I cut two more 1x4s and screwed these across the slats–one across each set of slats–on the bottom side of the lid.
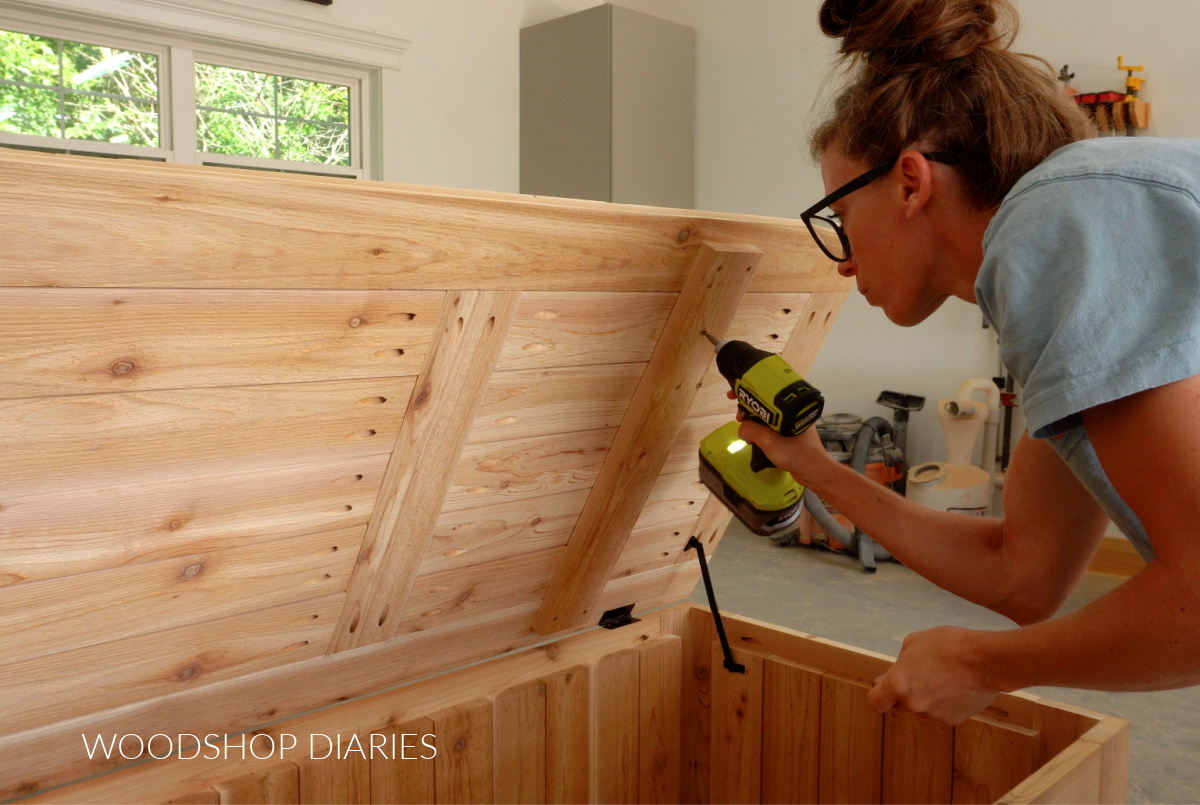
This helps hold the slats nice and flat to the frame to give it some extra support.
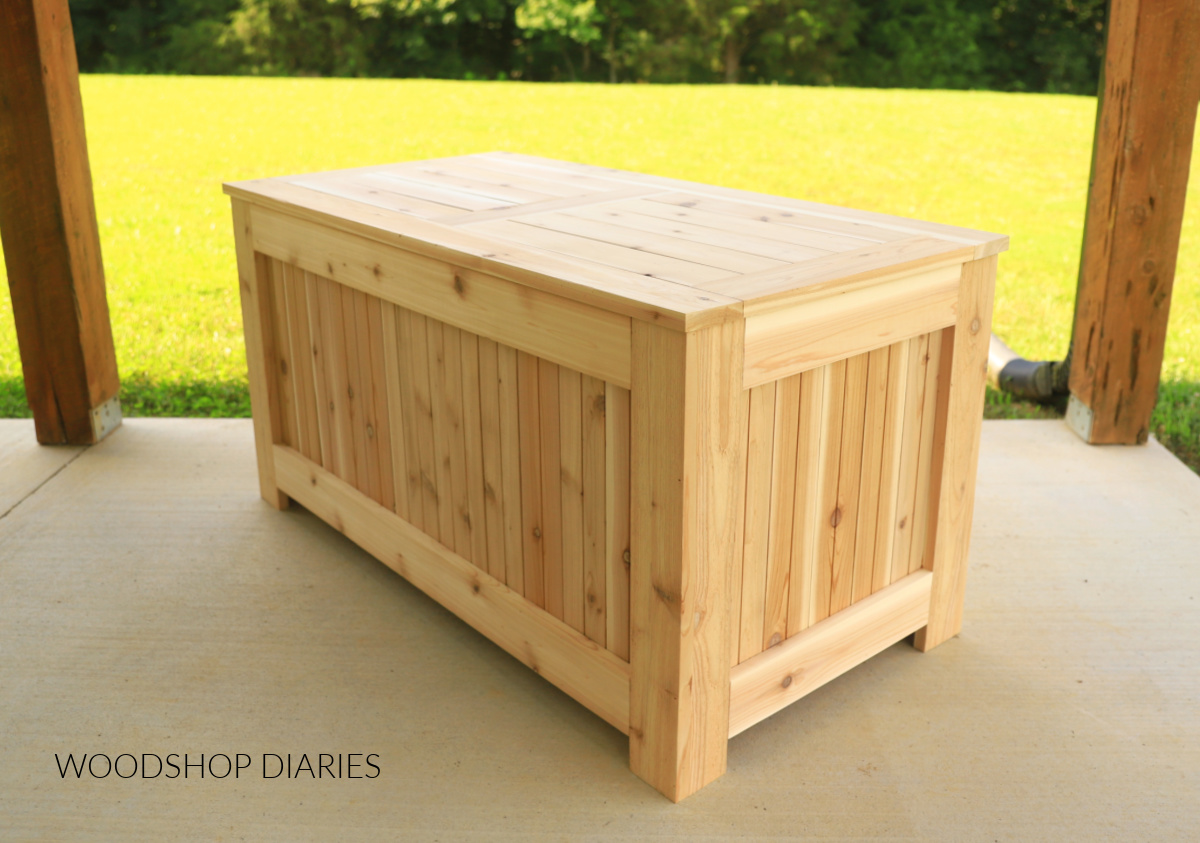
Step 6: Finish Outdoor Storage Chest
And with that, this build is complete, and is ready for finish. I’ll be honest, I haven’t finished my storage box yet because I can’t decide if I want to stain it to match my outdoor sectional or if I want to add a clear coat to keep that natural cedar tone.

So for now, I left it as is until I make up my mind. But if you plan to keep yours outside, it can weather and turn grey quickly if left unfinished. So I recommend finishing it sooner rather than later to keep it looking nice.
Check out this post for tips on finishing outdoor furniture.
And of course, here’s a shot with the lid actually closed, too.
Ready to build yours? Grab the printable plans to build this outdoor storage box here.
Looking for more storage projects?
Enjoyed this project, but looking for some more ideas and inspiration? Here are a few of my favorite storage options for both indoor and outdoor. Click on the image(s) below to take you to the tutorial for each:

If you’d like to save this project for later, don’t forget to pin it to your favorite social channel!
Until next time, friend, happy building!