
Need a new desk for working from home? This DIY corner desk is easy to build yourself with this tutorial!

I’m just going to throw this out there….I wouldn’t mind being sent to the corner if this was the corner I could go to 😉
.
I mean, do you blame me? This corner desk has the looks, the storage, and all the function you need to sit down and start on the task at hand. It’s perfect as a home school desk, a work from home desk, or just an ocassional use desk that still looks good in the corner of a living room 😉
.
RELATED: Looking for more desk ideas?? Here’s a few others to check out as well! Click on the images below to take you to the tutorial.

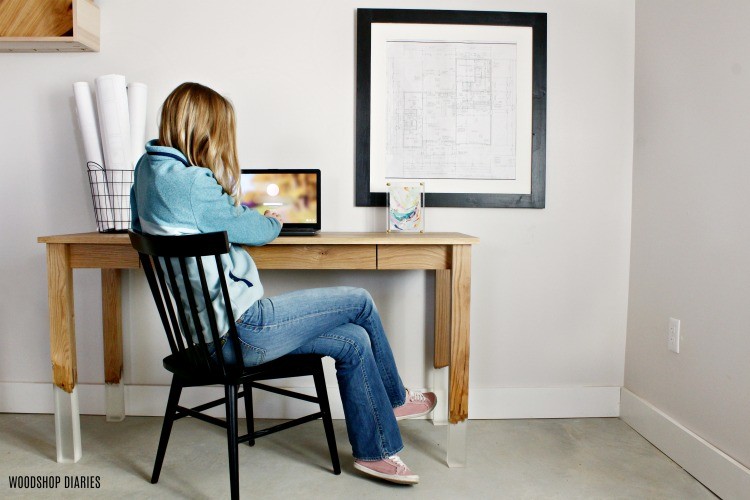
Resin Leg Desk 
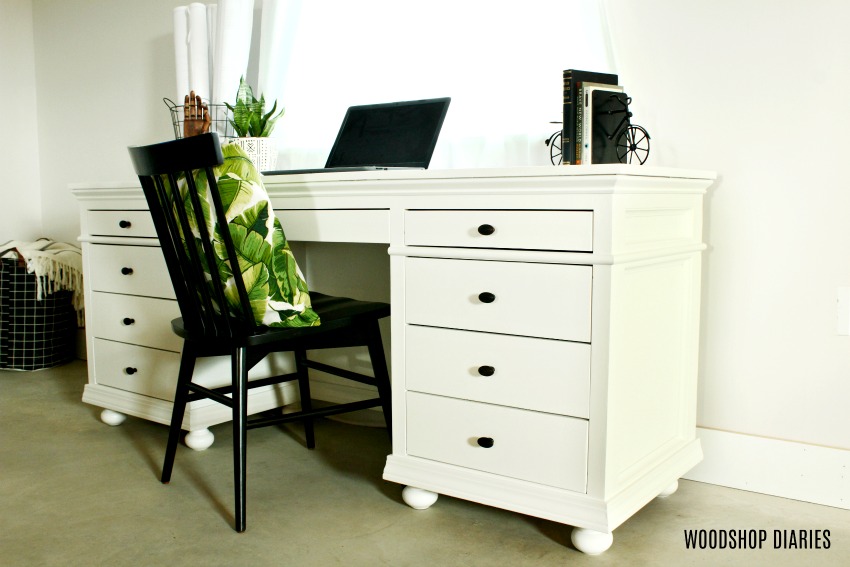
DIY Storage Desk 
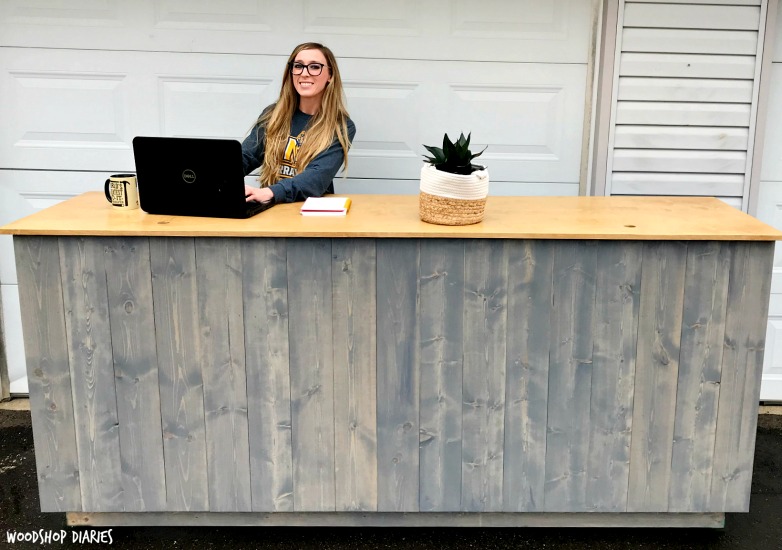
Standing Kiosk Desk 
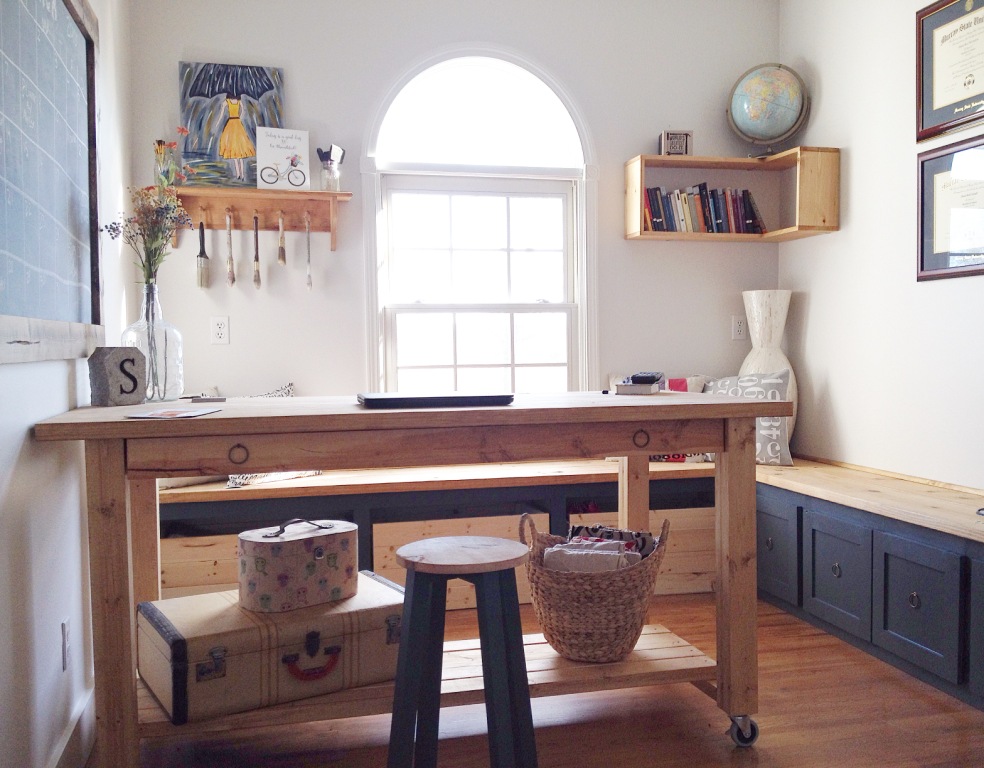
Simple Mobile Workbench Desk
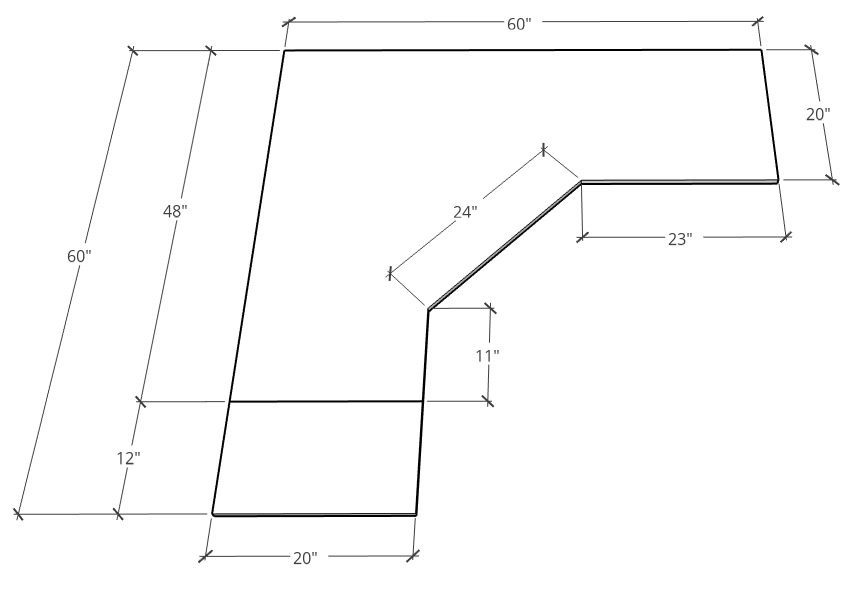
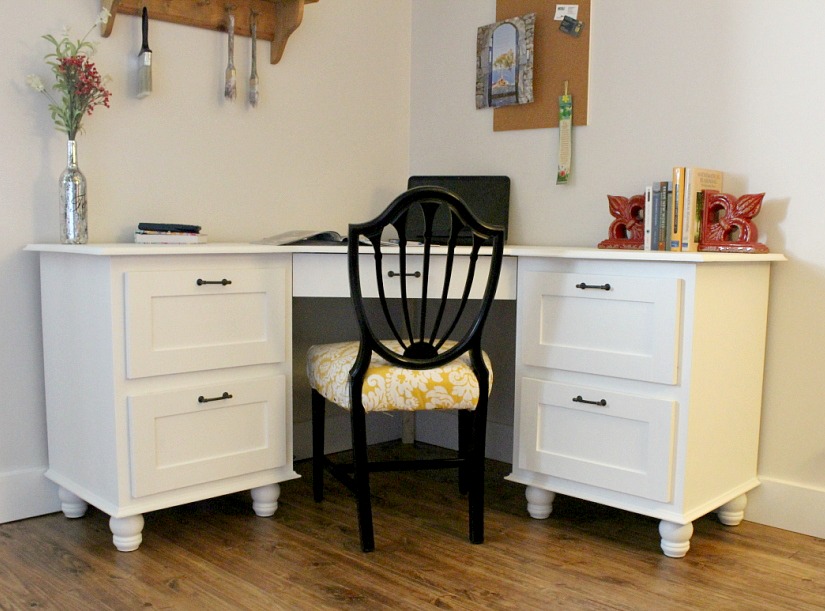
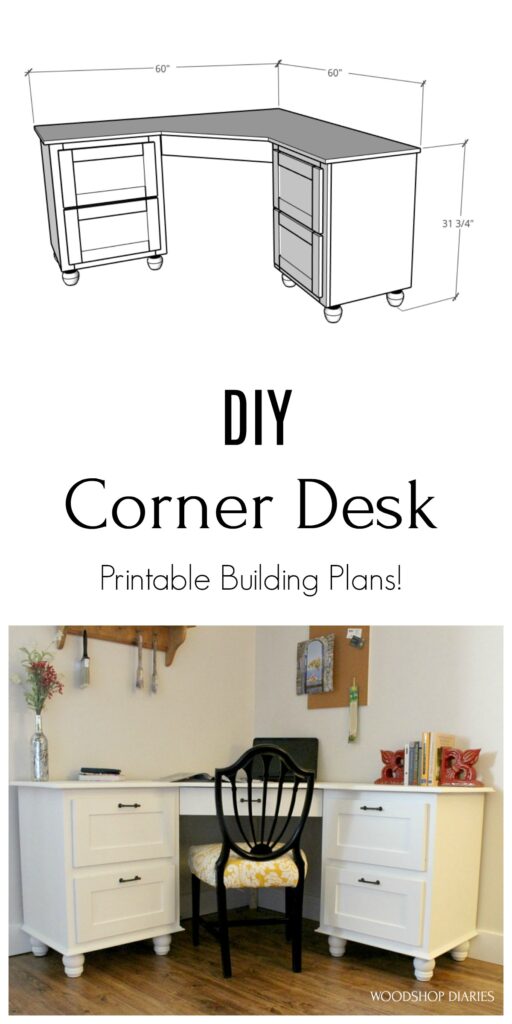
This corner desk design makes the desk about 5’x5′ (not including the optional molding on the edge), about 31 ¾″ tall, and about 20″ deep (on the two “wings” not including the optional molding).
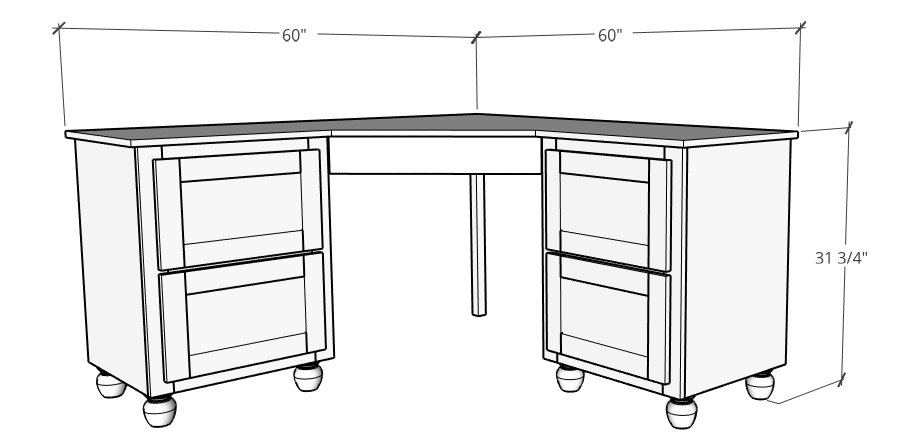
Each “wing” extended out about 23″ on the front side. This allowed for plenty of room in the front corner to slide in an average sized chair and still look good proportionally with the drawer size.
.
So, if you’re ready to get building, let’s go! I’ve got the link to the printable plans below and the tutorial following.
This post contains affiliate links. See disclosure policy for more details. I appreciate your support!
For This Corner Desk, You Will Need:
- ¾″ plywood (2 full sheets)
- ¼″ plywood (1 sheet)
- (3) 1x3x8 boards
- (2) 2x2x8 boards
- (1) 2x4x8 board
- Cove molding (optional)
- 8 wood feet
- 5 pair 16″ drawer slides
- 1 ¼″ pocket hole screws
- 2″ wood screws
- 2 ½″ pocket hole screws
- Wood glue
- Circular Saw
- Miter Saw
- Jig Saw
- Drill
- Kreg Jig
- Nail Gun
- Square
- Straight Edge (level)
GRAB PRINTABLE PLANS HERE!
.
1. Cut Out Corner Desk Top
First, I cut out the top to the size I wanted. I’ve provided a plywood cut diagram in the printable plans. I drew it out on the plywood with a straight edge and a pen to get a feel for the size.
.
RELATED: Check out my post on The Easiest Way to Cut Down Plywood Sheets!
First, I was going to build a 4×4 desk, so I wouldn’t have to piece the plywood together, but it felt too small, so I went with 5×5. I emphasized the lines I actually cut in the picture below. Notice one “wing” is longer than the other. Keep reading.
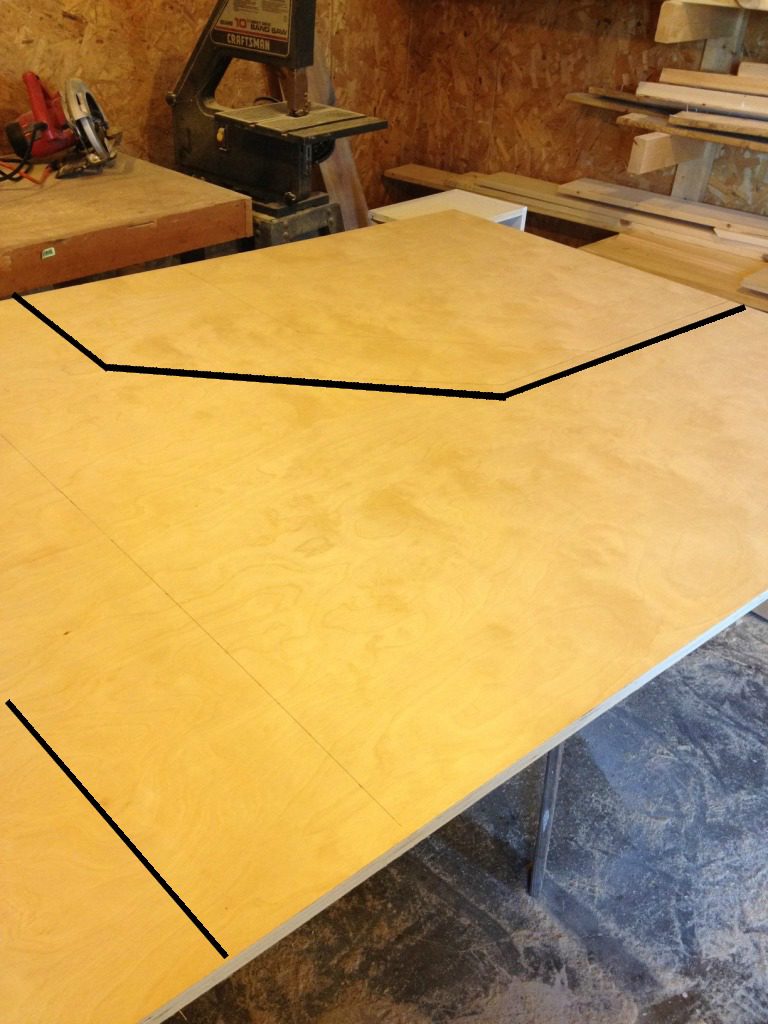
I cut across the board first with my circular saw (to make a 5×4 piece), then I cut the straight lines of the wings. Once those were cut, I CAREFULLY cut along the straight line of the 45 degree line with my jig saw.
.
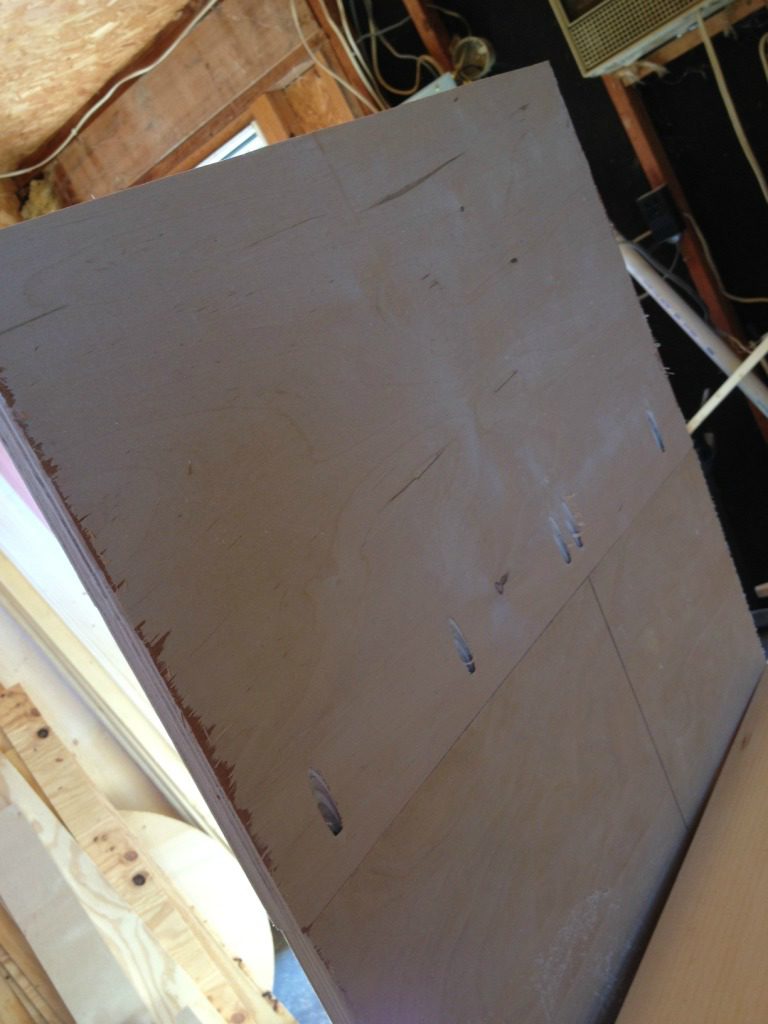
Because plywood sheets are 4ft wide, I had to attach a 12″ piece onto the end of one of the “wings” to give me 5ft. I attached it with wood glue and pocket holes (using my Kreg Jig and screws).
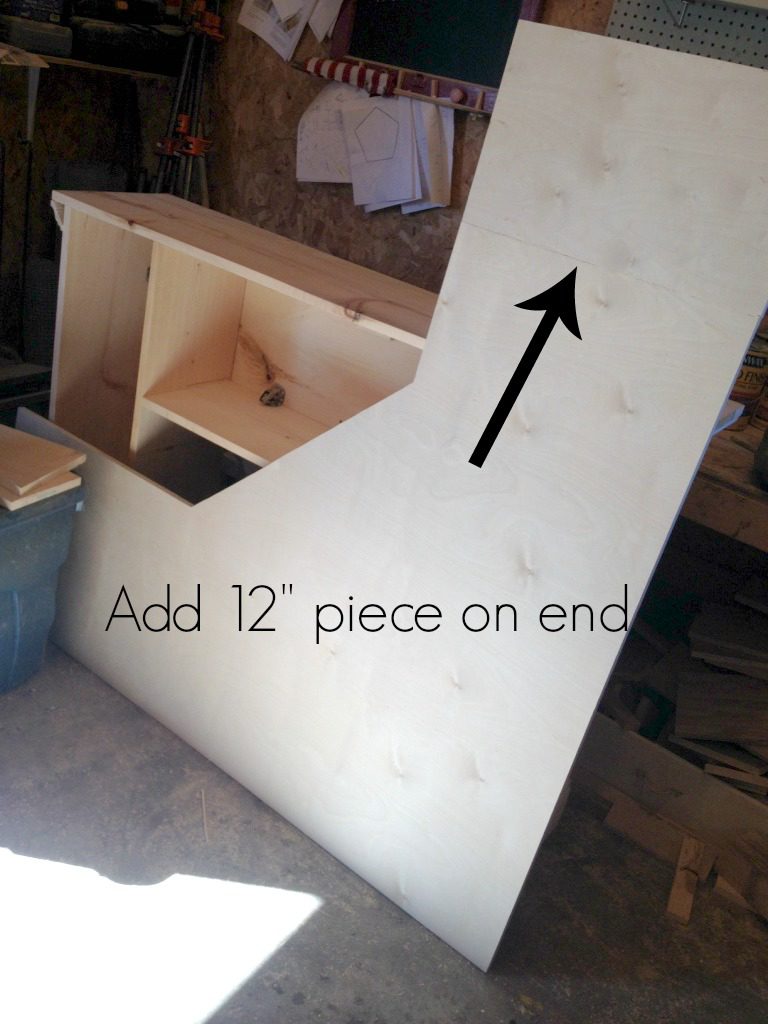
Then, I set the top aside while I built the rest of the pieces.
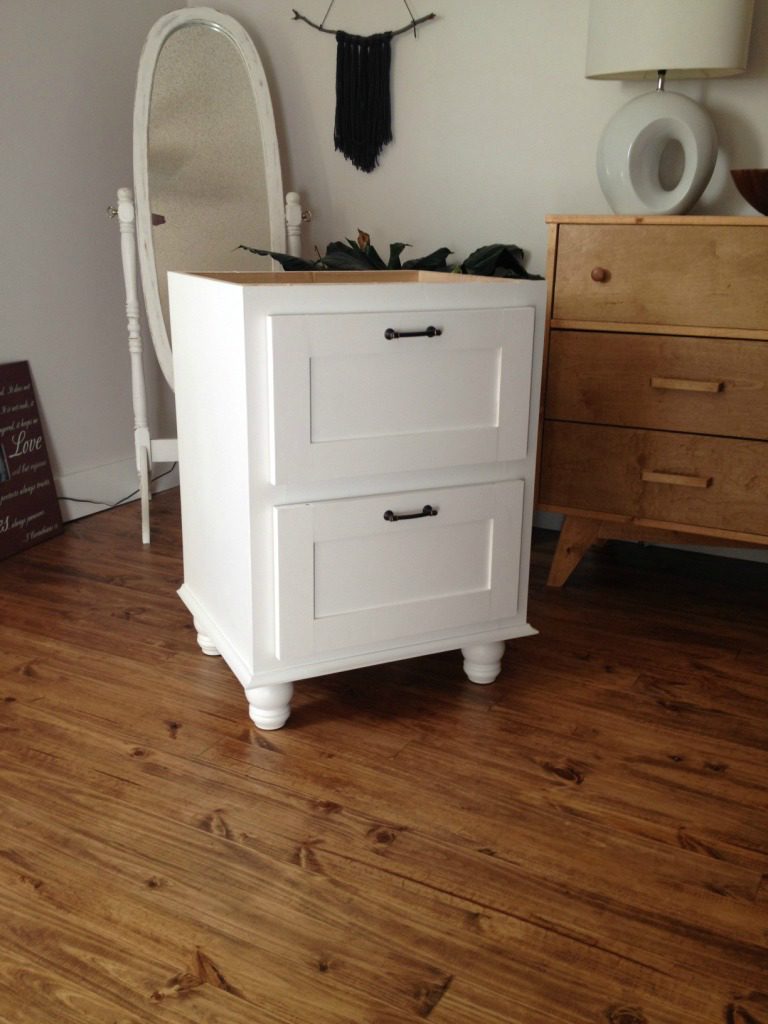
2. Build the Drawer Cabinet Boxes
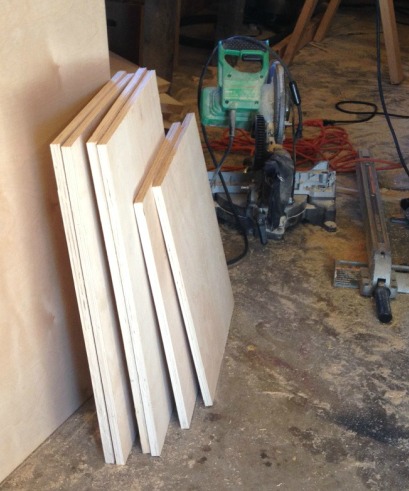
I built the cabinets so that their total height (after feet and face frames were added) would be 31 ¼″, depth 19″ and width 22″. I cut four cabinet sides and two cabinet bottoms based on these dimensions.
I used my Kreg Jig to drill pocket holes in the bottom of the cabinet bottom pieces.
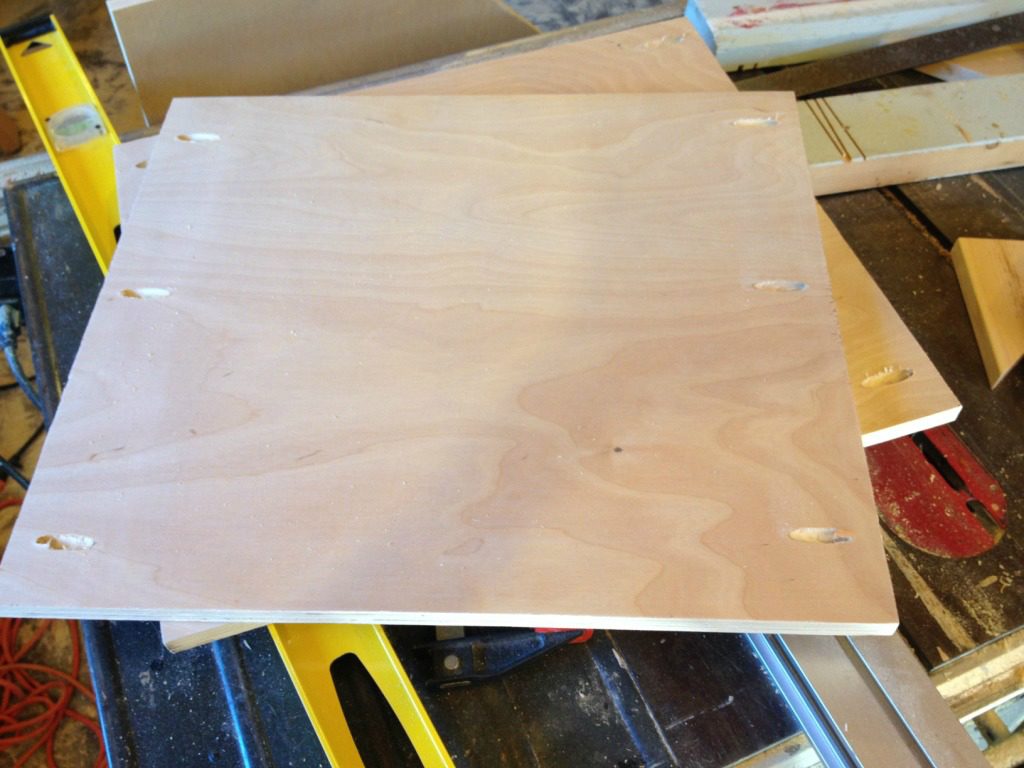
Then, I screwed the sides and bottoms together with ¾″ pocket holes and 1 ¼″ pocket hole screws.
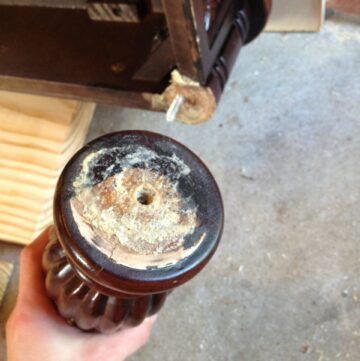
While I had the cabinets upside down, I went ahead and attached the feet. When I built this desk, the feet I used had a little bolt in the top and I used some attachment plates to install them.

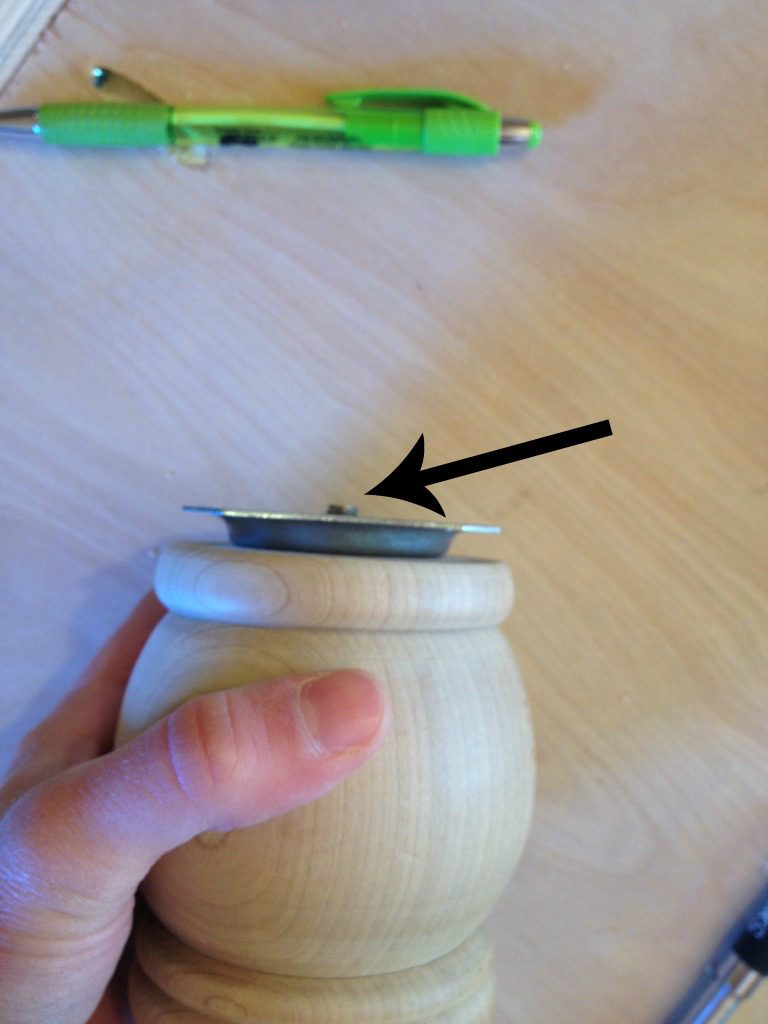
However, since then, I’ve found it easier to glue and screw these in place and skip the plates. So I recommend gluing and screwing 4″ tall furniture feet into the corners of the cabinet boxes using wood glue and 2″ wood screws through the bottom panel into the feet.
,
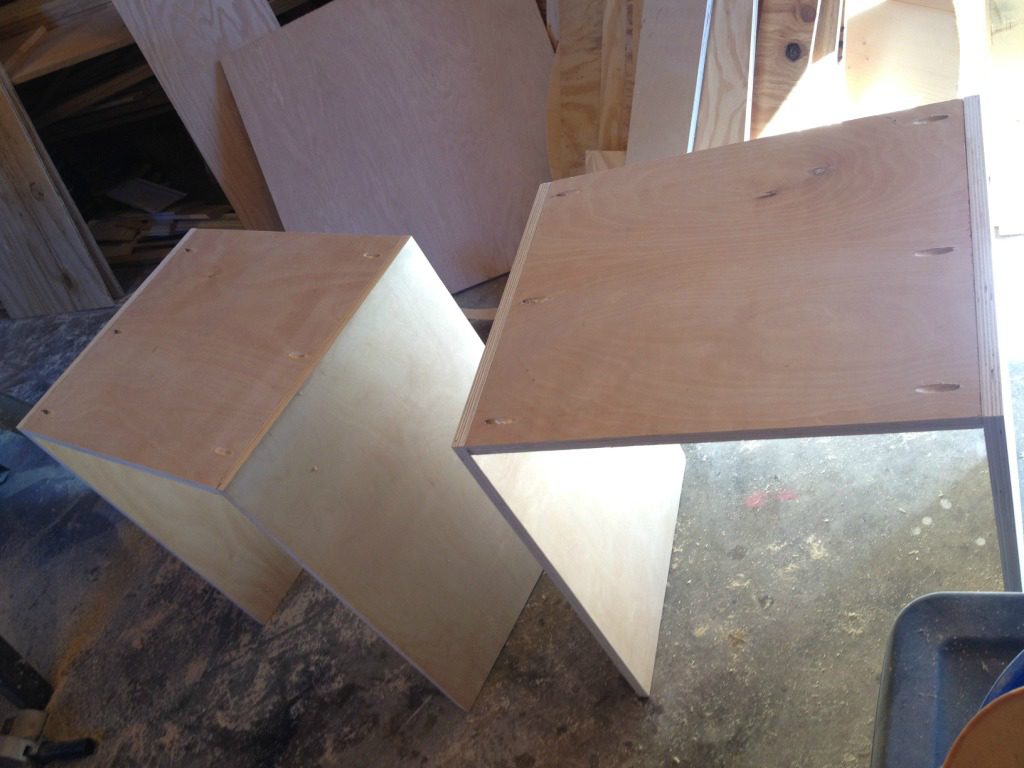
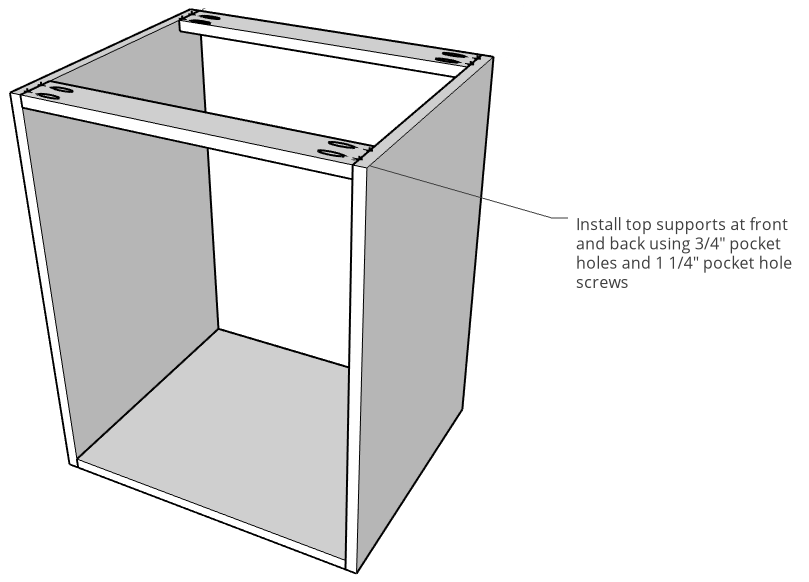
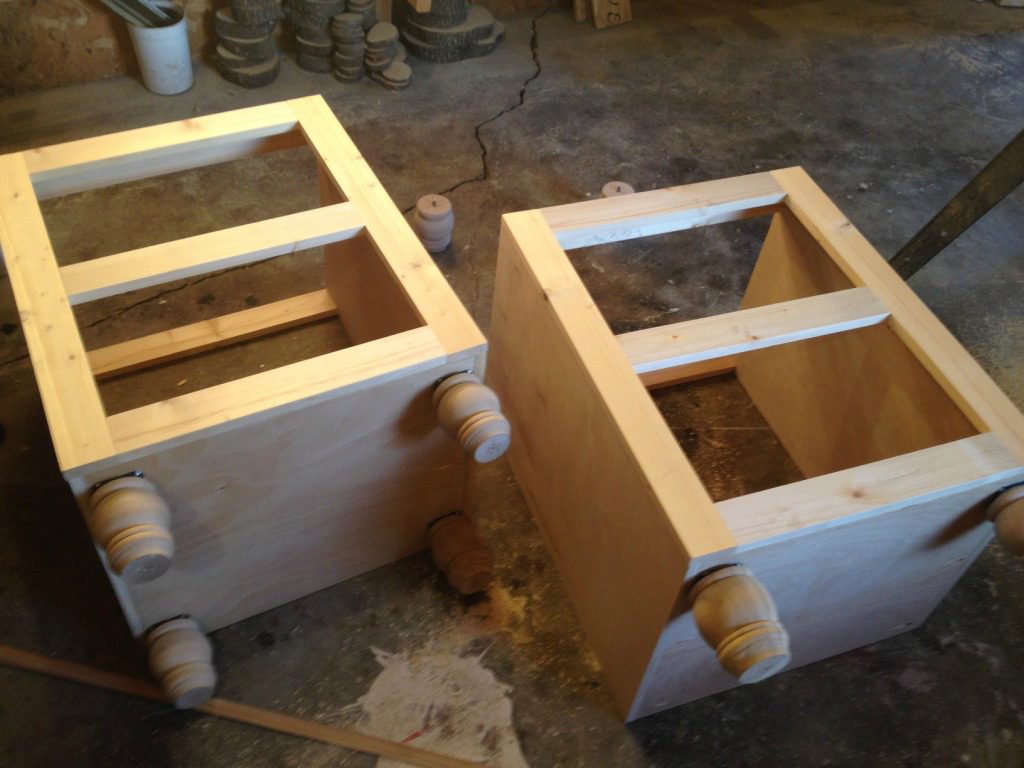
Then, I flipped them over and attached two pieces of scrap plywood (could also use 1×3 board) at the top using pocket holes and screws making sure everything was square.
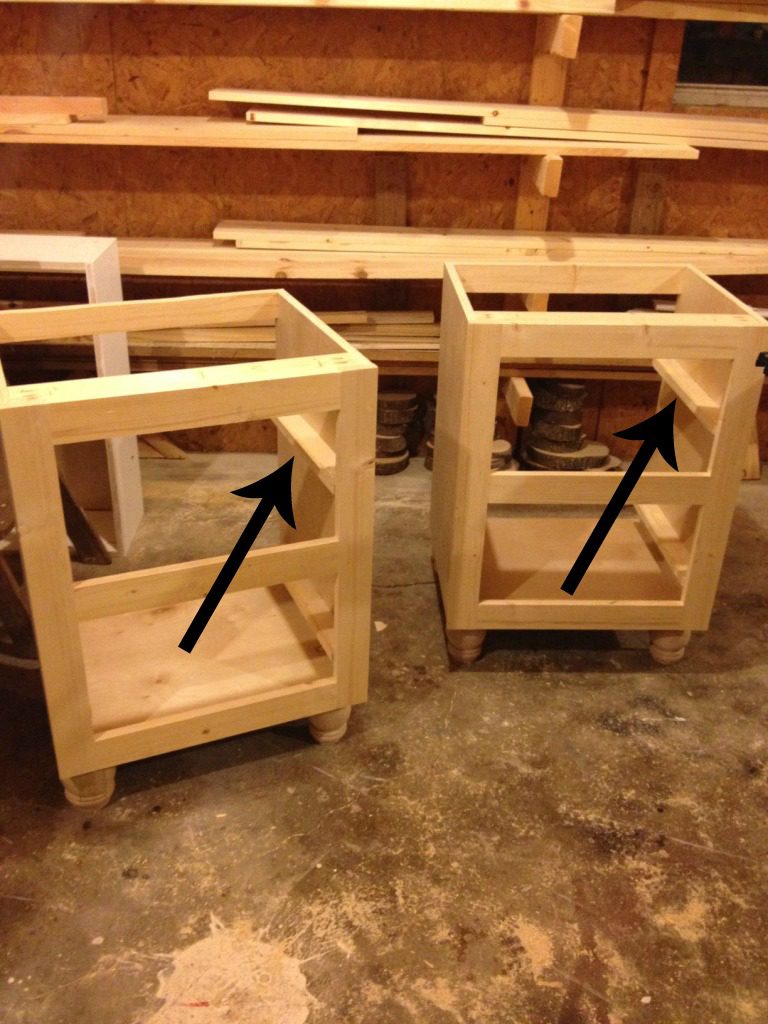
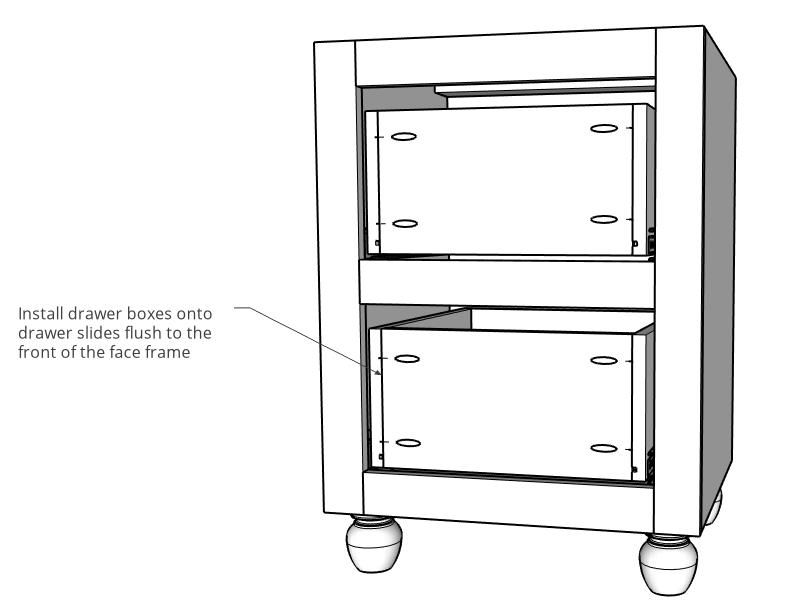
3. Add Face Frames to Corner Desk Cabinets
Now that the boxes were built, I added face frames to the front. I made my frames from 1x3s and pocket hole screwed them together first, then attached them from the inside of the cabinet using pocket holes and screws again.
.
You could also glue and brad nail these face frames in place as well. I built my frames to accommodate two identically sized drawers.
All details and dimensions are listed in the printable plans.
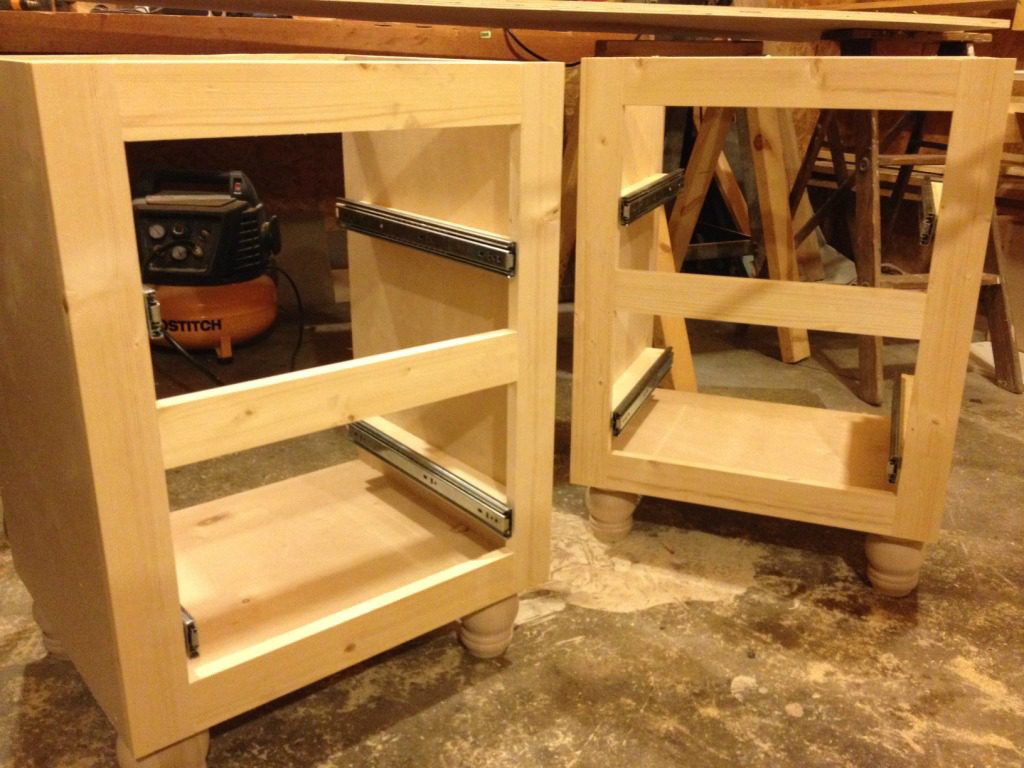
4. Add Drawers to Desk Cabinets
Because the face frames don’t allow me to mount the drawer slides directly to the side of the cabinet, I had to install “spacers” to push the slides out to where they would clear the face frame when the drawer was open.
.
RELATED: Check out this detailed drawer building guide for more information.
I cut some scraps about 1 ¾″ wide and mounted them on the side of the cabinet where I wanted to install the drawer slides making sure they were level. I actually used 2x2s first, and attached them with wood glue and 2″ wood screws. Then attached some ¼″ plywood on top of that to give me the 1 ¾″ total.
Then, I attached the drawer slides to the spacers.
Once the slides were in place, I made four drawers of identical size. and installed them into the cabinet boxes. You can check out my post here about how to make and install drawers.
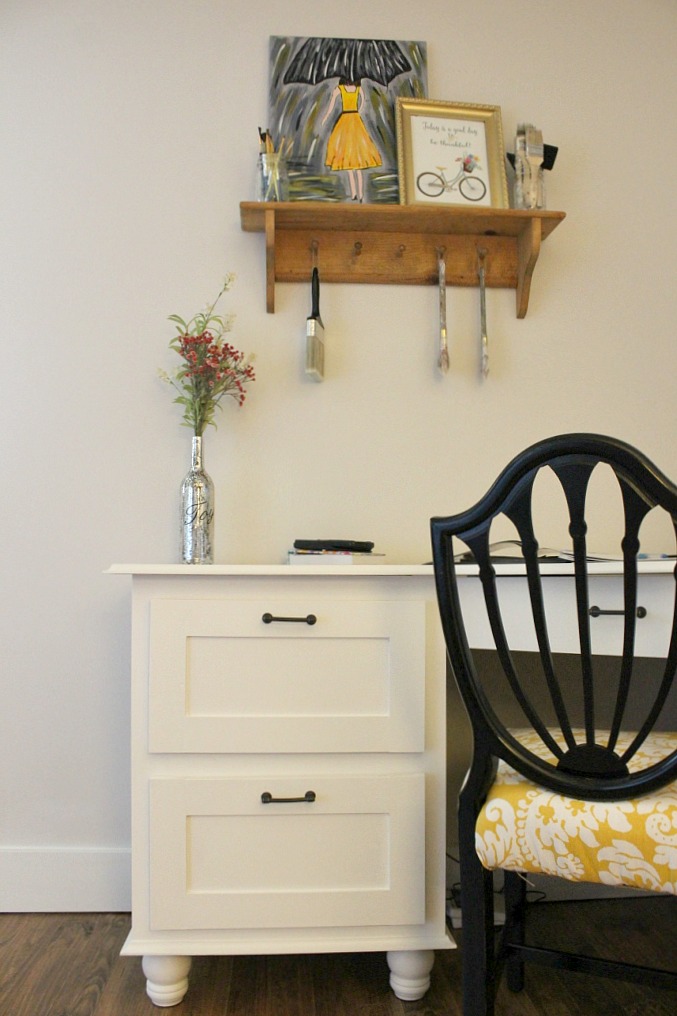
Once the drawers were in, I also added cove molding along the bottom of the cabinets using my nail gun and glue–that’s an optional step, but just adds some nice decorative detail.
5. Make Drawer Fronts
I made the drawer fronts like a shaker style cabinet door. I made them about 2 inches taller and wider than the opening on the face frame of the cabinets. This allows for 1″ overhang on all sides.
.
This tutorial shows you how to make shaker style doors. I used the same method to make the drawer fronts. Instead of pocket hole screwing them, I glued and clamped them instead.
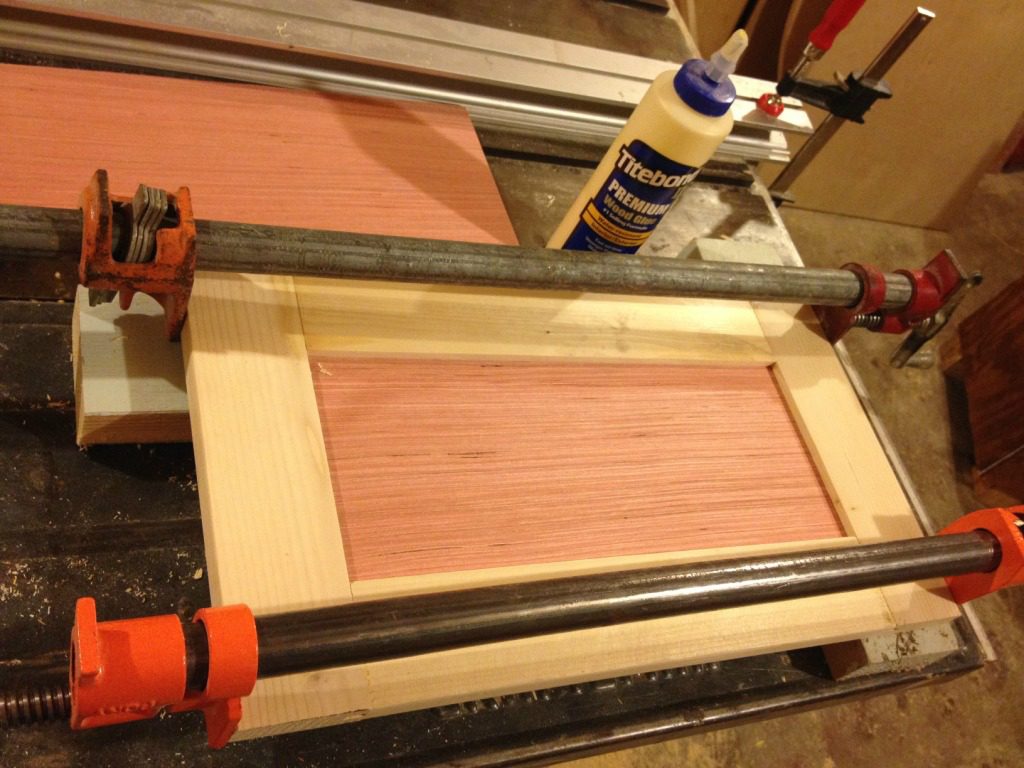
I actually recommend using solid panel (¾″ plywood) drawer fronts for this as they are much easier to install, (check out my drawer building guide for details) BUT if you do use this Shaker style drawer front, be aware you can’t screw them in from the inside of the drawer because the screw will poke through the ¼″ plywood center.
.
For this style drawer front, simply attach using wood glue between the drawer front frame and the drawer box. NOTE: It’s easiest to lay the cabinet on its back and allow gravity to hold the front where you want it until the glue dries.
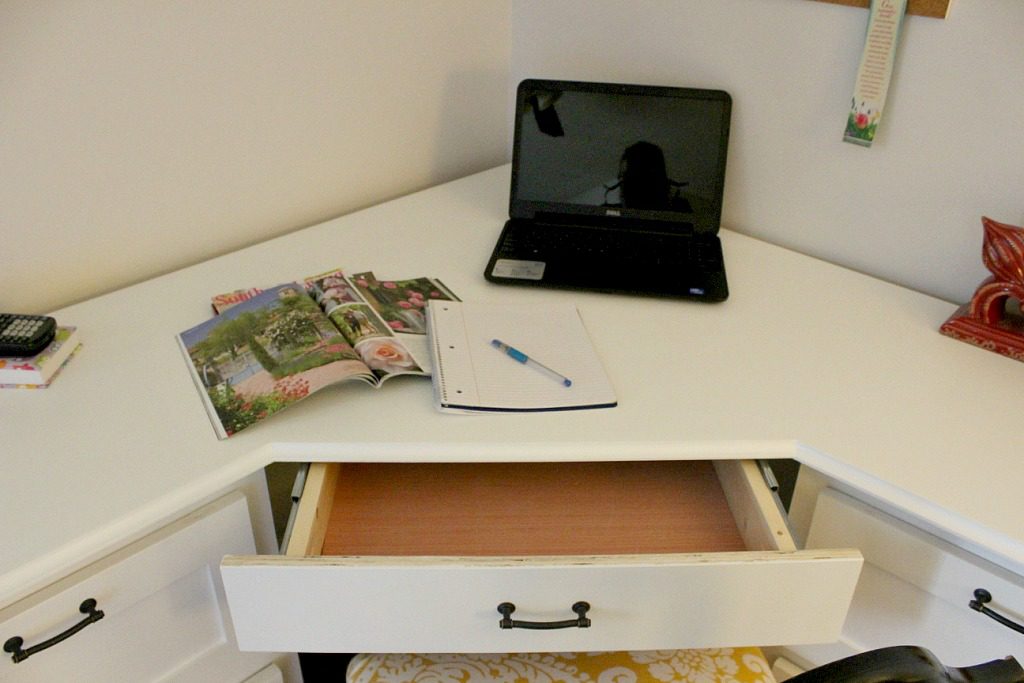
6. Install Middle Drawer to Corner Desk Top
Now that the side cabinets were finished, I flipped the corner desk top upside down and drew where I wanted to install the slides for the middle drawer. I cut some scrap 1×3 and attached drawer slides to them. Then, I glued and screwed them into the top.
.
NOTE: You could also use pocket holes and screws to attach as well.
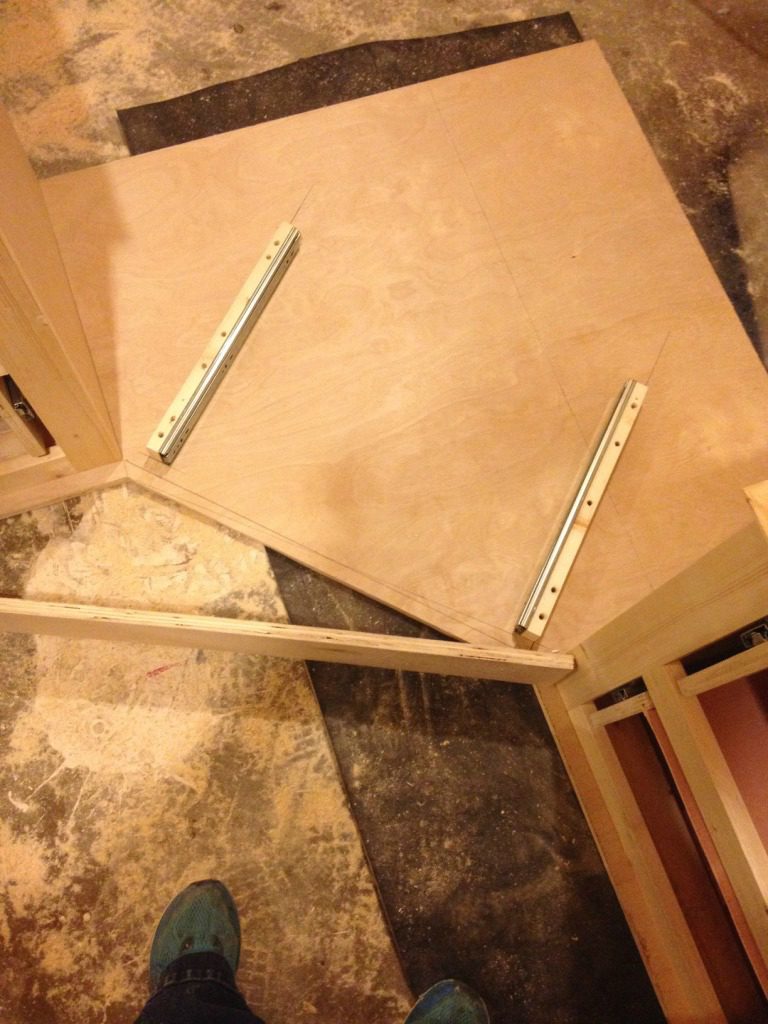
I built a drawer to fit this space and installed it. I used a scrap piece of plywood for the face front and cut it about ¼″ shorter than the distance between the cabinets so it would have clearance and not hit either when it slid out.
.
NOTE: In the image below you will notice the side cabinet drawers don’t have a front…this is because this is how I USED to build drawers years ago. I don’t build them like this anymore, so ignore the face the fronts here are missing.

Then, I flipped it all back over and added cove molding along the edges of the top (that’s optional, but adds a nice detail). I puttied the seam (see on the left) and along all the joints. Then sanded, caulked a few places, and painted everything.
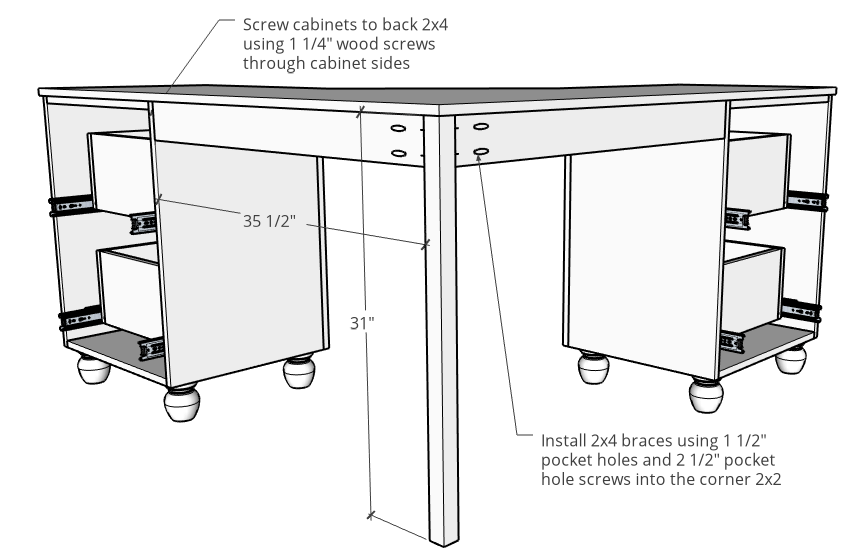
7. Assemble in Place
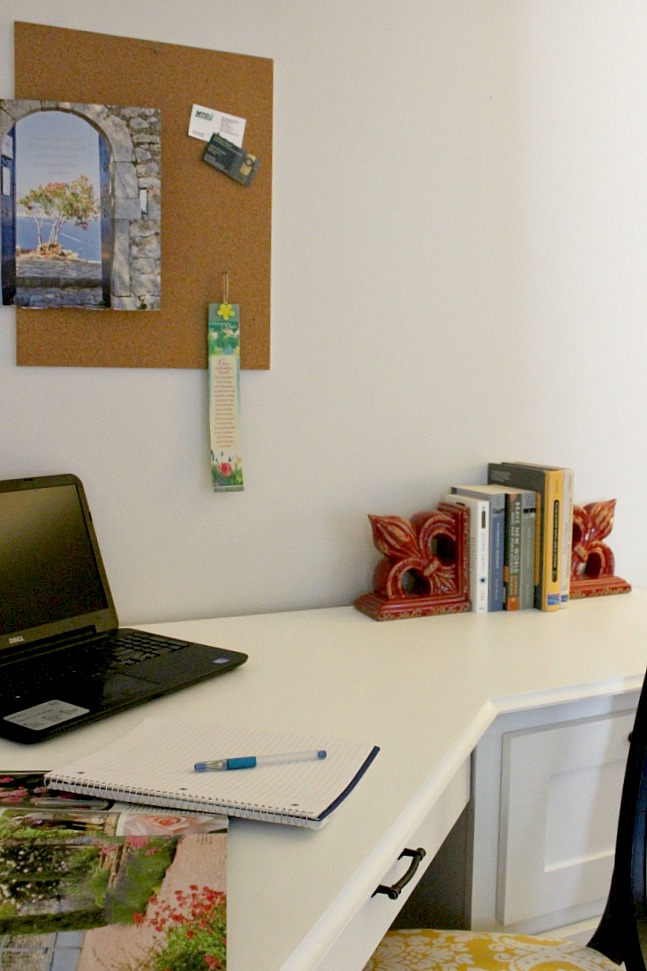
Once everything was finished, I brought it in inside and put it together.
Once all the pieces were in place, I screwed the top to the cabinets on those top supports mentioned in step 2 using 1 ¼″ wood screws. For an extra support at the back corner, I cut a 2×2 to use as a post and used 2x4s in the back between the post and the cabinets.
And at that point, it was time to slide it in place and set up shop….I mean set up OFFICE haha.
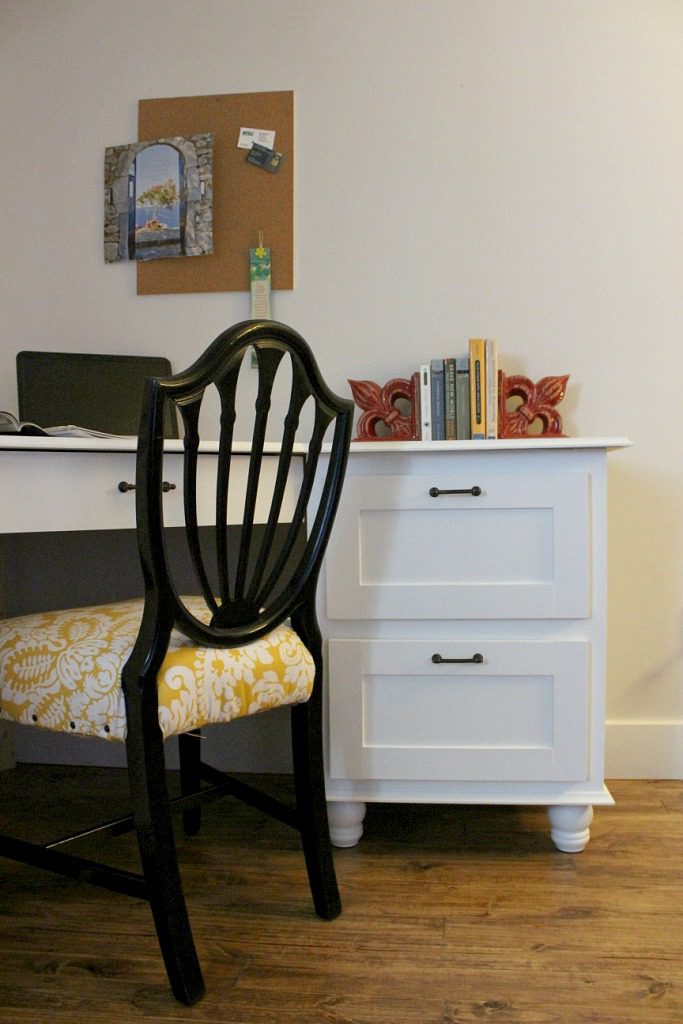
PS…Like my assortment of books here? We’ve got 1984 and Brave New World for when you’re feeling really morbid about the government (both highly recommended by the way), Pride and Prejudice and Wuthering Heights for when you need a dark, twisted, semi-romantic read, and Math Reasoning and Fluid Power for when you literally have nothing else better to do. Nice 😉
Since I’ve never build a corner desk before, it was a bit of a challenge, but I thought it turned out great! And I’m really loving how much storage is packed into this desk as well. Plenty of storage and workspace without taking up a huge footprint.
.
If you loved this project as well, be sure to pin this for later!
Until next time, happy building! 🙂
Ashley says
What kind of plywood do you recommend for a build like this? Oak, poplar, etc.
Shara, Woodshop Diaries says
I almost always use birch plywood because I personally like the way it stains and it’s smooth for paint as well. So it works nicely either way you choose to finish it. Plus around here where I live, it’s the cheapest option for cabinet grade plywood. If you are going to paint, any smooth plywood would work. Oak can sometimes have a grainy texture and may show up through the paint, so you may want to try something else for paint projects, but it does stain nicely.
Gail says
This is so gorgeous?! About how long start to finish did it take you to make?
Shara, Woodshop Diaries says
Thanks so much!! It took several hours. I worked on it several nights after work and some on a weekend. So it’s hard to say how long it took me since it was a little here and a little there. You could probably get it done in a weekend if you worked on it most of the day both days 🙂
Janet says
It’s ABSOLUTELY Wonderful! I want one for my Sewing Table. Be honest, how much did it cost to make this?? I’d much rather have a good handmade item than a factory put together! Super Great Job!! jwt
Shara, Woodshop Diaries says
Thank you!! I would have to go back and double check my math, but it probably cost me about $150-200ish in lumber and materials to build. I’d say that’s much better than the $1000+ similar items in the furniture store 🙂 Thanks again!
Becky says
I too am drooling over this desk, those legs! That cove molding! Those gorgeous drawers! Your blog makes me so happy. Seriously, not only are you a superstar with power tools, but you manage to make it all seem attainable. I appreciate the detail and fun that you inject into your work and your site. Thank you so much for being part of my day!
Shara, Woodshop Diaries says
Thank you! Your sweet comment made my day 🙂 Thank you so much for following along…I am truly thankful for readers like you!
Tyler says
About how much did this cost to build?
Shara, Woodshop Diaries says
Please send me an email through the contact page and I will be glad to answer your question 🙂
Ashley Smith says
I am looking to make a desk as close to this as possible. It is exactly what I have been looking for! I love the style and size. It is perfect! Do you have the whole shopping list needed for this size desk somewhere? I couldn’t find it, but was hoping maybe I overlooked it. I would love to get the shopping/ cut list, if it is around. Thanks for posting this; you did a fantastic job!
Shara, Woodshop Diaries says
Thank you! I have a supplies list in the blog post, but not an exact cut list. Most of my tutorials I post without exact measurements that way you get the idea of HOW to build it, but you can customize your own size. Hopefully this will get you started. I used 2 sheets of 3/4″ plywood, one sheet of 1/4″ plywood, and I bought a few (I think 3 was plenty) 1x6x8 boards and ripped them to 1x3s. I apologize for not having exact measurements in the post, but this way, you can completely customize the size you need. I may draw up some plans once I learn how to use the software, but tutorials is all I have right now. Feel free to email me (from the contact page) if you need some help!
Ashley Smith says
Thank you! It’s on the to-do list now, and hopefully in the next few weeks I will be able to get to it. Glad I found your blog!
Amy says
I love this!!! Exactly what I’ve been looking for. If you don’t mind me asking what did you charge to make this? I’d like to show it to some carpenters in my area to see if they could make me one, but kinda need to know if I’d even be able to afford it in the 1st place.
Again beautiful work!!!!
Shara, Woodshop Diaries says
Hi Amy! Please send me an email from the contact page 🙂
Samantha Murphy says
Hello!! I’m actually very interested in trying to make a desk just like this and was wondering if I could get the exact measurements that you used? I measured a corner in my house and the 5×5 desk size is perfect!
Laura says
It is very pretty and “yes” I would want one too. I have questions for you…. What type of paint did you use on the desk? And how did you paint it? Do you use a spray gun…spray paint etc… It also looks like there is a glossy sheen to it….did you put on a protective coat of something? Thanks in advance for you answers…..if you do answer…..
Shara, Woodshop Diaries says
Thank you so much! I used Kilz primer (two coats) and Sherwin Williams regular latex paint in a satin sheen (two coats). I wish I had a paint sprayer, but I do not, so I used a small roller and a brush. I rolled the flat areas that I could and brushed the areas that I couldn’t get with the roller. I did not use a protective coating, but after the paint dried, I hand sanded with 400 grit paper and it seems to take away the “tacky” feeling you sometimes get with latex paint.
Linda says
Wow, so impressed! It is beautiful. Sure wish you were my friend so I can get you to make me one!! What a talent you are.
Shara, Woodshop Diaries says
Thank you so much! 🙂
Jan says
You did a phoneminal job!!! I want one’!?
Shara, Woodshop Diaries says
Thank you so much! 🙂