Am I the only one that kind of thinks it’s weird that it took us this long to come up with the concept of standing desks? Like…I’ve never really seen one until fairly recently.
.
Maybe they’ve been around and I just haven’t noticed until now (highly likely…), but what a life changing concept, amiright?? No wonder they’re becoming so popular. And science (I’ve always wondered who exactly “science” is, haven’t you?) has shown that it’s much healthier to stand than it is to sit.
.
Can you tell I’m really selling the idea of a standing desk to you? Haha. That’s because I made one and I’m going to show you the how to to make your own!
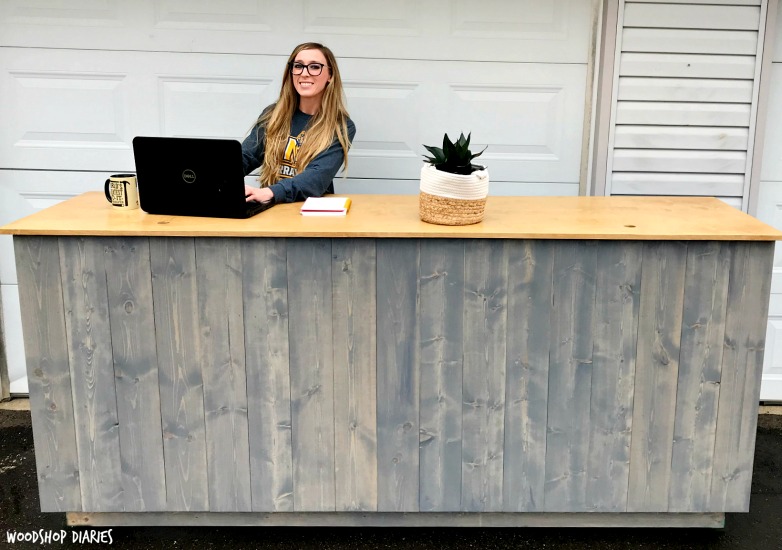
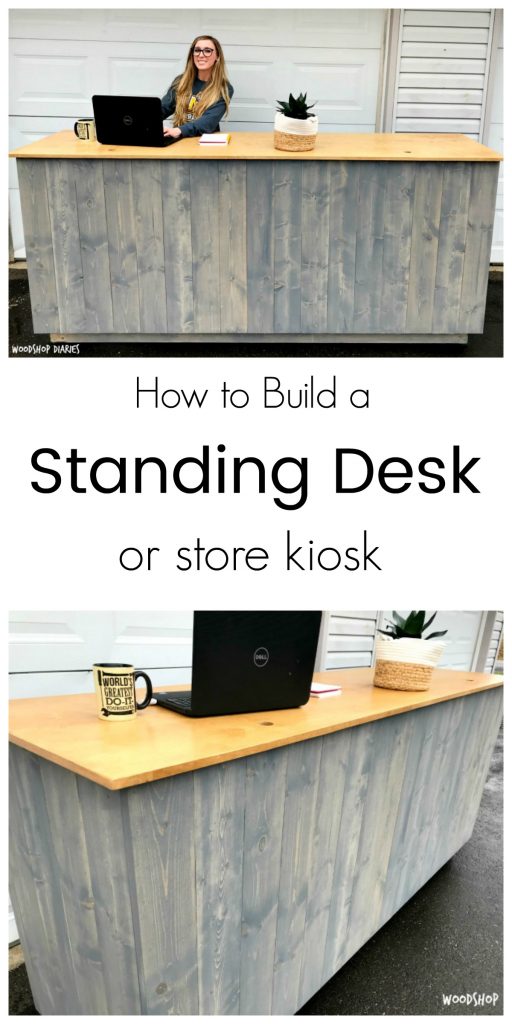
Actually, truth be told, this was originally built for a friend’s boutique store to serve as the cashier kiosk, but I thought it would also make a really cool looking DIY standing desk.
.
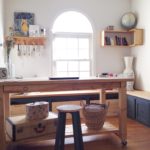
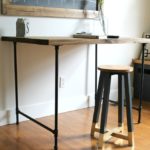
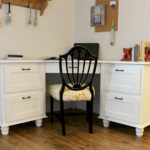
Side Note: If you’re looking for more desk ideas, check out these: mobile craft desk, industrial pipe desk, and corner storage desk 🙂
.
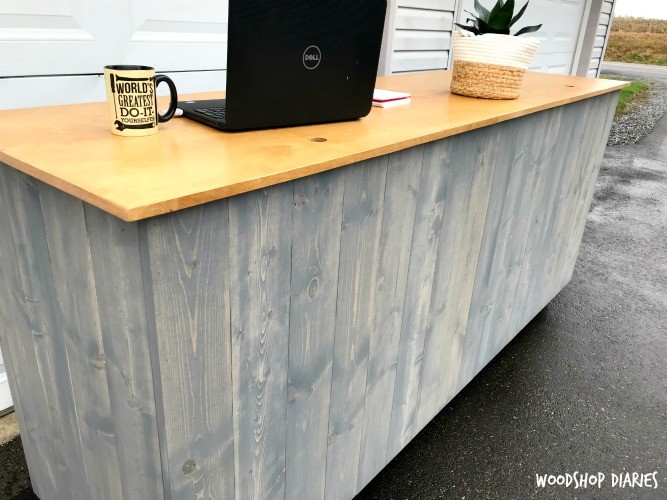
Anyway, back to the standing desk…This desk was fairly large, but the size is SUPER easy to modify and it’s got lots of space for storage on the back side along with a shelf you can store notebooks, laptops, etc.
So if you’re ready to get to work at your new fancy standing desk, let’s get building 🙂
.
This post contains affiliate links. Please see disclosure policy for details.
.
You will need:
(9) 1x6x10
(1) sheet ¾″ plywood
(4) 2x4x8
(5) 2x2x8
(2) 2x6x8 (optional)
Kreg Rip Cut (optional)
2 ½″ wood screws
2″ wood screws
.
Step 1: Build two Side Frames for DIY Standing Desk
First, I built two side frames. Keep in mind, this desk was 27″ deep and 42″ tall. If you want something different, modify this step for your application.
.
I assembled the sides with 2x4s and 2x2s as seen below. I cut the two side pieces at 36″ (see step X for more information on the height), and the pieces in the middle here at 17″ long. I left 6″ between the top and middle piece for the shelf. You can totally adjust however much you want.
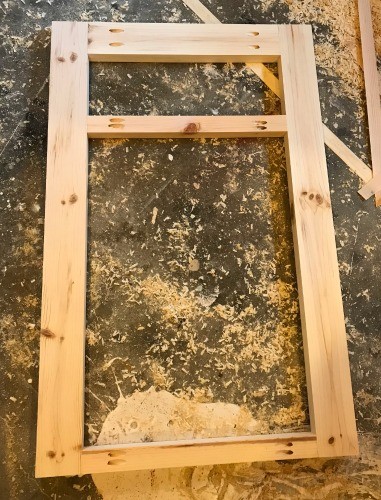
I built two sides just like the image above and assembled using 1 ½″ pocket holes and 2 ½″ pocket hole screws.
Step 2: Build DIY Standing Desk Frame
Now that the sides are assembled, it’s time to move on to the rest of the desk frame. I cut 2x4s for the top and 2x2s for the rest of the frame pieces and assembled like shown using 1 ½′ pocket holes and 2 ½″ pocket hole screws.
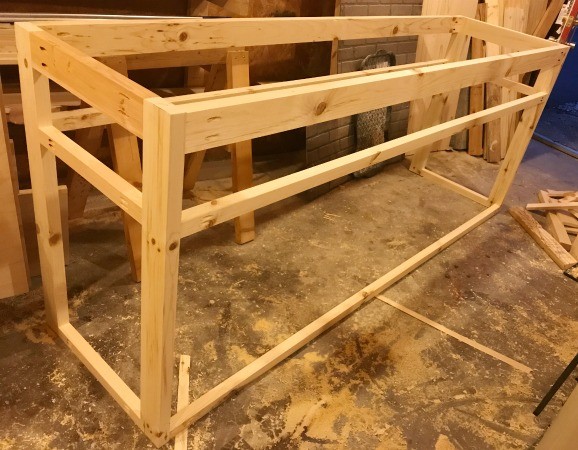
I made this desk 8 ft. long. I know that’s probably bigger than most people will want. I cut these pieces 89″ long. Modify this length as desired to get the size desk you’d want.
.
Keep in mind that when you modify this dimension, just trust me when I tell you to take your total length desired and subtract 6 ½″ to get the dimension these pieces need to be.
.
Also, note the pocket holes all face the outside EXCEPT for the 2×2 on the front where the shelf will go. The planks will cover the pocket holes this way 🙂
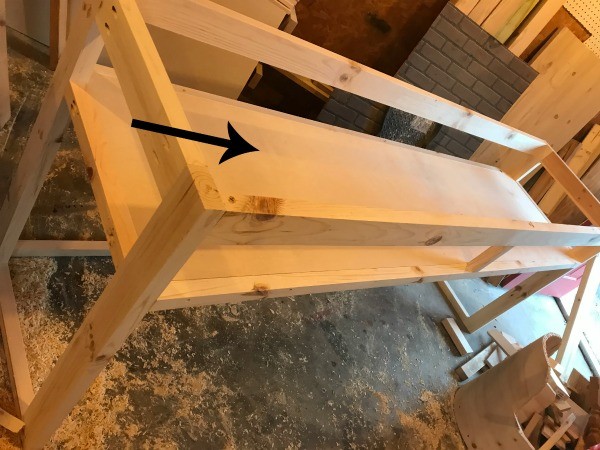
Step 3: Add Shelf to DIY Standing Desk
Using a circular saw and a Kreg Rip Cut (the Rip Cut is optional, but super handy for this step), I ripped a sheet of plywood down to one 21″ x 8 ft strip and one 27″ x 8 ft strip. The 27″ wide strip will be the top, so I set it aside for later. I cut the 21″ wide strip down to match the length of the frame pieces from step 2–so 89″.
.
I inserted the shelf this piece like shown below and used 2″ wood screws to screw it in place through the 2x2s along the side of the frame.
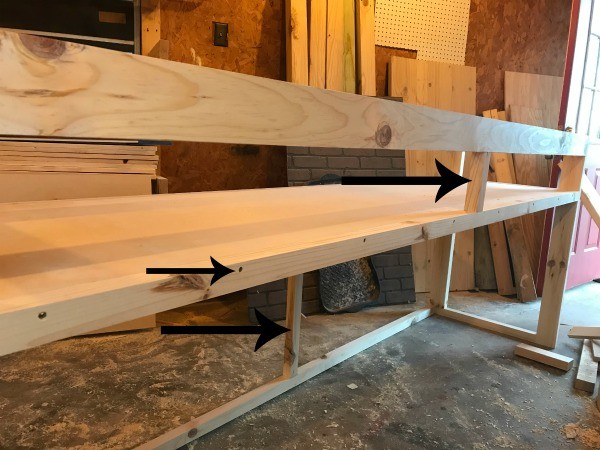
Step 4: Add Supports to DIY Standing Desk
You may have noticed in the image above, I had a support in the middle that I didn’t mention. Sorry, I got ahead of myself before I took the picture.
.
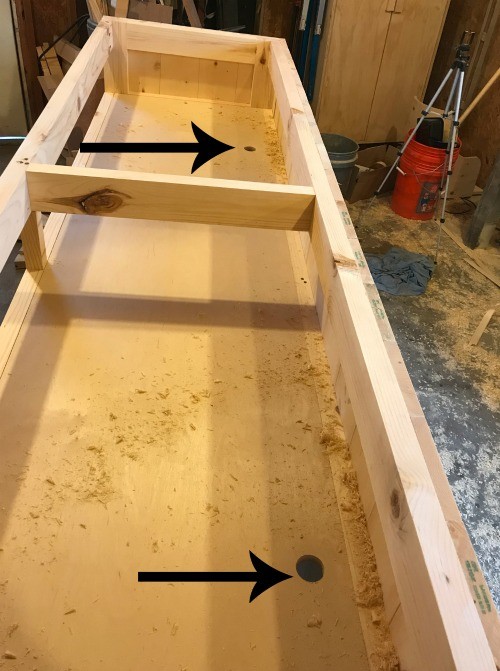
I added this little support piece and also one at the back on the bottom like shown using 2x2s. This just helps add some support to the shelf piece. I used pocket holes and screws on the piece at the bottom and used 2 ½″ wood screws to attach the piece at the front.
.
Since the 2×4 at the top is 3 ½″ thick, the screw wont go all the way through, so I just toenailed it in at the top. Also, I point out in the image below the screws I used for screwing the shelf in in step 3 in case you were wondering 🙂
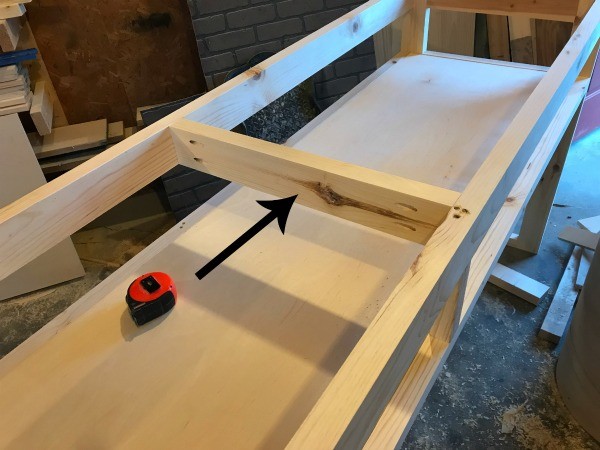
Step 5: Attach Top Middle Support
Using 1 ½″ pocket holes and 2 ½″ pocket hole screws, I attached a 2×4 middle support piece like shown. This just helps keep everything square and keeps it from bowing.
 “
“
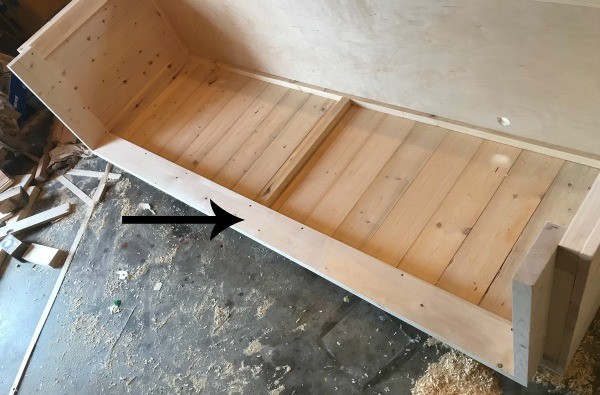
Step 6: Attach Wood Planks to DIY Standing Desk
This is the fun part. I cut SEVERAL pieces of 1×6 board at 36″ long and glued and nailed them into the frame like shown. (SORRY! The piece for the top is leaning up on the front, but you get the idea, right?) It’s easiest to start in the middle of the front here and work your way out. When you get to the edges, you may have to rip them down to the exact size you need so it doesn’t hang off too far.
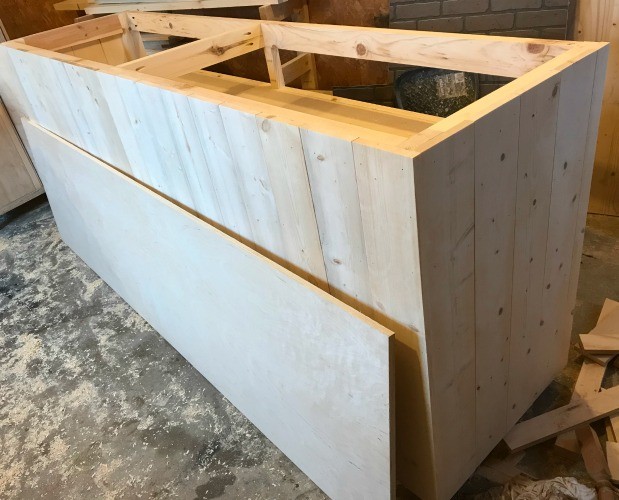
Then, just continue around the sides. Get excited…it’s almost done!
Step 7: Drill Holes for Cords
This step is optional, but I used a 1 ½″ spade bit on my drill and drilled holes in the shelf and the top for power cords for computers, etc. This isn’t necessary, but will help keep that mess of cords hidden later 🙂
Step 8: Add Bottom Toe Kick to DIY Standing Desk
This step is also optional. I thought this made it look a little more like the kiosk it was going to be used for than a standing desk, but I added a piece at the bottom here for extra height, but also as a sort of “toe kick” like a lot of cabinets have.
.
Basically, I cut 2x6s to make the piece you see below that would fit perfectly inside the bottom of the desk. I attached the boards using glue and 2 ½″ wood screws, then screwed it to the desk like shown using 2 ½″ wood screws.
Then, I glued and screwed it onto the inside of the bottom of the desk like shown using 2 ½″ wood screws.
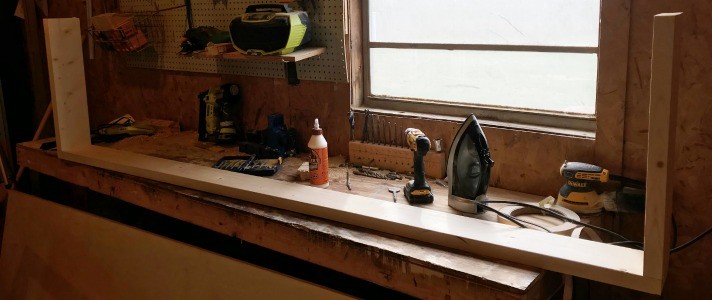
Step 9: Attach the Top to the DIY Desk
Remember that leftover piece of plywood from step 3? That’s the top. I edge banded the plywood edges to give it a more finished look, drilled holes for the cords like in step 7, then centered it onto the desk and attached by toenailing through all the top supports into the plywood top using 2″ wood screws. You could also do pocket holes and screws here, but I just toenailed.
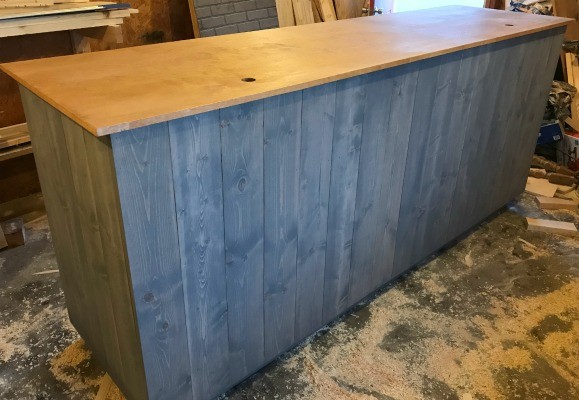
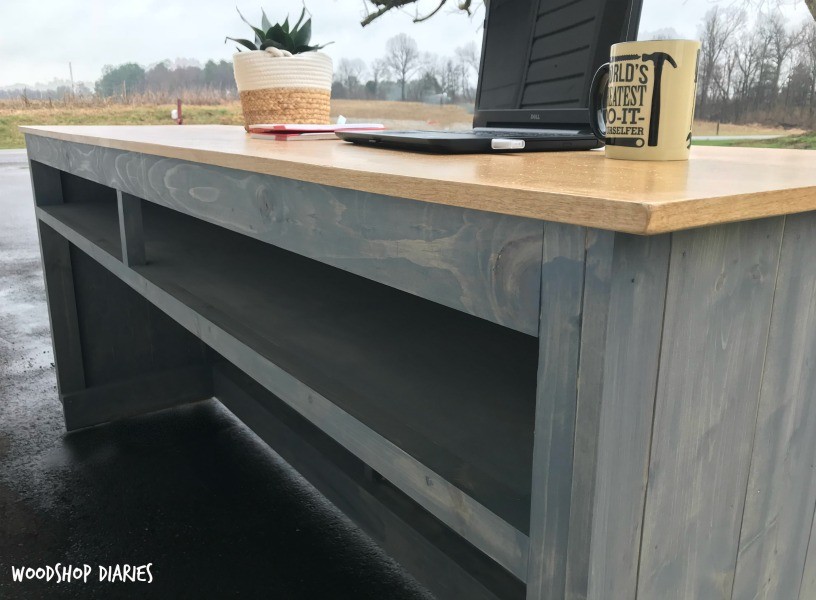
Just putty, sand, finish, and get to work 🙂 I used Rustoleum Weathered Grey stain for the bottom and Minwax Golden Oak for the top. I really like the two tone look.
.
For added storage, you could also build doors on the back to hide what you store underneath or even add drawers under there, too.
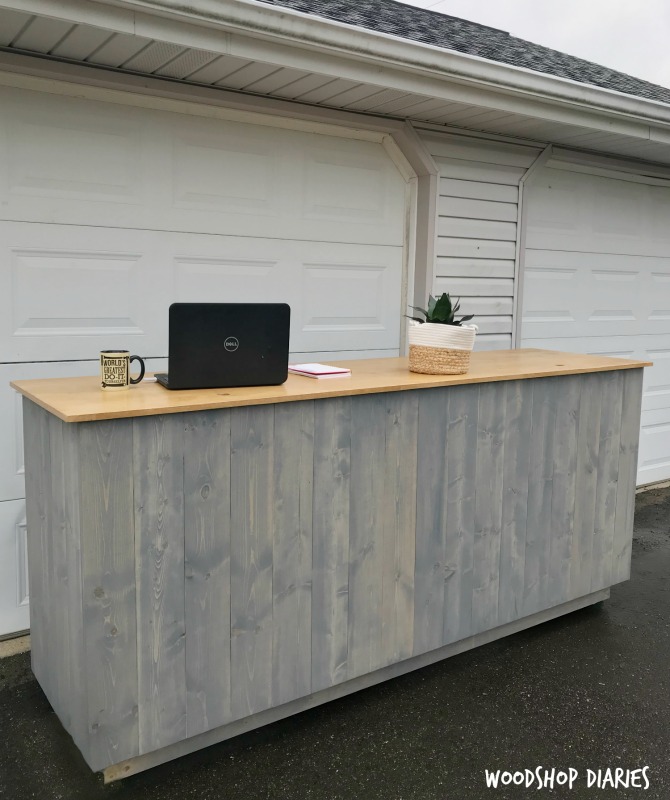
Also, in case you are wondering, I took these pictures in front of my garage in between rain storms. I know that made for an odd backdrop, but it was way to heavy to carry in the house just for pictures then carry it back out for my friend to pick it up haha. I’m too weak for that.
.
So what do you think?? I really like the planked look and the option to hide so much stuff behind it. Is this something you’d try for your next desk?? If so, I’d love if you’d pin this for later!
And stay tuned for lots more fun builds coming up soon 🙂
.
Until next time, happy building 🙂