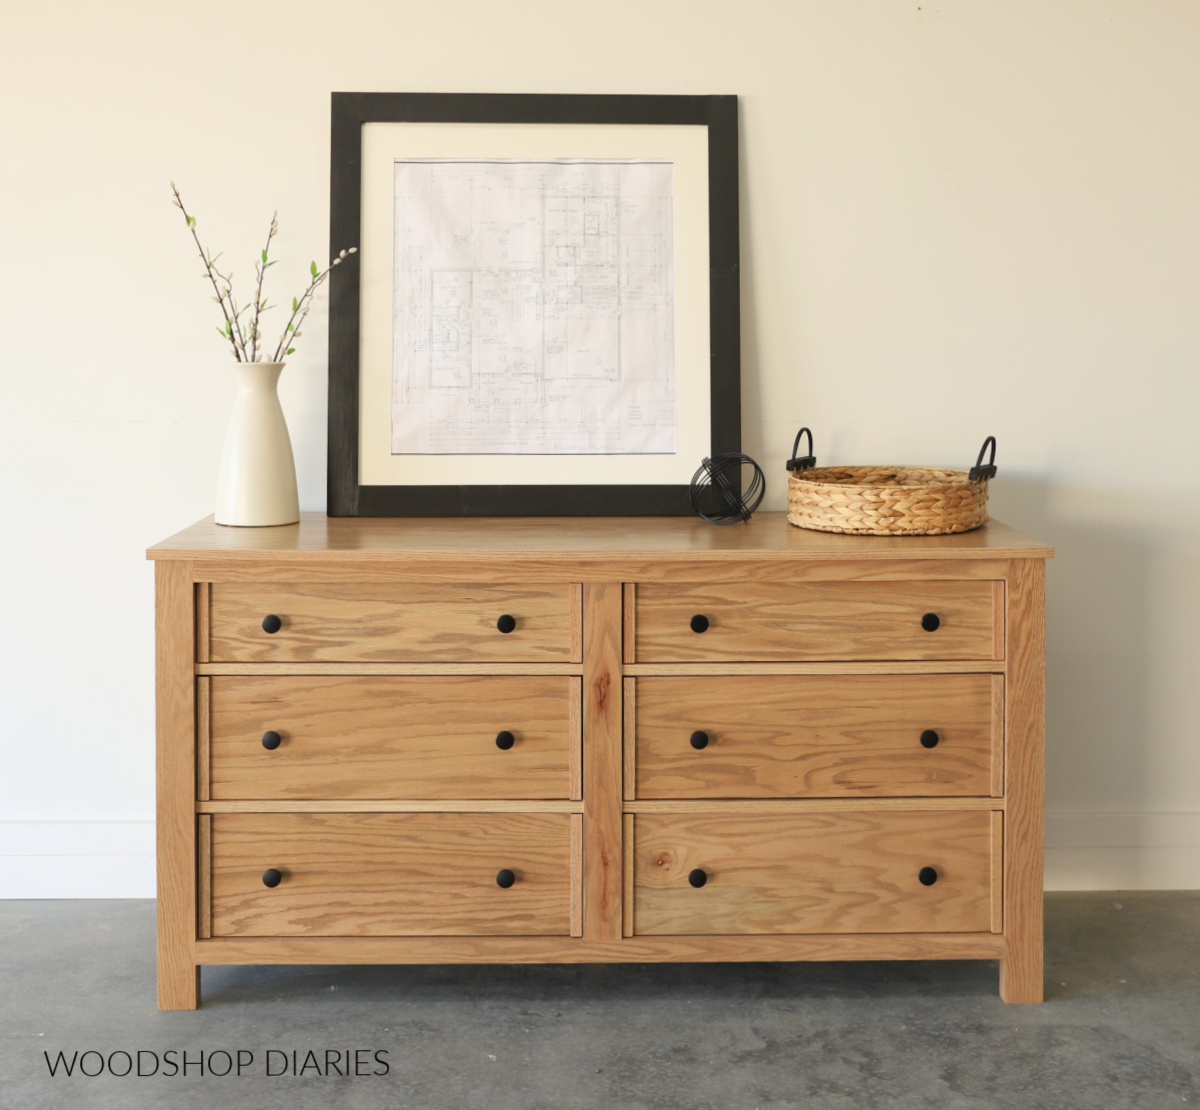
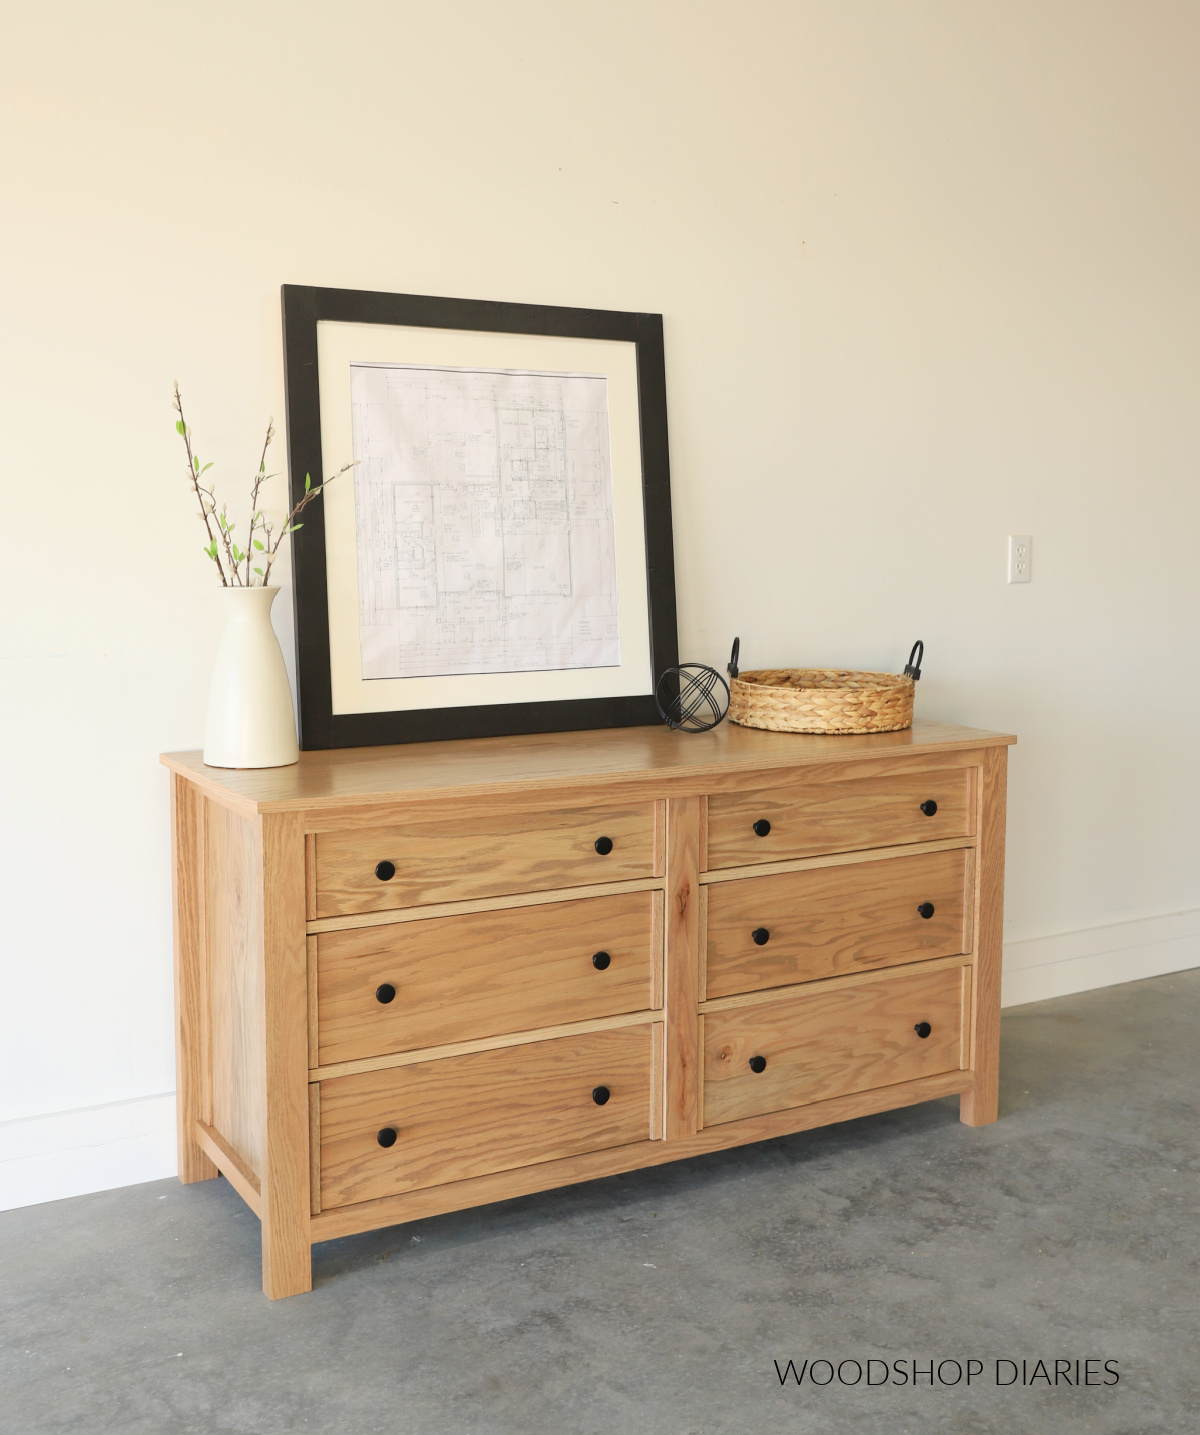
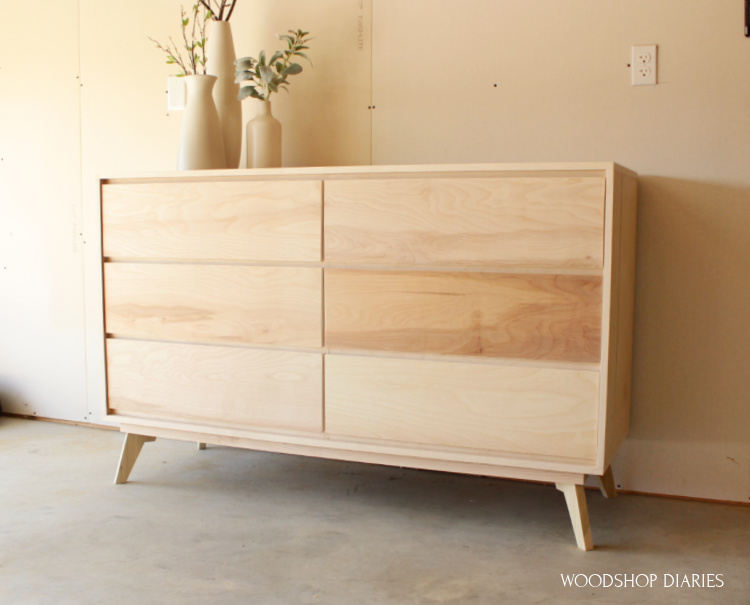
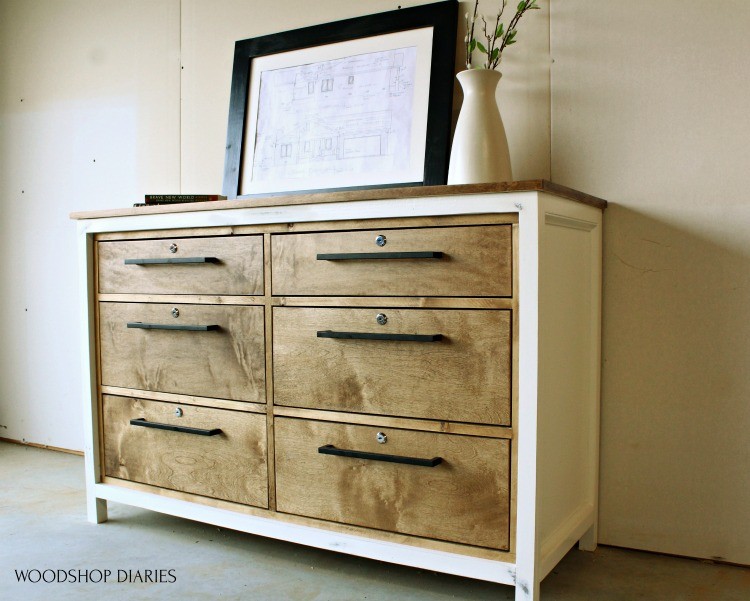
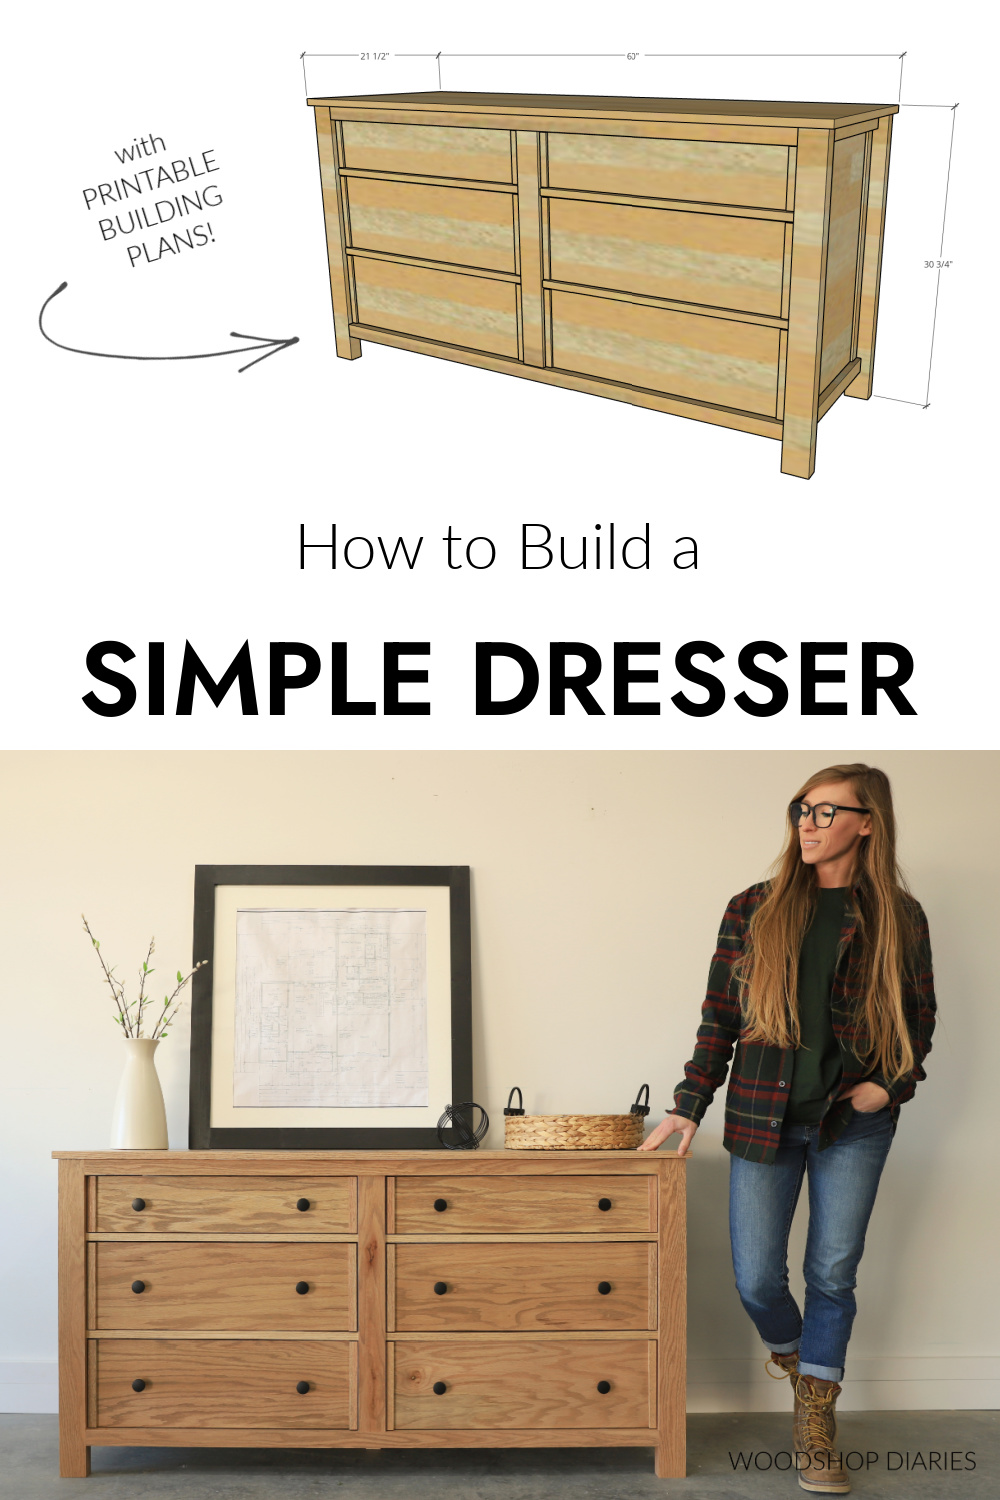
In this post, I’m sharing how to build a simple modern dresser with 6 drawers using basic tools and materials!
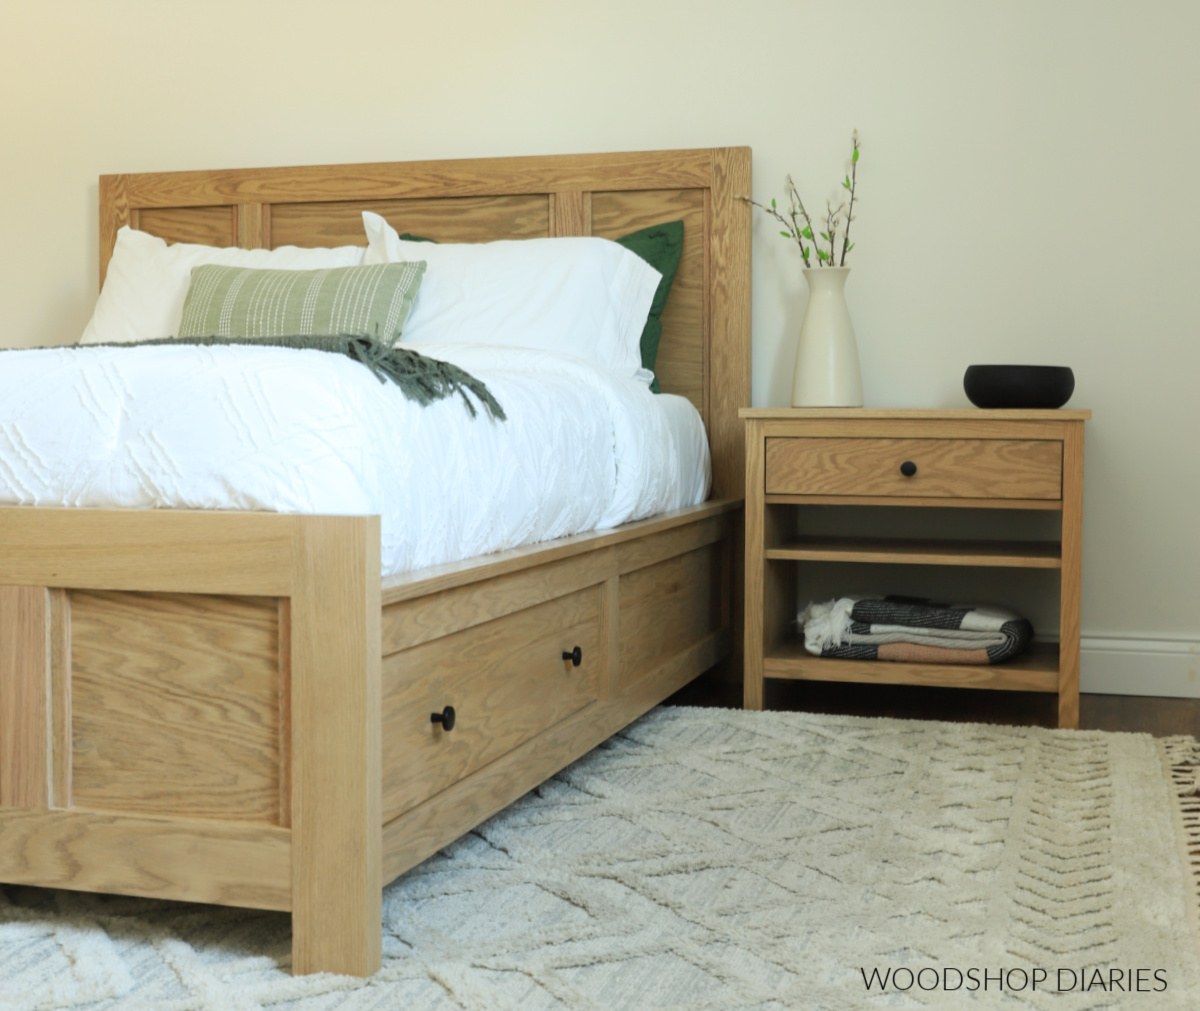
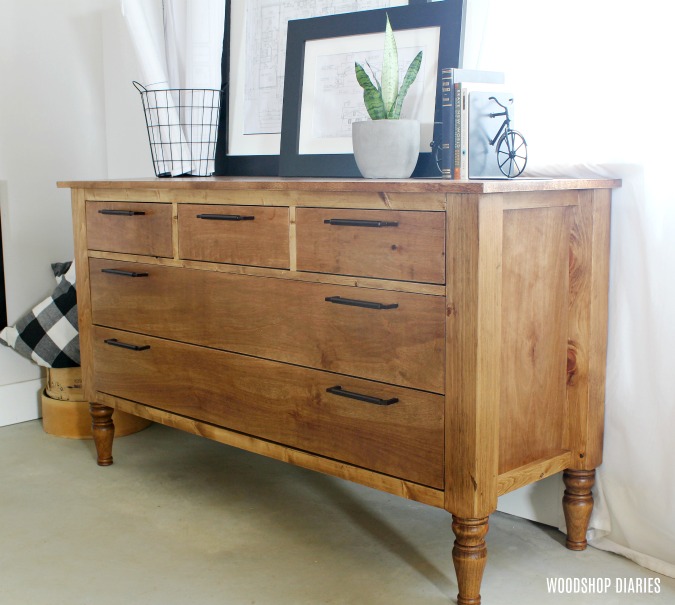
This particular dresser is part of a matching bedroom furniture series I’ve been sharing. I tried to use clean lines, matching wood types, and similar trim details to tie each piece together–the storage bed, the nightstands, and now, this dresser.
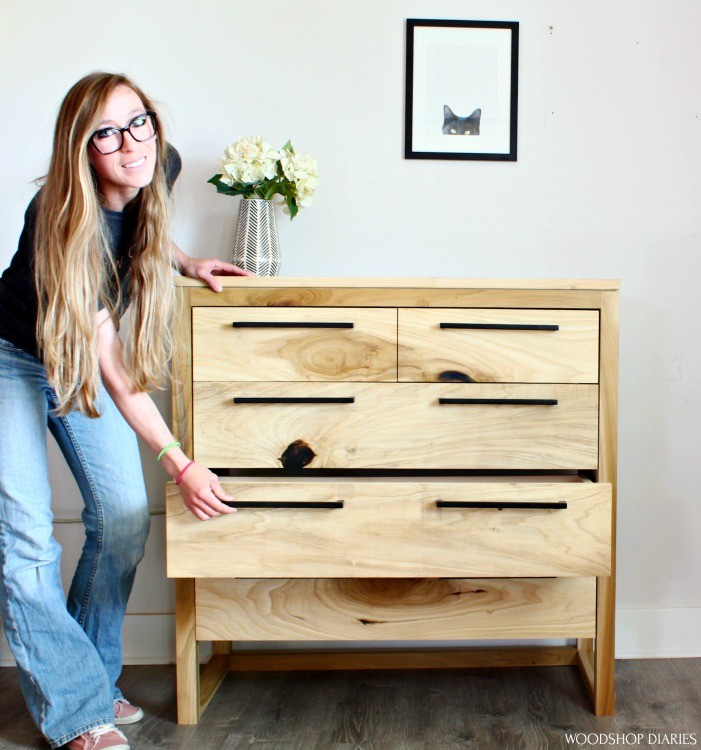
If you’ve seen many of my past projects or followed along very long, you’ve probably heard me mention that dressers are my favorite projects to build. I’ve got several dresser designs to choose from here!
I know dressers can be an intimidating project for some, but I like to think of it as a box (the dresser body) with several more boxes inside (the dresser drawers).
So, if you can build a box, you can build a dresser! There are a million different ways and styles to build a basic dresser, but I’ll show you exactly how this one came together in the post below.
*This post contains affiliate links. See website policies.
Some notes before building
Because there are a lot of parts and pieces that require some careful measuring (learn how to accurately use a tape measure here), I’d consider this an intermediate build. It’s definitely not difficult, but it’s probably not the best option as a very first project.
What kind of wood do you need to build this simple dresser?
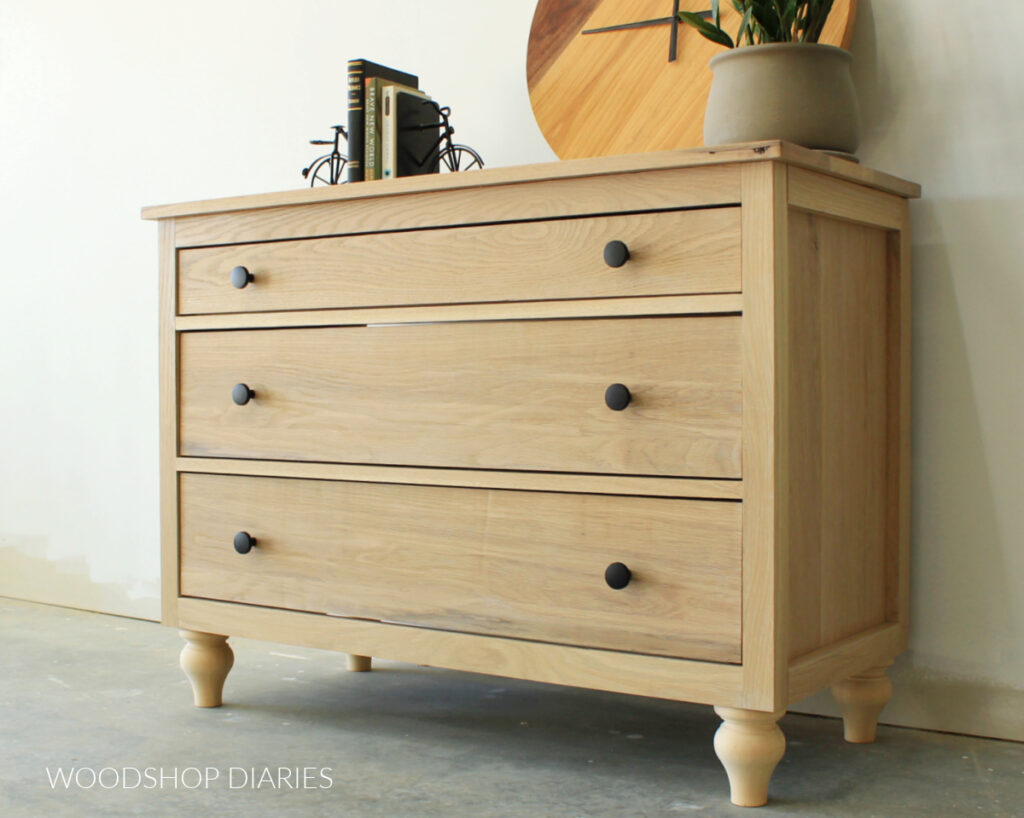
This dresser build is made entirely from plywood except for the front and back frames, which are solid. I used red oak for this particular dresser, but any wood type you prefer would work fine.

Construction lumber (like pine, spruce, fir) and birch plywood is a more budget friendly option that would work great as well.
If you’re new to DIY, check out this post to learn more about choosing plywood for your projects and this post about how and where to buy lumber.
Material Sizing
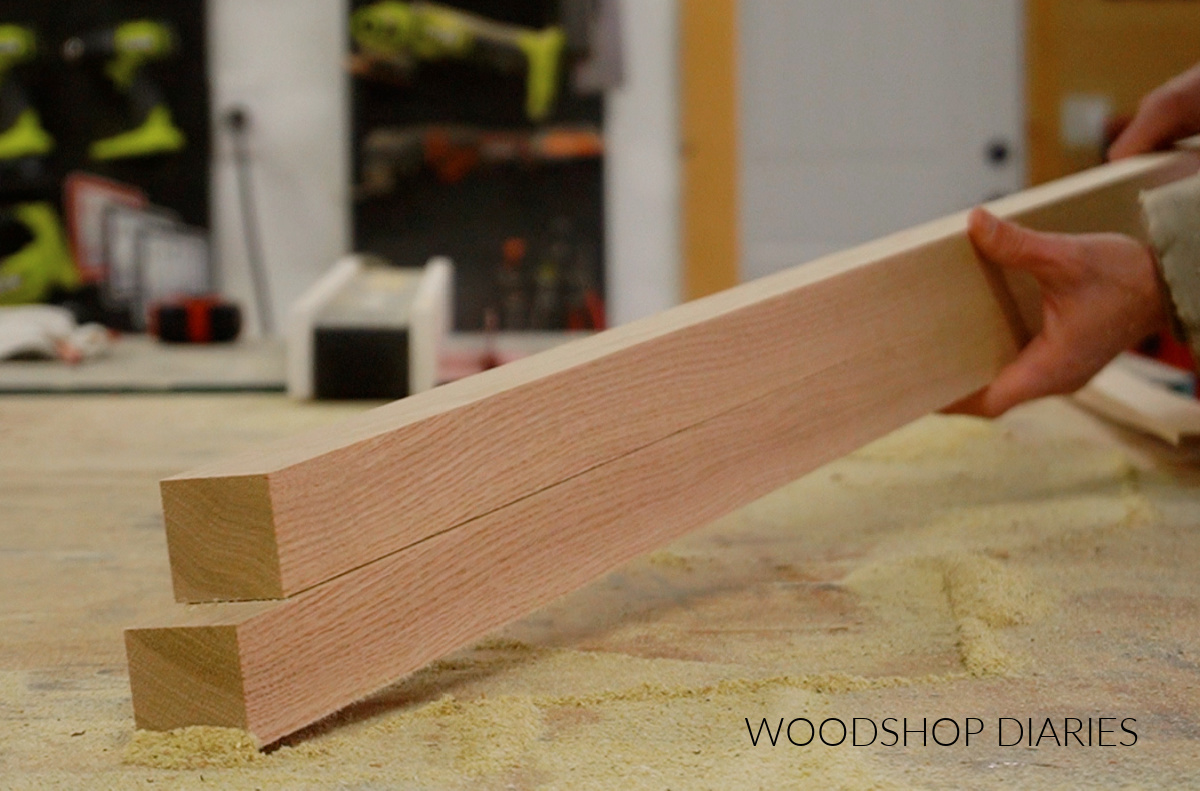
This plan calls for using 2x2s and 2x3s. (Did you know 2x2s aren’t 2″ x 2″? Learn more about understanding lumber sizing here.)
However, in many cases, 2x3s are difficult to find precut. Sometimes you can find them in the construction lumber, but not every store carries them. So I recommend ripping the 2×2 and 2×3 pieces down from 2x4s if you have a table saw.
RELATED: How to cut your own 2x2s
This saves on materials and you can reuse the off cuts for trim on the sides, too! See tutorial video for more information.
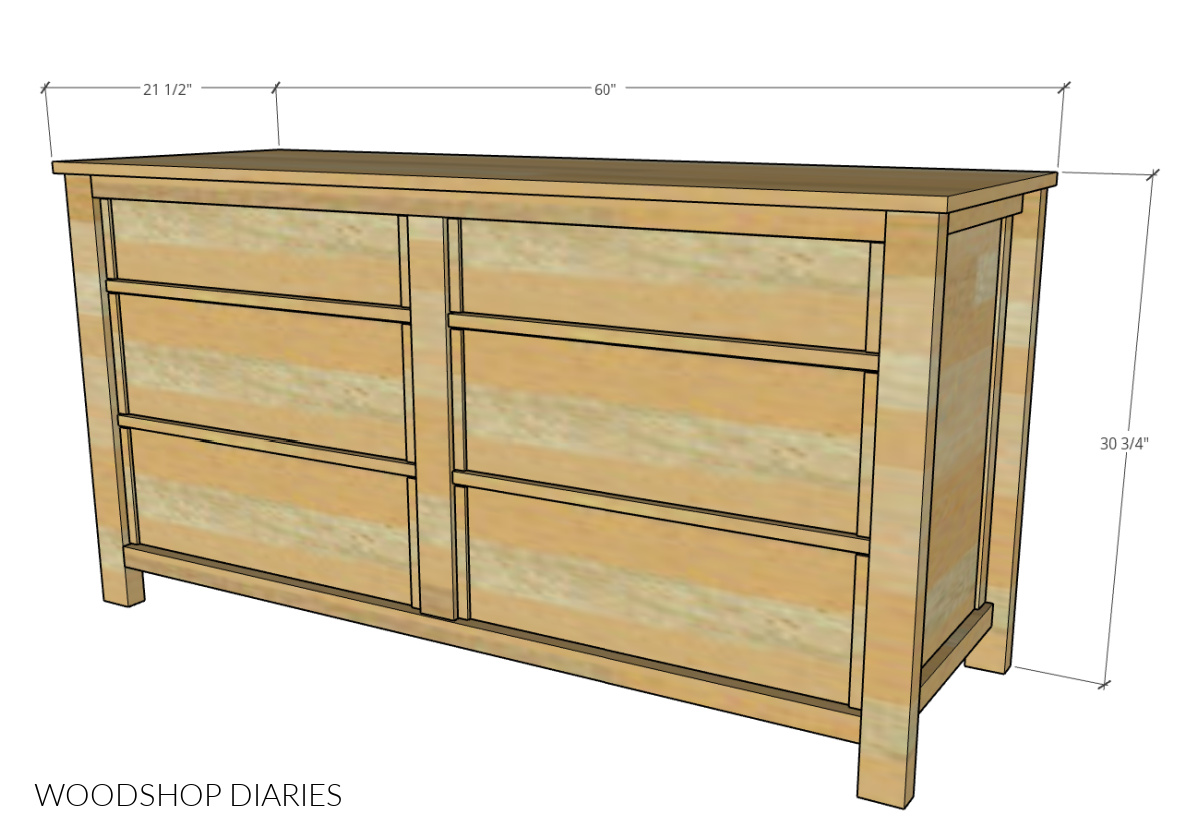
Overall Dresser Size
Overall dimensions of this dresser as shown in the plans below are 21 ½″ deep x 30 ¾″ tall x 60″ wide.
Building Dresser Drawers
If you’re new to building drawers, don’t worry! I’ll walk you through the entire drawer building process from start to finish in this drawer building series (with videos!). I’ve broken it down into four parts:
Prefer to print the whole series? Grab the Ultimate Drawer Building Guide which includes all four parts in a printable e-book you can take to the shop with you.
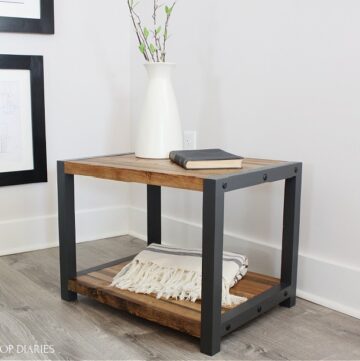
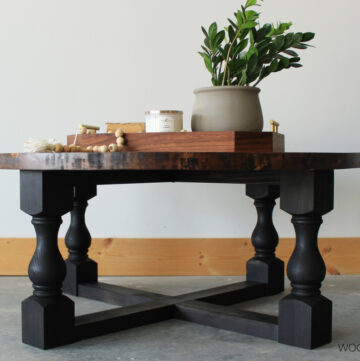
Matching Bedroom Set
If you’re looking to build the whole set, you can find the plans for the matching pieces here:
Helpful resources for this build:
Are DIY projects your thing? Sign up for our newsletter for priority access to the latest projects and build plans!
How to Build a Simple Dresser
I’ve included the step by step building instructions below along with printable building plans. But, if you prefer to watch, I’ve also included a build video as well. Check out the video for tips, visuals, and some extra clips from behind the scenes!
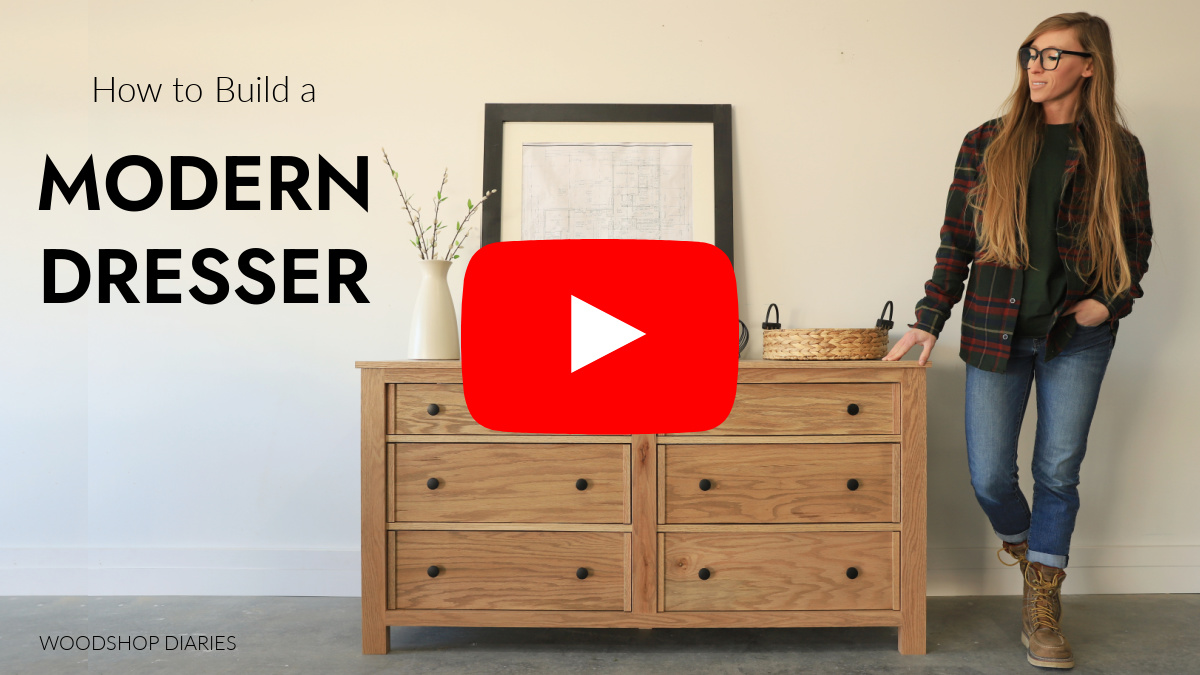
Love watching how-to videos? Subscribe to my YouTube channel for plenty more where that came from!
Prefer to print? Grab the printable modern 6 drawer dresser building plans here:
Tools & Materials
Tools:
- Drill/Driver
- Circular Saw
- Cutting Guides (optional): Kreg Rip Cut & Kreg AccuCut
- Pocket Hole Jig
- Miter Saw
- Dowel Jig (optional)
- Clamps
- Table Saw (optional)
Materials:
- (2) 4’x8′ sheet ¾″ plywood
- (1) 4’x8′ sheet ¼″ plywood
- (3) 2x4x8 boards
- (1) 1x2x8 board (optional for side trim)
- ¼″ x 1 ½″ AND ¼″ x ¾″ lattice trim (optional)
- 1 ¼″ pocket hole screws
- Dowel Pins (optional)
- 2″ Wood Screws
- Wood Glue
- (6) Pair 18″ Drawer Slides
- Edge Banding
- Knobs/Drawer Pulls
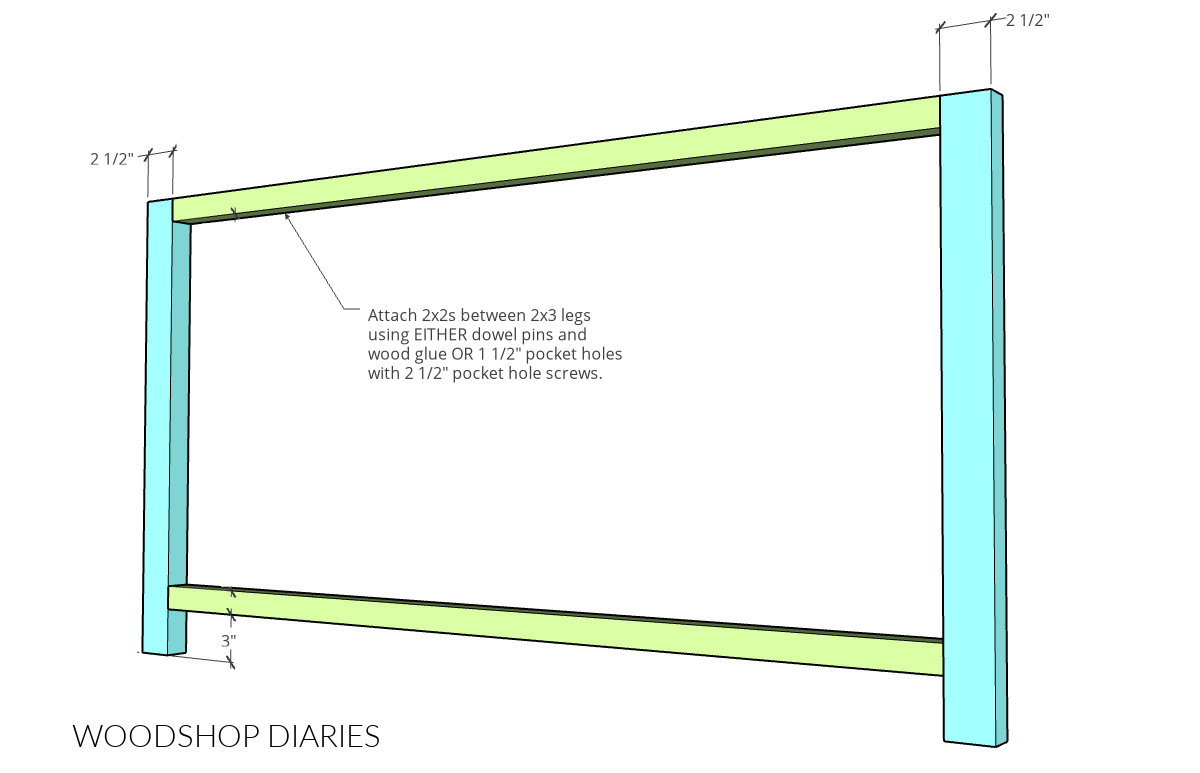
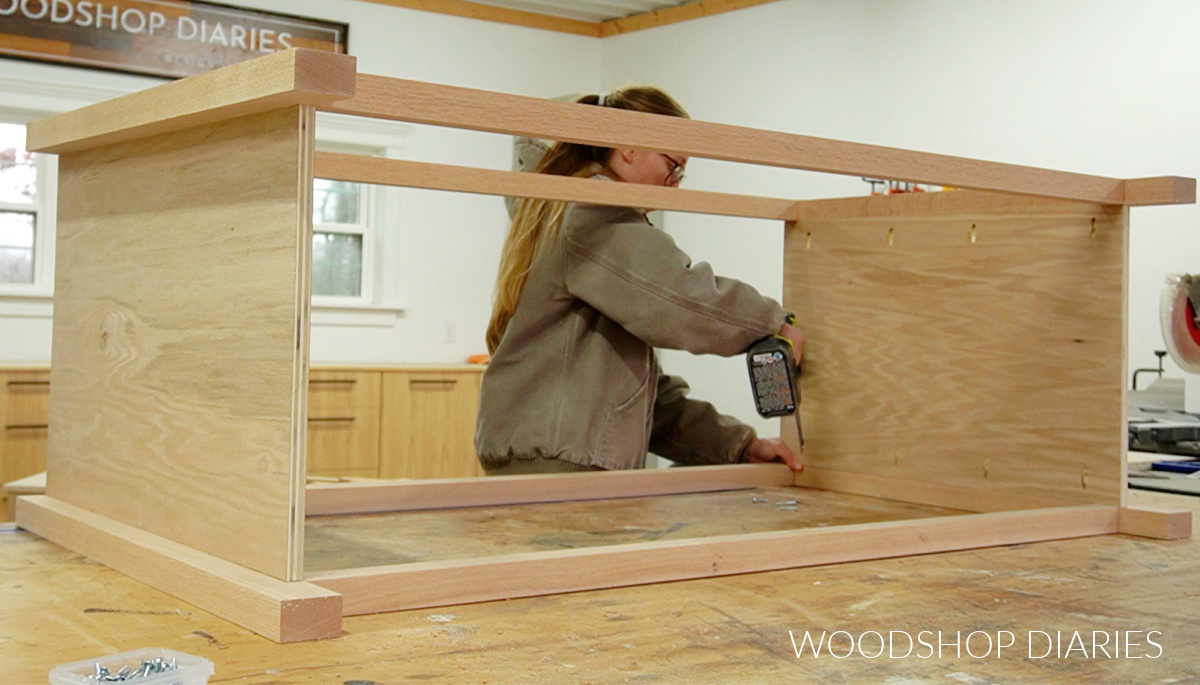
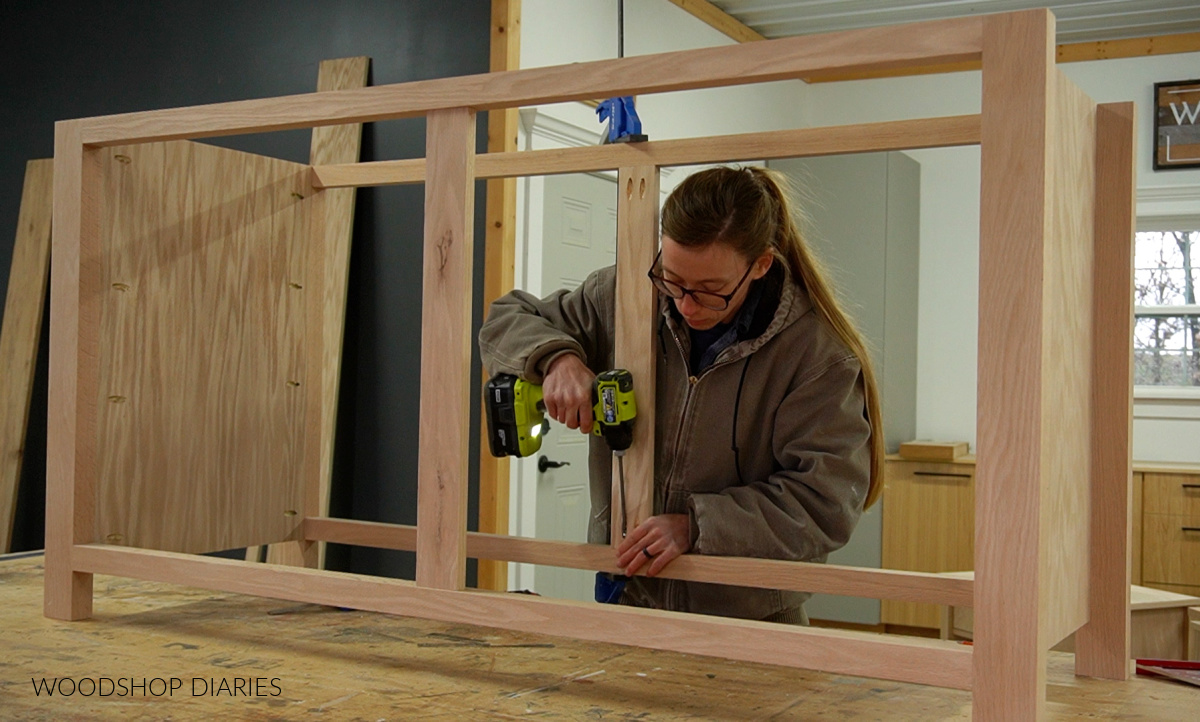
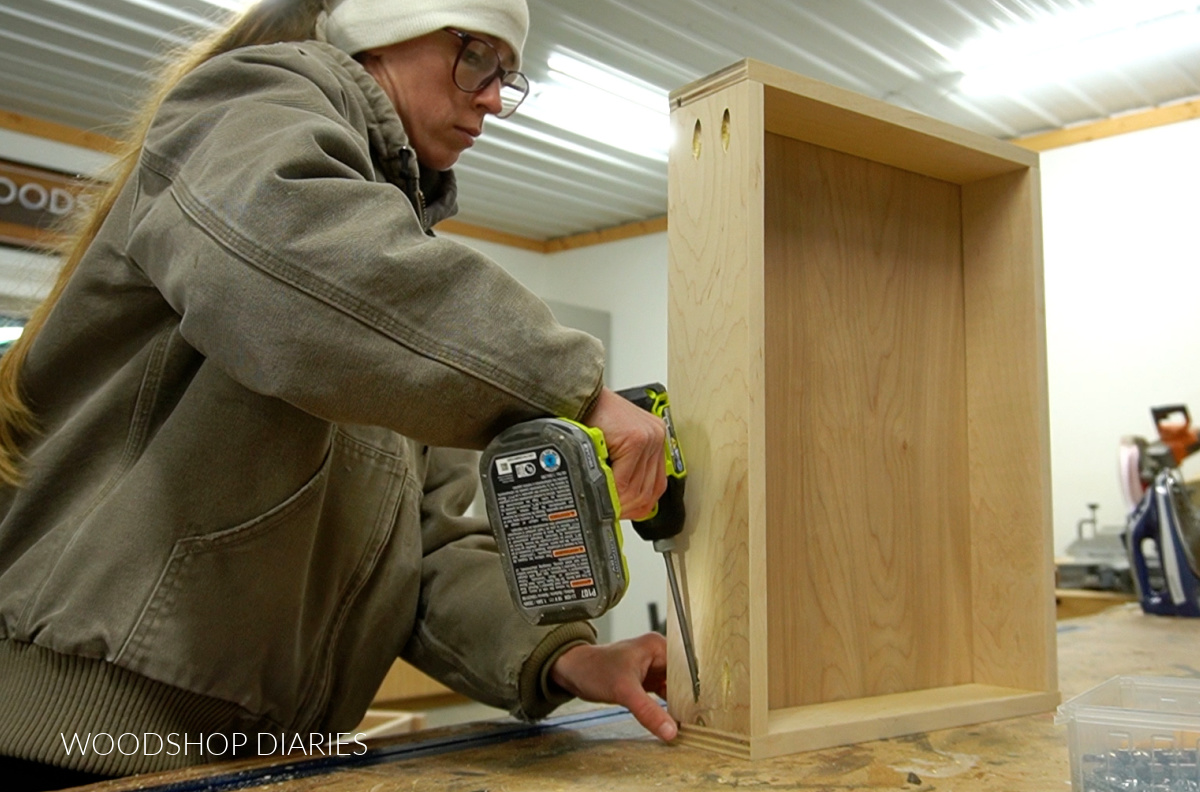
Step 1: Assemble Dresser Frame
To start this build, first, I needed to assemble two frames for the dresser. These are the parts of the build that are made from solid wood and will be the front and back.
I used 2x3s for the legs and 2x2s to go between them at the top and about 3″ up from the bottom. So first, I ripped these pieces down from 2×4 boards (see notes above), trimmed them to length and laid them out on the workbench.
Note: 2x4s are 3 ½″ wide and 2x3s are 2 ½″ wide. So if you rip these down, you’ll have a ~1″ thick piece left. And if you rip down 2x2s (which are 1 ½″ wide), you’ll have a ~ ¼″ thick piece left. Save these pieces to use as trim in step 5!
All the dimensions, cut diagrams, and cut lists can be found in the printable building plans here.
You can assemble these frames using 1 ½″ pocket holes and 2 ½″ pocket hole screws if you’d like. But, I assembled them using dowel pins and glue. I built two identical frames.

Then, I cut two ¾″ plywood side panels to attach between them using pocket holes and screws. Be sure if driving into hardwood, like oak, you use fine thread pocket hole screws!
RELATED: How to use a pocket hole jig
Step 2: Install Drawer Dividers
Once the main body was together, I added the dividers. I installed two strips (2 ½″ wide) between the top and bottom 2x2s–one at the front and one at the back–in the center using pocket holes and screws.
I inset the front divider ¼″ from the front of the 2×2 to add some extra dimension.
Then, I attached six strips (what I’ll call “runners”) between these pieces like shown below.
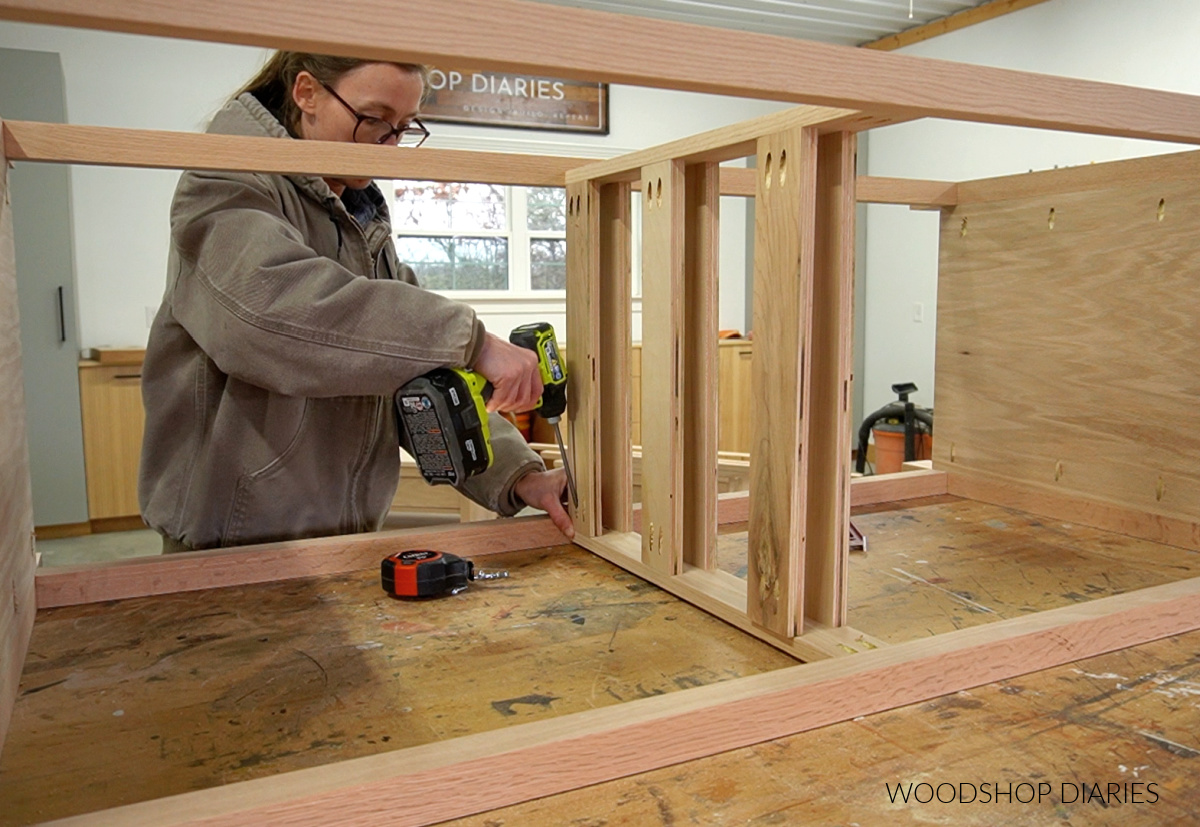
These will be used to mount the drawer slides onto, so they need to be placed where the slides will go. Dimensions are detailed in the printable plans.
To divide the drawers up, I also installed some strips between these runners and the sides, again with pocket holes and screws.
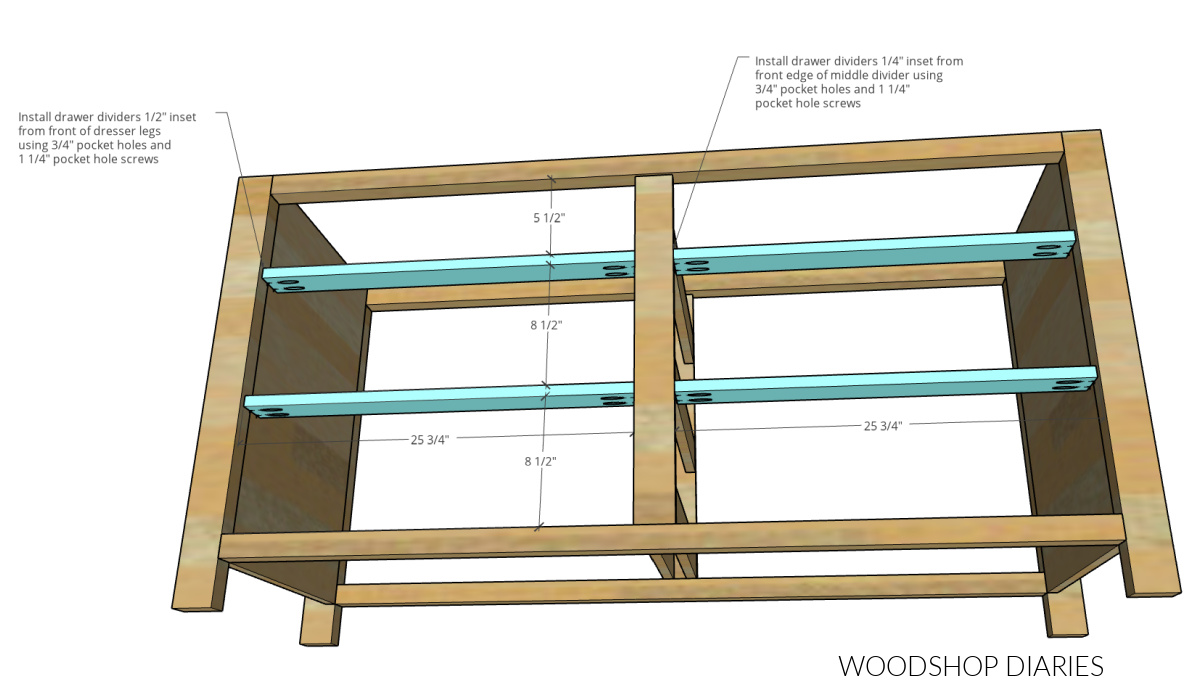
And again, to add some extra dimension, I installed these ½″ inset from the front of the legs and ¼″ inset from the middle divider.
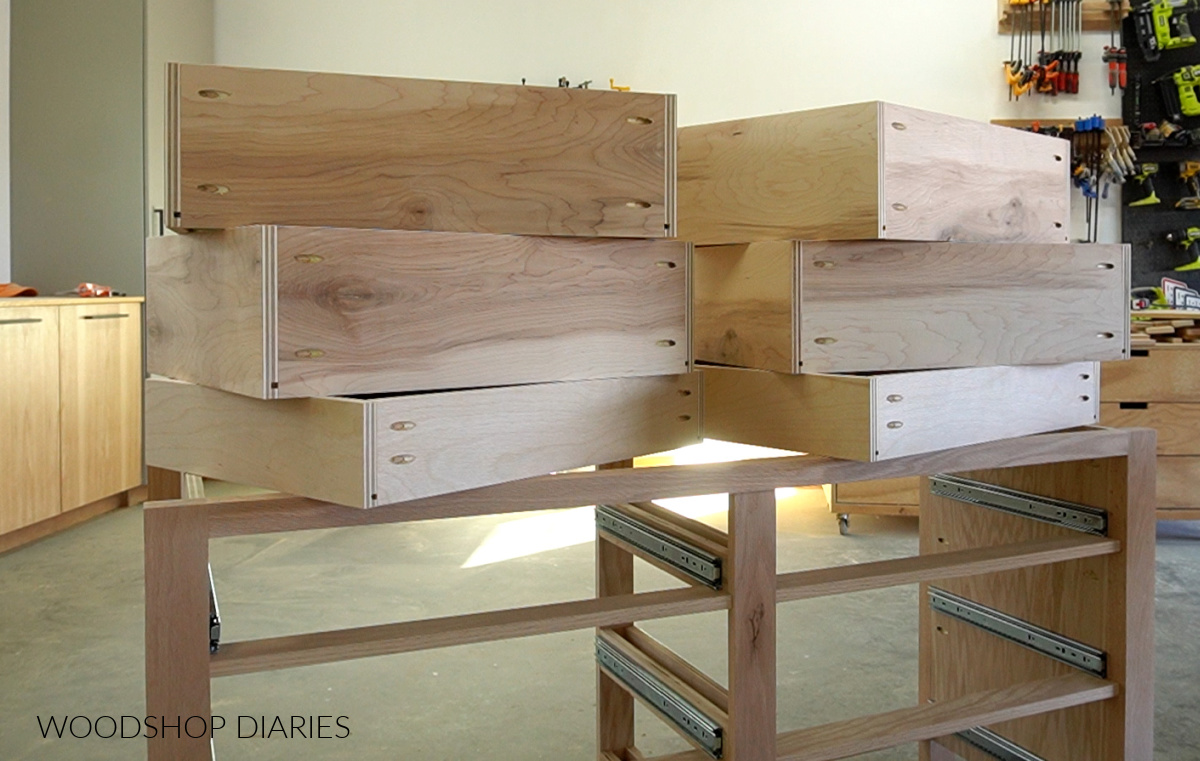
Step 3: Assemble 6 Dresser Drawer Boxes
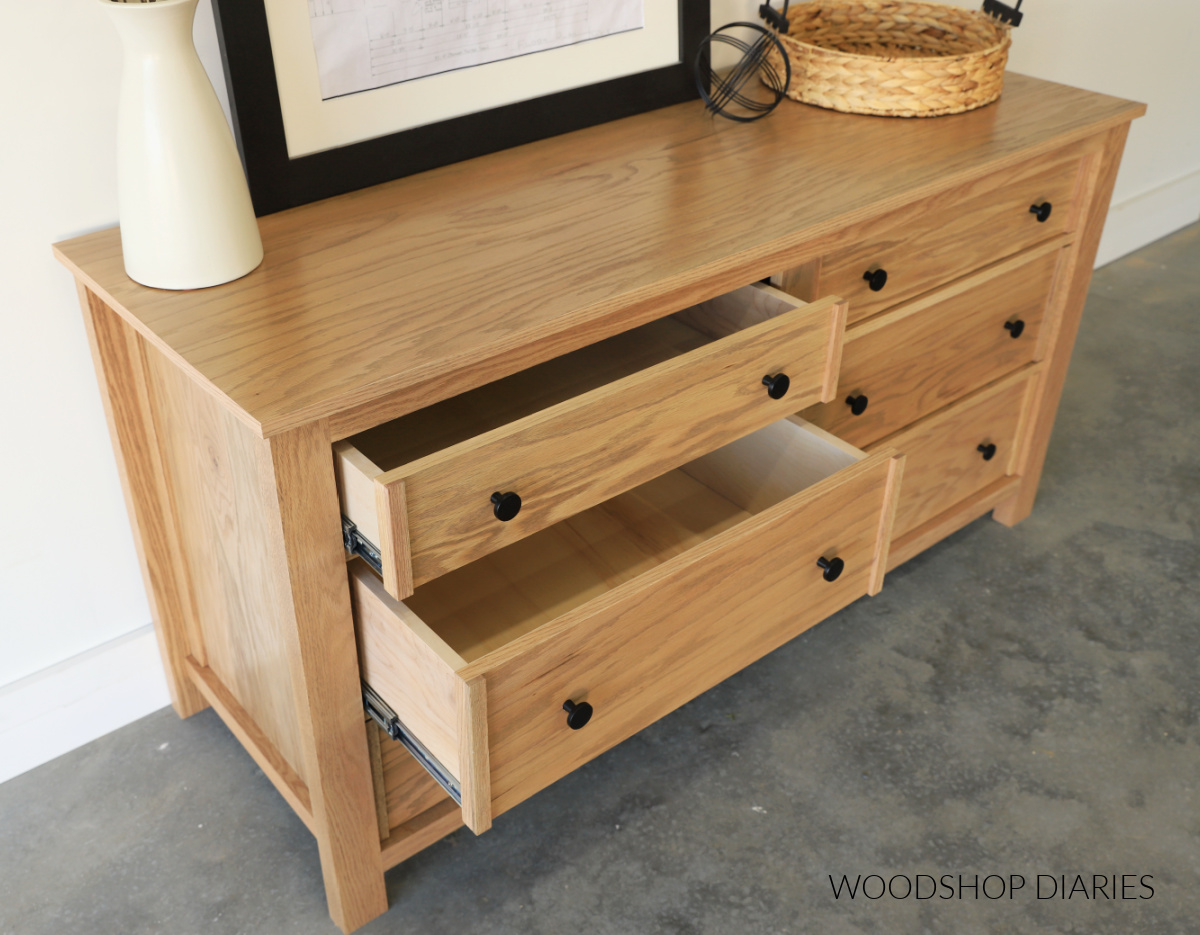
At this point, it’s time for the best part (my personal favorite part haha)–building the drawers! I made 6 drawer boxes to fit into this dresser–4 deeper drawers for the middle and bottom and 2 shallower drawers for the top.
I assembled the drawer boxes from ¾″ plywood (for the sides) and ¼″ plywood (for the bottom) using pocket holes and screws.
The shallower drawer boxes for the top and the deeper boxes for the bottom are exactly the same dimensions except for the height.
RELATED: How to determine drawer sizing for any project
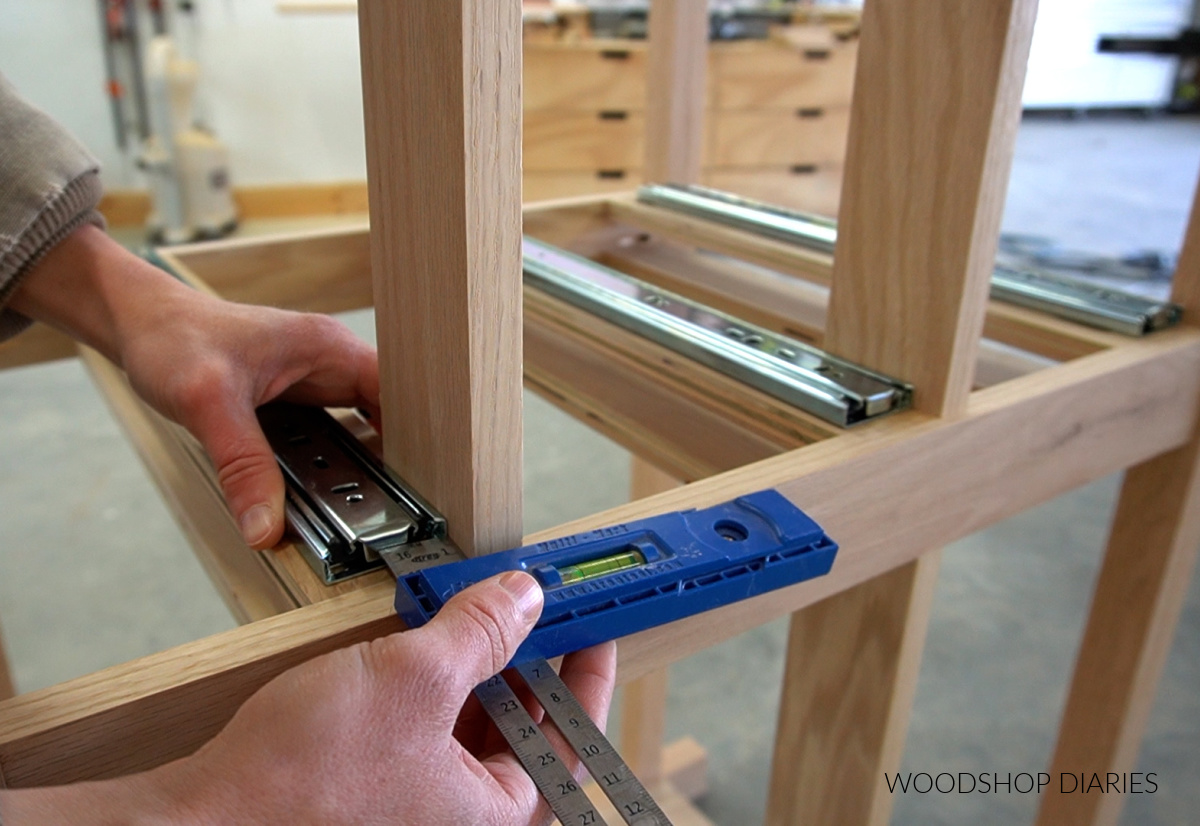
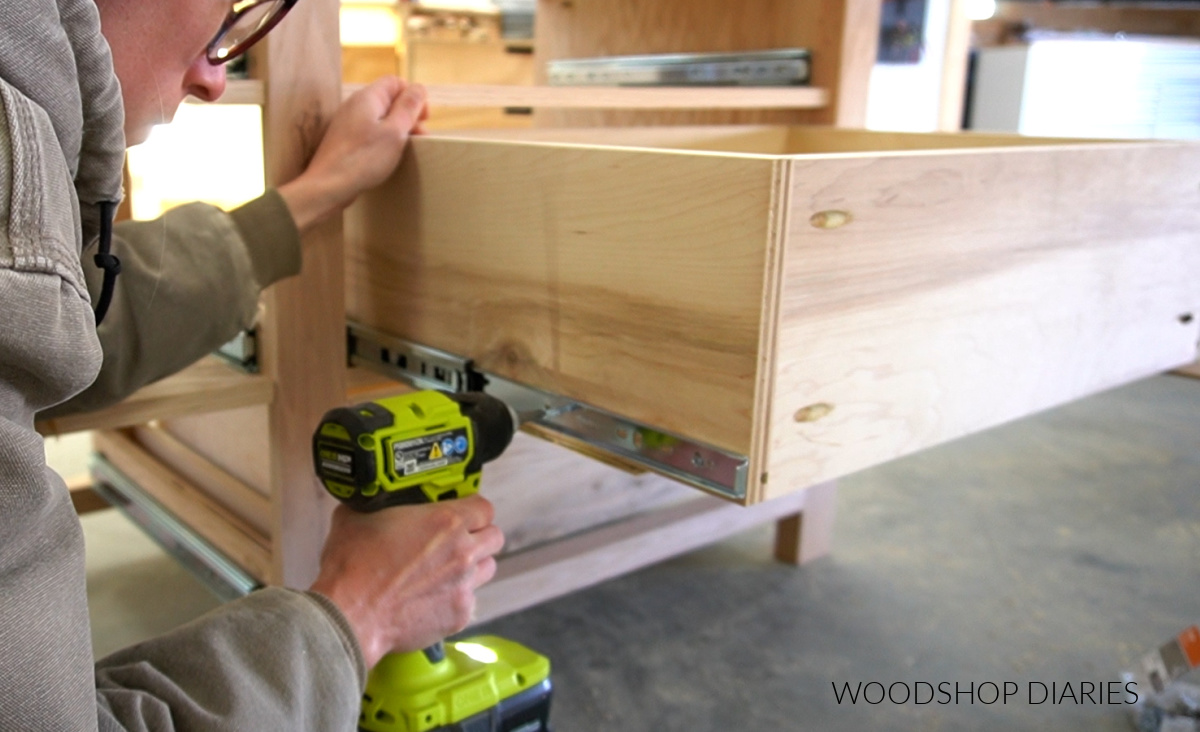
Step 4: Install Drawer Boxes
I installed six pair of 18″ ball bearing drawer slides into the dresser to mount the drawers to.
These drawers will be inset and the drawer front will be ¾″ plywood with a piece of ¼″ lattice trim on the front (more on that in just a minute), so it will be 1″ thick total. PS this Kreg MultiMark tool is super handy to have in the shop.
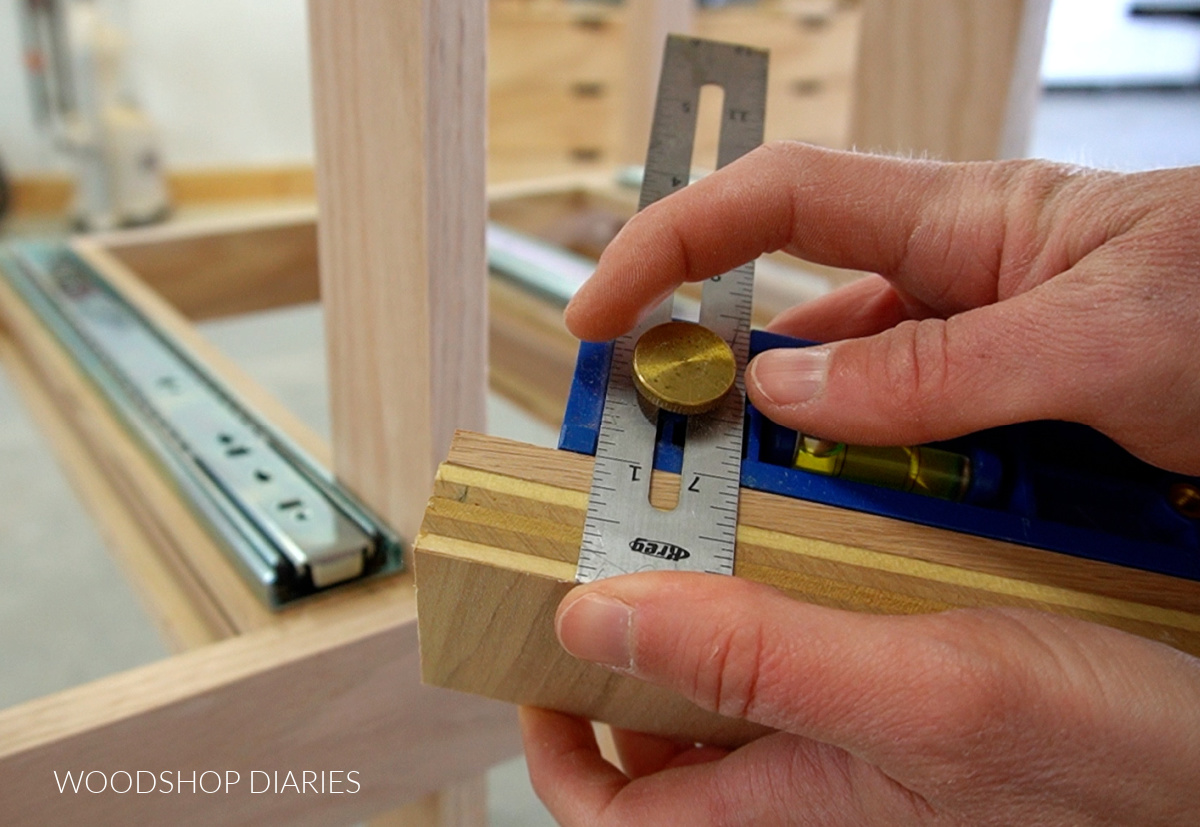
So I installed the slides 1″ inset from the dividers so that the drawer fronts will be flush to them once installed.
RELATED: How to install drawer slides
Then, I installed the drawer boxes into the dresser. There are several ways to install drawer boxes, but I like to place some ¼″ scrap plywood pieces on the divider below the drawer, pull the slides flush to the front, and simply screw them in.
This is a quick and easy way to do it that gives you consistent spacing and maximizes the space above for storage.
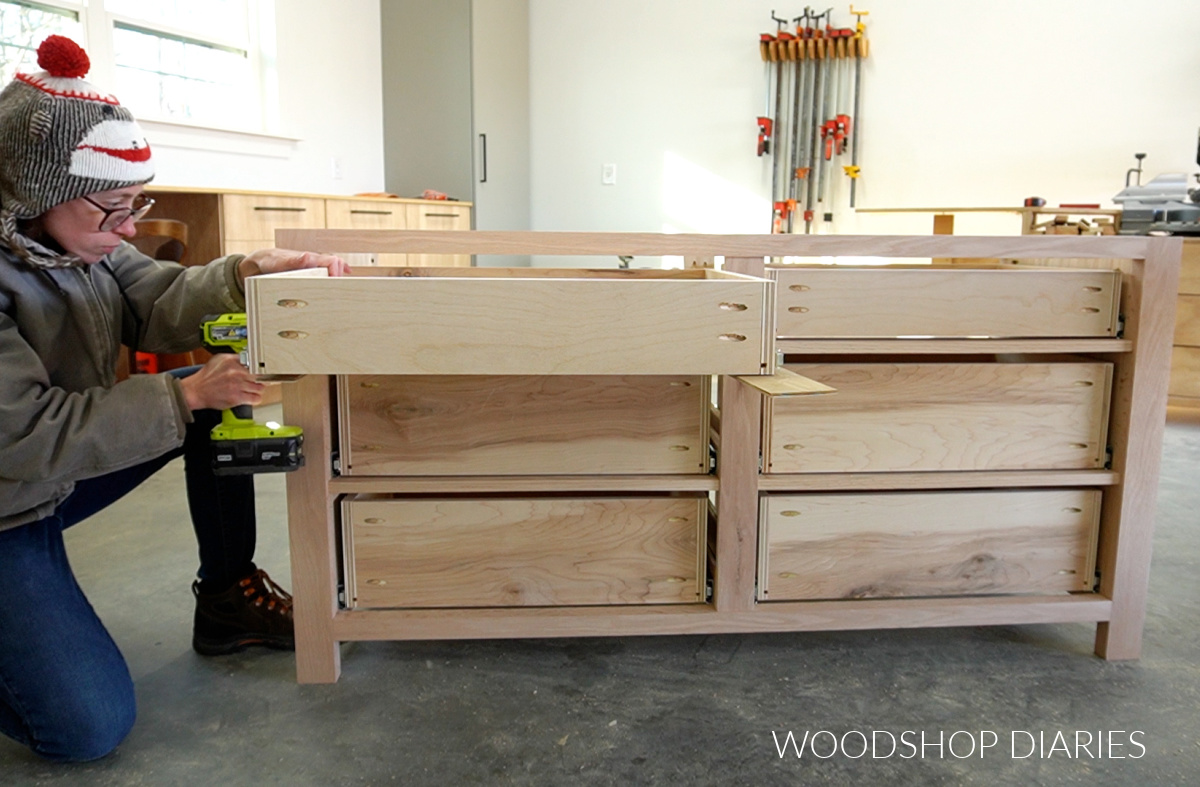
Once the boxes were in, I cut drawer fronts from ¾″ plywood to fit the openings. They should be ¼″ shorter and ¼″ narrower than the opening.
Then I applied iron on edge banding to the sides. Edge banding is optional, but it makes plywood edges look really nice–like solid wood! Learn how to apply edge banding here.
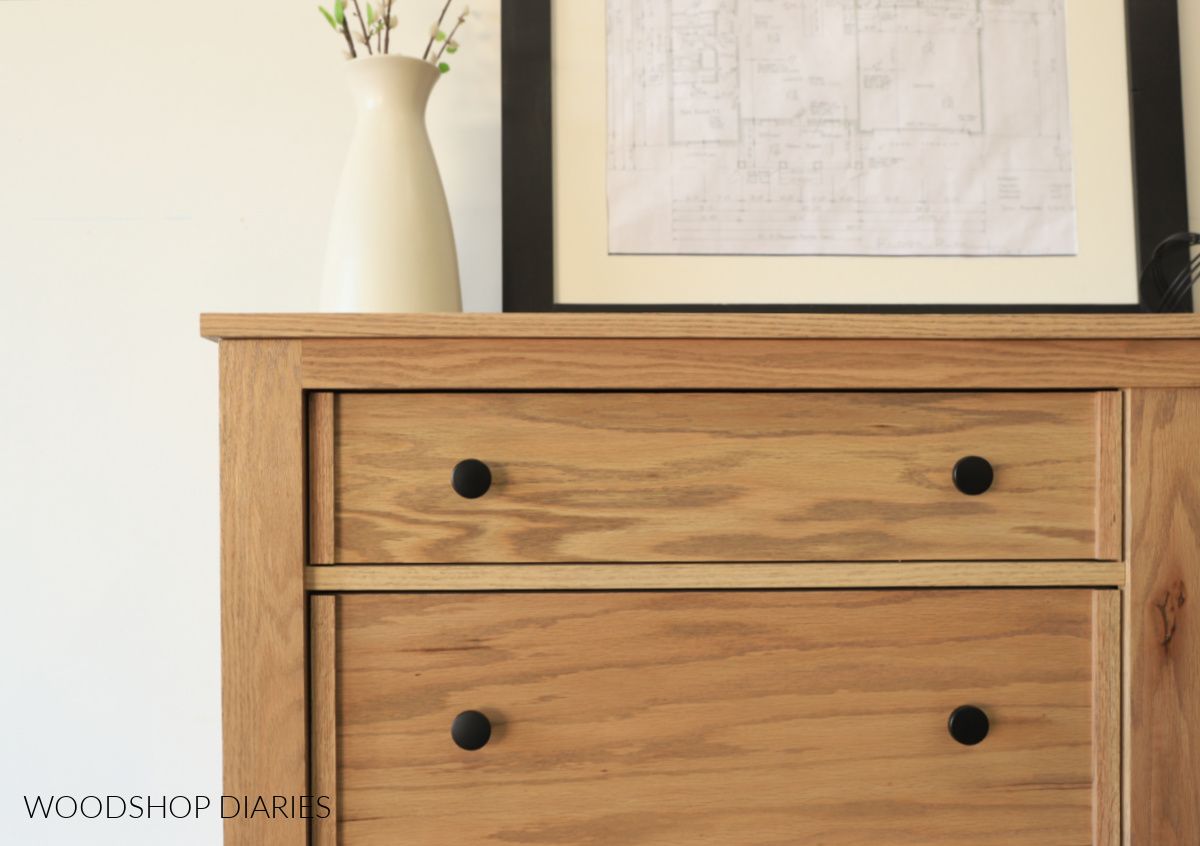
To give the drawer fronts some extra detail, I cut some ¼″ thick x ¾″ wide strips to glue onto the front flush to the left and right edges. This is similar to the trim I added on the head and footboards of the matching storage bed.

Then I placed these into the openings, made sure the gaps on all sides were even (⅛″), and screwed them in from the inside of the drawer box.
Step 5: Add Side Panel Trim
Adding trim onto the sides is optional, but helps dress this up a little. Remember those off cuts I mentioned that will be left if you cut your 2x2s and 2x3s from a 2×4 board?
This is where those come back into play! I cut to fit the thicker strips to go along the top and bottom of the side panels and the thinner strips to go vertically between them.
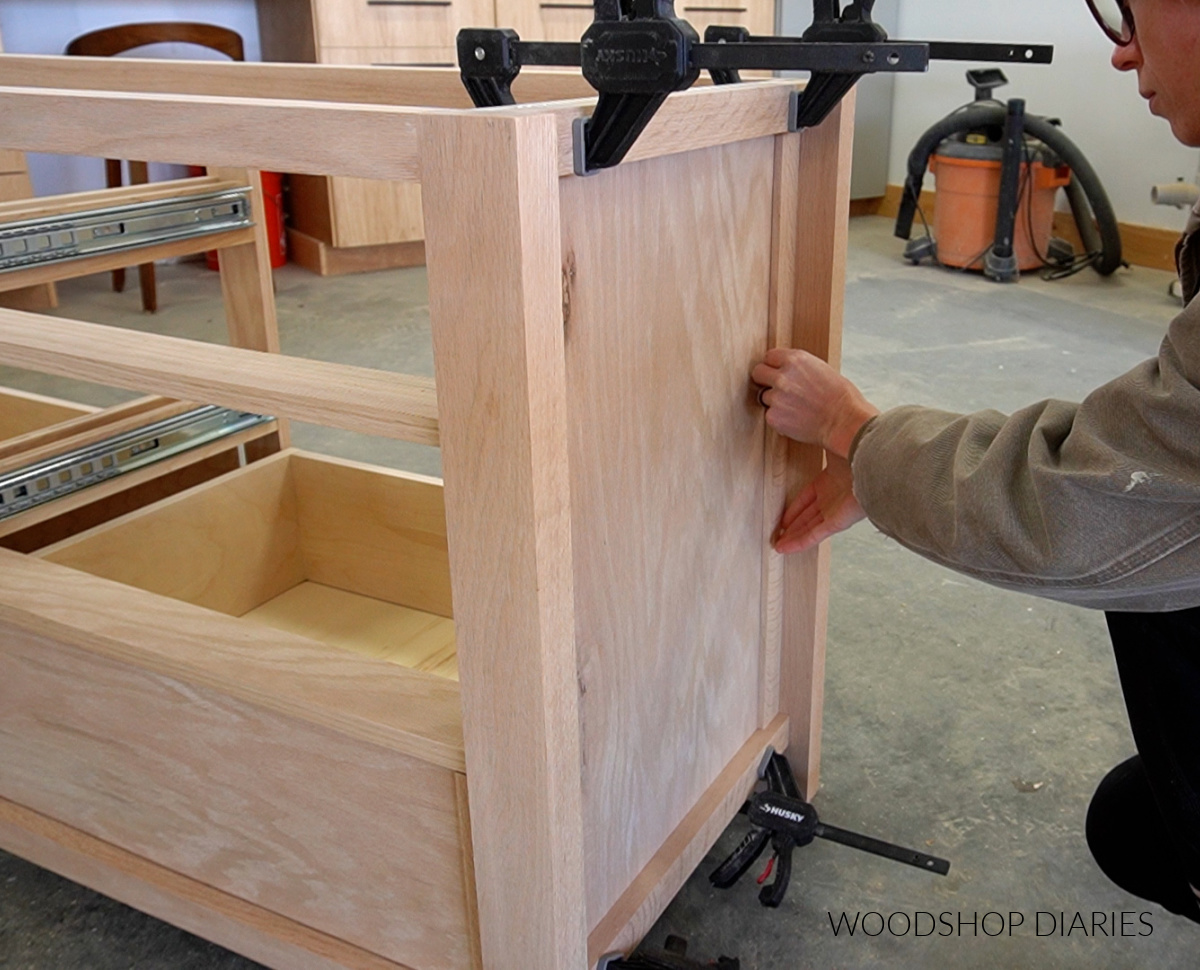
I just glued and clamped these in place until they were dry on each side. If you didn’t rip your boards and you don’t have these pieces, a simple 1×2 and some precut lattice trim would work just as well!
Step 6: Attach Top
Finally, I trimmed a piece of ¾″ plywood 1″ wider and ½″ deeper than the dresser base and edge banded the front and sides.
I flipped it all upside down and made sure there was ½″ overhang on the top (it should be flush across the back) and ½″ overhang on each side.
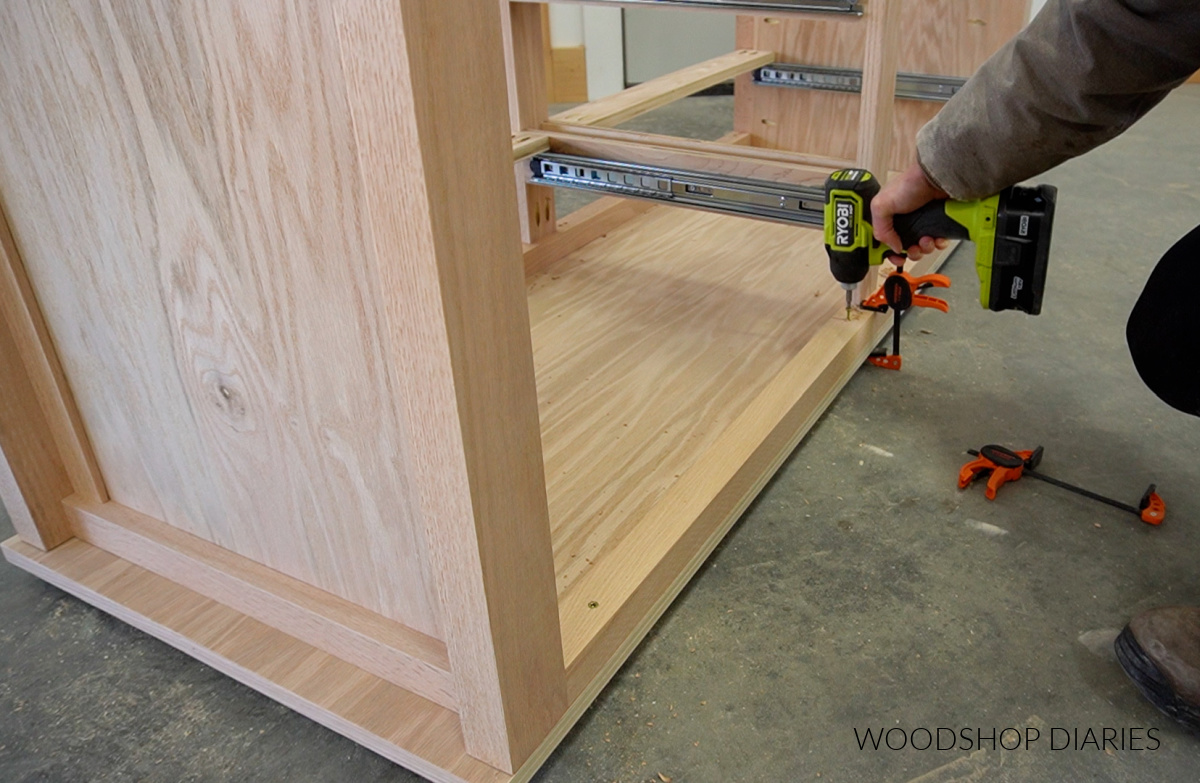
Then, I secured the top using 2″ wood screws through the top 2x2s of the dresser. NOTE: I recommend removing the drawers (using the tabs on the sides of the slides) to make this part much easier.
Step 7: Finish
While the drawers were still out, I applied a wood stain (Minwax Weathered Oak) to the drawer fronts and the dresser body, then sealed it with a few coats of Minwax Polycrylic.

I added some simple black knobs to the drawers, then slid them back into the dresser to complete.
AND THEN, I completely forgot to add a support in the middle until the VERY END. Whoops!
I made this little support block to attach to the bottom drawer runners in the middle to help prevent this from sagging over time. Basically, I cut a piece of 2×3 and screwed it to a piece of plywood to make kind of like a “T” shape.
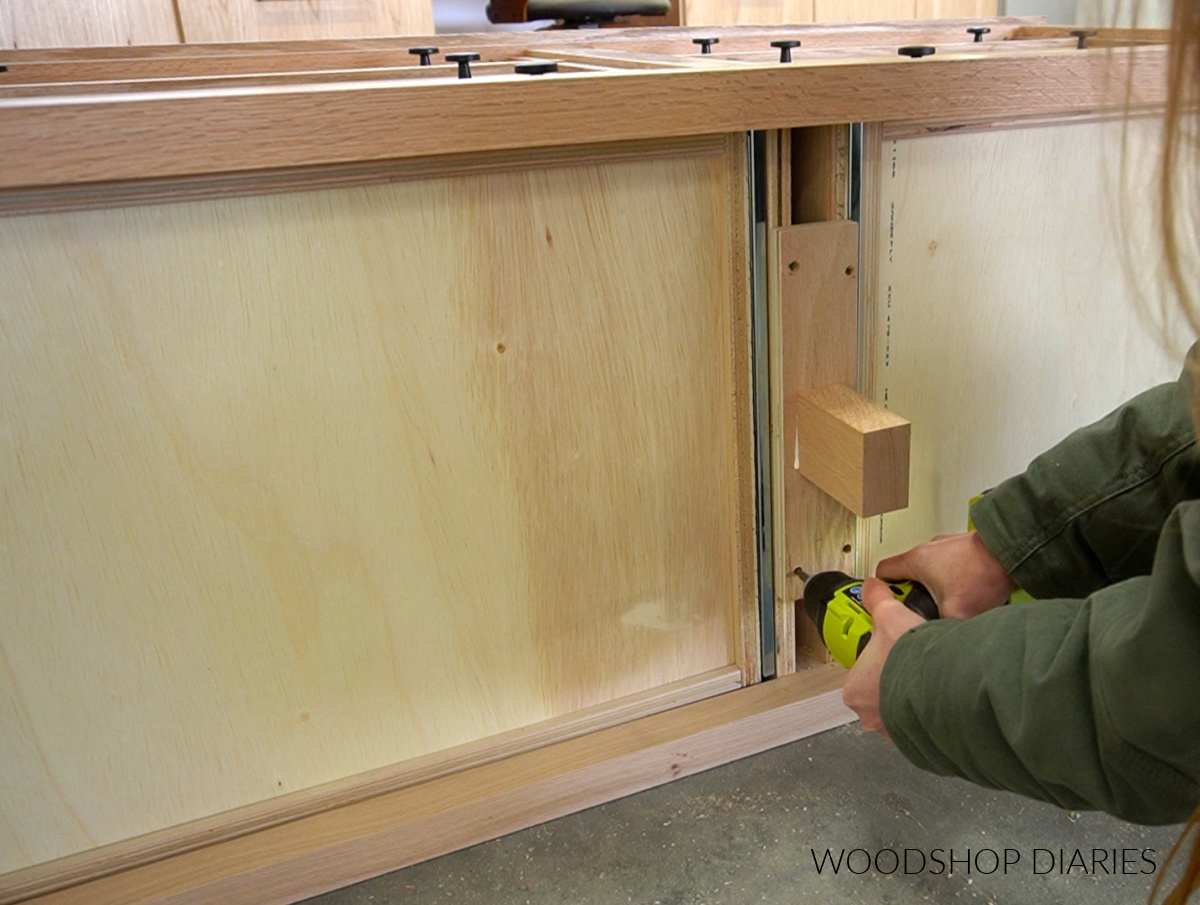
Then I screwed the plywood to the runners on the dresser. That way, when it’s flipped back upright, the 2×3 helps prop the middle up so it won’t sag.
And with that, this dresser is complete and ready to go!
A Note About Adding a Back Panel on the Dresser
Adding a back is optional. Some people have really strong feelings that all dressers should have backs. However, I don’t like adding backs onto things that have drawers–it’s just always been a peeve of mine. I know–kind of weird haha.
So, I didn’t add a back to this project, but if you’d like to, it’s easy to do. Simply cut a ¼″ plywood piece to fit over the back side and staple/screw it in place.
Looking for More DIY Dresser Ideas?
I love building dressers, so I’ve got plenty more styles, sizes, and designs to share. If you’re looking for more, check out a few of my favorites here:
If you enjoyed the project and want to save it for later, don’t forget to pin it or share to your favorite social channel!
Until next time, friends, happy building!