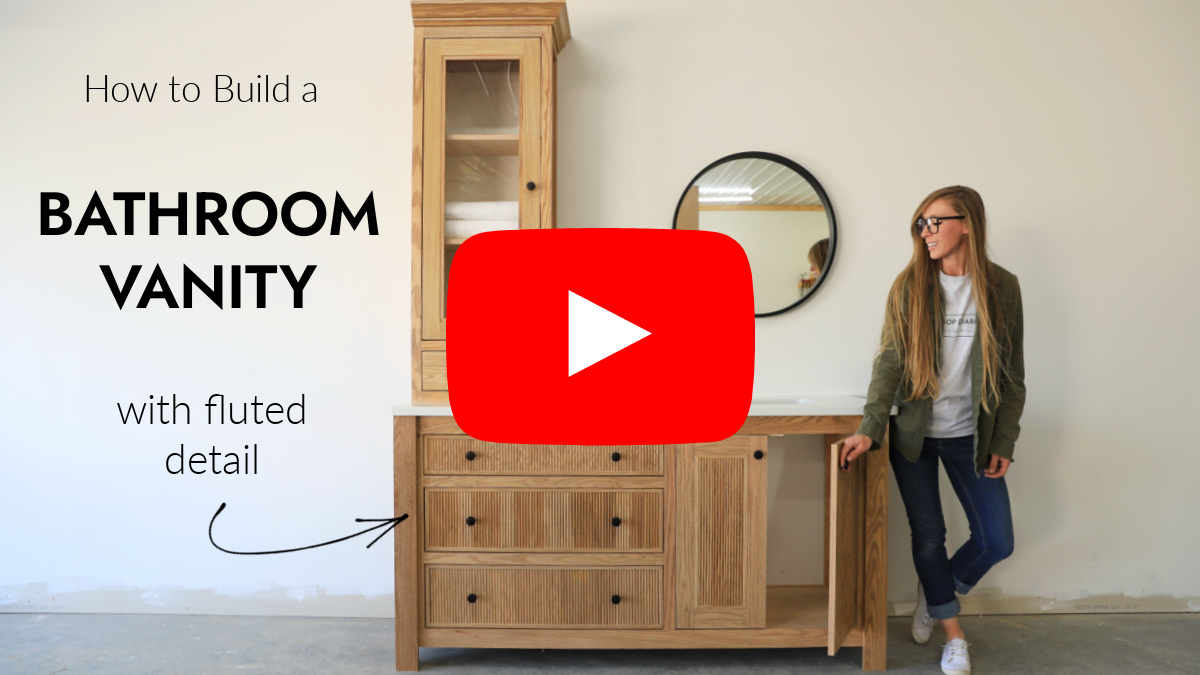
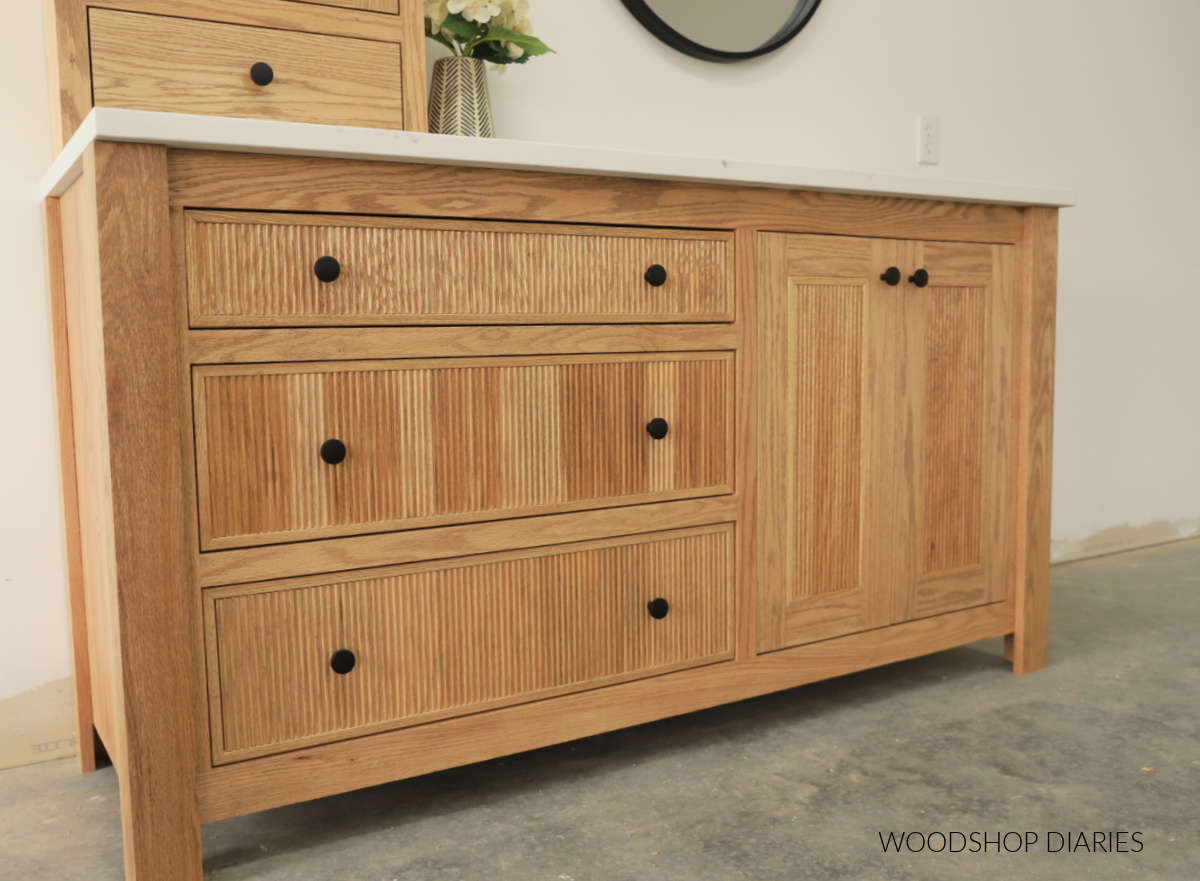
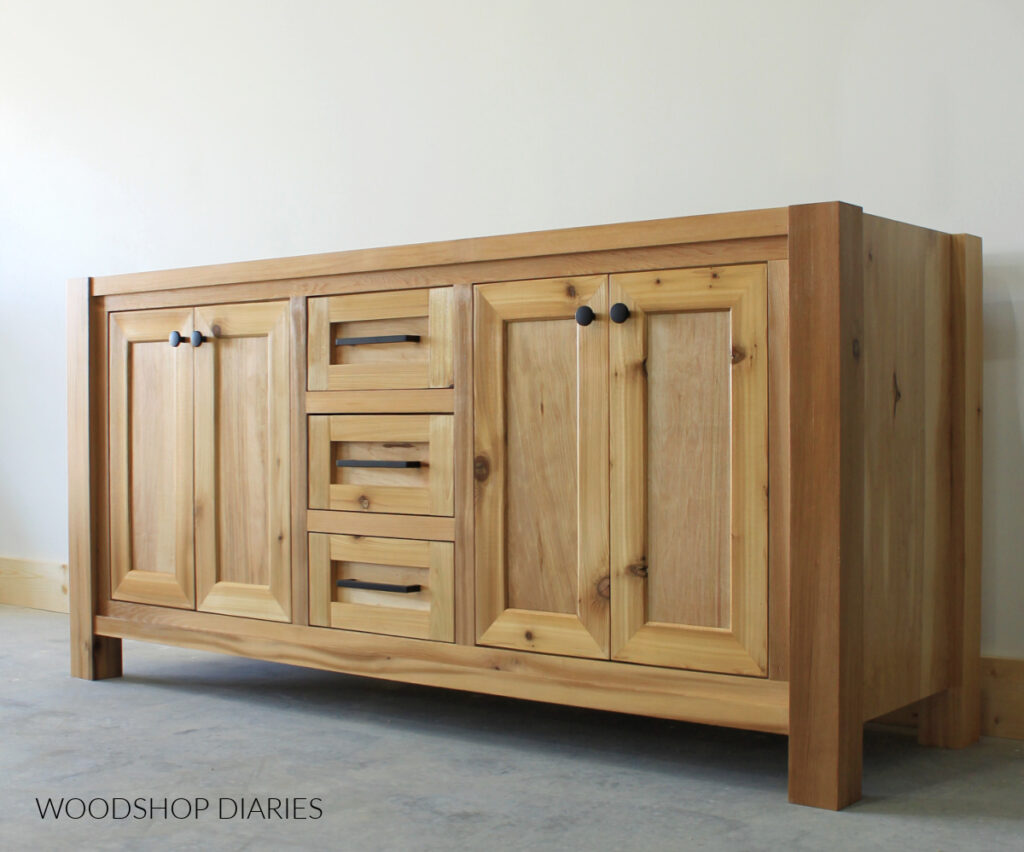
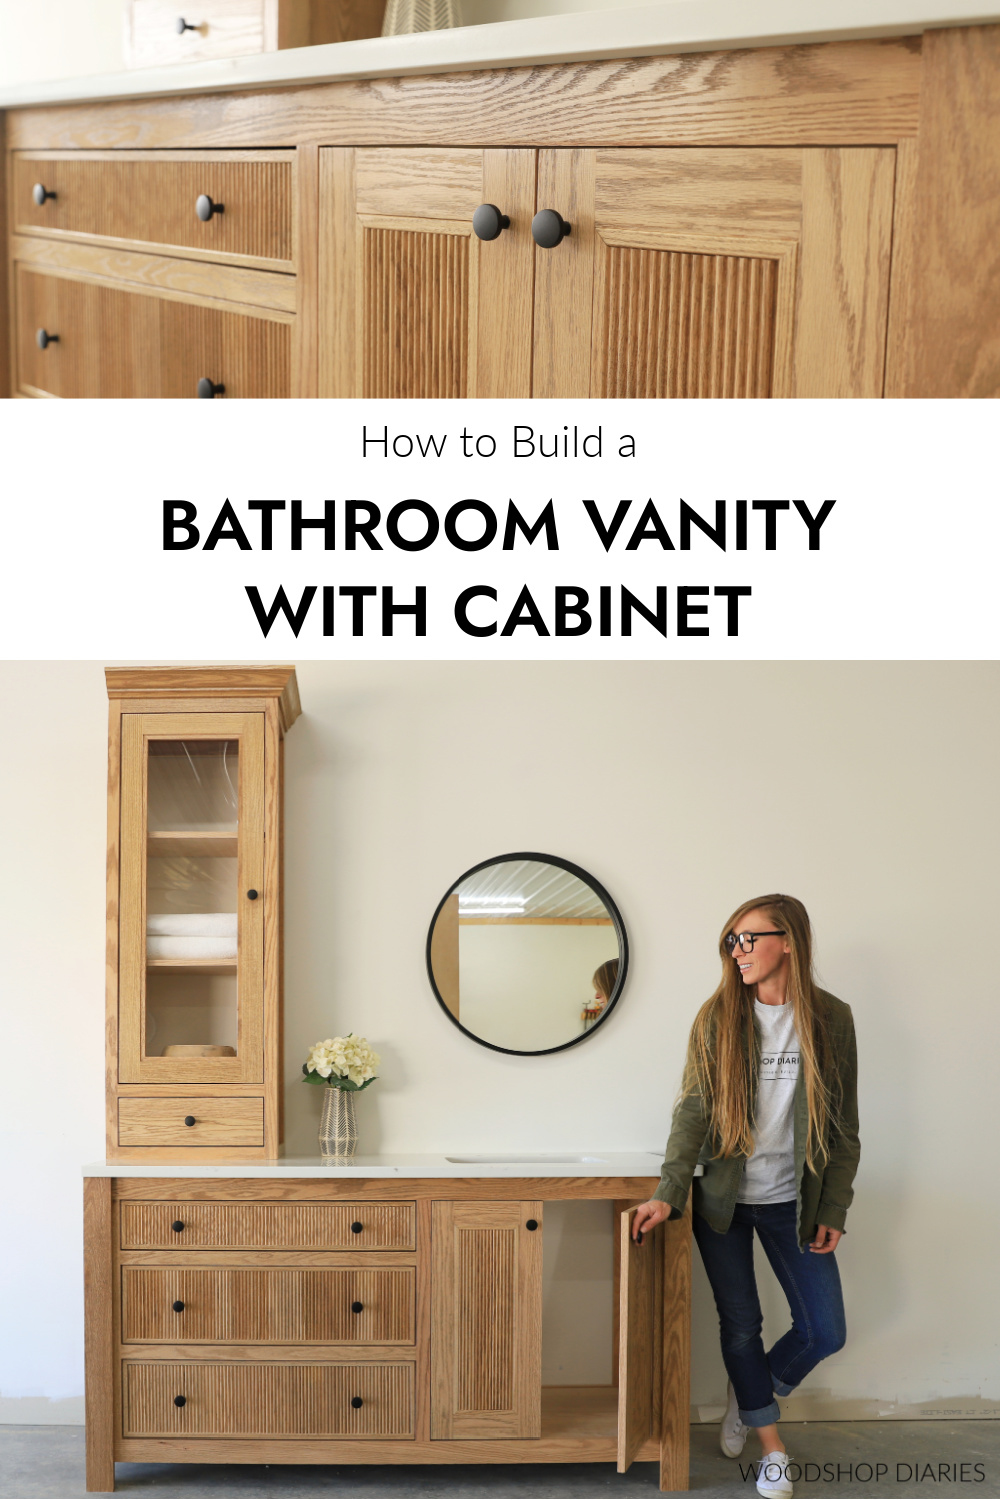
In this post, I’m sharing how to build this GORGEOUS bathroom vanity with a countertop cabinet and off-center sink.
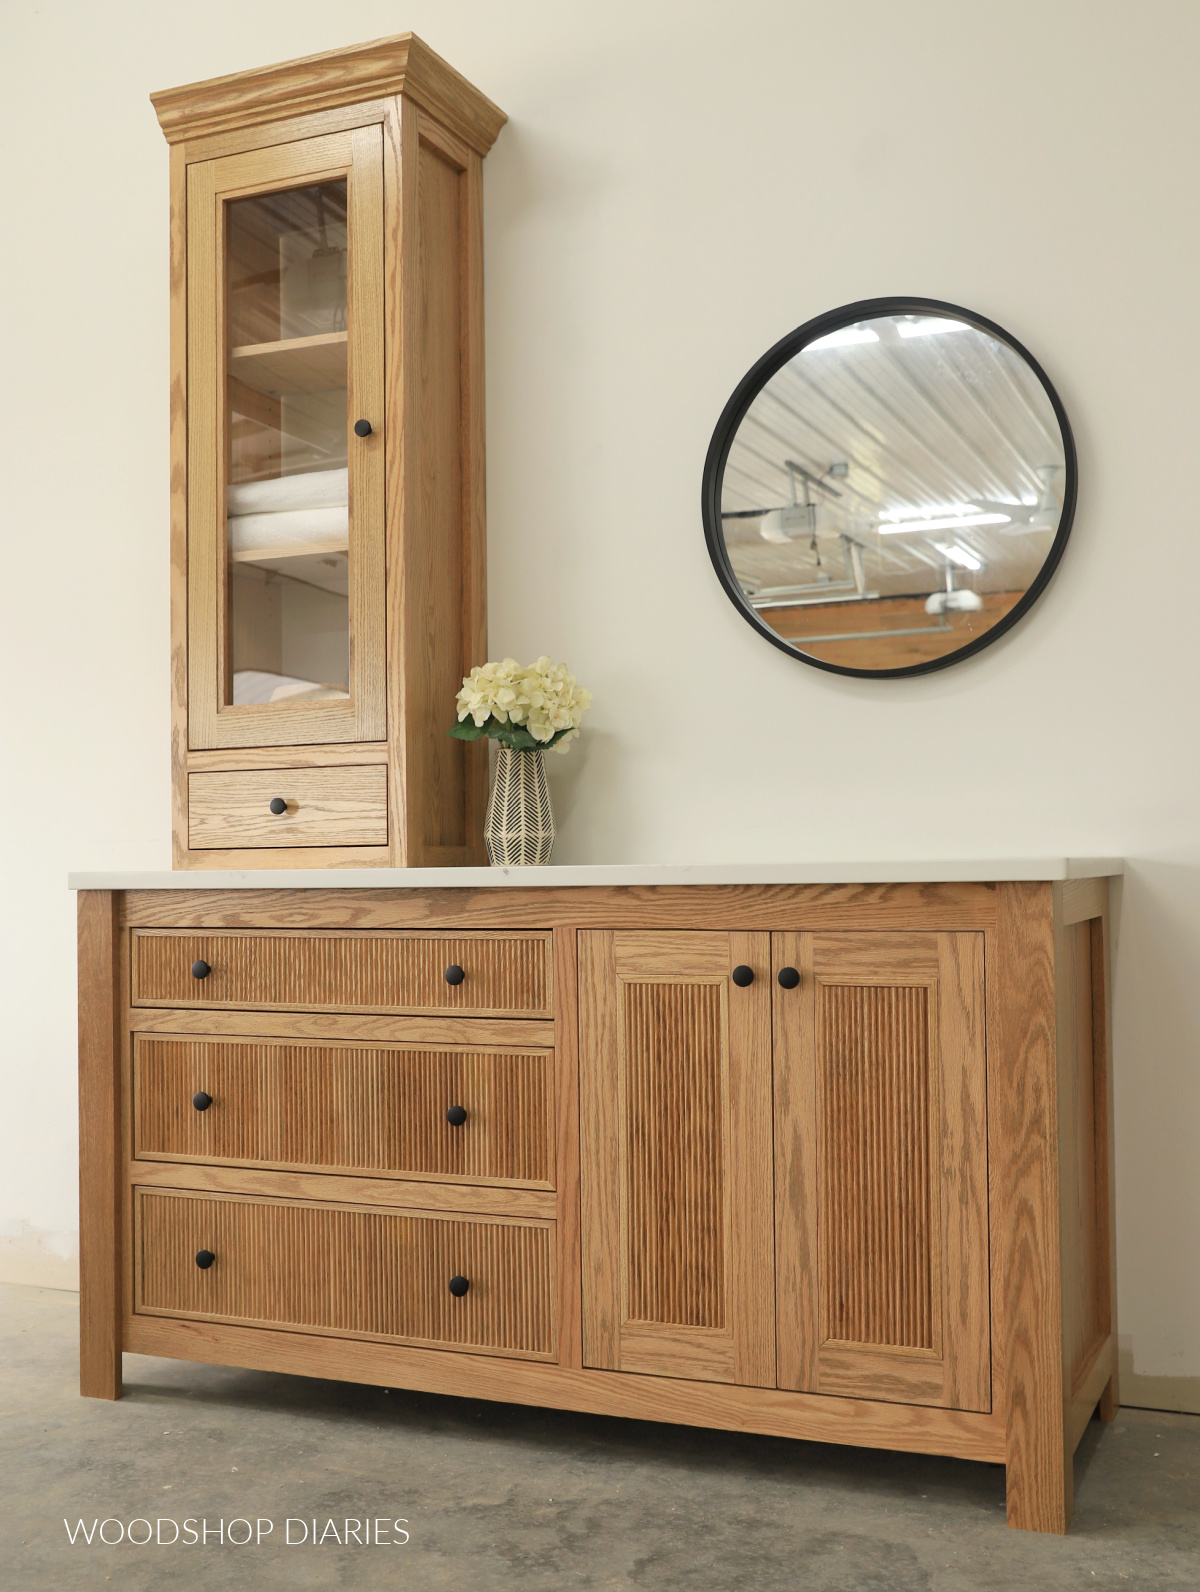
This vanity design includes fluted trim detail on the doors and drawers and an additional glass (well, its actually acrylic!) door and drawer in the countertop cabinet.
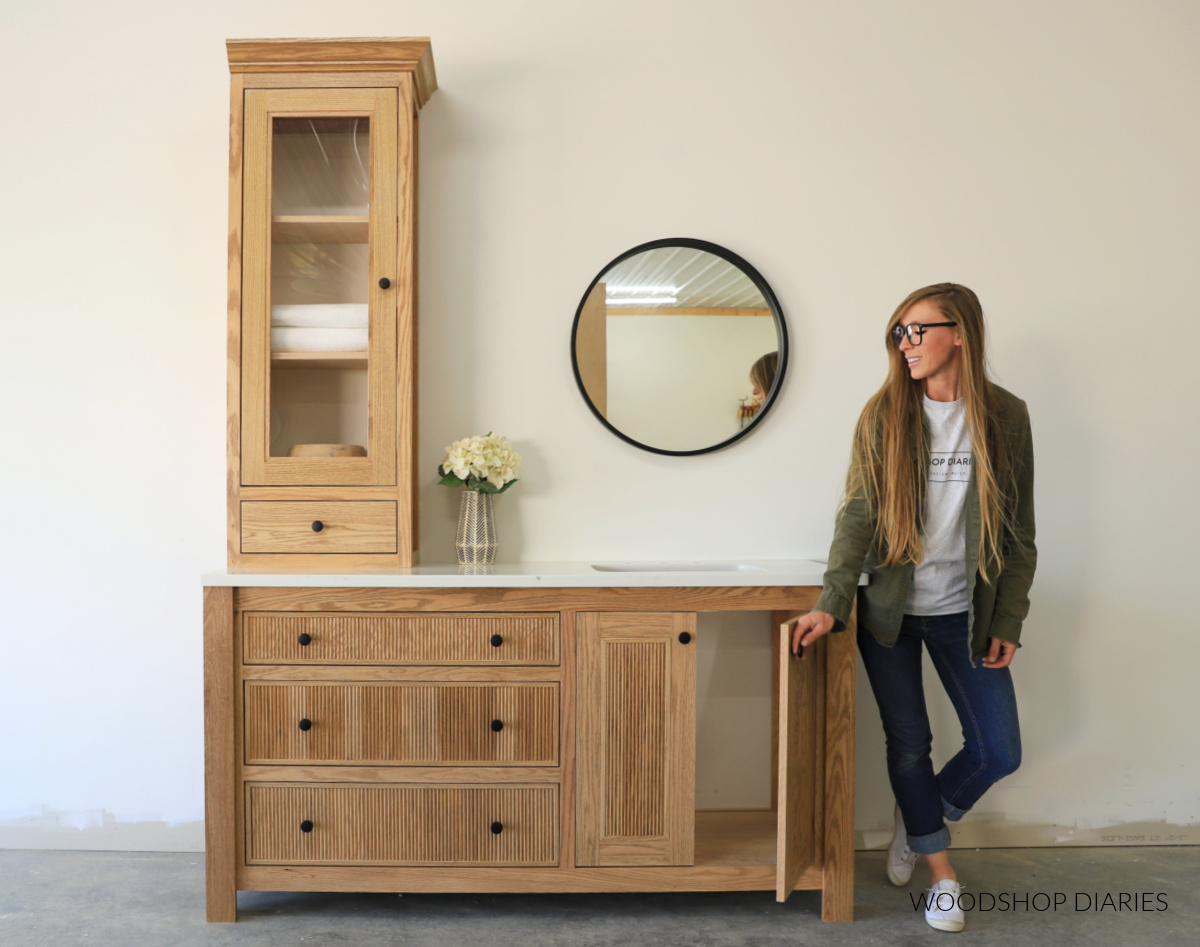
You may notice this doesn’t look quite like a bathroom haha. I took photos of it here–against the blank wall in my shop–because once it’s installed, it’ll be difficult to get the entire vanity in one photo with the walls in the way.
I wanted to capture the entire project in the photo since there’s a lot of detail to show.
This large single sink vanity packs a ton of storage between the three drawers on the bottom and the extra cabinet on top. I am SO excited about this project and I’m showing you how to build it below.
*This post contains affiliate links. See website policies.
What to know before building
You may be curious about the unique design of this build. The vanity is large enough for two sinks, but it only has one…and it’s off center.
Let me explain–the guest bathroom this is going into currently has a closet and an existing vanity that we need to remove.
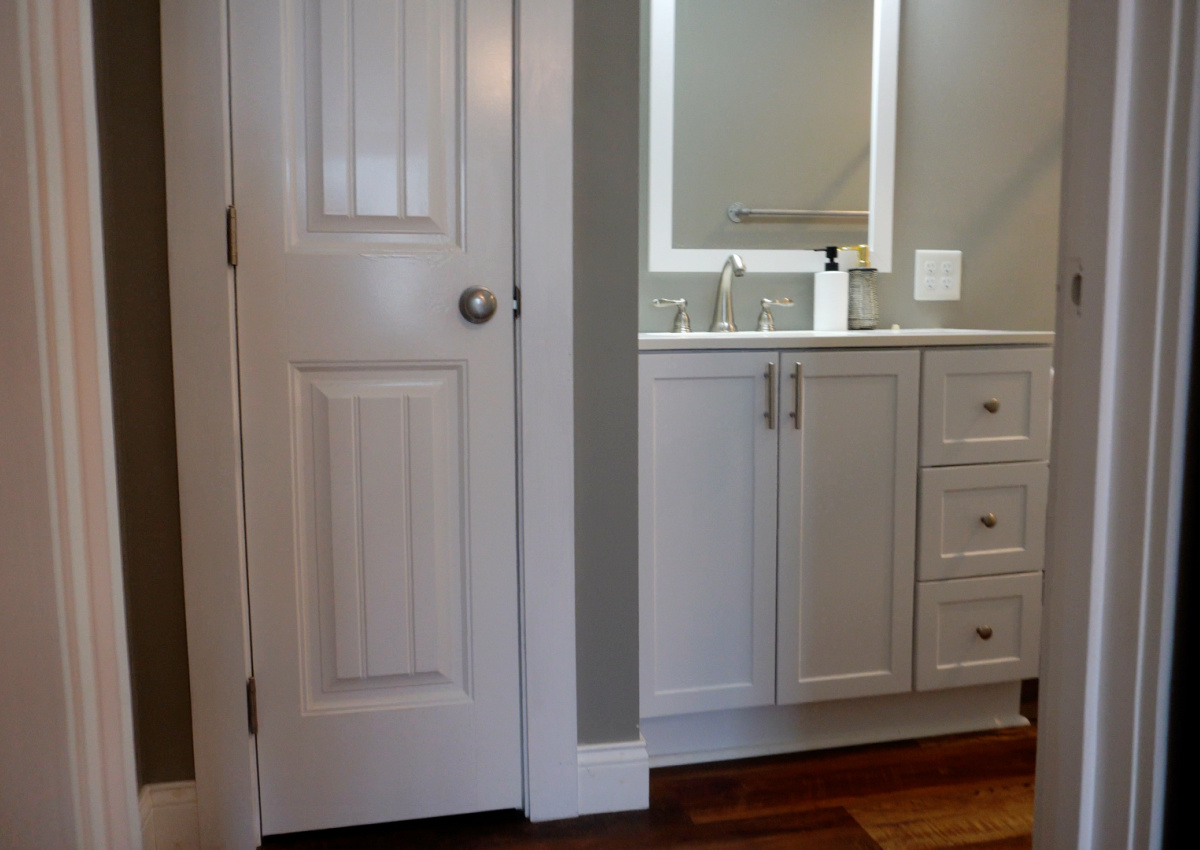
Basically, I’m tearing out the closet in order to install this larger vanity, but I didn’t want to move or modify the existing plumbing. So the sink is offset, or not centered.
And, since the sink is off center, I added an additional cabinet on the left side to give some extra storage since the closet will be gone.
This vanity is designed to fit into a corner so that the back and left sides are against a wall.
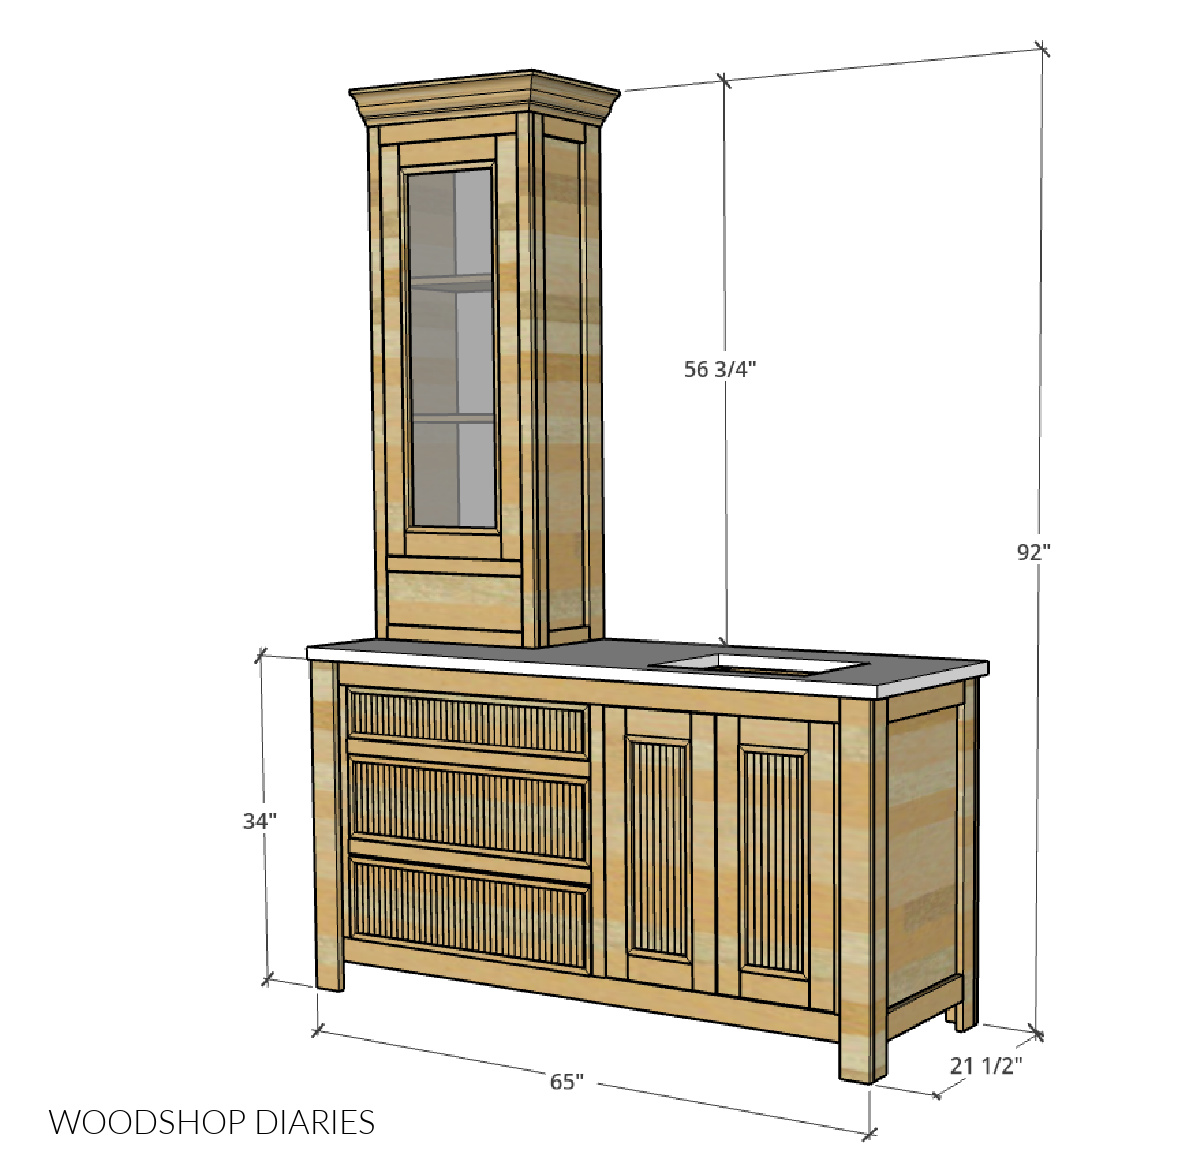
Overall dimensions & Countertop Size
The overall dimensions of this project are approximately 21 ½″ deep x 65″ wide x 92″ tall. The vanity height (not including countertop) is 34″ tall.
We purchased our countertop and sink from a local granite countertop supplier who was able to custom cut it from a remnant he had on his lot. We had him cut it to 22″ x 66″.
Since this is designed to go into a corner, it is flush on the left side and the back, but overhangs the front ½″ and the right side 1″.
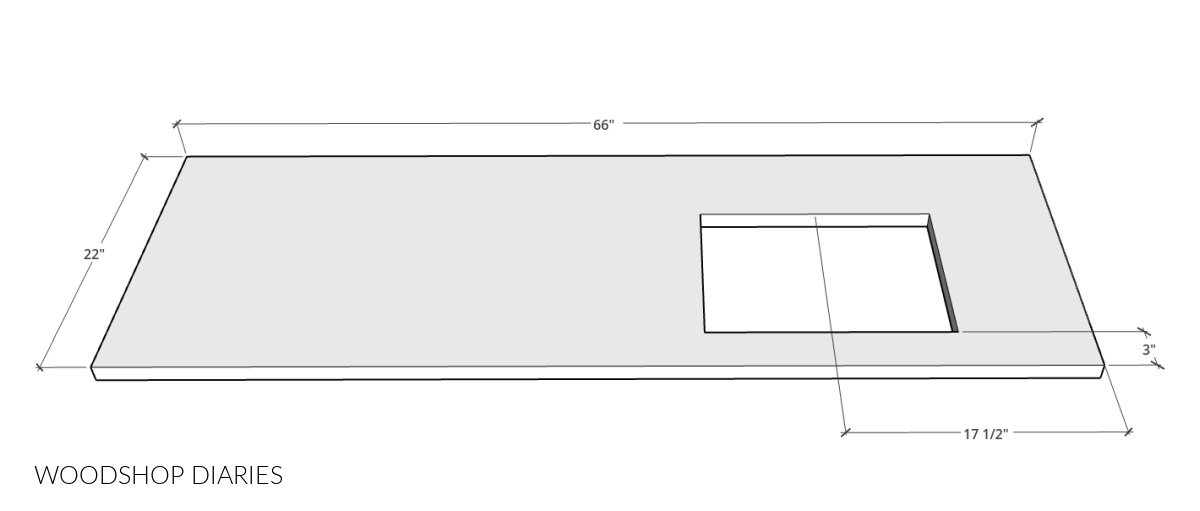
The sink was cut out so that it’s centered 17 ½″ from the right side. Due to the unique measurements with the offset sink, it’s unlikely you’ll find a countertop off the shelf to fit this design. So having it custom cut is probably the best and only option.
Helpful Resources
You may find these resources useful as you build to make your DIY the best it can be:
Are DIY projects your thing? Sign up for our newsletter for priority access to the latest projects and build plans!
How to Build a Bathroom Vanity with Cabinet
This is an intermediate to advanced level build. That’s not because it’s difficult, but it’s because there are so many parts and details.
You probably aren’t going to be able to knock this one out in a weekend. But, it is incredibly fun and well worth the time (and all the sanding!) invested.
If you’re planning to tackle it, I highly recommend checking out the video for helpful tips along the way.
Love watching how-to videos? Subscribe to my YouTube channel for plenty more where that came from!
Prefer to print? Grab the printable vanity with top cabinet building plans available here:
Tools & Materials
This project was built using solid red oak lumber and plywood. However, any wood type would work fine for this if you wanted to use something different.
For a more budget friendly option, pine wood and birch plywood is a great option. Learn how to choose the right plywood for your project here.
Tools:
- Drill/Driver
- Circular Saw and plywood cutting guides
- Pocket Hole Jig (I also recommend the Kreg Micro for face frames)
- Dowel Jig
- Concealed Hinge Jig
- Shelf Pin Jig
- Miter Saw
- Brad Nailer
- Router & ⅜″ Rabbeting Bit
- Chisel
- Table Saw
Materials:
- (2) 4’x8′ sheet ¾″ plywood
- (1) 4’x4′ sheet ¼″ plywood
- (2) 1x6x8 boards
- (4) 1x2x8 boards
- (8) 1x3x8 boards
- (6) ⅝″ x 3 ¼″ fluted trim casing (8′ boards)
- (1) 3 ⅝″ crown molding (6′ board)
- 12 ¾″ x 37 ½″ acrylic or glass panel ⅛″ thick (This is a 2 pack, so you’ll have leftovers, but it’s the best price I could find for the size needed)
- 1 ¼” pocket hole screws (coarse thread for softwood and plywood, fine thread for hardwood)
- 1 ½″ Dowel pins
- 1 ¼″ brad nails
- 1 ¼″ wood screws
- 2 ½″ wood screws (to install)
- Turn buttons (to install acrylic/glass panel)
- Wood glue
- Shelf Pins
- (3) pair 16″ drawer slides
- (1) pair 10″ drawer slides
- (2) pair concealed inset hinges for face frame cabinets
- (1) pair concealed inset hinges for frameless cabinets
- Edge banding (optional, but recommended)
- Drawer pulls/knobs
Step 1: Building Bathroom Vanity Frame
The legs of this vanity were made by ripping a 1×6 board into a 3″ wide piece and a 2 ⅜″ wide piece.
I glued the two pieces together into an “L shaped leg.” After the glue dried, I sanded them smooth and trimmed them into four 34″ long legs.
Then I cut two side panels to run between these legs and secured them on the inside using wood glue and screws.
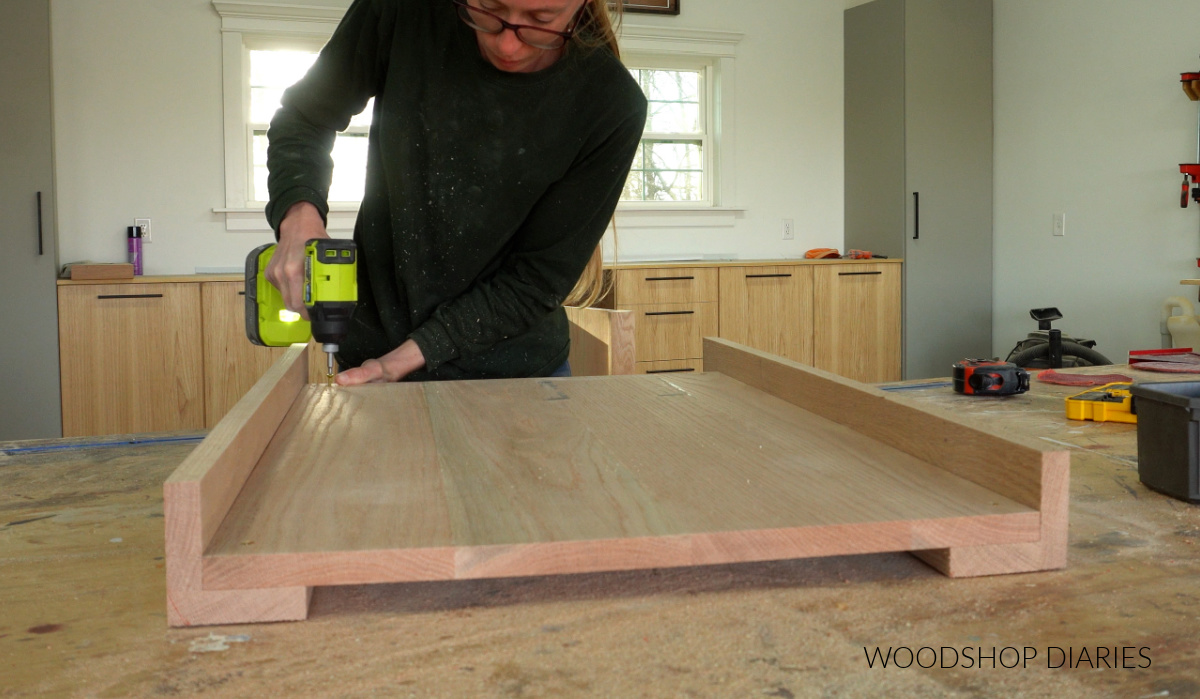
The vanity is split into two sections–the left side will contain three drawers and the right side is an open cabinet with doors.
So I cut some 1x3s and 1x2s to assemble a basic face frame to divide out the front of the vanity using pocket holes and screws.
RELATED: How to use a pocket hole jig
For complete details on all parts, dimensions, and cut diagrams, grab the printable building plans.
TIP: When assembling face frames and parts with narrow boards, I like to use the Kreg Micro Pocket Hole Jig because it drills 30% smaller holes.
You use these with pan head pocket hole screws (which are smaller than the standard size) and it’s much less likely to split the boards.
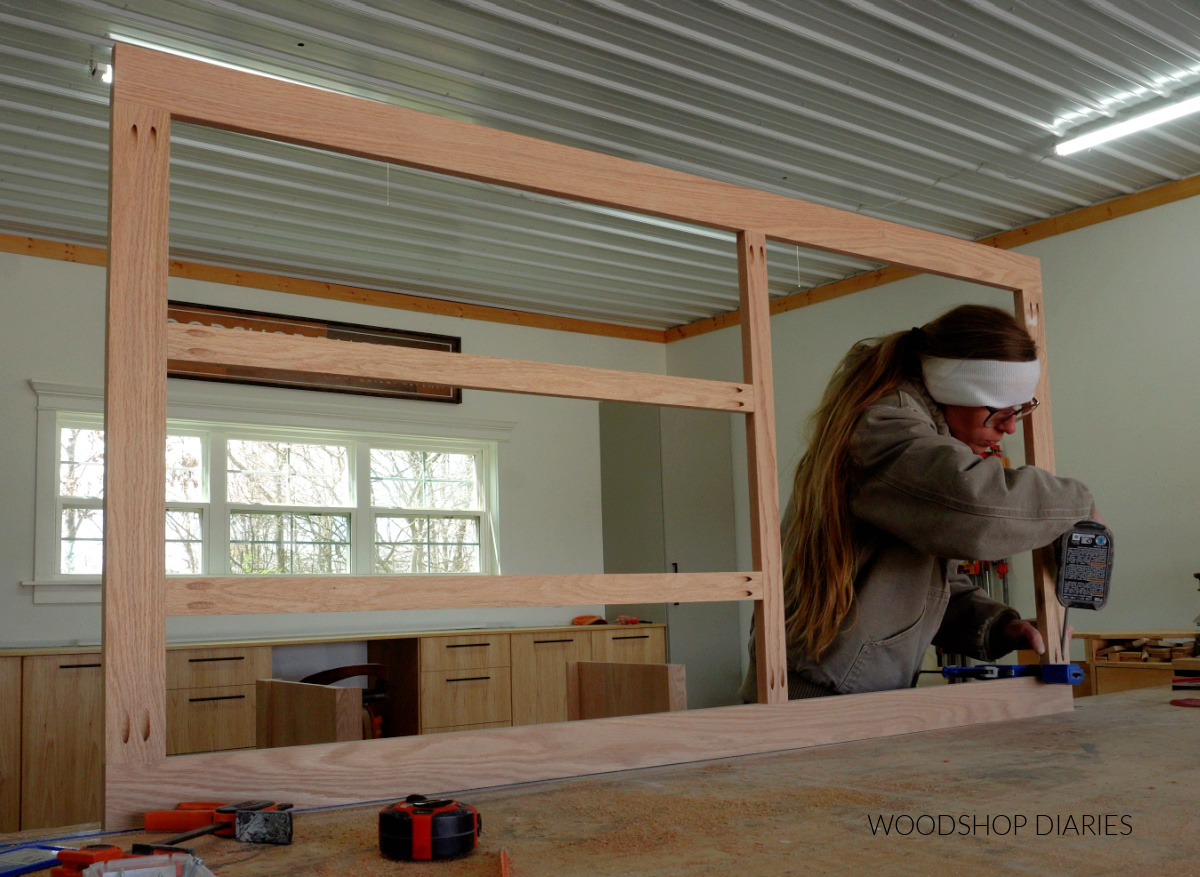
After the face frame was together, I screwed it between the side panels on the inside of the front legs to attach the two sides together.
Then, I added 1x3s and 1x2s to frame across the back side. The 1x3s went at the top and bottom, but I used the 1×2 as a vertical divider.
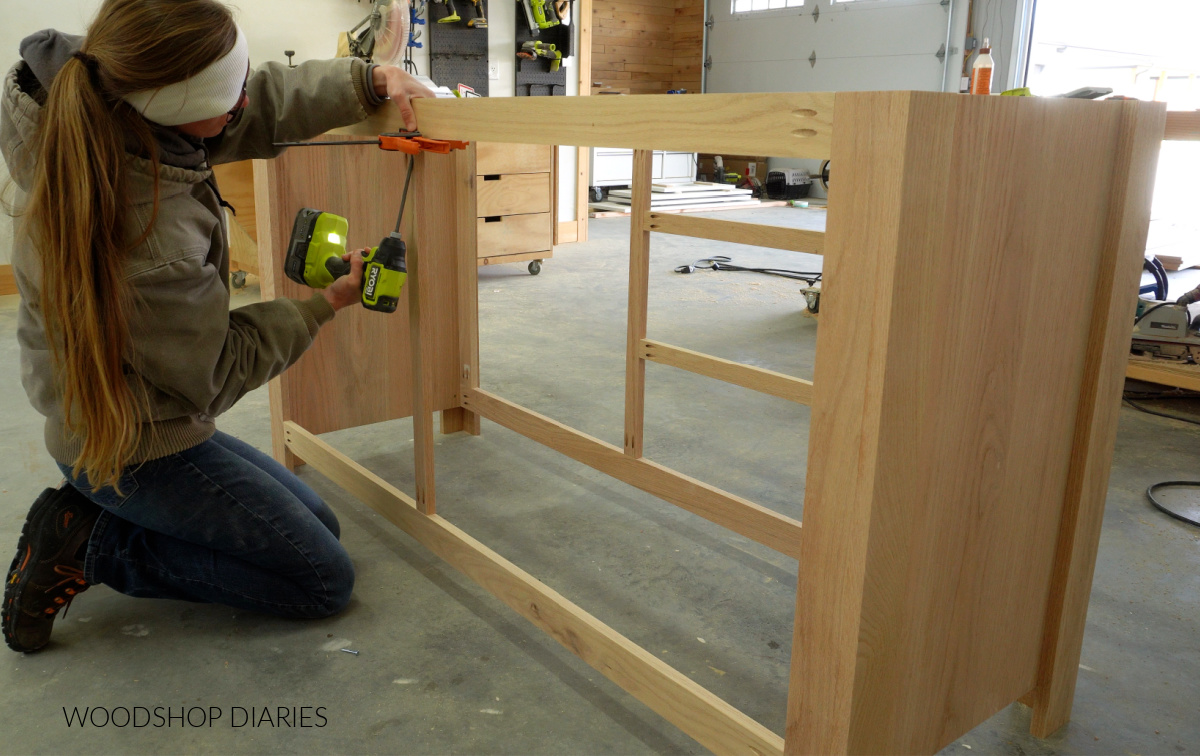
Now the frame was together, but I needed to add a divider to separate the door and drawer sections.
I installed some scrap plywood supports at the top and bottom of the frame using pocket holes and screws. Then I cut a plywood panel to fit into the opening.
I secured this panel in place using pocket holes and screws so it was flush to the left side of the 1x2s on the front and back.
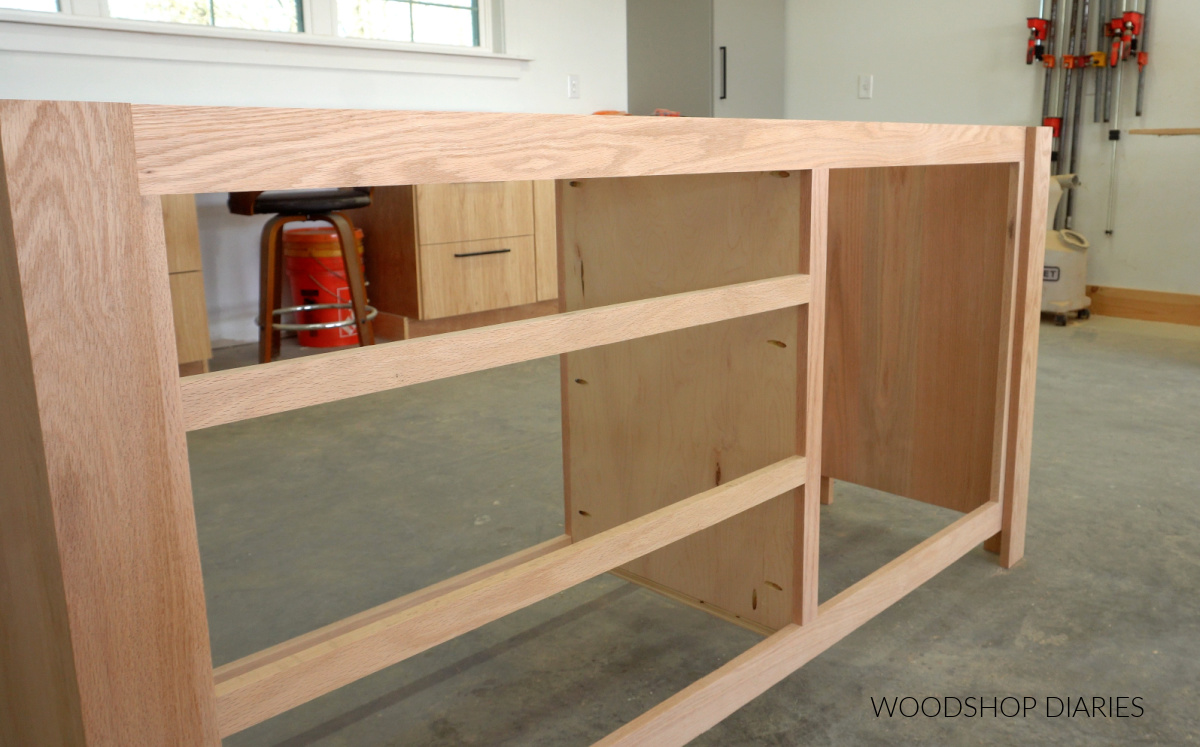
For the right side, where the cabinet is, I also needed to add a bottom. I like having removeable bottoms in my vanities because it makes cleaning out the p-traps easier.
I screwed a plywood strip along the right side panel so that I could place a plywood bottom panel across it and the middle divider at the bottom.
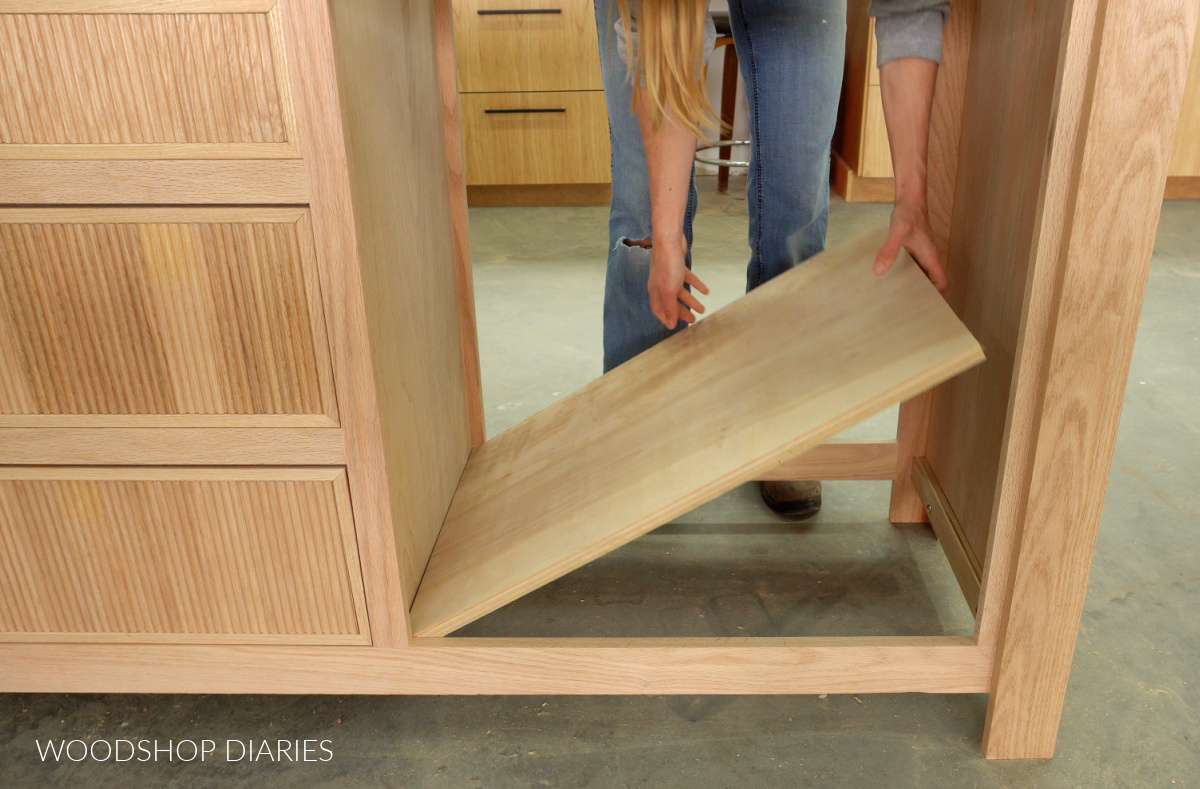
If you wanted to permanently secure it, you could add a few screws. But I left mine just resting here.
Step 2: Adding Drawers to Vanity
To add the drawer slides, first, I needed to add some framing on the left side to support the slides.
So I used some scrap plywood to attach a piece vertically across the back, then secured three slide supports between it and the face frame.
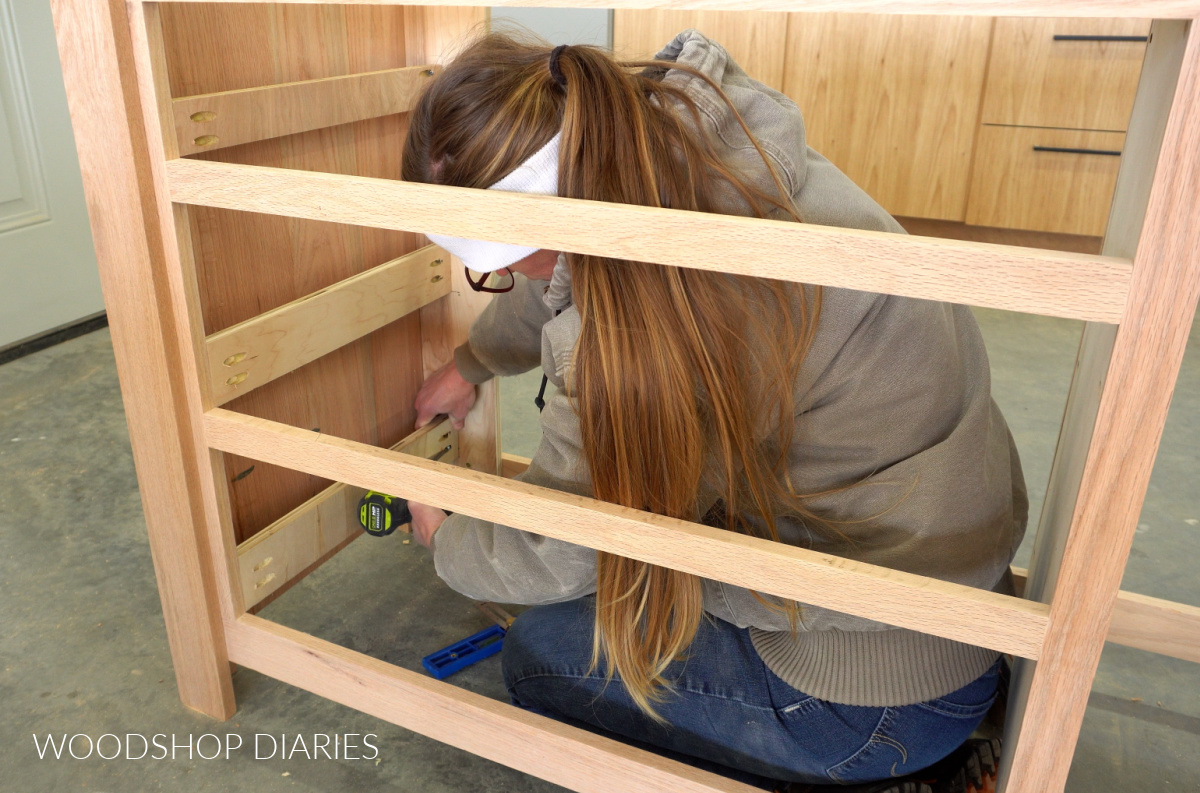
These supports give me somewhere to mount the slides to on the left side. The slides can mount directly to the divider panel on the right side.
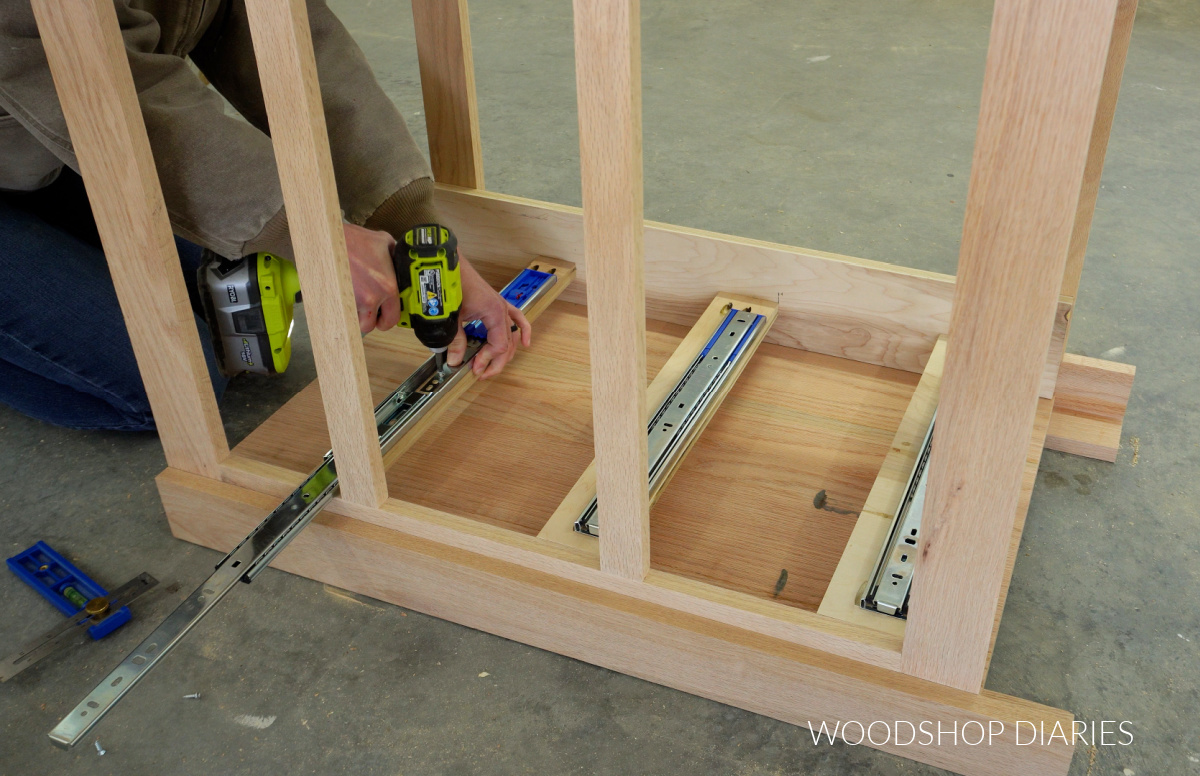
I installed 3 pair of 16″ drawer slides into the vanity 1 ½″ inset from the front of the face frame.
RELATED: How to install side mount drawer slides
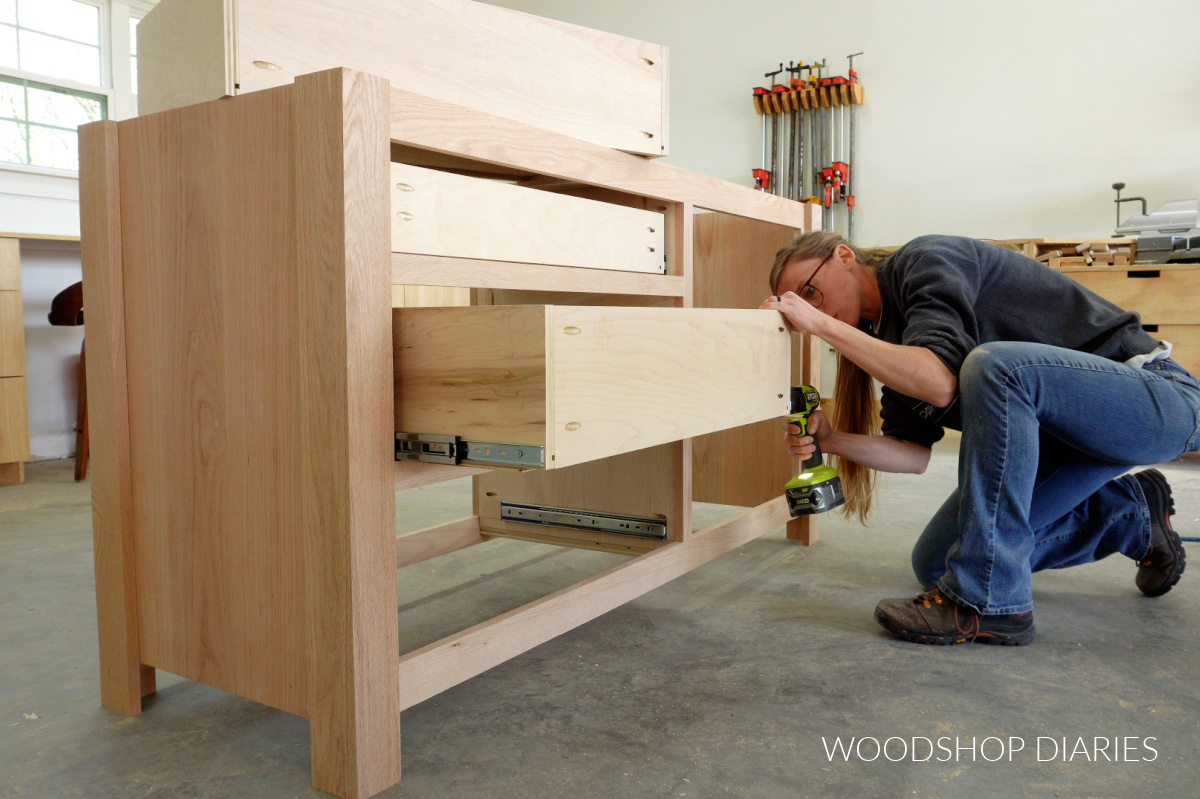
Then I assembled and installed three drawers to fit into these openings.
RELATED: How to build a drawer box
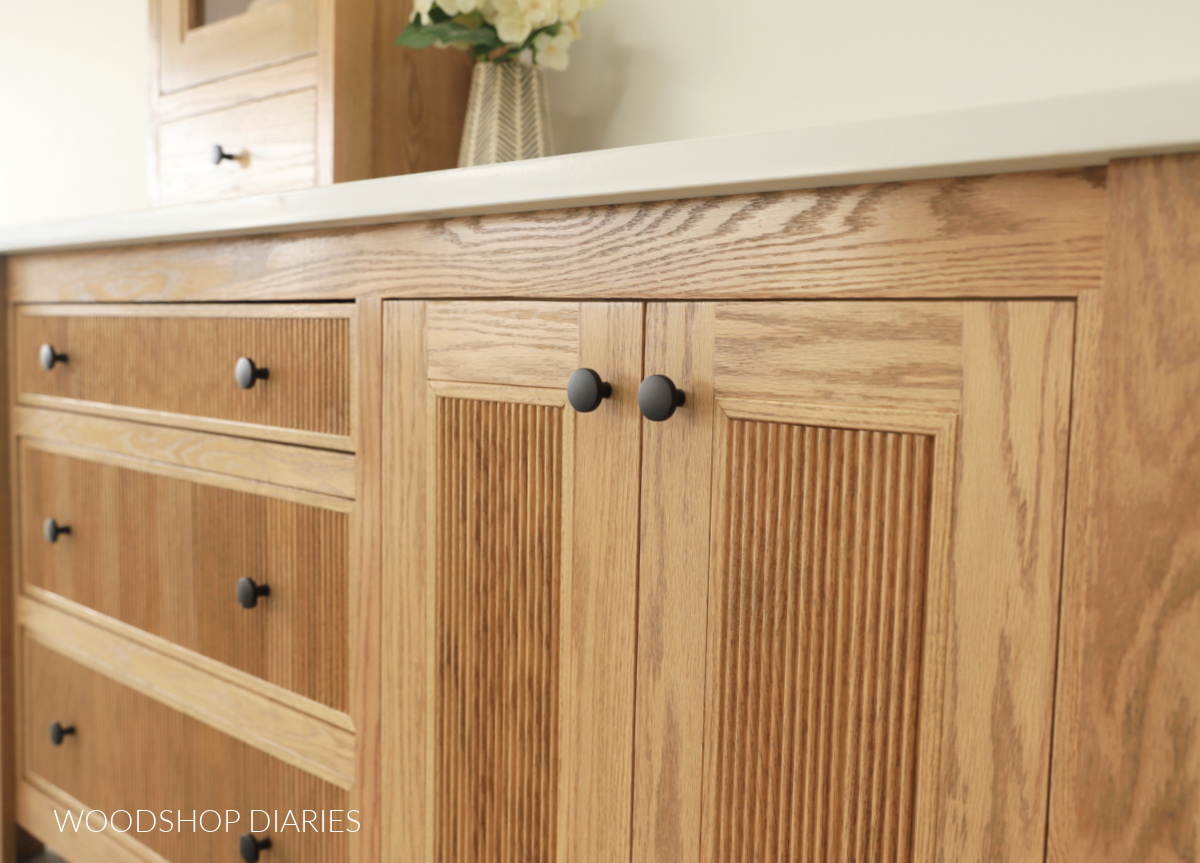
Step 3: Building & Installing Fluted Drawer Fronts
This was my favorite step! I cut ¾″ plywood to use as the drawer fronts for each drawer–three total.
RELATED: How to size drawer fronts
For the fluted trim, I used these red oak casing boards. They come with this profile–notice the fluting in the middle, but the flat pieces on each side.
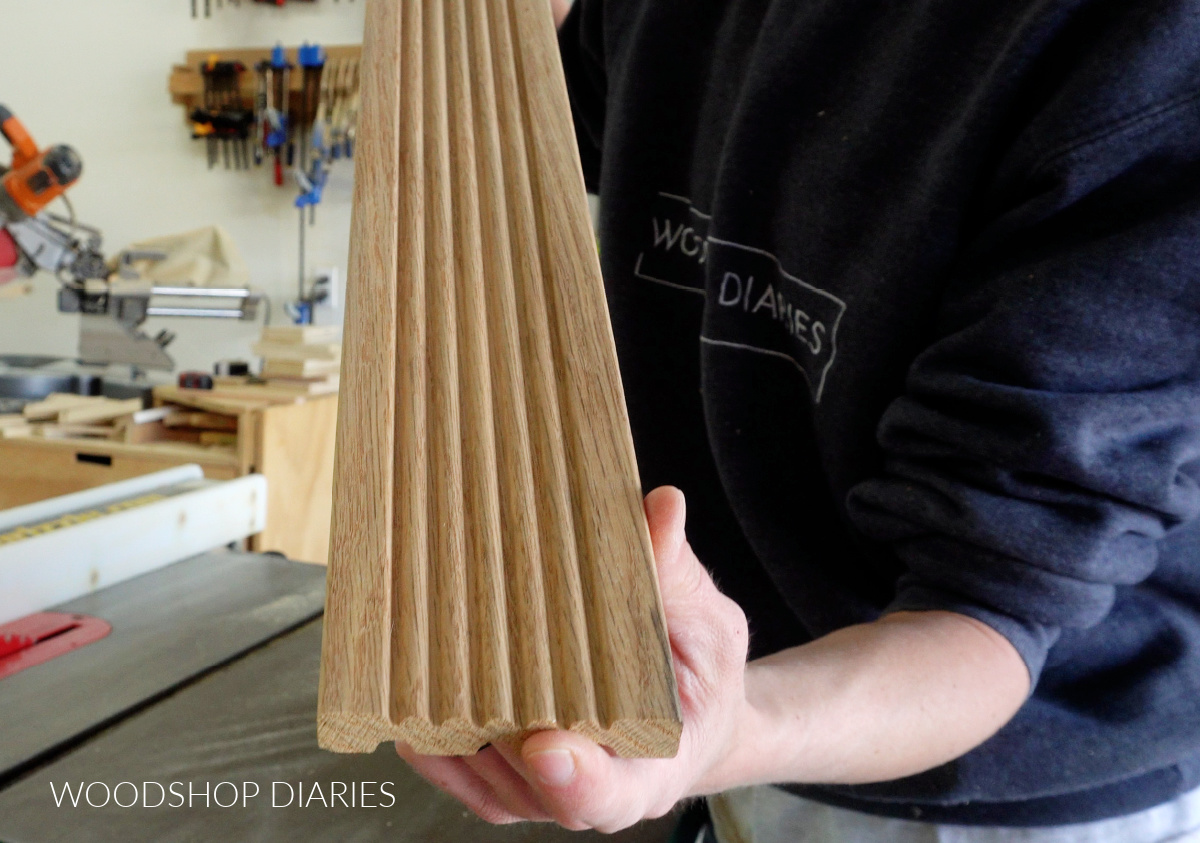
To make this work, I ripped the flat pieces off each side of the board–these made strips almost like square dowels.
I cut these pieces with mitered ends to go on the plywood drawer fronts flush to the edges to kind of frame them out.
Then, I cut the middle fluted part of the board down into small pieces to fill inside the frame.
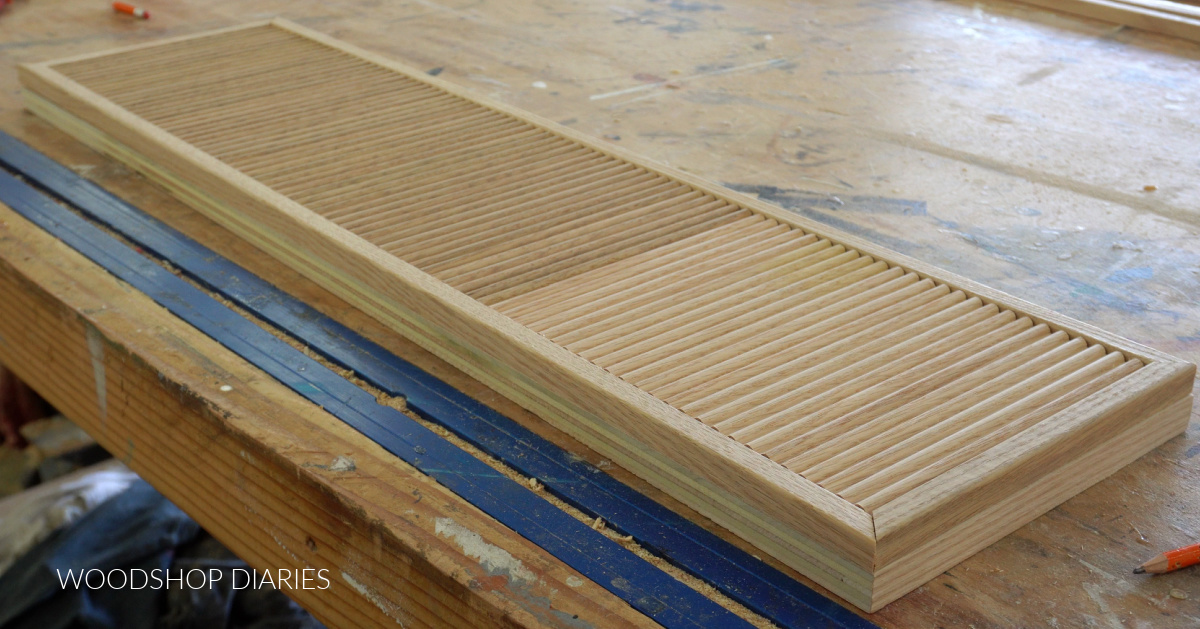
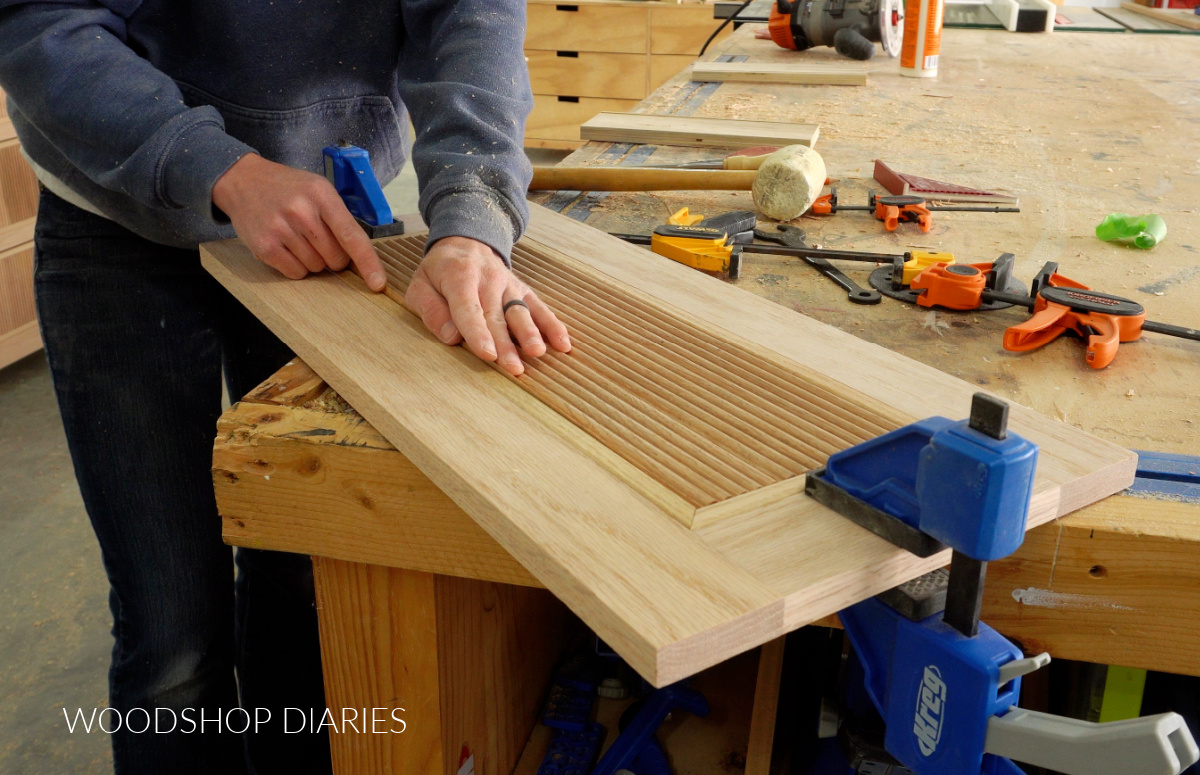
After making sure the pieces all fit together well, I glued and clamped them on each plywood drawer front and allowed to dry.
Then, I installed these into the vanity onto each drawer box using screws from the inside.
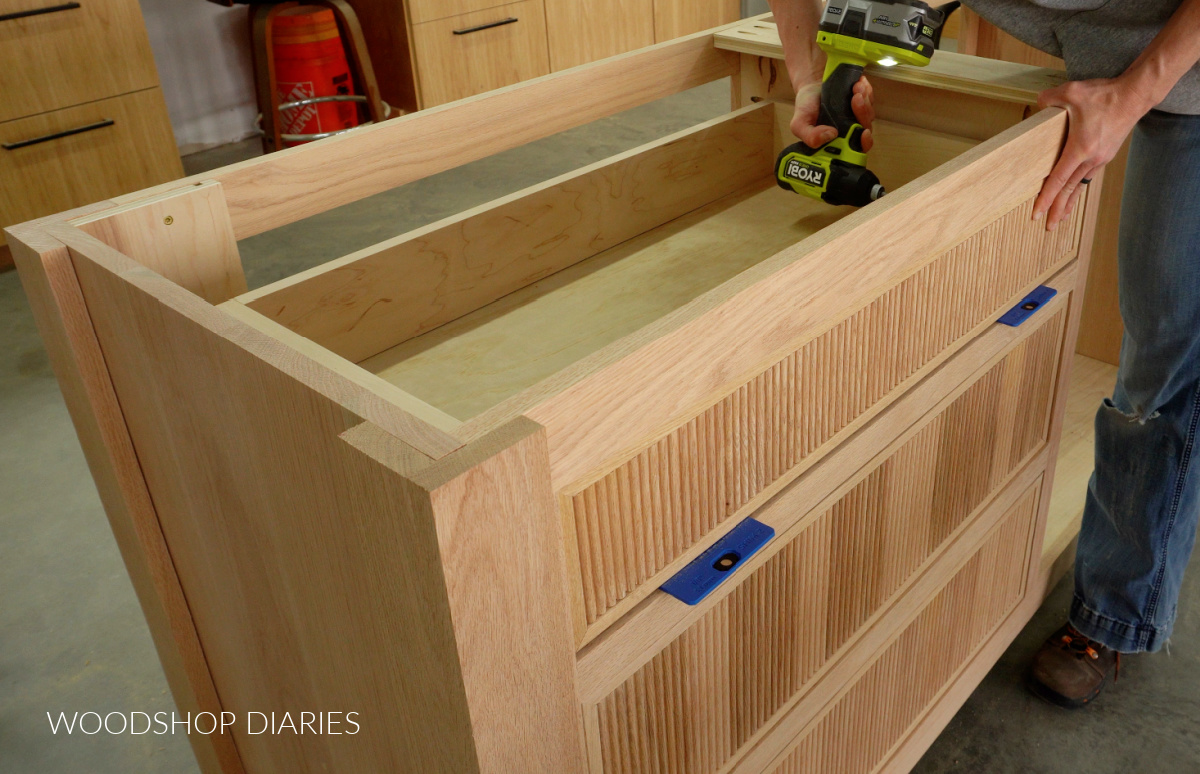
Step 4: Building & Installing Fluted Cabinet Doors
I cut 1x3s to assemble two door frames for the vanity. I used wood glue and dowels to glue the frames together. Learn how to use a dowel jig here.
Then, after the glue dried, I routed a ⅜″ wide x ¼″ deep rabbet on the back side to install a ¼″ plywood panel into. Learn 7 ways to build a cabinet door here.

After gluing the plywood panel into the rabbet, I added the fluted trim onto the front.
Just like with the drawer fronts, I ripped the flat parts off the oak casing molding and used these pieces to outline the opening on the front of the door.
Then, I cut the fluted parts down to fill the inside. After making sure everything fit well, I glued and clamped all the pieces on both doors.
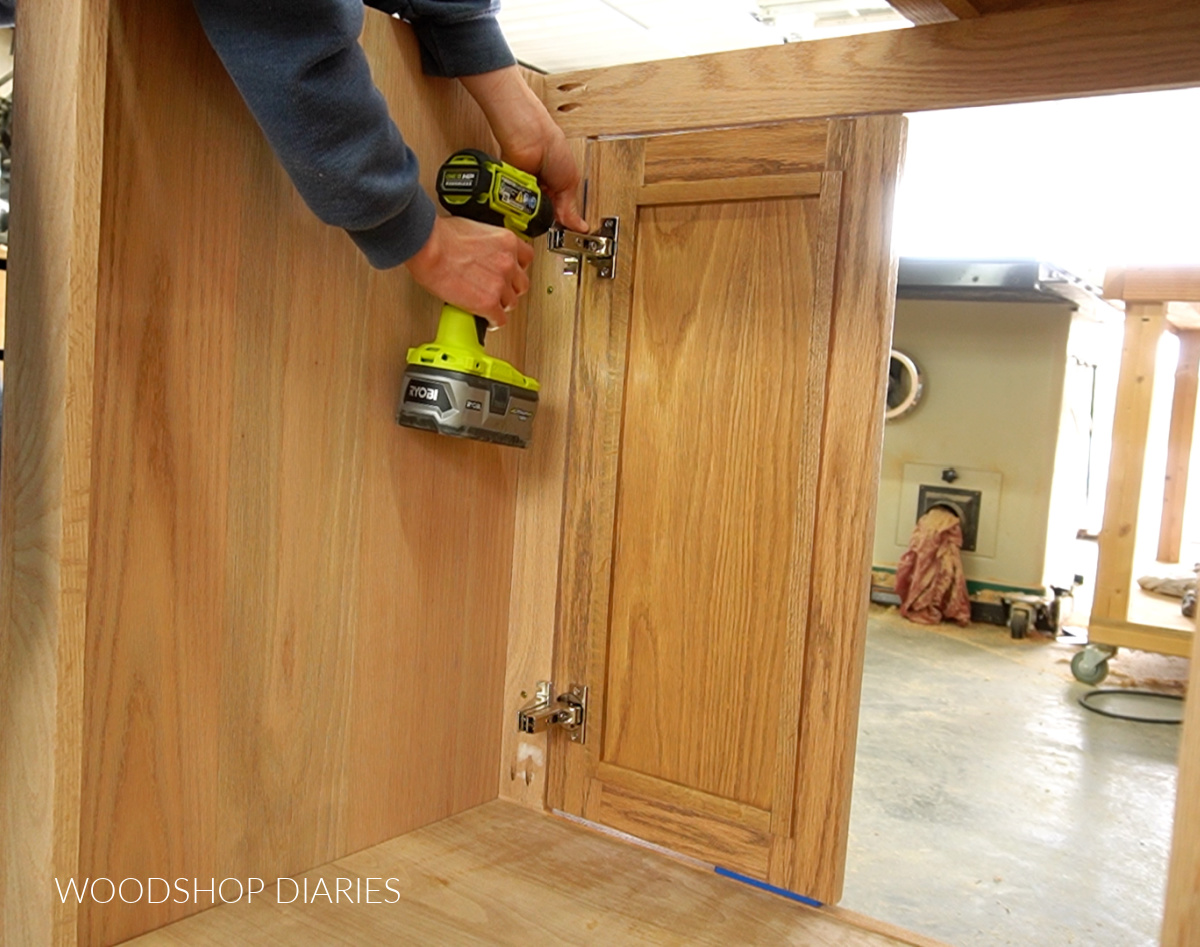
To install, I drilled concealed hinge cup holes using my Kreg Concealed Hinge Jig and screwed inset hinges for face frame cabinets to the doors.
I installed the doors to the vanity frame from the inside.
RELATED: How to install concealed hinges
NOTE: I didn’t love how the seam looked between the door frame and the plywood panel on the back side. So I cut and glued some thin lattice trim around the edges as you can see in the image above. This is completely optional.
Step 5: Assembling Top Cabinet
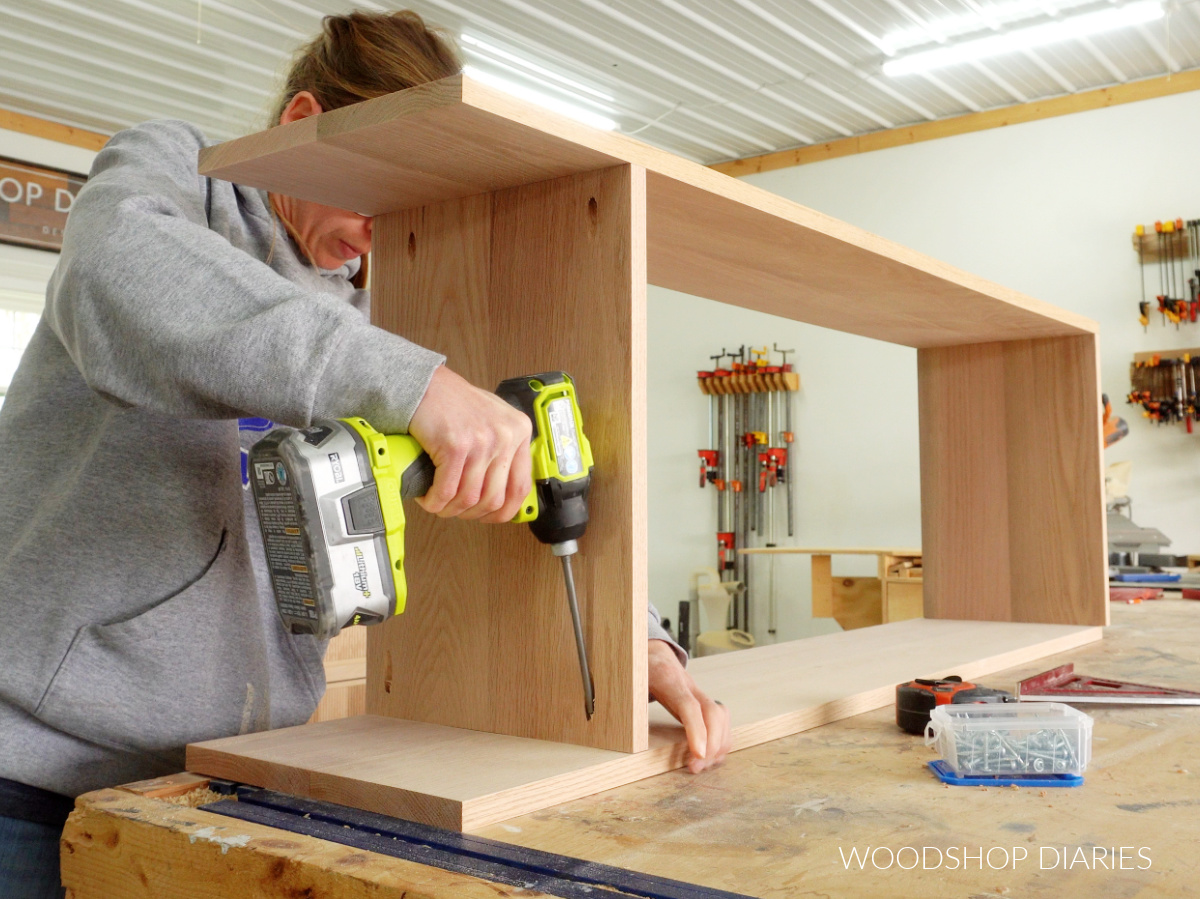
The top cabinet of this vanity is much simpler to build than the base. Basically, I assembled a tall, skinny cabinet box using pocket holes and screws.
The bottom panel of the cabinet is installed about 8 ⅞″ up from the bottom of the sides to leave room to install a drawer box later.
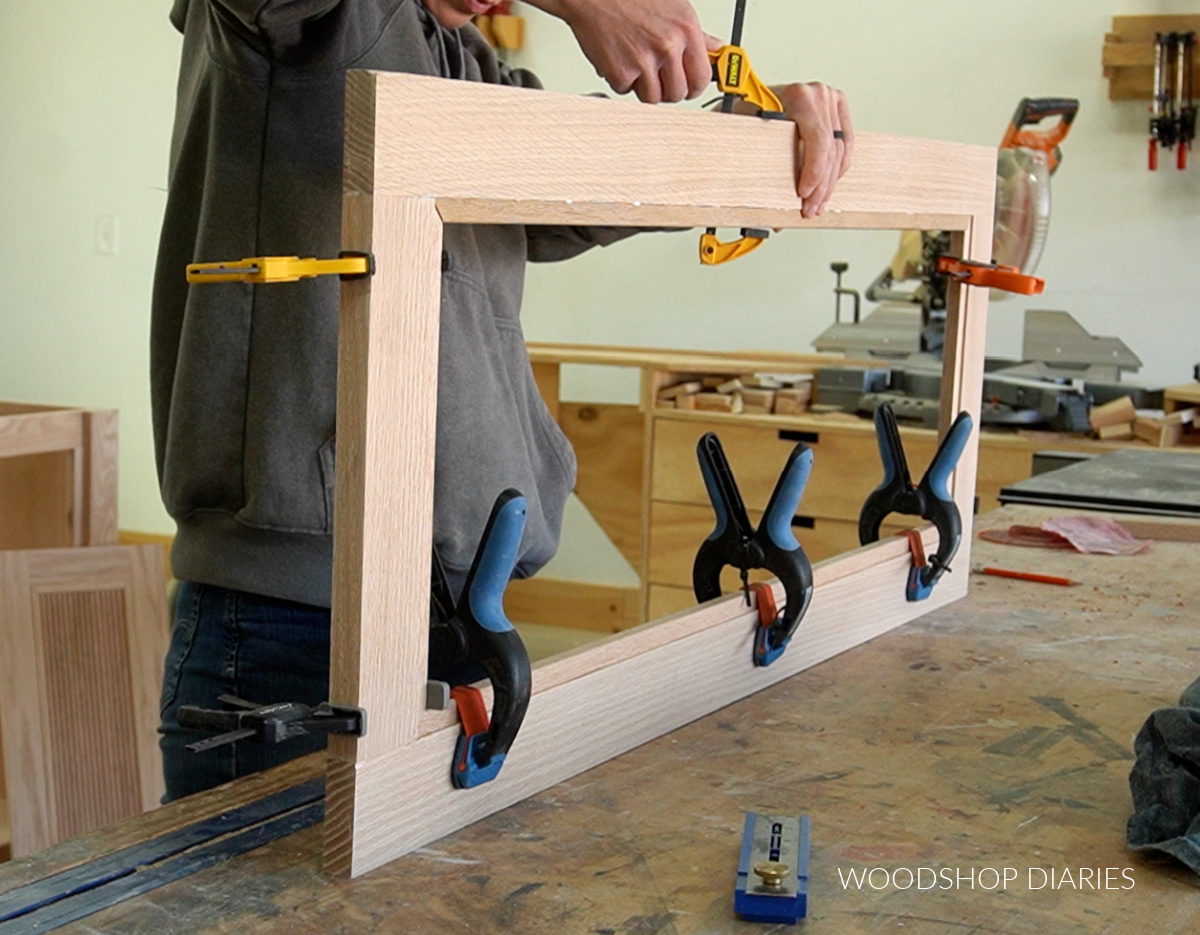
After the cabinet box was together, I assembled and glued a face frame onto the front so that it overhangs both sides of the cabinet ¾″.
The left side of this cabinet will go against the wall, so this overhang acts as a spacer block. But on the right side, I added some additional trim, so this overhang ties into that.

I glued 1×2 trim along the front and bottom and 1×3 trim along the back and top of the cabinet box.
Then, I cut, glued, and nailed some crown molding along the front and right side. Again, since the left side is going against a wall, I didn’t wrap the molding around that side.
RELATED: How to cut crown molding

To add adjustable shelves to the cabinet, I drilled shelf pin holes along both sides to be able to install shelves using shelf pins later.
RELATED: How to add adjustable shelves to cabinets
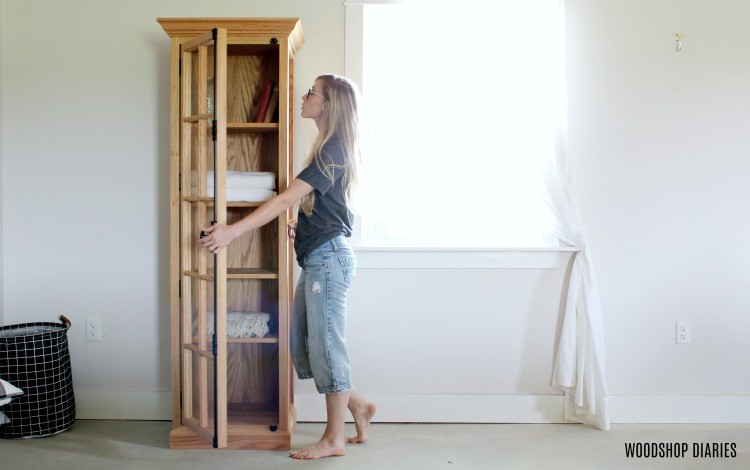
Step 6: Building Top Cabinet Glass Door
Once the cabinet box was together, I built a door frame to go into the top opening. Just like with the doors of the vanity, I assembled the door frame using 1x3s and wood glue with dowel pins.
But, instead of routing a rabbet on the back side of this door, I cut to fit and glued some of the flat parts of the fluted casing around the inside of the frame.
I had quite a bit of this material left and it was about ⅝″ thick. So I could line the inside of this door frame with it so that it was ⅛″ inset from the back edge of the door frame.
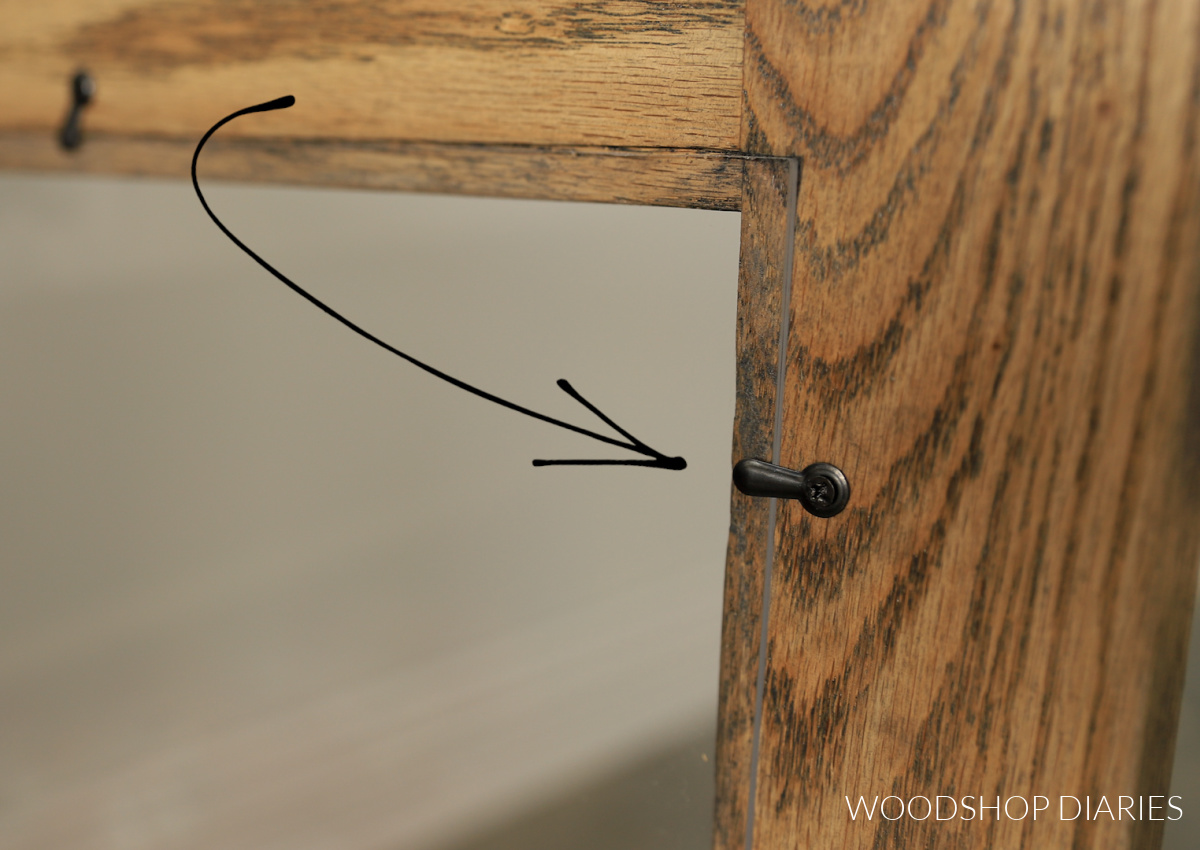
I was using ⅛″ thick acrylic, so it fit into this ⅛″ deep recess perfectly. I cut a piece of acrylic to fit and secured it on the back of the door using turn buttons.

TIP: You can cut acrylic/plexiglass/plastic sheeting using a circular saw a fine finish (or plywood) blade.
If you wanted a more permanent hold, you could also glue the acrylic, but I like the option of removing it to clean, replace, etc. as needed.
Then, I installed this door onto the cabinet using inset frameless concealed hinges.
Step 7: Adding Top Cabinet Drawer Box
The last part was adding the tiny drawer box in the bottom of the cabinet. I installed 10″ slides into the opening ¾″ inset from the front edge.
This cabinet is very shallow, so 10″ was the longest drawer slide that would fit.
I built a small drawer box to install onto these slides. This little drawer may be the smallest drawer I’ve ever made haha. It’s so tiny and cute!

Once installed, I added the flat drawer front onto it using screws from the inside (see video for additional tips). And now it’s ready for finishing touches!
Step 8: Finishing and Installing Bathroom Vanity
I actually built all the pieces first–vanity, drawers, doors, top cabinet. Then, before installing the doors and putting everything together, I finished everything separately to make it a little easier.
I stained this vanity using Minwax Weathered Oak wood stain, then gave it three coats of Minwax Water Based Helmsman to seal it.
RELATED: How to stain wood furniture
After it was stained and sealed, I installed the doors and drawers back into the vanity and added some simple black knobs to finish it up.
This is obviously not installed in the bathroom yet in these photos. Once installed, it will be impossible to get the entire vanity in one photo due to the layout of the space.
I also have to do some renovation work in the bathroom before installation as well and I haven’t gotten to that part yet…
But, when we get ready to install, we will secure the vanity base to the wall studs through the back 1x3s. Then install the countertop, sink, and plumbing.
Finally, we will set the top cabinet on the counter and secure it to the wall studs to finish up.
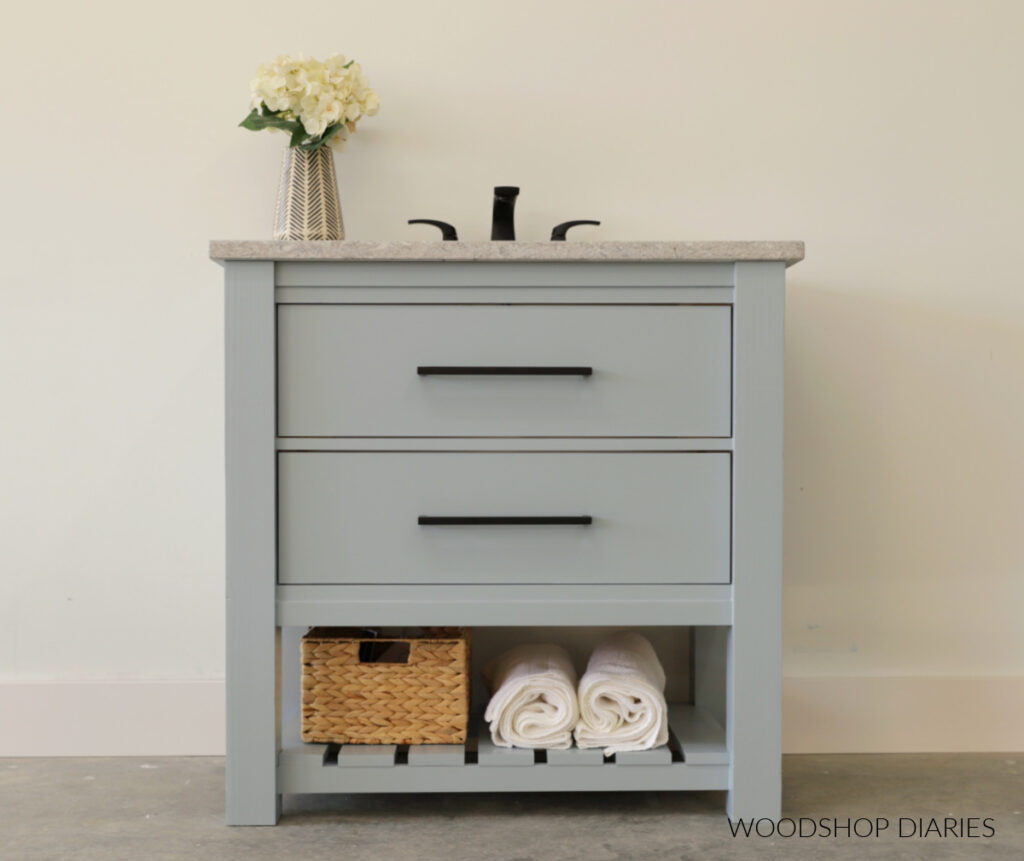
Even if you didn’t want to use this in an actual bathroom, the design would be perfect for a dresser, accent cabinet, or built ins, too!
If you want to build your own, grab the printable building plans here!
Looking for more bathroom DIY project ideas?
If you enjoyed this post, but are looking for more bathroom DIY projects and inspiration, check out these fun builds:
If you’d like to save this project for later, don’t forget to pin it or share it to your favorite social channel!
Until next time, friends, happy building!