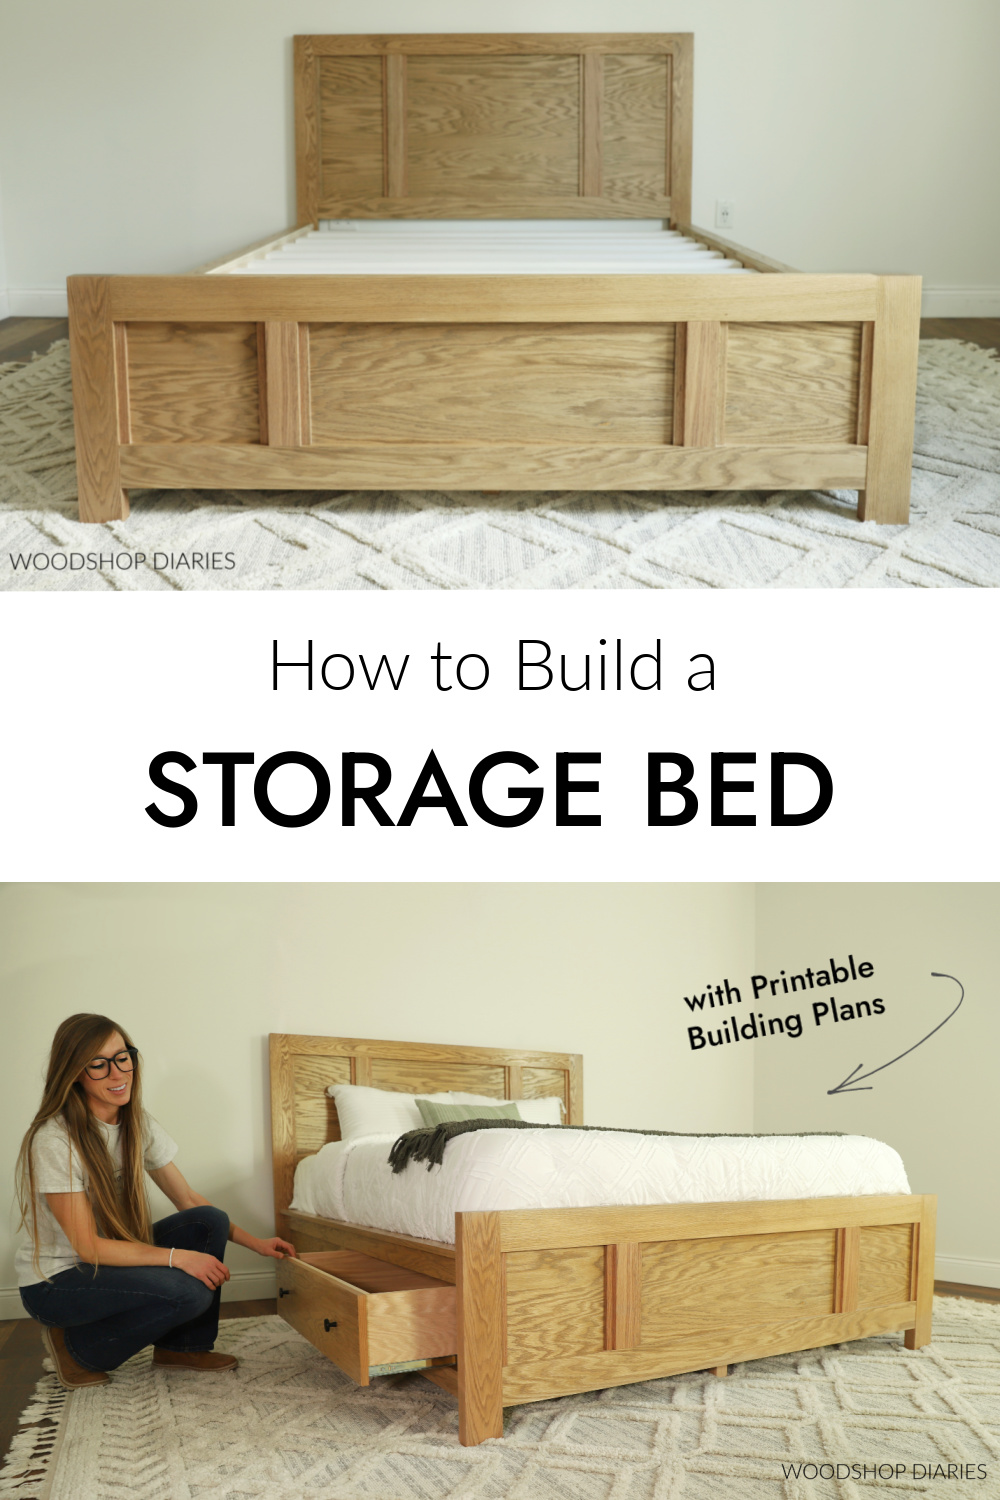
In this post, I’m sharing how to build a simple DIY bed with storage drawers built into the sides!
This bed design packs style and storage into one and it’s built in sections to make assembly (and disassembly) quick and easy.
I’ve shared several bed builds over the years, but I think this one may be my favorite!
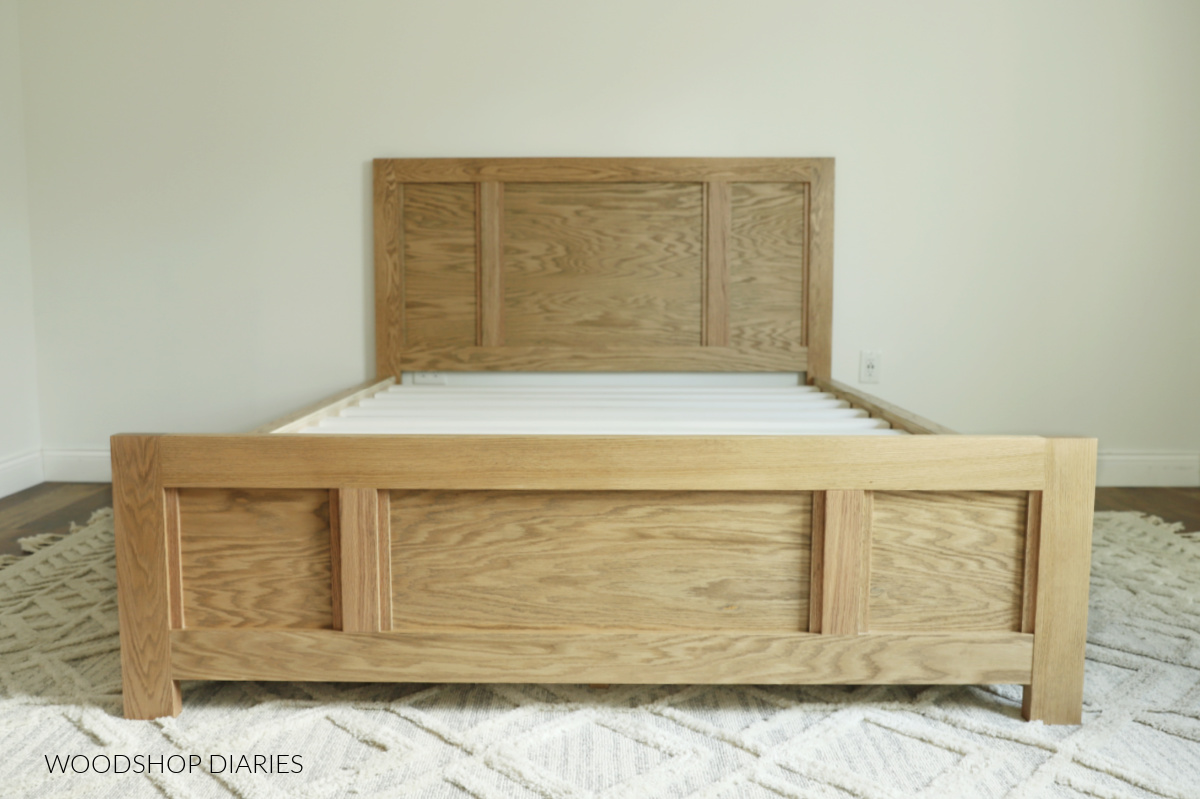
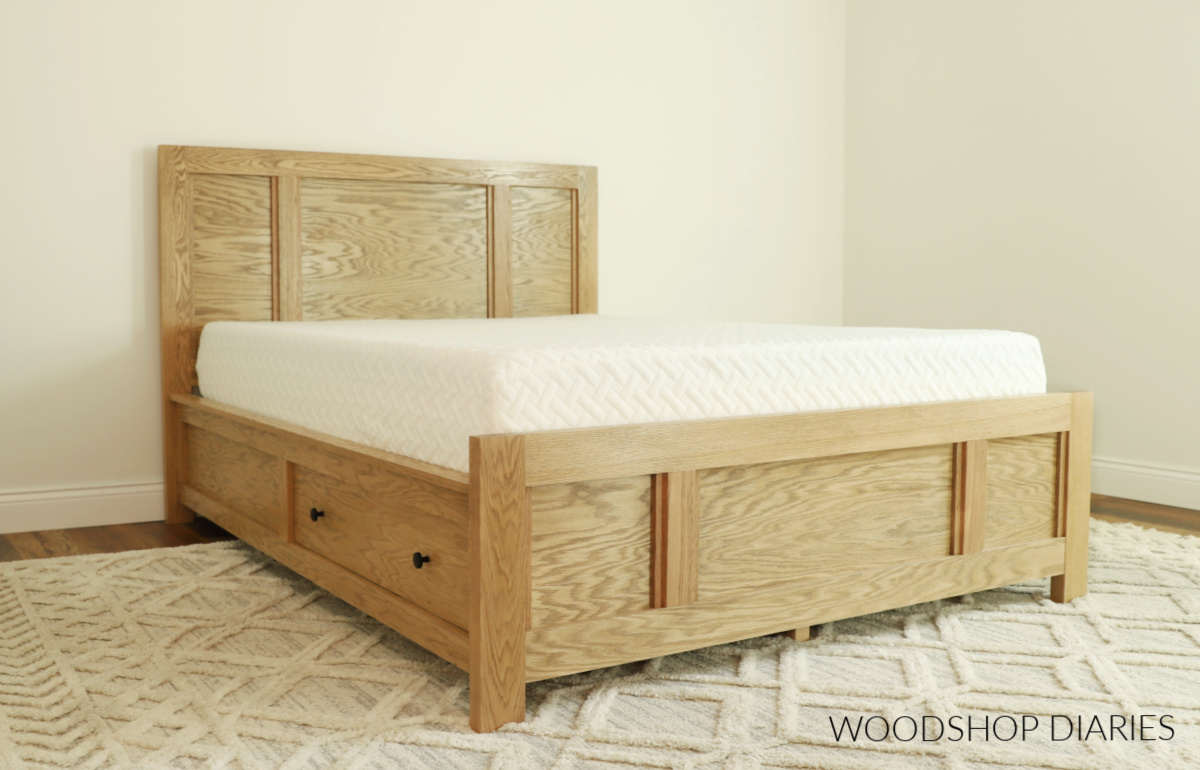
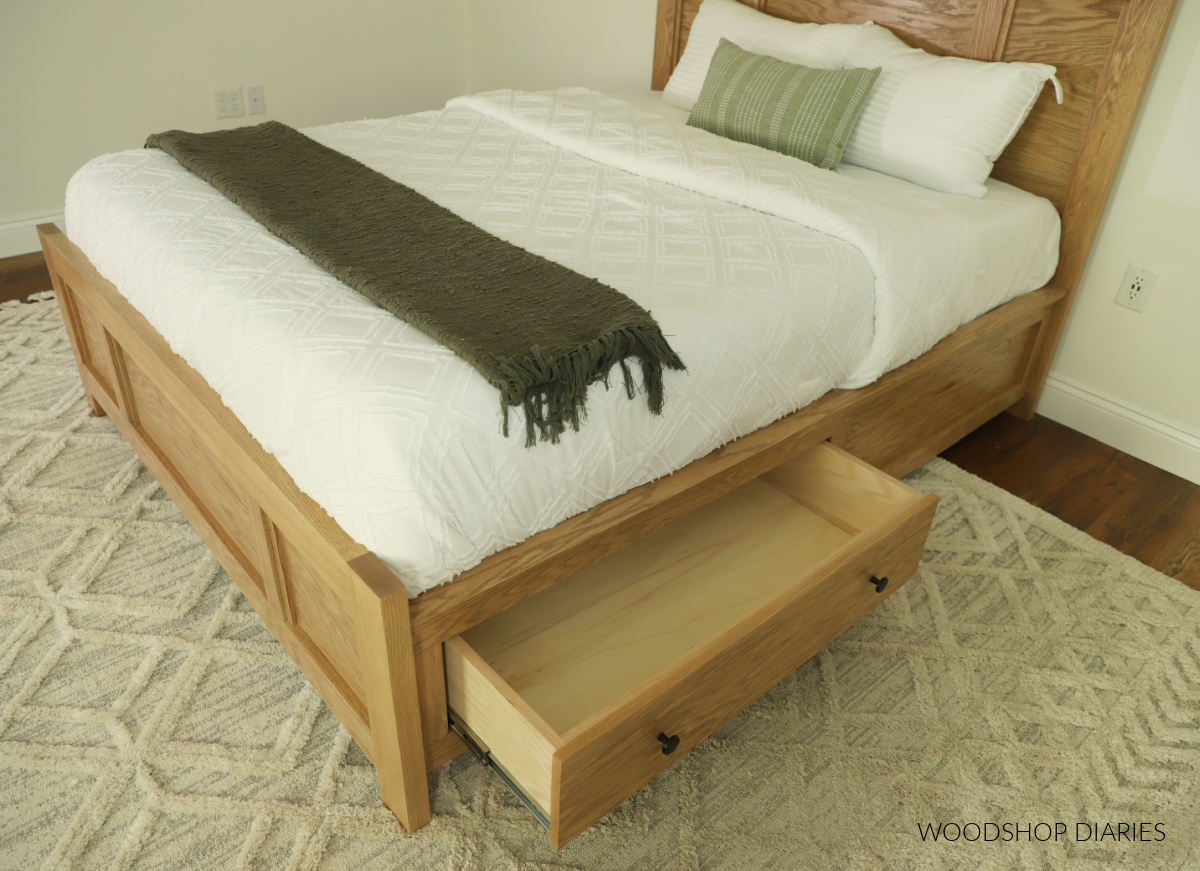
The large storage drawers on the side of the bed give you a place to store spare blankets, sheets, or clothes while keeping the foot of the bed open.
Drawers in the side rails are less noticeable than drawers in the footboard to keep this design clean and minimal. I actually designed the drawers to fit into the trim on the side rails, so without the knobs, you wouldn’t even know they were drawers!
I’m sharing how to build your own classic DIY storage bed with built in drawers in the steps below. So if you’re ready to get building, let’s dive in!
*This post contains affiliate links. See website policies.
Basic Anatomy of a Bed Frame
Bed frames can come in many shapes, sizes, and styles. But most bed frames consist of four basic parts–headboard, footboard, side rails, and slats. Sometimes a box spring is substituted for slats depending on the design.
Below shows an exploded view of these parts on a basic bed design with an arched headboard.
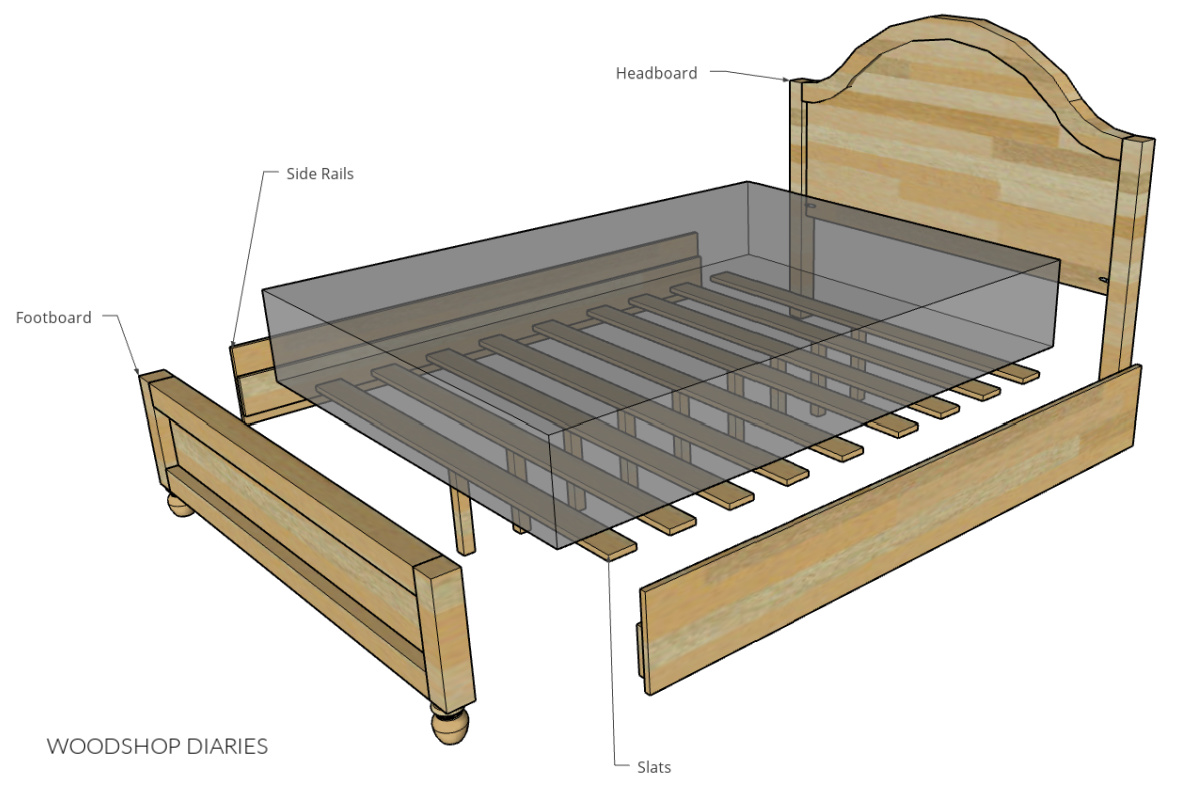
For storage beds, these 4 parts are still used. However, drawers are also built into either the footboard or the side rails.
In this case, I built two drawers into the side rails–one on each side toward the footboard end.
You may be asking why I didn’t maximize the storage space and add drawers at the headboard end, too? That’s absolutely a possibility, BUT, drawers at the front wouldn’t be able to open if you add a nightstand next to the bed.
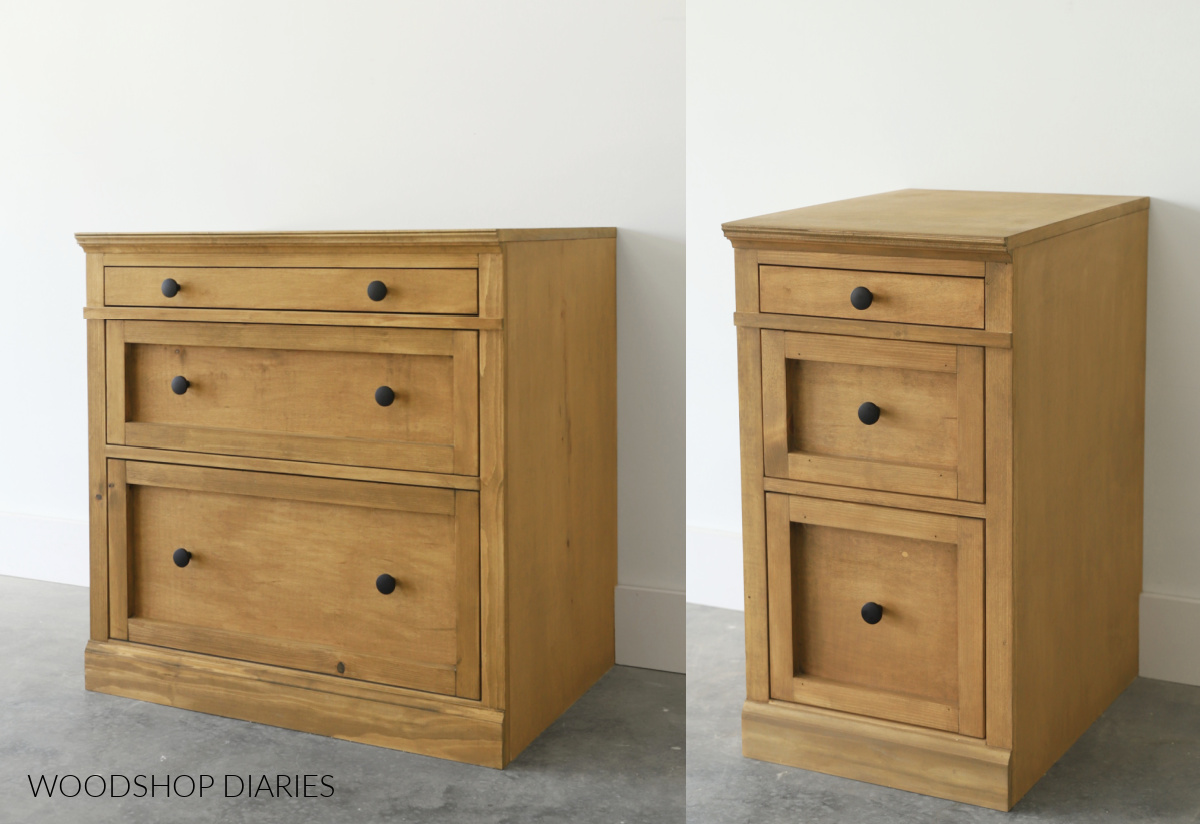
I plan to build matching nightstands to go with this bed soon, so I opted to only add drawers on the footboard half of the bed.
What to know before building a storage bed
This DIY storage bed is a great intermediate level build. It’s not difficult, but it is rather large and has several parts and pieces to it, so it may not be the best build for beginners.
I built this project with red oak plywood and red oak lumber to match. However, if you’re looking for a less expensive option, birch plywood and pine/spruce (construction grade) lumber would also work fine.
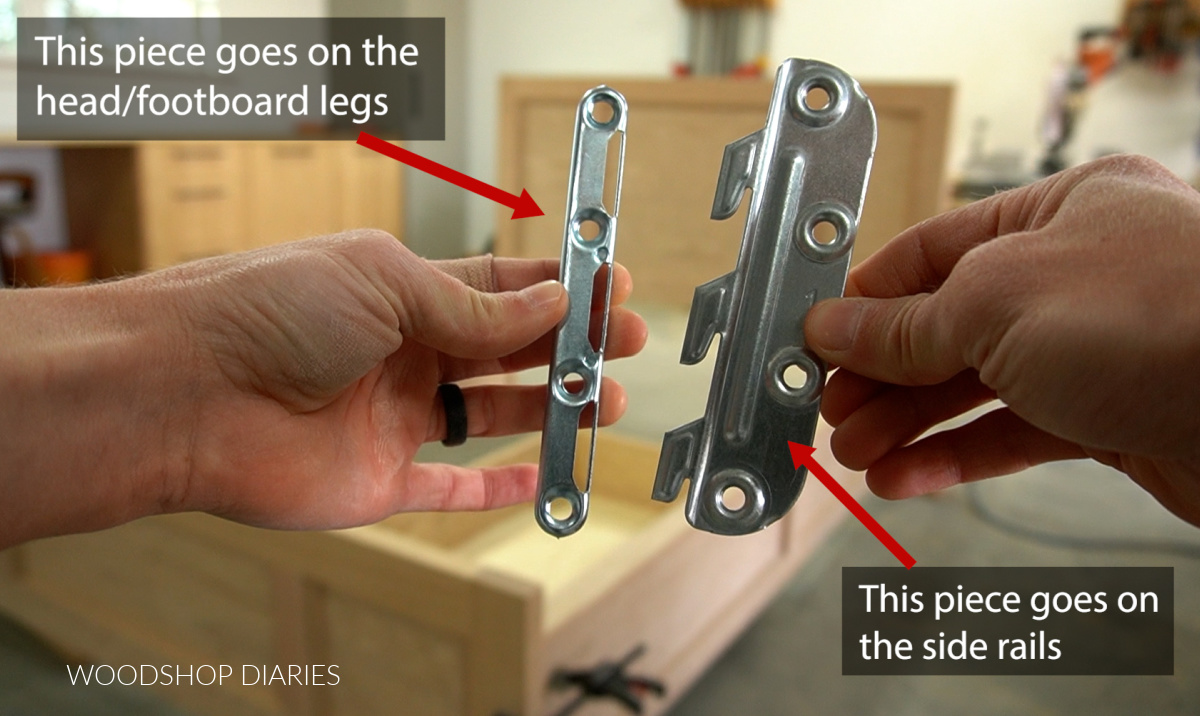
I used bed brackets at each corner to make assembly (and disassembly) easy. These brackets simply slide together (or apart) to attach (or detach) the side rails between the head and footboards.
No box spring is needed for this bed design. The mattress will sit directly on the bed slats.
Bed Frame Sizing
Mattresses come in various sizes, so it makes sense that bed frames also come in multiple sizes to accommodate. Twin, full, queen, and king are the most common. Below are standard mattress dimensions for these sizes:
- Twin: 38″ x 75″
- Full: 54″ x 75″
- Queen: 60″ x 80″
- King: 76″ x 80″
NOTE: This bed frame design is built ½″ wider and ½″ longer than the standard mattress dimensions to allow some wiggle room on all sides.
Overall dimensions and material amounts will vary based on the size bed you’re building. However, the assembly process remains the same no matter the size.
If you’d like specifics, I’ve included the dimensions, materials lists, and cut diagrams for all four sizes in the printable plans below.
Are DIY projects your thing? Sign up for our newsletter for priority access to the latest projects and build plans!
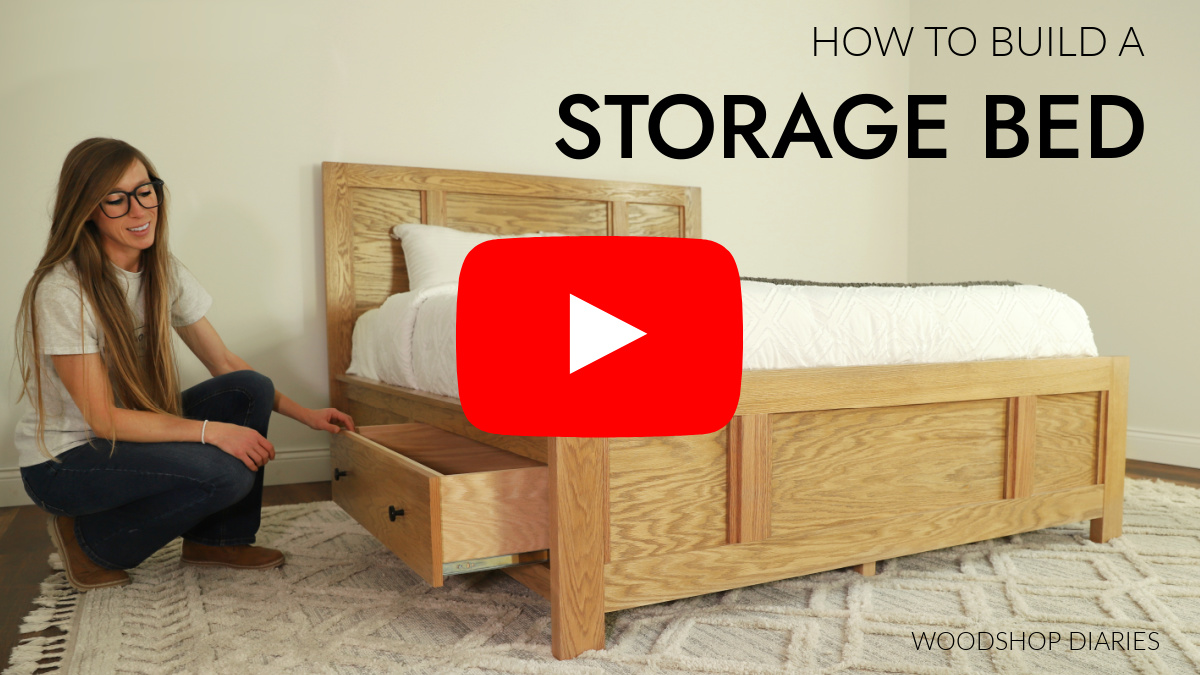
How to build a Bed with Storage Drawers
I know I’m biased, but I really think the video is incredibly helpful for this particular build in order to watch the process. I’ve included tons of tips, visuals, and extra info here in the YouTube video.
Love watching how-to videos? Subscribe to my YouTube channel for plenty more where that came from!
Helpful resources for this build:
Prefer to print? Grab the printable storage bed building plans here:
Tools & Materials
Tools:
- Drill/Driver
- Circular Saw and cutting guides (Kreg Rip Cut and AccuCut used here)
- Pocket Hole Jig
- Dowel Jig (optional)
- Miter Saw
- Jig Saw
- Brad nailer (optional)
- Clamps
- Table Saw (optional)
Materials:
- (2) 4’x8′ sheets ¾″ plywood
- (1) 4’x4′ (½ sheet) ¼″ plywood
- (2) 1x2x8 boards
- (7) 1x3x8 boards
- 1×4 boards (quantity depends on bed size–refer to plans)
- 2x2x8 boards (quantity depends on bed size–refer to plans)
- 2x4x8 boards (quantity depends on bed size–refer to plans)
- 1 ¼” pocket hole screws
- 2 ½” pocket hole screws
- 1 ¼” & 2 ½” wood screws
- 1 ½” dowel pins (optional)
- Wood glue
- Edge banding (optional)
- (2) pair 22″ ball bearing drawer slides (twin size uses 14″ slides instead)
- Bed rail brackets
- Drawer Pulls/Knobs
Step 1: Assemble Storage Bed Side Rails
To start this project, I cut two pieces of ¾″ plywood for the side rails of the bed. Dimensions for this will depend on the bed size you’re building–refer to the printable plans for specifics.
RELATED: How to cut plywood sheets
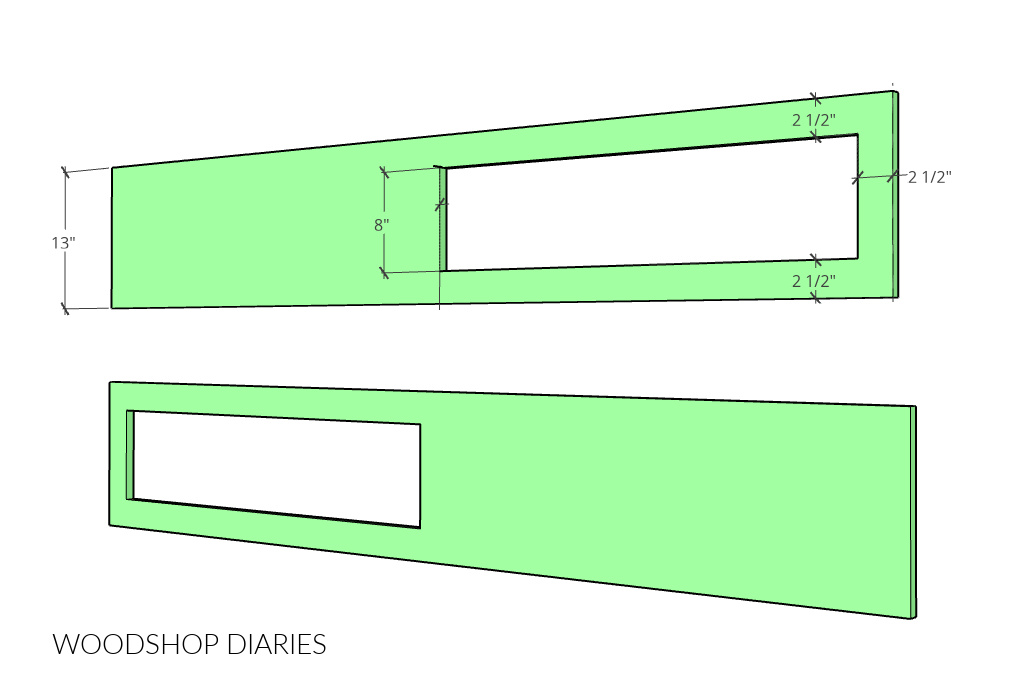
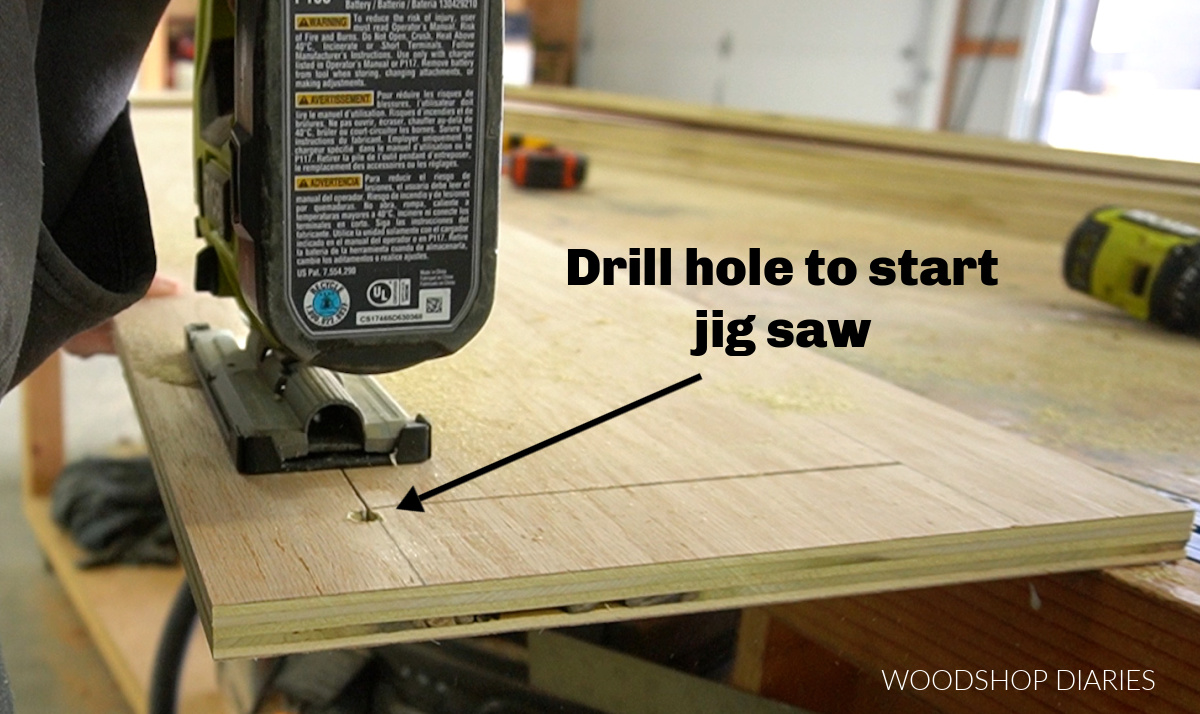
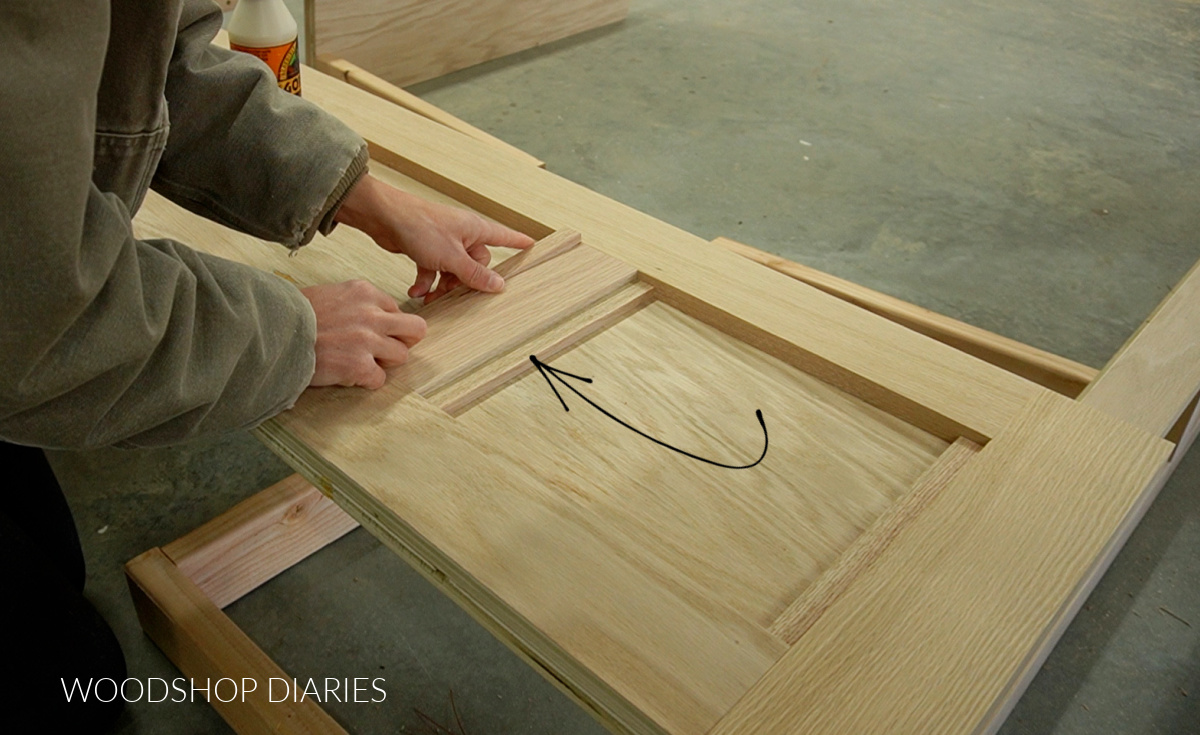
These side rails will be trimmed out with 1x3s on the top, sides, and in the center. Nominal 1x3s are actually 2 ½″ wide (not sure why? Check out this post on Understanding Lumber Sizing), so I drew out where the trim will go on these side rails and cut out one of the sections between the trim on each panel.
I discuss this a little more in the video, but in order to cut this out with a jig saw, I needed to drill a couple holes to get my blade started. However, I wanted to save these cut outs to use as drawer fronts later, so I didn’t want to drill or cut into them.
So I drilled my holes just outside the marks in order to cut around these lines. The trim will cover these holes later.
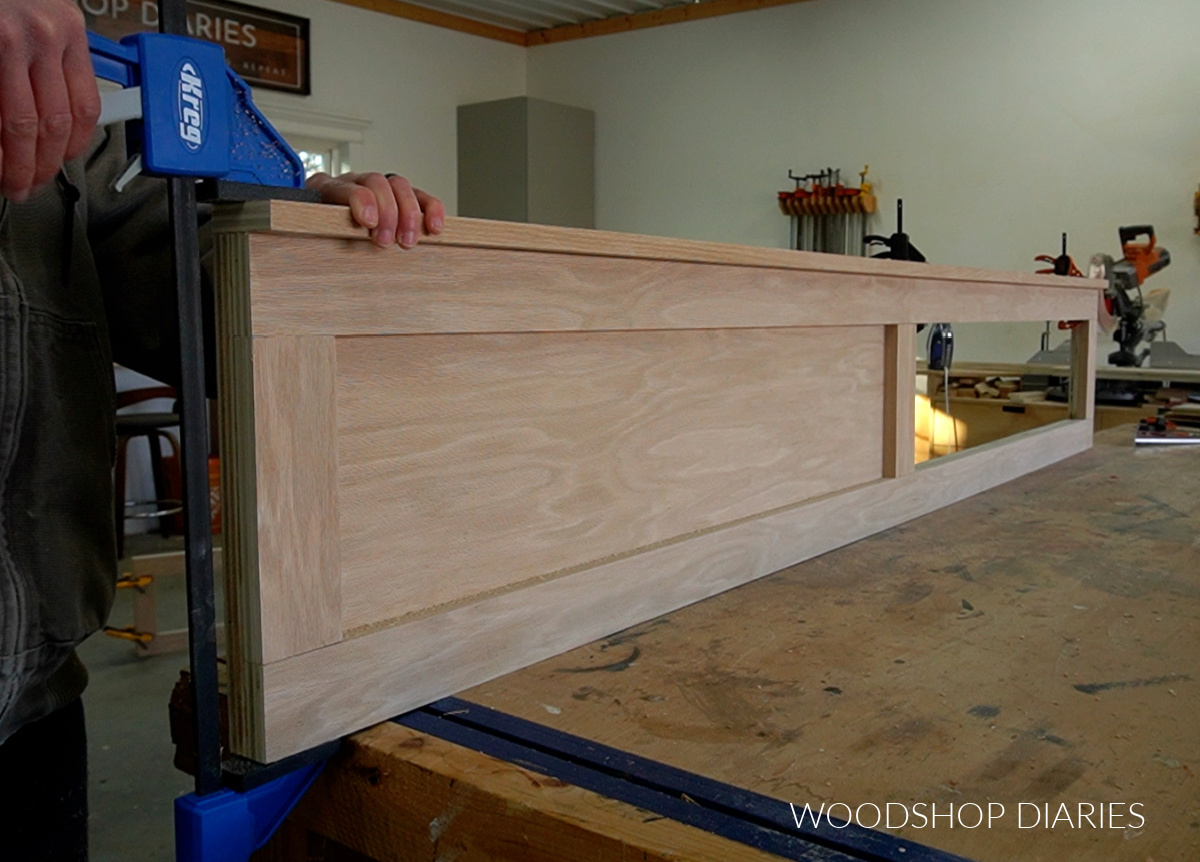
Once these sections were cut out, I cut and glued 1x3s onto the front sides to trim them out. I ran one piece along the top, one along the bottom, one on each end between them, then one in the middle (vertically).
Then, I cut one more to run across the top to kind of “cap” the side rails off (see image below). Keep in mind as you install the trim that the side rails should be mirrored–the openings should both be toward the footboard end of the bed.
After both side rails were trimmed out, I cut and assembled a 2×4 frame with two sides and a back. These will be the framing to house the drawer boxes.
I attached these frames onto the side rails around the opening using pocket holes and screws.
RELATED: How to use a pocket hole jig
Once the drawer framing was installed on the side rails, I glued and screwed a 1×2 to each side rail just above the drawer cut out opening.
These 1x2s will support the bed slats I’ll add later. If you wanted, you could use a 2×2 here instead.

Step 2: Add Drawers to Side Rails
Next, I installed ball bearing drawer slides onto the 2x4s framing on each side. These should be inset 1 ½″ from the front edge of the trim.
RELATED: How to install drawer slides
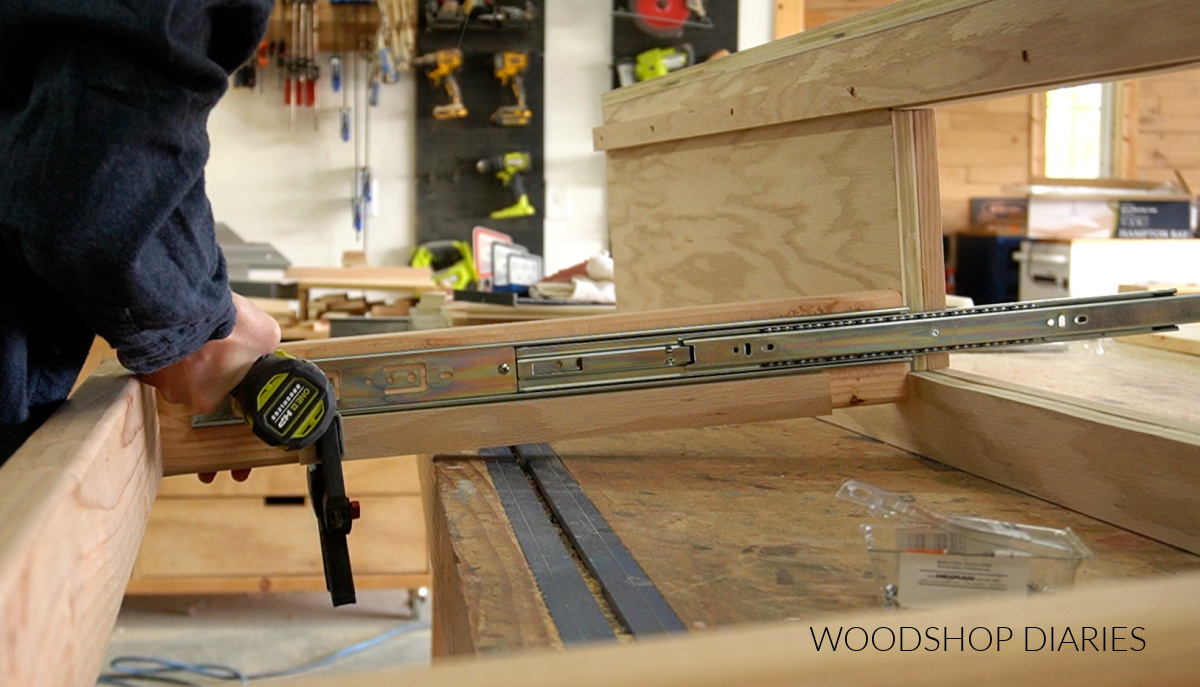
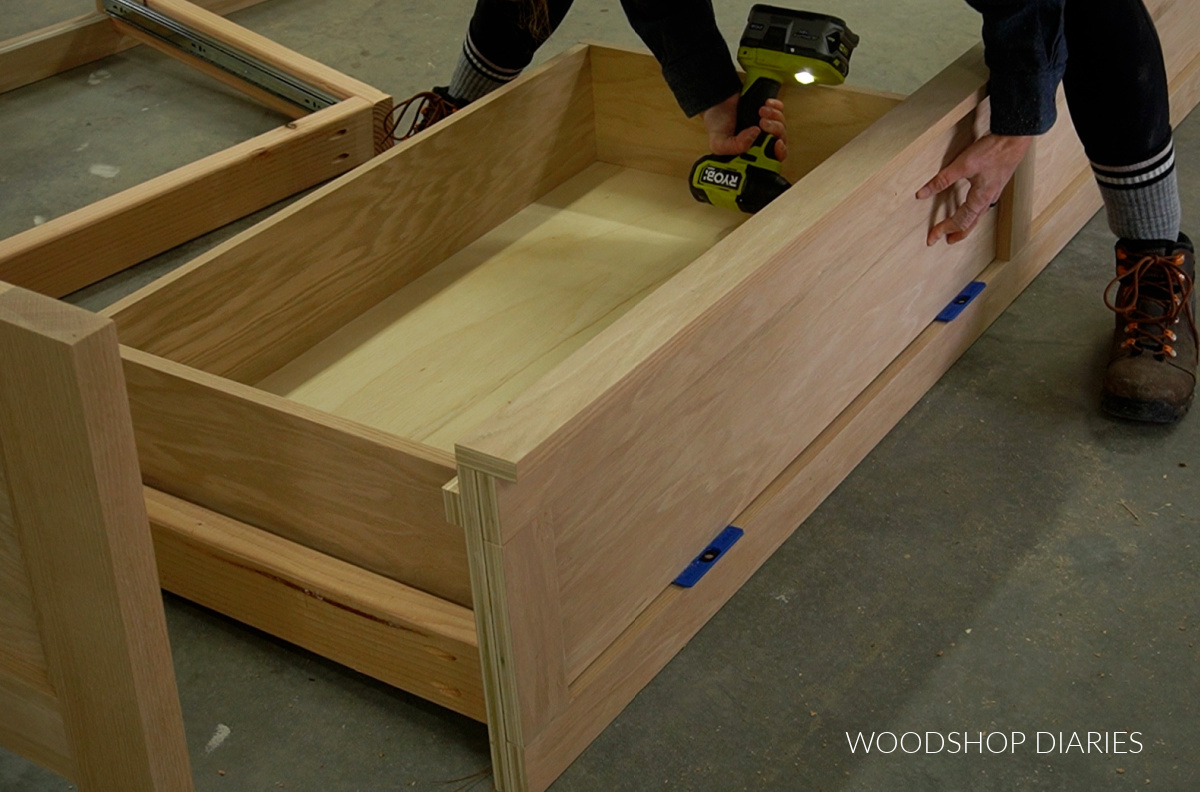
I assembled two identical drawer boxes–one for each side rail. Learn how to build simple drawer boxes here. Then, I installed these onto the slides. The front of the drawer box should be 1 ½″ inset from the front of the trim.

Prefer to print? Grab the Printable Building Plans for this bed in your specific size here.
Next, remember those cut outs from step 1? I trimmed the edges straight using my table saw (because right from the jig saw, they were a bit wiggly). If you don’t have a table saw, a circ saw and straight edge or Kreg AccuCut would work as well!
These are the drawer fronts, so I installed them onto my drawer boxes using wood screws from the inside. There should be ⅛″ gap around all sides for clearance to open and close without rubbing.
Step 3: Build Headboard
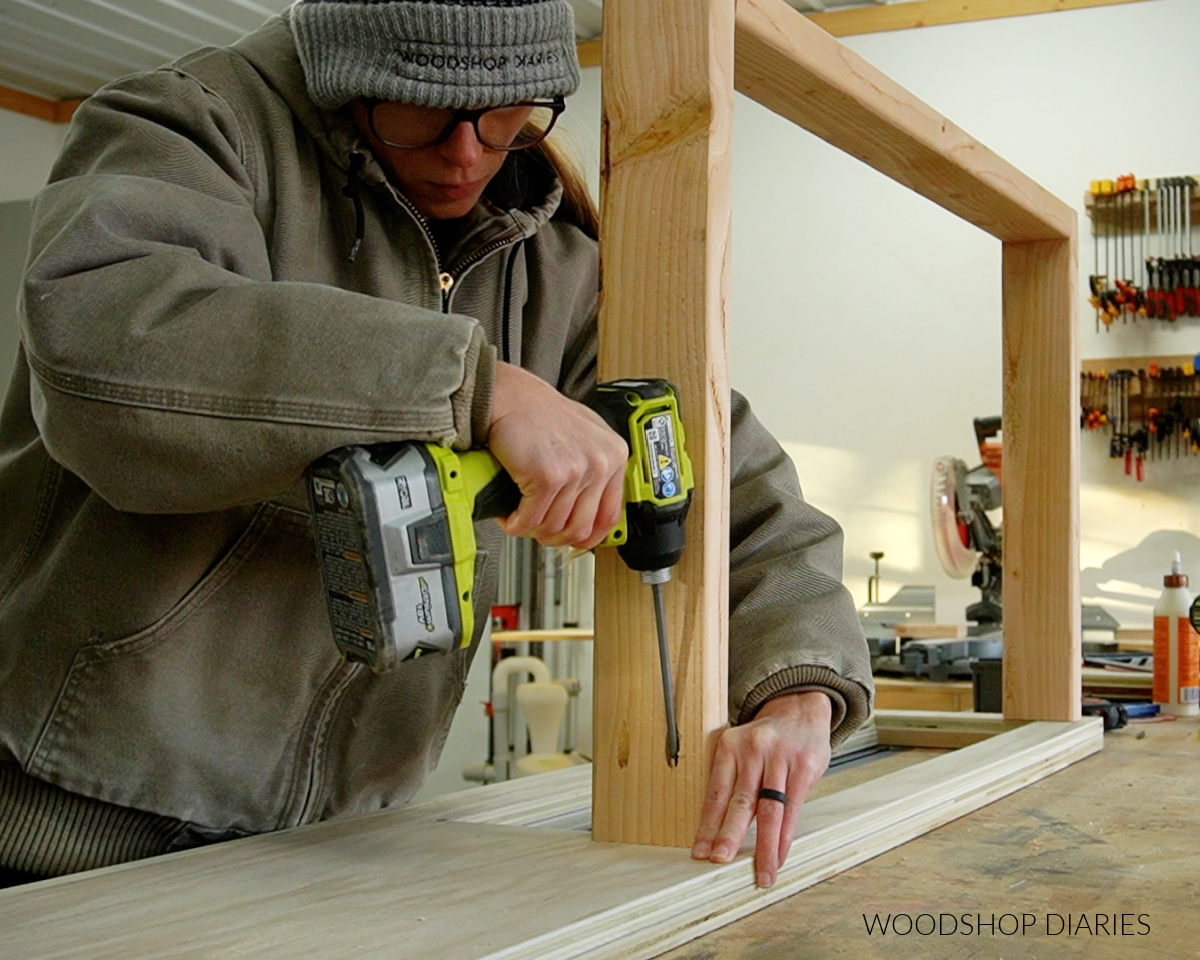
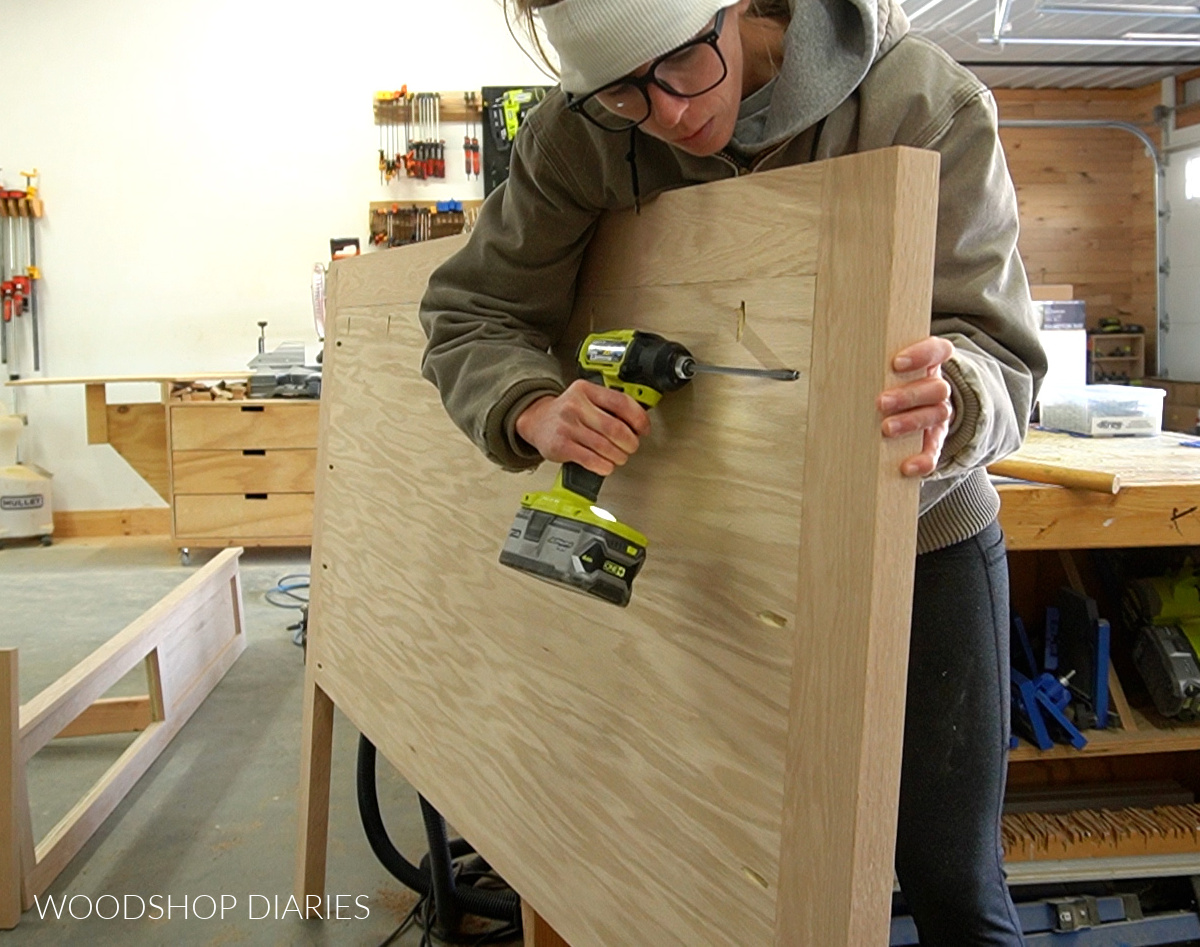
The headboard consists of a 2×4 frame–two legs and a top–with a plywood panel attached inside.
So first, I assembled the frame using dowel pins and glue. Learn how to use a dowel jig here. You could also assemble the frame using pocket holes and screws instead of dowels if you preferred.
Once the frame was assembled, I cut and installed a ¾″ plywood panel inside of it flush to the back edge using pocket holes and screws.
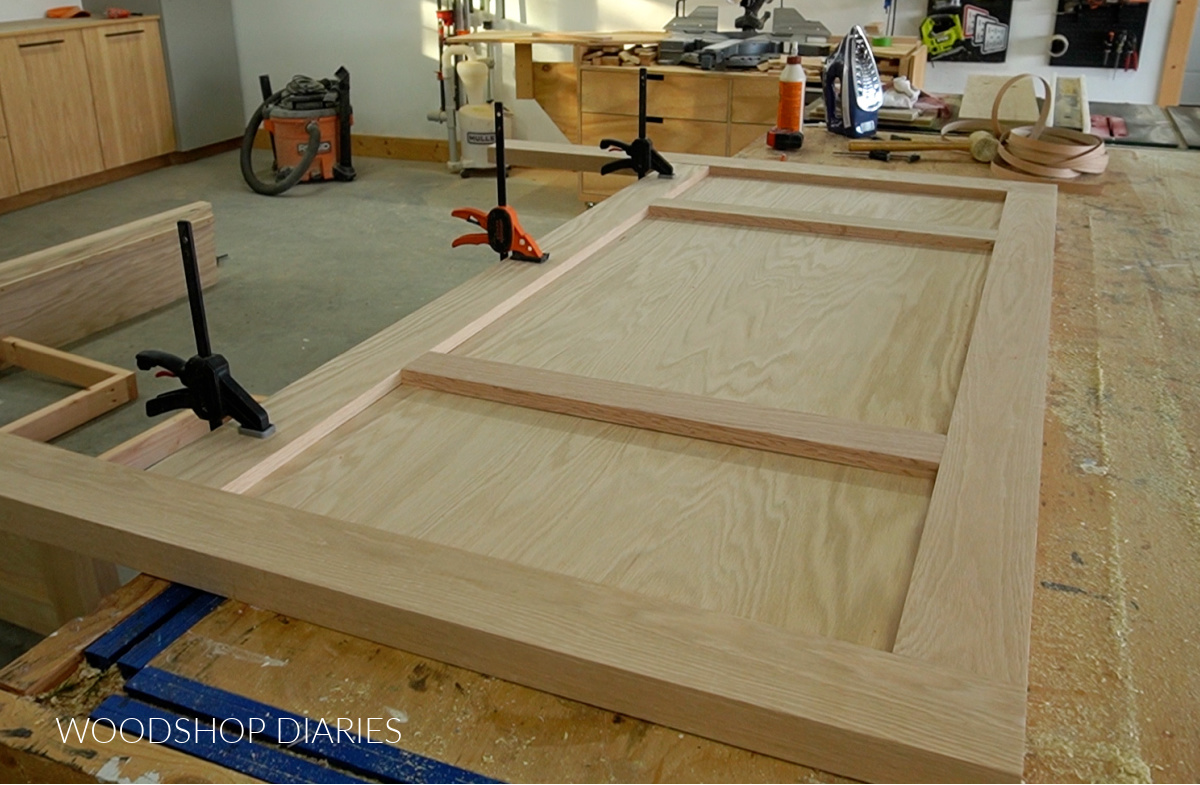
Similar to how I trimmed out the side rails, I also trimmed out the headboard using a 1×4 at the bottom and two 1x3s vertically to add some extra detail.
I simply glued these pieces on to the front side of the plywood panel (you could also brad nail, but I didn’t want to deal with filling nail holes, so I just used glue).
Step 4: Build Footboard
I assembled the footboard exactly like the headboard–2×4 frame, plywood panel, plus 1×4 and 1×3 trim. The only difference was that the footboard was obviously shorter in height.
I discuss this more in the video, but I also cut some ⅜″ x ¾″ strips to add on each side of the 1x3s and on the outside edges of the head and footboard panels.
This gave the piece a little extra dimension and detail, but also helped hide any gaps between the plywood and the trim/framing. These pieces are completely optional.
Step 5: Assemble Bed Frame/Attach Bed Rail Brackets
Now that the side rails, headboard, and footboard are all assembled, it’s time to bring them together.
The side rails should be installed so they are 3″ off the ground, so I set them up on scrap blocks, then clamped the pieces together.
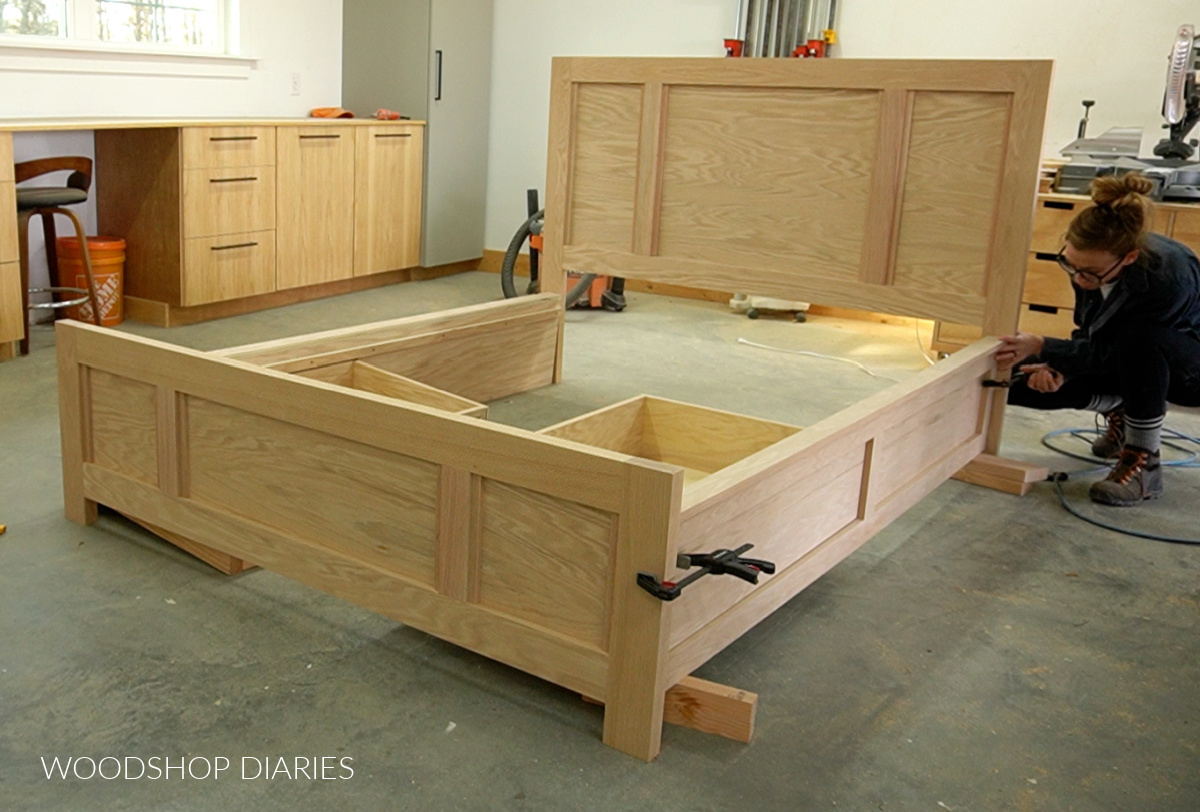
Once I had my bed pieces in place, I installed bed rail brackets at each corner using 1 ¼″ wood screws. The part with the “teeth” attaches to the side rails and the part with the slots attaches to the head/footboard legs.
The “teeth” slide into the slots to connect the two pieces when assembling and they slide apart to disconnect when disassembling.

There is plenty of room to install these on the headboard end, but on the footboard end, it’s a little cramped. I removed the drawer to give me a little more room to work with.
Once the four sides of the bed were connected, I screwed 2×4 blocks into the back of the drawer framing to support the drawer.
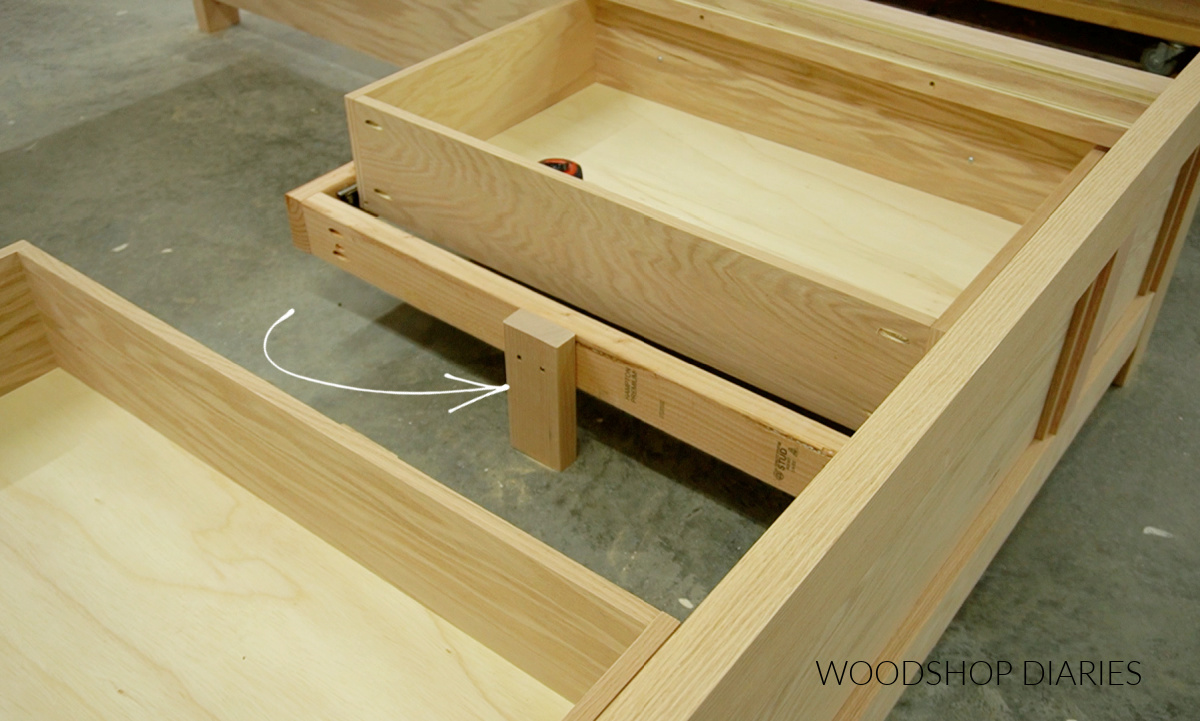
Basically, these blocks are needed to help hold the drawer framing level from front to back.
At this point, the bed is ready for paint/stain/finish. I disassembled the pieces at the brackets, stained them with Minwax Weathered Oak wood stain and sealed them with a few coats of Minwax Polycrylic.
Once dry, added some knobs to the drawers, then carried the pieces inside and attached them together where I wanted the bed to go.
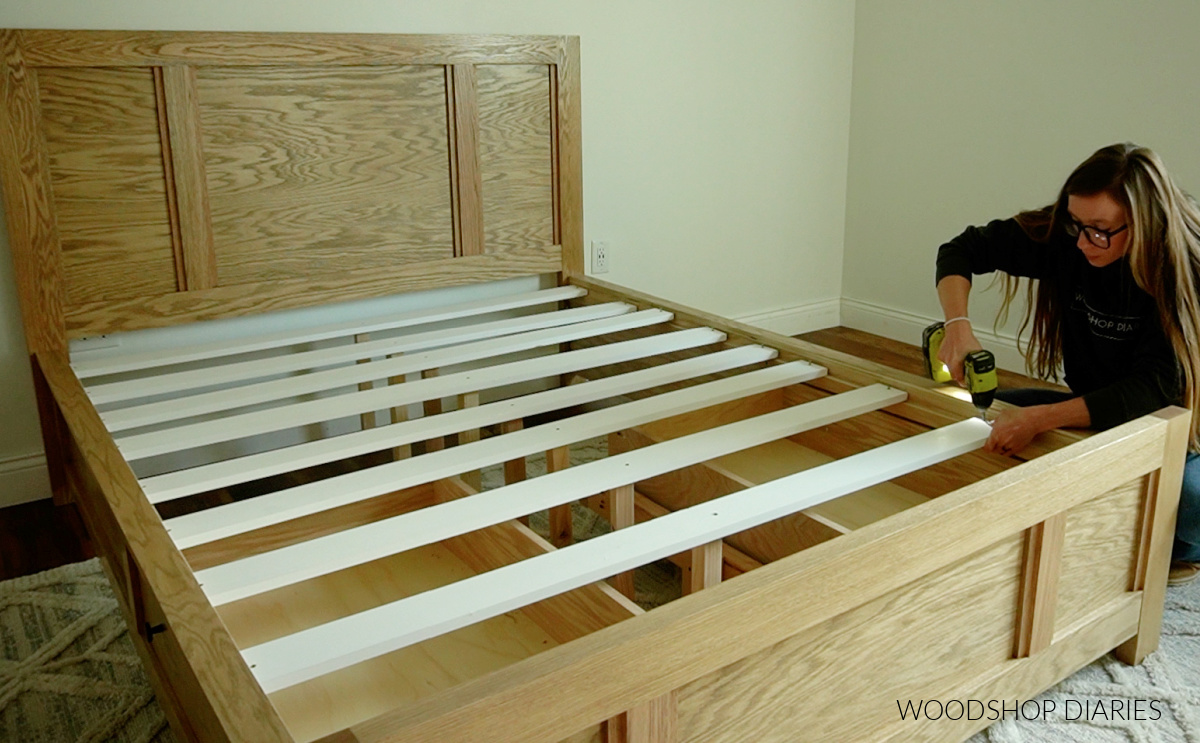
Step 6: Install Bed Slats
The final part is adding the bed slats to the frame. I cut 1×4 bed slats to run between the side rails. Because these span pretty far, I added 2×2 supports in the center to keep them from sagging.
Then I spaced these out along the 1×2 on the side rails in the bed frame and screwed them in with 1 ¼″ wood screws.
After the slats are secured, it’s ready to add the mattress and bedding. And then, it’s ready for a nap after all that hard work ha!
This bed design is so simple, but the drawers and the trim really add function and style making it perfect for any bedroom.

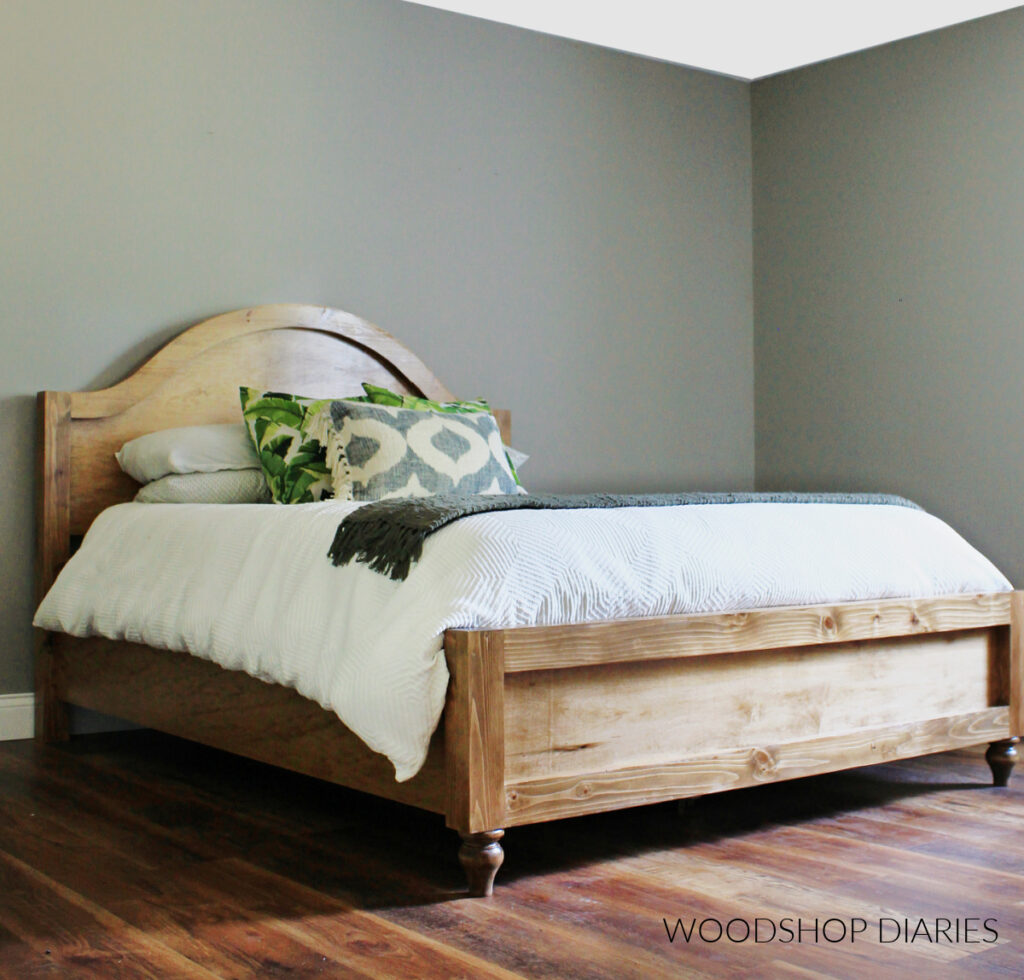
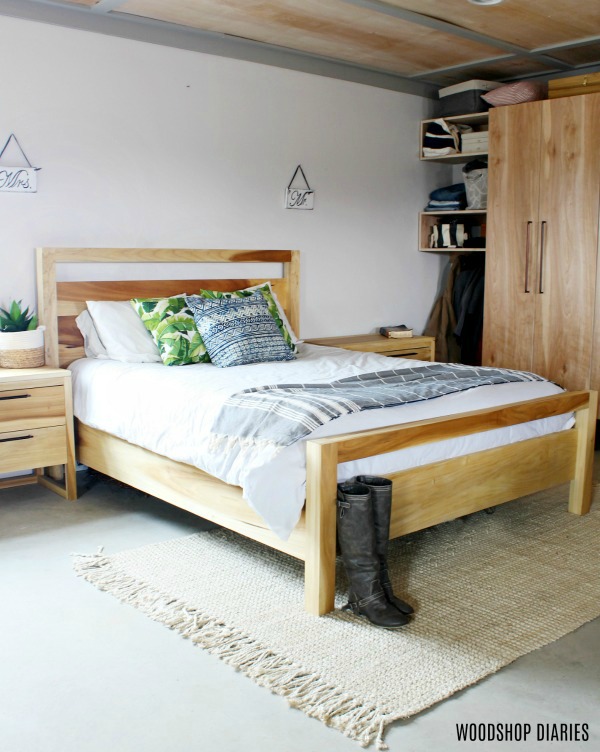
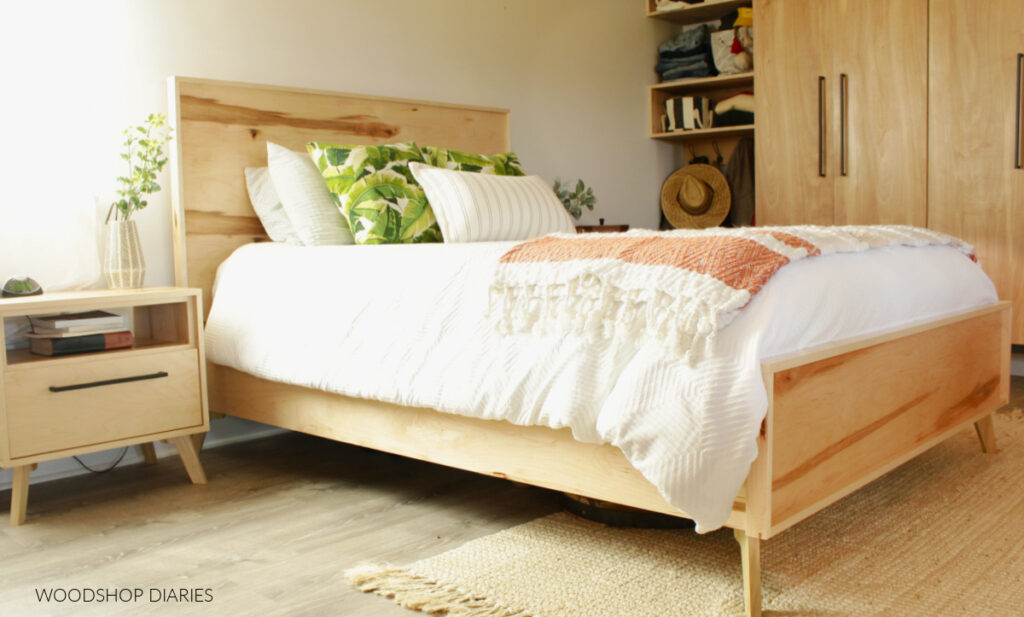
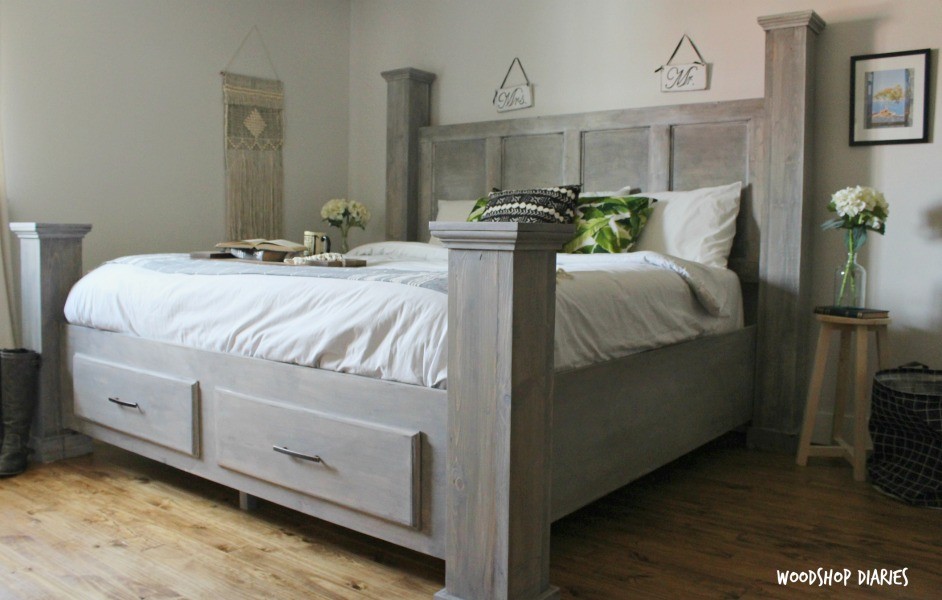
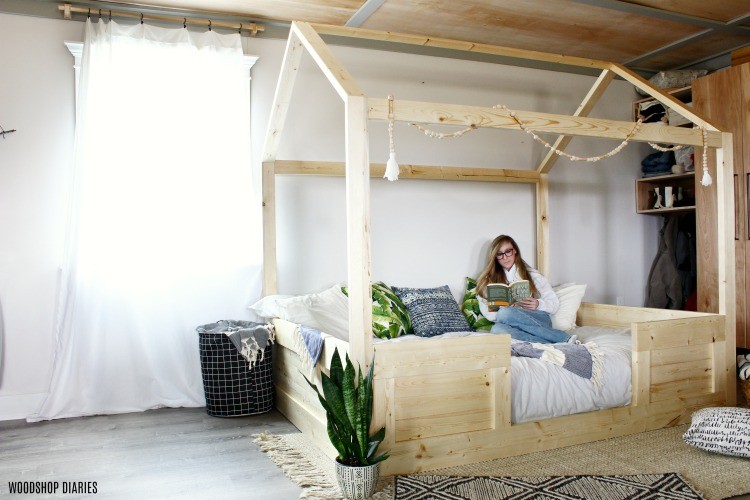
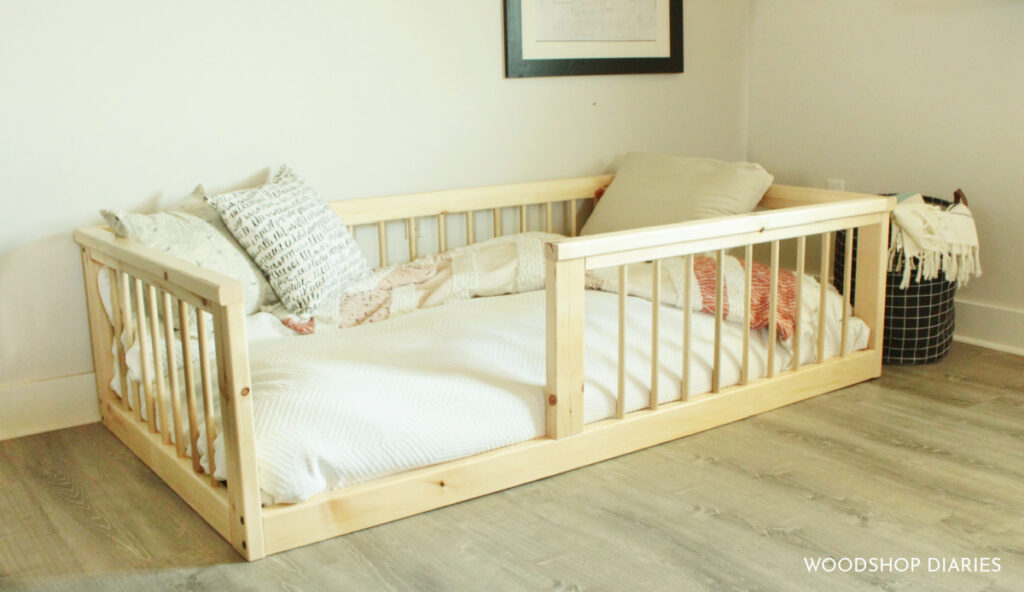
Looking for more DIY bed builds?
Enjoyed this build, but looking for more DIY bed frame ideas and inspiration? Here are a few favorites both with and without storage:
Want to save this project for later? Don’t forget to pin it or share it to your favorite social channel!
Until next time, friends, happy building!