
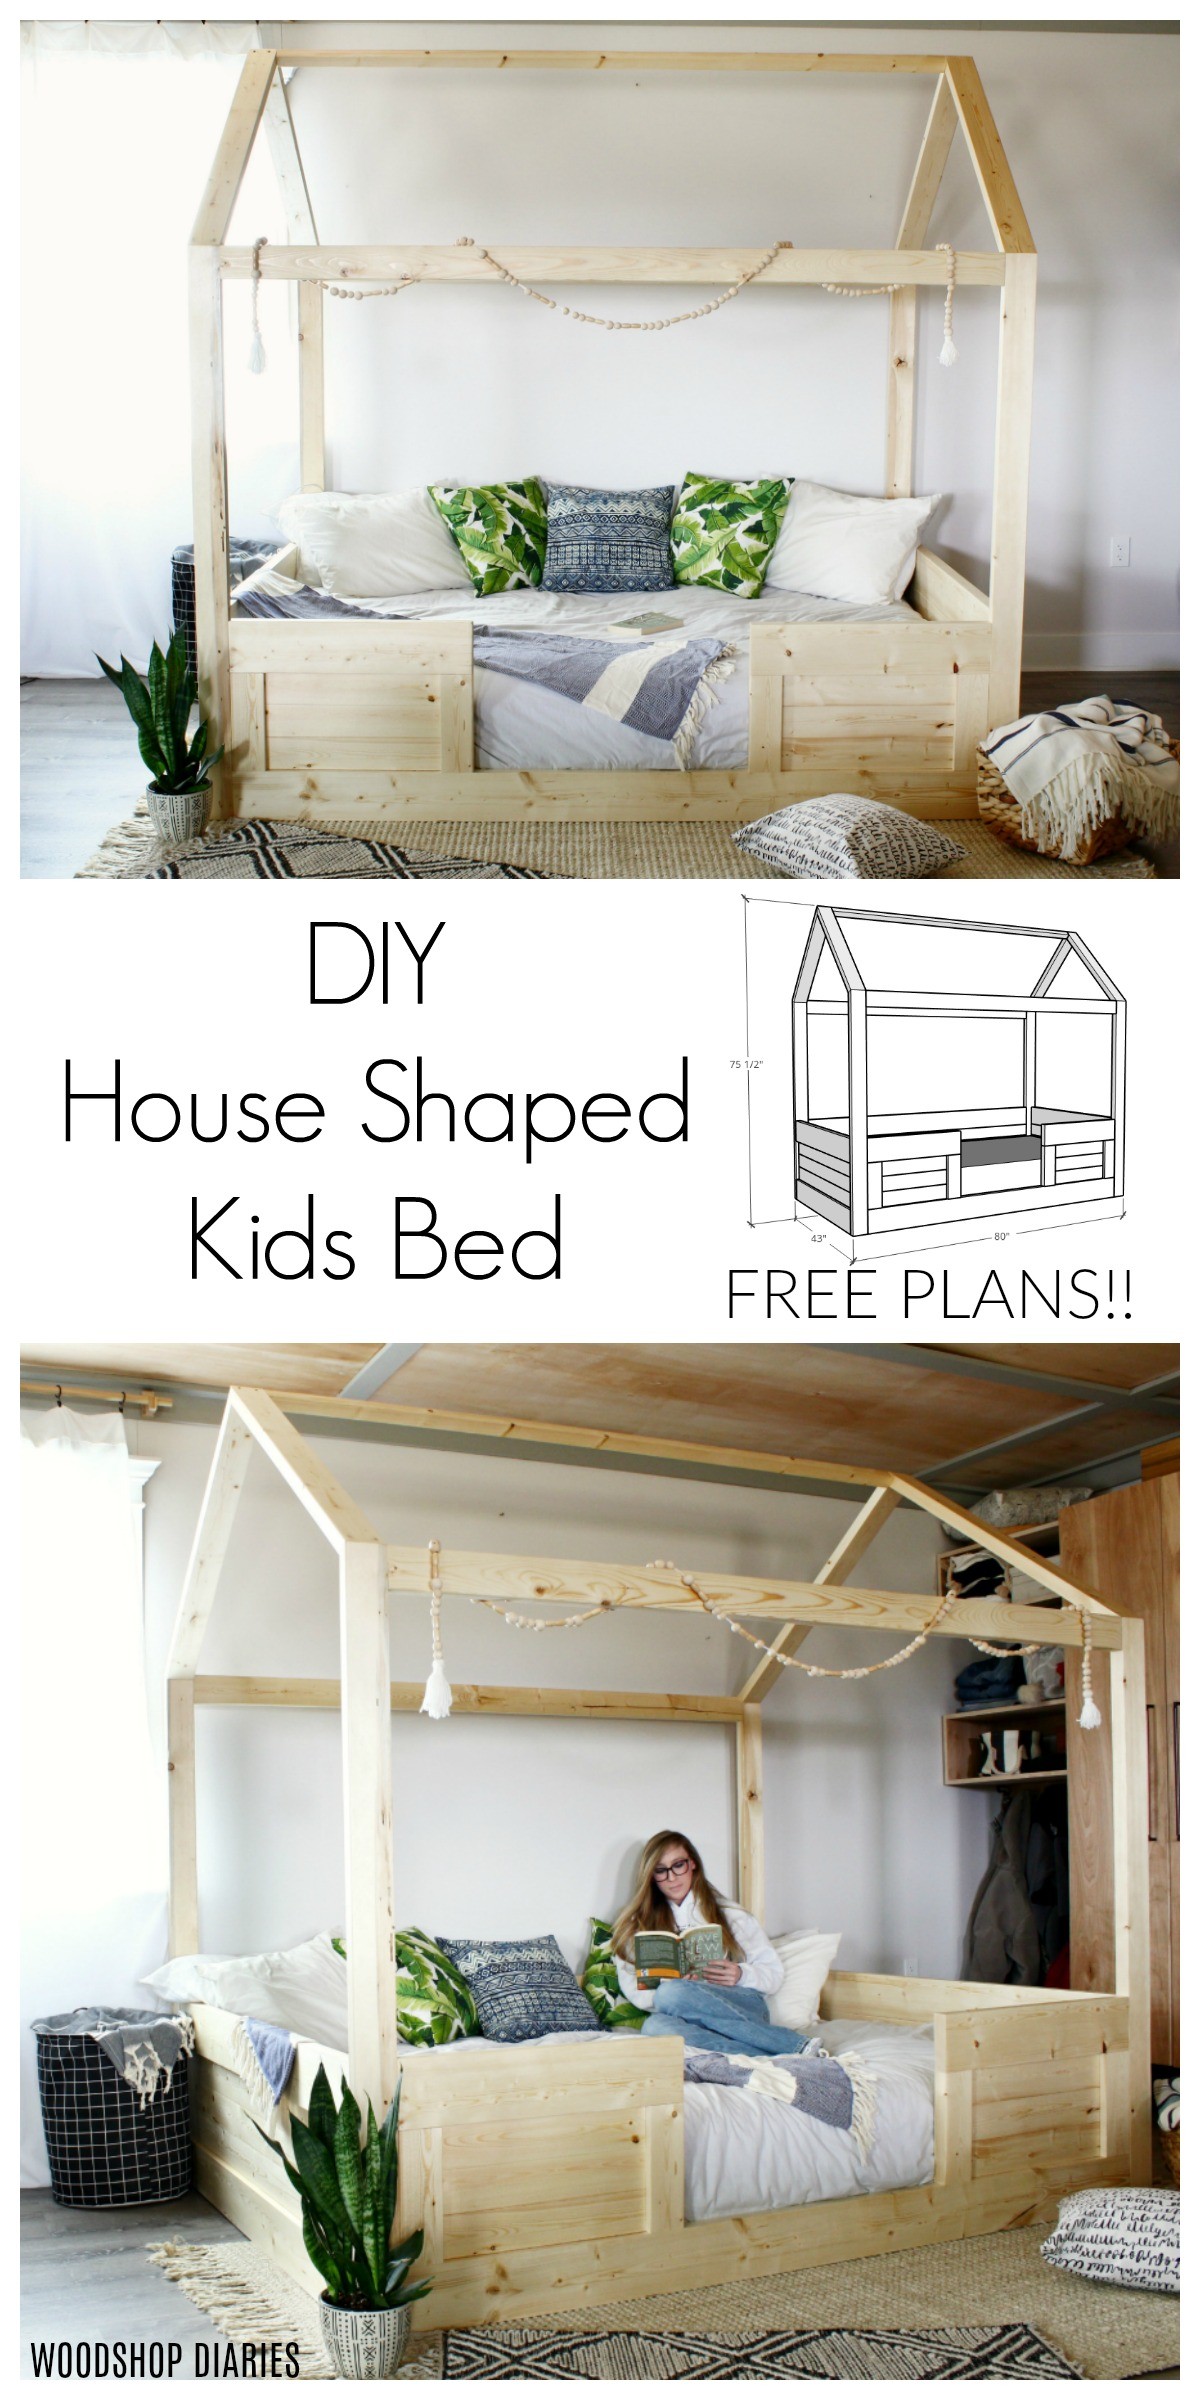
This post about how to build your own DIY Kids House Bed is sponsored by Build Something and contains affiliate links. See policies.
.
Now, this may not be the first house I built (I built a dog house, and my own house in years past). But IT IS the first house BED I’ve built.
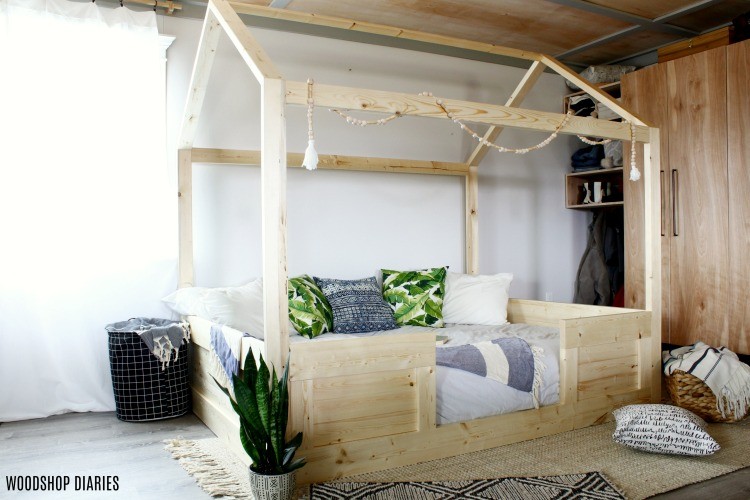
Channeling into my inner child on this DIY kids house bed build made me think about how much fun it would have been to have one of these when I was little.
.
I just had a bright (blindingly bright) brass railed headboard and a rickety metal twin bed frame in my childhood days.
.
Not that I’m complaining…I’m just getting old and grumpy in my 30s haha. Kid’s these days with their cool, fancy wood bed frames–they have all the fun.
.
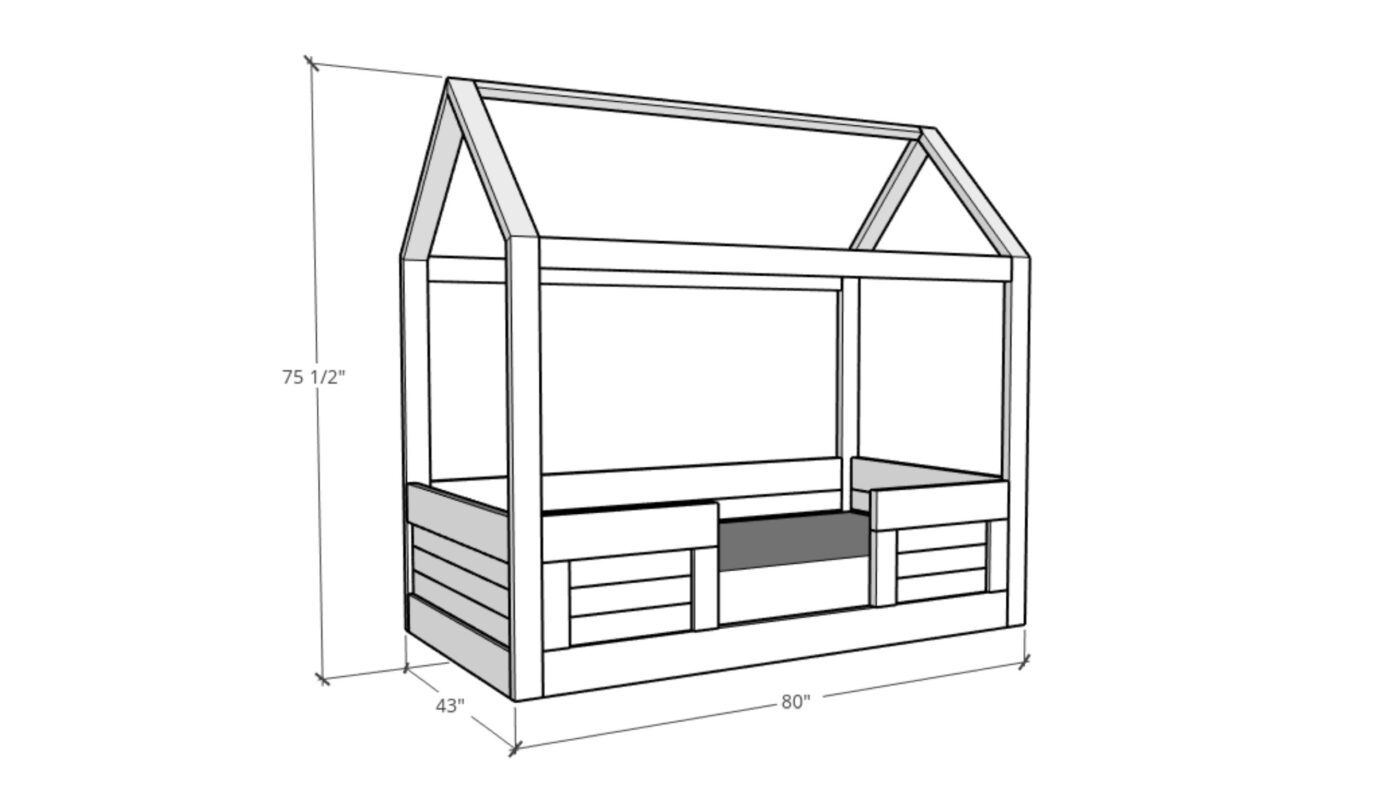
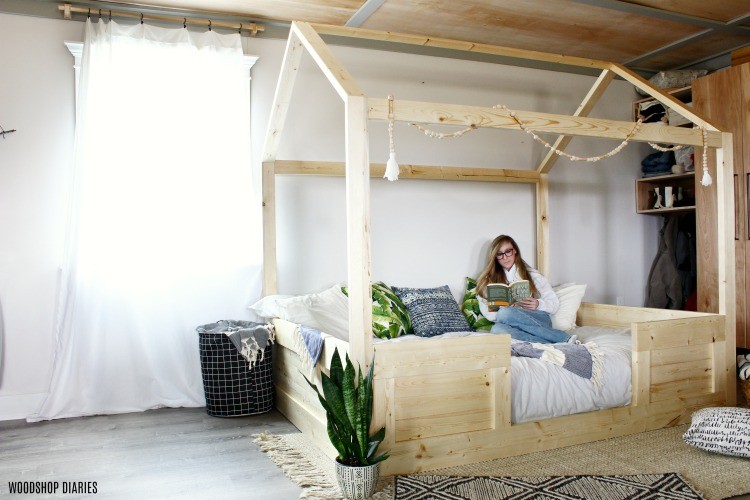
Now, before I get too far, let’s address the elephant in the room. I know what you’re thinking…THIS BED LOOKS HUGE. I agree. It is. It’s actually a queen. And just in case you want the queen OR full size, I’ve got you covered with the plans here:
BUT DON’T LEAVE YET! Although, I built this queen size for a friend, I knew that most likely, since this bed is for kids, many of you would like to see it in a twin size, too.
So, I partnered with my friends at Build Something and Kreg Tool to share FREE PLANS for this exact same style bed in a TWIN size over on Build Something here. PS, you can make the whole thing from standard construction lumber!

And I’ve got a really great video (although I may be slightly biased since I made it HA!) on how it came together for you right here:
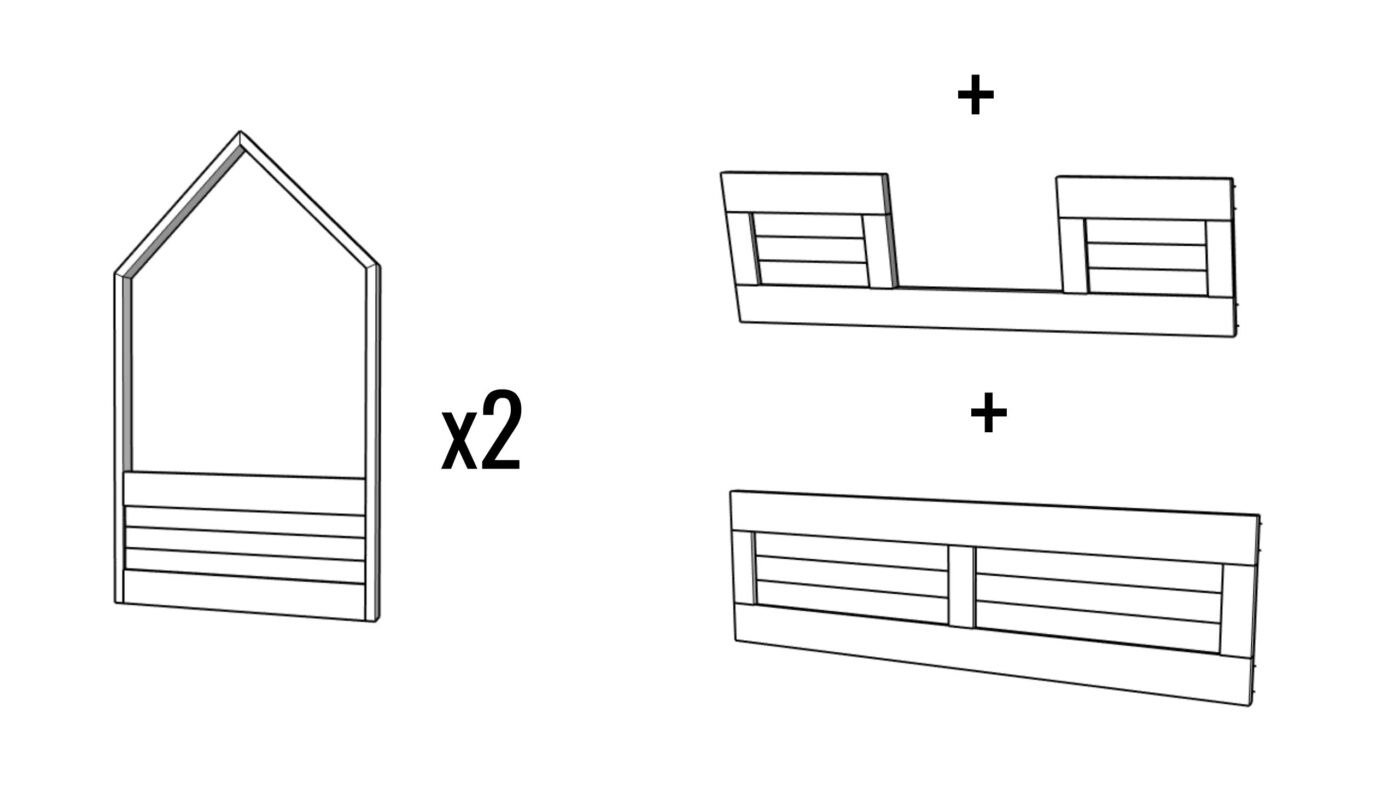
Now, before we get building, I did want to point out that this bed is built in sections for easy assembly and un assembly when it’s time to move it–there are two sides, a front, back, slats, and three pieces that attach at the roof line.
.
You can grab all the details on the pieces of this house bed and how to assemble them in the plans for a full and queen here and for a twin size here.
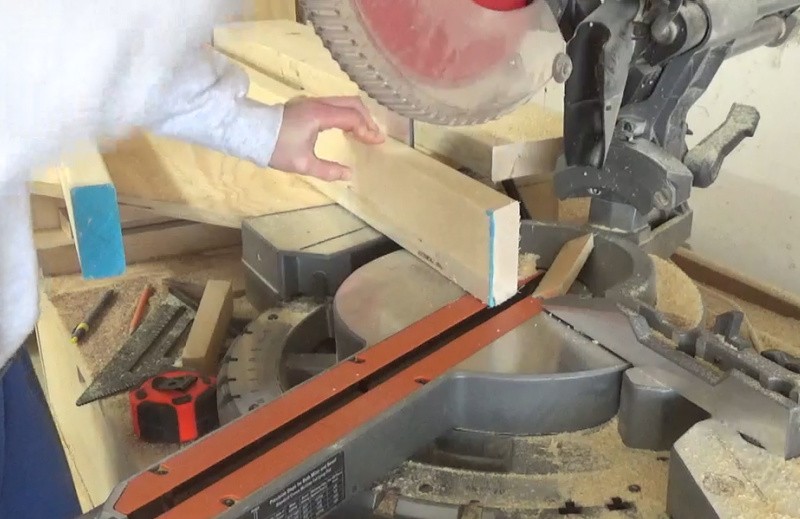
Step 1: Build House Bed Side Panels
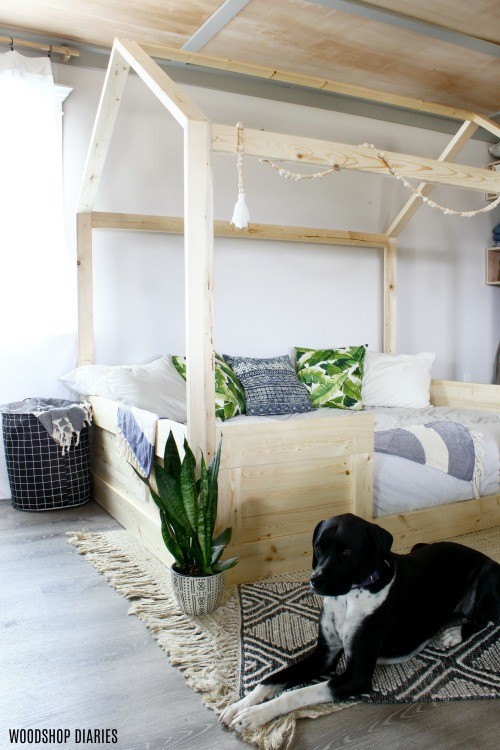
I’ve seen several designs for house shaped beds, but this one is a little different because it’s got solid sides to help prevent roll out.
.
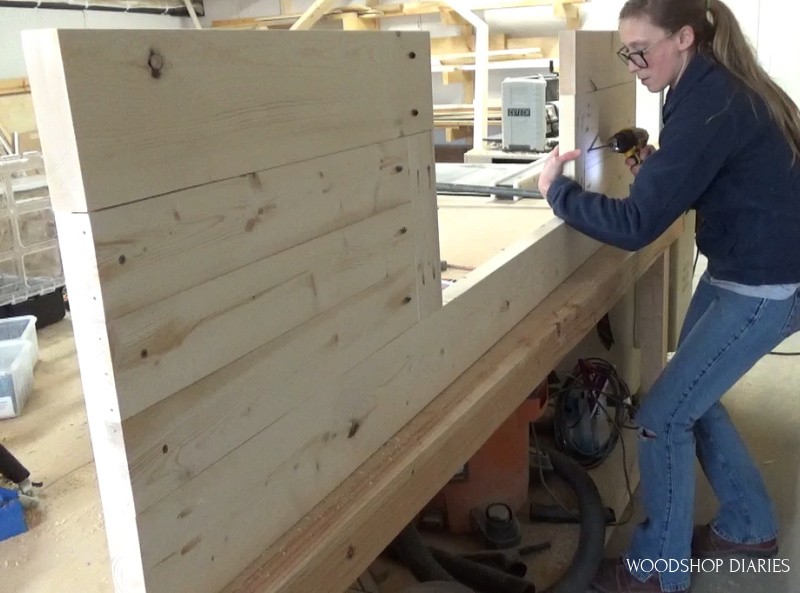
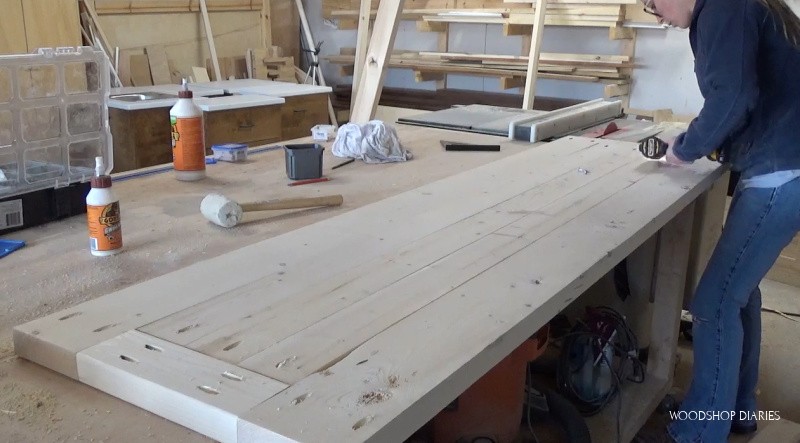
So the first thing I did was glue up two side panels using 1x4s. Each bed size will require a different length for this panel, so refer to the plans for details.
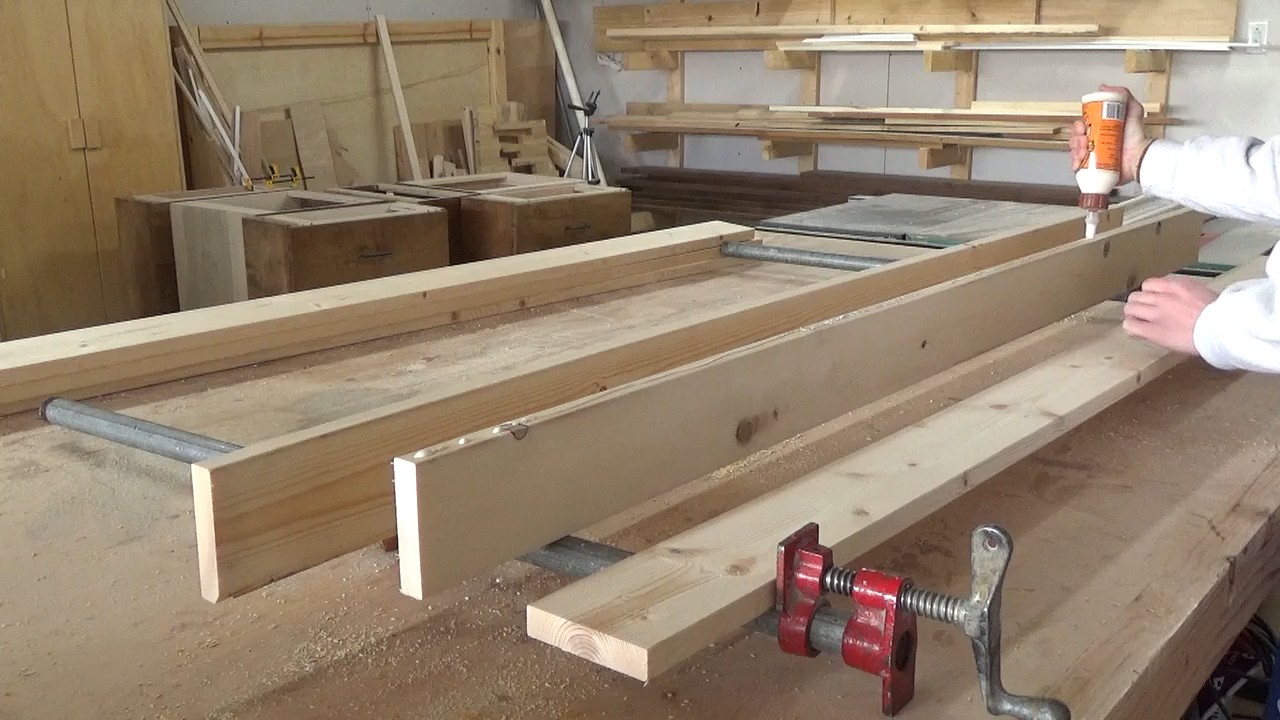
Once the side panels were glued up, I drilled pocket holes in the ends to assemble them into the frame in the next step.

Step 2: Assemble Side Frames
Now that the side panels were assembled, it was time for the side frames.
.
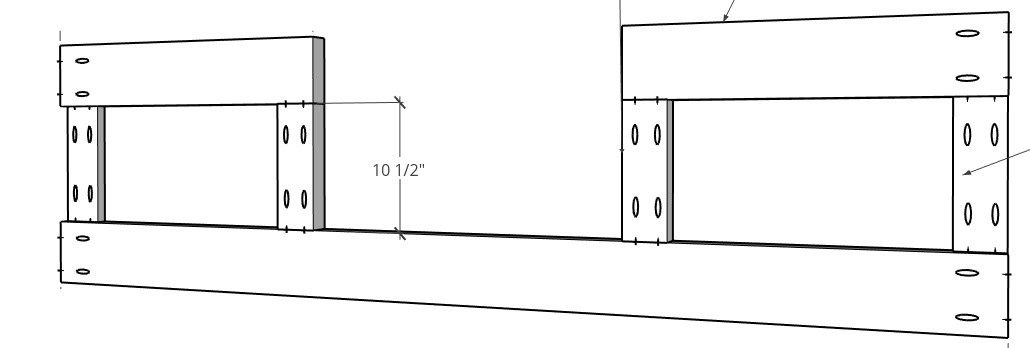
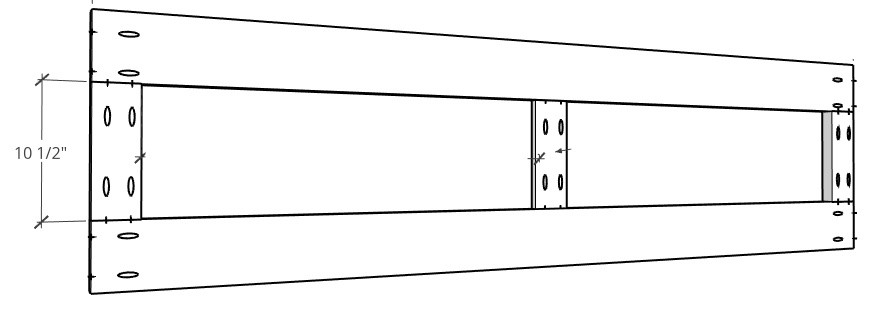
These frames were built with 2x6s on the bottom and top sides of the panel, and 2x4s everywhere else.
.
I trimmed the top of the 2×4 corner posts to a specific angle (again, each bed size is different, so refer to the specific plans for the angles here) to make the roof line.
Then, I used pocket holes and screws to attach the 2×6 between them with a 10 ½″ gap between them.
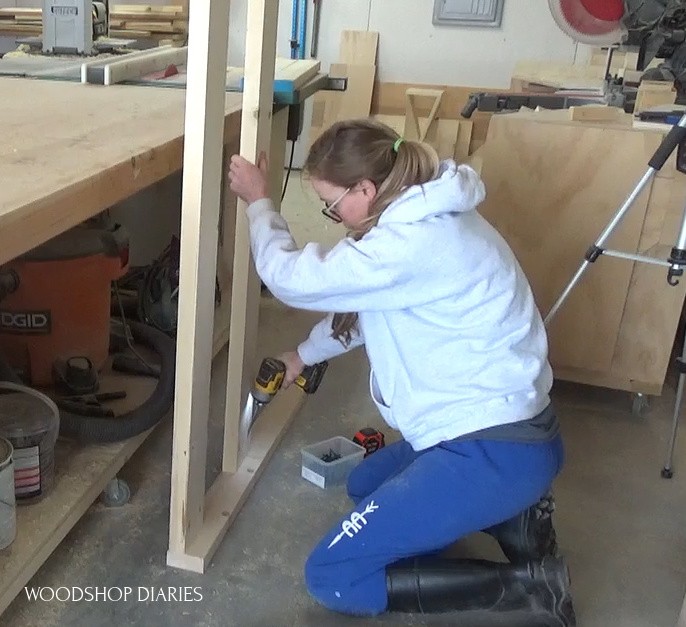
All that’s left is to add the roof line. I cut two pieces of 2×4 to the proper angles (again, this is detailed in the plans based on what size you’re building), and screwed them together at the “peak” of the roofline.
Then, I glued and screwed these into the corner posts to complete the side frames.
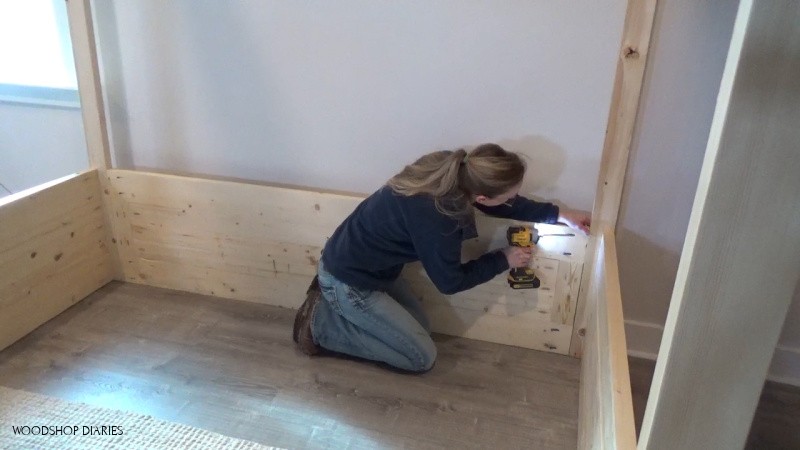
Step 3: Install Side Panels
Lastly, I installed the panel from step 1 into this frame using pocket holes and screws.

Now the two side panels are complete, so it’s time to build the front and back panels.
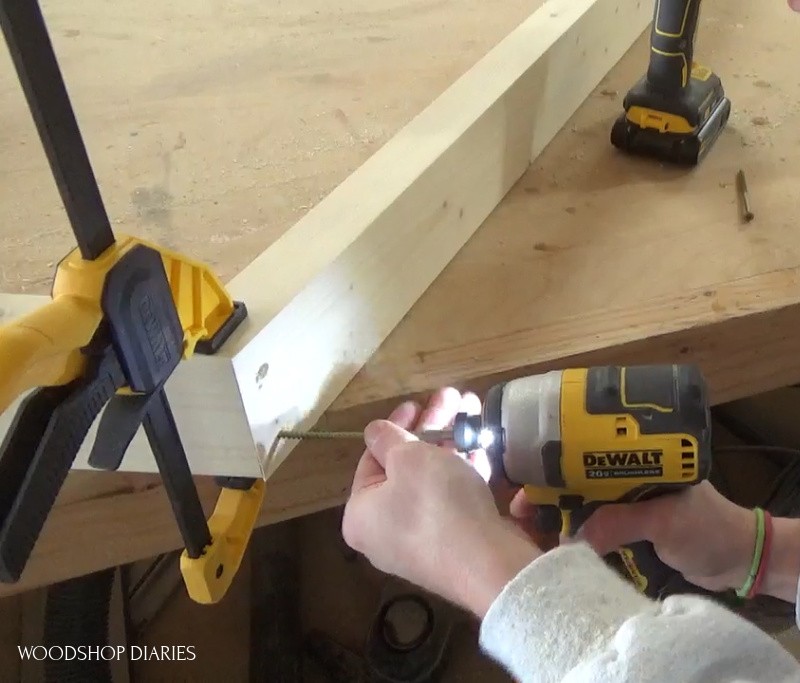
Step 4: Assemble Front and Back House Bed Panels
Now, just like the side panels, I glued up one long panel made of three 1x4s for the back of the bed and two shorter panels for the front of the bed.
.
While the glue dried, I build the frames. The front frame uses 2x6s at the top and bottom, 2x4s on the inside and 1x4s on the outside edge. The frame is assembled with pocket holes and screws.
The back frame uses 2x6s at the top and bottom, 2x4s on the outside edges and a 1×4 in the middle. Again, all assembled with pocket holes and screws.
Then, I installed the panels into the frames. For the front, the panel covers the outside 1×4 and simply screws in place. But on the inside, I used pocket holes and screws to attach to the inside 2×4.
The back panel uses pocket hole screws to install into the sides of the frame, then simply screws into the 1×4 in the middle (this just helps prevent bowing).
So now there are two side panels, and a front and a back panel. It’s time to put it together!
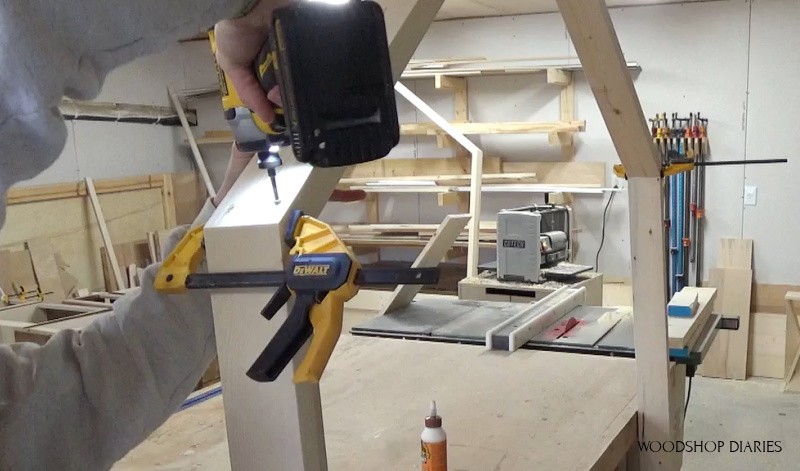
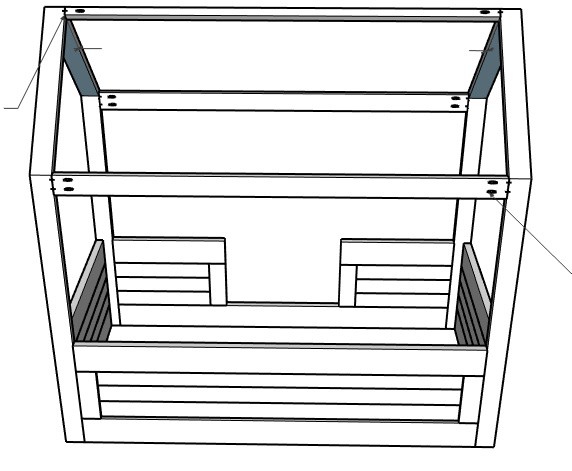
Step 5: Assemble Frame and Add Roof Stretchers
To assemble the four pieces of the bed together, I drilled pocket holes into the top and bottom 2x6s of both the front and back panels. Then, I moved them to their destination (inside the house) and screwed together.
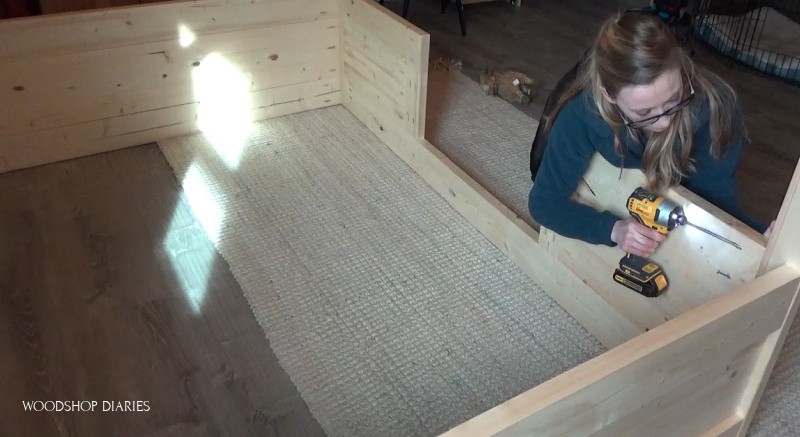
Once the four sides were together, I added a 2×4 on the front and back of the roof and a 2×2 at the roof peak. I used pocket holes and screws to attach these. Notice the holes are on the back side, so you won’t see them from the front.
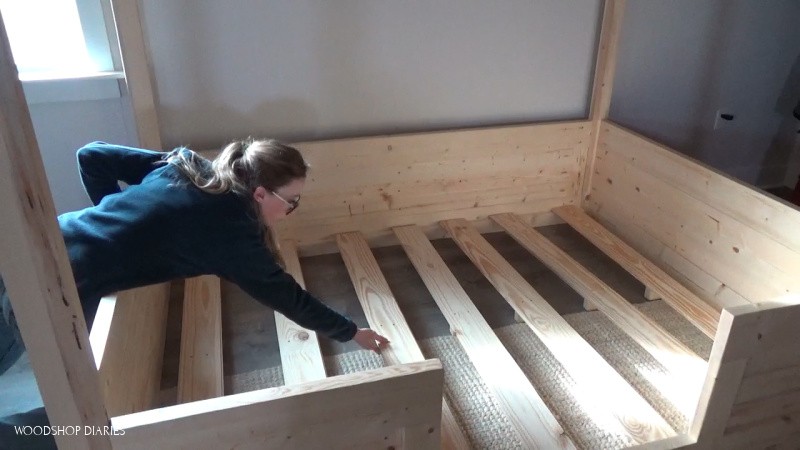
Step 6: Add House Bed Mattress Slats
Now everything is in place except the bottom slats. These are what supports the mattress.
.
I screwed some 2x4s along the bottom edge of the front and back panels to rest these slats on.

Then, I screwed some small 2×4 blocks into the middle of some 1×4 slats (I used 1x6s here in the photo, but the plans call for 1x4s–either works fine) and evenly spaced them out like shown. It’s best to screw these in place before installing the mattress on top.
At this point, it’s time to place the mattress inside and put the bedding on…and maybe take a nap 😉
.
If you want to paint and stain, you can do that at any point, but may be easier before bringing it inside to assemble. I simply applied some clear coat poly to protect the wood.
I really enjoyed this project and it’s such a fun project for a kids room or even a hang out spot for a man cave or she-shed. I’m a grown adult and wouldn’t mind this in my own home office haha.
.
Of course, I probably wouldn’t get much work done with it in there, so might not be the best idea for productivity ha!
So if you’re ready to head to the shop and start building this DIY kids house bed, be sure to check out the YouTube video tutorial here and grab the FREE PLANS for a twin size over on Build Something here.
Looking for more DIY beds OR bedroom furniture projects?
Here are some of my favorites:

DIY Modern Bed 
DIY Storage Bed 
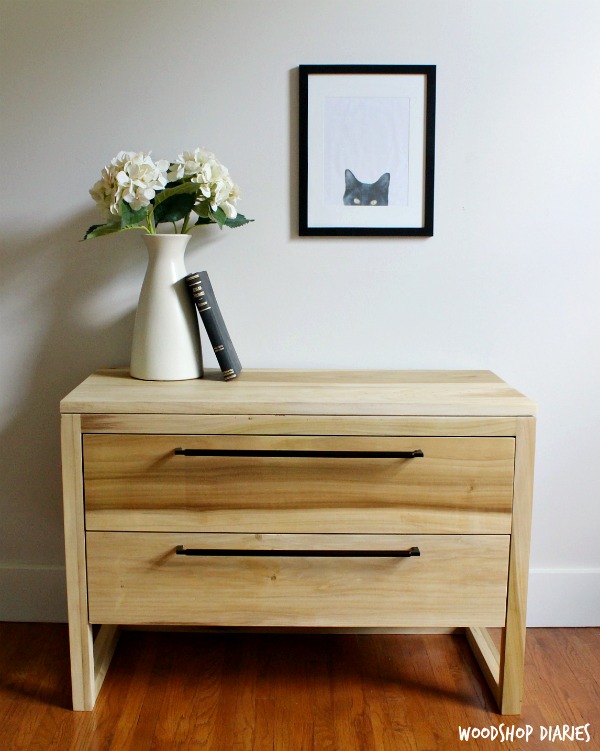
DIY Modern Nightstand 
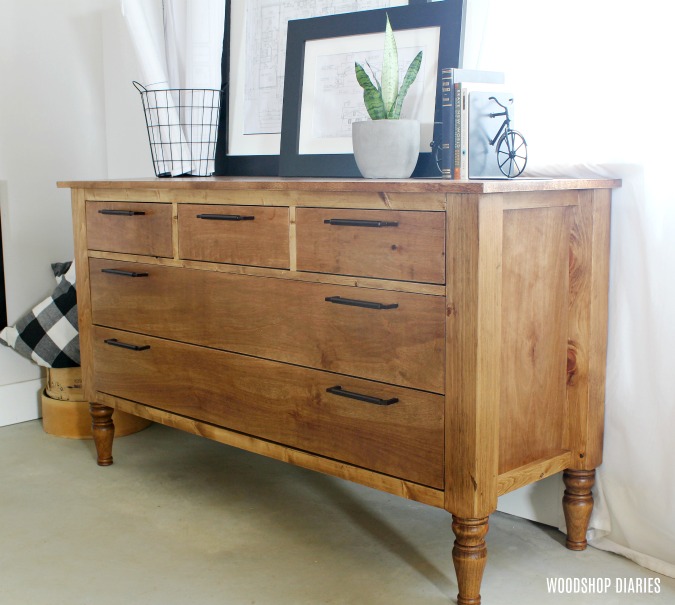
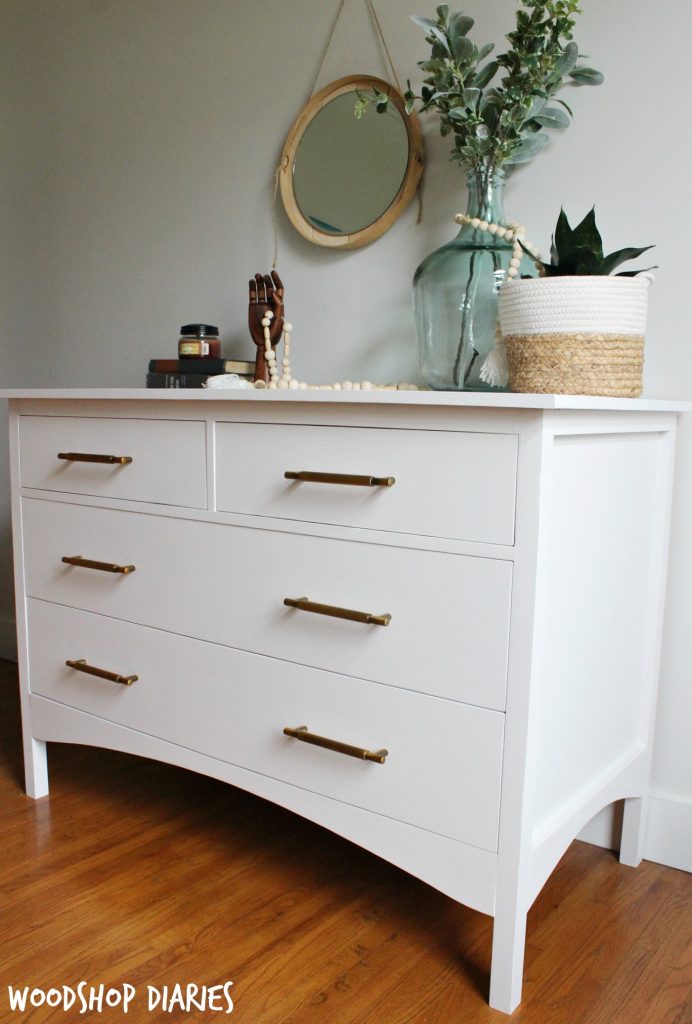
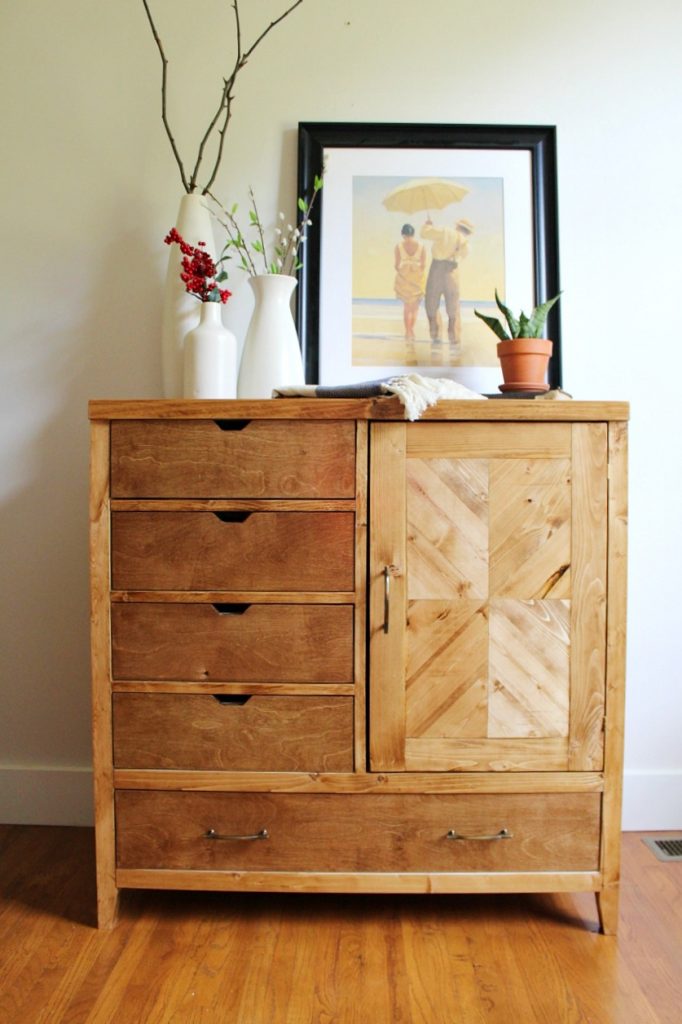
DIY Dresser 
DIY Dresser 
Faux Drawer Dresser 
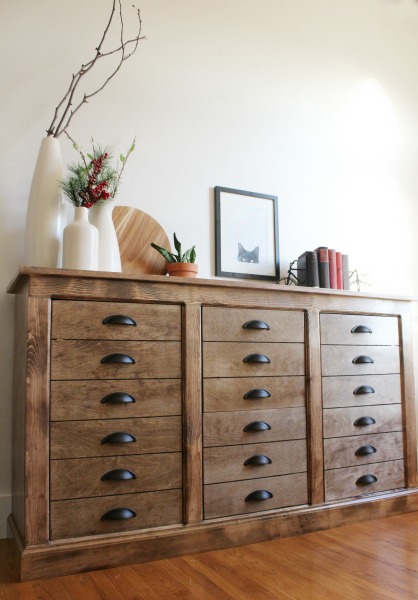
DIY Wardrobe Dresser
If you like this DIY kids house bed project, I’d love if you’d pin it for later or share it on your favorite social channel 🙂
Until next time, friends, happy building! 🙂

Tyra says
I think we are going to make one of these for my little girl! She has a queen size bed and I know she would LOVE it! I’ll let ya know how it goes!
Lydia Cox says
Hmmmm, I love this for a kid but also for the kid in me! I adore your posts!