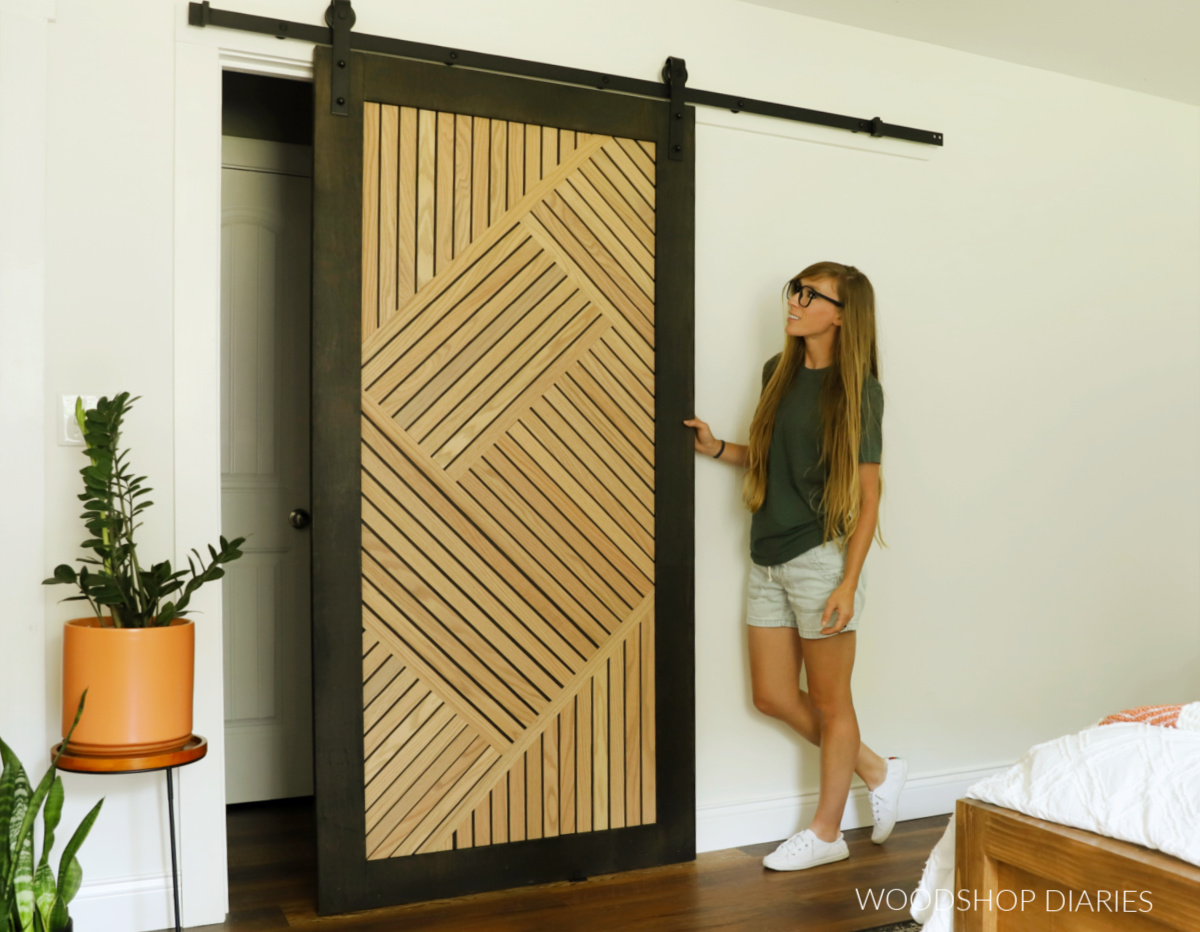
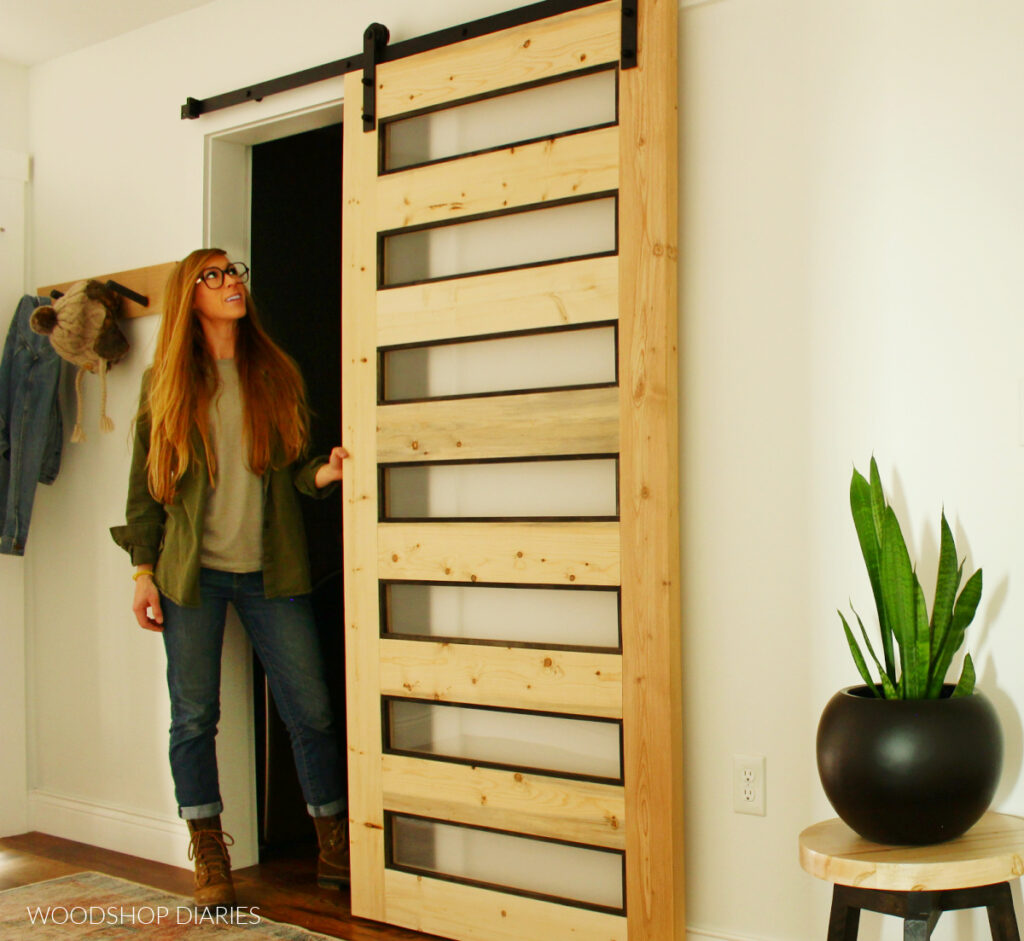
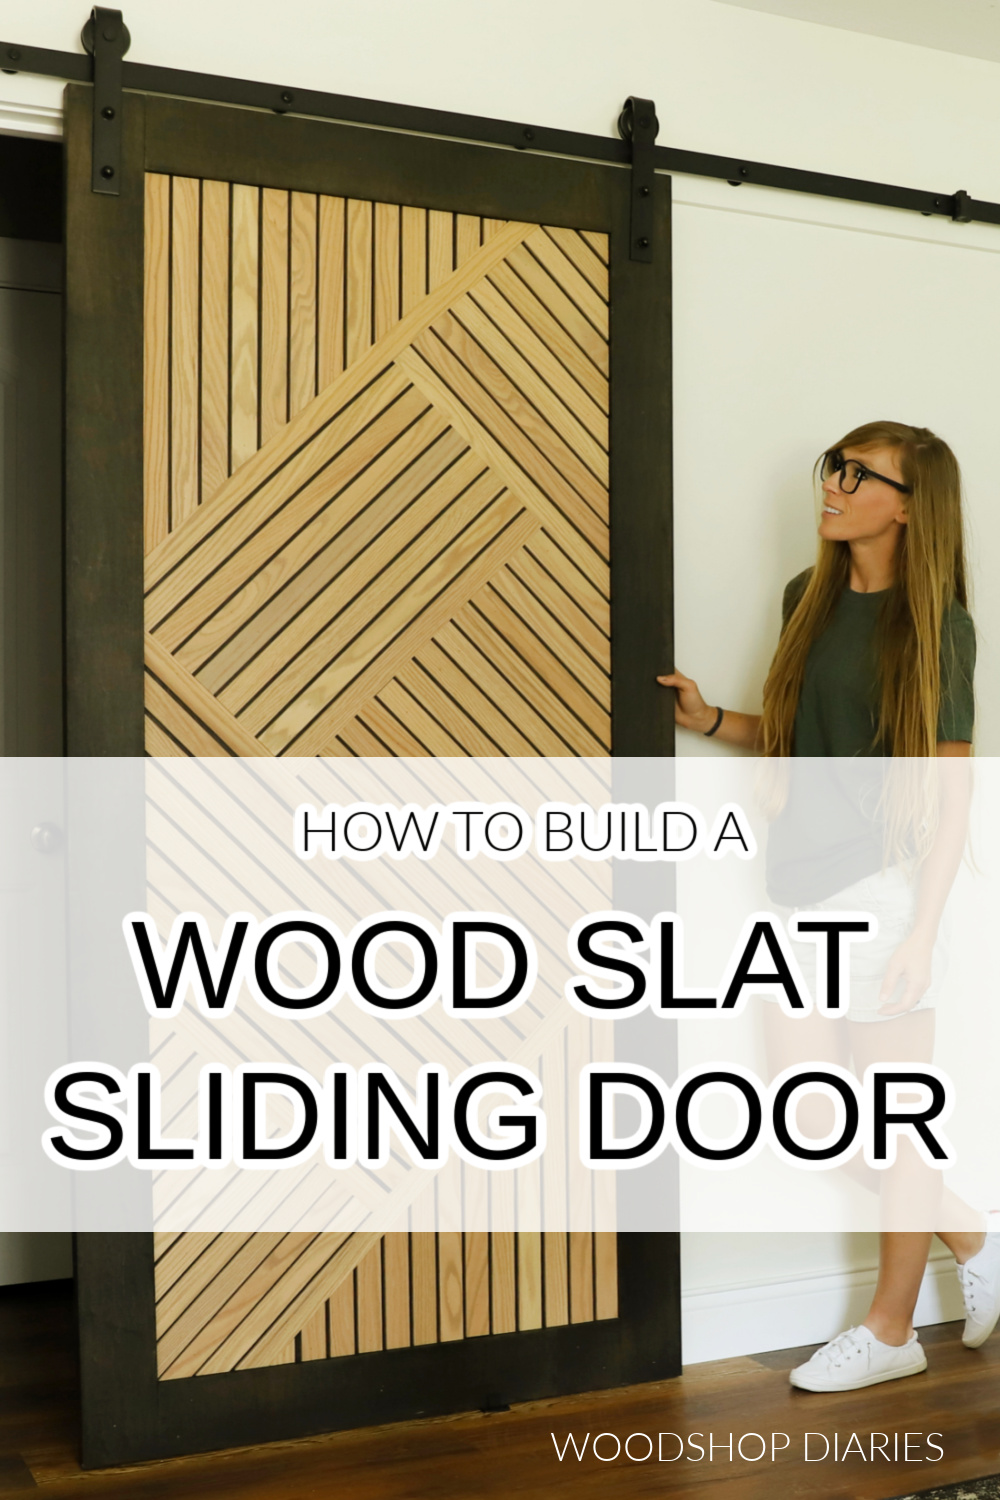
In this post, I’m sharing how to build a modern, geometric wood slat sliding door using basic tools and materials!
Sliding barn doors are trendy. But with most trends, some people love them and some people hate them. I get it.
I’m not a huge fan of the rustic, barn-style sliding doors, but I do love a fun, modern take on the project–especially when it’s also a space saver!
The previous swing door on our guest bathroom entrance made the space feel cramped and was in the way of opening and closing the closet door.
This modern, geometric wood slat door added a pop of color, some character, and a nice chunk of extra floor space to this guest bathroom entrance directly off our guest bedroom.
If you’d like to build your own sliding door, I’m sharing how I built this one in the steps below! But, first, let’s address a few frequently asked questions.
*This post contains affiliate links. See website policies.
Are DIY projects and woodworking plans your jam? Subscribe to the newsletter for priority access to new projects, plans, and how tos on Woodshop Diaries!
What size do you make your sliding door?
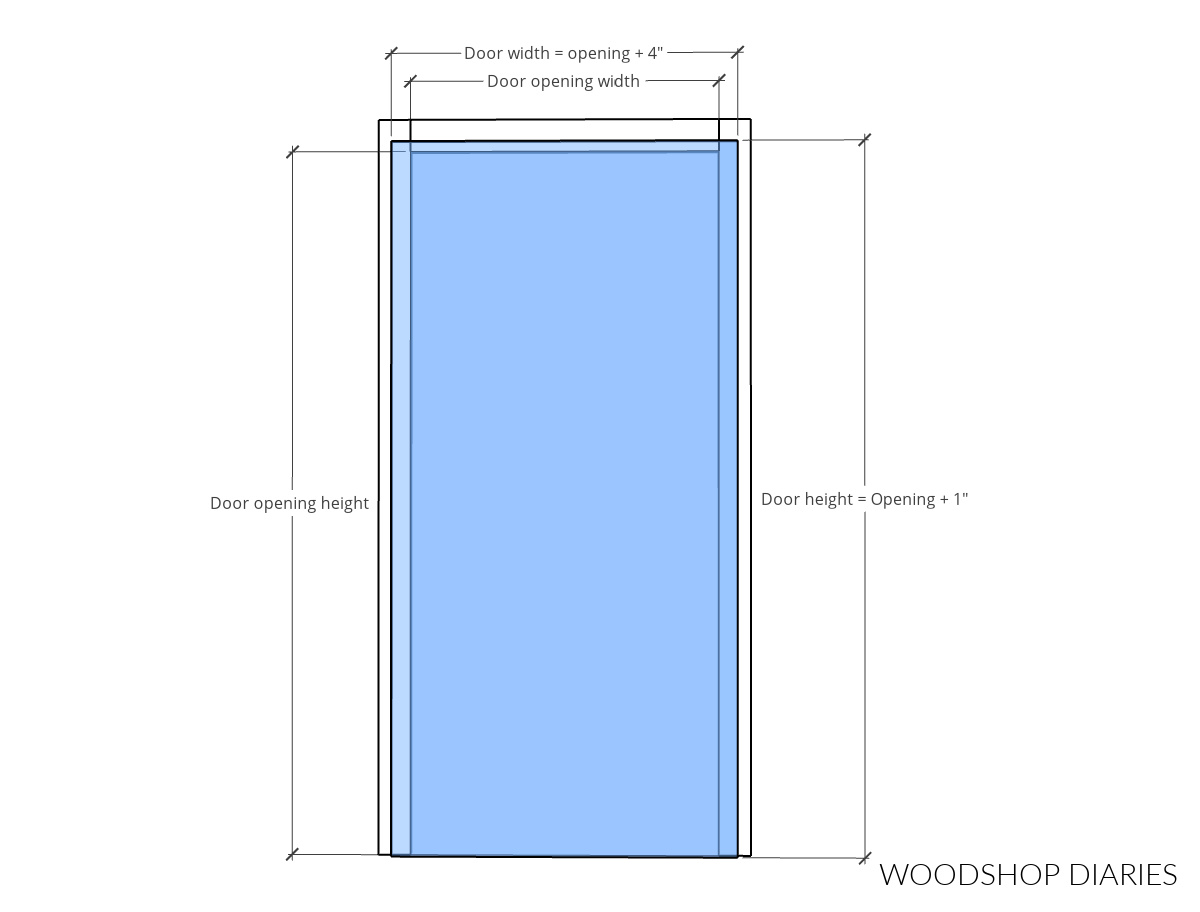
There’s no exact rule for how big or small to make your sliding door. However, I usually measure my door frame opening and add 2″ on each side to the width (so 4″ total) and 1″ to the height.
Door Size:
Width = Door Frame Opening Width + 4″
Height = Door Frame Opening Height + 1″
The diagram below gives a visual so you can see how this size door fits over the opening. Note that the door shown below in blue is transparent so you can see the door frame opening behind it.
What size sliding door hardware kit should you use?
Again, just like the size of the door, there’s not an exact rule for this. However, typically, you’d want something about twice the length of your door.
For example, if you make your door 36″ wide, get at least a 72″ (or 6′) rail. But, using one a little longer–like 6′ 6″–would give you a little more wiggle room to work with.
You can purchase sliding door hardware kits in various sizes. If in doubt, I recommend sizing up because you can always adjust the stop blocks on the rail so that the door can’t slide as far. But if you get one too short, you can’t make it longer.
Tools & Materials
Here’s a list of tools and materials needed to build and install this DIY wood slat sliding door.
Tools:
- Drill/Driver
- Miter Saw
- Circular Saw
- Cutting Guides–Kreg Rip Cut & Kreg AccuCut (optional)
- Brad Nailer
- Ratchet & Sockets (various sizes–used to install sliding rail)
- Wrench (to install sliding rail)
- Level
- Stud finder
- Drill Bits (various sizes to install hardware)
Materials:
- (1) 4×8 sheet ¾″ plywood
- Prefinished oak slats (amount will vary based on your design–I used 2 boxes for this door)
- 1x4x8 board
- Sliding Door Hardware Kit (length will depend on door size–see notes above)
- ¾″ edge banding & 1 ½″ edge banding
- ¾″, 1 ¼″, and 1 ¾″ brad nails
- Wood Glue
- Wood Stain/Paint
- Trim Caulk
How to Build a Geometric Wood Slat Door
Building a simple sliding door is a great weekend project. The actual door only took a day to build. It is a simple project that allows you to get as plain or as “complicated “fancy” as you’d like with your slat design.
If you prefer to watch, check out this video of the whole project from start to finish:
If you enjoy project videos (and bloopers!) be sure to subscribe to my YouTube channel here!
Step 1: Cut Sliding Door Back Panel
This sliding door was made from a single sheet of ¾″ plywood. First, I determined the size I wanted my door. See notes above.
My door ended up being 39″ wide x 82″ tall. A full plywood sheet is 48″ wide, so to make it 39″ wide for my door, I needed to cut off 9″. Instead of cutting a whole 9″ in one pass, I cut two strips 4 ½″ wide off my plywood sheet.
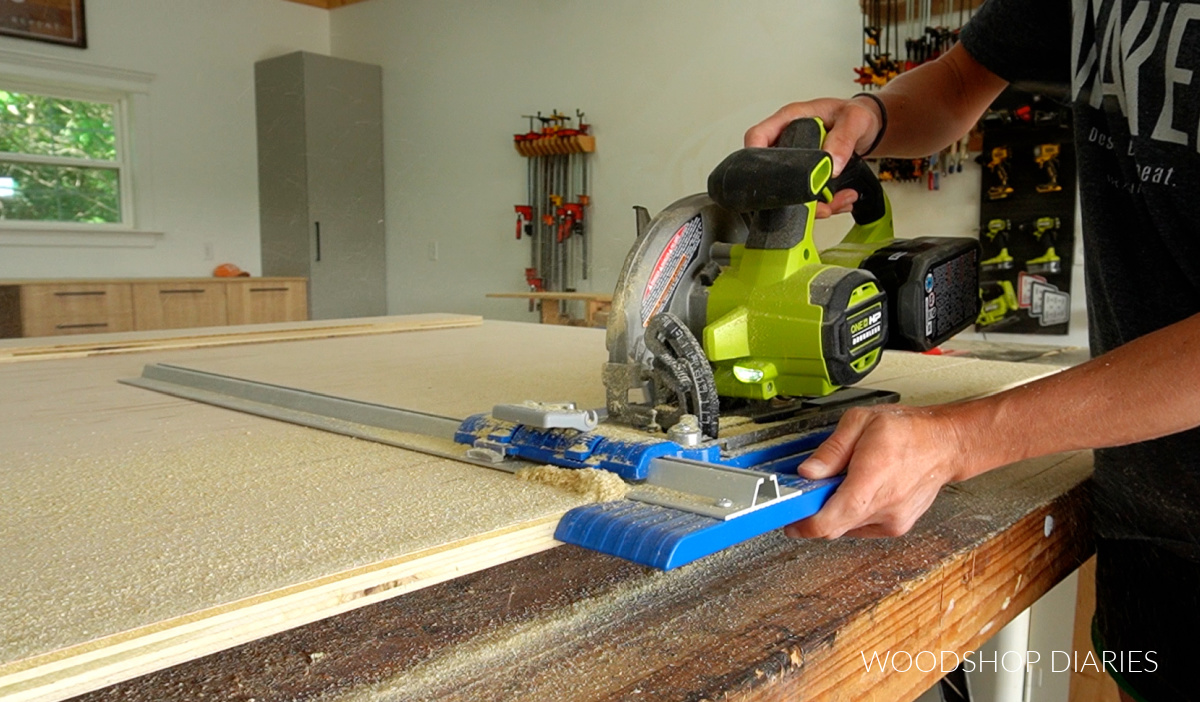
I cut my sheet down using my circular saw and Kreg cutting guides. Check out how to cut plywood sheets in this post.
This left me with a plywood panel about 39″ wide. I set these 4 ½″ wide strips aside to use in step 2.
Then, I trimmed the remaining sheet of plywood to 82″ long. This gave me a plywood panel the overall size I wanted my door–39″ x 82″. I saved this leftover piece to cut the top and bottom trim from in step 2.
Here’s a cut diagram to help visualize these cuts–but you’ll need to determine your own dimensions based on your door size.
Step 2: Trim Door Sides
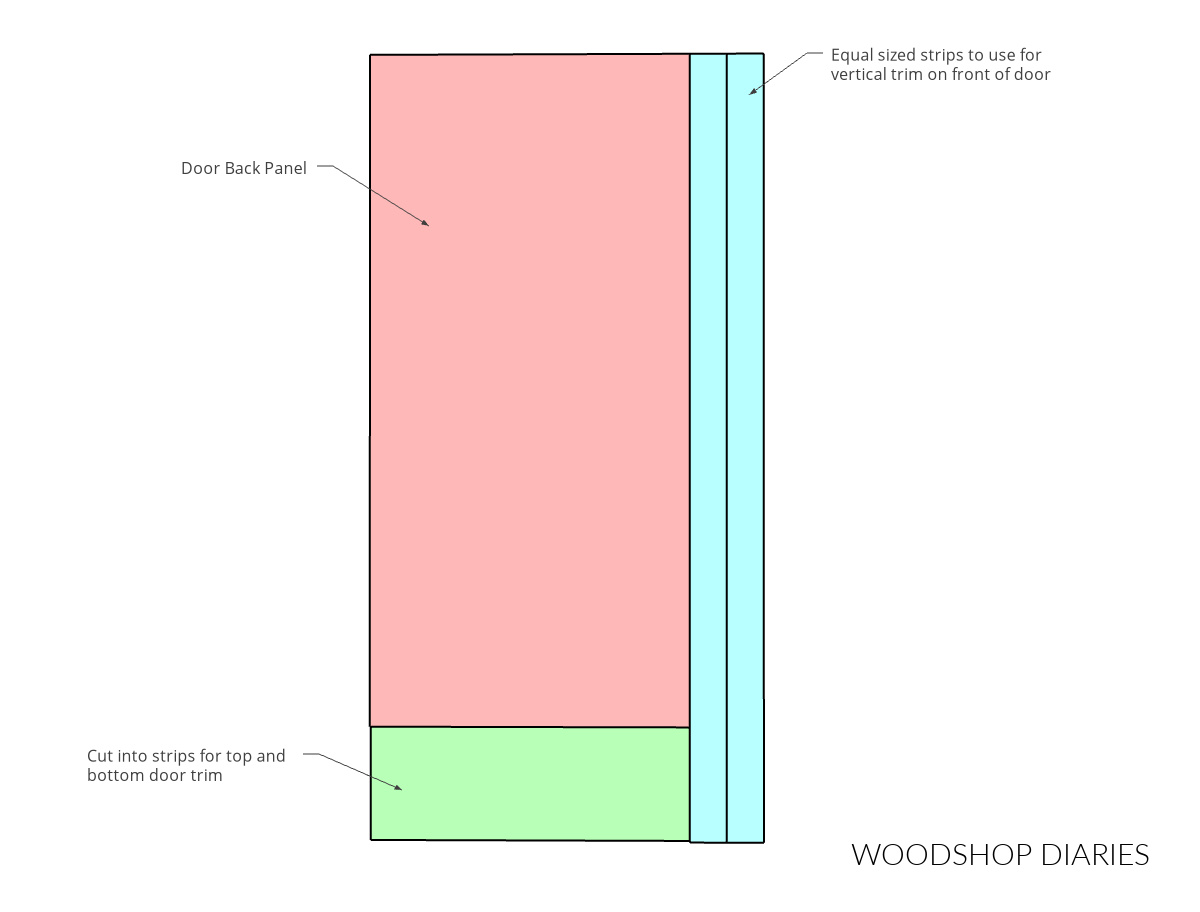
To make the door 1 ½″ thick, I added plywood strips onto the front along the edges to trim it out.
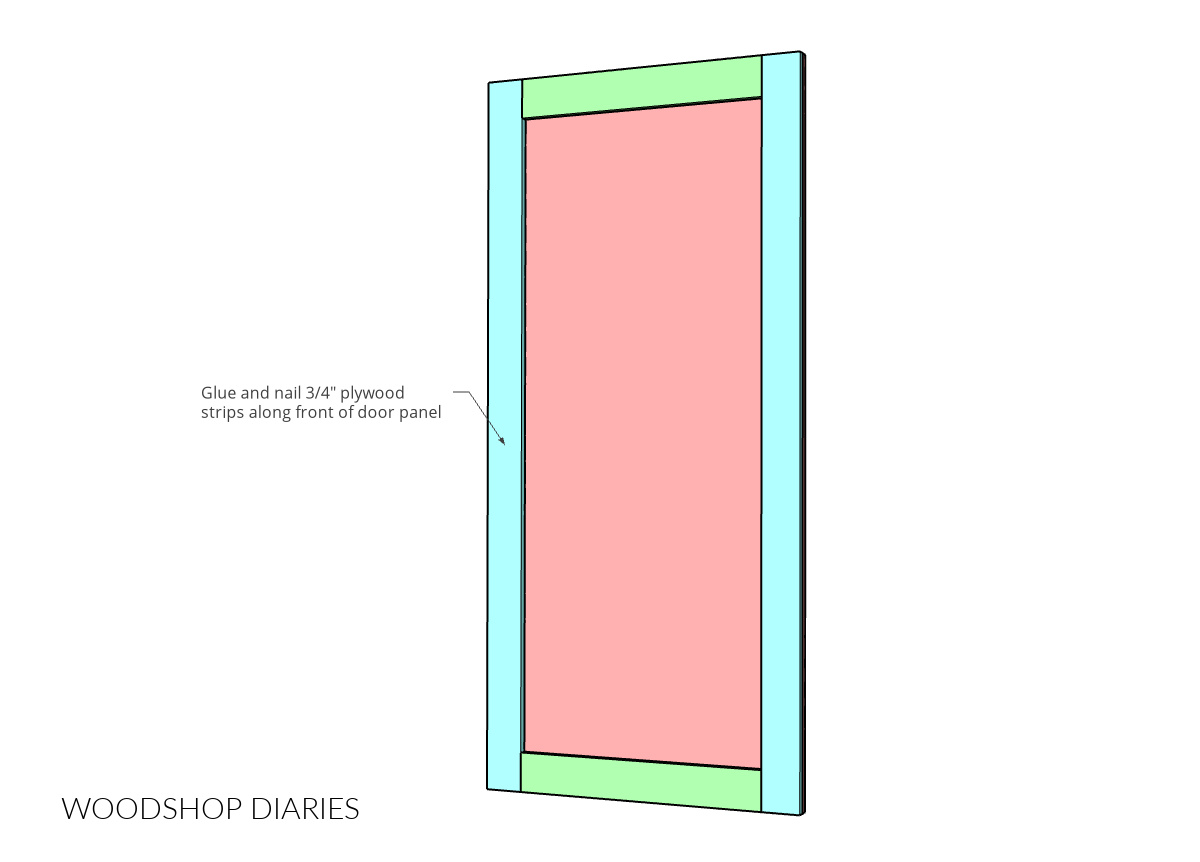
I cut the 4 ½″ wide plywood strips from step 1 to 82″ long to line the vertical sides of the door (shown in blue above). Then, I ripped two 4 ½″ wide strips from the leftover ¾″ plywood and cut these to fit on the top and bottom of the door (shown in green above).
*Note that the trim pieces around the front don’t have to be any specific width. Just try and use whatever you have left of your plywood sheet after step 1 to trim out the edges.
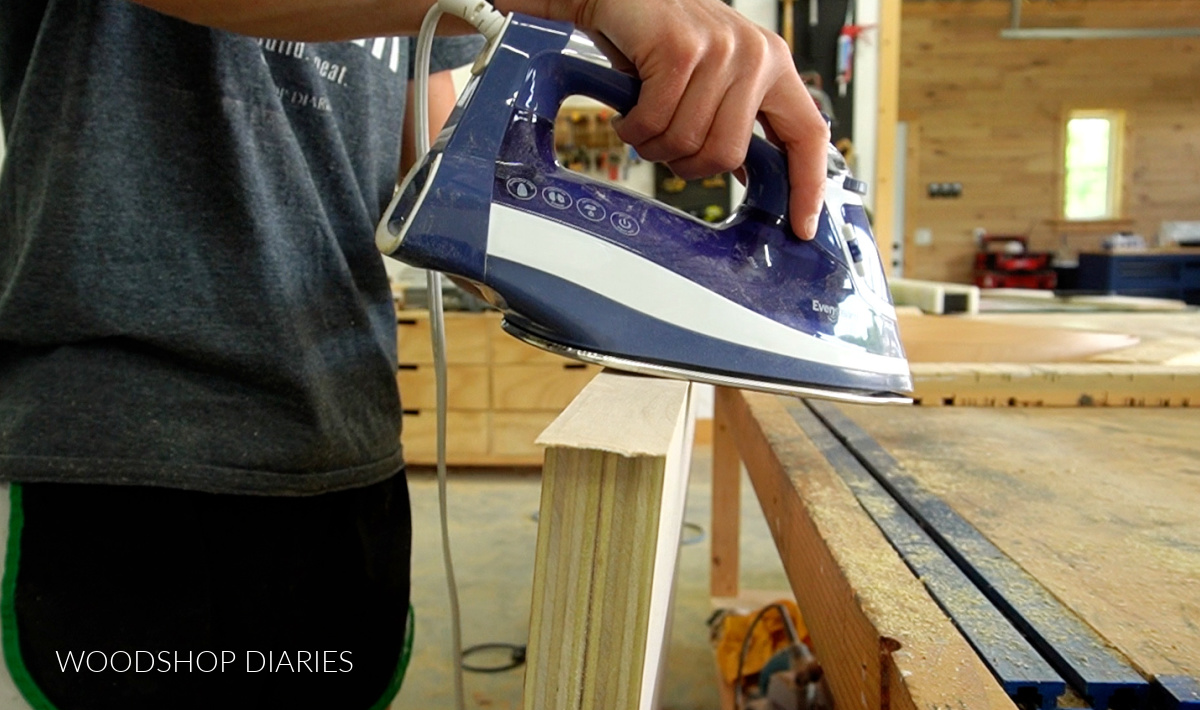
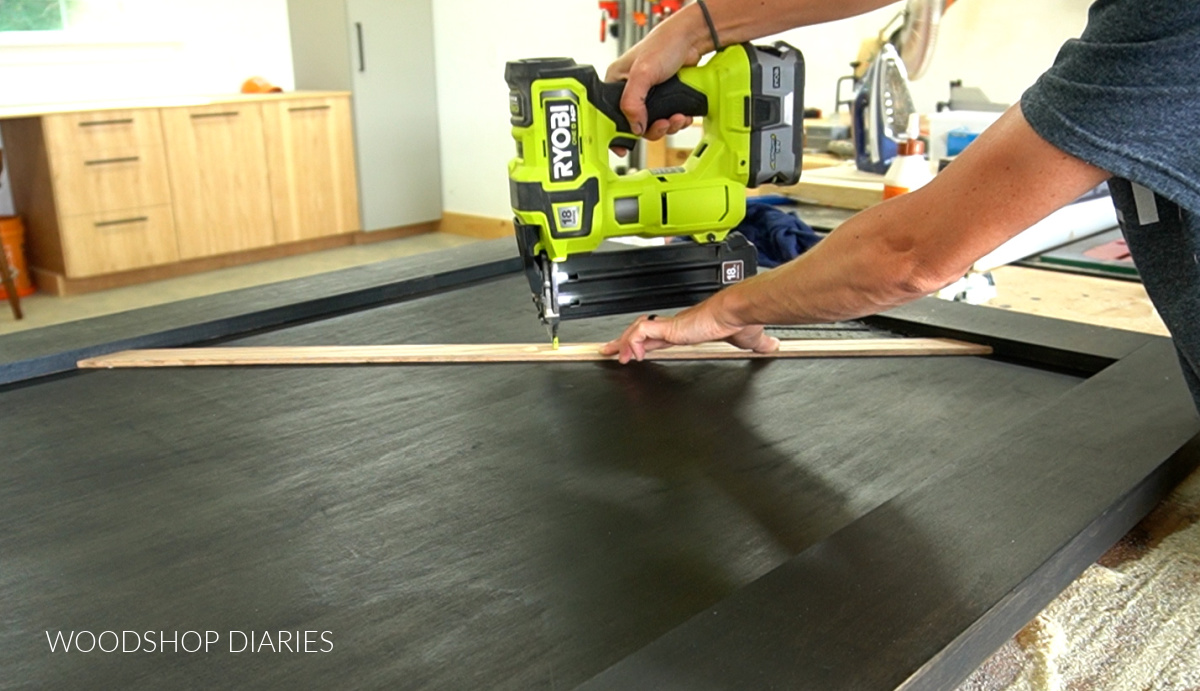
Before attaching these trim pieces, I applied ¾″ iron on edge banding to the edges of the trim that will be on the inside of the door. Edge banding is optional, but it makes the edges look nicer. Learn how to apply edge banding here.
Then, I used wood glue and 1 ¼″ brad nails to secure each piece around the door.
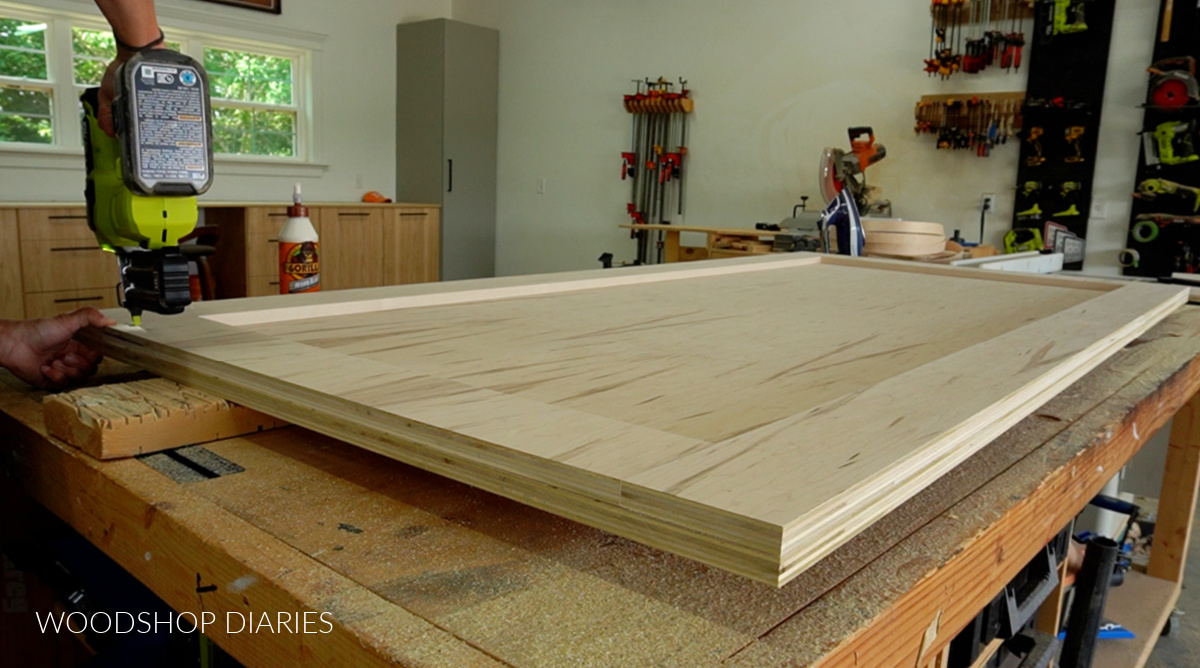
After these were nailed on, I applied 1 ½″ iron on edge banding on the vertical sides of the door to cover the exposed plywood edges.
I didn’t bother edge banding the top or bottom of the door since these won’t be seen in the finished project.
Step 3: Stain or Paint Sliding Door
At this point, the door is assembled, so it’s ready for finish. You can paint or stain whatever color you’d like here. I stained it black in my case.
If you wanted to leave the door as is at this point, you certainly could. But if you want to add the slats, head to step 4 below.
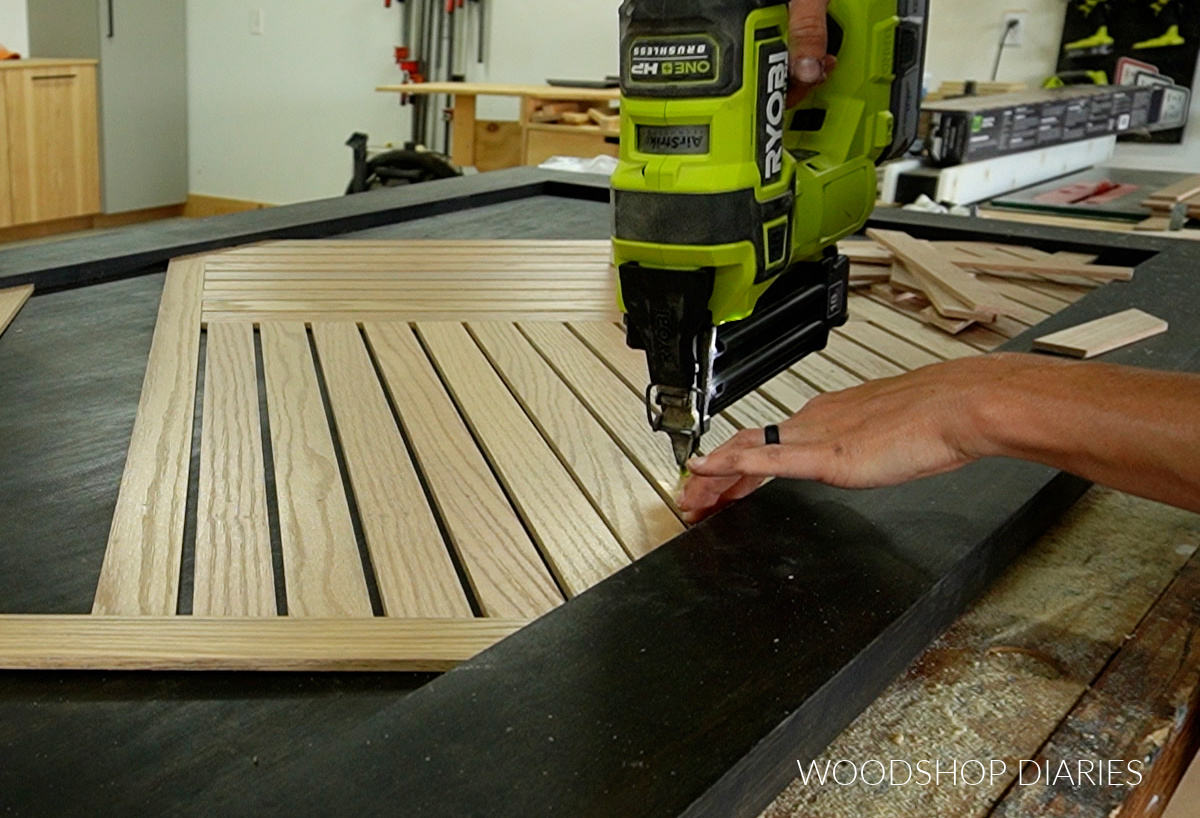
Step 4: Add Wood Slats
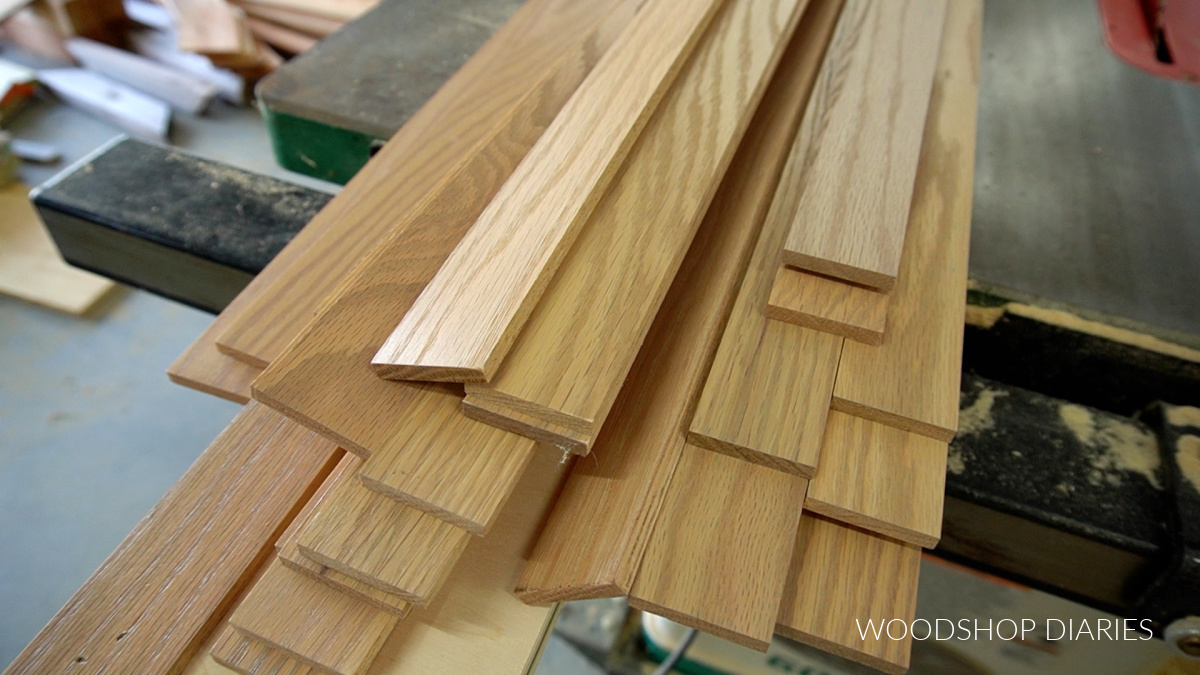
For the slats on this door, I used these Weaber Prefinished Solid Oak Slats. These are ¼″ thick x 1 ½″ wide x 36″ long and one side is already finished.
FYI, the amount of slats you’ll need will depend on the size of your door and your design. I used just barely over 1 box of these to complete this door.
The prefinished part makes it really nice because you can just nail in place and not have to worry with staining or painting first–hallelujah haha.
I didn’t have a specific design or pattern I was following for my slats. I just kind of made it up as I went, so feel free to play around with your own design to make something you love.
To minimize waste, I kept all my angles at 45 degrees and 90 degrees and I cut these pieces on the miter saw.
NOTE: Cutting small pieces on the miter saw can be a little scary. To help with this, try clamping a “sacrificial fence” of scrap wood to the fence of the miter saw to help keep the tiny pieces from flying out the back. See video here.
I started by cutting a piece to run diagonally across one of the top corners and used wood glue and ¾″ brad nails to secure it in place. Then, I began working my way out from there.
These slats are ¼″ thick, so I used a small piece of slat as a spacer block to space them ¼″ apart. I cut to fit each piece as I went and I found it easiest to cut a few pieces at a time and lay them out before nailing them in.
Since I didn’t have an exact design or pattern to follow, I’d lay several slats one way, then turn them and lay a few more that way. Here are the kind of “sections” of the door and the order I installed the slats.
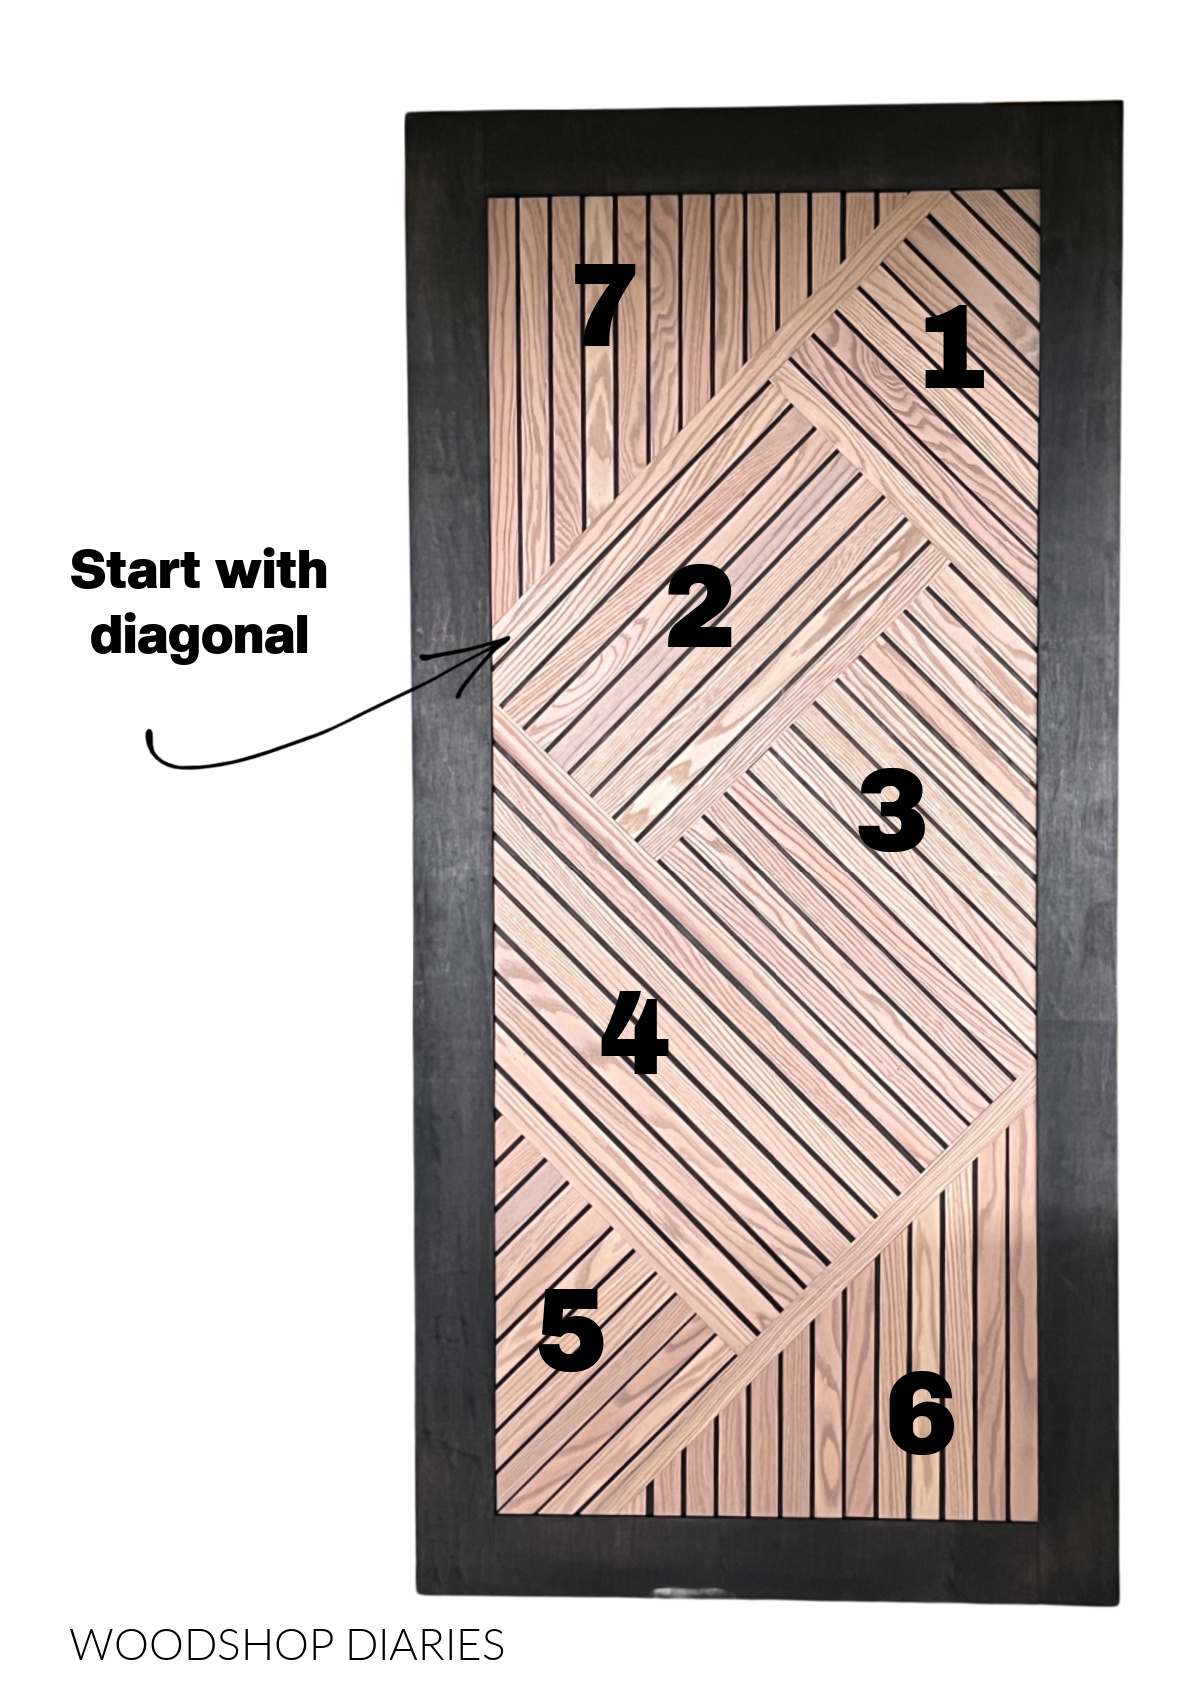
I tried to use up as many of the off cuts as I could so I didn’t waste much material. That’s one benefit of using 45 and 90 degree cuts only–you can recycle the off cuts pretty easily. But, feel free to use other angles if you’d like.
Once the slats were on, the door itself was complete and it was ready to install!
How to Install a Sliding Door
For specific measurements and detailed installation instructions, check your sliding door hardware kit. Always follow manufacturer’s instructions for installation.
However, the following is a general overview of a typical sliding door installation with some helpful tips.
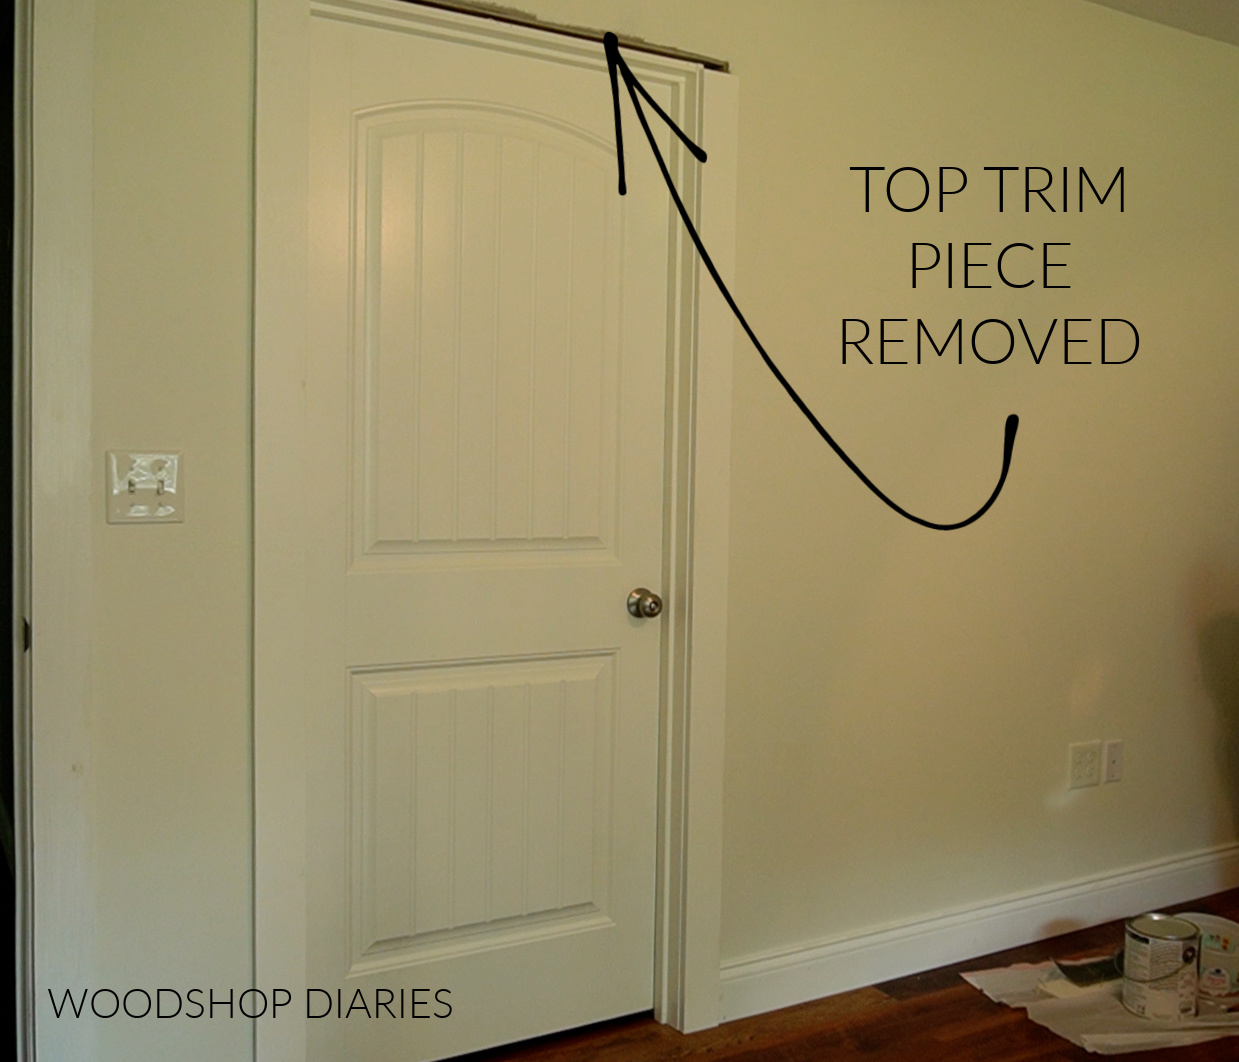
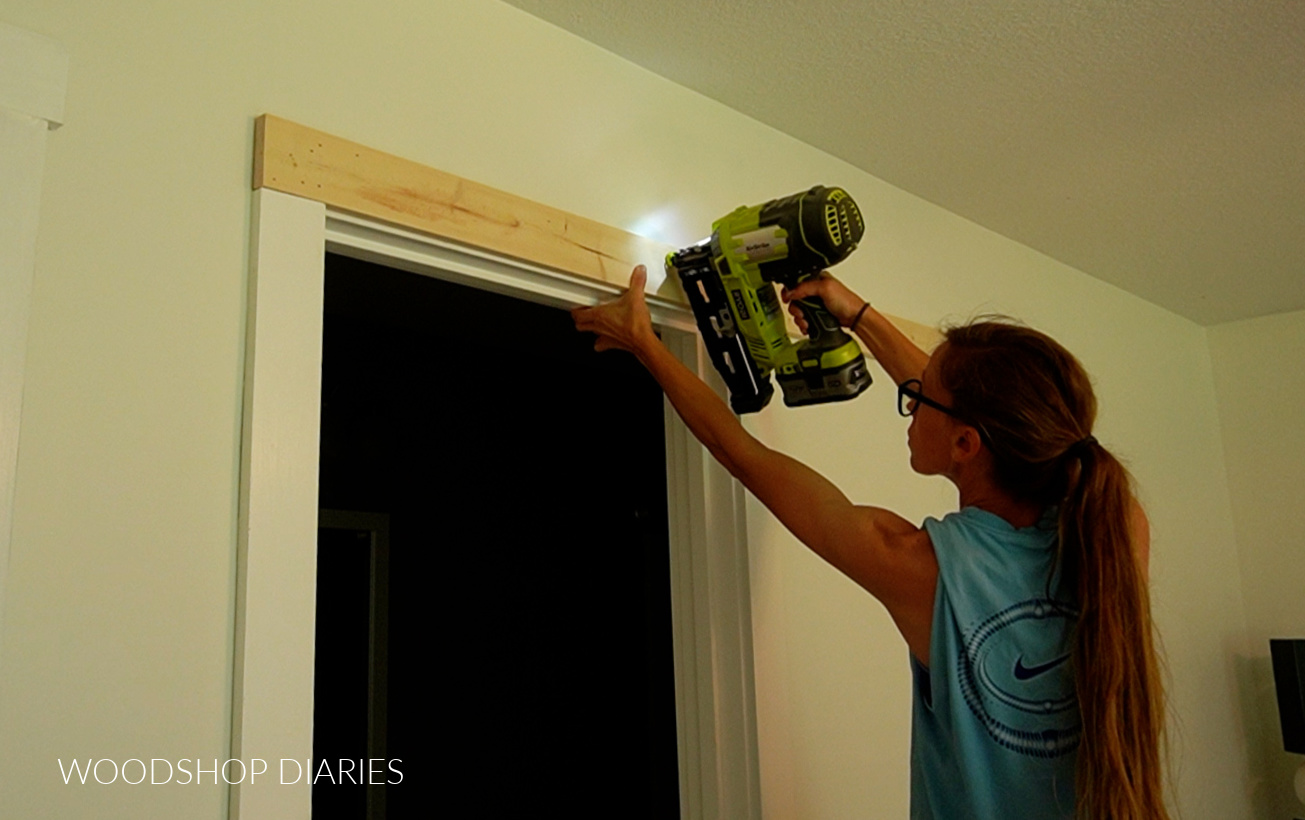
Step 1: Replace Top of Door Trim
If your door frame is trimmed out with wood (like in our case), you will likely need to replace the top piece in order to install the rail onto. This top piece needs to be about the same length as the rail.
OR, you can make your door taller and install the rail above the trim. However, if you do this, note that you may need to make your door thinner to be able to clear the door trim behind it.
To replace the trim, I used a prybar to carefully remove the top trim piece on my existing door frame. Then, I cut a 1×4 board the same length as the rail I was installing to go in its place.
Before installing this new trim piece, I used a stud finder to locate and mark the studs on the wall along where this piece will be going. The trim should be nailed securely into the studs.
Once the new trim piece was nailed on, I puttied the nail holes and primed and painted it. However, this piece can potentially be pulled in or pushed out a little in the process of installing the rail onto it.
So I don’t recommend caulking this trim until AFTER the rail is installed in step 2.
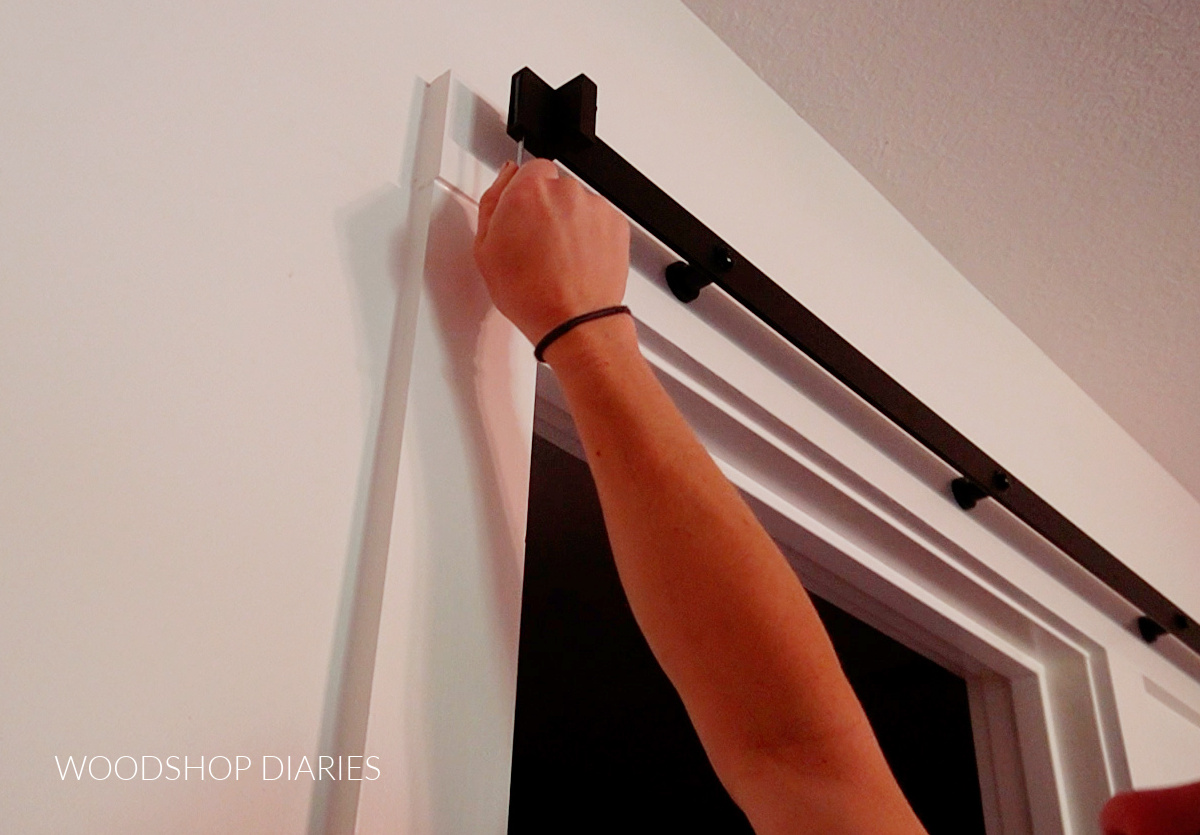
Step 2: Install Sliding Door Rail
Once the paint is dry on the trim, you’ll need to locate your wall studs again and mark the height to drill the holes in order to install the rail.
The instructions with the hardware kit should tell you what height and spacing you need to mark and drill at to install your rail. It should also tell you the size drill bit you need.
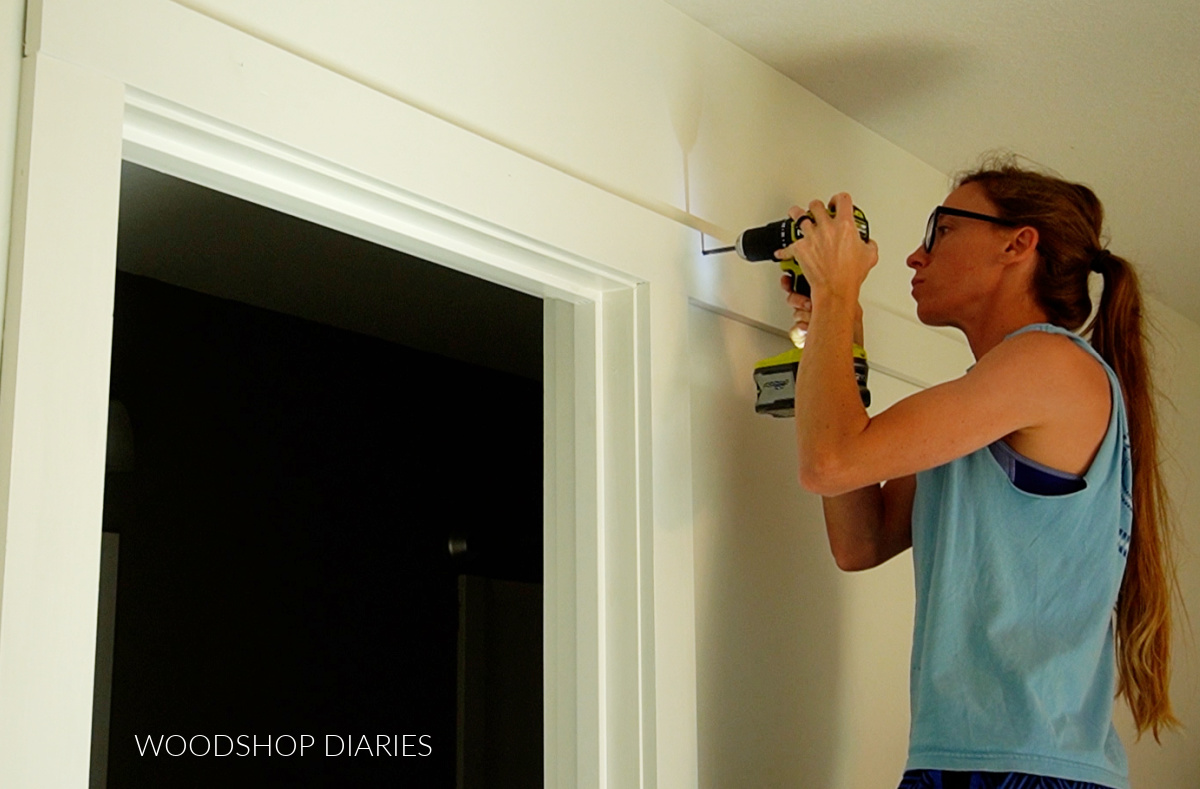
These may vary depending on what kit you use. Make sure your marks and holes are level and that every hole lines up with a wall stud!
Personally, I like to drill out the center hole first and snug the rail in place using the spacers and hardware included with the kit. That way, before drilling the rest of the holes, I can line up the rail and double check that my marks match up with the holes in the rail.
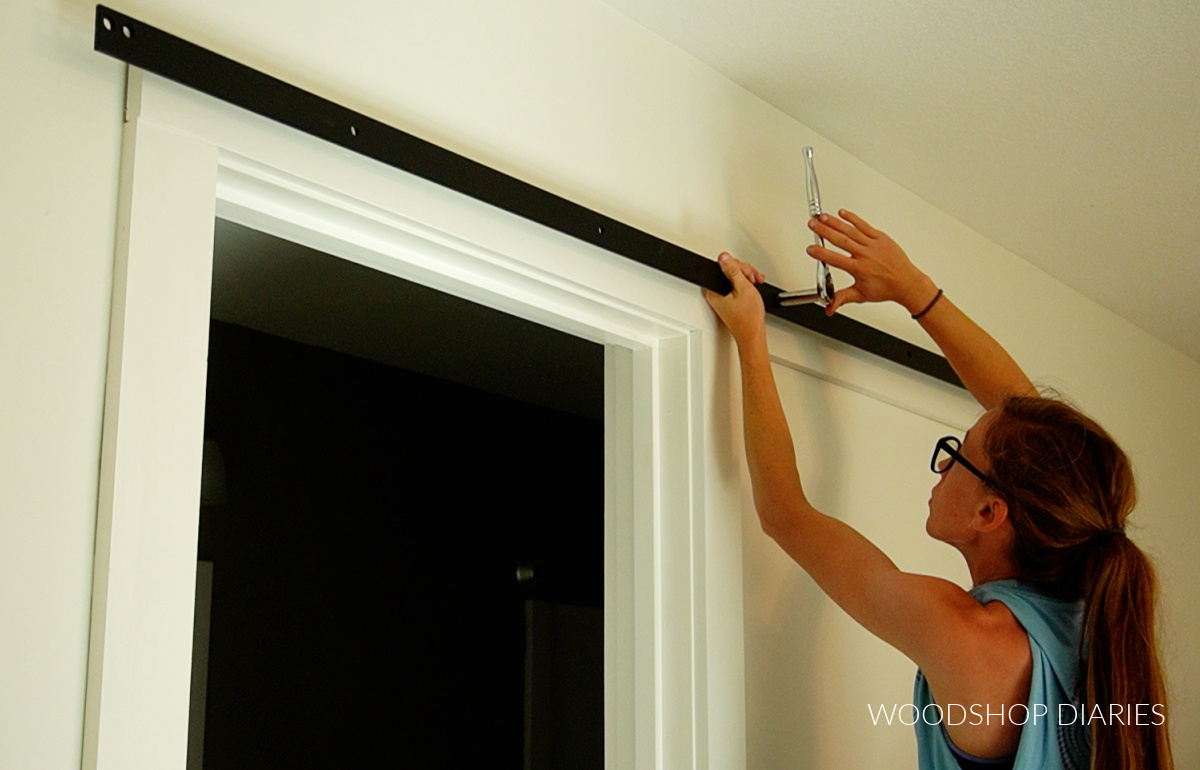
Once I make sure my marks match up, I drill out the remaining holes and secure the rail with the spacers and lag bolts included with the kit.
I like to use a ratchet to install so that I can make sure it’s tight, but not so tight that it is stripped out.
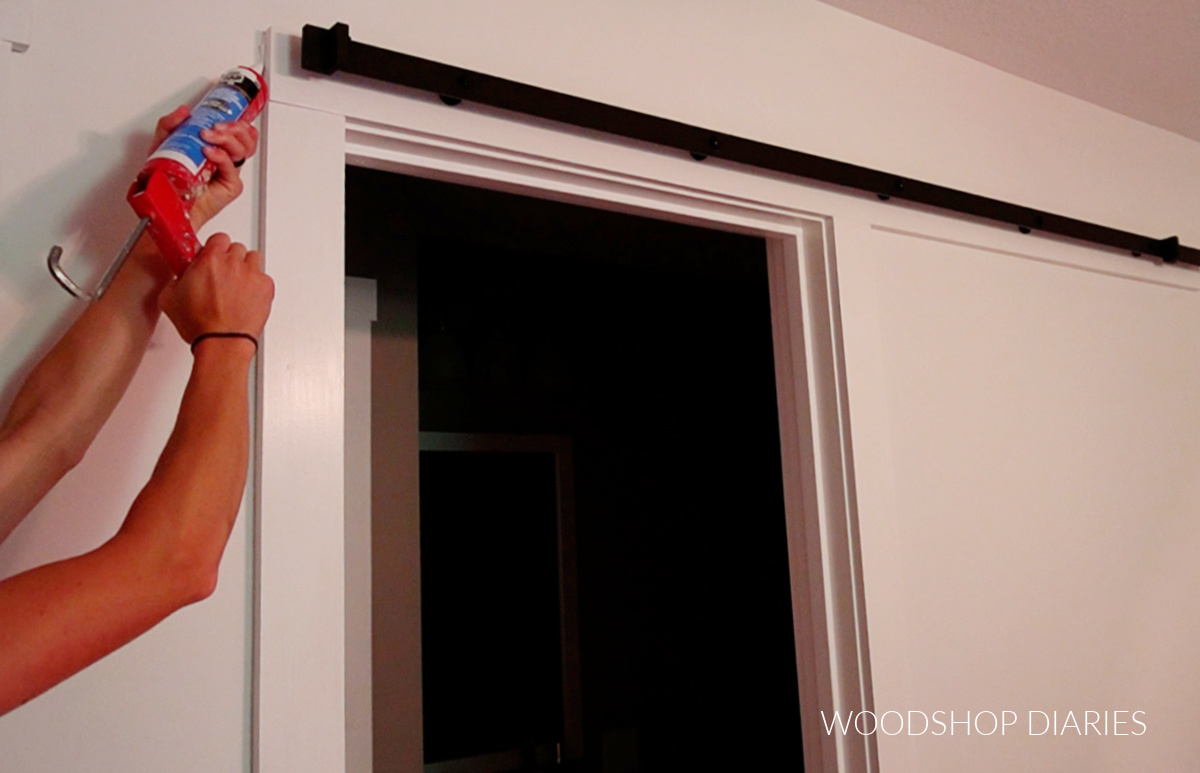
After the rail is secured in place, don’t forget to go back and caulk the new trim piece.
Step 3: Install Rollers onto Sliding Door
The sliding hardware kit includes rollers to install onto the door. These rollers are how you hang the door onto the rail. Install the rollers onto the top of the door according to the instructions included with the kit.
This usually involves drilling holes through the door and securing with bolts. The kit instructions should tell you specifically where to drill these holes for proper hanging height.
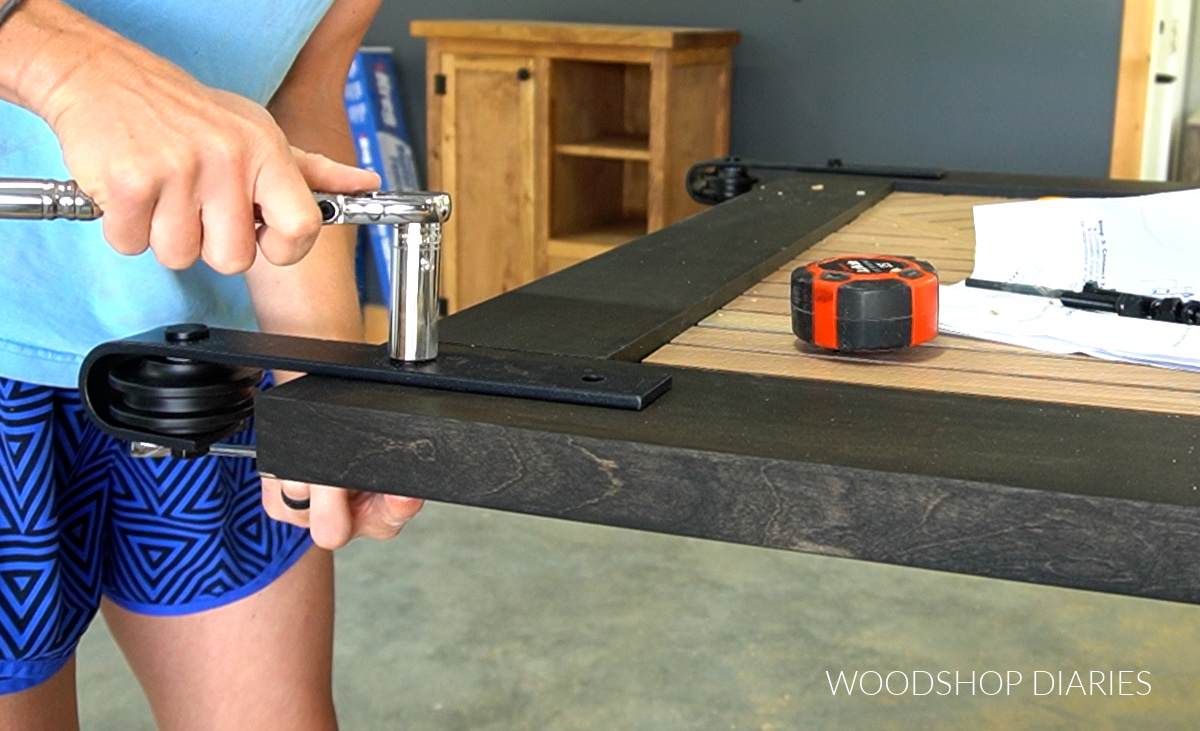
It’s helpful to have several sizes of sockets and/or wrenches for this–the size of these bolts will vary by kit.
Step 4: Hang Door and Adjust Guides
Before hanging the new door, I removed the old door, hinges, and hardware from the door frame. Then, I carefully hung the new sliding door on the rail.
The hardware kit should come with two “end stops” that slide onto the rail on each end to prevent the door from sliding off.
You can adjust these how you’d like to keep the door from sliding too far one way or the other. They simply tighten where you want them with set screws on the bottom.
The kit also includes floor guides to prevent the door from swinging back and forth. Usually, these will screw into the floor, but if you don’t want to drill holes into the floor, try some double sided mounting tape to stick the guides on the floor instead.
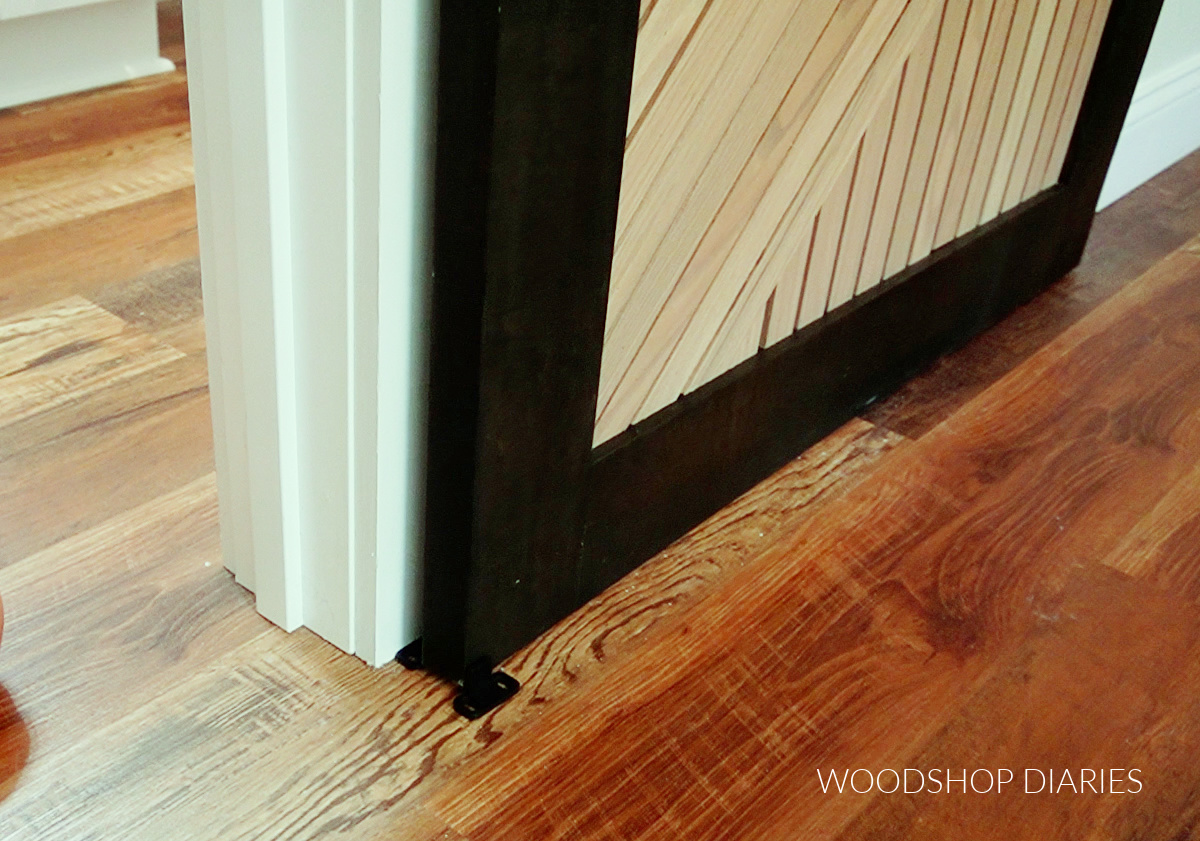
I used mounting tape since we have concrete subfloors and drilling into it is a pain.
Step 5: Add Finishing Touches
Once the sliding door is on, you can add a knob or hardware on the front as you’d like. But, keep in mind there isn’t a lot of room on the back side of the door to add a knob or handle without hitting the wall or trim behind it.
So drilling a shallow “finger hole” on the back of the door to be able to open and close it from the back side works really well.
To cover up the holes left from the old hinges, one option is to simply putty over them and sand them smooth. This may take a few coats of putty.
Another option is to pick up (or cut your own!) some thin lattice trim to glue and nail along the inside of the door frame to cover them up. You can run it from top to bottom so it blends in and isn’t noticeable–you’d just need to paint it to match!
I left mine as is for now because I’m going to take care of it when I replace the bathroom trim when we remodel it soon. Stay tuned for that!
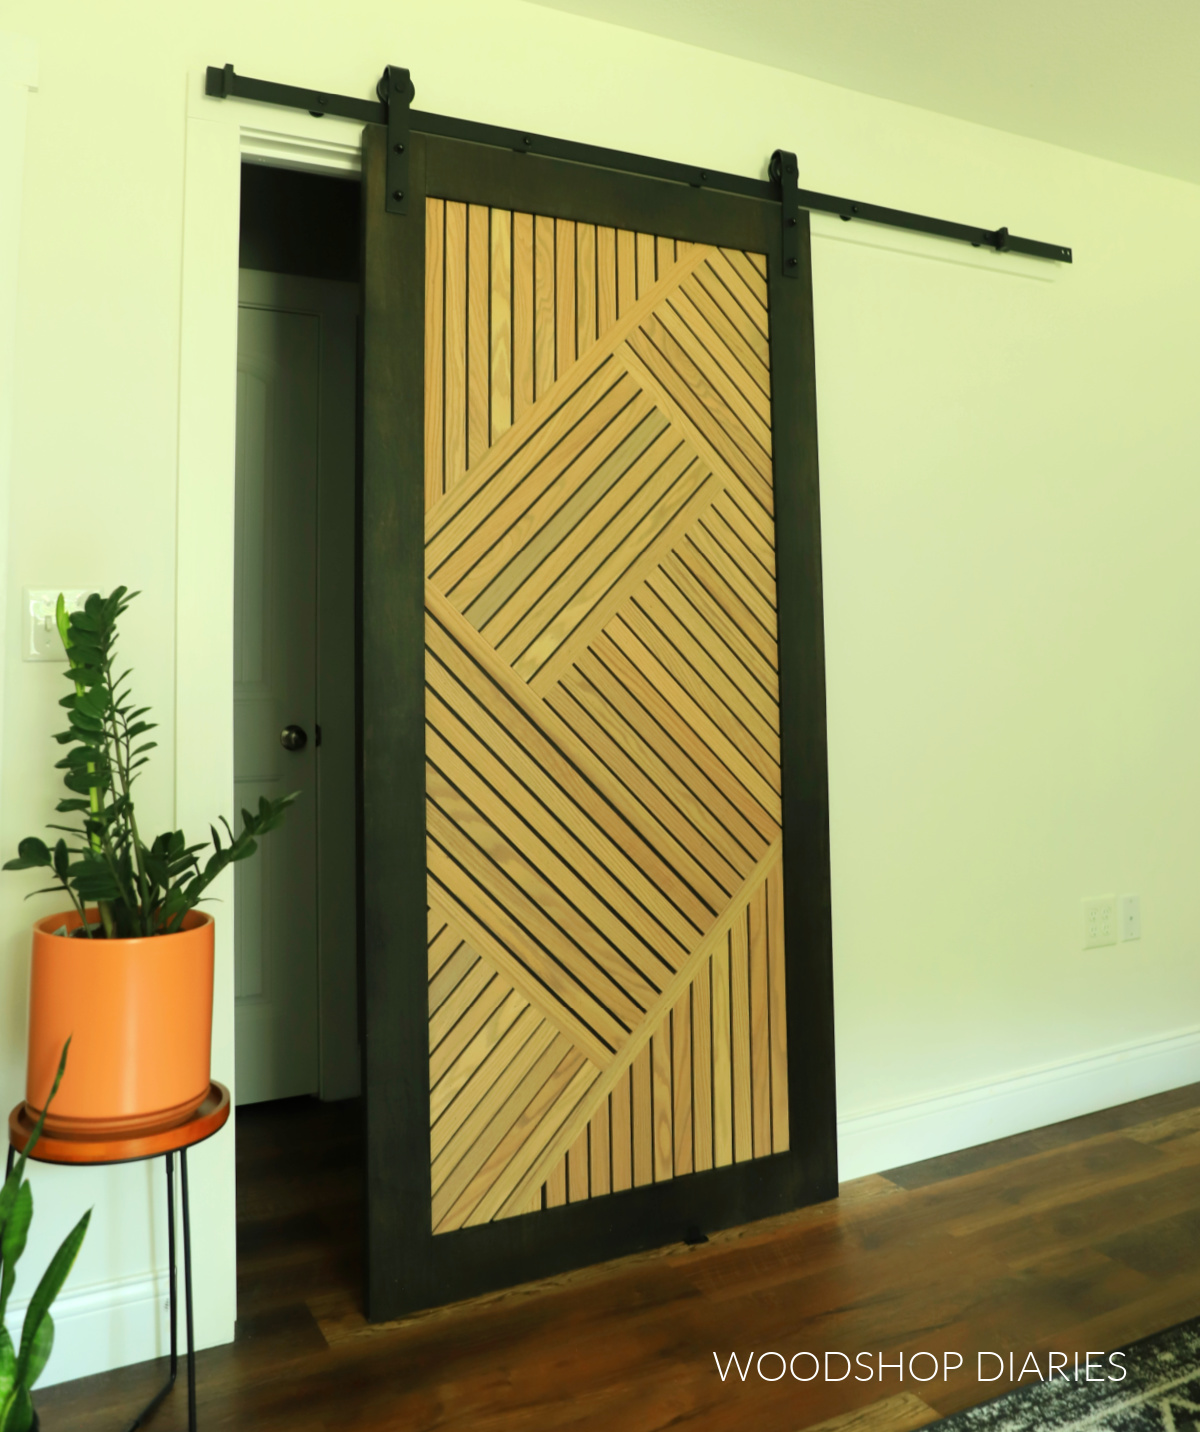
In the meantime, that wraps up this sliding door project and I am SO happy with how much character it adds to this space! I hope you enjoyed seeing how it came together!
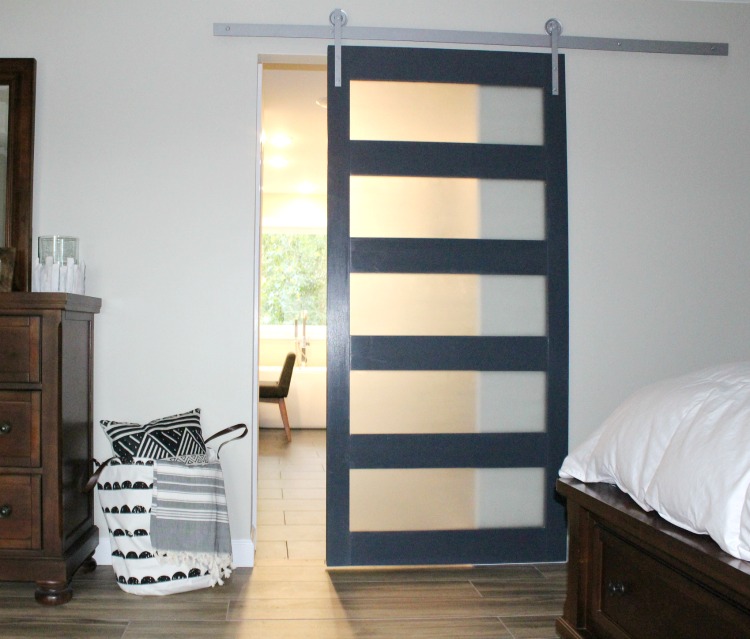
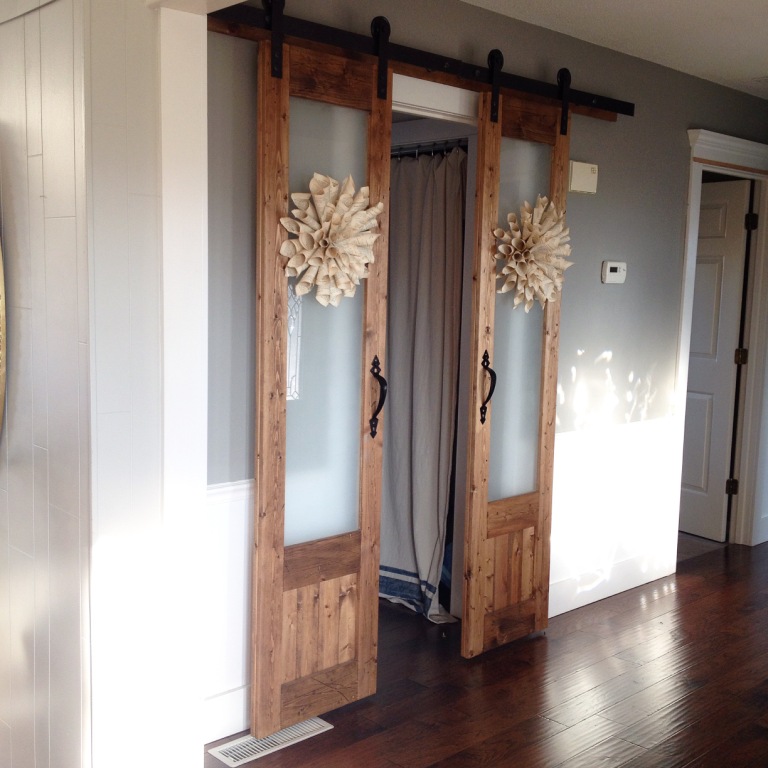
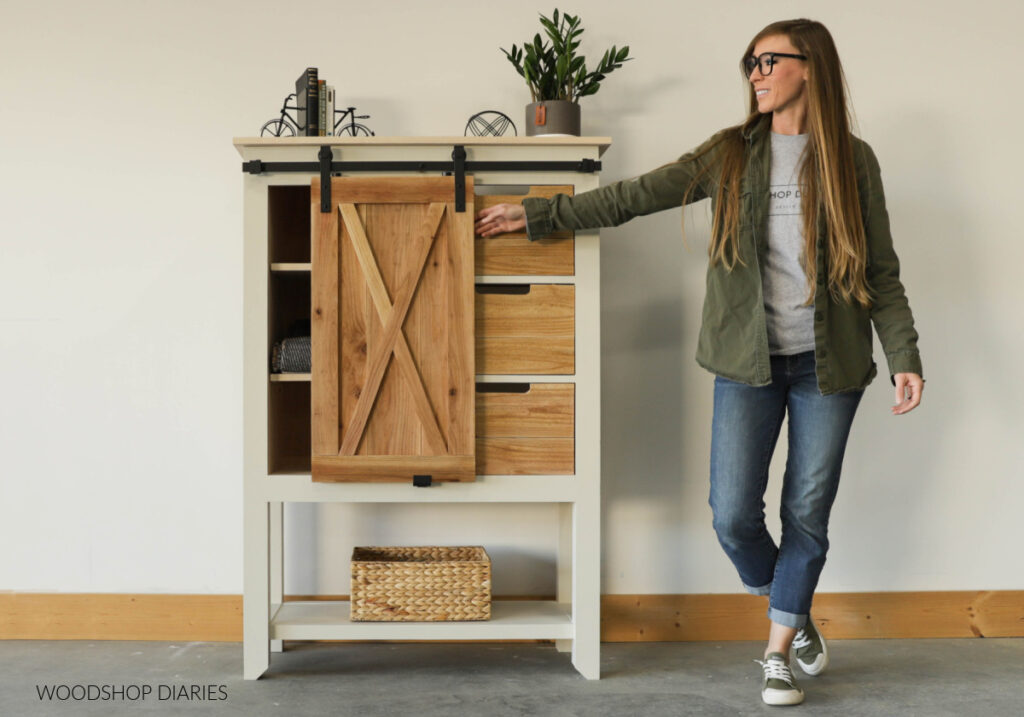
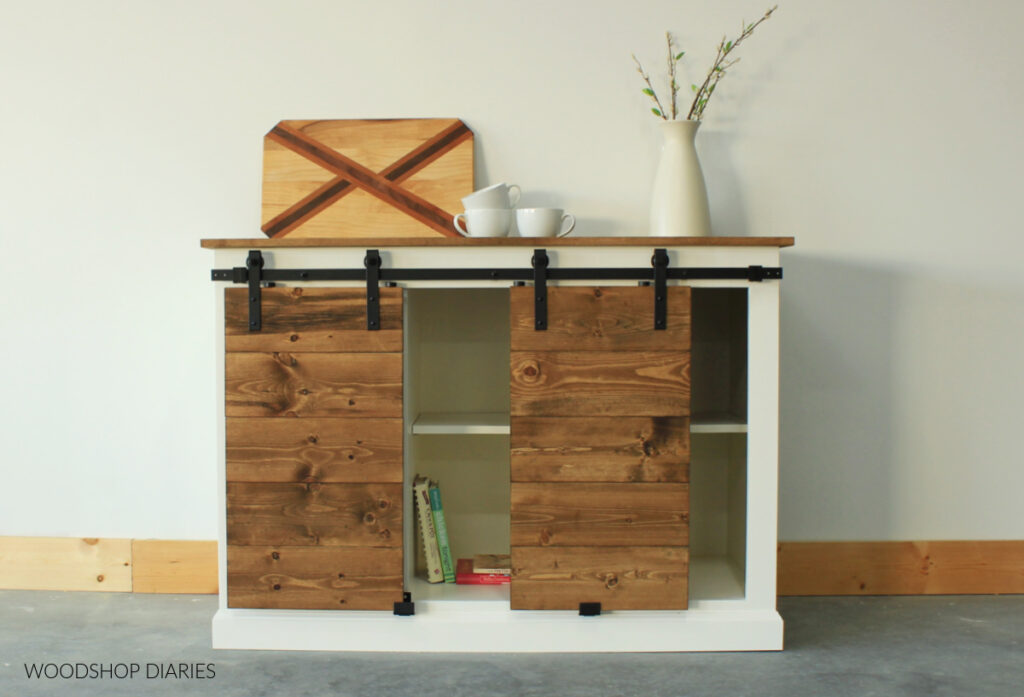
Looking more more sliding door projects?
Check out these other fun and unique sliding door projects you might enjoy!
If you’d like to save this project for later, don’t forget to pin it or share to your favorite social channel!
Until next time, friends, happy building!