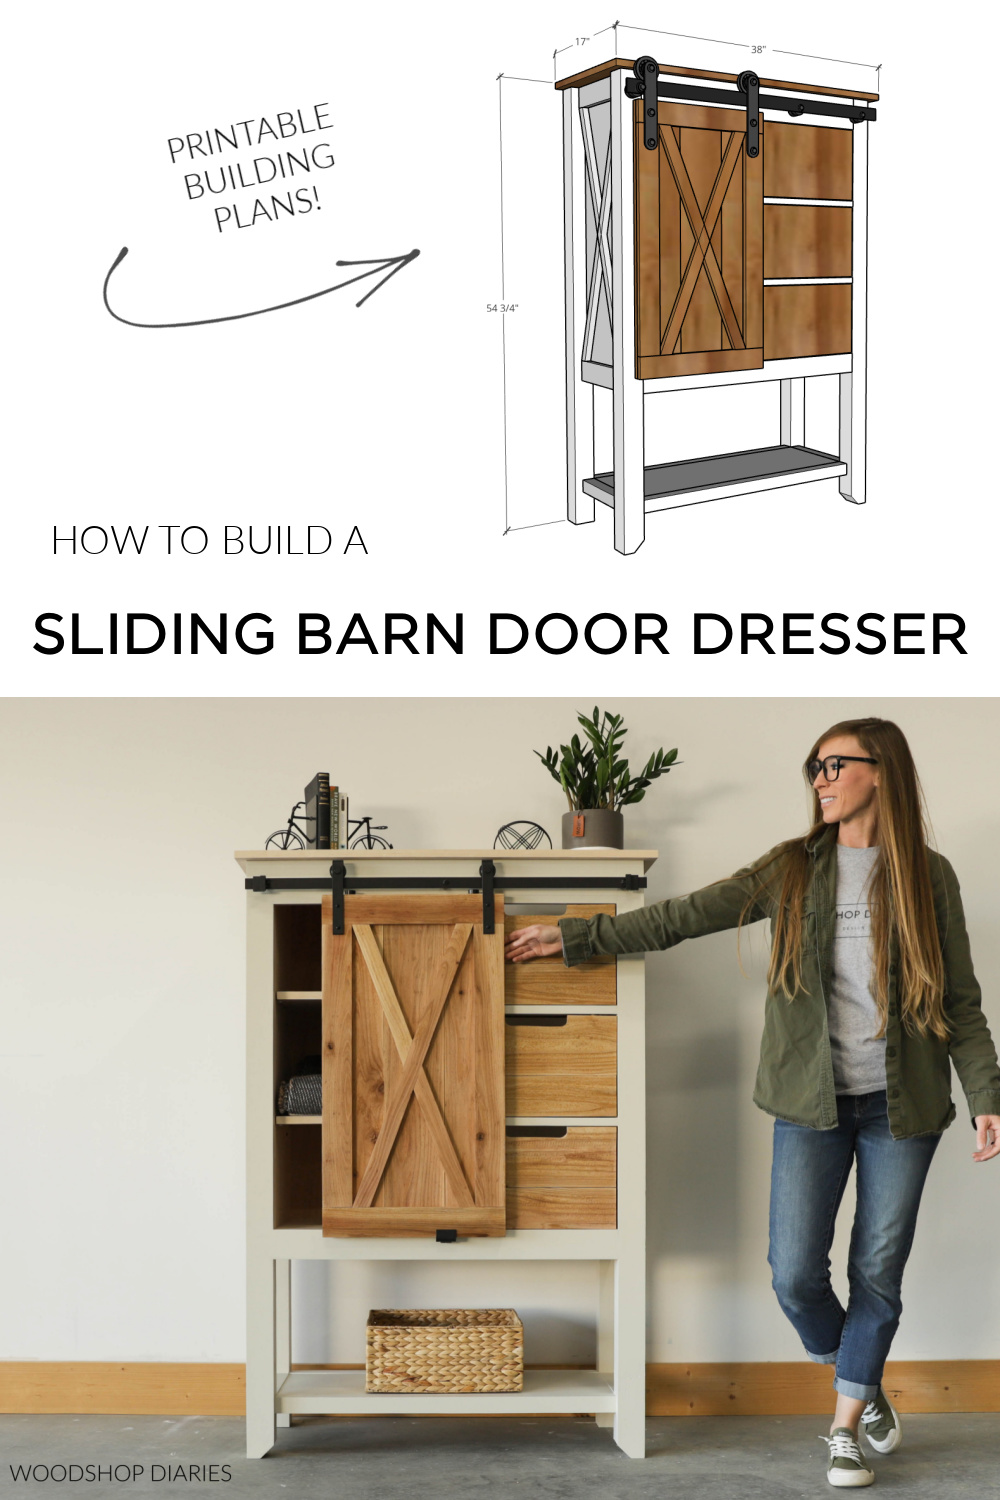
In this post, I’m sharing how to build a sliding door dresser chest with drawers and a sliding barn door!
Sliding doors have been trendy for several years. Some people love them and some people hate them. It’s just one of those things, you know? Ha!
But they’ve recently started showing up not only in and on houses, but also on furniture!
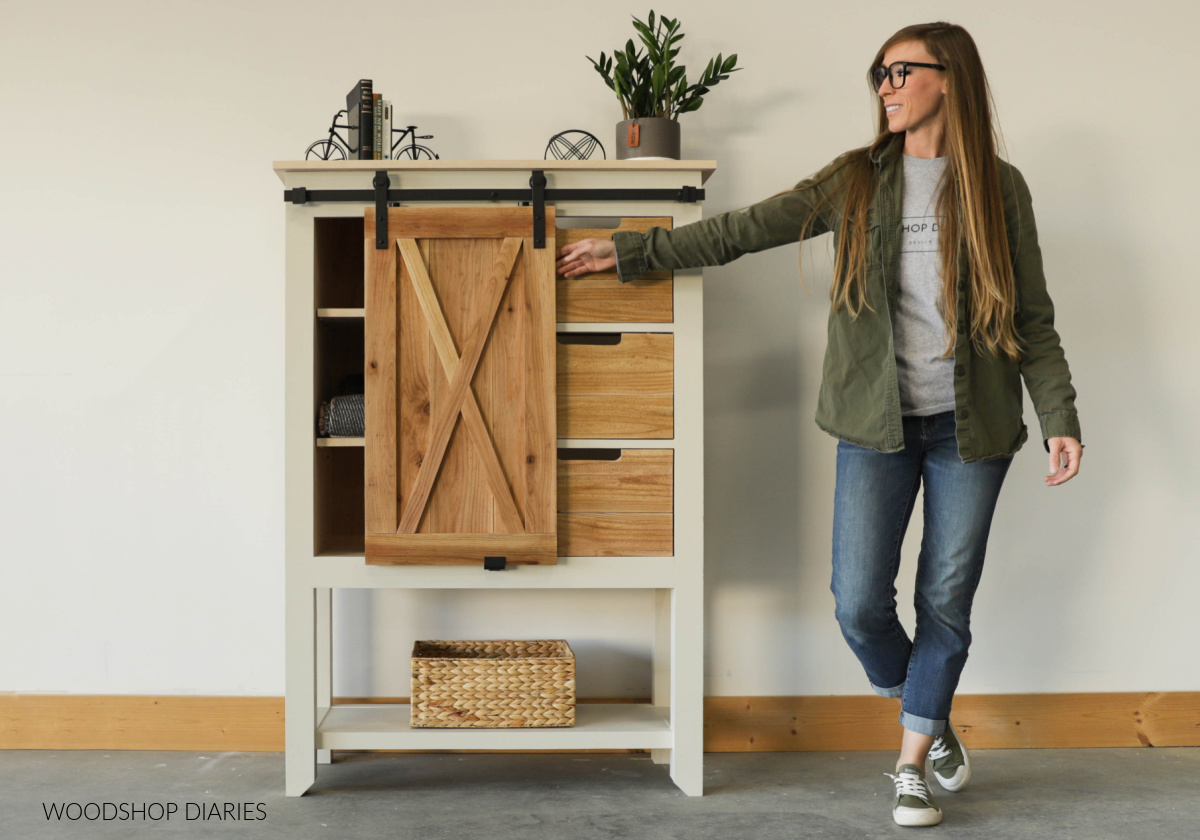
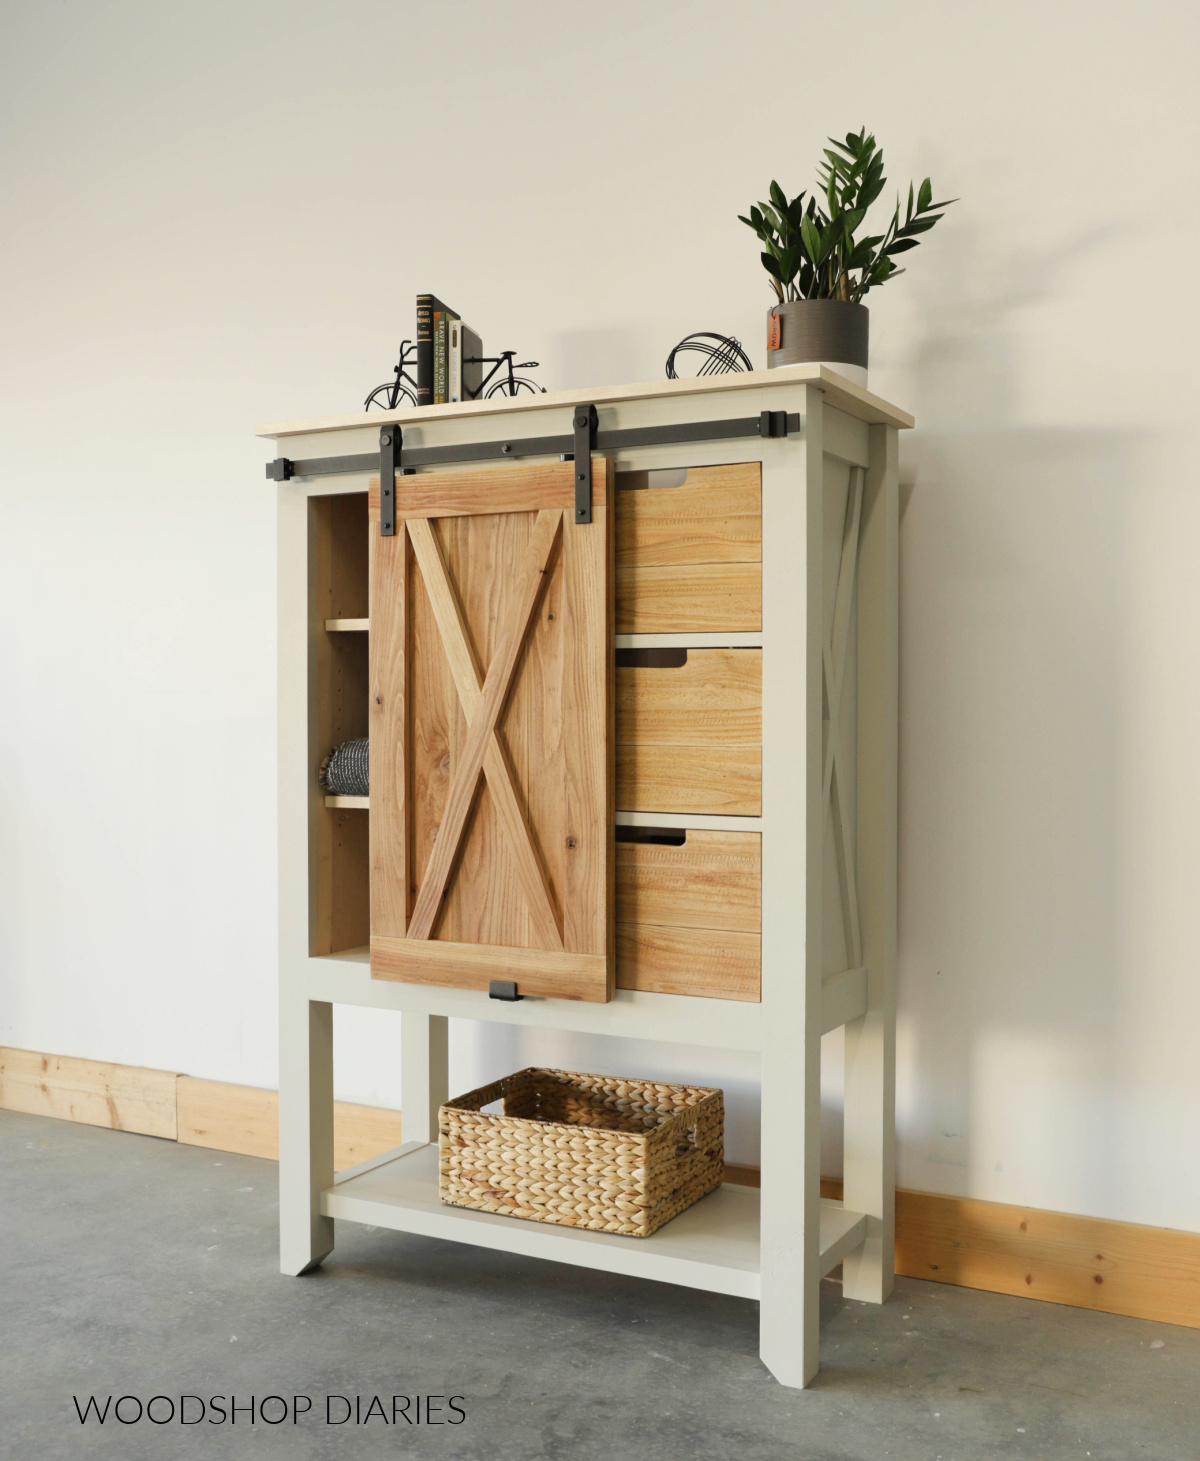
This modern farmhouse style chest of drawers is a great example of combining a basic furniture cabinet design with a sliding barn door.
If you’d like to learn how to build a sliding door dresser with shelves and drawers, I’ve got you covered with the plans and video in this post below.
First, here’s what you’ll need.
Tools & Materials
*This post contains affiliate links. See website policies.
Tools:
- Miter Saw
- Drill/Driver
- Circular Saw
- Cutting Guides–Kreg Rip Cut & Kreg AccuCut used here (optional, but helpful)
- Pocket Hole Jig
- Table Saw
- Shelf Pin Jig
- Brad Nailer
- Jig Saw
- Speed Square
- Clamps
- Sander
Materials:
- (1 + ¼) 4 x 8 sheet ¾″ plywood
- (1) 4×4 sheet ¼″ plywood (½ sheet)
- (4) 2x6x8 boards
- (4) ⅝″ x 5 ½″ x 6′ cedar fence pickets
- (1) 1x6x8 board
- (2) 1×2 boards (optional)
- 1 ¼” pocket hole screws
- 1 ¼” wood screws
- 2 ½ ” pocket hole screws
- 1 ” & 1 ¼″ brad nails
- (3) pair 14″ ball bearing drawer slides
- 36″ sliding cabinet door hardware kit
- Wood Glue
- Shelf Pins
- Edge Banding (optional)
- Wood filler, caulk, wood finish of your choice
What to Know Before You Build a Sliding Door Dresser Chest
I would consider this sliding door cabinet build an intermediate level project. It’s assembled using basic pocket hole joinery and using common materials.
However, you will need a table saw to be able to custom cut some of these pieces and the corner posts. See notes below.
Check out the YouTube video below for tips on installing the sliding door hardware and the X trim on the sides and door.
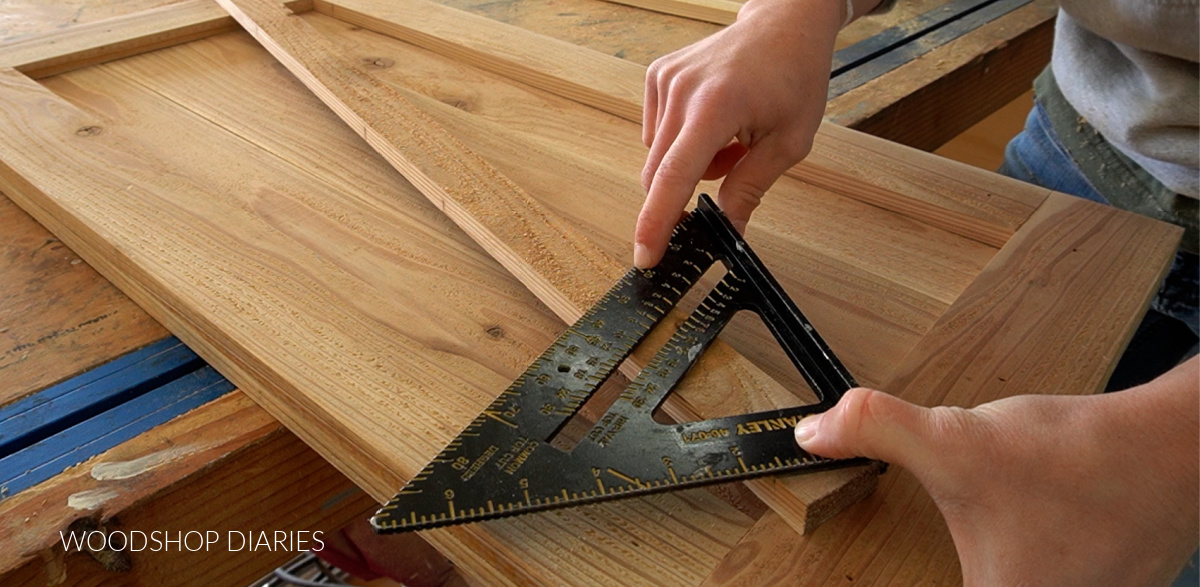
How to Cut the X Trim
This short video has some tips for using a speed square to find the angles on the X trim.
The full build video of this sliding door cabinet project on YouTube also has some additional tips as well.
I HIGHLY recommend checking it out and using this method to double check your own angles for a more precise fit.
Why I Used Cedar Fence Pickets for Door and Drawer Fronts
I wanted this project to have a “rustic” feel, so I wanted to use “rougher” material for the door and drawer fronts.
I used cedar fence pickets for these because they are inexpensive and they look really nice after they’re sanded. You can see what they look like before sanding in the middle below.
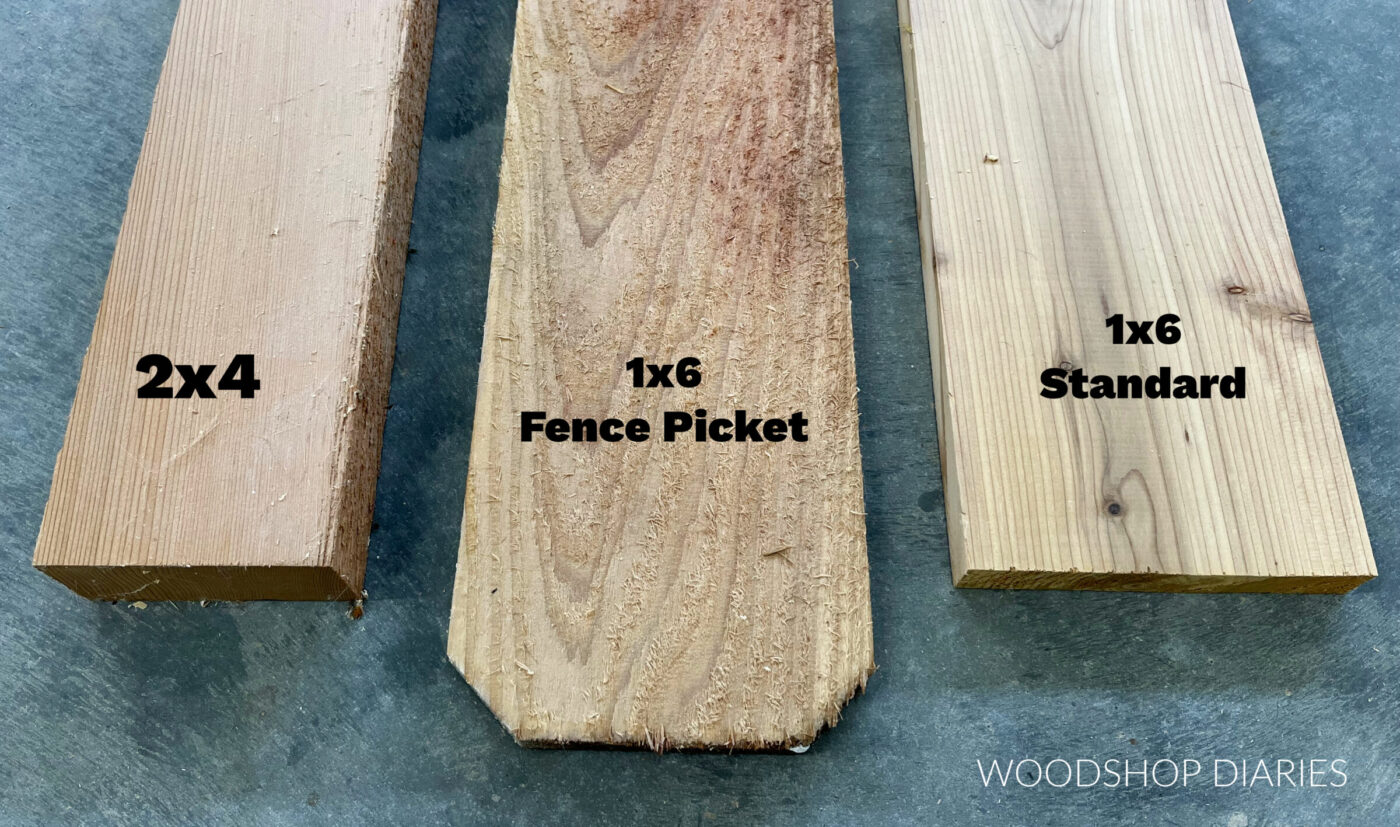
I made sure to sand these down with 100 grit sandpaper to knock off the really rough spots but not smooth them out completely.
The extra texture really adds some nice character–plus since it’s cedar, so it smells amazing!
Sliding Door Hardware Installation Tips
There are several different brands and styles of sliding cabinet door hardware that you can purchase to use with this. Each manufacturer will have slightly different instructions and dimensions.
Always follow their specific instructions for installation and double check the specifications of the kit you are using. This is the kit I used.
The YouTube video below gives some additional tips for installation.
Custom Sized Board Cuts
This project used some “non standard” size lumber. This means that many of the pieces will need to be custom cut using a table saw.
I provided several diagrams in the printable plans below to help give you a visual of the cuts.
Overall Project Dimensions
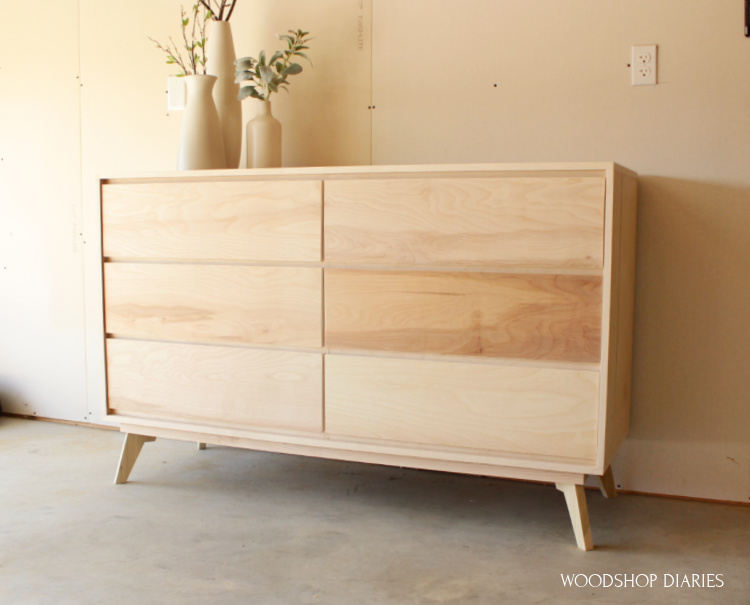
The overall dimensions of this project are approximately 17″ deep x 38″ wide x 54 ¾″ tall. This does not include the sliding door.
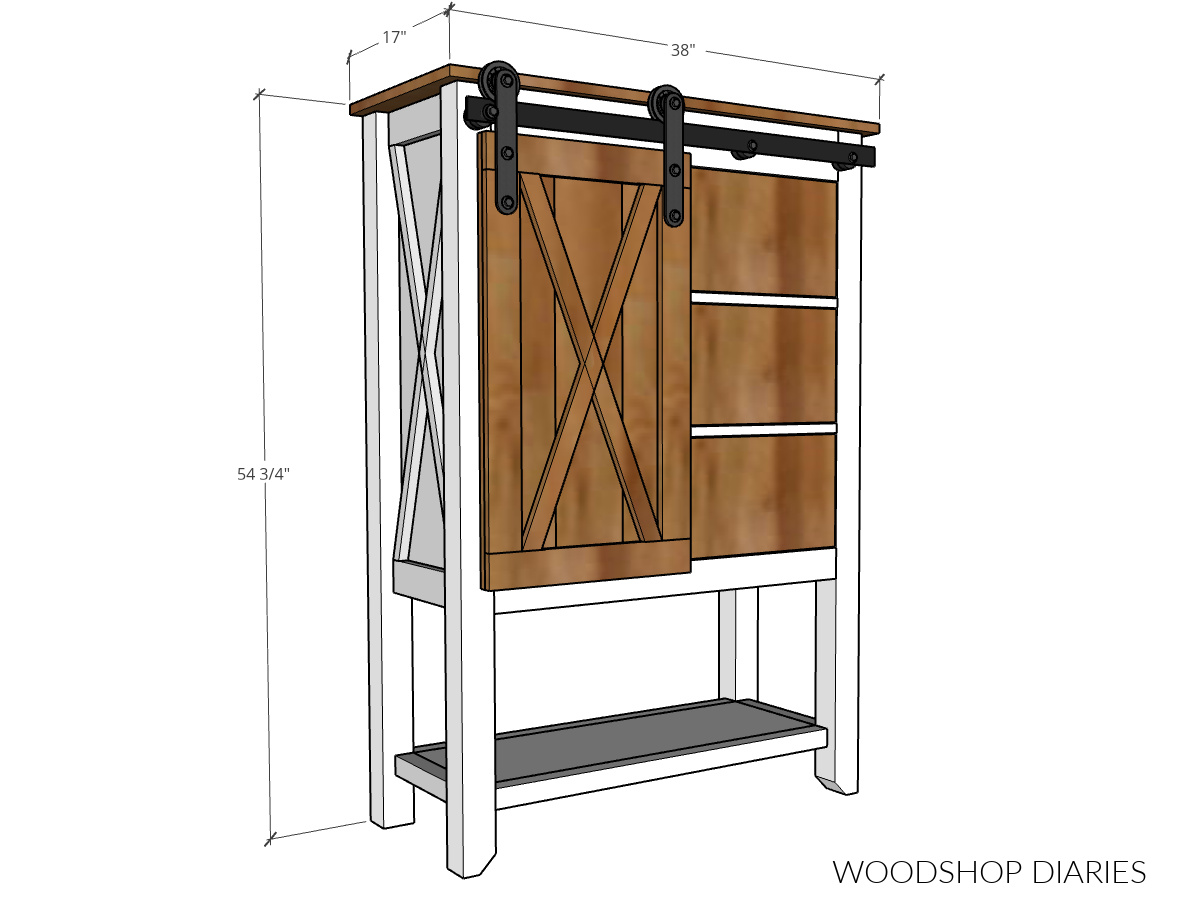
This is a great size cabinet to use as a chest of drawers in a bedroom, or as a storage cabinet in the kitchen or dining room.
It’s versatile with adjustable shelves on the left, drawers on the right, and open shelving below. It can be a great addition to any room in the house!
Additional Resources For This Project
You may find these articles helpful during the building process.
How to Build a Sliding Door Dresser
Now, for the how to! In the steps below, I explain the assembly process and share several tips I learned while building this sliding door dresser.
But, if you prefer to watch, I’ve also got a YouTube video as well.
Are you subscribed to my YouTube channel? Don’t miss out on the latest videos! Subscribe to the channel here.
Prefer to print? All the dimensions, diagrams, and project details can be found in the printable plans available here:
Just for clarity here–I always build the project before I make the plans. That way, I can see what I would do differently and adjust the plans to make it easier for you guys.
So you may notice that the order of the steps in the printable plans don’t 100% match my photos below and the video above.
I learned while building that some of the pieces would have been easier to attach in a different order–so I made the printable plans to show that.
Step 1: Assemble Side Panels
The corner posts of this project were 2 ½″ square. There are many ways to make a 2 ½″ square post, but I used 2x6s ripped in half and glued together.
A 2×6 is actually 5 ½″ wide, so I cut my 2x6s a little longer than I wanted my corner posts, then set my table saw rip fence to about 2 ¾″ from the blade and ripped them down the middle.

Then, I glued them up in pairs to make 4 “posts.”
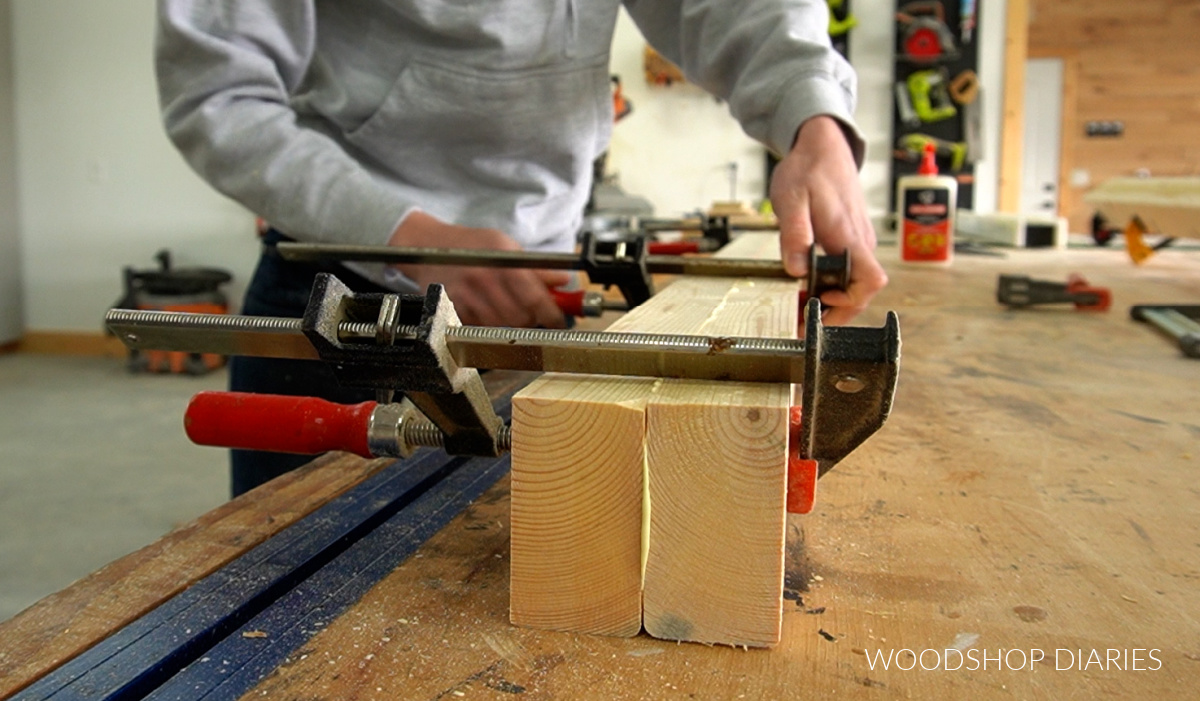
Once the glue was dry, I took them back to the table saw to trim them down to 2 ½″ square posts to use for the legs.
I cut down two pieces of 2×2 and two ¾″ plywood panels to assemble the sides of the cabinet.
RELATED: How to cut down plywood sheets
I used pocket holes and screws to assemble two identical sides like shown here.
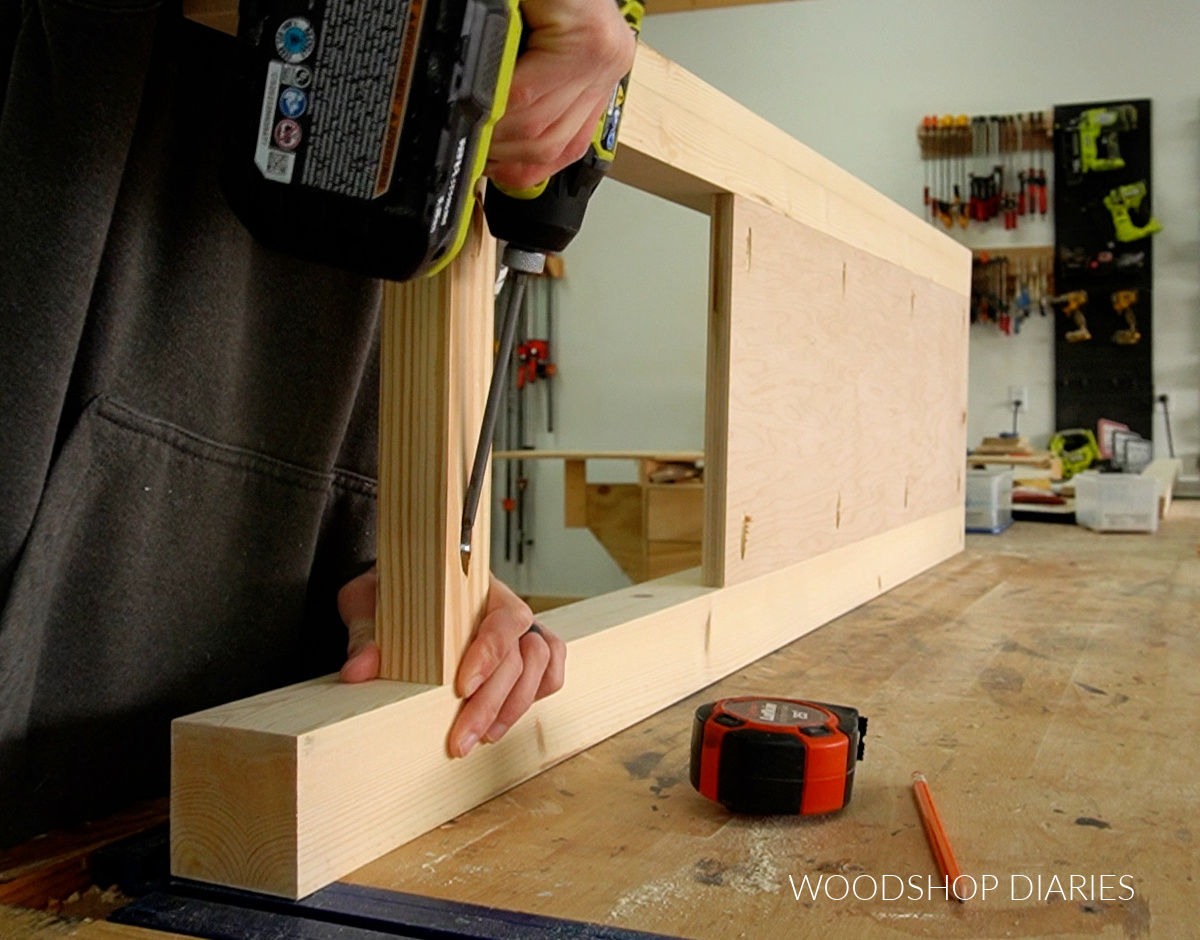
RELATED: How to use pocket holes for building
Step 2: Assemble Dresser Frame and Shelf
Once the side panels were assembled, I continued building the remainder of the dresser frame.
I installed two more 2x2s at the bottom even with the ones on the side, a 1×3 in the middle at the front where the bottom of the cabinet will be and a 4″ wide piece at the top where the sliding hardware rail will mount.
Please ignore the shop cat on the workbench…he likes to be in the middle of everything.
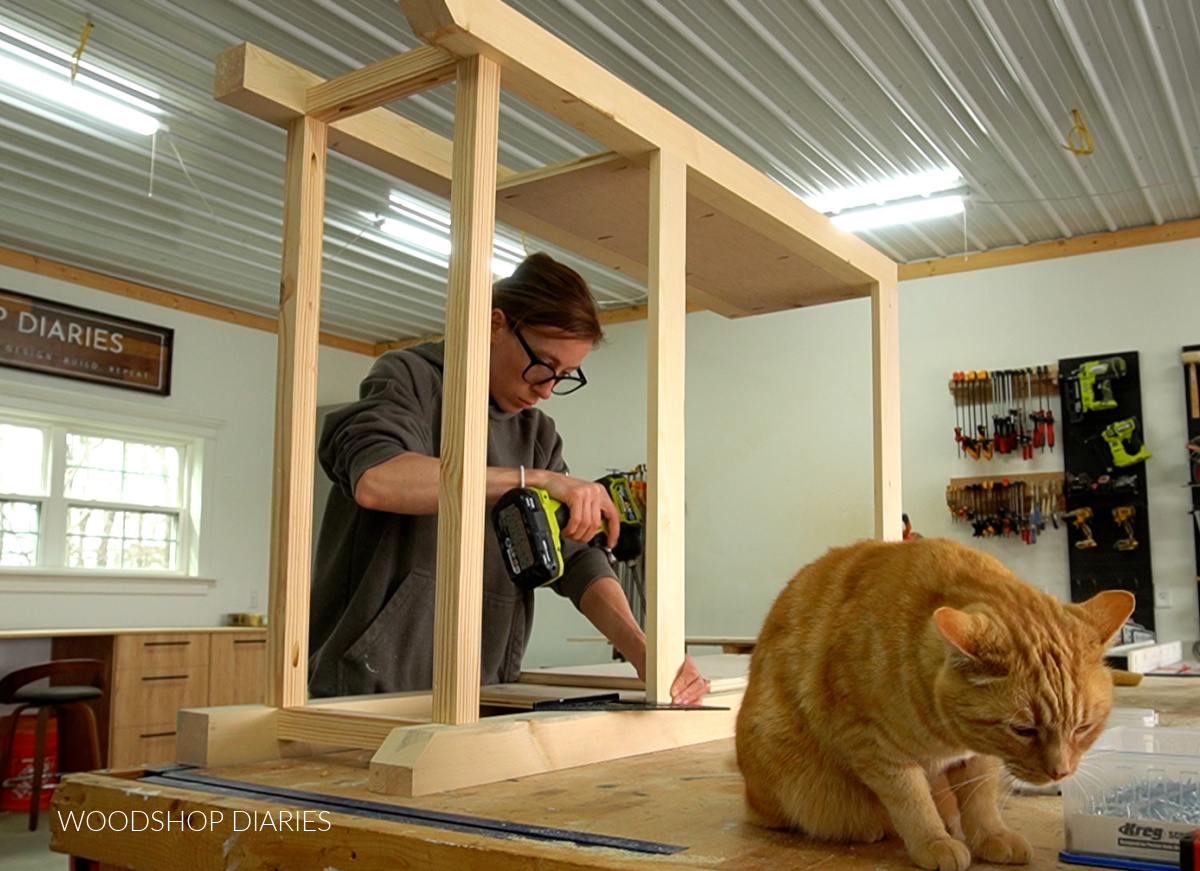
To keep things simple, I installed all the pieces using pocket holes and screws.
Once the frame was together, I added the plywood shelf that will be the bottom of the cabinet. This should be installed flush across the top of the 1×3 piece on the front.
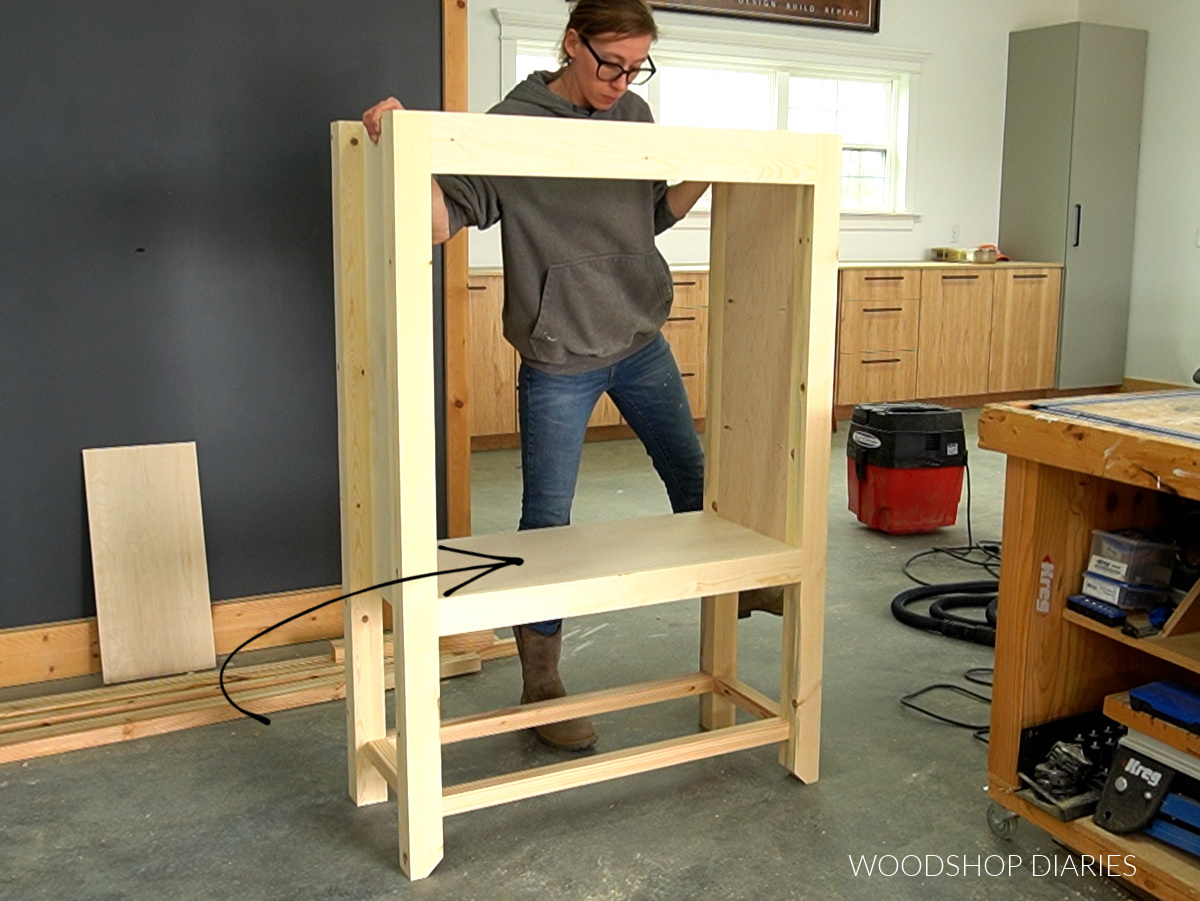
Then, I installed a ¾″ plywood panel between the 2x2s at the bottom to create the bottom shelf.

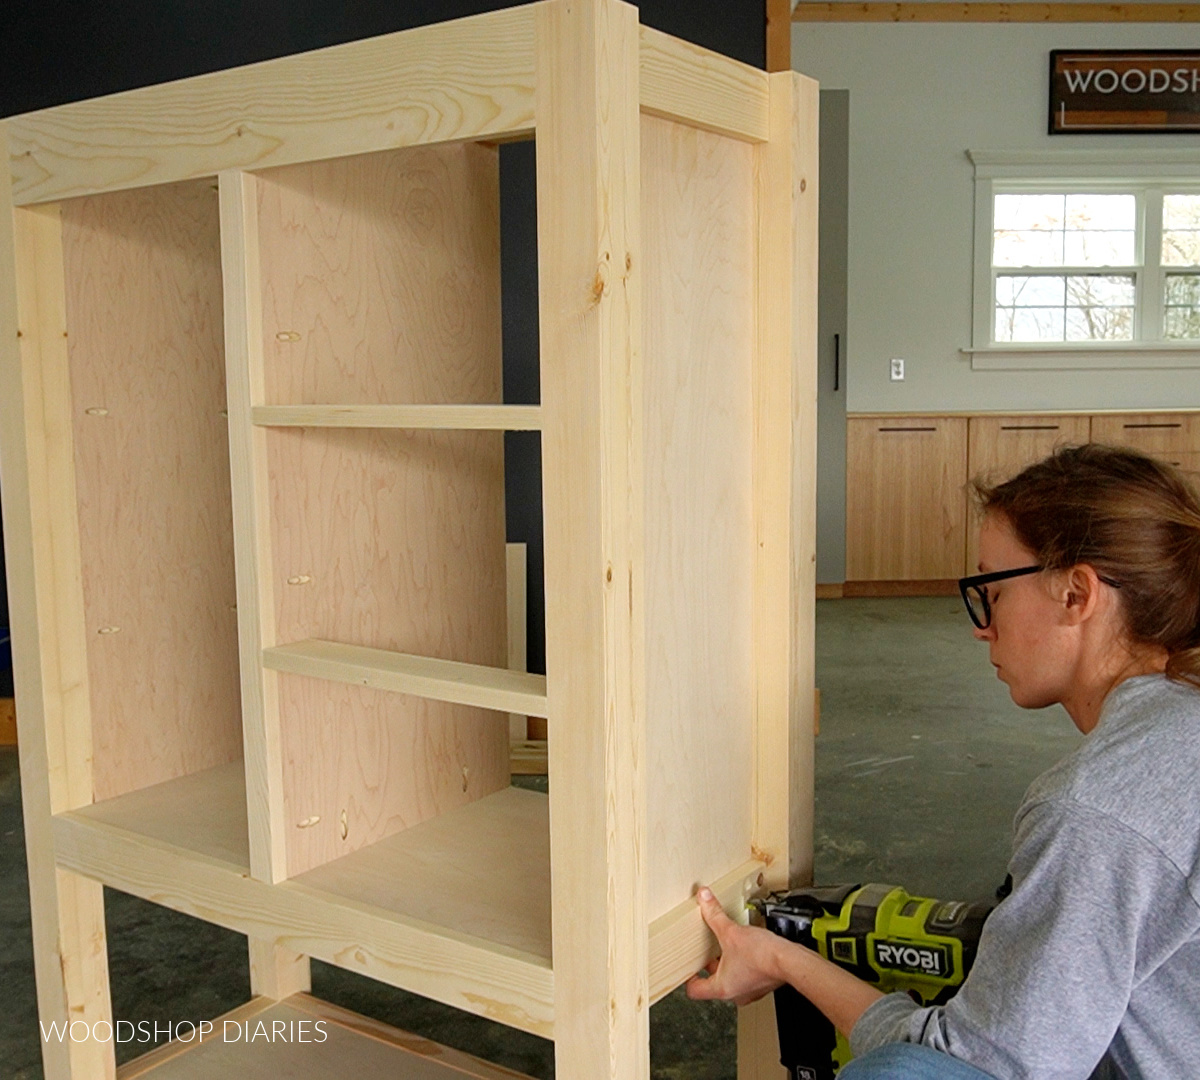
Step 3: Install Dividers
To divide the cabinet into a shelf section and a drawer section, I added a 1×2 in the center at the front of the chest frame.
I used pocket holes and screws from the back side (so they’re hidden). Then, I installed a ¾″ plywood panel behind it.
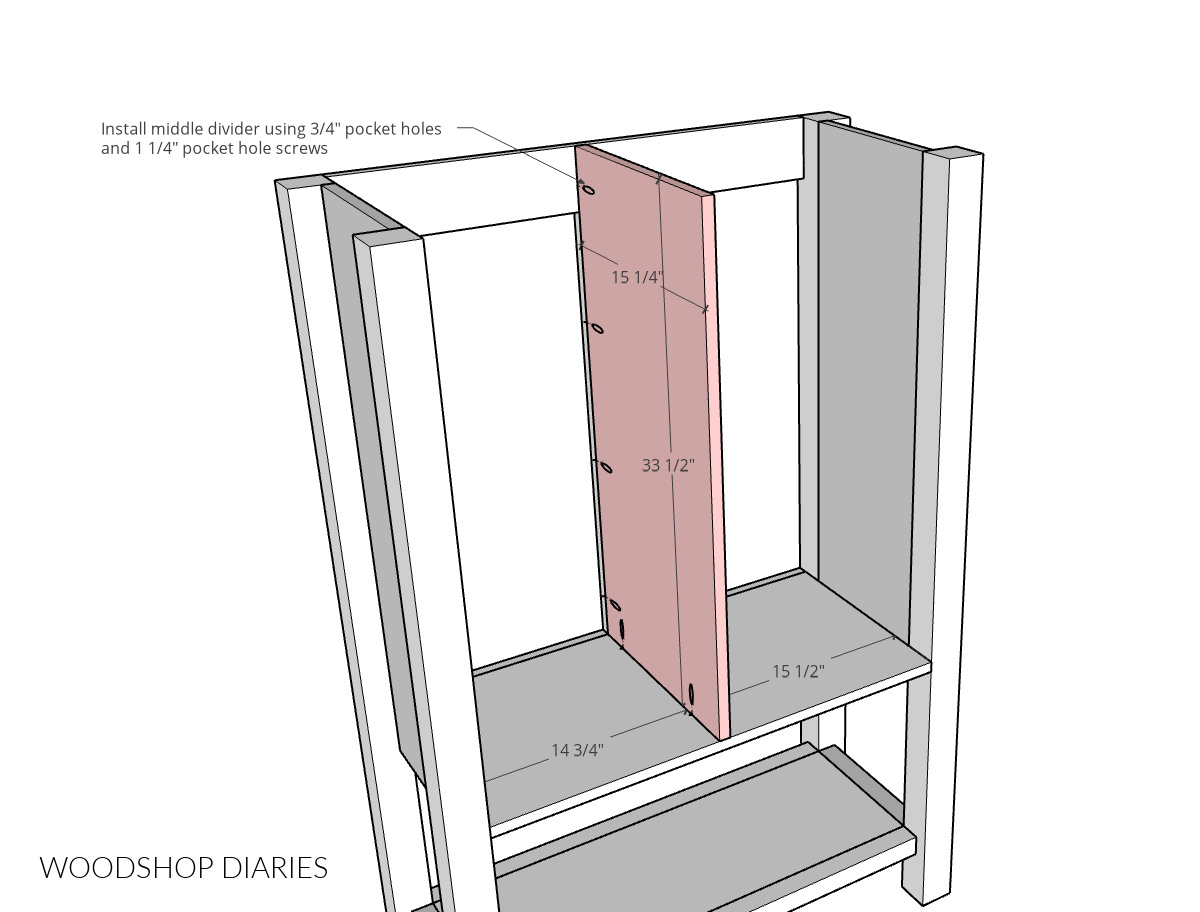
The 1×2 is centered in the opening, but I installed the plywood panel off center so that it’s flush to the drawer side of the 1×2.
This just saves me from having to use spacer blocks to install the drawer slides later.
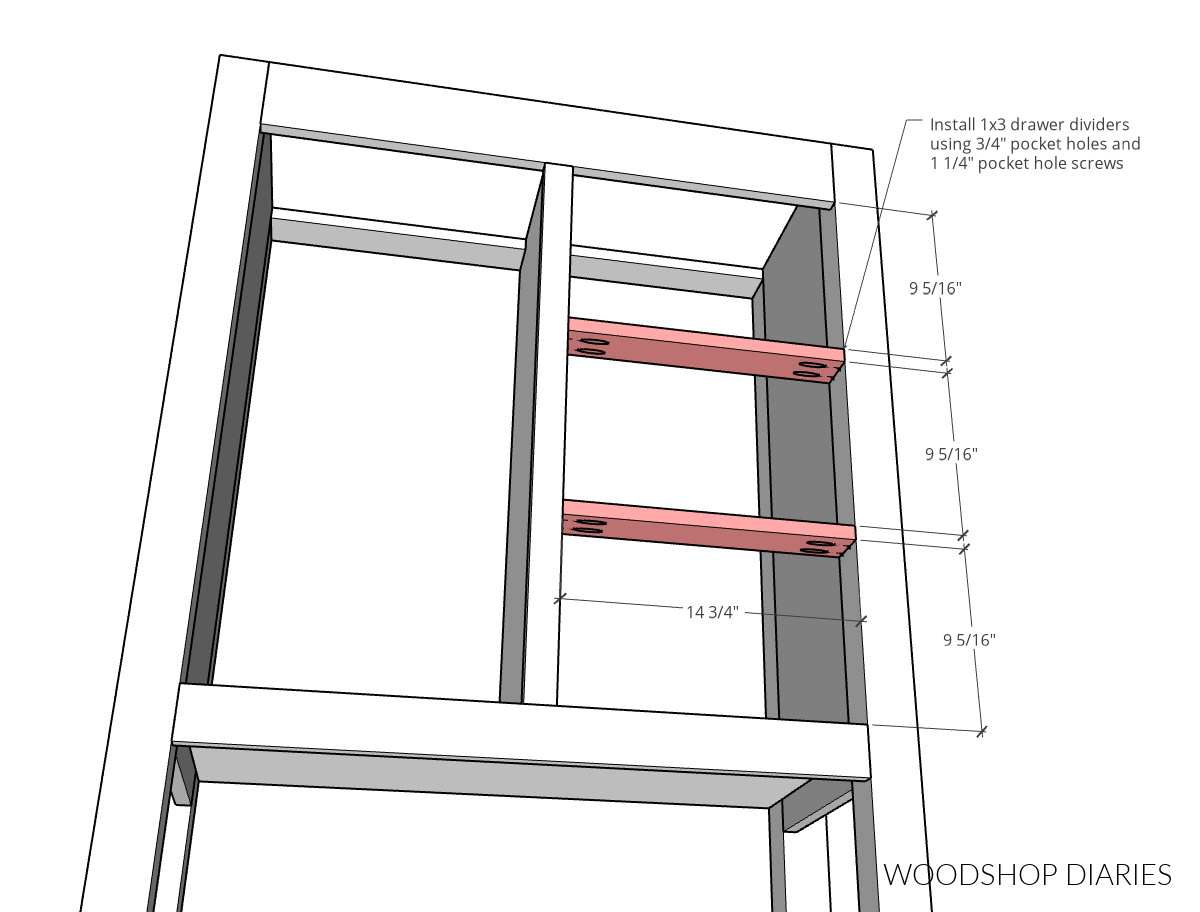
Then, I added a couple 1x3s into the drawer section to evenly space out the drawer boxes using pocket holes and screws.
Step 4: Add X Trim on Sides
The trim on the sides was one of my favorite parts of this project! I cut to fit 1x3s to glue and brad nail at the top and bottom.
When I cut my corner posts, I had some thin ⅜″ x 2 ½″ wide pieces left. You can see this in the video above.
I ripped these to 1 ½″ wide strips to make the Xs from, but you could also use 1x2s if you wanted.
I marked and cut these pieces to fit, then glued and taped them on each side of the cabinet. In the notes above, I share how to find the angles for Xs of any size. All you need is a speed square!
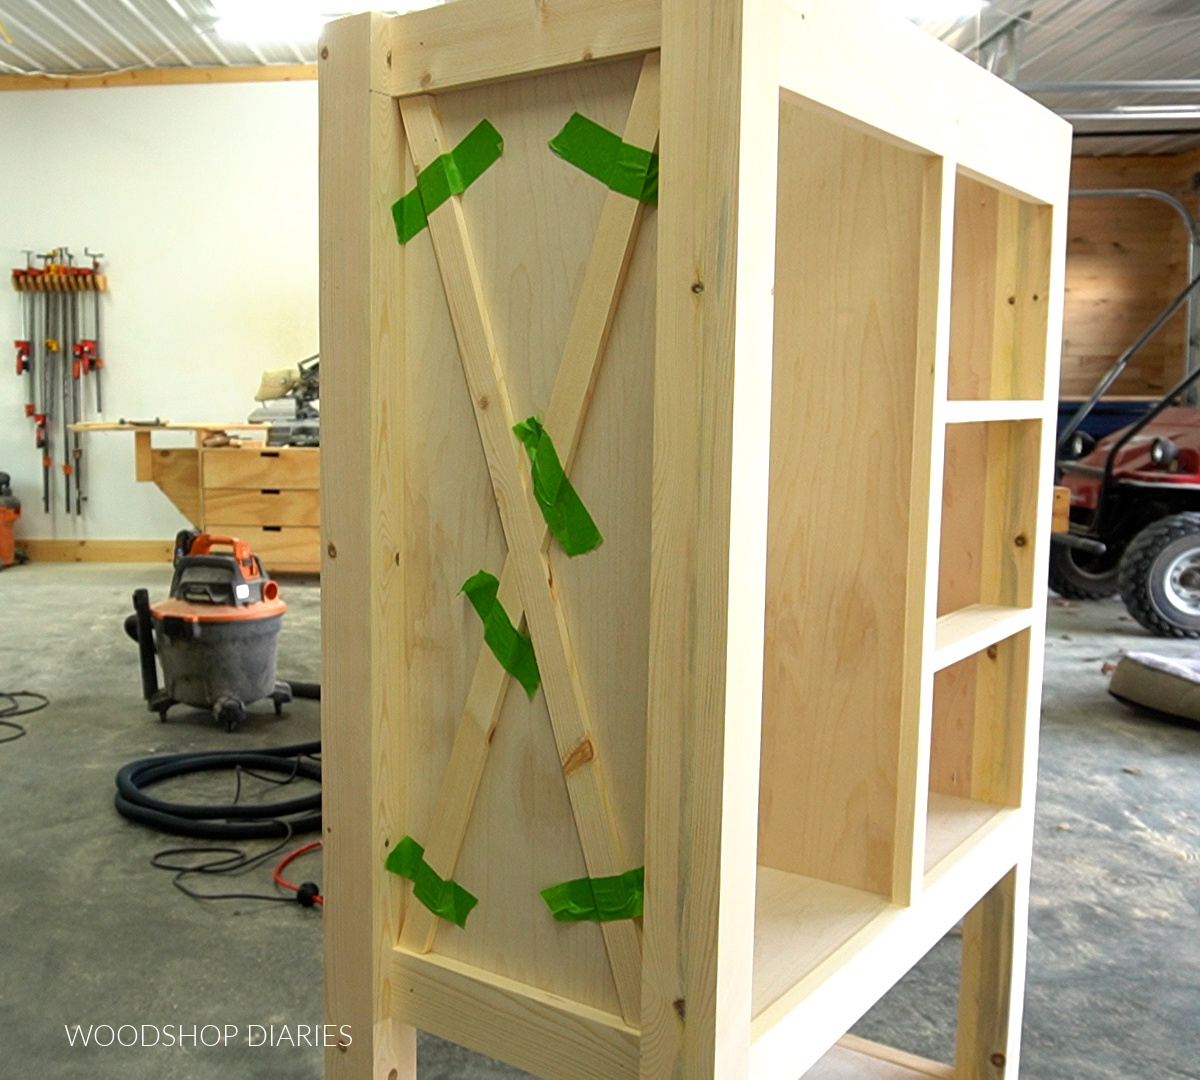
You could also use brad nails to secure these pieces if you had some the right length (I didn’t at the time).
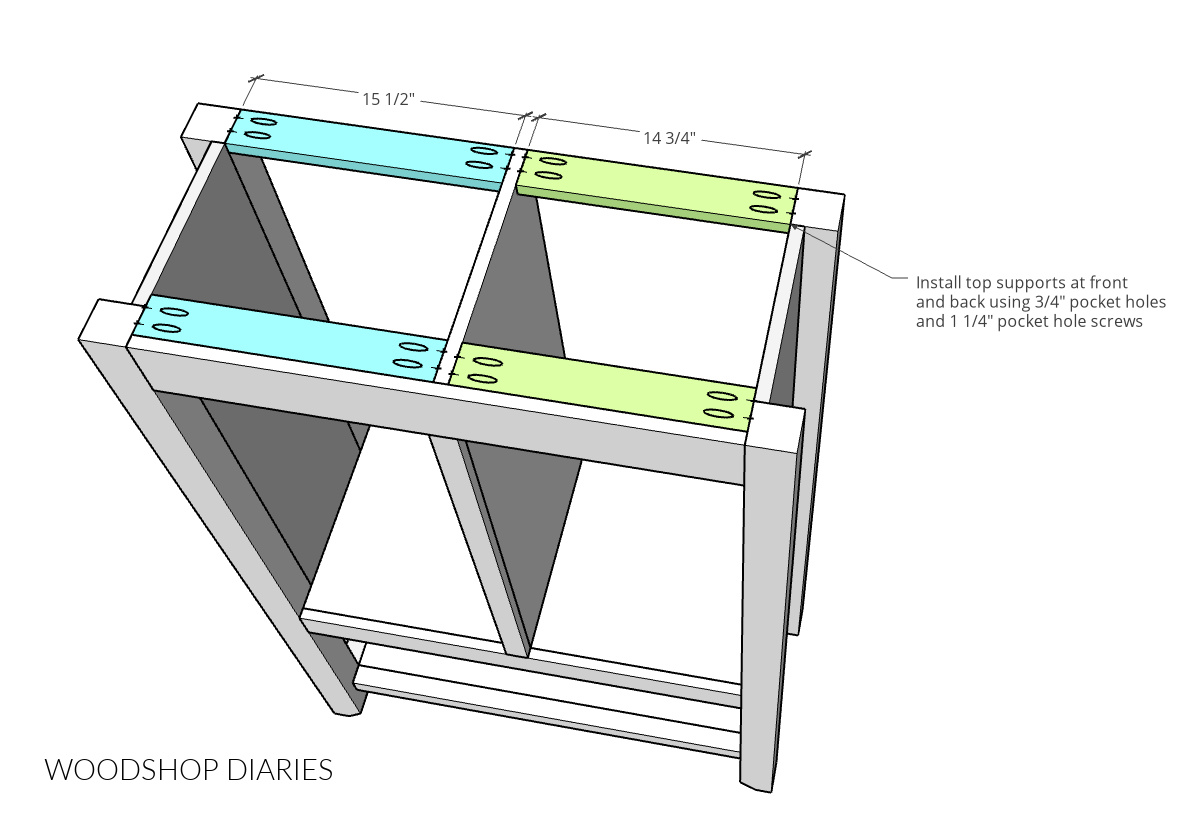
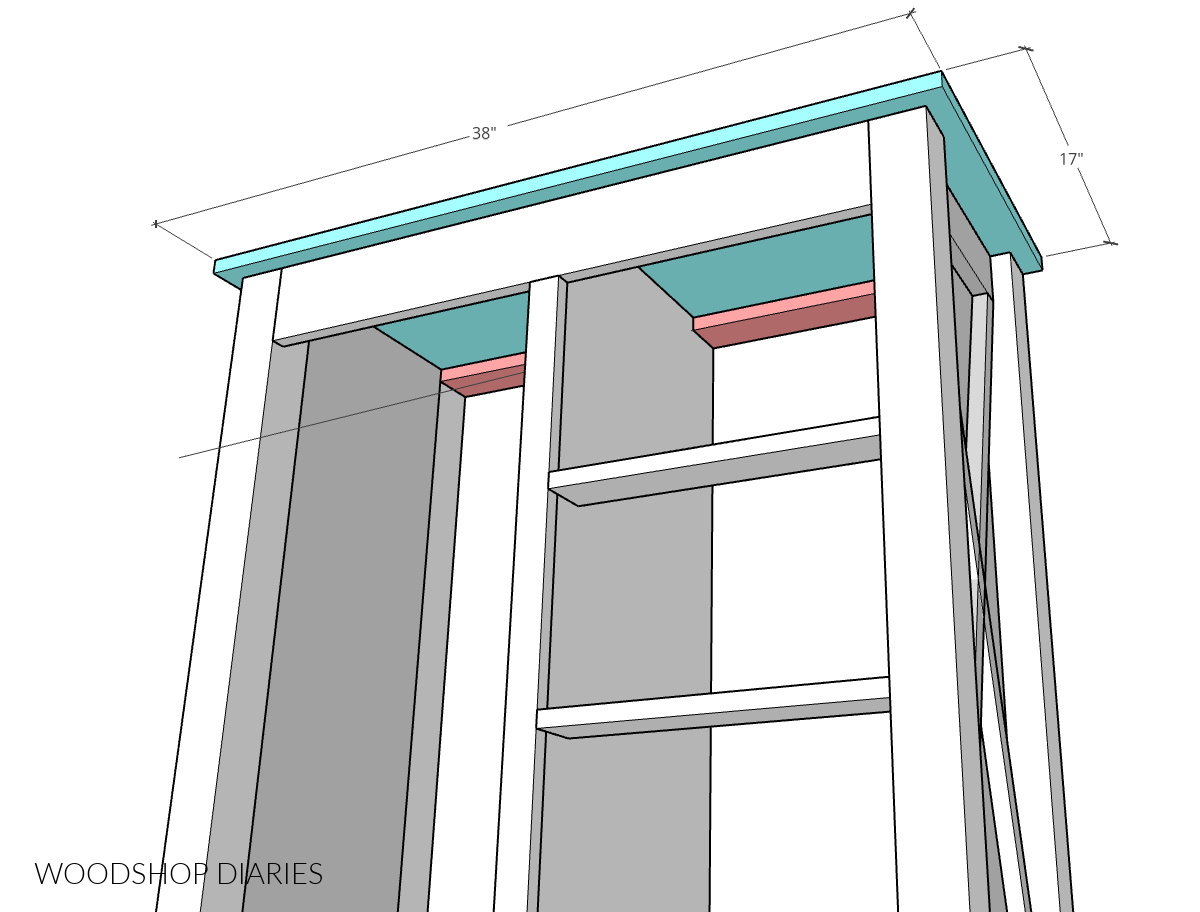
Step 5: Install Top Panel
I actually didn’t install the top panel until much later in the project, so you can add it now, or at a later time. Just make sure you install it before adding the sliding door hardware.
To add the top panel, you will need to add some supports to attach to. So I cut some scrap plywood strips to secure between the sides and the divider like shown below.
At this point, I went ahead and painted the body of the chest. Since the top, drawers and doors would be left a natural wood color, it was easier to go ahead and paint the cabinet before moving on.
RELATED: How I paint my furniture
Then, I could cut the top from ¾″ plywood and use screws through these support pieces to secure it in place.
Plywood edges aren’t usually very pretty. You can cover them easily using edge banding. I recommend applying edge banding to the front and sides of the top to make it look a little cleaner.
RELATED: How to apply iron on edge banding
Step 6: Build and Install Drawers
I added 3 pair of 14″ ball bearing drawer slides into the cabinet so that they were ¾″ inset from the front edge.
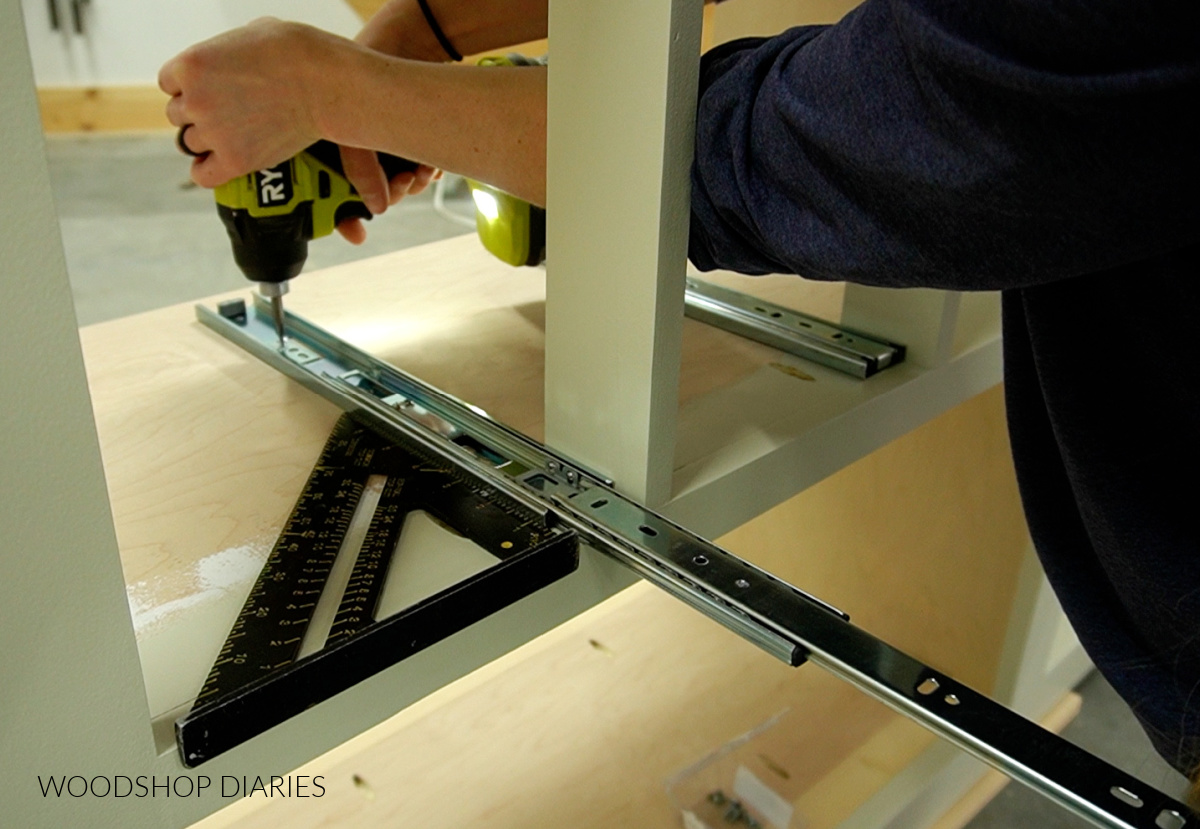
This post shows you how to install drawer slides.
Then, I assembled three identical drawer boxes to install onto them. The printable plans detail all the dimensions used here and this drawer building guide shows you exactly how I build drawers.
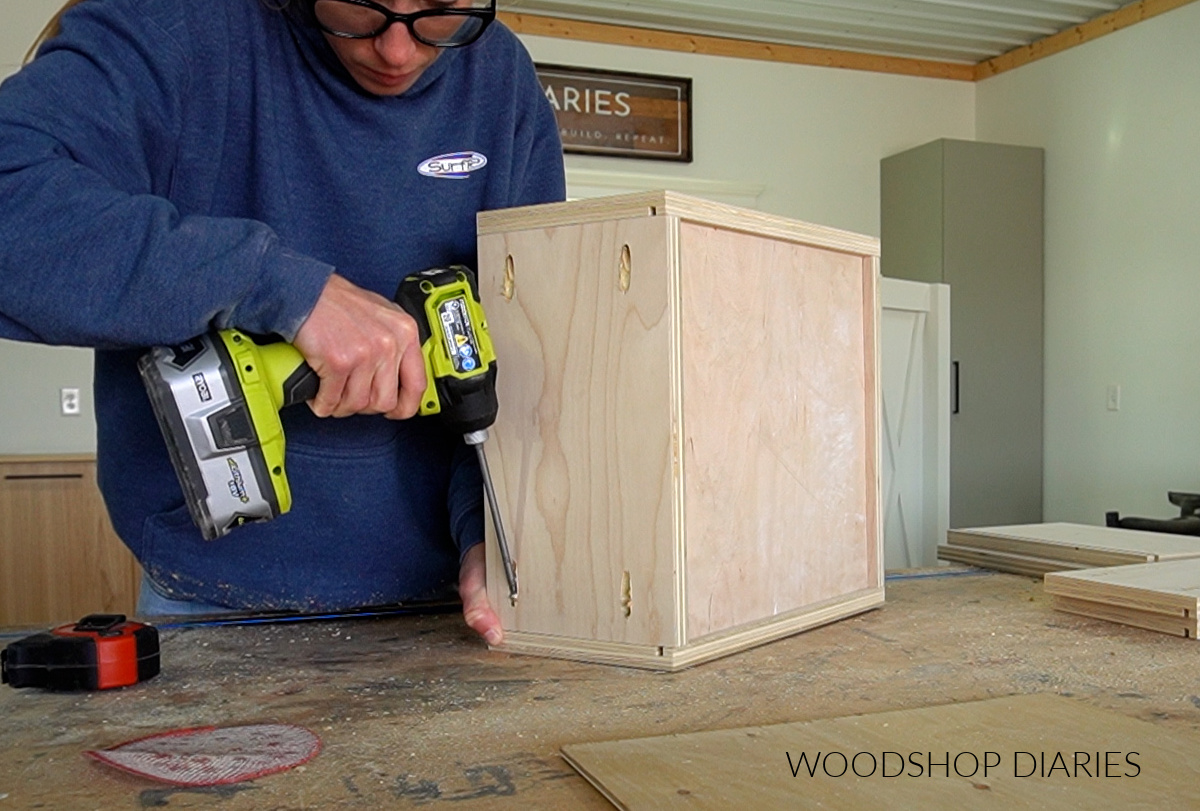
Of course, there are many ways to build drawer boxes, but that’s my personal favorite way.
Once the boxes were assembled, I installed them into the cabinet ¾″ inset from the front edge.
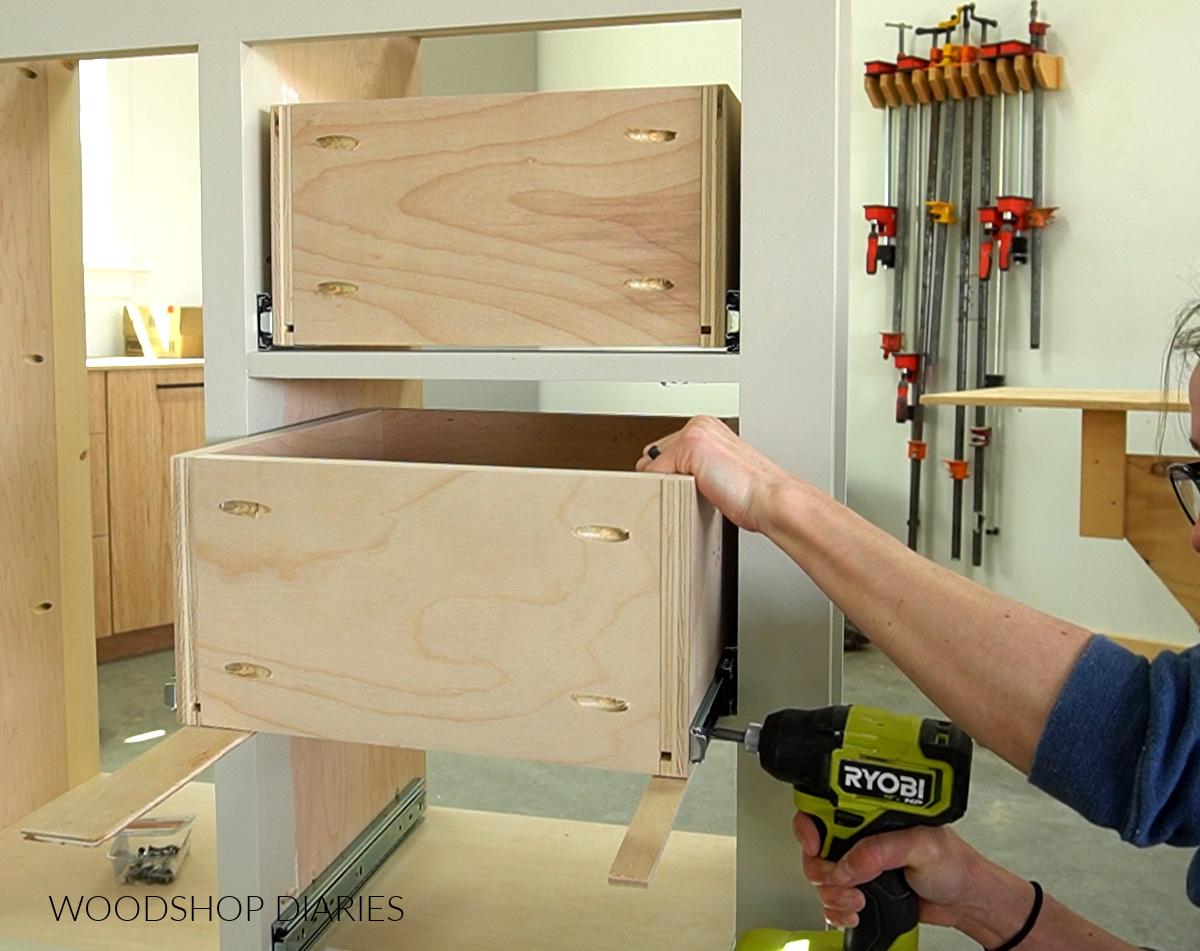
RELATED: How to install drawer boxes
Step 7: Add Drawer Fronts
I mentioned earlier that I wanted to use a “rougher” material for the drawer fronts, so I went with cedar fence pickets.
These come in what they refer to as a 1×6, but they are actually ⅝″ x 5 ½″ and they have some rather large tolerances, so they tend to have some variation.
Since these drawer fronts needed to be about 9″ x 14 ½″ overall, that meant that I needed to piece the fronts together because one piece wasn’t going to cover the whole thing.
So I cut to fit 6 pieces like shown–two for each drawer–to make the drawer fronts.
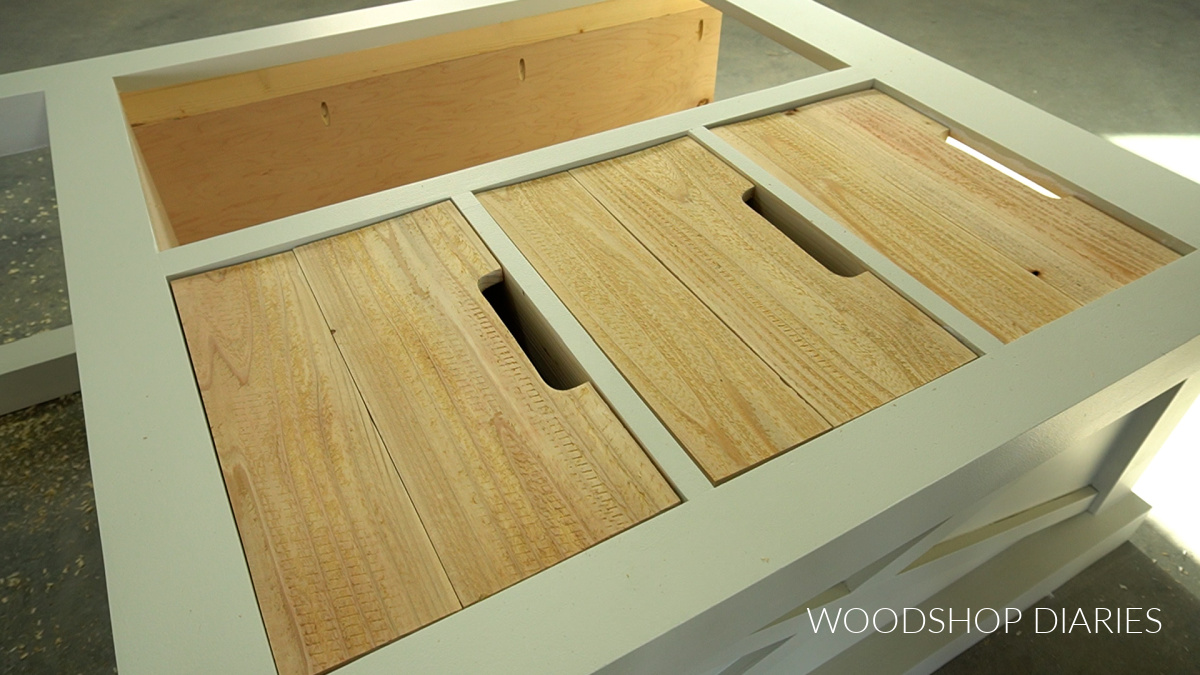
Make sure to leave ⅛″ gap around all sides of the opening.
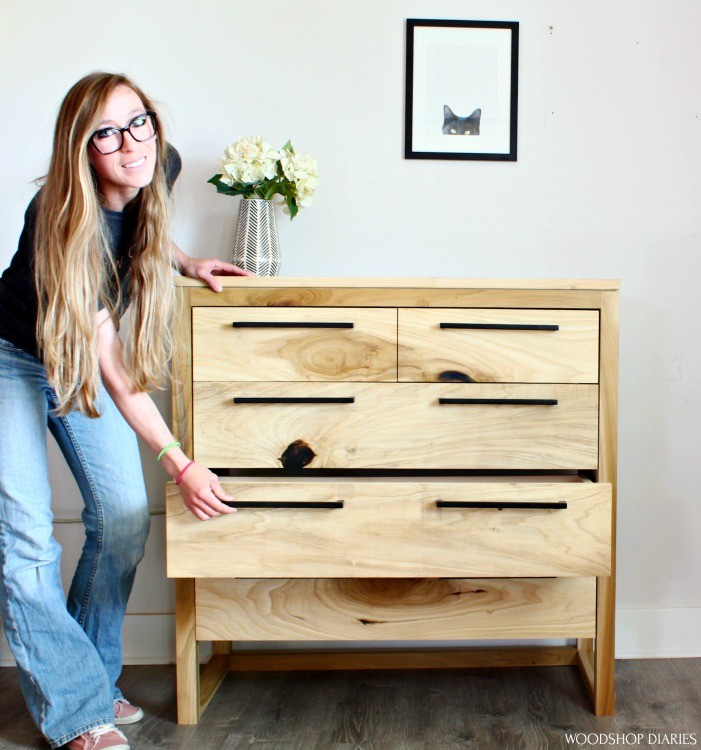
I used a jig saw to cut out “finger holes” in the top pieces of each drawer front to give me a way to open the drawers later.
Adding a knob or a pull would likely interfere with the sliding door, so I needed an alternative way to open them.
Once the pieces were cut and prepped, I used wood glue and brad nails to secure them to the front of the drawer boxes.
Step 8: Add Back Panel
I have a personal pet peeve about adding a back panel over projects with drawers–I know most people think I’m crazy for that.
So I didn’t want to add a back panel over the entire project–I only wanted to add it over the shelf section.
Since I didn’t want to add a panel over the entire back side, I used a router to cut a rabbet into the back of this section to install a ¼″ plywood back panel. See YouTube video for more information.
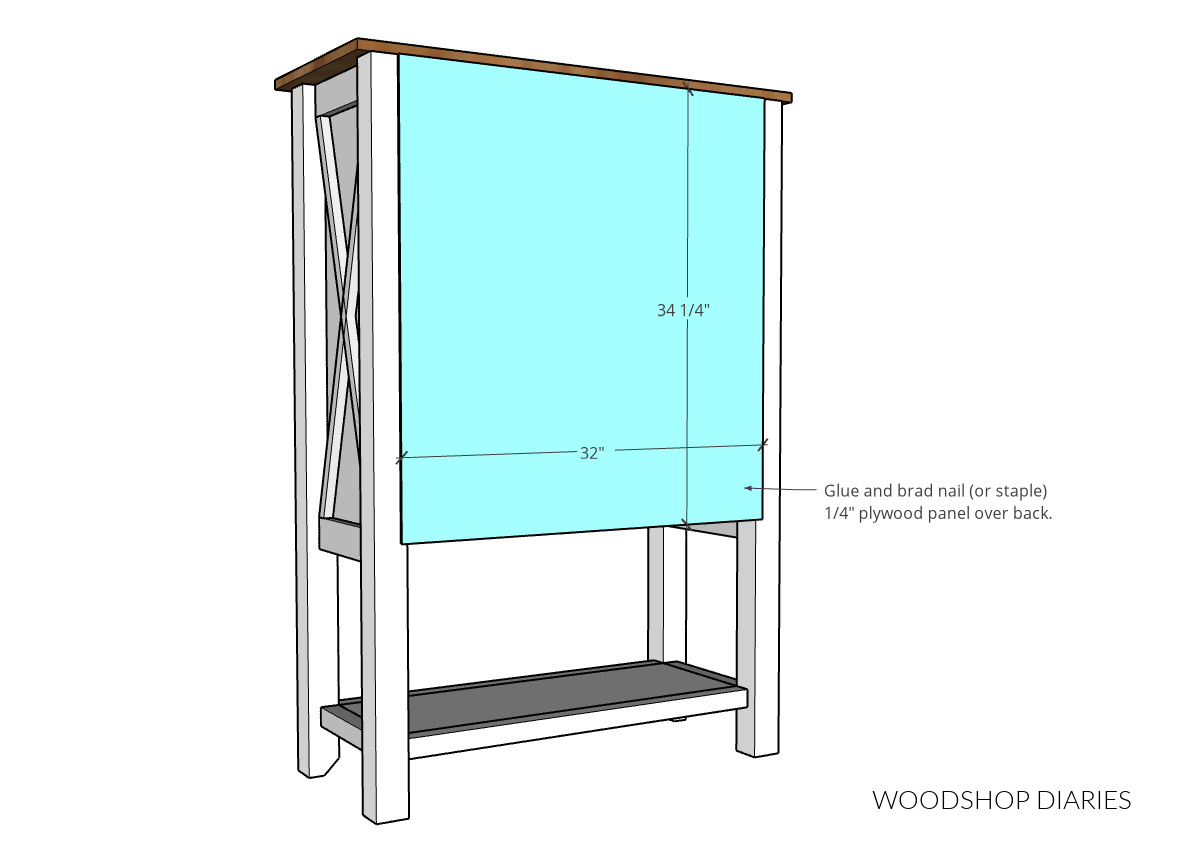
However, if you don’t want to deal with a router and you do want to cover the whole back, you can simply cut a ¼″ plywood panel to glue and nail (or staple) across the back like shown below.
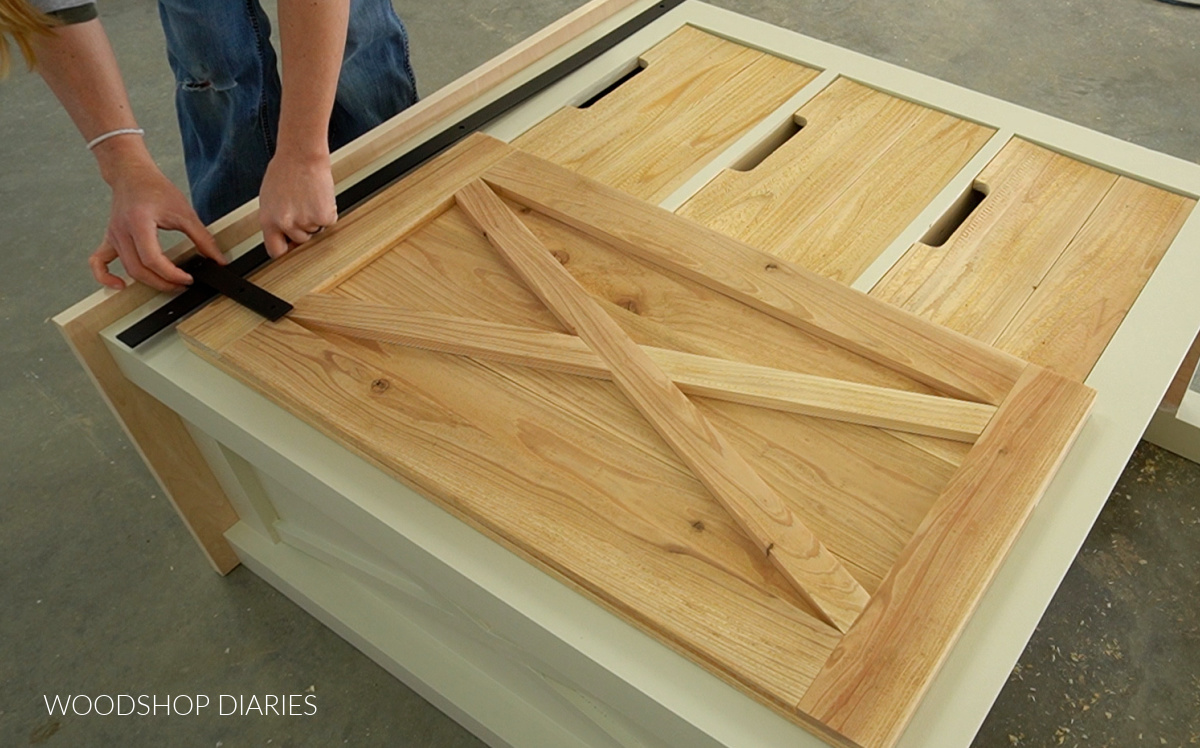
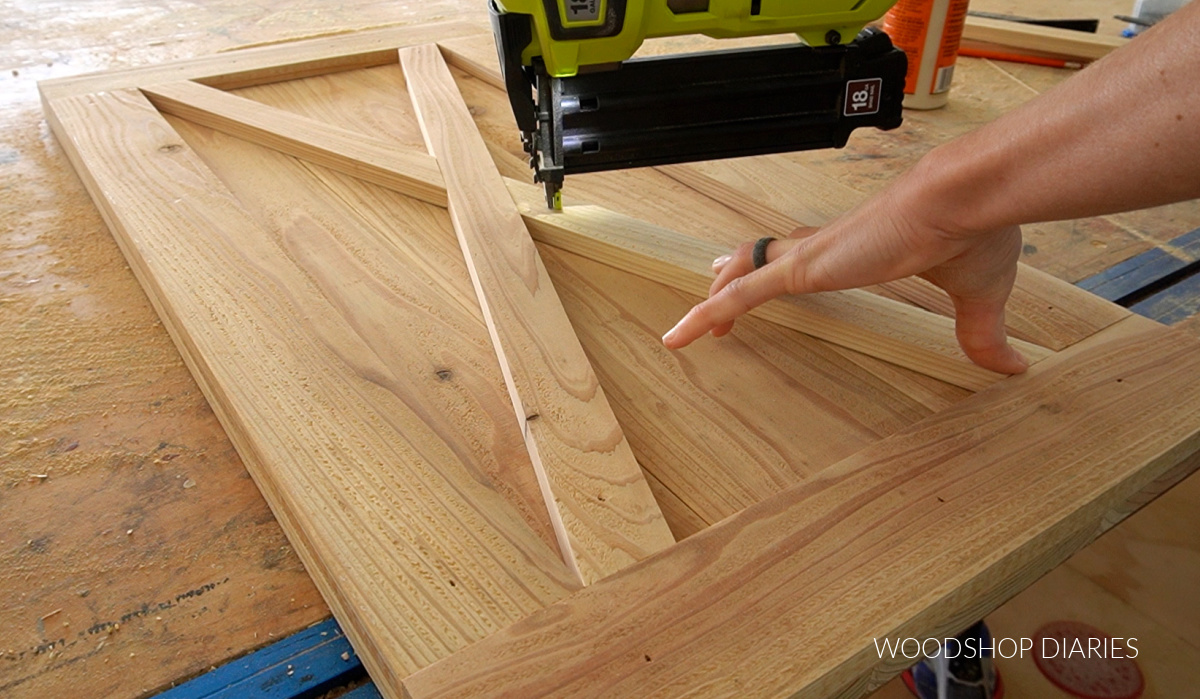
Step 9: Build and Install Sliding Door on Dresser
Just like the drawer fronts, I built the door with cedar fence pickets. I used three full width boards for the back.
Then, I ripped pickets in half to add a frame piece at the top and bottom, and onto the sides.
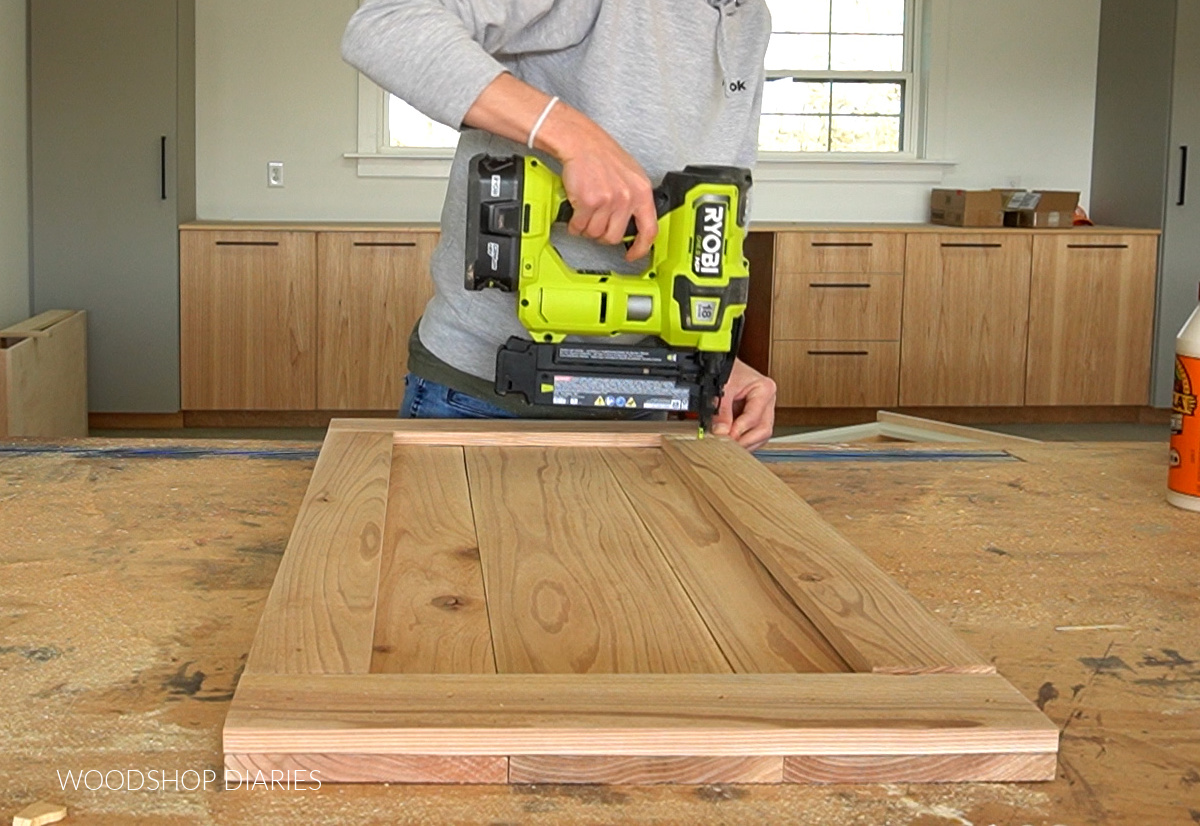
I ripped 1 ½″ wide strips to create the X on the front using the same “speed square trick” as on the sides.
I just glued and brad nailed these pieces together, then mixed some wood glue and sawdust to fill in the nail holes.
At this point, I highly recommend finishing the cabinet and the door separately (if you haven’t already) before installing. Paint, stain, poly as desired.
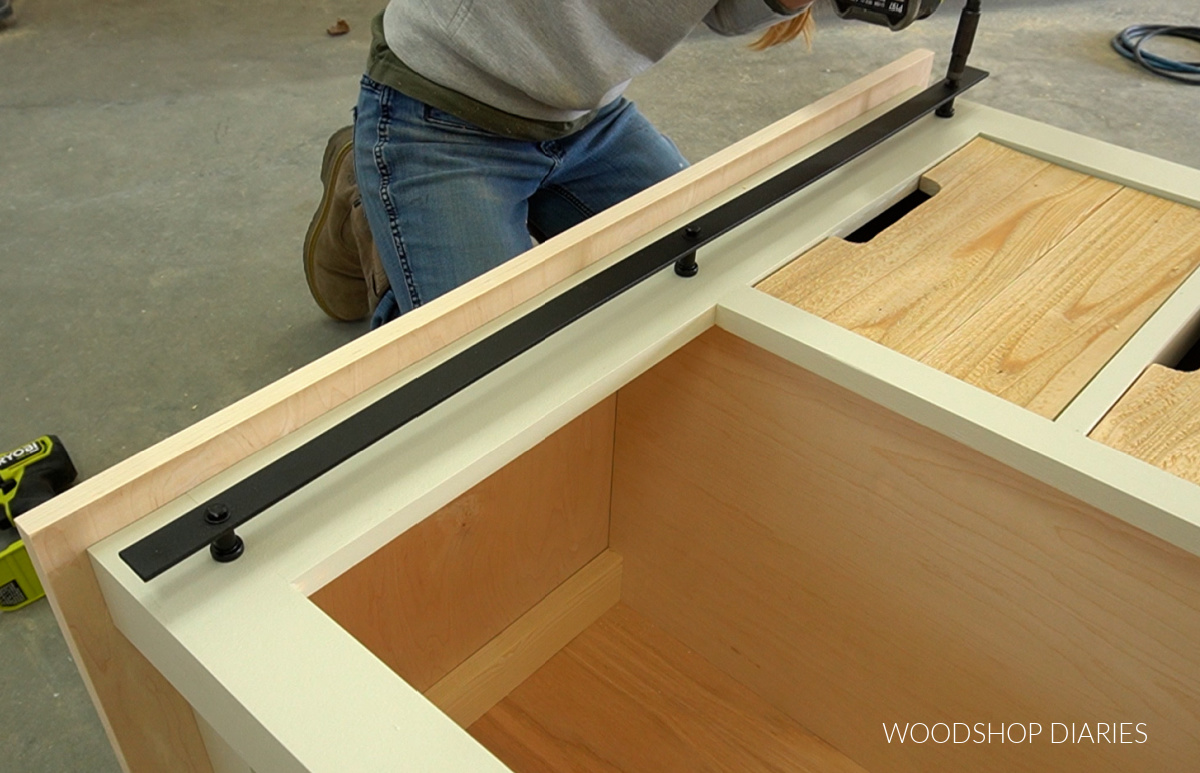
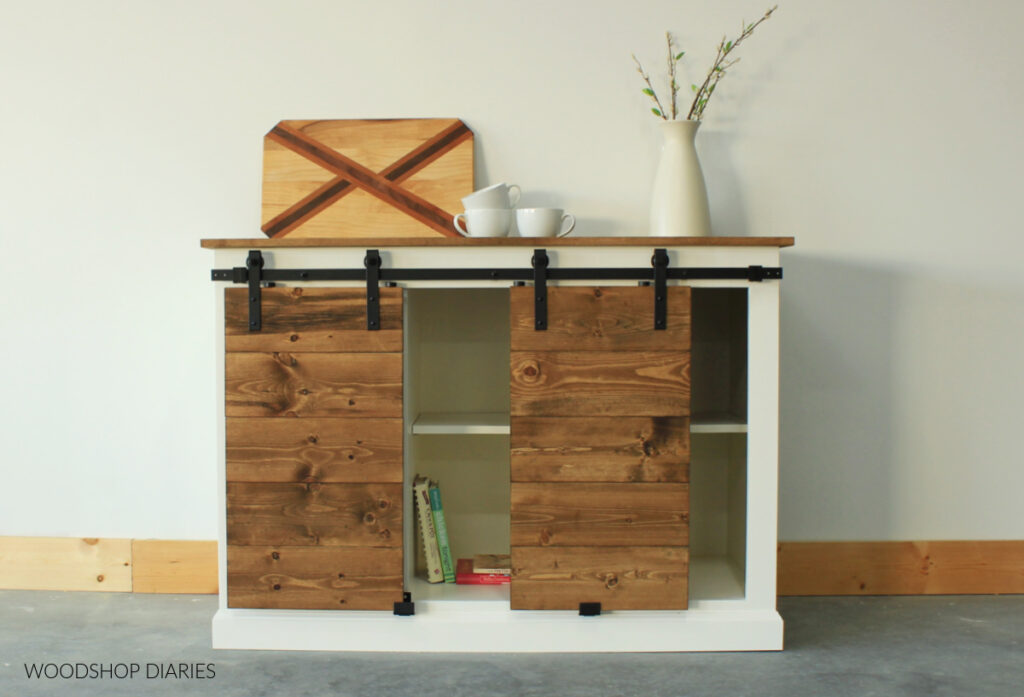
I used this 36″ sliding door hardware kit to install the door. I used this on a sliding door console cabinet previously and it worked really well.
Of course, there are tons of other brands and styles, so this isn’t the ONLY kit you can use.
However, be sure to follow the manufacturer’s instructions to install the kit as they may vary.
I mounted my rail onto the cabinet so that it was about 1 ⅞″ down from the top panel.
Then I installed the rollers onto the door so that the bottom edge was 3 ⅝″ down from the top of the door.
Again, different styles and brands vary, so double check this will work in your application before installing.
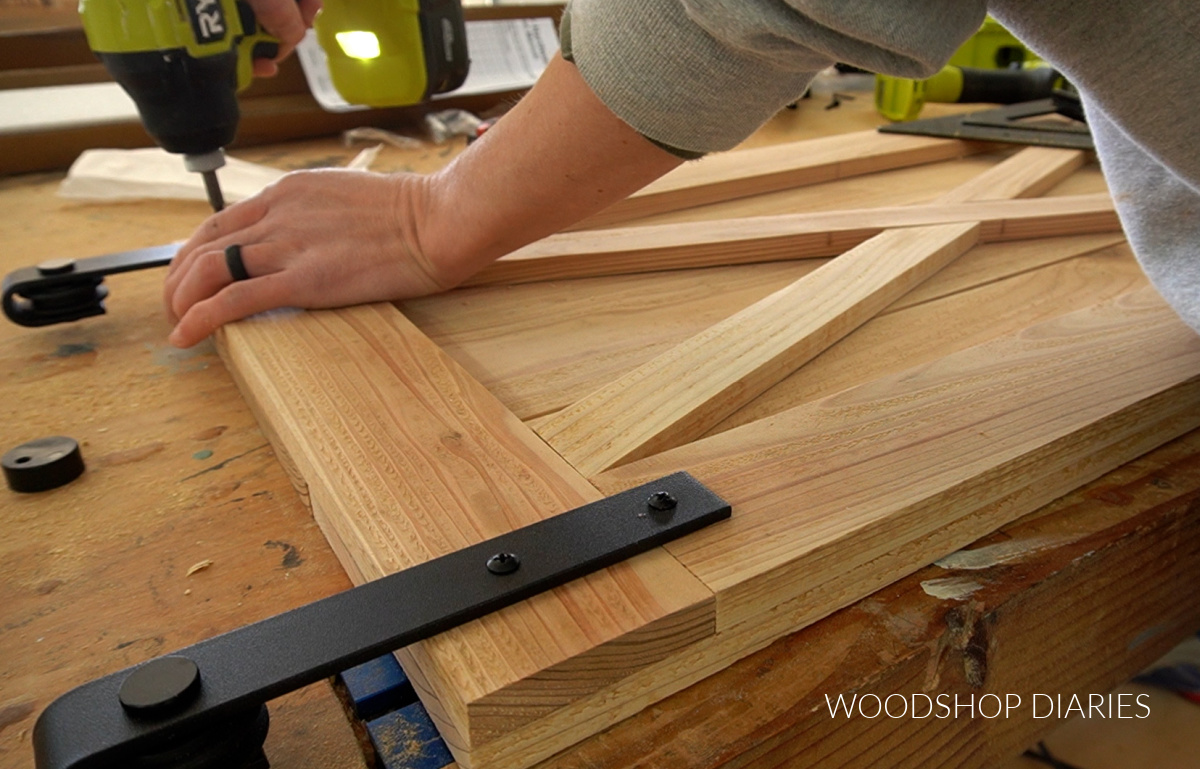
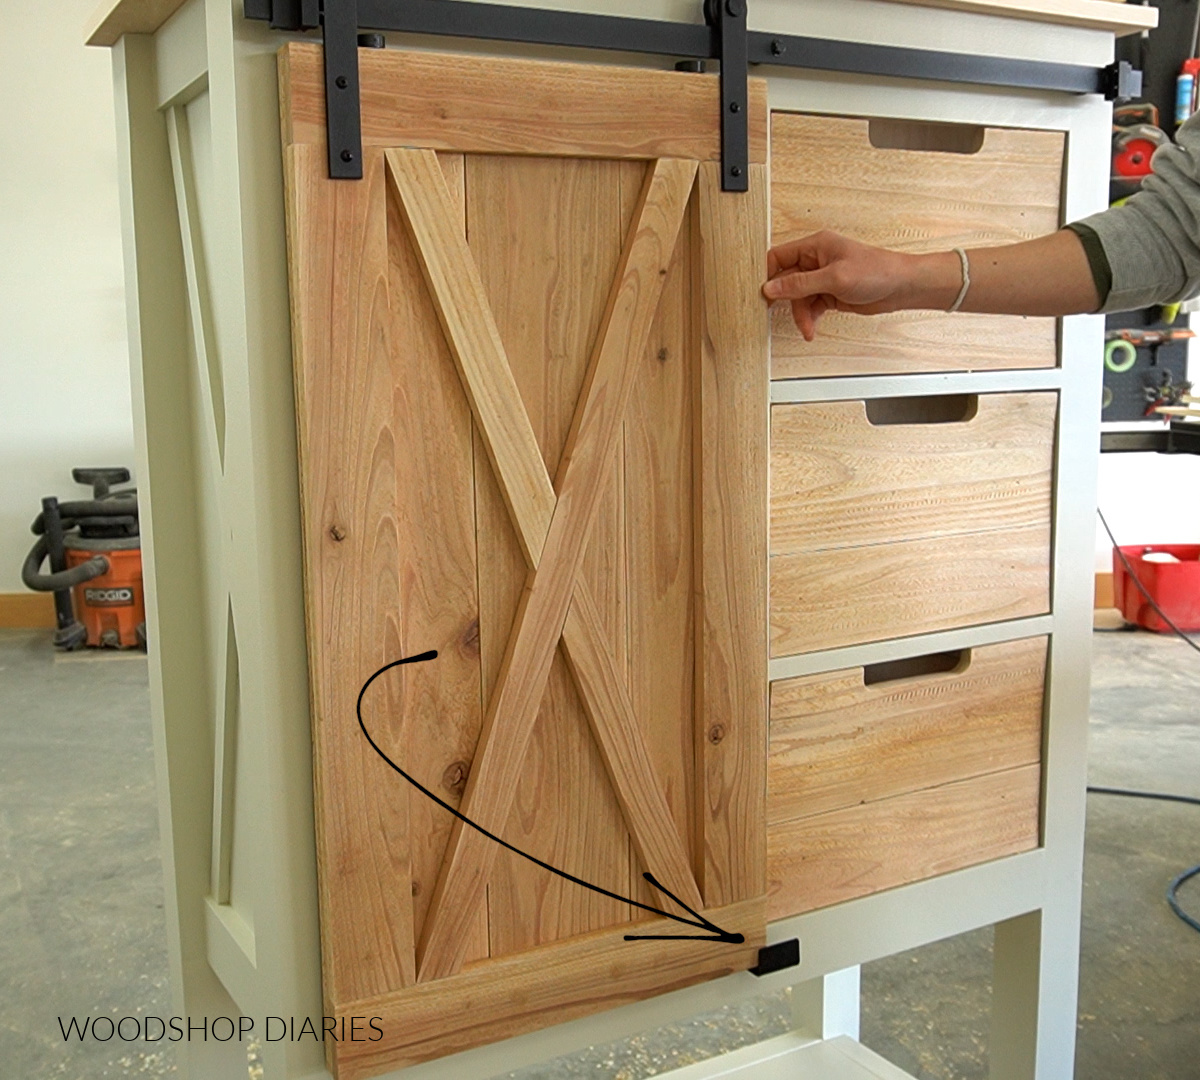
Then I hung the door on the rail and added the included stop blocks that came with the kit to prevent the door from falling off the rail. See YouTube video above for additional details.
The kit also comes with a piece to go on the bottom to keep the door from swinging. This is two parts–one part mounts to the cabinet like shown.
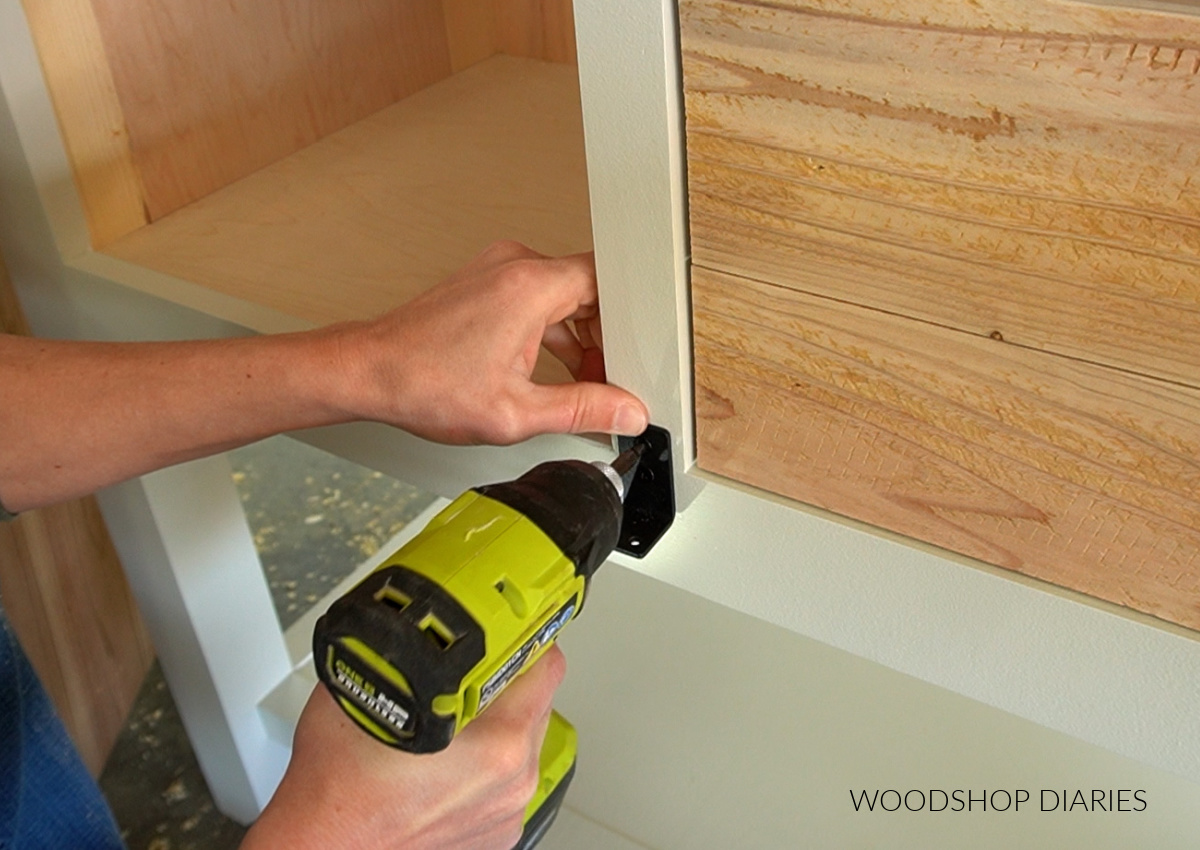
And the other part screws into it and adjusts front to back to accommodate the thickness of your door.
Step 10: Add Shelves
The last part was using a shelf pin jig to drill shelf pin holes inside the left side of the cabinet to install adjustable shelves.
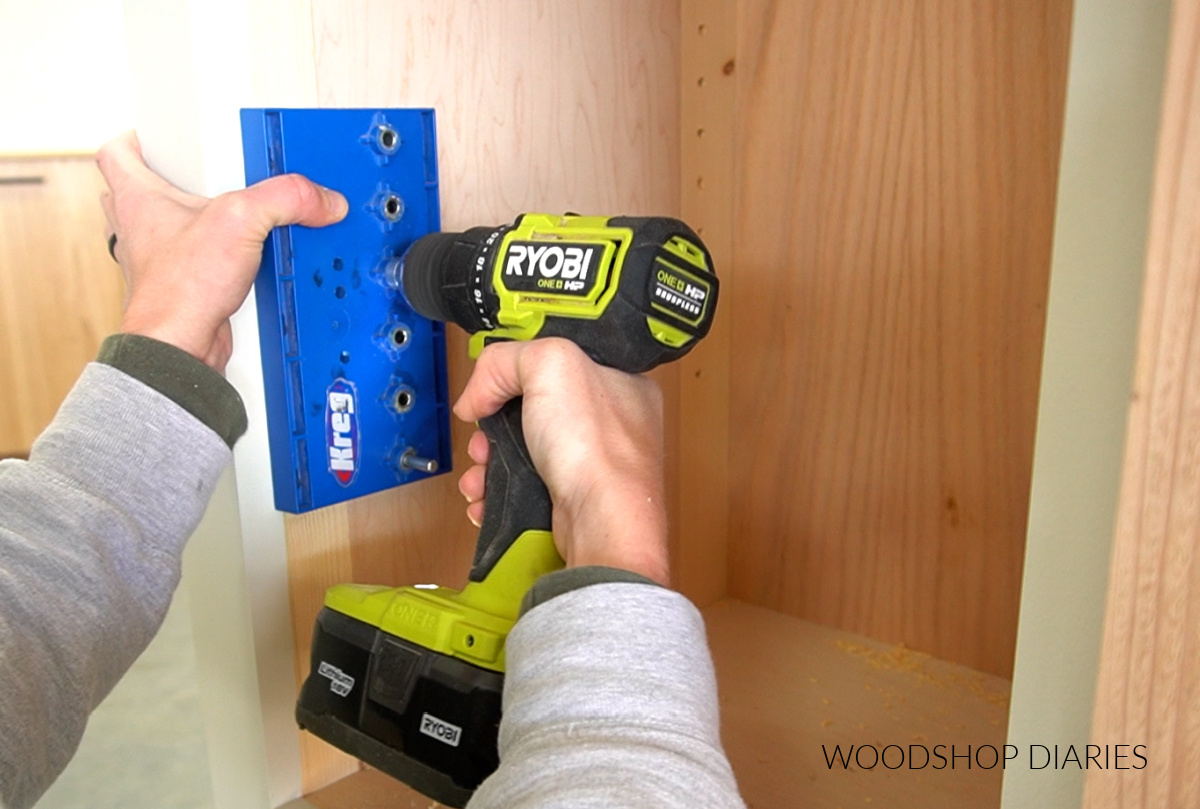
Shelf pin jigs are simply the guide for drilling equally spaced holes. You place shelf pins into these holes where you would like, then place the shelves on top.
It’s a great way to add shelves into any cabinet–especially if you are indecisive like I am and like the ability to move them up and down as needed haha.
And at that point, the project was complete and ready to use!
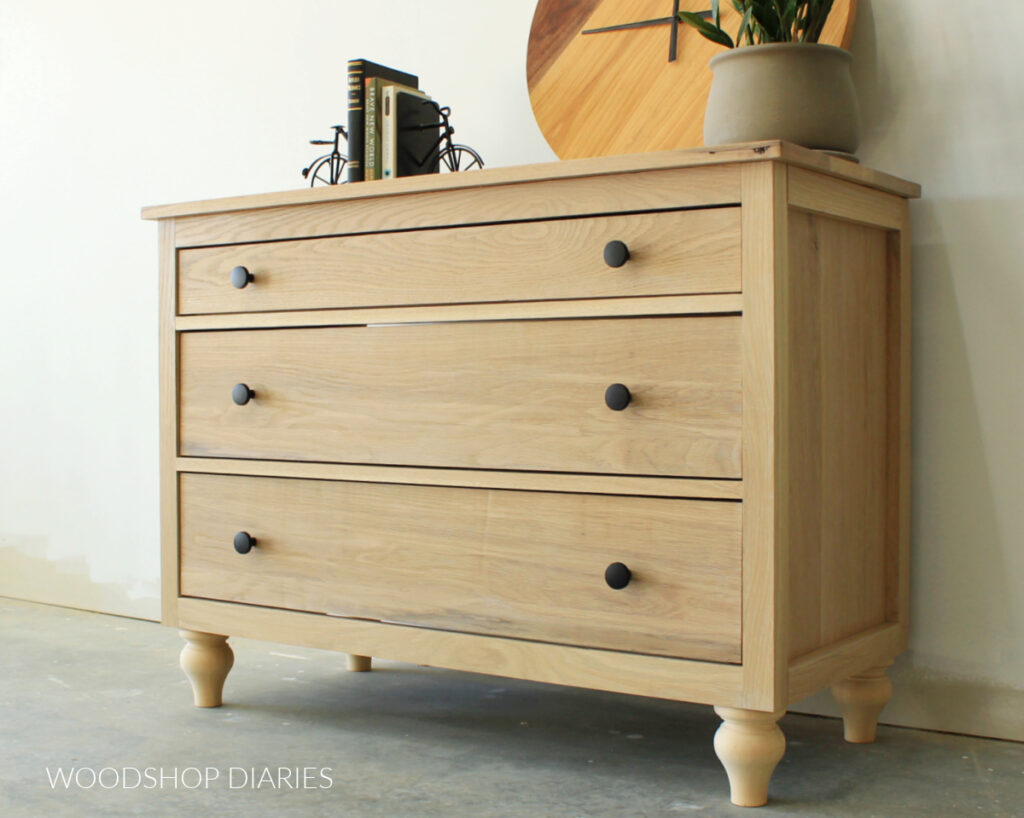
Looking for more DIY Dressers and Storage Ideas?
I hope you enjoyed watching this sliding barn door dresser chest come together. I think it turned out so pretty!
But if you are still looking for more dresser and storage ideas, here are a few favorites!

If you enjoyed this project and can’t wait to see what’s next, sign up for the FREE newsletter below for priority access to all the latest projects and plans!
Save this project for later by bookmarking, sharing to your favorite social channel or pinning it!
Until next time, happy building!