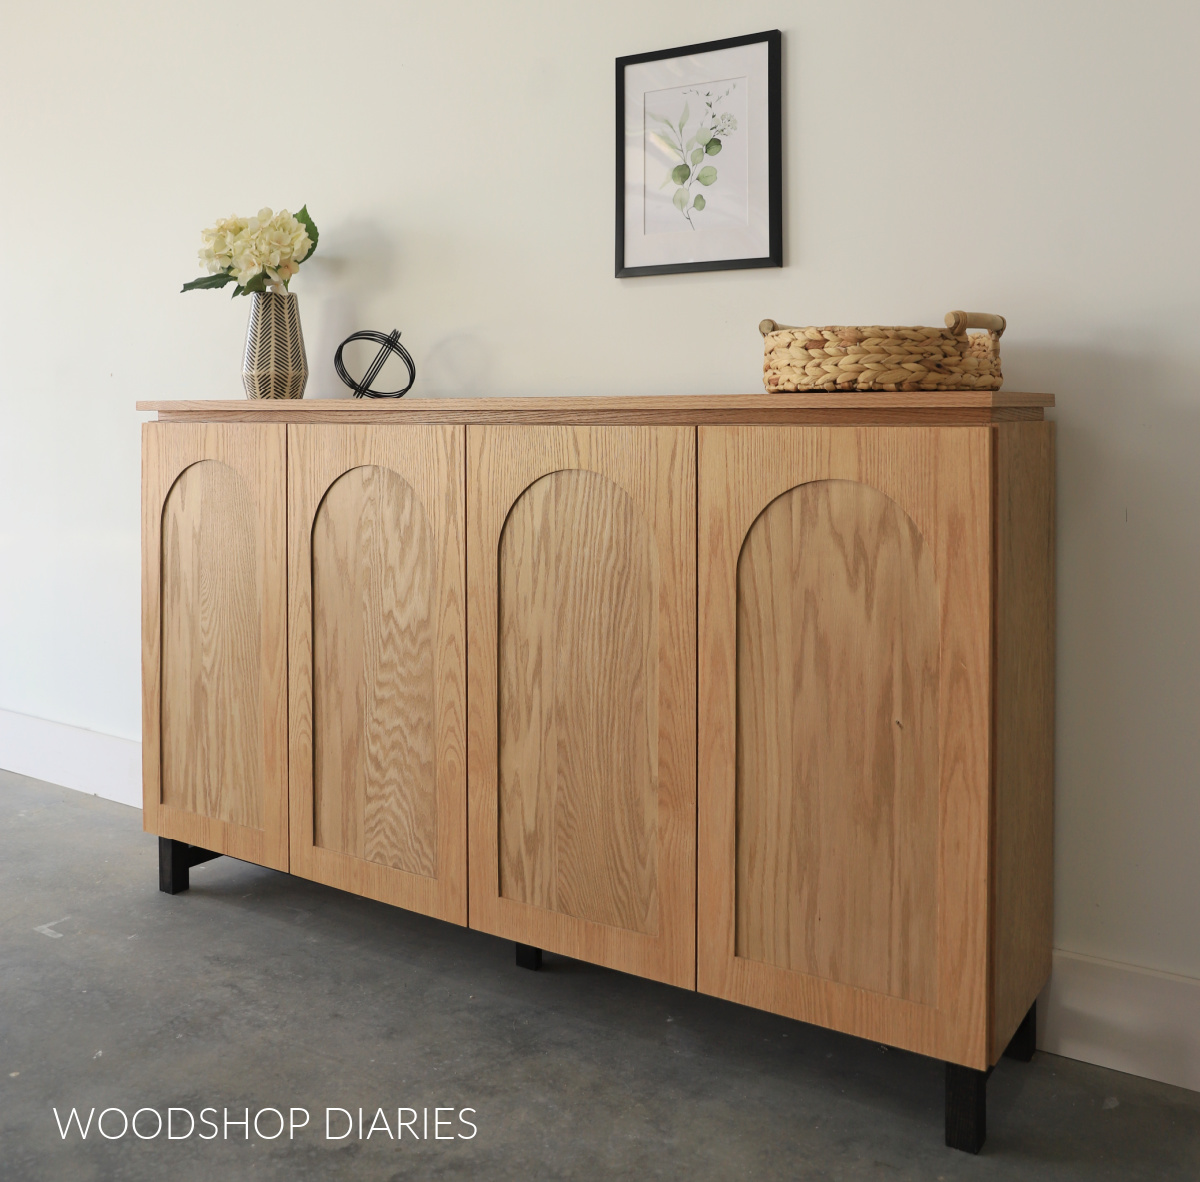
In this post, I’m sharing how to build a console cabinet with arched trim doors!
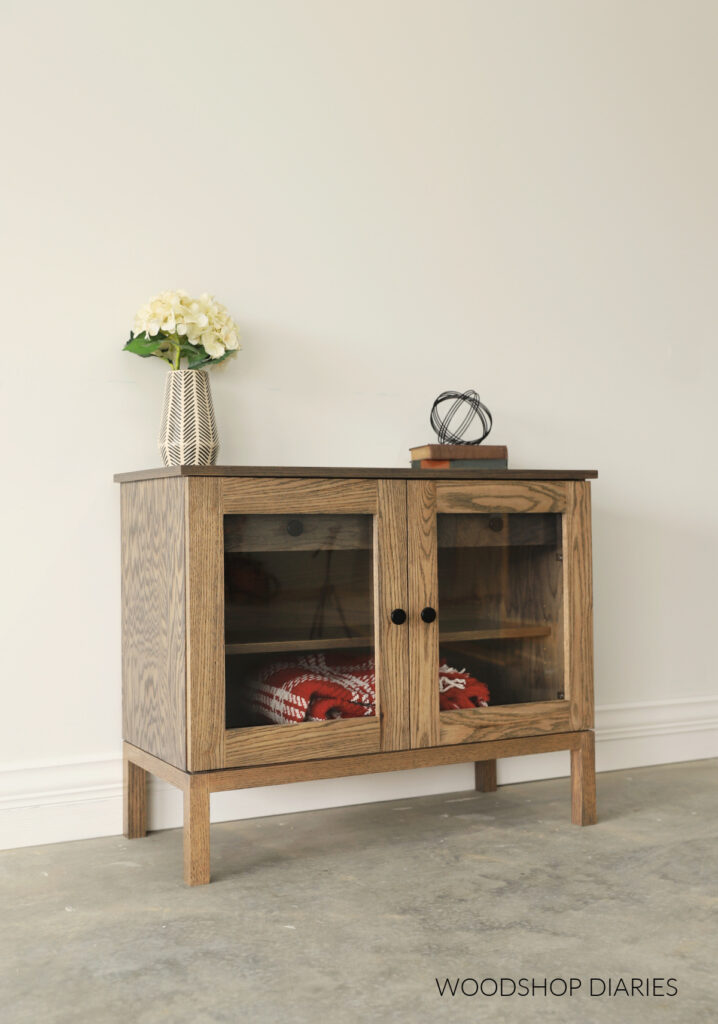
This basic console cabinet is a very simple design, but the arched detail on the doors makes it look high-end, classy and unique.
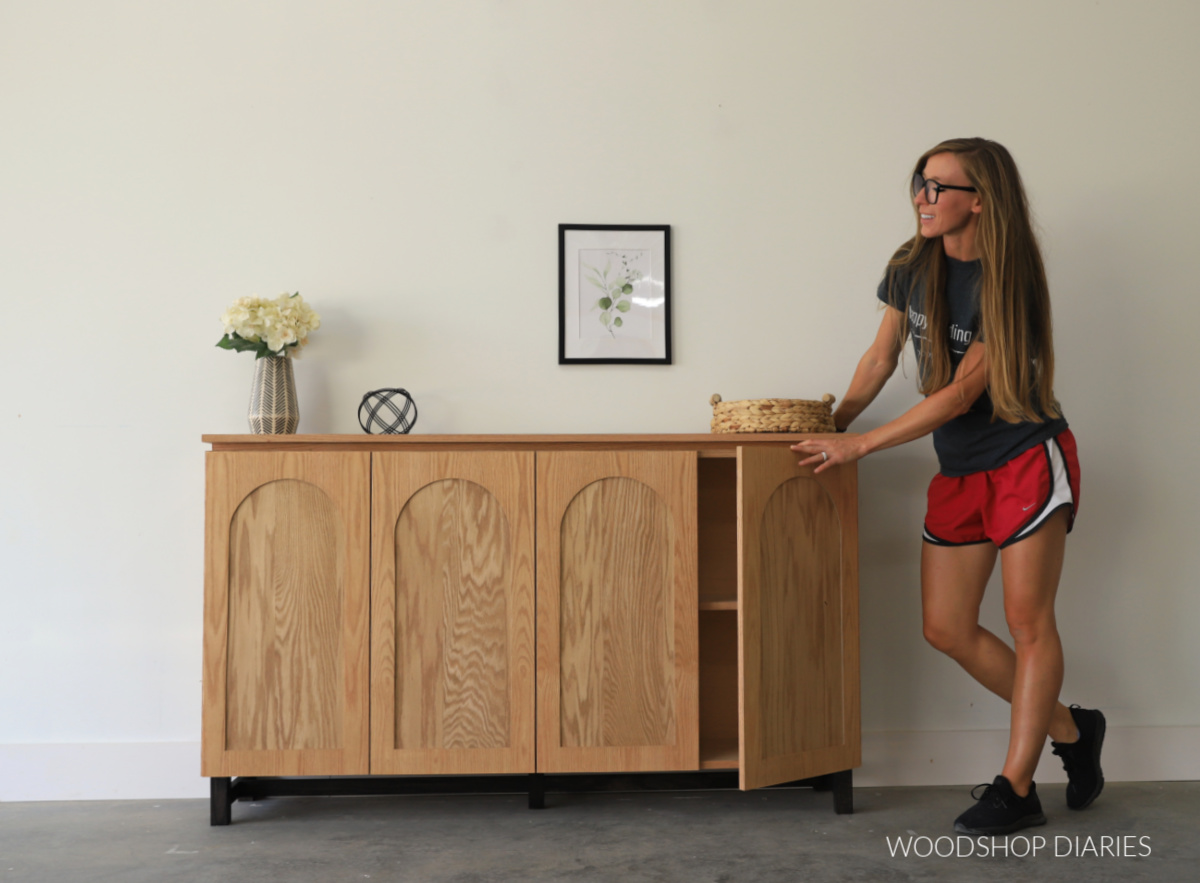
This project would be an eye catching accent piece for a dining room, living room, or home office. And of course, the extra storage inside is always nice to have in these spaces, too.
It’s hard to believe this console was built almost entirely from plywood! Which means it’s both easy to build and easy on the budget*.
*If you didn’t already know, plywood is much cheaper than the equivalent amount of solid wood in just about every instance.
I’m excited to share tips and plans to how to build your own below.
This post contains affiliate links. See website policies.
What to know before building
This simple console cabinet is a project you can reasonably complete in a weekend. I’d consider it an intermediate level build simply due to its size, not it’s complexity.
The assembly methods used here are pretty basic and it requires minimal tools. It’s a great project to get some practice on using your jig saw!
Material Choices
This modern console project was made almost entirely from plywood except for the base. The base uses 1×2 and 2×2 lumber.
I used red oak for this project, however any wood type you’d like to use here would work fine. Birch and/or pine are also great choices.

For the plywood, I always recommend using cabinet grade hardwood for furniture. Learn more about how to choose plywood for furniture and cabinets here.
I used a combination of ¼″, ½″, and ¾″ plywood to build this console. The ¾″ plywood is for the main body, and the thinner material is for the back panel and the doors.
The printable plans detail the cut diagrams for each plywood sheet to make things easy.
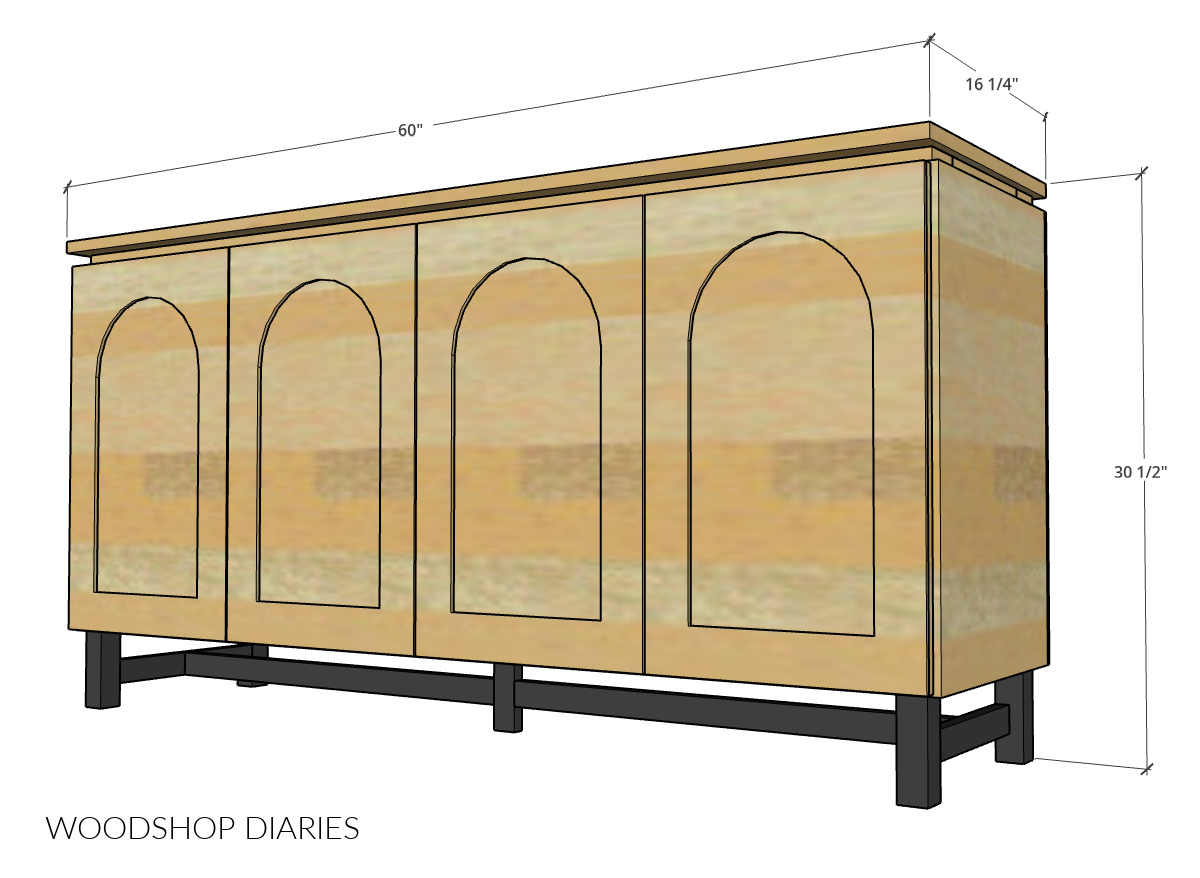
Overall Console Cabinet Size
The overall size of this console storage cabinet as detailed in the plans below are approximately 16 ¼″ deep x 30 ½″ tall x 60″ wide.
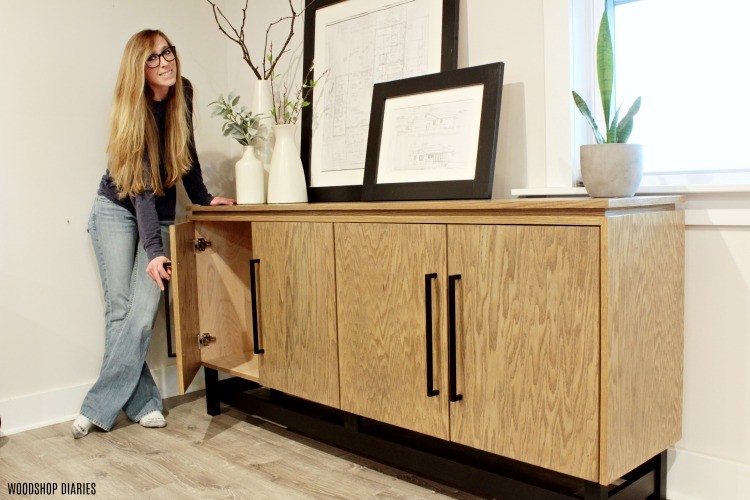
*NOTE: The finished console shown in the images was built to a kind of odd custom size for a friend of mine. It was only a foot deep and 36″ tall. This isn’t a practical size for most applications.
So I adjusted the plans I’m sharing here to make it deeper and slightly shorter so it’s more of a “standard” console cabinet size.
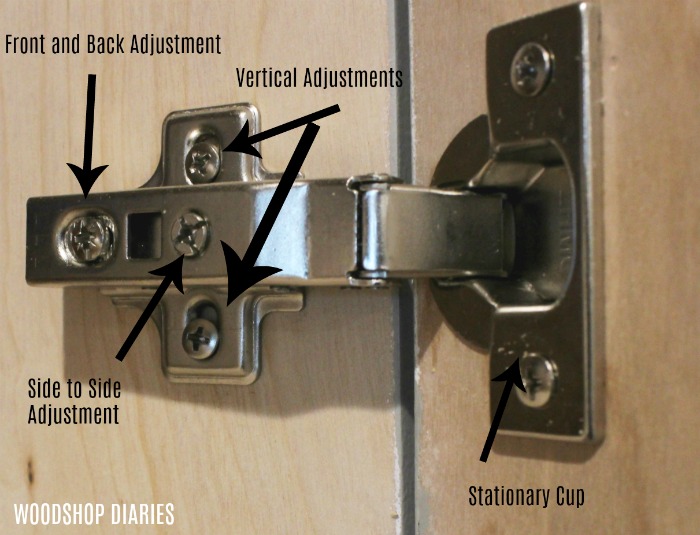
A Note About Hinges
While this is a simple build, one thing that can be a little confusing are the hinges. I highly recommend checking out this video for additional information on this part.
The cabinet is frameless and has overlay doors. Typically frameless overlay doors overlay the entire front edge of the cabinet like you see below. See this post about how to size cabinet doors.
But in this case, since two doors both share the middle divider panel, I had to build these doors so that they’d only overlay the middle divider about ¼″ each.
Even though the center doors are only “partially” overlaying the middle divider, you still use full overlay hinges.
If you’re new to concealed hinges, check out this post on how to choose the right hinges for your project.
That’s because frameless concealed cabinet hinges only come with one overlay option. But there is enough adjustment in the hinge that they still work here even if they’re only overlaying ¼″.
Check out this post to learn how to install and adjust concealed hinges.
Helpful Resources To Use With This Project
You may find the following posts helpful throughout the build:
Enjoy DIY projects and woodworking plans? Sign up for priority access for the latest posts on Woodshop Diaries!
How to Build an Arched Door Console
I’ve included a ton of helpful tips and behind the scenes info in the build video. You can check it out on my YouTube Channel here.
Love watching how-to videos? Subscribe to my YouTube channel for plenty more where that came from!
Prefer to print? Grab the printable modern console cabinet building plans available here:
Tools & Materials
Tools:
- Drill/Driver
- Circular Saw and plywood cutting guides
- Miter Saw
- Pocket Hole Jig
- Brad nailer or stapler (optional)
- Jig Saw
- Concealed Hinge Jig
- Shelf Pin Jig
Materials:
- (1 + ¼) 4’x8′ sheet ¾″ plywood (red oak used here)
- (1) 4’x4′ sheet ½″ plywood (red oak used here)
- (1) 4’x8′ sheet ¼″ plywood (red oak used here)
- (1) 1x2x8 boards
- (1) 2x2x8 board
- 1 ¼” pocket hole screws
- 1 ¼” and 2″ long wood screws
- 1 ¼” long brad or finish nails
- Wood glue
- (4) pair frameless overlay hinges
- Shelf pins
- Edge banding (optional, but recommended)
Step 1: Assemble Console Cabinet Box
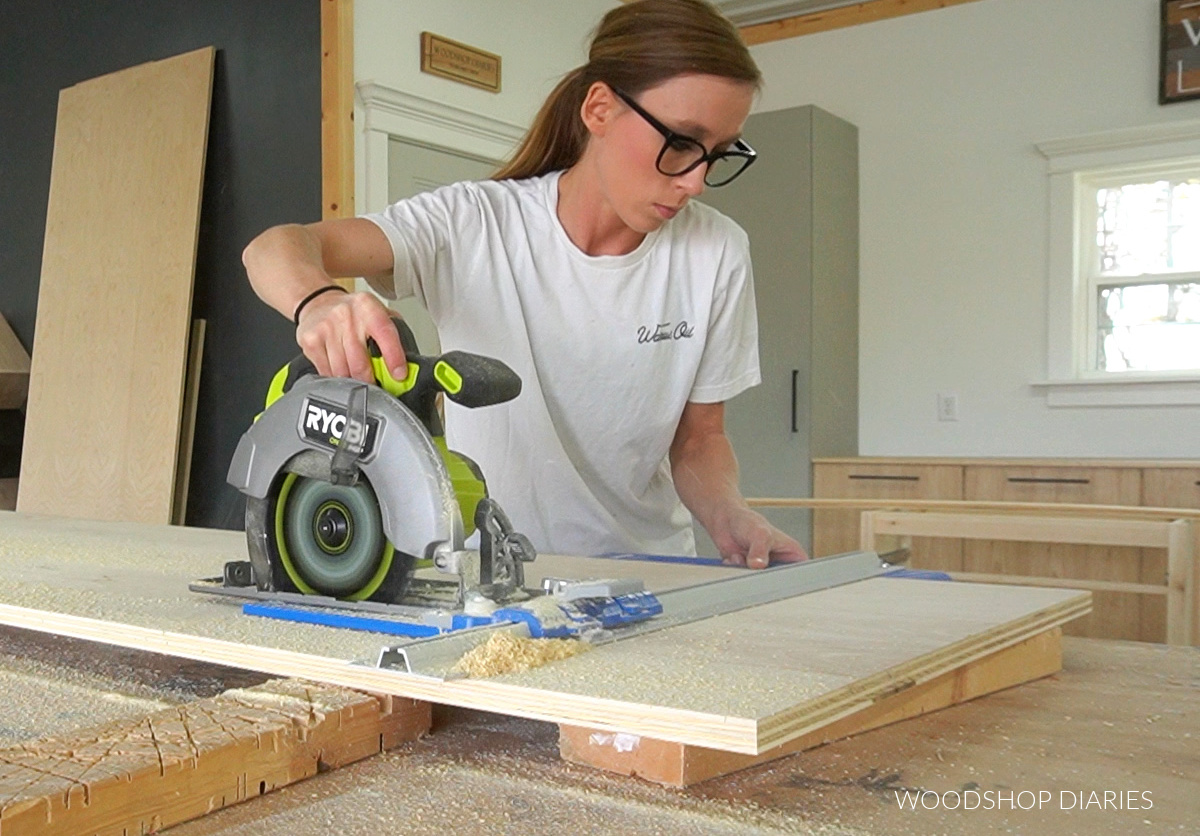
To kick off the project, I started by cutting down my ¾″ plywood sheet. I’ve included the full cut diagram and cut list in the printable plans.
I trimmed down the bottom, two side panels, and the top supports first to assemble the main body of the cabinet.
I edge banded the front edges that will be exposed in the finished build and I also edge banded the tops of the side panels. These will be partially revealed after the top is installed.
Then I drilled pocket holes in the ends of the two top supports and the bottom panel.
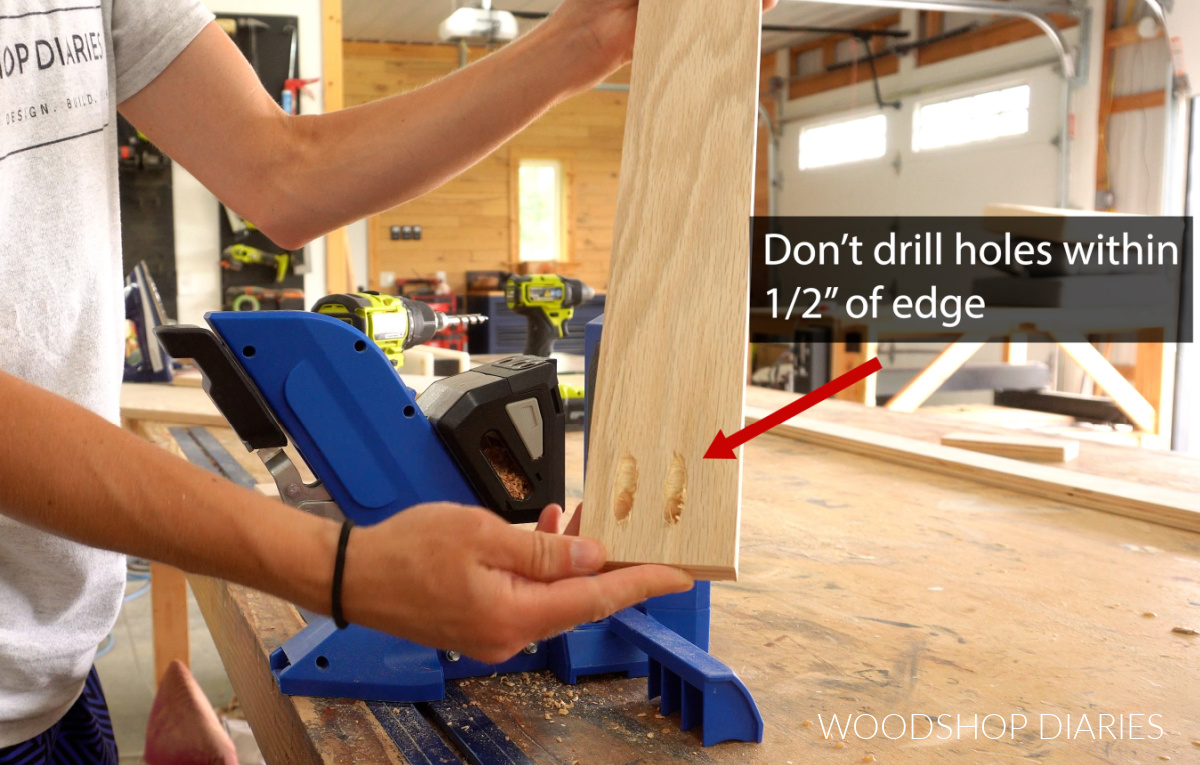
Note that the pocket holes on the top supports need to be drilled at least ½″ away from the edge of the board.
RELATED: How to drill pocket holes
At this point, I could assemble the cabinet box using pocket hole screws.
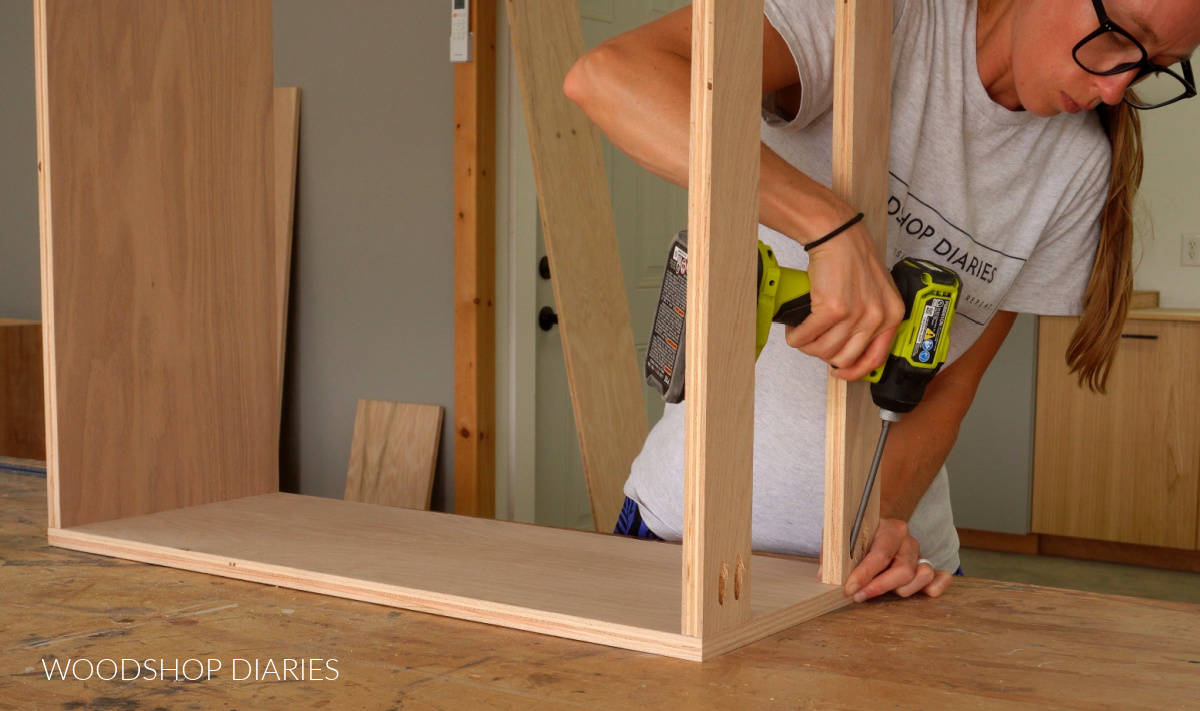
For the middle, I added a piece of plywood strip between the top supports with pocket holes and screws, then cut a divider panel to fit inside the box.
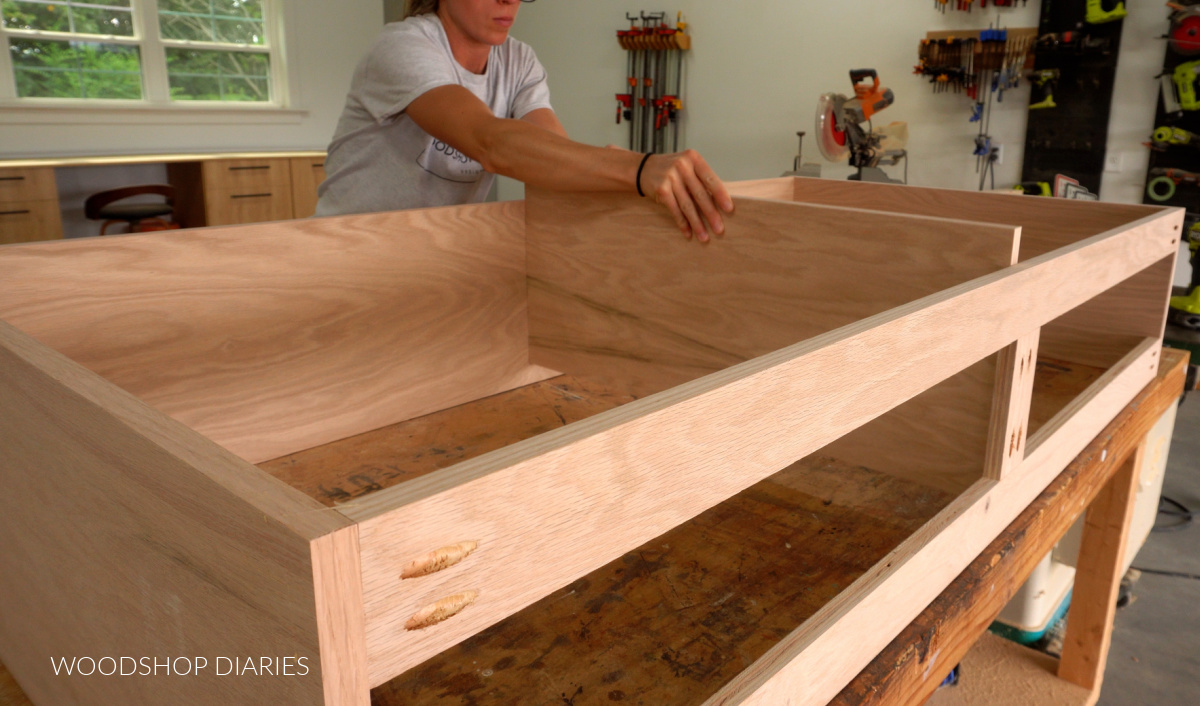
I just screwed this in using screws through the top and bottom instead of bothering with any pocket holes.
Step 2: Assemble and Attach Top
The top is a little…different haha. I made the top with a “riser” frame that raises it up above the cabinet ¾″.
To do this, I built a simple frame from some plywood strips ½″ smaller than the top of the cabinet on all sides.
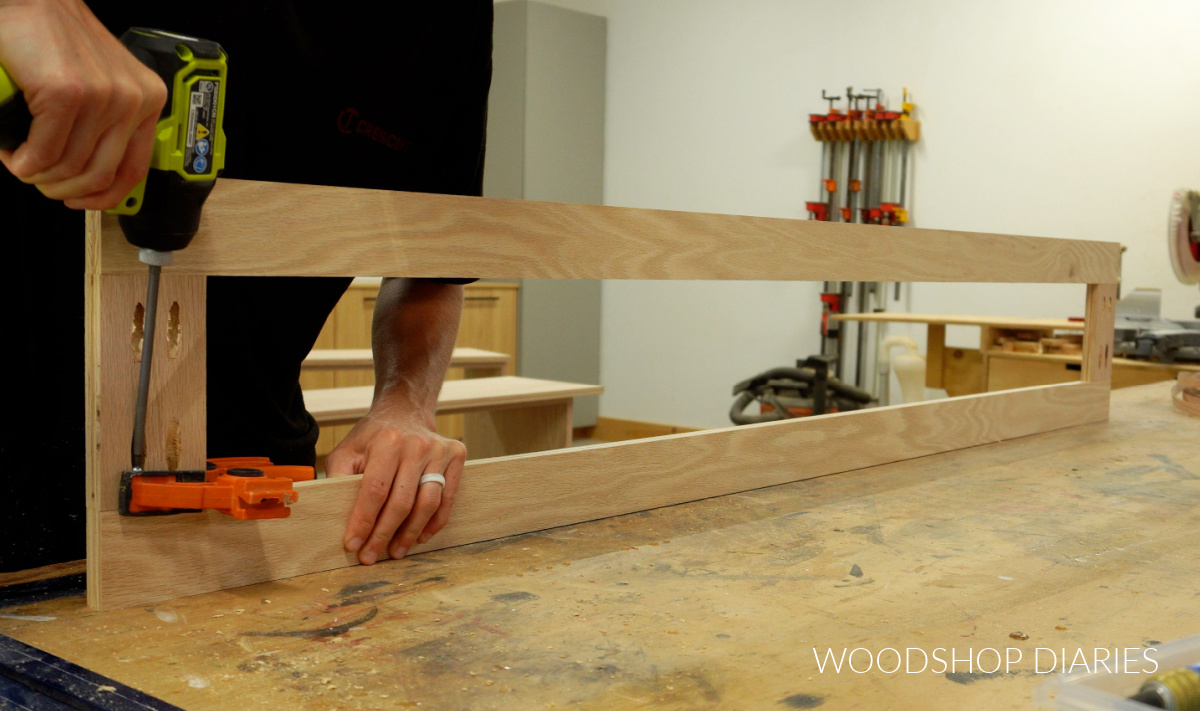
I assembled this frame using pocket holes and screws, then applied edge banding around the outside edges.
I also cut the ¾″ plywood top panel to size and edge banded it, too.
By the way, edge banding is totally optional, but it really makes your finished project look so much cleaner.
Check out this post to learn my top 5 tips to more professional looking DIYs.
I flipped the top panel upside down on my workbench and centered the frame on top. Then I screwed these two together.
Then I flipped it back over and added it onto the top of the cabinet. The spacer frame should be inset ½″ on all sides.

I secured this in place using screws through the bottom side of the top supports.
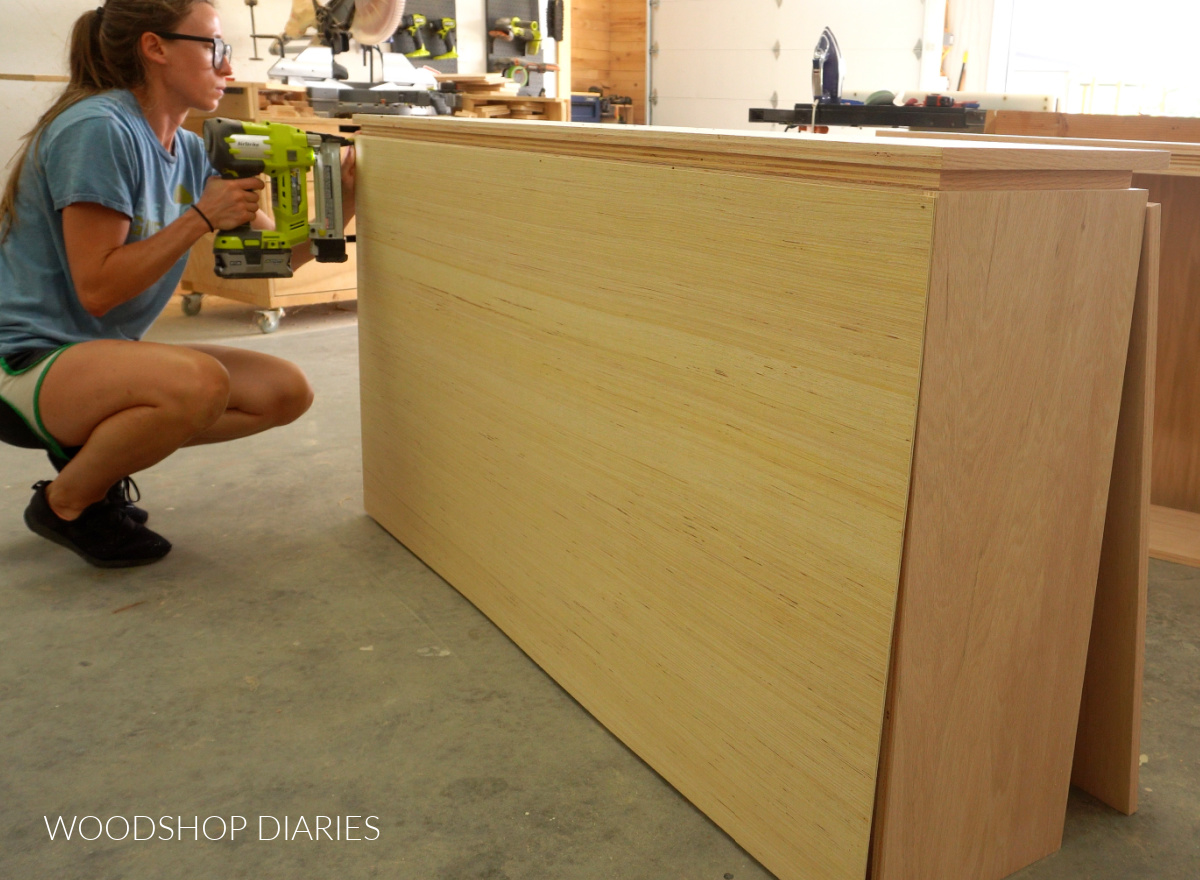
Step 3: Install Back Panel & Drill Shelf Pin Holes
Next, I finished up the main cabinet part of the build by attaching a ¼″ plywood back panel with a few staples (brad nails and glue would work too!).
Then, I drilled shelf pin holes into both sections of the cabinet.
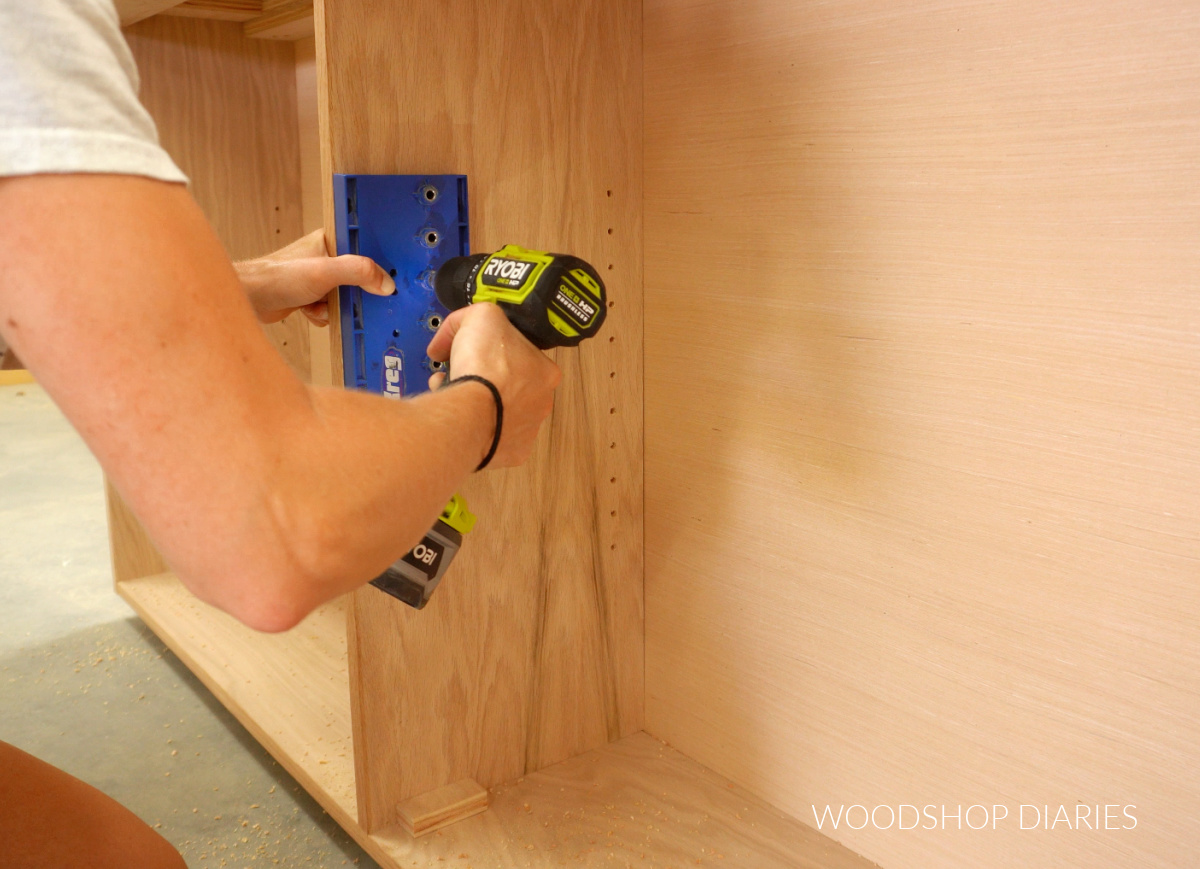
NOTE: I mention this in more detail in the build video, but since you’ll be drilling holes in both sides of the middle divider, it’s best to offset the holes on one side so they don’t run into the holes on the other.
An easy way to offset the holes is to simply start them at different heights. Using a scrap block underneath the jig on one side of the cabinet is an easy way to do this.
RELATED: How to drill shelf pin holes
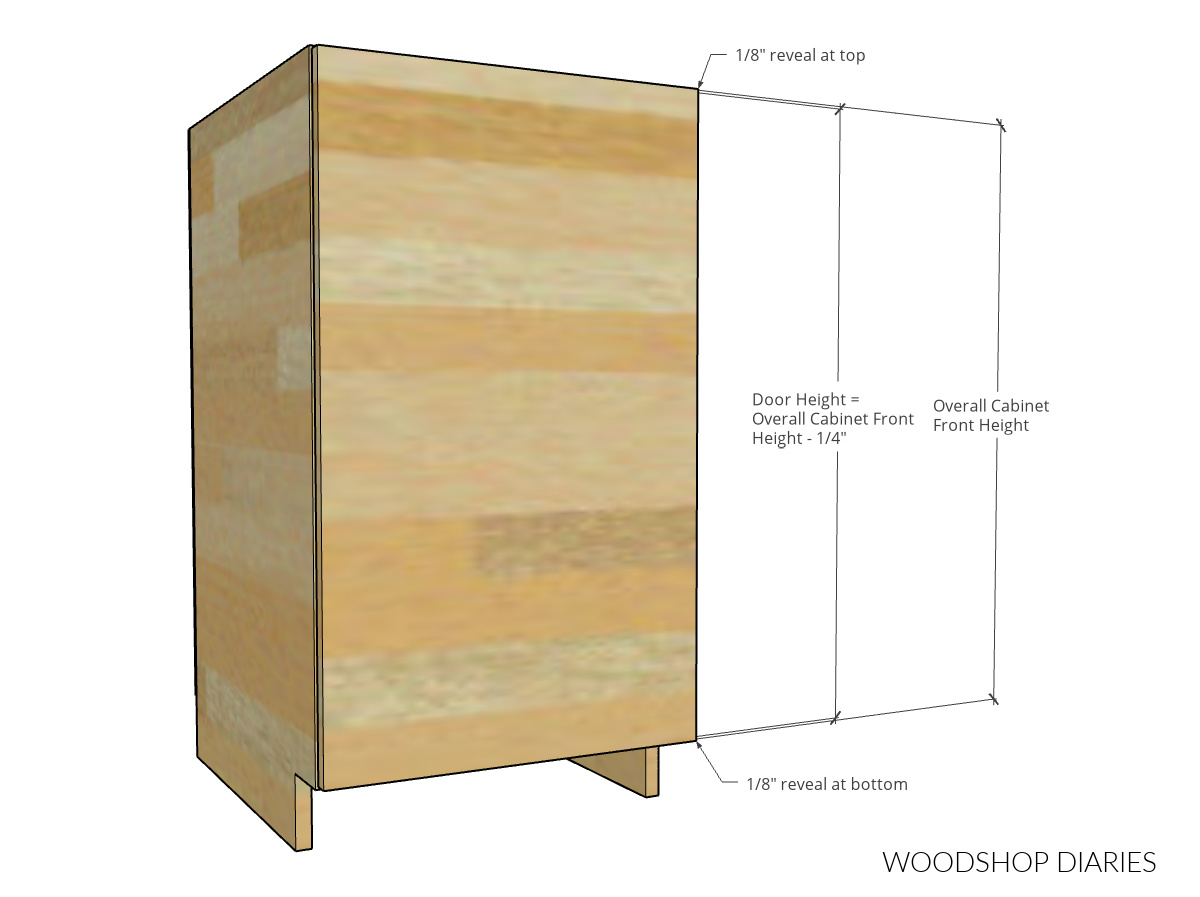
Step 4: Assemble Arched Trim Doors
This step is the most fun–let’s make those arched trim doors! These doors are simply ¼″ plywood glued onto ½″ plywood. The ¼″ panel just has an arched shape cut out of it.
To do this, I cut my ¼″ plywood down to the overall size I wanted my doors to be. Dimensions are detailed in the printable plans.
I used a scrap piece of 1×3 to trace a line 2 ½″ from each outside edge.
Then, I used a screw and a tape measure to trace an arc around the top. You can see how to draw a circle with a tape measure in this post.
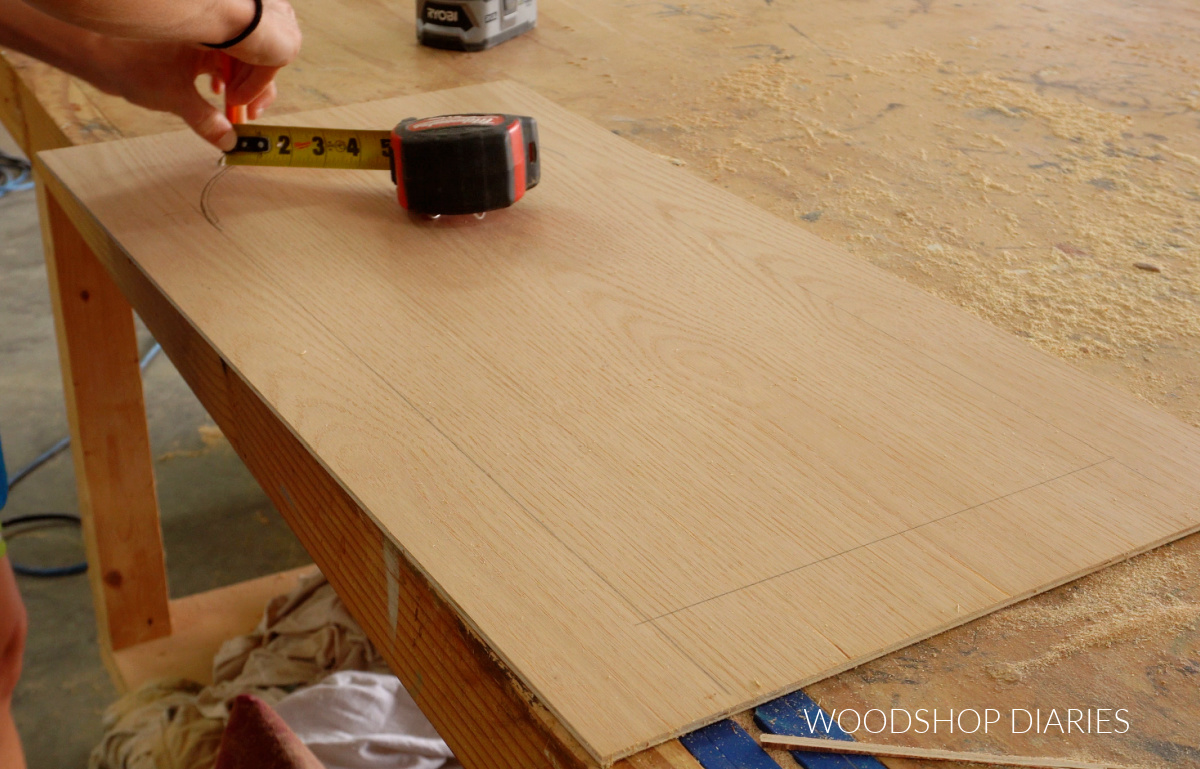
You could also use a round object to simply trace your arc instead. Or skip the arch shape and keep it square–feel free to customize how you’d like.
I drilled a hole in the center of the door to start my jig saw blade, then cut along the lines I just drew.
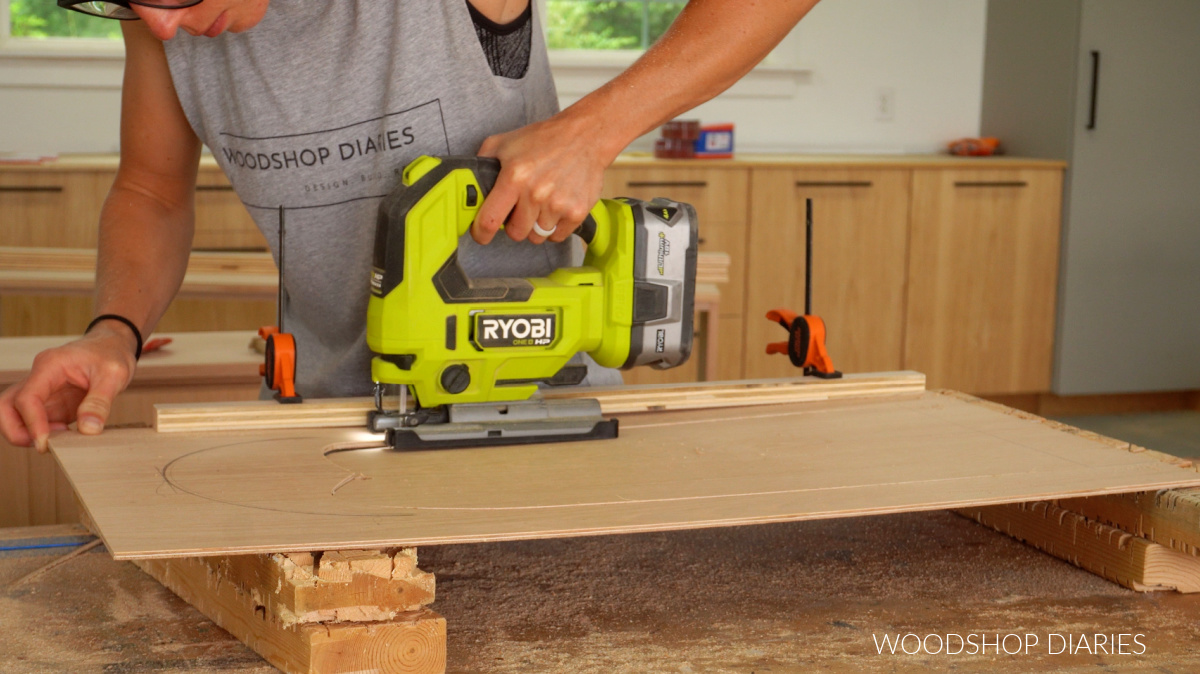
A scrap block clamped to the edge of the door gives you something to run your saw along to keep your straight cuts straight.
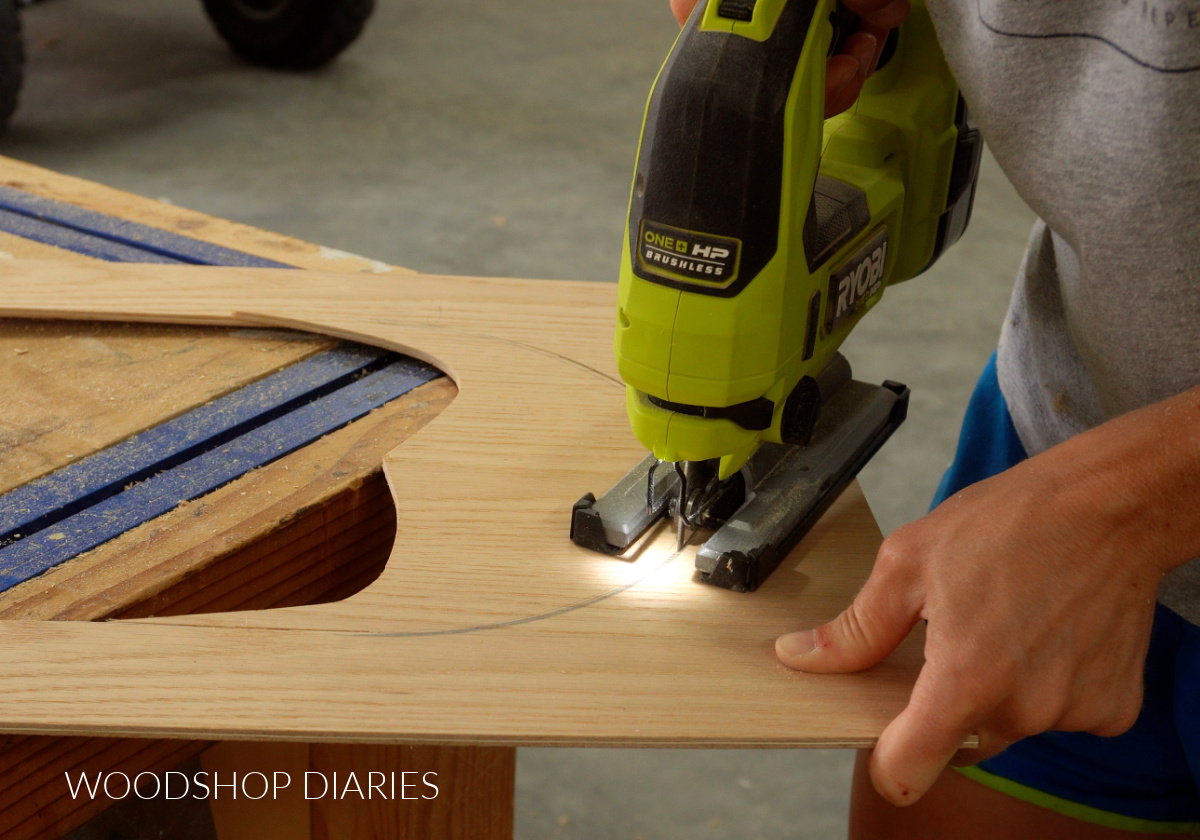
But for the arch, I just had to freehand that part. A good sanding after cutting can help smooth out any odd spots, but don’t panic if it isn’t PERFECT.
I glued this piece onto a piece of ½″ thick plywood cut the same size.
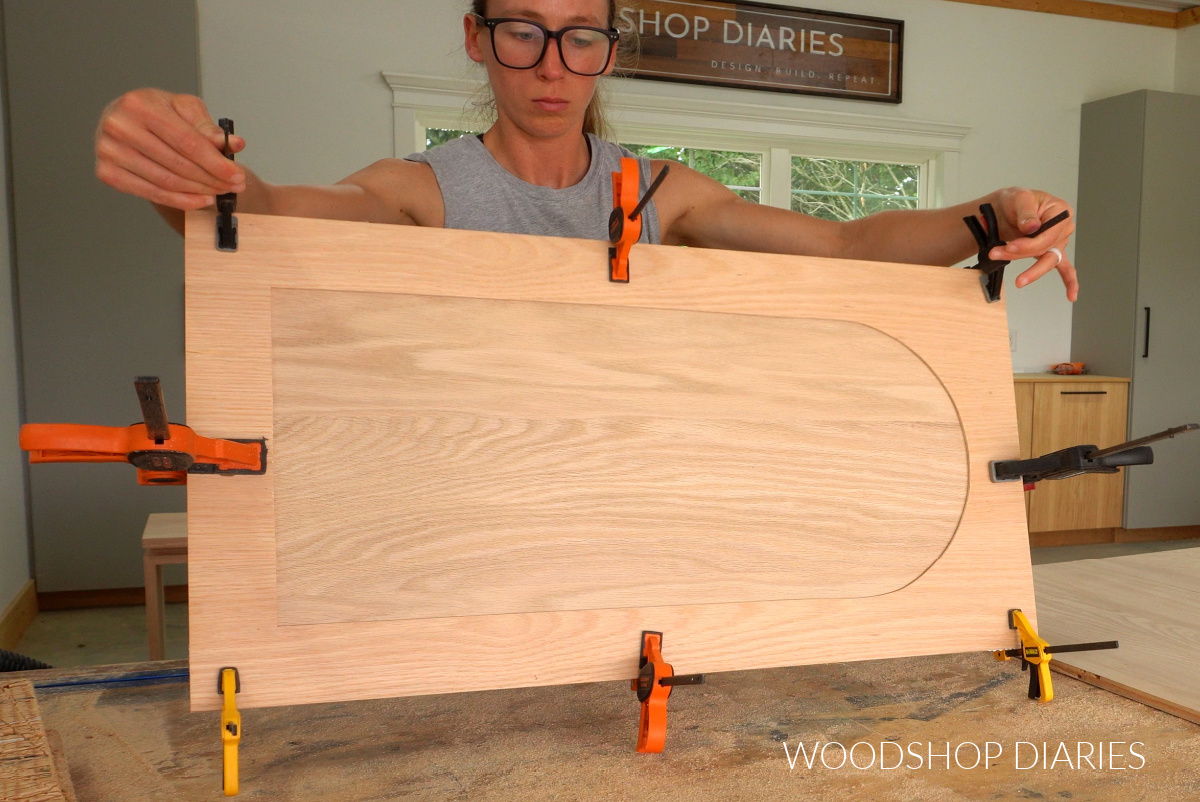
After the glue dries, I recommend edge banding the outside edges to make the doors look nice and clean. Sand well, but be careful not to sand through the veneer on the plywood.
RELATED: How to sand wood
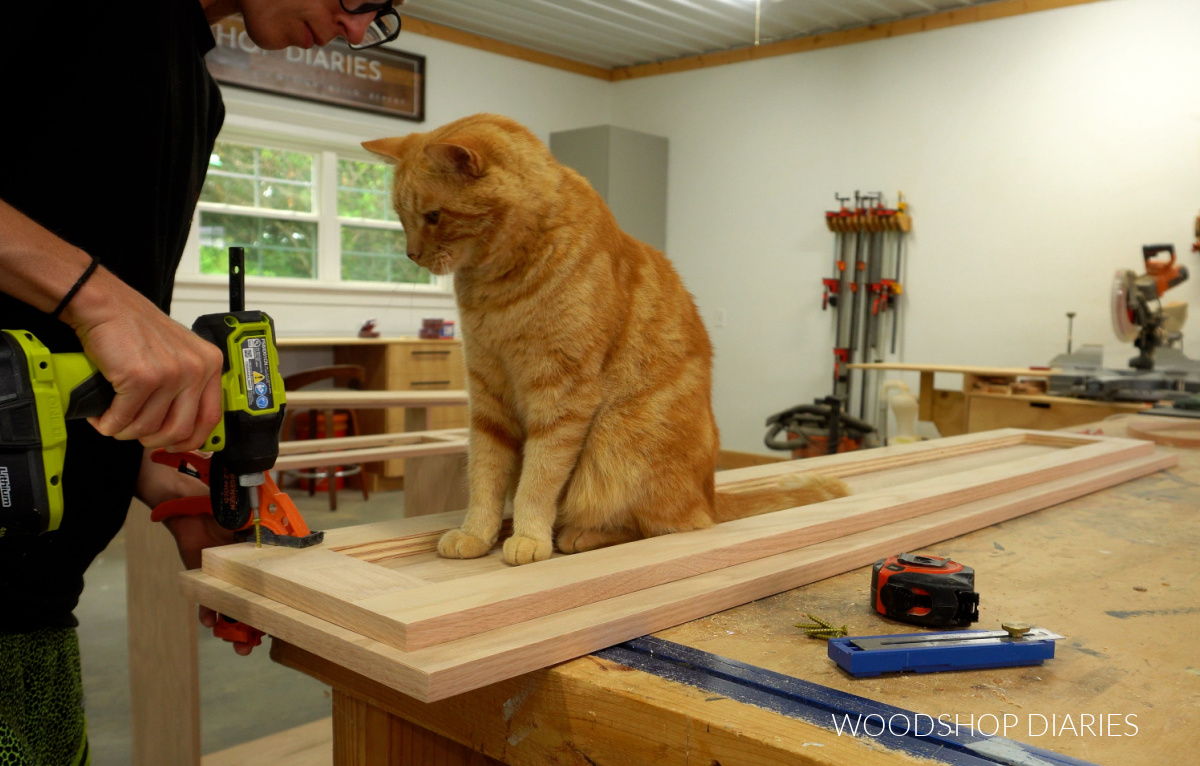
Step 5: Build and Attach Cabinet Base
The base is the only part of the project that’s not made from plywood. I built the base using 2x2s for the four corner legs and 1x2s for everything else.
I assembled the base using pocket holes (just like the cabinet), BUT since these small boards are so narrow, I recommend using the Kreg Micro Pocket Hole Jig for this part.
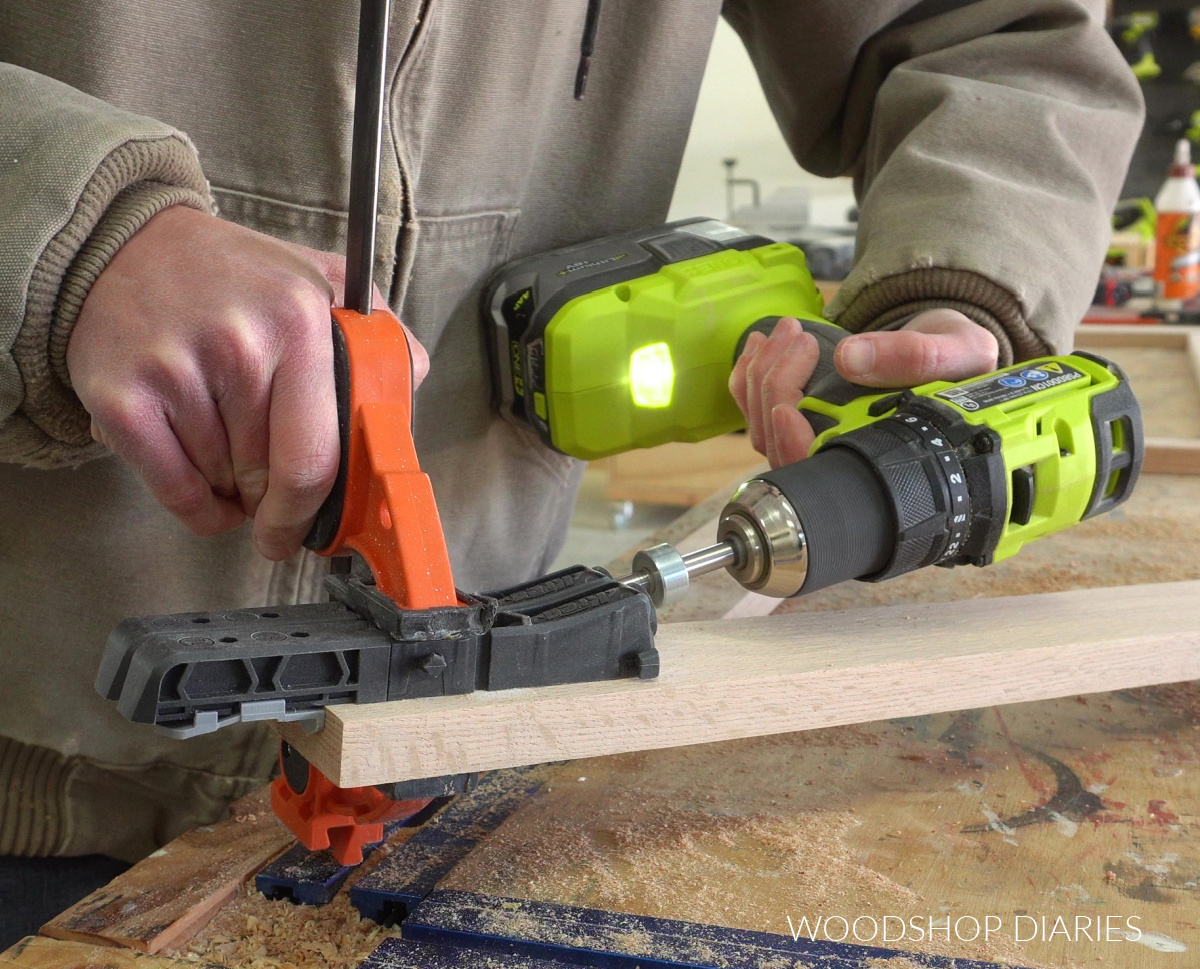
It’s definitely not NECESSARY (a standard size pocket hole jig works fine), but it’s helpful. Check out this post to learn when and how to use the Kreg Micro Jig.
I attached a 1×2 between the 2×2 legs first using pocket holes and screws.
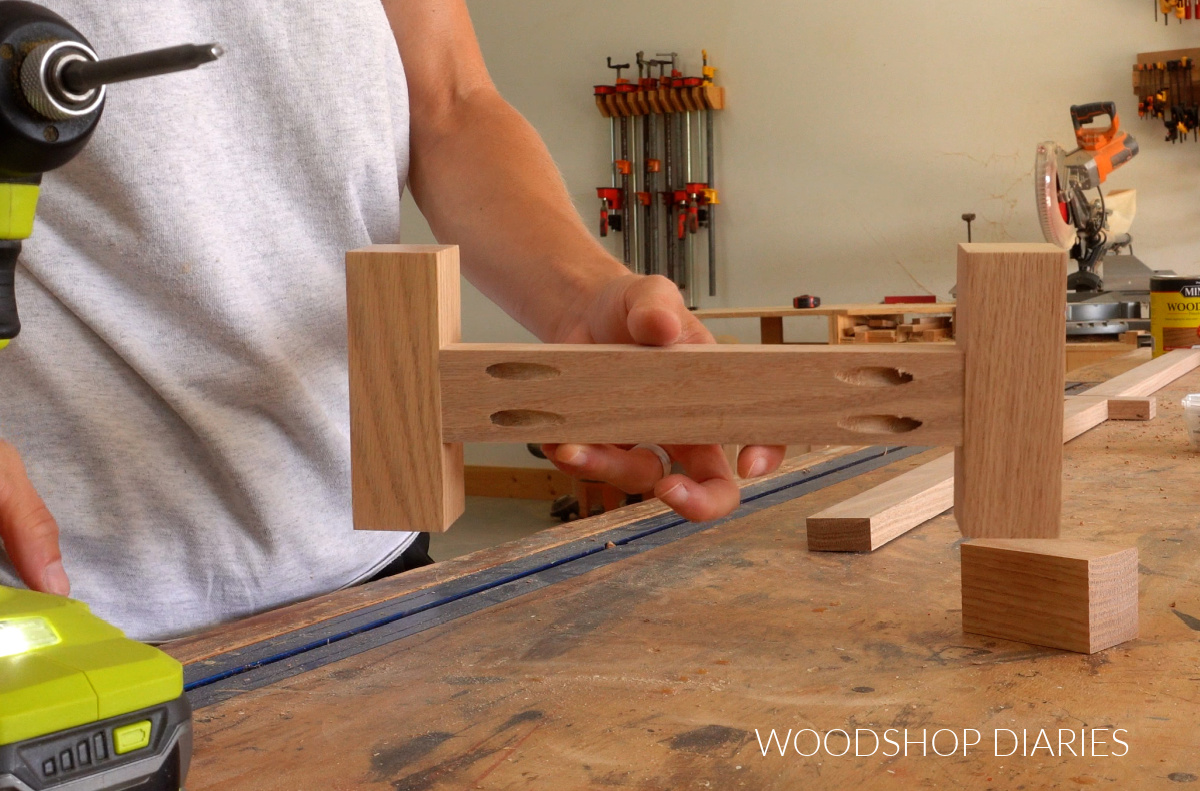
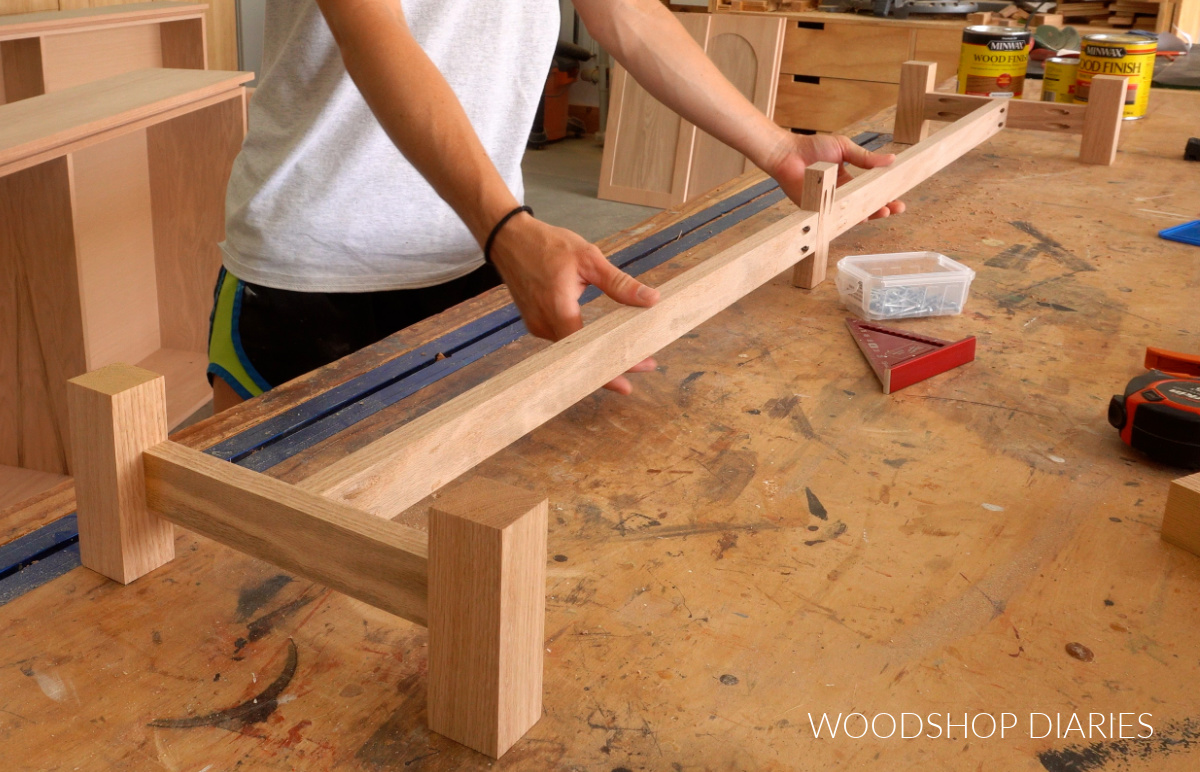
Then, I attached two longer 1x2s to a middle support leg to connect the two sides of the base.
Once the base was together, I stained everything before attaching. I stained the base in Minwax True Black and the cabinet and doors in Minwax Weathered Oak.
RELATED: How to stain wood furniture
After this had dried, I installed the base to the bottom of the cabinet using pocket hole screws in the center leg.
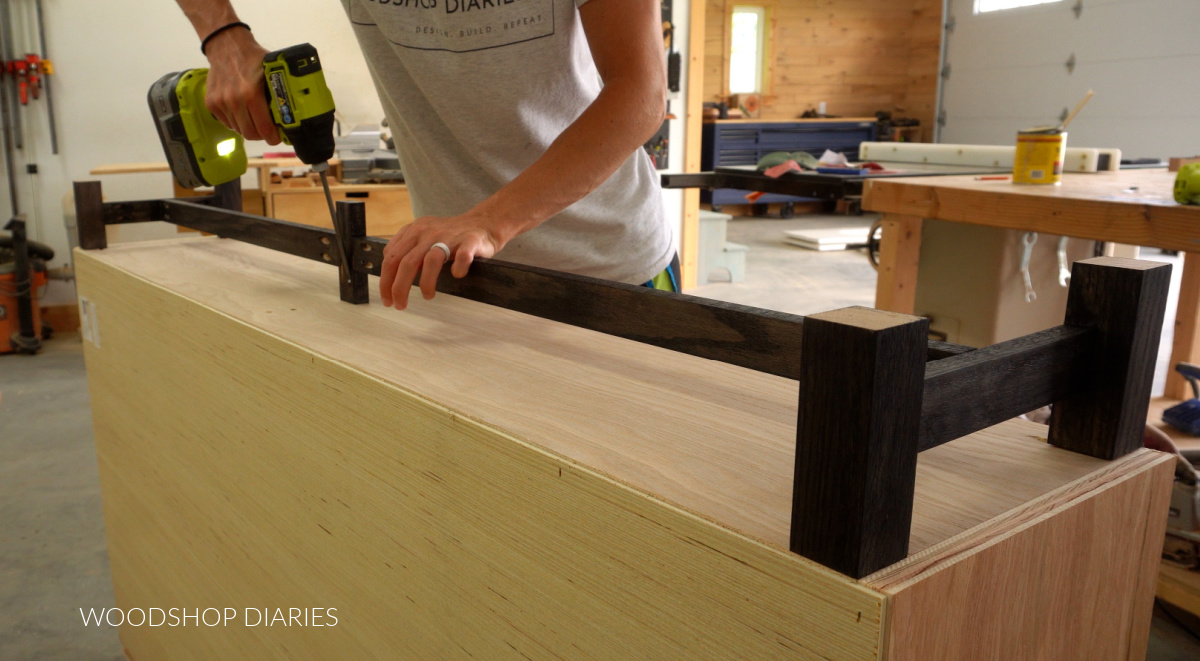
And I attached the four corner legs using wood screws through the bottom panel.
Step 6: Attach Doors
I used overlay concealed hinges for frameless cabinets to install the doors. First, I drilled concealed hinge cup holes using a Kreg Concealed Hinge Jig.
Then, I screwed the hinges into each door. Keep in mind the hinges should be on the left side of the door for two of them and on the right side of the door for the other two.
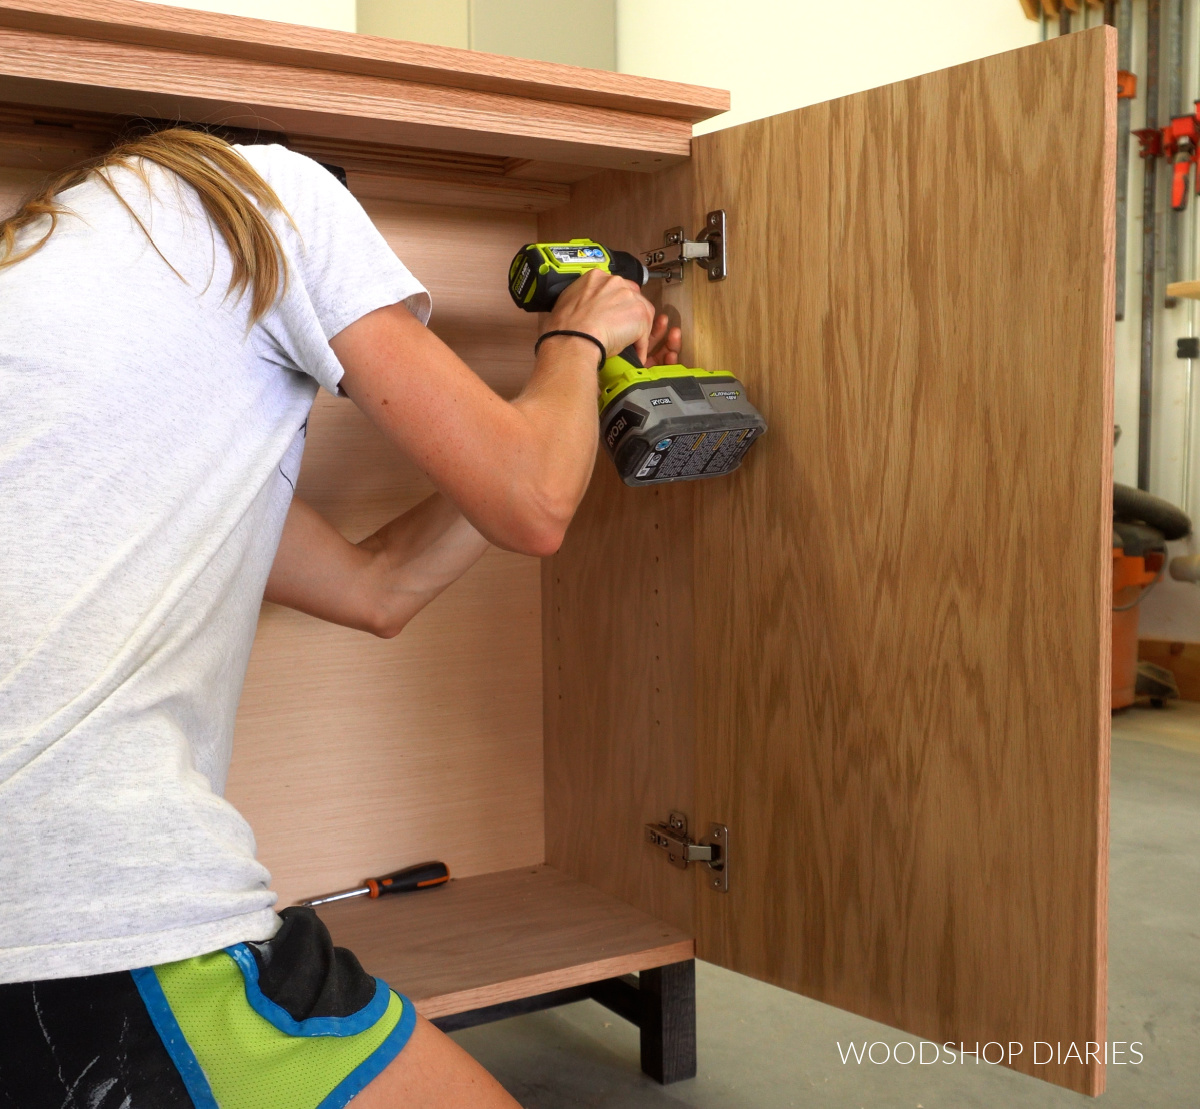
Then, I installed these doors to the cabinet and adjusted the hinges to even out the gaps between each one.
Step 7: Finish and Install Shelves
I waited until the doors were on before adding a few coats of Minwax Polycrylic clear coat to seal the cabinet.
Then, I could install the shelves using shelf pins placed in the holes I drilled earlier. I cut these shelves from ¾″ plywood.
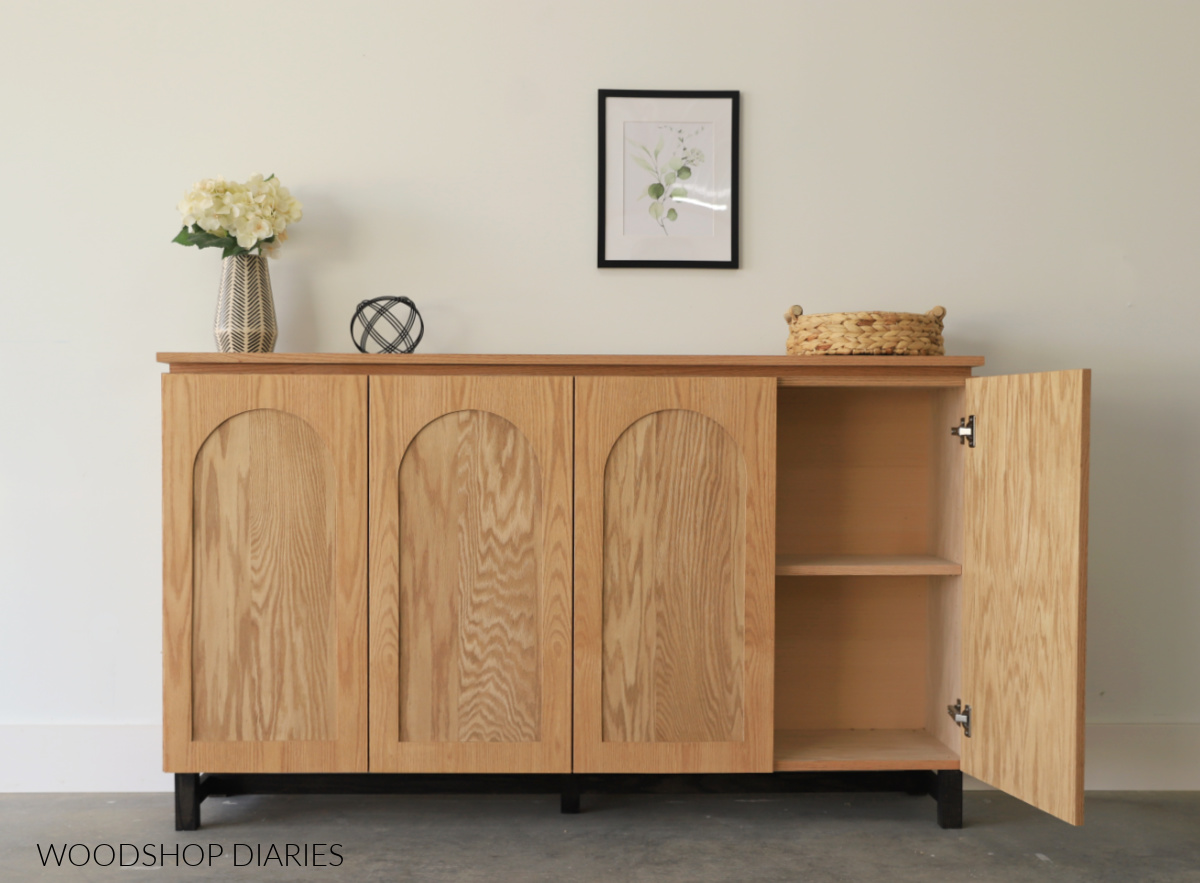
You can certainly add multiple shelves, but I just added one on each side.
This project packs plenty of storage space in a classy and unique cabinet. It would make an excellent sideboard for dishes in the dining room, a TV console in the living room, or an accent piece in the office.
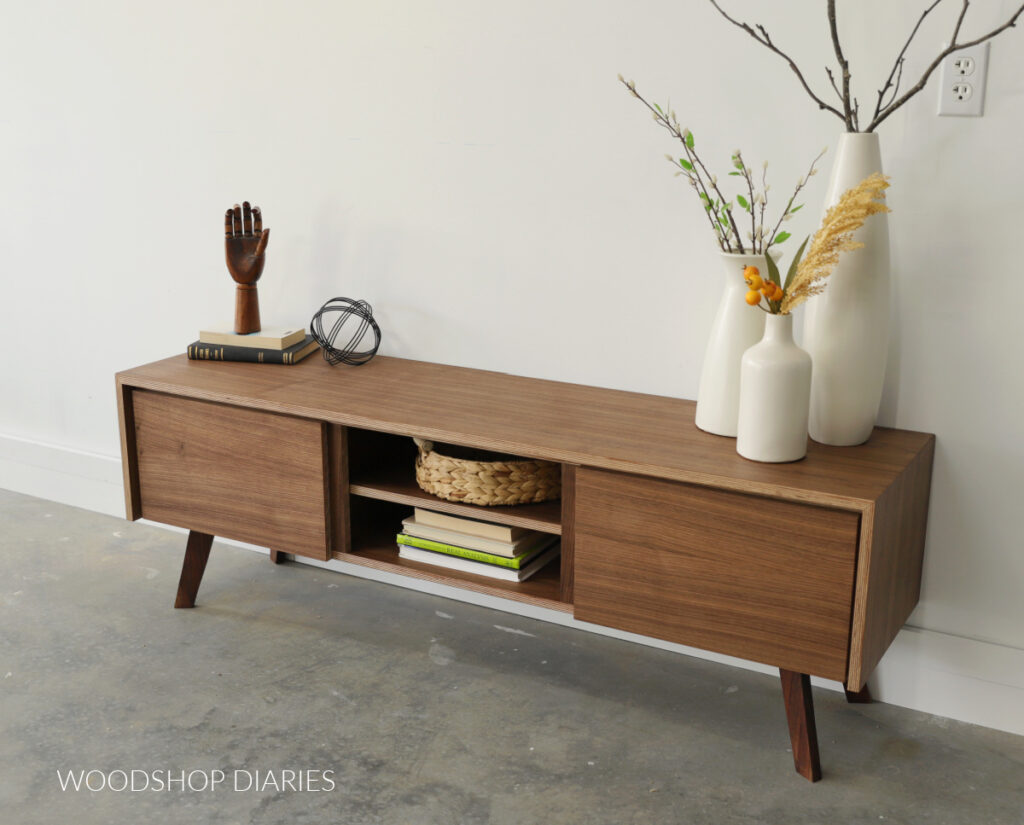
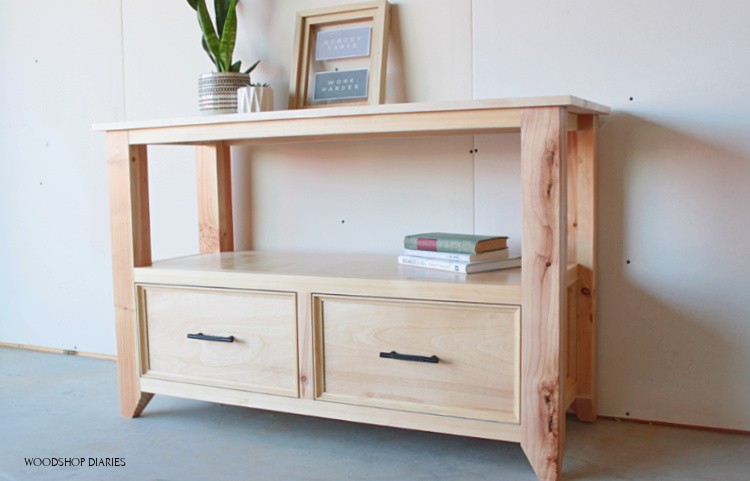
Looking for more DIY storage cabinet plans?
Here are a few of my favorite storage cabinet designs you may enjoy browsing. Click on the images below to see how to build each one!

If you enjoyed this project and would like to save it for later, be sure to pin it or share to your favorite social channel!

Until next time, friends, happy building!