In this post, I’m sharing how to build a Mid-Century style console cabinet from plywood!
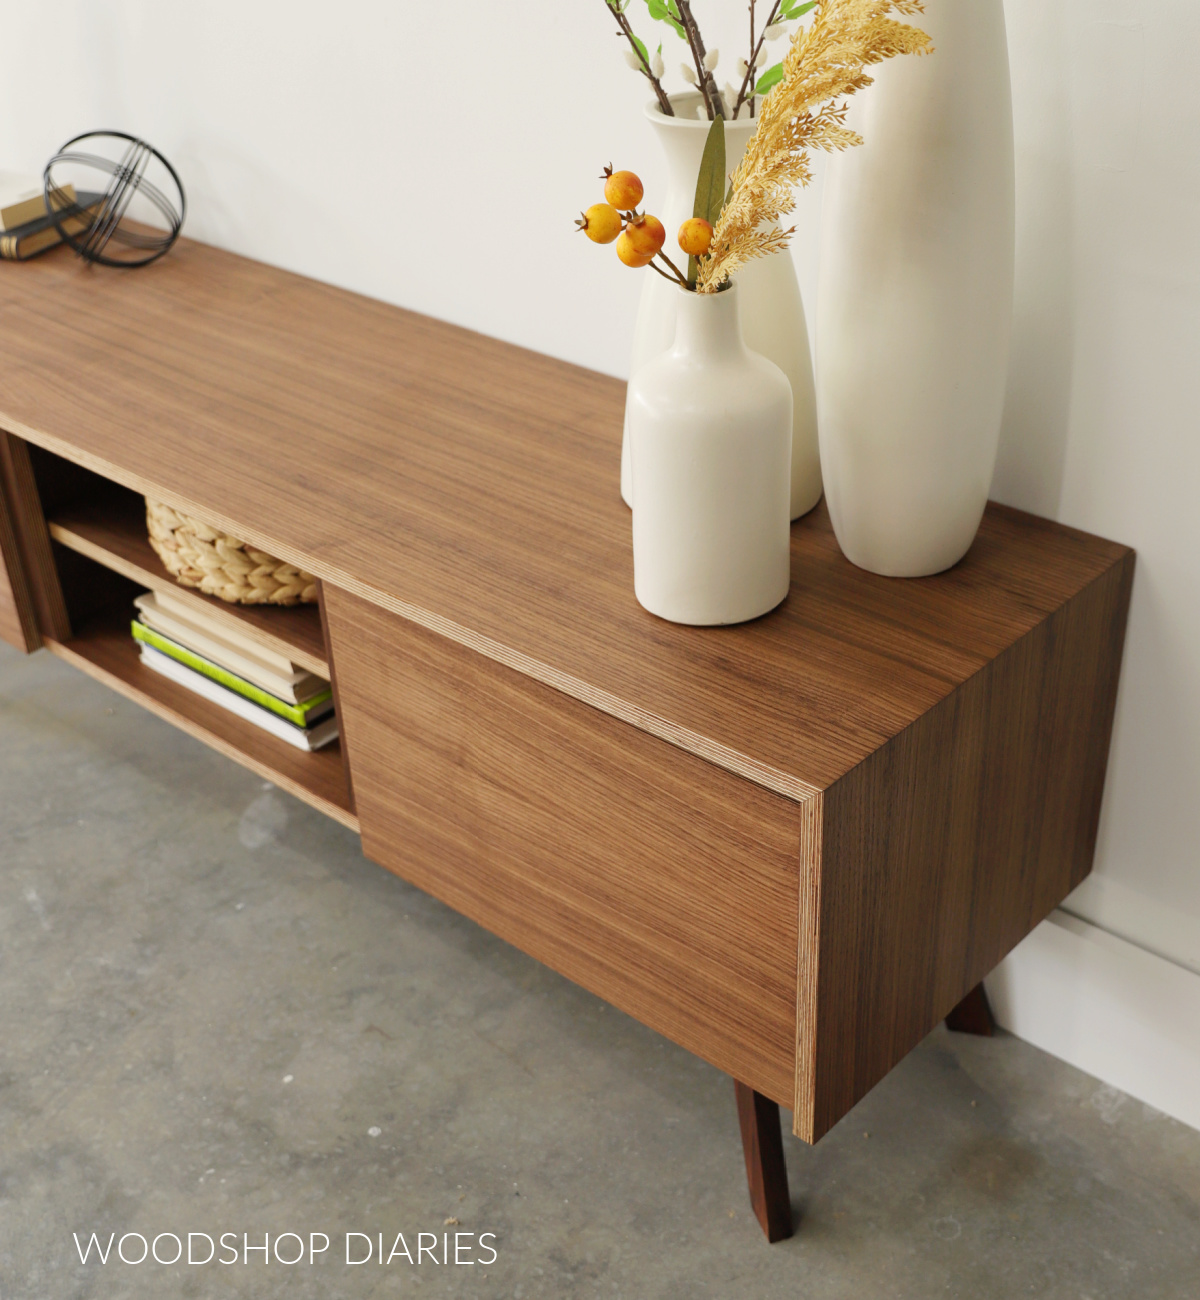
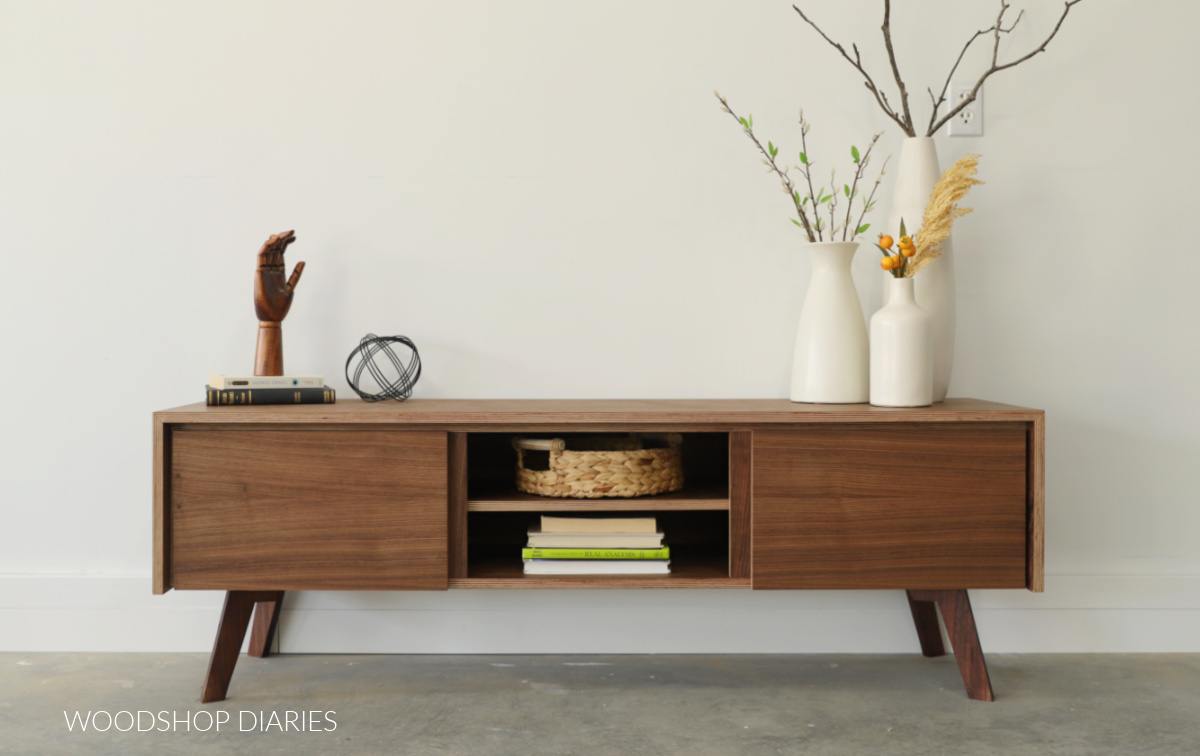
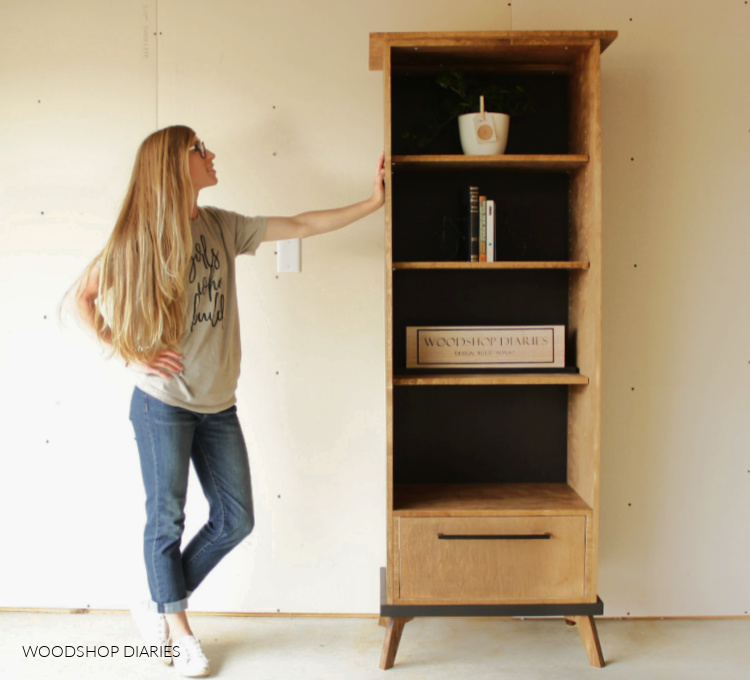
This wide, but shorter-than-usual cabinet has the coolest mid century vibe and makes a great tv stand, dining room console, or storage cabinet for an office.
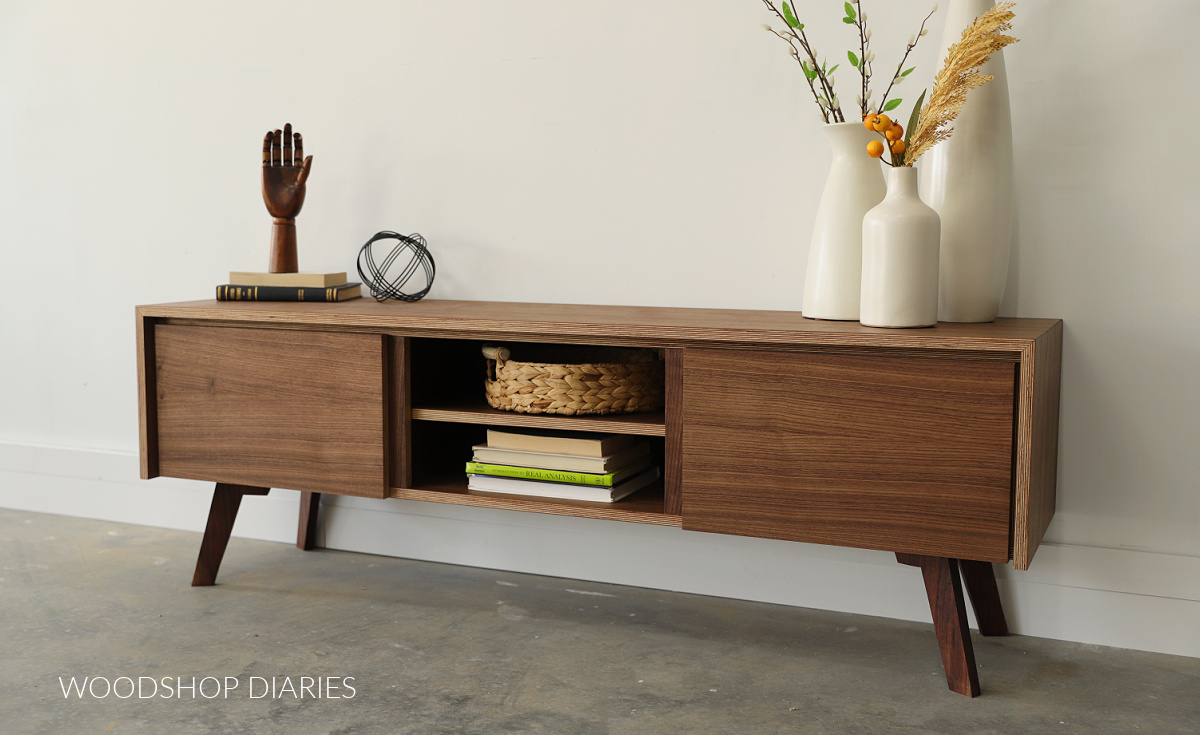
I built this modern console with walnut plywood and left the edges exposed on purpose (as you can see above) to give it an even more contemporary feel.
But of course, if you prefer covered edges, you can always apply edge banding when you build yours. The best part about building your own projects is you can customize however you’d like!
My favorite part is the continuous grain pattern on the sides and the top! But those angled, modern legs are a close second favorite.
If you love mid century style and a good plywood project, this one’s for you and I’m sharing all the details and plans below.
*This post contains affiliate links. See website policies.
What to know before building
This is a great intermediate level weekend woodworking project. It’s certainly not a difficult build, but it will involve making some precise measurements and cuts, and installing doors and shelves.
I have included several really helpful tips and additional information in the video below, so I definitely recommend checking it out before building.
Material Choices
For this project, I used PureBond EuroPly Walnut plywood. It’s absolutely beautiful, but it’s pretty pricey.
If you’re not interested in splurging on walnut plywood, that’s okay! Maple, birch, or oak plywood options are also great options. These are much cheaper options and more readily available at most lumber yards and big box stores.
Either way, I definitely recommend using a hardwood cabinet grade plywood for this project. Check out this post to learn how to choose the best plywood for your DIY projects.
What to do about the plywood edges
I almost always cover my plywood edges when I’m building a furniture project. I like to use iron on edge banding for this–it’s inexpensive, easy to apply, and looks amazing.
Learn how to apply iron on edge banding here.
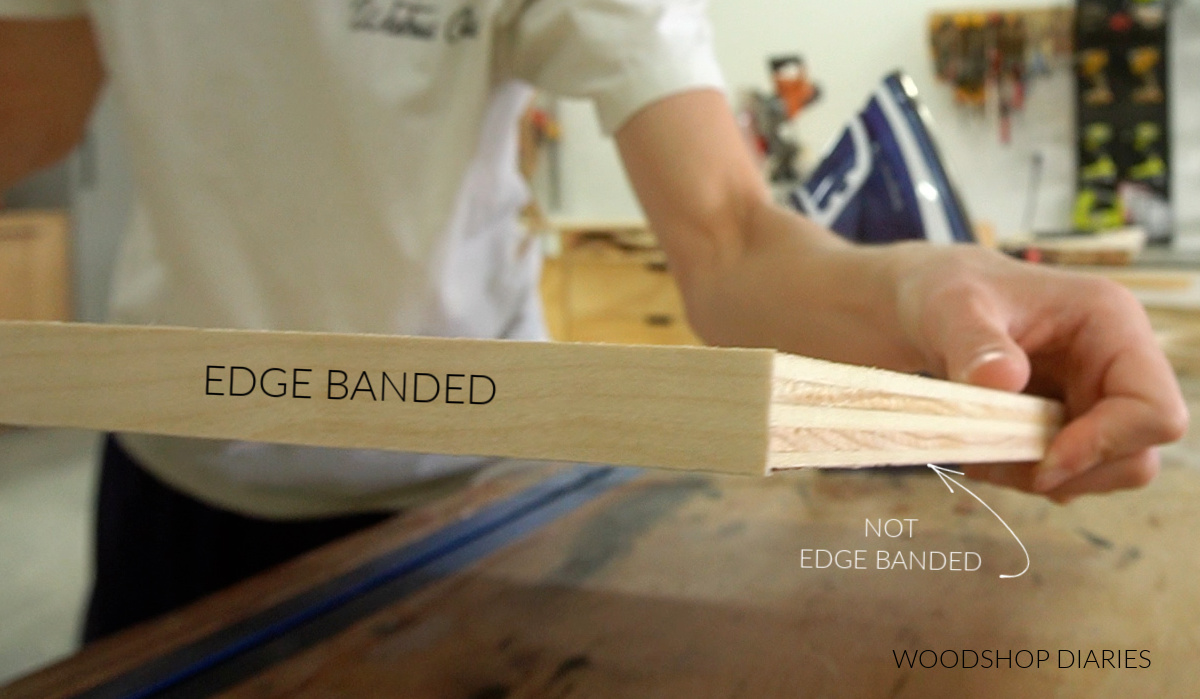
However, edge banding is certainly not REQUIRED. Sometimes people like to leave the plywood edges exposed as a design element–like in this case. I built this mid century console with exposed plywood edges to try something different than I usually do.
So when it comes to your own project, cover the edges or leave them exposed. It’s totally up to you!
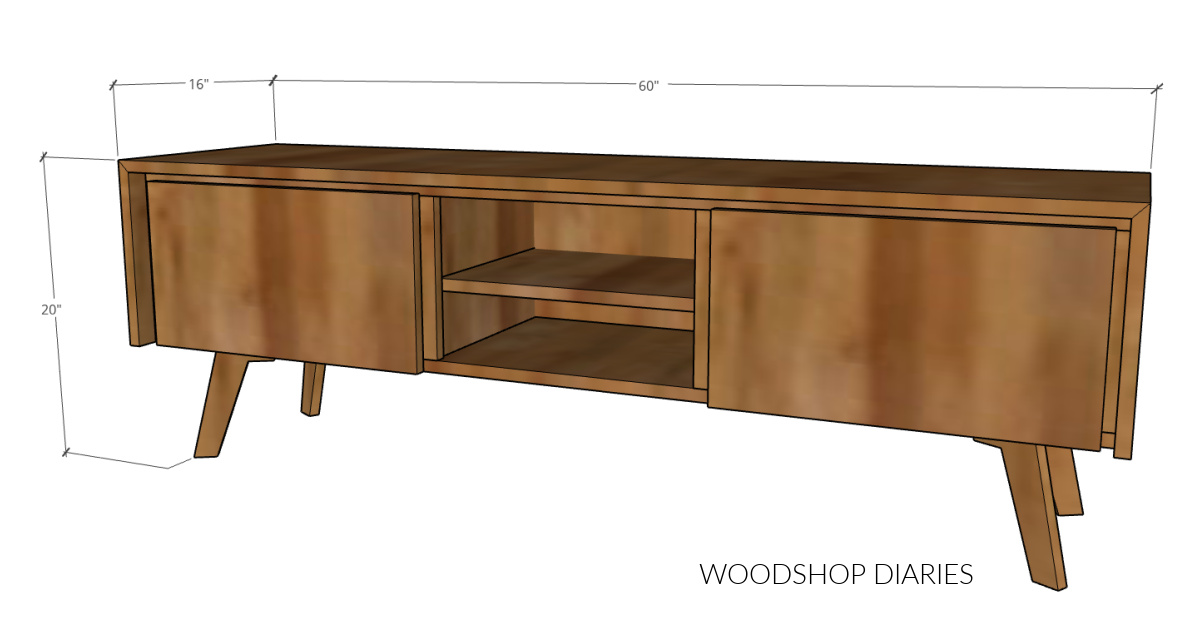
Overall Dimensions
The overall dimensions of this project are 16″ x 20″ x 60″.
Here are some resources you may find helpful throughout the build:
Enjoy building your own furniture and DIY projects? Sign up for priority access to the latest how-tos straight to your inbox!
How to Build a Mid Century Lowboy Console
I’ve got the details and steps below to see how it’s made, but I’ve also got the printable plans and video as well to make this as easy to build as possible!
If you prefer to watch, check out the full build video here. It’s packed full of helpful tips along the way:
Are videos your thing? Subscribe to my YouTube Channel for more project and how to videos!
If you prefer to print it out and take the plans to the shop with you, I’ve got you covered. Grab the Mid Century Modern Console Cabinet building plans here!
Tools & Materials
Tools:
- Drill/Driver
- Circular Saw and cutting guides
- Pocket Hole Jig
- Shelf Pin Jig
- Concealed Hinge Jig
- Jig Saw
- Speed Square
- Miter Saw (optional)
- Corner Clamps
Materials:
- (2) 4×8 sheets ¾″ plywood (walnut plywood used here)
- (2) pair concealed hinges for full overlay doors on frameless cabinets
- Shelf Pins
- 1 ¼” pocket hole screws
- 1 ¼” & 2″ wood screws
- Wood Glue
- Edge Banding (optional)
- Painters Tape
Step 1: Build Outside Console Cabinet Box
This project is made of two “boxes.” One is the main cabinet–the inside box. And the outside box is basically a top and two sides that kind of “wraps around” the main box.
In the video, I made the inside box first, then cut and glued up the outside box to fit around it. The problem was that when I glued up the outside box, the opening ended up being ⅛″ smaller than the inside box–so they wouldn’t fit together.
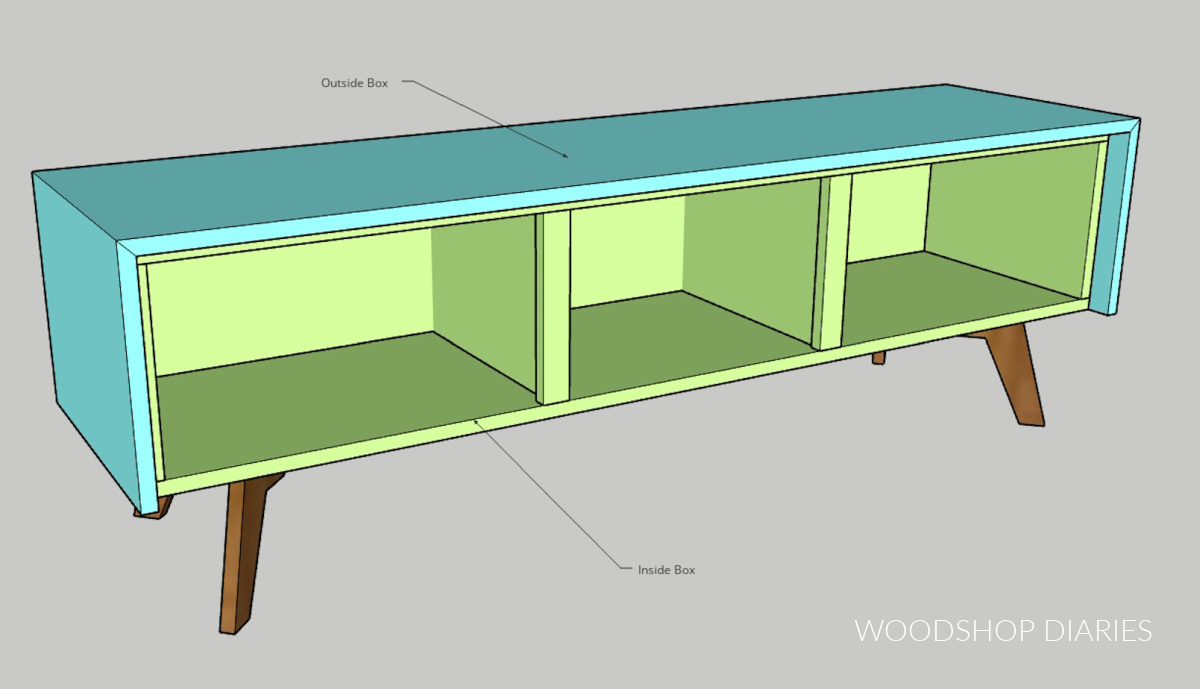
I had to take the inside box apart, trim it down, and reassemble it–which was a pain. So I recommend doing exactly the opposite of what I did. Make the outside box first, then build the inside box to fit the opening.
To make the outside box, I ripped a strip from my plywood sheet to 16″ wide using a circular saw and Kreg Rip Cut. RELATED: How to cut plywood sheets
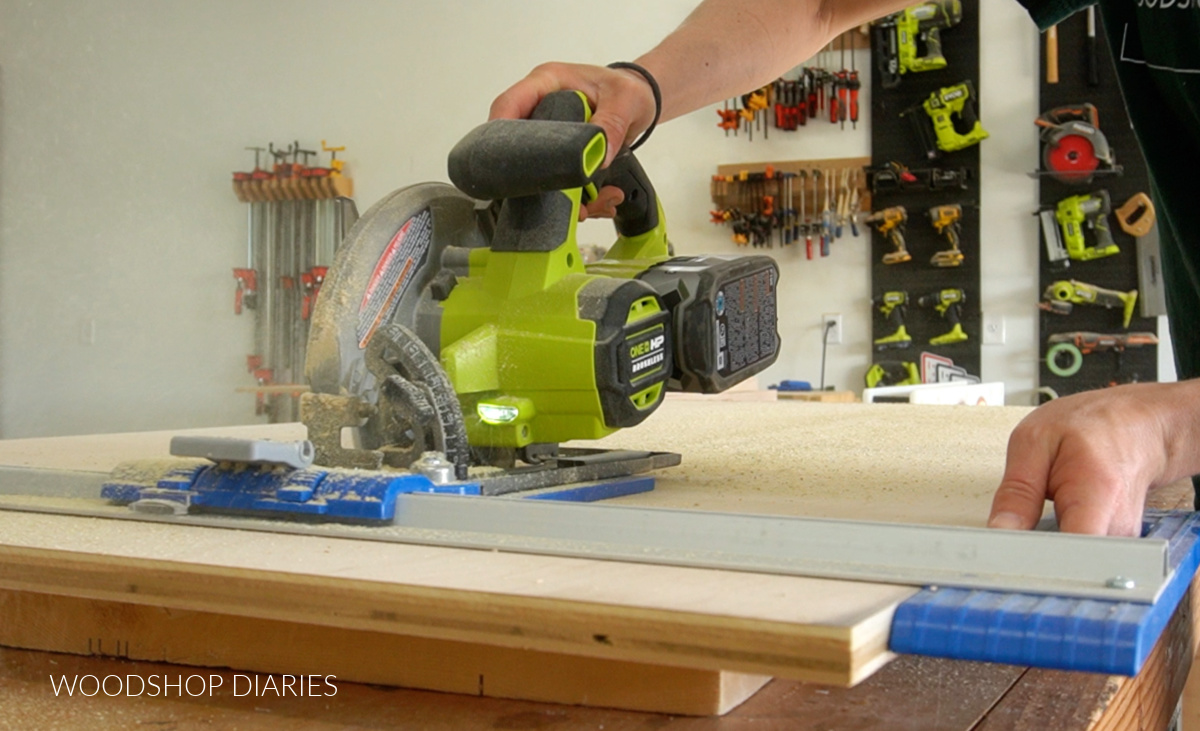
I wanted this box to have a continuous grain pattern, so needed to cut my pieces from this strip with a 45 degree bevel. That way, they can kind of “fold together” at the corners.
I used a straight edge and my circular saw to cut these pieces and I set the circ saw’s bevel angle to 45 degrees. I highly recommend checking out the video for more information on cutting these pieces.
I cut a side piece first to 12″ at the longest point, then I cut the top piece to 60″ long, then another side piece 12″ long. The side pieces have one end square and one end beveled.
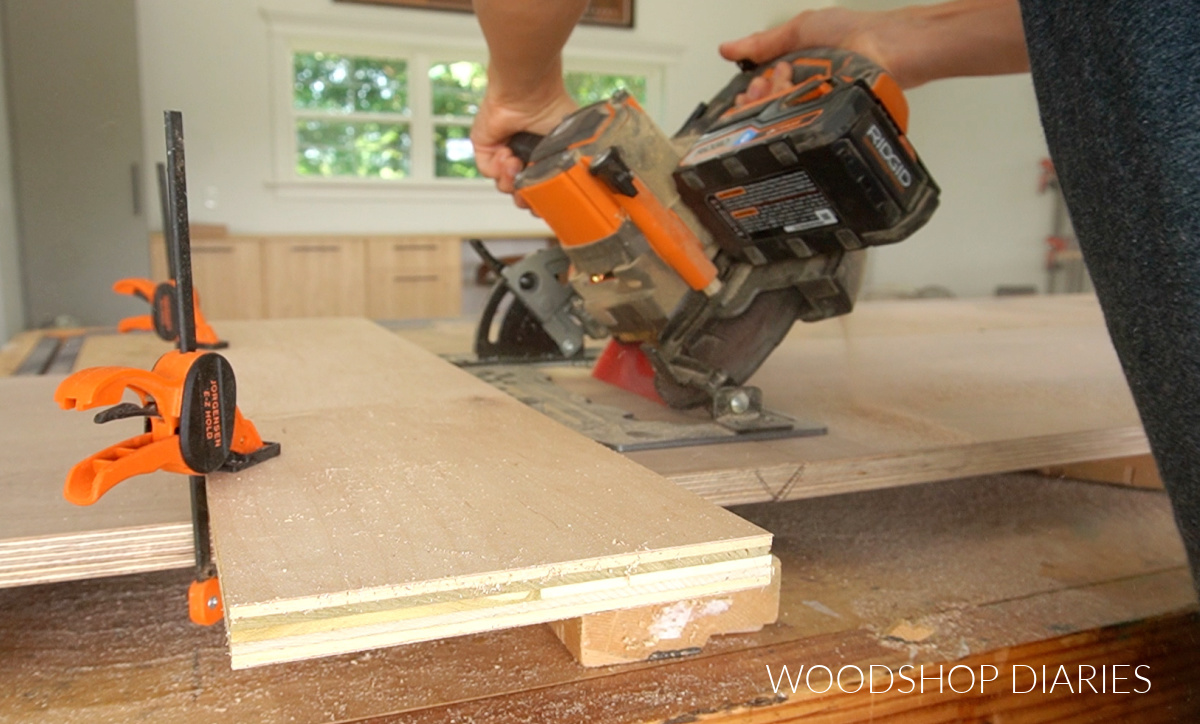
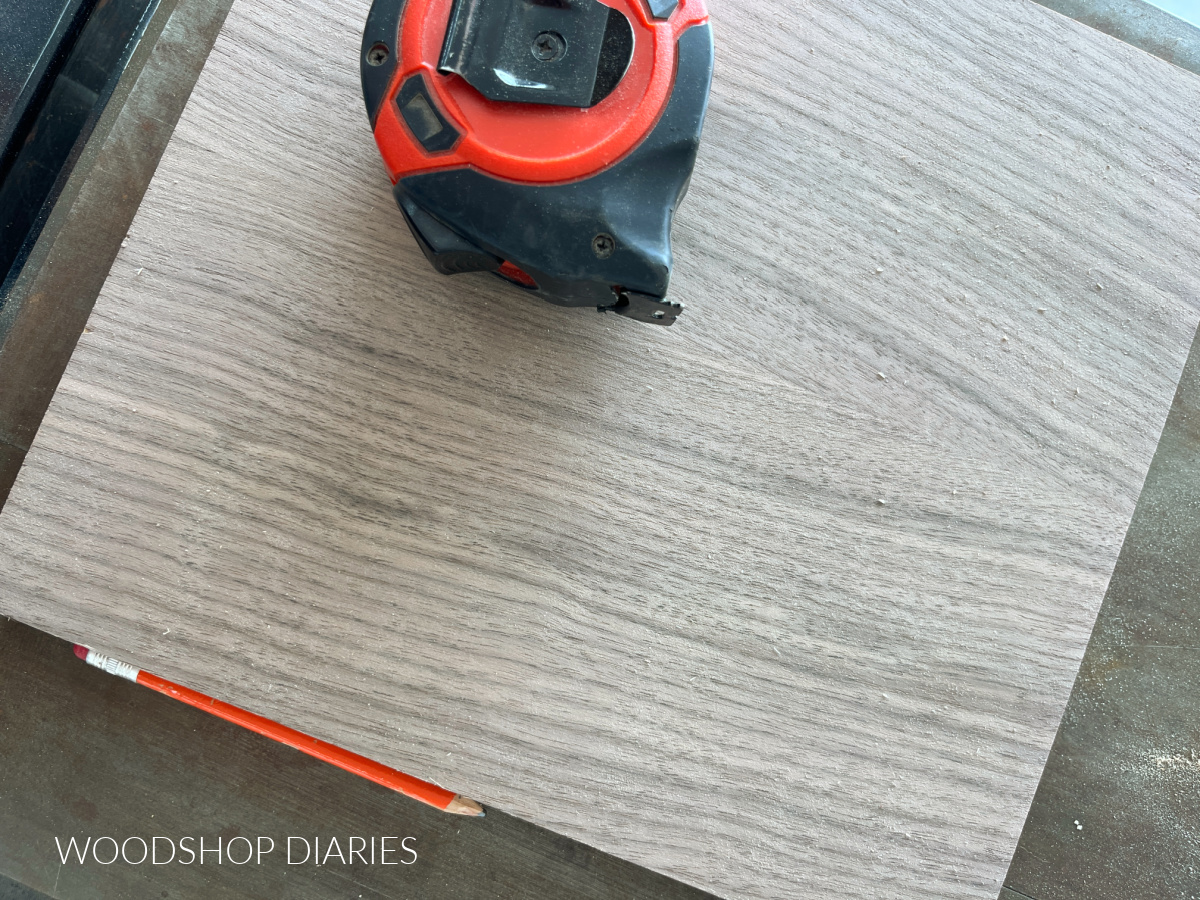
Note that you’re basically just cutting “Vs” out of the plywood sheet. I marked them with pencil on the board edge (as you can see in the image above) so I could keep track of how I needed to cut my pieces.
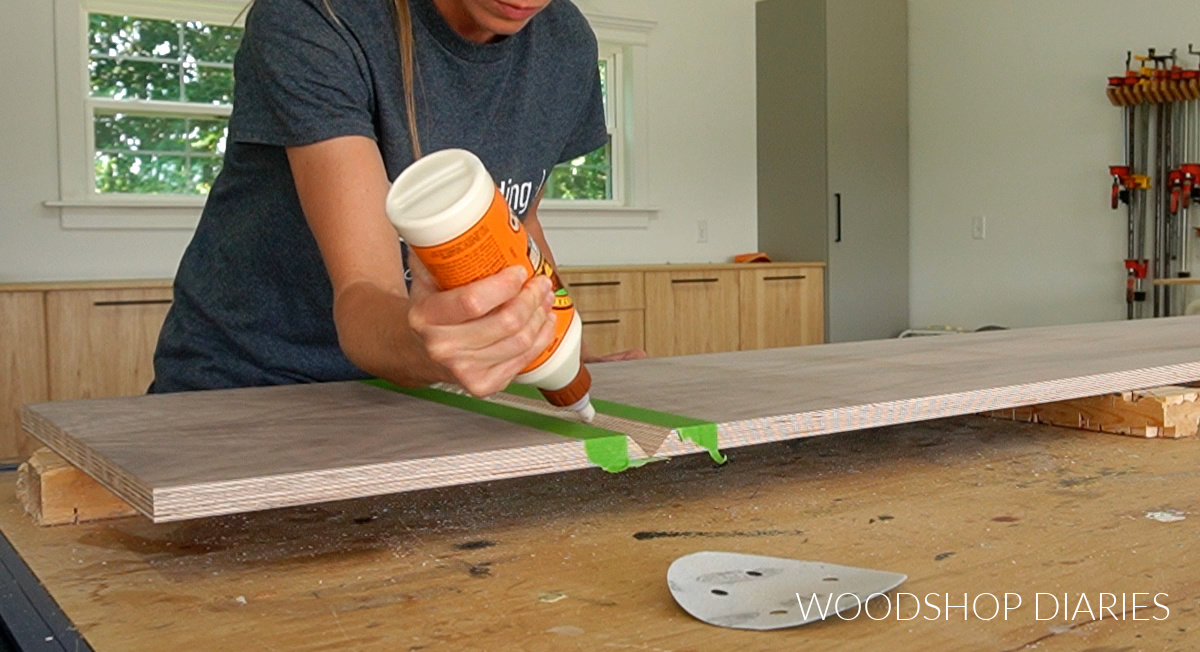
I laid these pieces out on my workbench so the long sides were together and the grain was running continuously across them on the top. Then I applied some painters tape along the joints to help hold them together during glue up.
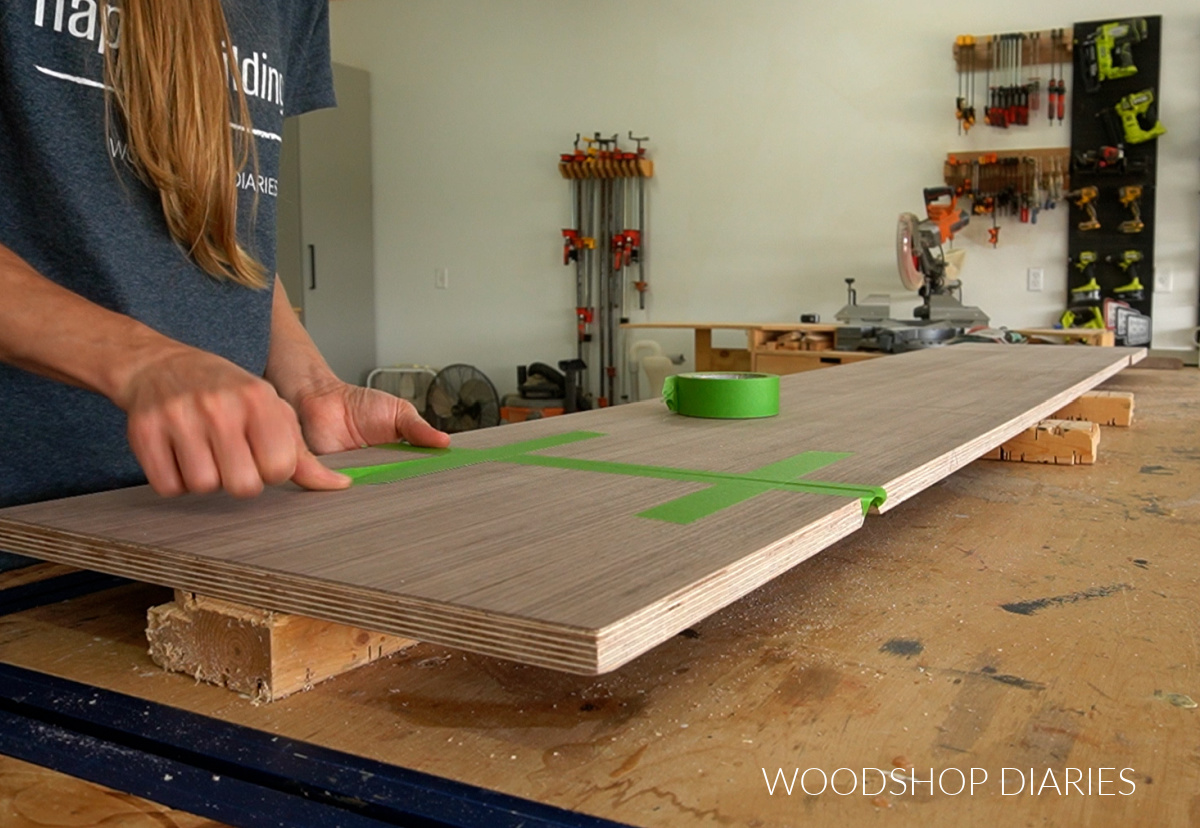
I flipped this over and added some more painters tape on the edges of the joints. This will help keep the glue squeeze out from getting all over the wood.
I applied wood glue to the Vs, then folded them over and clamped them square with corner clamps.
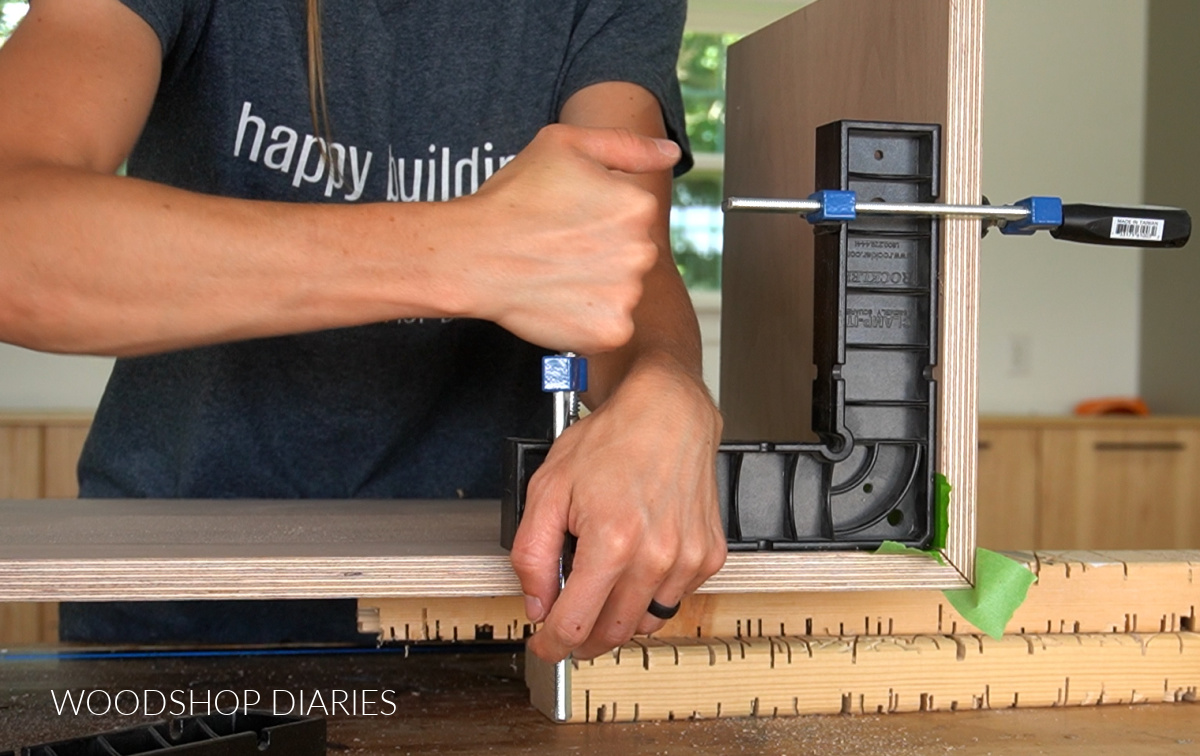
Once the glue was FULLY DRY, I removed the clamps and the tape and sanded and smoothed out the corners. Then I measured the inside opening of this box before moving on.
Prefer to print? Grab the printable building plans for this mid century modern console here.
Step 2: Build Inside Console Cabinet Box
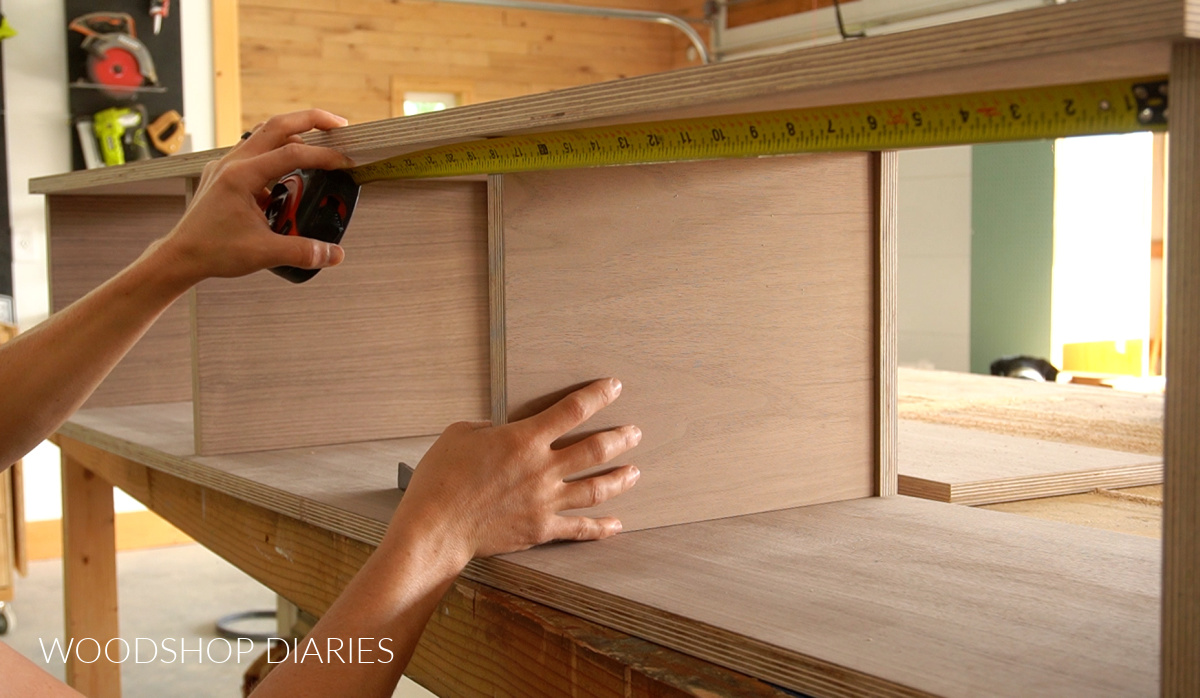
I built the inside box to fit into this opening–it should fit snug, but SLIGHTLY smaller than the opening works too. It just can’t be larger than the opening. This inside box depth is 14 ½″.
I assembled the inside console cabinet box using pocket holes and screws.
RELATED: How to use pocket holes in DIY projects
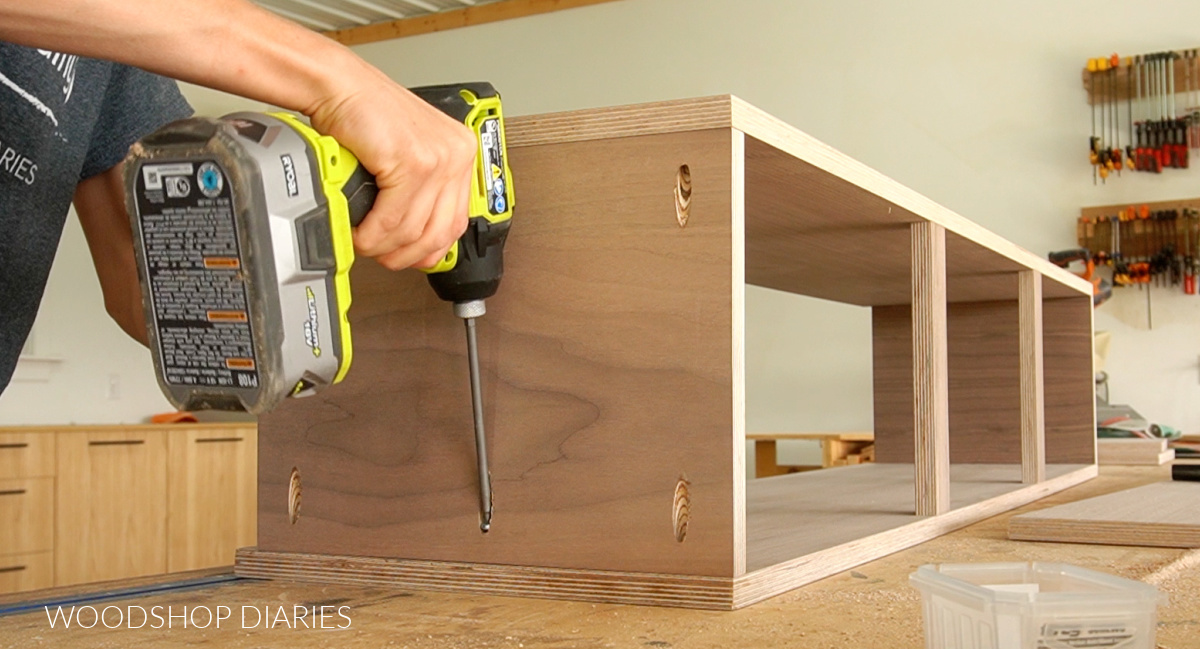
Note that the side panels are ¾″ inset from the back edge of the box. I divided the cabinet along the front with two pieces of plywood cut to 2″ wide.
Then I cut two divider panels to install into this cabinet to separate the three sections. Just like the side panels, these are inset from the back edge ¾″ as well.
I secured these in place using 1 ¼″ screws through the top and bottom panels.
Then, I cut a back panel to install along the back (this is why the dividers and sides are inset). I used 1 ¼″ wood screws to secure this panel to the sides, dividers, and through the top and bottom.

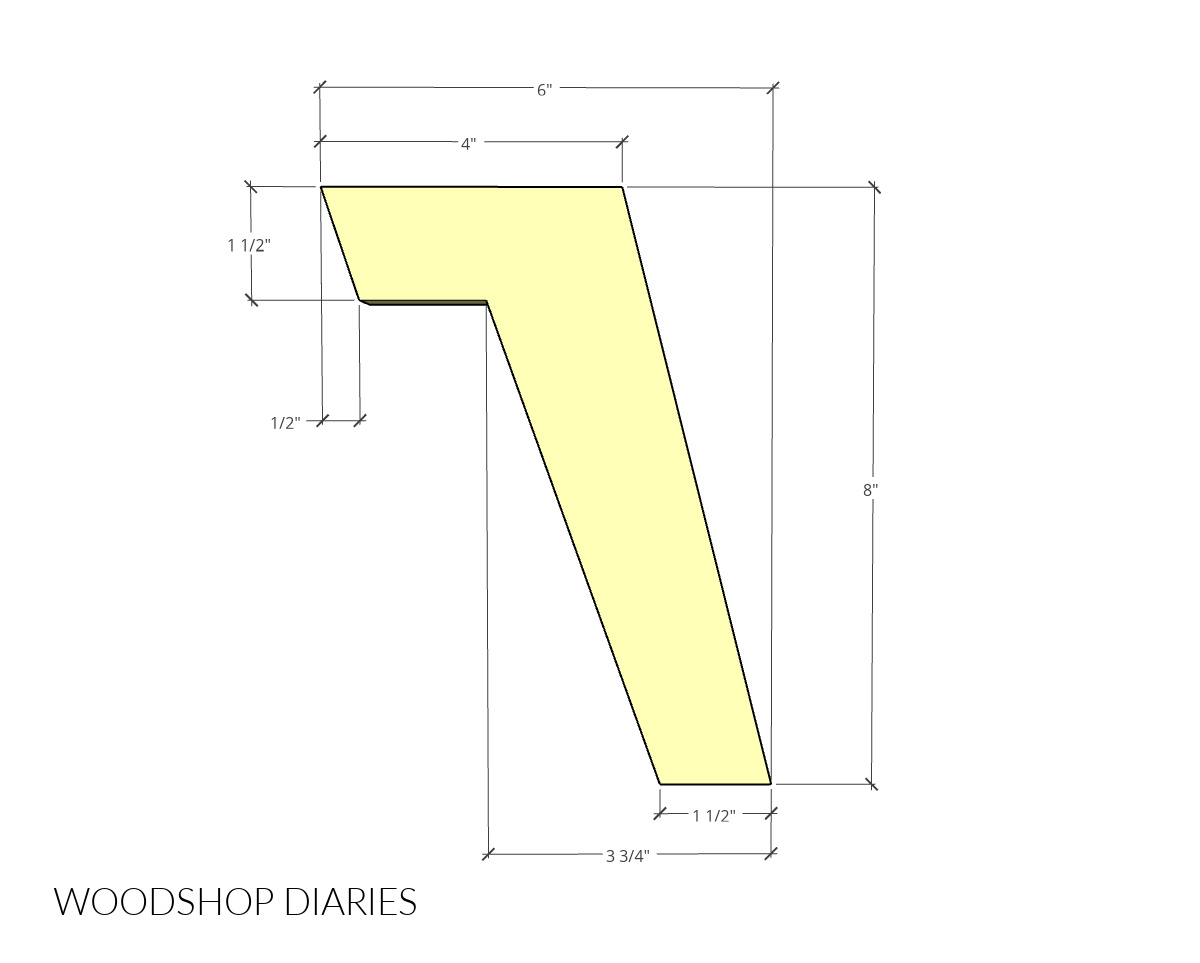
Step 3: Cut and Attach Mid Century Legs
The next part is adding the mid century style legs. I cut these legs from solid ¾″ thick walnut wood, but you could certainly cut them from some of the ¾″ plywood leftovers instead. Or, get creative and cut the legs from a contrasting color wood.
I drew out the leg template onto my board and cut it out with a jig saw. Once I had one cut, I traced it three times on the board and cut those out to make 4 legs total.
I flipped the box from step 2 upside down and used my speed square to locate these legs at a 30 degree angle, 4″ in from the corners.
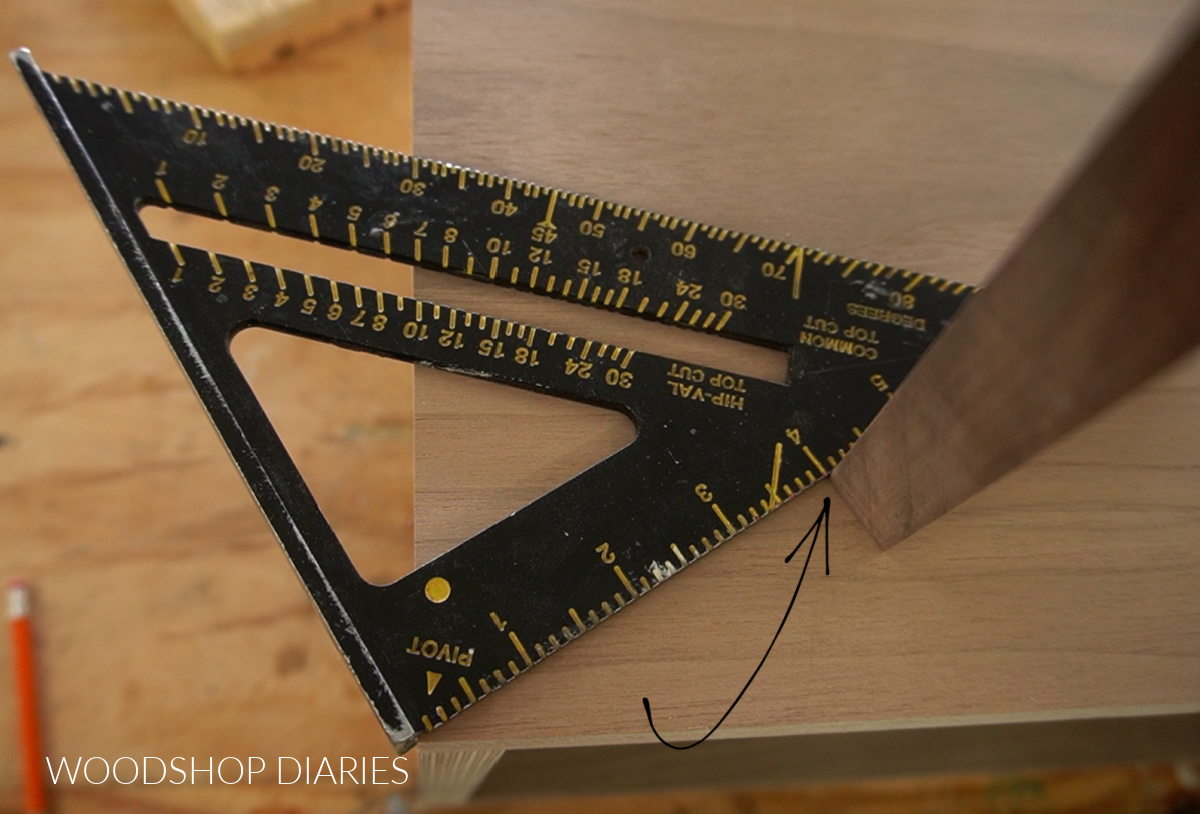
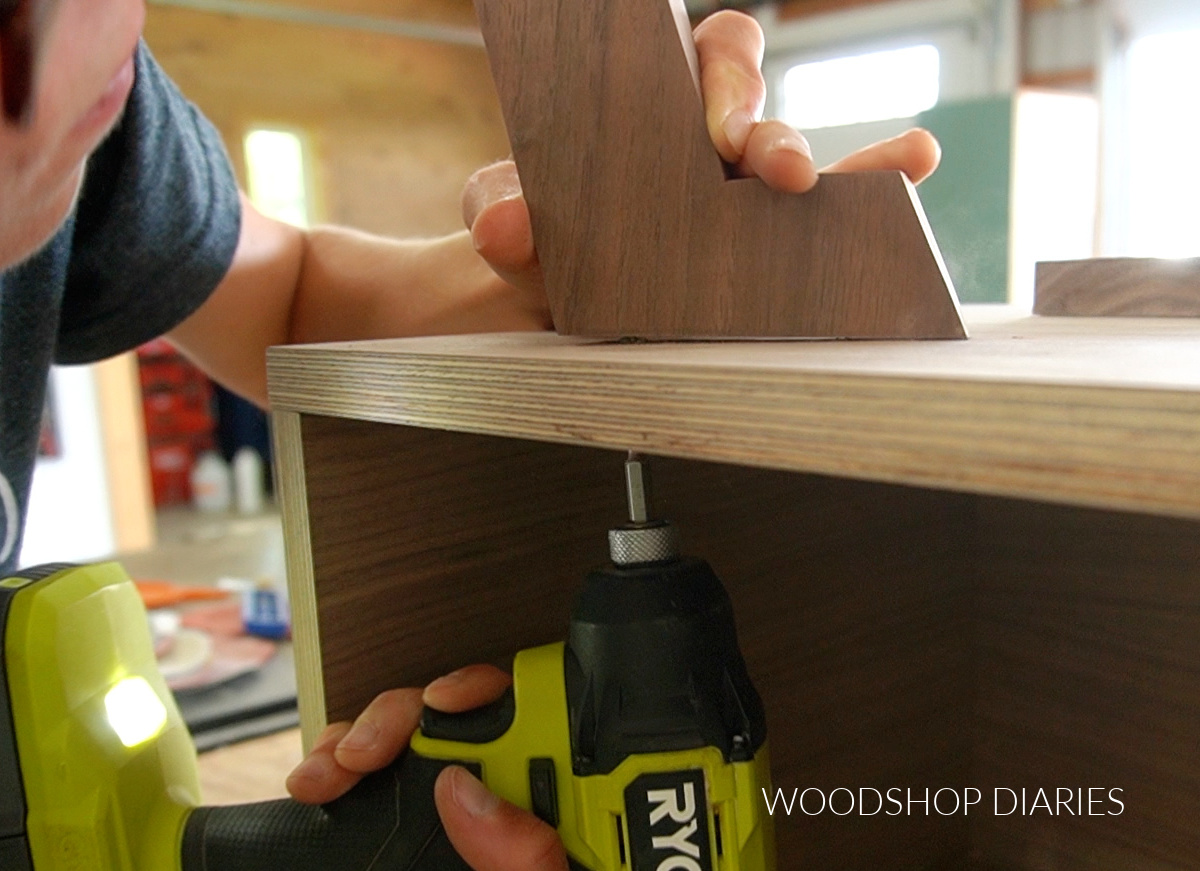
Once I positioned the legs, I traced around each one. Tracing the locations allows me to predrill two holes at each leg through the bottom panel.
I applied wood glue, and used 2″ wood screws through these predrilled holes from inside the cabinet to install each leg.
Printable building plans for this project are available here!
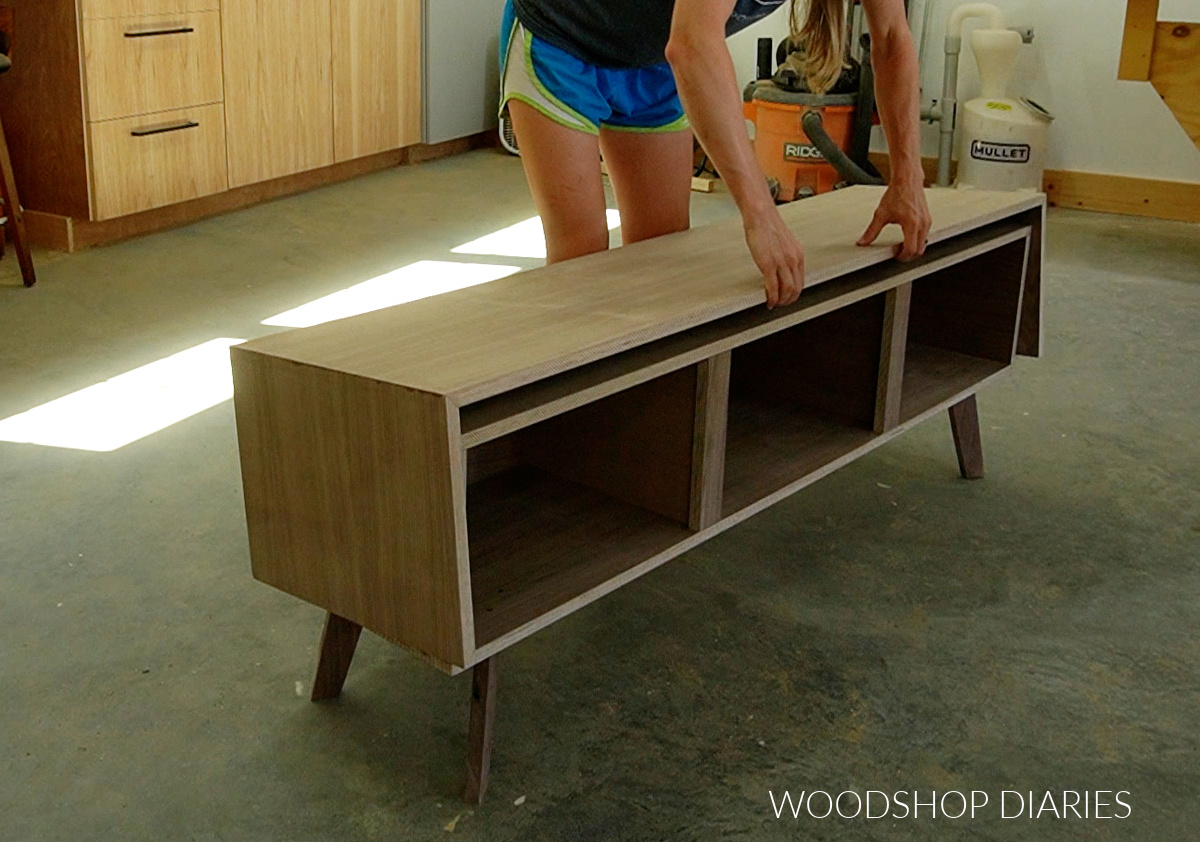
Step 4: Attach Outside Box to Inside Box
Now it was time to bring the pieces together and attach the outside box around the inside box.
In the video, I didn’t use glue and I explain why there. But I recommend (if you plan to keep this project for a while) slathering wood glue all over the top and sides of the inside box, then placing the outside box over it and clamping until dry.
You could also use a couple screws through the inside of the cabinet to help hold this while the glue dries, too.
The back edges of these boxes should be flush, so the outside box will overhang the front edge about 1 ½″
Step 5: Add Doors
Next, I cut two ¾″ plywood doors for the left and right sides of the cabinet. I cut these a bit “out of the ordinary” for overlay doors.
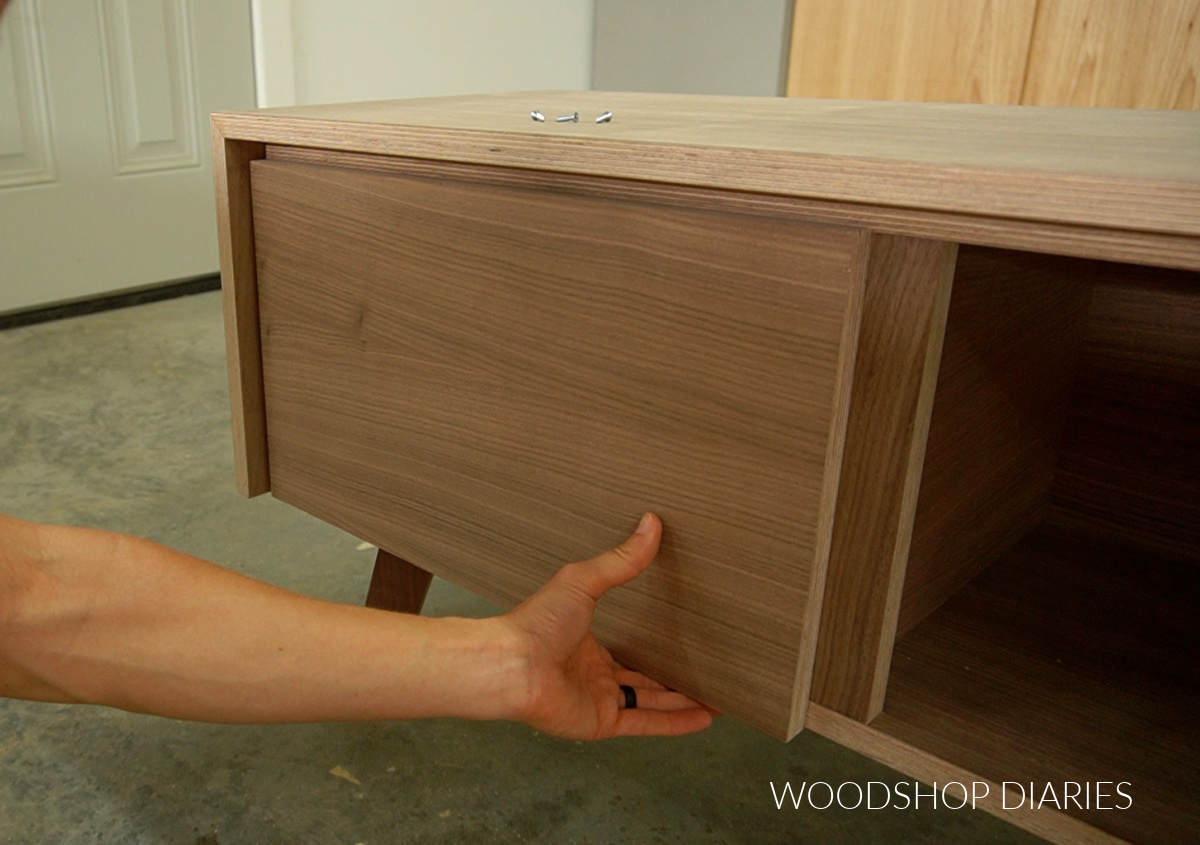
I cut these so they would fully overhang the bottom edge, but only overlay the top ⅛″. They overlay the outside edge ¼″ and the face frame divider piece about ½″. This is not “standard” sizing, but was done intentionally.
RELATED: How to determine cabinet door size
The video linked above has some great tips and information on installing the doors. I used my Kreg Concealed Hinge Jig to drill concealed hinge cup holes in my doors as close to the edge as possible.
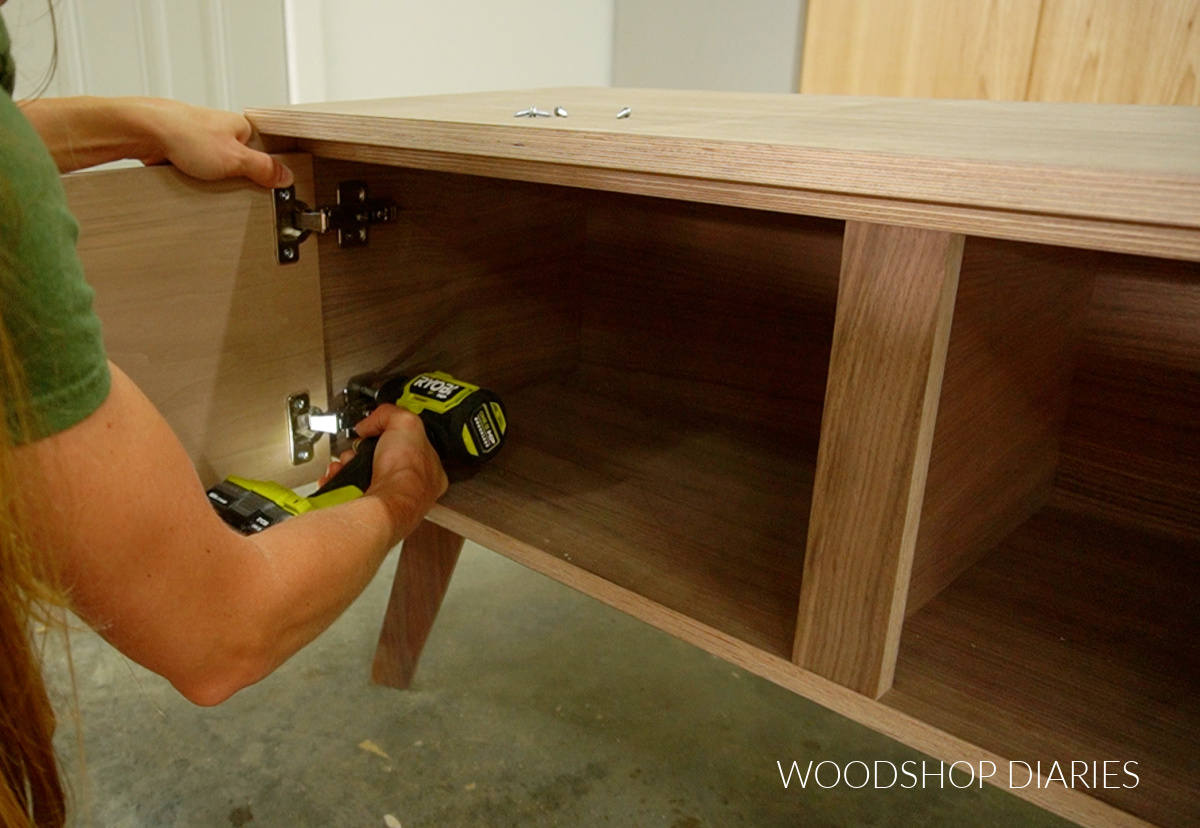
Then, I installed the concealed hinges for full overlay on frameless cabinets into these holes and onto the doors and adjusted as needed to get my overlays how I wanted.
Notice below how the door overhangs the whole bottom, but barely overhangs the top.
RELATED: How to install and adjust concealed hinges
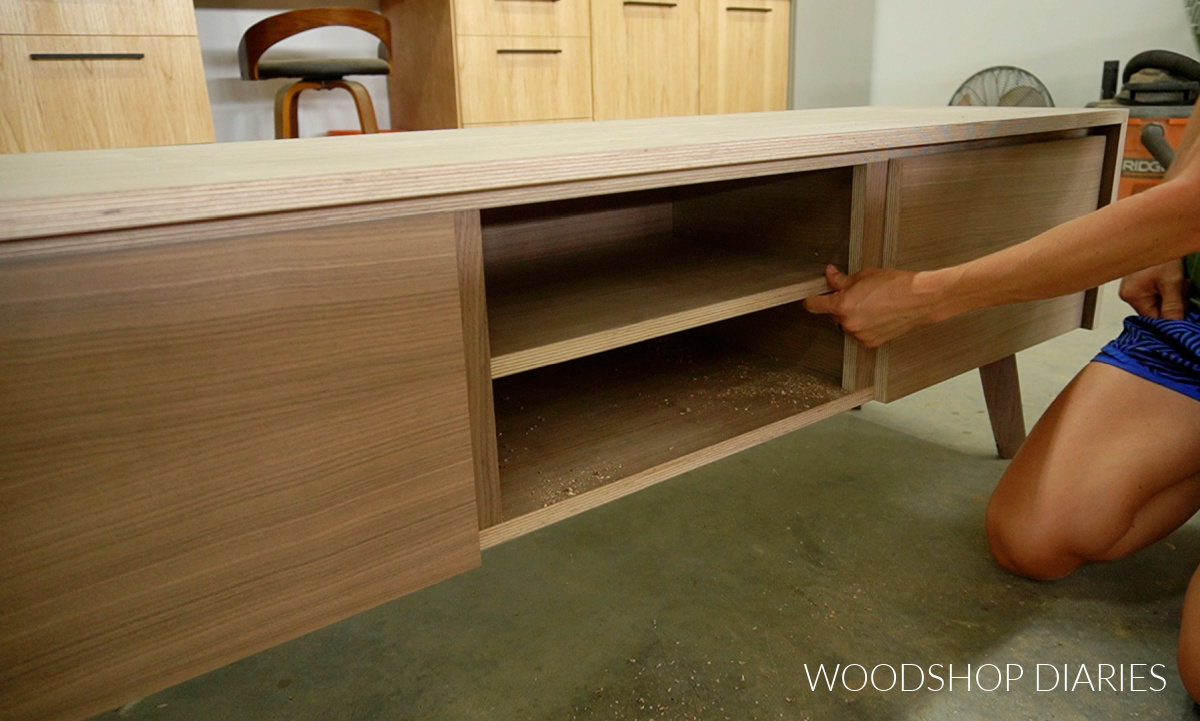
Step 6: Add Shelf
And the final part was adding an adjustable shelf for the middle section of the console cabinet. This section is pretty small, so there isn’t a whole lot of room for adjustment.
I used my Kreg Shelf Pin Jig to drill a few holes into each side of this middle section and cut a shelf to place inside with shelf pins.
RELATED: How to add adjustable shelves to a cabinet
If you didn’t want an adjustable shelf, you could also install this as a stationary shelf with pocket holes and screws.
Step 7: Finish
And finally, this project was ready for paint, stain, and/or finish. For this walnut plywood, I wanted to keep the natural color, so I used Walrus Oil Furniture Butter to finish it.
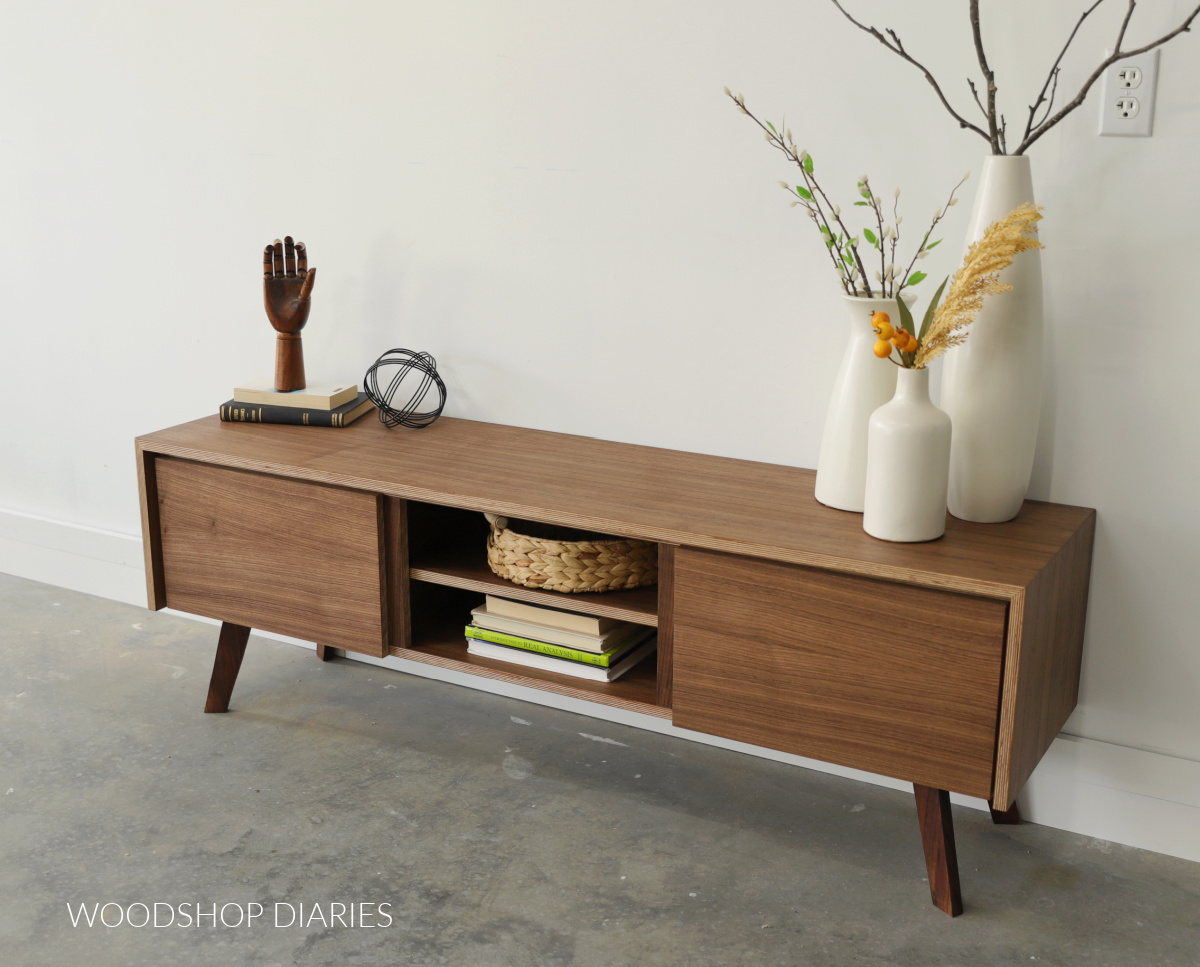
But feel free to paint or stain your project however you’d like! And now it’s ready to display! This cabinet would be the perfect TV console in a modern style living room.
But, it could also be great under some large wall art in a dining room or office.
Don’t forget to grab the printable plans to build your own here.
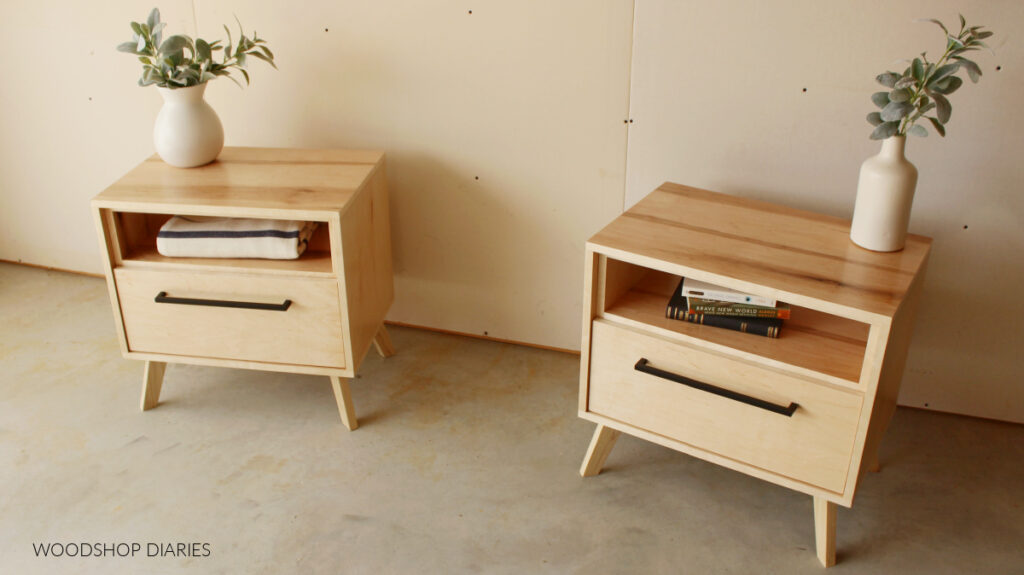
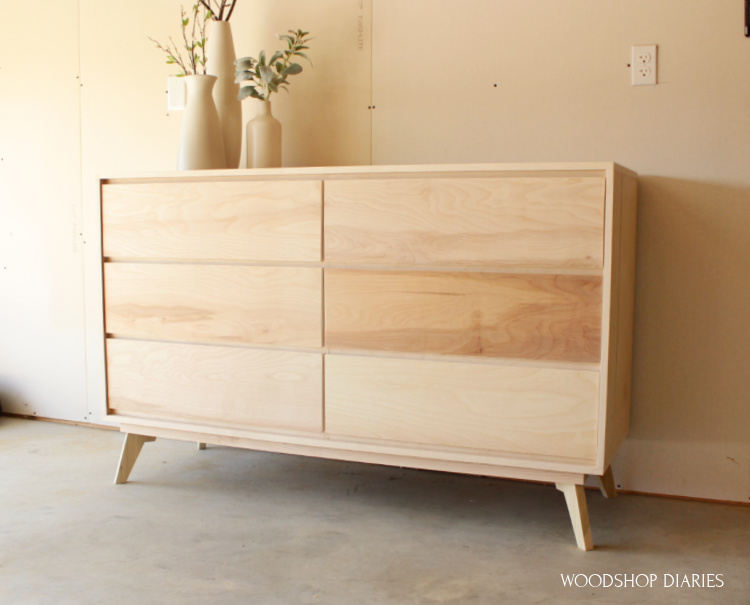
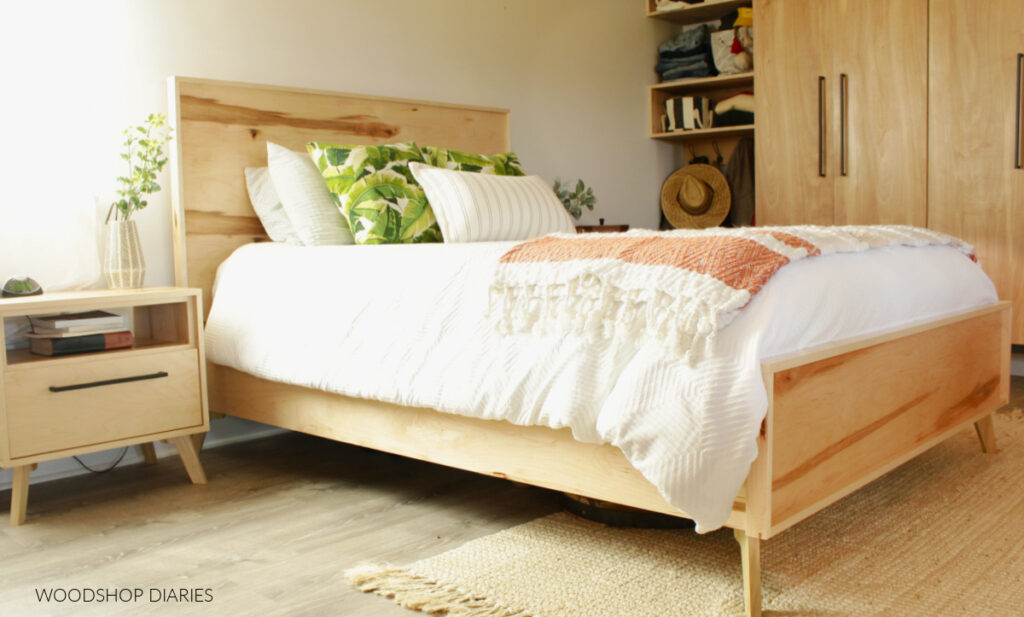
Looking for more Mid Century Designs?
Mid century style is making a come back. I’ve been trying to incorporate some of these modern designs in my builds the last few years. Here are a few more mid century style projects you may enjoy!

If you want to save this project for later, be sure to pin it or share it to your favorite social channel!

Until next time, friends, happy building!