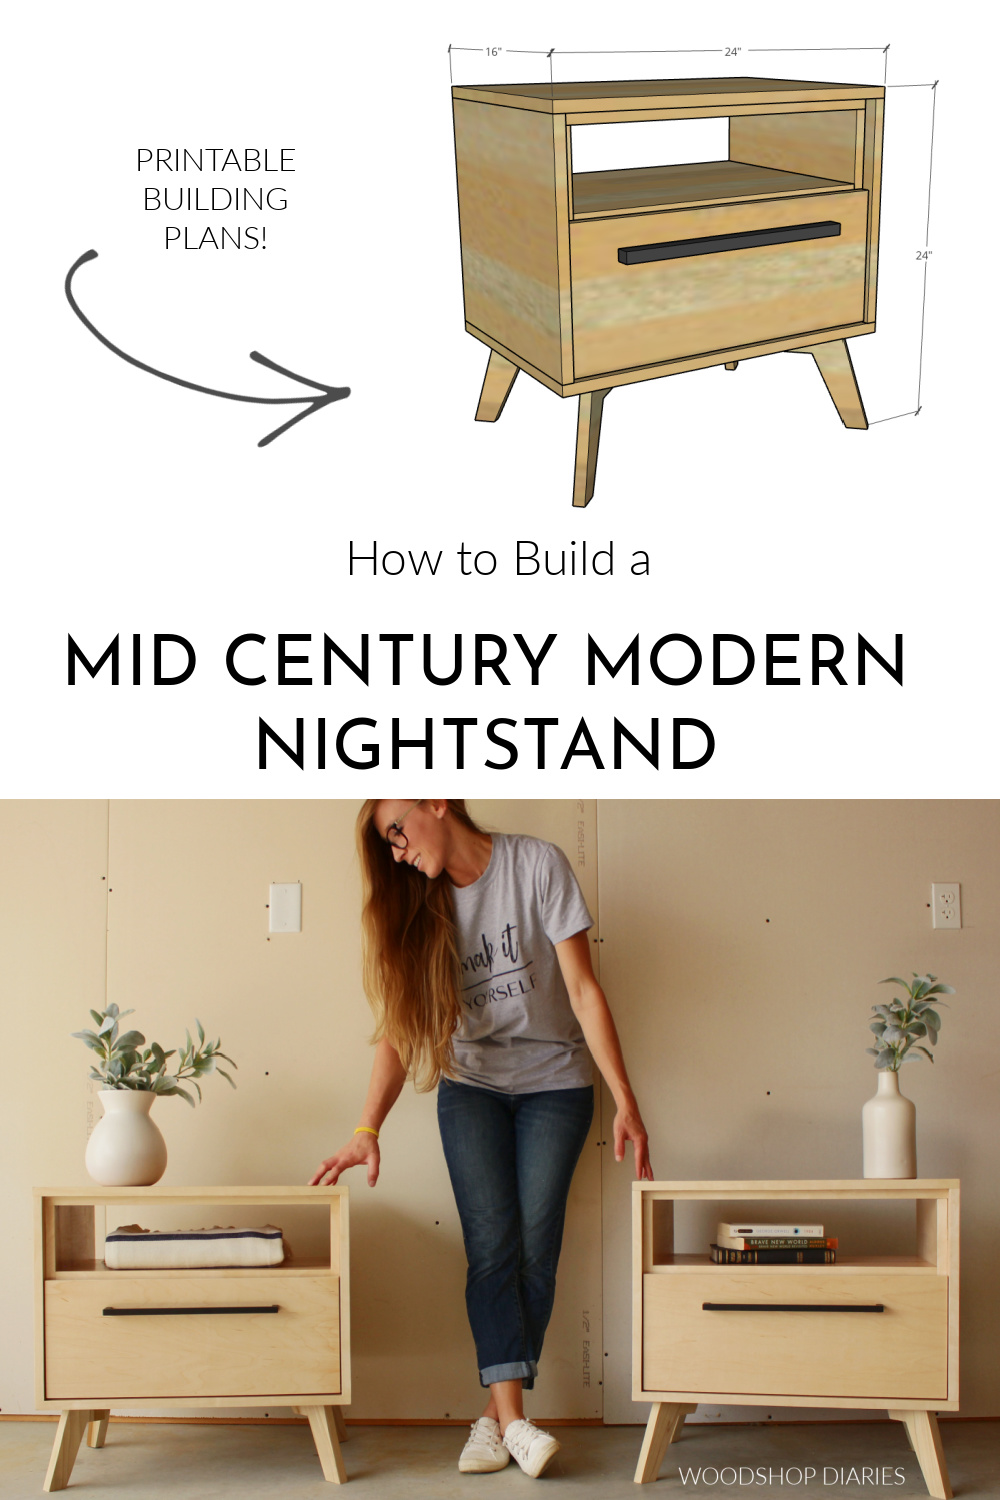
In this post, I’ll show you how to build an adorable DIY mid century modern nightstand from one sheet of plywood and a few wood scraps!
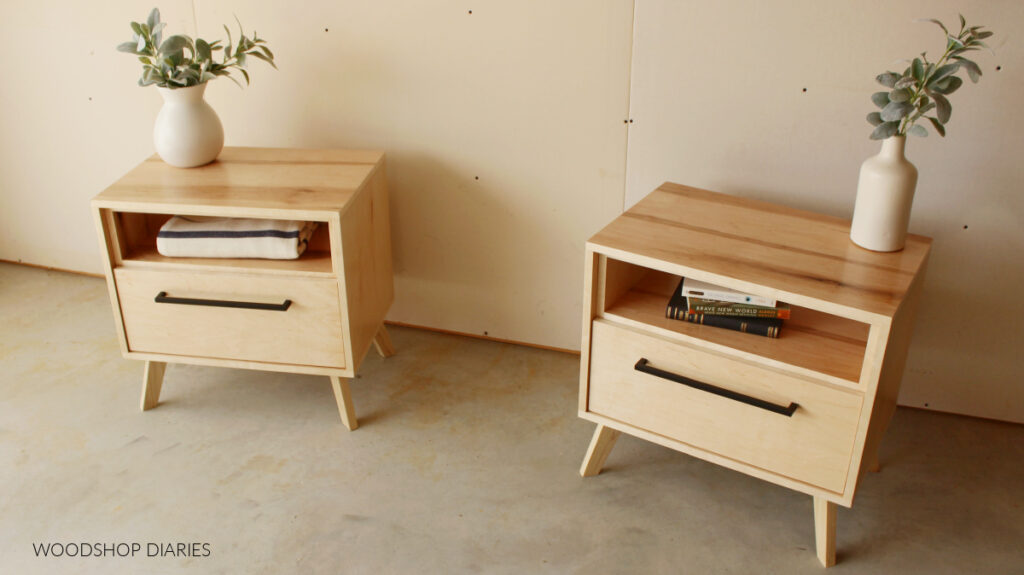
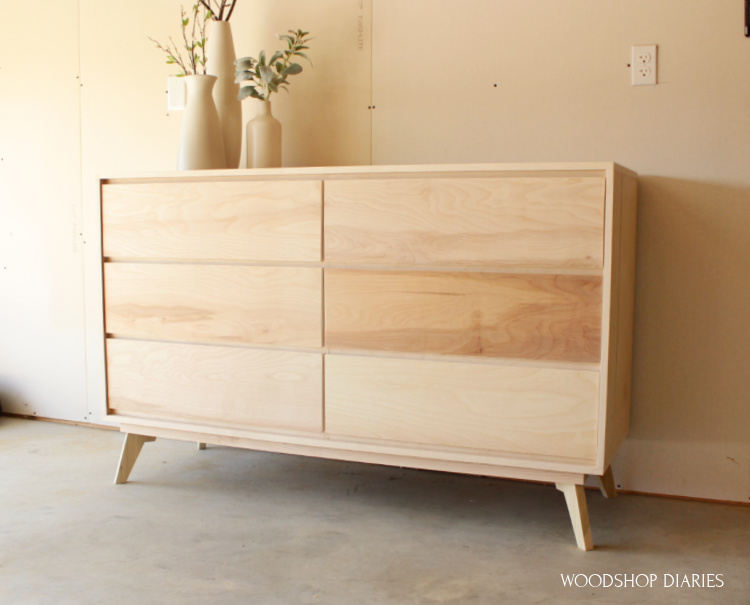
Do these look familiar at all?? Maybe they remind you of the recent DIY mid century modern dresser from a few months back?
.
After I built that dresser, I had so many requests from you all for matching mid century modern nightstands, so here we are! 🙂
.
I love a good mid century furniture project, so I’m actually planning an entire matching series–be sure to subscribe to the newsletter below to make sure you don’t miss out on any of those projects!
In the mean time, I’ve got the step by step video, plus the plans and tutorial below to build these DIY nightstands, so let’s get building!
This post contains affiliate links. See website policies.
Tools and Materials:
Tools:
- Circular Saw (cutting guides helpful, but not required–Check out this post for how to use them)
- Miter Saw (optional)
- Drill/Driver
- Pocket Hole Jig
- Jig Saw
- Table Saw (optional)
Materials:
- 1 sheet ¾″ plywood
- ¼ sheet (2’x4′) ¼″ plywood
- 1x8x8 board OR scrap 1x or ¾″ plywood to cut the legs from
- 1 ¼″ pocket hole screws
- 1 ¼″ wood screws
- 2″ wood screws
- (1) pair 14″ ball bearing drawer slides
- Wood Glue
- Edge banding
PRINTABLE BUILDING PLANS:
Notes About the Mid Century Modern Nightstand Build:
Design:
This design used simple butt joints on the corners. However, if you wanted to, you could definitely miter these corners instead for a little more seamless look.
RELATED: Check out this desk that has mitered corners for an example
.
You can use iron on edge banding to cover any exposed plywood edges you don’t want to see on the corners and the front.
.
The drawer is optional. This design looks great with or without the drawer.
.
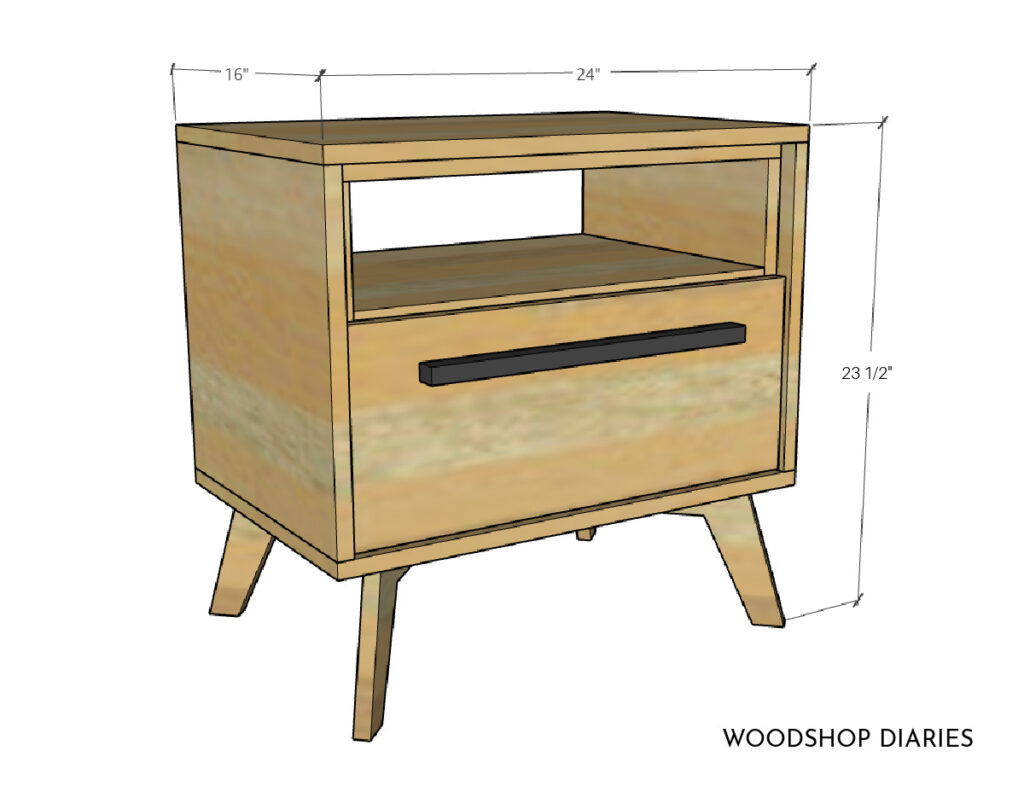
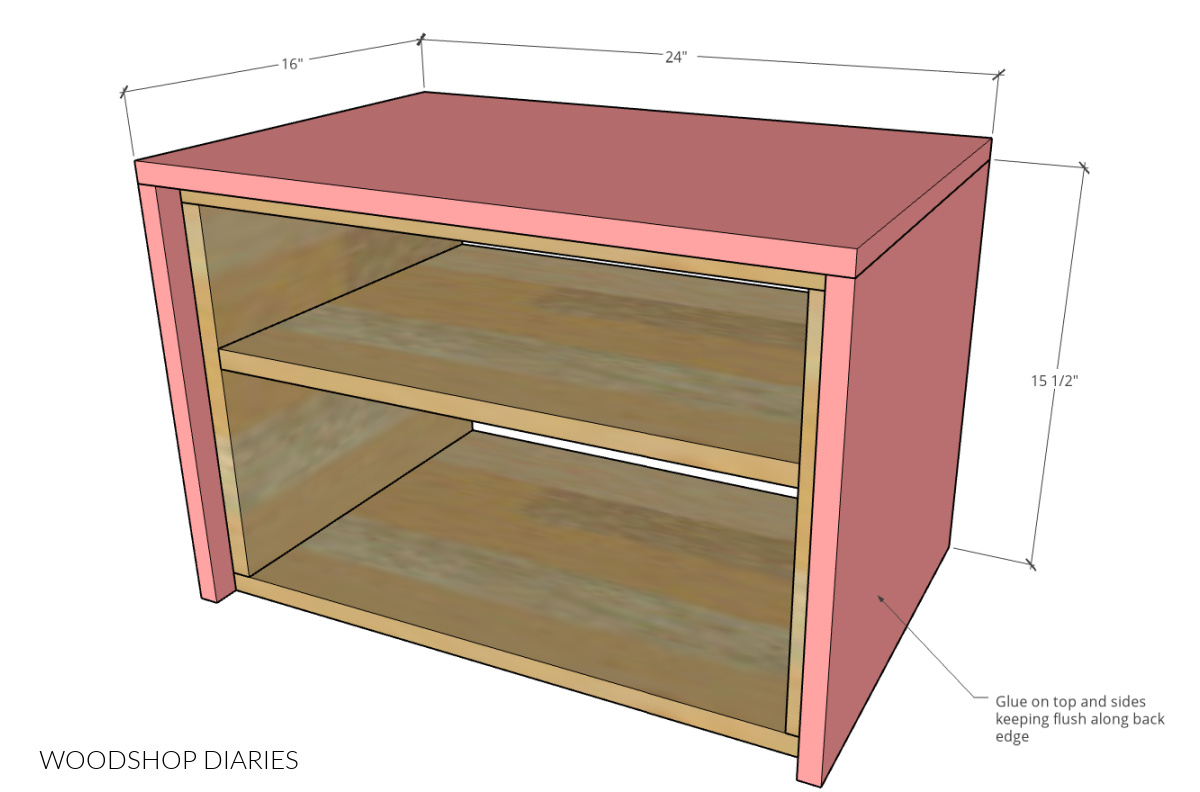
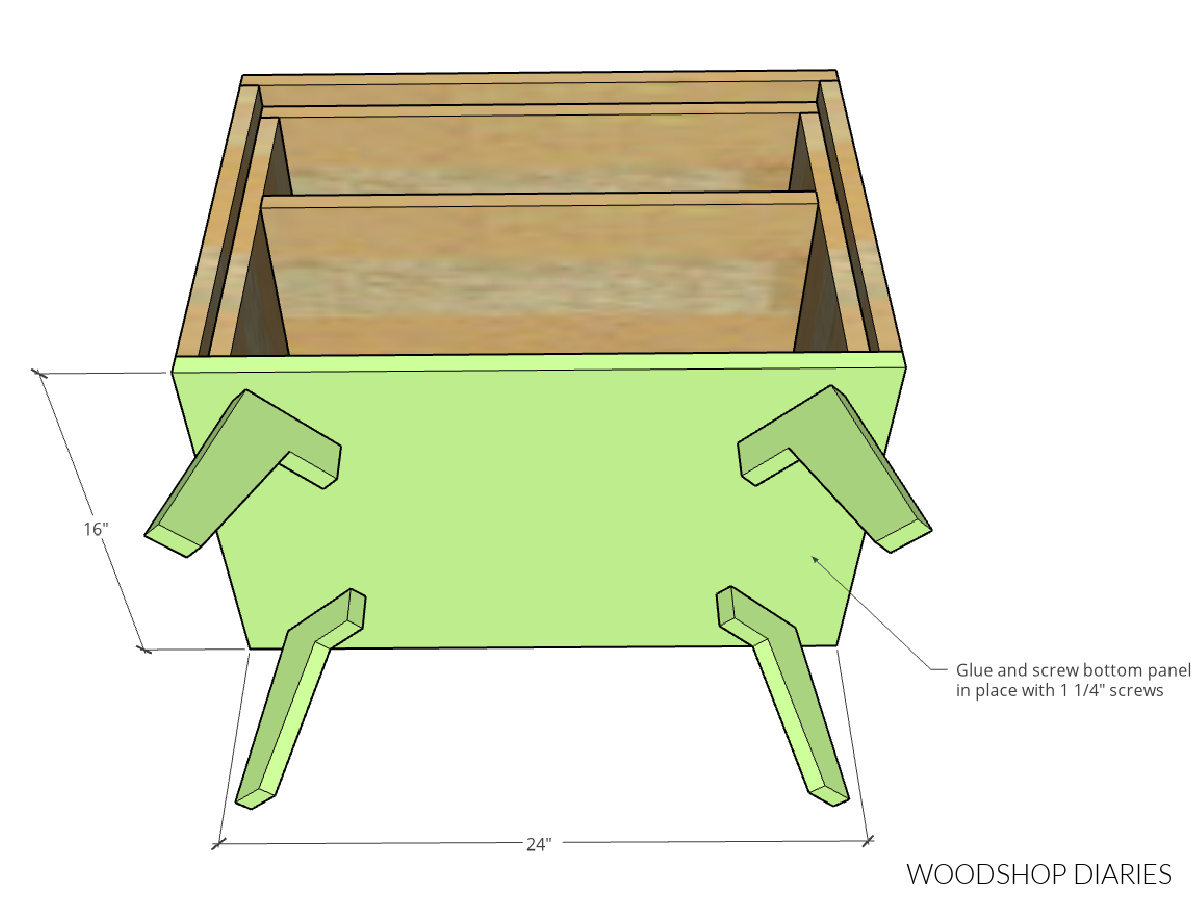
Overall dimensions:
This DIY mid century nightstand is 16″ deep, 24″ wide, and 23 ½″ tall.
Material:
This simple nightstand was made from ¾″ maple hardwood plywood. Any ¾″ plywood would work for this project, but hardwood plywoods (like maple, birch, oak) are the best looking/feeling options.
.
You only need a small piece (13″ x 19″) of ¼″ plywood for the drawer bottom, so a ¼ sheet is plenty, or you can browse your scrap pile to see if you can use what you already have.
.
I cut these leg pieces from some 1x poplar scraps. However, you can use any 1x material you have available or even use leftover ¾″ plywood to cut them from.
.
Note that plywood tends to shred a little when using a jig saw, so a solid wood option might look better.
.
Some helpful posts to reference during this build:
More DIY projects using this mid century modern style furniture leg:

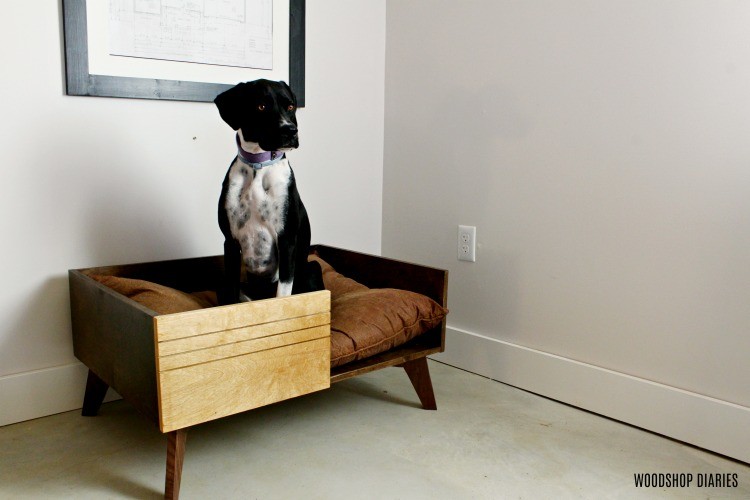
DIY Dog Bed 
DIY Mid-Century Modern Dresser 
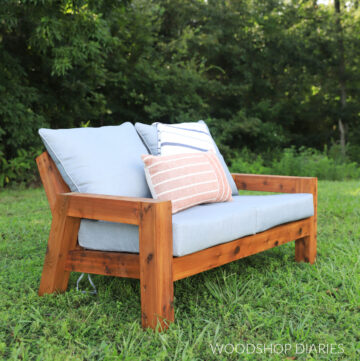
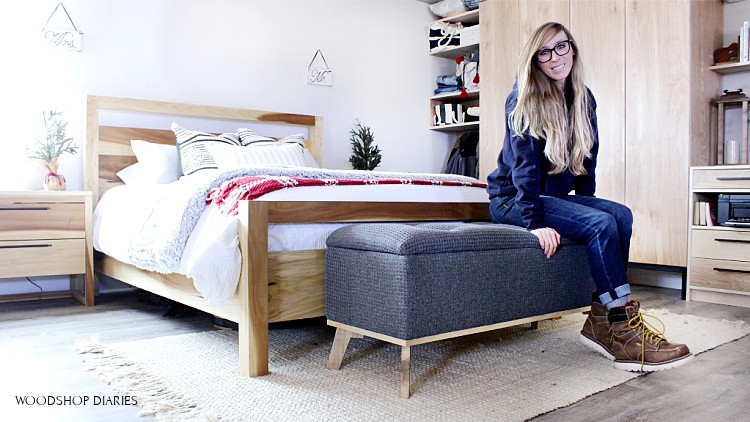
DIY Upholstered Storage Bench 
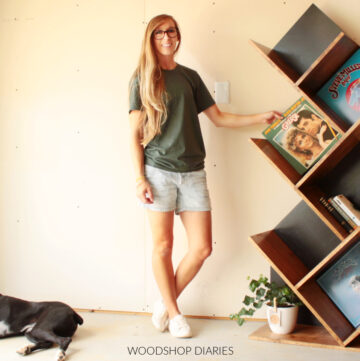
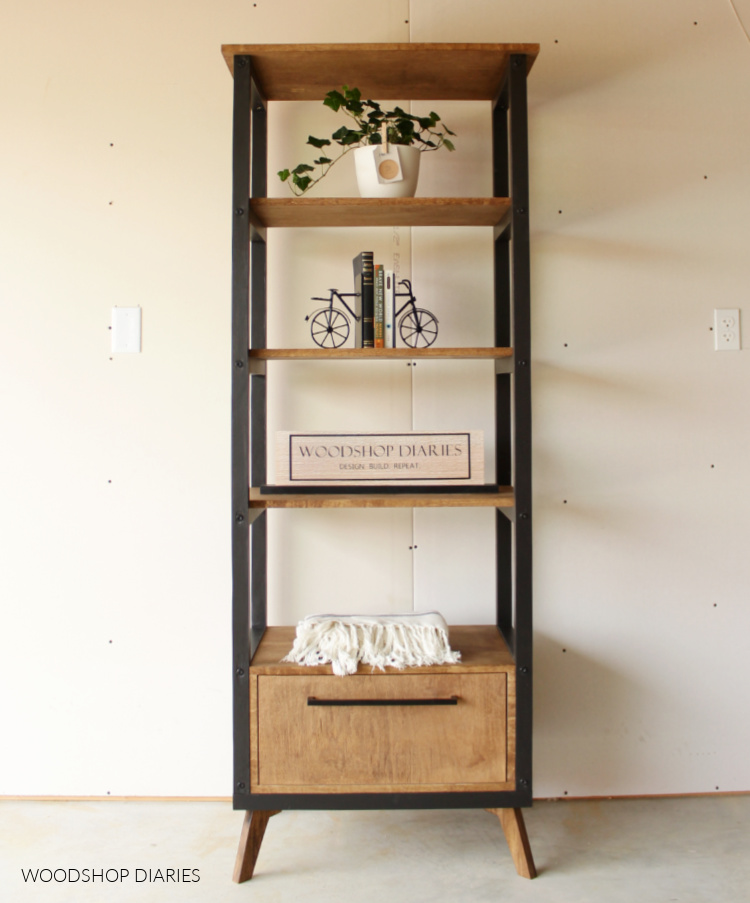
DIY Modern Open Bookshelf
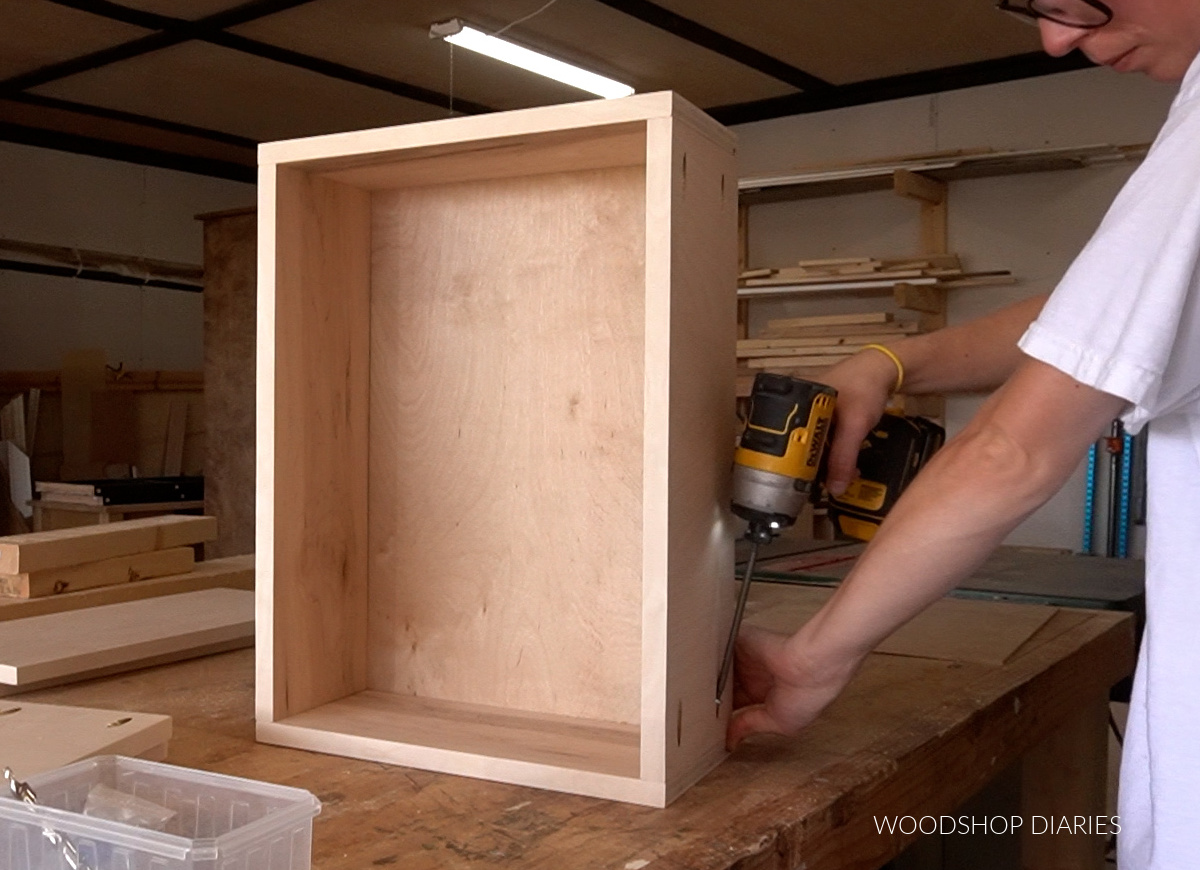
Step 1: Assemble Inside Nightstand Box
This build is basically just a box inside of a box with legs and a drawer. So first, I built the box on the inside. The “inside” box was 15″ deep and the outside box was 16″ deep.
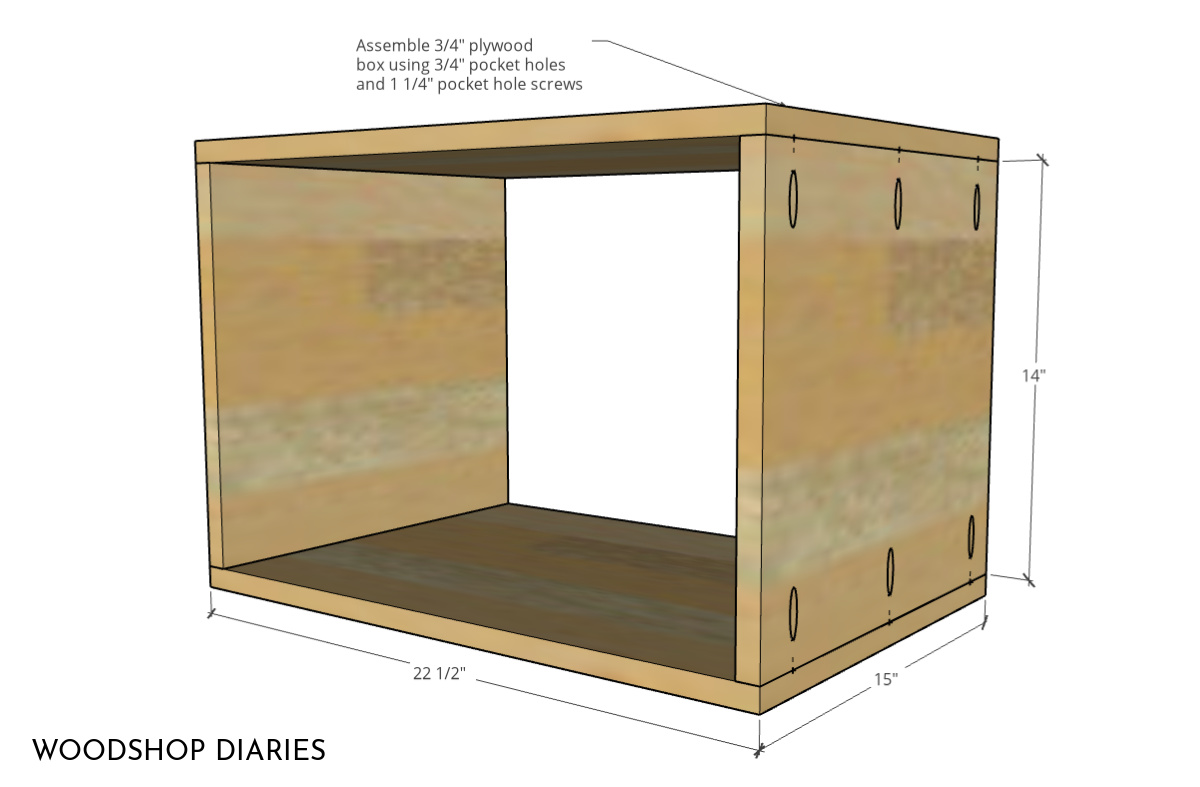
I ripped a piece of ¾″ plywood from the sheet 15″ wide and cut it down into two sides, two pieces for the top and bottom and one middle shelf.
.
I applied iron on edge banding to the FRONT edges of all these pieces before assembling.
RELATED: How to cover plywood edges
.
Since this inside box will be covered by the “outside” box, all the joinery will be covered. So you could either use ¾″ pocket holes and 1 ¼″ pocket hole screws or just simply use 1 ¼″ wood screws to assemble.
RELATED: How to use a pocket hole jig
.
I used pocket holes and screws to assemble the main box.
DON’T FORGET! All the details, dimensions, cut list, and diagrams can be found in the printable plans here.
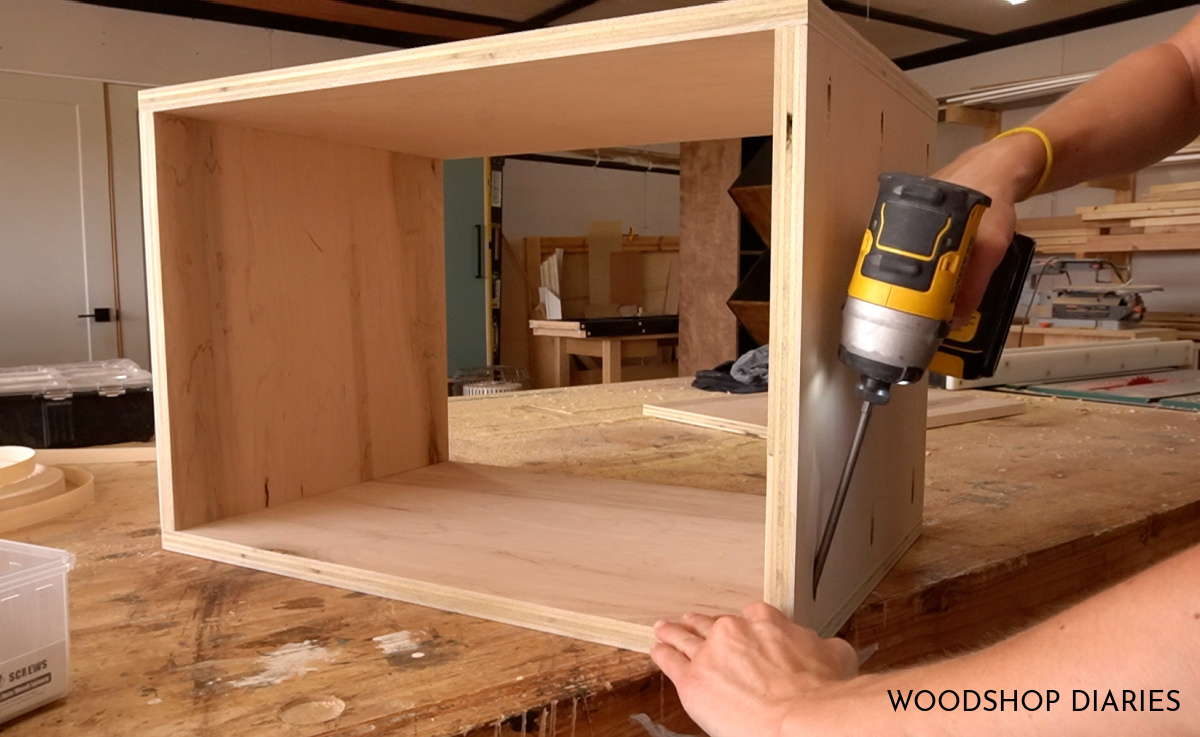
Step 2: Add Middle Shelf
To help evenly space the shelf, I used some 5″ wide scrap blocks to space my shelf 5″ from the top (it’s upside down in the picture) and used 1 ¼″ wood screws through the sides to secure the shelf.
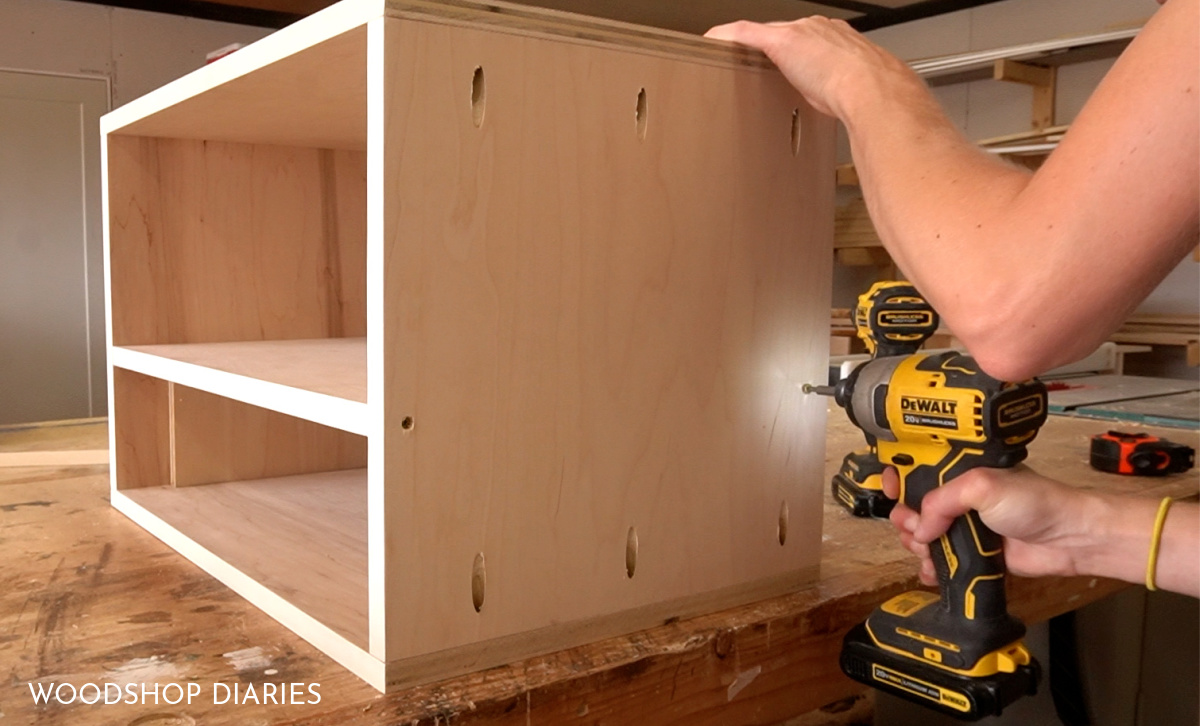
Step 3: Attach Sides and Top
Now, it’s time to add the “outside” box. For this, I ripped a second strip from my plywood sheet 16″ wide and cut these pieces to fit around this box.
I edge banded the exposed plywood edges before assembling, but you could also do this after.
.
These pieces will simply be glued and clamped in place. You can use brad nails or screws to add strength, but glue will hold fine if you use plenty of it.
.
I recommend cutting the two sides first, gluing them on, then measuring the top and cutting it to fit with the sides already in place.
Step 4: Cut Mid Century Modern Nightstand Legs
Before attaching the bottom panel, I needed to add the legs to it.
.
You may have seen this leg design on a few of my past projects–like this upholstered bench, this modern dog bed, and this bookshelf.
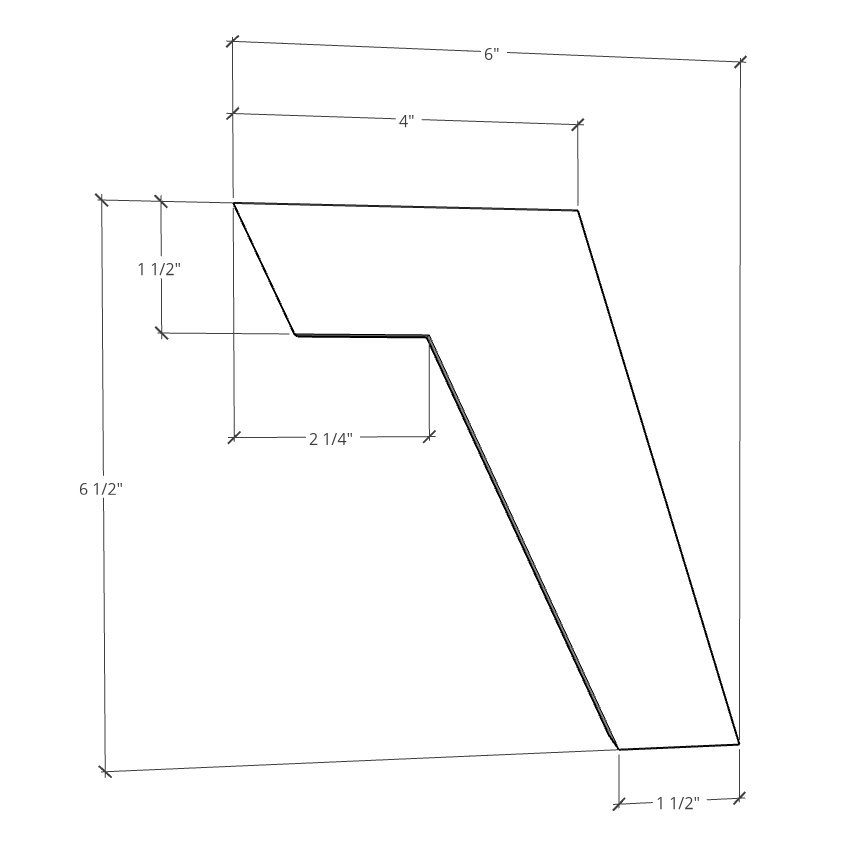
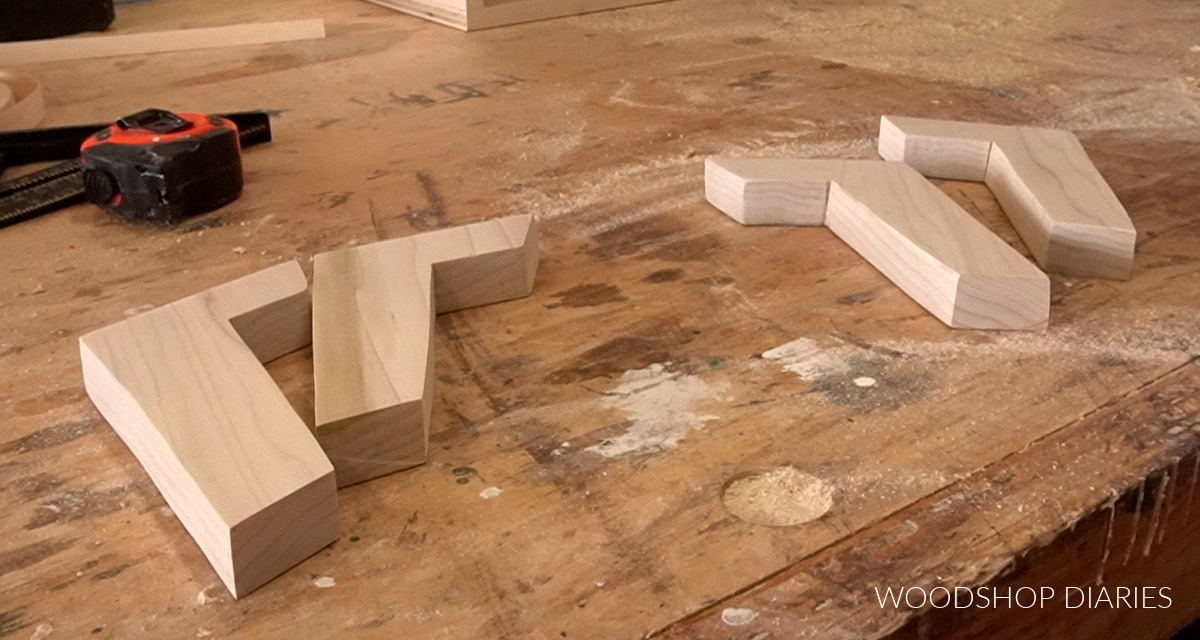
I drew out this template onto a scrap piece of poplar and cut it out with a jig saw. You can use 1x scraps, a 1x board, or some ¾″ plywood for this.
.
Once I had the first one cut out, I sanded it well, then traced it three more times onto the board and cut these out the same way.
Step 5: Attach Legs to Bottom Panel
I cut another piece from my 16″ wide plywood strip to fit across the bottom, just like the top piece, and edge banded the sides.
.
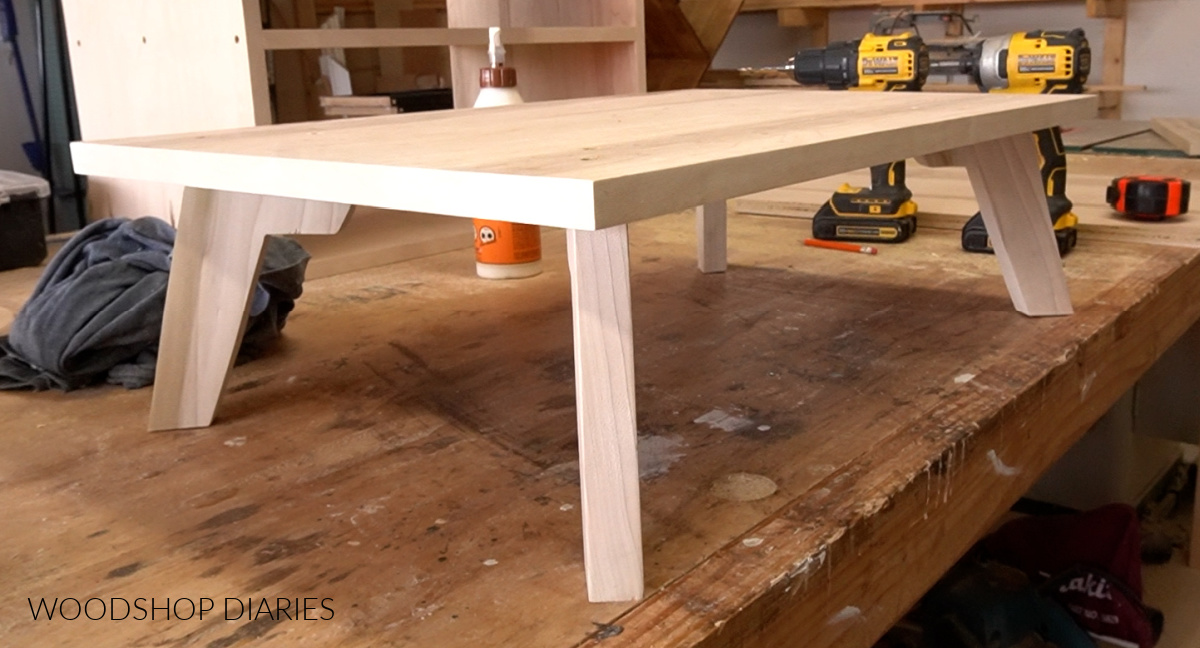
Then, I used wood glue and 2″ wood screws to secure the legs into this panel through the top. I found it easiest to flip this upside down to attach the legs.
.
I used a speed square to help me position them so that they were turned 45 degrees toward the center and about 2 ¼″ inset from the corner. Once I had it in position, I predrilled a hole through the plywood and up into the leg.

Then, I could drive a 2″ wood screw through this hole until it was just barely sticking out of the plywood, apply some wood glue, and reposition the leg so the tip of the screw was going into the predrilled hole.
.
Then I could drive the screw all the way in and add a second screw. I repeated for all four legs.
DON’T FORGET! All the details, dimensions, cut list, and diagrams can be found in the printable plans here.
Step 6: Attach Bottom Panel to Nightstand
Once the legs were attached to this bottom panel, I glued it onto the nightstand just like the sides and the top.
Now at this point, if you didn’t want to add a drawer, it’s complete! You can skip to the finishing process and paint/stain as desired.
.
But, if you want to add a drawer, here’s how. 🙂
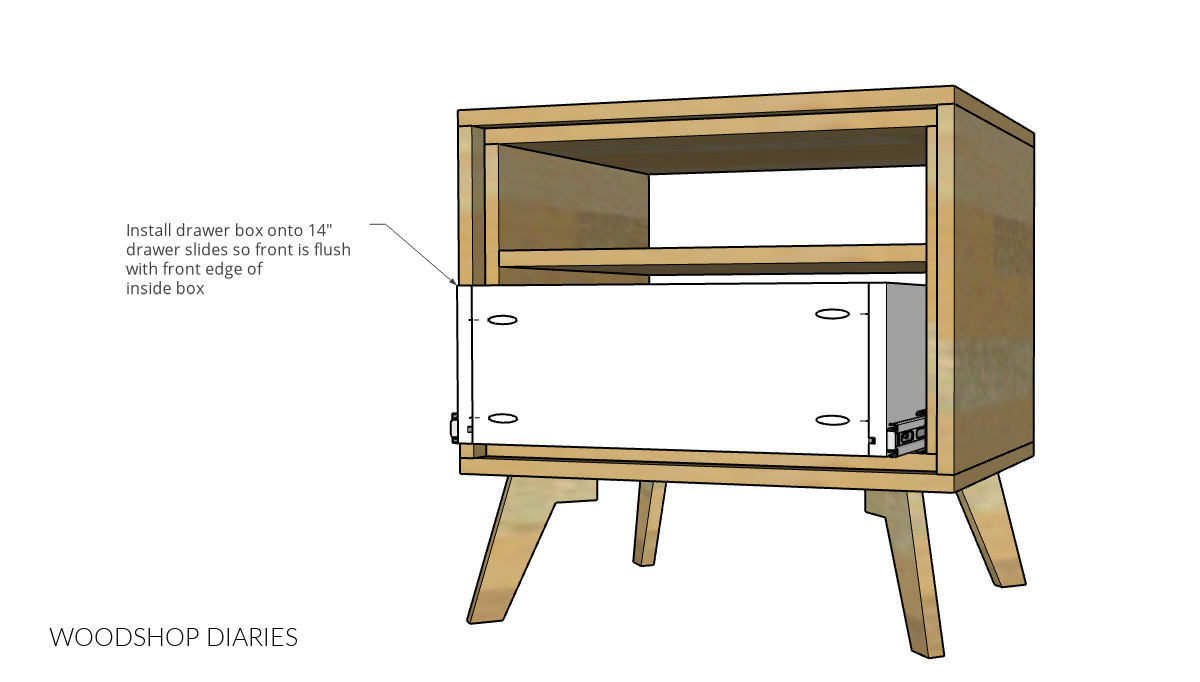
Step 7: Install Drawer Slides
I installed 14″ ball bearing drawer slides into the bottom section of this nightstand so that they were flush to the front edge of the INSIDE box like shown below.
RELATED: Learn how to install drawer slides in this helpful drawer guide.

Step 8: Build Mid Century Nightstand Drawer Box
Cut ¾″ plywood pieces for the drawer box and a ¼″ plywood piece for the drawer bottom like shown below.
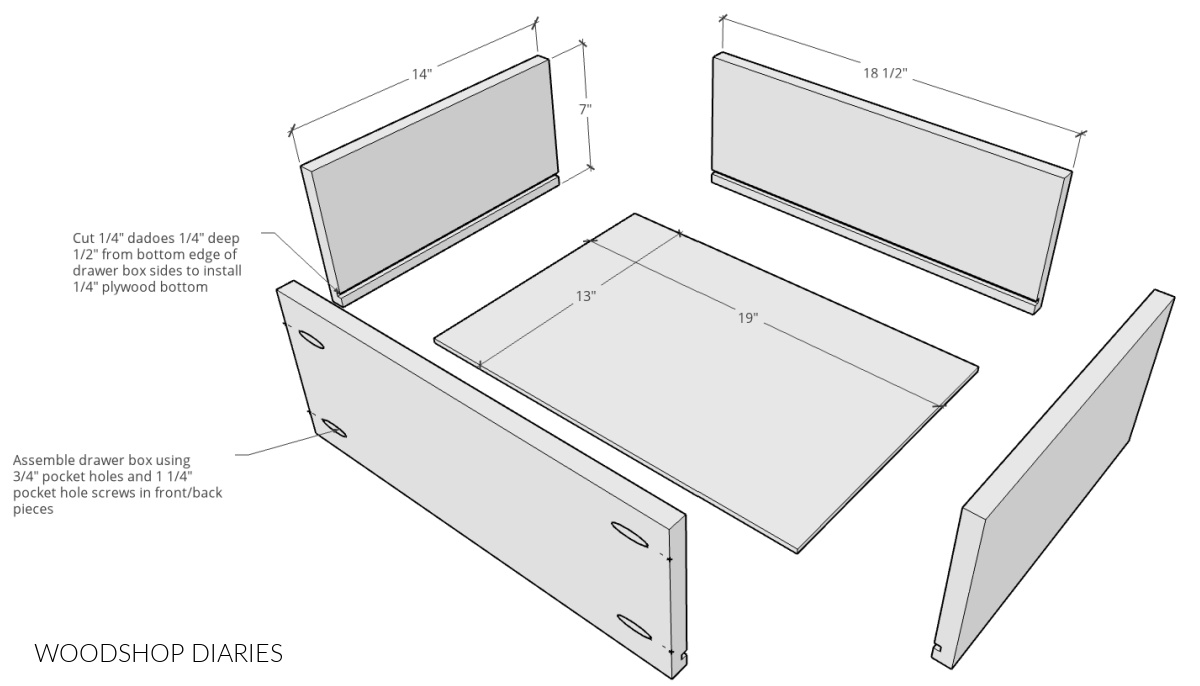
I used a table saw to cut a ¼″ dado ¼″ deep ½″ from the bottom edge of the drawer box pieces to insert the ¼″ plywood bottom.
.
However, if you don’t have a table saw, a router would work as well, or you could skip the dadoes, cut the bottom a little bigger, and just glue and staple or screw it onto the bottom of the drawer box once it’s assembled.
.
For more details on how to build drawers, check out this detailed drawer building guide!
.
I assembled this drawer box using ¾″ pocket holes and 1 ¼″ pocket hole screws.
Step 9: Install Drawer Box Into Nightstand
Once the drawer box was assembled, I installed it onto the slides. I used some ¼″ scrap blocks to set the drawer on in this cubby while I installed it so that it would be about ¼″ up from the bottom.
.
Then I screwed it onto the slides and remove the plywood. This allows for some room underneath the box so it doesn’t scrape the bottom when it’s pulled in and out.
Step 10: Attach Drawer Front
I cut a ¾″ plywood piece to use as the drawer front and installed it onto the drawer using 1 ¼″ wood screws through the front of the inside drawer box piece.
.
There should be about ⅛″ gap on the sides and the bottom. This drawer front will be INSET to the outside box, but OVERLAY the inside box.

Step 11: Finish Mid Century Modern Nightstand
Now it was ready for finish! I applied three coats of Minwax Helmsman clear coat and added a simple modern handle and it was complete!
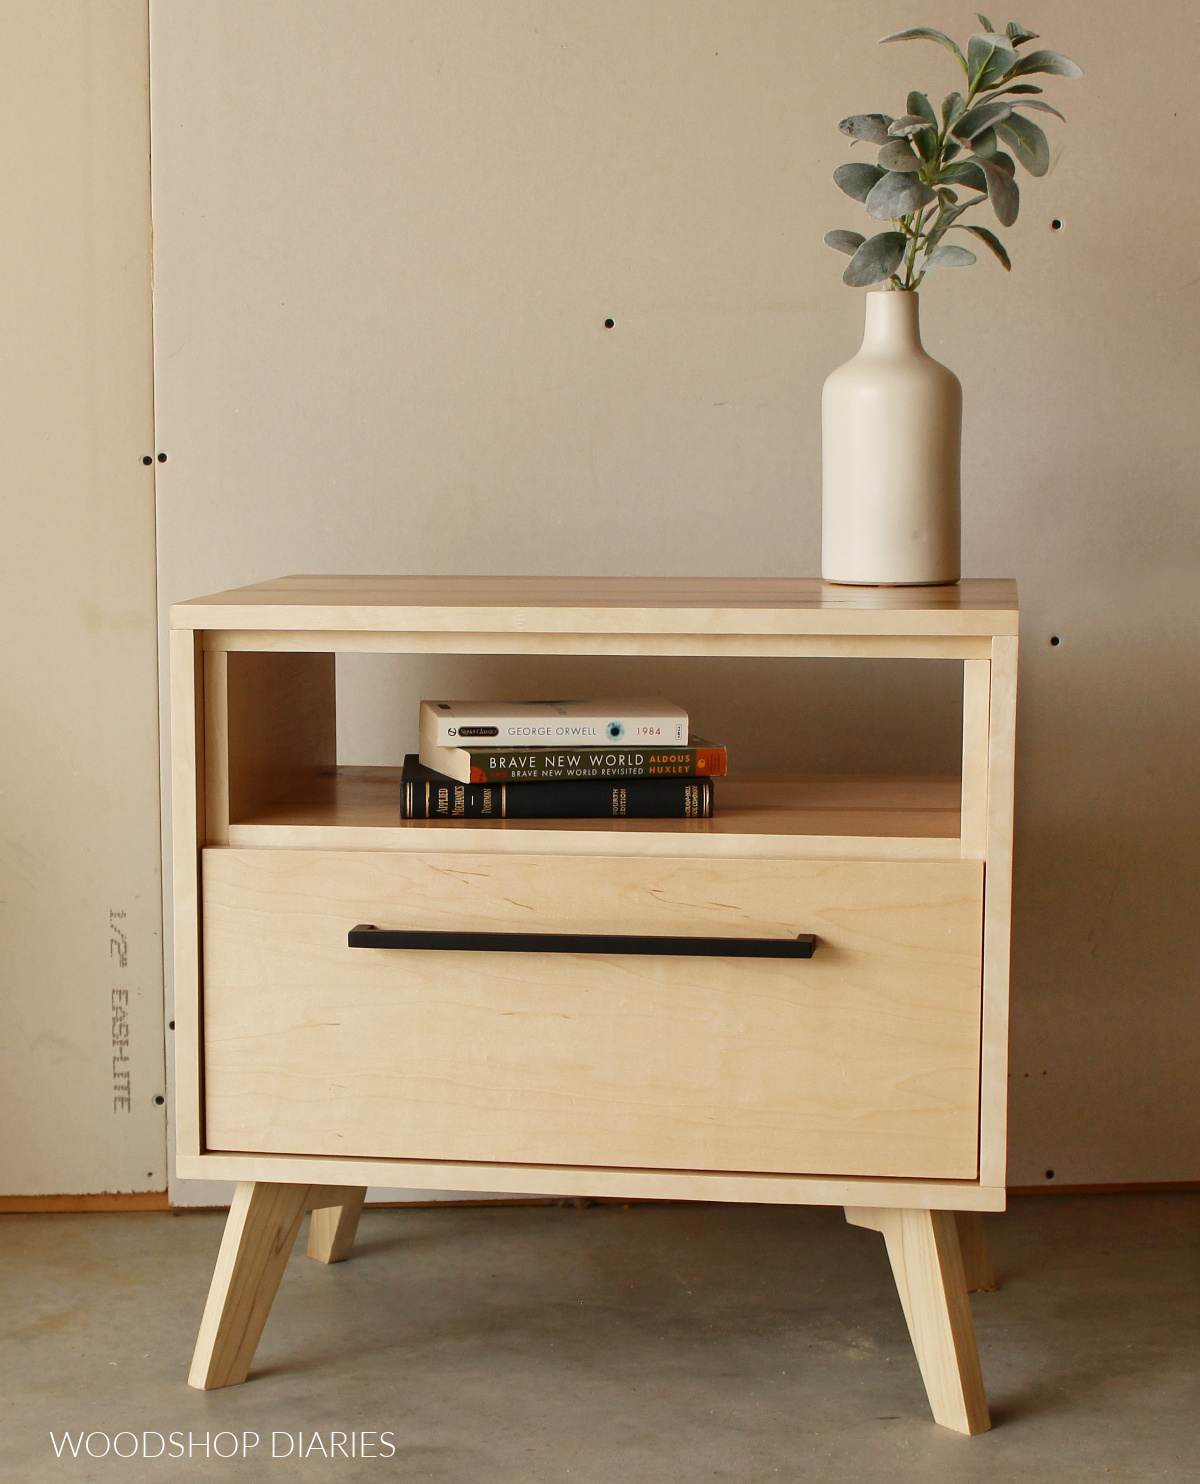
I LOVE how cute these turned out and I’m so excited to build the rest of the matching pieces in this bedroom furniture set!
.
I hope you enjoyed this mid century modern nightstand build and if you’d like to build your own, be sure to check out the plans here and the YouTube video guide here.
.
And if you want to subscribe to my newsletter so you don’t miss out on any upcoming projects, subscribe below for priority access to brand new plans, projects and videos!
.
Don’t forget to save this for later by pinning or sharing to your favorite social channel!
I hope you enjoyed this project and until next time, friends, happy building! 🙂