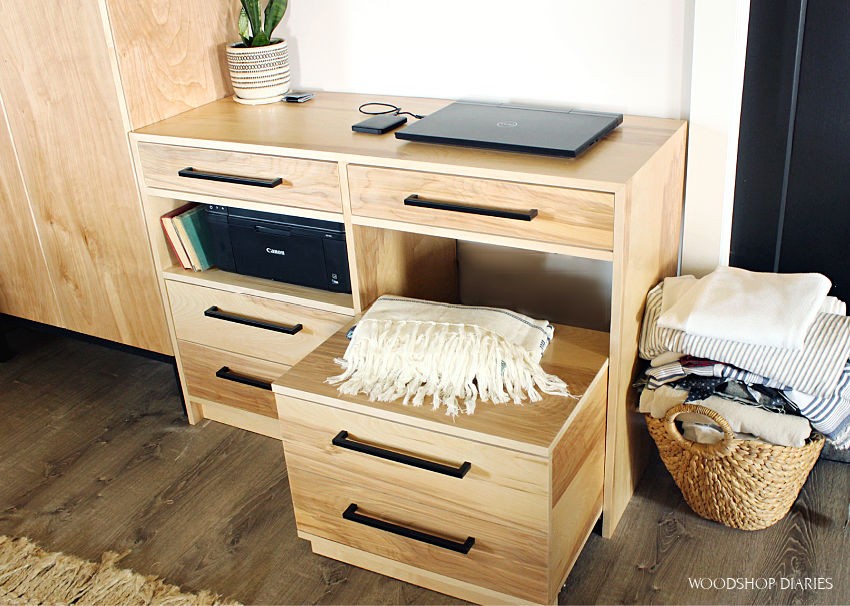
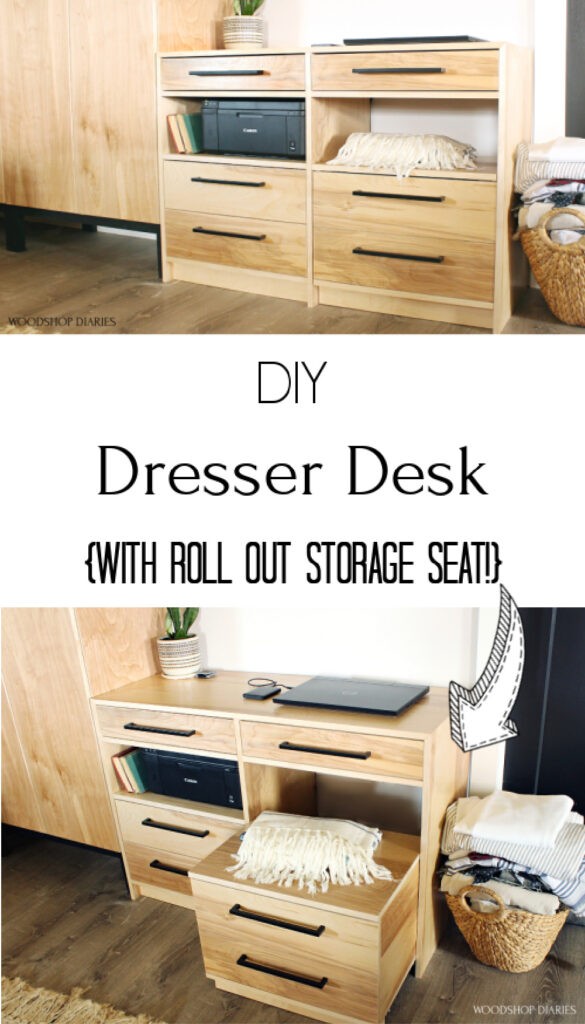
Need a dresser AND a desk?? Build an all-in-one with this genius DIY Dresser Desk with pull out storage seat! I’ll show you how below.
If you’ve been following along for a while or you’ve heard me mention in some of my previous posts, you may know that we are currently living in a very small studio style garage apartment.
.
Storage space is a constant issue as you can imagine.
.
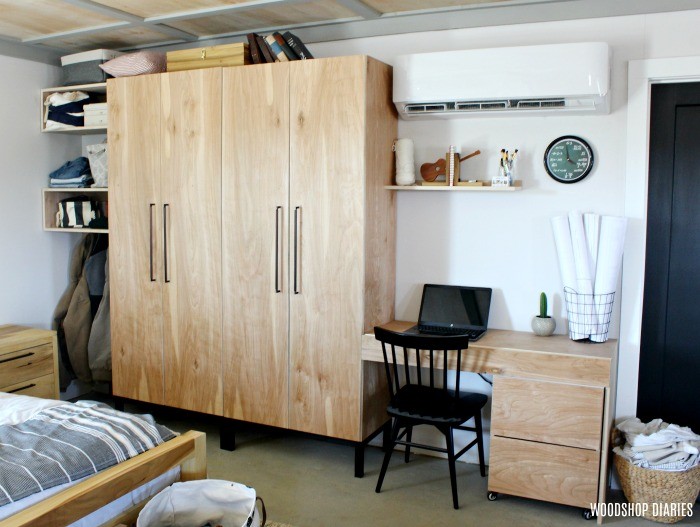
When we first moved in, I threw together a simple little desk next to the stand alone closet cabinets that I built and just made it work. It looks cute in the photo below, but trust me, it was not very efficient. But after two years of living here, I think it’s time to upgrade.
The space where the chair is could be better utilized for storage, and since this was basically an extension off my closet cabinets, it might look better if it was more like a dresser than a desk.
.
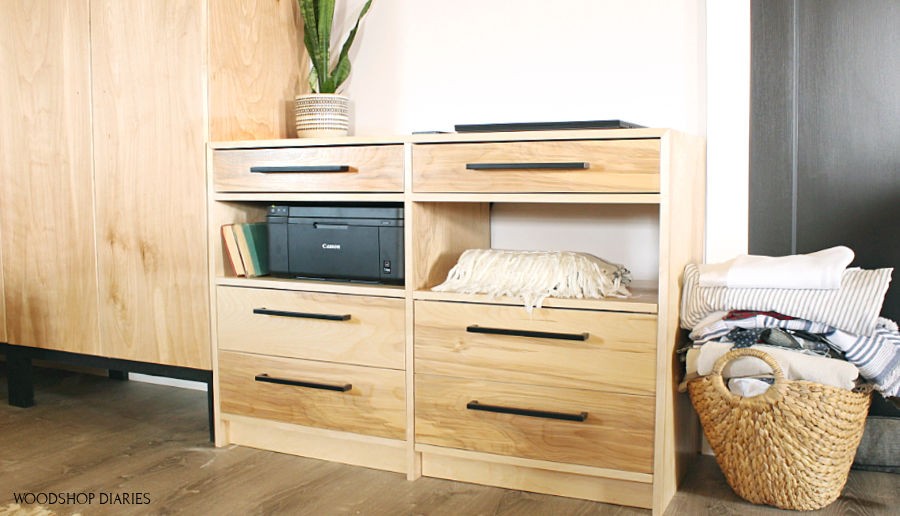
So this is what I came up with. Honestly, I’m pumped about my new workspace and all the extra storage I was able to build into it. I can finally get my camera bags put away and get my printer off the floor haha.
So if you’re ready to see how this dresser desk came together, let’s get building 😊 I’ve got the video below and the plans following. This post contains affiliate links. See policies.
For this DIY Dresser Desk, You Will Need:
- (2) sheets ¾″ plywood
- (½) sheet ¼″ plywood
- 1 ¼″ pocket hole screws
- 1 ¼″ wood screws
- Edge Banding (optional)
- Wood Glue
- Circular Saw
- Miter Saw
- Clamps
- Drill
- Pocket Hole Jig
- Painters Tape
- (4) casters
- (4) pair 16″ drawer slides (you only need four, but I buy the ten pack because they’re cheaper per pair–I use the extras on future projects)
- Washers
NOTE: I built this entire project from plywood—I used a little under two sheets of ¾” and then I used some scrap ¼” for the drawer bottoms. I have a post here on how I cut down my plywood sheets using the Kreg AccuCut and Rip Cut guides.
.
HOWEVER, you can make do for this project with a straight edge and clamps if you don’t have the guides.
Step 1: Assemble Sides and Top of Desk
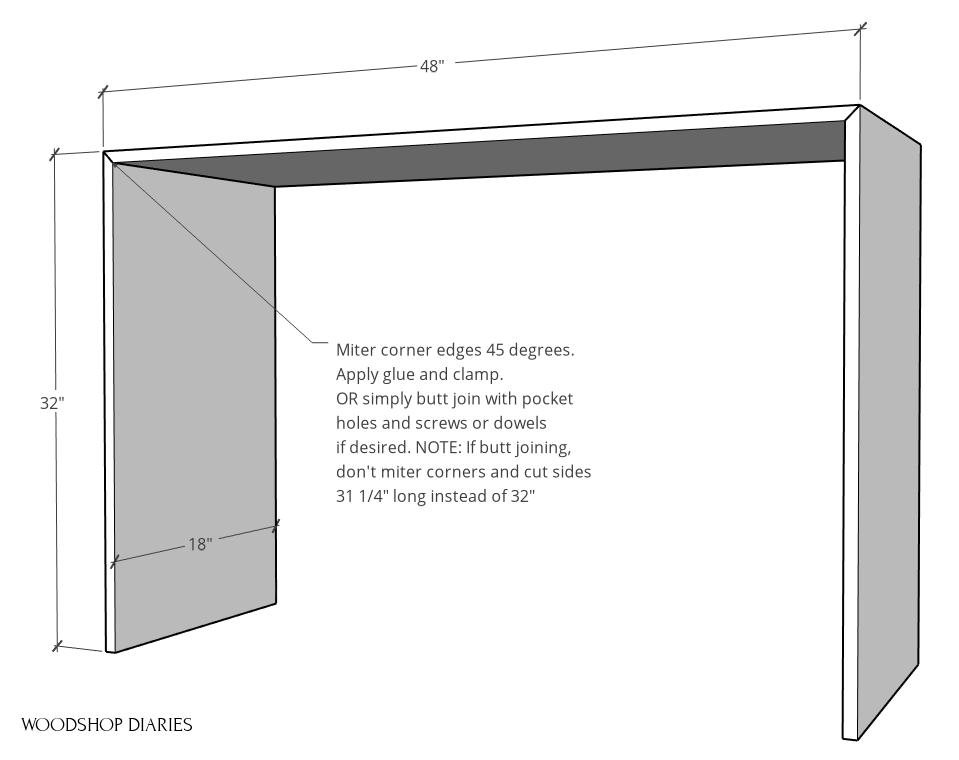
I began by cutting down my plywood sheets. I ripped two 18” wide strips from the first sheet, then took them to my workbench to miter the corners to assemble the desk sides and top.
.
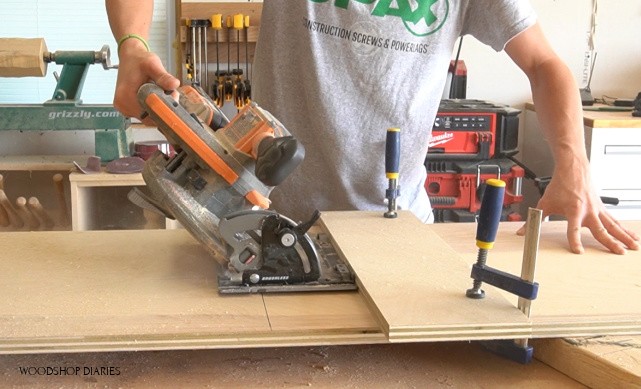
I chose to miter the corners to assemble the top and sides. You can definitely just butt join this if you’d rather, but I just wanted a cleaner look at the corners. So I set up my circular saw to cut a 45 degree miter.
.
Normally for cross cuts like this, I use my Kreg AccuCut guide, but I couldn’t tilt the blade with the sled attached. So I just used a straight edge and some clamps as a guide instead.
I cut two sides—one end mitered 45 degrees and the other left at 90. Then I cut a top with both ends mitered 45 degrees.
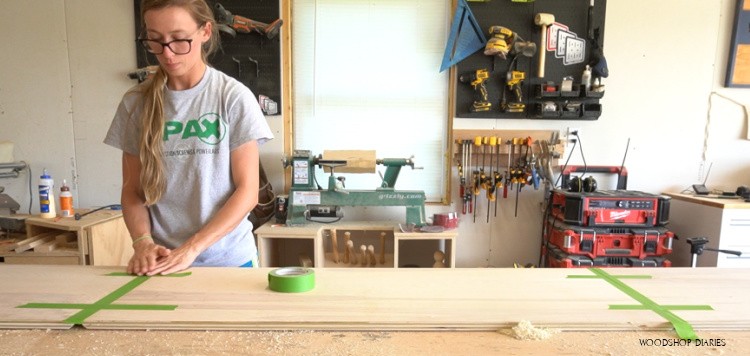
I laid these pieces out on the workbench and applied some painters tape along the joints.
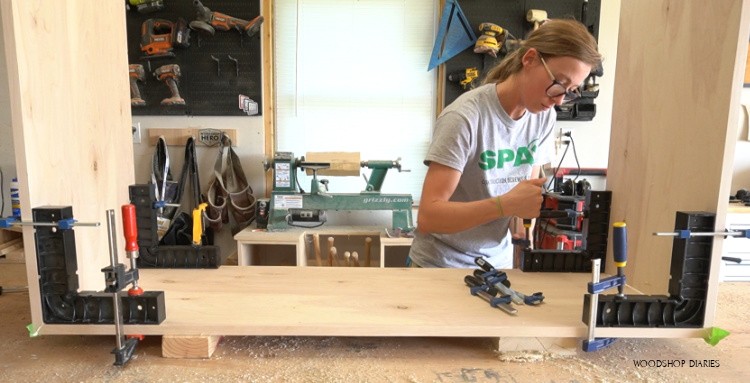
Then I flipped it over and applied glue. I used some corner clamps to hold everything together nice and square while the glue dried in the corners.
Again, the whole mitered corner thing isn’t necessary. Simply butt joining the top to the sides using dowels or pocket hole screws or whatever method you prefer works fine too.
Step 2: Install Dresser Desk Divider and Shelves
While the glue dried, I began preparing the pieces for the middle divider and shelves. I had one middle divider panel and four “shelf” panels.
.
Once the glue was dry on the top and sides, I used ¾″ pocket holes and 1 ¼″ screws to attach all the shelves in place and made sure to place the pocket holes where they wouldn’t be seen.
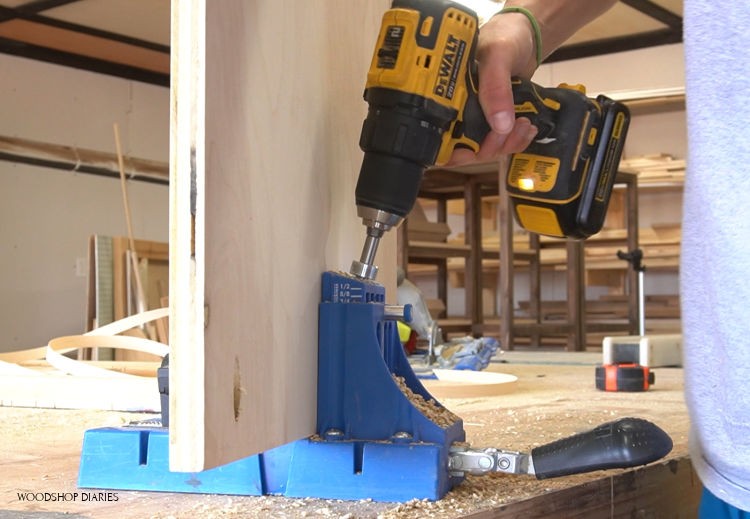
I installed the middle divider panel first.
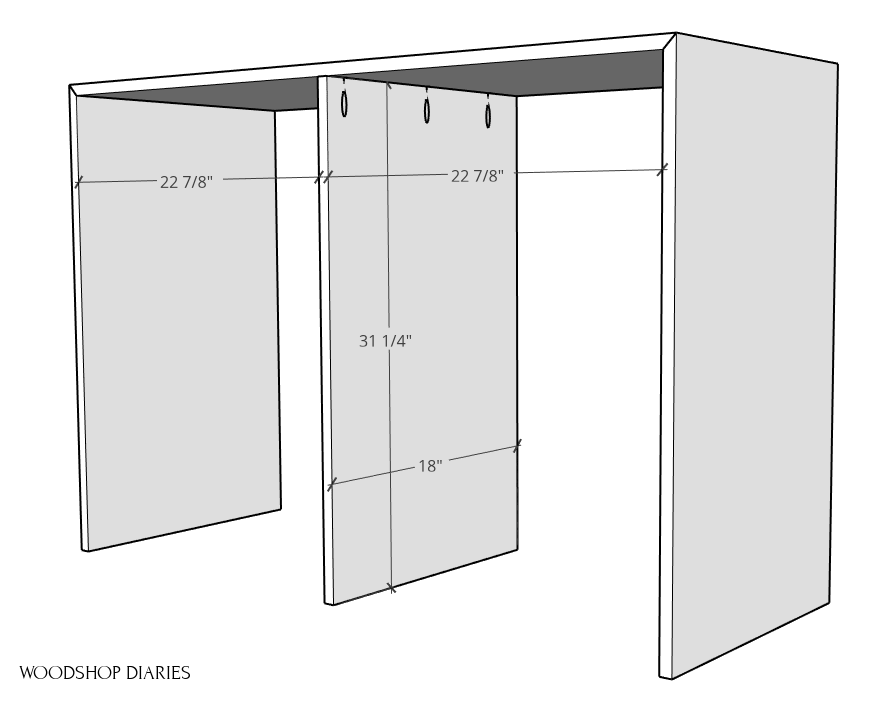
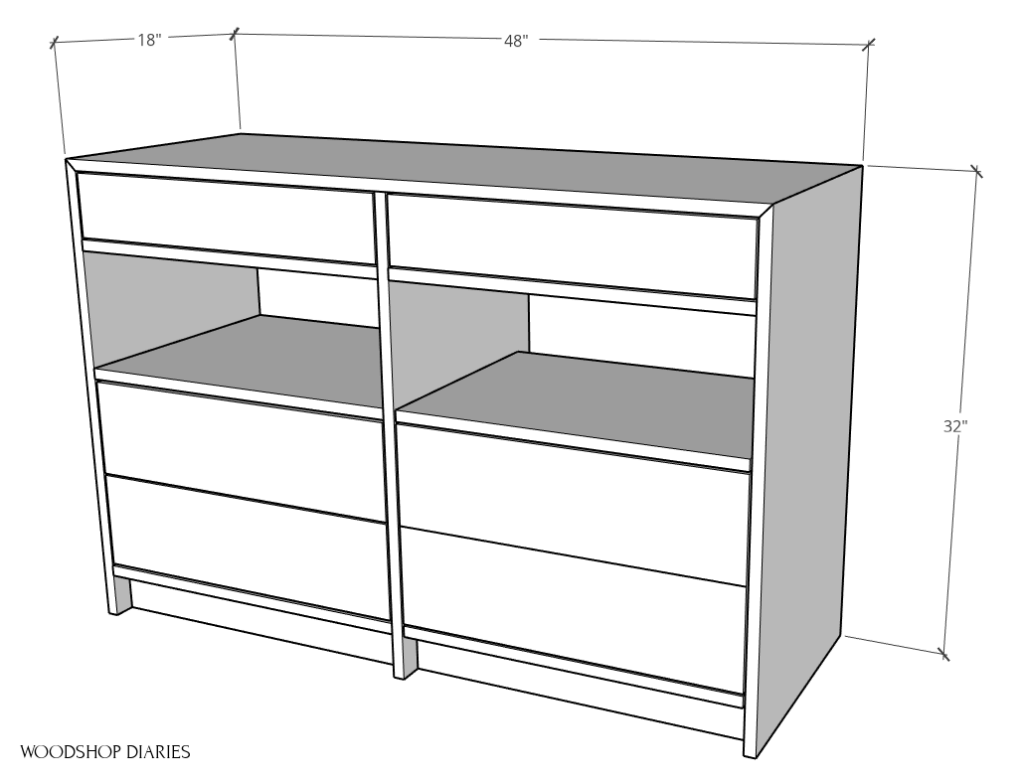
My design called for caster wheels that were 3″ tall (see step 4), so the bottom panel is installed 3″ from the floor. Then, I installed the middle shelf so that it would be about 18″ off the floor. I did this so my rolling seat would be that high, too–18″ is a good seat height.
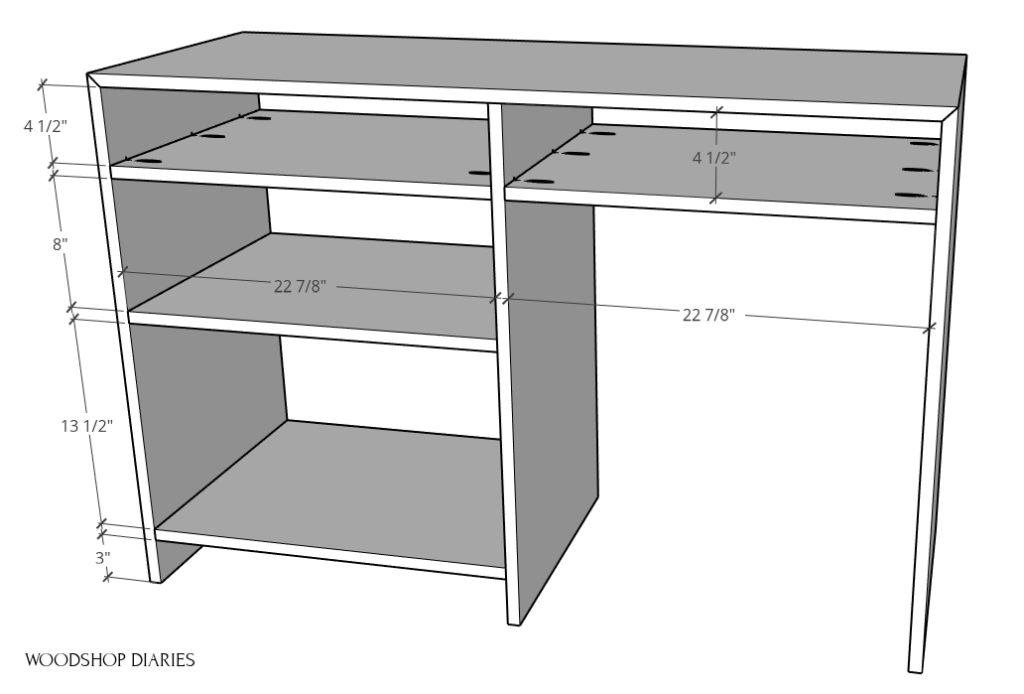
I made sure the open shelf section above the middle shelf was tall enough to fit my printer (about 8″) and left a small space at the top for two short drawer boxes.
.
You may want to modify your dimensions for your particular situation, but that’s what worked well for me.
.
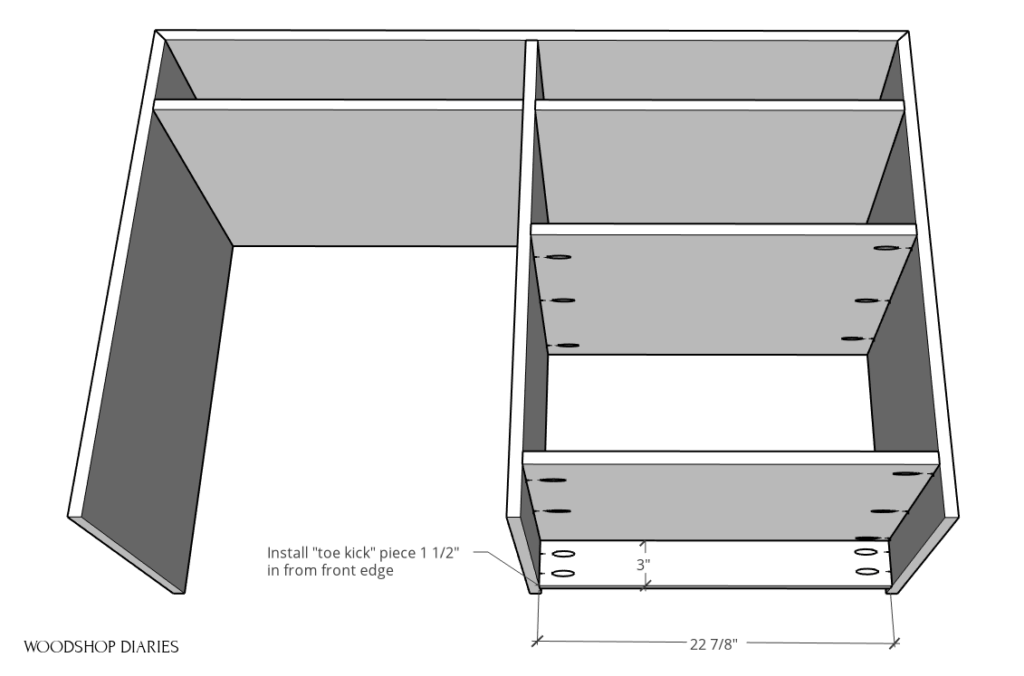
Lastly, I attached this “toe kick” piece using pocket holes and screws from the inside so you wouldn’t see them. I installed this about 1 ½″ from the front edge.
Step 3: Install Drawer Slides and Drawer Boxes
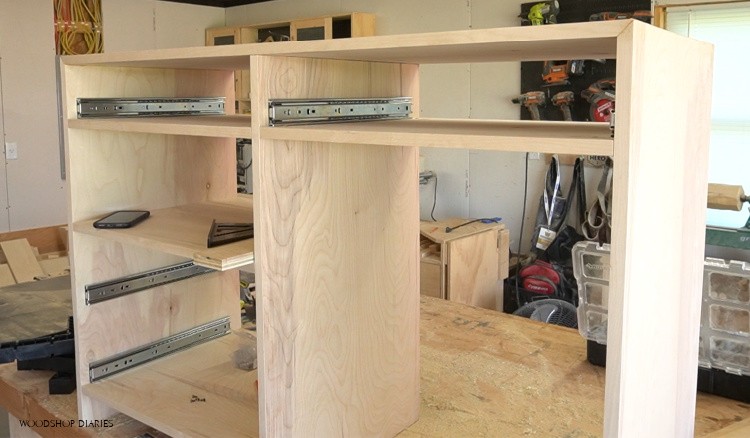
Next up was the drawers. I installed 16” ball bearing drawer slides into the desk where the drawers will be placed.
Then I proceeded to make the drawer boxes. I love making drawers…I know a lot of people hate it, but it’s my absolute favorite part of any project!
.
.
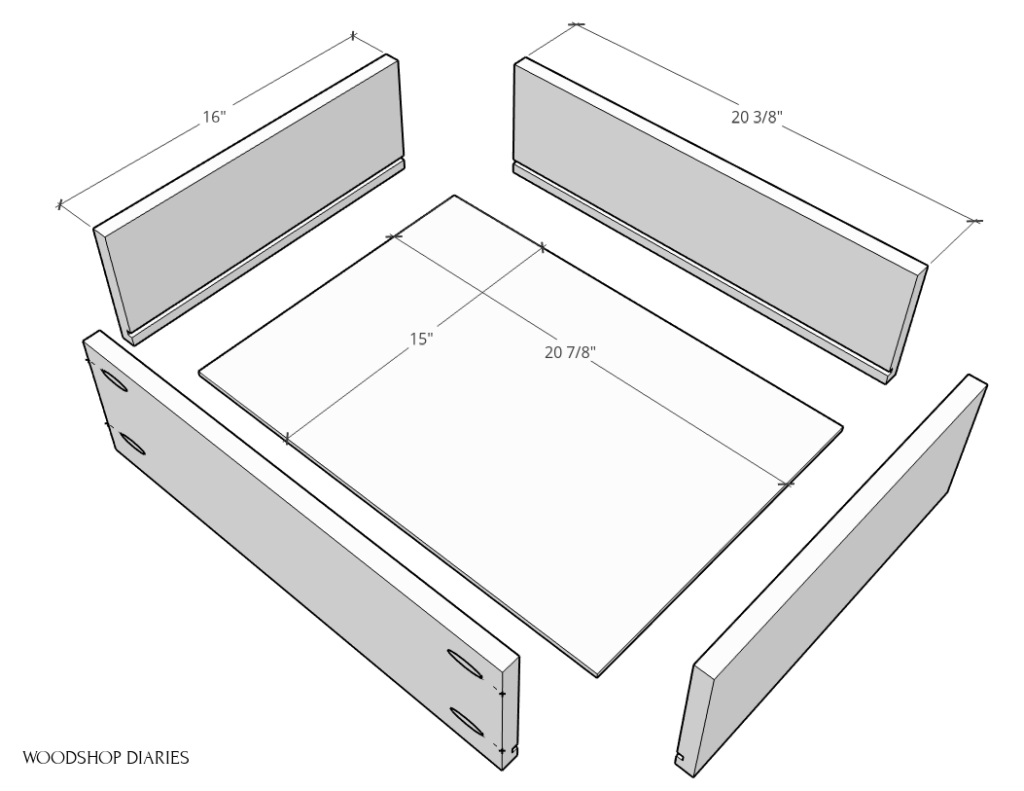
I made four drawer boxes of equal size—except for the height. The two top drawers were only 3 ½” tall and the two at the bottom were 6” tall.
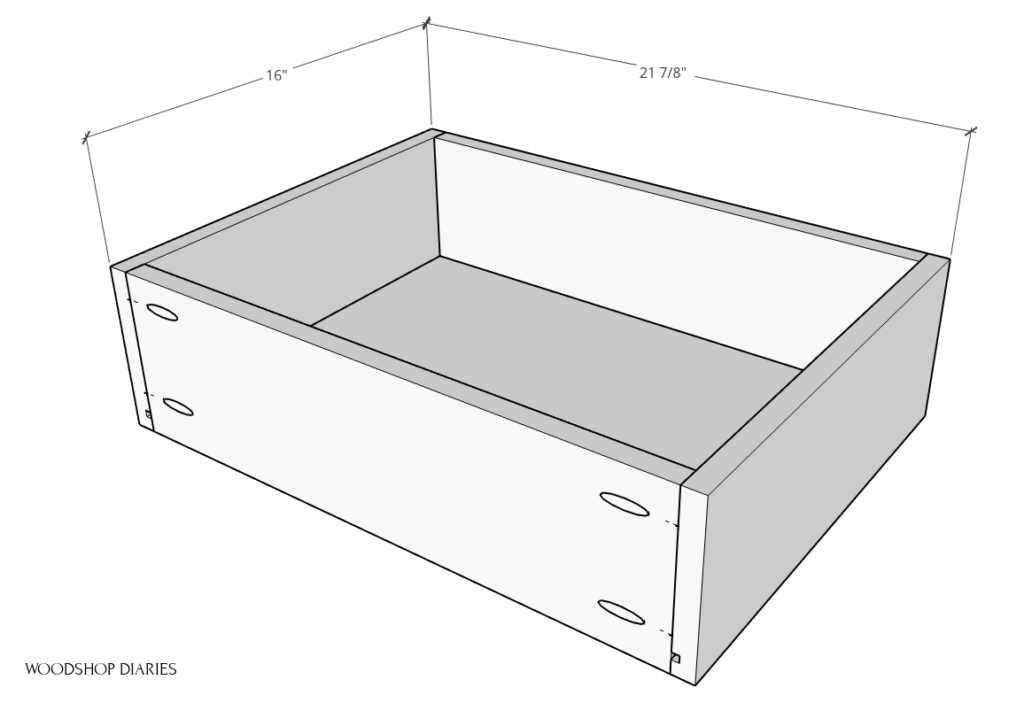
I cut dadoes along the bottom of the drawer box sides to install the ¼” plywood bottom, then assembled them together with pocket holes and screws.
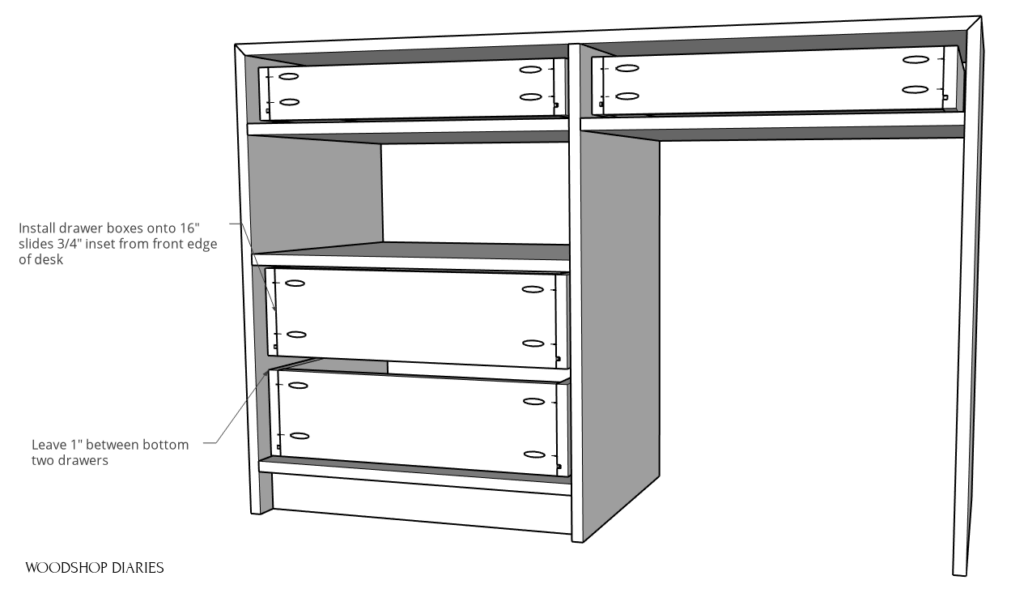
Once all four drawer boxes were built, I installed them into the desk. Note that these drawers are all ¾” inset to allow for the drawer fronts to be inset later.
Next, I cut down the drawer fronts to allow for ⅛” gap along all sides and applied edge banding along the edges—just to make it look a little cleaner.
.
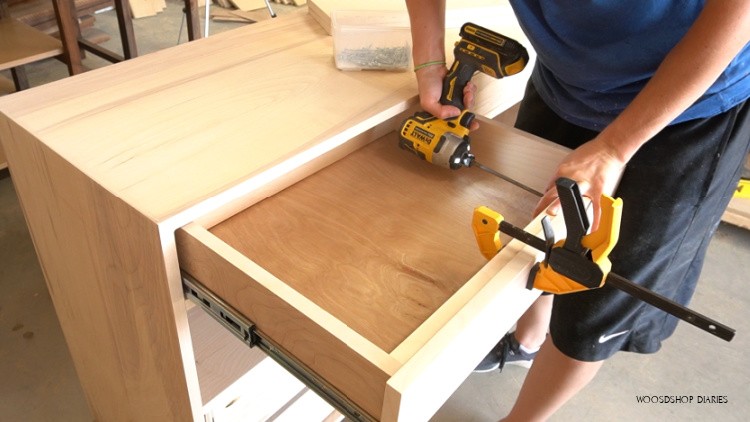
Then I installed the fronts onto the drawers using 1 ¼” wood screws from the inside of the drawer boxes.
Step 4: Build Rolling Storage Desk Seat
Now all that’s left is the rolling seat. HOORAY!
.
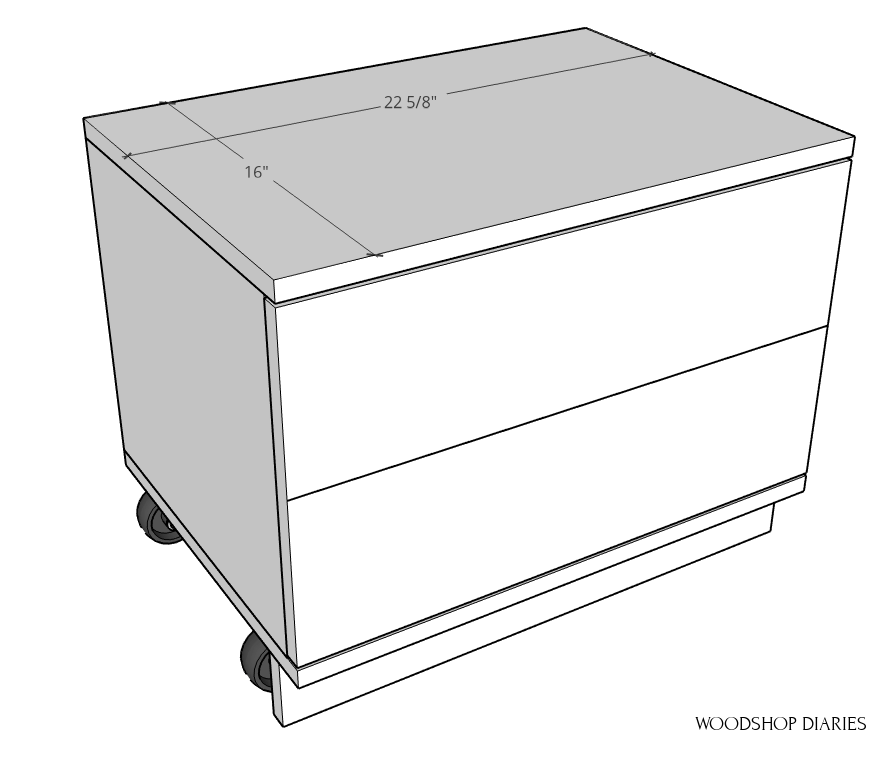
Now, this seat rolls right into the outlet that is behind my desk. The top of the seat hits right in the middle of the outlet (see below), so I made this rolling cart about 2” narrower than my actual desk. That left about 2” space behind it for the cords to plug in without the cart hitting them.
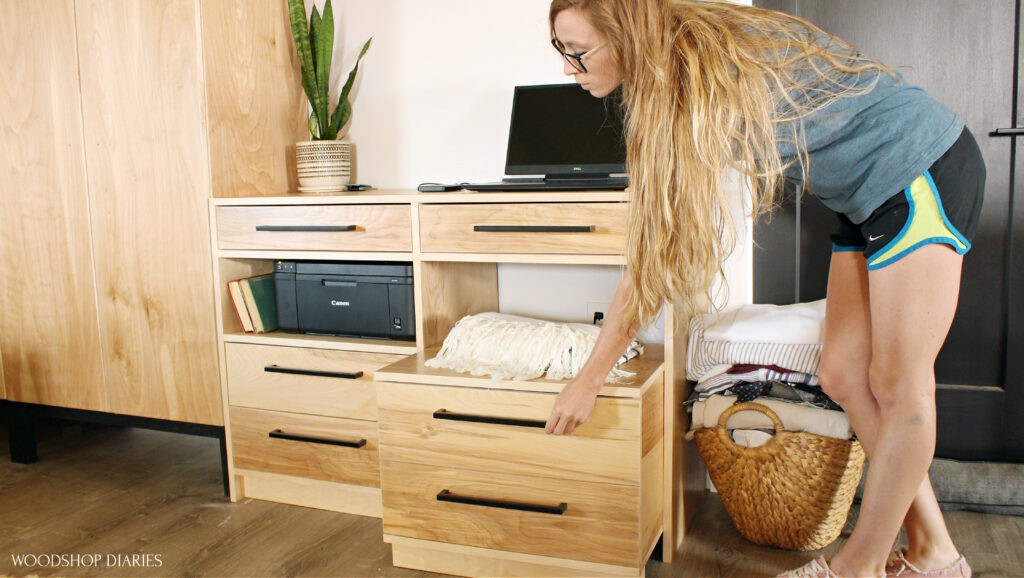
If you don’t have an outlet there, obviously, you could make your seat deeper. My desk was 18” deep overall, so I made this cart 16” deep overall. I also made the overall width about ¼″ narrower than the opening just to give me some wiggle room to slide it in and out.
.
Now, this seat will look like two inset drawer fronts from the front side. So the top and bottom sides will show, but the sides of the cart should be hidden by the fake drawer fronts. So I cut those ¾” narrower than the bottom piece.
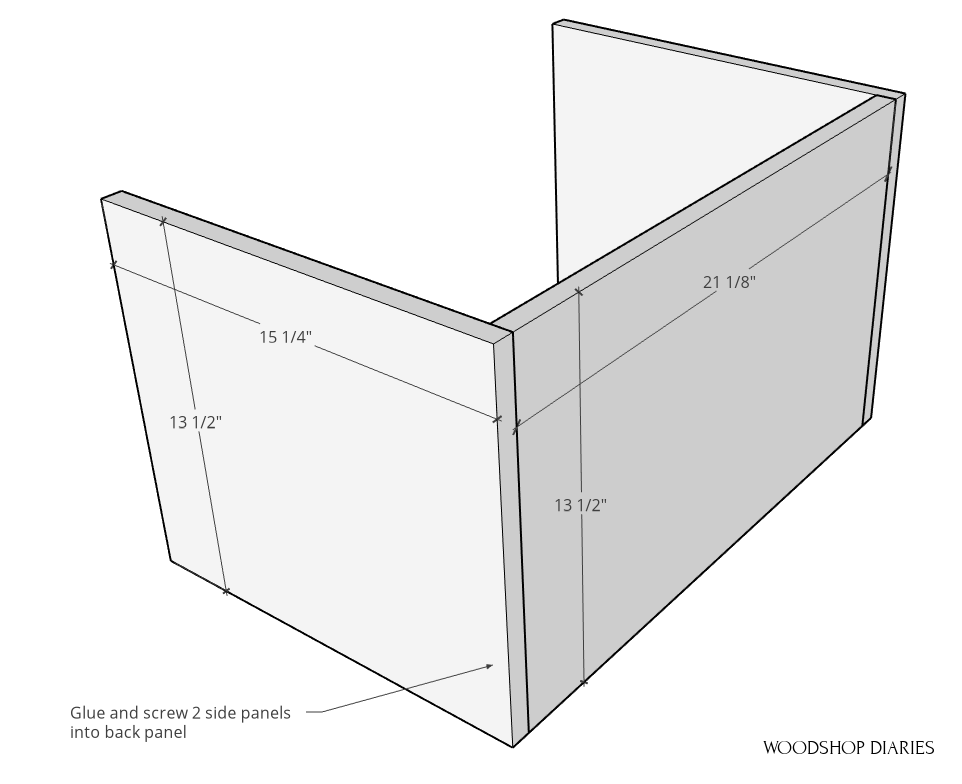
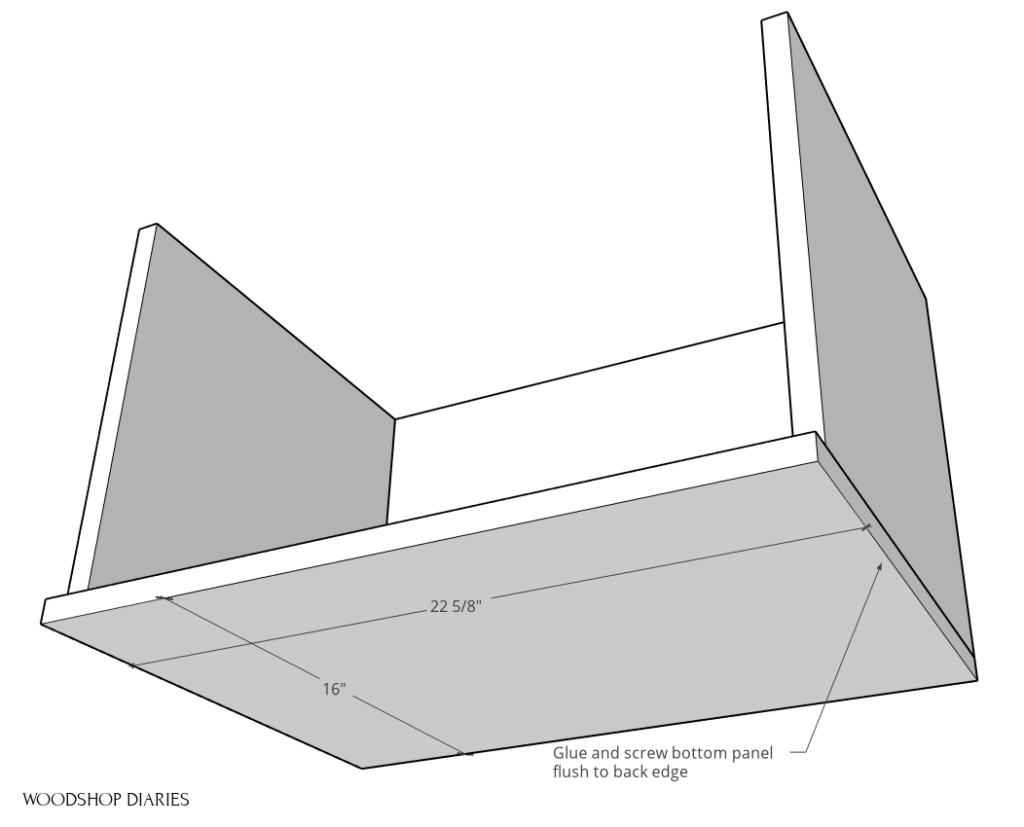
I used wood glue and screws to assemble the sides and back of the cart, then glued and screwed the bottom in place.
The bottom of this desk will have kind of like a toe kick. This will help hide the casters. So, I attached a toe kick about ⅛” shorter than the height of the caster wheels about 1 ½” in from the front edge. I just glued and clamped this piece.
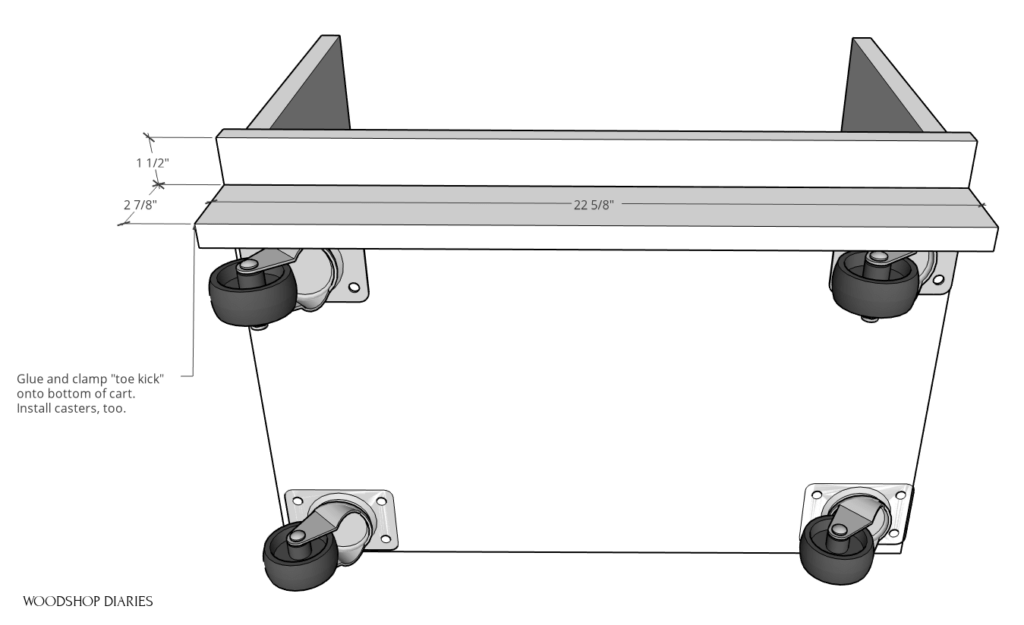
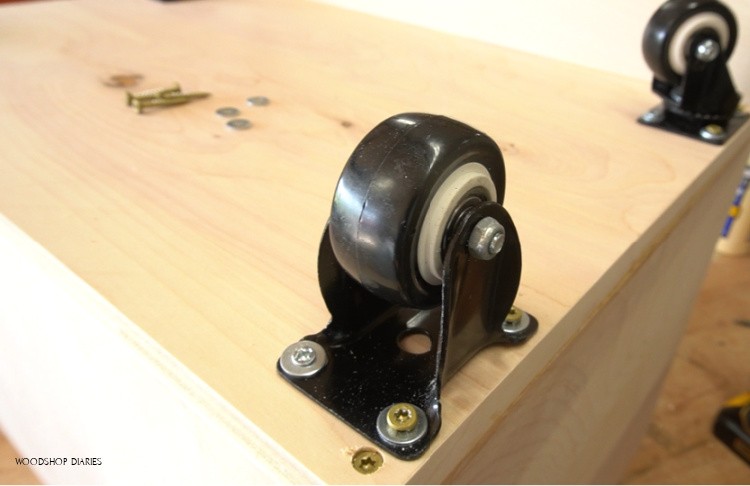
Then I installed the caster wheels. NOTE: The exact casters I used are no longer available. Here is the equivalent BUT instead of being 3″ tall, they’re 2.87″ tall. So, you will need to place a washer or two between the caster plate and the cart bottom to make the wheels “taller.”
.
I used washers with the screws because the holes were too large and I used longer screws on the outside, but shorter screws on the inside because I didn’t want screw points sticking up through the bottom into my storage cart.
Now the top piece is the lid to the storage cart, so it won’t be attached, but the front of the cart will be fake drawer fronts.
.
I love faking slats and drawer fronts using a small dado cut on the table saw (you can also use a circular saw for this, too!), so you may have seen me use this method before.
RELATED: Check out this method used with a circular saw on this Fake Drawer Dresser. And check it out here on this DIY Faux Slat Toy Box.
.
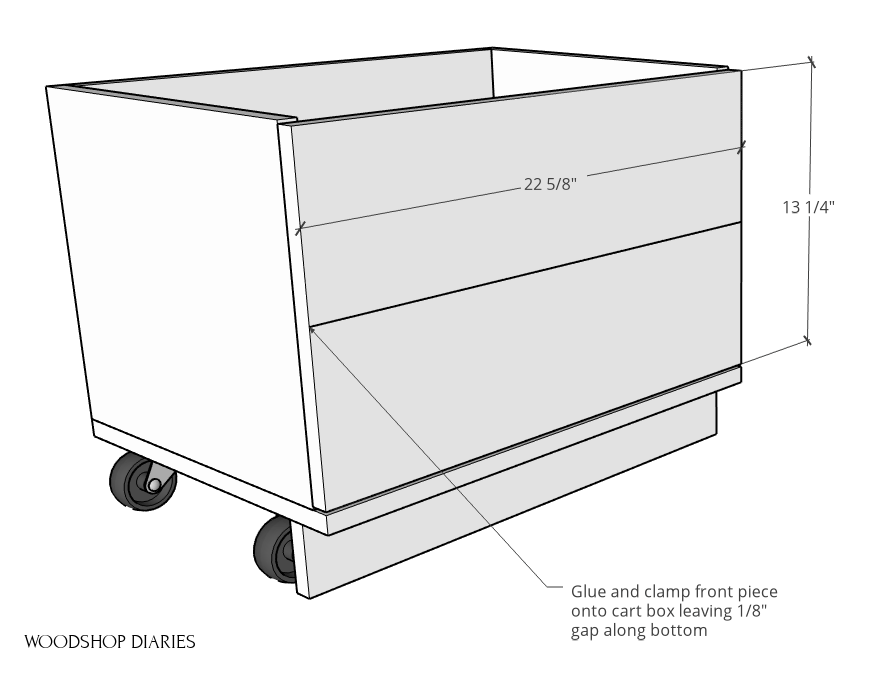
But I cut a piece of plywood to fit over the front of the cart leaving ⅛” gap along the bottom and an ⅛” gap along the top.
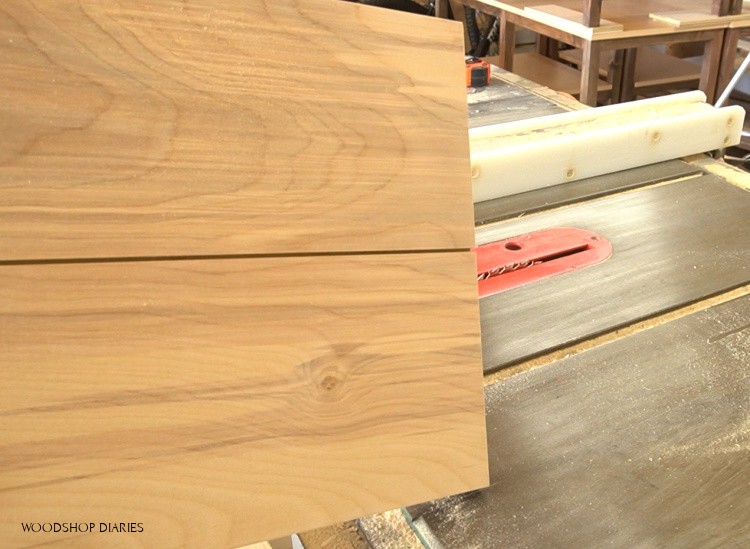
Then I set up the table saw to cut about ¼” deep down the middle of this piece.
.
Ta-da—fake drawer fronts!
I simply glued these onto the front of the cart leaving my ⅛” gaps at the top and bottom so it looks like real drawer fronts.
.
Then, to help the top sit in place, I glued and nailed two pieces of scrap plywood on the underside so that when it sits down in the cart, it stays in place.
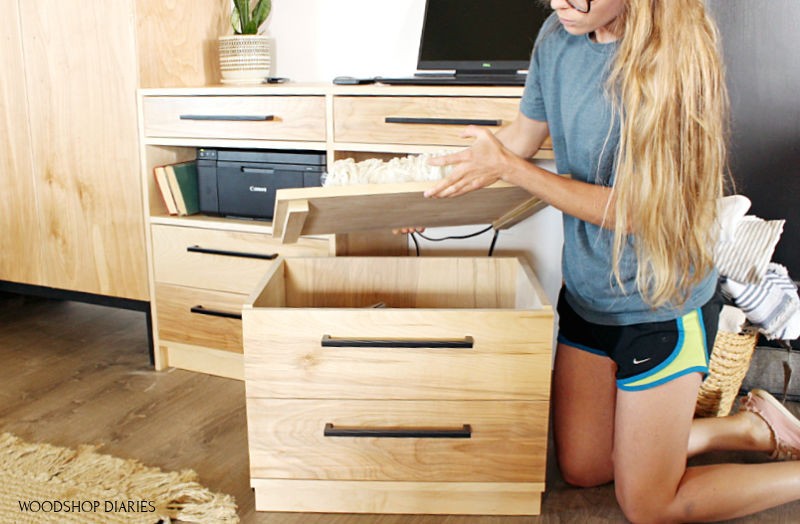
As a note—I originally planned to upholster this top piece for a padded seat, but I decided I liked it better without the fabric. BUT, if you want some padding on your seat, feel free to upholster the top.
Step 5: Finish Dresser Desk
I gave it a couple coats of Minwax Polycrylic, then installed these simple black handles (you need six, but I buy the 10 pack to save money) into the drawers and the cart seat, and it was ready to bring inside.
.
I emptied out my old desk and removed it. Then I brought my new desk inside. One thing to note about this is that I had a baseboard already installed here and I was lazy and didn’t want to cut it.
.
So I just butted the desk up to it. I actually like it better that way because I can run my cords through the gap between the desk and the wall instead of drilling holes into the actual desk to run my cords for my printer and laptop.
.
I got everything from my old desk organized and put away and I even had one drawer leftover that I didn’t have anything to put in it! I mean, I’m not mad about it…I haven’t had a spare drawer since we moved in here two years ago haha.
I’m sure eventually I’ll fill it with something, but for now, I’m thankful for all the extra storage space this project provided.
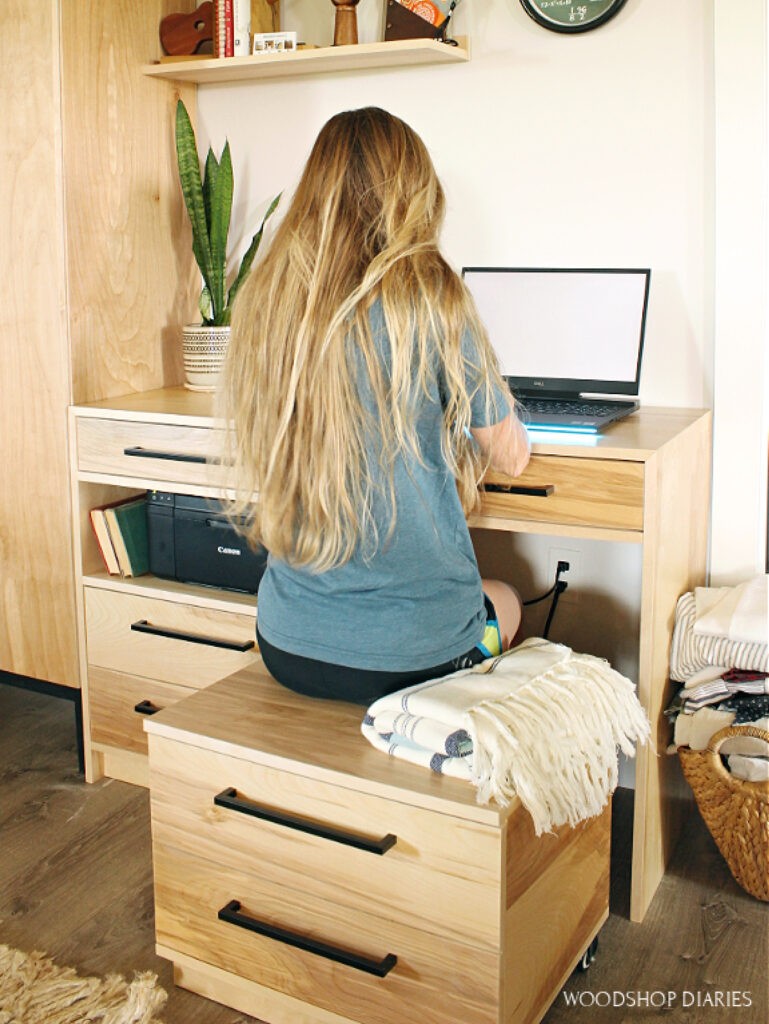
It blends right into my closet cabinets and I’m just really, really happy with how this turned out. It’s simple, clean, a little unexpected, and a whole lot practical—at least for my situation.
.
So if you’ve enjoyed this build, I’d love if you’d subscribe below so you don’t miss out on all the fun to come. And if you’d like some more desk ideas, feel free to browse them here.
.
Oh, and be sure to pin for later 🙂
Until next time, happy building 😊


