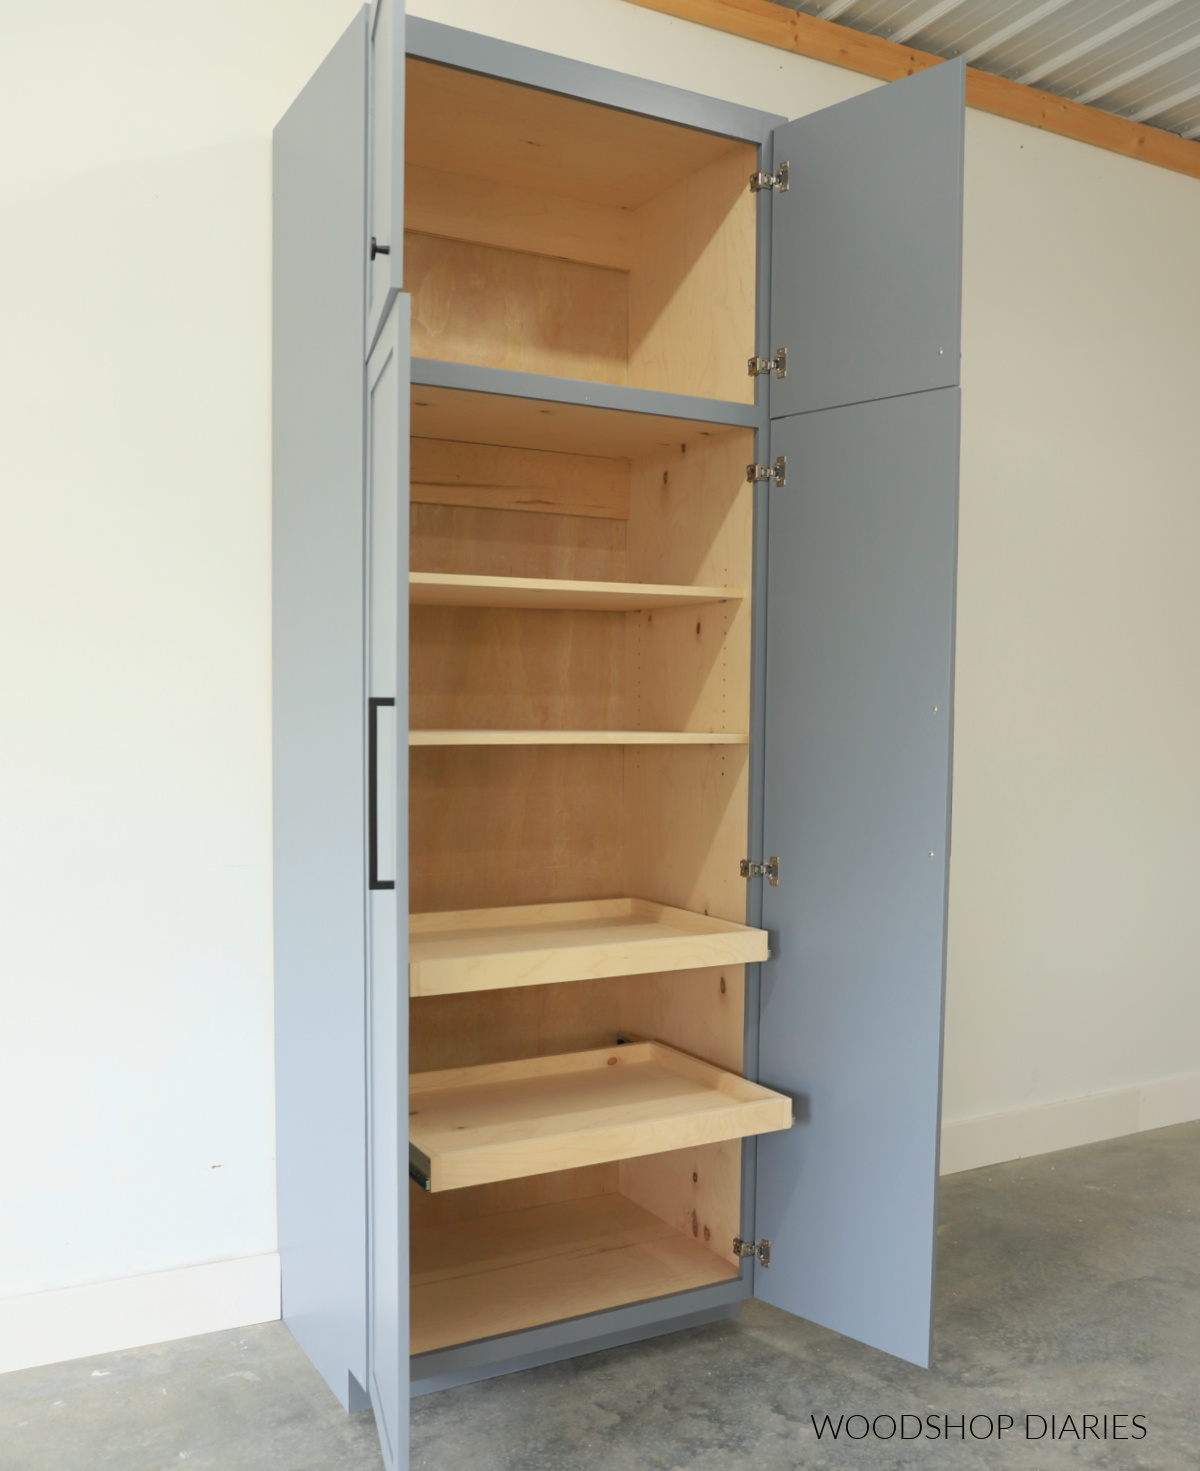
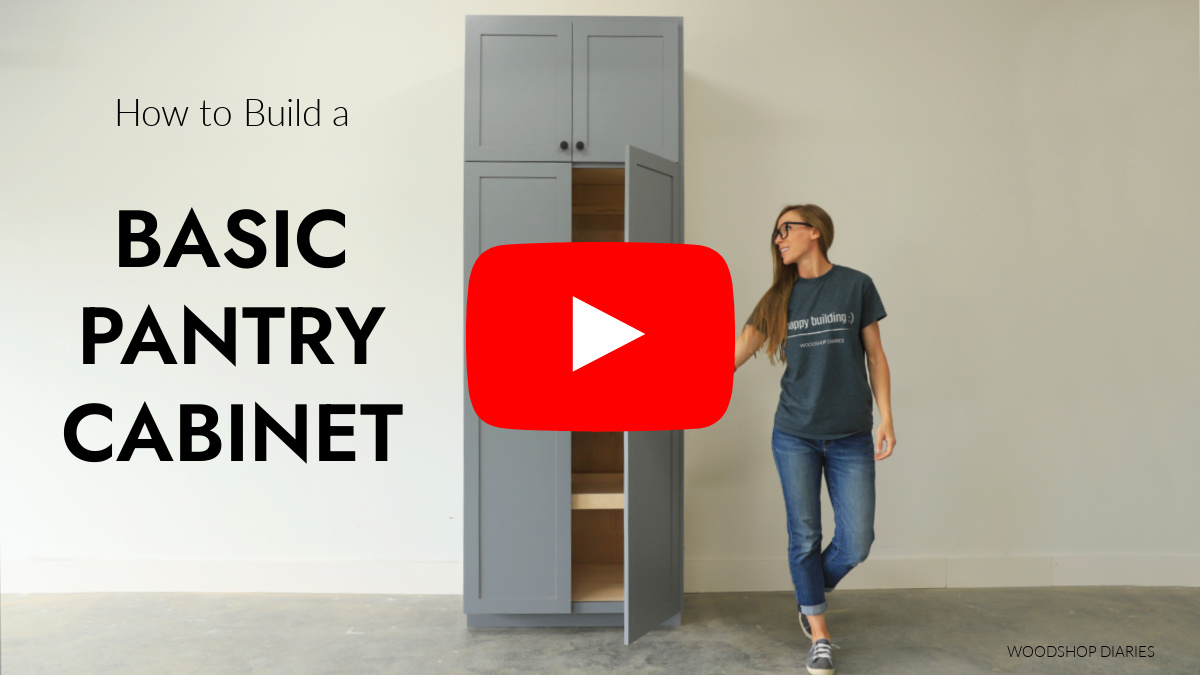
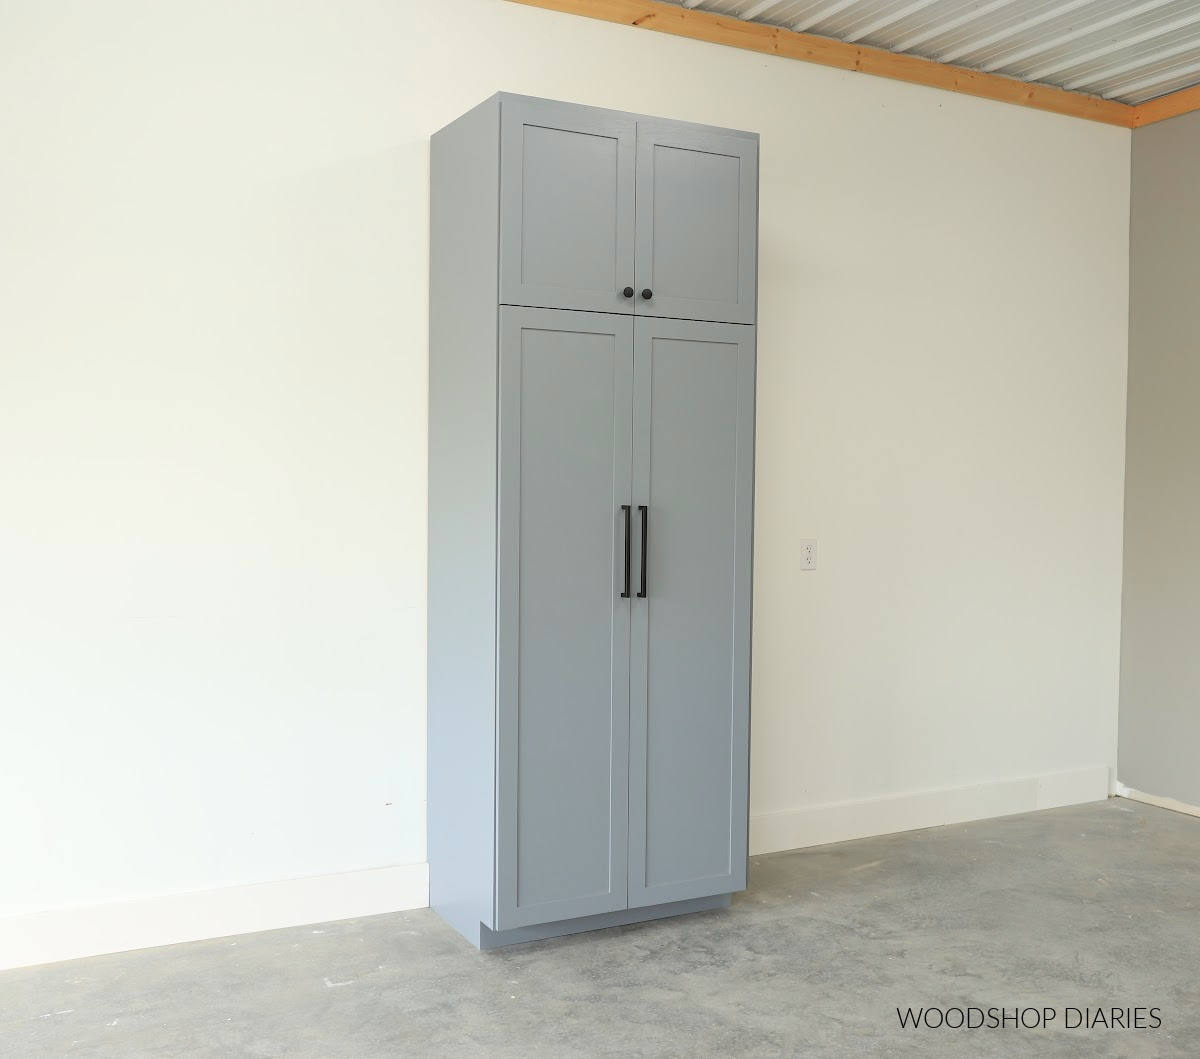
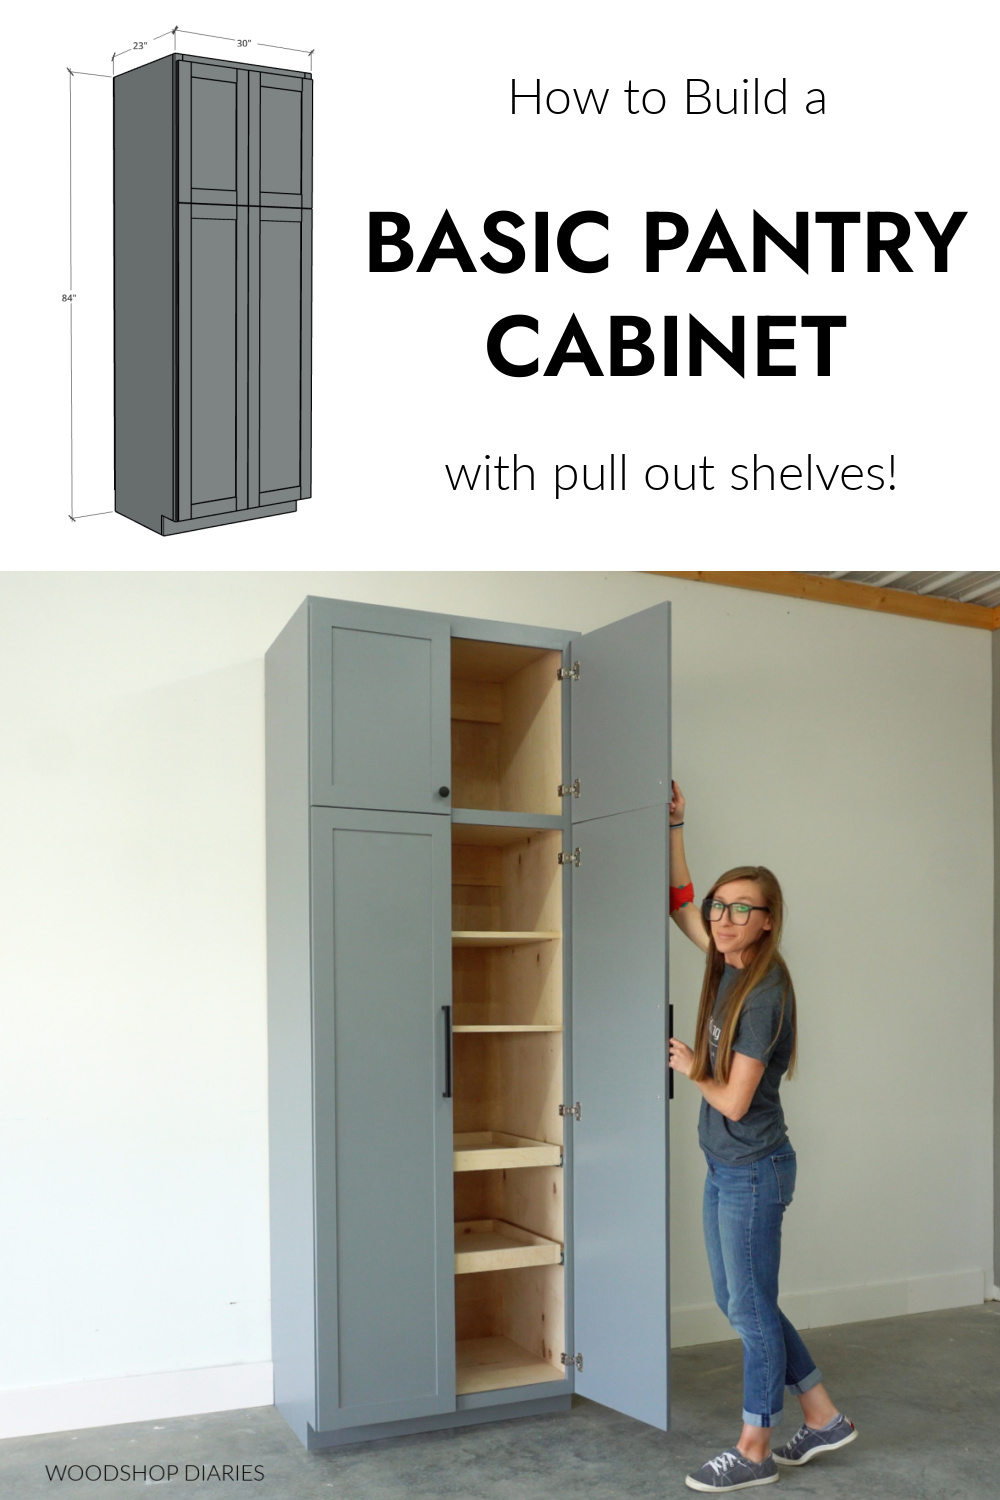
In this post, I’m sharing how to build a basic pantry cabinet with adjustable shelves OR pull out drawers!
The great thing about a basic pantry design like this one is that you can mix and match and customize as needed.
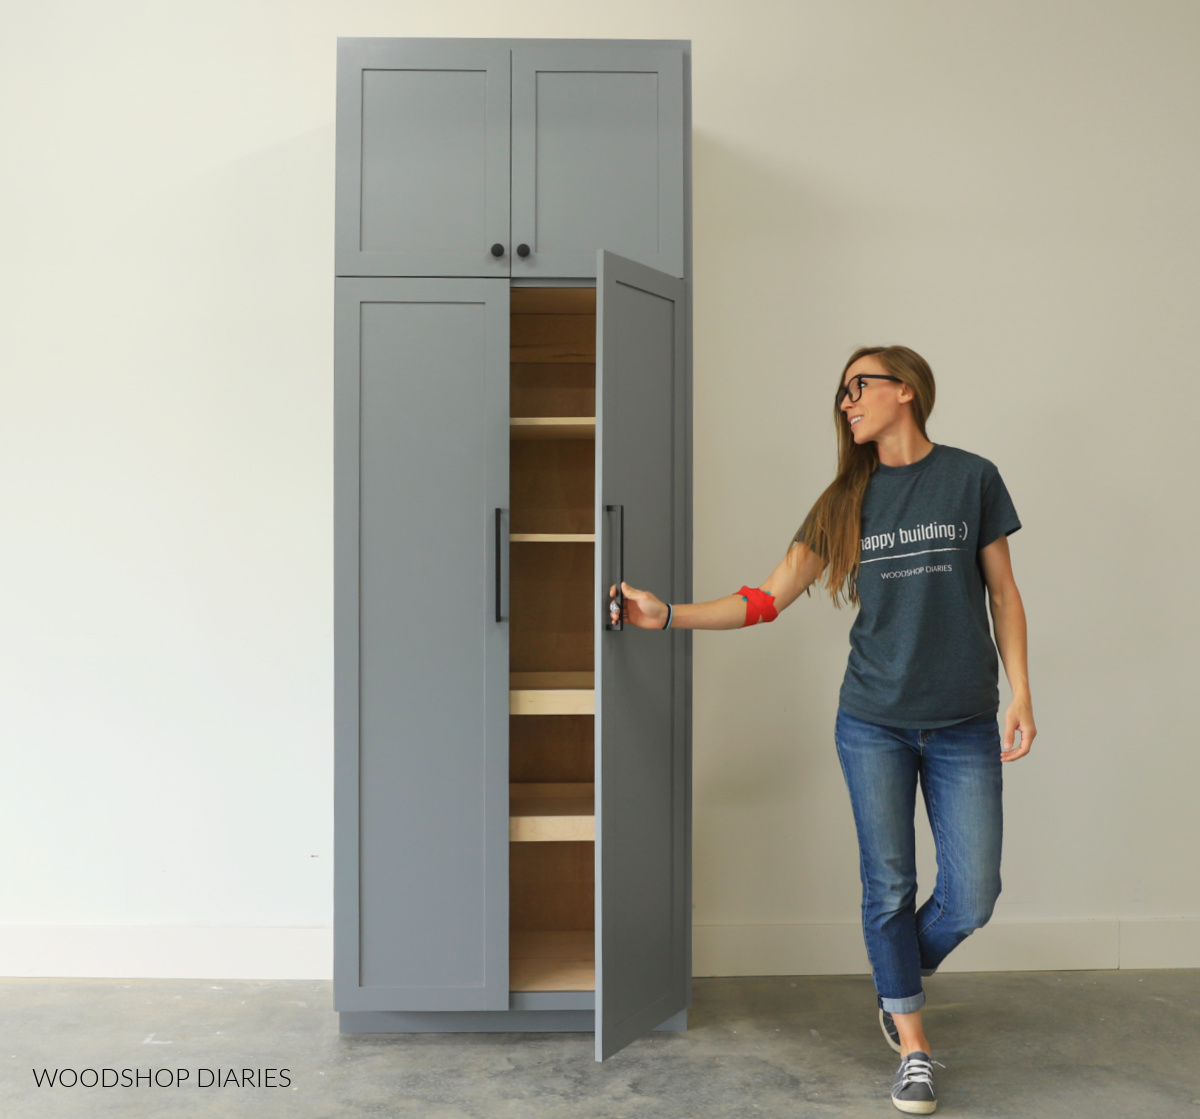
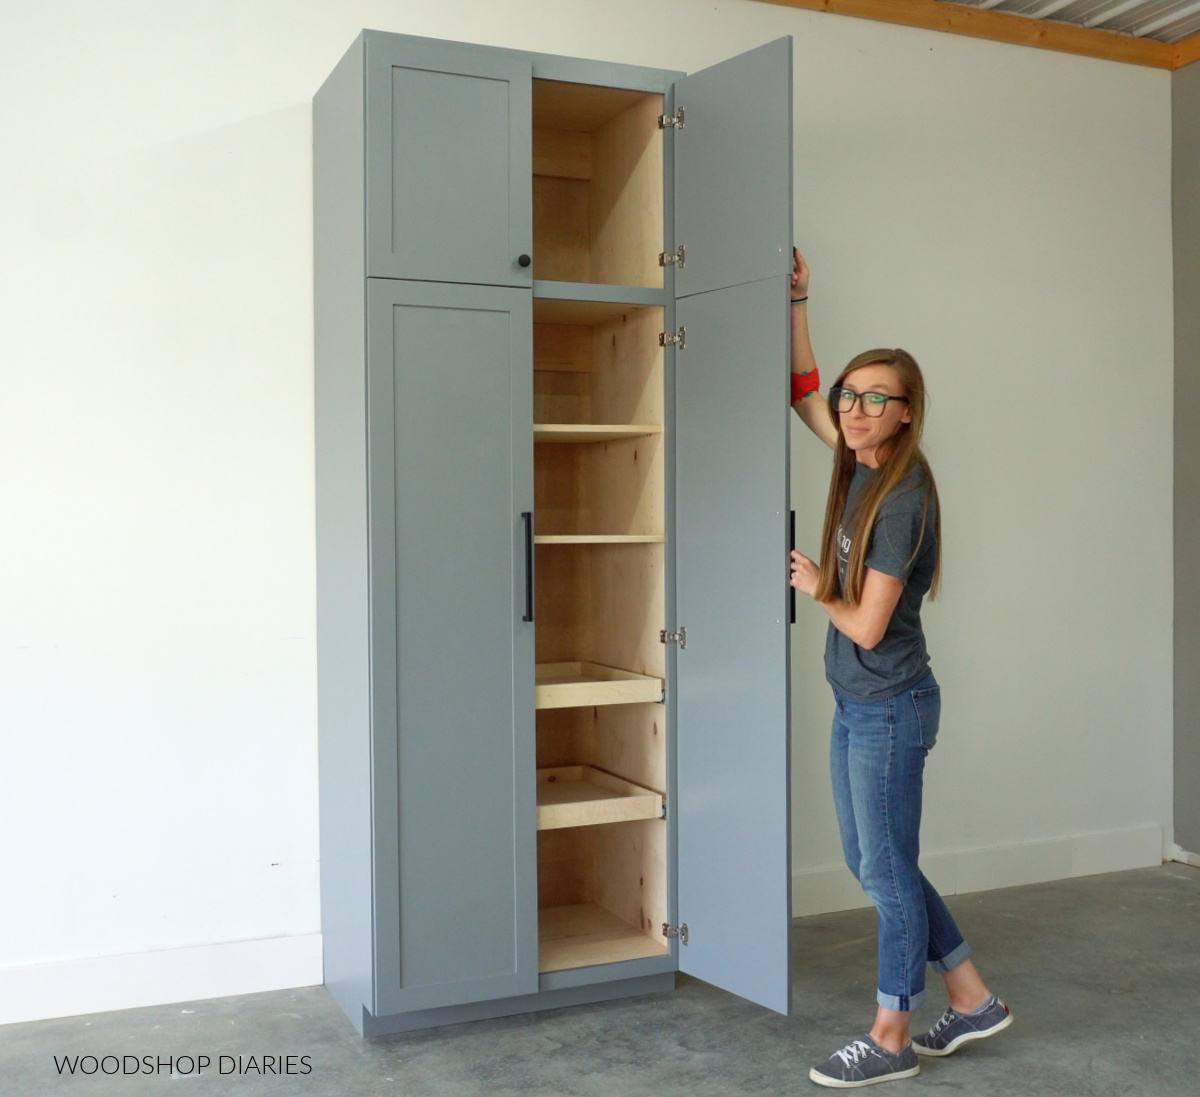
In this cabinet, I installed adjustable shelves AND pull out drawers, but you could stick to one or the other if you didn’t want both options in one cabinet.
This particular cabinet is going into my parents’ garage for extra storage.
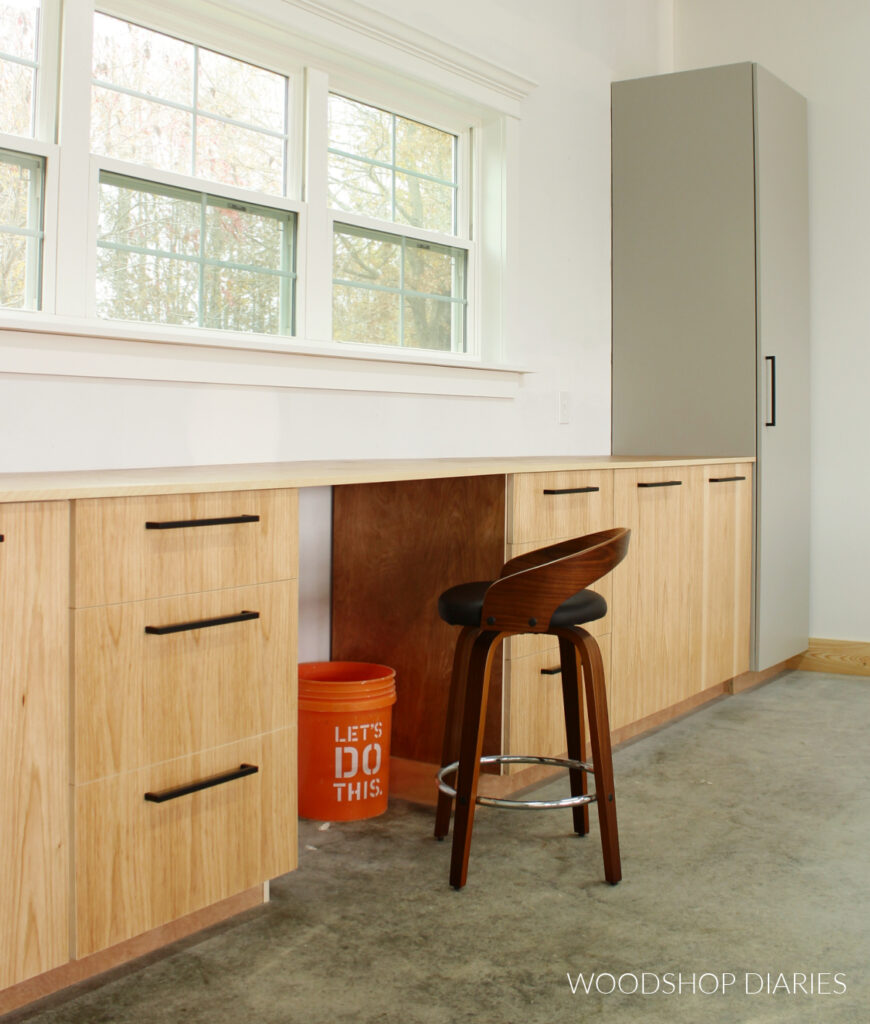
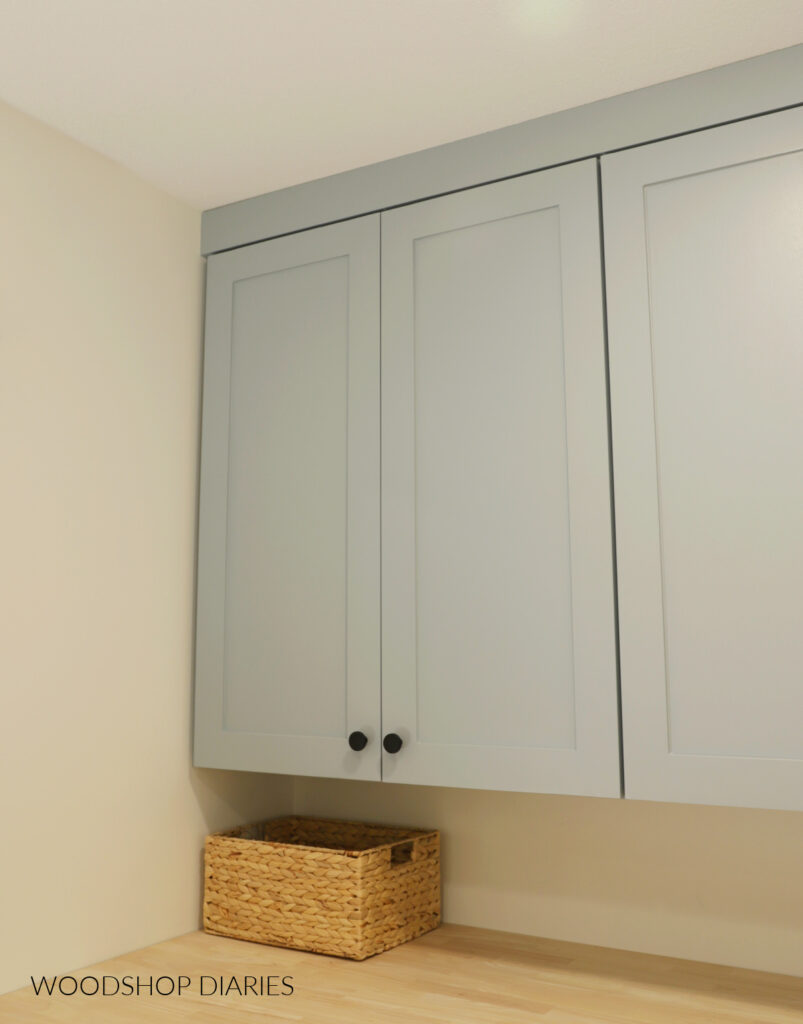
But this exact same design would work perfectly in a kitchen, bathroom, home office, or built in and it’s easy to adjust the sizing to fit your space.
*This post contains affiliate links. See website policies.
What to know before building a pantry cabinet
This is a very basic design that is super easy to customize to fit your needs and your space.
Pantry Cabinet Size
I built the cabinet shown a full 8′ tall, but standard pantry cabinet height is about 84″.
The plans I’m sharing below are for a standard 84″ tall pantry, but to make it taller, simply adjust the length of the side panels up to 96″ (which is 8 ft).
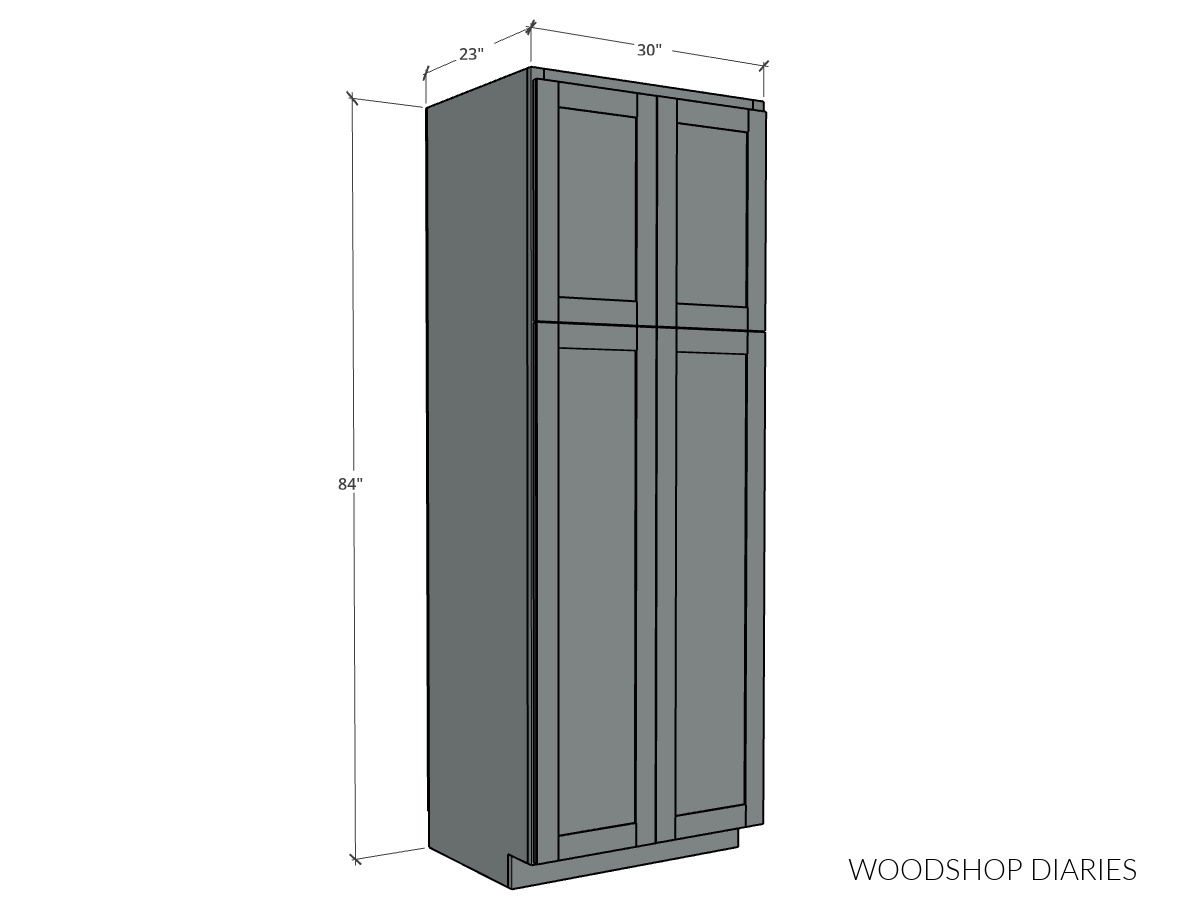
You can easily modify the width of the cabinet as well. To adjust the width, cut the top, middle, and bottom shelves 1 ½″ shorter than you want your overall cabinet width to be.
The plans shown are for a 23″ deep cabinet BOX. The doors on the front add an additional ~1″ to the overall depth. To make it deeper/shallower, adjust the width of the side panels and top, middle, bottom shelves.
This design can be used as a freestanding cabinet for extra storage or can be integrated in with your existing cabinets. Just make sure however you use it that it’s secured to the wall to prevent it from tipping over.
Shelving Customizations
The pull out drawer shelves are made SUPER beefy to hold heavy weights, but if you didn’t plan to store heavy items in here, you can make them with ¼″ plywood bottoms like I build basic drawer boxes here.
If you’d rather skip adjustable shelves and install pull out drawer shelves all the way up, you certainly can.
Or if you’d rather keep it a little simpler and just have adjustable shelves throughout the cabinet, you can skip the drawer slides and drawers.
This is your cabinet, so make it however fits your needs the best. I’d encourage you to measure the items you plan to store here to get a better idea of how far apart you may want to space your drawers and shelves.
Helpful Resources
These resources and guides may be helpful throughout the build if you get stuck or have a question:
Are DIY projects your thing? Sign up for our newsletter for priority access to the latest projects and build plans!
How to Build a Pantry Cabinet
This basic pantry cabinet build is a great intermediate project. It’s definitely not difficult, but it covers a lot of aspects of cabinet building.
It may be helpful to have some experience with doors, shelves, and drawers before building. BUT, even if you don’t, this is a great project to get some practice on.
If you prefer to watch, check out the full build video here:
Love watching how-to videos? Subscribe to my YouTube channel for plenty more where that came from!
Prefer to print? Grab the printable pantry cabinet building plans available here:
Tools & Materials:
Tools:
- Drill/Driver
- Circular Saw and plywood cutting guides
- Pocket Hole Jig
- Brad or Finish nailer
- Jig Saw
- Concealed Hinge Jig
- Shelf Pin Jig
- Miter Saw
Materials:
- (2) 4’x8′ sheet ¾″ plywood
- (1) 4’x8′ sheet ½″ plywood (optional for doors)
- (1) 4’x8′ sheet ¼″ plywood
- (3) 1x2x8 boards
- (1) 1x3x8 board
- 1 ¼” pocket hole screws
- 1 ¼” & 2 ½″ wood screws
- 1 ¼” long brad or finish nails
- Wood glue
- (5) pair face frame 1 ¼” overlay (or other as desired) hinges
- (2) pair 20″ drawer slides
- Shelf pins
- Edge banding (optional, but recommended)
- Drawer pulls/knobs
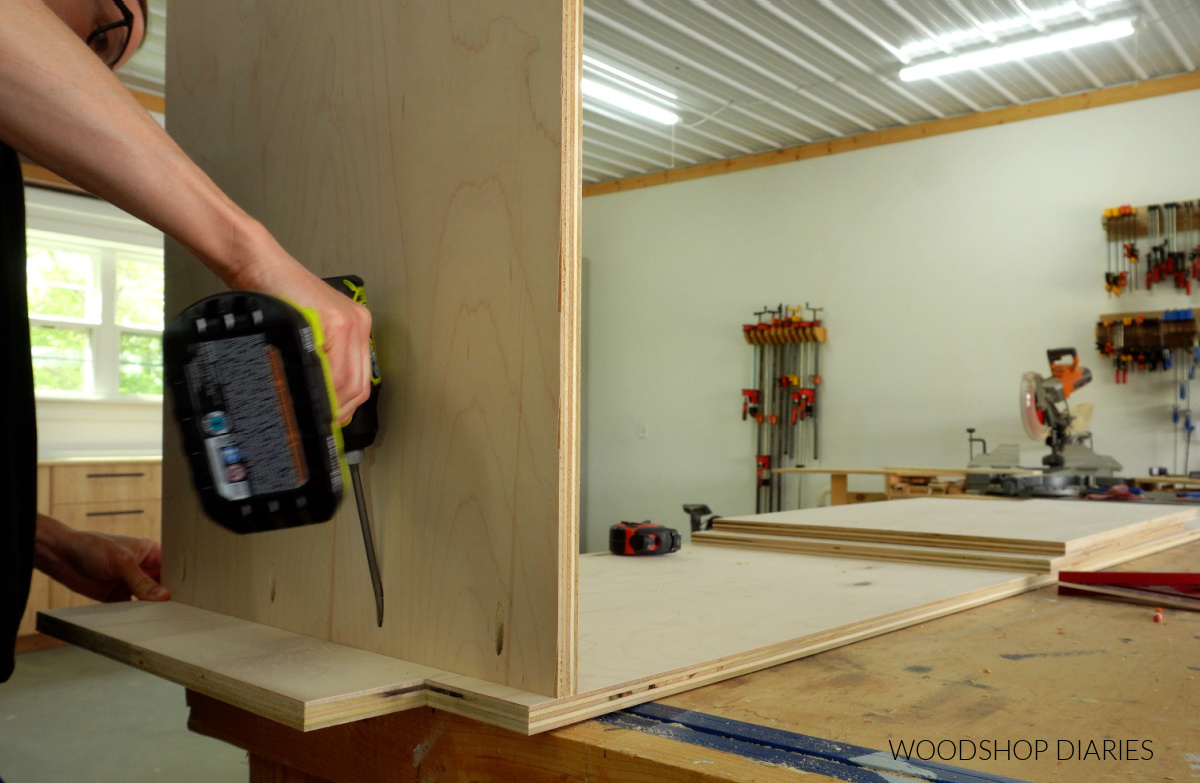
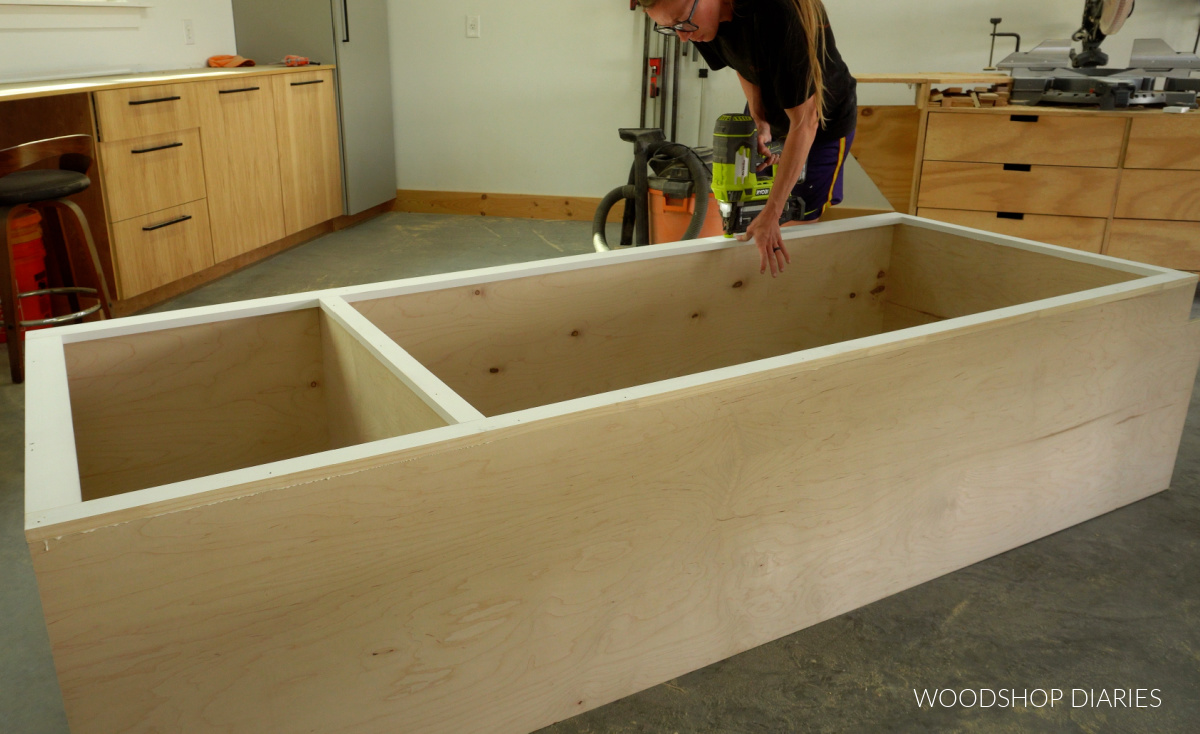
Step 1: Assemble Pantry Cabinet Box
As is the case with most cabinet building projects, the first step was cutting down the plywood.
RELATED: How to cut plywood sheets
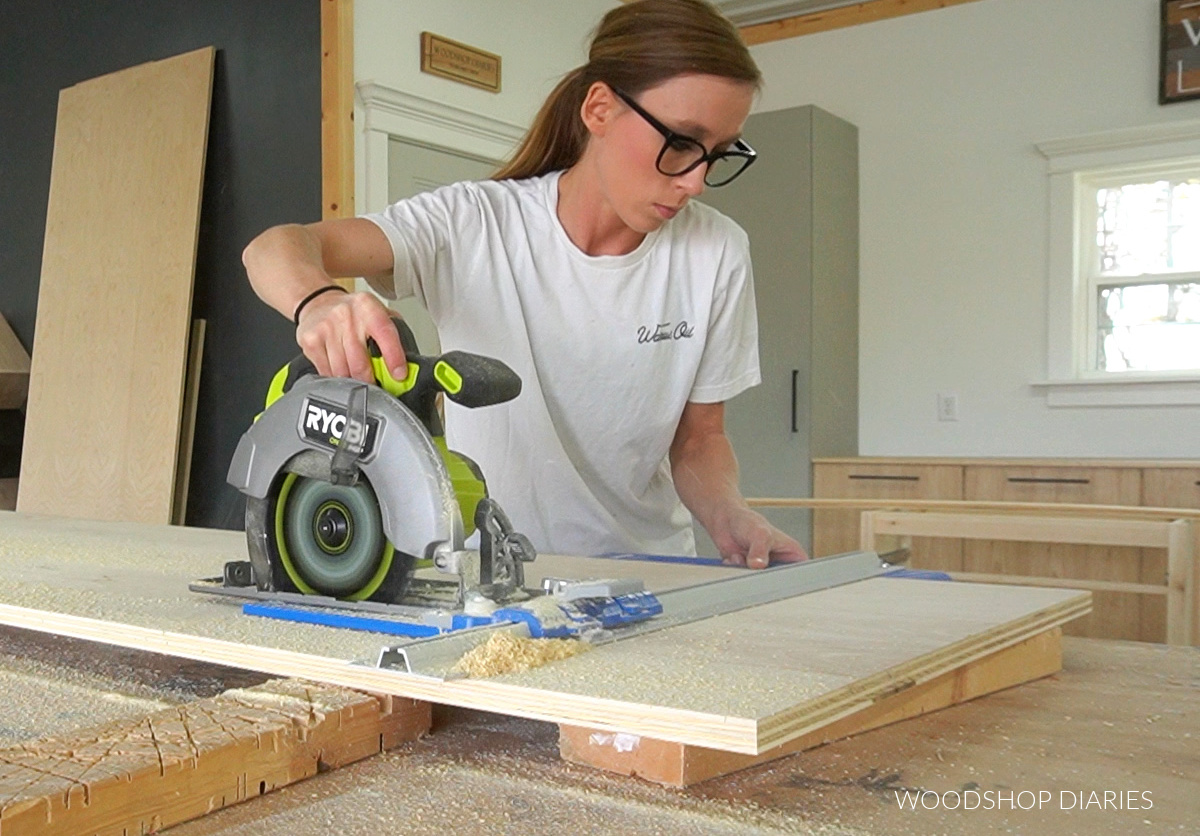
TIP: I recommend using cabinet grade hardwood plywood (like birch or maple) for this as it finishes nicely and is strong.
Learn how to choose the right plywood for your projects here.
I’ve provided the plywood cut diagrams in the printable plans, but I cut the two side panels from one sheet and the top, middle and bottom panels from another sheet.
I also cut two pieces of plywood scraps to use for the two back supports. These are used to secure the cabinet to the wall once built.
Just like when building base cabinets, I measured and marked a notch in the front bottom corner of the two side panels and cut it out with a jig saw.
This is a toe kick and is common in most cabinets that set on the floor, but it’s not NECESSARY if you don’t want to add it.
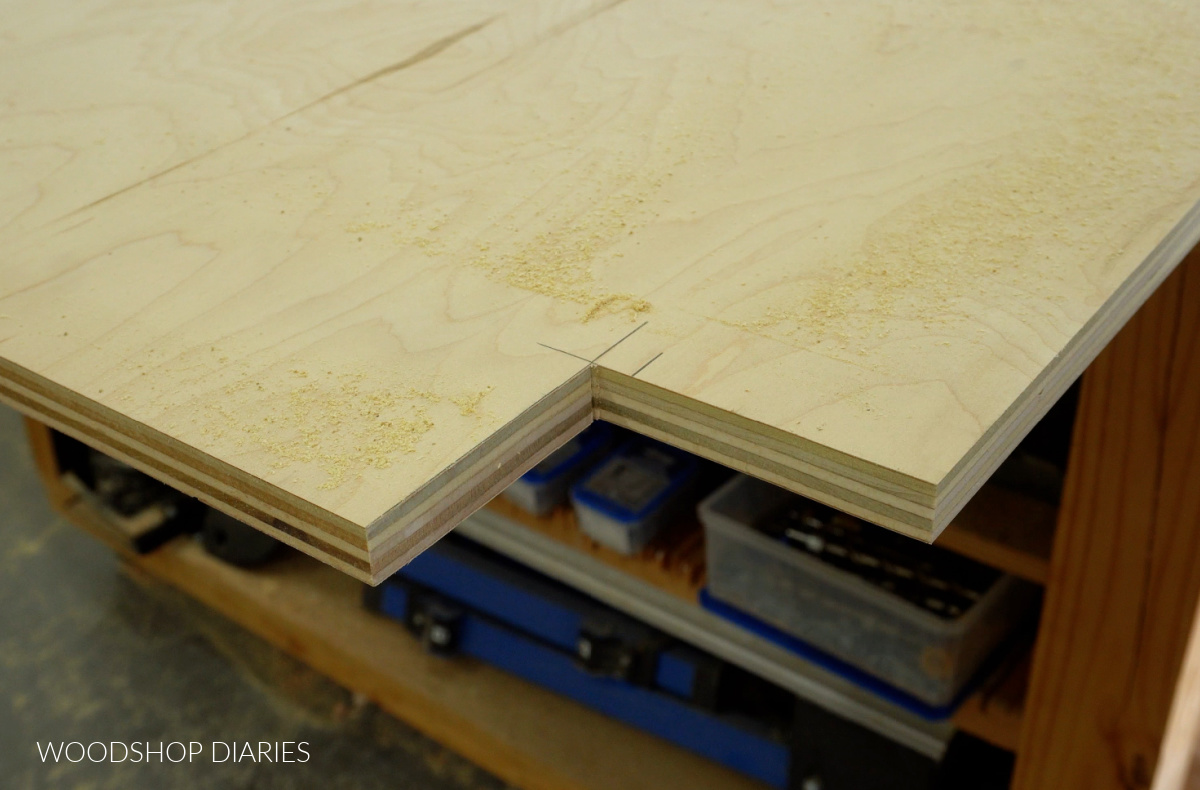
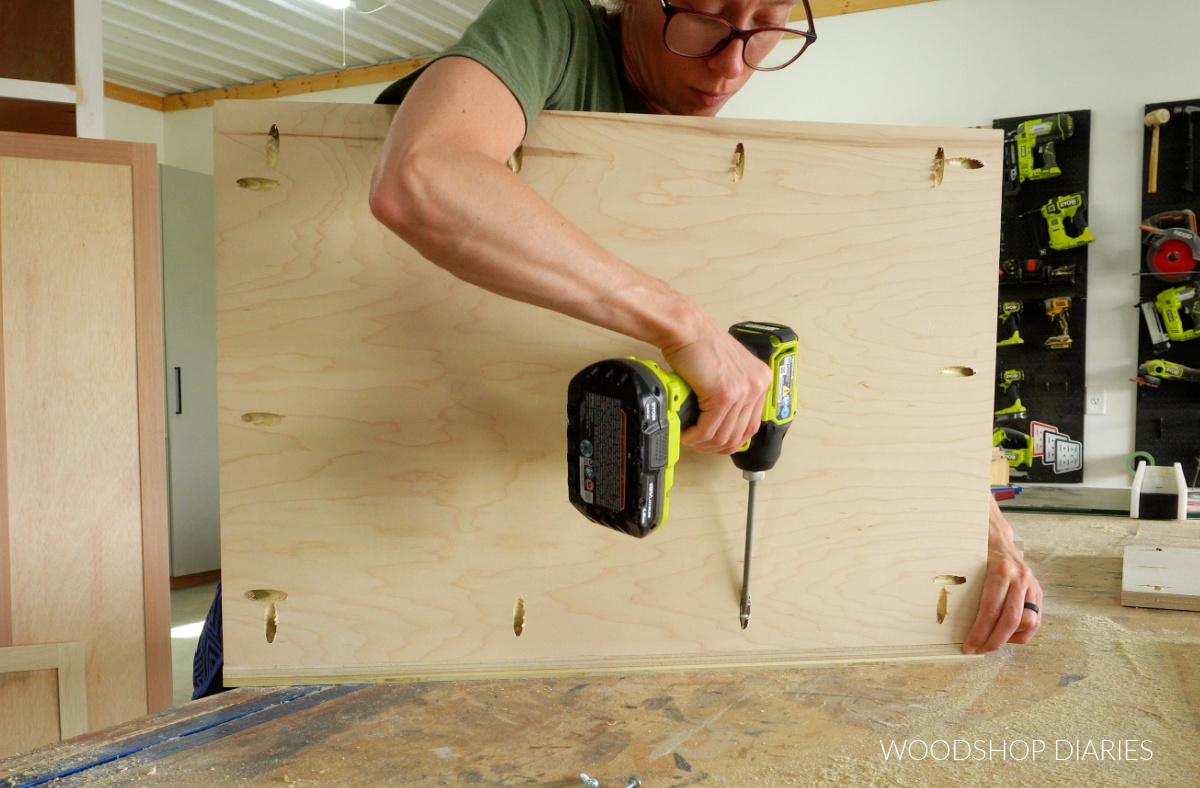
After all the pieces were cut, I assembled the cabinet using ¾″ pocket holes and 1 ¼″ pocket hole screws. Learn how to use a pocket hole jig here.
Since I’m adding a face frame onto the front of the cabinet, I installed the bottom panel so that it was about ⅝″ up from bottom edge of the toe kick.
I installed the “middle” panel about 24″ down from the top panel. But you can definitely adjust how how or low you want it to go.
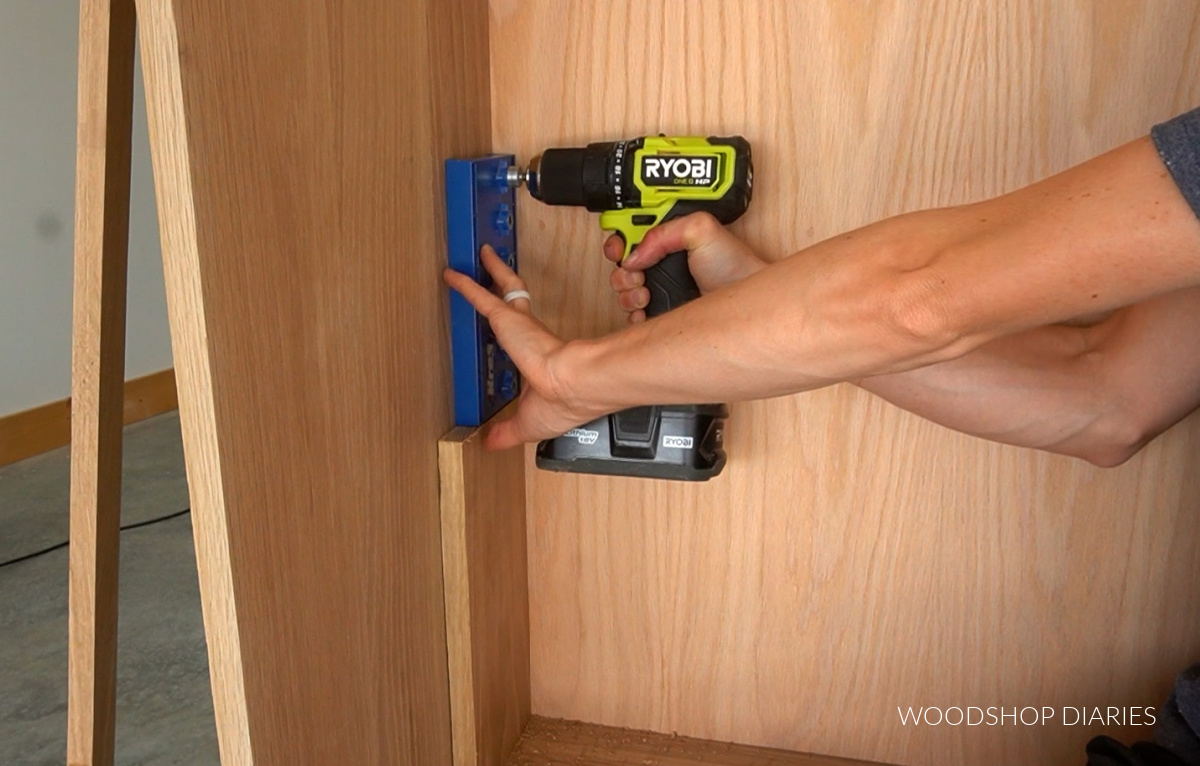
Step 2: Install Face Frame
Once the cabinet body was assembled, I measured the overall cabinet width and height from the top of the cabinet to the bottom of the toe kick.
Then, I assembled a face frame this size to fit over the front using pocket holes and screws.
RELATED: Why I recommend using the Kreg Micro Pocket Hole Jig for face frames
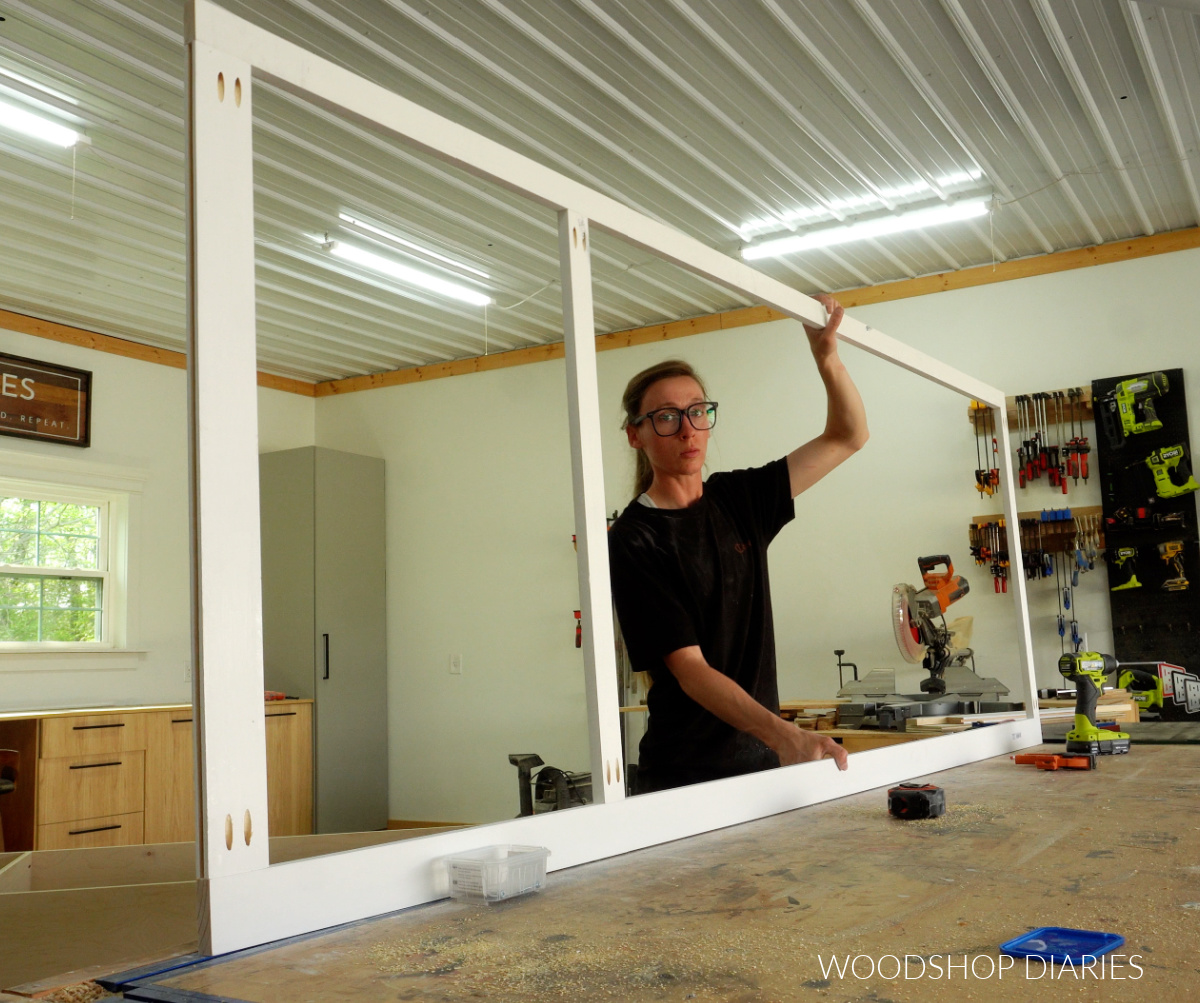
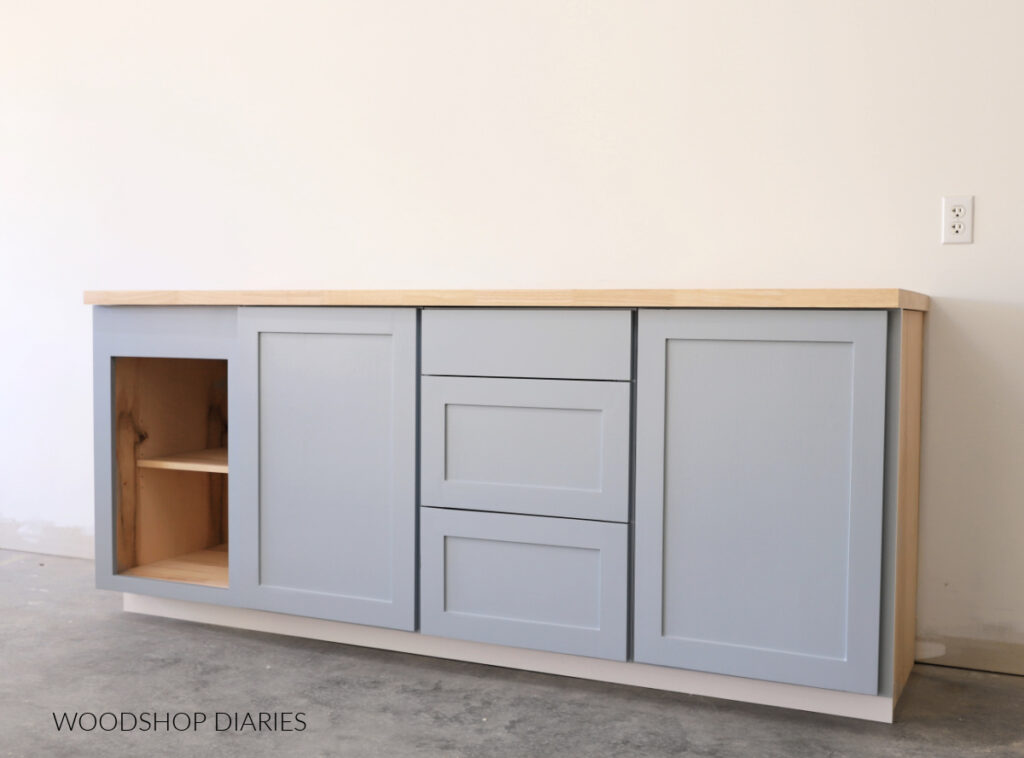
I used 1x2s for the face frame except for the piece on the right side and the piece at the top–for those, I used 1x3s.
Why? Using a 1×3 at the top leaves room after the doors are installed to be able to add crown molding, if desired.
But the reason I used a 1×3 on the right side is because when this is installed (in my parent’s garage later), the right side will butt up against a wall.
Using a 1×3 on that side of the face frame allows me to overhang the right side of the cabinet box 1″, creating a built in filler strip. Below shows this on a base cabinet, but this applies to pantry cabinets, too.
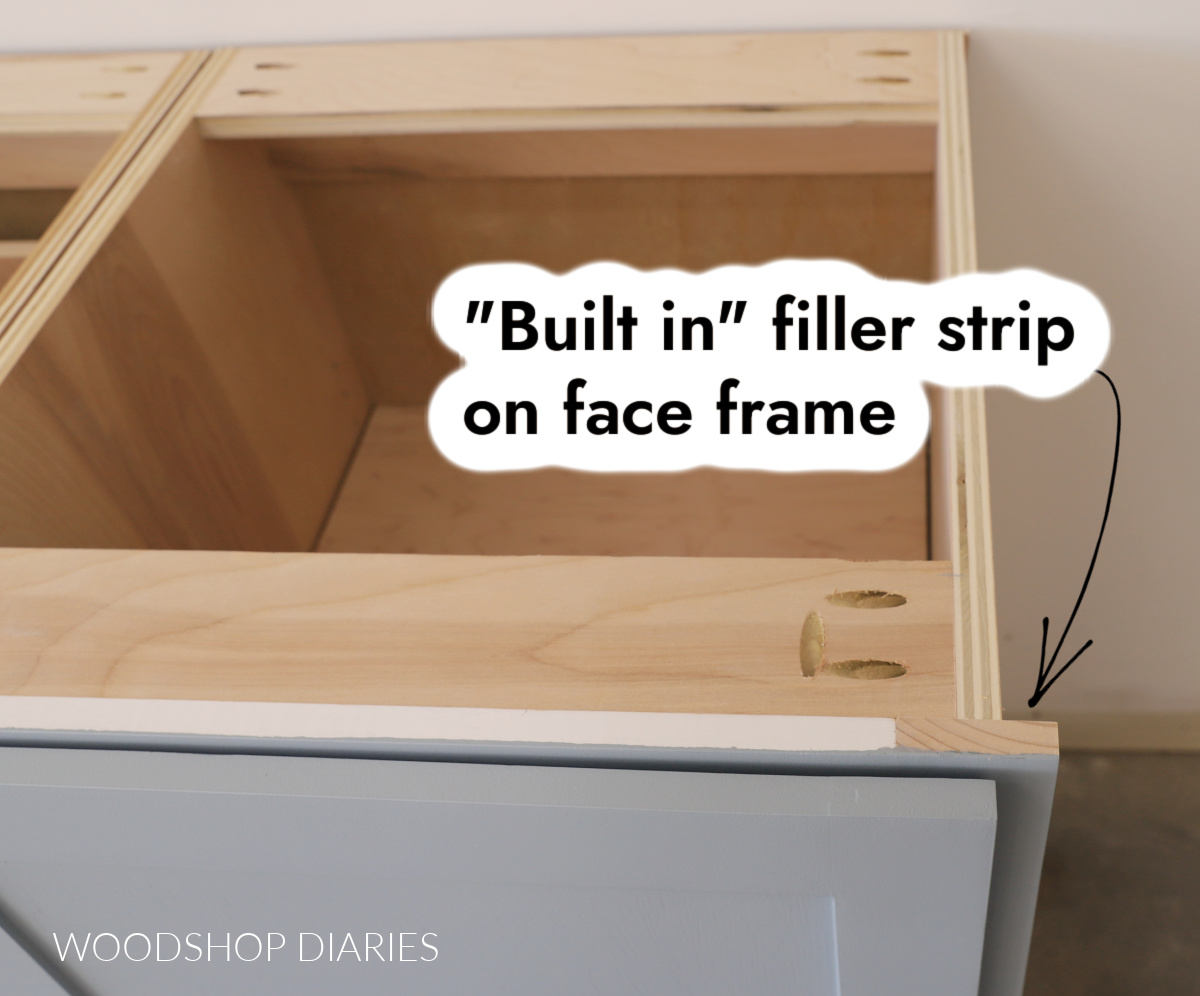
This filler strip allows room to add a baseboard, allows the doors plenty of room to open without rubbing, and accounts for unsquare drywall corners.
So, if you’re installing in a corner where one side will be against the wall, I recommend using a 1×3 for this side of the face frame. Keep in mind this does add an additional 1″ to the overall cabinet width.
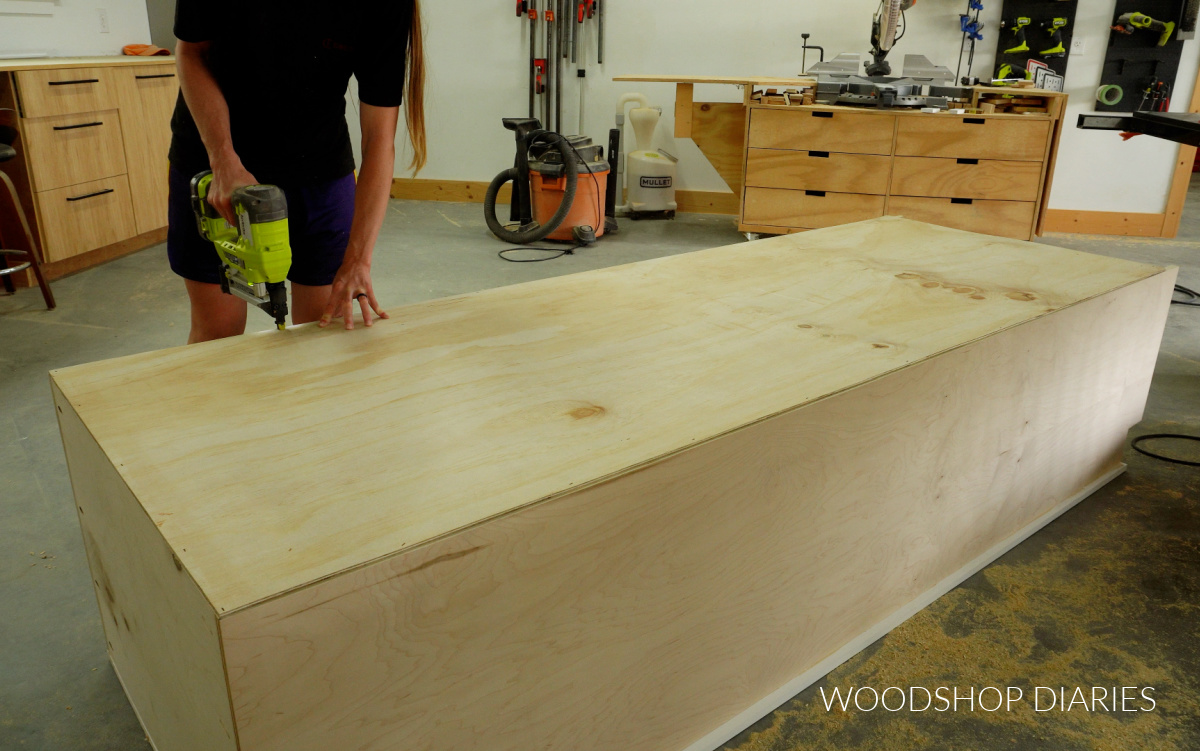
Once assembled, I glued and nailed this face frame onto the front of the pantry cabinet.
Make sure to putty and fill all the nail holes, then sand well.
Step 3: Add Back Panel
Then I flipped the cabinet over, and cut a piece of ¼″ plywood to cover the back side. I stapled this in place, but you could also glue and nail, or screw it instead.
OR, if you wanted to route out a rabbet or dado to insert the back panel into, you could do that as well.
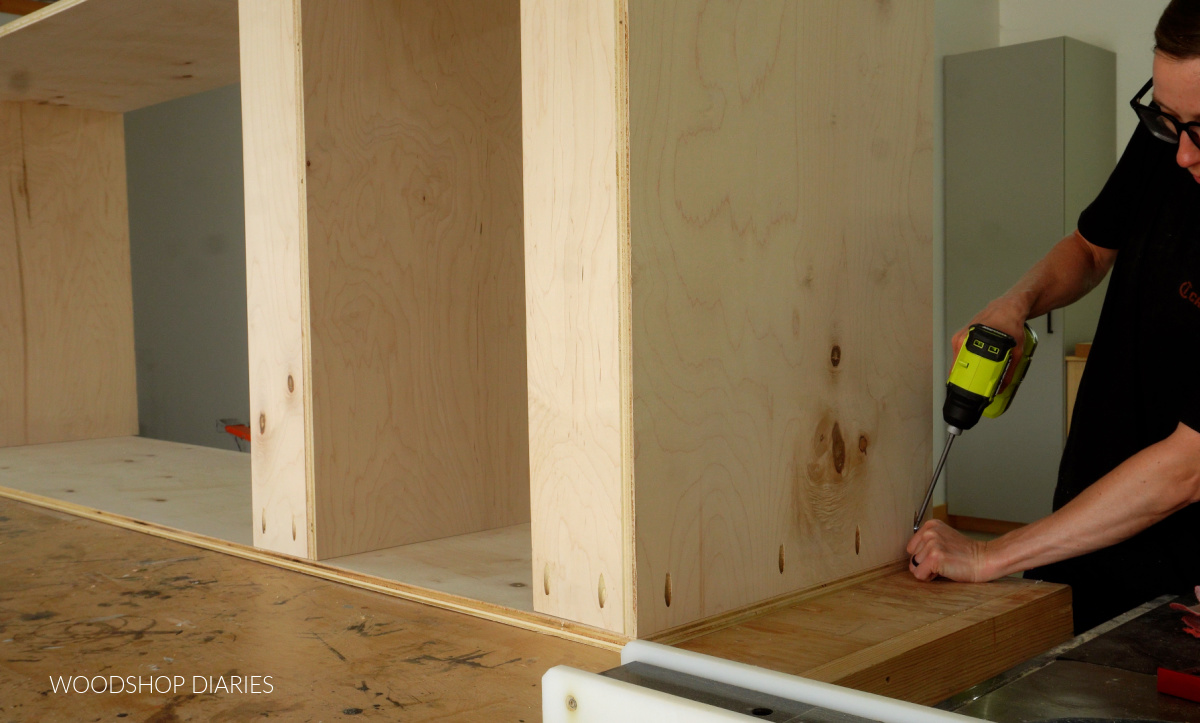
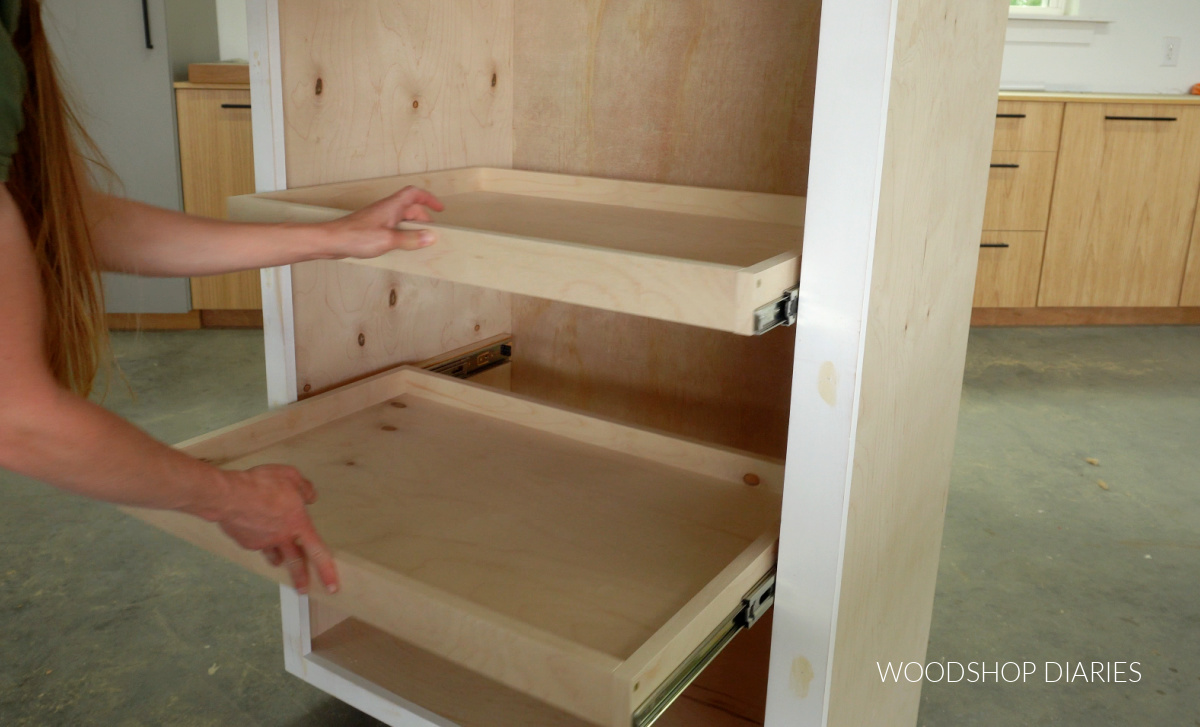
Step 4: Install Pull Out Drawer Shelves
The pull out drawer shelves are basically really shallow drawer boxes. Because of the face frame, I needed to add some spacer blocks to mount the slides to.
So I flipped the cabinet on its side and measured and marked out where I wanted my drawer shelves to go. I glued and screwed ¾″ plywood strips at these marks.
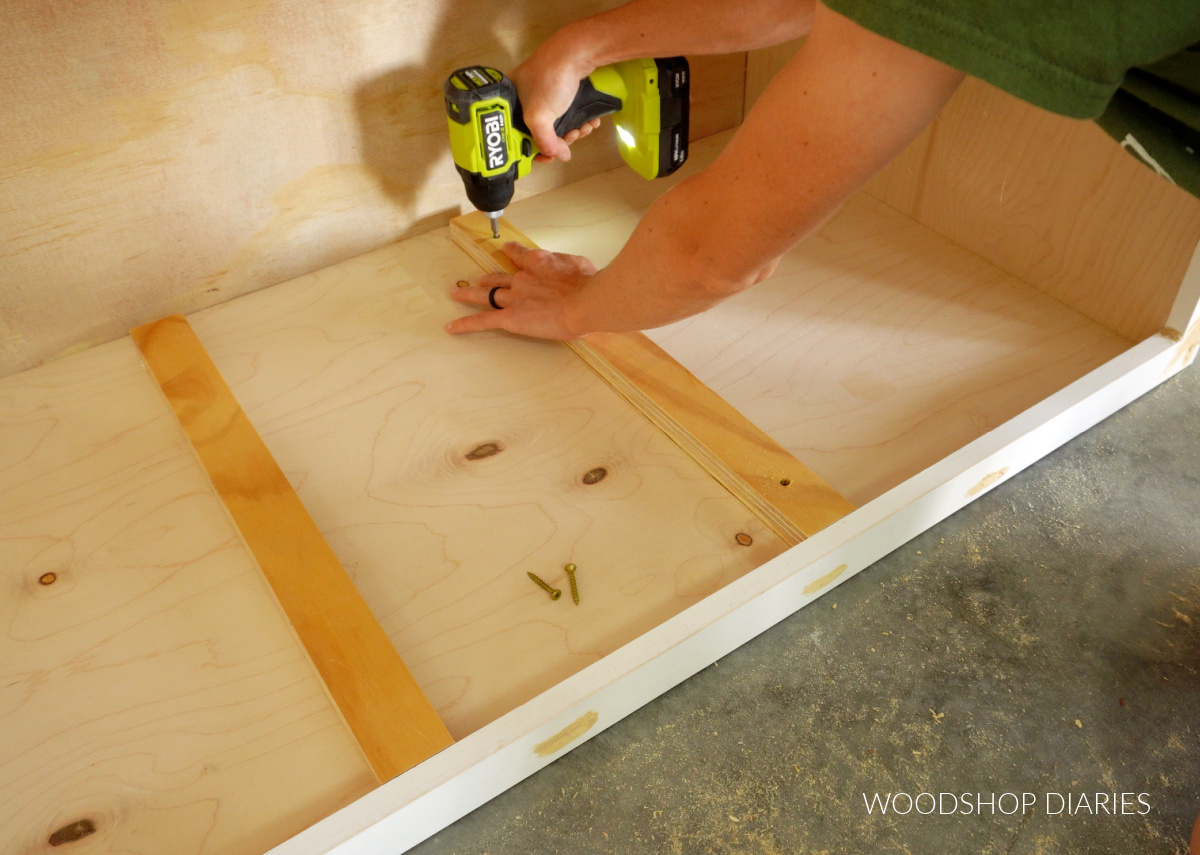
Feel free to space these out however you want/need. I spaced mine out about 12″ apart.
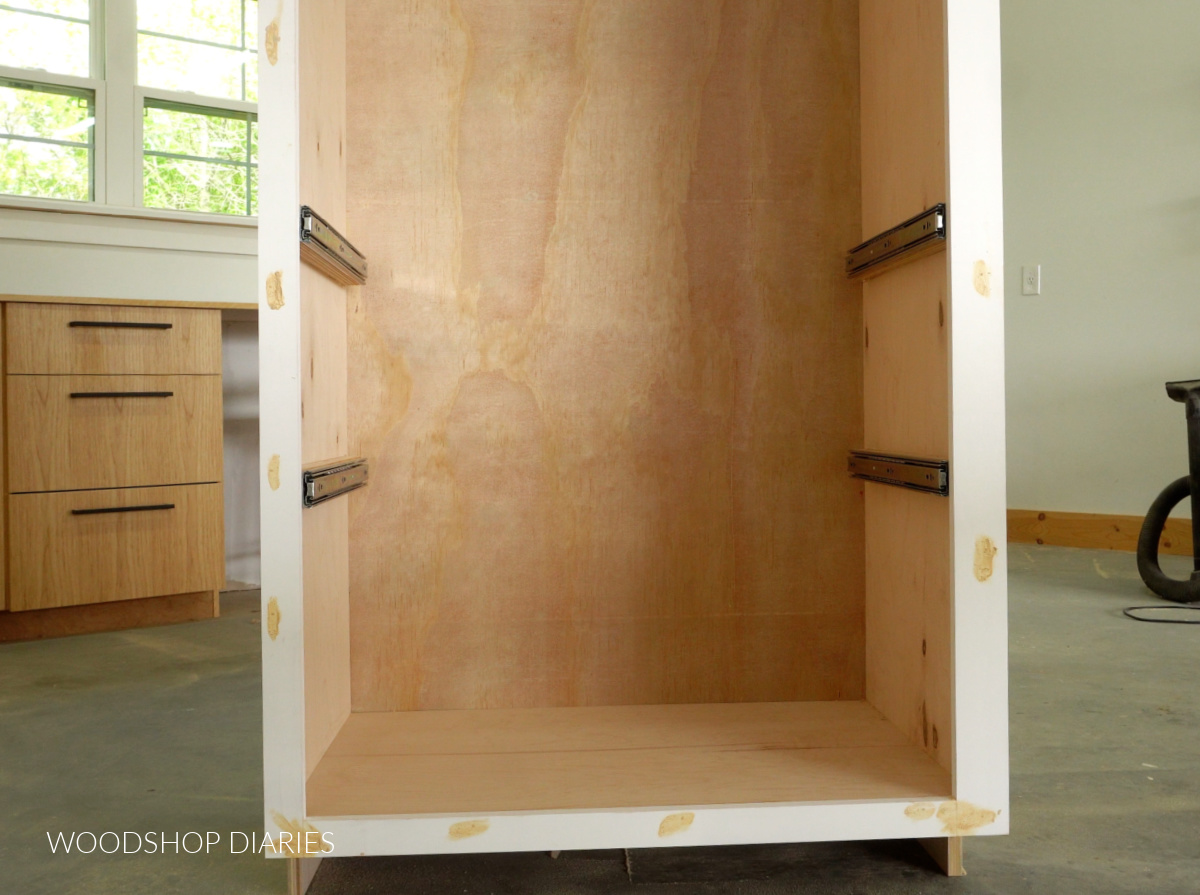
Then, I installed 20″ side mount slides onto these blocks. Learn how to install drawer slides here.
I did this for both sides. Make sure the slides are mounted at the same height on both sides of the cabinet.
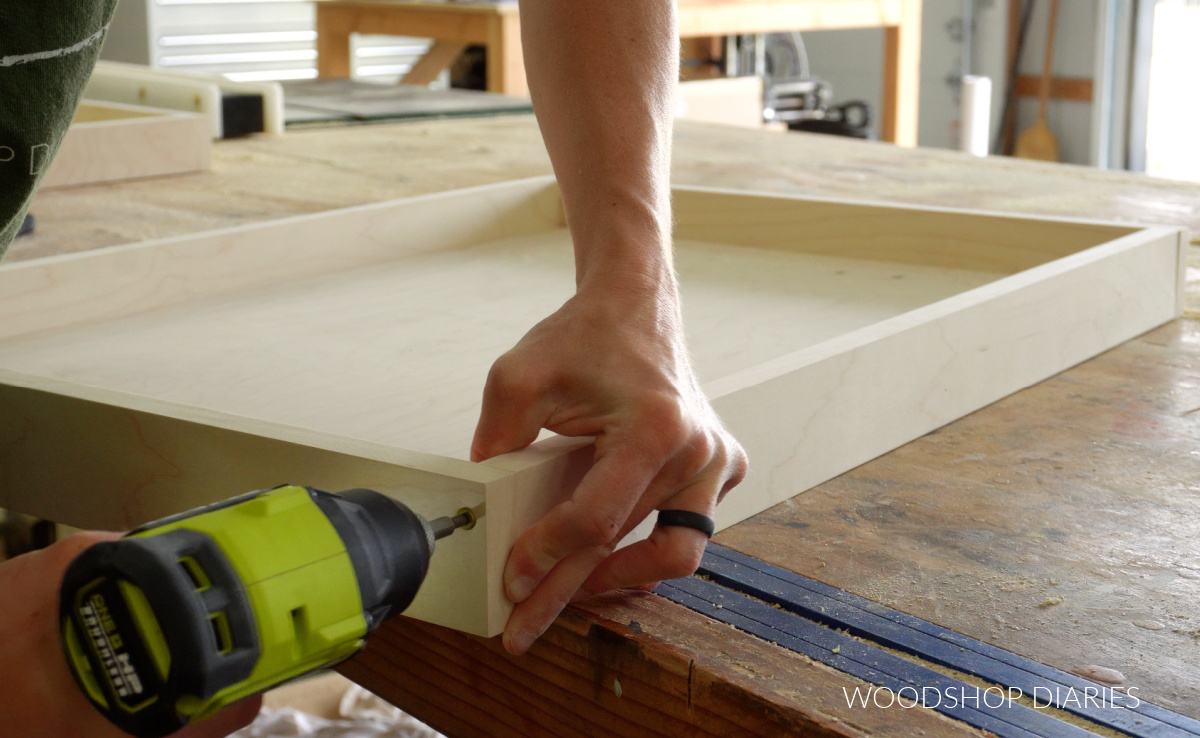
After the slides were in, I assembled two simple trays/drawer boxes using ¾″ plywood and pocket holes and screws.
Essentially, I attached the 2″ tall sides to the bottom panel using pocket holes and screws.
Then, at each corner, I drove a 1 ¼″ wood screw to attach the sides together.
Then, I installed these two drawer shelves onto the slides in the cabinet.
Prefer to print? Grab the printable pantry cabinet building plans here.
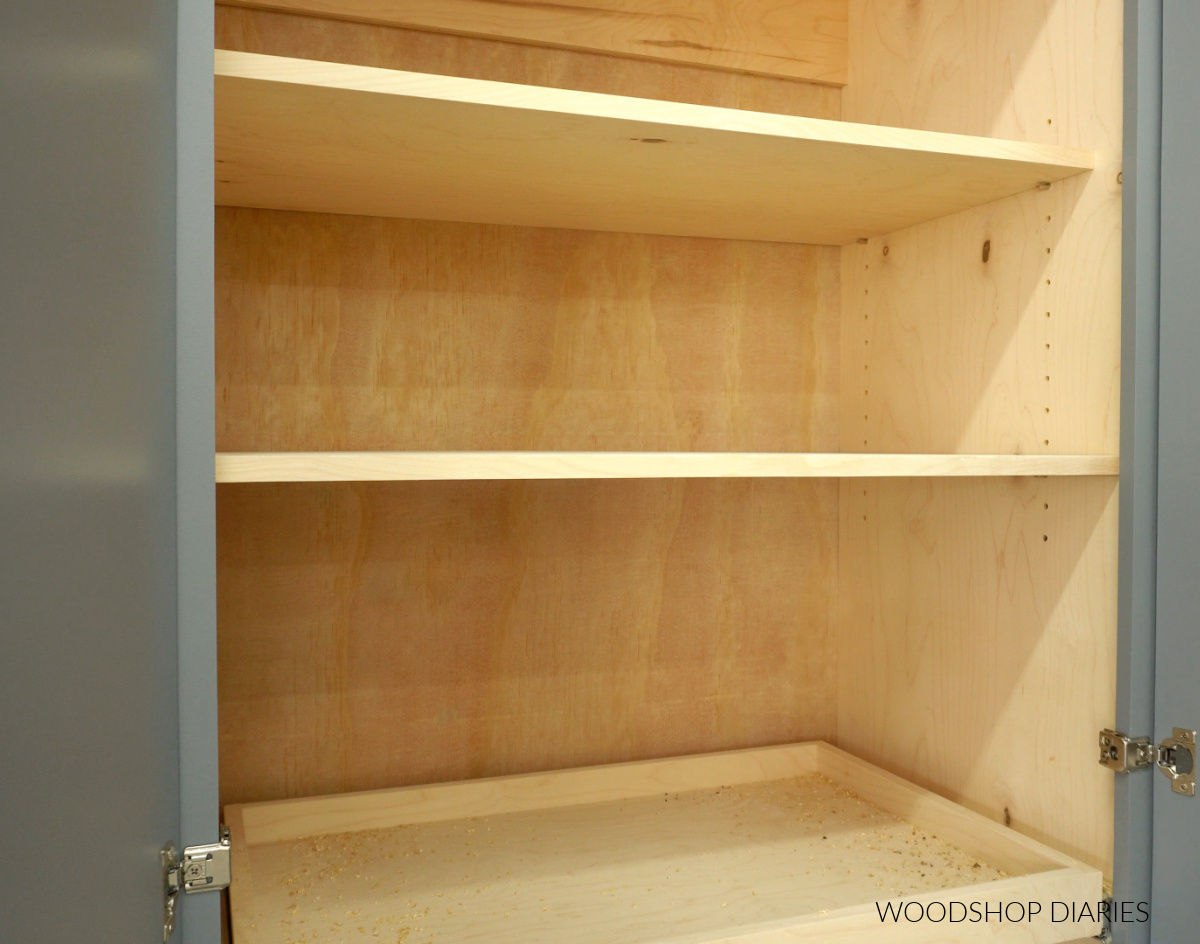
Step 5: Install Adjustable Shelves
Now that the pull out shelves are installed, I added the adjustable shelves above them.
Adding adjustable shelves to a cabinet is simple using a shelf pin jig.
I drilled shelf pin holes up both sides of the cabinet above the pull out drawers, then cut two ¾″ plywood shelves to fit.
I installed these using shelf pins. The great thing about installing shelves this way is that you can easily adjust them up or down by moving the shelf pins to different holes.
Step 6: Build and Install Cabinet Doors
There are a hundred (probably more, actually) ways to build a cabinet door. I share 7 ways to build a cabinet door in this post.
For this particular cabinet, I cut my four doors from ½″ plywood, then cut strips of ¼″ plywood to 2 ½″ wide to glue onto the front.
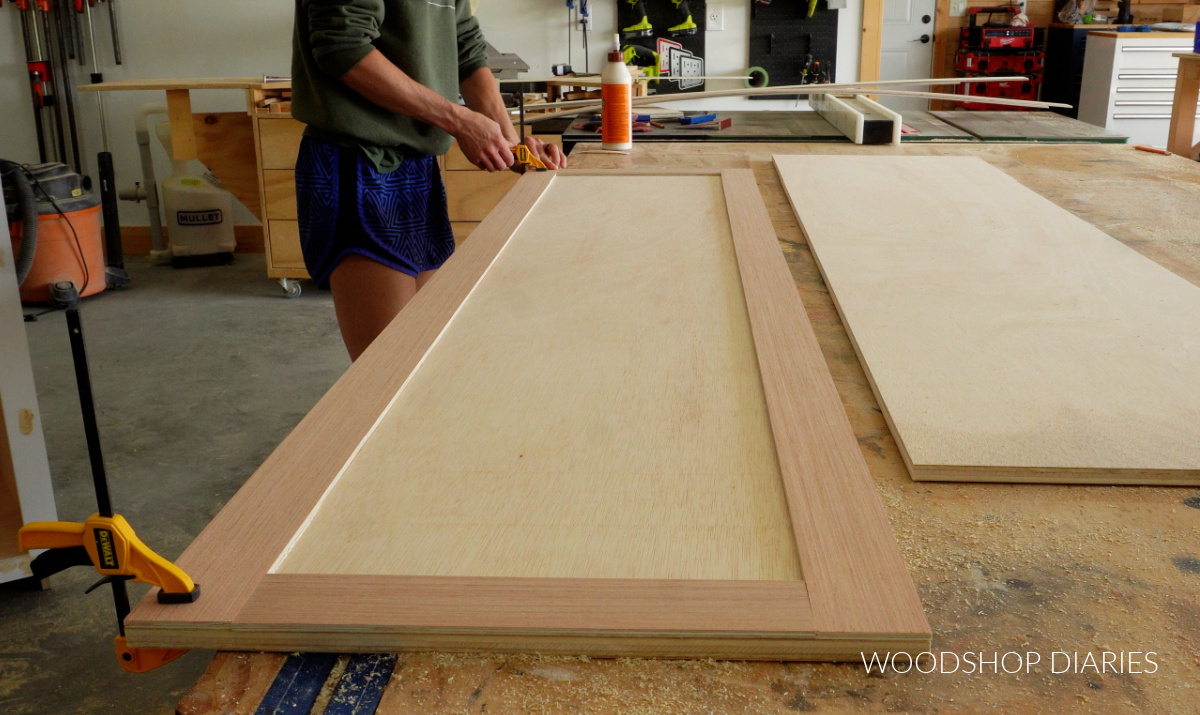
This created a “faux frame and panel” style door. Once the glue was dry, I applied iron on edge banding to the sides to hide the plies on the edges.
I detail the door sizing in the printable plans, but this post explains how to determine your cabinet door size for any project.
These doors will be hung with concealed hinges, so I installed concealed hinges for face frame cabinets onto the doors, first.
RELATED: How to install concealed hinges
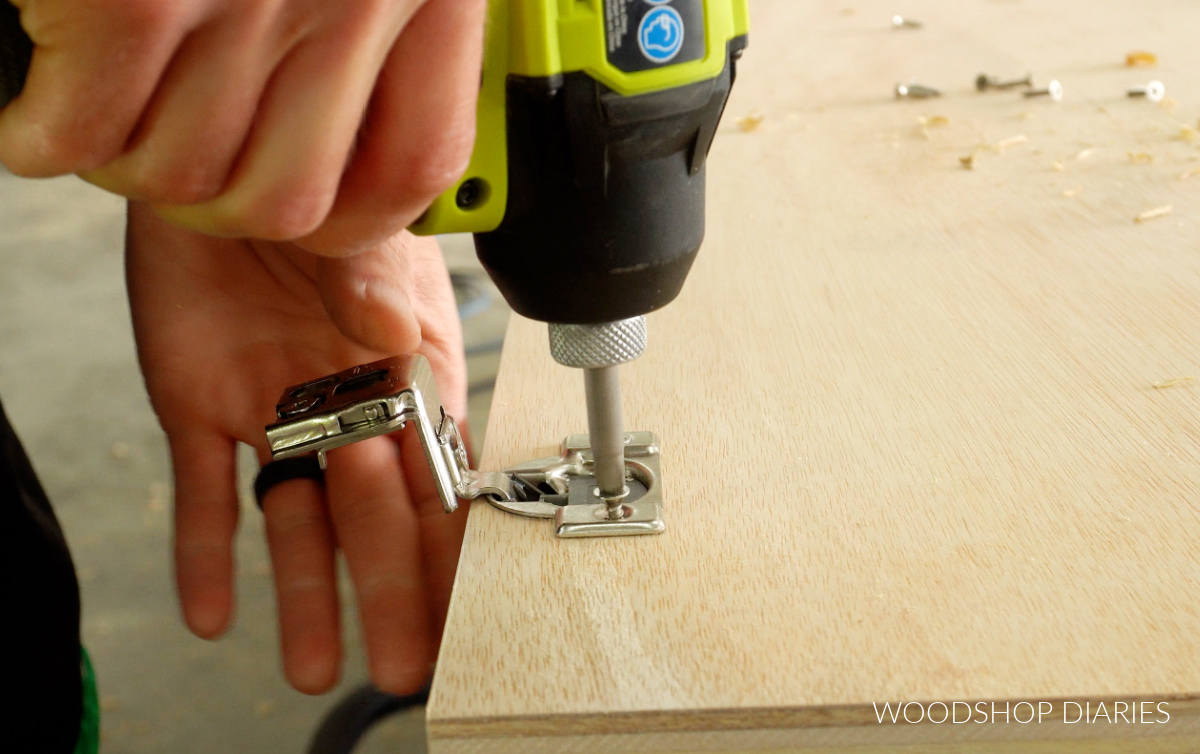
I installed two hinges on the top, smaller doors, but I used three hinges on the bottom taller doors.
The middle hinge should be close to the center, but doesn’t have to be exact. Make sure to install this hinge where it won’t interfere with where you placed your pull out drawer shelves.
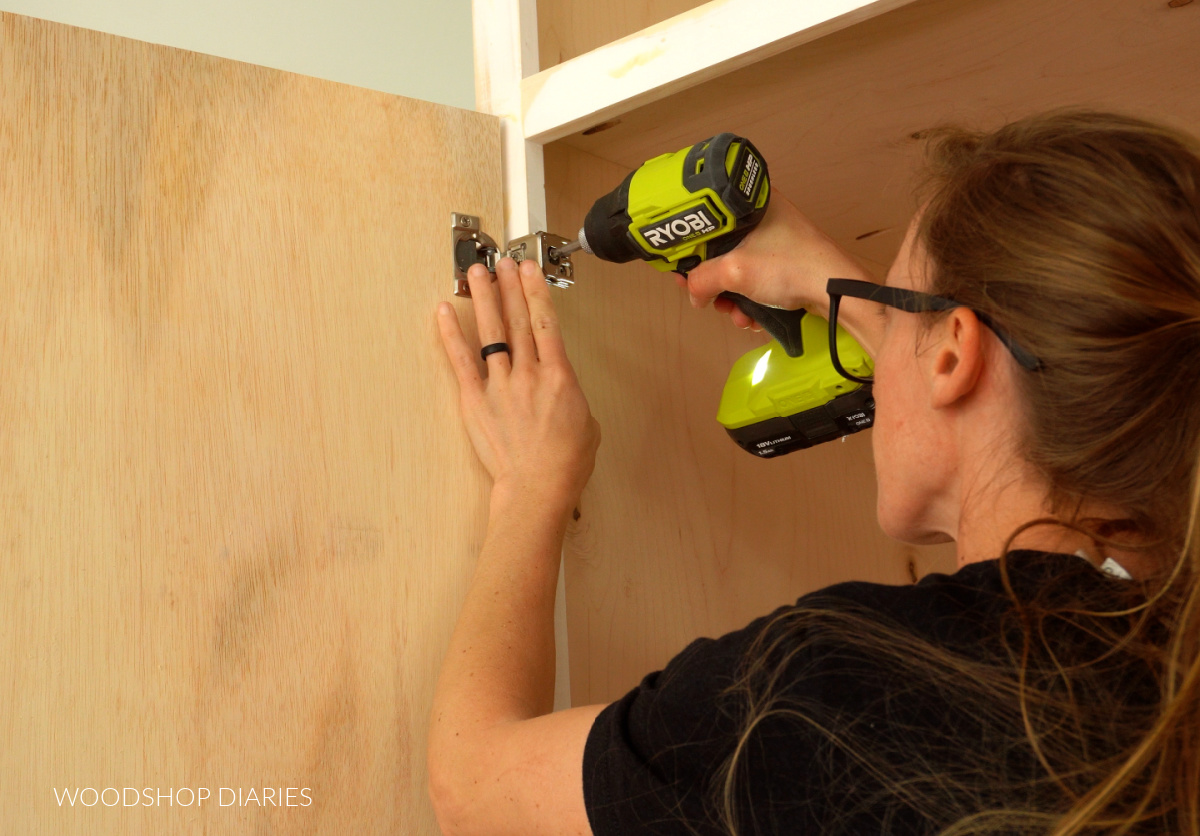
Then, I installed these doors onto the cabinet to ensure they fit. After making sure everything fit well, I removed them to make finishing in the next step a little easier.
Step 7: Finish & Install Pantry Cabinet
I primed and painted this cabinet and the doors separately. I always find it easier to paint projects if they’re in pieces.
I painted it SW Software, but of course, you can paint or stain it however you wish. Learn how to paint DIY furniture without a sprayer here.
Once the finish is dry, I recommend installing the pantry before adding the doors back on. To install, move the cabinet to its desired location and use shims around the bottom as needed to ensure it’s sitting level and square on the floor.
Secure pantry cabinet to wall studs using 2 ½″ screws through the back supports of the cabinet.
Cut a piece of ¾″ plywood for the toe kick, finish, and nail it along the front of the cabinet to complete.
TIP: If you needed to use shims to level the cabinet and you have gaps around the bottom, you can wrap the cabinet base with baseboard molding, quarter round, cove, or shoe molding to hide these gaps and make it look more finished.
Looking for more cabinet building guides?
If you enjoyed this build but are looking for more cabinet building and pantry ideas, here are a few favorites:
If you want to save this project for later, be sure to pin it or share it to your favorite social channel!
Until next time, friends, happy building!