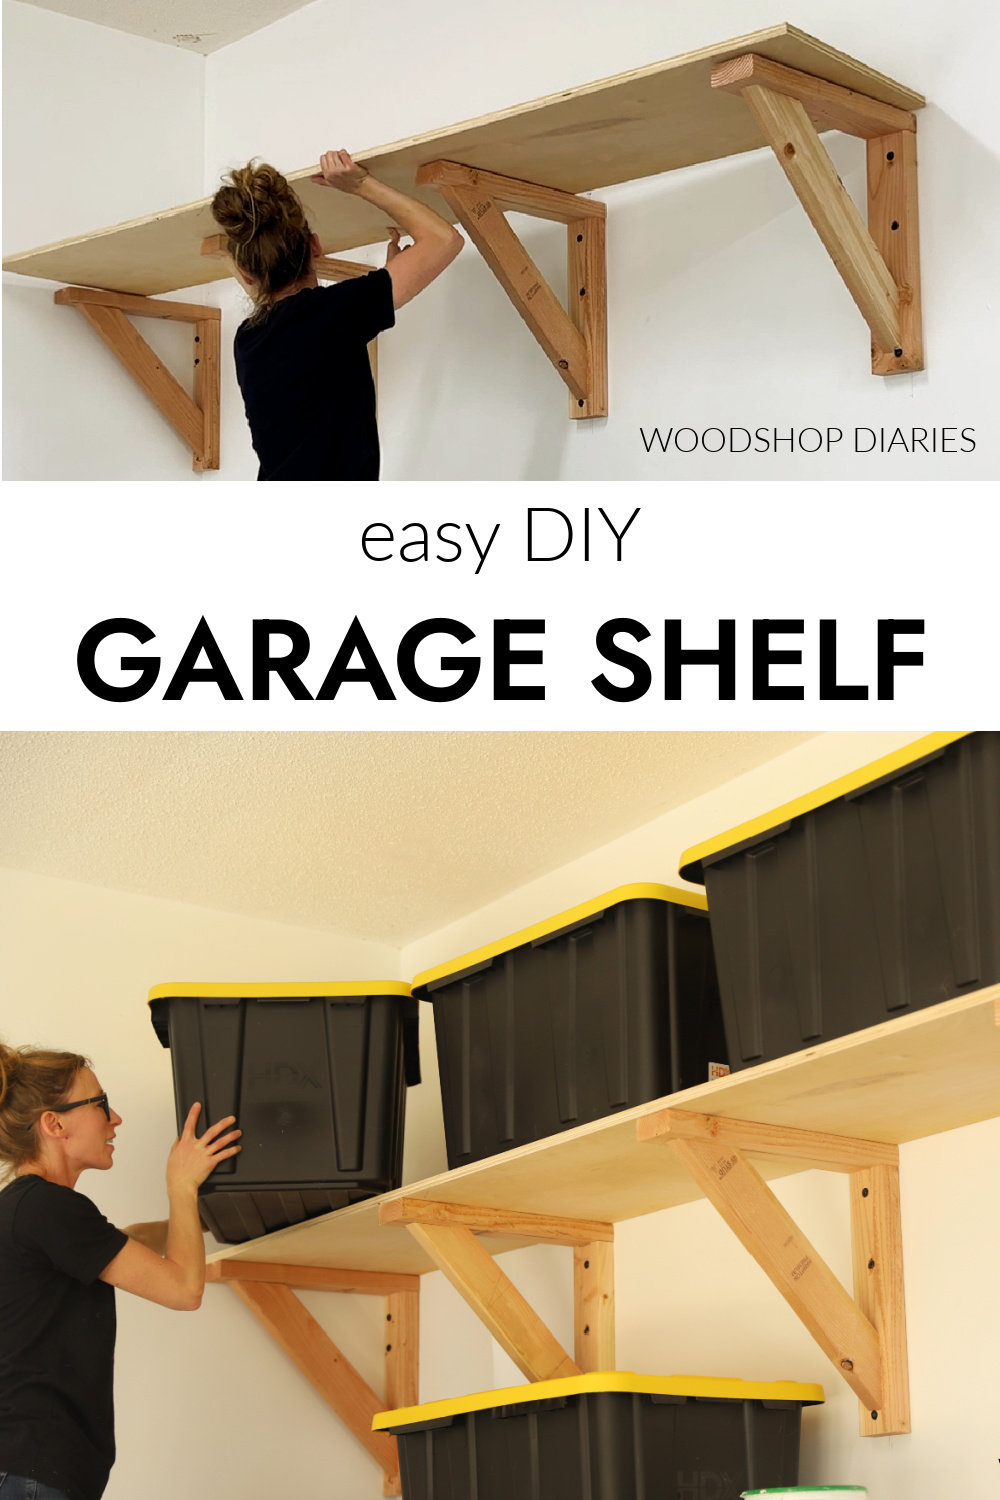
In this post, I’m sharing how to add extra storage to your garage with these easy DIY wall shelves made from 2x4s and plywood!
My parents’ garage has high ceilings and plenty of wall space for storage. But…until this project, they were empty.
So we decided to add some super quick and easy storage space with these simple, but sturdy wooden shelves.
They only took about 10 minutes to build and 10 minutes to hang and are easy to customize to any size you need.
So if you need an easy weekend project to add some organization and storage to your space, I’m sharing how we made these below.
*This post contains affiliate links. See website policies.
What to know before building
These shelves are easily customizable to whatever length(s) you need. You can also install multiple rows of shelves, if you want them to go floor to ceiling.
The shelf supports install directly to the wall studs, so you can add more supports to make a longer shelf, or less to make a shorter shelf.
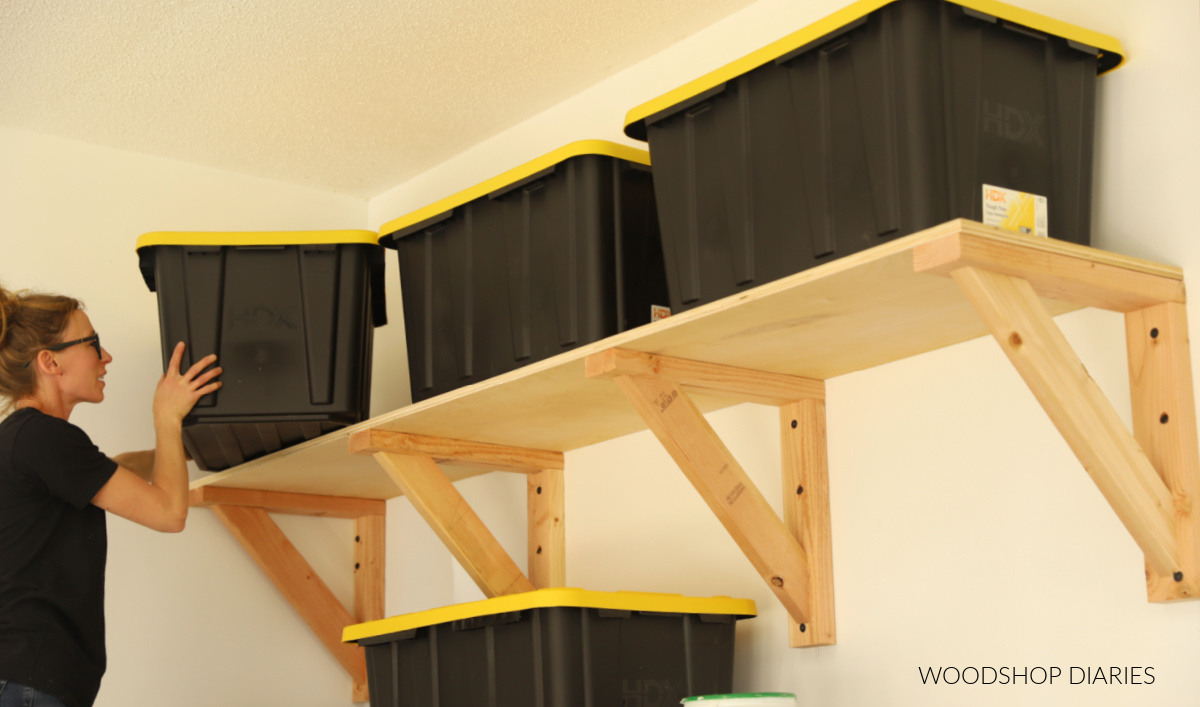
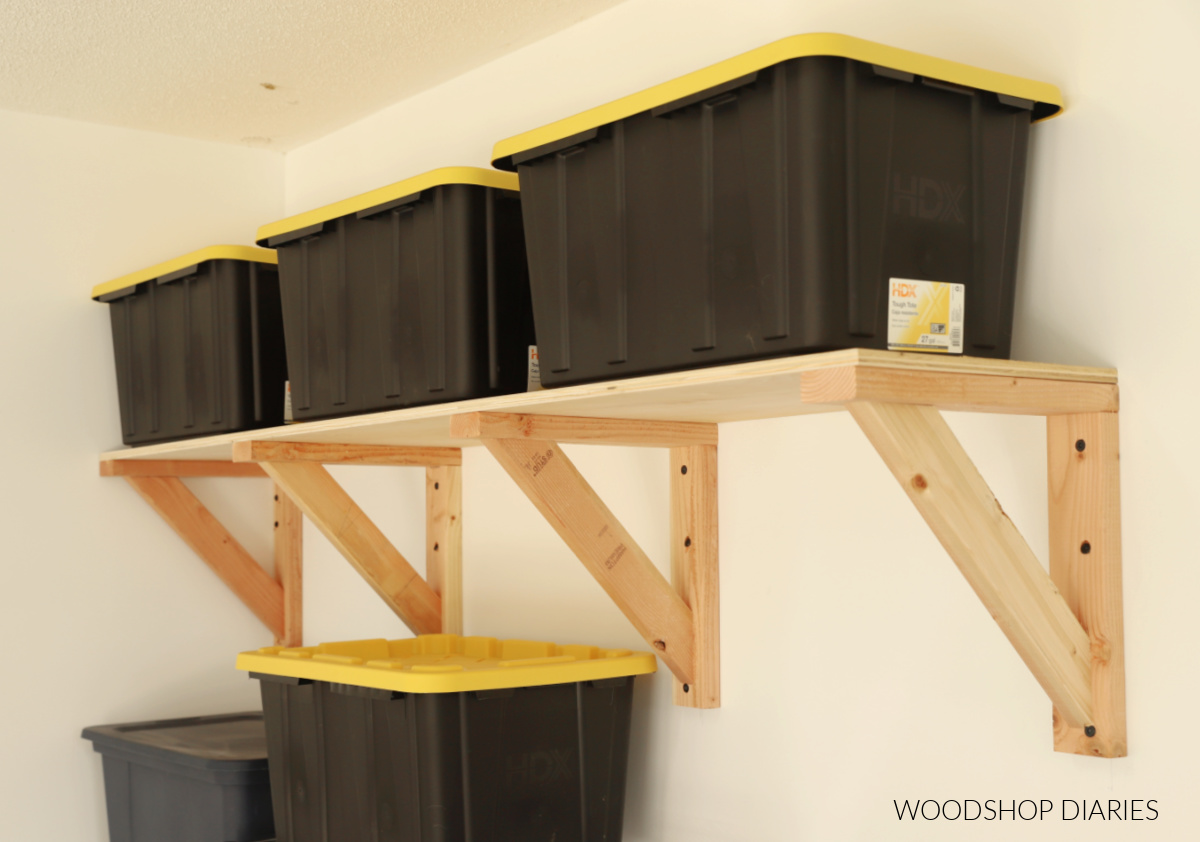
Keep in mind that wall studs are typically spaced out 16″ on center. In our case, I installed them to every other stud so they were approximately 32″ apart.
If you’re planning to store totes on your shelf (or shelves) like we did, I recommend measuring your totes before building so that you can modify the depth/length as needed to fit.
These are the storage totes I used for this project, and I made this shelf 19″ deep.
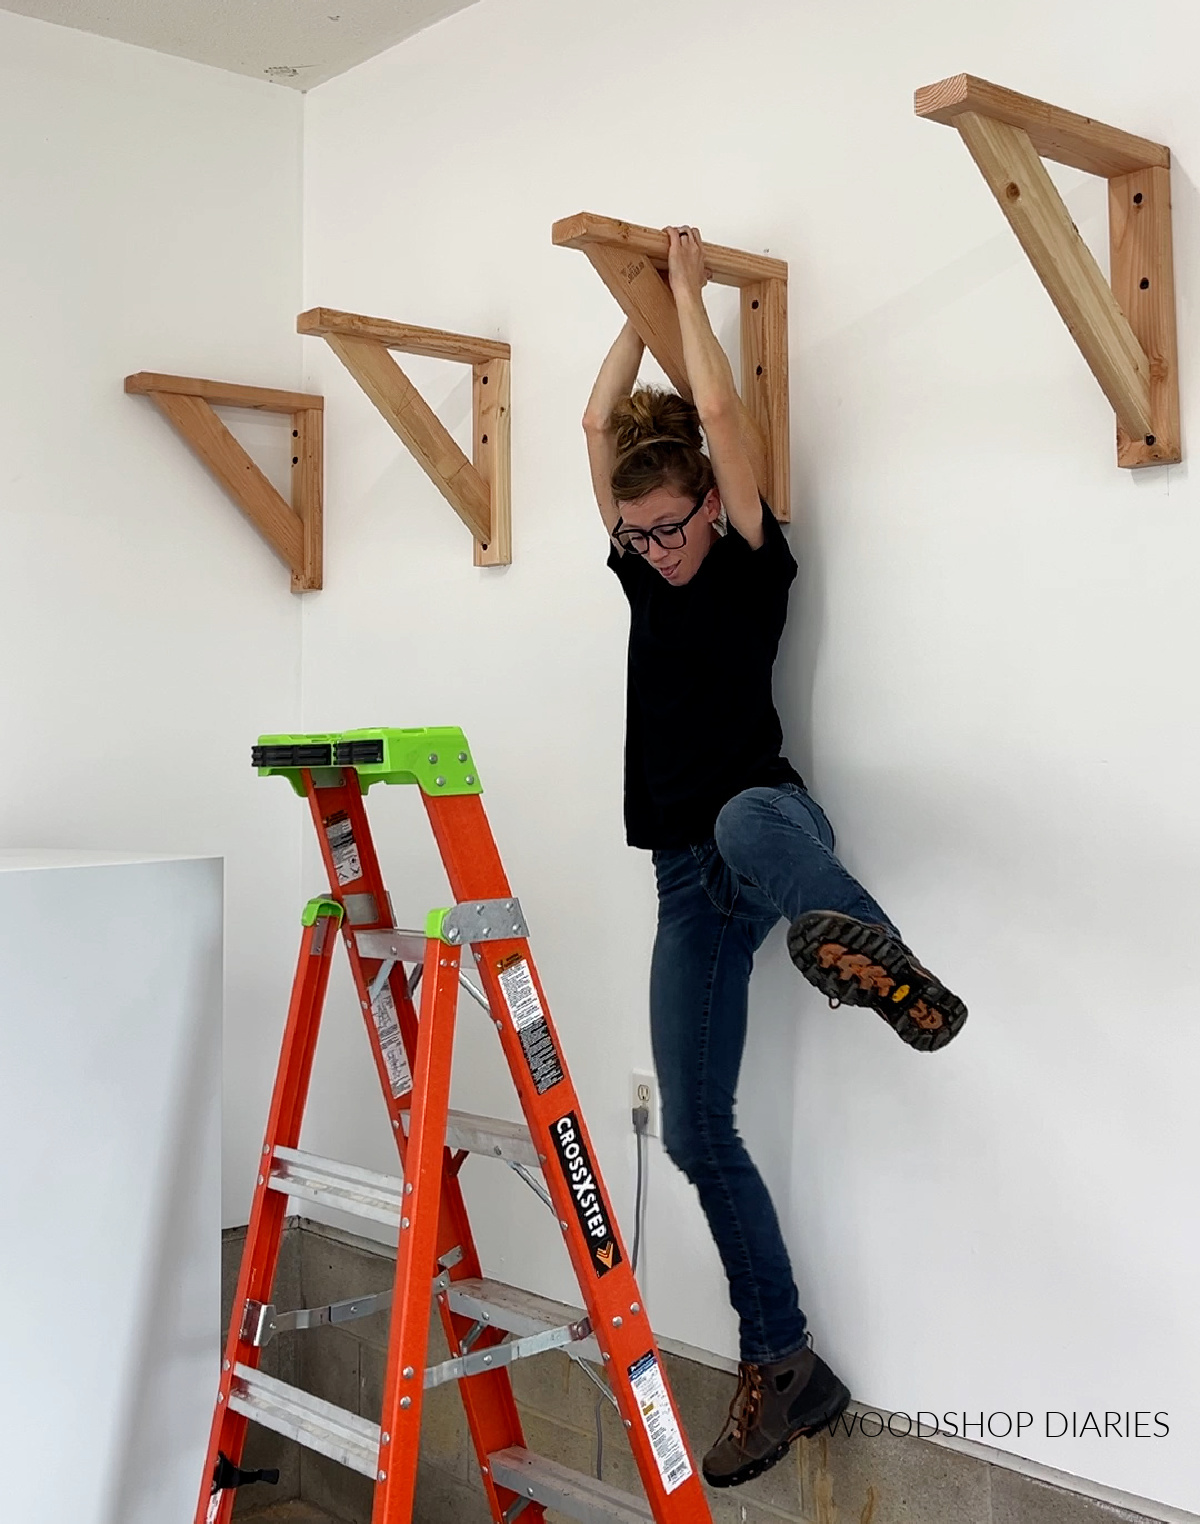
As far as weight limits, I’m not sure exactly how much these will hold–it depends on several factors. But, I hung on the supports after I screwed them to the wall, so I know each support can hold over 100 lbs.
Are DIY projects your thing? Sign up for our newsletter for priority access to the latest projects and build plans!
How to Build Easy Wall Shelves for Garage
This is such a quick and practical build you can easily complete in under an hour.
It only takes about 10 minutes to assemble and 10 minutes to install (at least that’s about what it took for my one shelf).
Tools & Materials
Tools:
- Miter Saw
- Drill/Driver
- Circular Saw
- Plywood Cutting Guides (optional)
- Stud Finder
- Level
Materials:
- (3) 2x4x8 boards (for one 8′ long shelf)
- (1) 2’x8′ (half sheet) ¾″ plywood (for one 8′ long shelf)
- 1 ¼″ long wood screws
- 3″ long wood screws
- 3 ½″ long lag screws
- Storage Totes
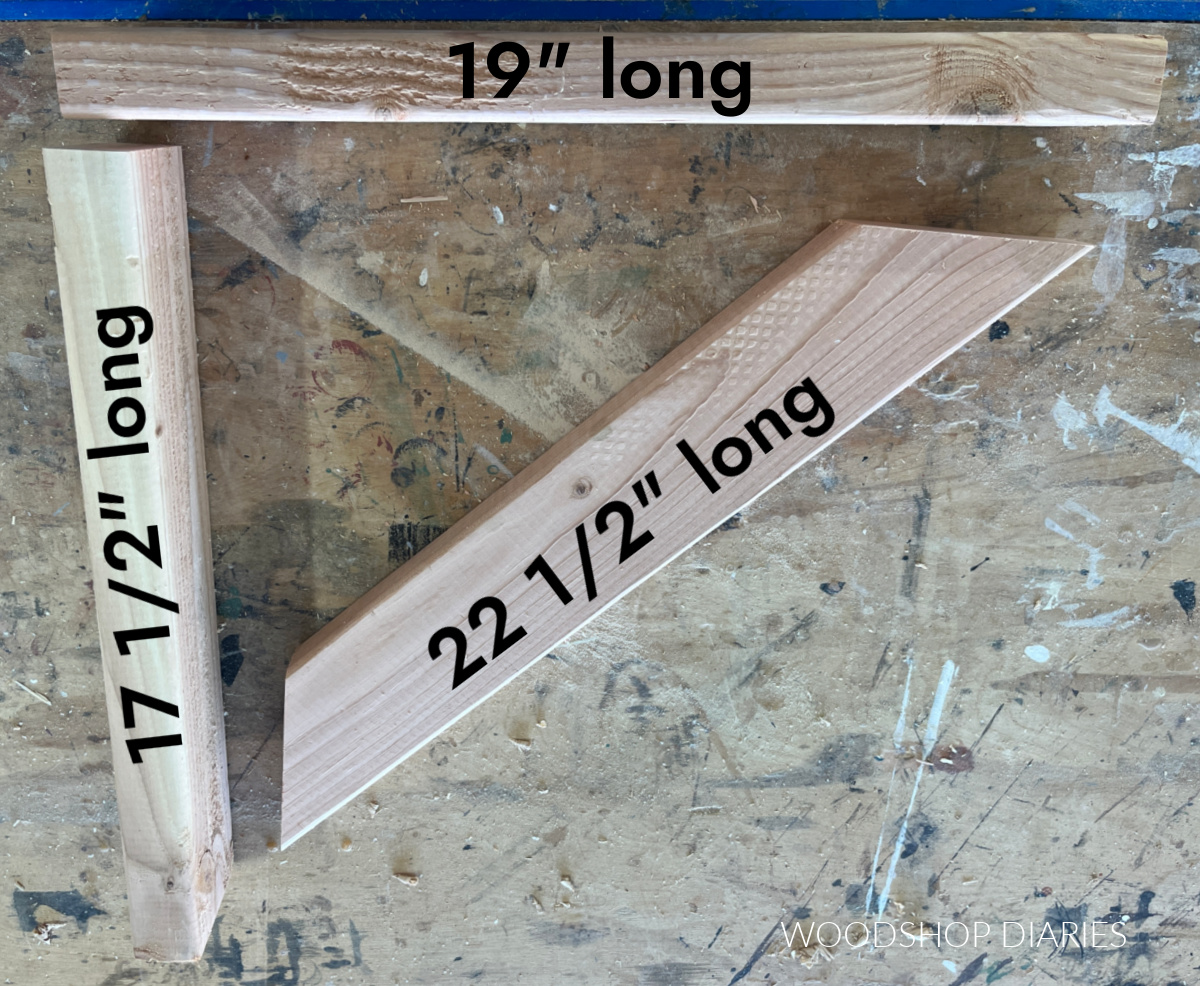
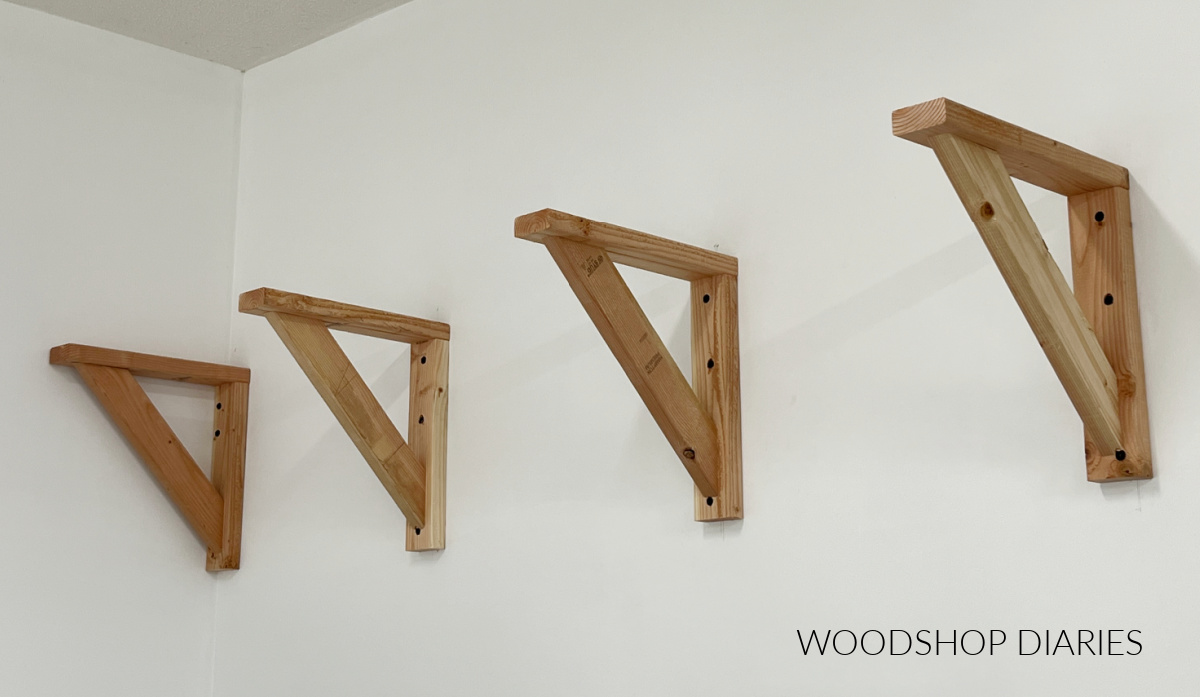
Step 1: Cut Bracing Pieces from 2×4
The shelf supports are assembled from 2x4s. So first, I cut three pieces of 2×4 for each support–4 total.
The top piece was 19″, the back piece was 17 ½″. And I cut the third piece with 45 degree mitered ends so that the longest side was about 22 ½″.
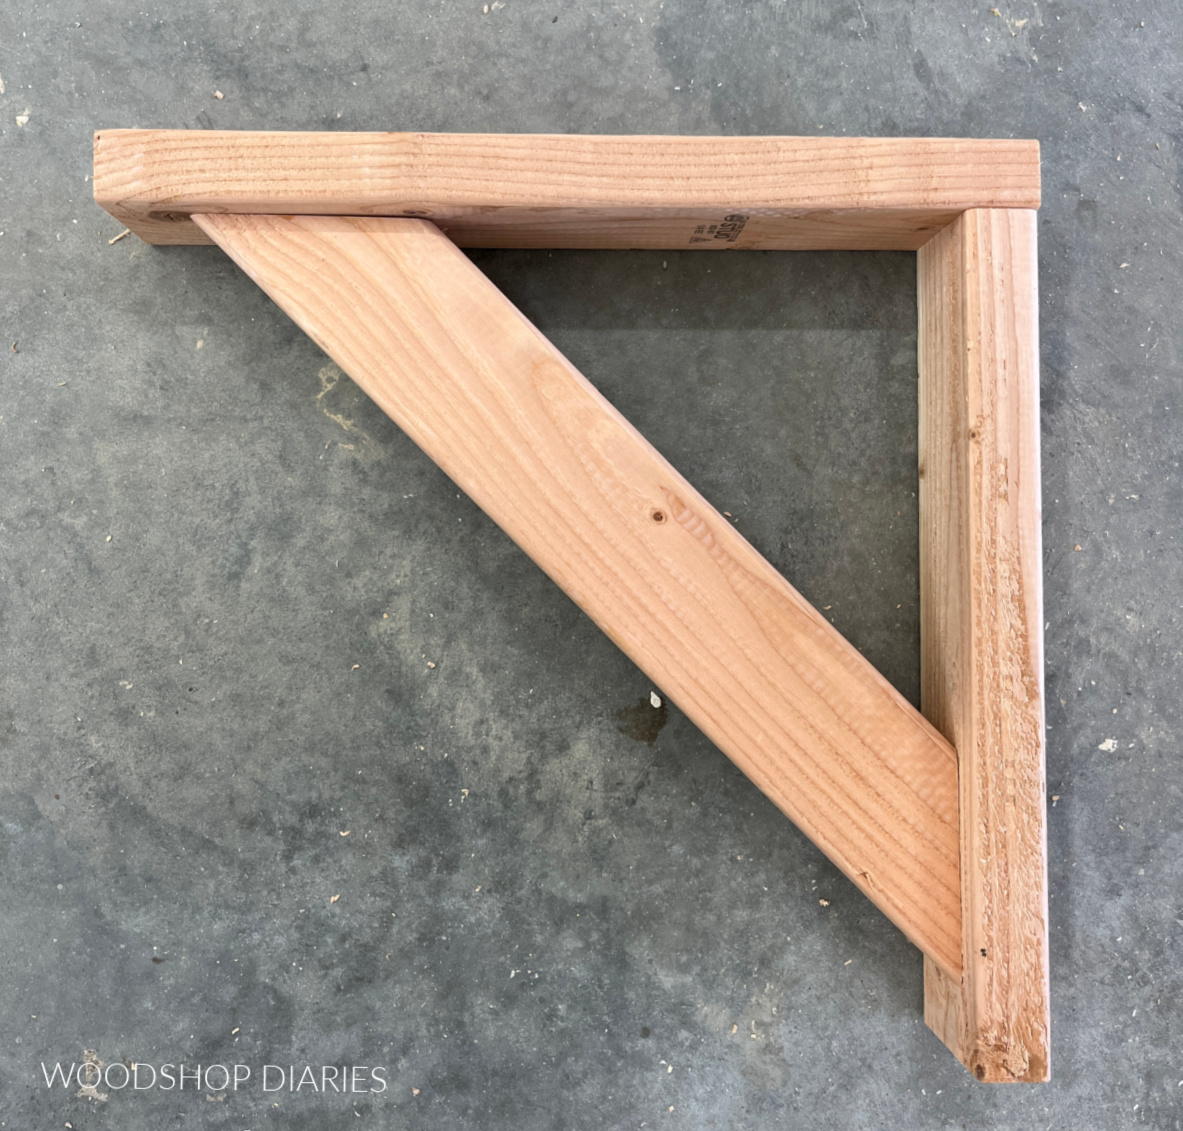
Step 2: Assemble Shelf Supports
Once the pieces were cut, I assembled them together using 3″ wood screws.
I found it easiest to screw the straight pieces together at a right angle first. Then, I added the angled piece between them.
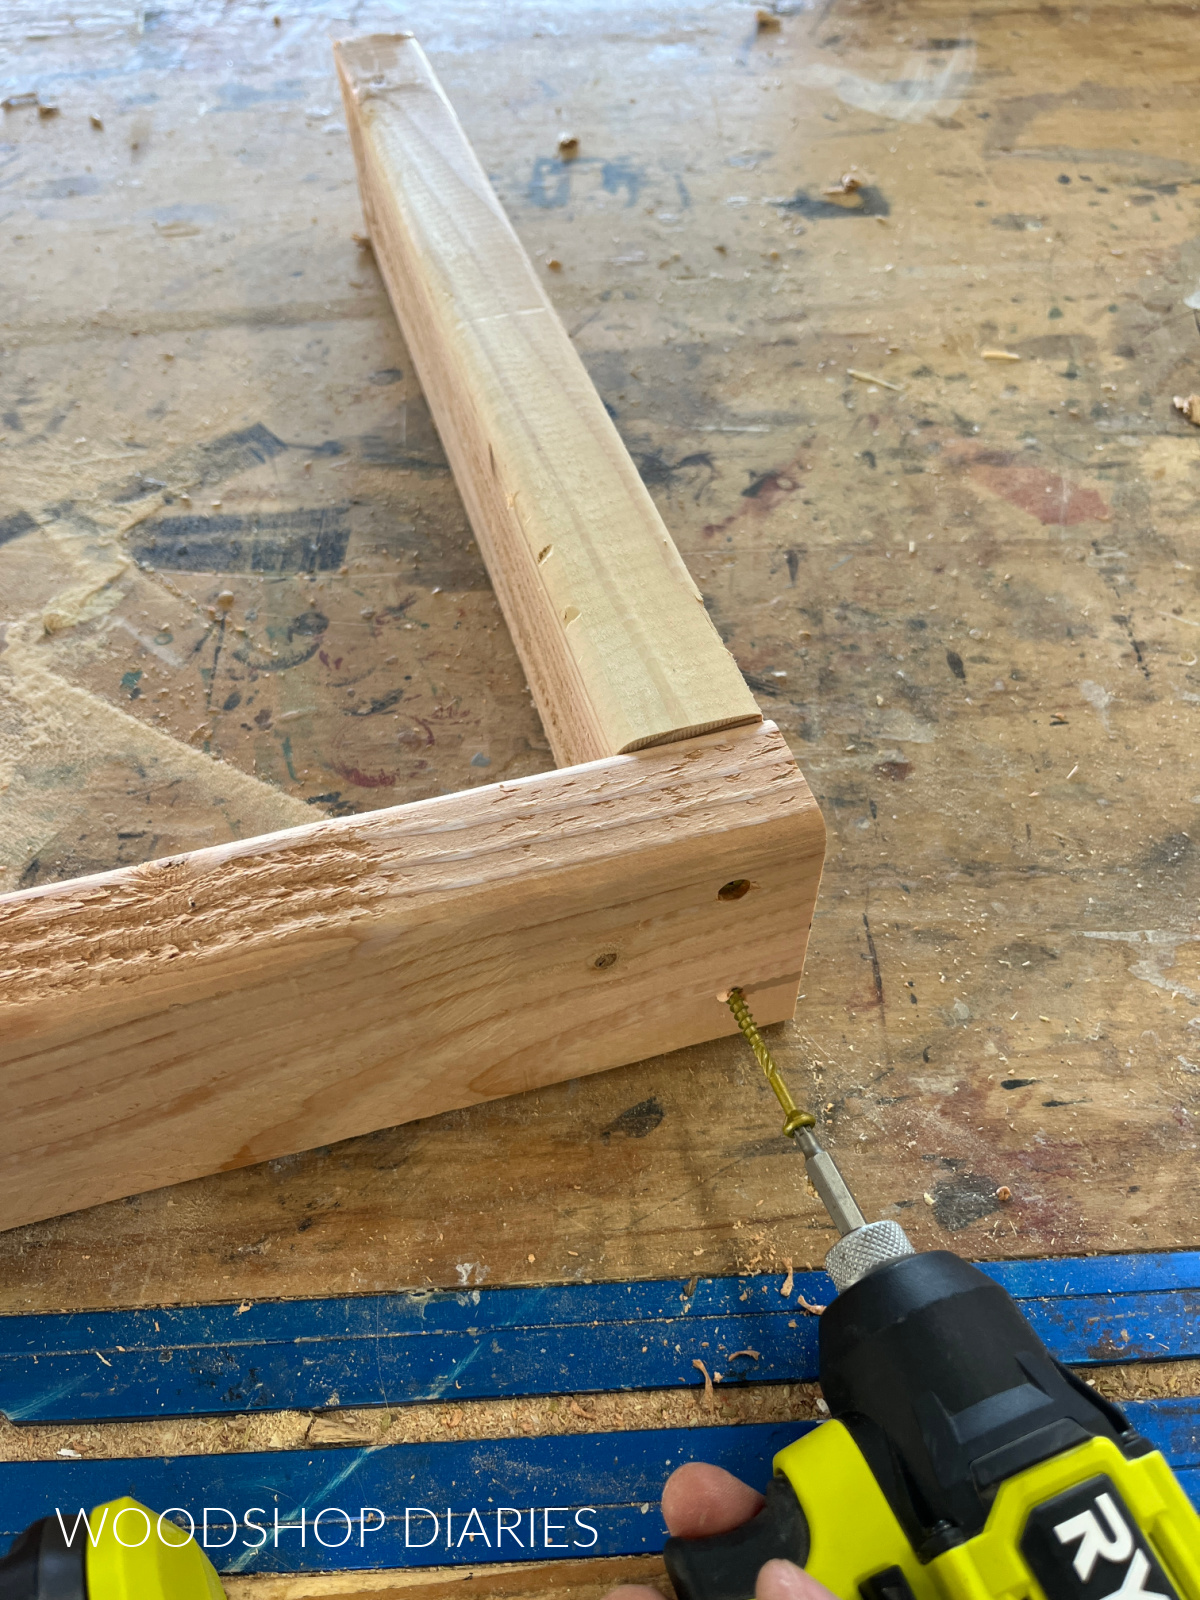
Make sure when assembling, the supports stay square. I made four of these supports total.
Step 3: Install Shelf Supports
I marked the height on the wall I wanted to mount the shelf, then used a level to draw a line across the wall at this height. You can install yours however high you’d like.
Then I used a stud finder to locate the wall studs along this line. Once I found the wall studs, I used the level to mark a vertical line on the wall at each stud.
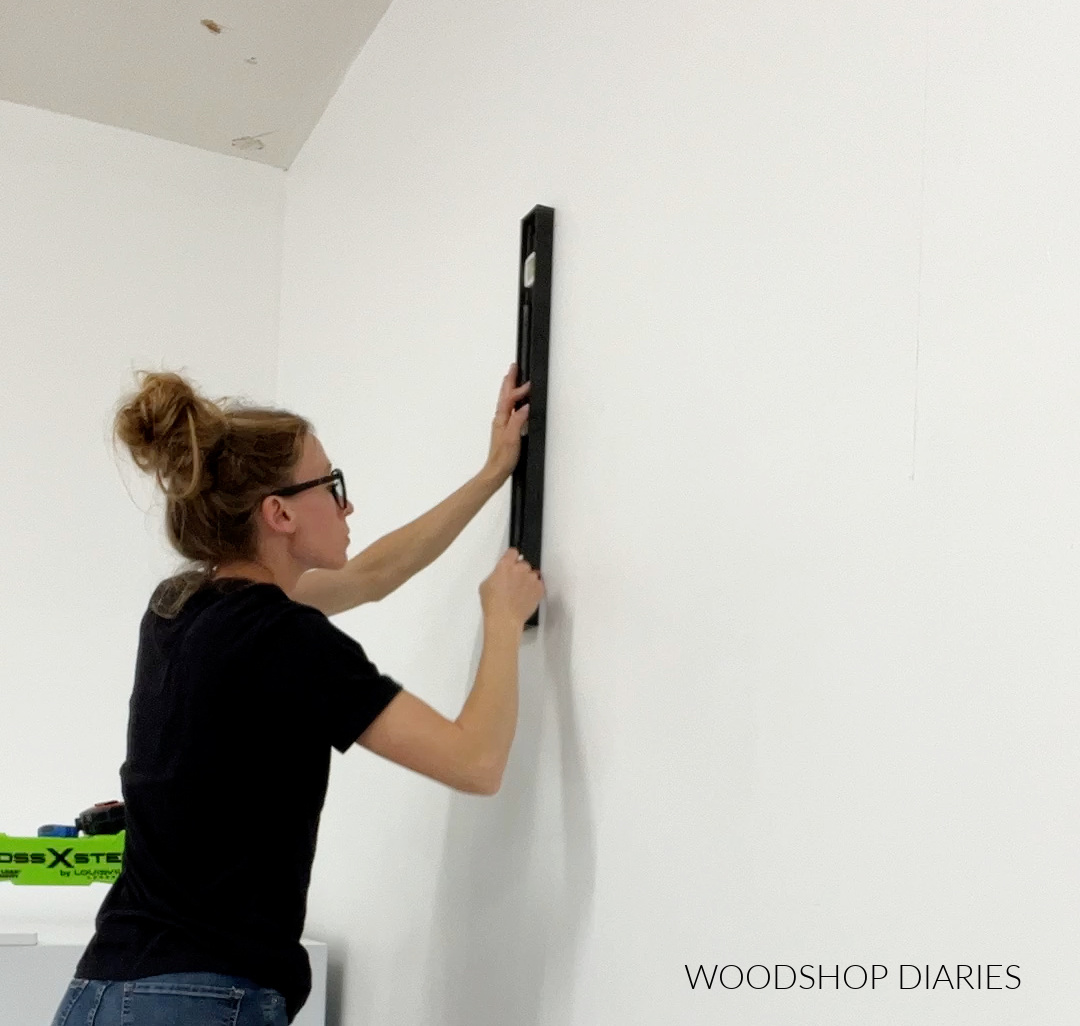
You don’t have to do that, but I helps me see better to line up the supports vertically.
I screwed each shelf support into a wall stud with three 3 ½″ lag screws making sure to keep them level to each other.
TIP: Keep in mind that if you hang them up high, you’ll need a ladder to access. I don’t recommend storing heavy items up high as they may be difficult to get down using a ladder.
Use the level to ensure the shelves are level to each other, but also level vertically.
Step 4: Add Plywood Shelf
After the shelving supports were installed, I needed to add the actual shelf. For this, I ripped a piece of ¾″ plywood to 19″ wide x 96″ long to fit over the supports.
RELATED: How to cut plywood sheets
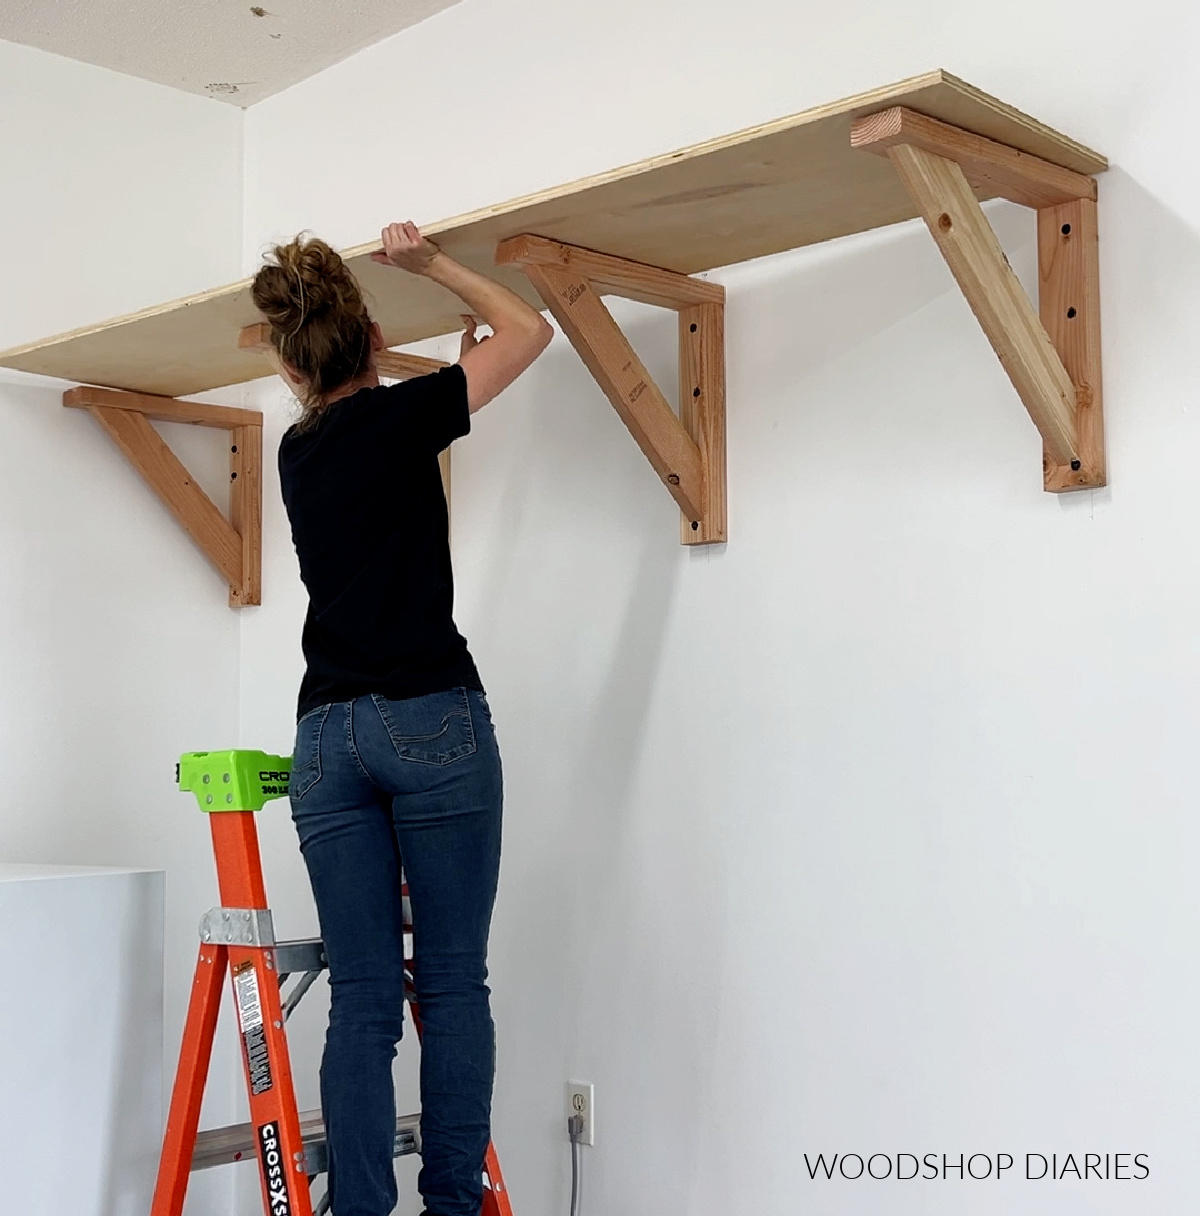
Once the shelf was placed on top, I secured them to the supports using 1 ¼″ wood screws from the top.
NOTE: You don’t have to use plywood for the shelf if you’d rather use a different material. You can use 1x lumber or 2x lumber laid across the supports for shelving instead.
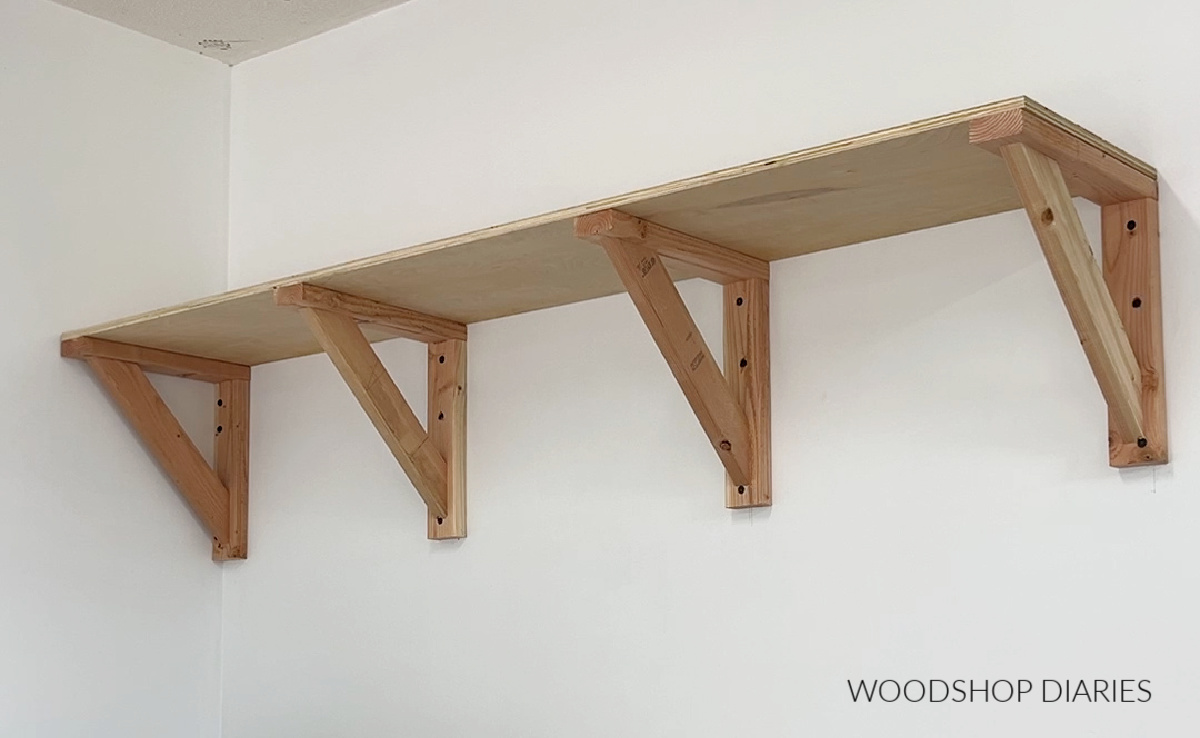
Step 5: Store & Organize
And now this simple garage shelf is installed and ready for storage! We used these large storage totes to store seasonal decorations up high and out of the way.
If you wanted, you could add several rows of shelves all down the wall for tons of storage for
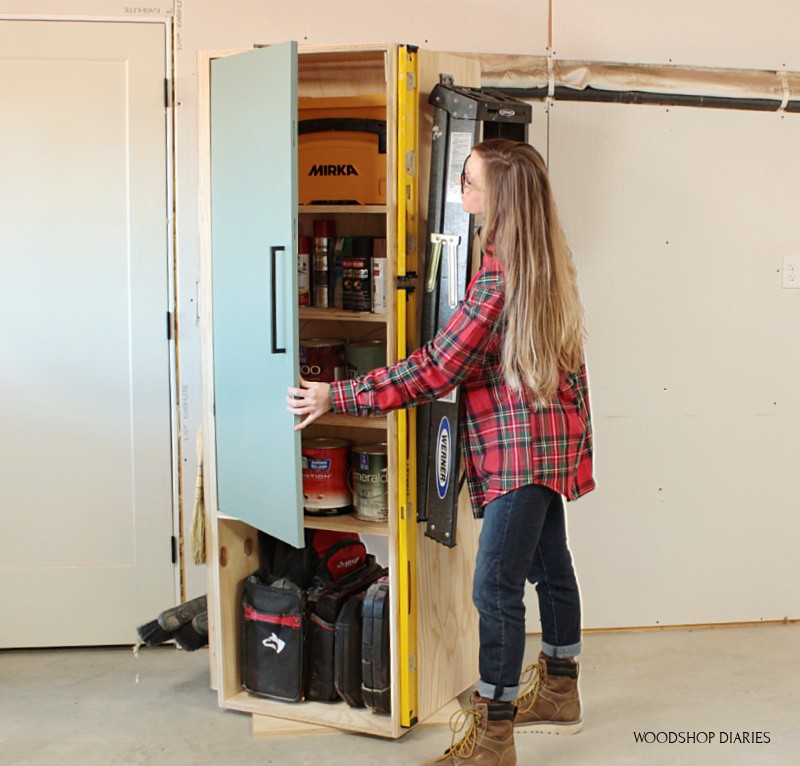
Looking for more Garage Storage and Organization Ideas?
Looking for more garage storage and organization ideas for your space? Here are a few of my favorites!

If you enjoyed this post and would like to save it, don’t forget to pin it or share to your favorite social channel!
Until next time, friends, happy building!