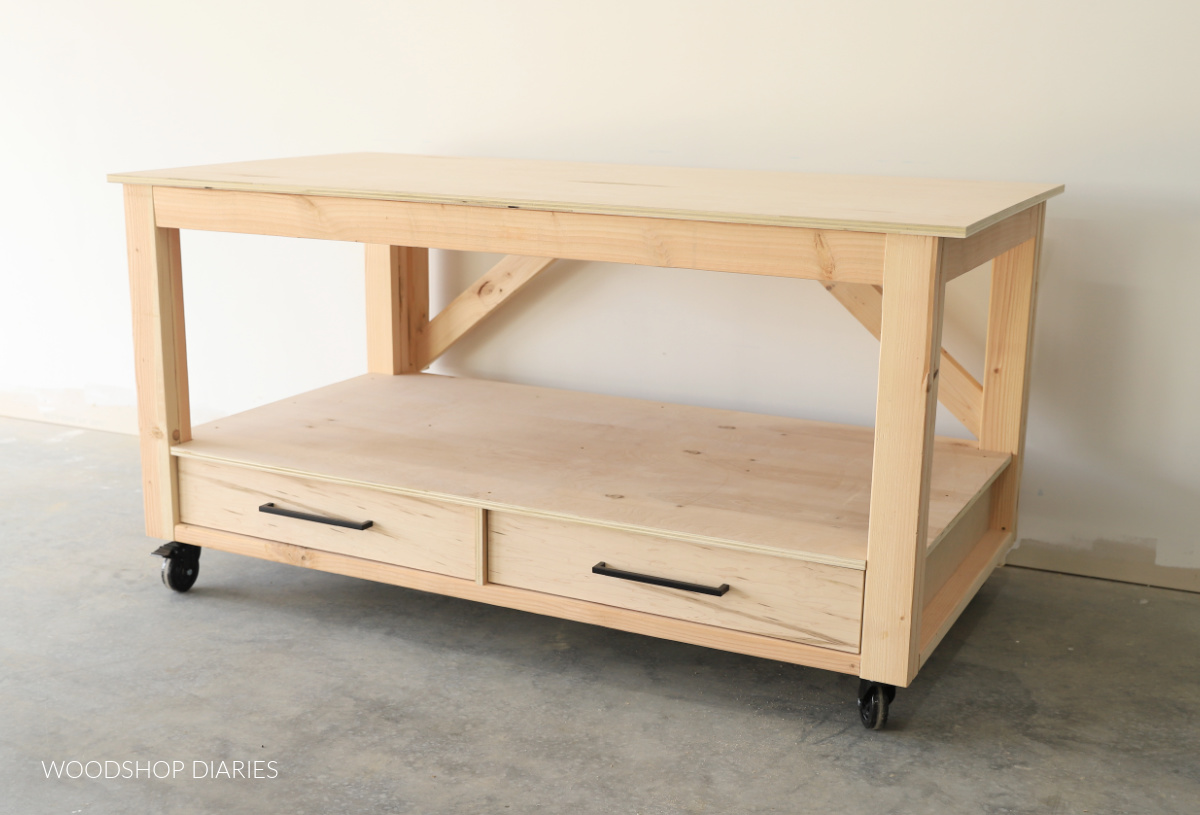
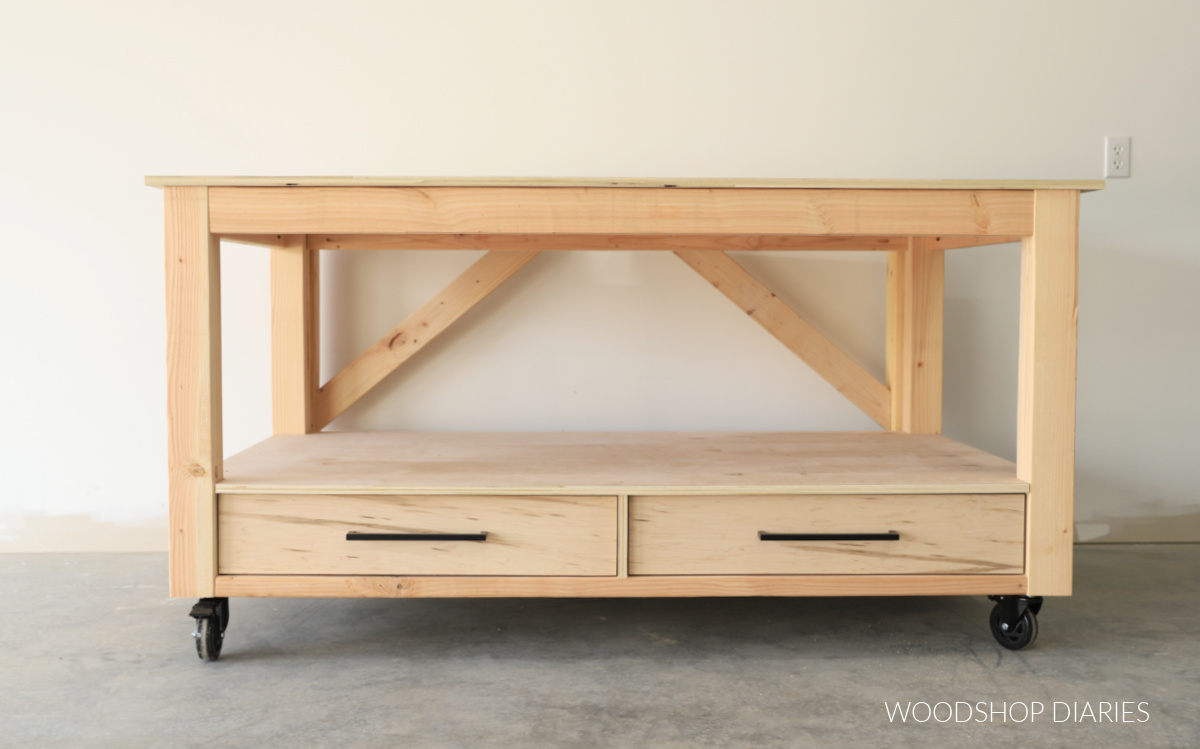
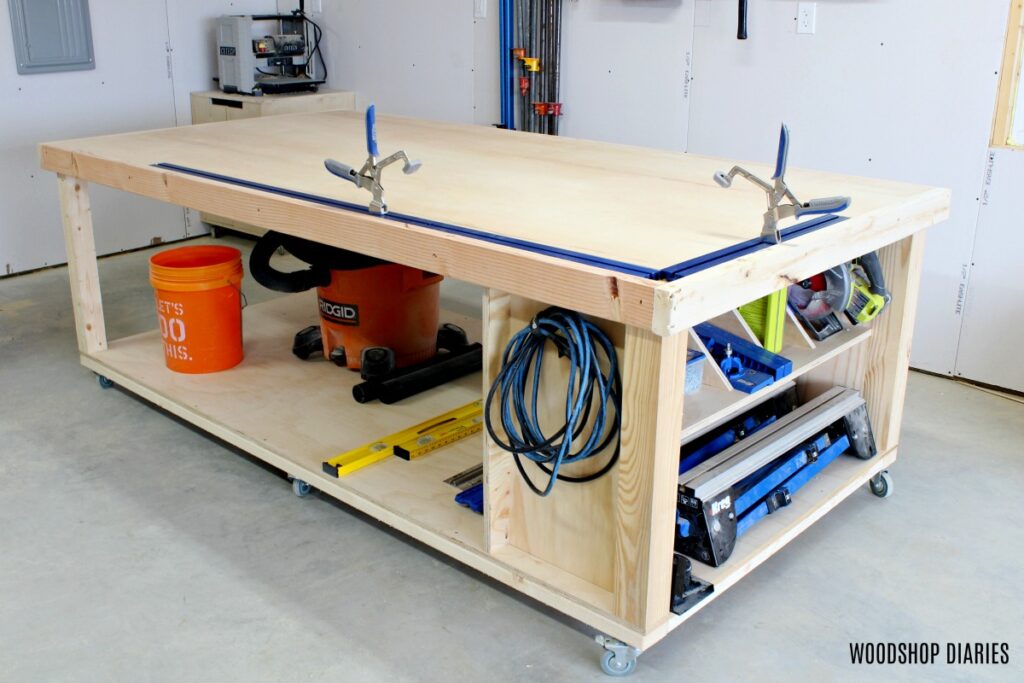
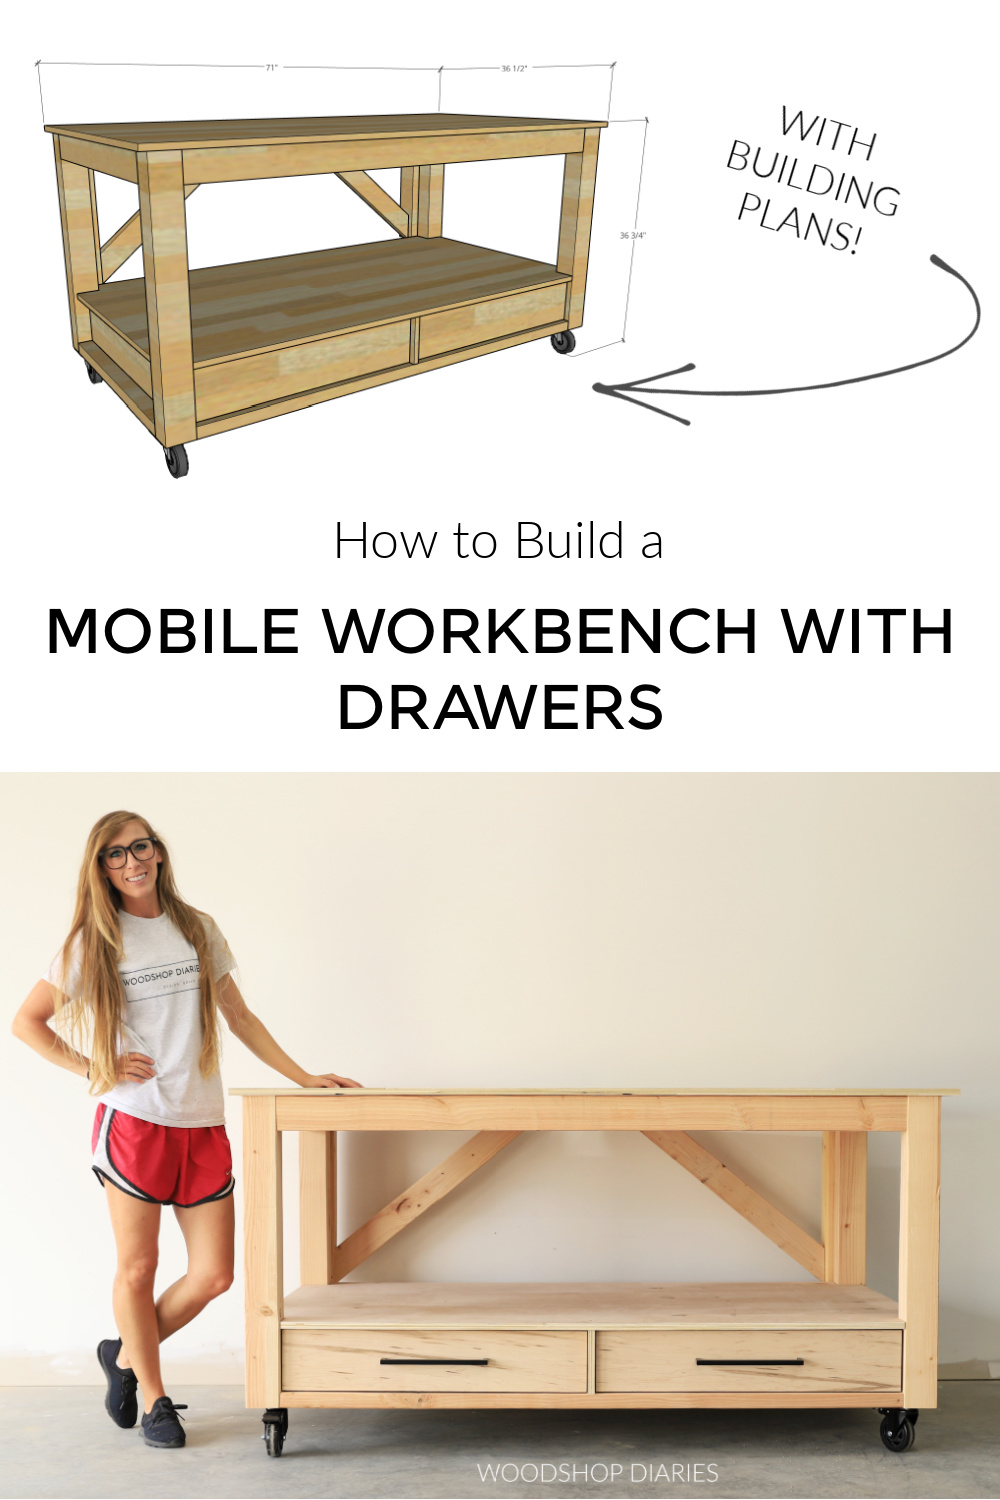
In this post, I’m sharing building plans for an easy DIY workbench with drawers and a flip open top!
This medium sized mobile workbench design is a great addition to any garage or workshop for some added work surface plus plenty of storage.
I designed this workbench to eventually house a CNC machine (once I get it assembled), but I didn’t want the machine to take up all my work surface.
So I built this workbench with a large open shelf in the middle. I can place the CNC on this shelf and still keep my entire worksurface on top.
But, just in case I need access from the top side, I made the top so that it flips open and rests on these corner brackets that swing out to support it.
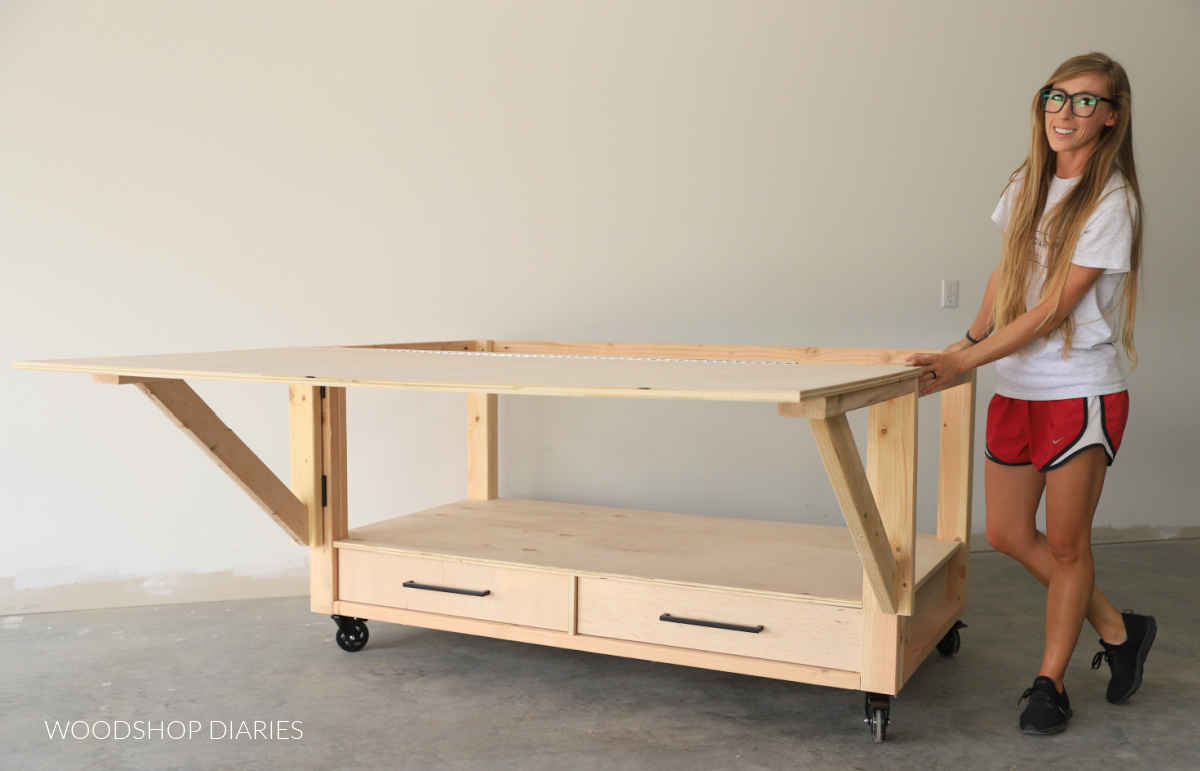
Obviously, the flip open top may not be necessary (or useful) for every workshop, so you can totally skip that part if you don’t want it.
But the open shelf and storage drawers on this bench are super handy for tools, scrap wood, sanding vacuums, accessories, whatever. So…flip top or not, it’s a great project for your shop.
I’m sharing DIY workbench building plans, video, and extra tips below, so if you’re ready, let’s get building!
*This post contains affiliate links. See website policies.
What to consider before building a workbench
The great thing about shop projects is that they don’t have to look extra nice. So normally, I’ll skip the time consuming details like edge banding and I’ll leave it unfinished, which saves a ton of time!
This workbench only takes about a day to build, so it’s a great weekend woodworking project!
Full disclosure: I took 1 ½ days to build it because 1. I was filming it (which makes everything take longer) and 2. It was 100 degrees in the shop and I had all that I could take after a few hours the first day.
But, weather permitting (and minus the camera), you can definitely build this in just a few hours.
Want to be the first to know about new projects and plans? Subscribe to the newsletter for priority access!
What size should your workbench be?
Workbenches can be just about any size you want to make them. So there’s no set “standard” to follow.
For this DIY workbench, the overall dimensions are approximately 36 ¾″ tall x 36 ½″ deep x 71″ long.
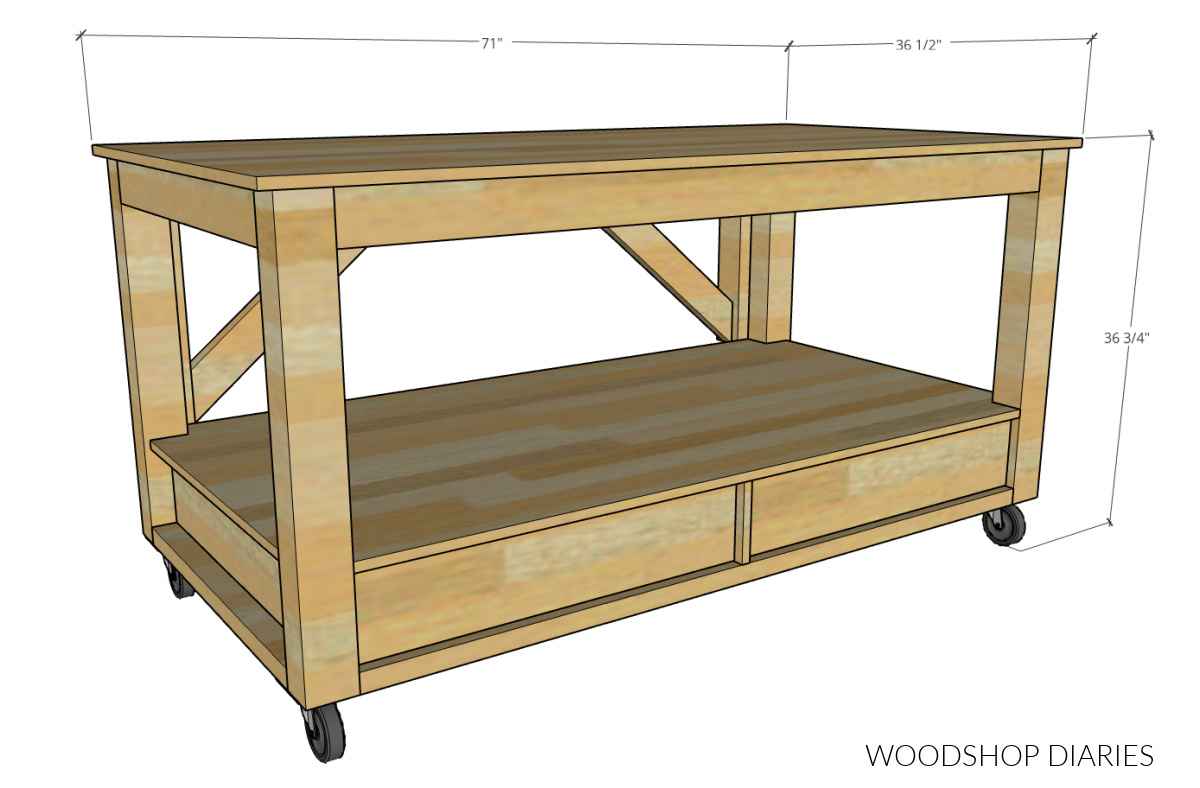
Length and width can vary greatly and as needed to fit whatever space you’re working with. So feel free to adjust these dimensions as needed.
However, typical workbench height is between 34″-38″. For reference, standard height for kitchen countertops is 36″. So if you feel that’s a comfortable working height for you, then stick with 36″.
Or, be a rebel and go lower or higher a few inches. Whatever height you feel comfortable working at is an acceptable height.
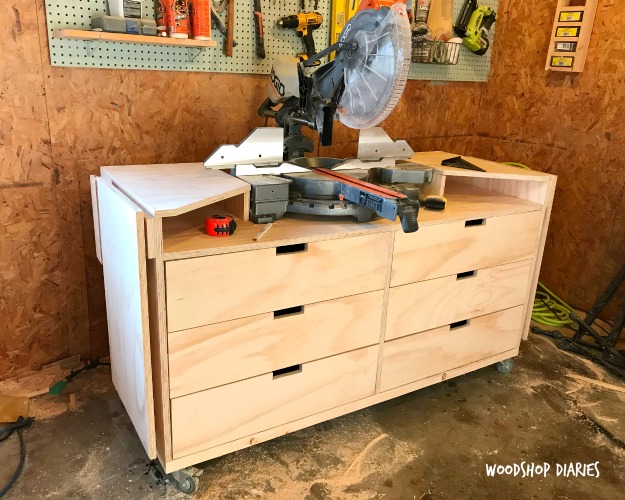
I actually built my other mobile workbench to serve as an outfeed table for my table saw, so I made it the same height as my saw top. There’s no right or wrong here, so feel free to customize to fit your needs.
What type of wood are workbenches made from?
Workbenches can be made from pretty much any type of wood. Some people like to get fancy and build it from really nice hardwoods.
However, in my shop, my workbenches usually get beat up with constant use, so I don’t like to sink a ton of money into nice wood to build them with.
So I personally recommend using basic construction lumber (like 2x4s or 2x6s) and plywood. These materials are budget friendly, readily available, and strong (they literally build houses out of them).
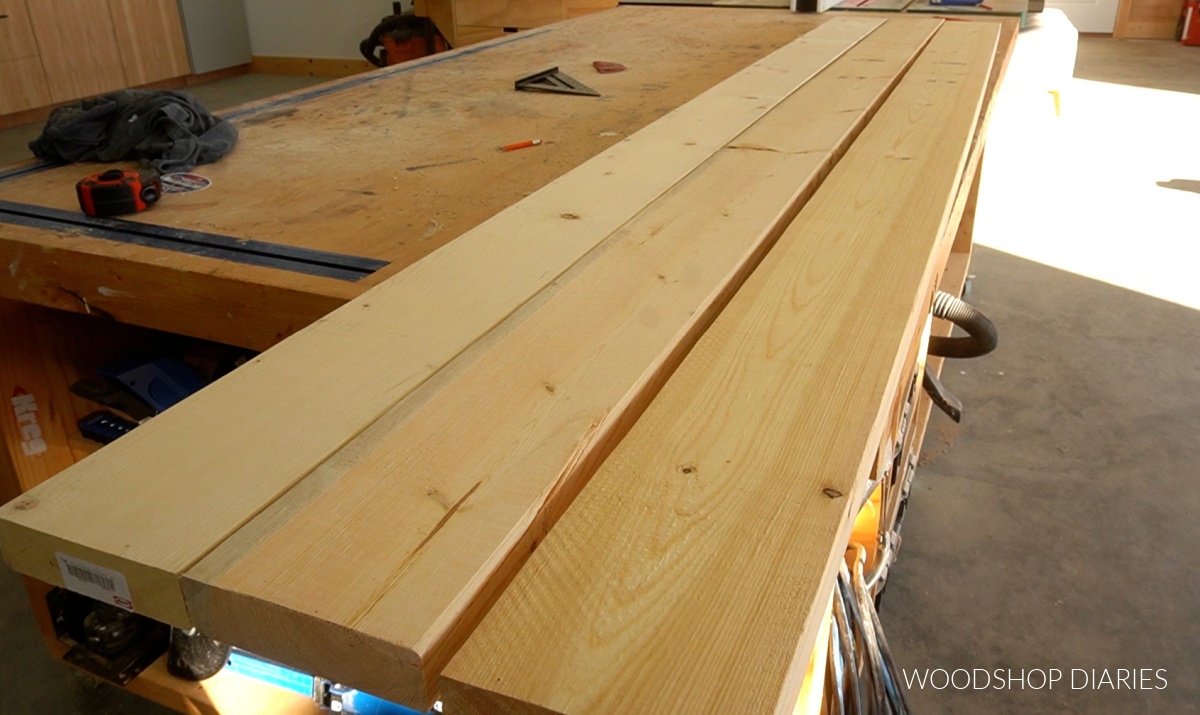
Sanded pine plywood is a great budget option for workshop projects. But hardwood ply will take a little more wear and tear. It’s a fairly small price difference, so I went with hardwood ply for this build.
Learn more about choosing plywood for your projects here.
Should you build a mobile or stationary workbench?
Personally, I prefer mobile over built in workbench set ups. I change my mind too much to be anchored to one spot haha.
But ultimately, this question really comes down to personal preference and your shop space.
If you’re working in a garage that you share with your cars, you may like to go mobile so you can roll your bench out of the way when you pull your car in.
If you have a dedicated shop space, you may prefer built in, since you don’t need to move it out of the way.
The only difference between this DIY workbench design I’m sharing with you here being mobile or stationary is the caster wheels. Add them for mobility. Don’t add them to keep it stationary. The choice is yours 🙂
Is it cheaper to buy or DIY a workbench?
Whether it’s cheaper to build or buy a workbench depends on the material, the size, the brand, if it’s new or used, etc. So there are a lot of factors to consider when determining which is cheaper.
And in most cases, you’re comparing apples to oranges because most DIY workbenches are custom built and you won’t find an exact match in a store to compare it to.
But, for what it’s worth, the approximate cost to build this workbench was $250 as of June 2023, when it was built.
*Lumber and material prices vary greatly by location and change daily, so your cost may be different.
How to Build an Easy DIY Workbench with Drawers
You’ll find the step by step building instructions below, but if you prefer to watch, check out the full build video plus additional tips and bloopers here:

Are new project videos your thing? Subscribe to my YouTube Channel for the latest project and plan videos.
Prefer to print your plans? Grab the DIY workbench printable building plans with full cut list, dimensions and diagrams here.
Tools & Materials:
Tools:
- Circular Saw
- Cutting Guides (Kreg Rip Cut & Kreg Accu-Cut used here)
- Miter Saw
- Jig Saw
- Drill/Driver
- Pocket Hole Jig
Materials:
- (7) 2x4x8 boards (add 2 more if you want the flip open top)
- (2) 4×8 sheets ¾″ plywood
- (1) 4×8 sheet ¼″ plywood
- 1 ¼″ wood screws
- 1 ¼″ pocket hole screws
- 2 ½″ wood screws
- 2 ½″ pocket hole screws
- (4) pair 16″ ball bearing drawer slides
- (4) caster wheels
- Wood Glue
- 48″ piano hinge (optional for flip open top)
- (4) 3 ½″ door hinges (optional for flip open top)
Step 1: Assemble Workbench Frame
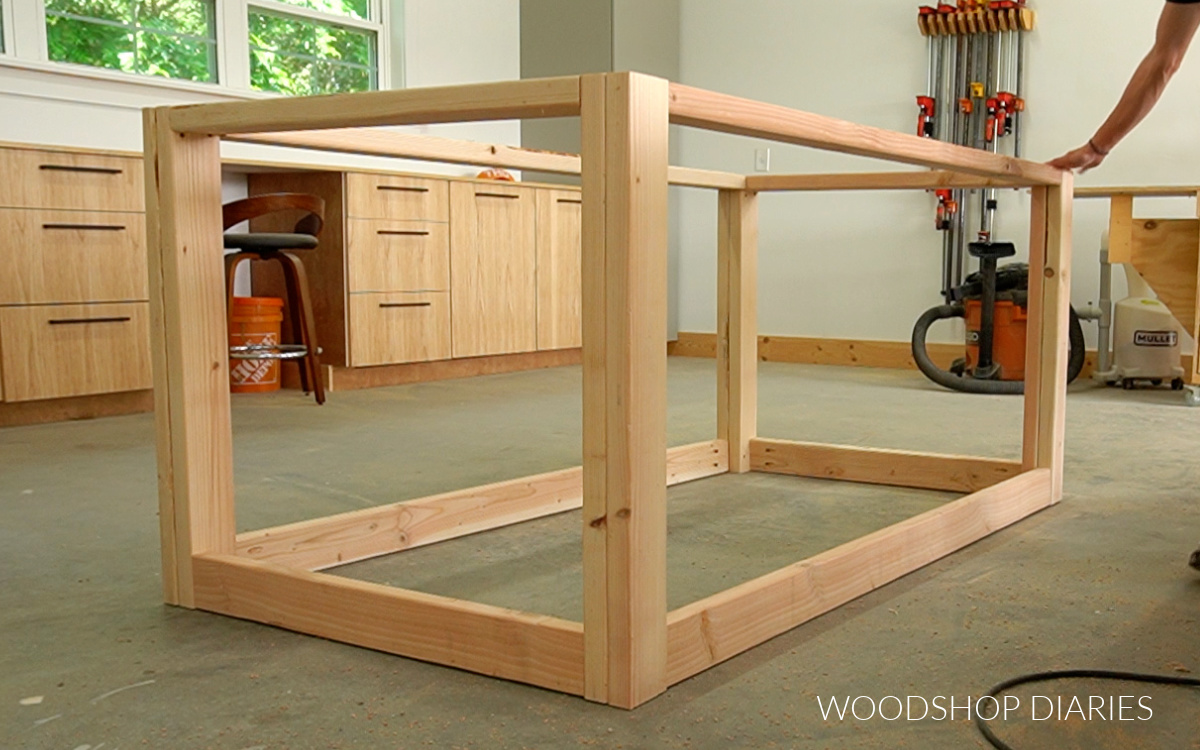
To get started with this build, I assembled the main workbench frame using 2x4s.
For the legs, I cut 8 pieces of 31″ long 2×4 and paired them up using wood glue and screws to make four leg posts.
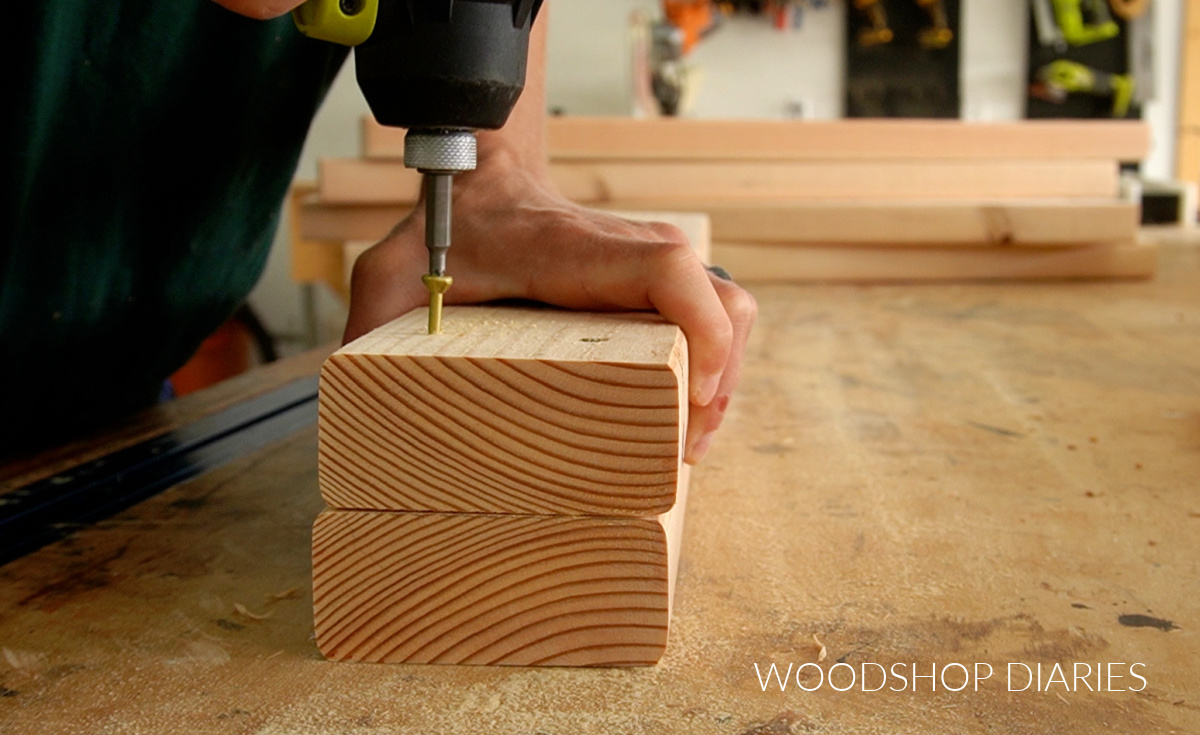
Then, I cut four 2×4 pieces to 30″ long and four more at 62″ long and drilled 1 ½″ pocket holes into the ends of each board.
RELATED: How to use a pocket hole jig
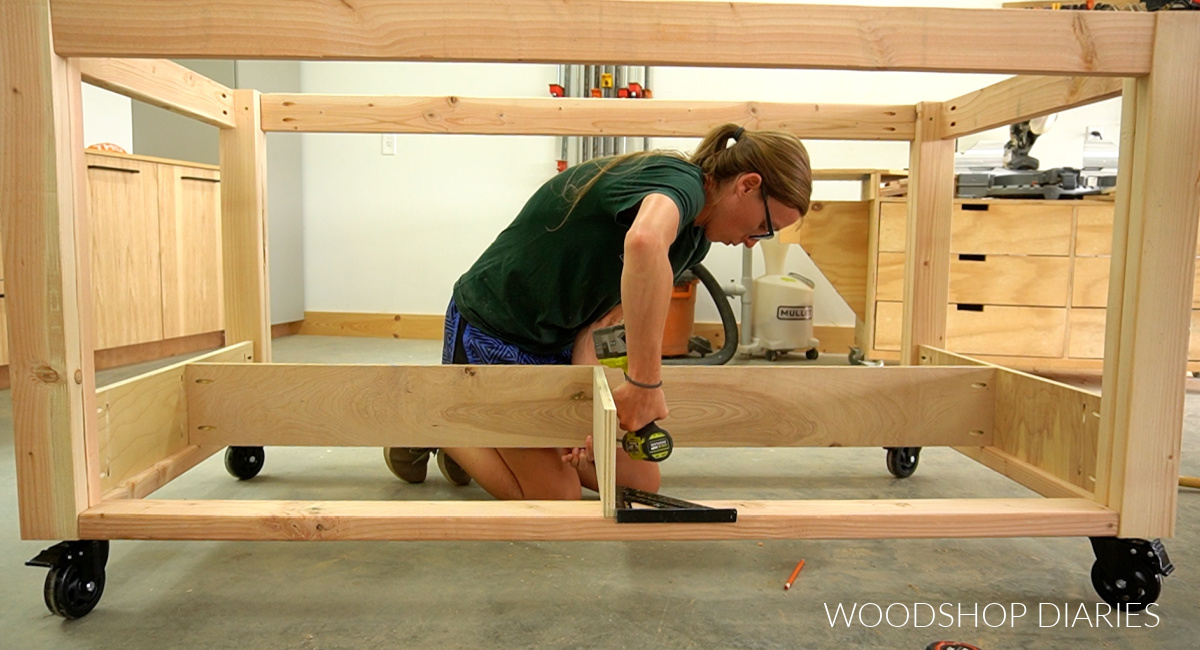
I attached the short 2x4s between the legs first using 2 ½″ pocket holes to make 2 identical sides. Note that the bottom 2x4s are run horizontally and the top are run vertically.
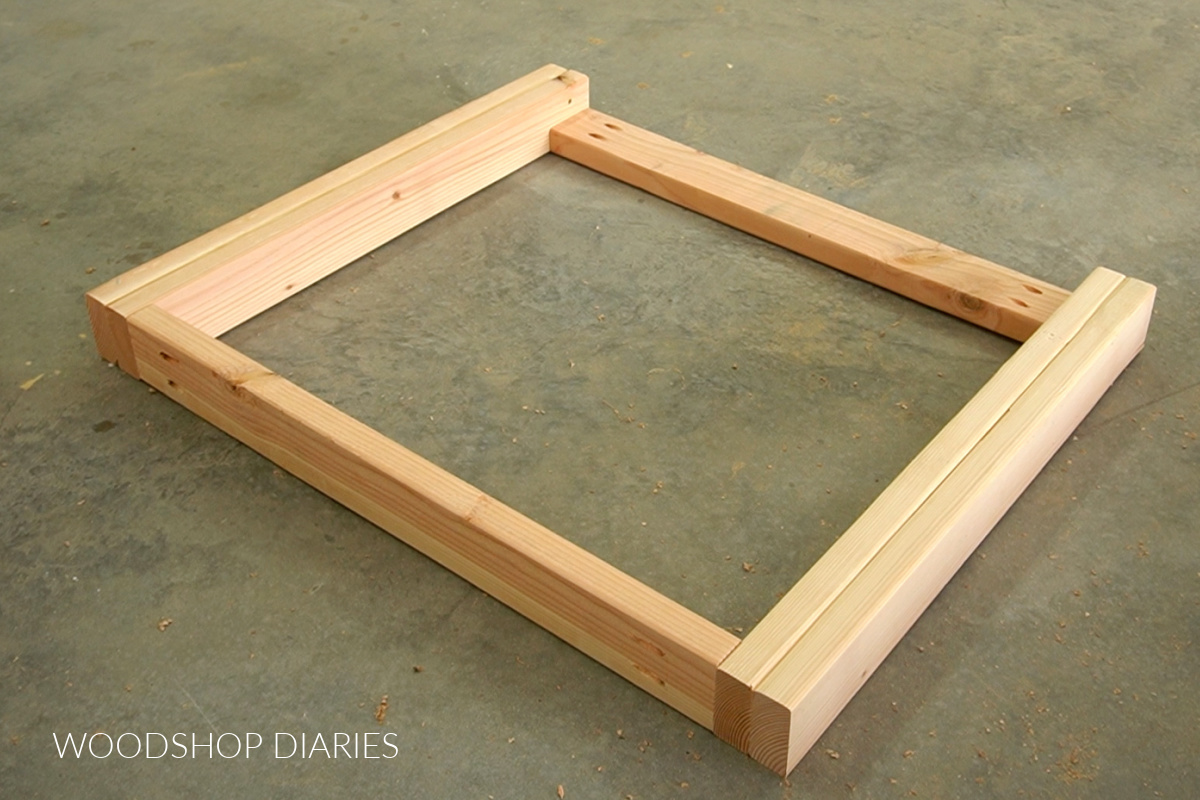
Then, I attached the long 2x4s between these sides the same way to complete the frame. Note that the frame is upside down in the image below.
To make this mobile, I added some caster wheels onto the bottom of this frame using 1 ¼″ screws with washers.
These are the caster wheels I used here, but any heavy duty caster wheels would work fine for this, so you don’t have to have anything specific.
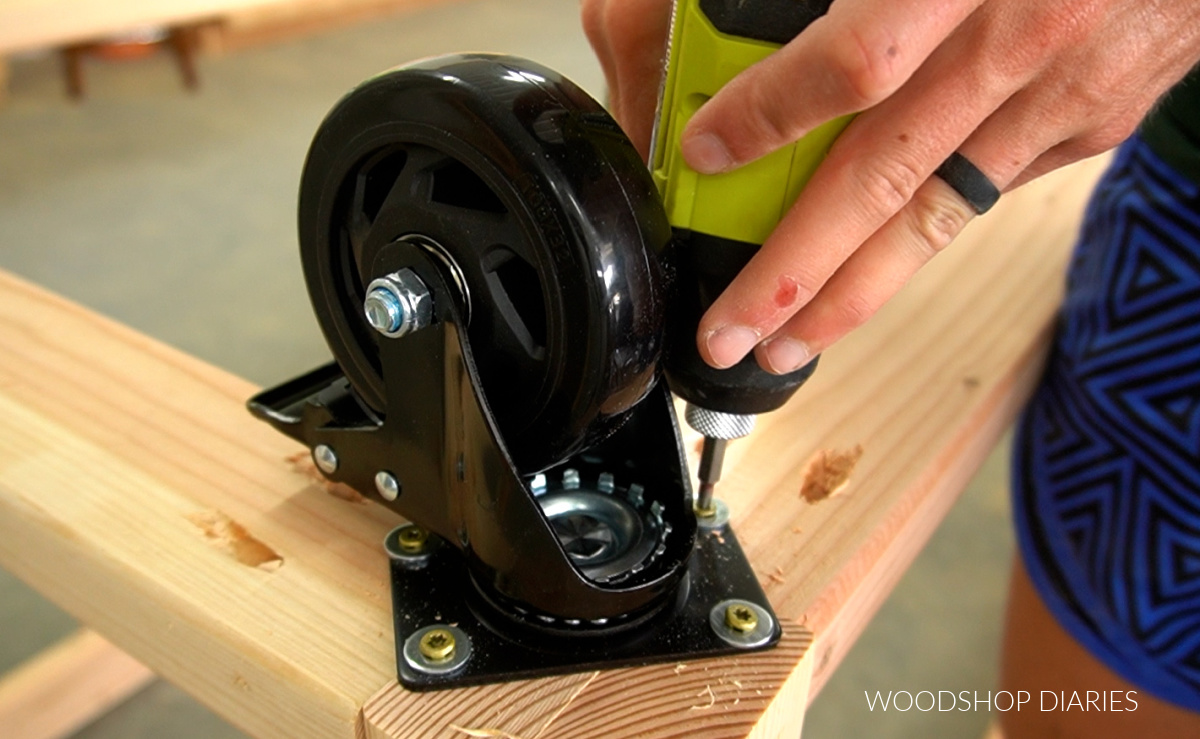
Keep in mind that caster wheels come in various sizes, so if you use a different type of wheel, it may change your workbench height.
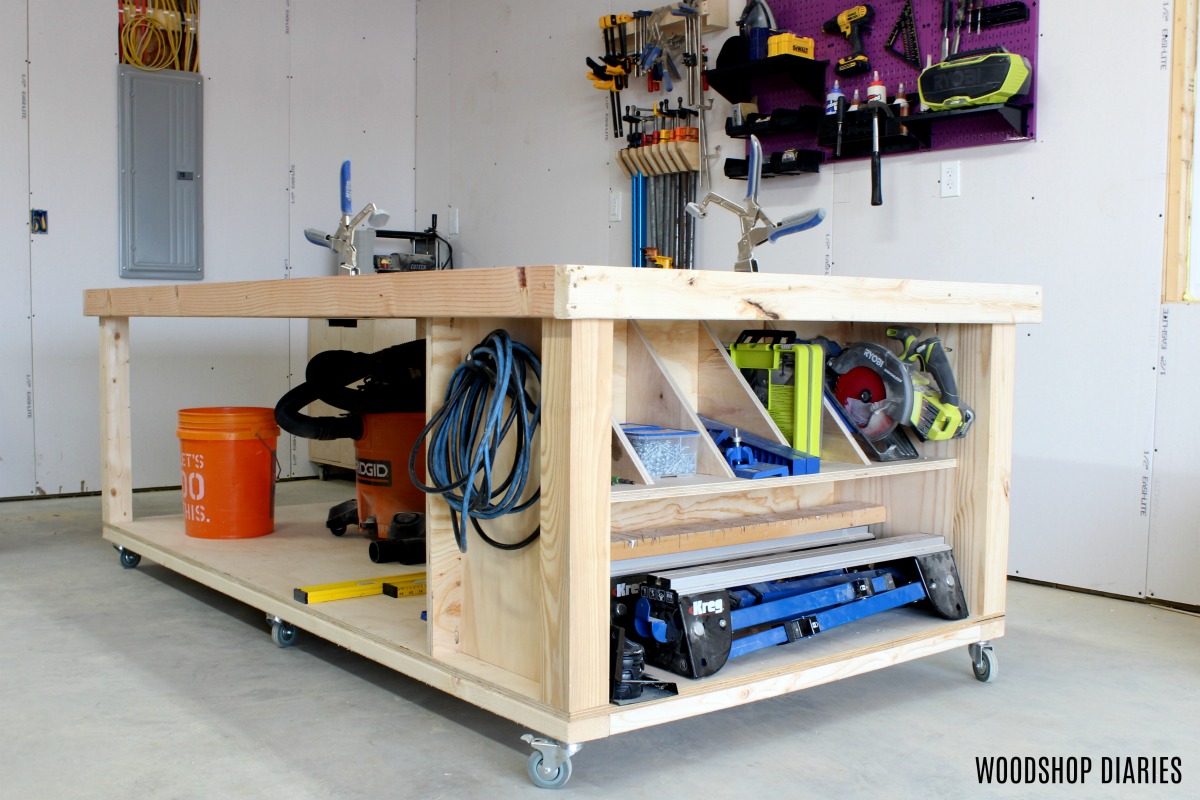
Step 2: Install Workbench Drawer Dividers
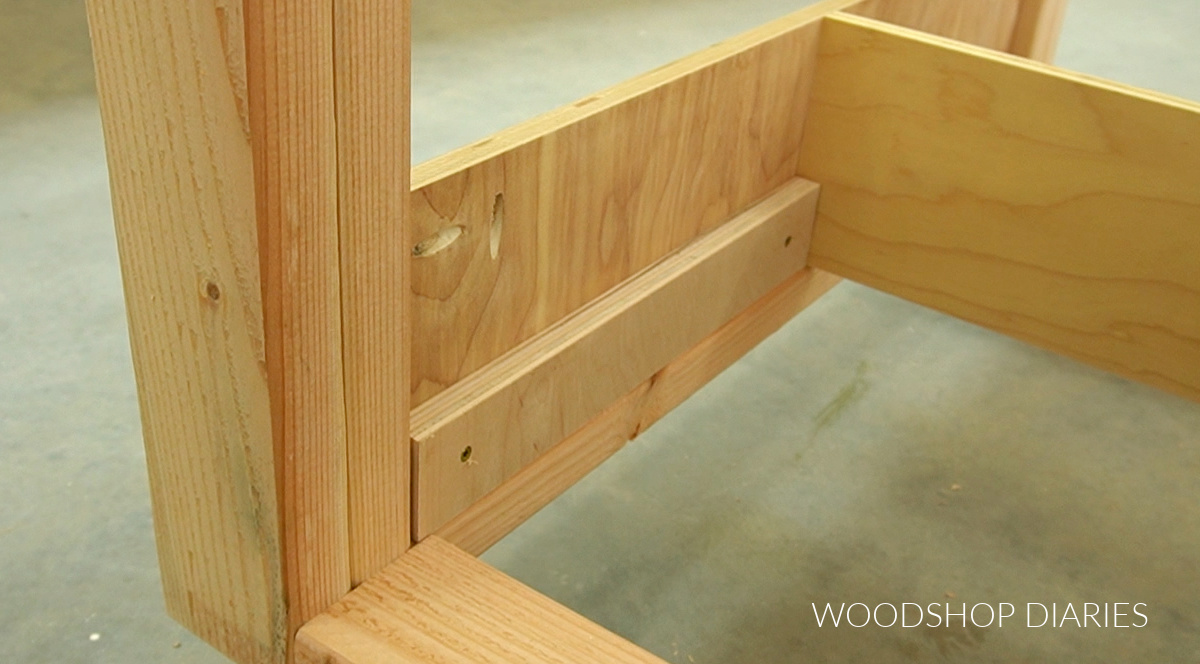
After the frame was assembled, I cut down ¾″ plywood panels to fit into the sides of the workbench. I made my panels 6 ½″ tall, but you can adjust shorter or taller as needed.
RELATED: How to cut plywood sheets
I installed these into the short sides of the workbench using ¾″ pocket holes and screws. I positioned these ¾″ inset from the inside of the 2×4 frame–you can see I used a scrap plywood block as a spacer to help me keep this inset while I drove the screws.
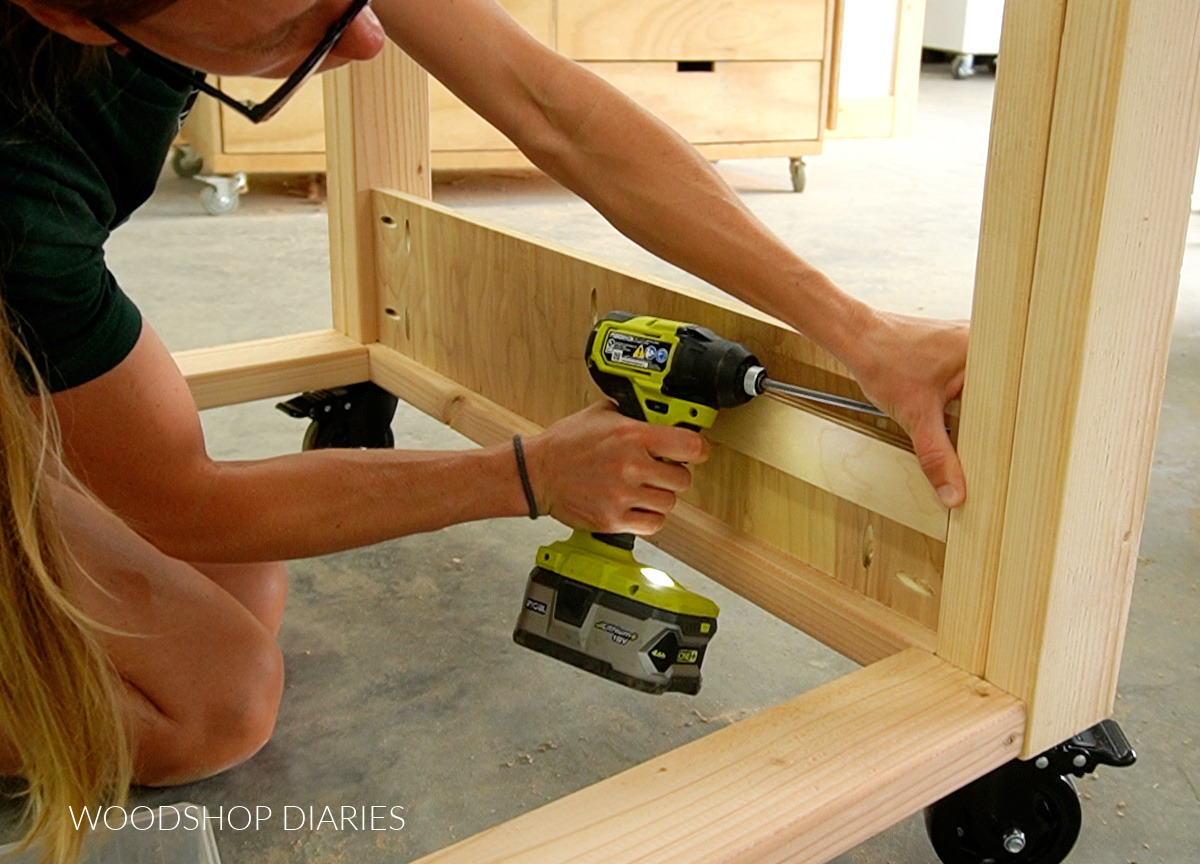
Then, I attached a long ¾″ plywood support piece between these panels using pocket holes and screws. This piece should be centered side to side on each end.

To divide the drawers into two on each side, I installed two more ¾″ plywood panels between the bottom 2×4 and this long center support.
I made sure these panels were centered side to side so that each of the 4 sections here are the same size.
That allows me to build 4 identical drawer boxes to make things easy.
Prefer to print? Grab the complete cut list, diagrams, and project details in the printable building plans here.
Step 3: Build and Install Workbench Drawers
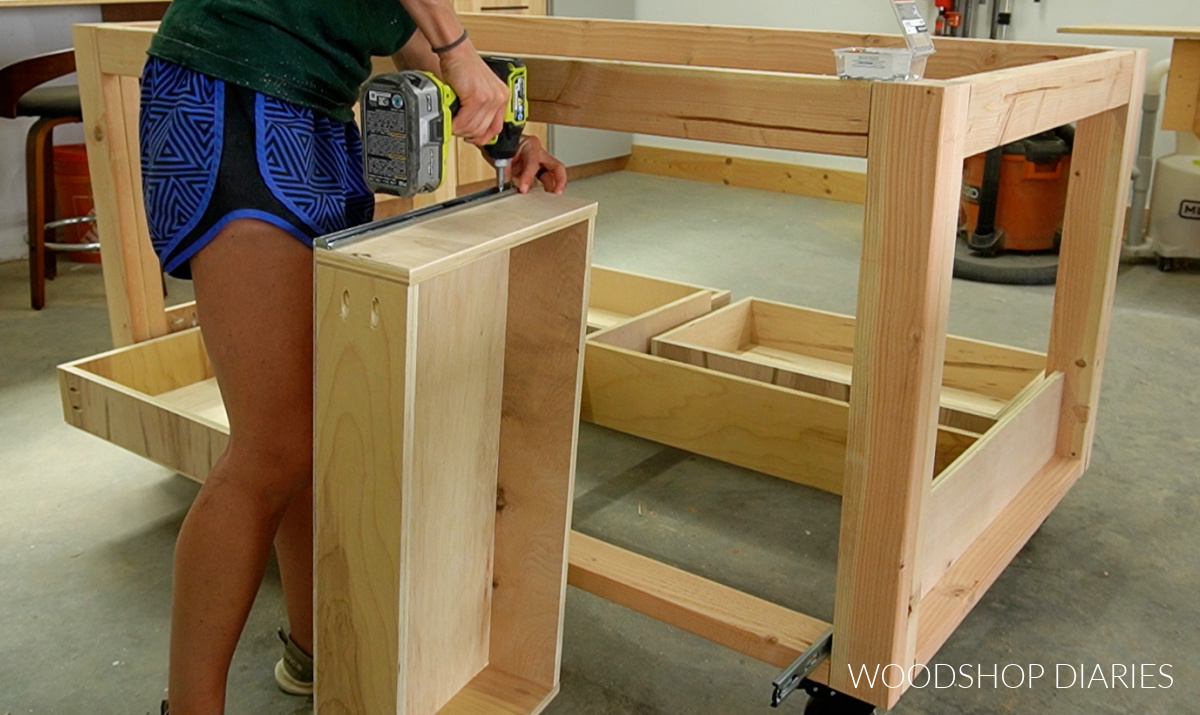
Because the side panels weren’t flush to the inside of the frame, I had to add some small ¾″ plywood scrap pieces into each section (only on the side panels) like shown below.
I simply glued and screwed these in place, then added 4 pair of ball bearing drawer slides–one pair in each drawer section. These slides are inset 1 ½″ from the outside edge.
Check out this post for more information on installing drawer slides!
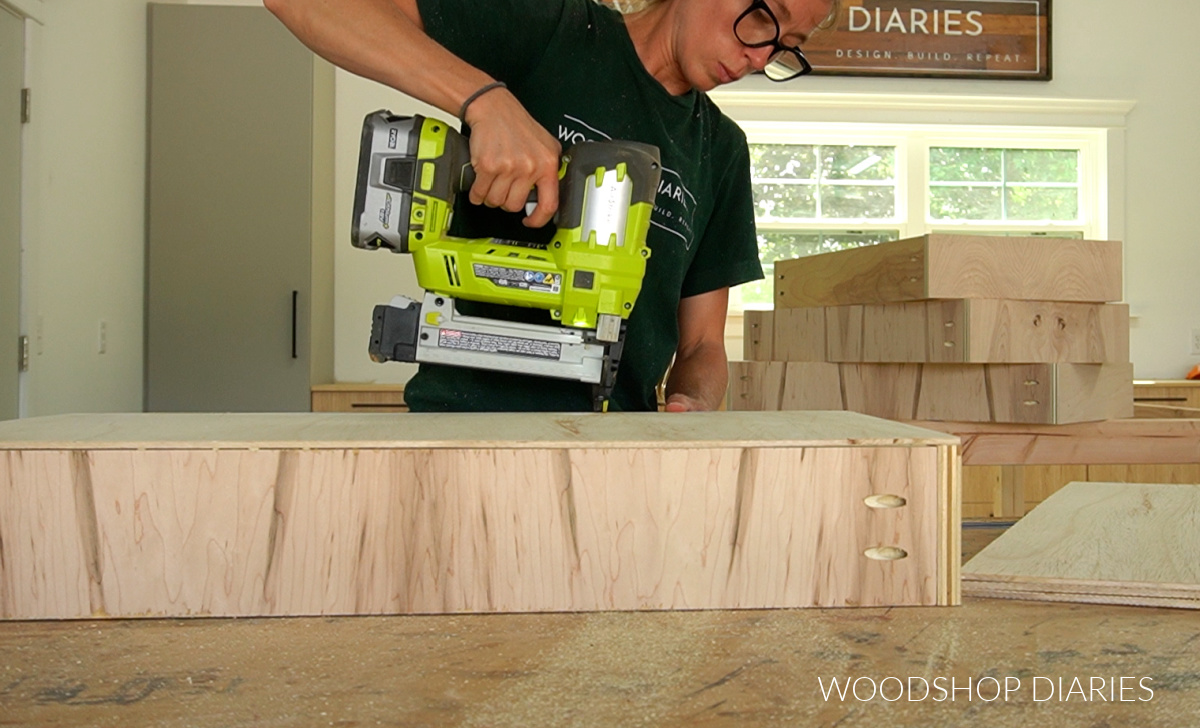
I built the drawer boxes from ¾″ plywood for the four sides and ¼″ plywood for the drawer bottoms. Normally, I cut dadoes into the drawer box sides to install the bottom panel.
However, since these were just workshop drawers, I kept it simple and just assembled the four drawer box sides with pocket holes and screws, then glued and stapled the bottom panel in place.
Check out this post for more information on building drawer boxes.
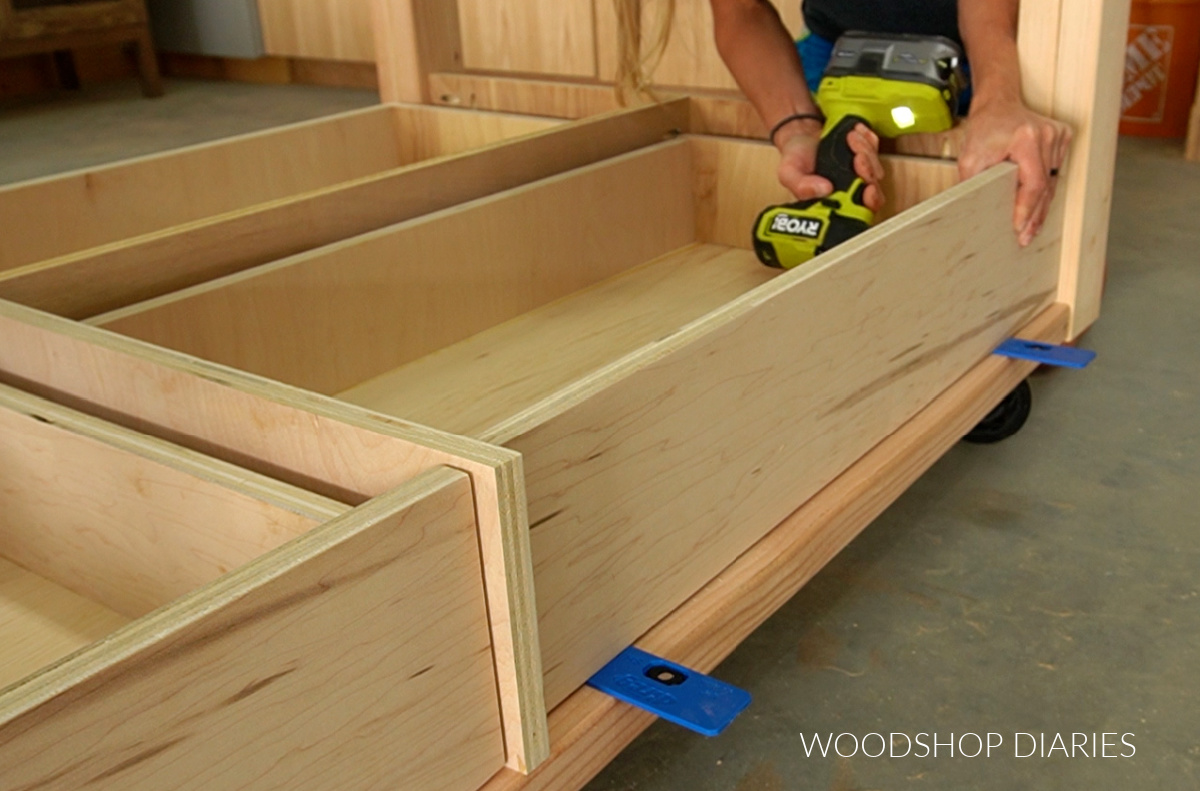
Once assembled, I installed these into the workbench. There are several ways to install drawer boxes, but I dettached the section of the slide that mounts to the drawer box and screwed these into the side of each box.
That way, I could work standing up vs crawling around on the floor haha.
Finally, I cut ¾″ plywood drawer fronts for each drawer box and installed these using screws from the inside of the drawer boxes. I used some ⅛″ shims on the bottom here to help me keep my gaps even.
Check out this post to learn more about how to measure and size your drawer boxes and drawer fronts.
At this point, they’re ready for knobs, drawer pulls, or you could cut some notches in the top of the drawer fronts to open and close them.
Step 4: Attach Bottom Shelf
The shelf that will go above these drawer boxes will kind of “wrap around” the corner leg posts.
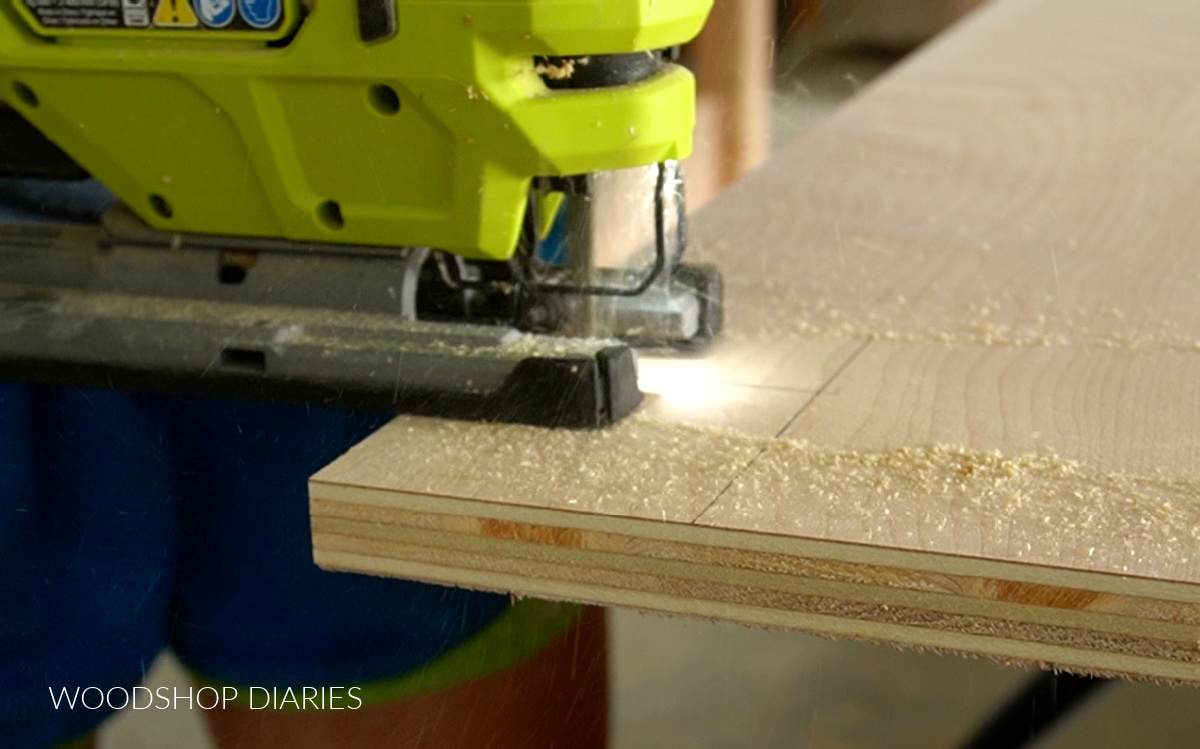
So first, I cut a ¾″ plywood panel to 36″ x 68″. Then, I marked 3″ squares on each corner and cut these out with a jig saw.
This panel should fit snuggly onto the drawer framing from step 2. However, you’ll need to temporarily remove one of the top 2×4 framing pieces in order to get it in place.
I just backed out the pocket hole screws in one of the top 62″ framing pieces, placed this shelf inside, then reattached the 2×4. Since the screw holes are already there, it’s easy to get it back exactly where it was before.
I secured the shelf to the drawer framing pieces below using 1 ¼″ wood screws. It was helpful to use a measuring tape here to locate where these pieces were so I didn’t miss then while driving the screws.
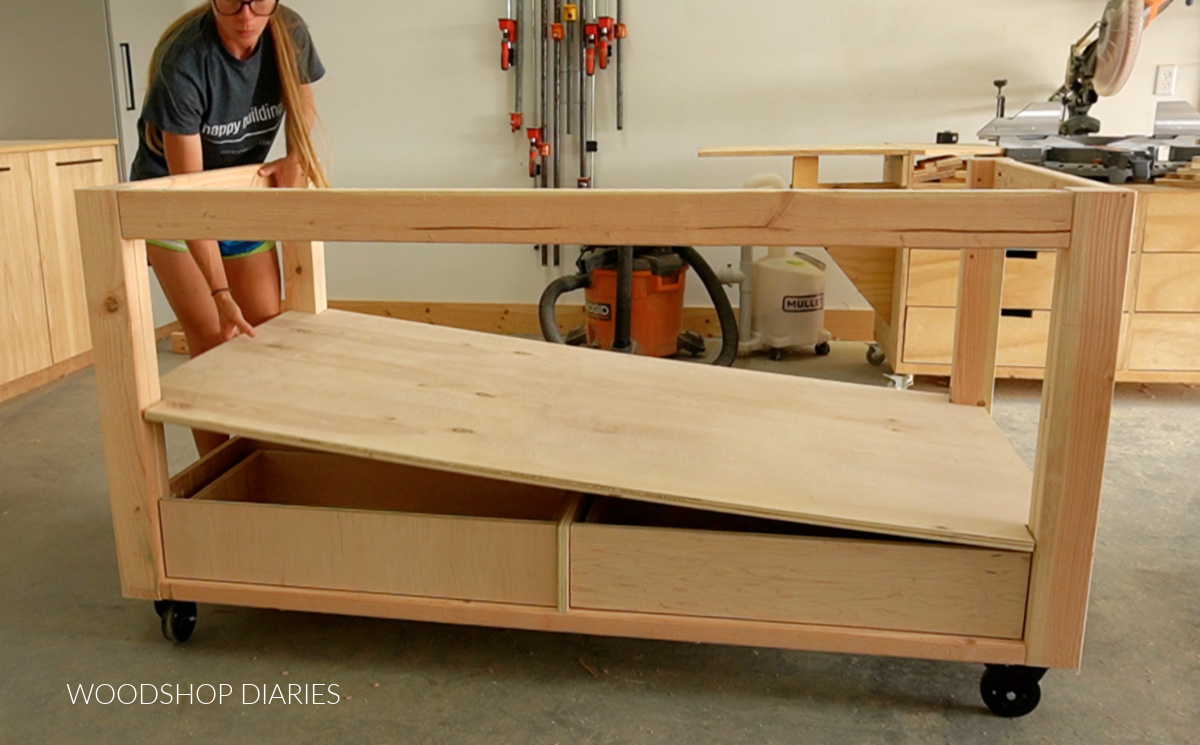
Step 5: Add Flip Open (or Stationary) Top
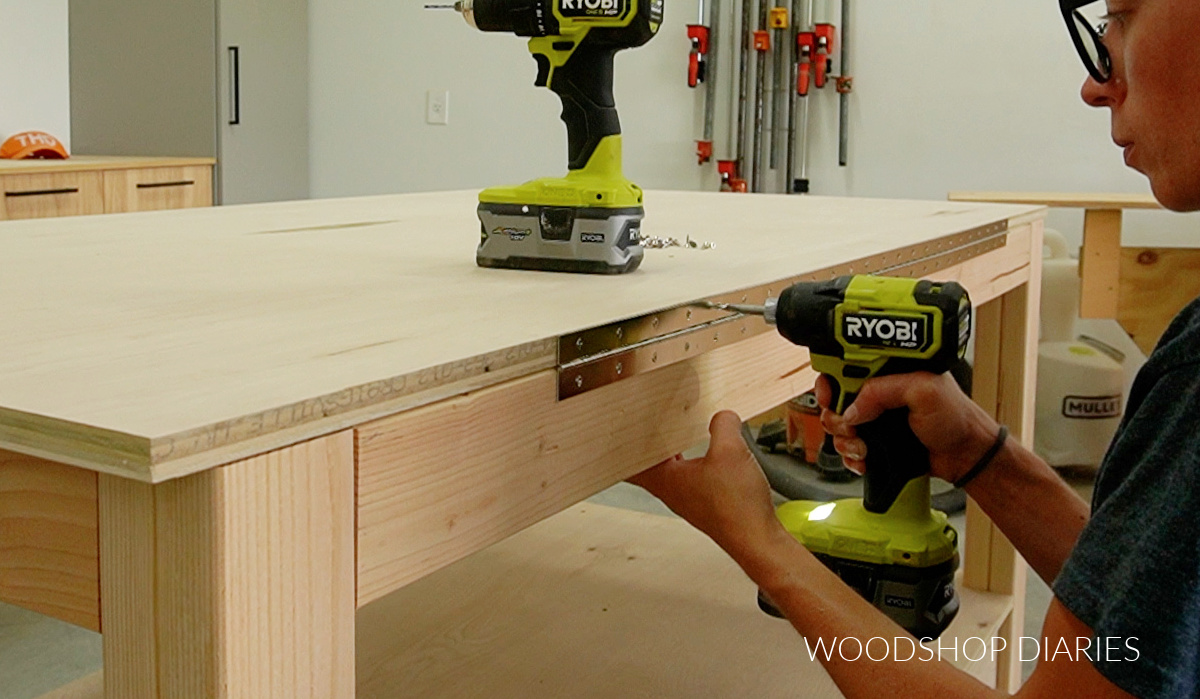
The last part is simple adding the top. If you want a stationary top, simply cut a piece of ¾″ plywood to fit over the top of the workbench and screw it in place.
OR, if you didn’t want screw heads showing on the top surface, use some 90 degree corner brackets on the underside to secure it to the framing.
However, if you want a flip top like I made, it’s a few extra steps. First, to make the top “flipable,” I installed a 48″ piano hinge to connect the top plywood panel to the framing.
Now, the top can flip, but it needed something to support it once it was flipped open.
So I assembled two basic corner braces from 2x4s with 2 pieces at 90 degrees and another piece running between them for support–nothing fancy.
I wanted these braces to be able to swing open and closed, so I installed them onto the legs of the workbench using basic door hinges–two hinges per brace.

That way, these can fold in when not in use, but they can swing out when I need to open the top.
And with that, this DIY mobile workbench with drawers and a flip open top is complete and ready for work!
I love this simple design–plenty of open storage for tools and lumber, but still some drawers for small parts and accessories.
Grab the printable workbench with drawers building plans to build your own here!
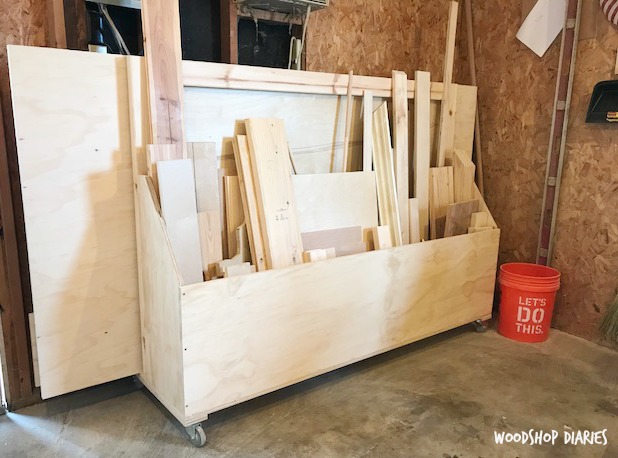
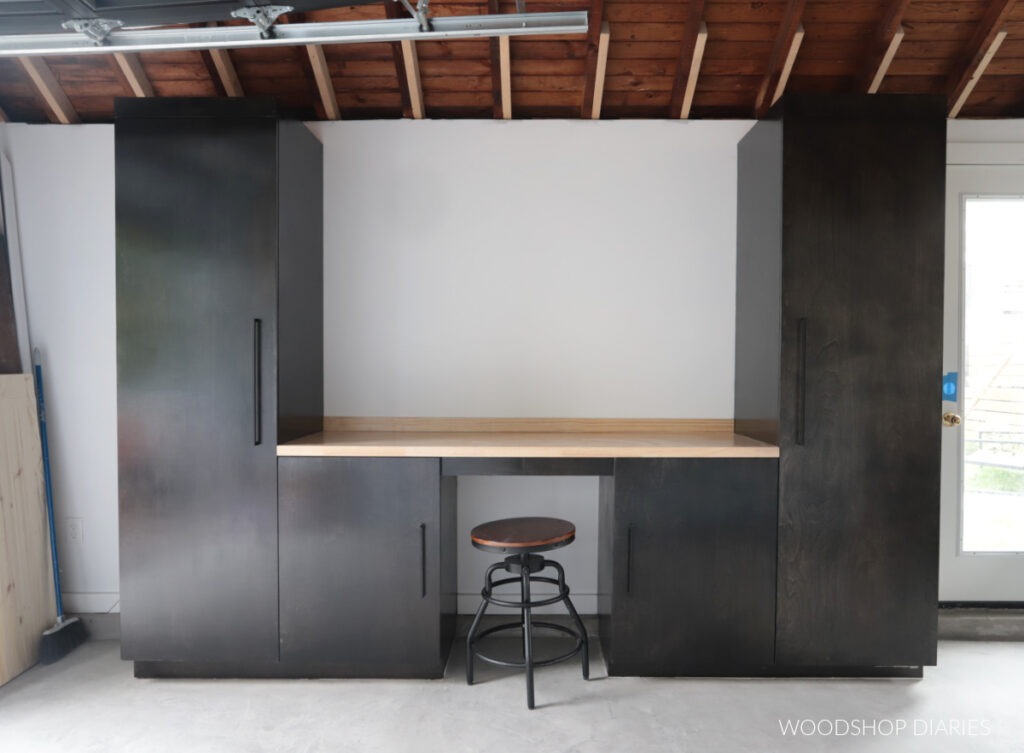
Looking for more DIY workshop projects?
Need some more DIY ideas for your workshop or garage? Here are a few favorites to help make the most of your shop space!
If you’d like to save this project for later, don’t forget to pin it or share it to your favorite social channel!
Until next time, happy building!