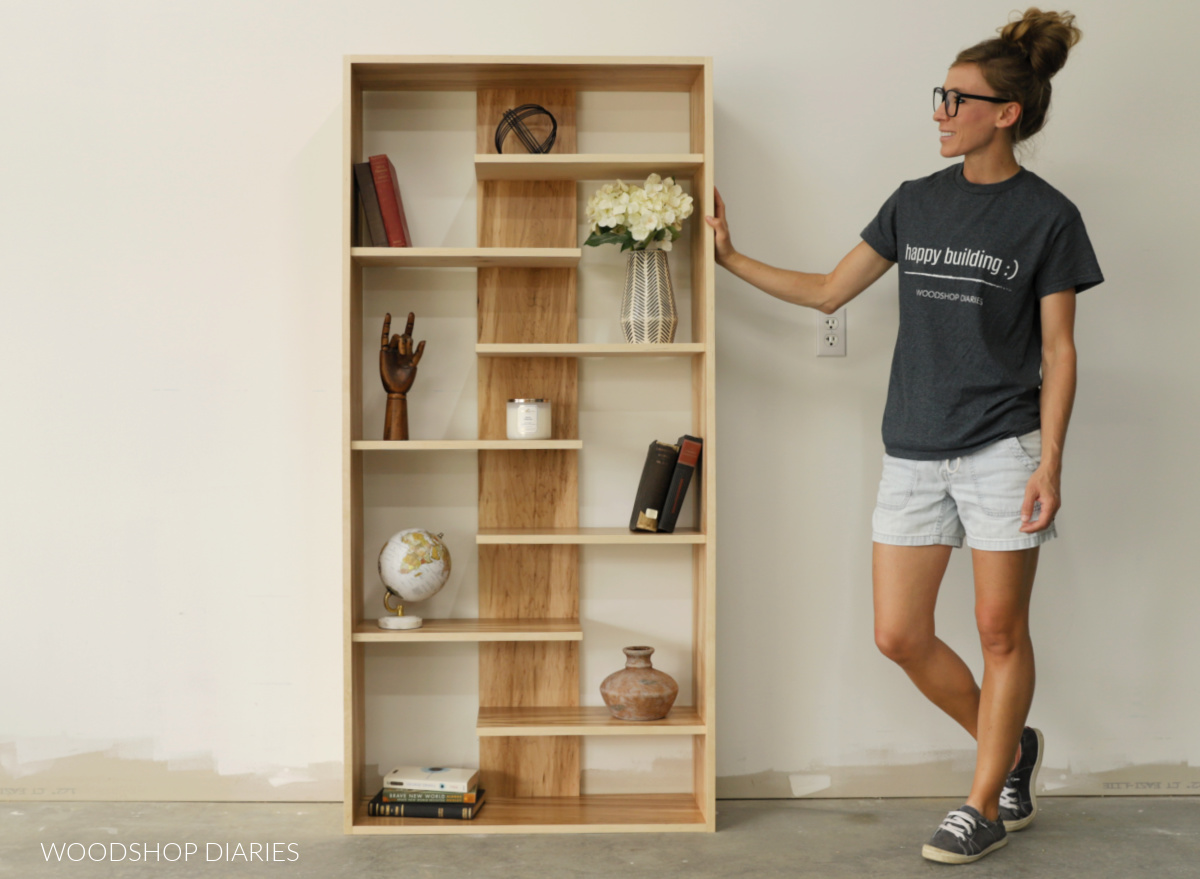
In this post, I’m sharing how to build a modern DIY bookshelf from a single sheet of plywood!
I don’t know about you, but I love a fun DIY plywood project. It’s even better when all you need is one sheet and a few basic tools.
*This post contains affiliate links. See website policies.
I built this DIY plywood bookshelf for my dad to display his collection of model cars in his office. But even if you don’t have a collection of toys to display (that makes me giggle a little), it’s perfect for books, shoes, and/or décor.
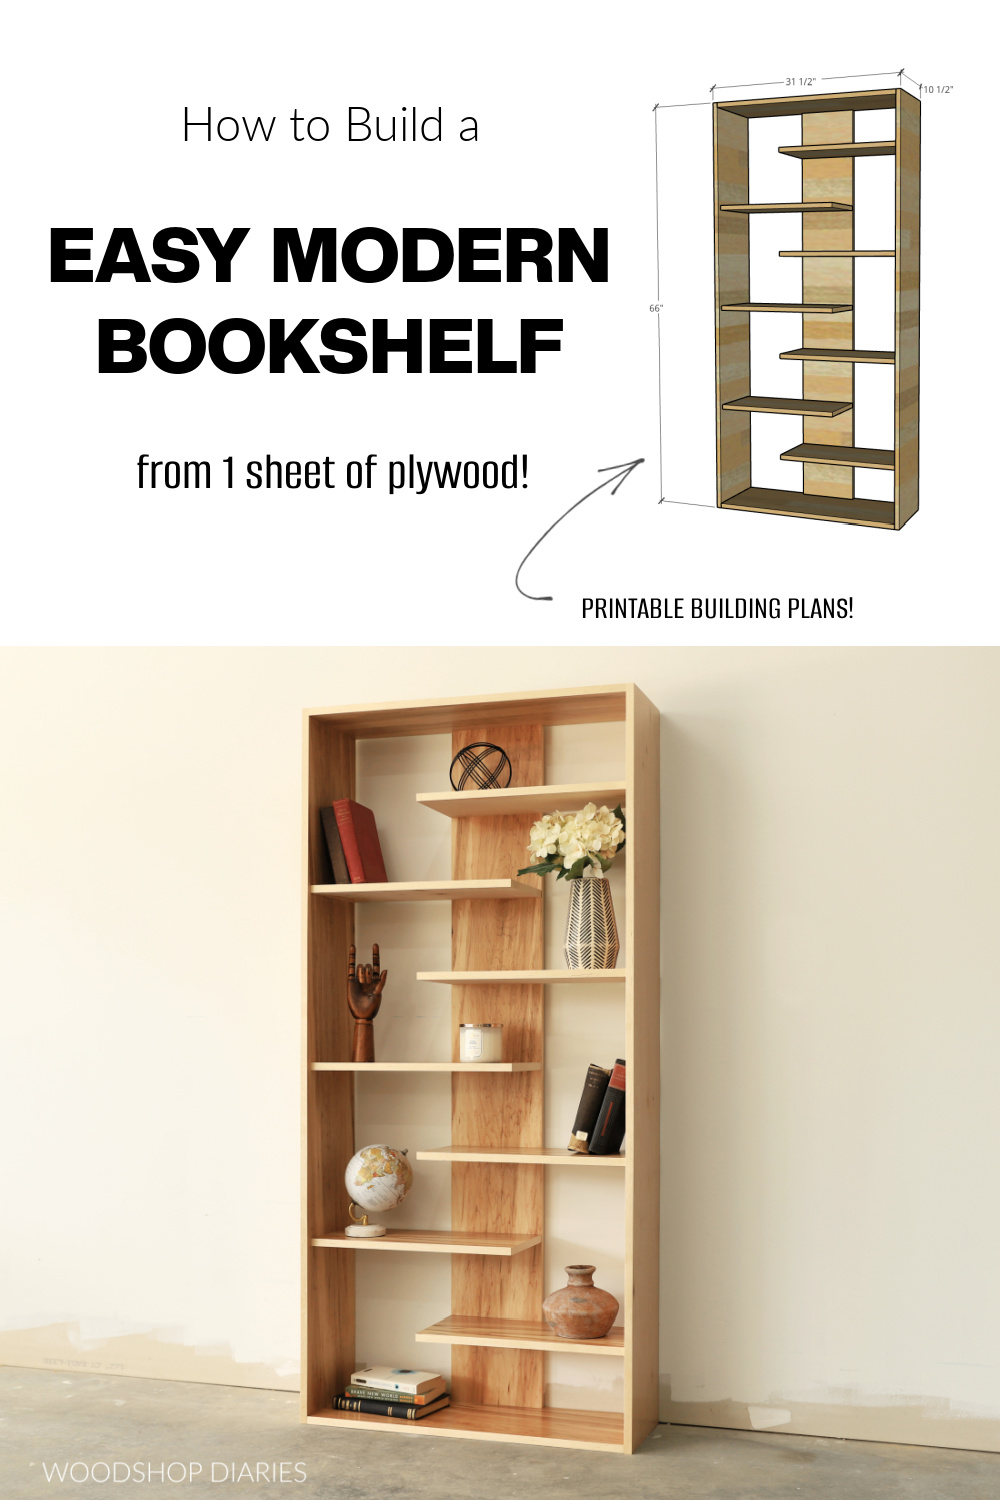
This simple plywood bookshelf is a fun, modern take on your basic shelf design with taller sections on the left and right for larger items and shorter, overlapping sections for smaller items.
The open back and clean lines give it a minimal look, too. Assembling this bookshelf is a quick and easy project, so if you’re ready to dive into the how to, let’s go.
What You’ll Need
Prefer to print? You can find the complete cut, tools, and materials list plus dimensions and diagrams in the printable building plans here.
Tools:
- Circular saw
- Kreg Rip Cut (optional, but helpful)
- Miter saw (optional–can cut everything with circular saw if needed)
- Drill/Driver
- Pocket Hole Jig
- Square
Materials:
- (1) 4×8 sheet ¾″ plywood (maple used here)
- 1 ¼″ pocket hole screws
- 1 ¼″ wood screws
- Iron on edge banding (optional)
- Wood Glue
- Pocket Hole Plugs (optional)
Want to be the first to know when new project and plans are out? Subscribe to the newsletter for priority access!
What to know before building
This simple DIY plywood bookshelf can be made from a single sheet of ¾″ plywood. I recommend using a hardwood plywood for best results.
RELATED: How to choose the right plywood for your project
In this case, I used maple plywood because I found a sheet that had some really pretty color variations. But oak or birch would work great, too.
I’d consider this project a good beginner to intermediate project. It’s a super easy assembly, but it’s rather large in size. Edge banding is by far the most time consuming part of the build, but it’s optional.
You should easily be able to complete this build in a few hours or less.
Overall Bookshelf Size
The overall dimensions of this bookshelf are 10 ½″ deep x 31 ½″ wide x 66″ tall.
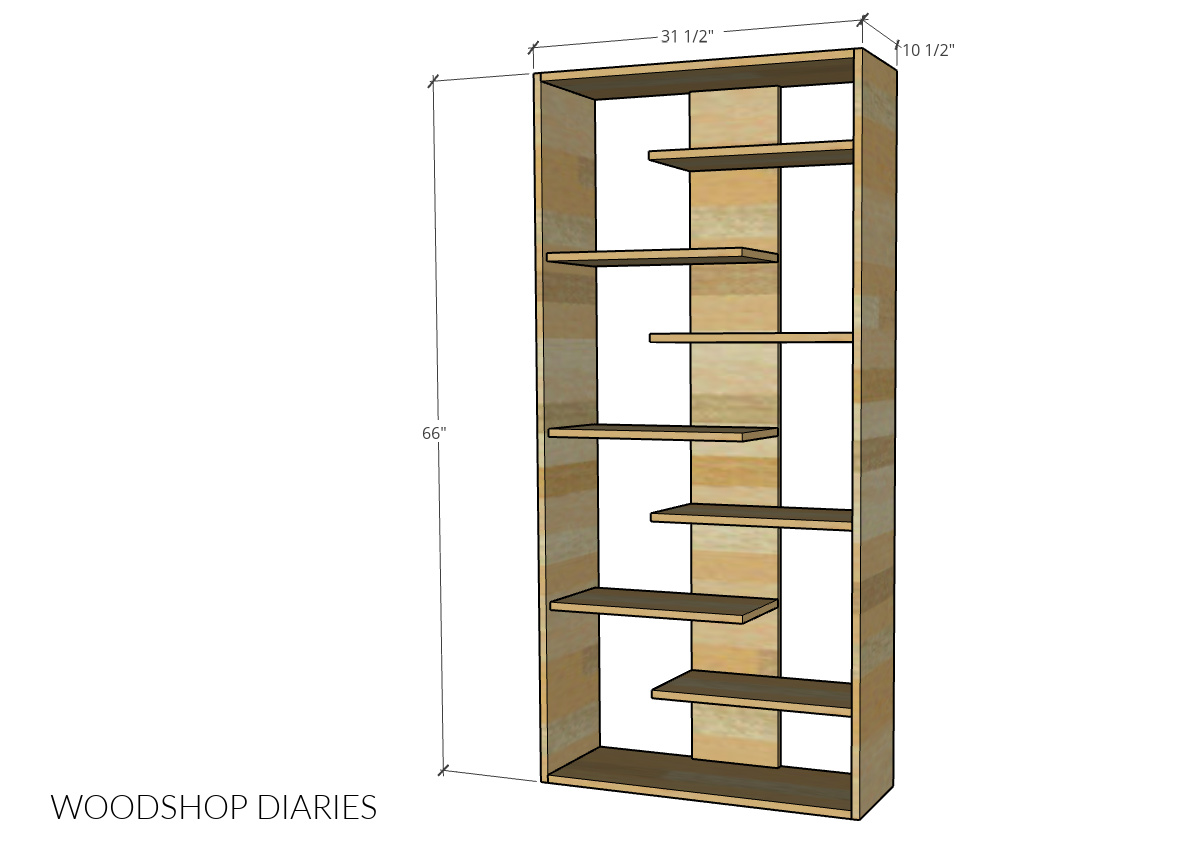
The individual shelves are approximately 9″ deep and 19 ½″ long.
Securing Bookshelf to the Wall
Because this shelf is fairly lightweight, tall, and narrow, it can tend to be top heavy. To prevent accidental tip over, I recommend securing the shelf to the wall once complete.
You can do this several ways. There are several different styles of anti tip over hardware kits available online for use with furniture.
But, an easy way to secure it is to simply drive a screw or two through the back panel of the shelf into a wall stud behind it. You may need a shim to go between the shelf and the wall to accommodate for the thickness of the baseboard if you don’t want to cut it out.
How to Build a Modern Plywood Bookshelf
I’m sharing the step by step guide to assembling this shelf below, but if you prefer to watch, I’ve also included a video tutorial here as well with additional tips and behind the scenes footage.
If you enjoy project videos, subscribe to my YouTube channel for plenty more where that came from!
And if you prefer to print your plans, I’ve got printable DIY bookshelf building plans available here. Printable plans include cut list, materials list, detailed diagrams, dimensions and step by step instructions.
Cutting the Plywood
In most cases, I don’t recommend cutting all your pieces at the beginning of the project. But for this shelf, it’s a good idea to go ahead and cut everything down first.
I’ve provided a plywood cut diagram and cut list in the printable plans, but first, I ripped my plywood sheet into 5 strips using my circular saw and Kreg Rip Cut–two wider for the body and three narrower strips for the shelves.
Learn how to cut plywood sheets in this post!
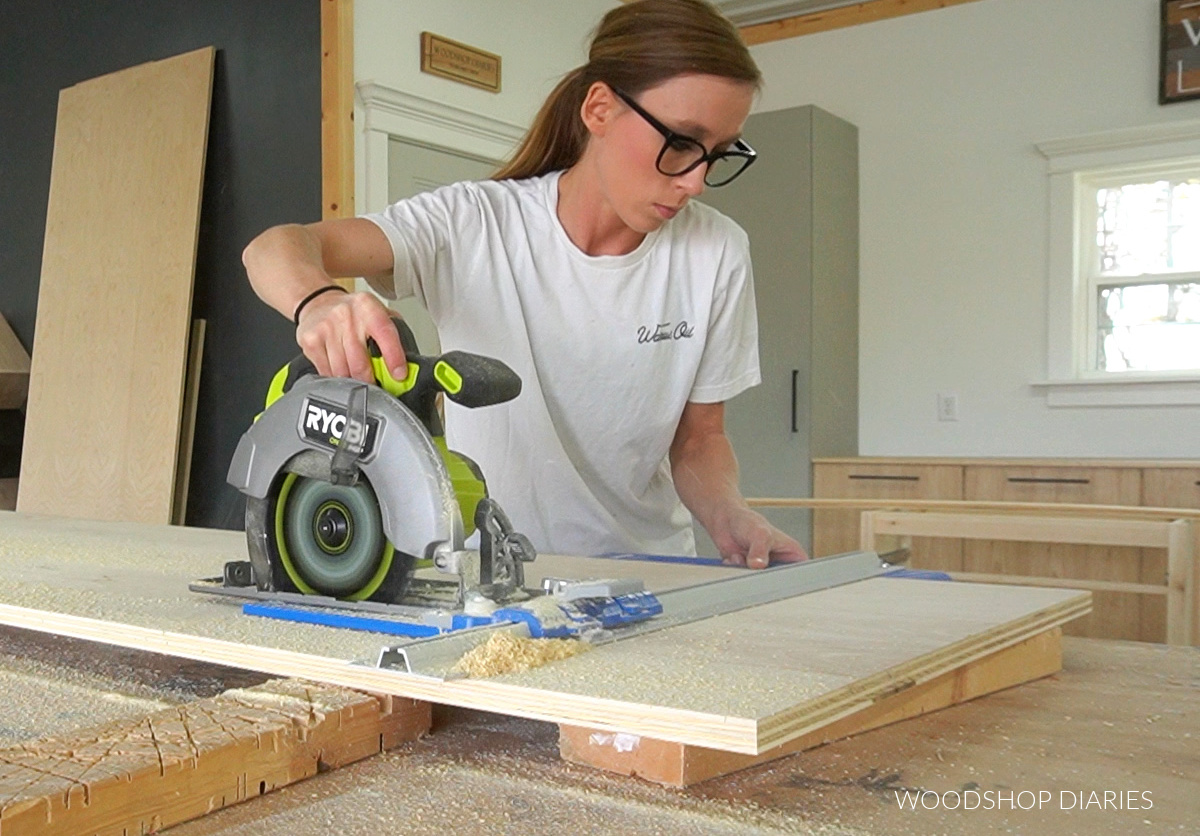
Once the plywood sheet was cut into these strips, I trimmed them to length on the miter saw. But, if you wanted, you could also cut these to length with a circular saw as well.
Step 1: Assemble Bookshelf Body
The bookshelf body is assembled from the wider plywood strips I cut from my sheet. I cut these two pieces into two short and two long pieces to make the bookshelf body.
The shorter pieces are the top and bottom and the longer pieces are the bookshelf sides.
Before assembling, I applied iron on edge banding to the front edges of these pieces. Edge banding is optional, but it hides the plies and makes the edges look a little nicer.
Learn how to apply iron on edge banding in this post.
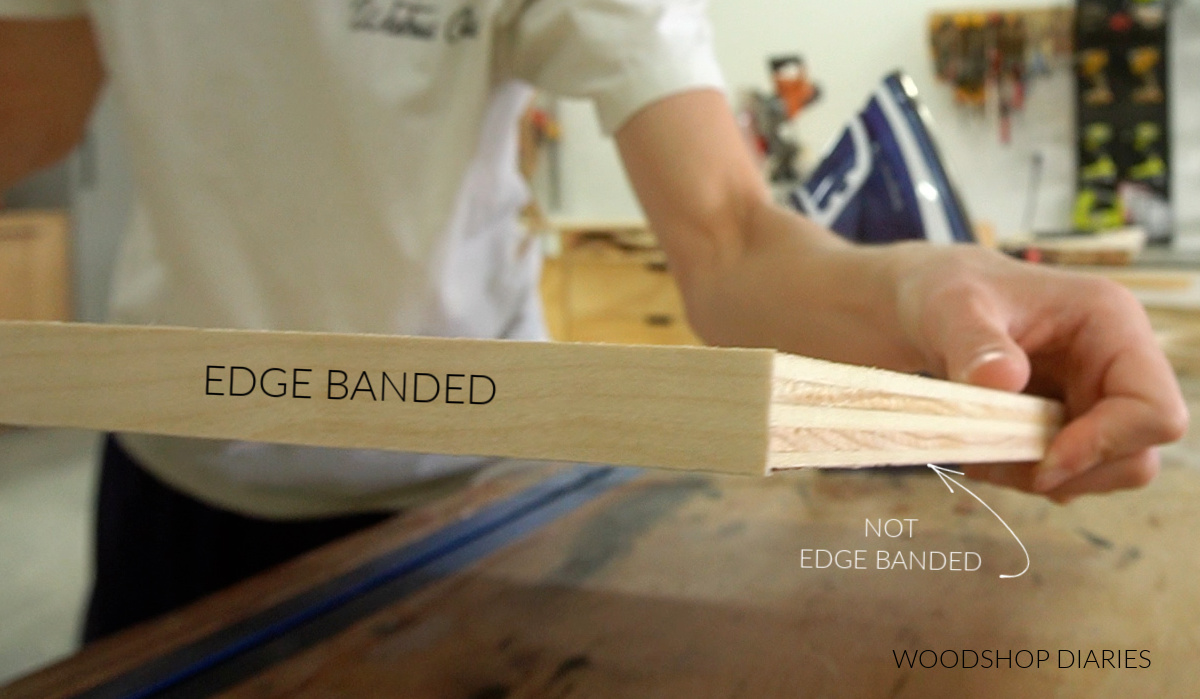
After a light sanding, I drilled ¾″ pocket holes into the ends of the top and bottom pieces and assembled the bookshelf body using 1 ¼″ pocket hole screws.
Learn how to use pocket holes in your DIY projects here.
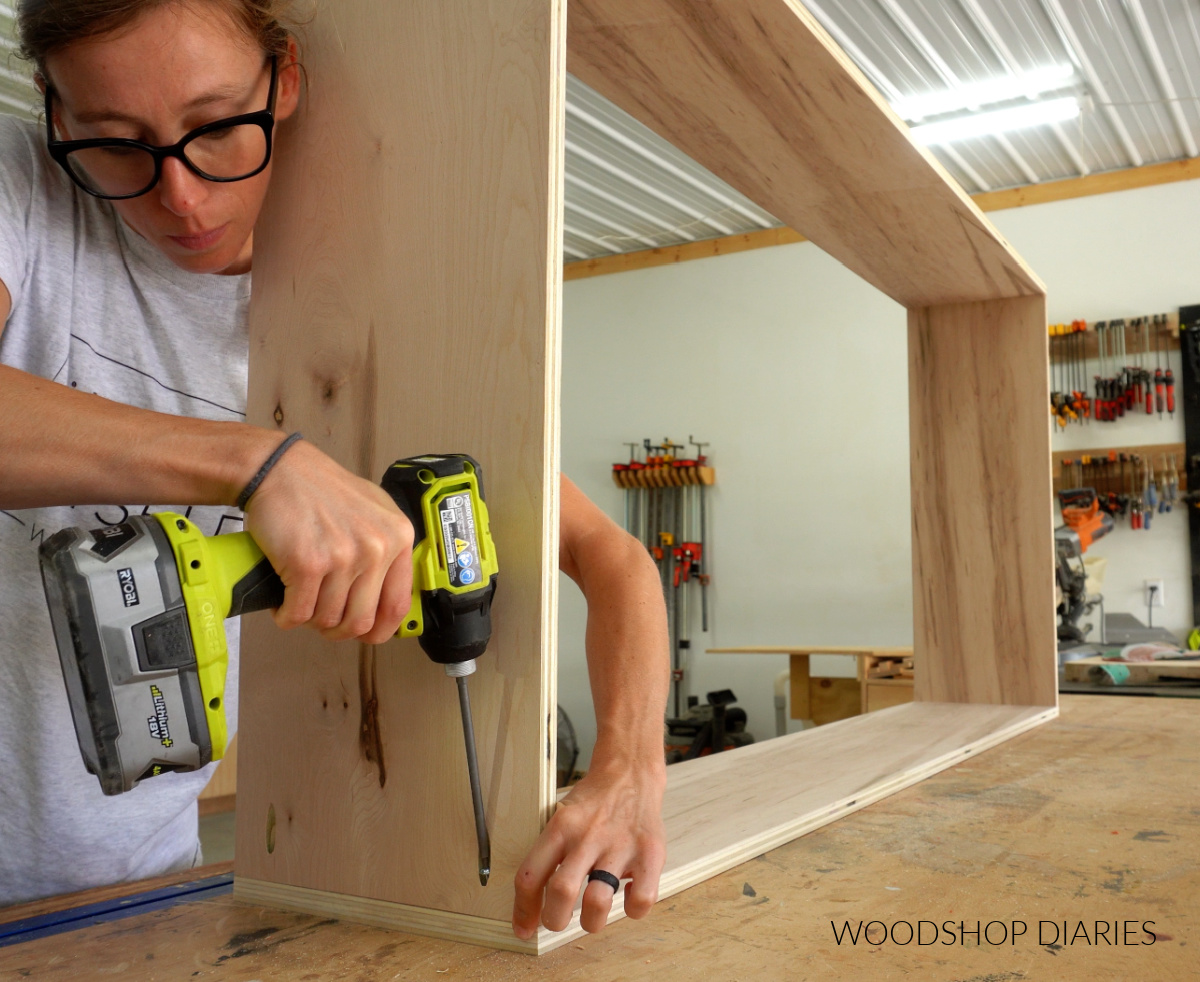
TIP: Make sure to face the pocket holes toward the outside here so that they’ll be hidden in the finished project.
Step 2: Install Back Panel
The “back panel” here is simply a piece of plywood that runs between the top and bottom of the shelf body. So I cut a piece from one of my plywood strips to fit inside this shelf.
I edge banded both long sides and centered this piece flush to the back edge between the two long sides.
NOTE: The shelf is laid on it’s side on the workbench in the image below.
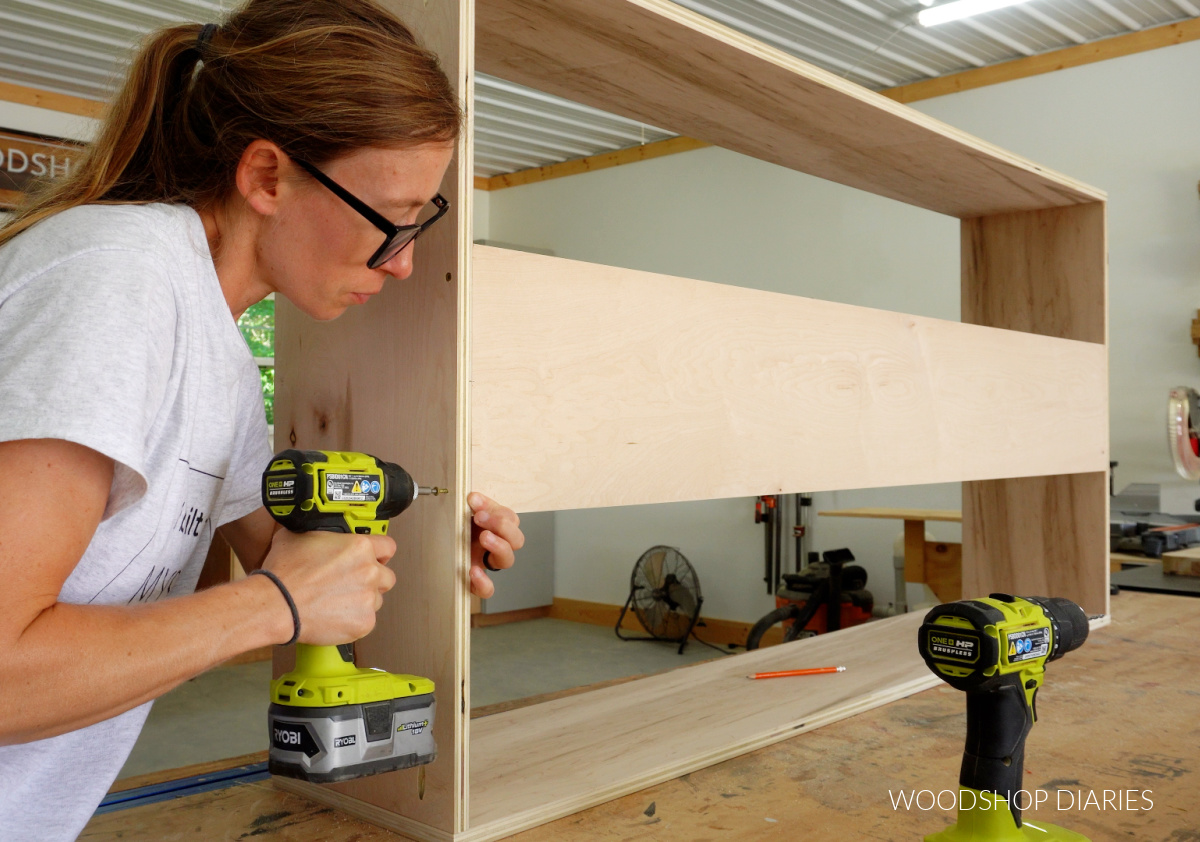
To secure this in place, I predrilled pilot holes (this helps prevent the wood from splitting) and drove 1 ¼″ wood screws through the top and bottom shelf panels.
TIP: Make sure to keep this back piece centered between the sides of the bookshelf while attaching.
Step 3: Add Left Shelves
You can certainly adjust the shelf spacing and add more or less here as you’d like. But, in my case, I added three shelves on the left side and 4 shelves on the right.
I found it easiest to attach all the shelves on the left side first. I trimmed these shelf boards from the remaining plywood strips to span across the middle board.
I applied edge banding to the front and right side of each shelf and drilled ¾″ pocket holes into the left side. You only need pocket holes in one end.
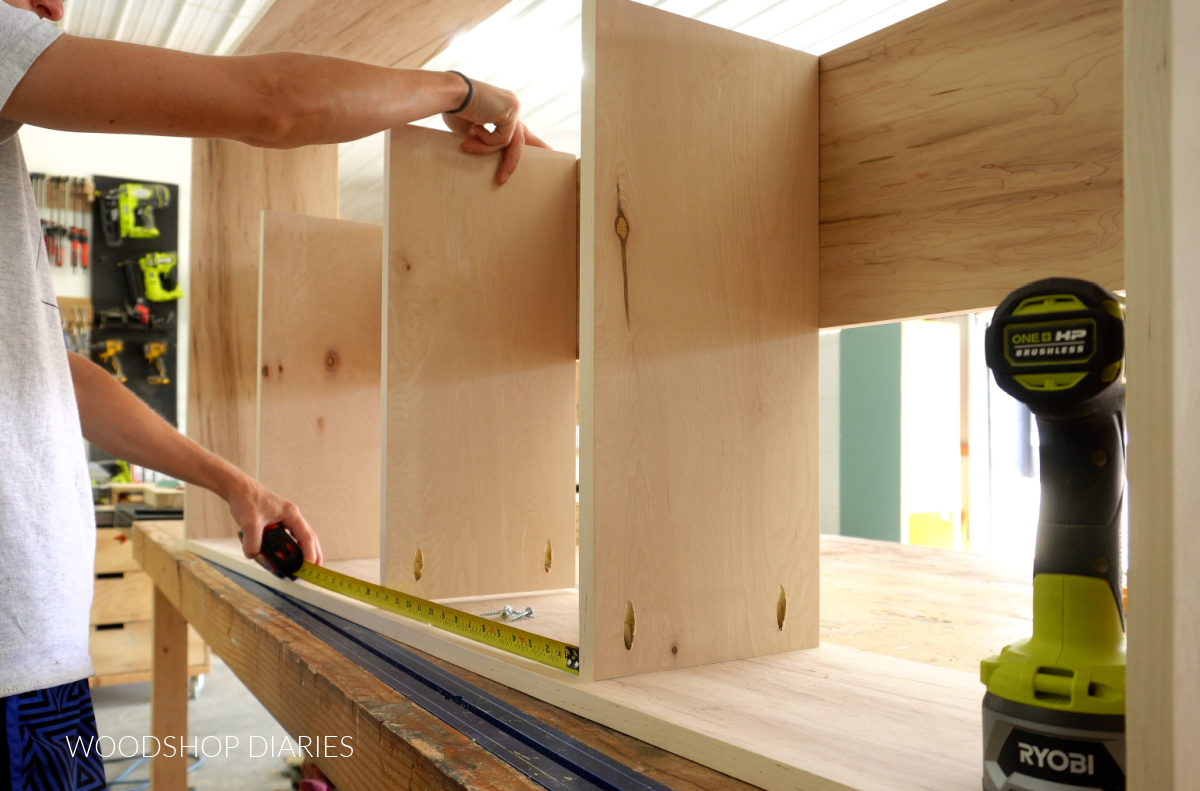
With the shelf body laying on it’s left side on the workbench, I evenly spaced these shelf boards out and secured them to the side of the bookshelf using 1 ¼″ pocket hole screws.
TIP: Make sure the back edge of each shelf is flat against the front of the back panel.
Then, I moved around to the back side and used a couple 1 ¼″ wood screws per shelf to secure them to the back panel.
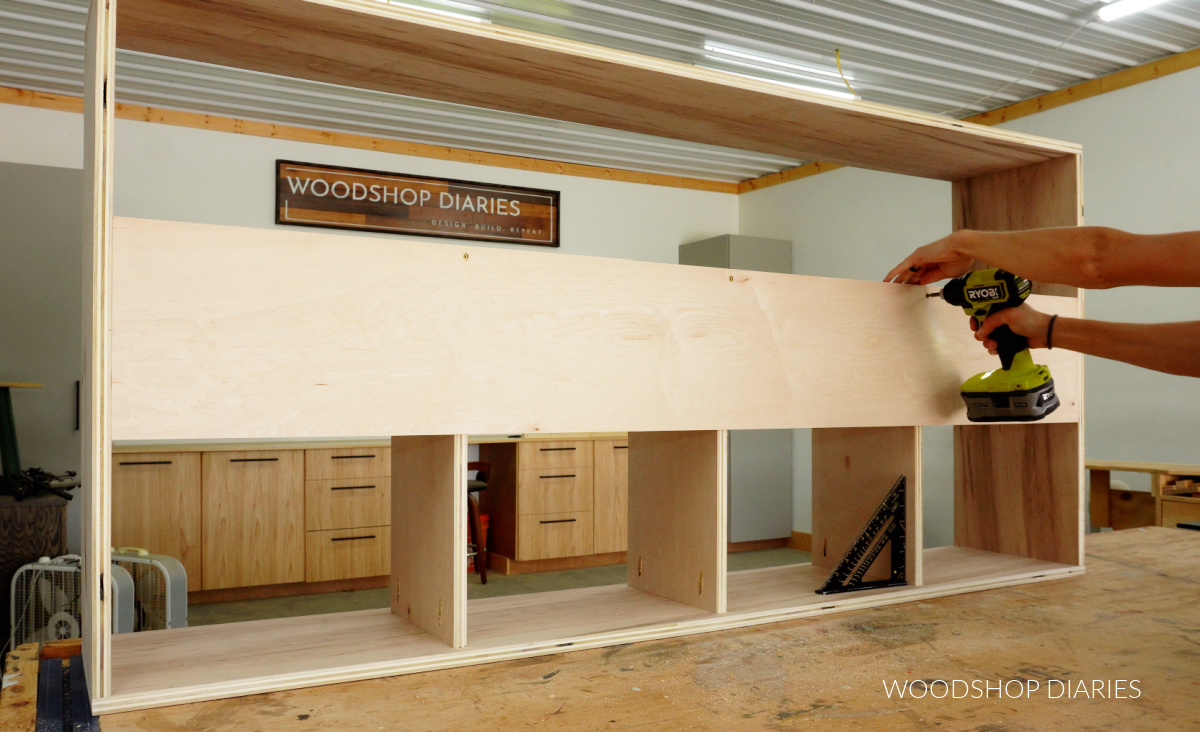
I recommend using a speed square to make sure these shelves stay square to the side panel while securing.
Step 4: Add Right Shelves
The right side shelves are cut the same size, but this time, I edge banded the front and left edges and drilled ¾″ pocket holes in the right end.
I flipped the bookshelf on its right side and evenly spaced these shelves out between the others.
Then I secured them to the right side of the shelf using 1 ¼″ pocket hole screws just like I did on the left side.
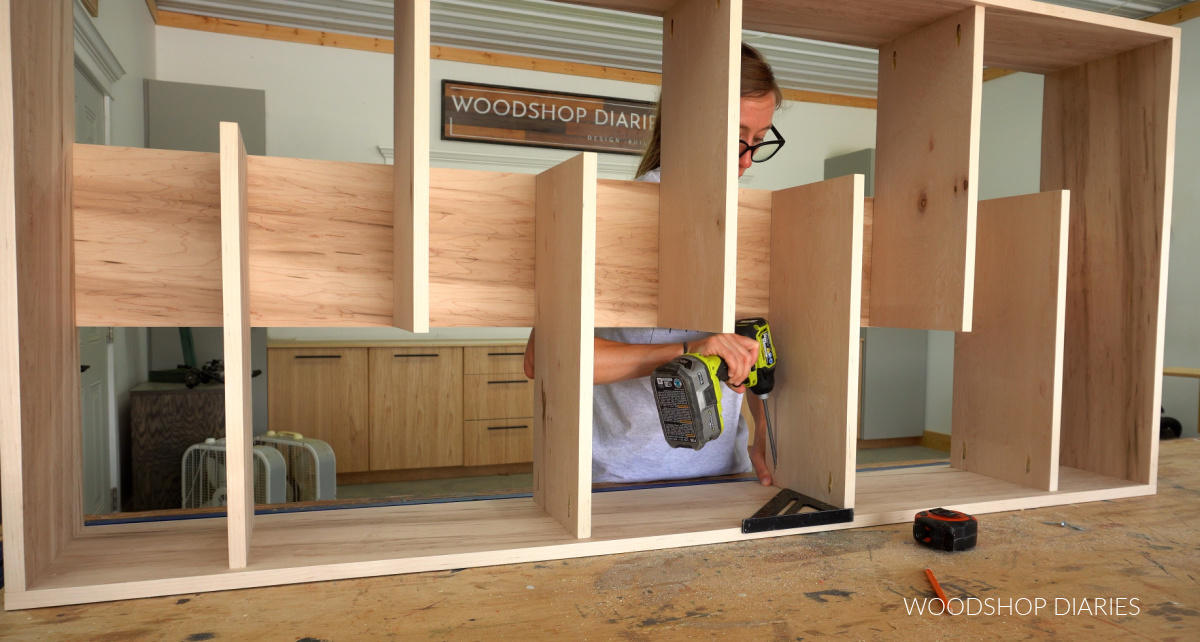
I added two more screws per shelf to secure them to the back panel–again, just like the left side. Make sure to keep these shelves square to the side panel while securing at the back.
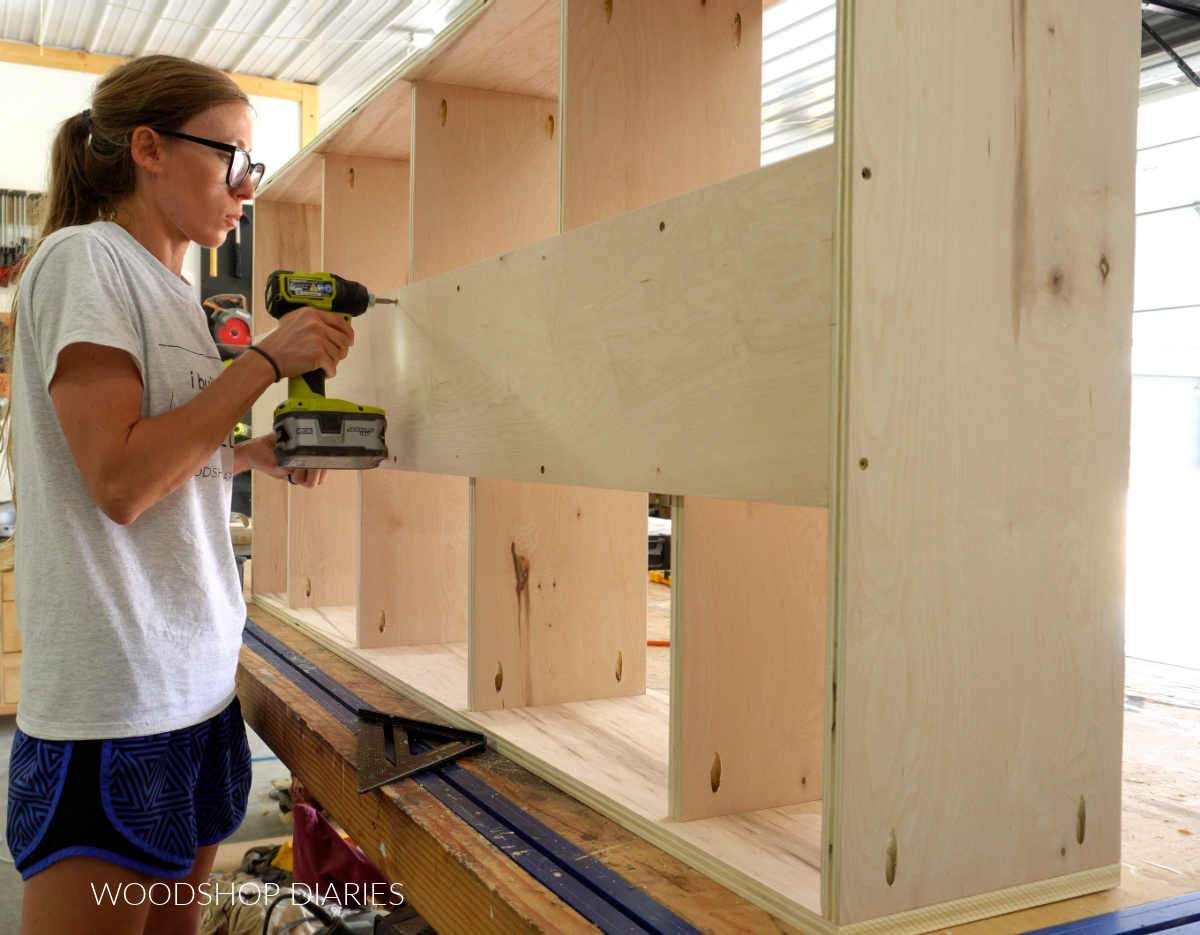
And with this, the assembly is complete! All that’s left are a few final details.
Step 5: Finish Bookshelf
Plugging the pocket holes on the shelves is completely optional. Since they’re on the underside, they’re not really noticeable, but I went ahead and plugged mine just so it looked a little cleaner.
I flipped the bookshelf upside down to make this a little easier and simply applied some wood glue and worked in a pocket hole plug into each hole.
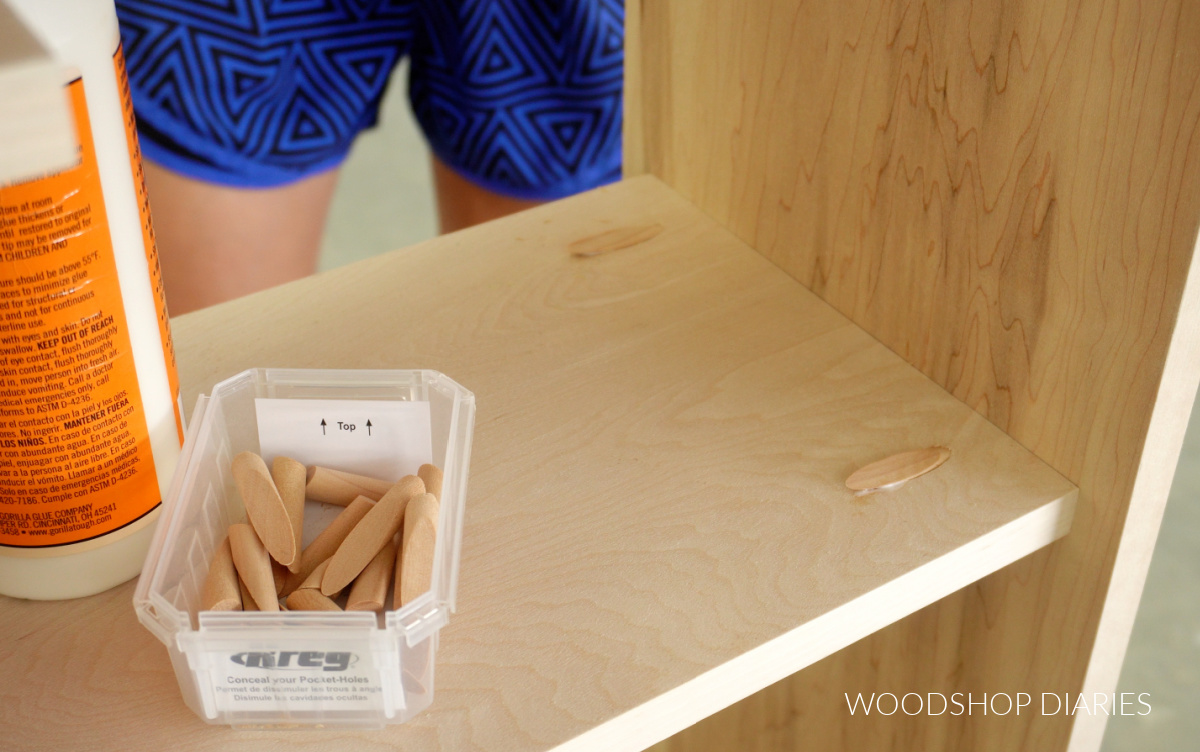
Once the glue had dried, I sanded these flush.
TIP: These precut plugs are usually a little long, so you may have to sand quite a bit off. Be careful not to sand too aggressively on the plywood surface. You can also cut these flush with a flush cut blade on an oscillating saw if you have one.
You can stain or paint however you’d like. Feel free to get creative! I kept mine super simple and just applied a couple coats of clear coat poly to seal it but keep the natural color.
And at this point, it was ready to fill up with all the things! See notes above about securing bookshelf to the wall.
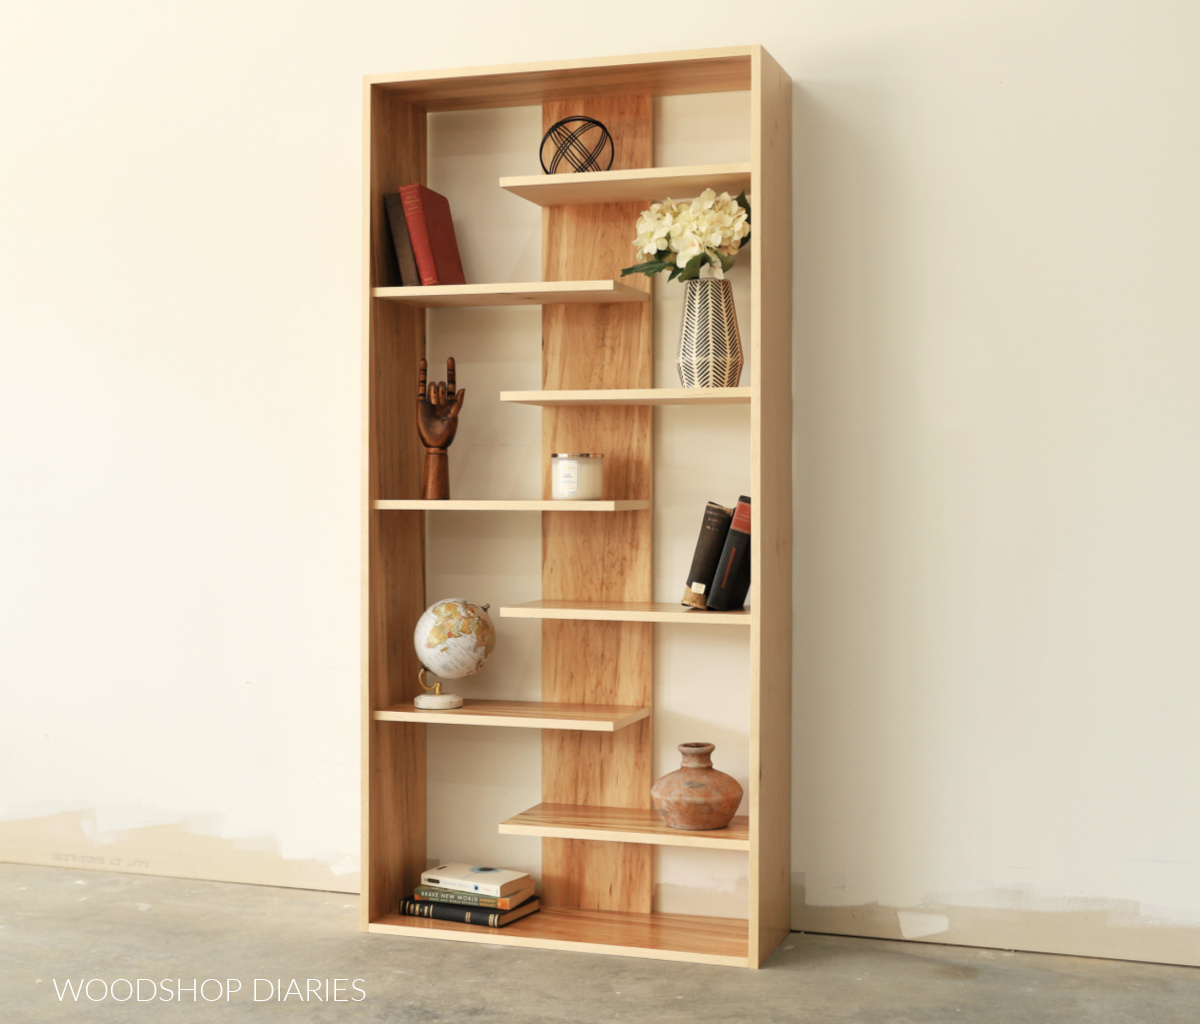
I love love love how simple, but unique this bookshelf is. It would be the perfect addition to a home office or living room. It’s even the perfect size for extra storage in a closet for clothes and/or shoes!
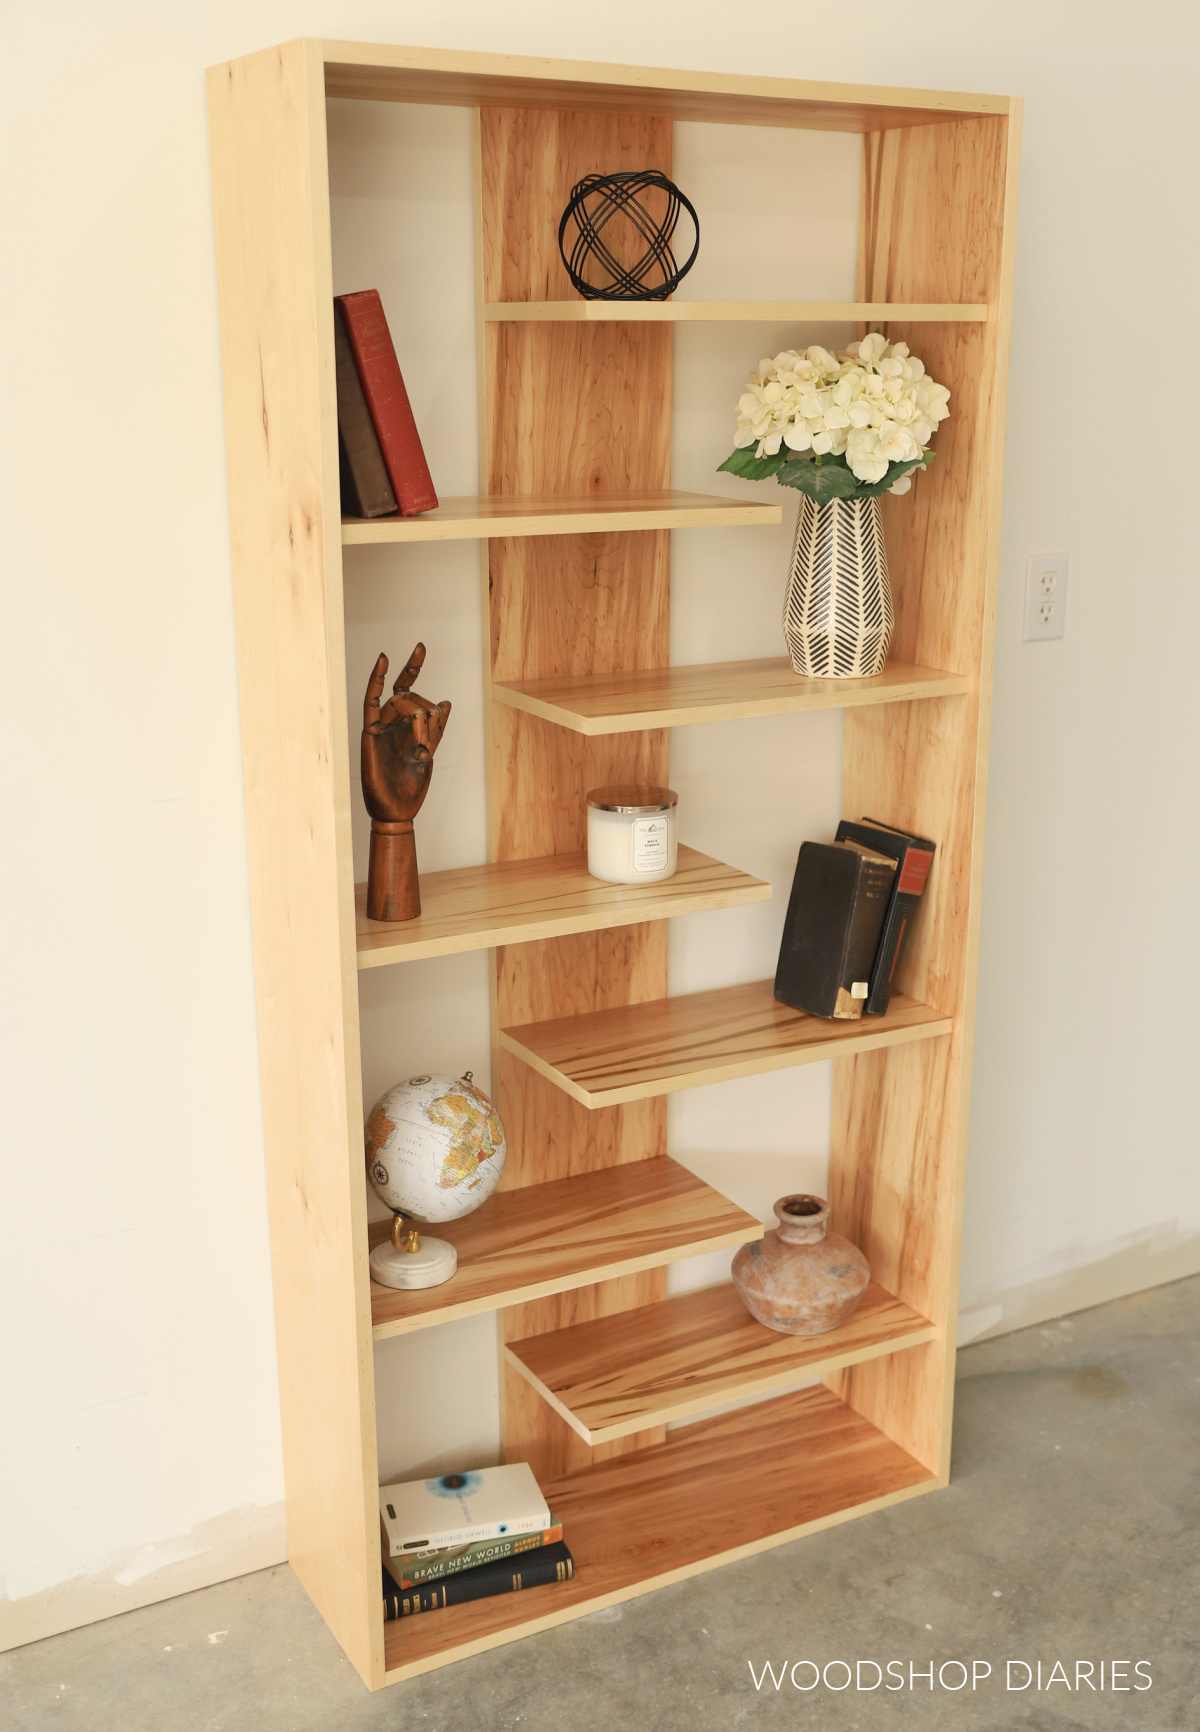
If you’d like to build your own, don’t forget to grab the printable building plans for a fun and easy weekend woodworking project!
Looking for more DIY Bookshelf Projects?
Love this project, but looking for more shelving project ideas? Here are a few favorites of different shapes and sizes you might enjoy as well!
Be sure to save this post for later by pinning it or sharing to your favorite social channel!
Until next time, happy building!


