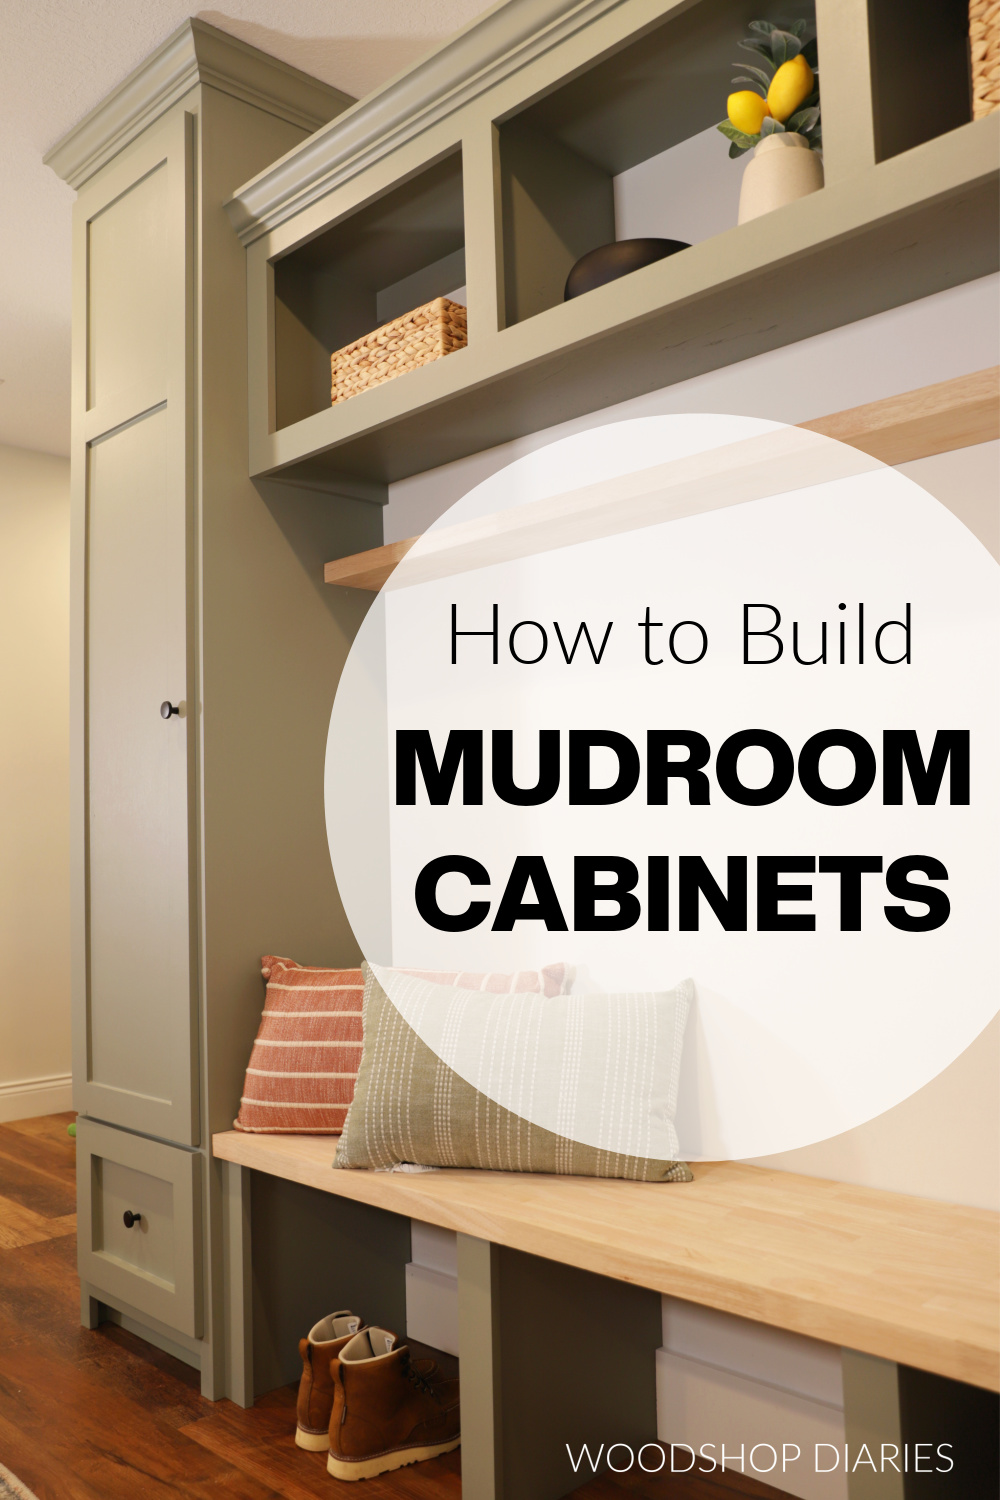
In this post, I’m sharing how I took an empty hallway and turned it into a built in mudroom with cabinets, a bench seat, and tons of storage!
To keep things simple, this project was built in four pieces, then assembled together once we got it inside.
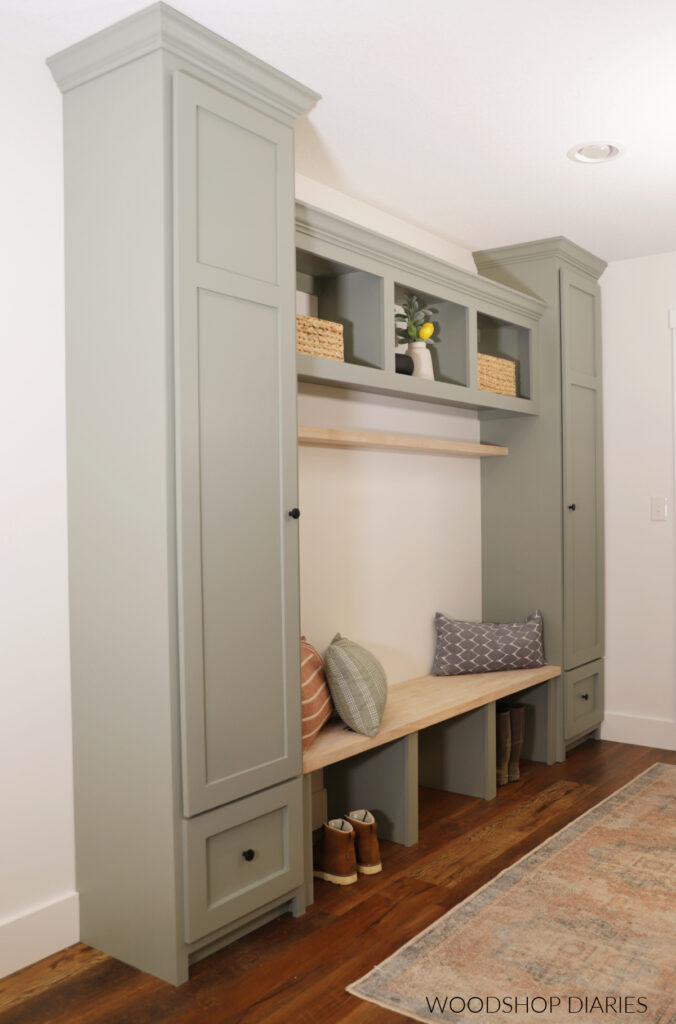
This addition was such a great upgrade to this previously empty hallway. The tall cabinets allow plenty of hidden storage to tuck away coats, hats, etc.
And the bench seat is a great place to store away shoes and boots.
The drawers and cubbies are perfect for keeping gloves, hats, dog leashes, etc stored away, but still easy to access before heading out the door.
If you’re ready to get building, let’s dive in to how this came together!
*This post contains affiliate links. See policies.
Things to consider before building DIY mudroom cabinets
This mudroom design has two tall cabinets that anchor each side, an open bench seat between them, and an open cubby cabinet in the middle. These pieces were assembled separately, then carried into the house to install.
Building everything in sections makes initial assembly and transportation (like carrying it from the workshop to the mudroom) much easier.
Of course, everyone’s needs and how they will use a space like this will vary, so feel free to customize these cabinets as you see fit. I used the tall cabinets for coat storage, so I added some hooks inside and a shelf above.
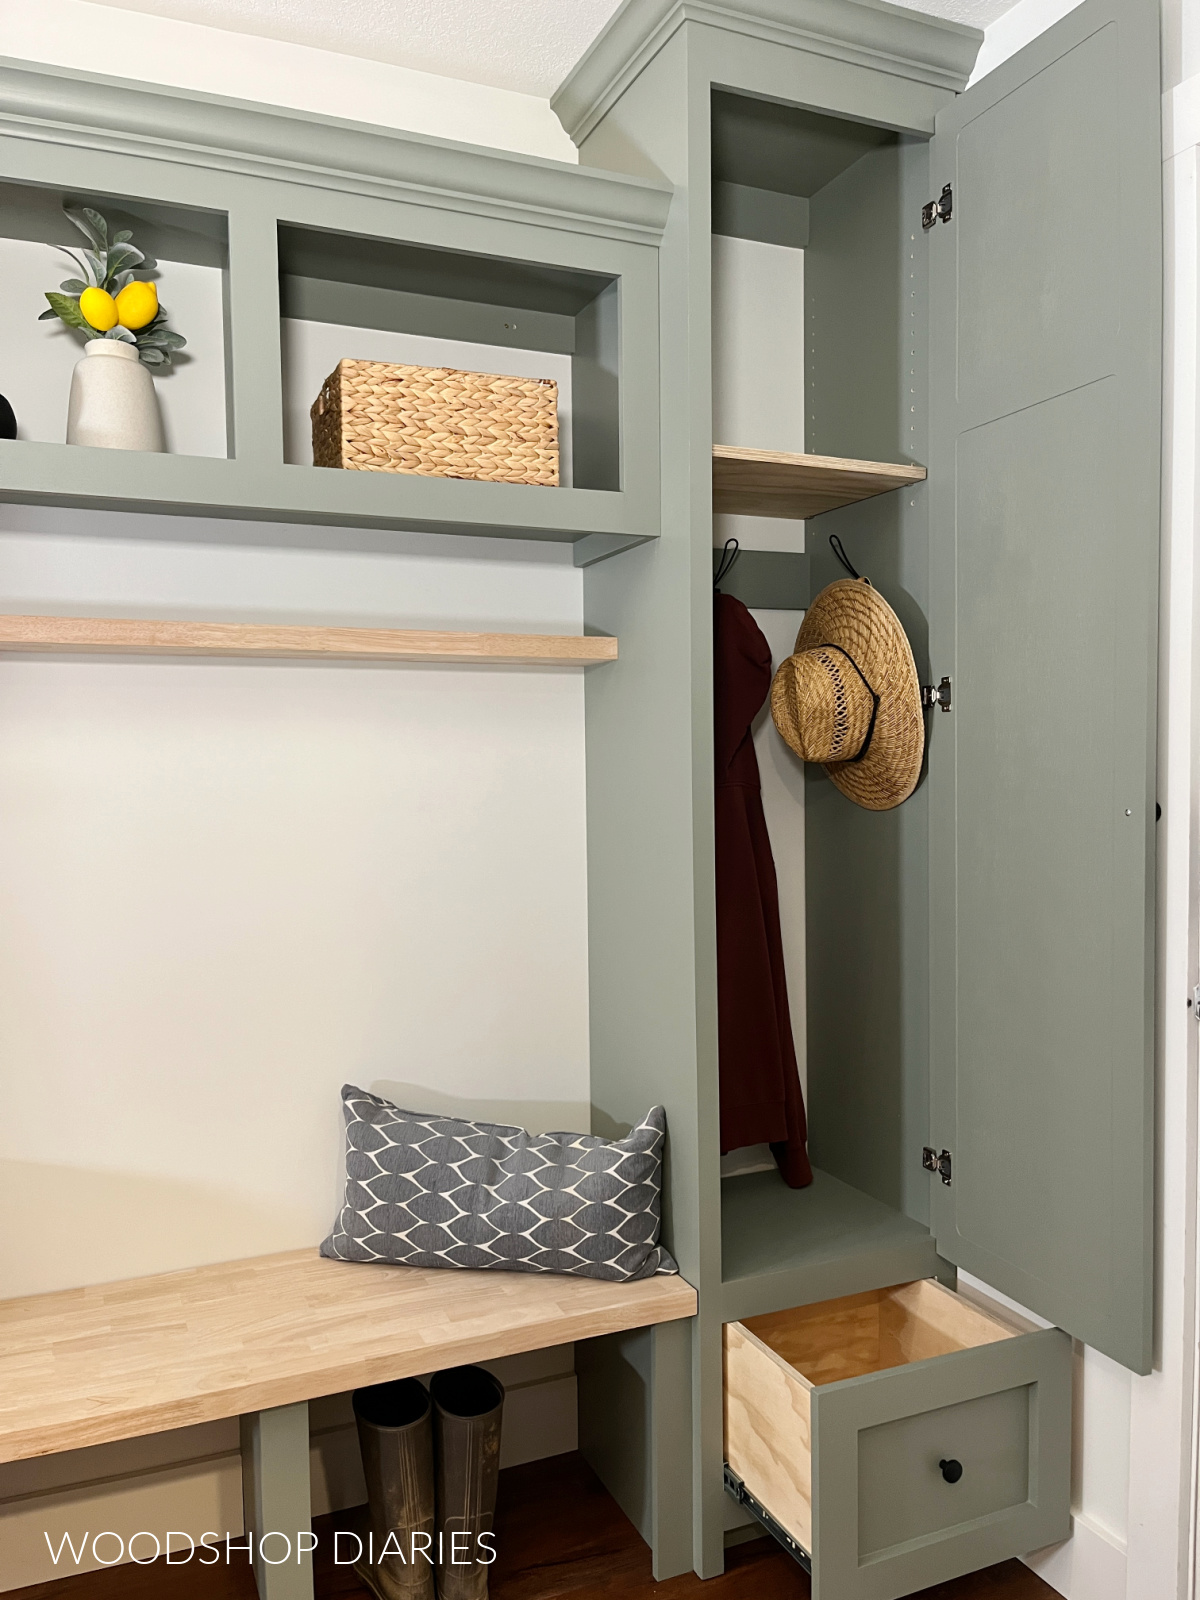
But, if you’d rather use the whole thing as shelves, or swap the hooks for a closet rod, both of those are great options and easy changes.
Overall Size of Mudroom Cabinets
The overall size of this project was approximately 96″ tall (including the crown molding) x 16 ⅝″ deep x 111″ wide. Depth and width here do not include crown molding.
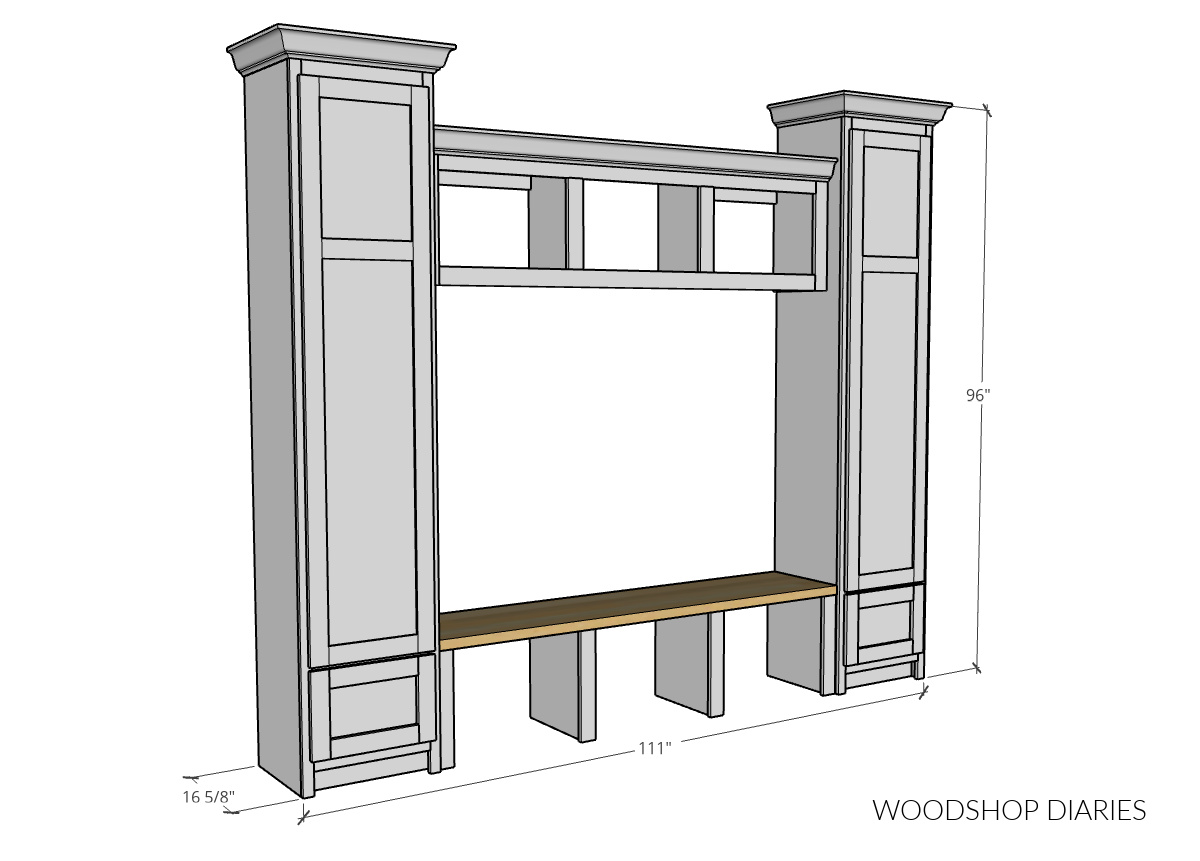
The ceiling height where I was installing these was 96″ (which is an 8′ ceiling), so I made the tall cabinets about 94″ tall and used crown molding to cover the gaps once they were in place.
The reason I didn’t make these cabinets a full 96″ tall is because once they get inside, they need to tilt upright into position.
If they were 96″ tall, there wouldn’t be room to tilt them upright without scraping the ceiling. However, if you had 9′ or 10′ (or higher) ceilings, this wouldn’t be an issue.
Bench Seat Material
I used a premade butcherblock countertop for the bench seat. It’s the same butcherblock used with these DIY garage cabinets.
This top was originally 25″ x 74″, but I trimmed it down to 16″ x 72″ for the bench seat. I used the leftover strip of this butcher block as a simple, shallow shelf underneath the middle cabinet, but that’s totally optional.
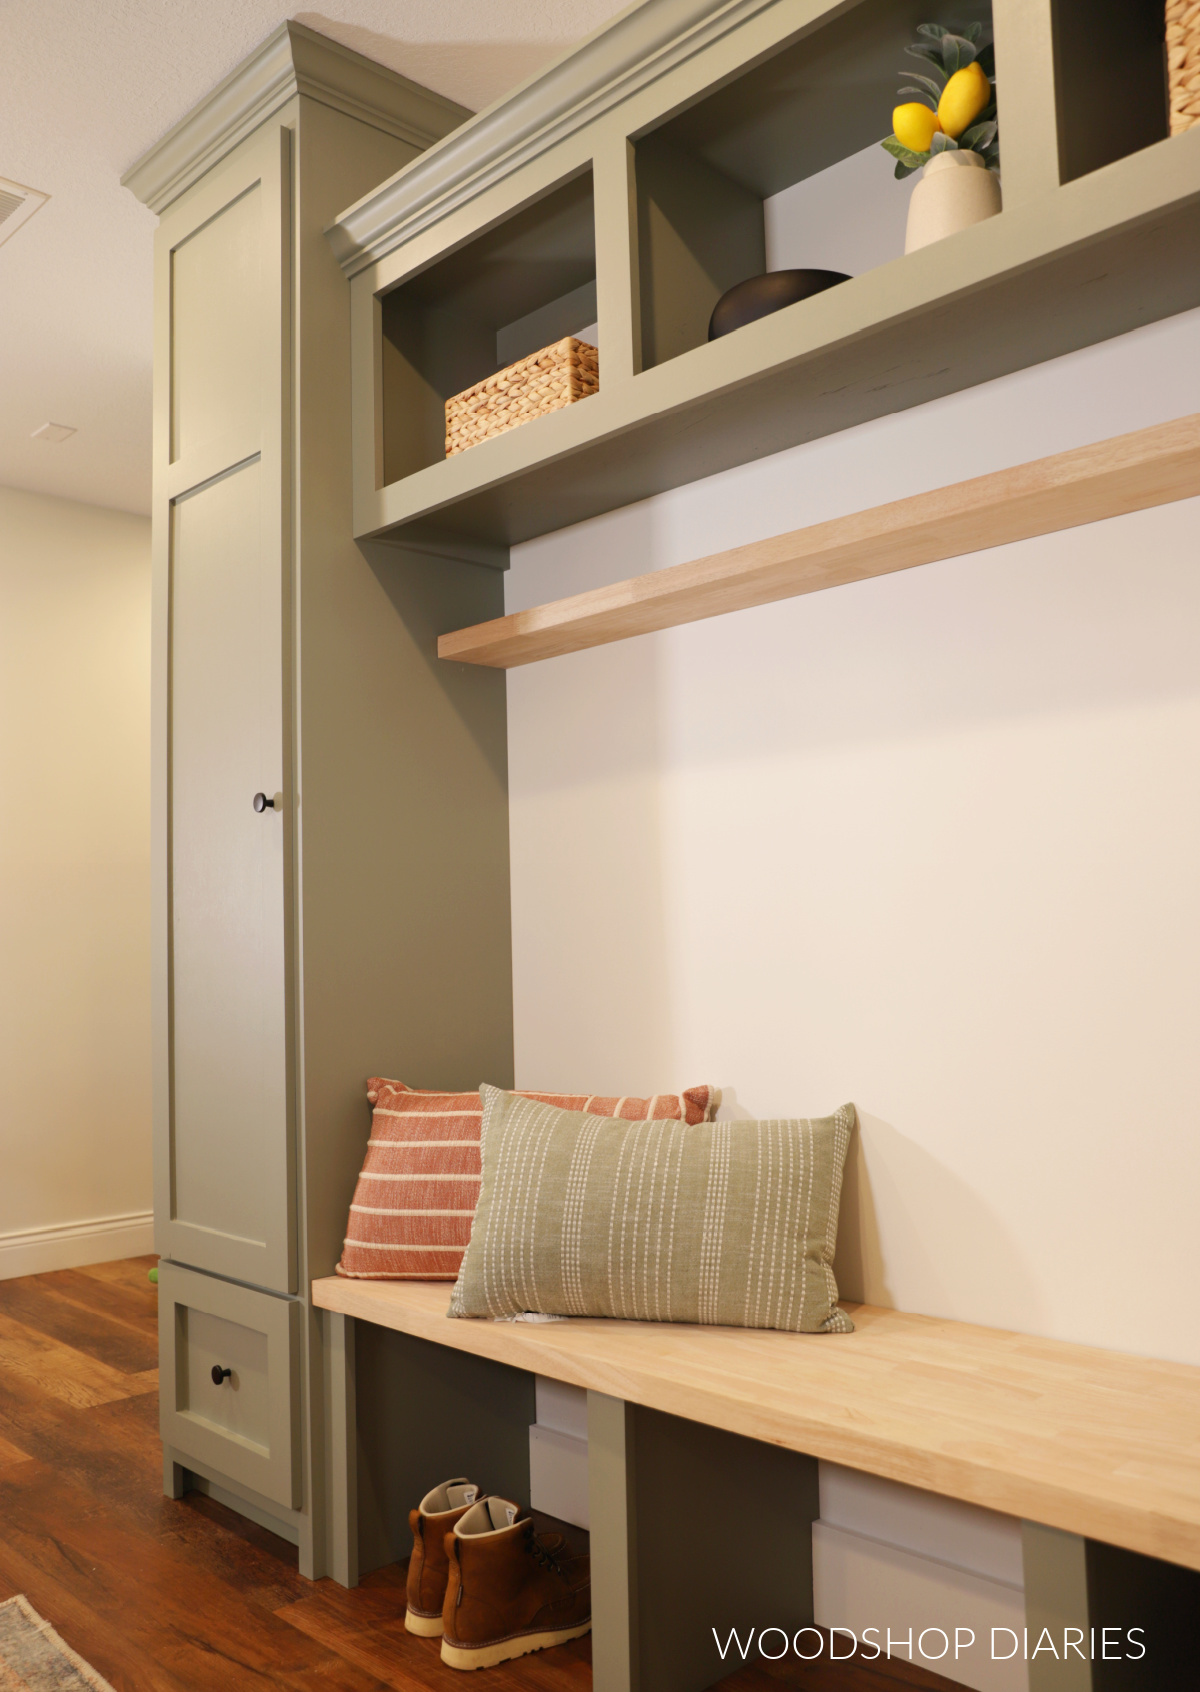
I thought it was a good way to use up the leftover material and this little shelf would be handy for throwing keys, gloves, phones, mail, etc on.
But you could also save the leftover wood and make something else with it later. To each their own 🙂
Also, I just noticed that Lucy’s dog toy is barely sticking out from behind the tall cabinet in the image above. It’s a squeaky stuffed ear of corn. I was going to go back and edit it out, but I left it in for a little laugh haha!
Cabinet Materials
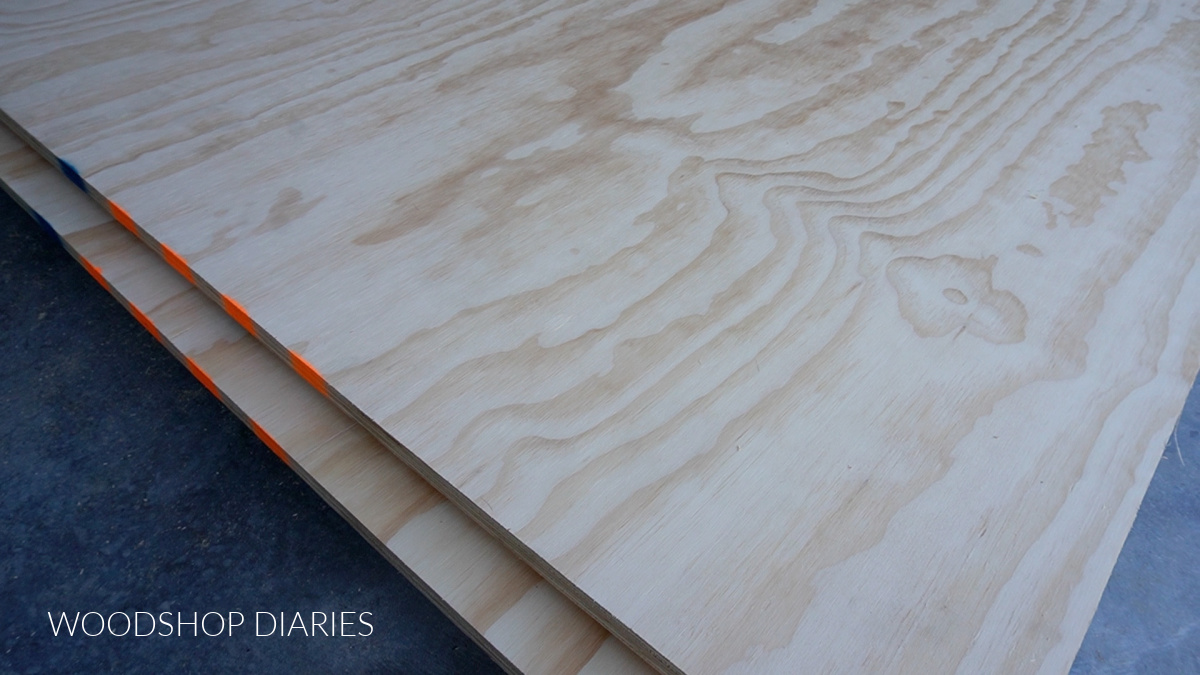
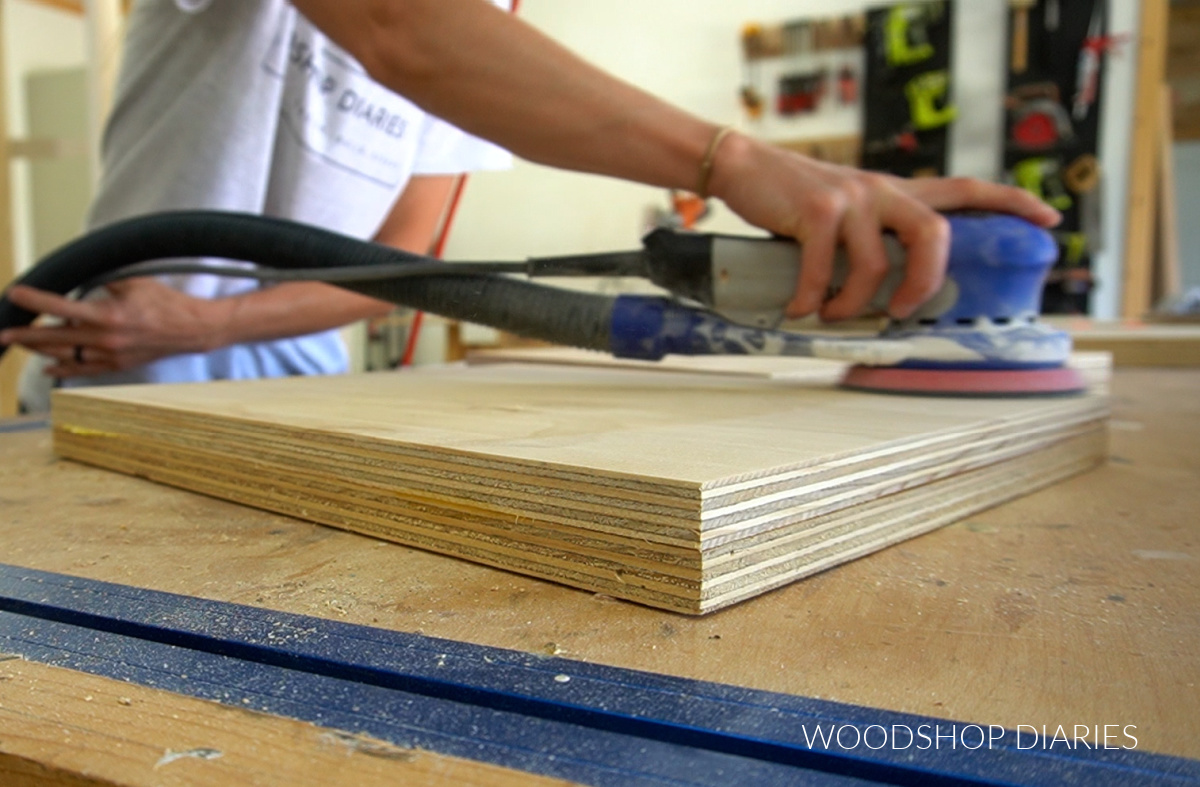
I used plywood to build these cabinets as it’s a really great material for projects like this. In this case, I used a sanded pine plywood because I was painting and this saved a little money.
Learn how to choose the right plywood for your projects here.
I used preprimed 1x2s, 1x3s, and 1x4s for the face frames on the front of these cabinets and for the door frames and drawer fronts.
Since I was painting, using preprimed lumber saved me some time during finishing since it’s already smooth and primed. However, unfinished 1xs would work just as well here if you wanted to prime them yourself.
Learn how to finish raw wood furniture here.
Love new DIY projects, plans, and how tos? Join our newsletter to be the first to know when new posts are out!
How to Build Mudroom Cabinets
People always ask how long a project took to build. Building mudroom cabinets is a fairly large project. This took me about a week from start to finish–and painting was a large portion of that haha.
So this may not be a project you can complete in a weekend. But it’s not a difficult build, and I’ll try to break it down in easy to digest sections below.
I built this in sections in my workshop, then carried these pieces into the house to install. This kept things easily manageable (in both size and weight), so I’ll discuss each section below.
If you prefer to watch, I put together a full build video of the process plus some bloopers, tips and behind the scenes here:
Like watching projects come to life? Subscribe to my YouTube Channel for the latest project videos, and lots of bloopers along the way!
For detailed dimensions, diagrams, and cut lists, grab the printable building plans for this project here:
You may find these resources helpful throughout the build:
Tools & Materials:
Materials:
- (4) 4×8 sheets ¾″ plywood
- (1) 4×8 sheet ¼″ plywood
- (1) 25″ x 74″ butcherblock countertop (see notes above)
- (4) 1x2x8 boards
- (9) 1x3x8 boards
- (2) 1x4x8 boards
- (2) 8′ pieces crown molding (3 ⅝″ crown molding works well)
- (3) pair concealed hinges for ½″ overlay doors on face frame cabinets
- (2) pair 16″ ball bearing drawer slides
- (4) knobs/handles
- Shelf Pins
- 1 ½″ dowel pins
- 1 ¼” pocket hole screws
- 1 ¼” wood screws
- 1 ¼” brad or finish nails
- 3″ wood screws (to install)
- Wood Glue
- Figure 8 brackets or 90 degree corner brackets
- Shims
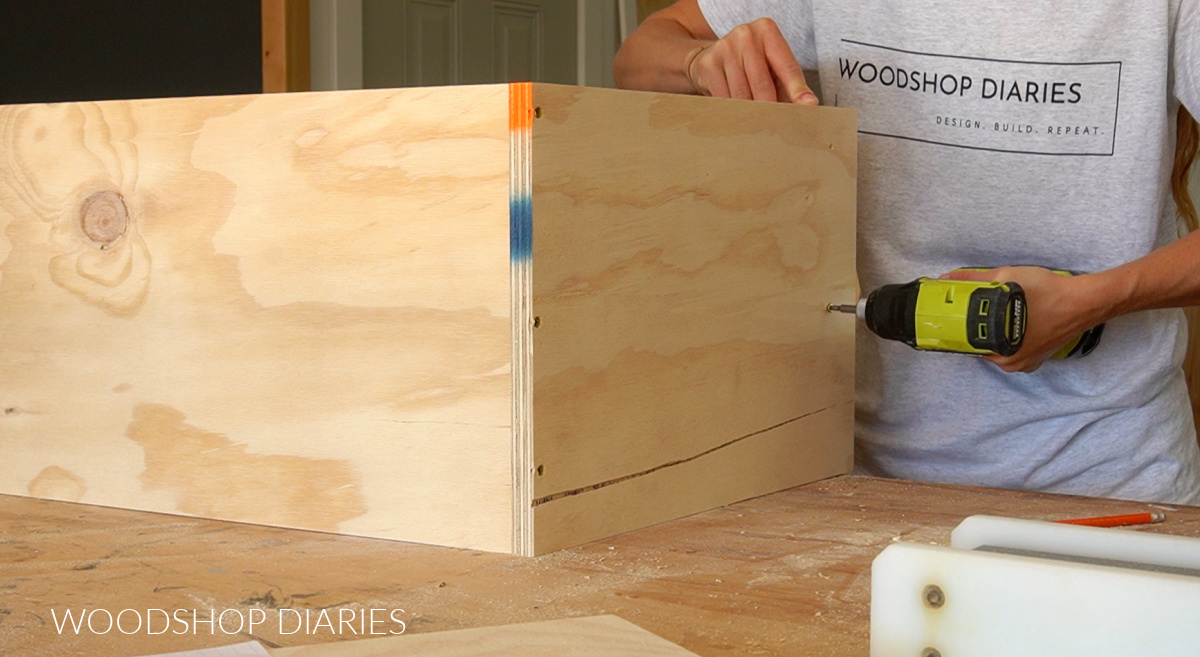
Step 1: Assemble Tall Mudroom Cabinets
I made two tall cabinets to kind of “anchor” each side of the mudroom. These cabinets contain a small drawer at the bottom and the top section is open to allow you to either add adjustable shelves, or use for hanging coats/clothes.
I’ve provided the detailed measurements in the printable plans here, but, first, I cut down ¾″ plywood to assemble these cabinets from.
RELATED: How to cut plywood sheets.
I made these approx. 16″ deep and 20 ½″ wide overall, but you can certainly customize as needed to fit your space.
Then, I assembled a basic cabinet carcass using pocket holes and screws. Learn how to use a pocket hole jig here. I added a panel at the top, and two toward the bottom–one below and one above the drawer.
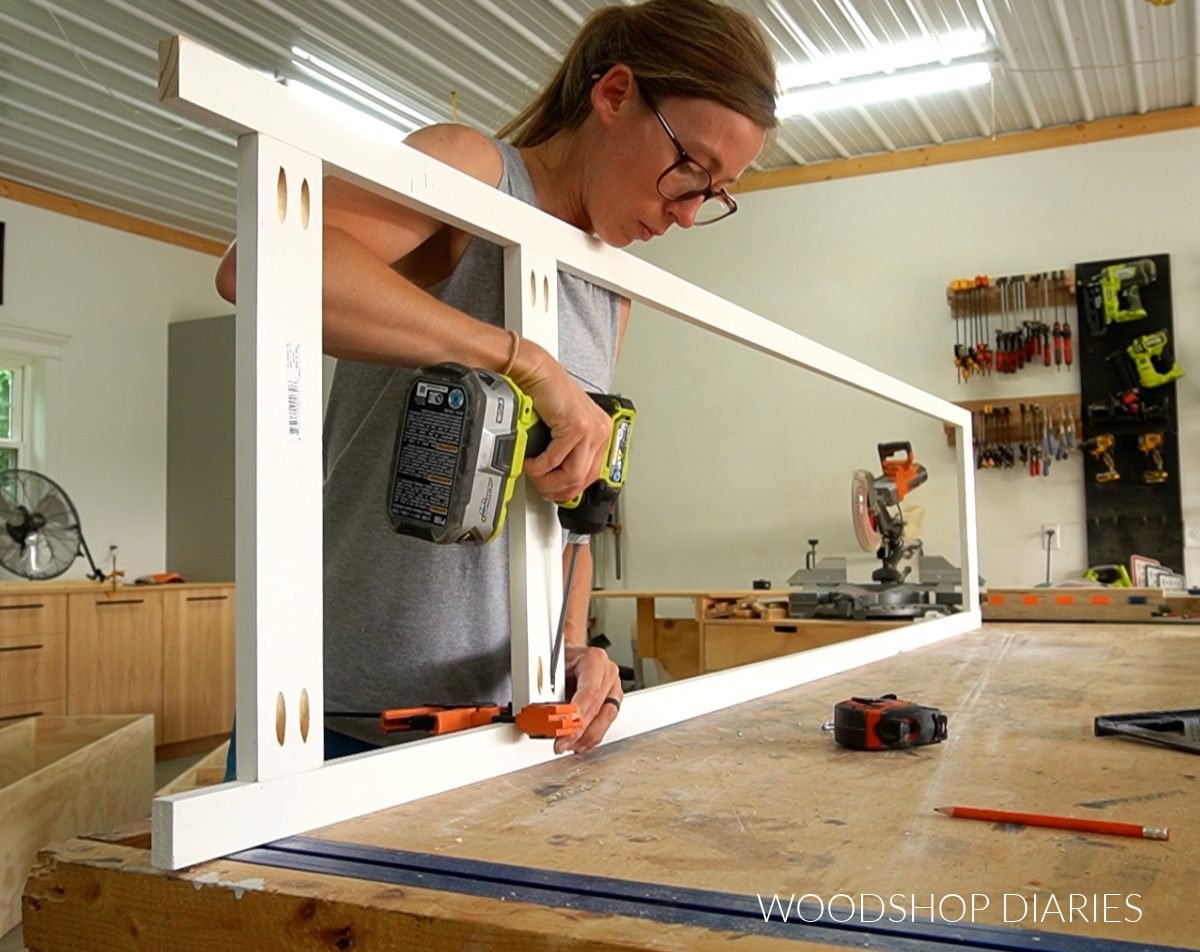
I built two of these–one for the left and one for the right of these built ins. Once they were both together, I assembled a basic face frame using 1x2s on the sides, a 1×4 at the top and 1x3s above and below the drawer section.
Just in case you wondered…The reason I used a 1×4 at the top is to allow for some extra wiggle room for the crown molding once installed.
I glued and nailed this onto the front of both tall cabinets to frame it out and cover the exposed plywood edges.

Don’t forget to putty over the joints, seams, and nail holes and sand once dry.
Step 2: Add Doors and Drawers
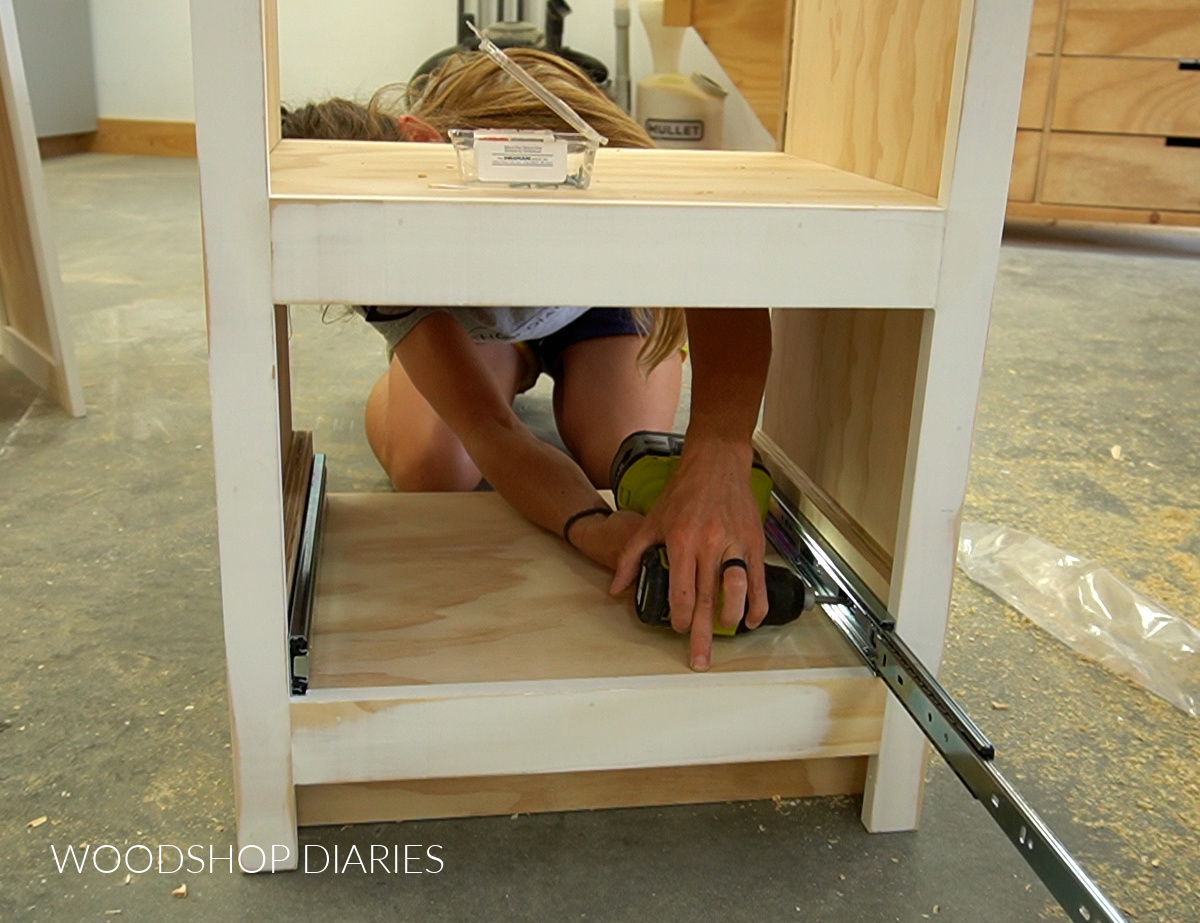
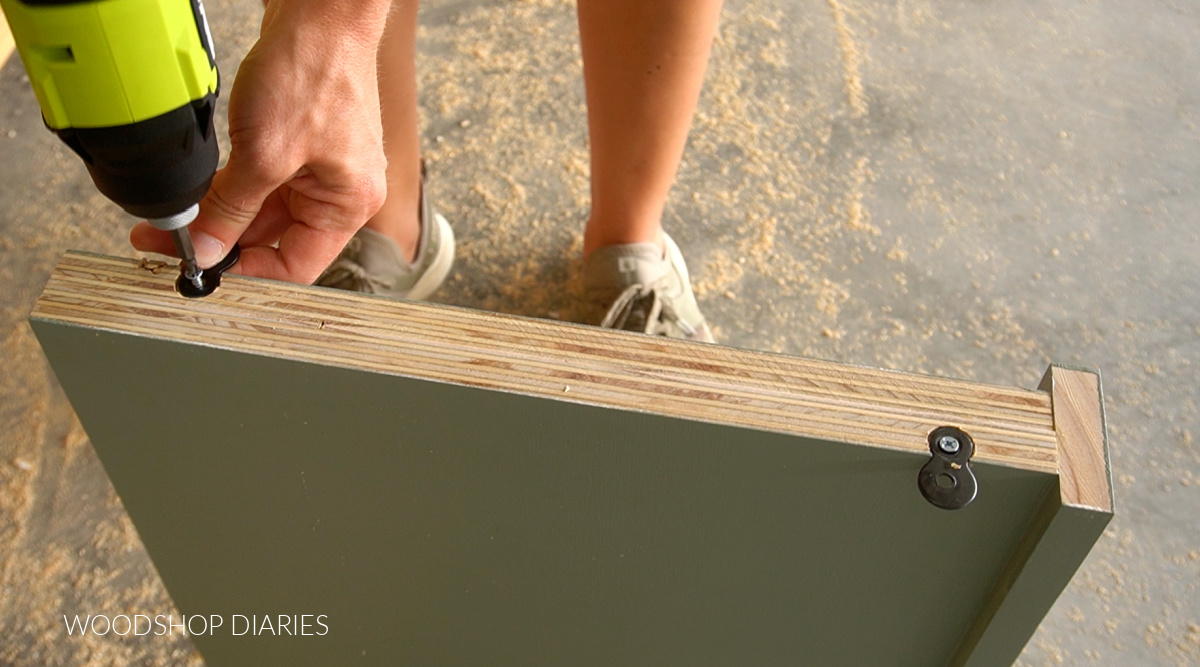
Next, I added a drawer into the bottom section of each cabinet. I used 16″ ball bearing drawer slides and secured these to the sides of each cabinet.
RELATED: How to install drawer slides
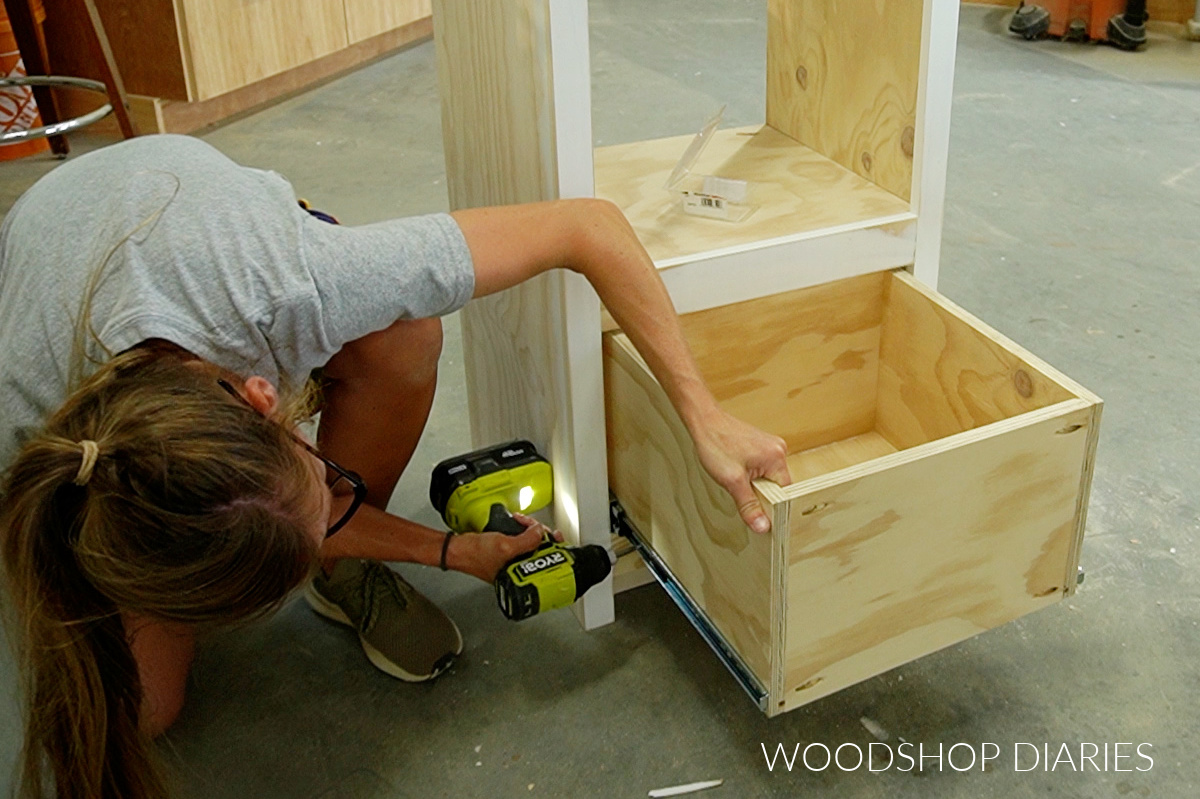
Then, I assembled and installed a simple drawer box onto them. Note that I drilled the pocket holes for these drawers as close to the top and bottom as possible so that when I add the drawer front, it’ll cover these holes.
RELATED: How to build a drawer box
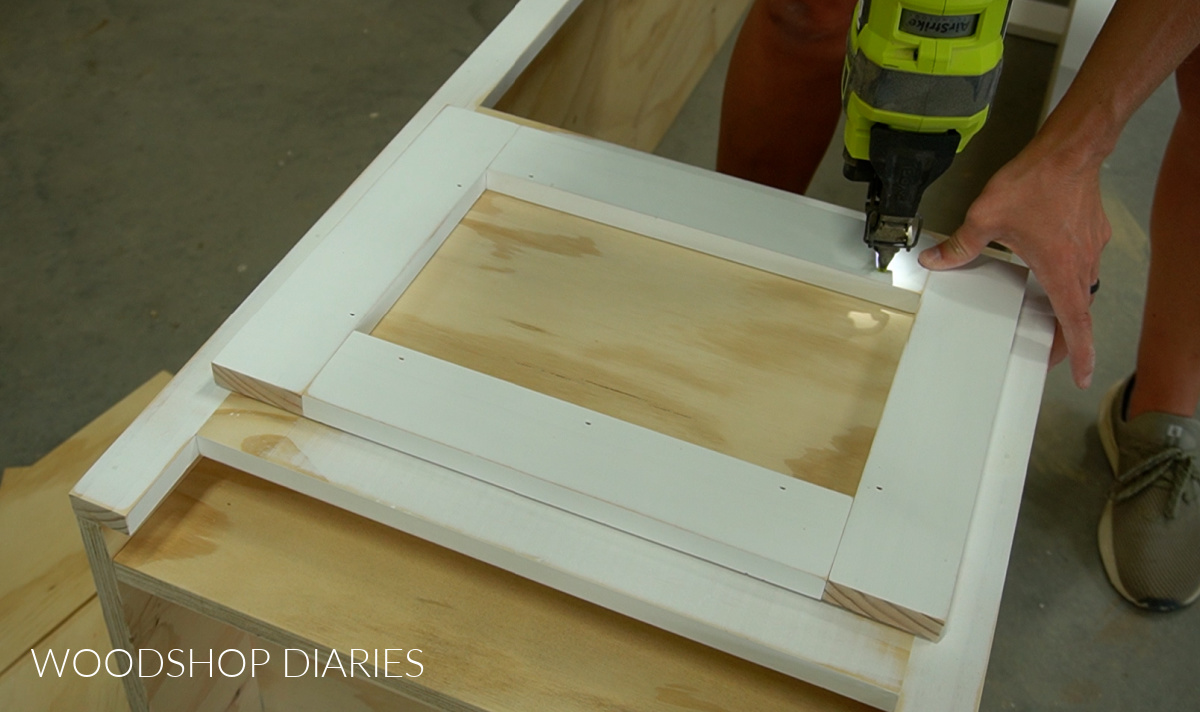
Speaking of drawer fronts, I assembled a drawer front “frame” using 1x3s and pocket holes and screws. There are many ways to make a drawer front, so feel free to get creative with your own design.
I glued and nailed this frame onto the drawer box making sure the pocket holes were covered. Find detailed diagrams, dimensions, and cut lists for this project in the printable plans.
To cover the open section above, I added a tall door onto the cabinet. There are many ways to build a cabinet door, but for this, I tried something different.
I used wood glue and dowels to assemble a door frame using 1x3s. You could certainly use pocket holes and screws to assemble the frame, however, after the glue was dry, I routed a ⅜″ rabbet on the back side of the openings.
RELATED: How to use a router
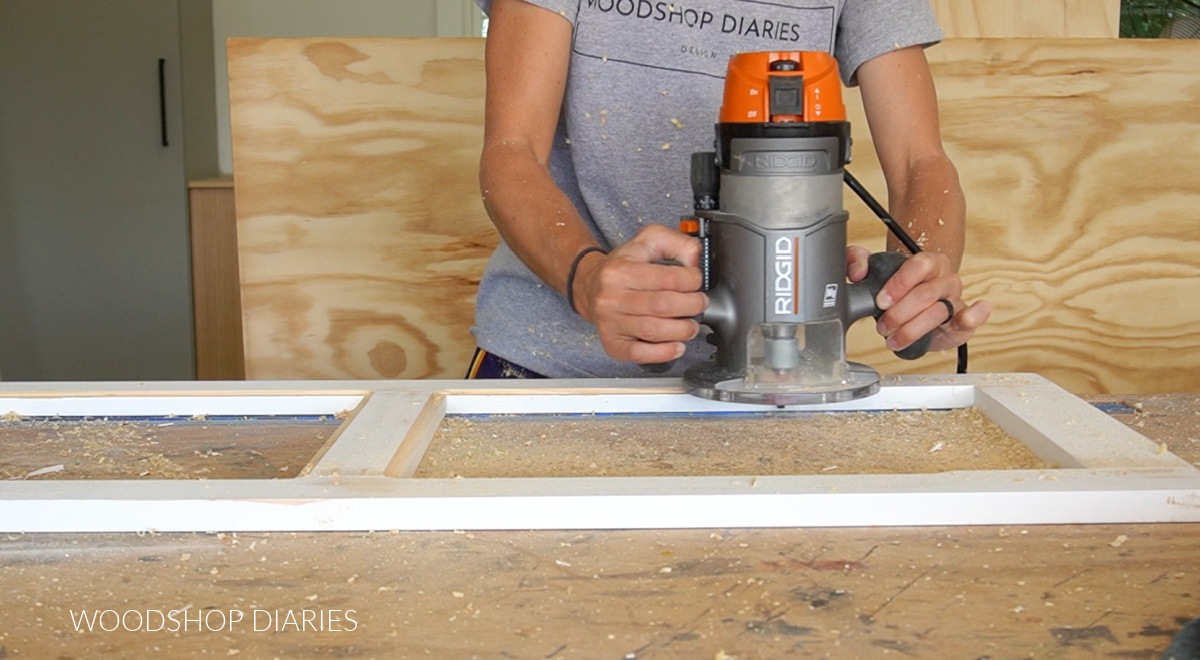
I didn’t want to take a chance on routing into a screw, so I opted against pocket holes.
Once these rabbets were cut, I glued ¼″ plywood panels into these open sections to complete the doors.
I’ve never tried this method of door assembly before. It wasn’t difficult, but if painting, I suggest making sure to caulk where the panels meet the frame on both the front and back for the smoothest results.
I waited until after painting to install the doors, but once I had painted everything, I installed three ½″ overlay concealed hinges for face frame cabinets onto the doors.
RELATED: How to install concealed hinges
I tried just using two hinges per door, but since these were so large, it needed three–so don’t skip the third hinge!
Then I installed the doors onto the cabinet and finished up by drilling shelf pin holes and adding a shelf.
RELATED: How to add shelves using a shelf pin jig
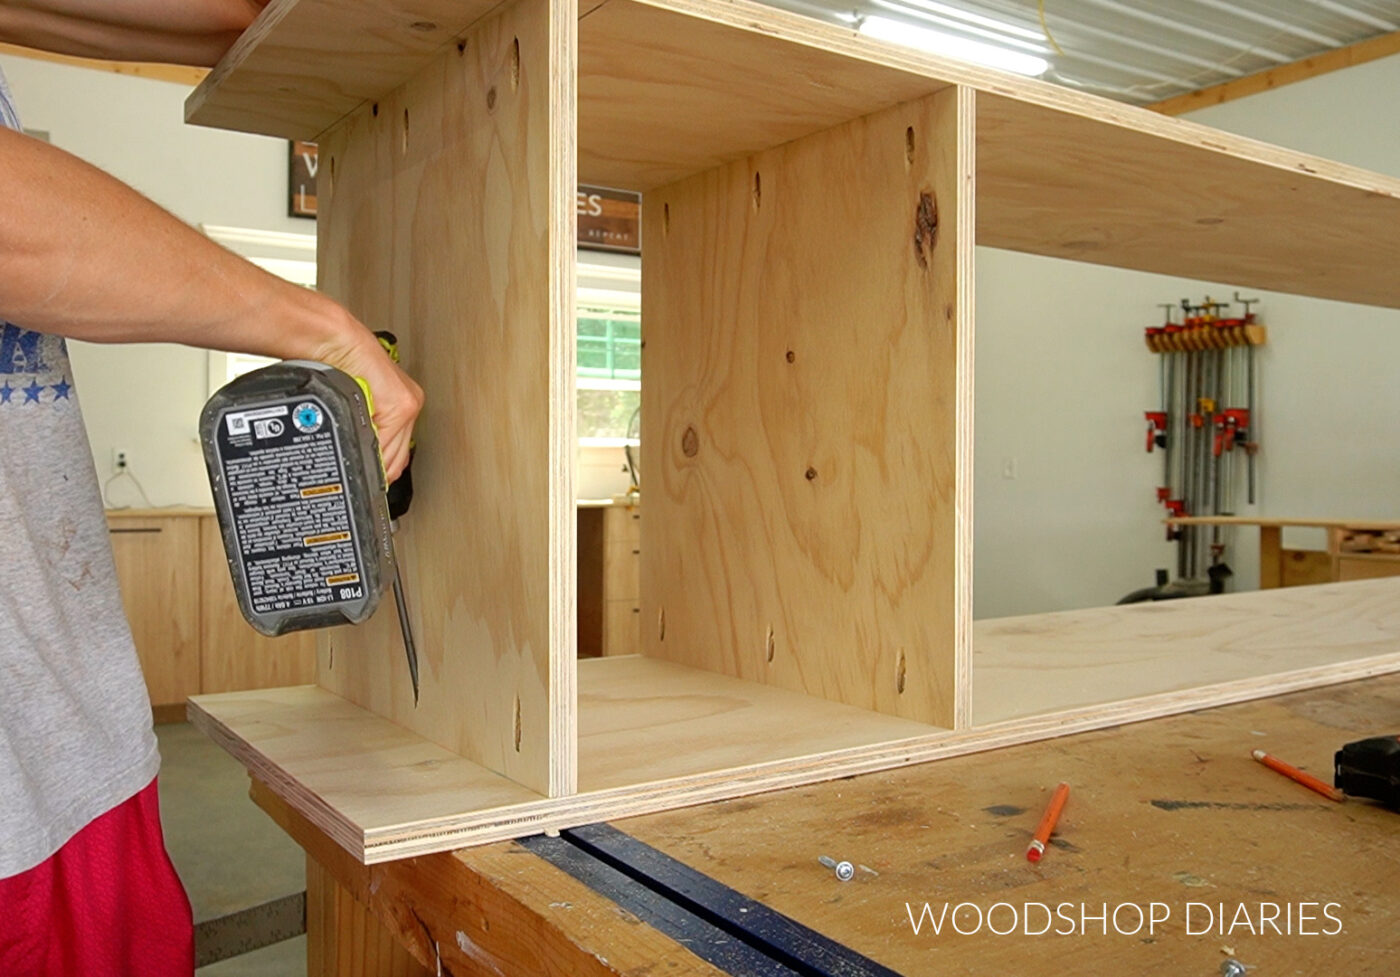
Step 3: Assemble Middle Cubby Cabinet
The middle open cubby cabinet is much simpler than the taller cabinets as it consists of just a cabinet box and a face frame.
I made this cabinet 12″ deep so it is a little inset the two tall cabinets it will go between. This just adds a little extra dimension to the project.
I cut ¾″ plywood pieces to assemble a cabinet about 18″ tall x 72″ wide. Feel free to customize to fit your own space.
You can certainly use pocket holes and screws to assemble this cabinet, but no matter where you put them, they’ll be visible in the finished project. So instead, I opted to simply screw these pieces together through the sides, top and bottom.
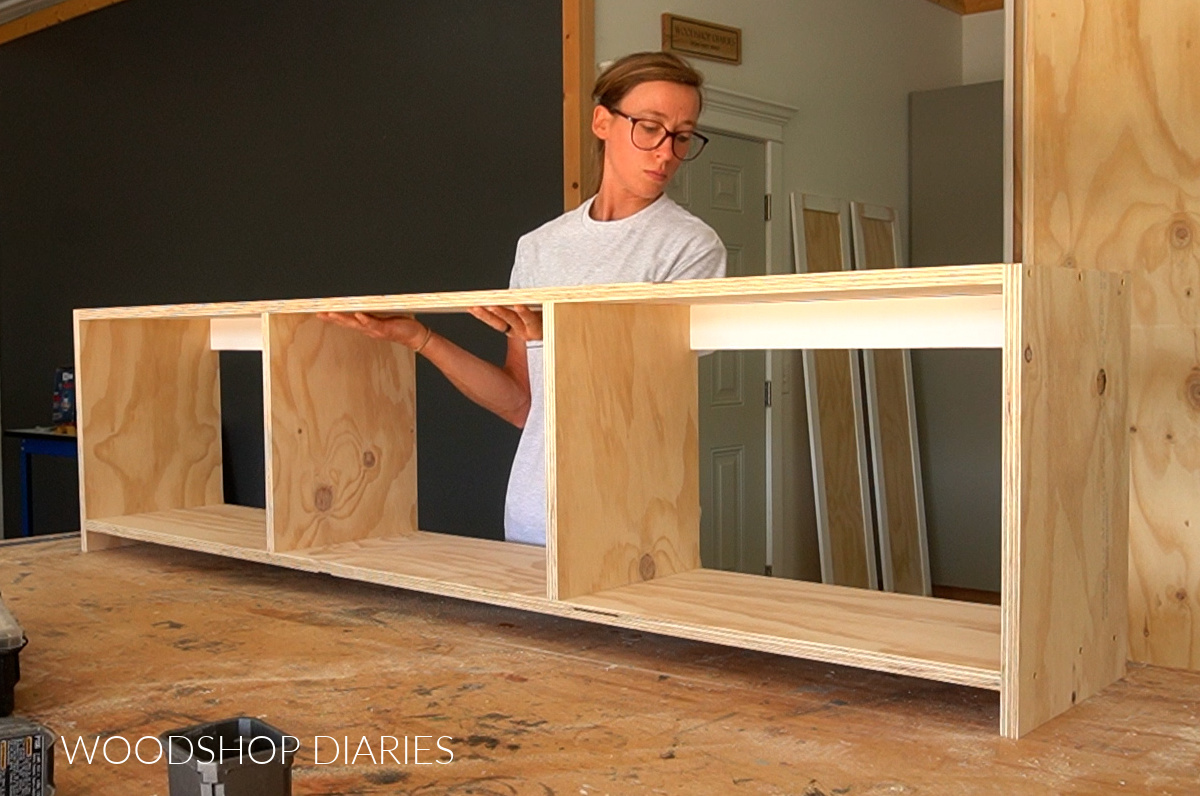
I separated this cabinet into three sections by adding two evenly spaced dividers and I also added two 1x3s at the back of the left and right sections to be able to secure it to the wall later during installation.
After the cabinet was together, just like with the tall cabinet, I assembled a face frame to glue and nail on to the front of this. This face frame was all 1x3s.
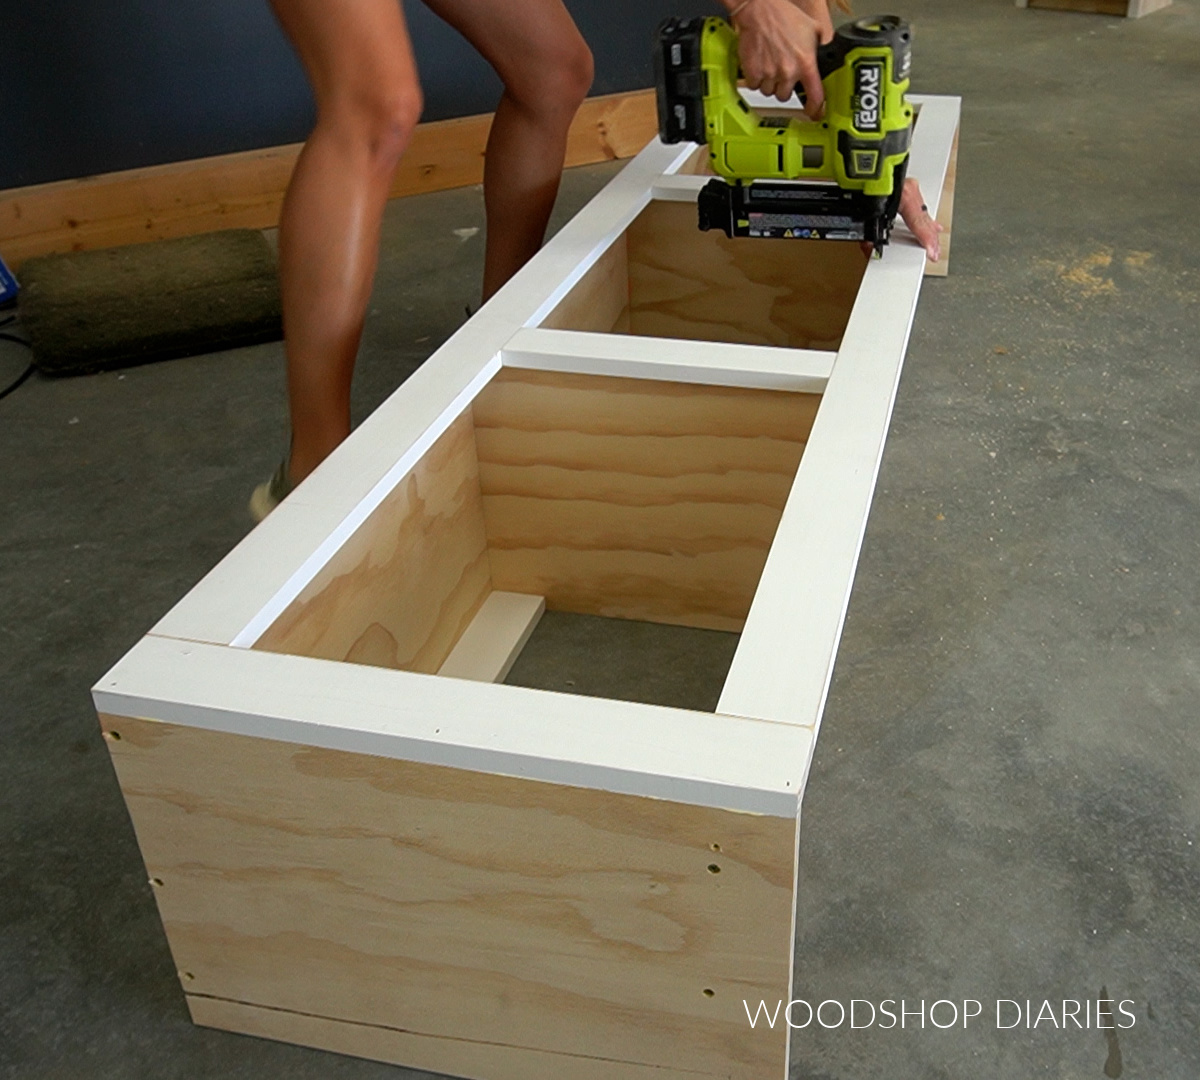
Step 4: Assemble Mudroom Bench Seat
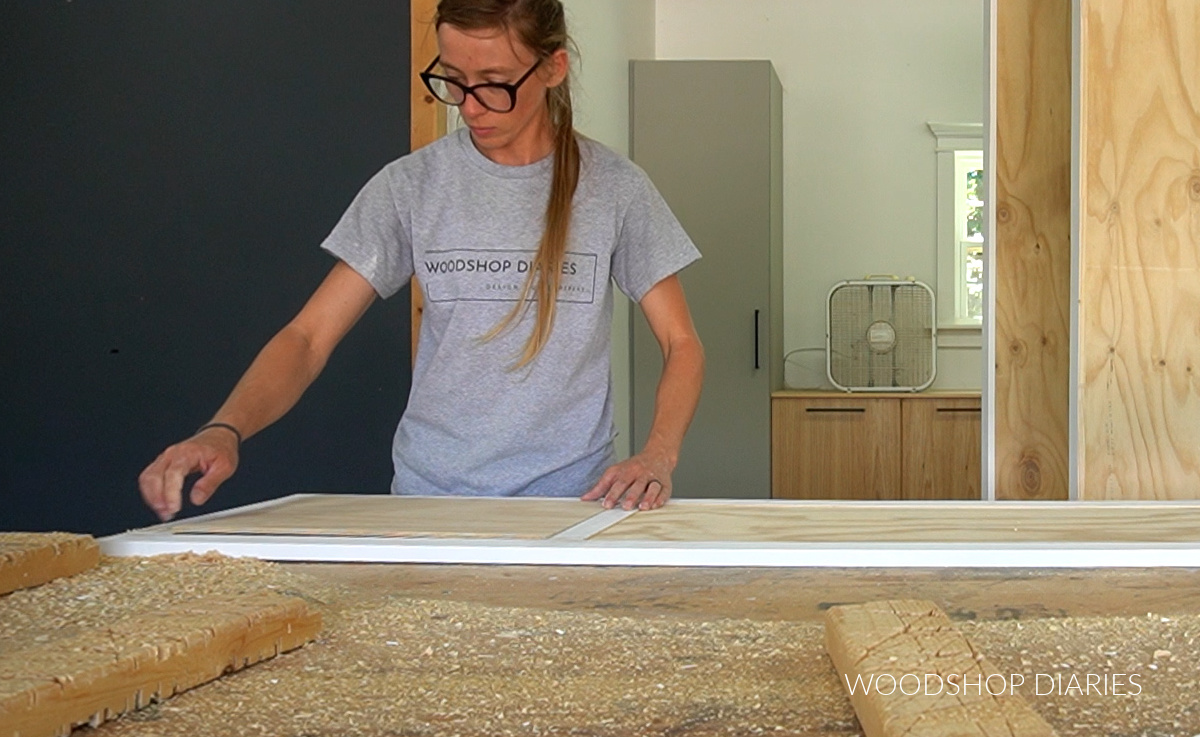
I mentioned earlier that this bench seat top was cut from a butcherblock countertop. So first, I ripped my countertop down to 16″ x 72″ to make the bench seat.
Then, I cut 8 pieces of ¾″ plywood about 15″ x 16 ½″ and glued them in pairs so it was about 1 ½″ thick. Two of these will go on each end of the bench seat, and the other two will be evenly spaced in the middle.
I glued and nailed 1x3s onto the fronts of these supports to cover the plywood edges and so that they would kind of “match” the cubby cabinet that goes above it.
You can install these to the bench seat top several ways. 90 degree corner brackets would work fine, but I didn’t have any in the shop, so instead I used these figure 8 fasteners.
I installed these onto the top of the bench seat supports, then secured them to the bench seat from the bottom side.
Prefer to print? Grab the printable building plans here.
Step 5: Install Built In Mudroom Cabinets
At this point, the various sections of the mudroom cabinets are assembled and it’s ready to install. Before installing, make sure to locate and mark the wall studs in the area you are working in.
You’ll need to remove the baseboard in this area as well so the cabinets can sit flush against the wall.
I suggest painting everything before installing–it’s not required, but I personally think it makes things much easier. I primed and painted my cabinets in SW Evergreen Fog.
RELATED: How to finish raw wood furniture
I recommend installing one of the tall cabinets first by scooting it in place, shimming if needed, then using wood screws through the back supports into the wall studs behind it.
Once one tall cabinet is in place, I recommend adding the bench seat next. I secured the end of the bench seat to the tall cabinet with screws through the inside of the drawer section. You’ll have to slide the drawer out in order to access it.
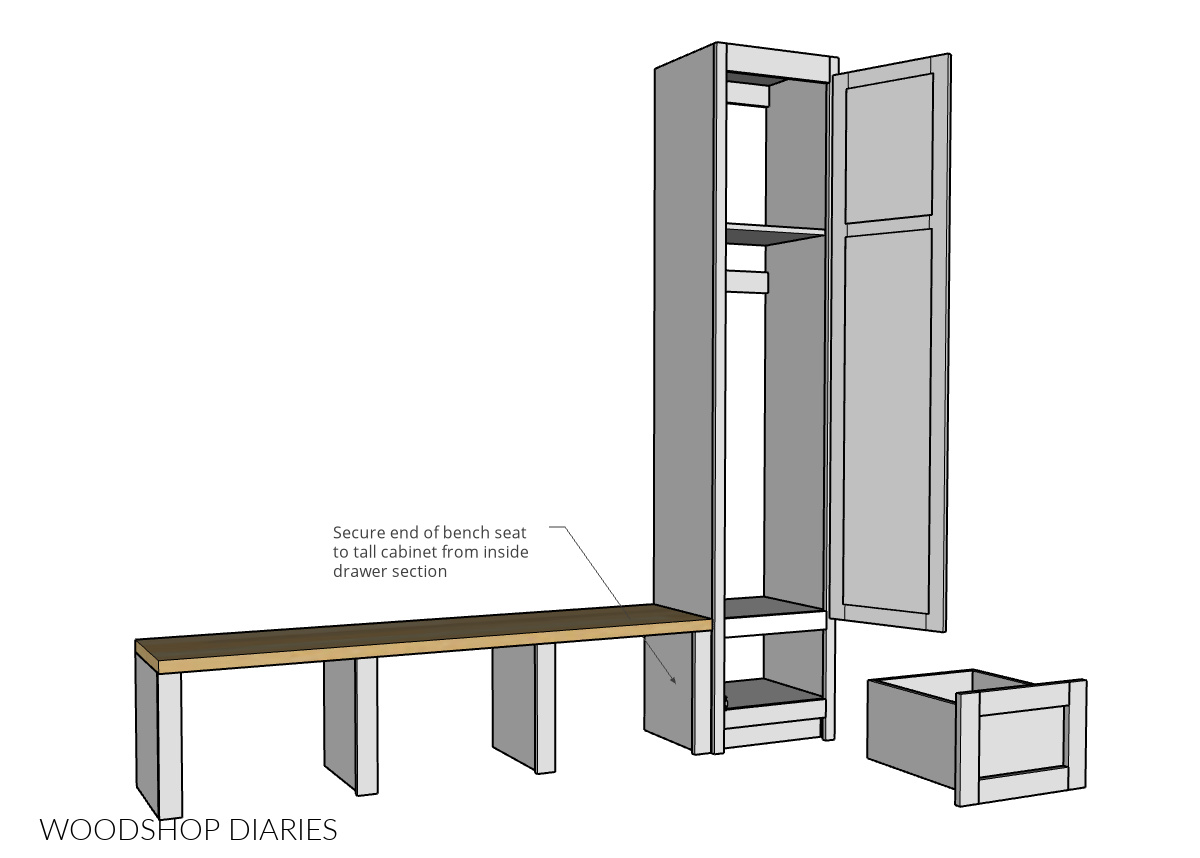
Then, you can use some scrap wood pieces to help you position the middle cubby cabinet about 48″ above the bench seat. This cabinet should be secured to the wall studs behind it and to the tall cabinet beside it.
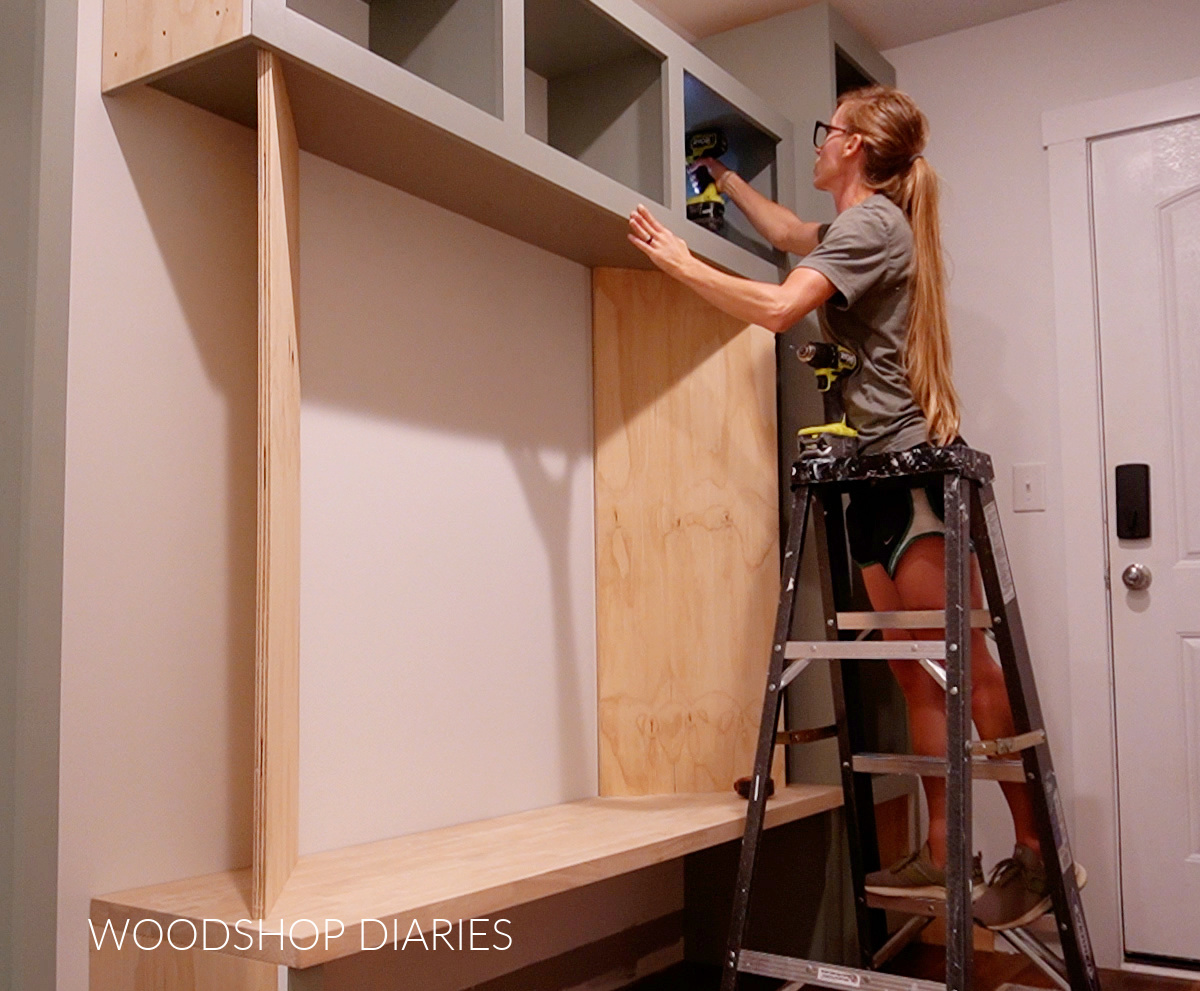
Once I had the middle sections in place, I scooted the other tall cabinet up to them and secured it to the wall studs, the bench seat, and the middle cubby cabinet.
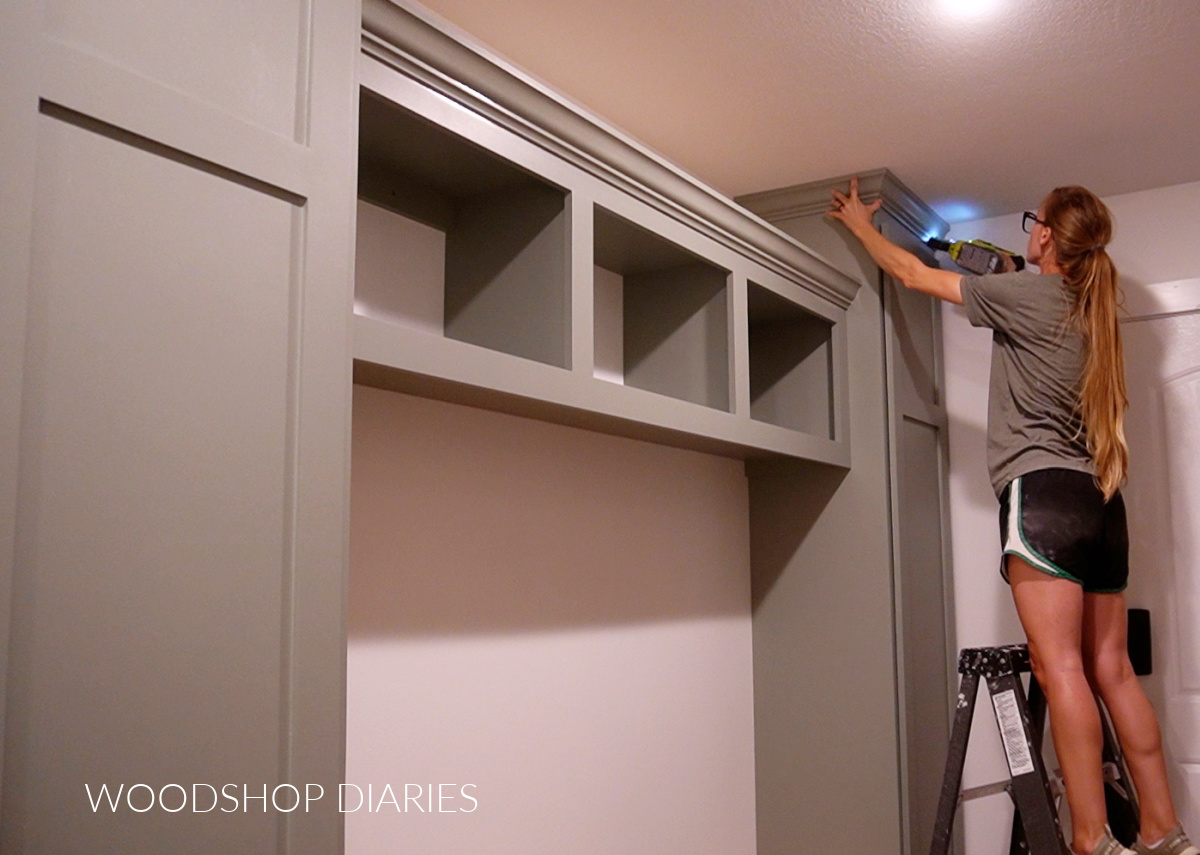
To wrap things up, I cut to fit and brad nailed crown molding around the top of the tall cabinets and along the top of the middle cabinet.
RELATED: How to cut and install crown molding
Then, I reinstalled the baseboard to but up to the cabinets and to run between the bench seat supports at the back.
Tips on Finishing and Installation
Once everything is installed, putty, caulk, touch up paint as needed. There are always lots of little finishing details with installation haha.
Here are a few tips you might consider when installing this project.
When installing the crown molding, cut it and make sure it fits well, but don’t install yet. Label each piece, paint them separately, and once the paint is dry, nail them in place. This will minimize the chances of you getting paint on the ceiling.
If the middle bench seat supports are “floating” or don’t fit snug once installed, use some shims on the bottom to tighten them up. If there are gaps on the floor, add some shoe or quarter round molding to cover them.
If the floor isn’t square to the walls (no house is perfect, and this is a common issue), you may need some shims during installation of the tall cabinets. If you have large gaps either on the wall or on the floor, simply cover these with cove, quarter round, shoe or other molding. No one will ever notice 😉
I recommend painting all pieces separately–the tall cabinets, the doors, the drawers, the middle cubby cabinet, the bench seat supports before putting them all together and before installing. This just makes things easier and minimizes the chances of getting paint on the floor, walls, or ceiling.
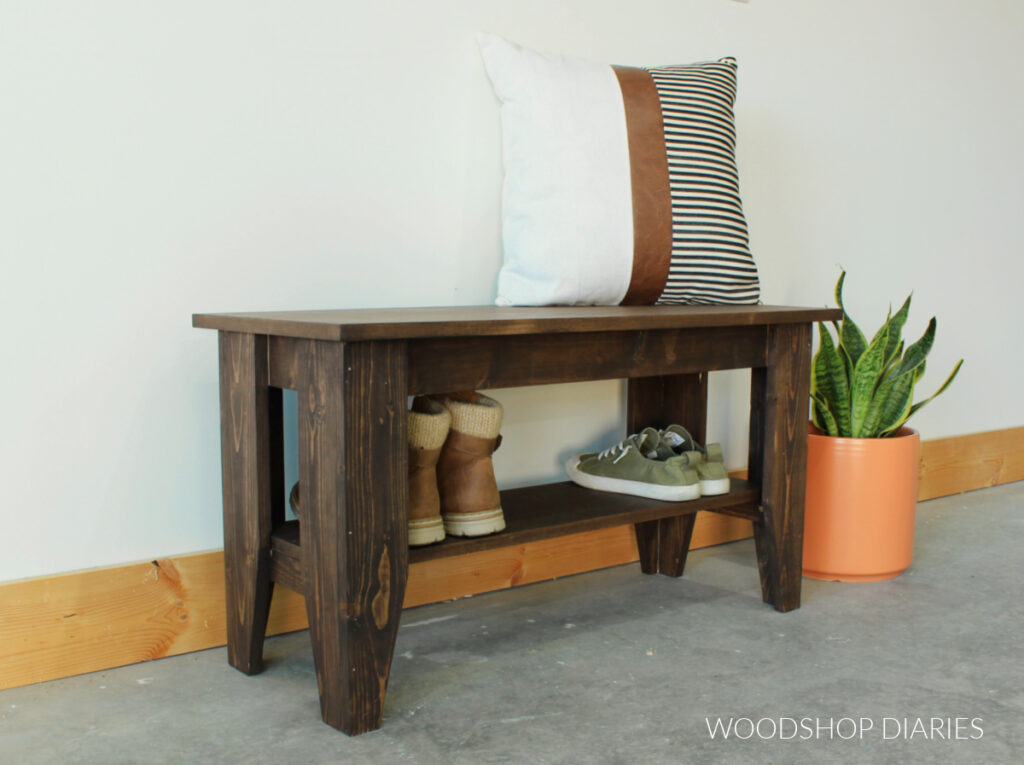
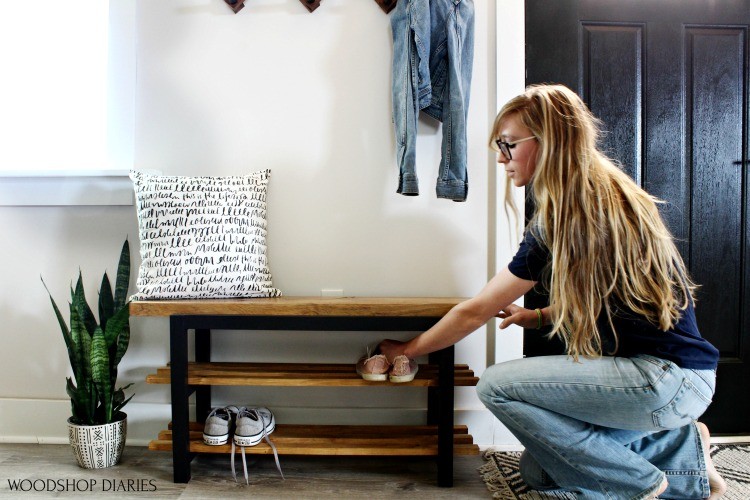
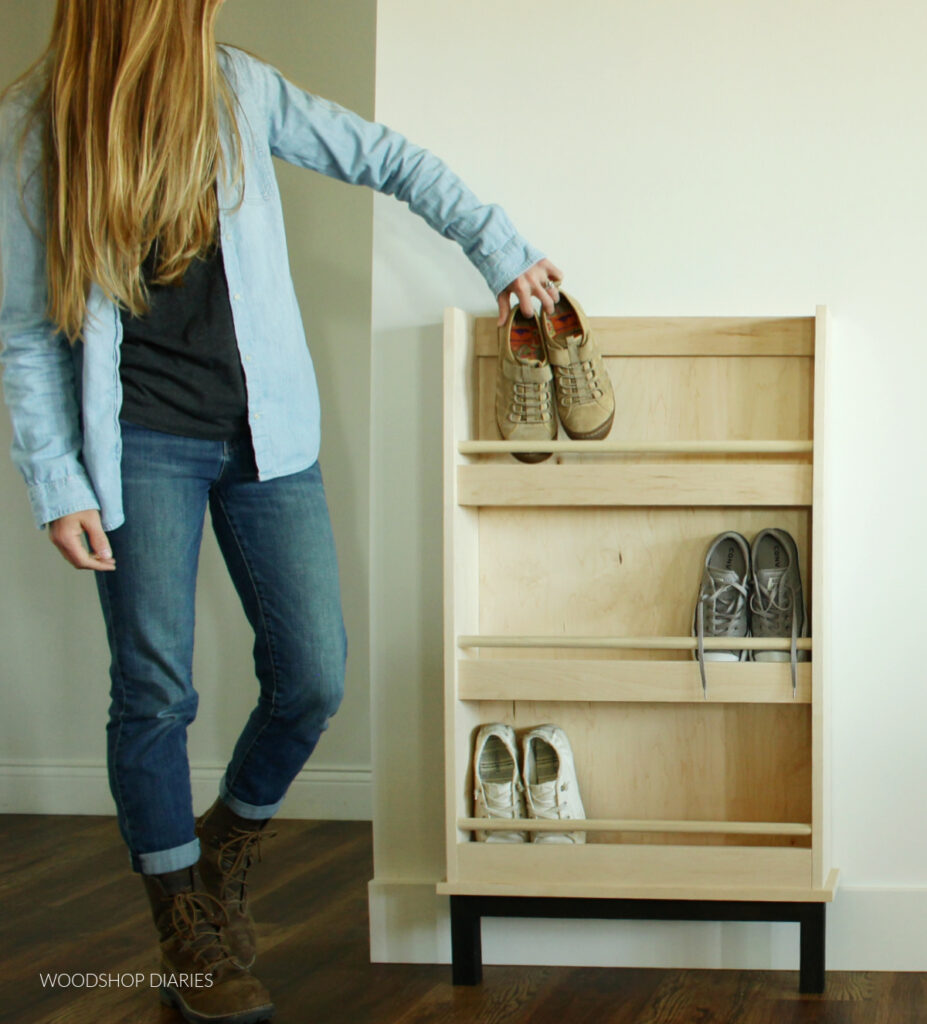
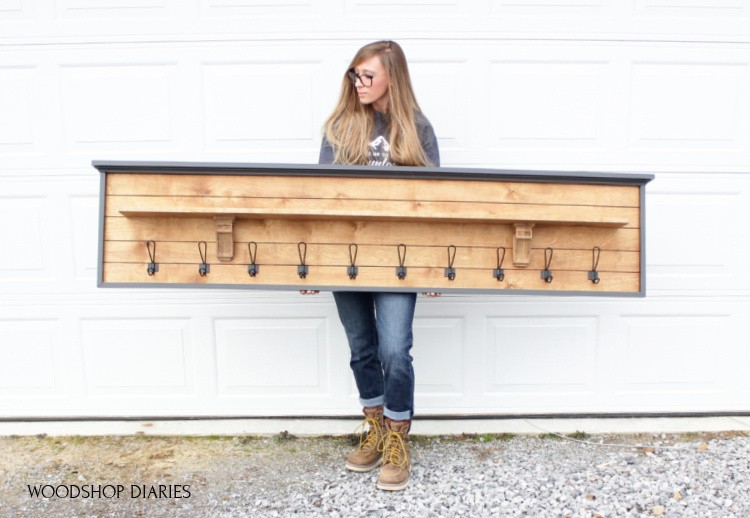
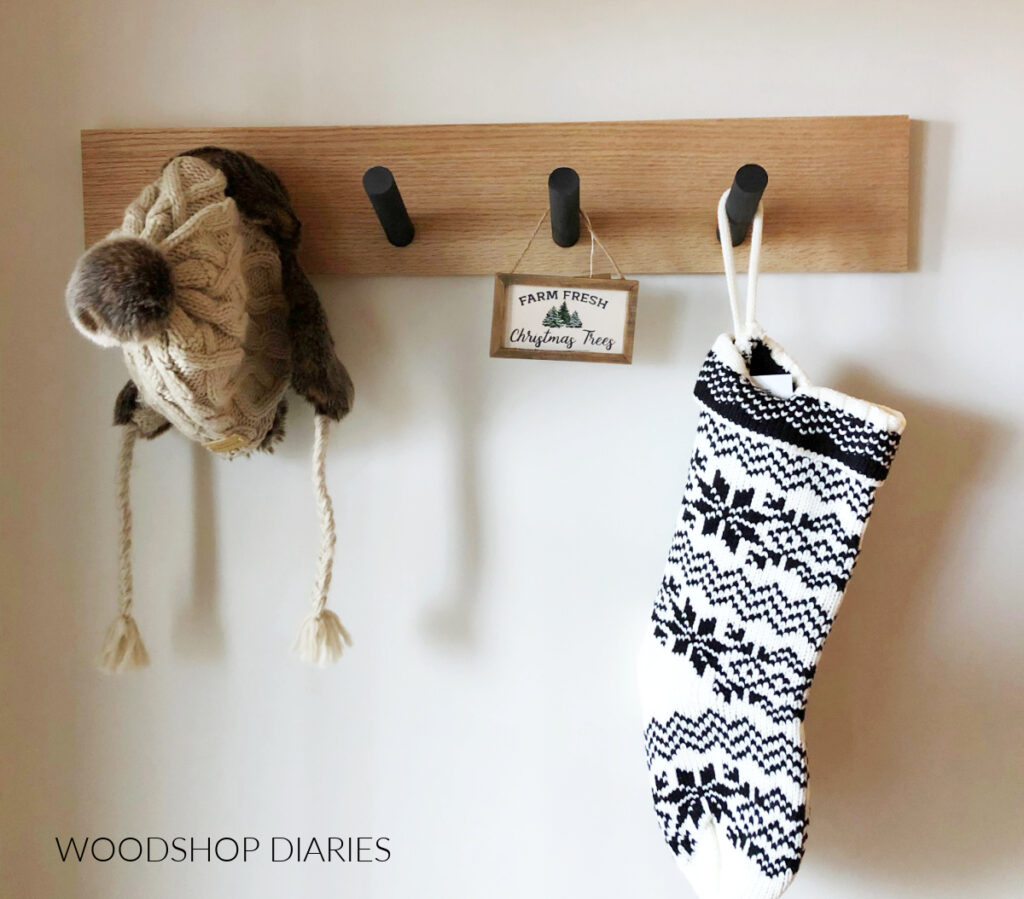
Looking for more entryway and storage ideas?
Want to see more entryway and storage ideas? Here are a few favorites you’ll enjoy! Simply click on the images below to check out how to make each one.

Be sure to save this project by pinning it for later or sharing to your favorite social channel.
Until next time, happy building!