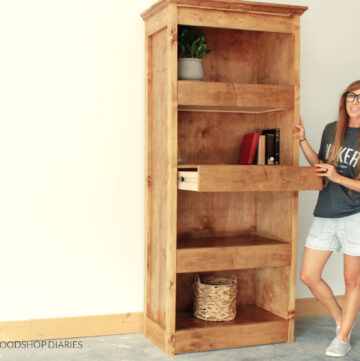
Need some storage for your garage or workshop? In this post, I’m showing you how easy it is to build your own DIY garage cabinets to store and organize all your tools!

If you’re looking for an easy weekend project to help you organize your garage or workshop, this is it! These simple cabinets pack a TON of storage and can easily be built in just a couple days.
The great thing about building your own garage cabinets is that you can customize the size, mix and match pieces, or add extra cabinets to make this work for your own space.
The entire project was made using plywood and a few basic tools–no fancy equipment or expensive tools needed.
For the top, we used an inexpensive, pre-cut wooden countertop from The Home Depot, but you could certainly get creative here and use stone, epoxy, or plywood.
Before we dive into the how-to, let’s address some common questions you may have about building your own cabinets.
*This post contains affiliate links. See policies page.
Is it cheaper to buy or build garage cabinets?
Which is cheaper–building or buying? This is always the number one question I get about projects like this.
This is the 5th set of cabinets I’ve built for either a garage, closet, workshop or a kitchen. Prices have changed a lot over the years, but in every case, building my own was DEFINITELY cheaper than buying them.
Of course, everything depends on your location, the type of cabinets you’re buying/building, how many, and the layout of your space. So the exact savings will vary.
But for reference, these cabinets cost approximately $600 in lumber and materials (in April 2023) and a similar set of prefabbed cabinets (the cheapest option I could find) cost over $1000. Neither of these prices included the countertop.
On top of that, the cabinets I built here were made from hardwood plywood and the prefabbed cabinets were made from particle board. So the ones I built were both cheaper AND better quality.
What kind of wood do you use for garage cabinets?
Garage cabinets can be made from many different materials–metal, plastic, wood, etc. Wood is a great, inexpensive option to build garage cabinets with.
In this case, I’m building these cabinets using 100% plywood. Cabinet grade hardwood plywood (like the birch plywood I used for these) is a great option for cabinets because it’s dimensionally stable and very strong.
This means it can stand up to temperature and humidity fluctuations and can hold all those heavy items you’re typically storing in the garage or workshop.
They also come in 4’x8′ sheets, so they’re easy to cut down to just about any size you need!
Learn more about lumber sizing in this post!
I highly recommend using a hardwood plywood (like birch, maple, or oak) for cabinets. However, sanded pine plywood is another option that might save a bit of money.
Note that sanded pine is more likely to warp, can’t hold as much weight, and tends to be much rougher than hardwood plywood. But for garage applications, that might be fine.
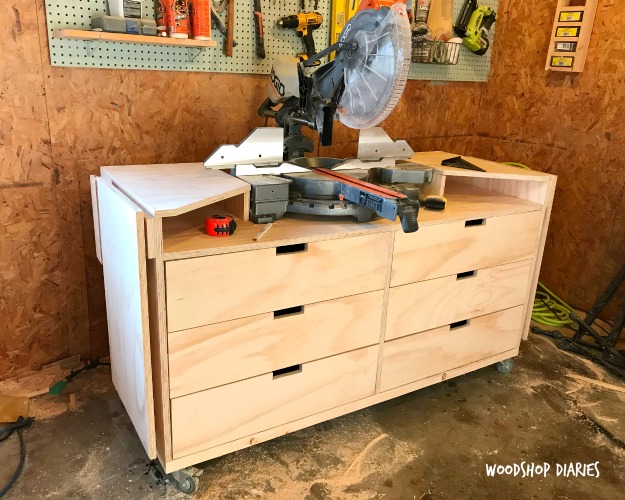
If you’d like to see what it looks like, I used sanded pine plywood to build this miter saw station.
TIP: If your garage floor sweats, it can damage the bottom of plywood cabinets over time. If you have a lot of moisture in your shop or garage, be sure to shim up your cabinets so they’re not sitting directly on the ground or consider installing a moisture barrier between them and the floor.
You may also consider building a simple base made of treated wood to rest your cabinets on.
How deep should garage cabinets be?
While kitchen cabinets have standard size specifications in order to fit with appliances and sinks, garage cabinets are a little more flexible.
You’ll typically find garage cabinets between 16″-24″ deep. When building your own, take note of the space have you available (like if you’re parking a car next to them, make sure you can open your doors, etc) and make your cabinets as deep as you’d like to fit your space.
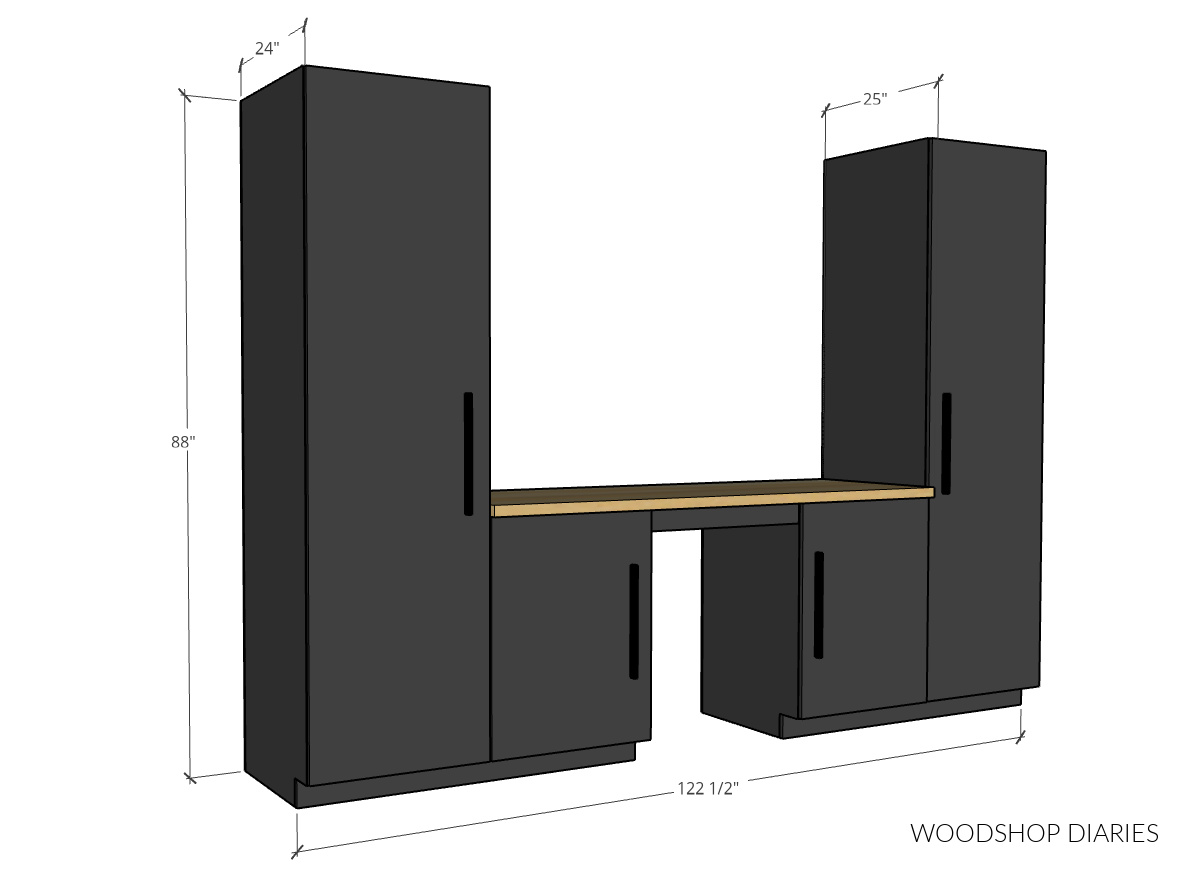
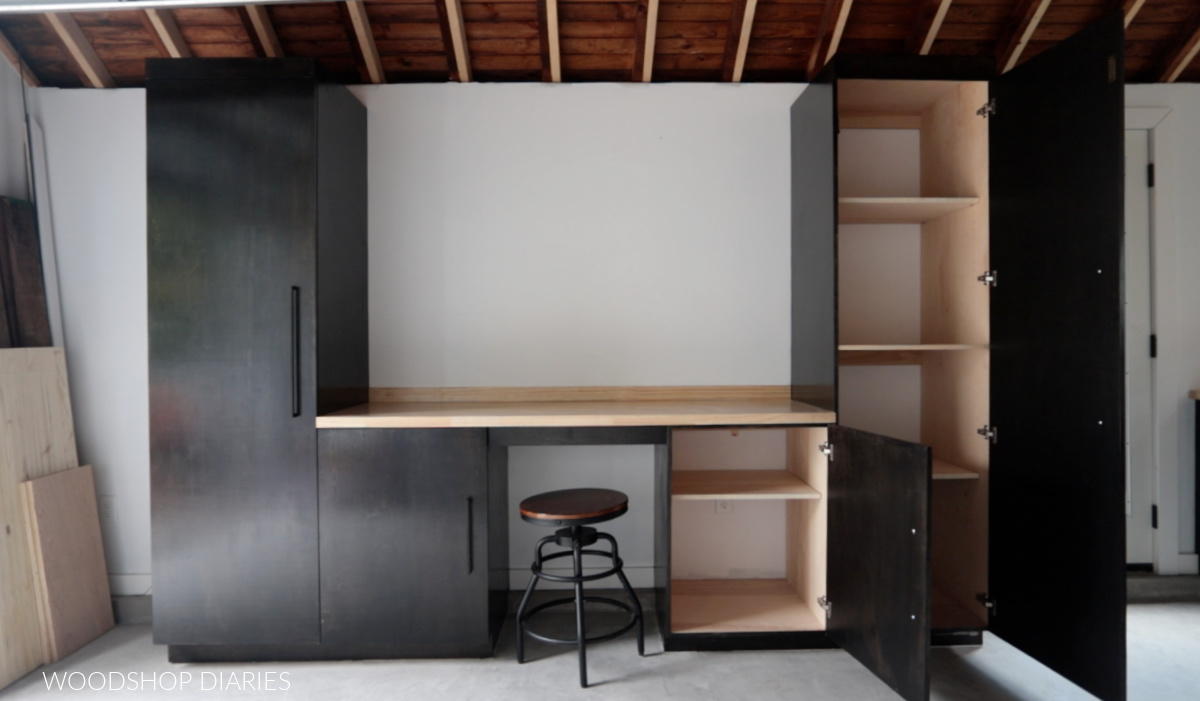
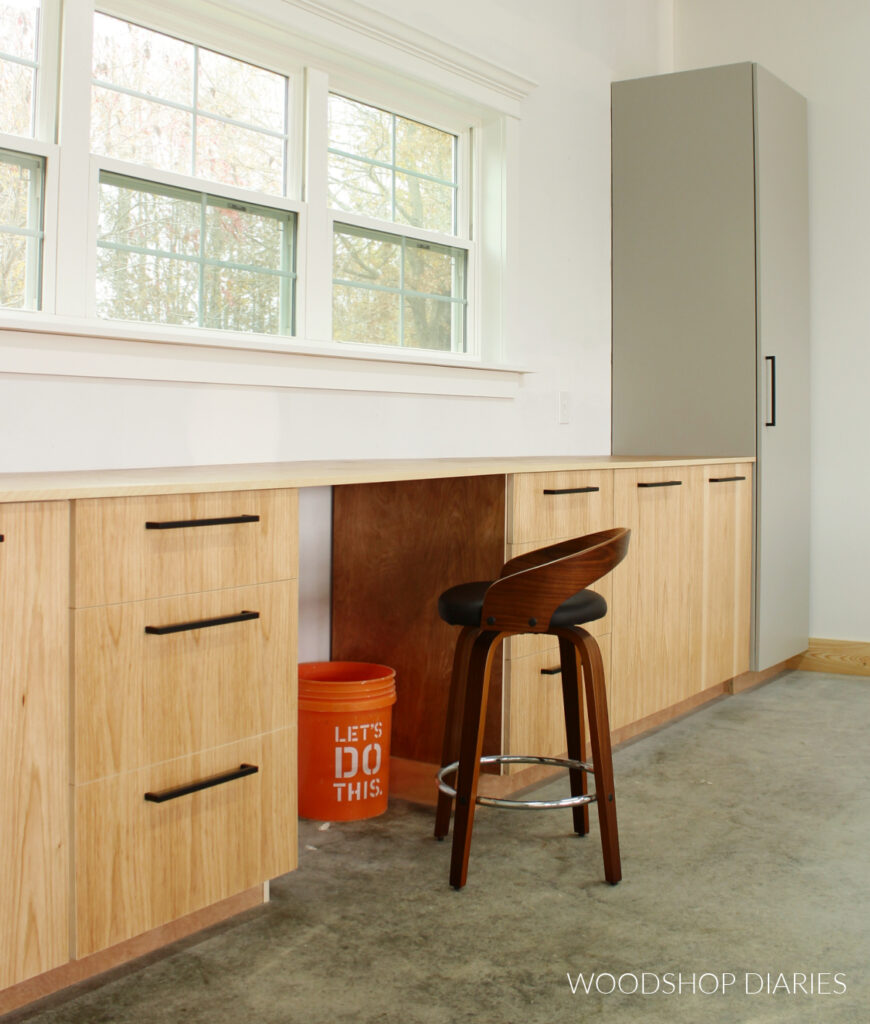
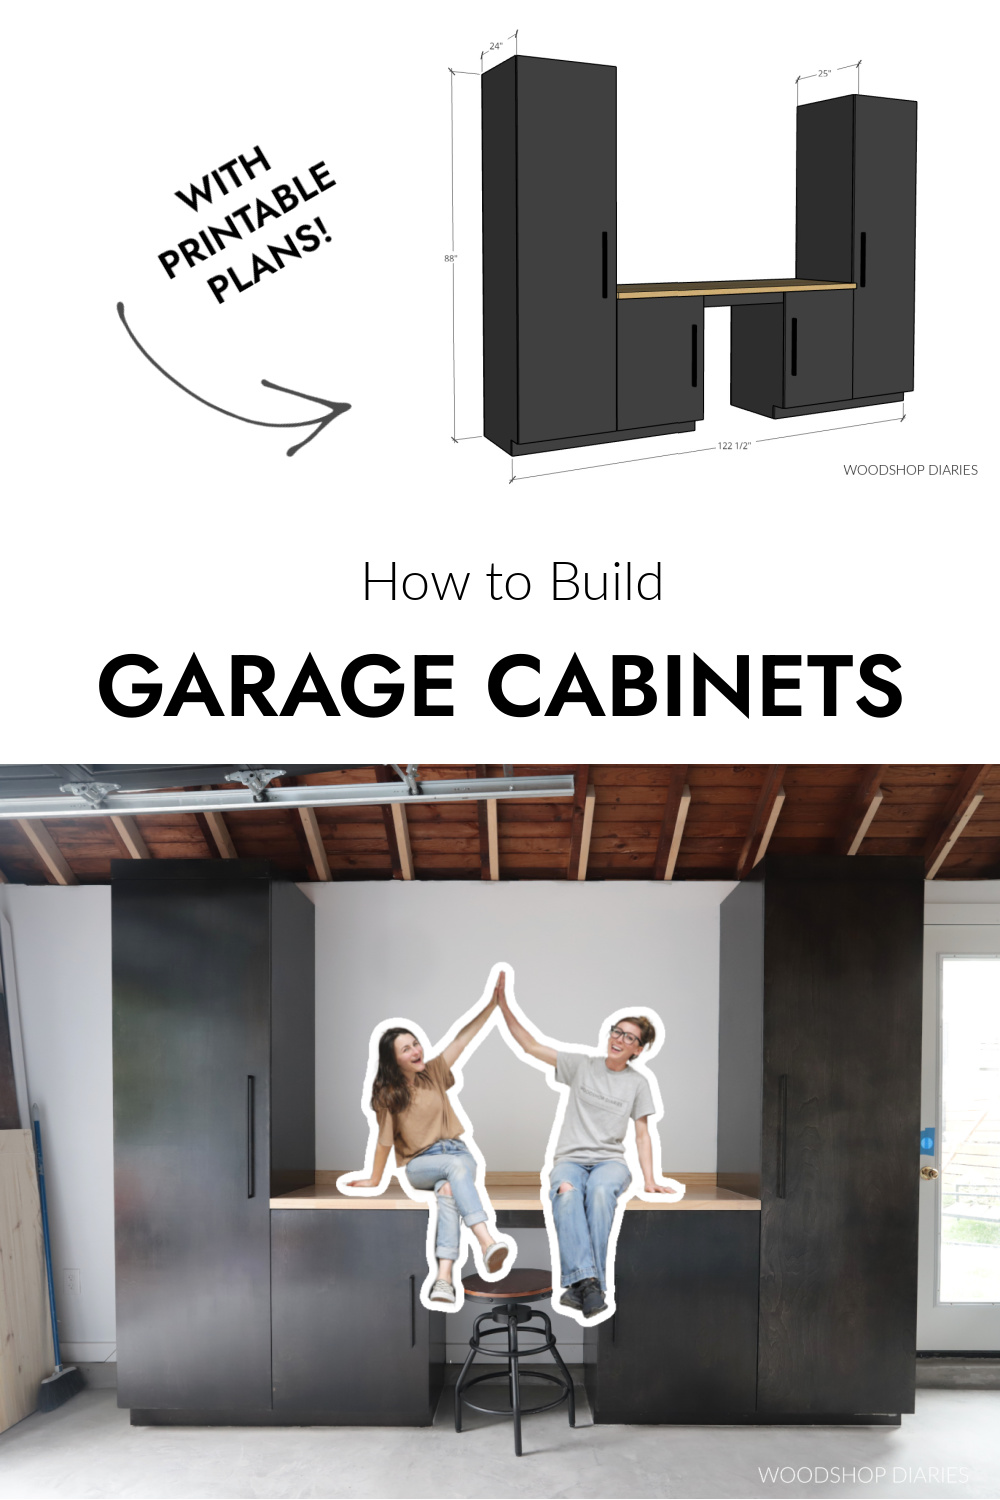
The overall size of this project was 88″ tall x 122 ½″ wide x 25″ deep (at the countertop). The cabinets were 24″ deep including the door.
What’s the difference between garage cabinets and kitchen cabinets?
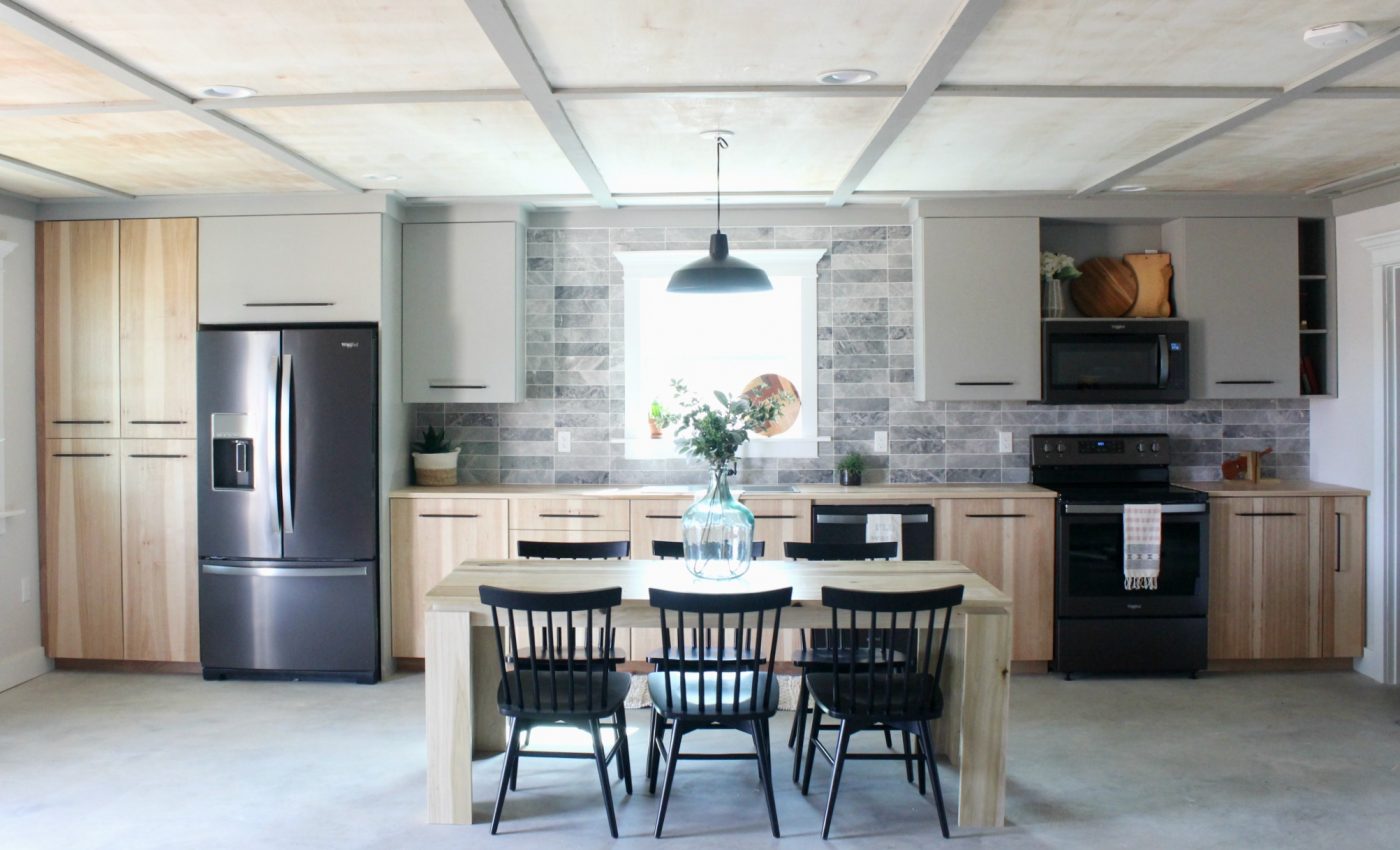
In this case, these garage cabinets are the exact same style and sizes that I build for kitchen cabinets, too! These simple, basic cabinets work great for kitchens, garages, workshops, and built ins.
One main difference is that with kitchen cabinets, like mentioned earlier, there are standard sizes as far as height and depth.
For garages, workshops and built ins, you usually have a little more flexibility with sizing so you can customize it however you’d like. But, I usually just build them all the same if space allows.
Another key difference is that kitchen cabinets are also usually made from wood materials like particle board, plywood and/or solid wood.
But, garage cabinets may be made from various materials–sometimes you’ll see them made of metal, sometimes plastic, sometimes wood, etc.
How to Build Garage Cabinets
Building cabinets may seem like an intimidating project to some, but it’s really pretty easy! Just think of a cabinet as a box–because that’s all they are! If you can build a box, you can build a cabinet. I’ll show you how below.
If you prefer to watch, check out the full video here:
And if you prefer your plans printable, I’ve got printable building plans for these cabinets here:
You may find these tips and tutorials helpful throughout the build:
Tools & Materials
Below is the tools and materials list needed to build this exact set of cabinets.
Tools:
- Drill/Driver
- Circular Saw and cutting guides (Kreg Rip Cut & Kreg Accu-Cut)
- Pocket Hole Jig
- Shelf Pin Jig
- Concealed Hinge Jig
- Brad Nailer (and/or stapler)
- Jig Saw
- Speed Square
- Miter Saw (optional)
Materials:
- (6) 4×8 sheets ¾″ plywood (birch used here)
- (2) 4×8 sheets ¼″ plywood
- (1) 25″ x 74″ butcherblock countertop
- (5) pair concealed hinges for full overlay doors on frameless cabinets
- (4) knobs/handles
- Shelf Pins
- 1 ¼” pocket hole screws
- 3″ wood screws
- Washers
- Stud finder
- Level
- Shims
- Edge Banding (optional)
Step 1: Assemble Base Cabinets
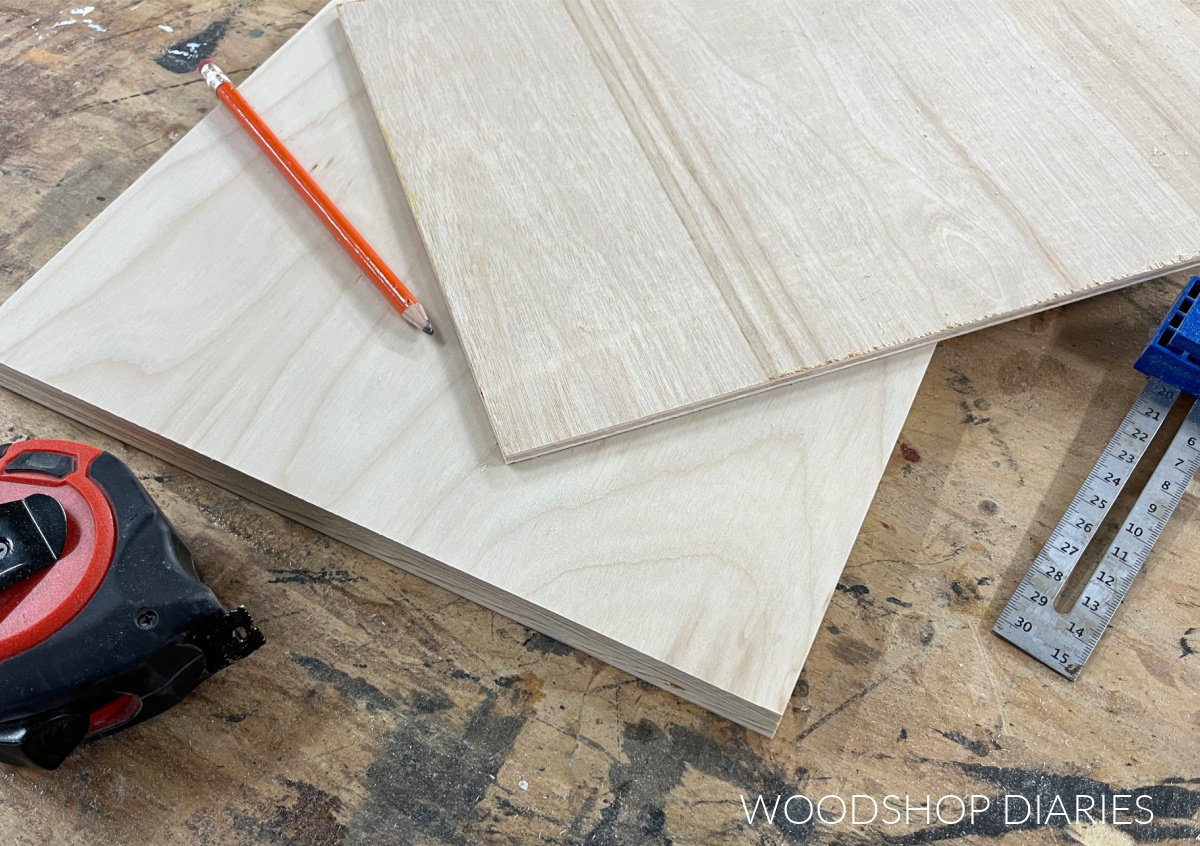
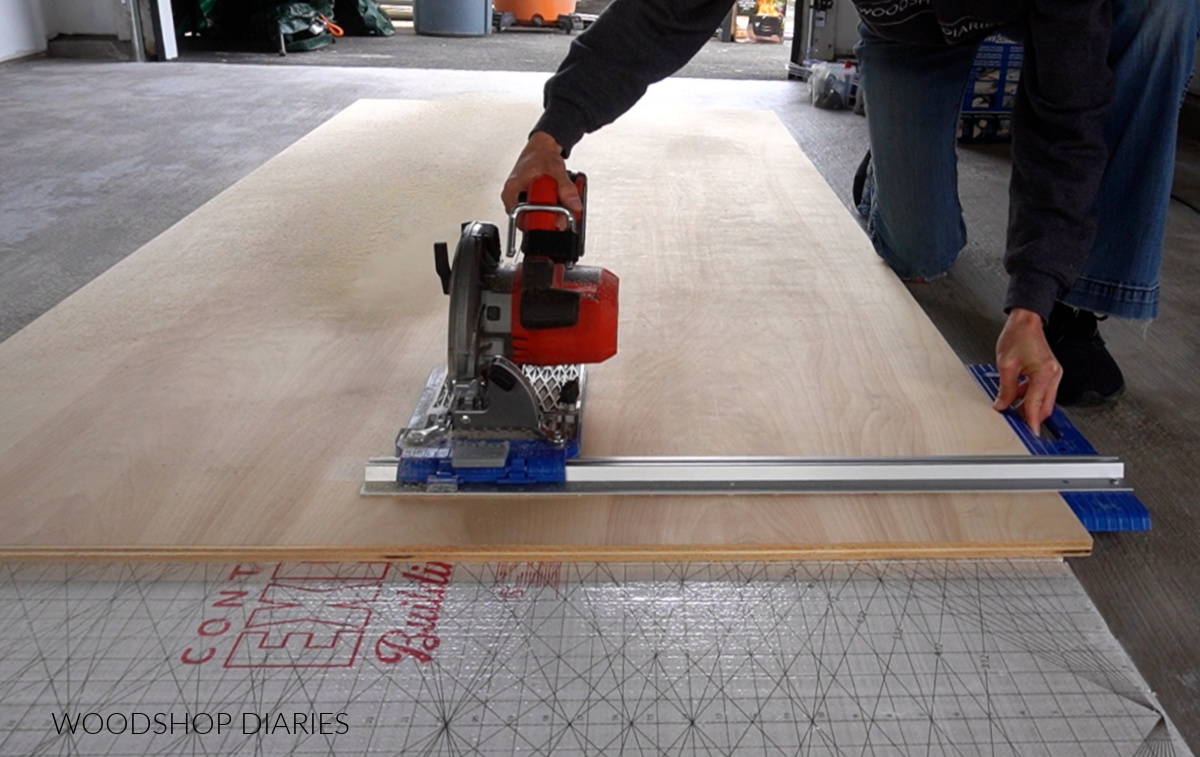
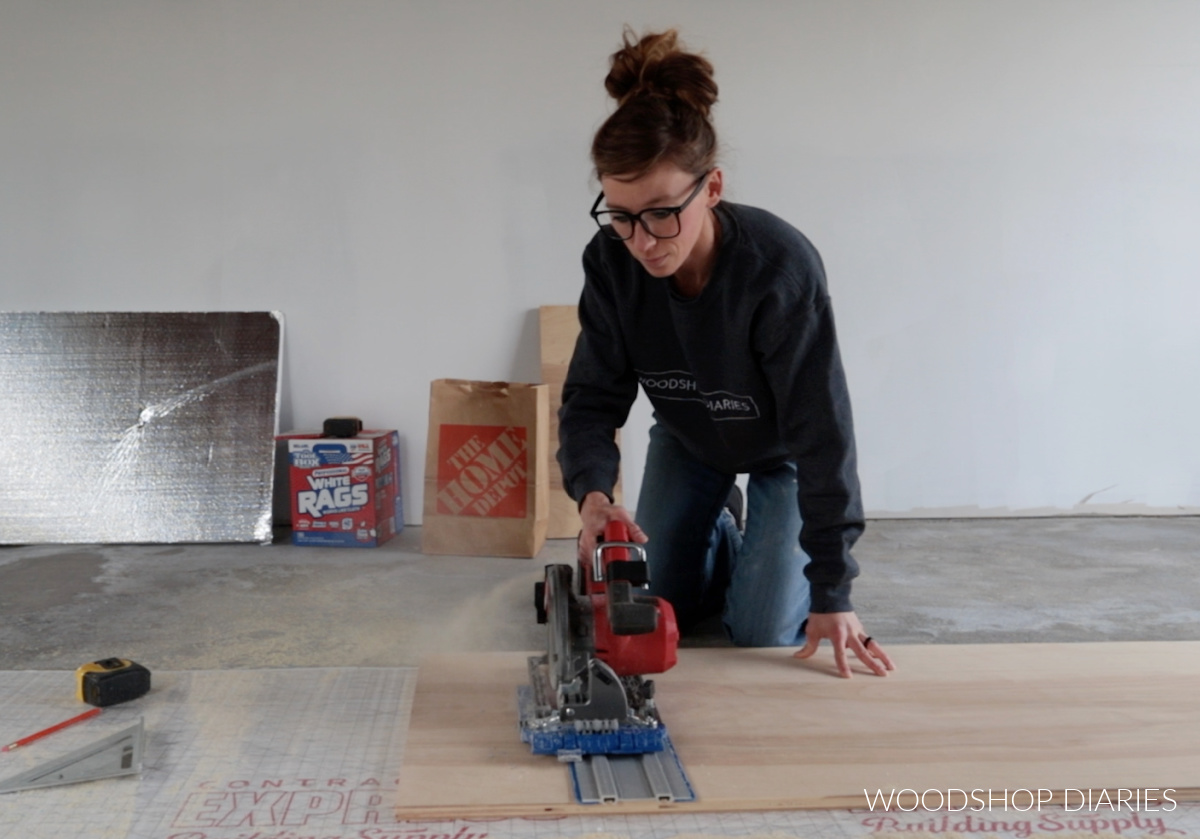
This project consists of two simple base cabinets for the middle section. I used a circular saw and Kreg cutting guides to cut two ¾″ plywood side panels for each cabinet to 23″ x 34 ½″.
Cabinets commonly have what’s called a “toe kick.” This is a recess in the bottom of the cabinet that allows you to stand up to it with without bumping your toes.
To add this to these cabinets, I used a jig saw to notch out the front bottom corners of each side panel.
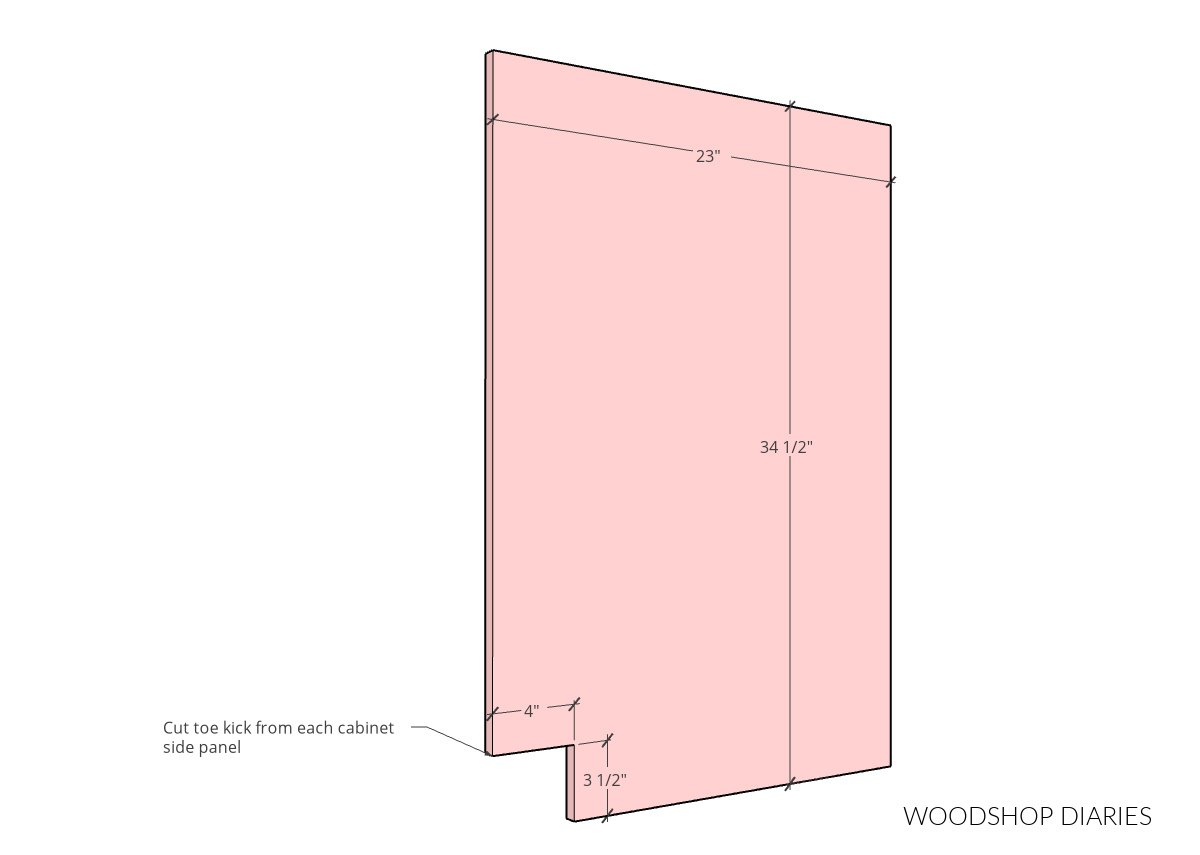
NOTE: An alternative way to create a toe kick is to cut the side panels 3 ½″ shorter and simply build a base from 2x4s that is 19″ deep. Then you can set the cabinet boxes on this base to create basically the same thing. It just requires more lumber.
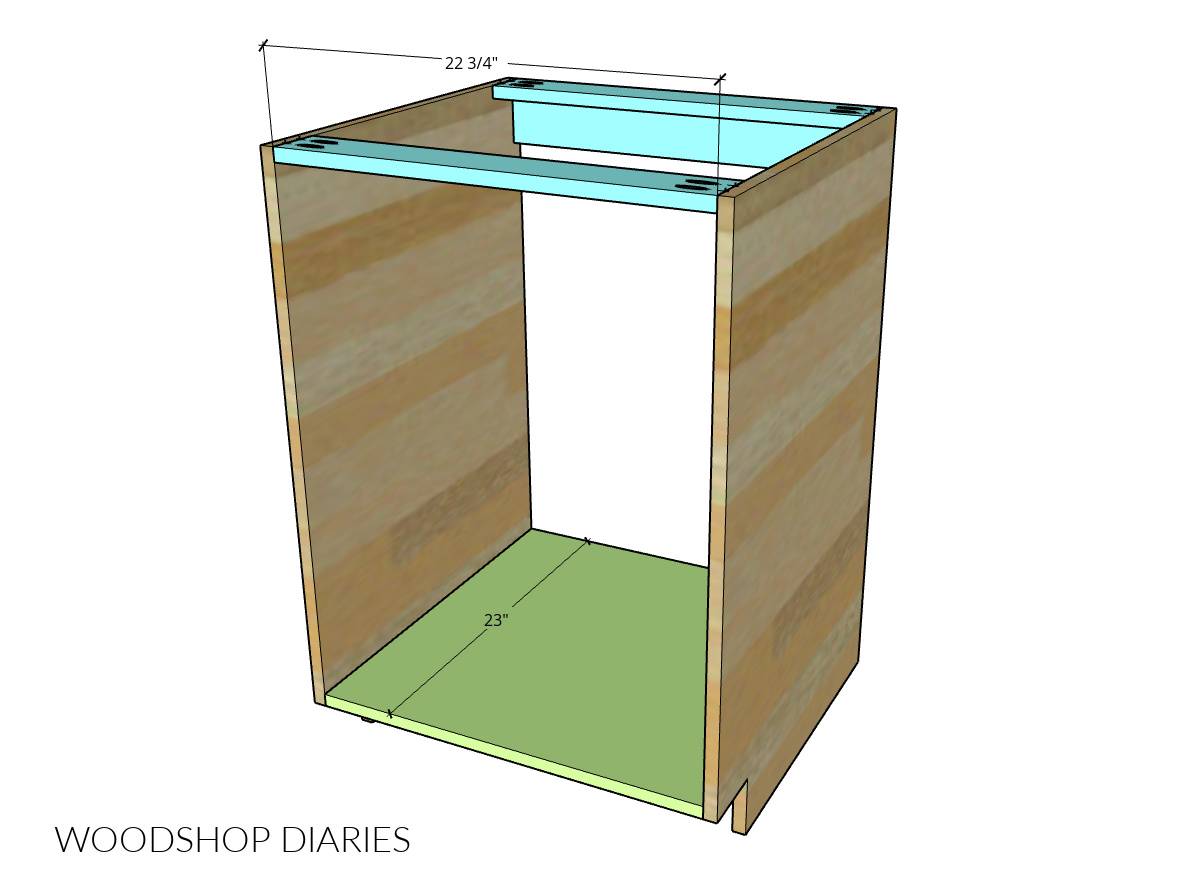
Then, I cut the bottom panels and three top support strips from ¾″ plywood to assemble each cabinet box. Specific dimensions and cut diagrams can be found in the printable plans.
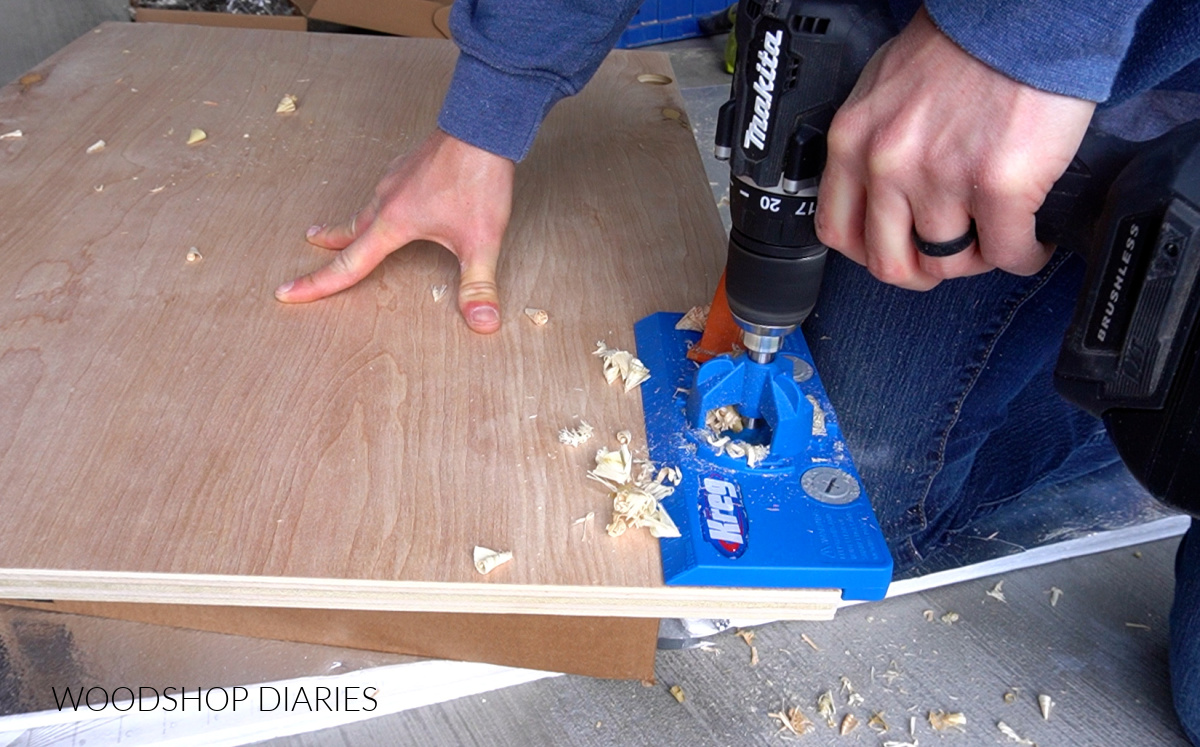
I drilled ¾″ pocket holes into the ends of each piece and assembled two identical cabinet boxes using 1 ¼″ pocket hole screws. Learn how to use a pocket hole jig here.
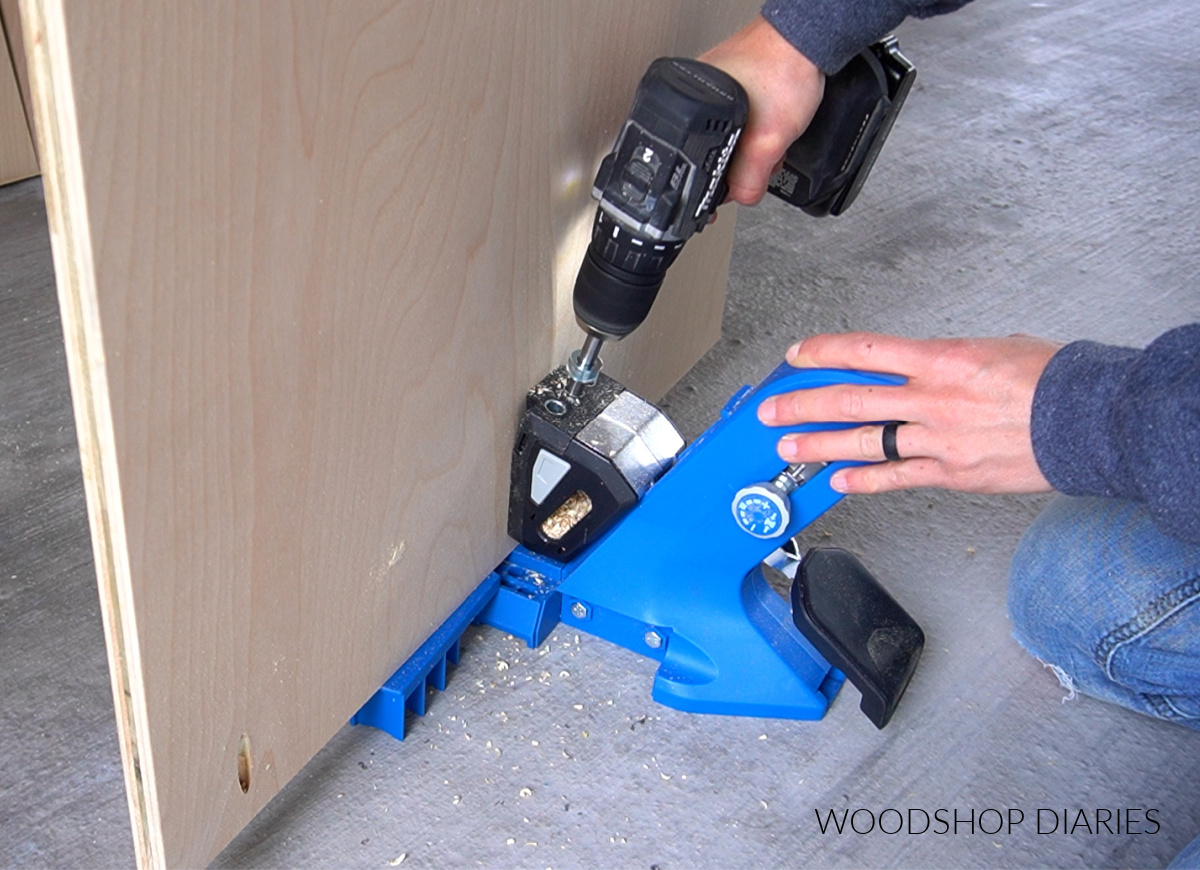
TIP: Apply iron on edge banding to the front edges that will be exposed to hide the plys, if desired. Learn how to apply edge banding here.
Both base cabinets will have a bottom panel, two top supports and one back support like shown. The top supports will be for attaching the countertop later and the back support is for securing the cabinet to the wall.
Adding the back panel is optional, but if you’d like to add a back panel, cut a piece of ¼″ plywood 24″ x 34 ½″ and staple or brad nail onto the back side.
Note that if you add a back panel and place a cabinet over an outlet, you’ll need to cut out a hole in the panel for access! That’s one reason we didn’t add back panels here in our case.
Step 2: Install Base Cabinets
Once the two base garage cabinets are assembled, it’s time to install them.
Before installing, double check the measurement of the countertop you plan to use to see how far apart to space your cabinets.
For this project, we used a pre-cut butcherblock top that was 25″ deep and 74″ long. So we positioned the cabinets so the outside ends were 74″ apart and used some shims to help get them level.
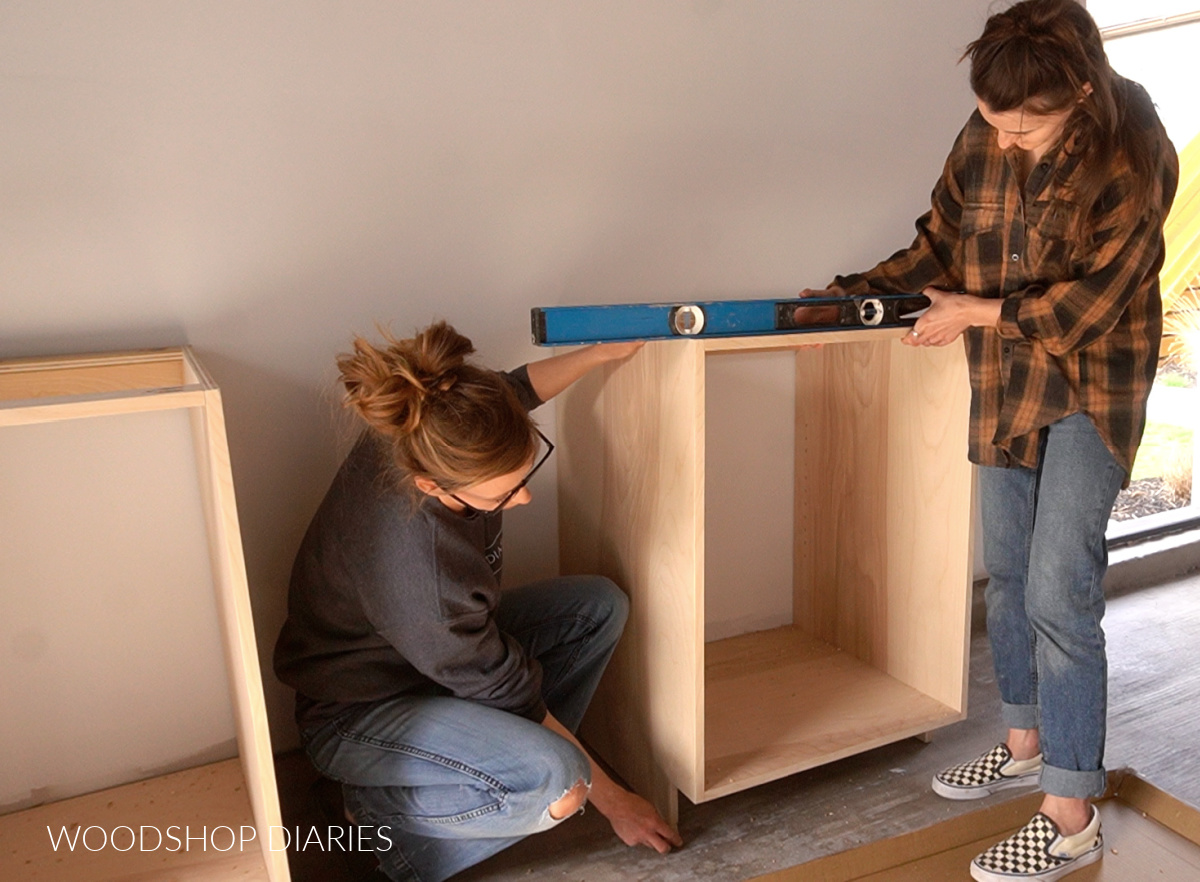
By the way, I worked with Sam from DIY Huntress‘ to build these cabinets for her workshop, so when I say “we,” that’s who I’m talking about.
After the cabinets were leveled, we used 3″ wood screws to secure them into the wall studs through the back support on each cabinet.
Step 3: Attach Countertop
Since the countertop is butcherblock, we wanted to allow for wood movement so it doesn’t split over time. To do this, I drilled oversized (⅜″) holes into the top supports on both cabinets.
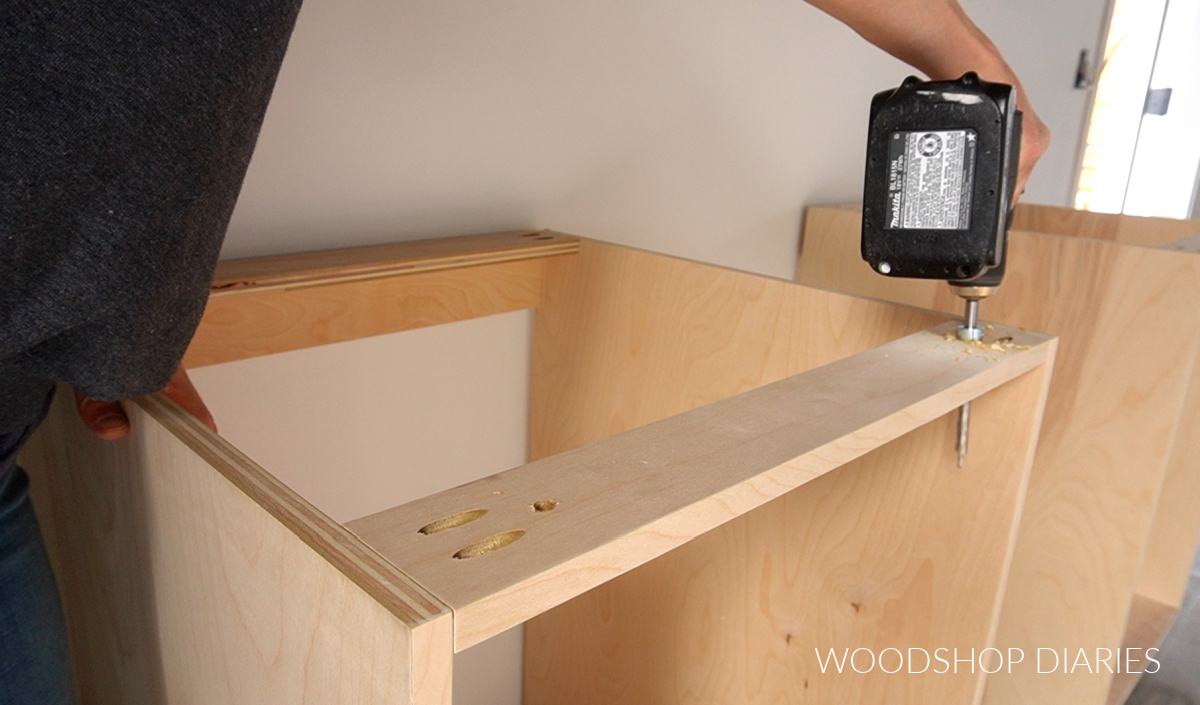
Then, we placed the butcherblock countertop on so the edges were flush to the sides of the cabinet and used 1 ¼″ wood screws with washers (so the screws didn’t go through the oversized holes) to secure the top from the inside of the cabinet.
Prefer to print? Grab printable building plans for these garage cabinets here!
Step 4: Assemble Pantry Cabinets
Now that the middle base cabinets are assembled, it was time to add the taller pantry style cabinets.
I cut the sides and toe kicks for these cabinets the same as the base, only I made them 88″ tall.
I cut three plywood panels for each cabinet–one for the bottom, one for the middle, and one for the top.
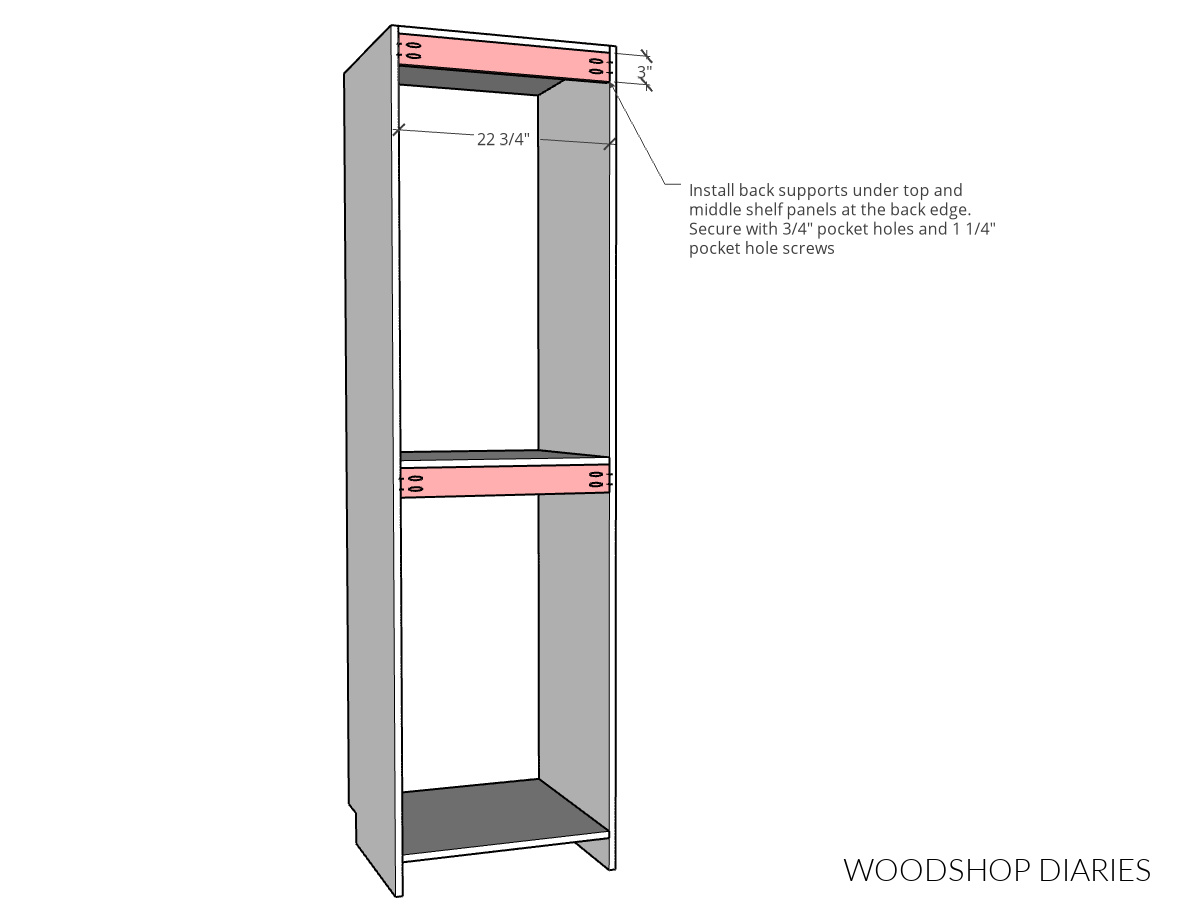
These cabinets will have adjustable shelves, but since these are so tall, to help keep the sides from bowing, I added a stationary shelf in the middle to hold the sides in place.
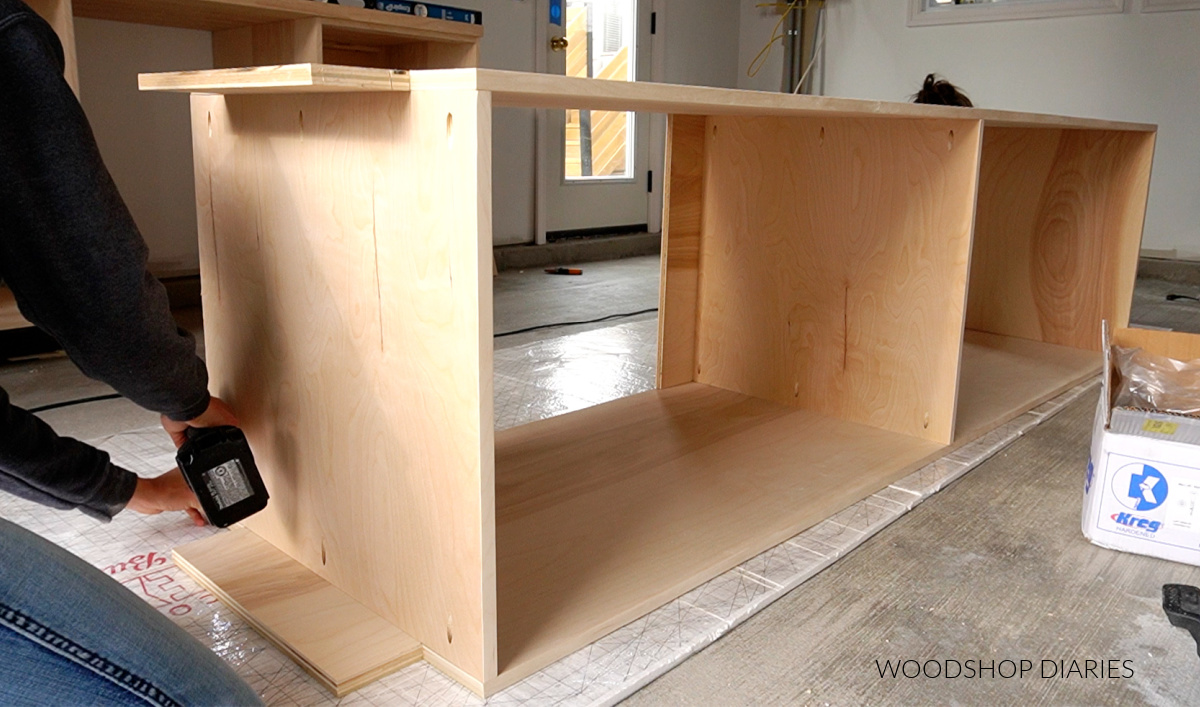
I installed these between the two side panels using ¾″ pocket holes and 1 ¼″ pocket hole screws.
These cabinets will need to be secured to the wall studs in the next step, so I added two back support strips–one under the top shelf and one under the middle–on each of the tall cabinets using pocket holes and screws.
Just like with the base cabinets, you can add a back panel of ¼″ plywood here if you’d like, but it’s not necessary.
NOTE: The cabinet boxes are 24 ¼″ wide. If you cut the back panels, cut them to 24″ wide to save on material. It won’t matter if the cabinets are ⅛″ wider than the back on each side.
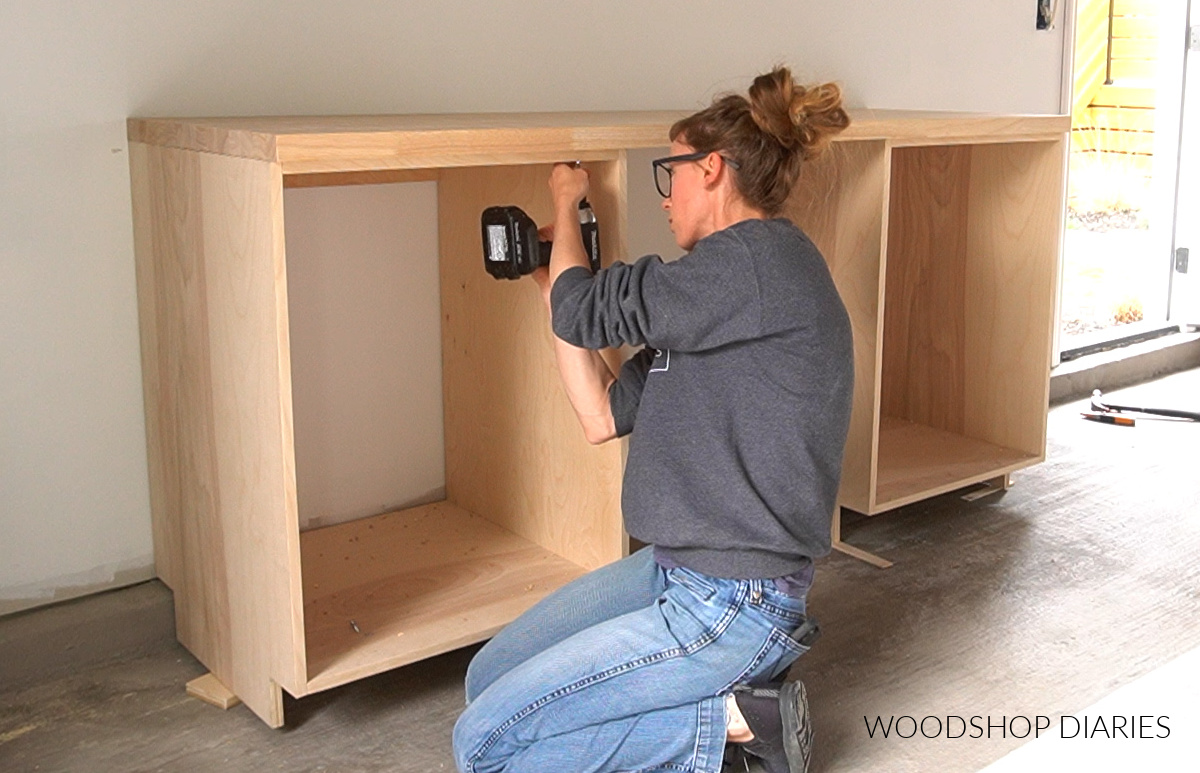
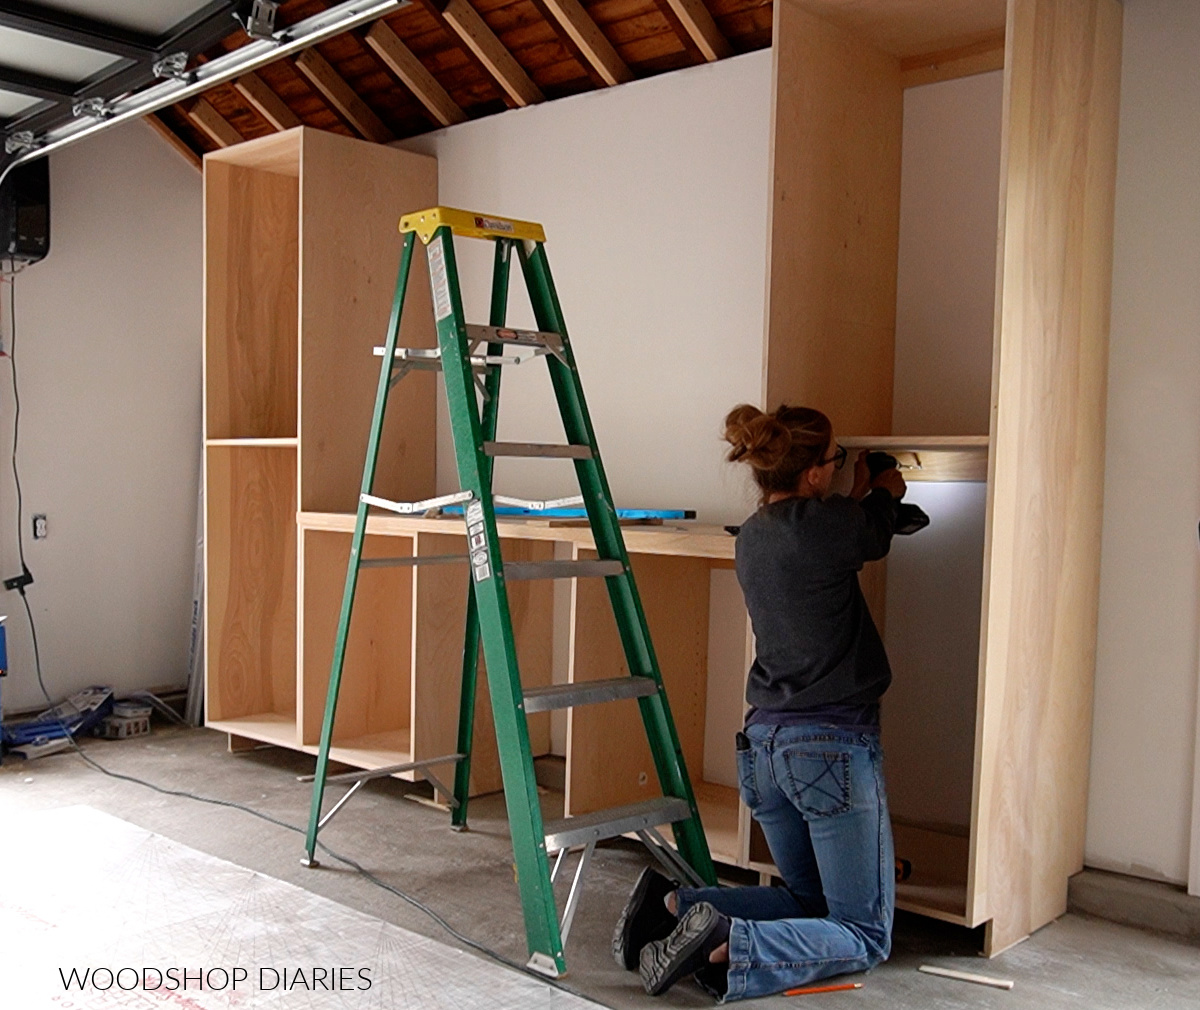
Step 5: Install Pantry Cabinets
We placed the tall garage cabinets next to the middle cabinets and used shims to get them square and level.
Once they were shimmed, we used 1 ¼″ wood screws through the cabinet sides to secure the tall cabinets to the base cabinets.
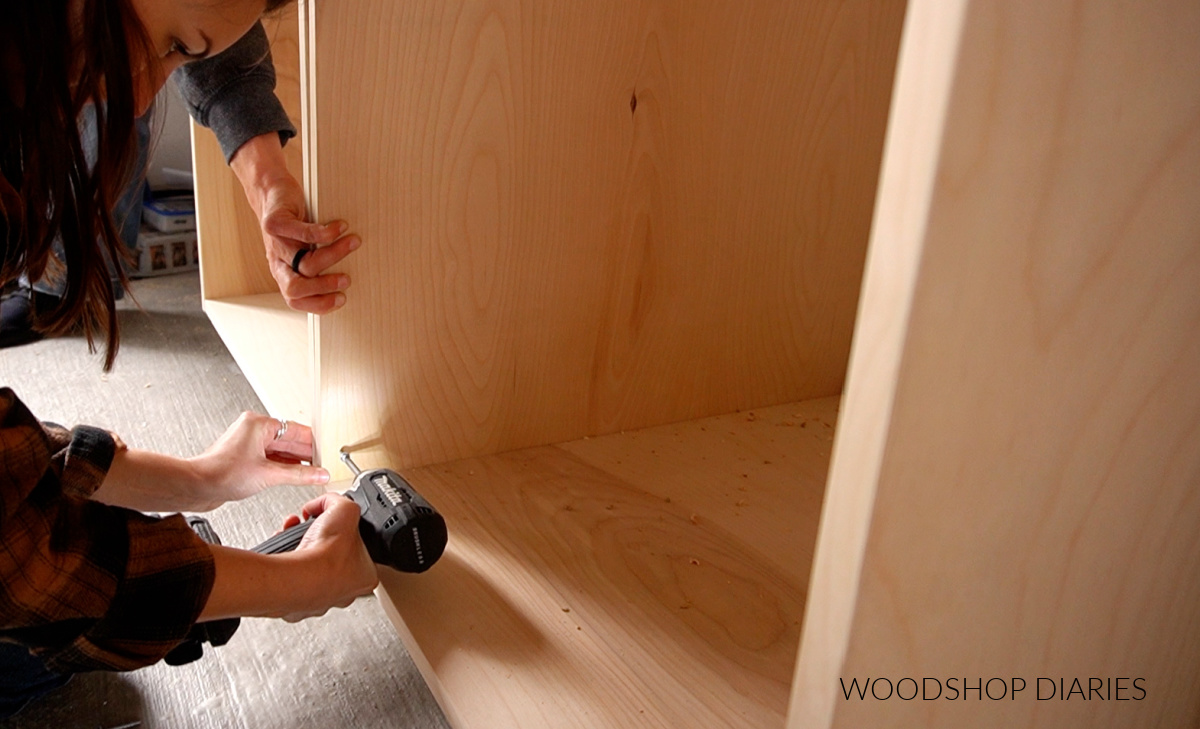
After the cabinets were screwed TOGETHER, we used 3″ wood screws through the back supports to secure them to the wall studs on each side.
Step 6: Add Adjustable Shelves
To install adjustable shelves, we drilled shelf pin holes along both sides of each cabinet box. A shelf pin jig allows you to easily and quickly drill evenly spaced holes.
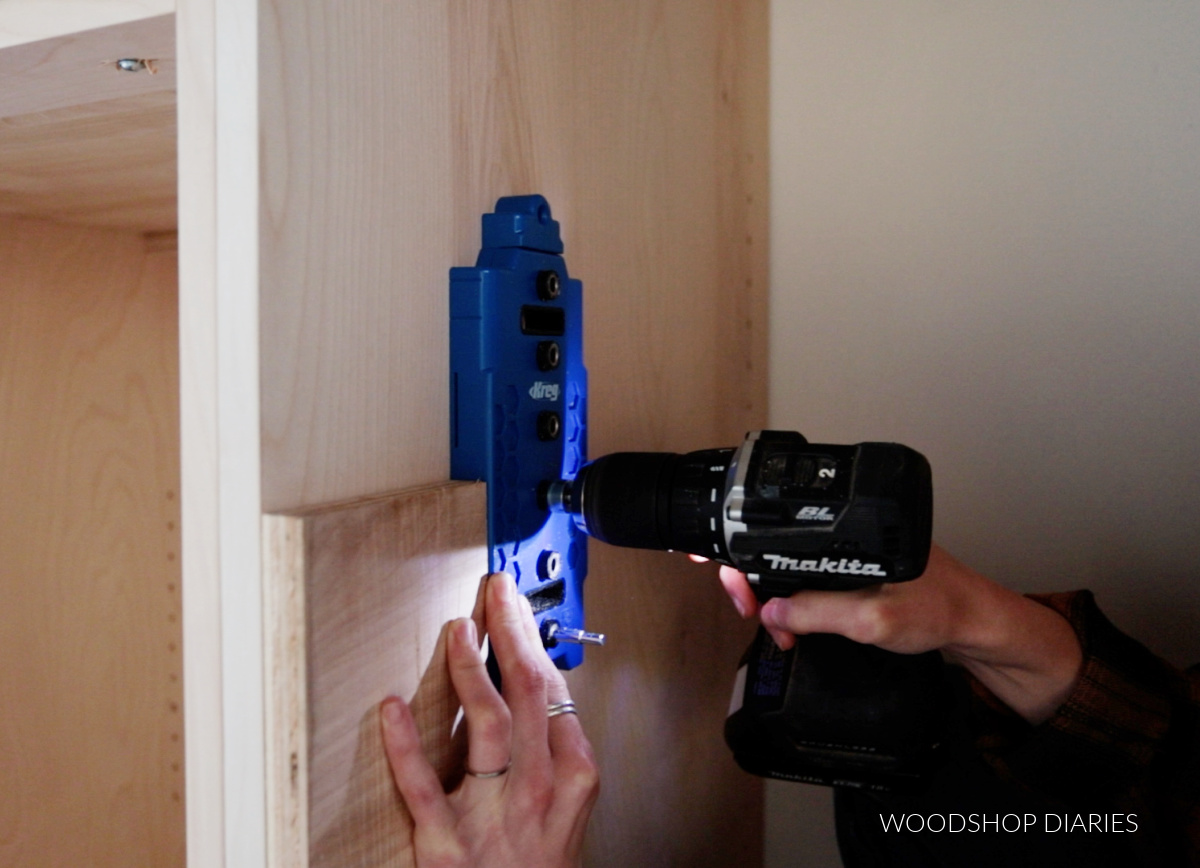
Once they’re drilled, you place shelf pins into the holes to rest your shelves on. This allows you to adjust your shelf pins in different holes to raise or lower (or remove or add) your shelves.
In this case, be sure not to drill the shelf pin holes toward the front any further than 20″ from the back of the cabinet. We cut ¾″ plywood shelves 21″ deep x 22 ½″ wide to install into the cabinets. You can find the cut diagrams in the plans.
I made sure they fit, but didn’t install them until later so they wouldn’t be in the way while we attached the doors.
Interested in adding drawers instead of shelving? You can definitely do that! Check out these posts to help you measure, build and install them
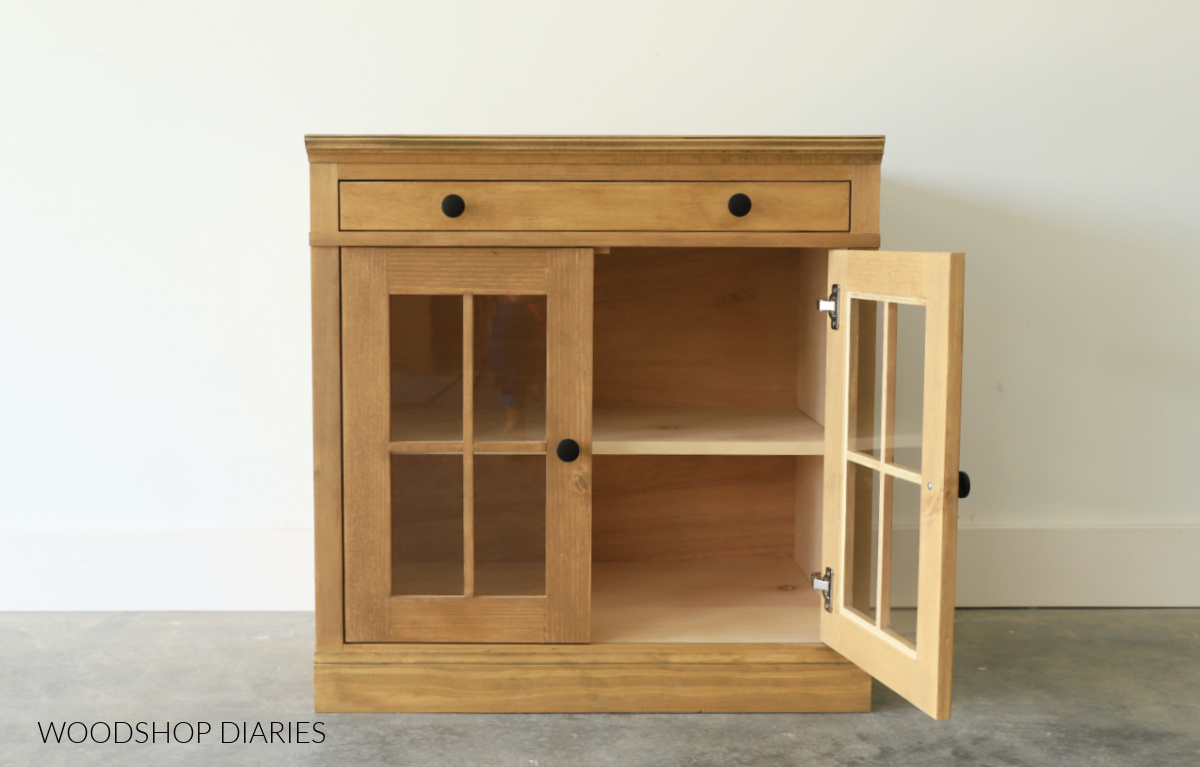
Step 7: Attach Cabinet Doors
The cabinet doors are all cut from ¾″ plywood. These are full overlay doors. The rule of thumb with full overlay is to cut them ¼″ smaller in height and width than the front overall dimensions of the cabinet.
So the small doors were 24″ x 30 ¾″ and the tall doors were 24″ x 84 ¼″. I cut these doors and applied edge banding to the sides that will show.
SIDE NOTE: You’ll see in the video I shared that the full height doors wouldn’t open in Sam’s shop because the garage door rail was in the way. So we had to cut a piece off the door and nail it on at the top as a “trim piece.”
Before installing your doors, make sure they’ll be able to open in your case and if not, this is a work around you may need to consider.
Once the doors were cut, I used a Kreg concealed hinge jig to install the hinges onto the door. Check out how to install concealed hinges here.
Then I installed these doors onto the cabinets. The small doors just have two hinges–one toward the top and one toward the bottom.
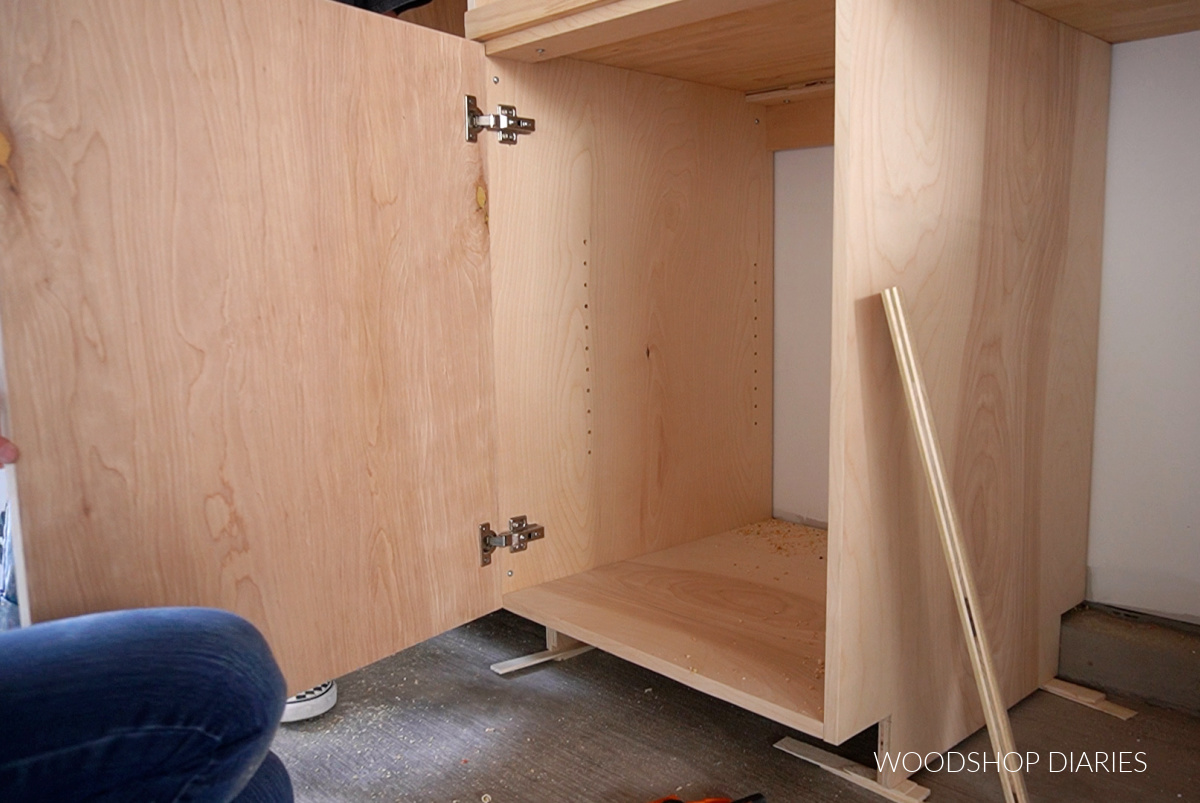
But the taller doors, due to their weight, needed to have 4 hinges on each door. I just evenly spaced the 4 hinges out along the door edge, then installed these onto the tall cabinets.

Step 8: Install Toe Kicks
Before installing the toe kicks, we went ahead and applied a black gel stain to the cabinets.
I cut the toe kicks from leftover ¼″ plywood we already had in the shop, but ¾″ plywood would work just as well! Use whatever you have left here.
I cut and stained the toe kicks before brad nailing them in place so I didn’t get stain all over the floor.

Step 9: Finish
The last step was adding an optional middle trim piece between the middle cabinets. This was a 3″ wide plywood strip secured with pocket holes and screws just to give a little extra detail.
We applied a clear coat to the cabinets and added some modern handles. I often get questions about warping with plywood cabinet doors. So I’ve shared some tips below.
Two suggestions to help prevent and “fix” issues with plywood door warping:
- Be sure to seal ALL sides of the doors with a clear coat, paint or sealant. Sealing only the front side can cause uneven absorption of moisture and cause warping.
- If the door is already slightly warped, use a magnetic catch to help pull it in tight when it’s closed.
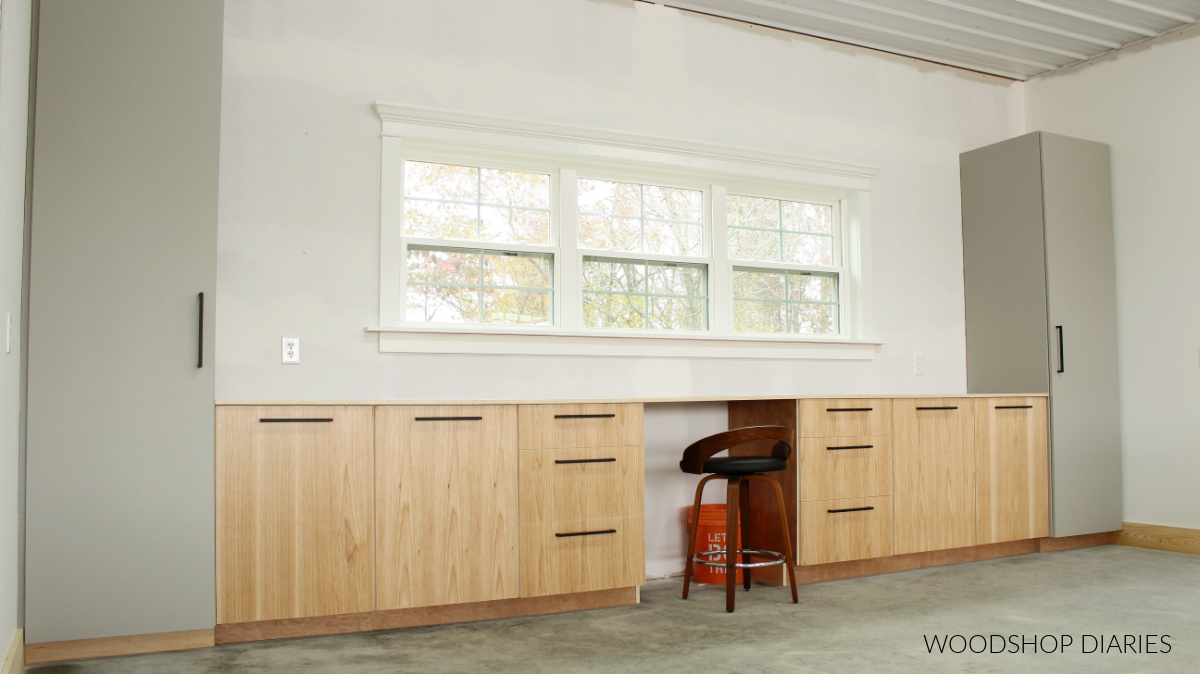
And finally, we added the shelves and these garage cabinets were ready to be packed full of tools and supplies.
Ready to build your own? Grab the plans here!
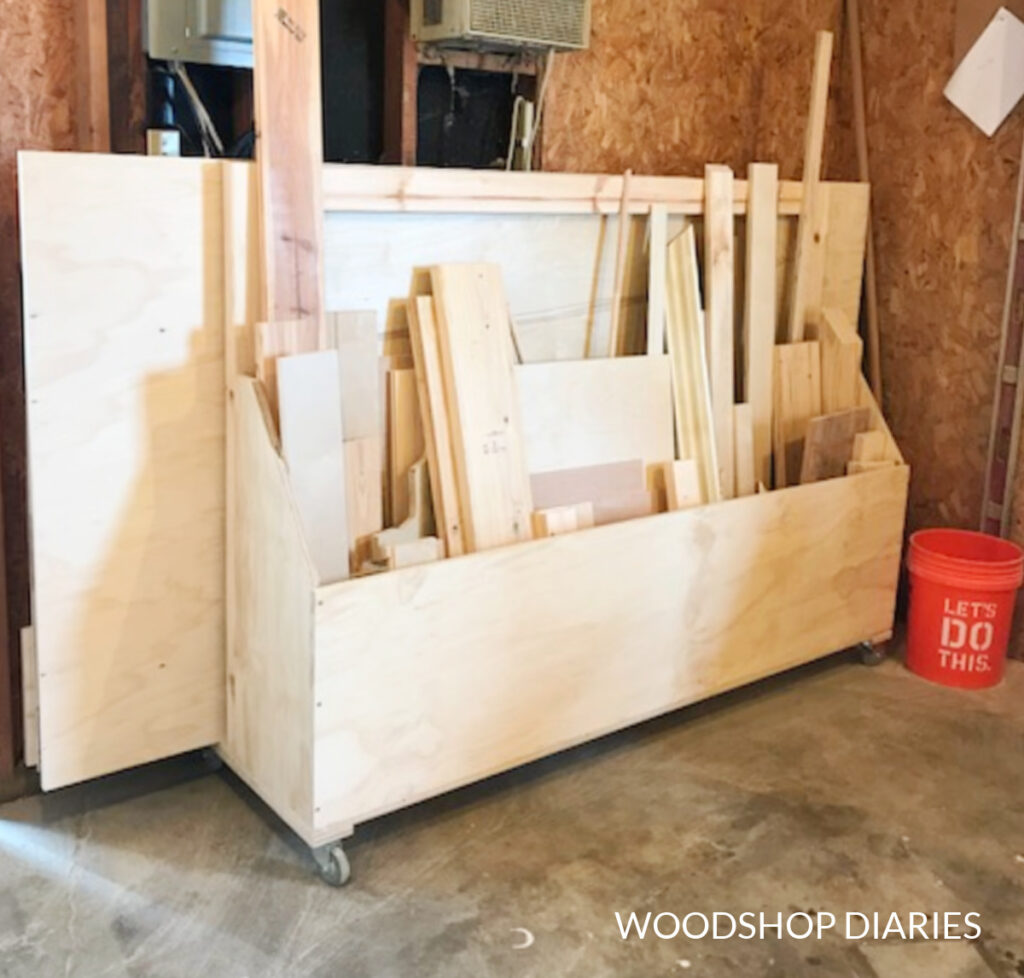
Looking for more workshop and garage storage projects?
Enjoyed this project and looking for more workshop and garage storage ideas? Here are a few favorites!
Be the first to know about new posts! Sign up to our free newsletter for priority access for all new projects, plans, and woodworking tips.
Save this project for later by pinning it or sharing to your favorite social channel!
Until next time, friends, happy building!