
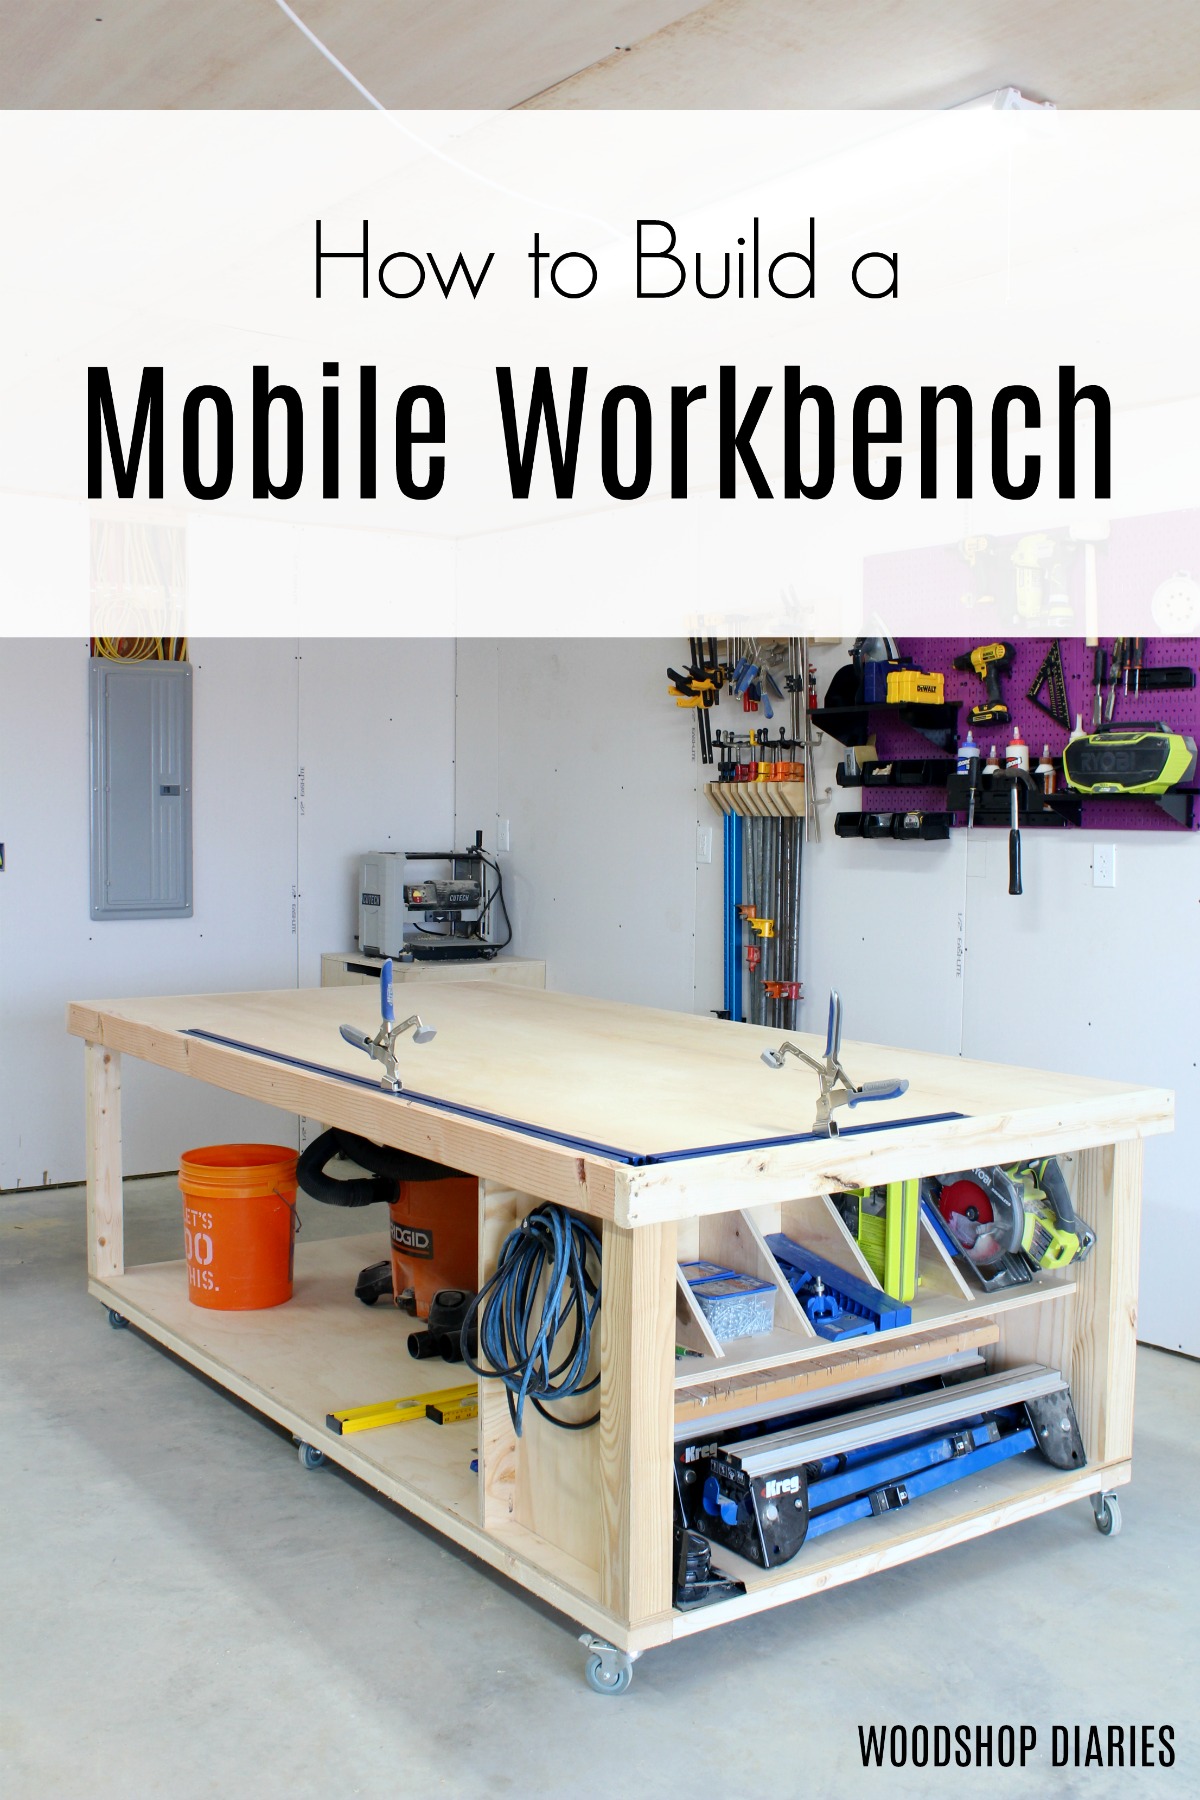
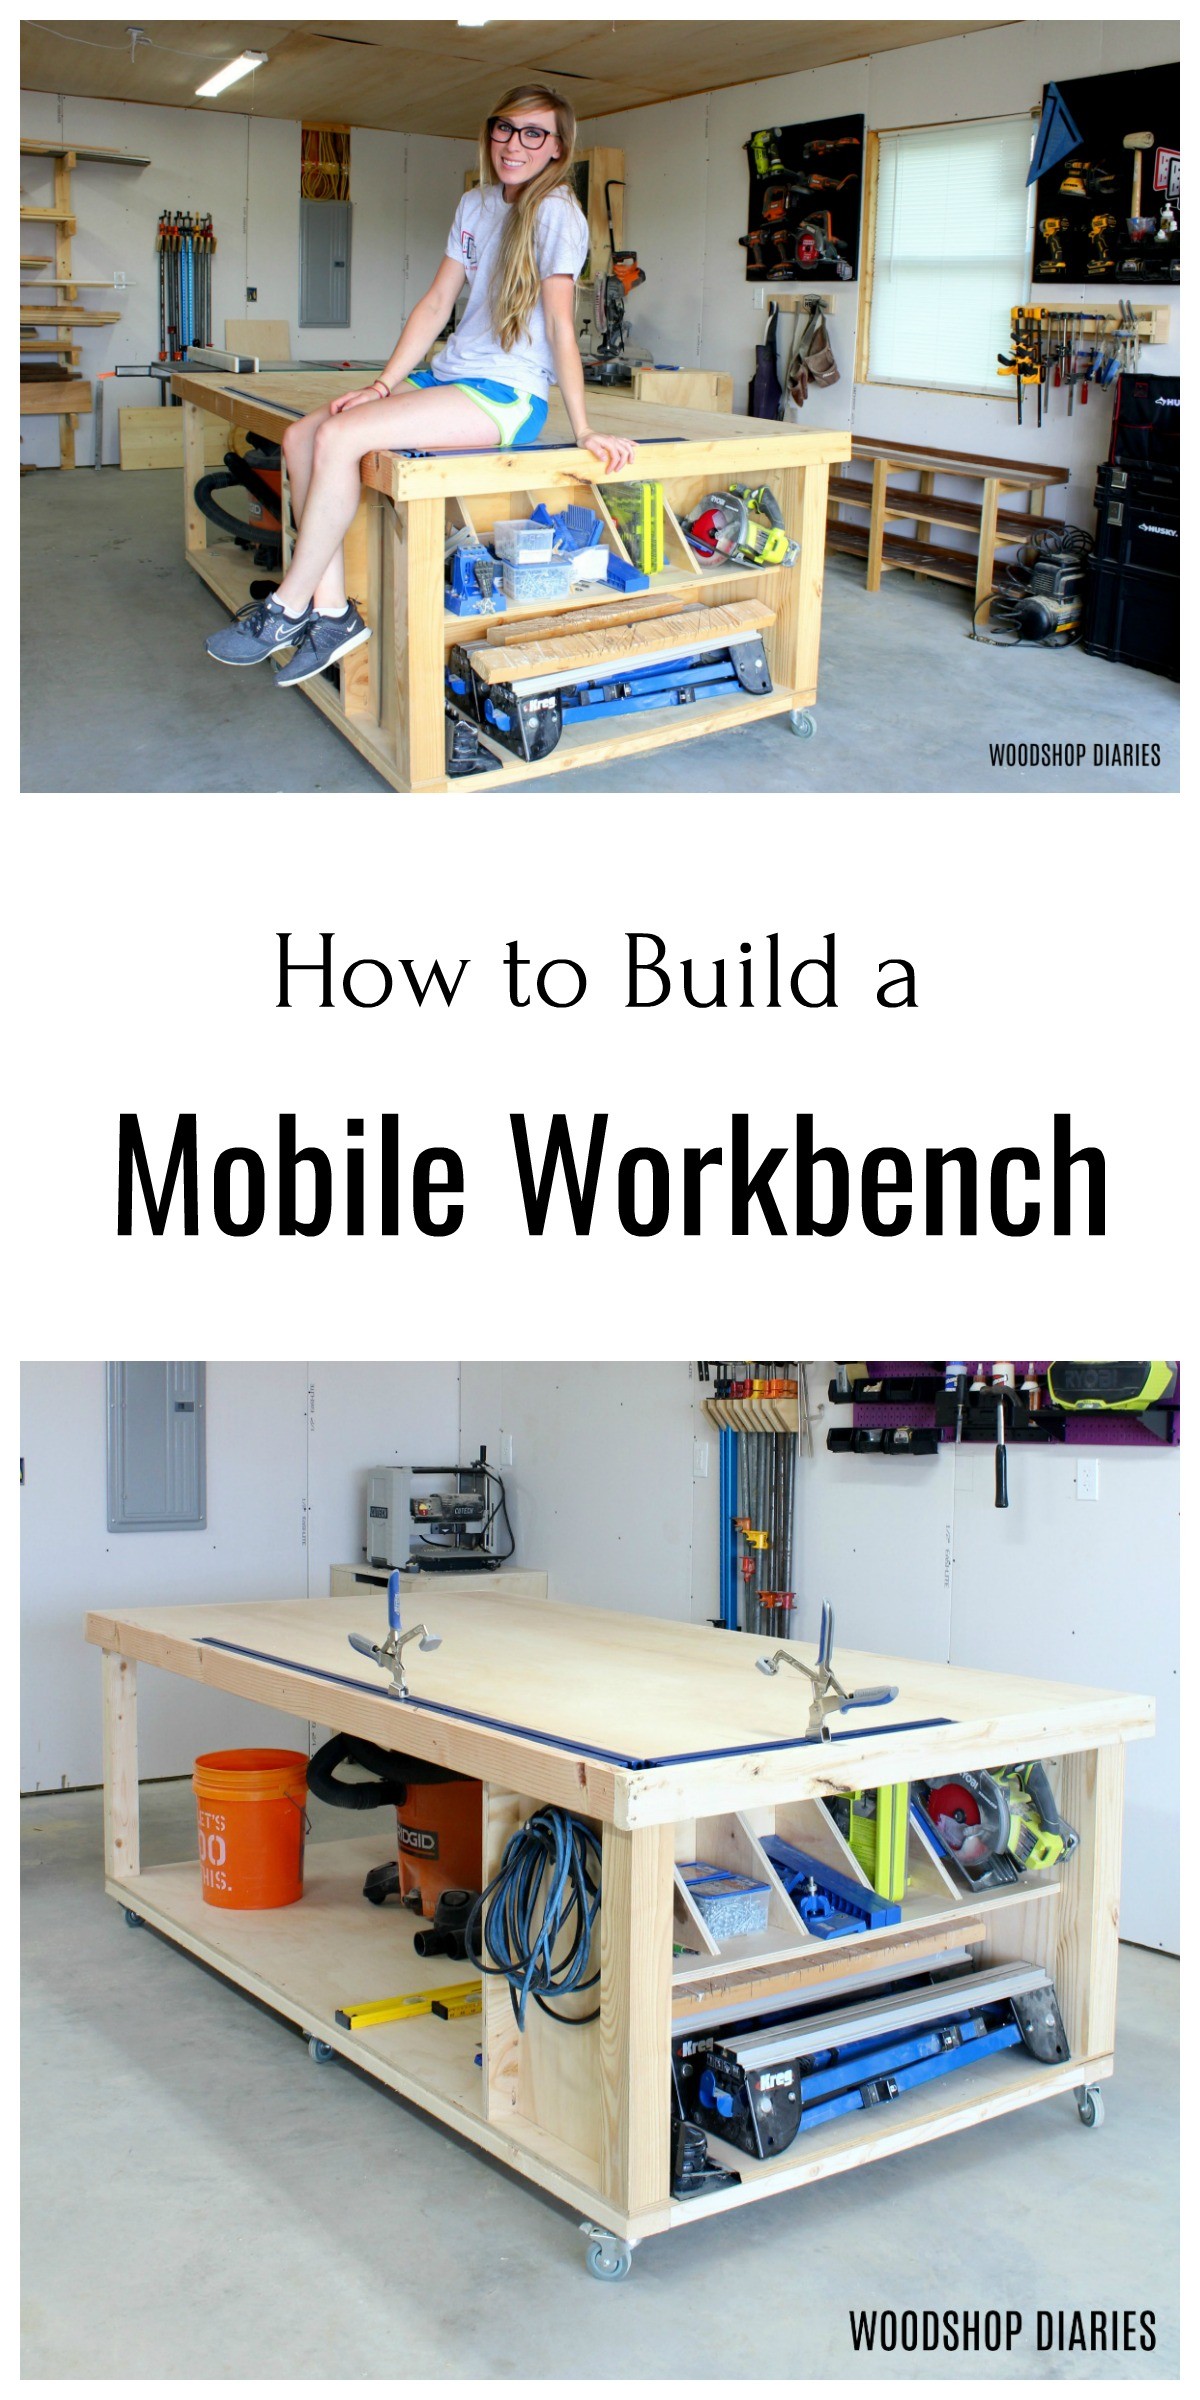
In this post, I will show you how to build a sturdy and versatile DIY Mobile Workbench!
This post is sponsored by Kreg Tool and contains affiliate links. See policies for details.
A workbench in any shop is a valuable asset. In my old workshop, I built some narrow, stationary workbenches along one of the walls and it served its purpose for a while…
But, I quickly found that mobile work surfaces are much more versatile (and easy to clean under) than stationary. And the narrow bench tops I had built originally just weren’t large enough to do much assembly on.
So, when I moved to a new shop space, I decided to change things up and built a MOBILE workbench that was ALSO large enough to actually work on.
I also made the workbench frame exactly the right height to serve as an outfeed table for my table saw and gave it some storage space underneath for my most used items. It’s been a game changer for my workshop!
So, if you’re looking for the ultimate mobile workbench for your own workshop, I’m excited to be sharing the free woodworking plans for this one below.
What to know before building a DIY Mobile Workbench
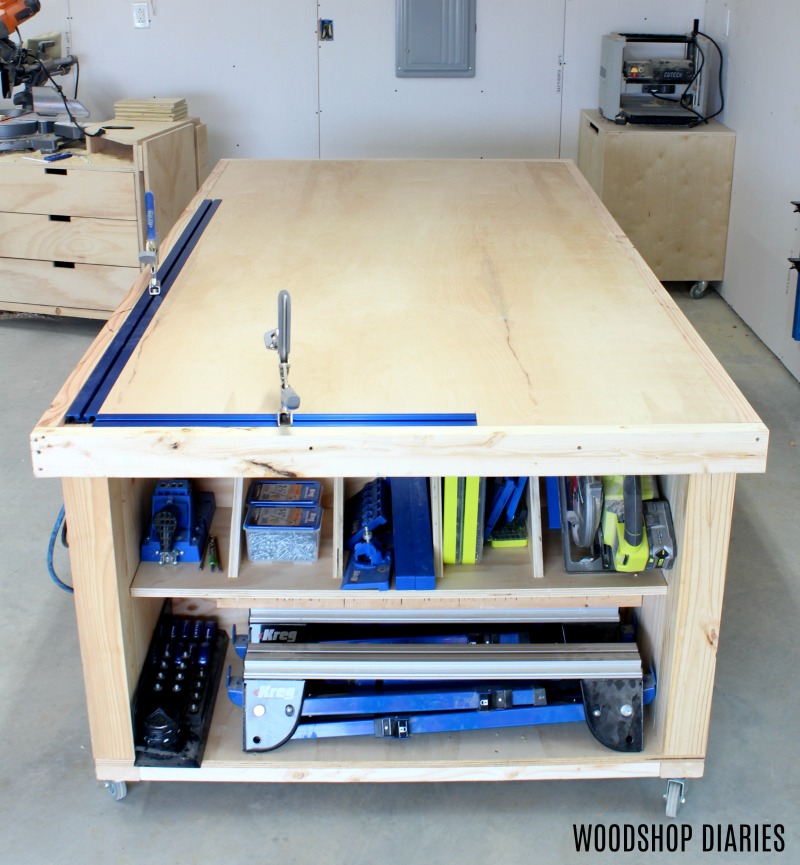
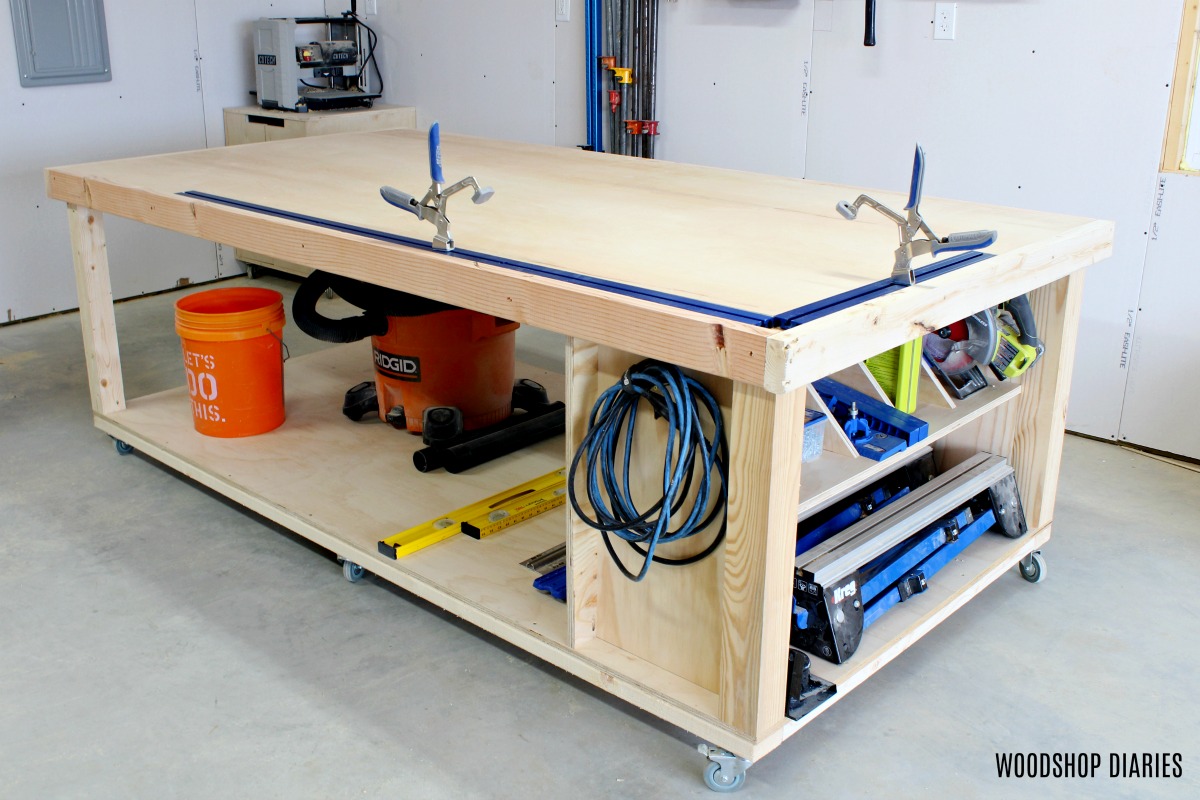
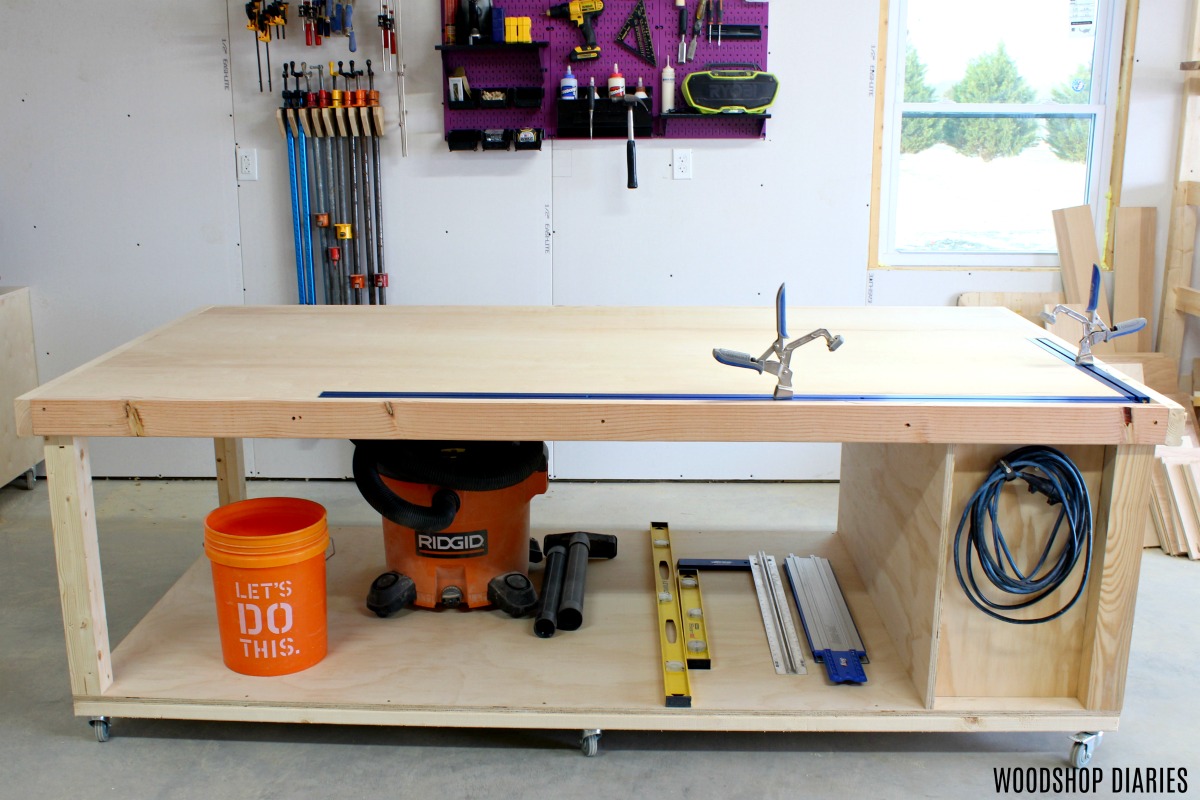
This workbench is a workhorse! It packs plenty of storage space on the bottom shelf and plenty of worksurface on the top.
Workbench Sizing Considerations
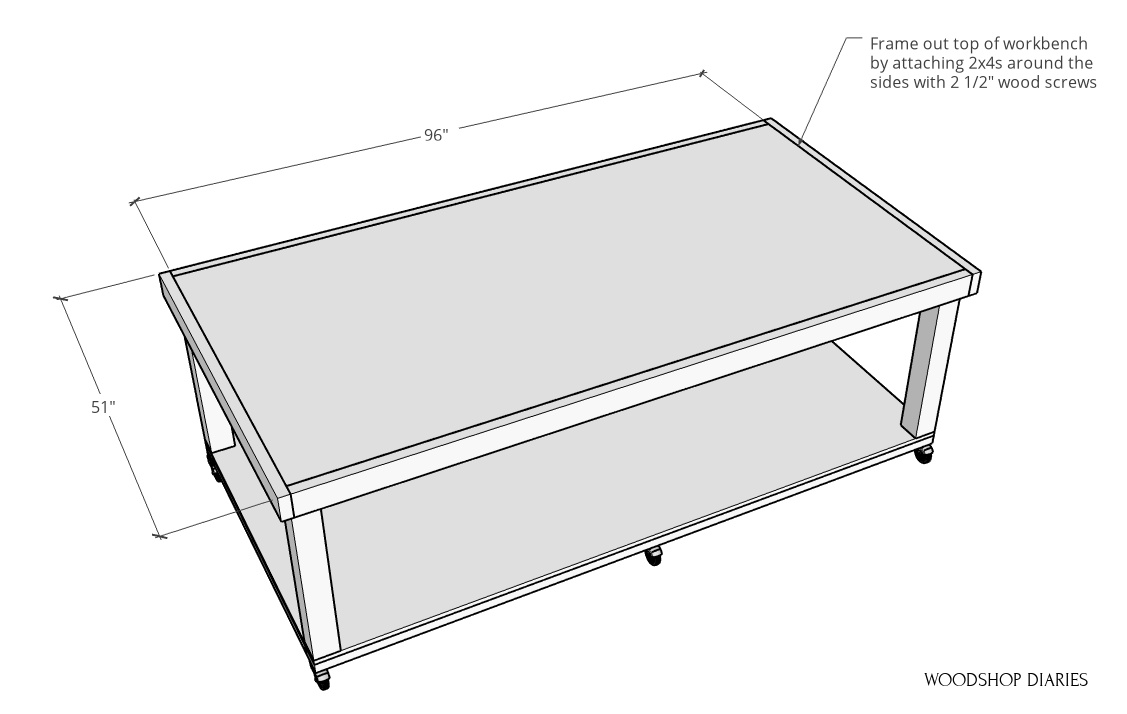
Before we build, let’s discuss a couple details about the size of this basic workbench. The overall dimensions of this DIY workbench are 51″ x 99″ x 34 ½″.
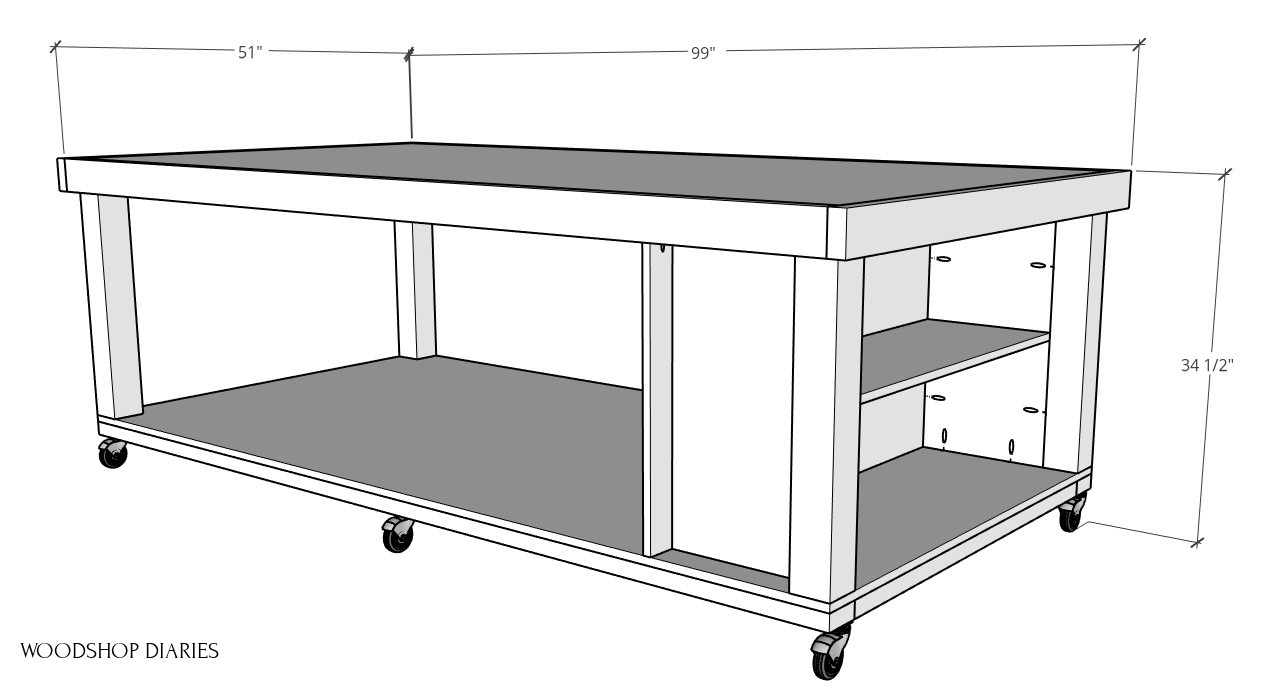
I used full plywood sheets for the work surface and the bottom shelf, so it is fairly large. However, you can easily modify your size just my changing a few measurements in the workbench plans linked below.
Adjust the frame in step 1 to your desired workbench size, then just cut your plywood bottom shelf to fit as needed.
How tall should a workbench be?
A comfortable workbench height is between 34″ – 36″. If you want something easy to compare this to, most standard kitchen counter heights are 36″ tall.
This specific workbench design is 34 ½″ tall because that’s the height of the surface of my table saw. So this height works out perfect for an outfeed table.
If your table saw isn’t 34 ½″ tall like mine or you don’t care to use it as an outfeed table and want it taller or shorter, simply adjust the height of your legs in the plans.
NOTE: Double check the actual overall height of your caster wheels before assembling. Caster wheel designs will vary and they come in various sizes. Without the wheels, the workbench frame is 30 ¾″ tall.
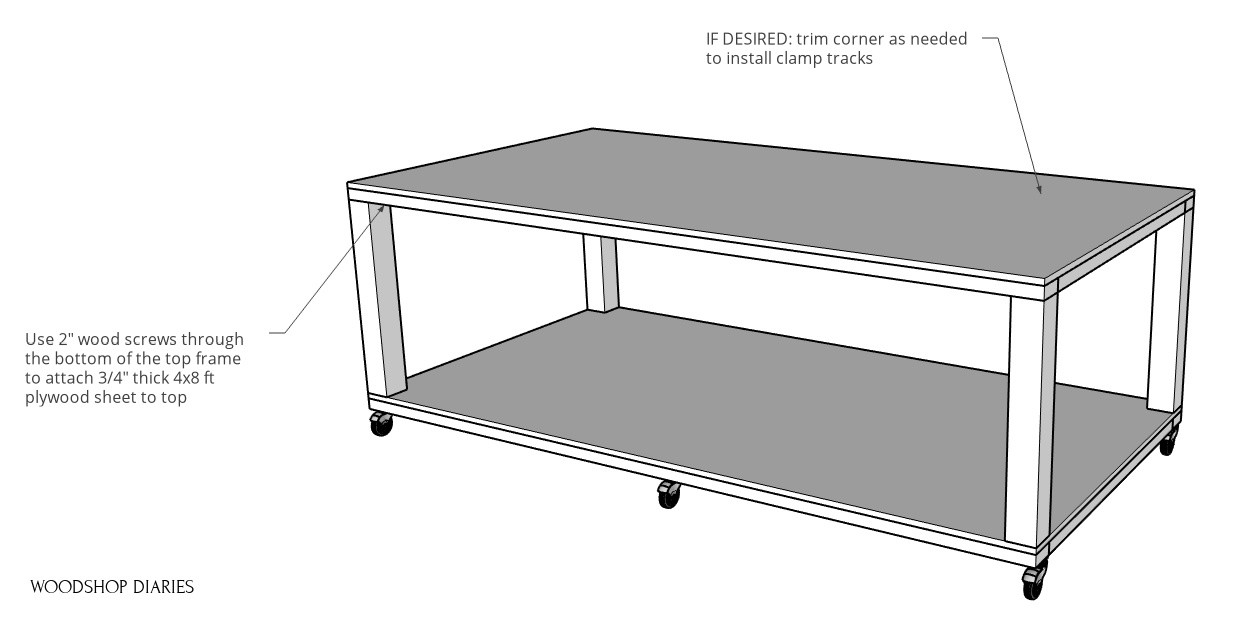
Does a Workbench Need Built in Clamp Tracks?
The short answer here is no. Clamp tracks on a workbench are COMPLETELY optional.
I added some to my workbench here (the blue rails on the work surface you see in the photos are Kreg Clamp Traks). But I’ll be honest…in the 4+ years that I’ve been using this workbench, I’ve only used them maybe twice.
If you think you’ll use them regularly, they are easy to add and can be a great addition! However, if I were to build another workbench, I personally don’t use them enough to add them again.
What type of wood should be used for a workbench?
You can build a workbench from all kinds of materials. If you want to get fancy and aren’t on a budget, hardwood is a great option for a workbench.
However, in most cases, since workbenches will get beat up and be well used, you probably don’t want to splurge on materials.
So in these cases, construction lumber is a great option for workbenches as it’s budget friendly, readily available, strong (they literally build houses out of it!), and comes in various sizes.
I used basic pine/spruce construction lumber for all my workbench framing and I used sanded pine plywood for my bottom shelves.
Since my top shelf will be subject to more wear and tear, I opted for a hardwood birch plywood for it since it’s a little more durable. It’s still going strong 4+ years of heavy use–although it does have some stains as seen below ha!
One good thing about this workbench design is that the top plywood panel is easy to replace if needed.
Tools & Materials
Tools:
- Circular Saw
- Drill/Driver
- Kreg Pocket Hole Jig
- Kreg Clamp Trak (OPTIONAL–you can add these to your workbench top if desired)
Materials:
- (3) ¾″ plywood sheets (I used pine for the bottom and dividers and birch for the top)
- (2) 4x4x72 posts
- (9) 2x4x8 boards
- 1 ¼″ pocket hole screws
- 2 ½″ pocket hole screws
- 1 ¼″, 2″, 2 ½″, and 3″ wood screws
- Caster Wheels--the exact wheels I used are discontinued, so I don’t have a link
How to Build a DIY Mobile Workbench
This build is a great weekend woodworking project! It’s a fairly quick and straightforward project with simple joinery.
I’m sharing the detailed step by step instructions below with tons of tips along the way. And I’ve also got a video tutorial here as well.
Don’t judge too harshly…this is one of my older videos and they’ve come a long way since then haha. Check out my YouTube channel for the latest project videos!
Prefer to print? Grab the free mobile workbench plans on KregTool.com.
Step 1: Assemble Top and Bottom Mobile Workbench Frames
First, I decided what size to make my workbench. I used full plywood sheets for mine, so I made two frames the size of my sheets–4 ft x 8 ft.
I assembled this frame from 2×4 boards using 1 ½″ pocket holes and 2 ½″ pocket hole screws.
Check out this post for more on how to use a pocket hole jig in woodworking projects.
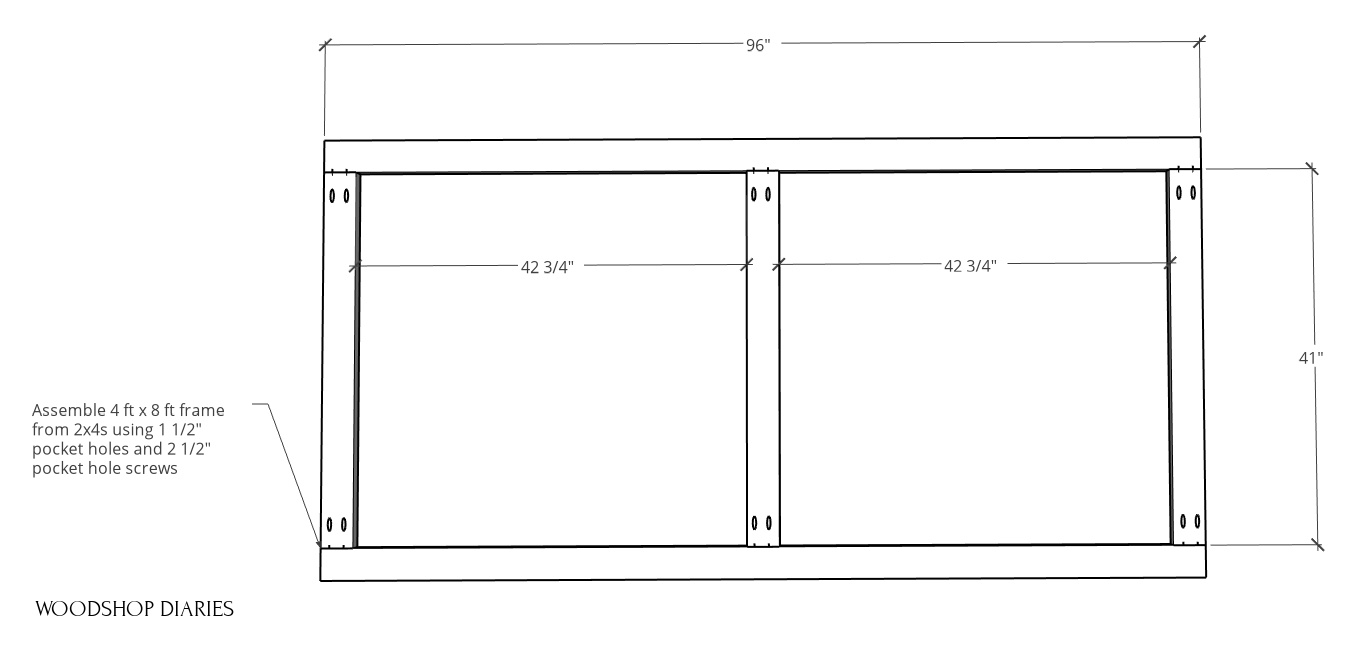
I made TWO identical frames like shown above–one will be used for the top and one for the bottom of the mobile workbench.
TIP: If you wanted your workbench smaller, simply modify the overall size of the frame in this step.
Step 2: Attach Bottom Workbench Panel
Once the frames were assembled, I screwed my bottom shelf plywood sheet (I used sanded pine plywood for the bottom panel) onto one of the frames using 1 ¼″ wood screws from the top side.
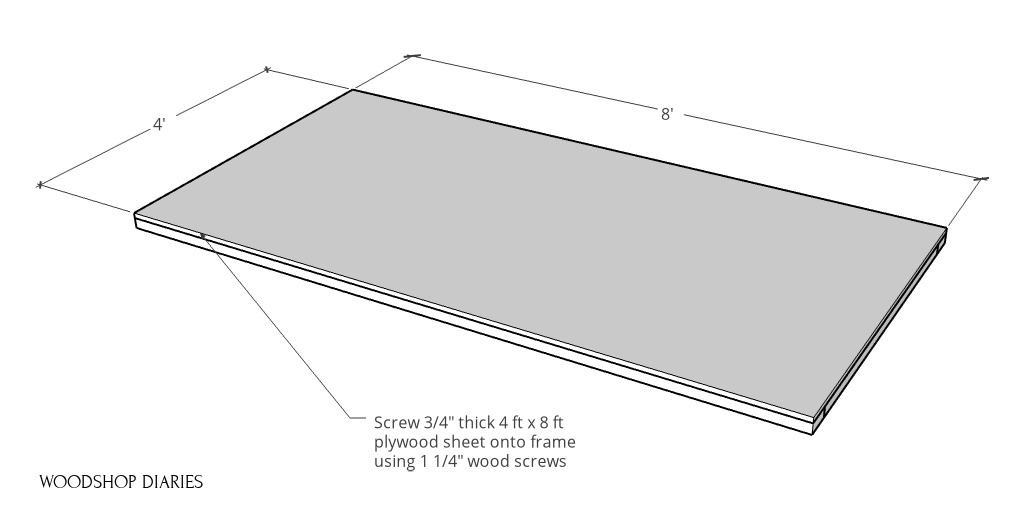
Obviously, if you are making this smaller than a full sheet, you will need to trim your plywood sheet to the size you want.
For tips on cutting plywood sheets, check out this guide for easily and accurately cutting down plywood sheets using a circular saw!
I set the second frame from step 1 aside to use in a later step.
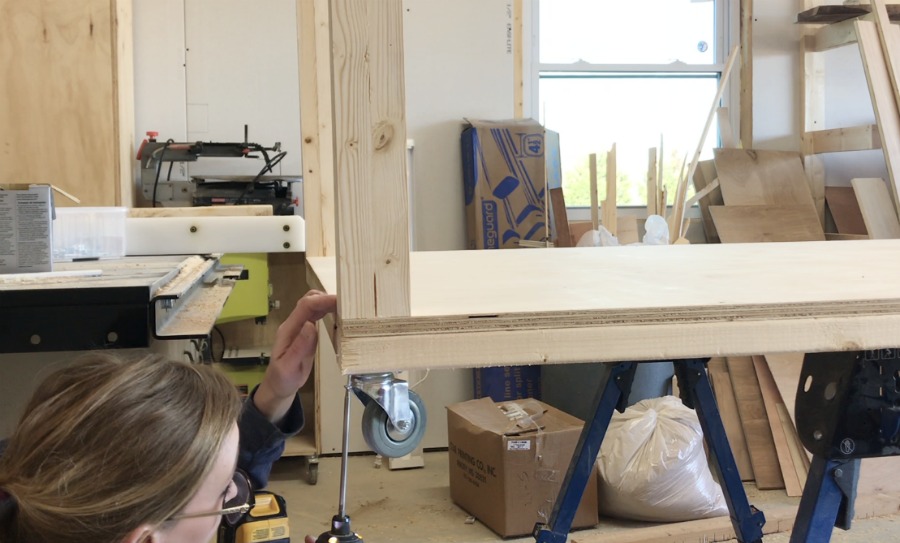
Step 3: Attach Mobile Workbench Corner Posts
Next, I cut four corner posts/legs from 4x4s. If you didn’t want to use 4x4s, you could also just glue and screw 2x4s together to make your own 4×4 posts.
NOTE: 4×4 posts are 3 ½″ x 3 ½″. If you screw 2x4s together to make your own, this will give you 3″ x 3 ½″. However, in this project, the slight difference shouldn’t matter.
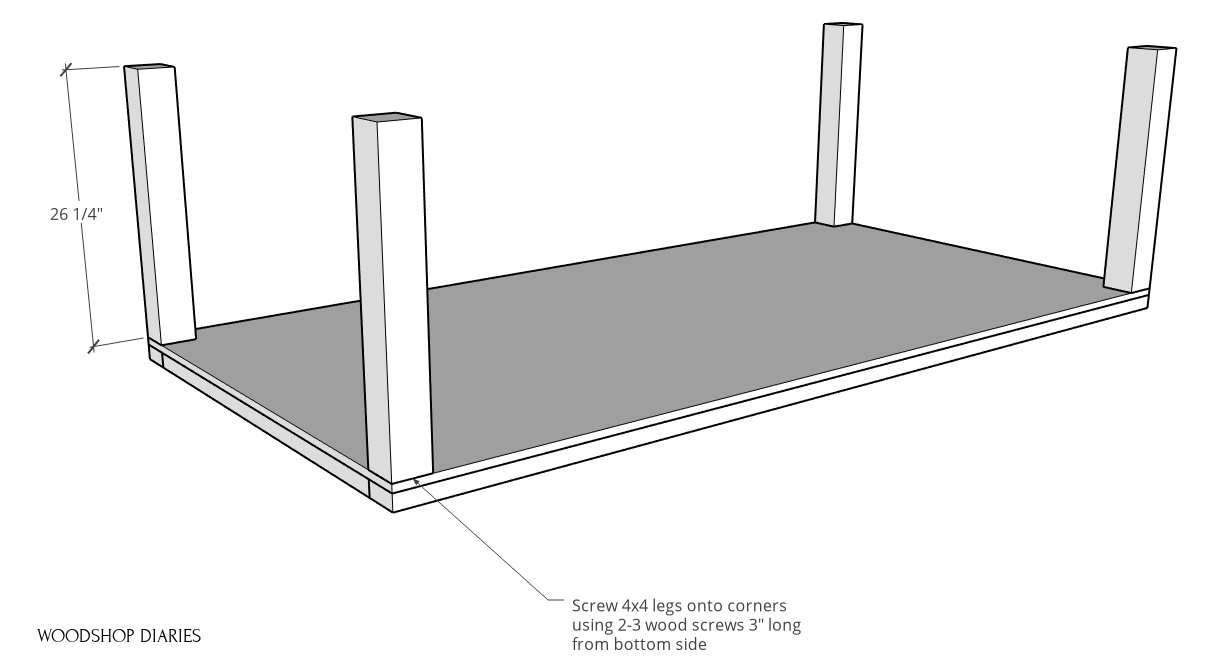
This DIY mobile workbench is 30 ¾″ tall without the casters if these legs are cut to 26 ¼″ long. So consider the height of your caster wheels and adjust the legs longer or shorter as needed if you want a taller or shorter workbench height.
I used two 3″ long wood screws to attach these posts from the bottom side of the 2×4 frame at each corner.
Step 4: Attach Caster Wheels to Workbench Frame
Next, I attached caster wheels at each corner and added two in the middle along the long sides to help prevent sagging.
You can use just about any size and style of caster wheel you’d like, but make sure they are heavy duty since this workbench (and what you put on top of it) will be pretty heavy.
I installed 3″ caster wheels and simply used 1 ¼″ wood screws through the holes on the plates. I don’t have a link to the exact wheels I used because they are discontinued.
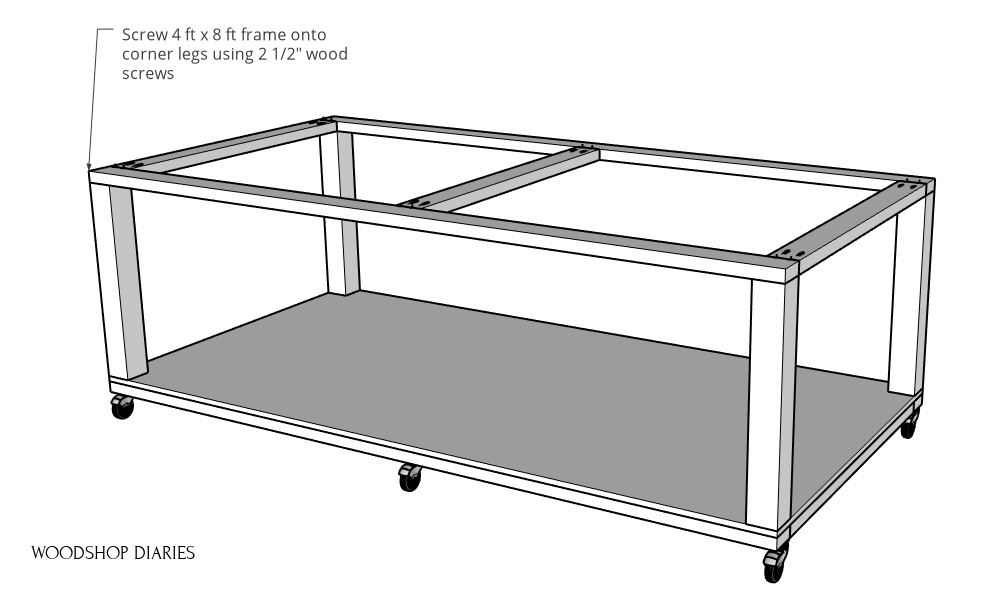
Step 5: Attach Top Frame at Corners
I brought out the second frame from step 1 and secured at the top corners of these legs using 2 ½″ wood screws.
Step 6: Attach Top Workbench Panel
I mentioned this earlier, but for the rest of this project, I used sanded pine plywood. However, for the top, I splurged for good quality hardwood birch plywood.
I used good plywood for the top to ensure I would have a smooth, durable surface to work on.
Just like in step 2, I attached a full sheet on top of this top frame. If you modified the size of the sheet in step 2, do the same here–just trim to size.
I attached this sheet to the top frame using 2″ wood screws from the bottom side of the top frame. You can use 1 ¼″ wood screws through the top side instead, but I didn’t want to see the screws.
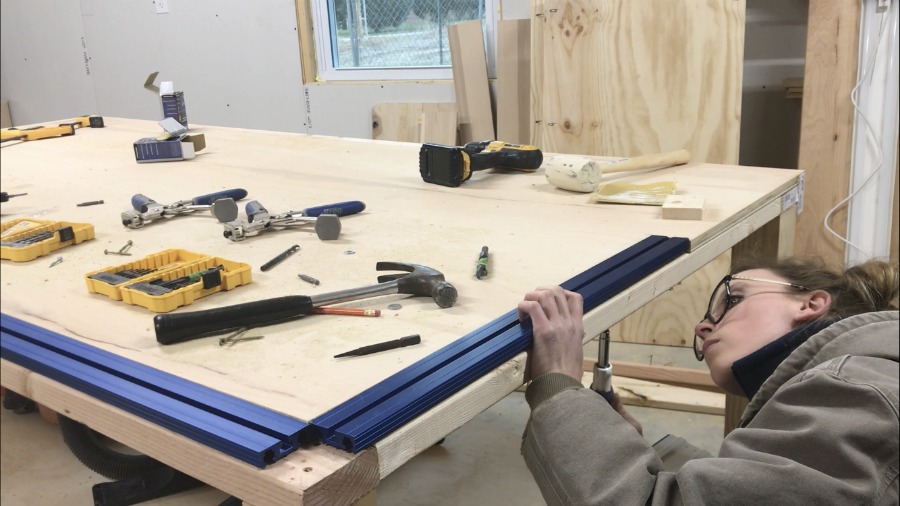
Step 6.5: Install Kreg Clamp Traks (OPTIONAL)
I added Kreg Clamp Traks to my workbench surface–of course, these are optional. They come in kits of different sizes depending on what size you make your bench. I used the 27″ x 69″ kit.
If you are adding these as well, you will need to follow the instructions to trim down your top panel from step 5 for your traks to fit into.
I had built my frames for this project from 2x4s before my tracks came in and I didn’t have the instructions. Once they arrived, I realized they were designed to be installed onto ¾″ thick surfaces. But I was using 2x material so it was 1 ½″ thick. Whoops.
Check out the Kreg Trak installation instructions here.
So, what I did was follow the instructions to drill the holes for the bolts through the surface I was mounting to. I just drilled all the way through my 2x4s. (You can see this in my video above.)
Then I used a larger drill bit (one that was large enough for the head of the bolt to fit into), to countersink a hole ¾″ deep into the BOTTOM SIDE of the top 2×4 frame.
Now, my bolts would fit up into the hole ¾″ and it was ESSENTIALLY just like mounting to ¾″ material. It’s a little extra work, but not too bad.
Step 7: Trim Around Workbench Top
Now, this workbench is large and could have a tendency to sag in the middle. You could add some supports in the middle to help prevent that, but I wanted this space open.
So, instead, I attached some 2x4s along the end to provide a little extra support and help prevent excessive sagging.
I simply cut to fit a 2×4 frame around the top edge of the workbench and screwed in place using 2 ½″ wood screws.
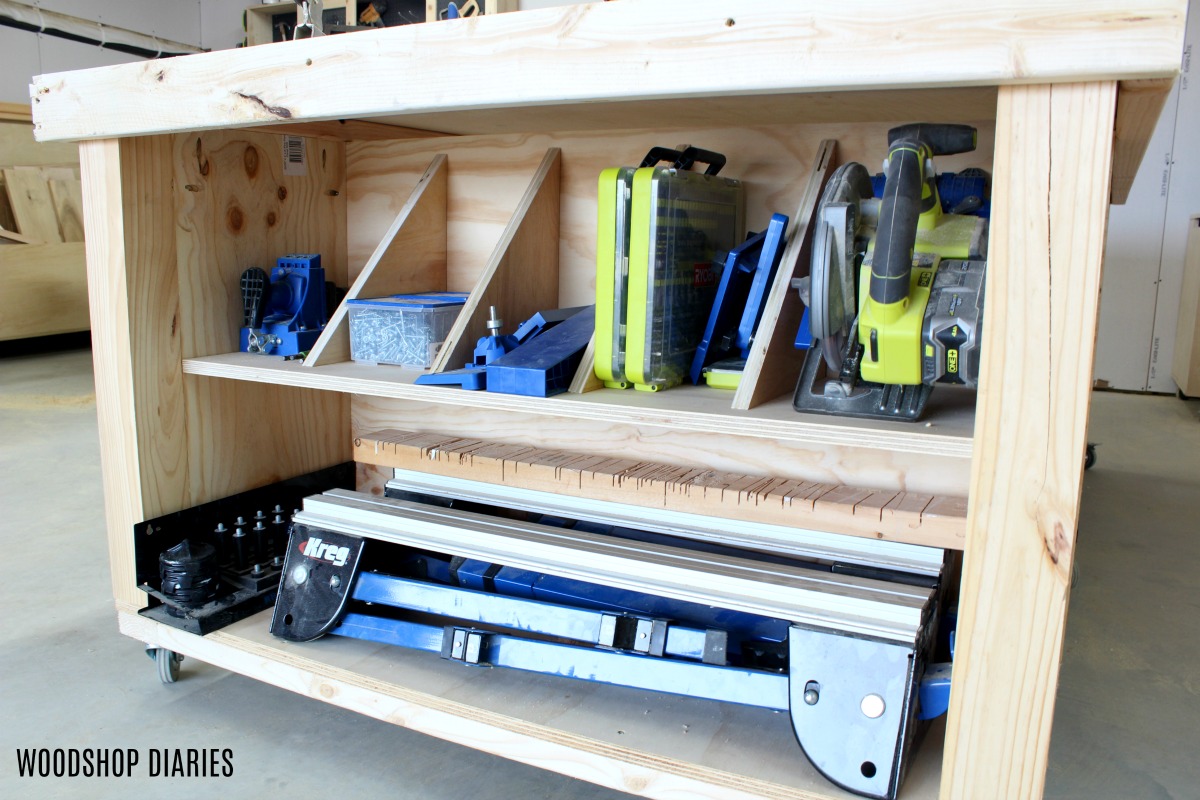
Step 8: Install Divider Panels/Storage Section on End of Workbench
To add some extra storage and organization to the workbench, I installed some side panels and a shelf on the end. I built this section using ¾″ sanded pine plywood.
First, I cut and installed a plywood panel like shown here using ¾″ pocket holes and 1 ¼″ pocket hole screws 13″ from the inside edge of the legs on one end.
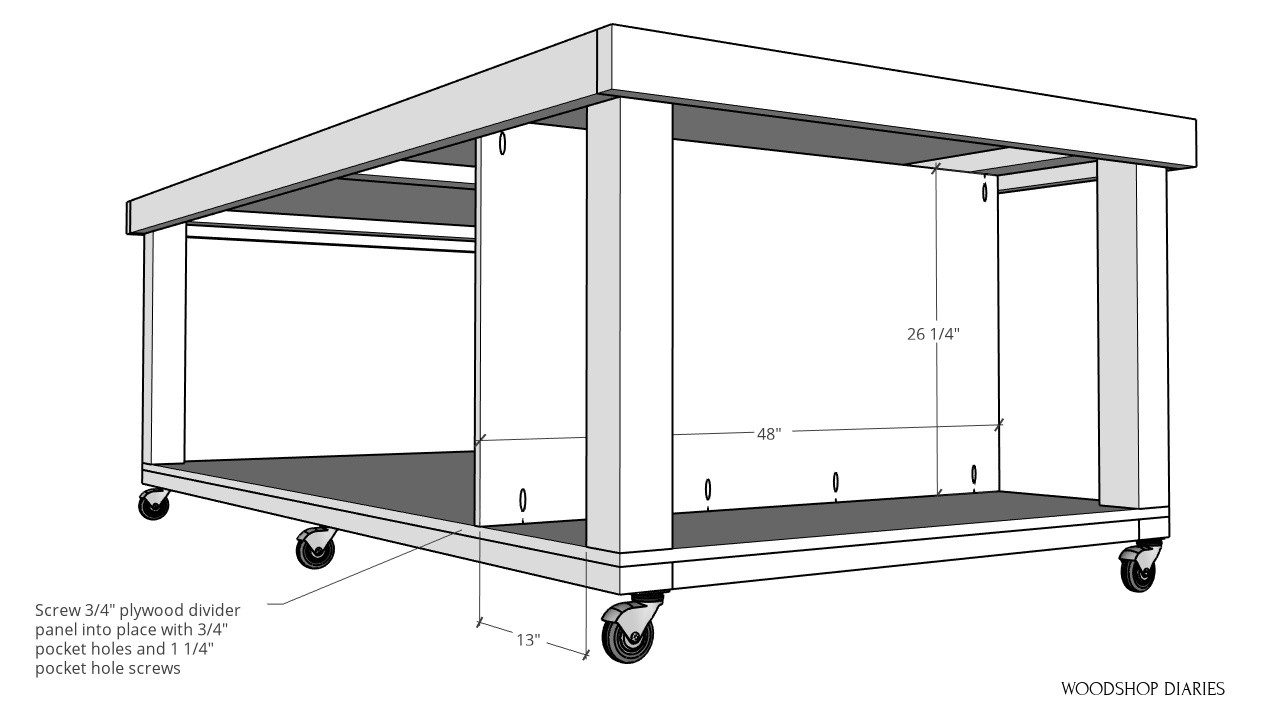
Then, I added side panels on each side flush to the INSIDE of the legs using ¾″ pocket holes and 1 ¼″ pocket hole screws.
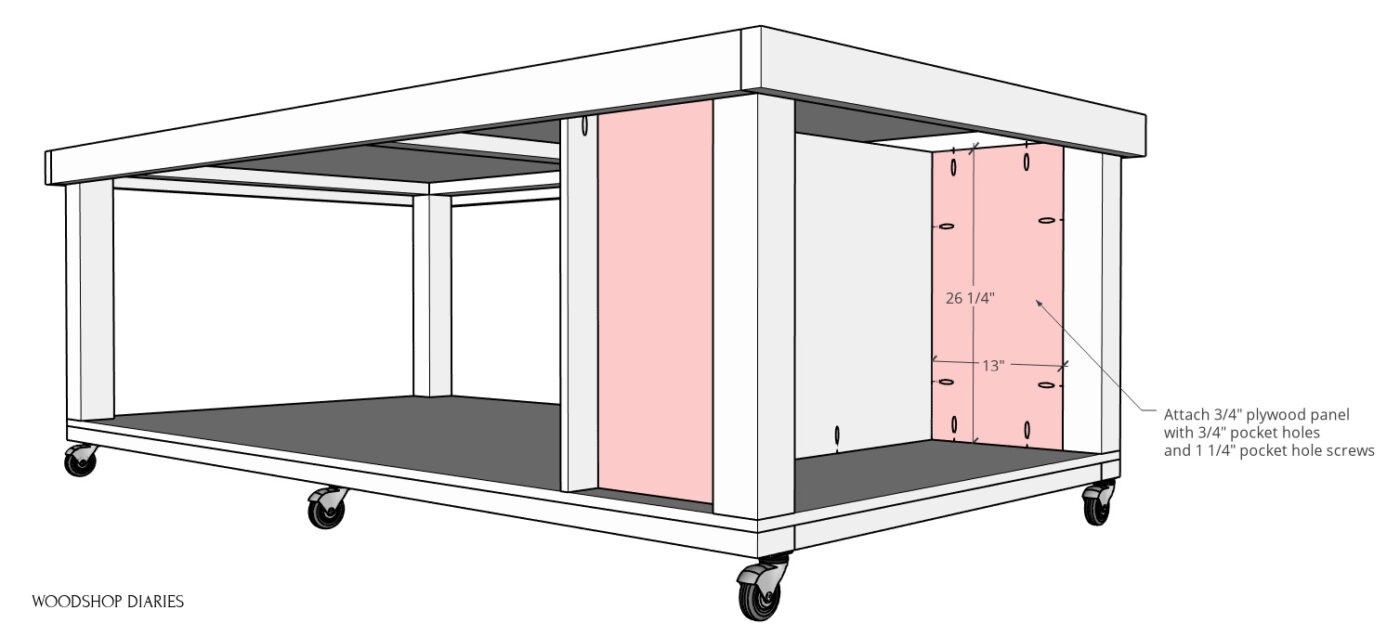
Lastly, I used ¾″ pocket holes and 1 ¼″ pocket hole screws to install a stationary shelf between these two panels.
NOTE: Double check your own shelf length and cut accordingly. If you didn’t use 4×4 posts, your length may vary slightly.
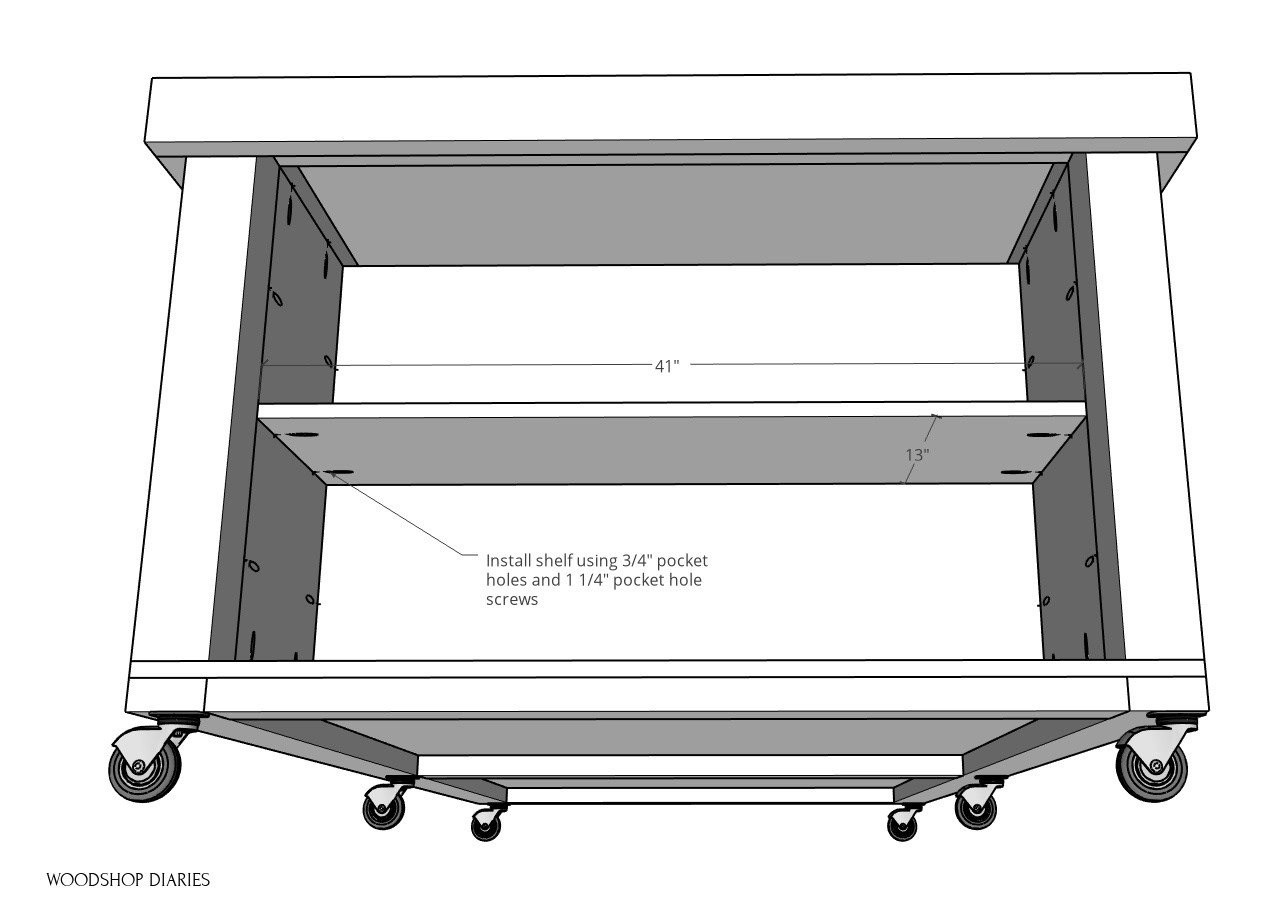
I added some scrap wood triangles on my shelf to act as dividers, but that’s totally optional. I used 1 ¼″ wood screws to secure them to the back and shelf panels.
And with that, I completed one of the most helpful projects I’ve ever built for my shop–a DIY mobile workbench!
This has already become my most used piece in the shop. I love the cubbies on the end, for all my jigs, and the large area underneath for my vacuum and a bucket to toss small scraps into while I’m working.
If you are ready to start working on an ultimate DIY mobile workbench instead of on the shop floor, head over to Kreg Tool for the printable plans.
.
And if you liked this project, I would love it if you’d pin it for later and don’t forget to subscribe to my newsletter below so you don’t miss out on the awesome projects to come!
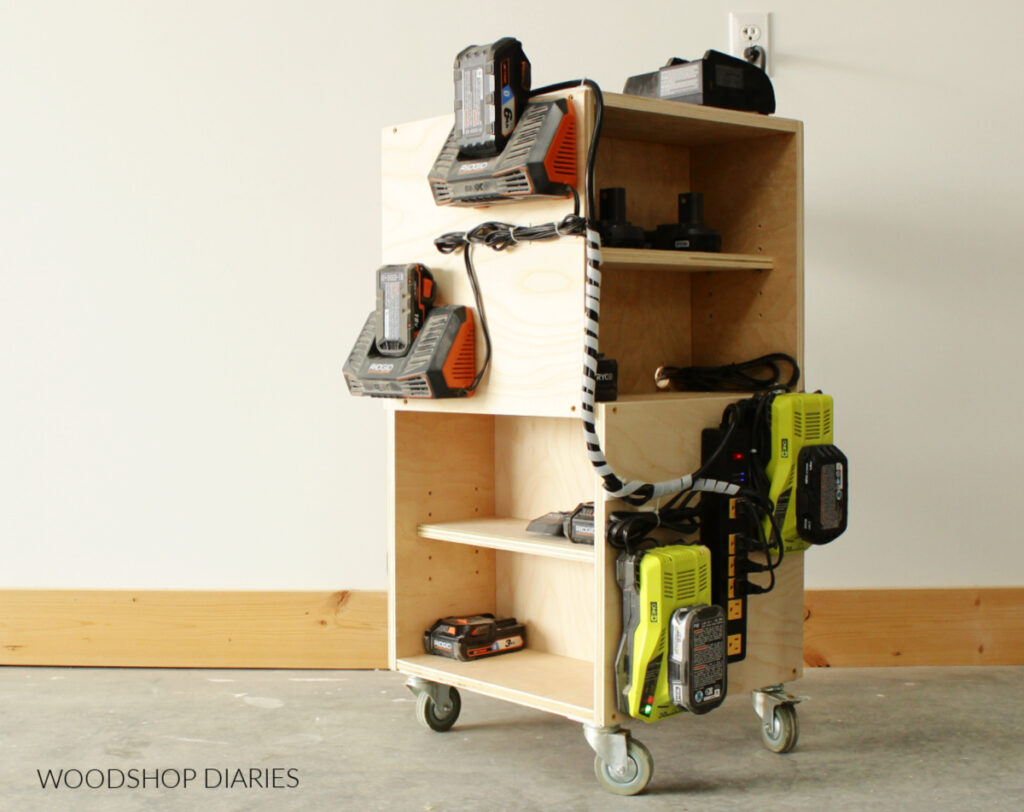
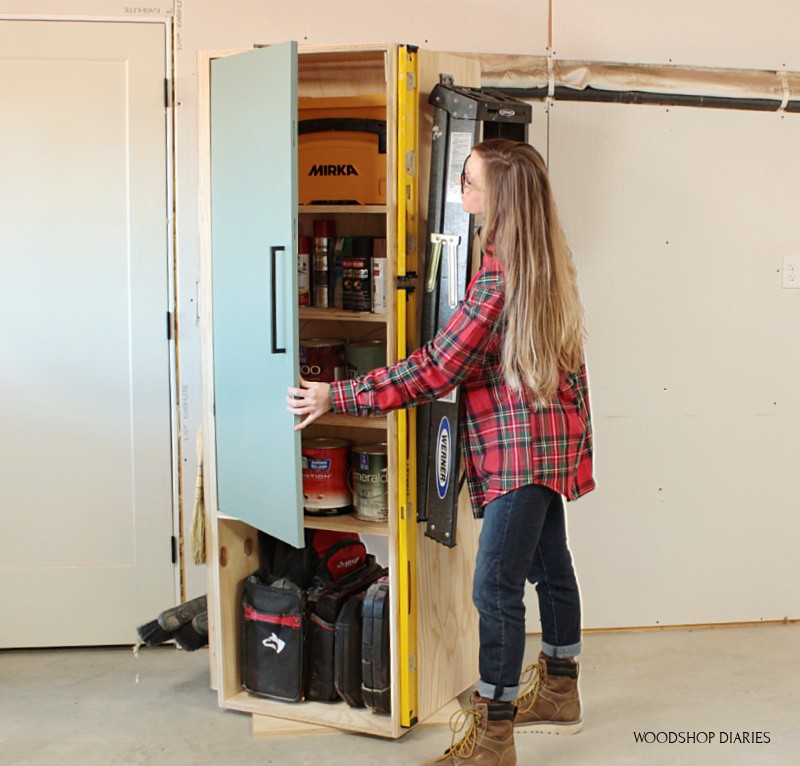
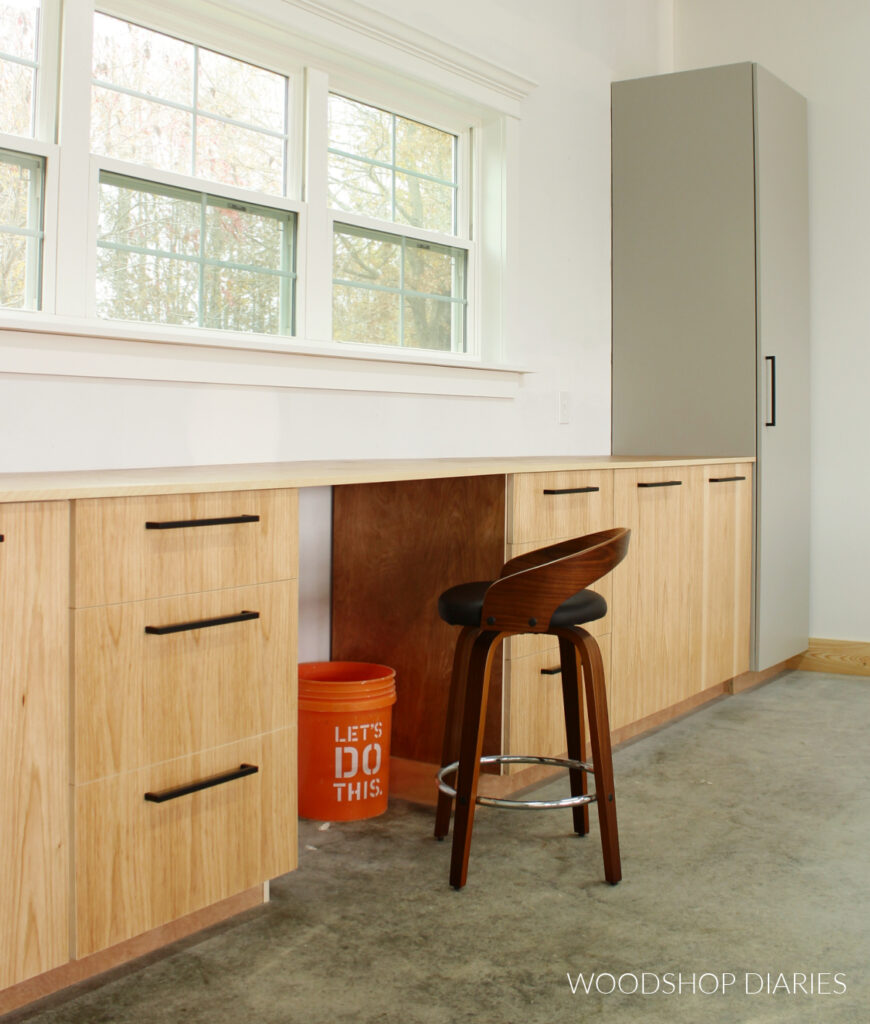
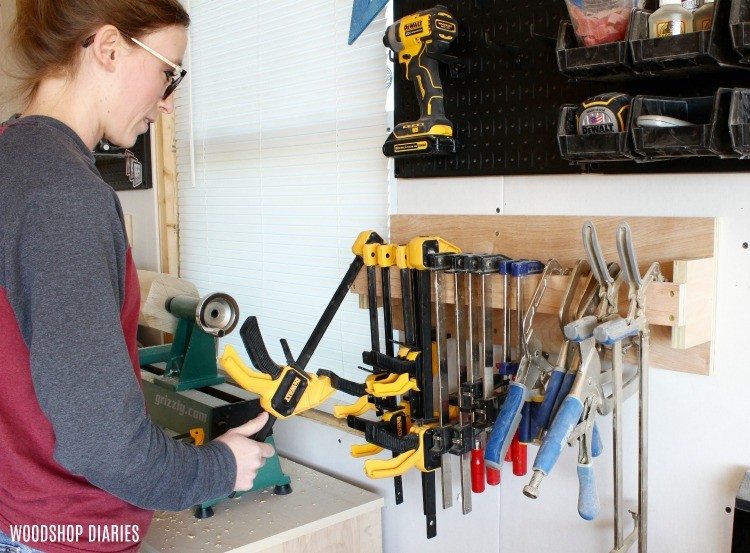
Looking for more workshop organization projects?
If you enjoyed this project and want to see more workshop and garage organization and storage projects, here are a few favorites!
Want to be the first to know about new projects and plans? Subscribe to the FREE newsletter below for priority access!
Save this project for later by pinning it to Pinterest or saving to your favorite social network!
Until next time, happy building! 🙂
DIY Home Sweet Home says
I have never seen clamp tracks before. That would make life so much easier! I love the cubbies you added to the work bench. Not sure this would fit in my shop but maybe I can make a smaller version. Thank you for sharing!!
-Jamie
Shara, Woodshop Diaries says
Thank you! This bench is really easy to modify to a smaller size. Simply change the size of your frames, and trim your plywood to match. So glad you enjoyed it!