Ready to see our laundry room refresh before and after? Small spaces are sometimes the most fun to redo 😉 Keep reading to see how it all came together.
.
It was almost exactly a year ago this weekend that we moved into our new garage apartment. Time flies, you guys.

So while our home is still fairly new, I’m not sure I’d call it “finished.” Take the laundry nook for example…last winter, I attempted to make the little laundry nook kind of cute. I threw a simple cabinet on the wall and had intentions of adding a few other things. Then I kind of stopped short.

Life happened and I got busy and it worked for now, so it wasn’t a high priority. You know how those things go.
.
But after helping my sister remodel her kitchen lately, I’ve got the itch to do something fun to my own little house. And in all 750 sq ft of brand new house, there’s not a lot I can tear out and remodel. So here I am…back to this laundry nook to attempt to finish what I started.
.
So I took a long hard look…well, really more like a quick glance…at my current situation and thought about how it could improve. And at the end of the day (it was more like a week haha), I ended up with the after:

I’ve got a quick and fun video of the process here and all the details (and pretty pictures) below. If you aren’t already subscribed to my YouTube Channel, be sure to subscribe so you don’t miss out on my latest videos!
Laundry Room Refresh Improvement #1: Storage
My biggest issue in this little nook was storage. Living in a small space means you have to make the most of every square inch for storage. The previous set up left much to be desired.
.
The existing cabinet had flimsy, hard to open doors—a design flaw that was 100% my own fault. And there was a large section on the left that was just wasted space.

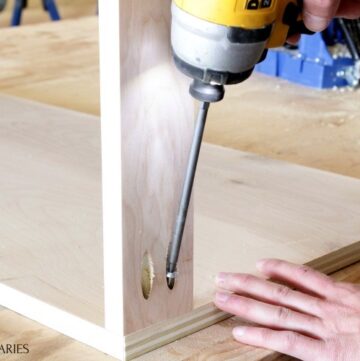
So I cleared out the clutter, emptied the cabinet and took it out to the shop to take it apart. I used a router to cut out a section for thicker sliding doors (Post coming soon with all the details on how I built these cabinets), then put it back together. But not before painting the new doors a pretty new color 😉

I also painted the front of the cabinet white to brighten things up and little. Then, I just hung it right back in place.
.
I also put together another deeper cabinet to go on the left side to give me more storage for odds and ends, linens, and random items I’m not sure what to do with haha. You can never have enough storage…especially in a laundry room 😉

I’m currently using the bar cart I built a few years ago as my “laundry hamper cart,” but since it’s all open, I matched the PureBond hickory plywood door on the top cabinet with a panel I screwed onto the front of the cart to help hide the clutter.

I used this same PureBond Hickory Plywood in my kitchen cabinet build as well if you want to check that out here.
Laundry Room Improvement #2: Counter Top Space
Once the storage situation was up to par, I moved on to my next task—a countertop.

I’ve wanted a nice countertop to fold clothes on since we moved into our home a year ago…dragging the clothes from the dryer over to the bed to fold was really annoying. But with limited space and my top load washing machine, it just wasn’t feasible.
.
Since my current washer and dryer set was running on its last leg, I decided to upgrade my washer and dryer set and we went with this Samsung front load champagne finish washer and dryer set. (Check out my thoughts on it and all its features in a post tomorrow.)

Having a front load set opened up the possibility of having a countertop here, so I built a butcher block style top to go wall to wall in my little laundry nook. (I’ll have a post for the tutorial to build your own very soon.)
It’s my new favorite. I love being able to contain all my clean laundry in this area and fold it without covering my entire bed with stacks of laundry to put away.

Side note: if you check out the video, you’ll see that we installed the cabinets, then the countertop, then the washer and dryer. But, in hindsight, it would have been much easier to install the countertop, THEN the cabinets, then the washer and dryer. Live and learn 😉

Laundry Nook Improvement #3: Style
I love my kitchen in our new home. It’s literally my favorite. It’s very simple, but exactly my style.
But the old laundry nook….not so much. It was just really boring looking and didn’t tie into the kitchen. And since it’s in such close proximity (like everything else in my house haha), I really needed some cohesion.

Also, side note: when I walk in from my shop, this is the view I see…so I look at this A LOT. I want it to be pretty haha.
.
So I made sure my cabinets were simple to match those in the kitchen and I matched these light wood tones from the PureBond hickory plywood doors as well. AND I even had plenty of leftover backsplash from the kitchen to tile this tiny section.

I’ll show you a few tiling basics and how I tiled this section of my laundry nook in another post coming soon!
.
But, to give it a little personality of its own, I painted the cabinets white and these doors pink, while still matching the overall aesthetic (it feels weird using these big words haha) of the space.
Honestly, I was hesitant to go with pink…afraid it would be too bold. But with these champagne appliances, it looks SO GOOD. And if I get tired of it, it’s just paint, so it’s easily changeable 🙂 It’s okay to be fearless in your design style every now and then haha.

So with a few tweaks and a few additions, I transformed this little 2 ½” x 6” space from blah to this 🙂

Even tiny laundry rooms deserve to be pretty. I’ve always put a lot of value in having a nice laundry room…no matter what size it was. You have to do the most boring and mundane chores in this room. At least make it fun to look at, amiright?
.
PS check out my old house’s laundry room before and after here.
.
I’m really loving the bold look, but I am glad I chose a small part of the house to try it out in. Maybe it’ll extend out to other parts of the house…we will see.
.
Either way I’m happy with the counter space and the storage and this will definitely make things more functional. Be sure to check out all related posts to this one and all my additional tutorials coming in the next few days.
.
I hope I was able to give you some laundry room refresh inspiration. Stay tuned for plenty more projects coming your way. But until then, be sure to pin this for later and share with your friends!

Thanks for following along and until next time, happy building 🙂


